

In this tutorial, We will cover:
- How to scrape Naver search results using Bright Data’s SERP API
- Building a custom Naver scraper with Bright Data proxies
- Scraping Naver using Bright Data Scraper Studio (AI Scraper) with a no-code workflow
Let’s begin!
Why Scrape Naver?
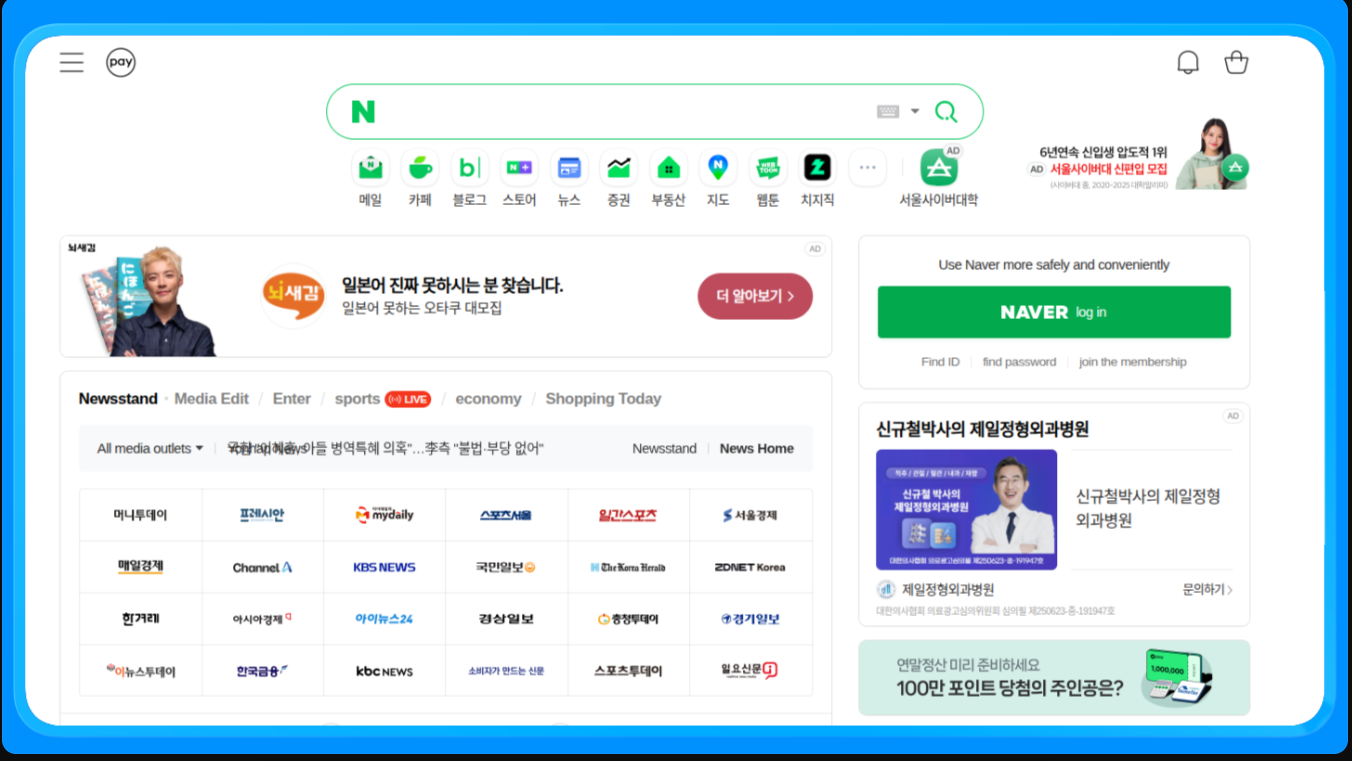
Naver is the leading platform in South Korea and a primary source of search, news, shopping, and user-generated content. Unlike global search engines, Naver surfaces proprietary services directly in its results, making it a critical data source for companies targeting the Korean market.
Scraping Naver enables access to structured and unstructured data that is not available through public APIs and is difficult to collect manually at scale.
What Data Can be Collected?
- Search results (SERPs): rankings, titles, snippets, and URLs
- News: publishers, headlines, and timestamps
- Shopping: product listings, prices, sellers, and reviews
- Blogs and Cafes: user-generated content and trends.
Key Use Cases
- SEO and keyword tracking for the korean market
- Brand and reputation monitoring across news and user content
- E-commerce and pricing analysis using Naver Shopping
- Market and trend research from blogs and forum
With that context in place, let’s go into the first approach and see how to scrape Naver search results using Bright Data’s SERP API.
Scraping Naver with Bright Data’s SERP API
This approach is ideal when you want Naver SERP data without managing proxies, CAPTCHAs, or browser setup.
Prerequisites
To follow along with this tutorial, you will need:
- A Bright Data account
- Access to SERP API, Proxies, or Scraper Studio in the Bright Data dashboard
- Python 3.9 or newer installed
- Basic familiarity with Python and web scraping concepts
For the custom scraper examples, you will also need:
- Playwright installed and set up locally
- Chromium installed via Playwright
Create a SERP API Zone in Bright Data
In Bright Data, the SERP API requires a dedicated zone. To set it up:
- Sign in to Bright Data.
- Go to SERP API in the dashboard and create a new SERP API zone.
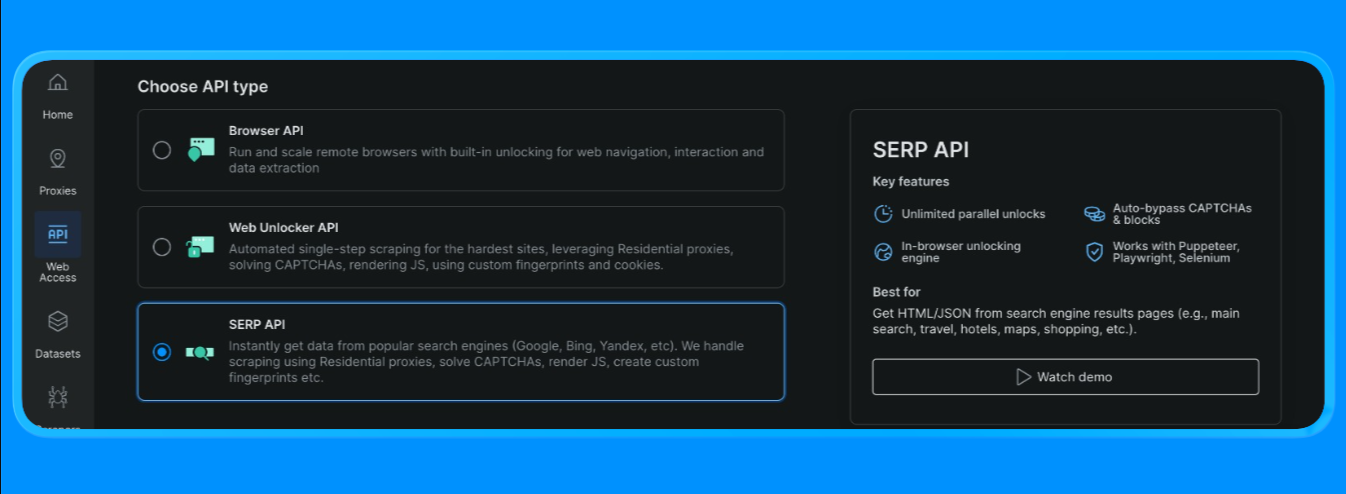
- Copy your API key.
Build the Naver Search URL
Naver SERPs can be requested via a standard search URL format:
- Base endpoint:
https://search.naver.com/search.naver - Query parameter:
query=<your keyword>
The query is URL-encoded using quote_plus() so multi-word keywords (like “machine learning tutorials”) are formatted correctly.
Send the SERP API Request (Bright Data Request Endpoint)
Bright Data’s quickstart flow uses a single endpoint (https://api.brightdata.com/request) where you pass:
zone:your SERP API zone nameurl:the Naver SERP URL you want Bright Data to fetchformat:set to raw to return the HTML
Bright Data also supports parsed output modes (for example, JSON structure via brd_json=1, or faster “top results” via data_format options), but for this tutorial section we’ll be using your HTML parsing flow
You can now create a python file and include the following codes
import asyncio
import re
from urllib.parse import quote_plus, urlparse
from bs4 import BeautifulSoup
from playwright.async_api import async_playwright, TimeoutError as PwTimeout
BRIGHTDATA_USERNAME = "your_brightdata_username"
BRIGHTDATA_PASSWORD = "your_brightdata password"
PROXY_SERVER = "your_proxy_host"
def clean_text(text: str) -> str:
return re.sub(r"\s+", " ", (text or "")).strip()
def blocked_link(href: str) -> bool:
"""Block ads/utility links; allow blog.naver.com since we want blog results."""
if not href or not href.startswith(("http://", "https://")):
return True
netloc = urlparse(href).netloc.lower()
# block ad redirects + obvious non-content utilities
blocked_domains = [
"ader.naver.com",
"adcr.naver.com",
"help.naver.com",
"keep.naver.com",
"nid.naver.com",
"pay.naver.com",
"m.pay.naver.com",
]
if any(netloc == d or netloc.endswith("." + d) for d in blocked_domains):
return True
# In blog mode, you can either:
# (A) allow only Naver blog/post domains (more "Naver-ish")
allowed = ["blog.naver.com", "m.blog.naver.com", "post.naver.com"]
return not any(netloc == d or netloc.endswith("." + d) for d in allowed)
def pick_snippet(container) -> str:
"""
Heuristic: pick a sentence-like text block near the title.
"""
best = ""
for tag in container.find_all(["div", "span", "p"], limit=60):
txt = clean_text(tag.get_text(" ", strip=True))
if 40 <= len(txt) <= 280:
# avoid breadcrumb-ish lines
if "›" in txt:
continue
best = txt
break
return best
def extract_blog_results(html: str, limit: int = 10):
soup = BeautifulSoup(html, "html.parser")
results = []
seen = set()
# Blog SERP layouts change; use multiple fallbacks
selectors = [
"a.api_txt_lines", # common title link wrapper
"a.link_tit",
"a.total_tit",
"a[href][target='_blank']",
]
for sel in selectors:
for a in soup.select(sel):
if a.name != "a":
continue
href = a.get("href", "")
title = clean_text(a.get_text(" ", strip=True))
if len(title) < 5:
continue
if blocked_link(href):
continue
if href in seen:
continue
seen.add(href)
container = a.find_parent(["li", "article", "div", "section"]) or a.parent
snippet = pick_snippet(container) if container else ""
results.append({"title": title, "link": href, "snippet": snippet})
if len(results) >= limit:
return results
return results
async def scrape_naver_blog(query: str) -> tuple[str, str]:
# Naver blog vertical
url = f"https://search.naver.com/search.naver?where=blog&query={quote_plus(query)}"
async with async_playwright() as p:
browser = await p.chromium.launch(
headless=True,
proxy={
"server": PROXY_SERVER,
"username": BRIGHTDATA_USERNAME,
"password": BRIGHTDATA_PASSWORD,
},
)
page = await browser.new_page()
# Proxy-friendly timeouts
page.set_default_navigation_timeout(90_000)
page.set_default_timeout(60_000)
# Block heavy resources to speed up + reduce hangs
async def block_resources(route):
if route.request.resource_type in ("image", "media", "font"):
return await route.abort()
await route.continue_()
await page.route("**/*", block_resources)
# Retry once (Navers can be slightly flaky)
for attempt in (1, 2):
try:
await page.goto(url, wait_until="domcontentloaded", timeout=90_000)
await page.wait_for_selector("body", timeout=30_000)
html = await page.content()
await browser.close()
return url, html
except PwTimeout:
if attempt == 2:
await browser.close()
raise
await page.wait_for_timeout(1500)
if __name__ == "__main__":
query = "machine learning tutorial"
scraped_url, html = asyncio.run(scrape_naver_blog(query))
print("Scraped from:", scraped_url)
print("HTML length:", len(html))
print(html[:200])
results = extract_blog_results(html, limit=10)
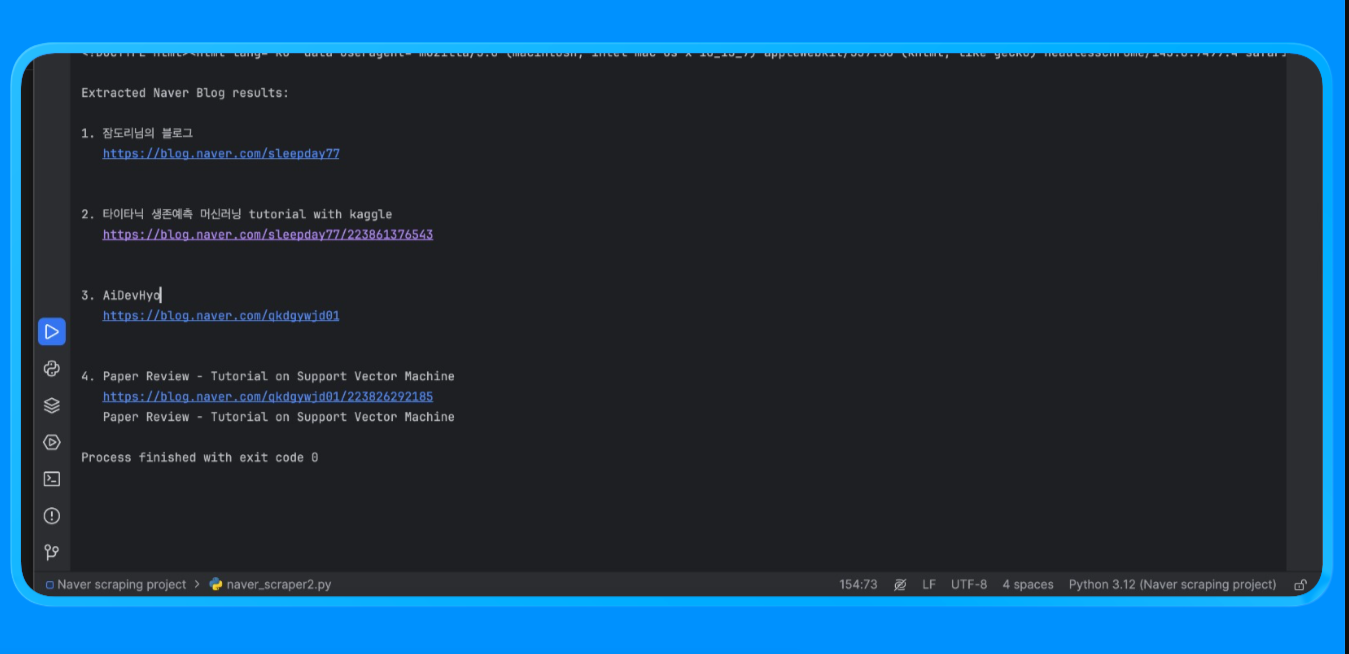
print("\nExtracted Naver Blog results:")
for i, r in enumerate(results, 1):
print(f"\n{i}. {r['title']}\n {r['link']}\n {r['snippet']}")Using the fetch_naver_html() function, we sent a Naver search URL to Bright Data’s request endpoint and retrieved the fully rendered SERP page. Bright Data handled IP rotation and access automatically, allowing the request to succeed without running into blocks or rate limits.
We then parsed the HTML using BeautifulSoup and applied custom filtering logic to remove ads and internal Naver modules. The extract_web_results() function scanned the page for valid result titles, links, and nearby text blocks, deduplicated them, and returned a clean list of search results.
When you run the script, you’ll get an output that looks like this: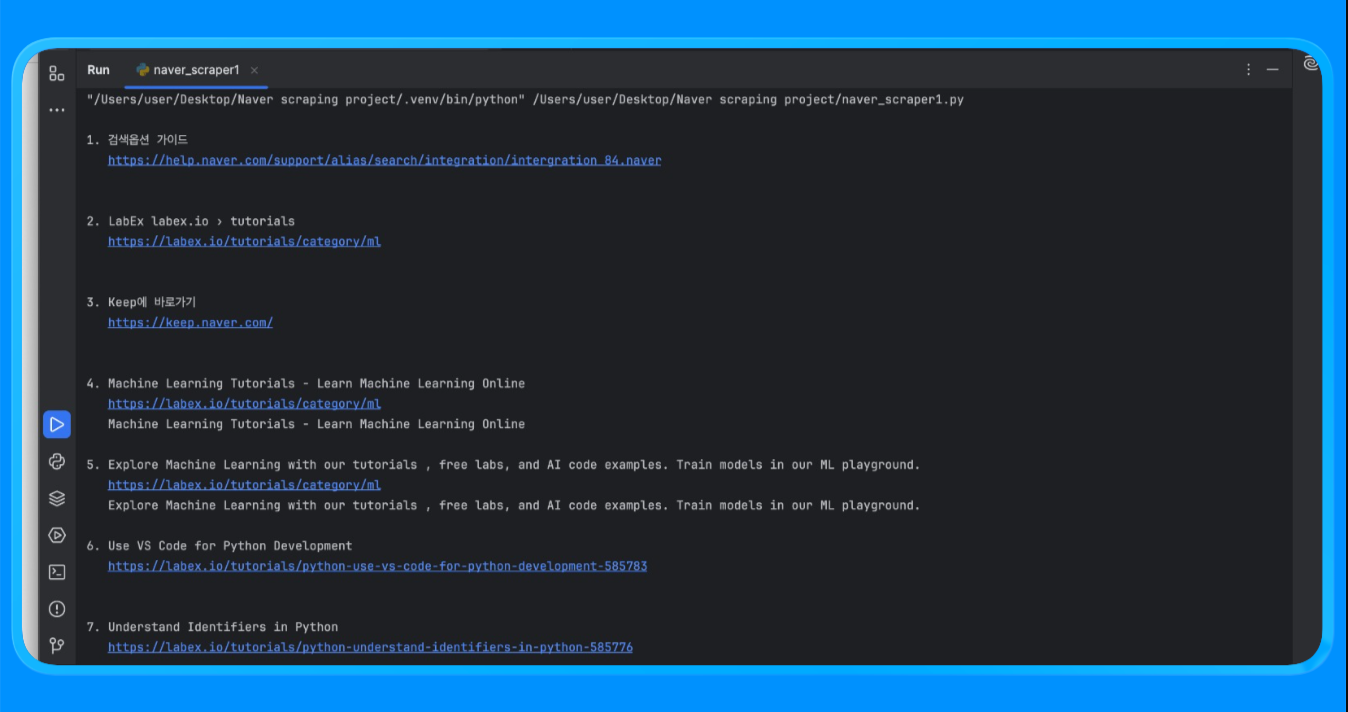
This method is used to collect structured Naver search results without building or maintaining a custom scraper.
Common use cases
- Keyword ranking and visibility tracking on Naver
- SEO performance monitoring for Korean markets
- SERP feature analysis such as news, shopping, and blog placements
This approach works best when you need consistent output schemas and high request volumes with minimal setup.
With SERP-level scraping covered, let’s move on to building a custom Naver scraper using Bright Data proxies for deeper crawling and greater flexibility.
Building a Custom Naver Scraper with Bright Data Proxies
This approach uses a real browser to render Naver pages while routing traffic through Bright Data proxies. It is useful when you need full control over requests, JavaScript rendering, and page-level data extraction beyond SERPs.
Before writing any code, you first need to create a proxy zone and obtain your proxy credentials from the Bright Data dashboard.
To get the proxy credentials used in this script:
- Log in to your Bright Data account
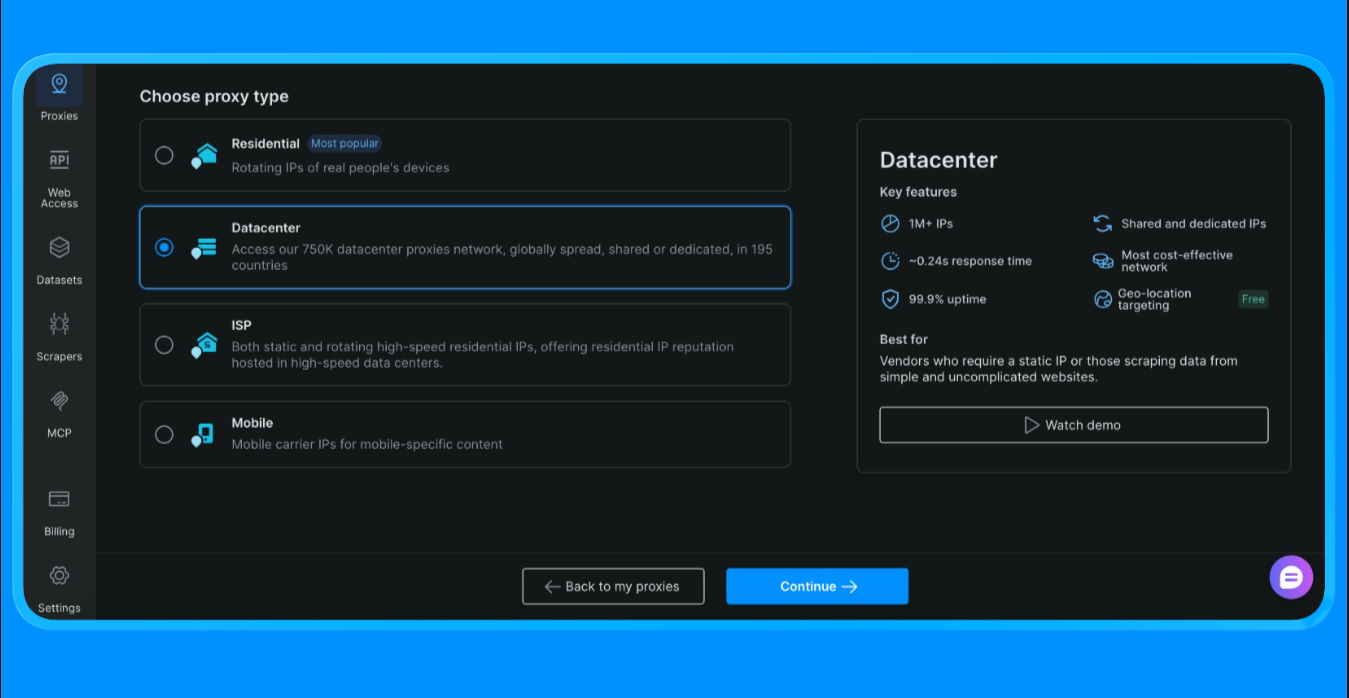
- From the dashboard, go to Proxies and click on “Create Proxy”
- Select Datacenter Proxies (we’re choosing this option for this project, the option varies based on the scope and project’s use case)

- Create a new proxy zone
- Open the zone settings and copy the following values:
- Proxy username
- Proxy password
- Proxy endpoint and port
These values are required to authenticate requests routed through Bright Data’s proxy network.
Add Your Bright Data Proxy Credentials to the Script
After creating the proxy zone, update the script with the credentials you copied from the dashboard.
BRIGHTDATA_USERNAMEcontains your customer ID and proxy zone nameBRIGHTDATA_PASSWORDcontains the password for the proxy zonePROXY_SERVERpoints to Bright Data’s super proxy endpoint
Once these values are set, all browser traffic initiated by Playwright will be routed through Bright Data automatically.
Now we can now proceed to scraping with the following codes:
import asyncio
import re
from bs4 import BeautifulSoup
from urllib.parse import quote_plus
from playwright.async_api import async_playwright

BRIGHTDATA_USERNAME = "your_username"
BRIGHTDATA_PASSWORD = "your_password"
PROXY_SERVER = "your_proxy_host"

def clean_text(s: str) -> str:
    return re.sub(r"\s+", " ", (s or "")).strip()

async def run(query: str):
    url = f"https://search.naver.com/search.naver?query={quote_plus(query)}"

    async with async_playwright() as p:
        browser = await p.chromium.launch(
            headless=True,
            proxy={
                "server": PROXY_SERVER,
                "username": BRIGHTDATA_USERNAME,
                "password": BRIGHTDATA_PASSWORD,
            },
        )
        page = await browser.new_page()
        await page.goto(url, wait_until="networkidle")
        html = await page.content()
        await browser.close()

    soup = BeautifulSoup(html, "html.parser")

    results = []
    seen = set()

    for a in soup.select("a[href]"):
        href = a.get("href", "")
        title = clean_text(a.get_text(" ", strip=True))

        if len(title) < 8:
            continue
        if not href.startswith(("http://", "https://")):
            continue
        if any(x in href for x in ["ader.naver.com", "adcr.naver.com", "help.naver.com", "keep.naver.com"]):
            continue
        if href in seen:
            continue

        seen.add(href)
        results.append({"title": title, "link": href})

        if len(results) >= 10:
            break

    for i, r in enumerate(results, 1):
        print(f"{i}. {r['title']}\n   {r['link']}\n")

if __name__ == "__main__":
    asyncio.run(run("machine learning tutorial"))
The scrape_naver_blog() function opens the Naver Blog vertical, blocks heavy assets such as images, media, and fonts to reduce load time, and retries the navigation if a timeout occurs. Once the page is fully loaded, it retrieves the rendered HTML.
The extract_blog_results() function then parses the HTML with BeautifulSoup, applies blog-specific filtering rules to exclude ads and utility pages while allowing Naver blog domains, and extracts a clean list of blog titles, links, and nearby text snippets.
Once you run this script, you get the output:
This method is used to extract content from Naver pages that require browser rendering and custom parsing logic.
Common use cases
- Scraping Naver Blog and Cafe content
- Collecting long-form articles, comments, and user content
- Extracting data from JavaScript-heavy pages
This approach is ideal when page rendering, retries, and fine-grained filtering are required.
Now that we have a custom scraper running through Bright Data proxies, let’s move to the fastest option for extracting data without writing code. In the next section, we will scrape Naver using Bright Data Scraper Studio, the no-code AI-powered workflow built on the same infrastructure.
Scraping Naver with Bright Data Scraper Studio (No-Code AI Scraper)
If you do not want to write or maintain scraping code, Bright Data Scraper Studio provides a no-code way to extract Naver data using the same underlying infrastructure as the SERP API and proxy network.
To get started:
- Log in to your Bright Data account
- From the dashboard, Open the “Scrapers” option on the left side menu and click on “Scraper studio”. You’ll see a dashboard that looks like this:
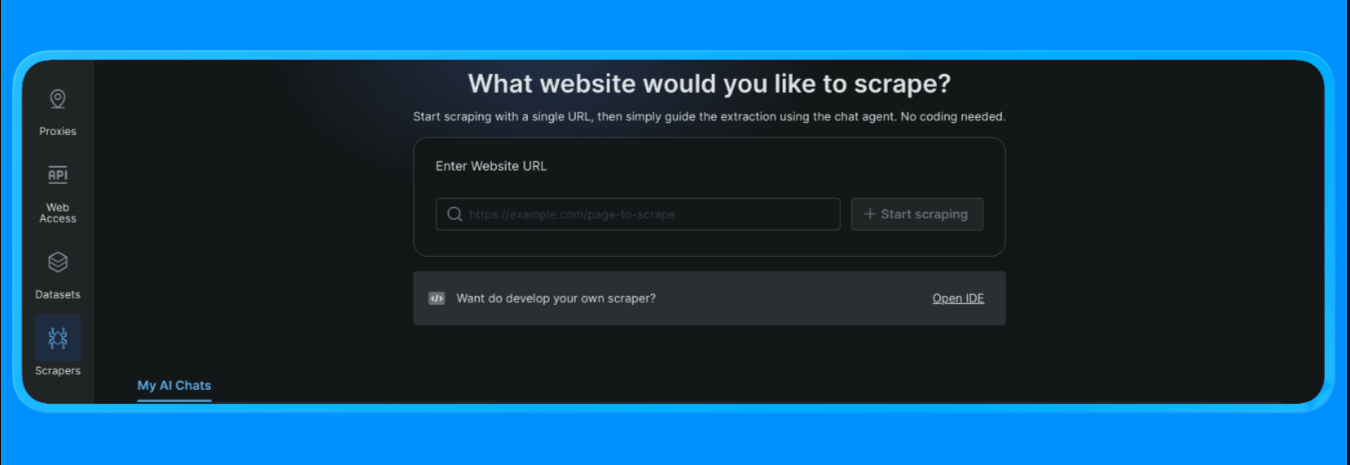
Input the target URL you’d like to scrape, and then click on the “Start Scraping” button
The Scraper Studio then goes ahead to scrape the site and provide you with the information you need.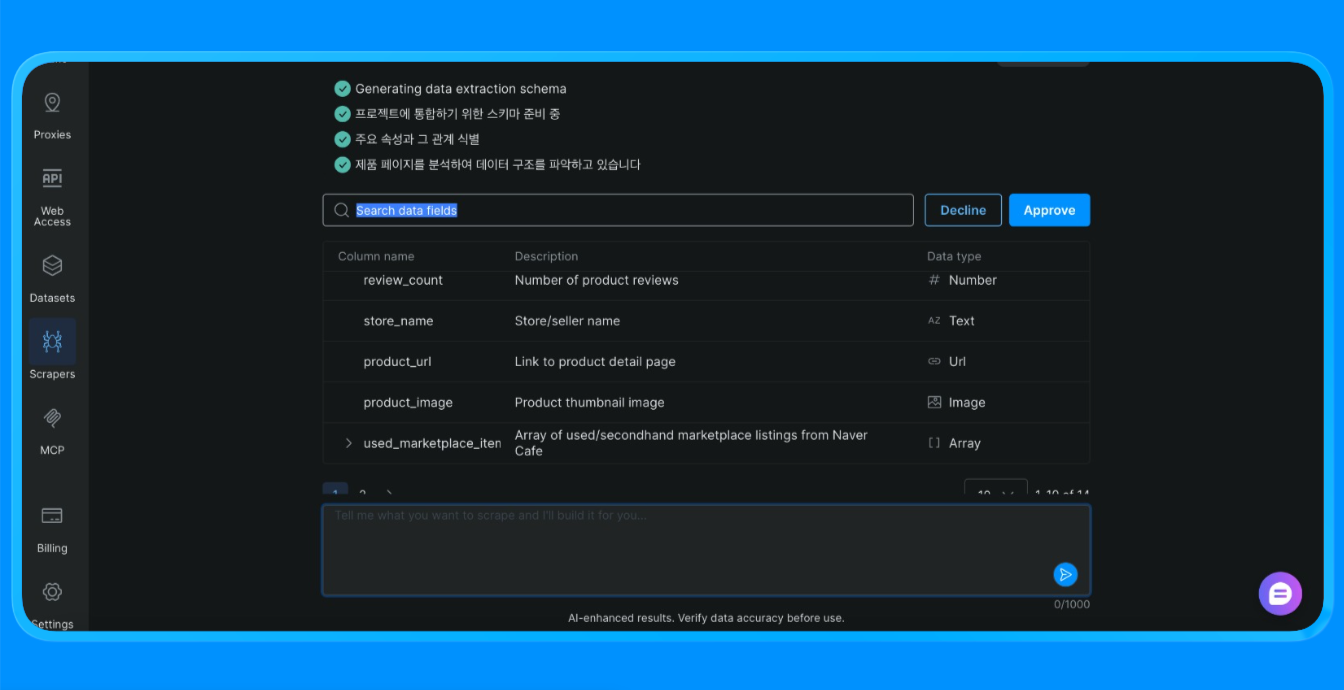
Scraper Studio loaded the Naver page through Bright Data’s infrastructure, applied visual extraction rules, and returned structured data that would otherwise require a custom scraper or browser automation.
Common use cases
- One-off data collection
- Proof-of-concept projects
- Non-technical teams collecting web data
Scraper Studio is a good choice when speed and simplicity matter more than customization.
Comparing the Three Naver Scraping Approaches
| Approach | Setup Effort | Level of Control | Scalability | Best For |
|---|---|---|---|---|
| Bright Data SERP API | Low | Medium | High | SEO tracking, keyword monitoring, structured SERP data |
| Custom Scraper with Bright Data Proxies | High | Very High | Very High | Blog scraping, dynamic pages, custom workflows |
| Bright Data Scraper Studio | Very Low | Low to Medium | Medium | Fast extraction, no-code teams, prototyping |
How to choose:
- Use the SERP API when you need reliable, structured search results at scale.
- Use proxies with a custom scraper when you need full control over rendering, retries, and extraction logic.
- Use Scraper Studio when speed and simplicity matter more than customization.
Wrapping up
In this tutorial, we covered three production-ready ways to scrape Naver using Bright Data:
- A managed SERP API for structured search data
- A custom scraper with proxies for full flexibility and control
- A no-code Scraper Studio workflow for fast data extraction
Each option is built on the same Bright Data infrastructure. The right choice depends on how much control you need, how often you plan to scrape, and whether you want to write code.
You can explore Bright Data to get access to the SERP API, proxy infrastructure, and no-code Scraper Studio, and choose the approach that fits your workflow.
For more web scraping guides and tutorials:

Technical Writer
Arindam Majumder is a developer advocate, YouTuber, and technical writer who simplifies LLMs, agent workflows, and AI content for 5,000+ followers.


