
In this tutorial, you will learn:
- What Cursor is and why it has become so popular.
- The main reasons to add a game-changing MCP server like Bright Data’s to Cursor.
- How to connect Cursor to the Bright Data Web MCP.
- How to achieve the same results in Visual Studio Code.
Let’s dive in!
What Is Cursor?
Cursor is an AI-powered code editor built as a fork of Visual Studio Code. Its core functionality, like any text editor, is to provide an interface for writing code. Still, what makes it special is its built-in deep AI integration.
Instead of basic autocomplete, Cursor uses LLms to understand your entire codebase and context. This enables it to provide smart features like:
- Conversational prompts: Describe what you want in plain English, and Cursor will write or edit the code for you.
- Multi-line autocomplete: It suggests and completes entire blocks of code, not just single lines.
- AI-driven refactoring: It can intelligently optimize, clean up, and fix your code based on project-wide context.
- Debugging assistance: Ask the AI to find and explain bugs in your code.
Cursor turns a standard code editor into a proactive, highly intelligent pair programmer. It supports multiple LLMs from various providers and includes built-in support for tools through MCP.
Why Add Bright Data’s Web MCP to Cursor
Behind the scenes, Cursor relies on known LLM models. While its integration is deeper and more polished than most tools, it still faces the same core limitation as any LLM: AI knowledge is static!
After all, AI training data reflects a snapshot in time. That quickly becomes outdated, especially in fast-evolving fields like software development. Now, imagine giving Cursor’s AI agent the ability to:
- pull in the latest tutorials and documentation for RAG workflows,
- consult live guides as it writes code, and
- browse real-time websites as easily as it can navigate your local files.
That is precisely what you unlock by connecting Cursor to Bright Data’s Web MCP!
Web MCP offers access to 60+ AI-ready tools built for real-time web interaction and data collection. These are all powered by the rich Bright Data AI infrastructure.
Even on the free tier, your Cursor agent can already access two powerful tools:
| Tool | Description |
|---|---|
search_engine |
Retrieve search results from Google, Bing, or Yandex in JSON or Markdown. |
scrape_as_markdown |
Scrape any webpage into clean Markdown format, bypassing bot detection and CAPTCHA. |
Beyond these, Web MCP includes tools for cloud browser automation and structured data retrieval from platforms like Amazon, YouTube, LinkedIn, TikTok, Google Maps, and many others.
Here are just a few examples of what becomes possible when extending Cursor with Bright Data’s Web MCP:
- Retrieve the latest API references or framework tutorials, then auto-generate working code or project scaffolds.
- Instantly fetch up-to-date search engine results and embed them into your documentation or code comments.
- Gather live web data to create realistic test mocks, analytics dashboards, or automated content pipelines.
To explore the full range of capabilities, take a look at the Bright Data MCP documentation.
How to Integrate Web MCP into Cursor for an Enhanced AI Coding Experience
In this step-by-step section, you will see how to connect a Bright Data Web MCP local server instance to Cursor. This setup provides a supercharged AI experience with over 60 tools available directly in your IDE.
In detail, we will use the Web MCP tools to create an Express backend with a mocked API that returns real-world data from Amazon. This is just one example of the many use cases supported by this integration.
Follow the instructions below!
Prerequisites
To follow along with this tutorial, make sure you have:
- A Cursor account (a Free plan is enough).
- A Bright Data account with an active API key.
Do not worry about setting up Bright Data right now. You will be guided through the process as you go through the article!
A basic understanding of how MCP functions, how Cursor works, and the tools provided by Web MCP will also be helpful.
Step #1: Get Started with Cursor
Install the Cursor version for your operating system, open it, and log in with your account.
If this is your first time launching the application, complete the setup wizard.
You should then see something like this:
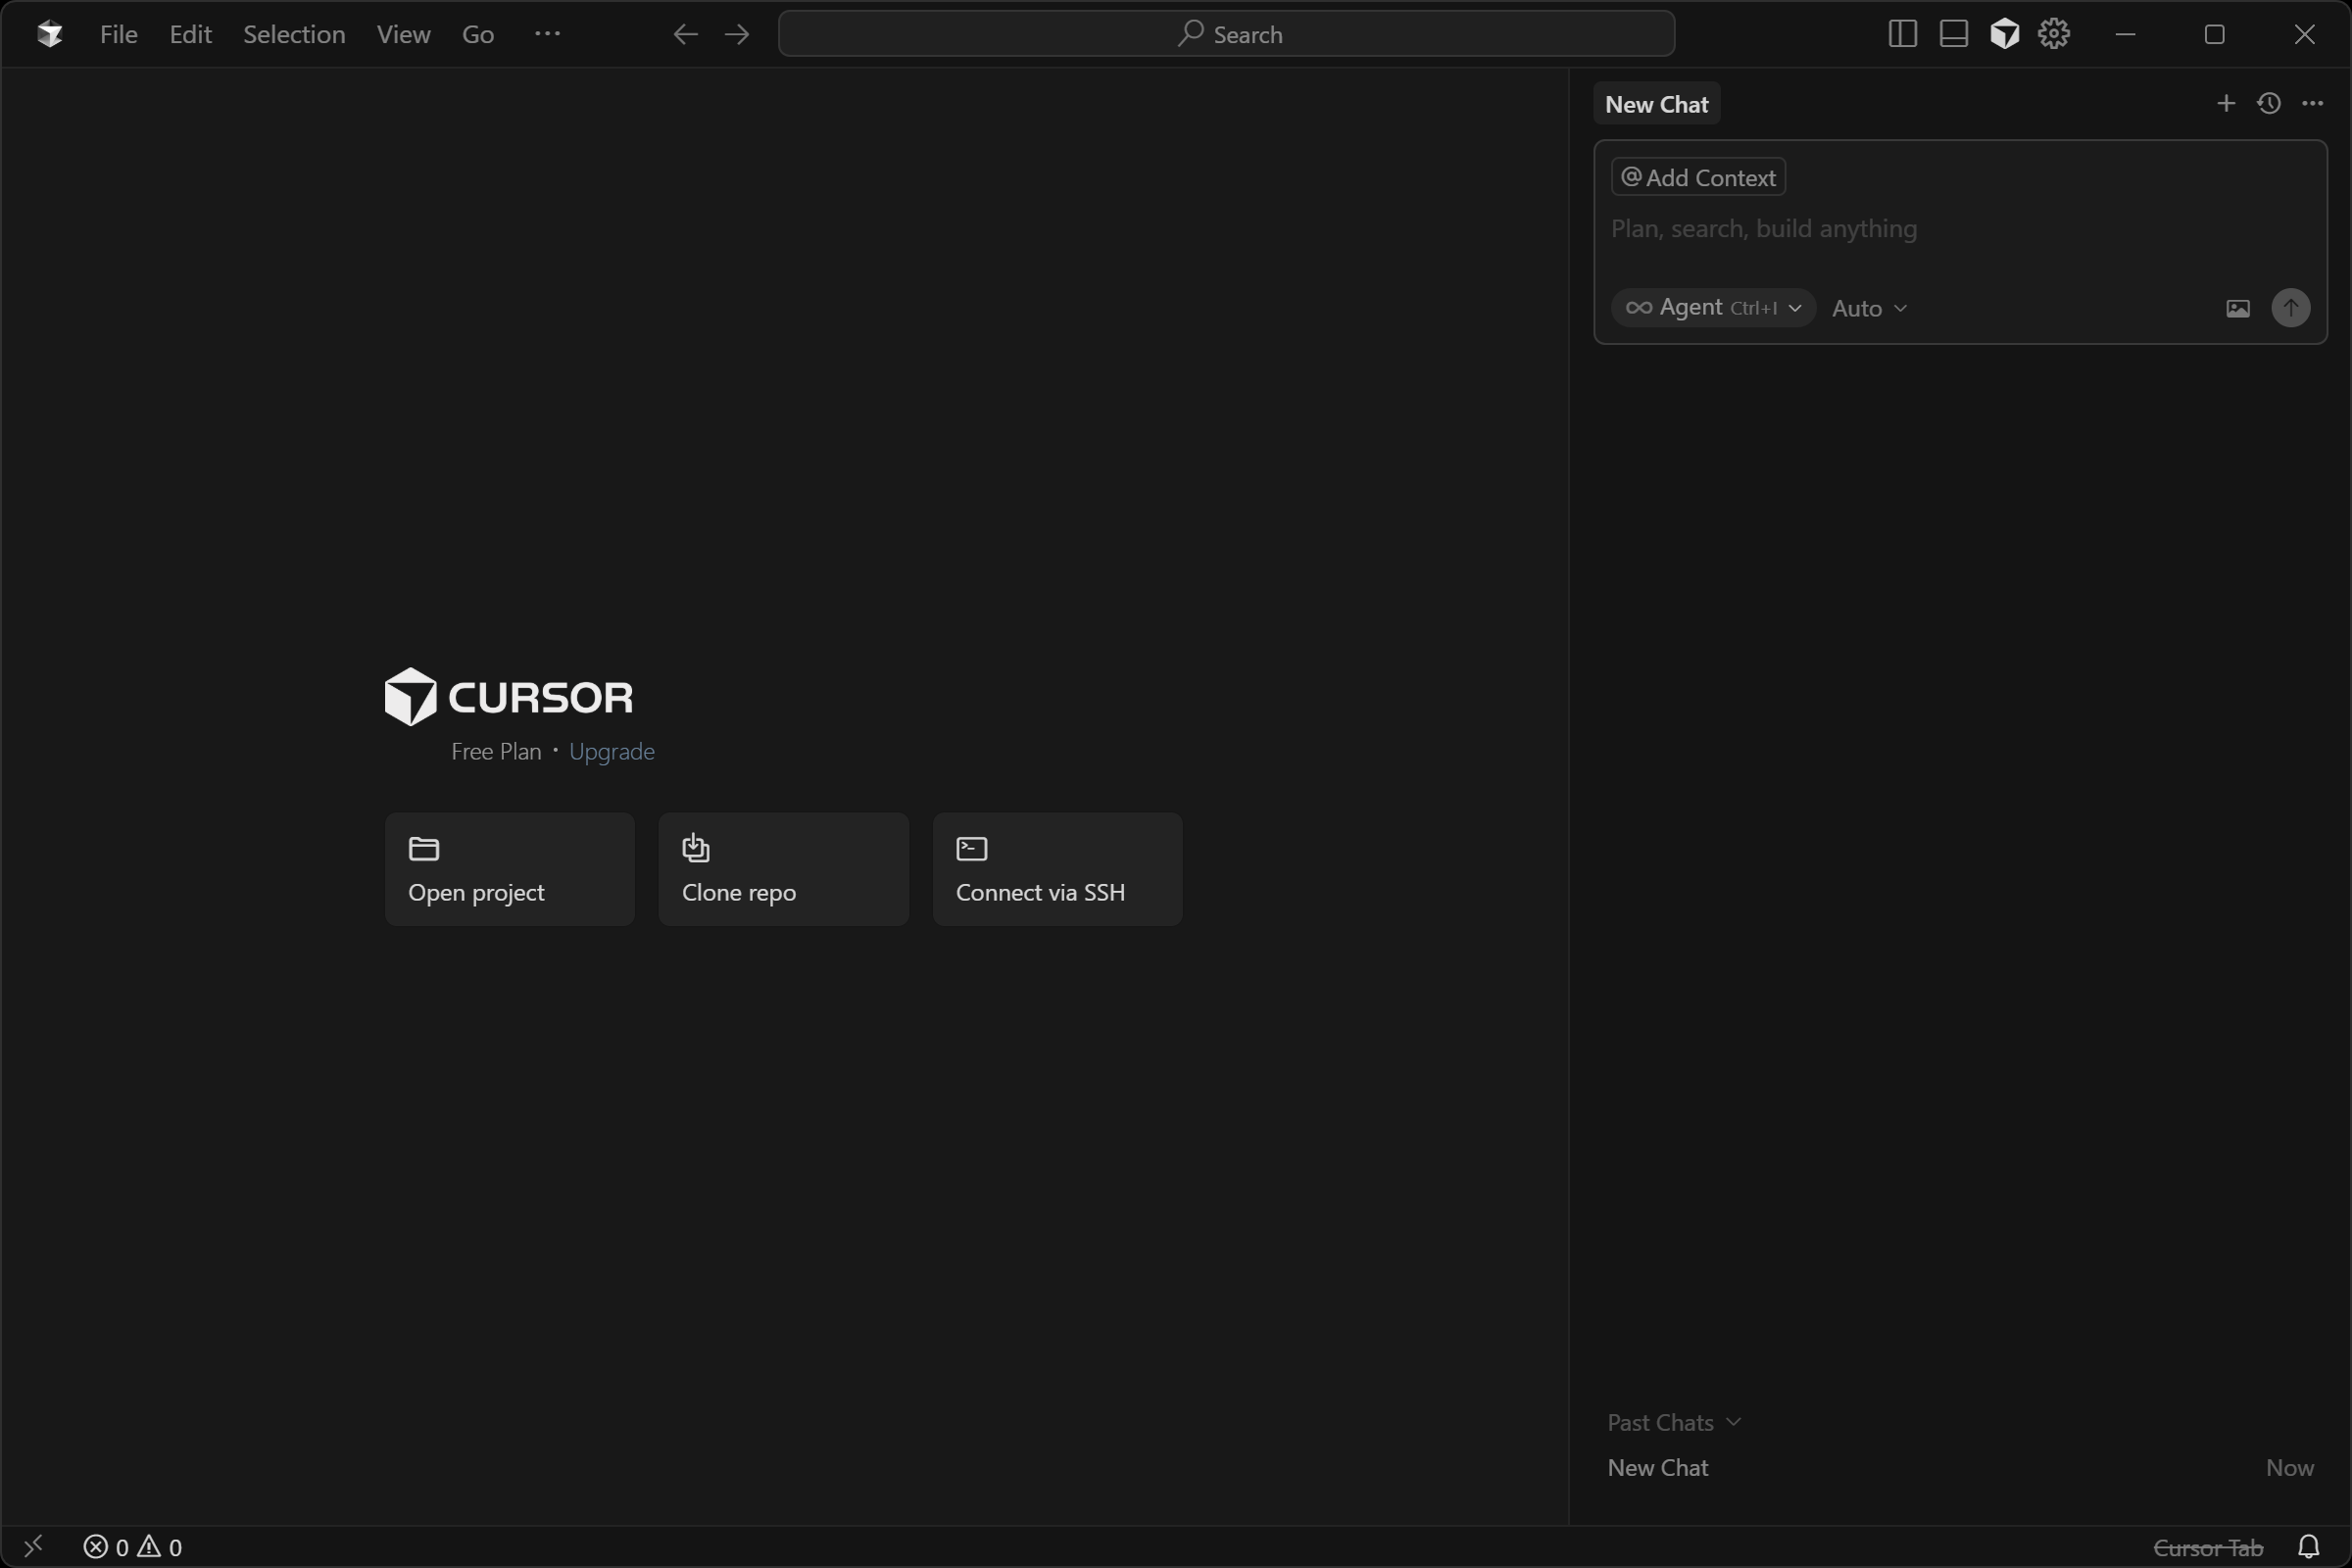
Great! Now open your project folder and get ready to use the built-in AI coding agent, extended with Web MCP.
Step #2: Configure Your LLM
As of this writing, Cursor uses the Claude 4.5 model by default (through “Auto” mode). If you are fine with that, feel free to skip to the next section. Remember that Claude can also be integrated with Web MCP.
If you want to change the default model, search for “cursor settings” and select the equivalent option:
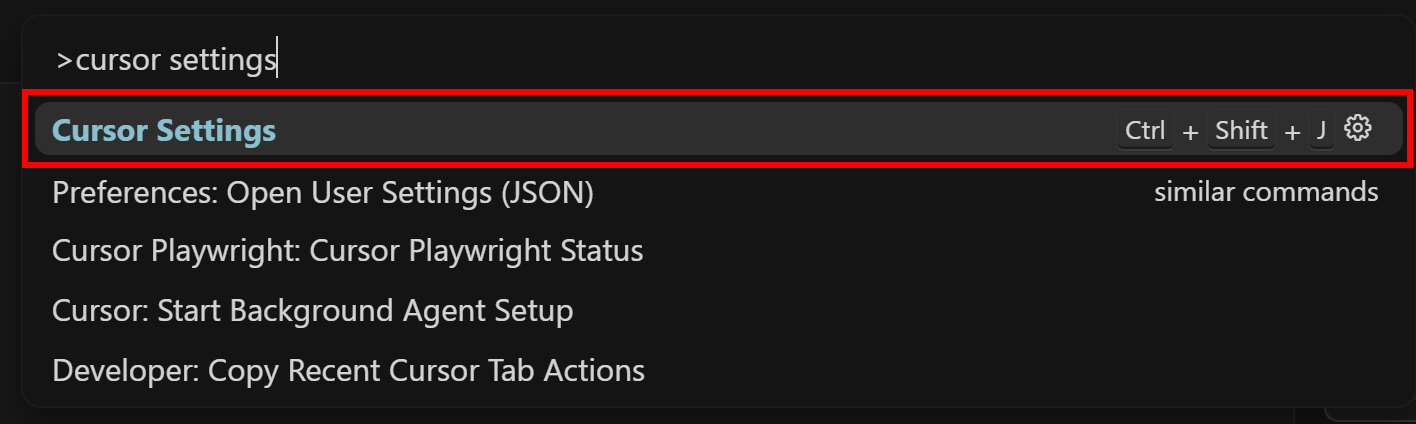
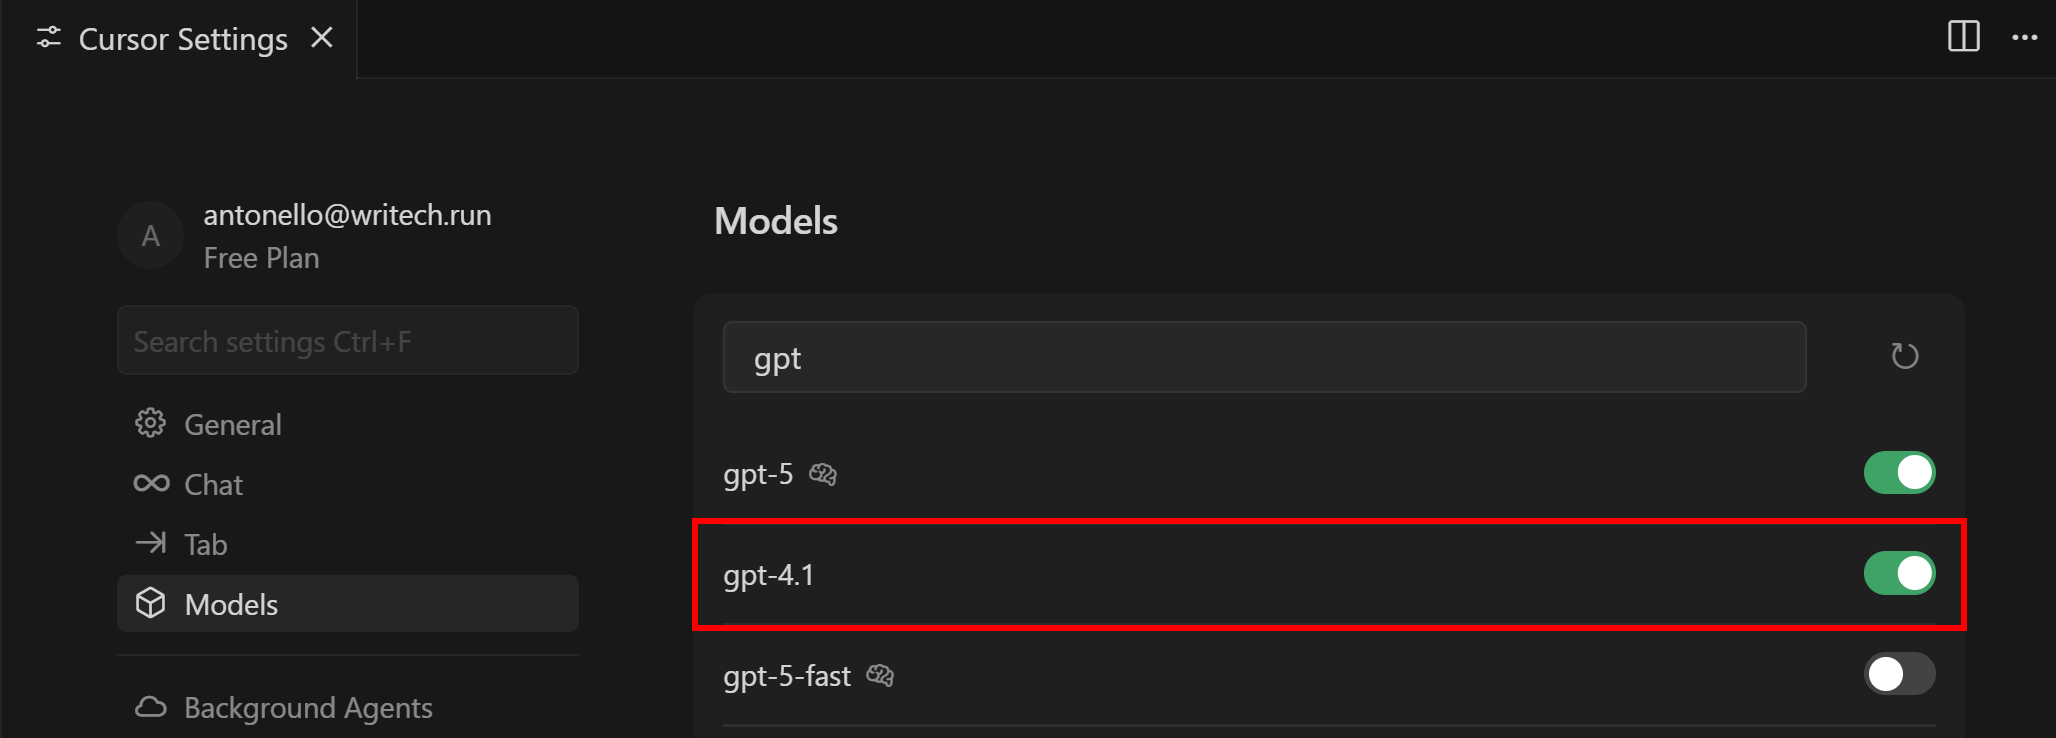
In the tab that opens, go to the “Models” tab:
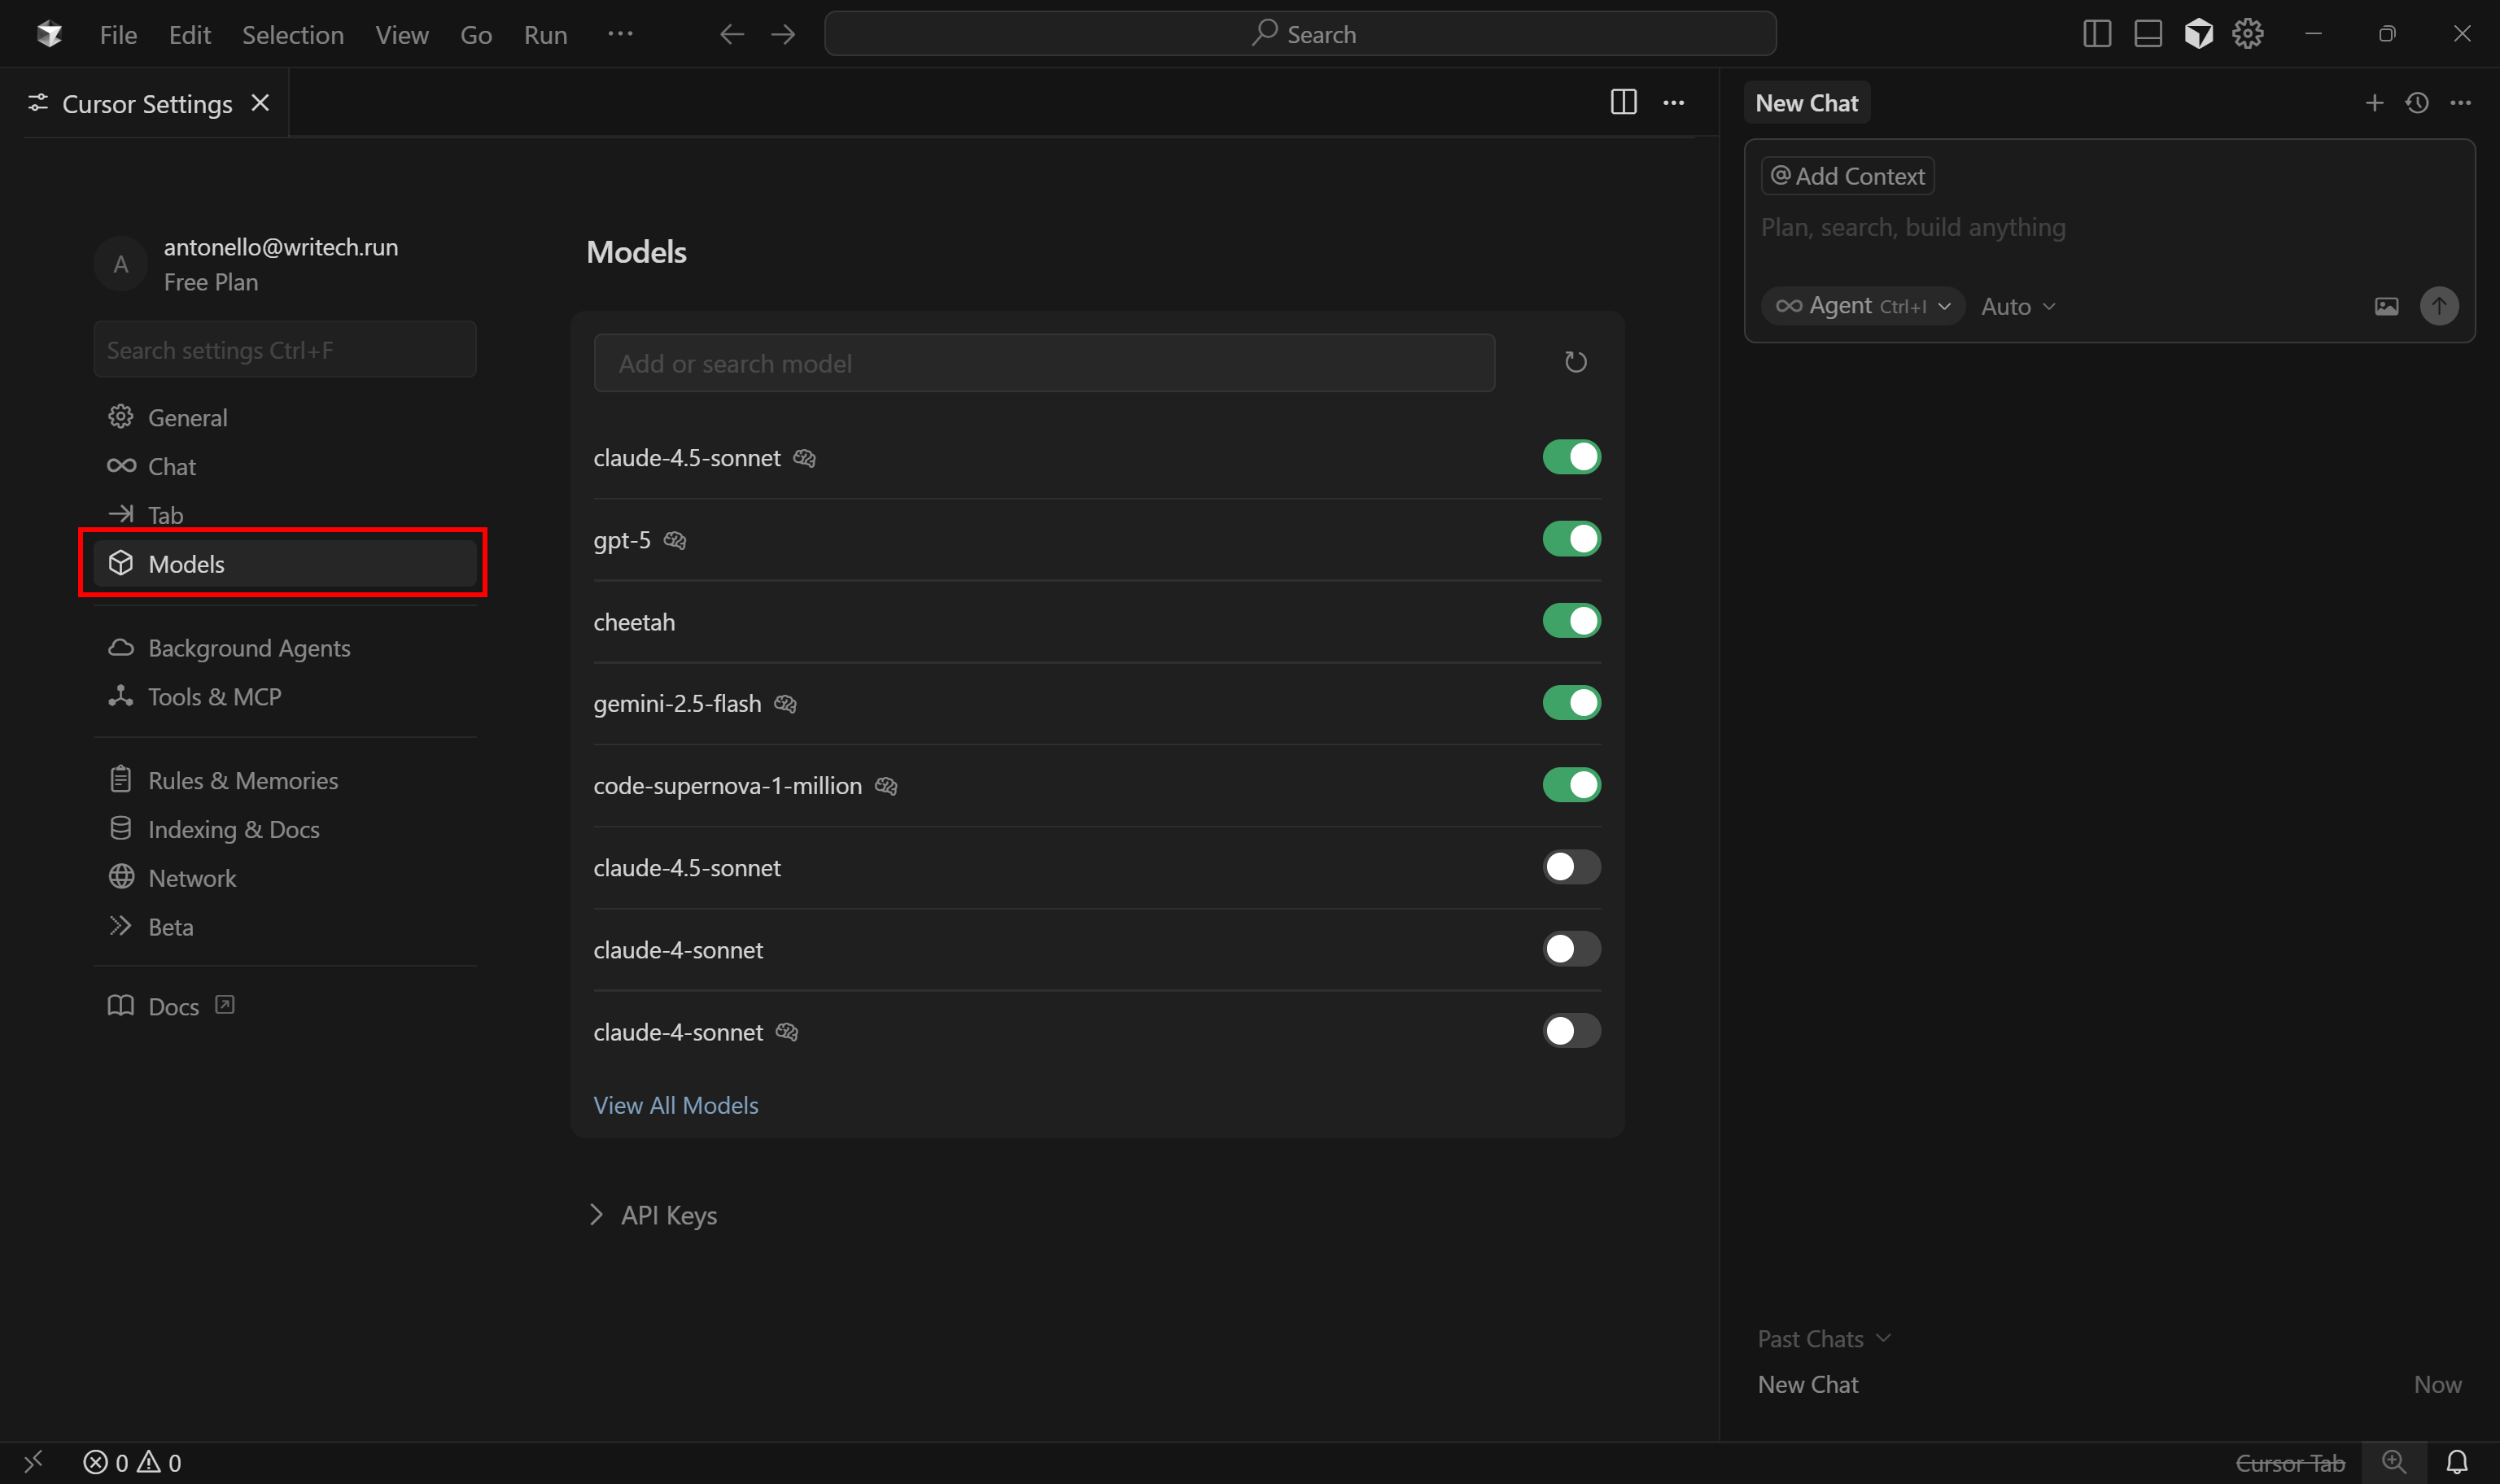
Here, you can configure which LLM Cursor’s AI agent should utilize. Keep in mind that free users can only choose between GPT-4.1 and “Auto” as premium models.
To change the model to GTP 4.1, search for “gpt”, find the “gpt-4.1” model, and enable it:
If you have a Pro or Business subscription, you can enable any other supported LLMs. Additionally, you can even provide your own API key for the chosen provider.
Next, open the “New Chat” panel on the right. Click the “Auto” dropdown, disable it, and select “gpt-4.1” option:
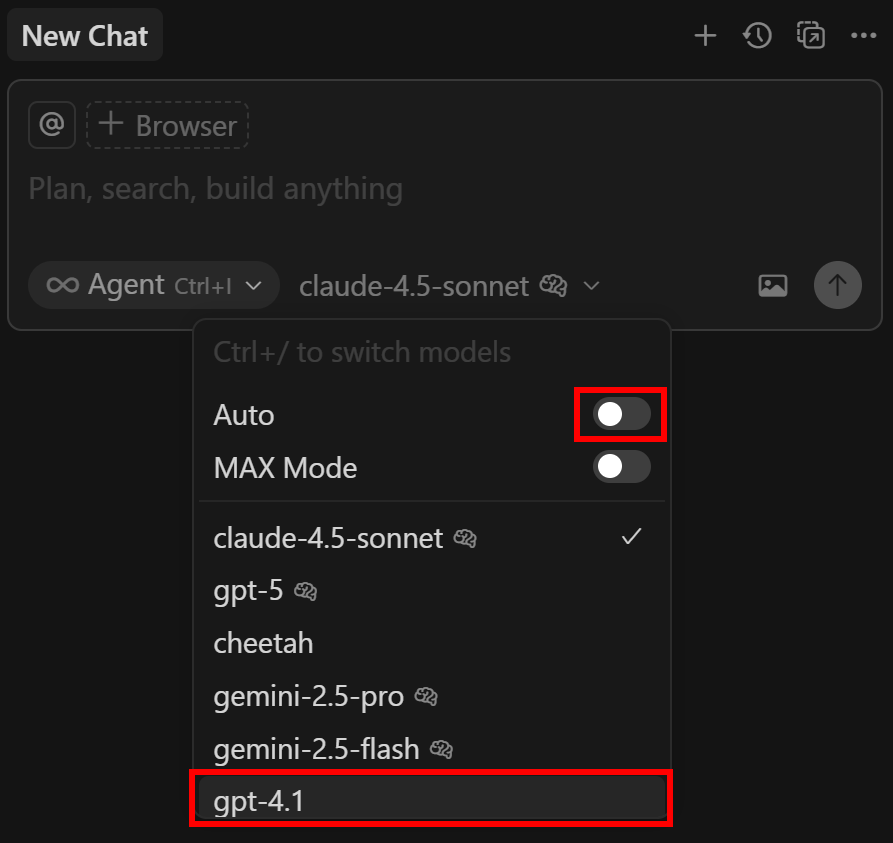
Well done! Cursor is now operating through your configured LLM.
Step #3: Test Bright Data’s Web MCP on Your Machine
Before connecting Cursor to the Bright Data Web MCP, verify that you can actually run the server locally. That is required because the MCP server will be configured through STDIO.
Begin by signing up for Bright Data. Otherwise, if you already have an account, just log in. For a quick setup, follow the instructions in the “MCP” section of the dashboard:
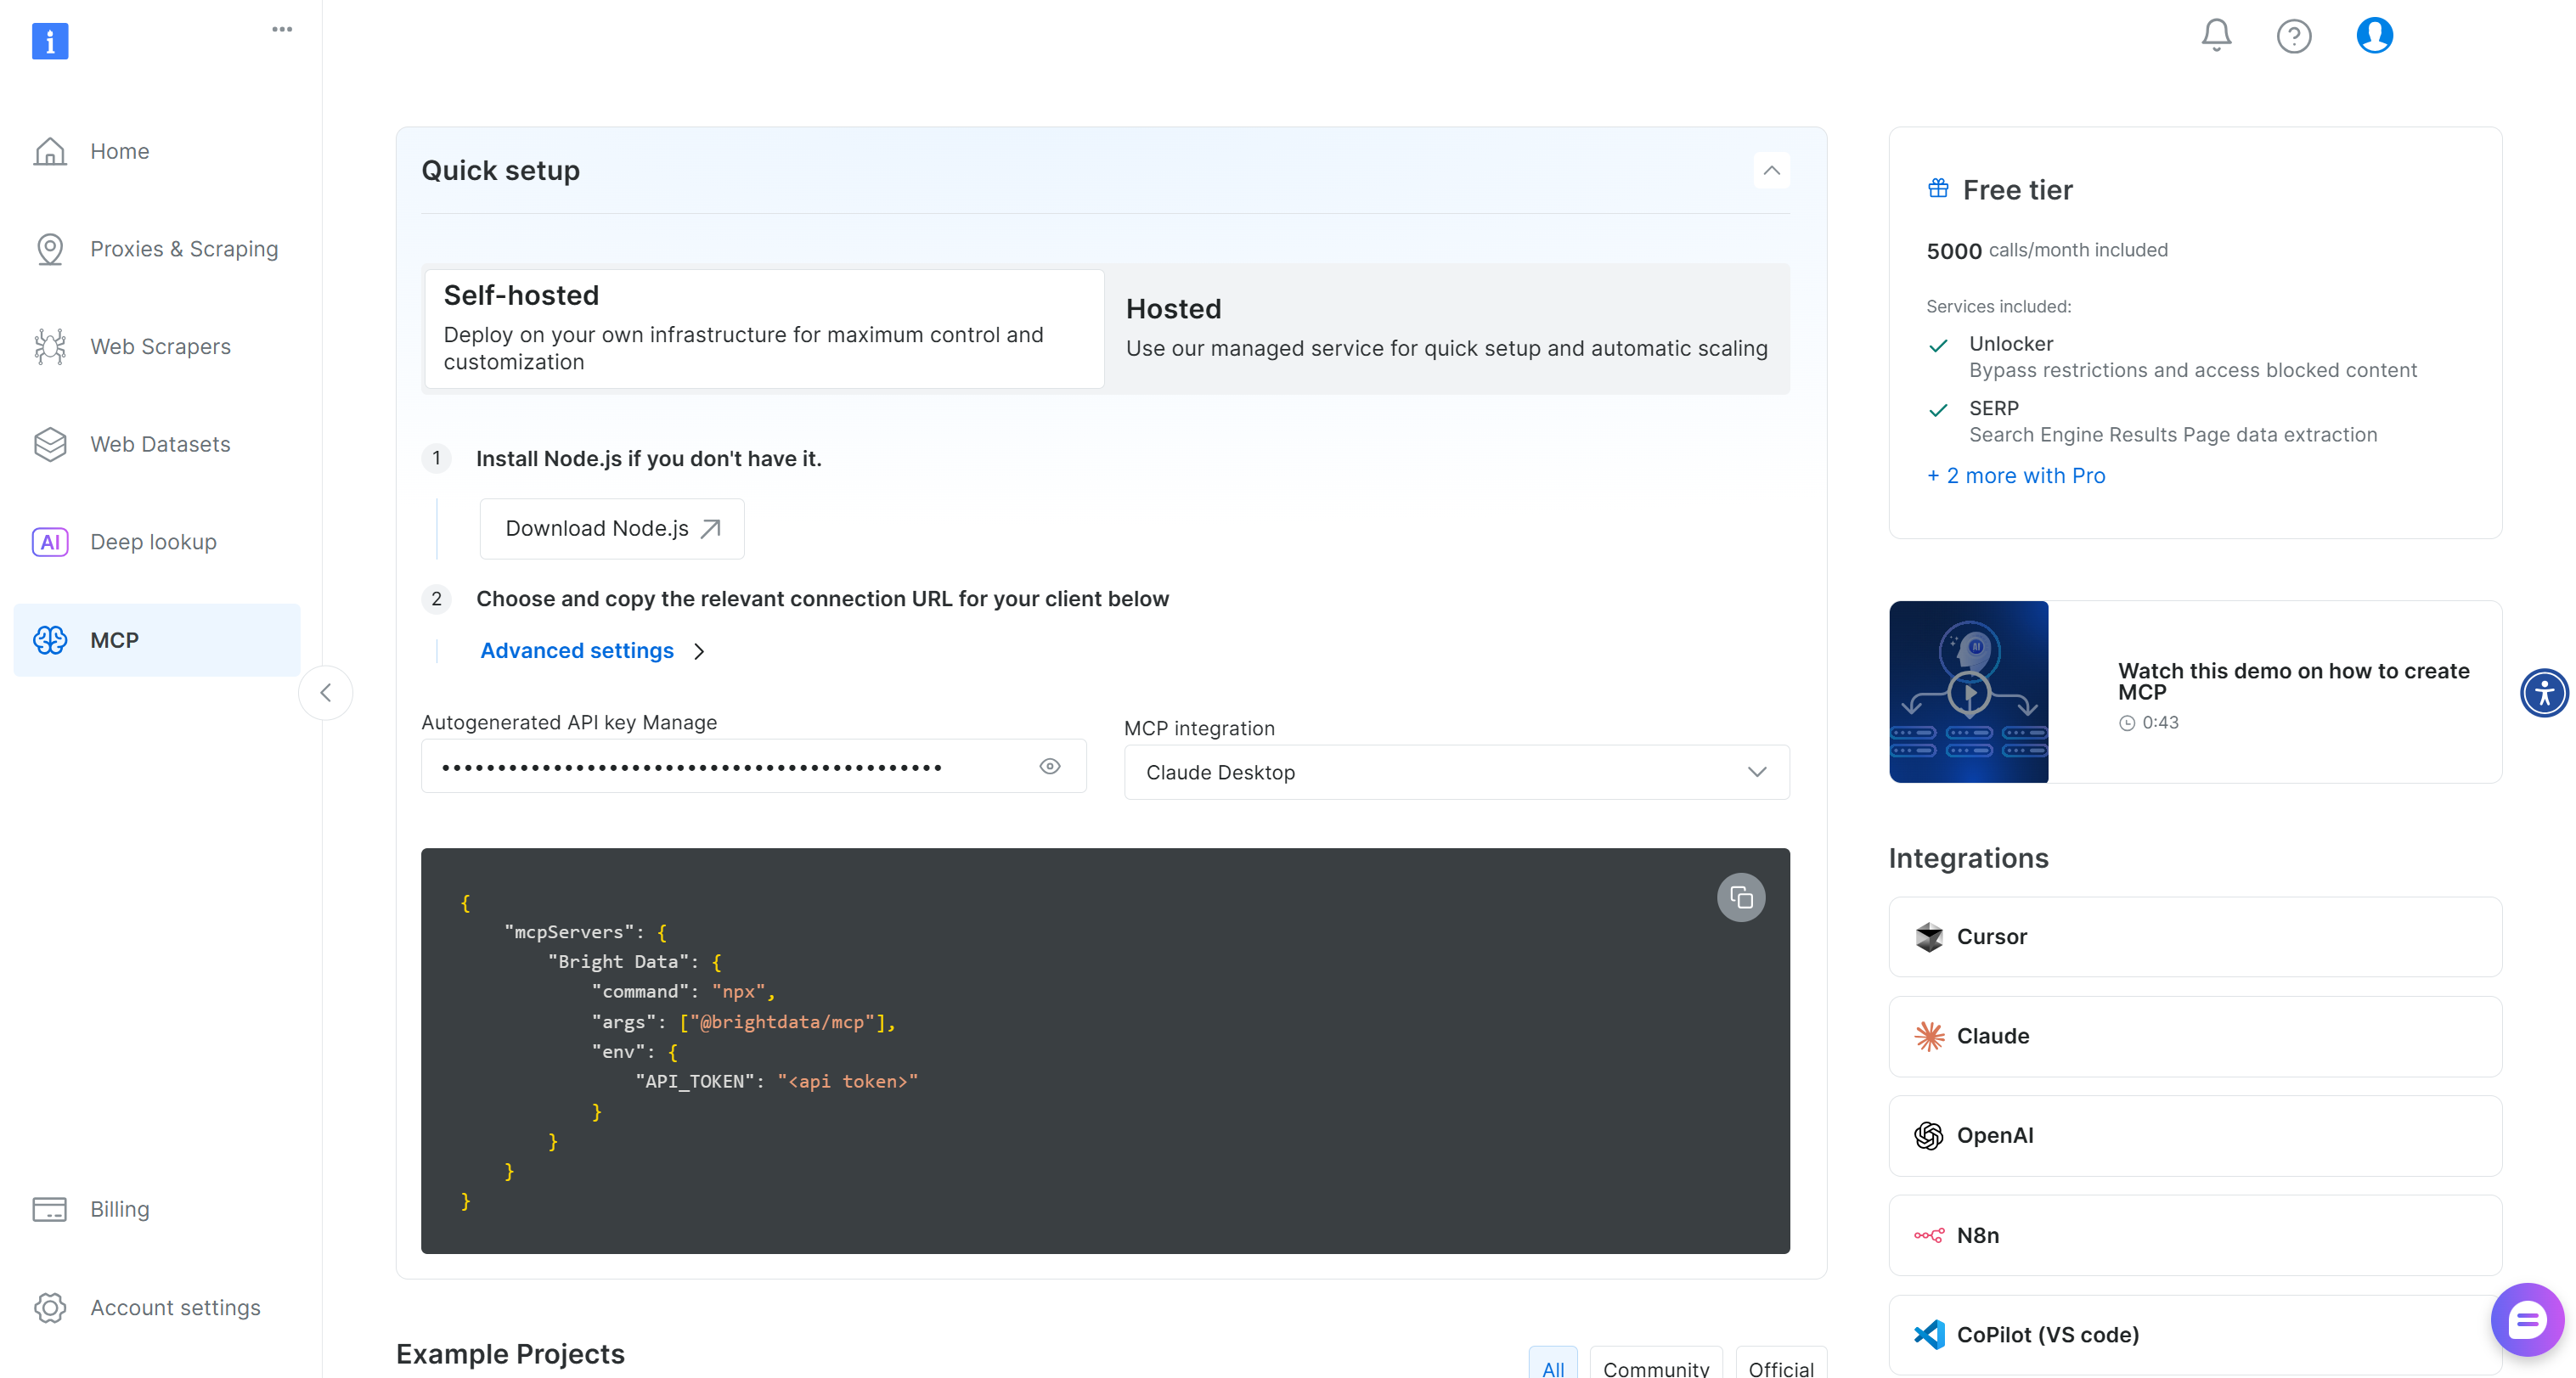
For more guidance, refer to the instructions below.
First, generate your Bright Data API key and store it in a safe place. You will need it in the next step. We will assume that your API key has Admin permissions, as that simplifies the Web MCP integration.
Now, install the Web MCP globally on your machine via this npm command:
npm install -g @brightdata/mcpVerify that the MCP server works by launching it:
API_TOKEN="<YOUR_BRIGHT_DATA_API_KEY>" npx -y @brightdata/mcpOr, equivalently, in PowerShell:
$Env:API_TOKEN="<YOUR_BRIGHT_DATA_API_KEY>"; npx -y @brightdata/mcpReplace the <YOUR_BRIGHT_DATA_API> placeholder with your Bright Data API token. These commands set the required API_TOKEN environment variable and launch the Web MCP locally through the @brightdata/mcp package.
If successful, you should see an output like this:

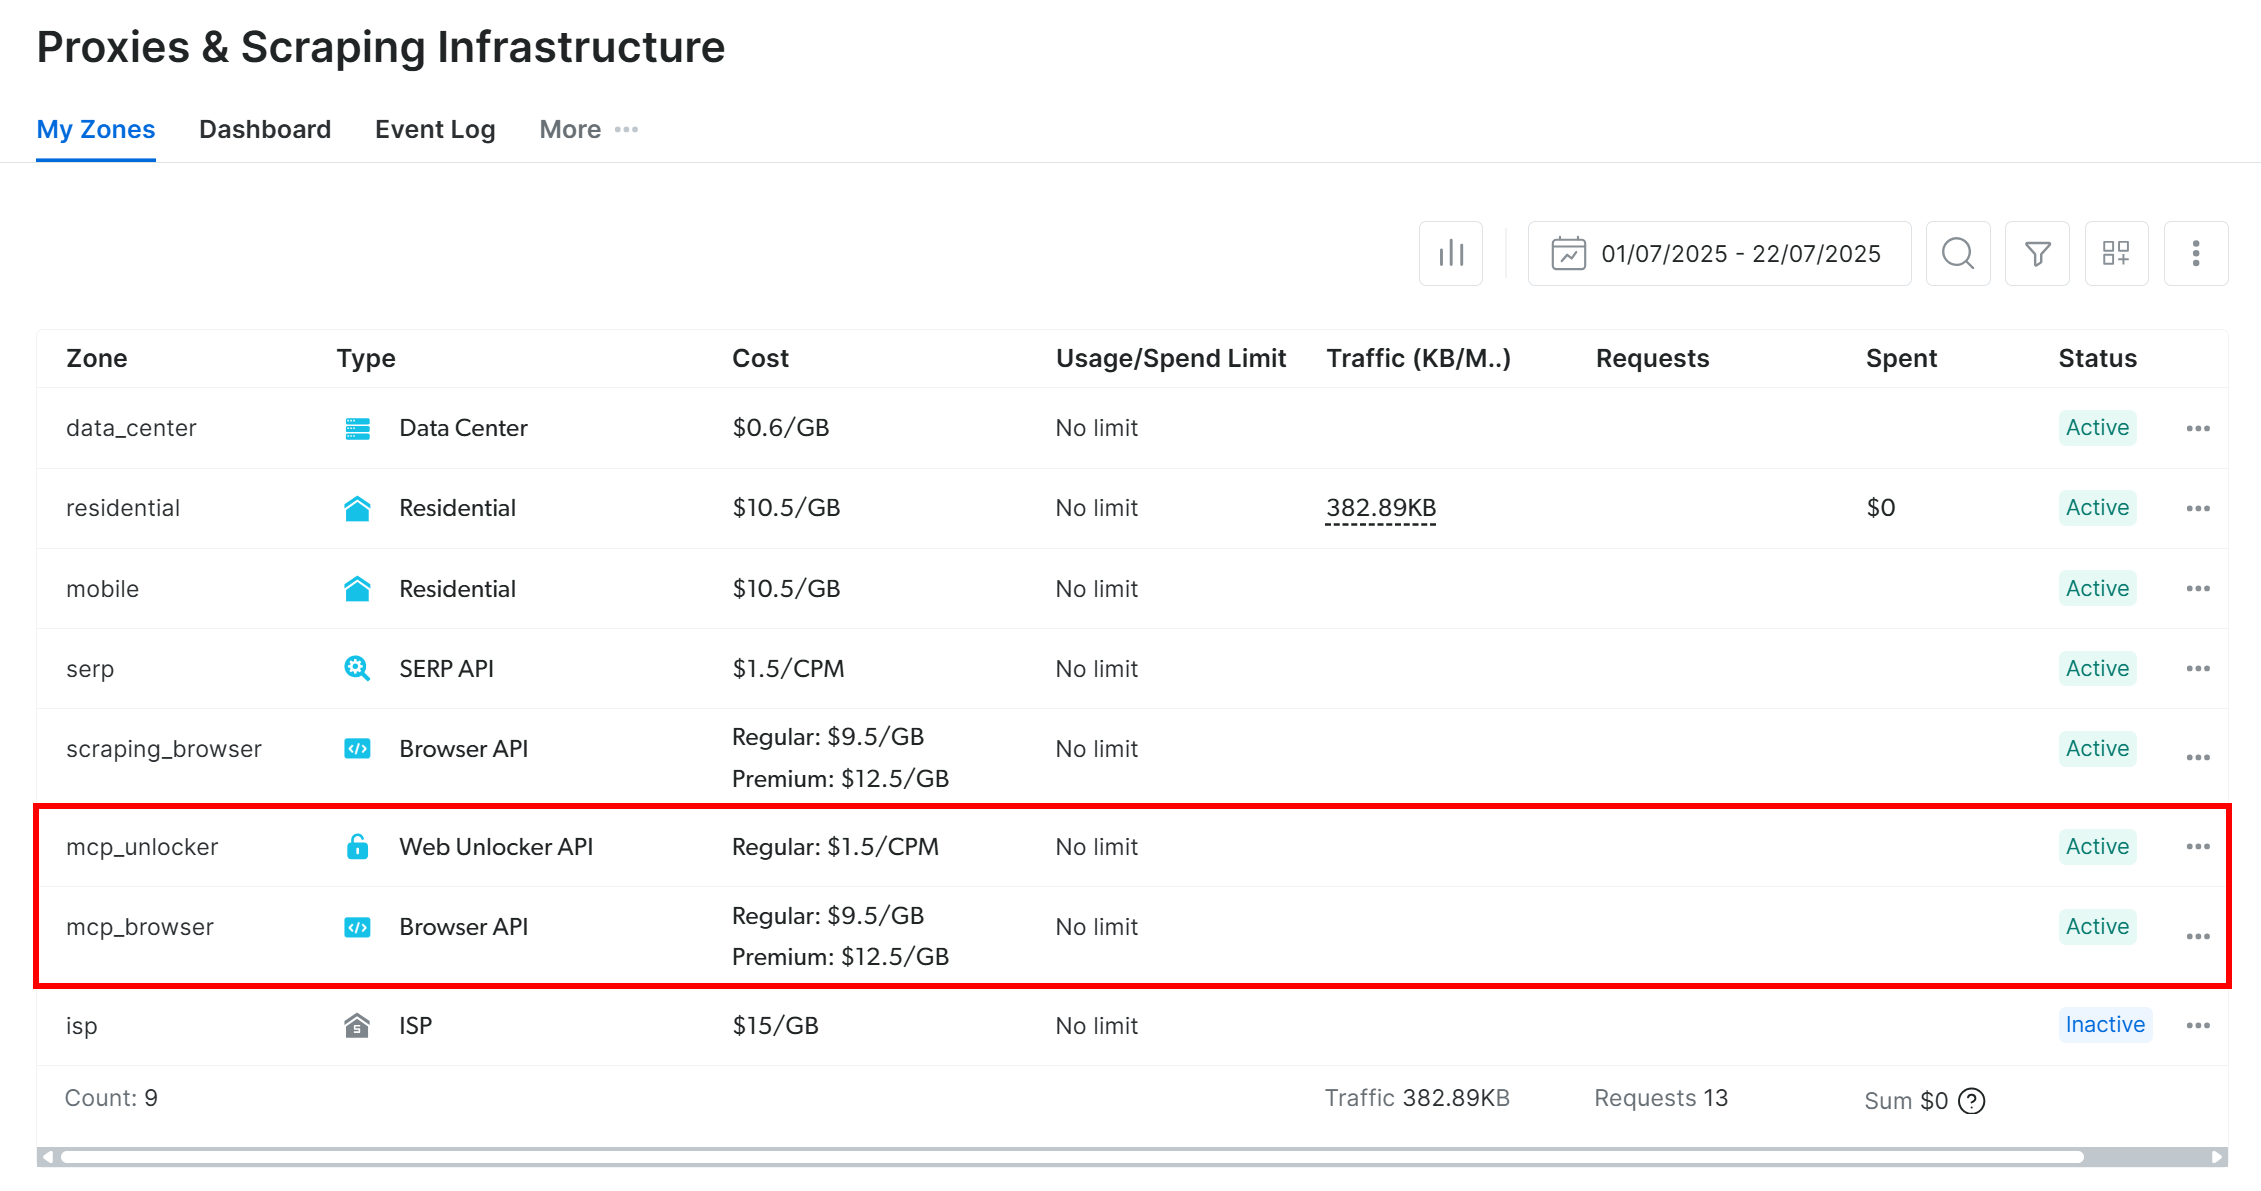
On the first launch, the Web MCP creates two default zones in your Bright Data account:
mcp_unlocker: A zone for Web Unlocker.mcp_browser: A zone for Browser API.
Web MCP relies on those two Bright Data services to power its 60+ tools.
If you want to check that the zones were set up, reach the “Proxies & Scraping Infrastructure” page in your Bright Data account. You should spot the two zones in the table:
Note: If your API token does not have Admin permissions, the two zones will not be automatically created. In that case, define them manually and set them via environment variables as explained on GitHub.
Remember that, on the free tier, Web MCP only exposes the search_engine and scrape_as_markdown tools (and their batch versions). To unlock all other tools, enable Pro mode **by setting the PRO_MODE="true" environment variable:
API_TOKEN="<YOUR_BRIGHT_DATA_API>" PRO_MODE="true" npx -y @brightdata/mcpOr, on Windows:
$Env:API_TOKEN="<YOUR_BRIGHT_DATA_API>"; $Env:PRO_MODE="true"; npx -y @brightdata/mcpPro mode unlocks all 60+ tools, but it is not included in the free tier, which means it will incur additional charges.
Terrific! You just made sure that the Web MCP server works locally. Kill the MCP process, as you are about to configure Cursor to start it for you and connect to it.
Step #4: Configure Web MCP in Cursor
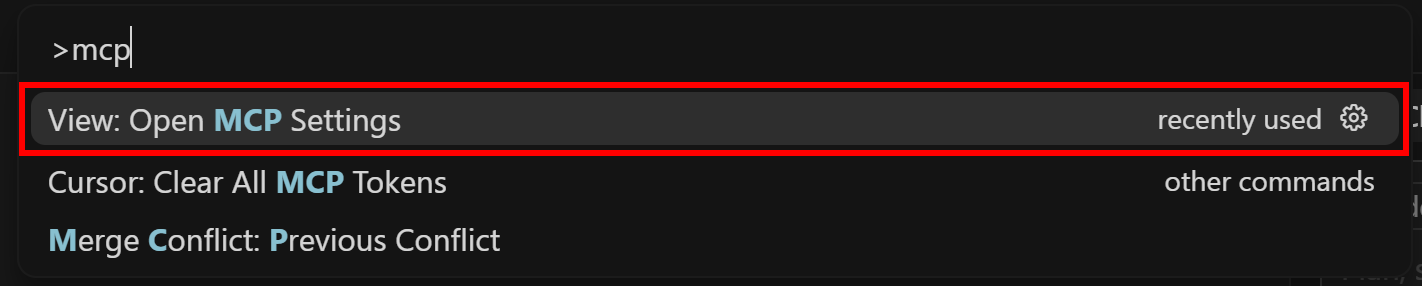
Begin by searching for “>mcp” and selecting “View: Open MCP Settings” option:
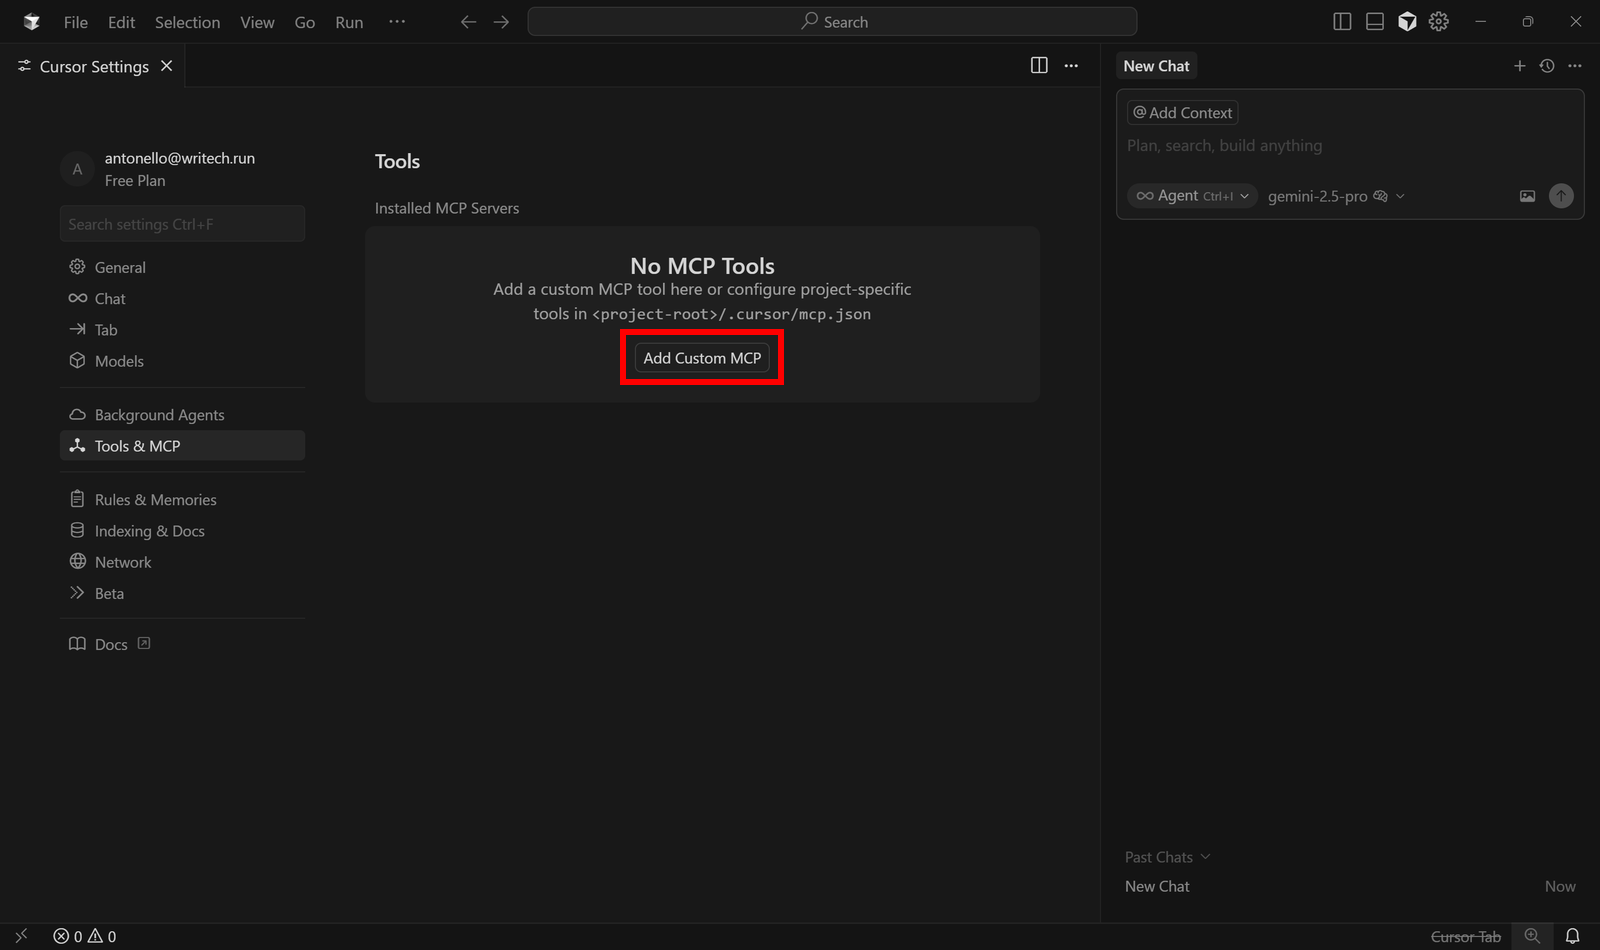
In the “Tools & MCP” section, click the “Add Custom MCP” button:
This will open the following mcp.json configuration file:
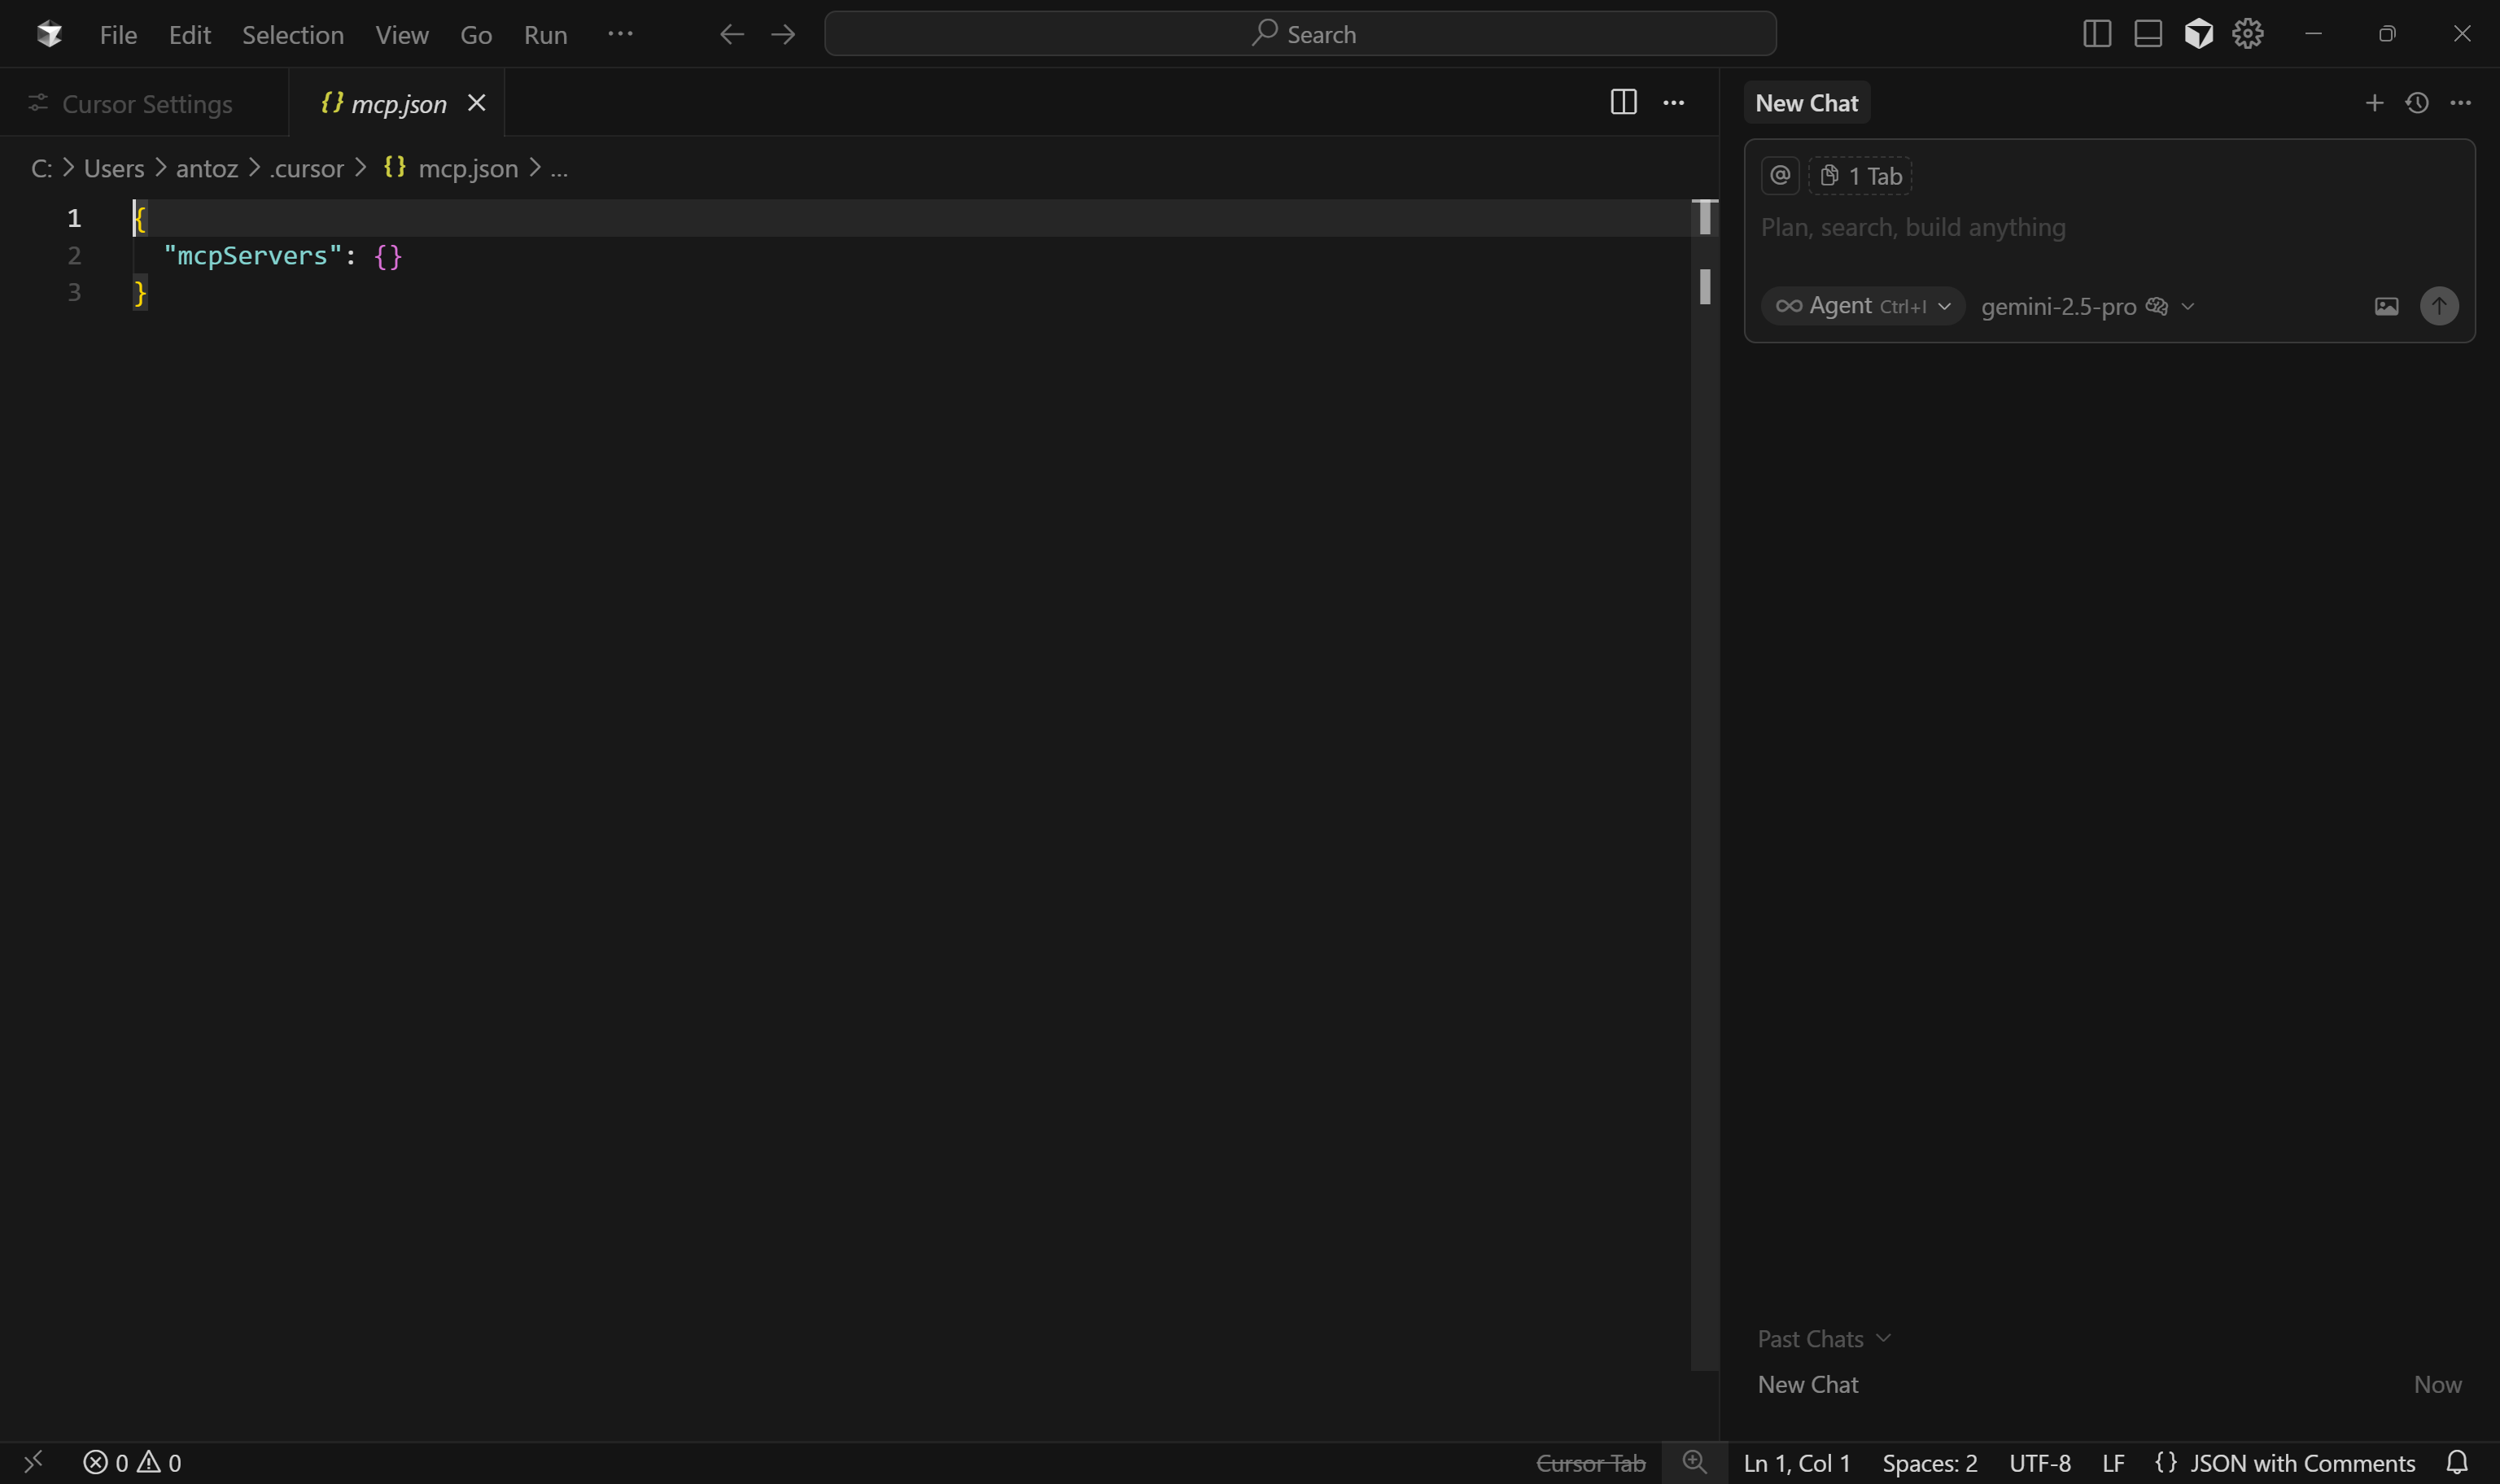
As you can see, by default, it is empty. For Bright Data’s Web MCP integration, fill it as below:
{
  "mcpServers": {
    "Bright Data": {
      "command": "npx",
      "args": ["-y", "@brightdata/mcp"],
      "env": {
        "API_TOKEN": "<YOUR_BRIGHT_DATA_API_KEY>",
        "PRO_MODE": "true"
      }
    }
  }
}
Next, save the file using Ctrl + S (or Cmd + S on macOS):
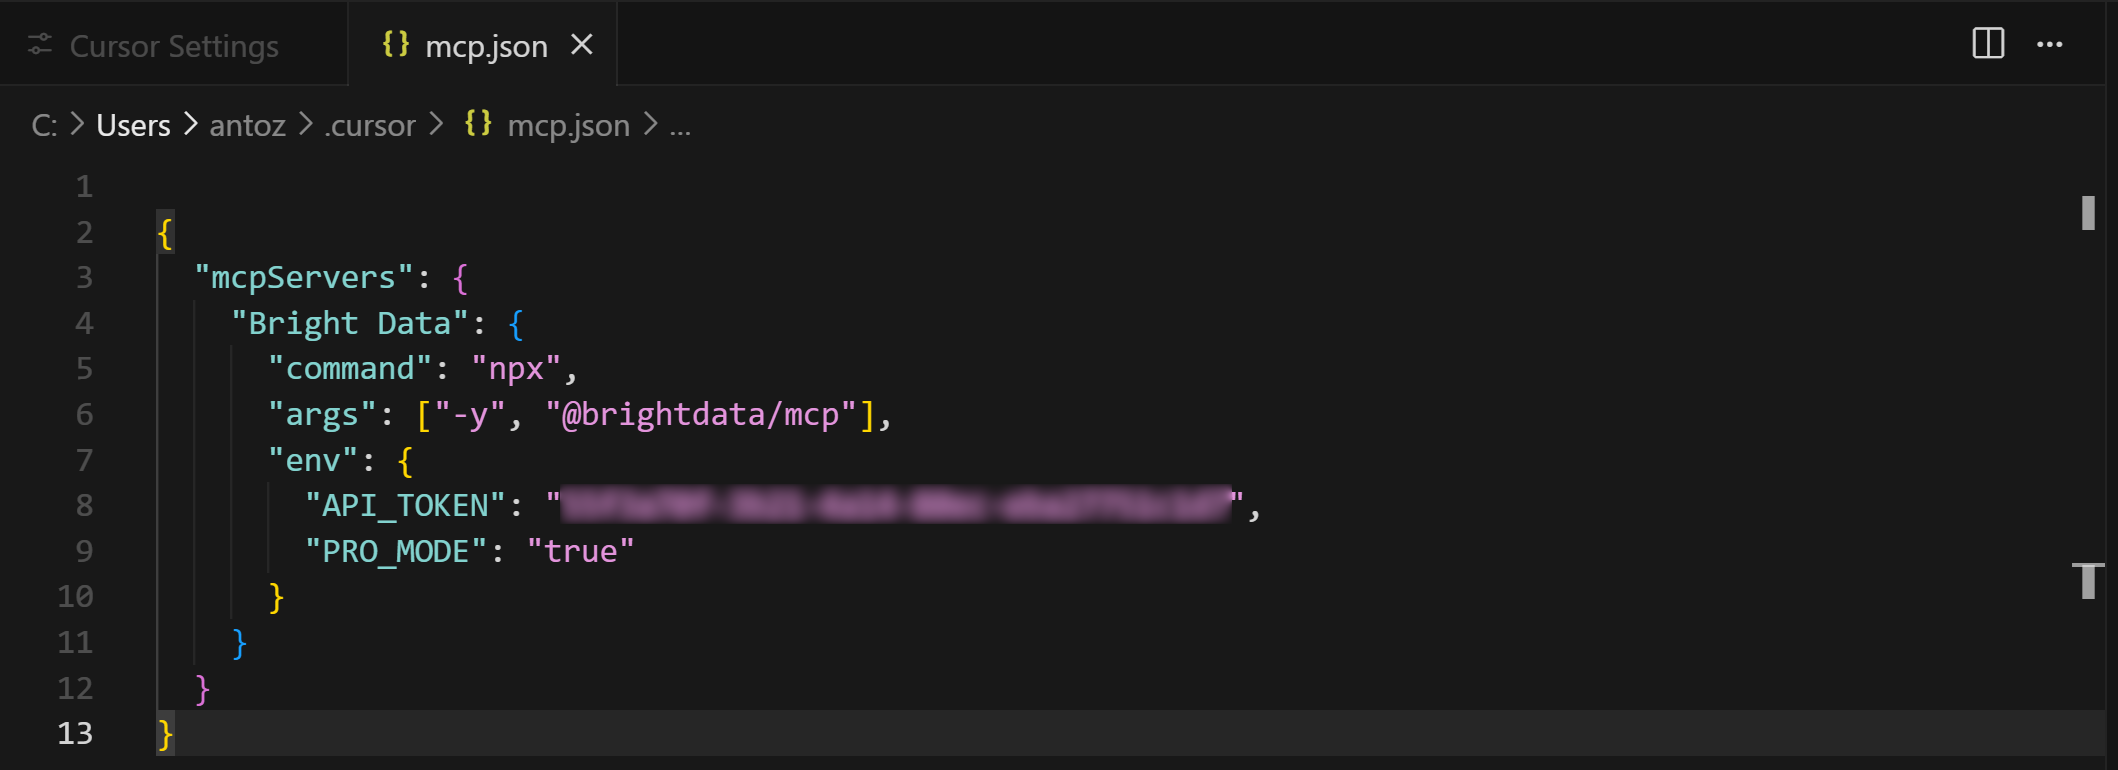
The above configuration replicates the npx command we tested earlier, using environment variables to pass credentials and settings:
API_TOKENis required. Set this to the Bright Data API key you generated earlier.PRO_MODEis optional. Remove it if you do not intend to enable the Pro mode.
In other words, Cursor will use the configuration in mcp.json to execute the npx command seen earlier. It will run a Web MCP process locally, connect to it, and get access to the exposed tools.
Close the mcp.json tab, as the Cursor + Bright Data Web MCP integration is complete!
Note: If you prefer not to use STDIO and want to use SSE or streamable HTTP, keep in mind that Bright Data’s Web MCP also provides a remote server option.
Step #5: Verify Tool Availability from the MCP Integration
It is time to check whether Cursor has successfully connected to the Web MCP server and can access all its tools.
To do that, go back to the “Tools & MCP” section in the “Cursor Settings” tab. You should now see the configured “Bright Data” option, listing all available tools:
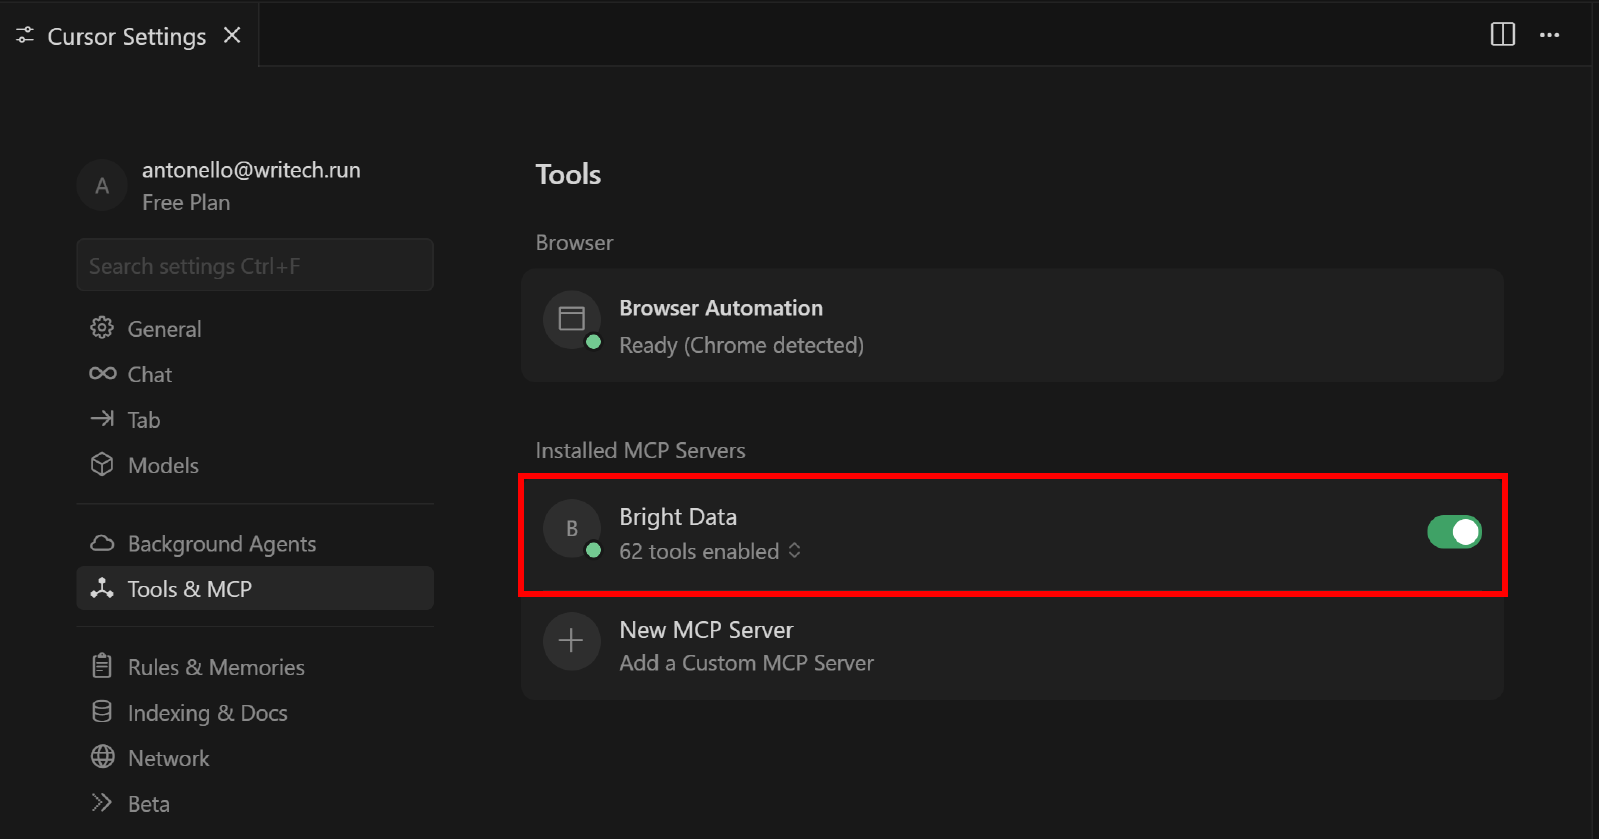
Expand the “N tools enabled” dropdown (where N is the number of tools enabled) to inspect all the available tools:
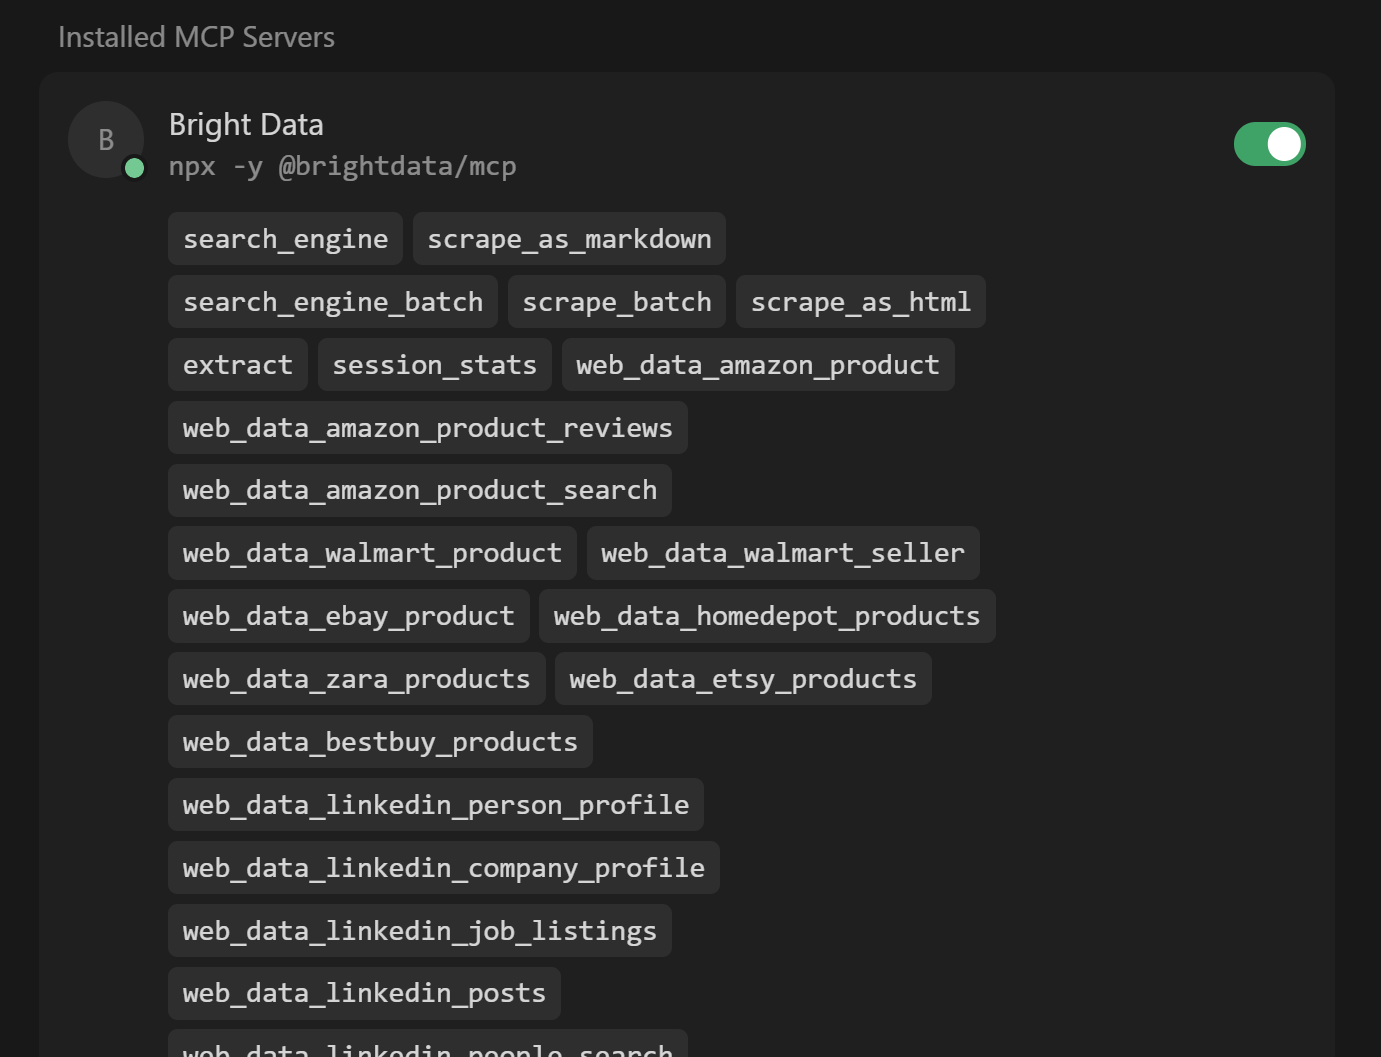
Note that Cursor automatically connects to the server and retrieves its 60+ tools.
If Pro Mode is disabled, you will only see the 4/5 free tools available. Here, you can also activate or deactivate tools as you prefer. By default, they are all activated.
Once confirmed, close the “Cursor Settings” tab. Prepare to take advantage of these tools for an extended AI-powered coding experience!
Step #6: Run a Task with the Enhanced AI Coding Agent
To test the capabilities of your Cursor coding agent, you need a prompt that exercises the newly configured web data retrieval features.
For example, suppose you are building a backend in Express.js for your e-commerce application. You want to mock an API that returns real-world Amazon product data.
Achieve that with a prompt like this:
Scrape the data from the following Amazon products:
1. https://www.amazon.com/Clean-Skin-Club-Disposable-Sensitive/dp/B07PBXXNCY/
2. https://www.amazon.com/Neutrogena-Cleansing-Towelettes-Waterproof-Alcohol-Free/dp/B00U2VQZDS/
3. https://www.amazon.com/Medicube-Zero-Pore-Pads-Dual-Textured/dp/B09V7Z4TJG/

Then, save the scraped data to a local JSON file. Next, create a simple Express.js project with an endpoint that accepts an ASIN (representing an Amazon product) and returns the corresponding data read from the JSON file.
Suppose you are operating in Pro mode. Execute the above prompt in Cursor.
This is what happened next, step by step:
- The LLM configured in Cursor identifies
web_data_amazon_productas the tool for retrieving Amazon product data. - For each of the three Amazon products in the prompt, you are asked for permission to run
web_data_amazon_productto fetch the data. - You grant permission for each tool, triggering asynchronous data collection tasks (which, under the hood, call the Bright Data Amazon Scraper).
- The retrieved data for each product is displayed in JSON format.
- GPT-4.1 processes the retrieved data and populates a
products.jsonfile with it. - Cursor creates the npm project structure, defining
package.json, and theindex.jsfile with the Express server logic. - You are asked for permission to install the project dependencies via
npm install. This will result in apackage.jsonfile and in thenode_modules/folder. - You are asked for permission to run the server with
npm start.
Note: Even if it was not explicitly specified in the prompt, GPT-4.1 also decided to ask for project dependency installation and server setup. That was a nice addition!
In this example, the final output will produce a project structure as follows:
your-project/
├── node_modules/
├── index.js
├── package.json
├── package-lock.json
└── products.json
Perfect! Let’s inspect the result to see if it achieves the intended goal.
Step #7: Explore the Output Project
As the AI coding agent generated the files, they appeared in the left column in Cursor.
Disclaimer: Your files may differ from what is shown below, as different AI runs can produce different results.
Start by inspecting the products.json file:
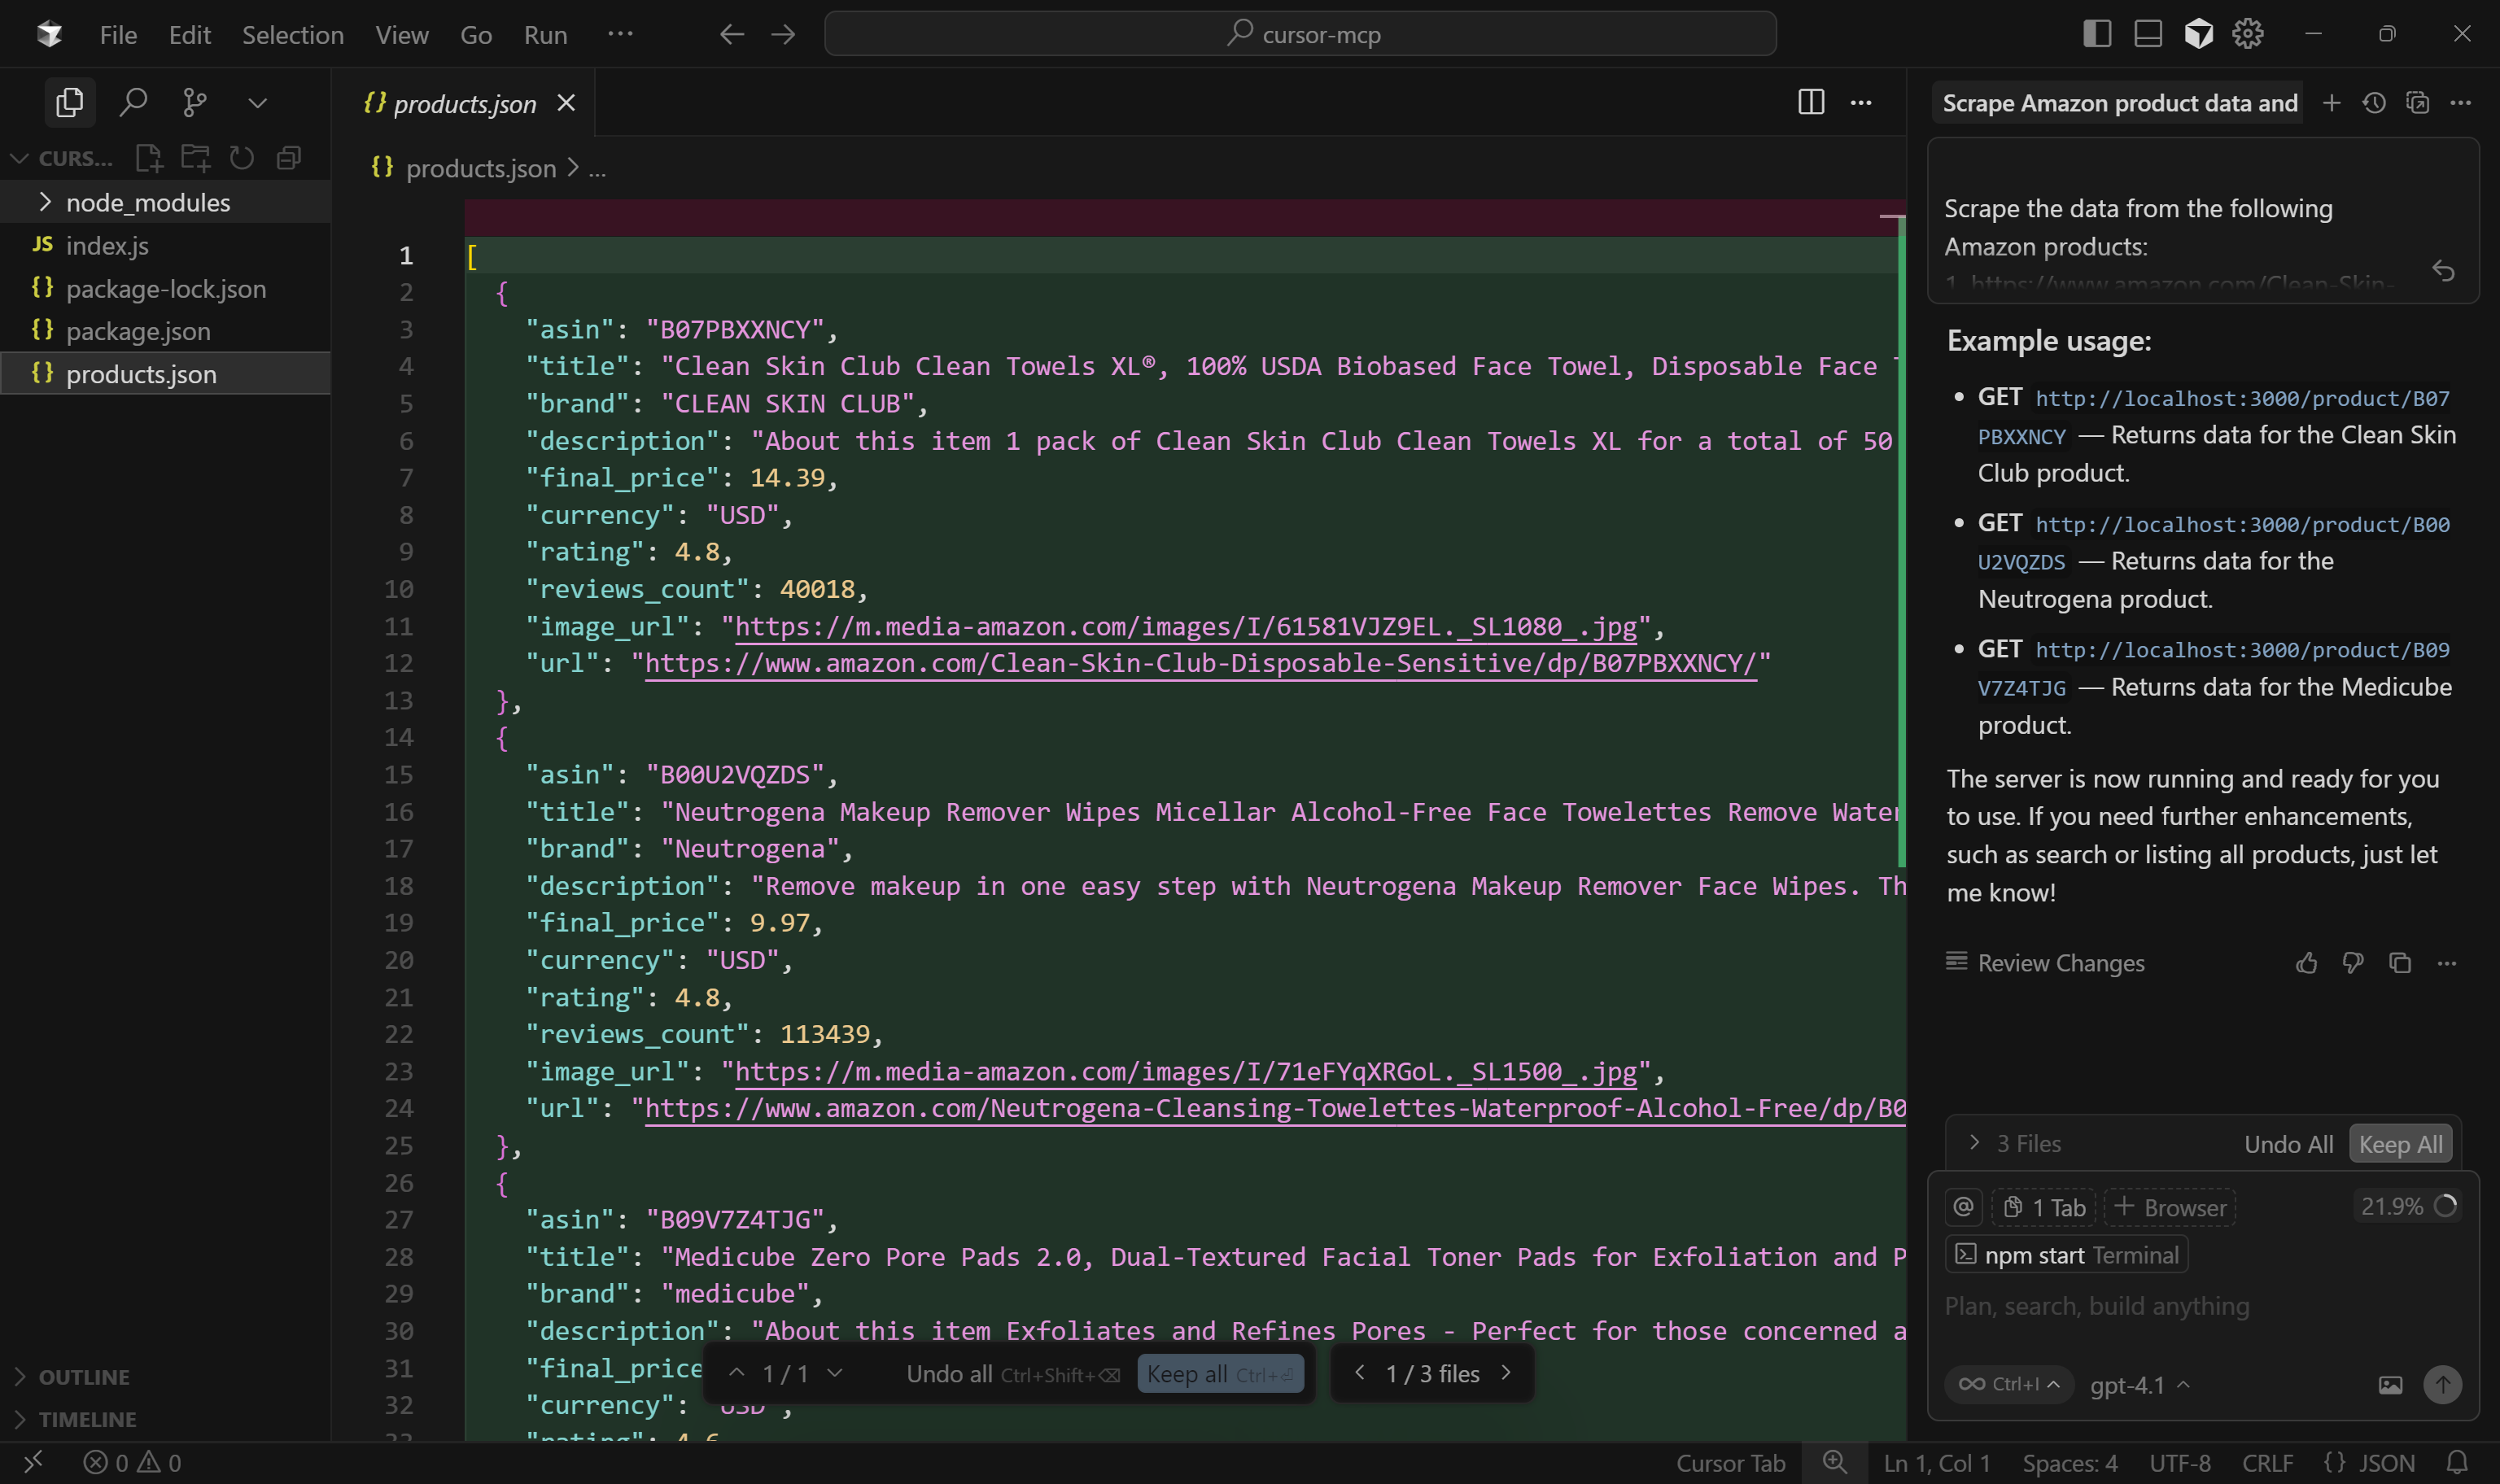
As you can see, this contains a simplified version of the scraped data returned by the web_data_amazon_product tool:

Important: web_data_amazon_product actually returns all product data from the Amazon page, not just a few fields. Still, the AI decided to include only the most relevant fields. With some prompt optimization, you can instruct the AI to include all fields if desired.
Next, open index.js to see the Express.js server logic:
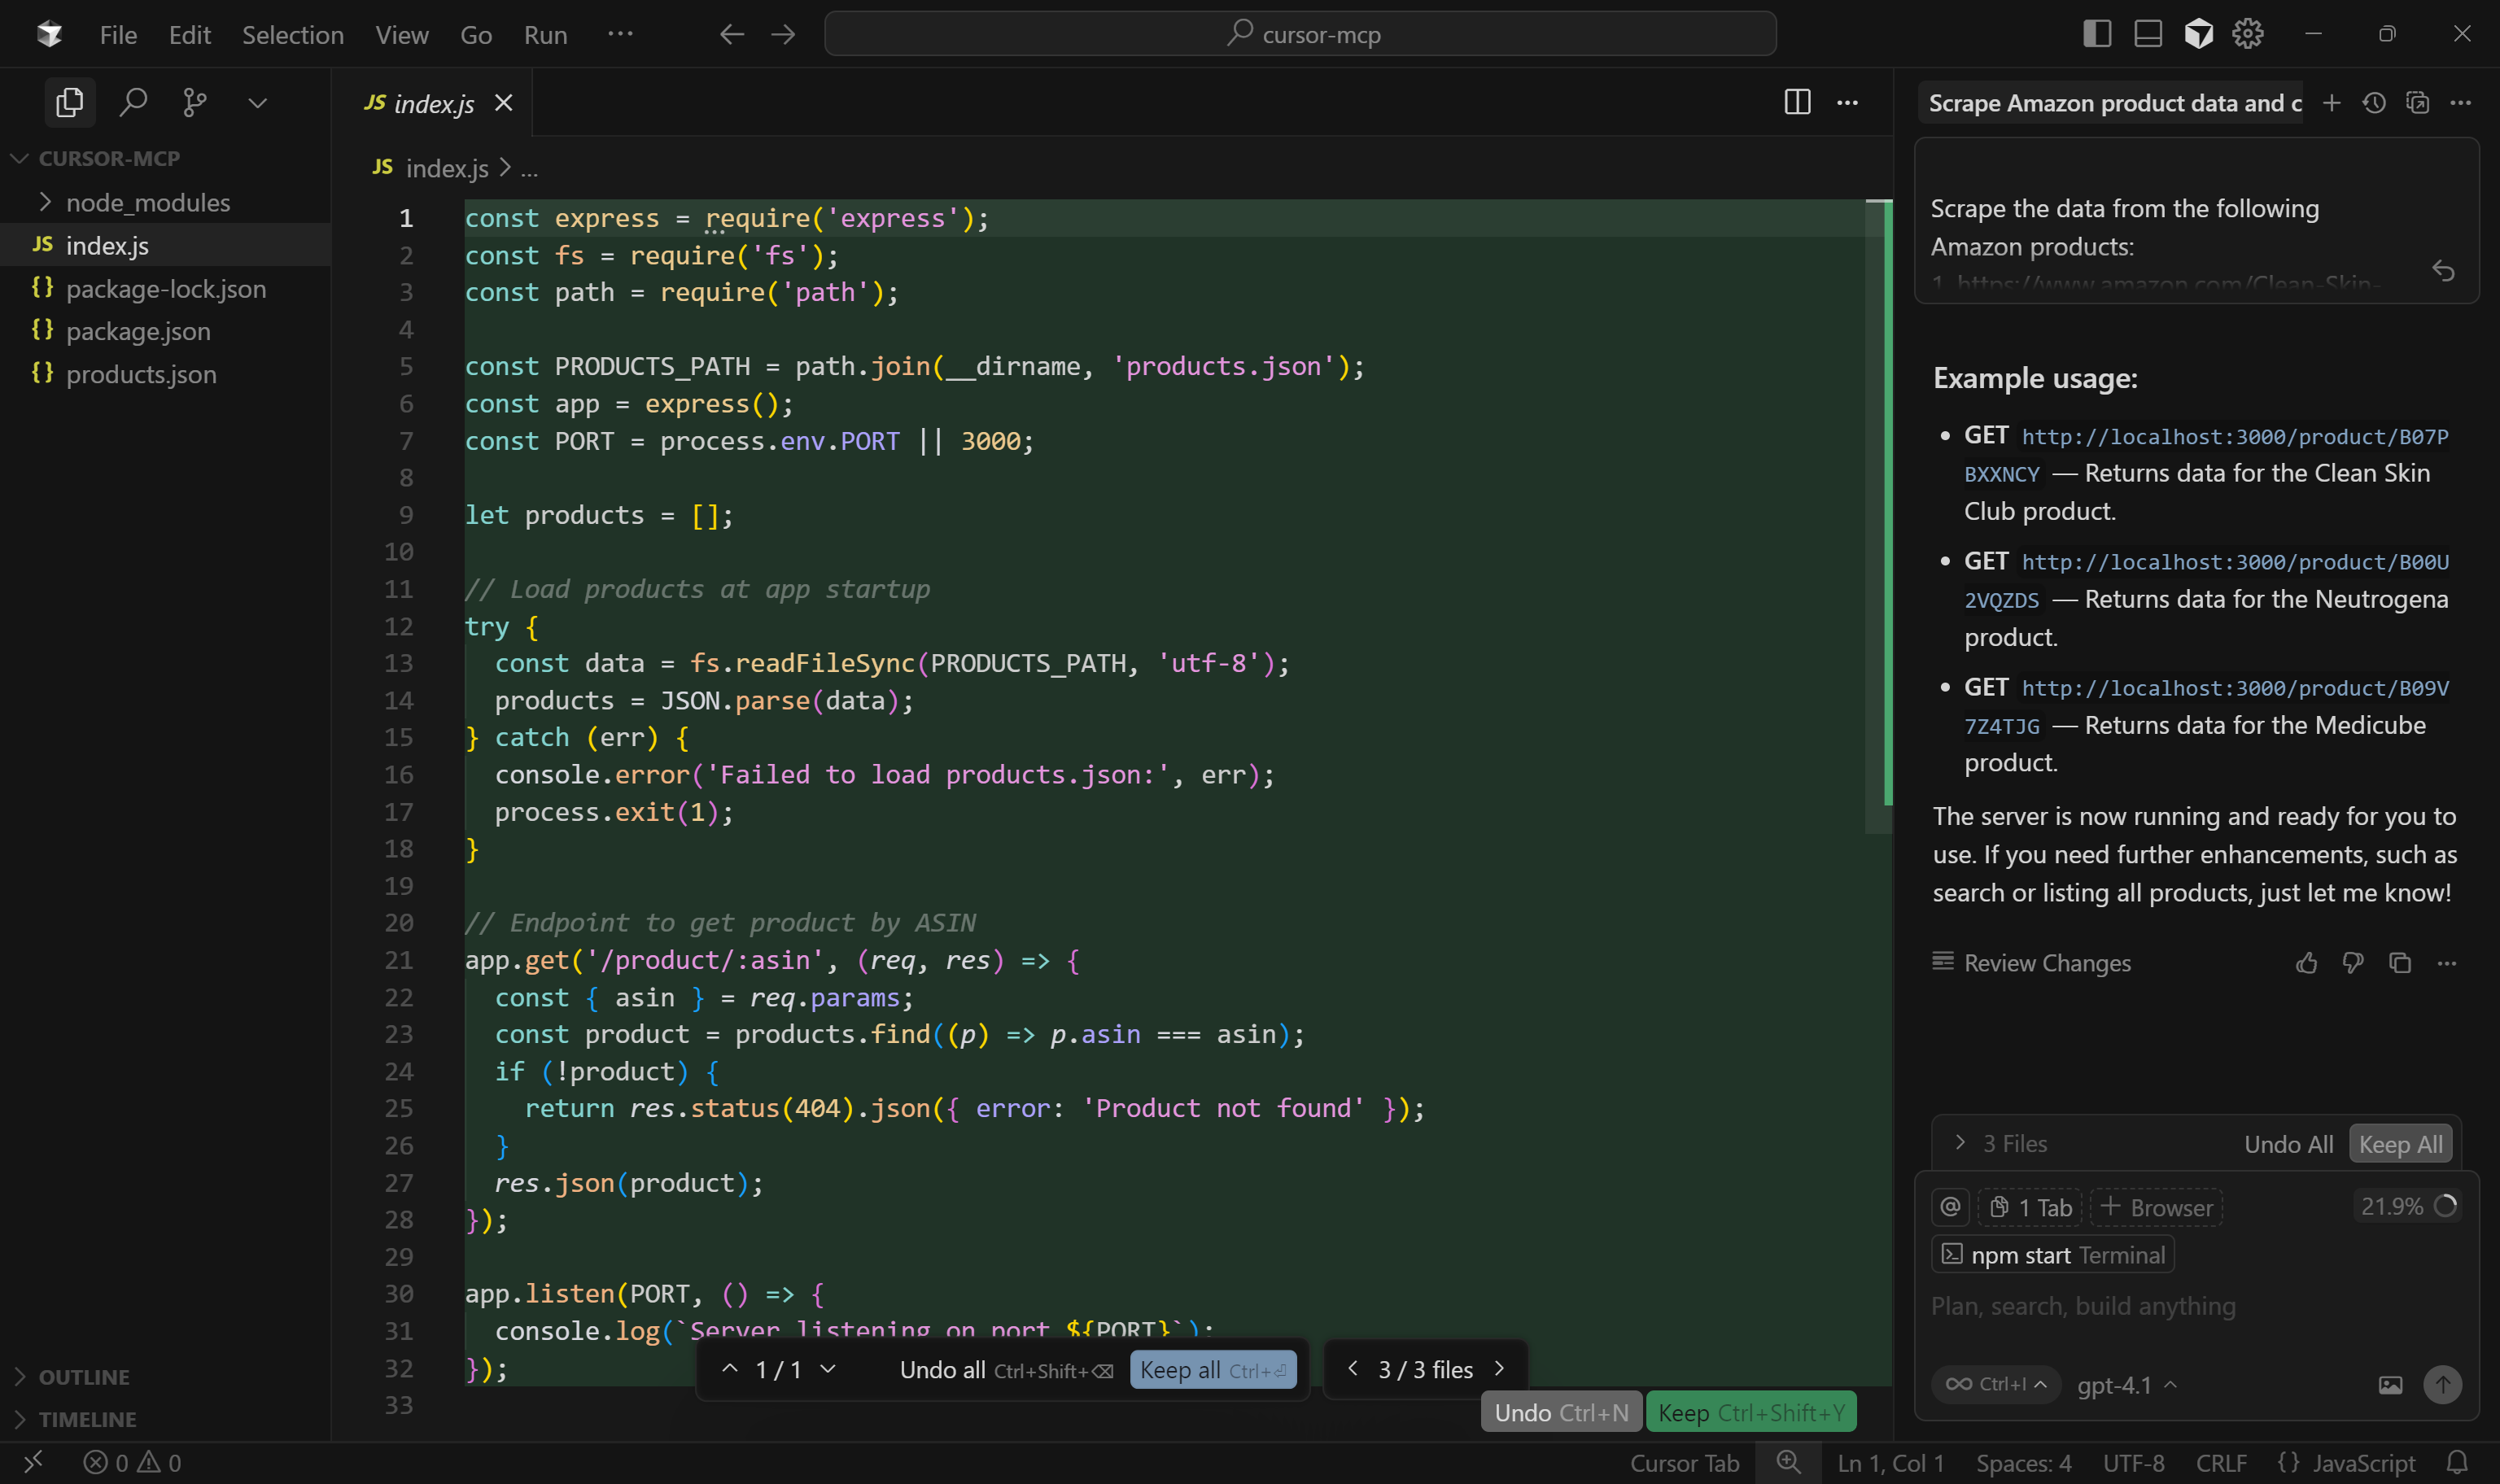
Specifically, the mocked endpoint for product data retrieval uses the path /product/:asin.
Continue by inspecting the other files, but they should all be fine. So, press the “Keep All” button to confirm the AI-generated output and get ready to put your project under test!
Step #8: Test the Produced Project
Your Express.js application should already be running, as GPT-4.1 asked for permission to run npm start. If it has not, you can start it manually with:
npm startYour Express.js backend should now be running at http://localhost.
Next, run the following cURL command to test the GET /product/:asin endpoint:
curl "http://localhost/ product/B07PBXXNCYWhere B07PBXXNCY is the ASIN of one of the Amazon products mentioned in the prompt.
You should see something like this:
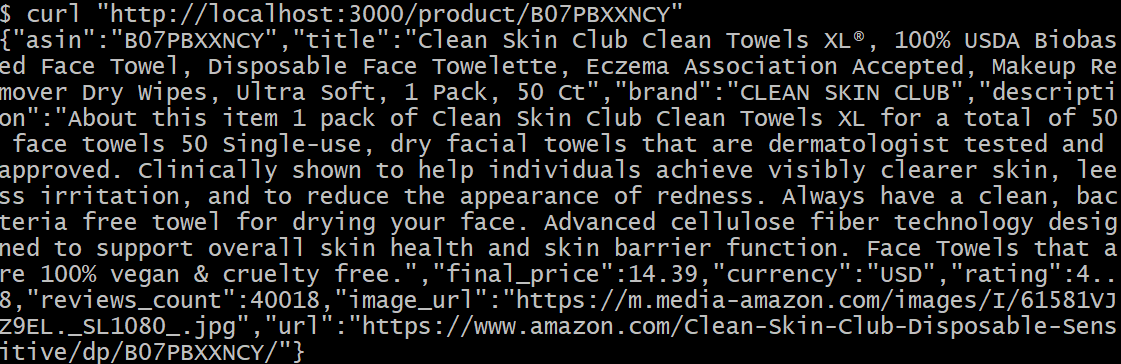
Wonderful! That data was fetched to the generated products.json file correctly. The result corresponds to (a simplified version of) the data from the original Amazon page.
If you have ever tried to scrape product data from Amazon, you know how challenging it can be due to their notorious Amazon CAPTCHA and other anti-bot measures. Surely, vanilla GPT-4.1 alone cannot retrieve data from Amazon on the fly.
This demonstrates the power of combining Web MCP with Cursor. Now, this was just a very simple example. However, with the 60+ tools available and the right prompts, you can handle more advanced scenarios directly within your IDE!
Et voilà! An Express backend with a mocked API endpoint has been successfully created, thanks to the Cursor + Bright Data Web MCP integration.
[Extra] Alternative Approaches in Visual Studio Code
If you are looking to achieve a Cursor-like experience in Visual Studio Code, use extensions like Cline or Roo Code.
In particular, for integrating Web MCP into VS Code, refer to these guides:
- Adding Bright Data’s Web MCP to Roo Code in Visual Studio Code
- Web Scraping in Cline with Bright Data’s MCP Server
Conclusion
In this blog post, you learned how to take full advantage of MCP integration in Cursor. The AI coding agent built into the IDE is already helpful, but it becomes far more capable and resourceful once connected to Bright Data’s Web MCP.
This integration gives Cursor the ability to perform live web searches, extract structured data, consume dynamic data feeds, and even automate browser interactions. All that, directly from within your coding environment.
To build even more advanced AI-powered workflows, explore the complete suite of services and data solutions available in Bright Data’s AI ecosystem.
Create a free Bright Data account today and start experimenting with our AI-ready web data tools!

Technical Writer
Antonello Zanini is a technical writer, editor, and software engineer with 5M+ views. Expert in technical content strategy, web development, and project management.


