
In this tutorial, you will learn:
- What Roo Code is and why it is currently one of the most widely used AI coding agents for IDEs.
- How equipping it with web interaction and data extraction capabilities can make it even more useful.
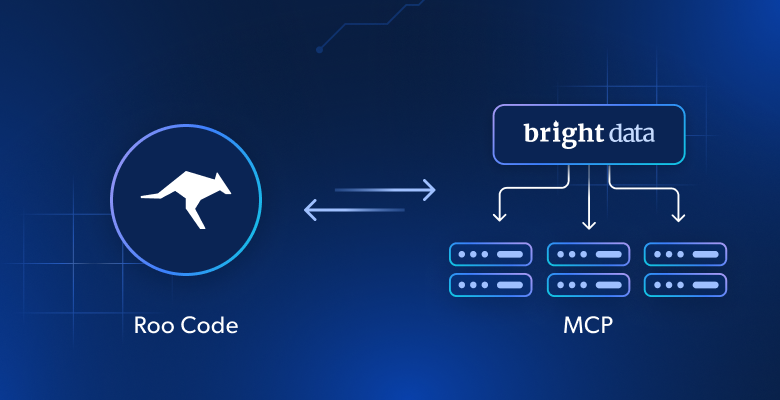
- How to connect Roo Code with the Bright Data Web MCP server in Visual Studio Code to create an enhanced AI coding agent.
Let’s dive in!
What Is Roo Code?
Roo Code is an AI-powered autonomous coding agent that lives directly in your editor. In detail, it can:
- Operate as an AI-powered pair programmer that you can communicate with in natural language.
- Read and write files directly in your workspace.
- Run terminal commands.
- Automate browser actions via a built-in browser integration.
- Integrate with a wide range of OpenAI-compatible or custom APIs/models.
- Adapt its “personality” and capabilities through different modes.
- Connect it to third-party providers via MCP integration.
Roo Code was born as a Cline fork and is available as an open-source Visual Studio Code extension. It allows you to automate coding tasks and enhance your development workflow using AI directly within VS Code.
Unlike Cline, Roo Code does not require an account to work (although a Roo Cloud platform is available with additional features for enterprises). For more details, see our guide on integrating Cline with Bright Data’s Web MCP server.
Currently, the Roo Code project has over 18k stars on GitHub and 750k installs in the Visual Studio Code marketplace. That means it is one of the most widely used AI coding agents for IDEs.
Why Integrate the Web MCP into the Roo Code VS Code Extension
The LLM you configure in Roo Code has the common limitation of all language models: outdated knowledge. An LLM can only generate answers based on the static data it was trained on, which is nothing more than a snapshot of the past.
Given how quickly the tech world evolves, that limitation cannot be ignored. LLMs can easily suggest outdated coding approaches, deprecated methods, or miss newly introduced features entirely.
Now, imagine giving your Roo Code AI coding assistant the ability to fetch up-to-date tutorials, documentation pages, and guides—and learn from them in real time. This becomes possible by integrating Roo Code with a solution that extends LLMs with web search and data access capabilities.
This is precisely what you can find in Bright Data’s Web MCP server. This open-source (now with a free tier) MCP server offers over 60 AI-ready tools for real-time web interaction and data collection.
The two most commonly used tools in the MCP server are:
| Tool | Description |
|---|---|
scrape_as_markdown |
Scrape content from a single webpage URL with advanced extraction options, returning results as Markdown. Can bypass bot detection and CAPTCHA. |
search_engine |
Extract search results from Google, Bing, or Yandex, returning SERP data in JSON or Markdown format. |
In addition, there are 55+ specialized tools to interact with web pages (e.g., scraping_browser_click) and collect structured data from a wide range of websites, including Amazon, Yahoo Finance, TikTok, LinkedIn, and more. For instance, the web_data_amazon_product tool retrieves detailed, structured product information from Amazon by accepting a valid product URL as input.
Possible Bright Data Web MCP + Roo Code use cases include:
- Retrieving live SERP data and inserting contextual links into your Markdown reports directly in VS Code.
- Requesting tutorials or documentation based on the code you’re actively writing.
- Scraping fresh public data from websites and saving it locally for mocking, analysis, or further processing.
Let’s now see the Web MCP in action within Roo Code!
How to Connect Roo Code to Bright Data’s Web MCP in Visual Studio Code
In this guided section, you will learn how to add Roo Code to Visual Studio Code and integrate it with Bright Data’s Web MCP. The end result will be an AI coding agent capable of accessing and interacting with the web. Those capabilities will make the agent more resourceful and accurate.
Specifically, you will build an enhanced Roo Code AI agent with data retrieval capabilities and use it to:
- Scrape an Amazon product page in real time.
- Store the data locally.
- Create a Python script to load and process the collected data.
Follow the steps below to get started!
Prerequisites
To follow this tutorial, you need:
- A Bright Data API key
- An API key from one of the supported LLM providers (in this guide, we will use an OpenRouter API key)
Do not worry if you do not have a Bright Data API key yet. We will walk you through setting it up in the next steps.
To run the generated output, you will also need Python installed locally.
Step #1: Install Roo Code in Visual Studio Code
Open Visual Studio Code. Then, click the “Extensions” icon in the left sidebar, search for “Roo Code”, and select the Roo Code extension. In the Roo Code extension tab, press the “Install” button:
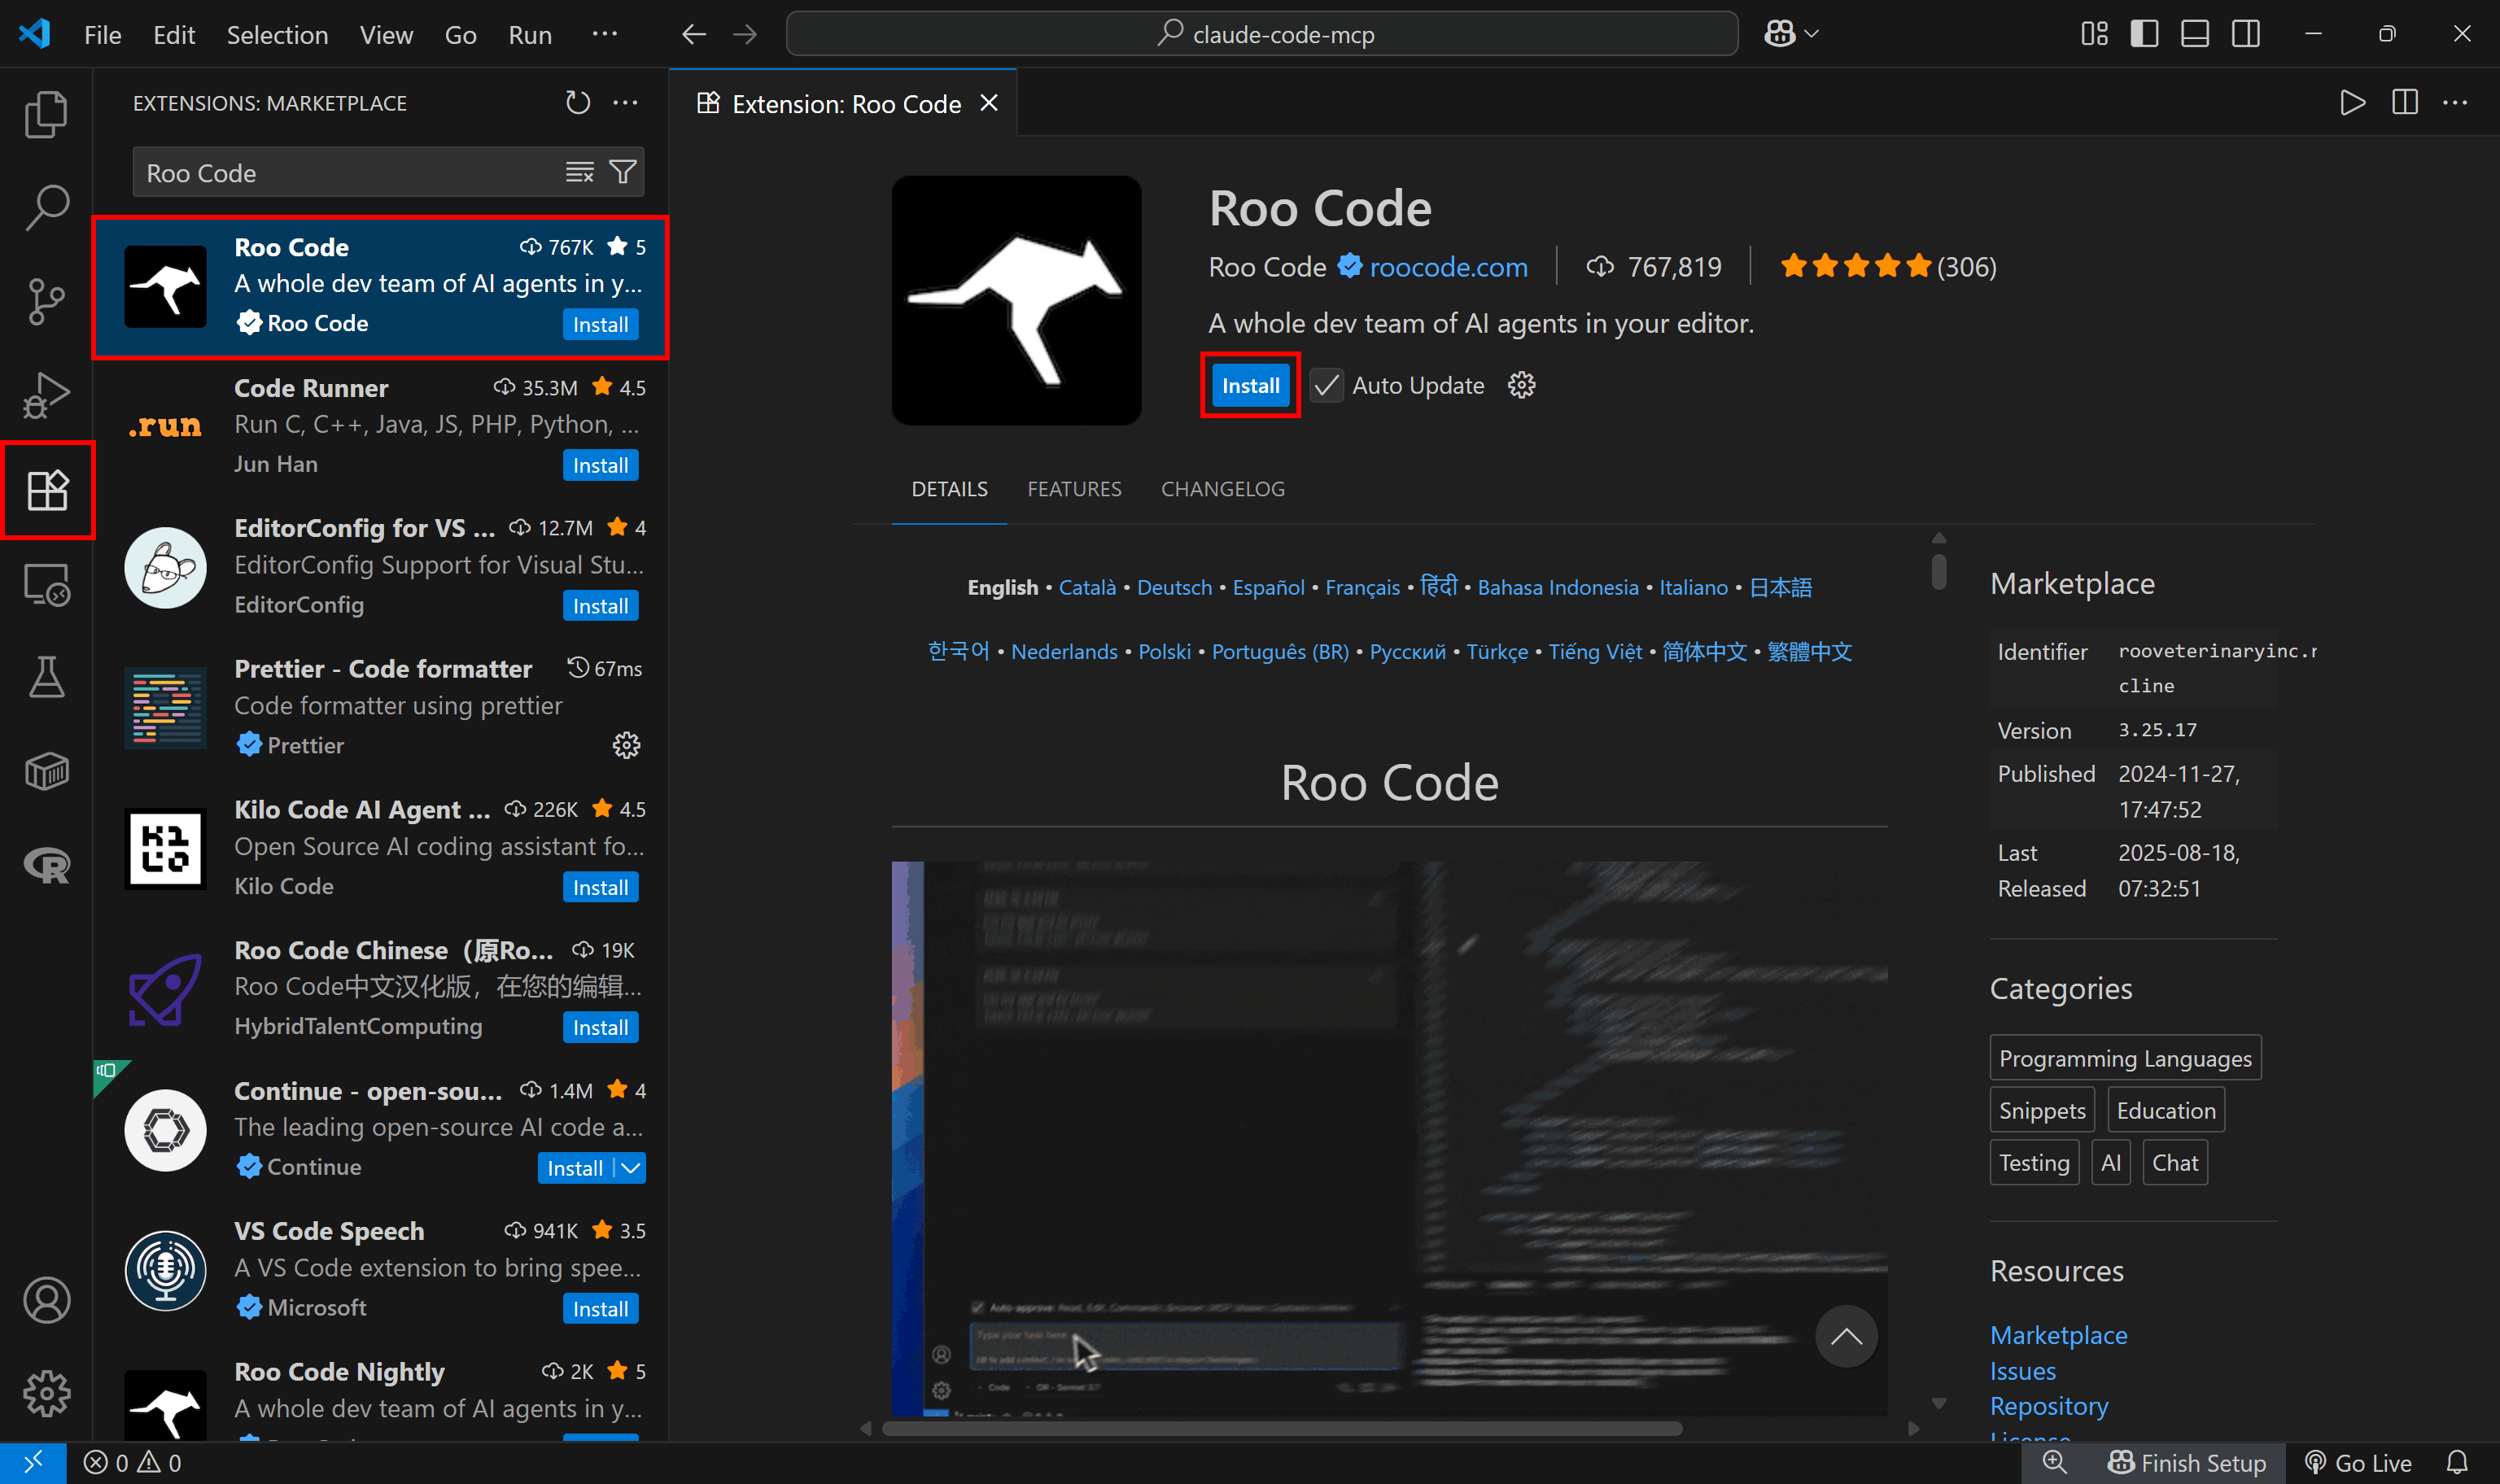
If this is your first time installing an extension from the Roo Code provider, you will be asked to trust the publisher. Click “Trust Publisher & Install” to continue.
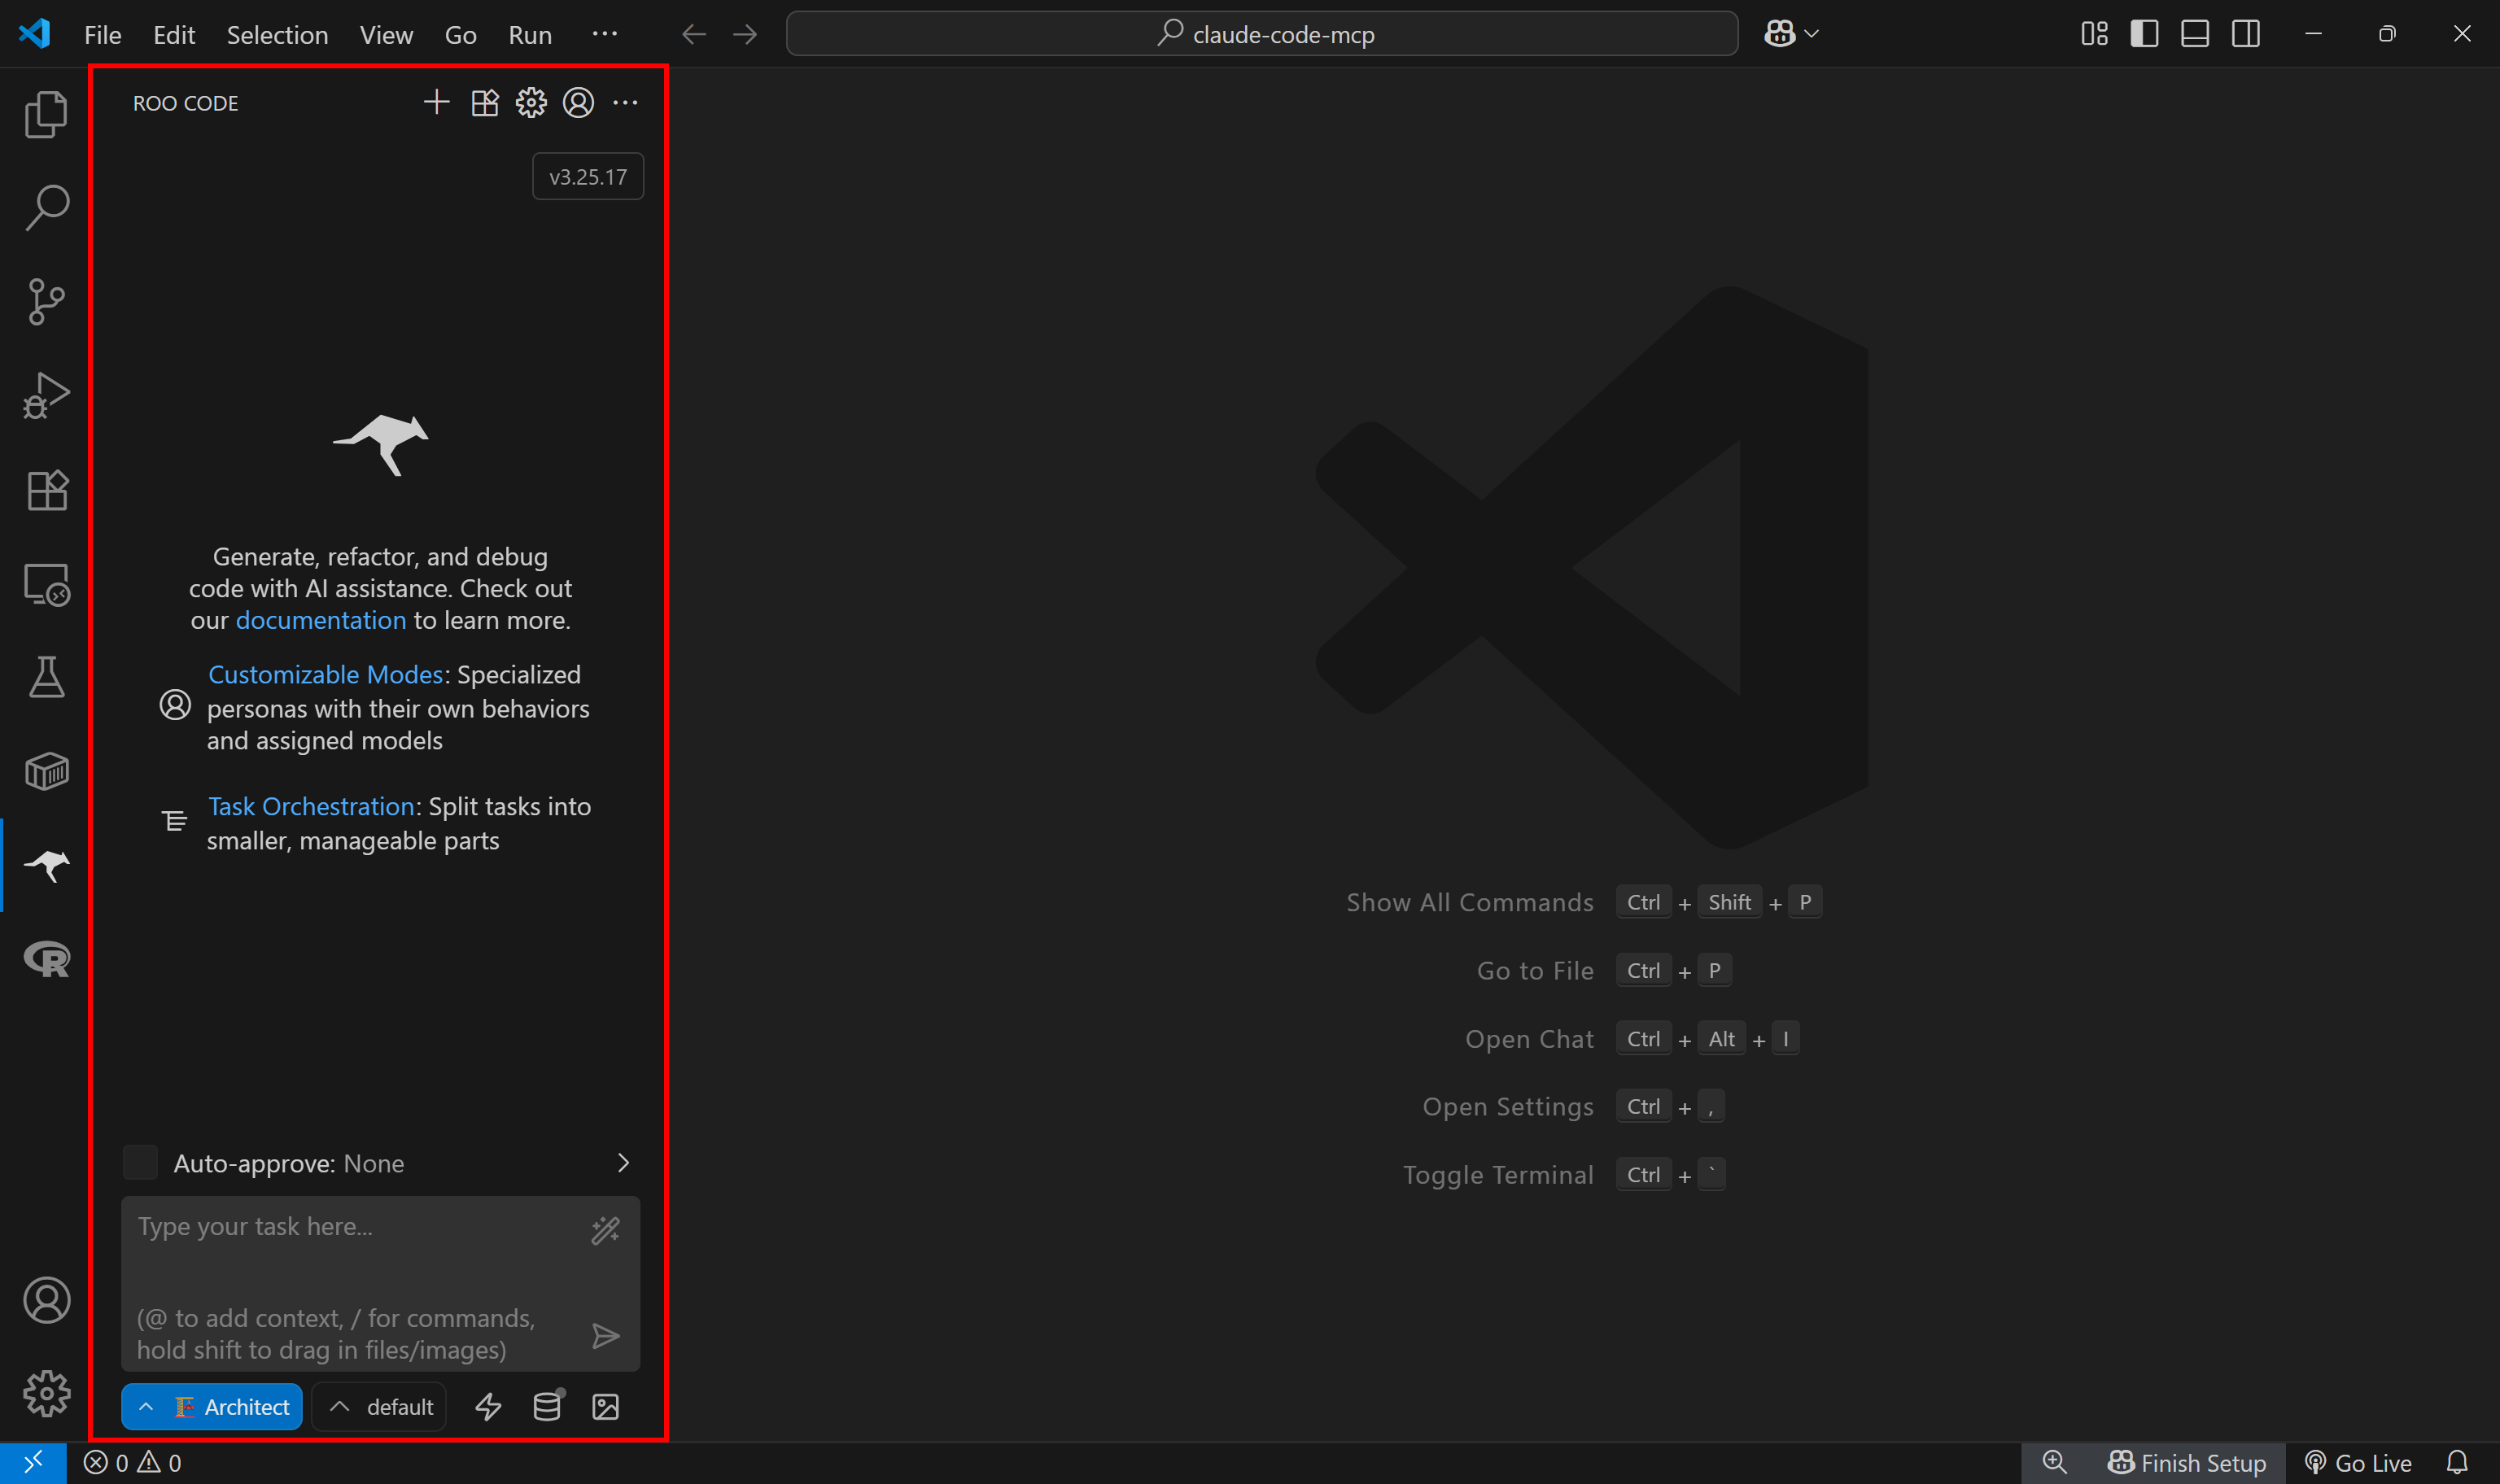
Once installation is complete, you will see a Roo Code icon in the left sidebar. Click it to open the extension:
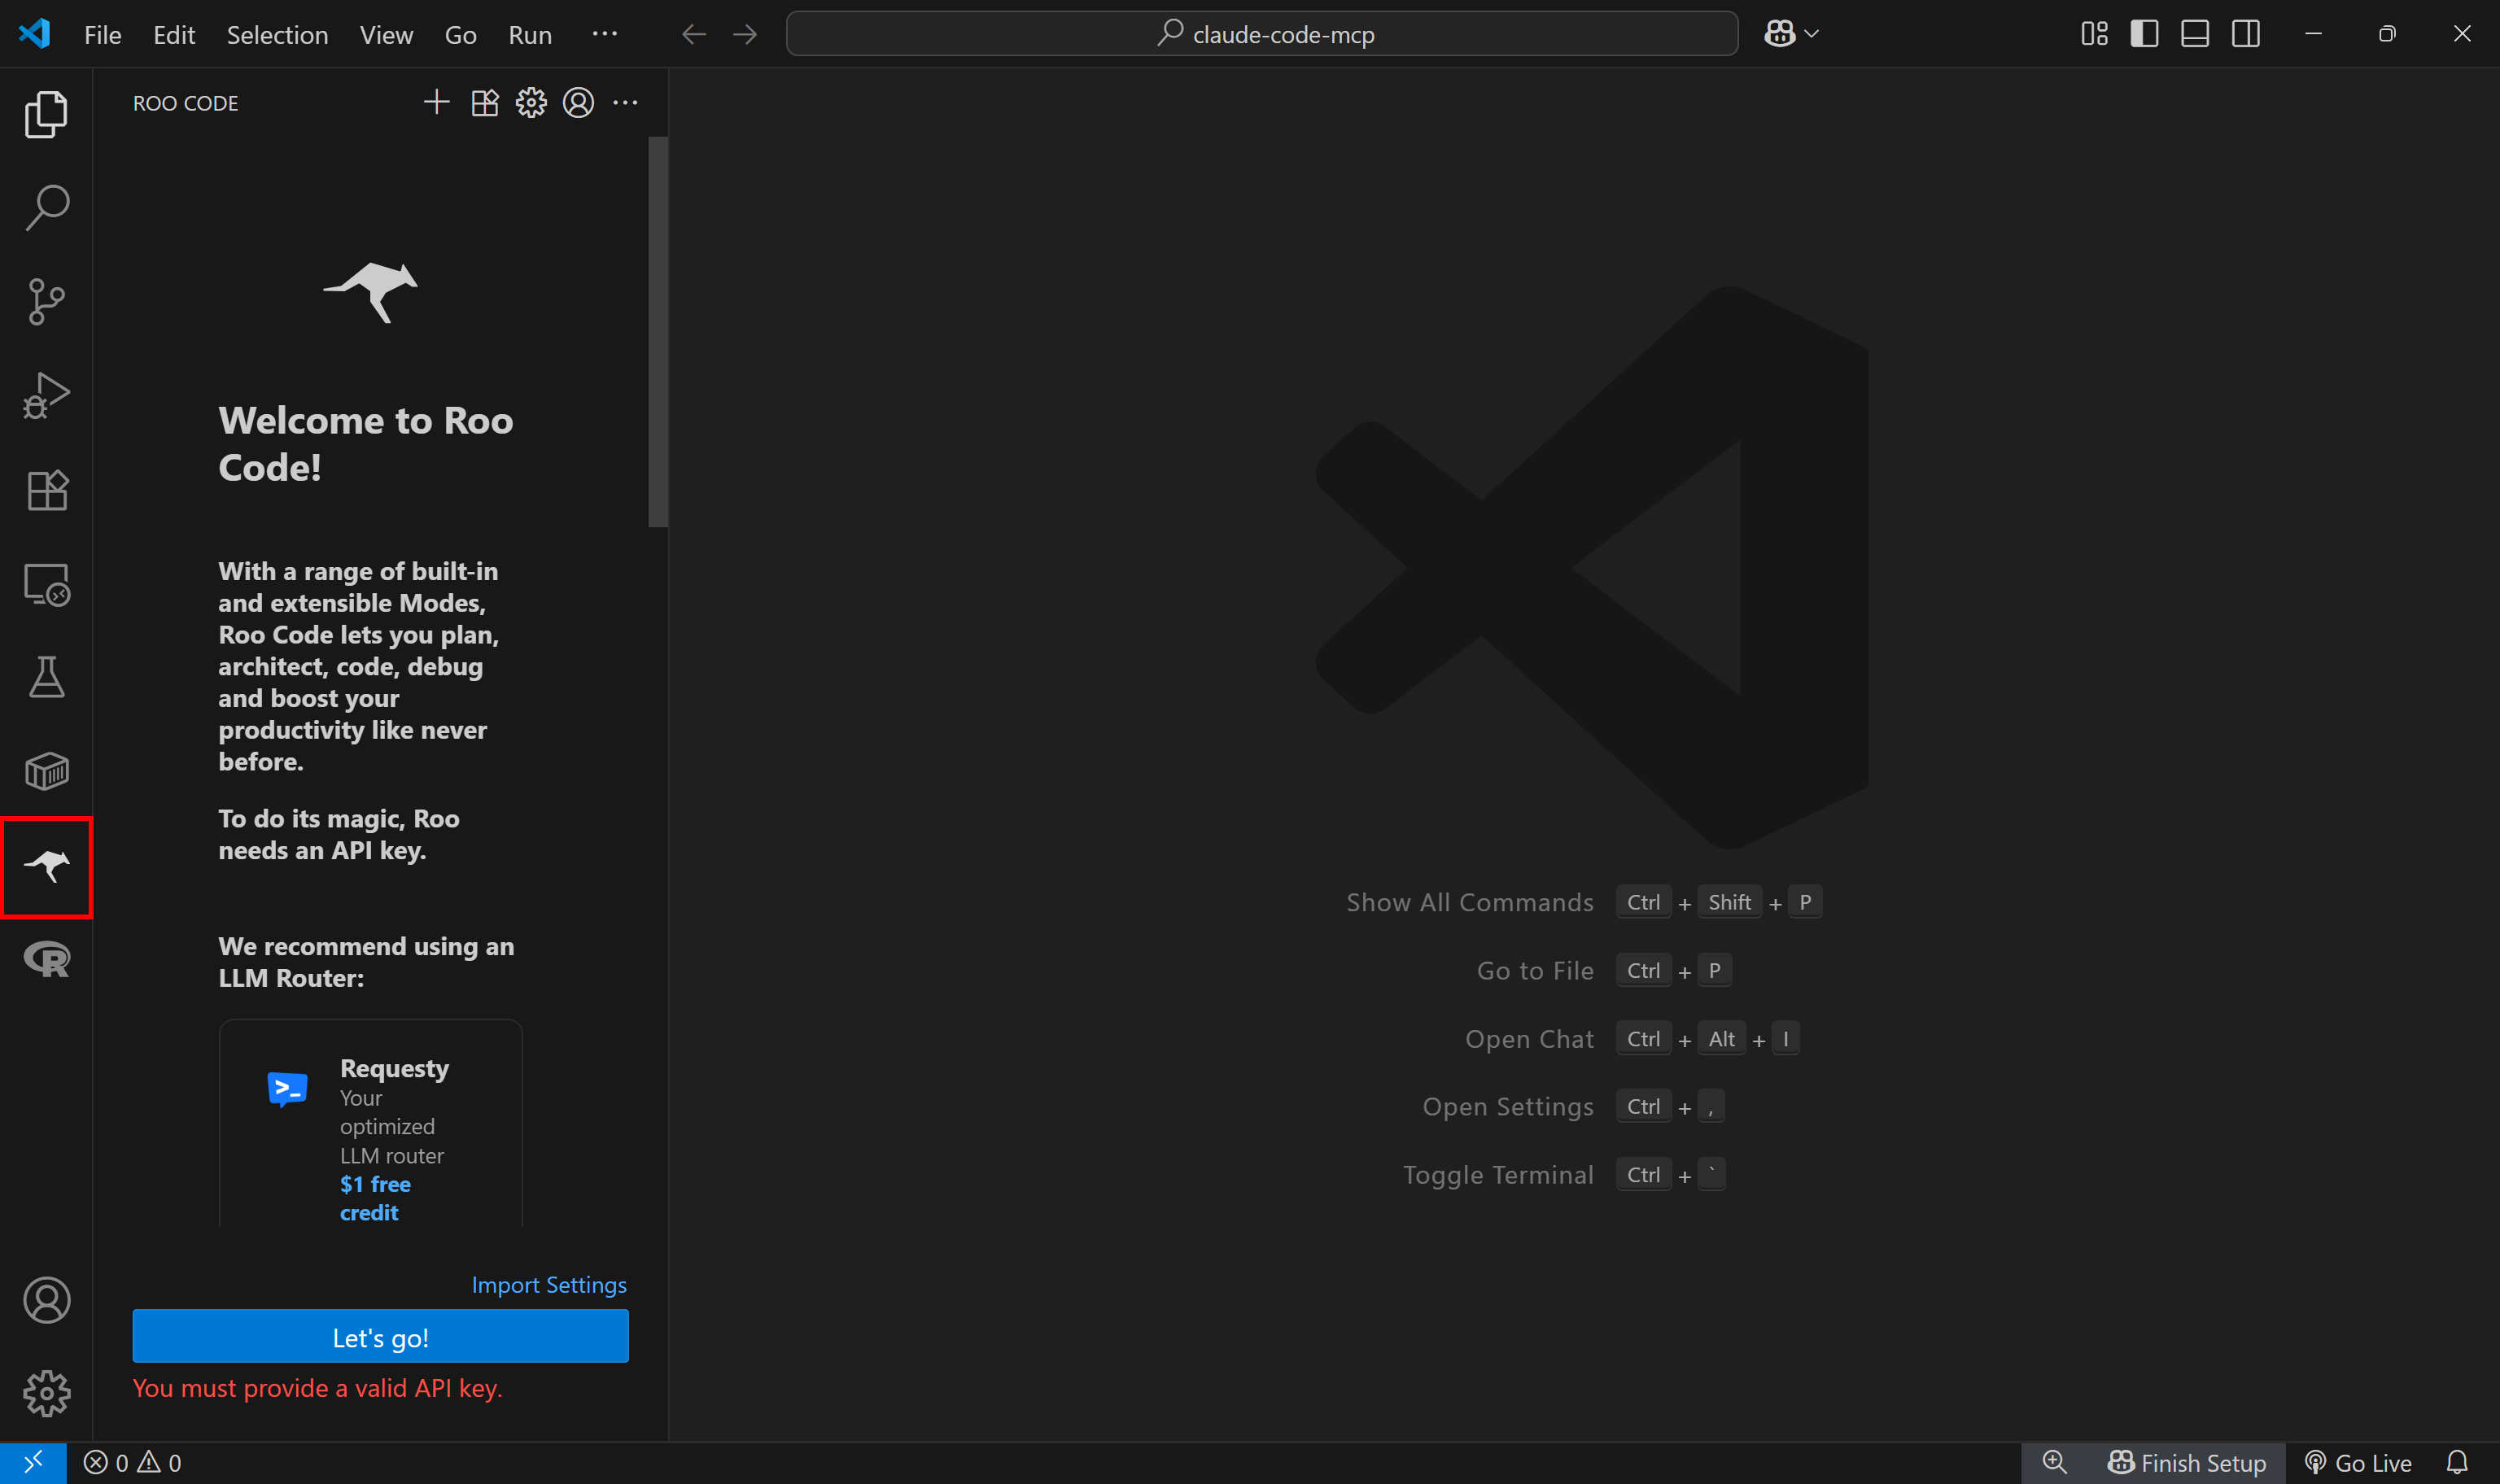
Note: If the Roo Code icon does not show up, try reloading Visual Studio Code. For any other issues, refer to the official installation guide.
Done! Roo Code is now available in VS Code.
Step #2: Set Up Your OpenRouter Connection
Now that Roo Code is installed, the next step is to connect it to an LLM provider. Roo Code supports a wide range of providers, including Anthropic, Claude Code, AWS Bedrock, DeepSeek, Google Gemini, Groq, Hugging Face, LiteLLM, Mistral AI, Ollama, OpenAI, OpenRouter, Requesty, xAI (Grok), and many more.
In this guide, we will connect Roo Code to an OpenRouter and use the qwen/qwen3-coder:free model. This setup is completely free, which means no funds or credits are required.
Note: If you prefer another provider or already have different API keys, follow the specific integration guide in the Roo Code documentation.
Create an OpenRouter account and retrieve your API key. If you are not familiar with this process, take a look at what we did in our tutorial on Qwen-Agent.
In the Roo Code extension panel, scroll down until you see the “OpenRouter” button. Click it:

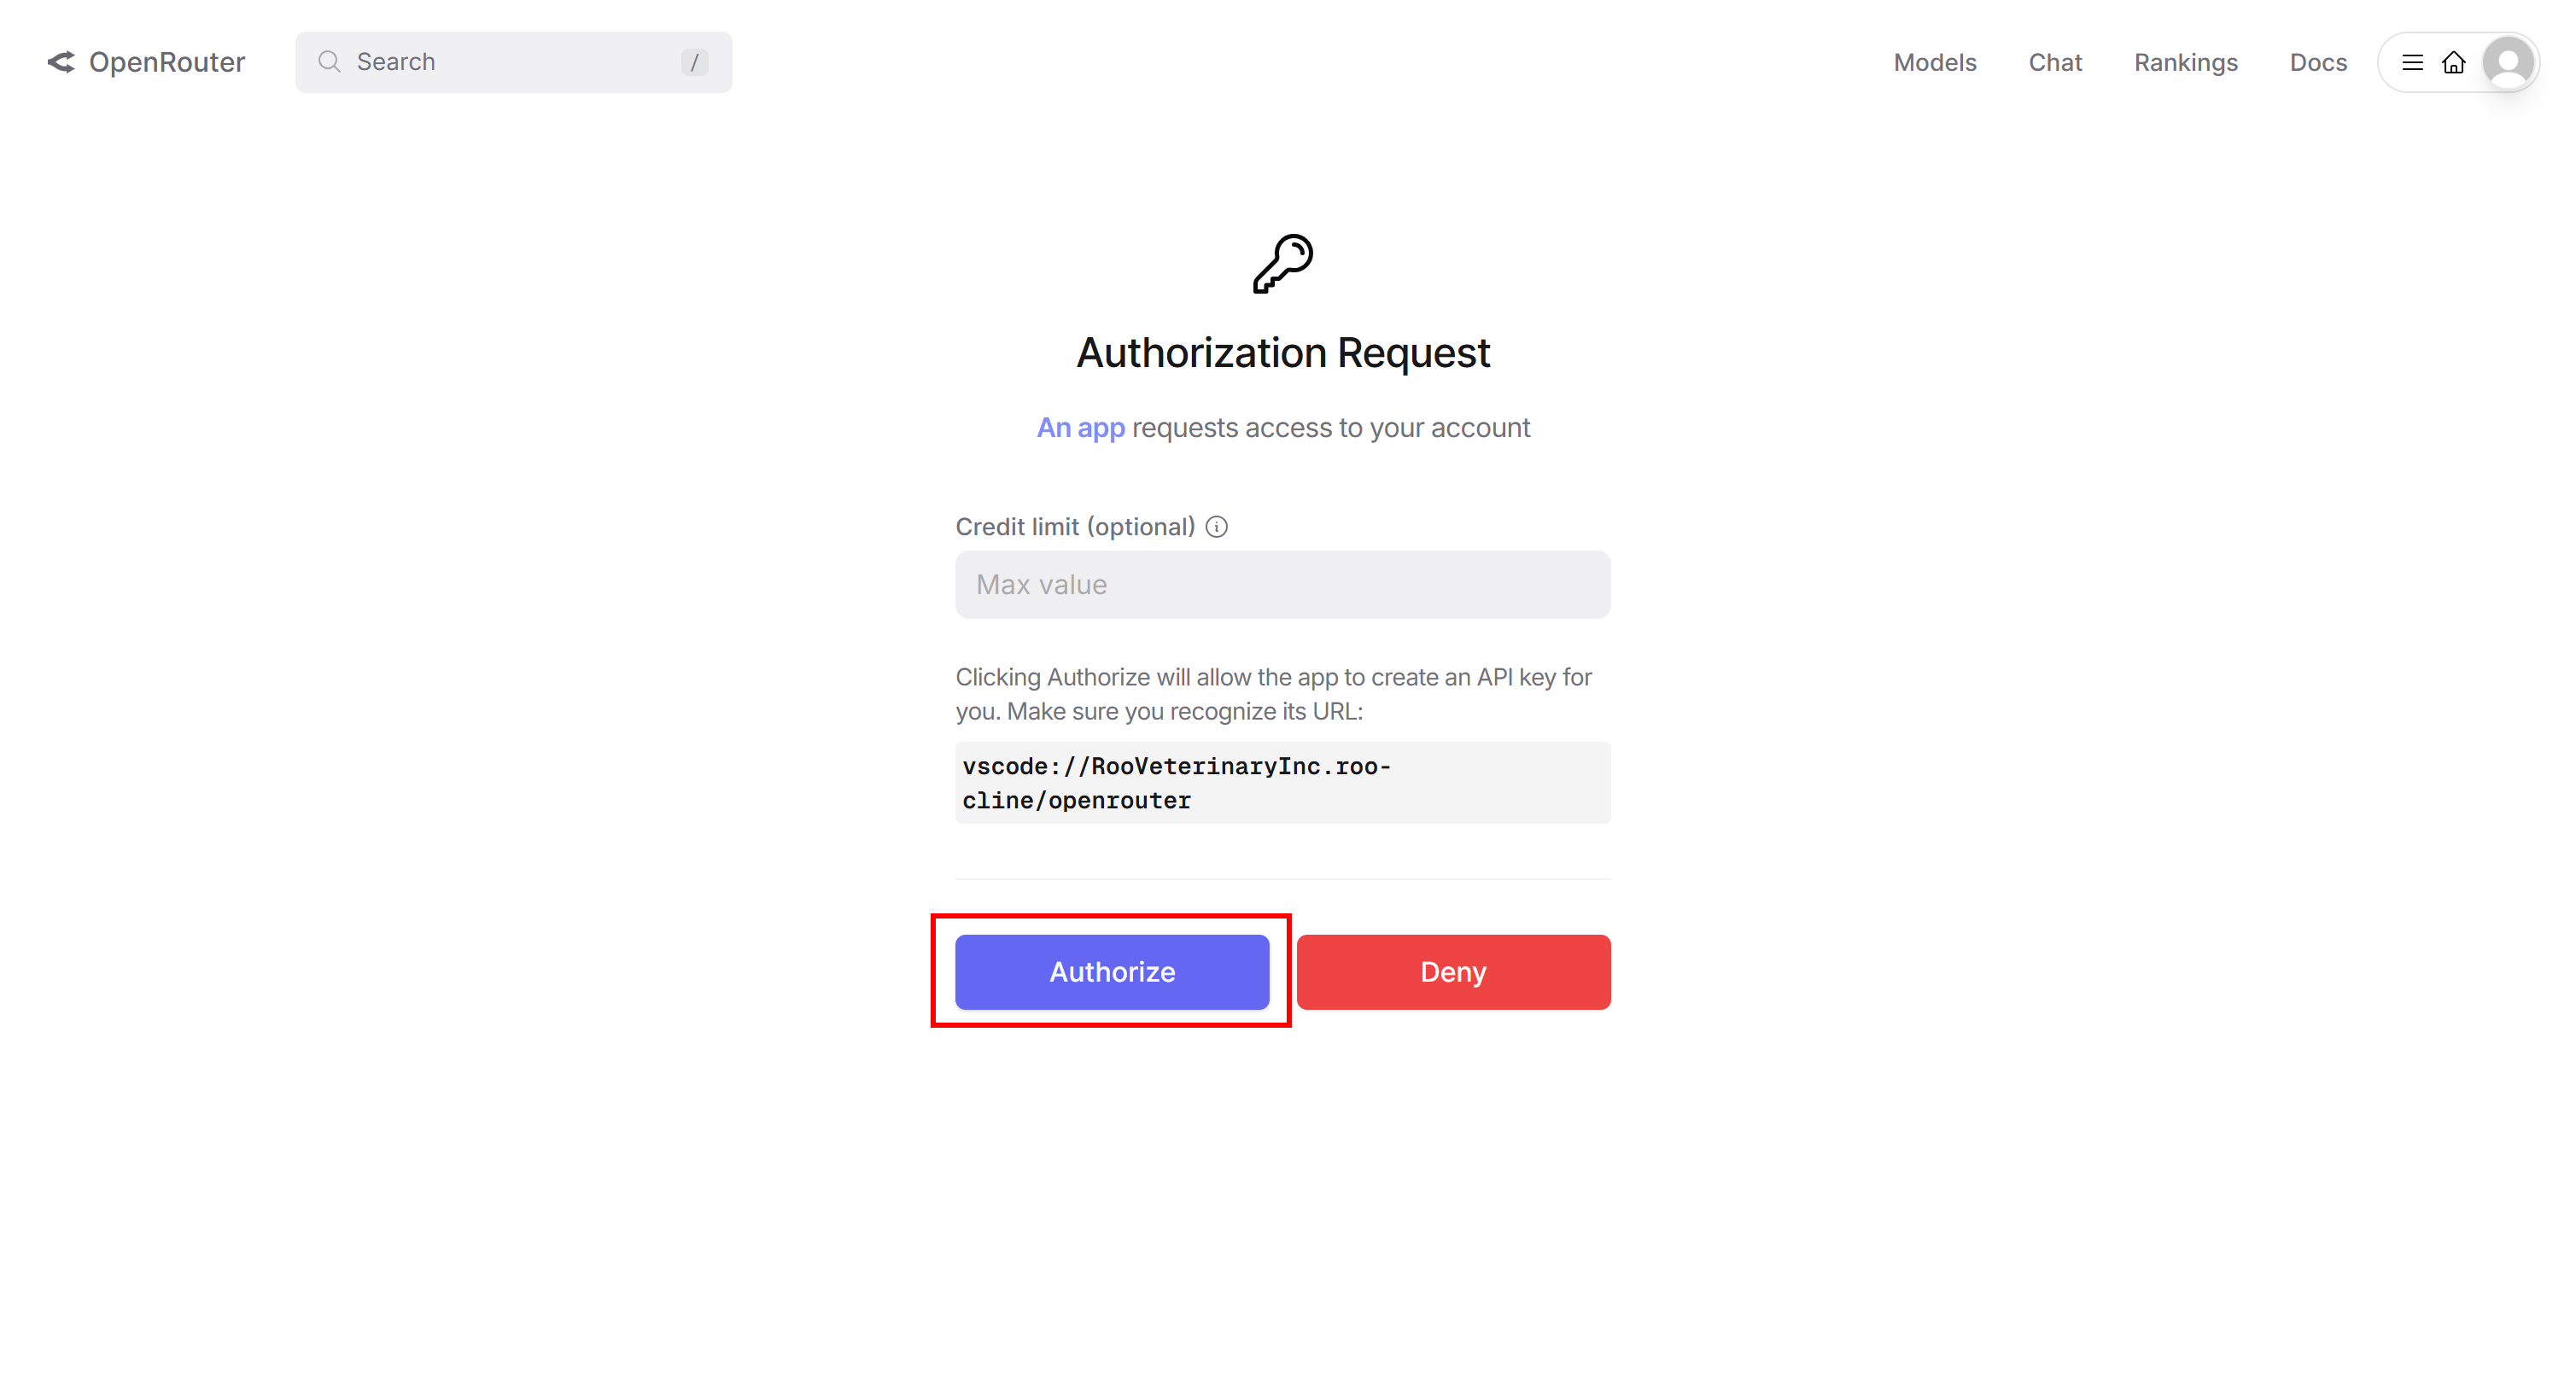
A browser window will open, prompting you to log in to your OpenRouter account and authorize Roo Code. Press “Authorize” to proceed:
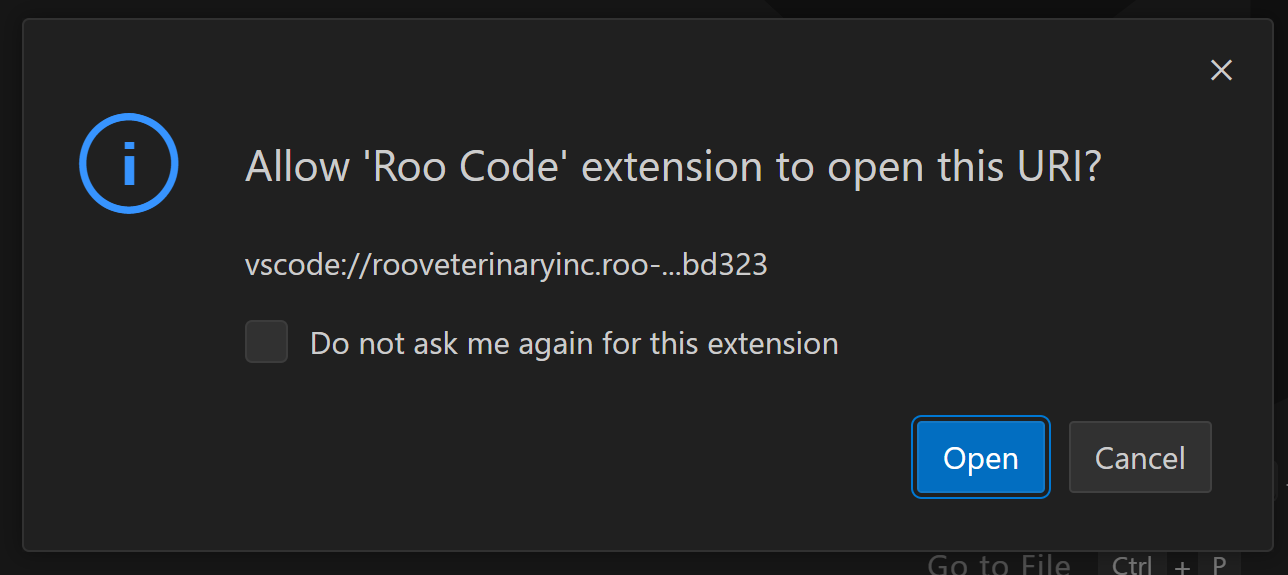
Back in VS Code, you will be asked to confirm the connection. Click “Open” to complete the authorization process:
This is what you should now see in Visual Studio Code:
As you can tell, the authorization worked fine, and Roo Code is ready to use!
By default, Roo Code uses the Claude Opus 4 model (which requires a funded OpenRouter account to be used). To switch to a free model (or any other model), click the gear icon in the top menu:

In the “Settings” tab, scroll down to the ”Model” dropdown and choose the model you want to configure:
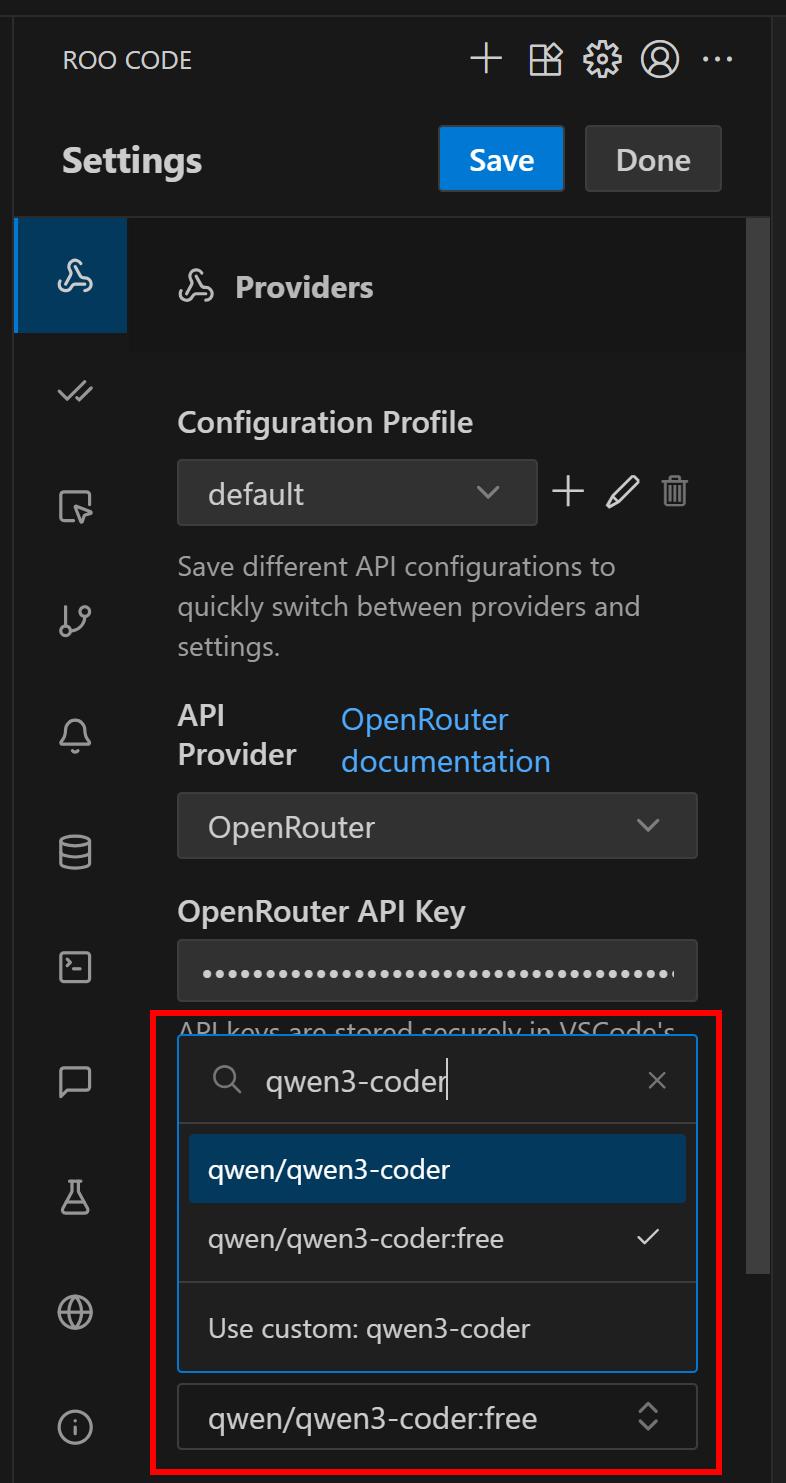
For example, select qwen/qwen3-coder:free, a free-to-use model optimized for coding scenarios. Once done, click the “Done” button to confirm the changes.
Fantastic! Roo Code is now fully set up in VS Code. Time to make it into a coding agent with web data retrieval and interaction capabilities via MCP integration.
Step #3: Install Bright Data’s Web MCP
If you have not already, start by creating a Bright Data account. Otherwise, if you already have one, log in.
Follow the official instructions to generate your Bright Data API key. Make sure to store it in a safe place. We will assume you are using an API key with Admin permissions, as that makes integration easier.
Open the terminal, and install the Web MCP globally via the @brightdata/mcp package:
npm install -g @brightdata/mcpVerify that the local MCP server works with this Bash command:
API_TOKEN="<YOUR_BRIGHT_DATA_API>" npx -y @brightdata/mcpOr, equivalently, on Windows PowerShell:
$Env:API_TOKEN="<YOUR_BRIGHT_DATA_API>"; npx -y @brightdata/mcpReplace the <YOUR_BRIGHT_DATA_API> placeholder with the actual Bright Data API token. The above two commands set the required API_TOKEN environment variable and then launch the MCP server via the @brightdata/mcp npm package.
In case of success, you should see logs as in the image below:

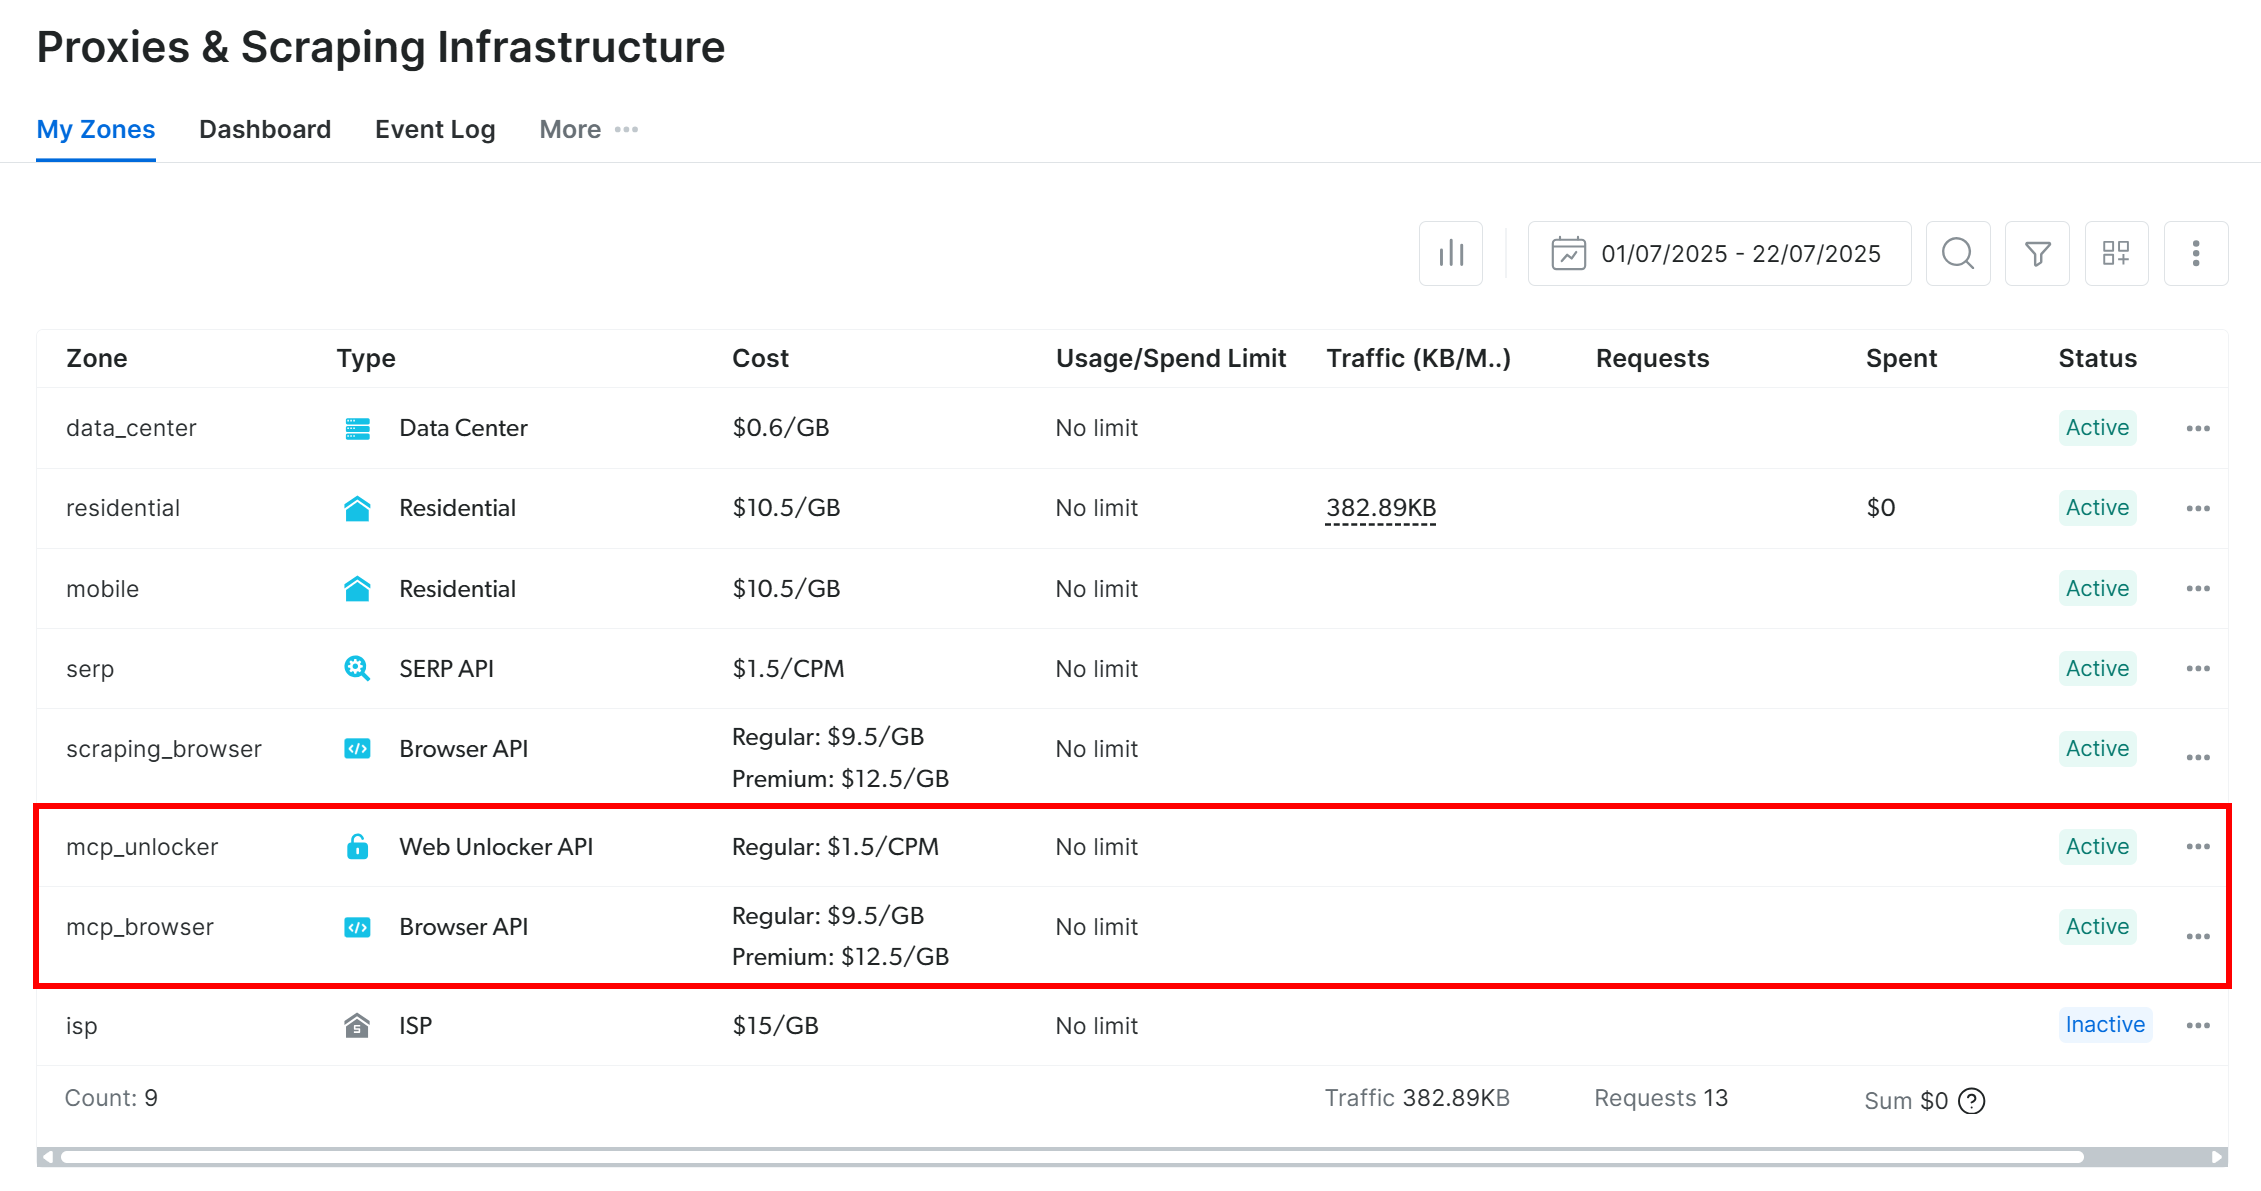
On first launch, the package automatically sets up two default zones in your Bright Data account:
mcp_unlocker: A zone for Web Unlocker.mcp_browser: A zone for Browser API.
These two zones are required to access all the tools exposed by the Web MCP.
To confirm that the above zones were created, log in to your Bright Data dashboard. Navigate to the “Proxies & Scraping Infrastructure” page, and you should see the two zones listed:
Note: If your API token does not have Admin permissions, these zones might not be set up automatically. In this case, you can create them manually in the dashboard and specify their names through environment variables, as documented on the GitHub page of the package.
By default, the MCP server exposes only the search_engine and scrape_as_markdown tools, which can be used for free.
To unlock advanced features like browser automation and structured data extraction from a long list of domains, you need to enable Pro mode. To do so, set the PRO_MODE=true environment variable before launching the MCP server:
API_TOKEN="<YOUR_BRIGHT_DATA_API>" PRO_MODE="true" npx -y @brightdata/mcpOr, in PowerShell:
$Env:API_TOKEN="<YOUR_BRIGHT_DATA_API>"; $env:PRO_MODE="true"; npx -y @brightdata/mcpImportant: If you choose to use Pro mode, you will gain access to all 60+ tools. On the other hand, Pro mode is not included in the free tier and will incur additional charges.
Perfect! You verified that the Web MCP server works on your machine. Kill the server process, as you will now configure Roo Code to launch it automatically for you and connect to it.
Step #4: Connect Roo Code to the Web MCP
Time to connect the Roo Code extension to the Bright Data Web MCP. In the Roo Code panel, on the top menu, select the “MCP Servers” option:

You will land in the “MCP Servers” configuration section. Here, you can configure MCP servers, either global MCP servers (available across all projects) or local MCP servers (available only in the current project).
The configuration procedure is nearly identical, so click the “Edit Global MCP” button. This will open a mcp_settings.json file, which contains an empty mcpServers entry:
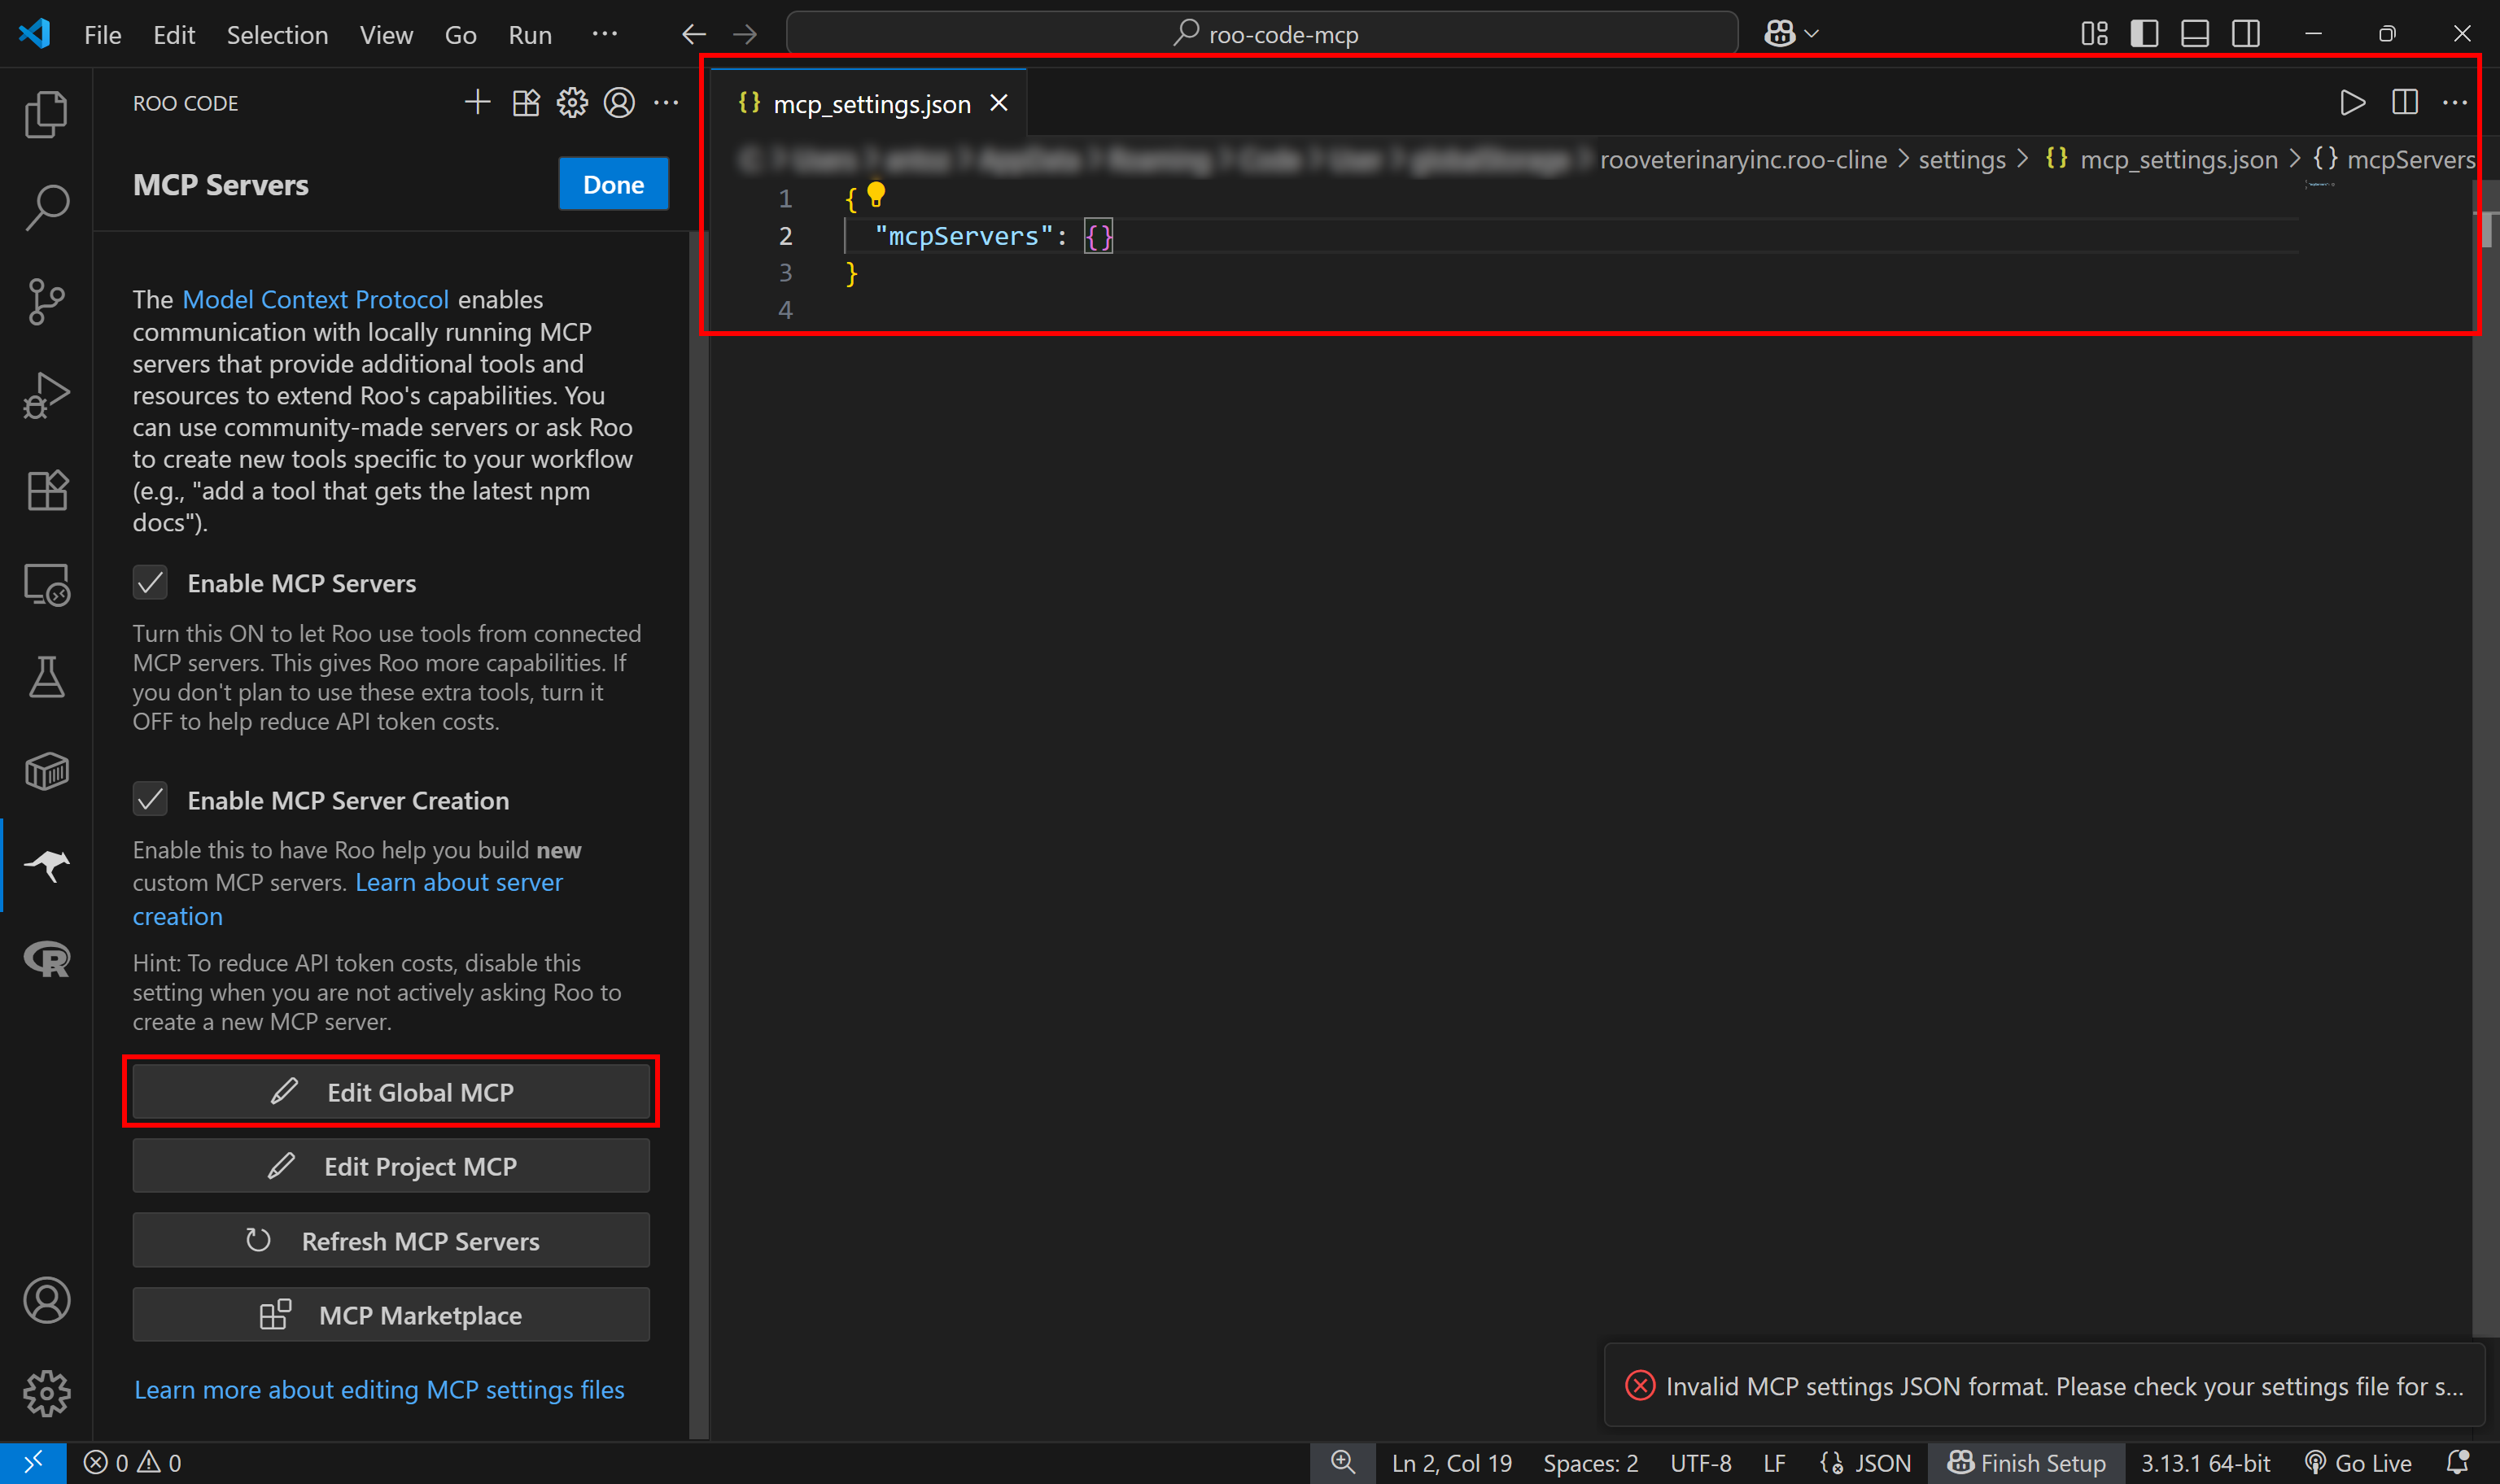
That configuration file is where you need to specify the details for connecting to the Bright Data Web MCP. Make sure it contains the following code:
{
  "mcpServers": {
    "brightData": {
      "command": "npx",
      "args": [
        "-y",
        "@brightdata/mcp"
      ],
      "env": {
        "API_TOKEN": "<YOUR_BRIGHT_DATA_API_KEY>",
        "PRO_MODE": "true"
      }
    }
  }
}
In this configuration:
- The
mcpServersobject tells Roo Code how to start external MCP servers. - The
brightDataentry defines the command (npx) and environment variables needed to launch the Web MCP.PRO_MODEis optional, but enabling it unlocks the full set of available tools.
This is what you should see:
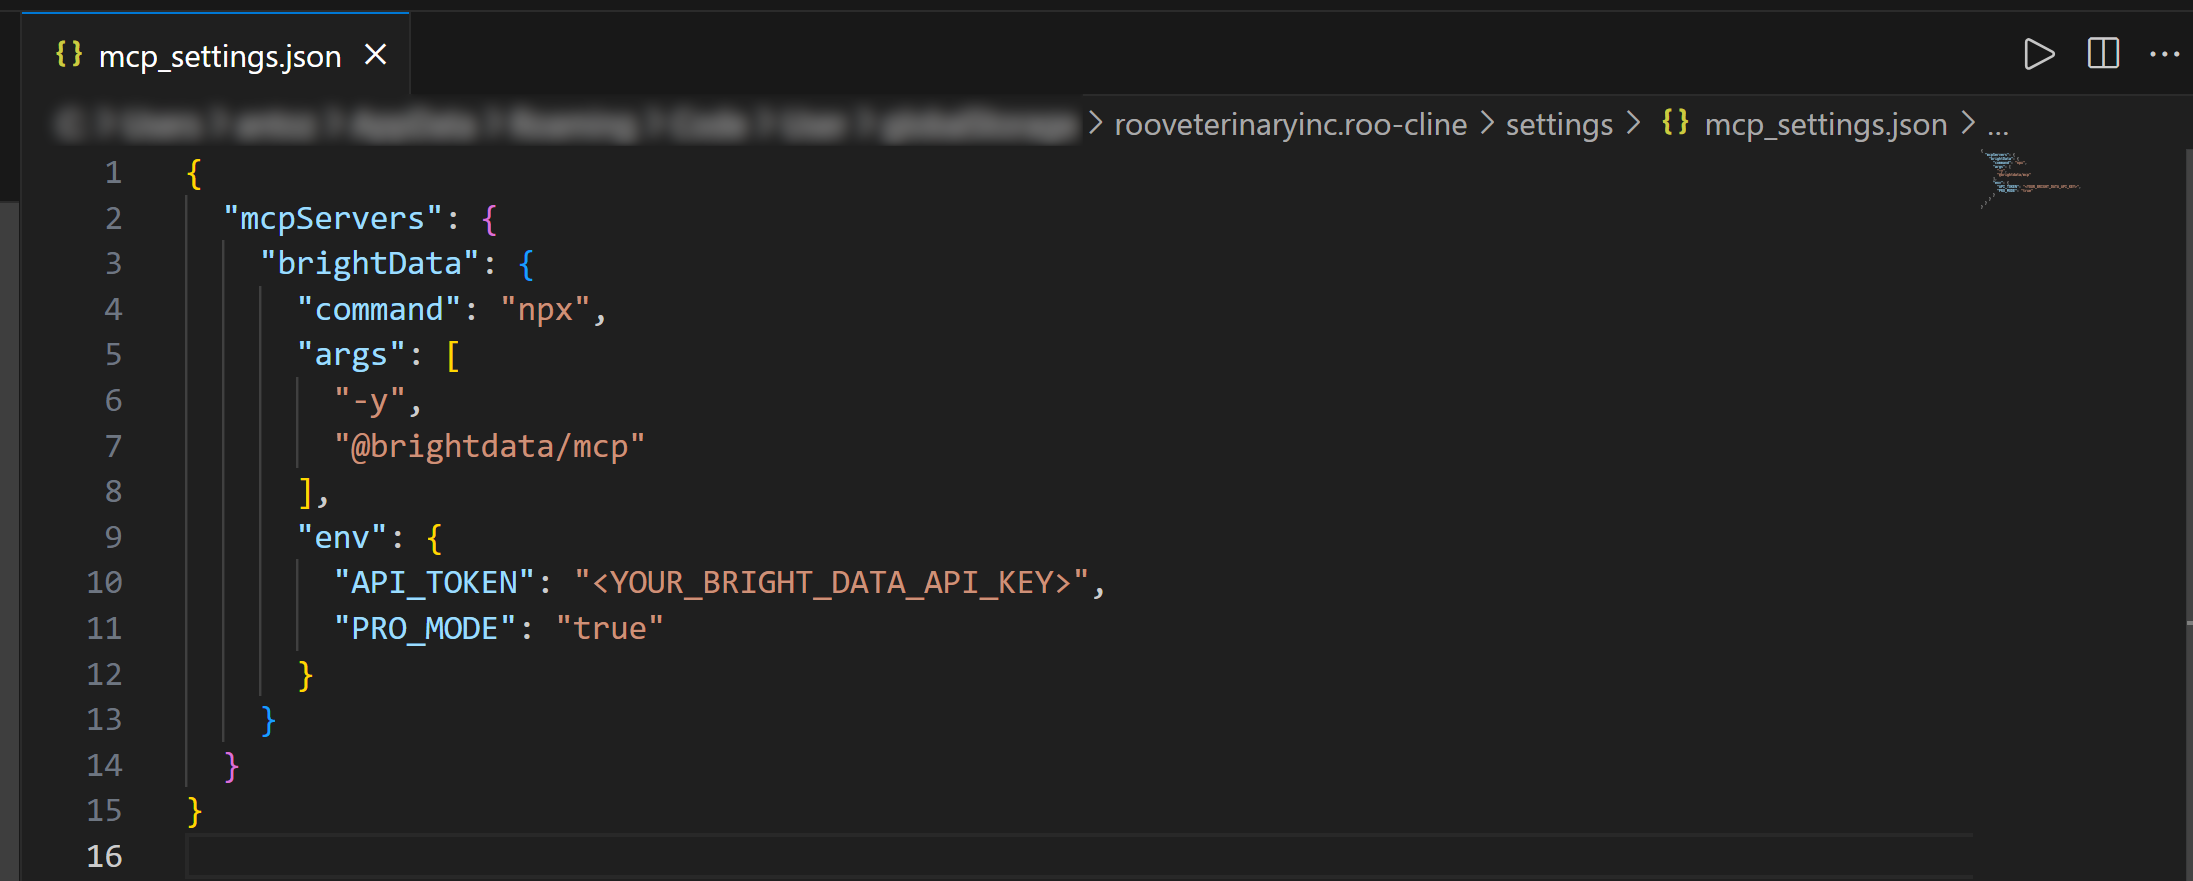
Replace the <YOUR_BRIGHT_DATA_API_KEY> placeholder with your Bright Data API key retrieved earlier.
This configuration tells Roo Code to run the same npx command with the environment variables seen in the previous step. In other words, Roo Code can now launch and connect to the Bright Data Web MCP server. (Enabling PRO_MODE is optional but recommended.)
Once you add the brightData entry in mcpServers, Roo Code will immediately connect to the Web MCP server and display the available tools:
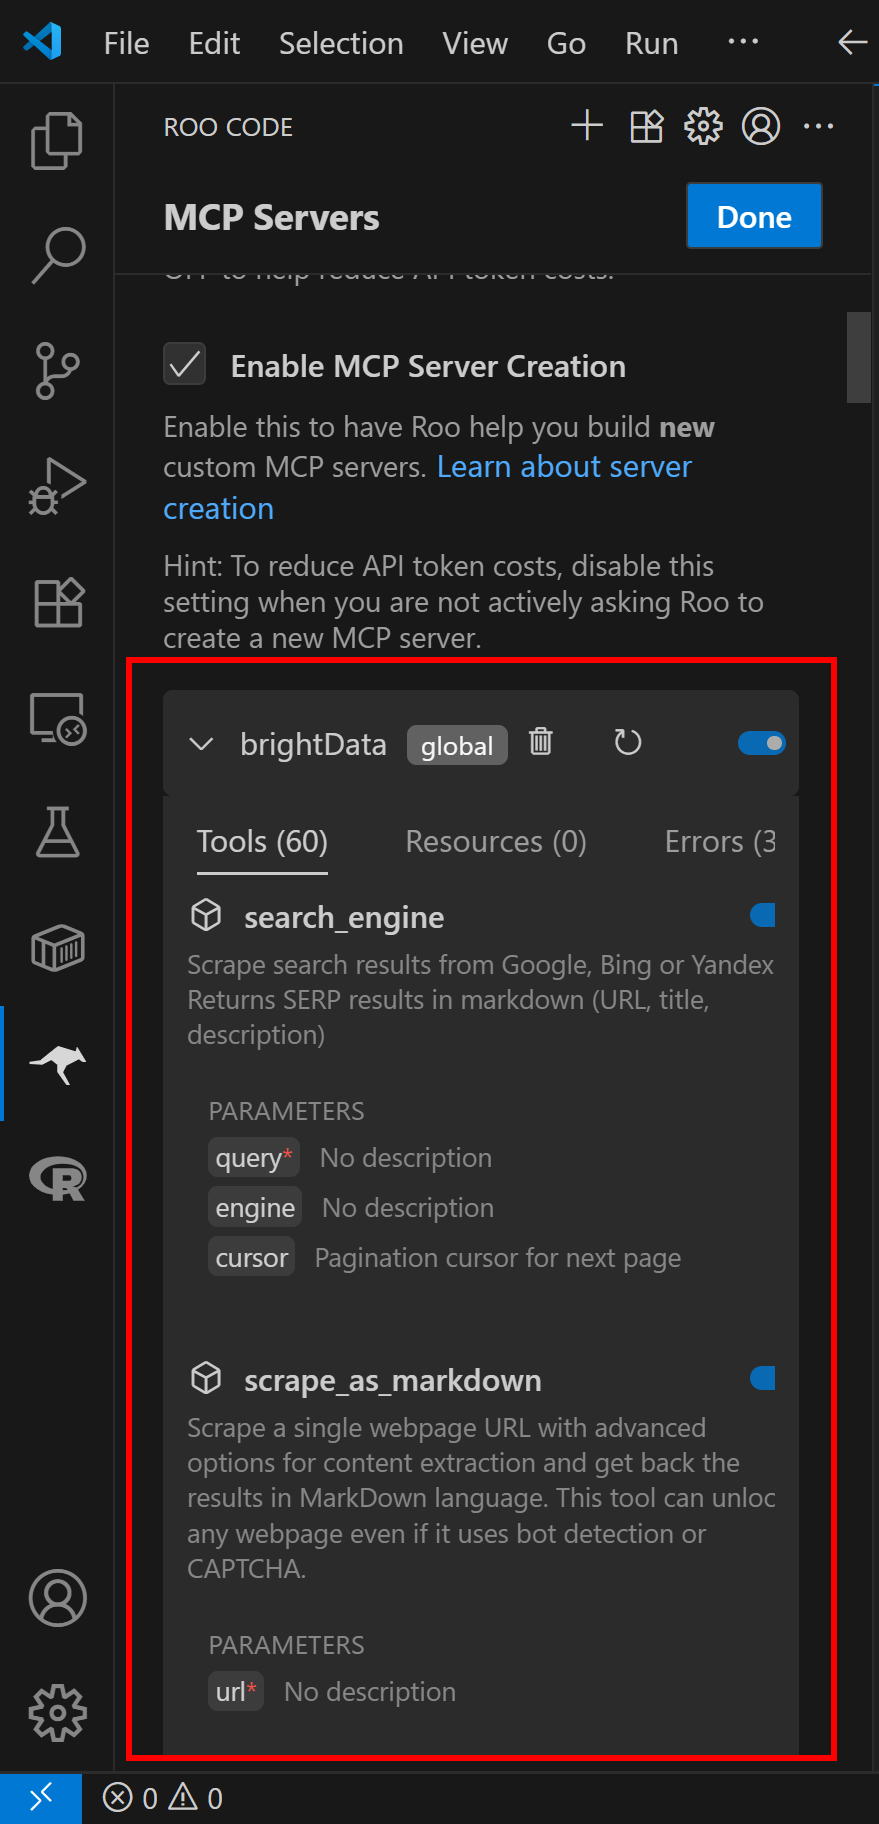
Since we set the PRO_MODE environment variable to true, Roo Code now provides access to 60+ tools. Without PRO_MODE, only 2 tools would be available: scrape_as_markdown and search_engine.
Click the “Done” button, and you have successfully integrated the Web MCP into Roo Code. Terrific!
Step #5: Test the Roo Code Agent
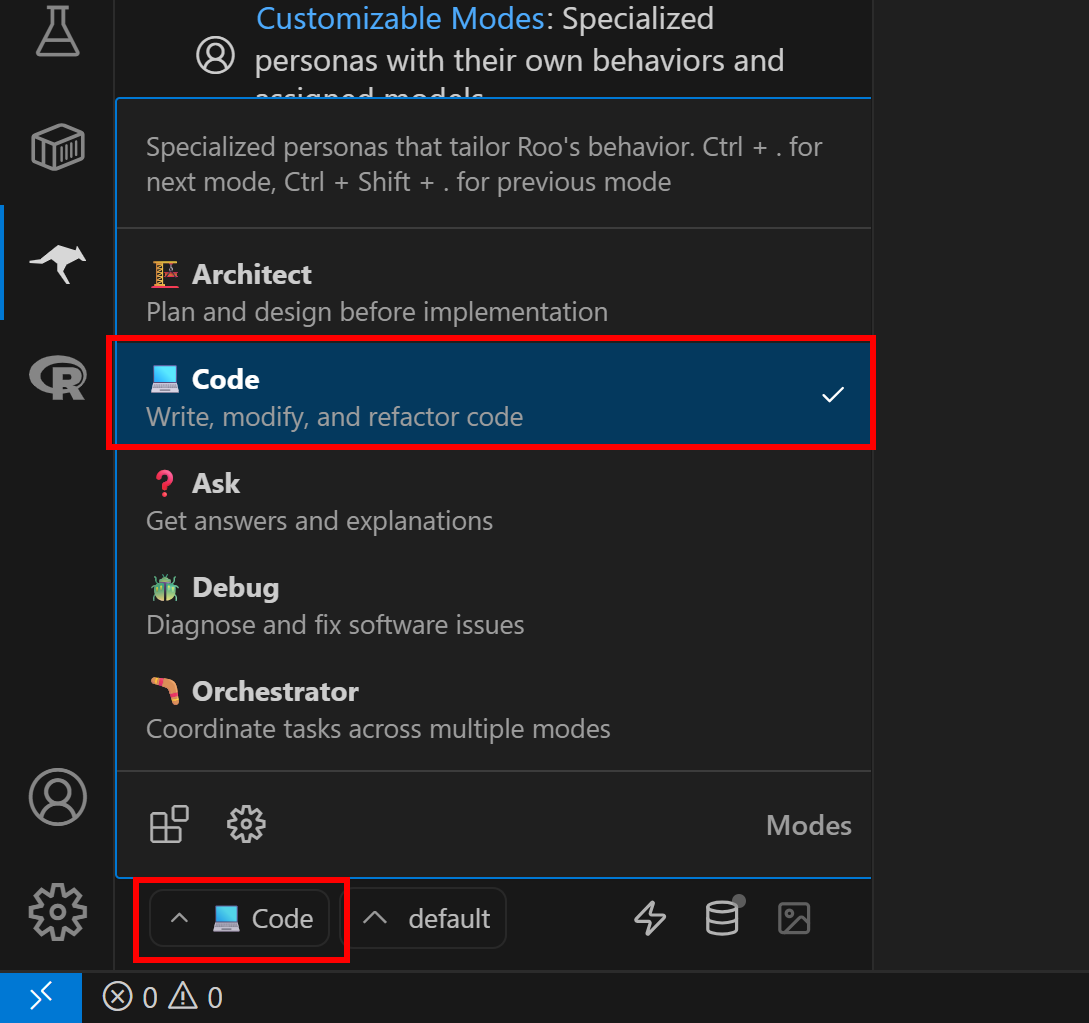
By default, Roo Code runs in Architect mode, which acts as an “experienced technical leader and planner who helps design systems and create implementation plans.”
For most scenarios, you will want to use it as an AI pair programmer instead. To do this, switch Roo Code to Code mode, as shown below:
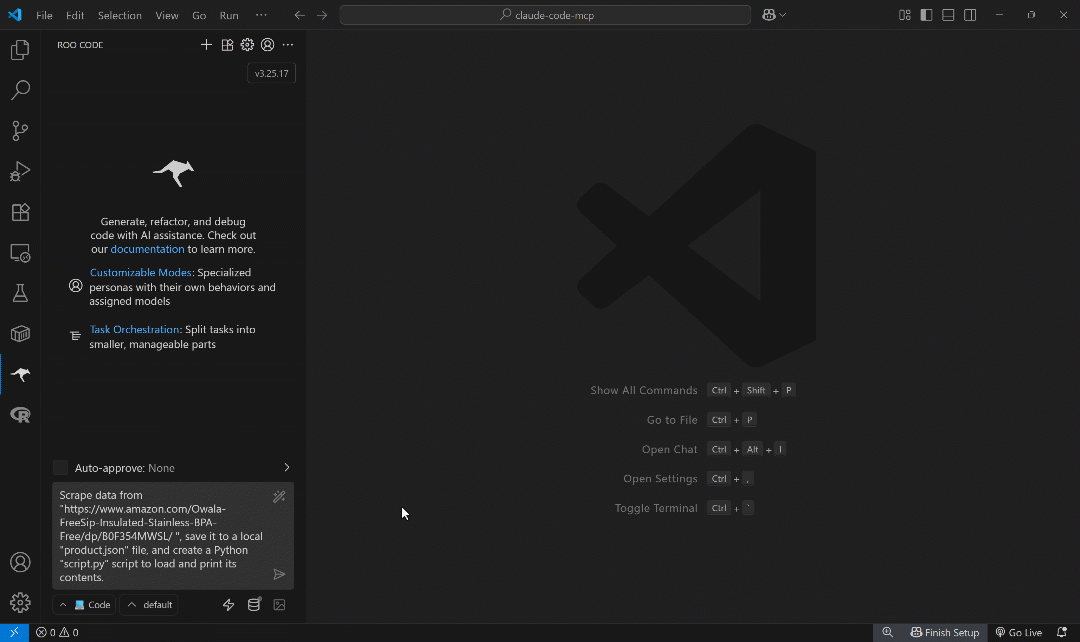
Now, test your AI coding agent’s web data retrieval capabilities with a prompt like the following:
Scrape data from "https://www.amazon.com/Owala-FreeSip-Insulated-Stainless-BPA-Free/dp/B0F354MWSL/", save it to a local "product.json" file, and create a Python "script.py" script to load and print its contents.This simulates a real-world use case, retrieving data for analysis, visualization, mocking, or other workflows.
Run the prompt in Roo Code, and you should see a result similar to this:
The above GIF has been sped up, but this is what happens step by step:
- Roo Code breaks the task into a 3-step plan.
- It determines that the best way to fetch the Amazon product data is by using the
web_data_amazon_producttool from the Web MCP. - You are prompted to approve running the scraping tool.
- The tool runs, and the Amazon product data is retrieved in JSON format.
- You are asked if the data should be saved to a local
product.jsonfile. - After approval, the JSON file is created and populated.
- Roo Code asks for permission to generate a
script.pyfile that reads and prints the contents ofproduct.json. - The file is created with the generated Python code.
- You are prompted to run the script with
python script.py. - The script fails due to encoding issues.
- Roo Code suggests updating the script with UTF-8 handling.
- After approval, the updated script runs correctly and outputs the expected result.
Notice how Roo Code proactively suggested script execution, even though your original prompt did not explicitly request it. That was useful, as it helped the agent detect flaws and refine its own output.
After completing the flow, your working directory should contain these two files:
├── product.json
└── script.py
Open product.json in VS Code:
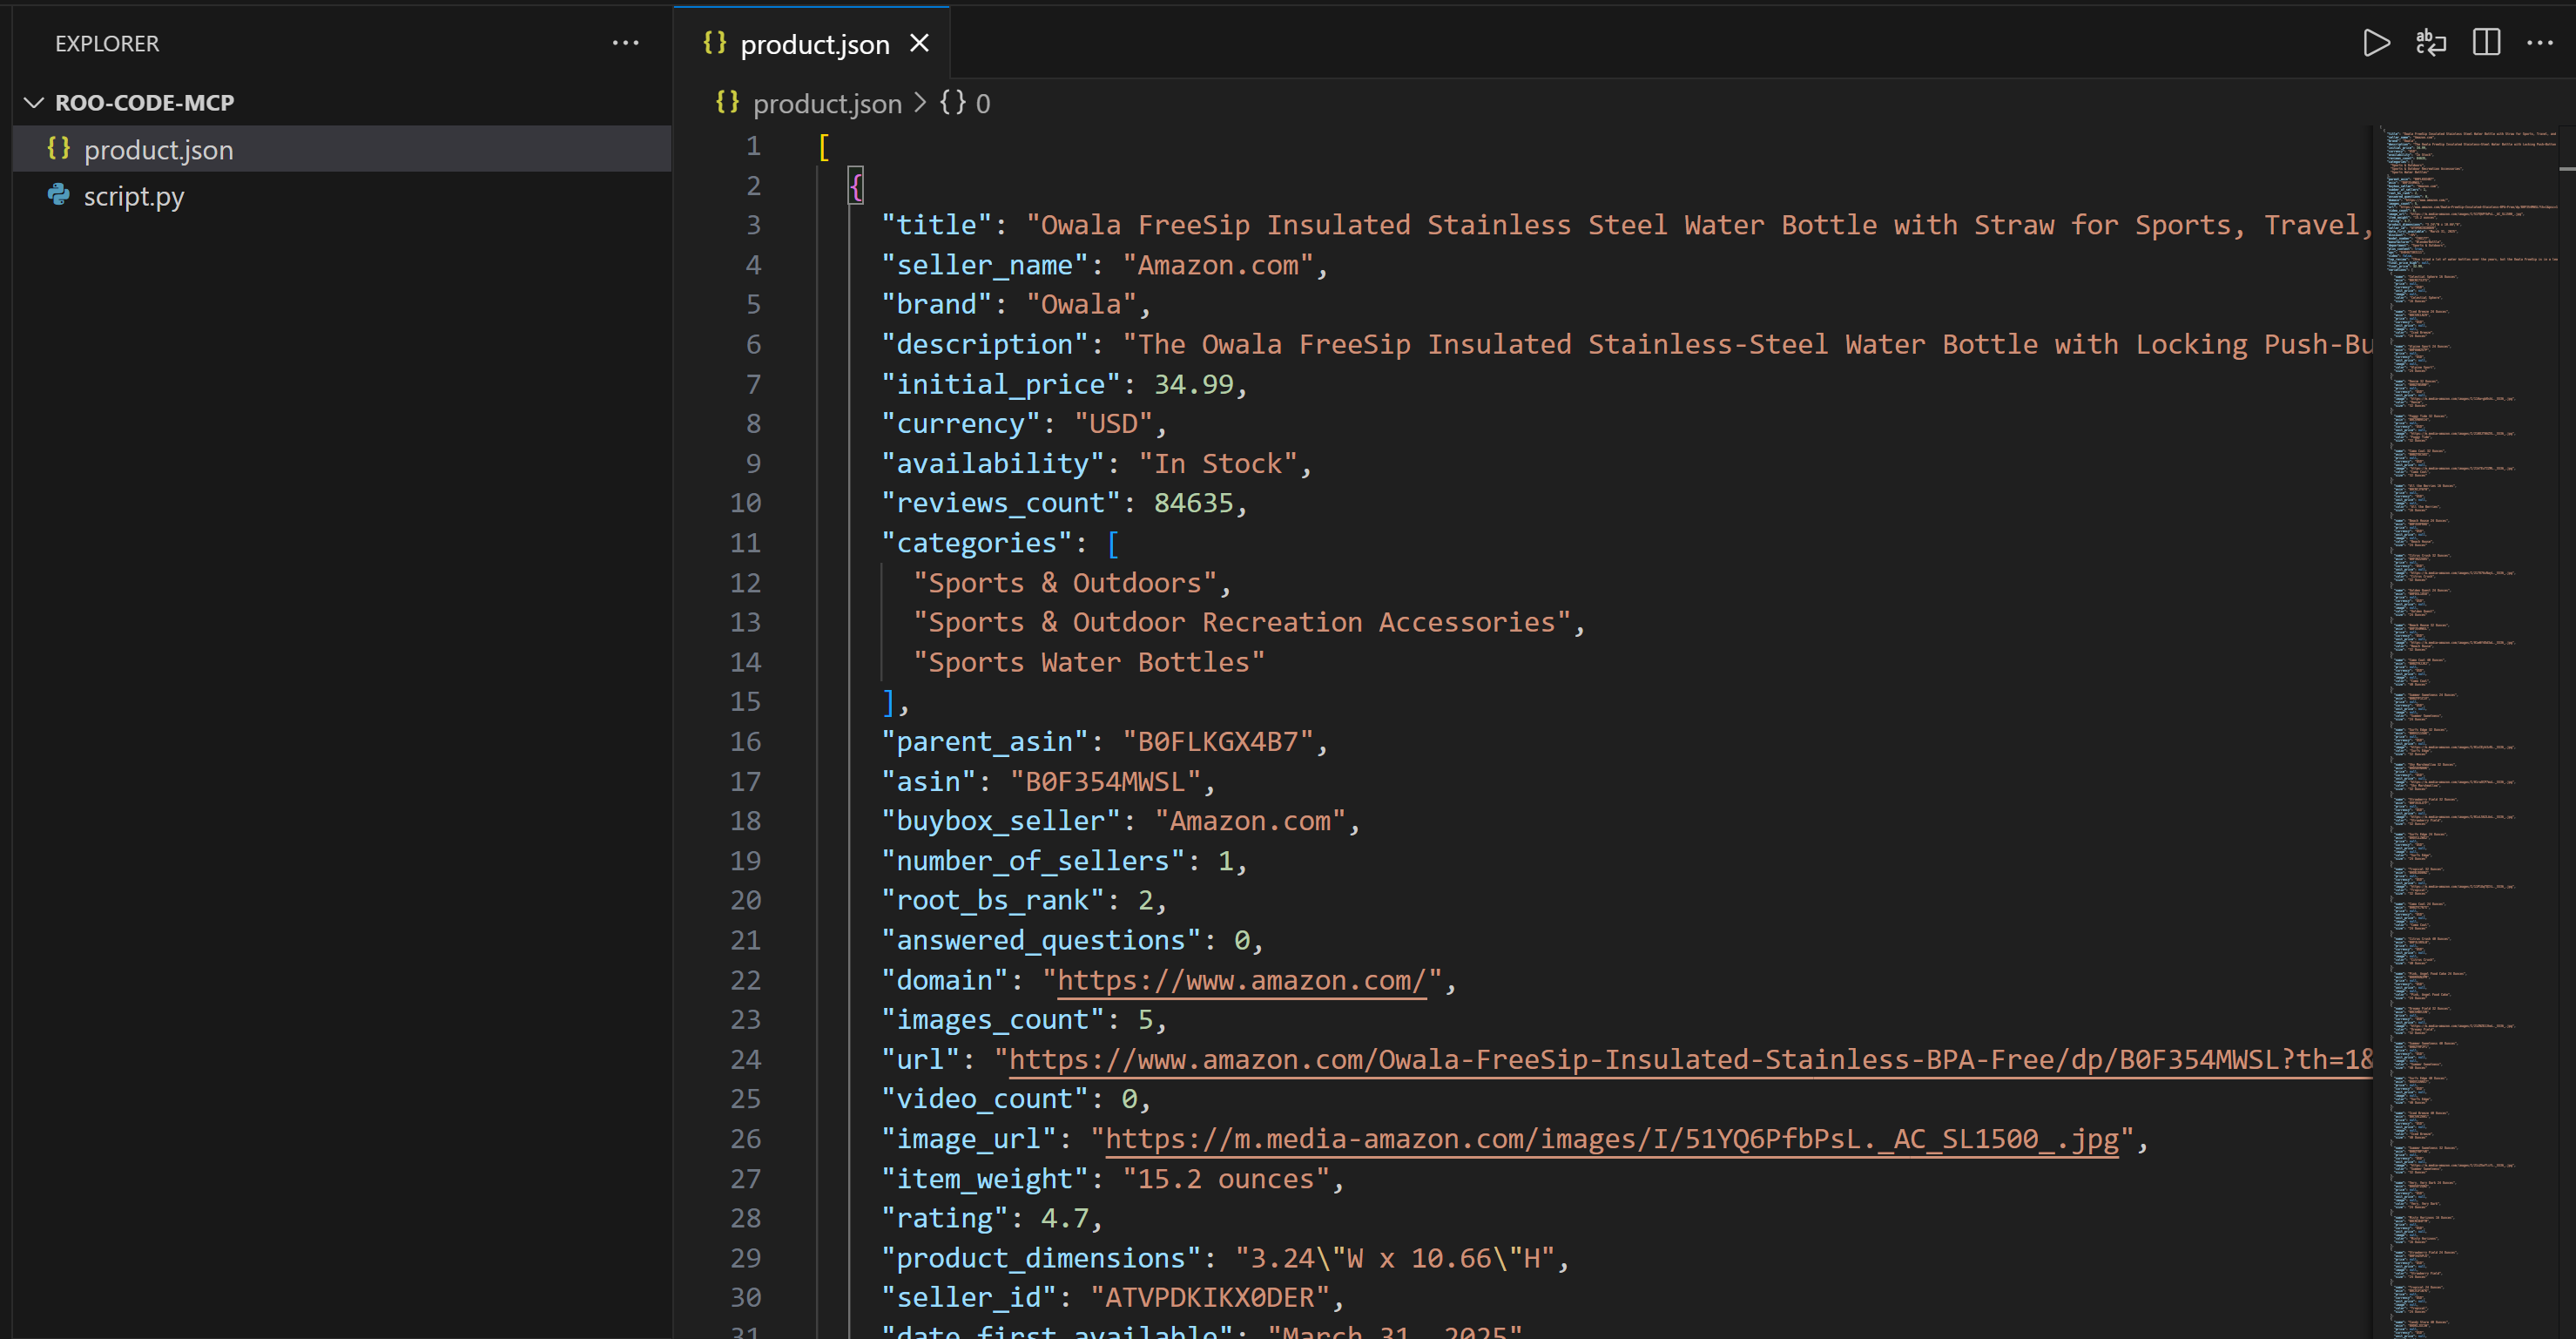
This file contains real Amazon product data—not hallucinated or fabricated output. In particular, the data was captured by Bright Data using the web_data_amazon_product tool (which internally leverages the Amazon Scraper) from the target product page below:
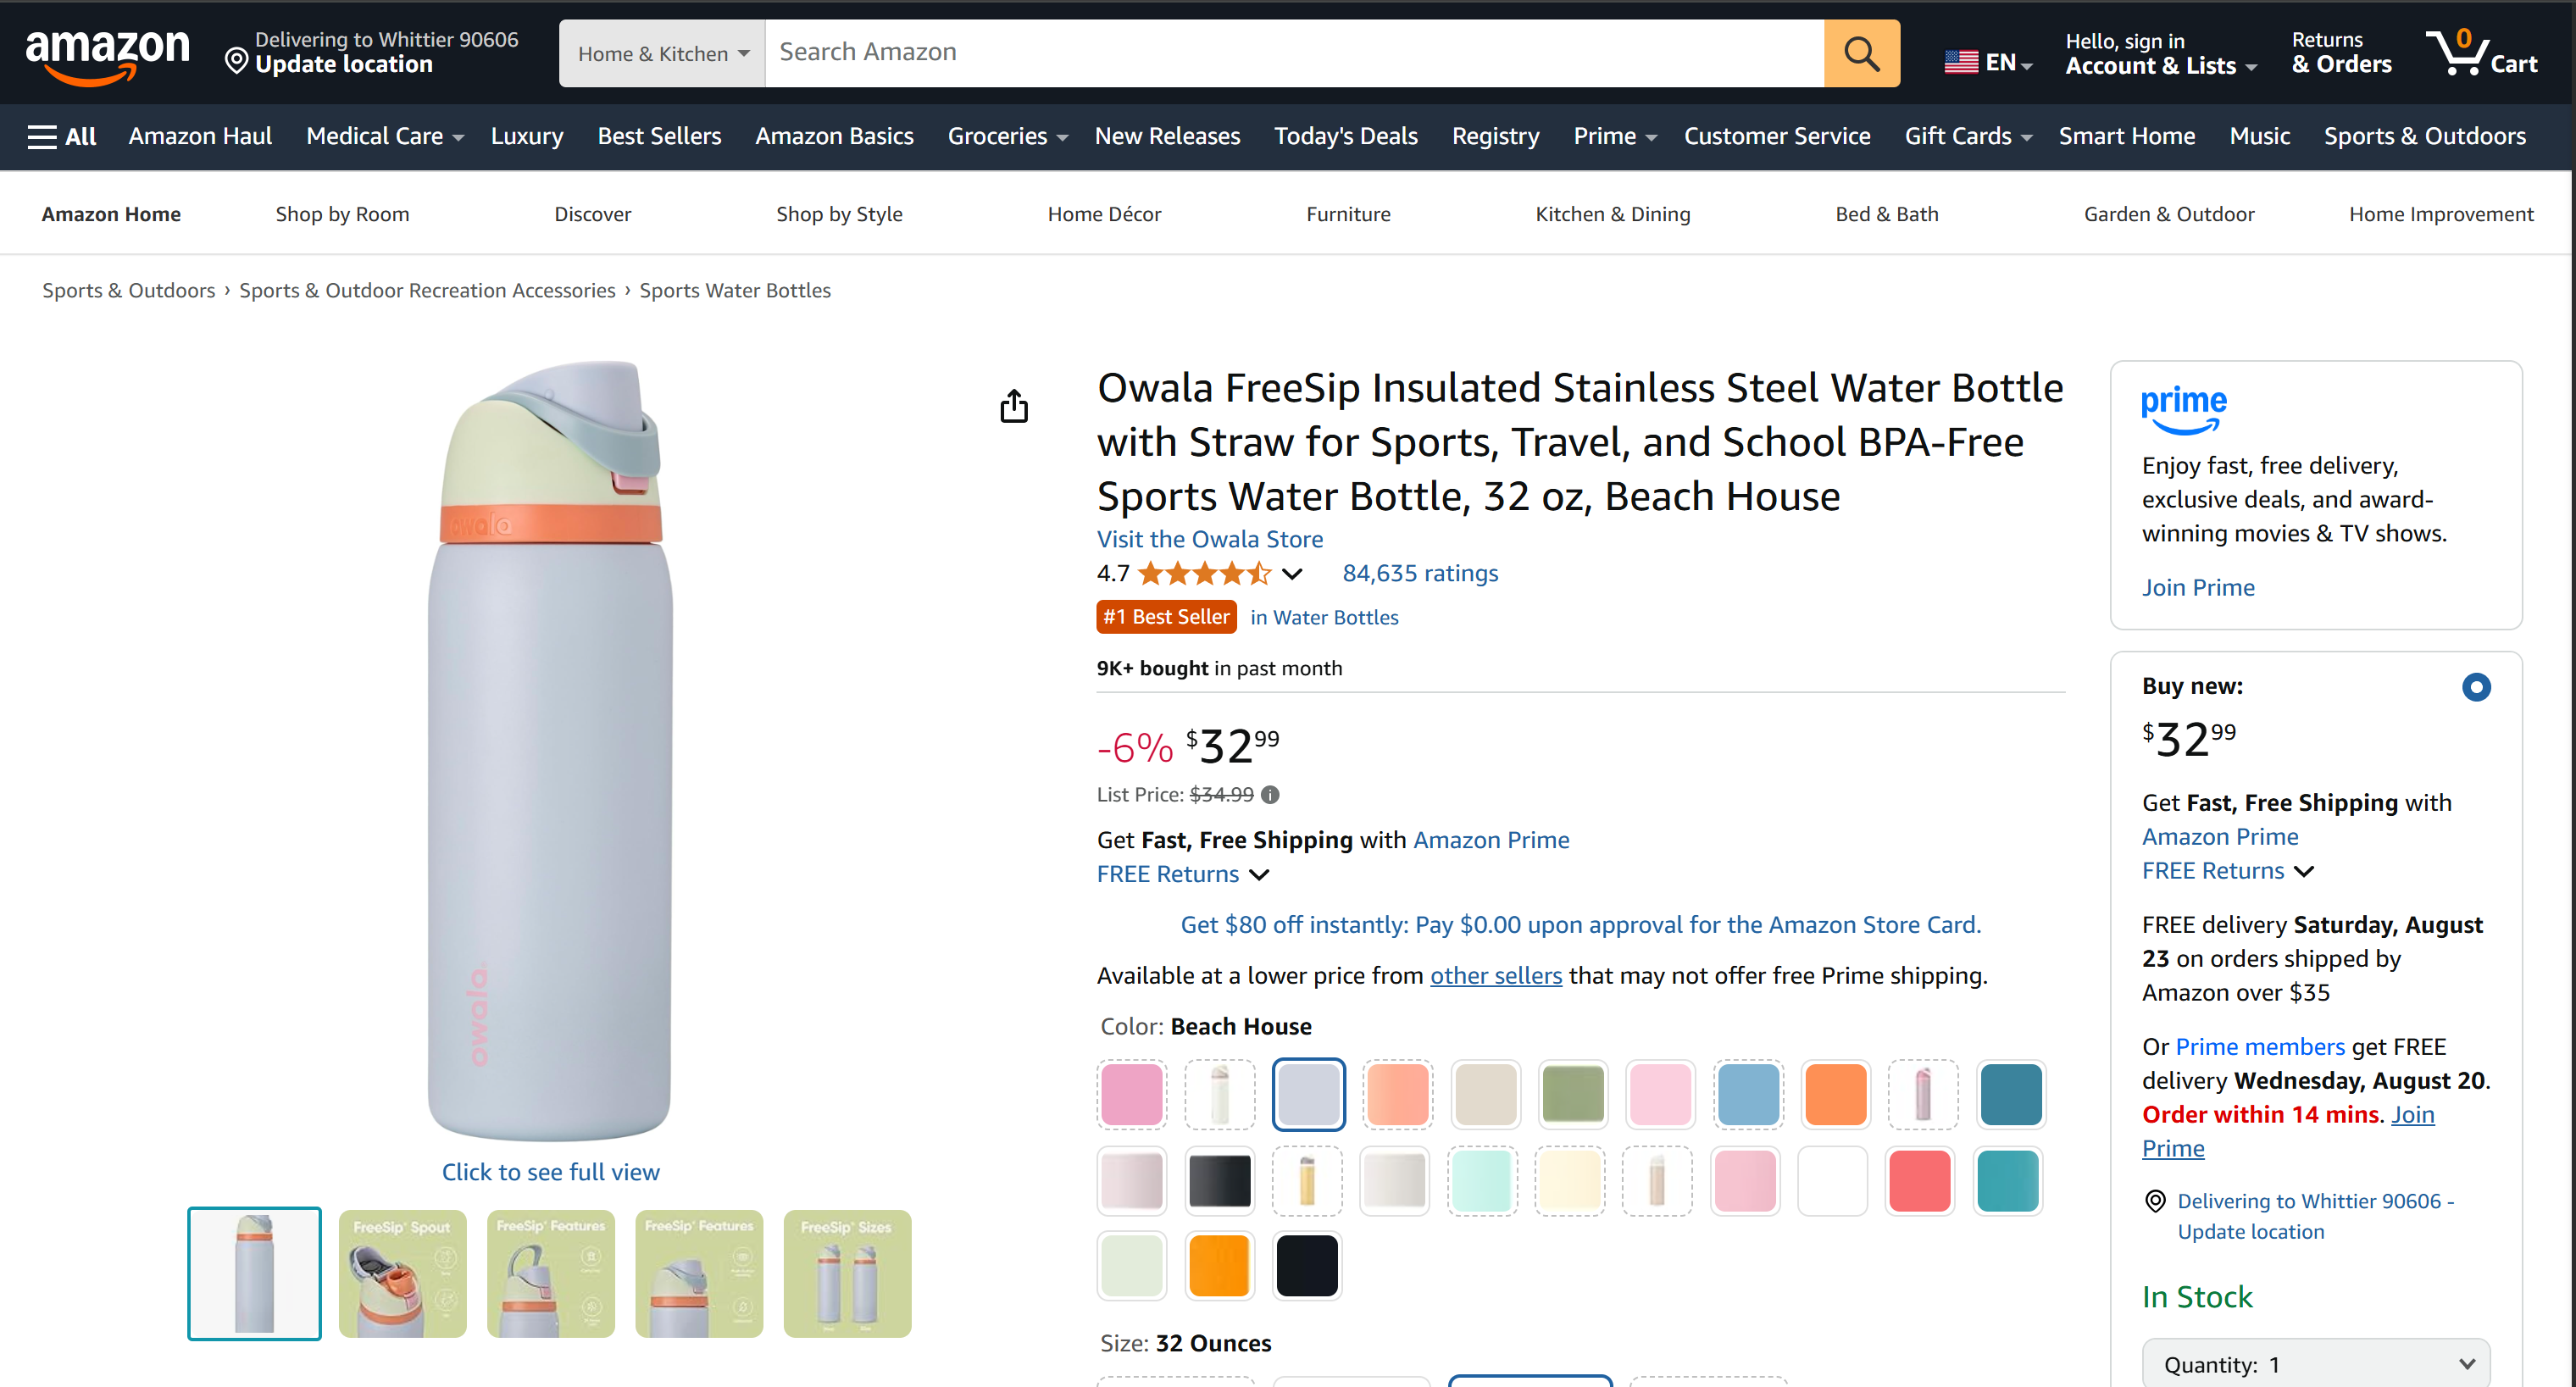
Note: Scraping Amazon is notoriously difficult because of its strict anti-bot protections (e.g., the notorious Amazon CAPTCHA). A standard LLM alone cannot handle this task reliably. That is why combining Roo Code with Bright Data’s Web MCP makes your coding agent uniquely powerful.
This file contains real Amazon data, not hallucinated or made-up content generated by the chosen LLM. Specifically, the data was captured by Bright Data using the web_data_amazon_product tool (which internally calls the Amazon Scraper).
Then, the generated script.py file contains the logic to read and print the JSON product data:
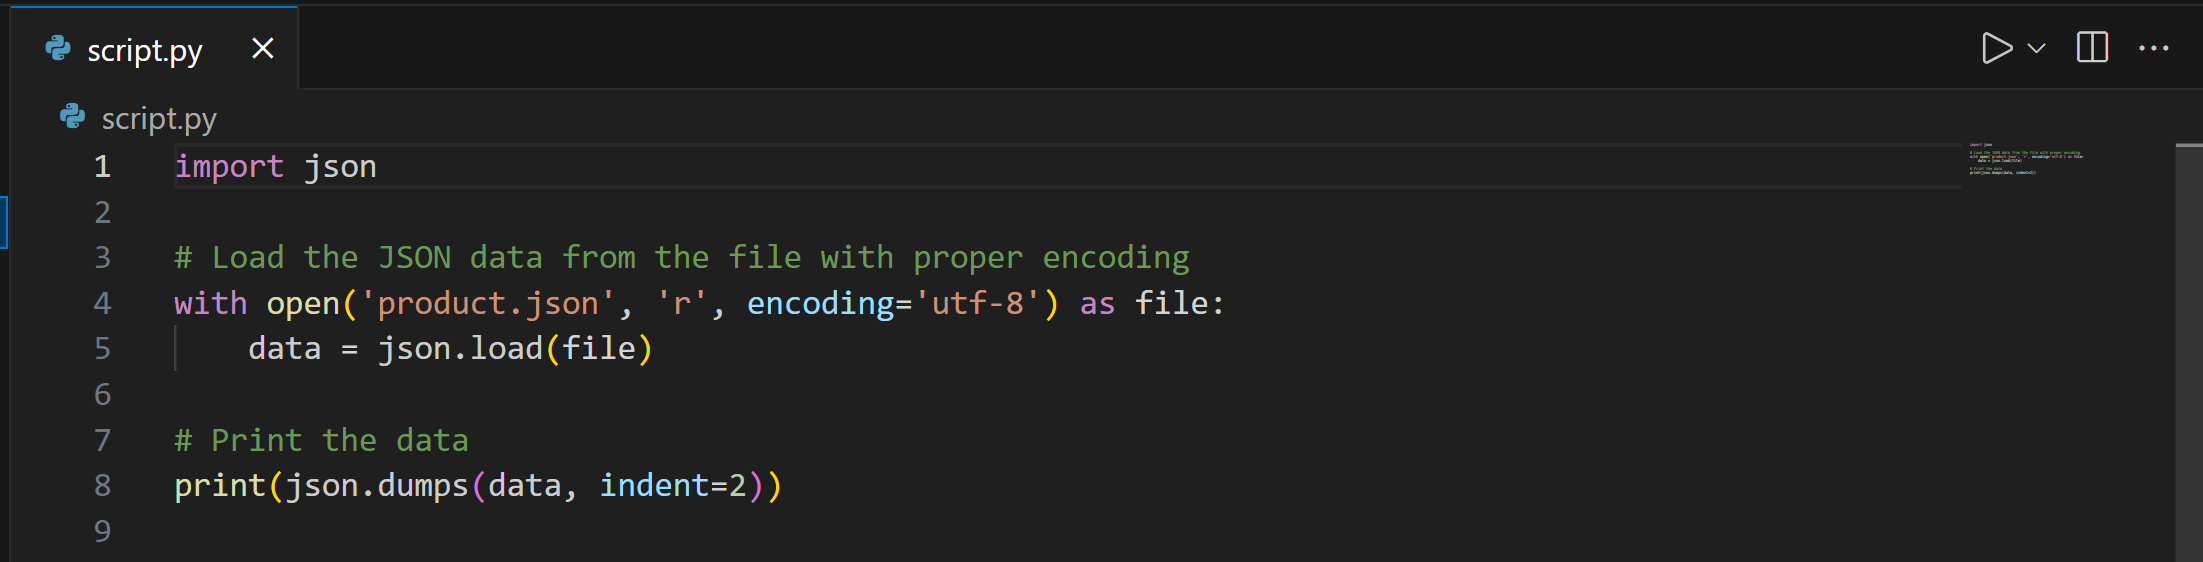
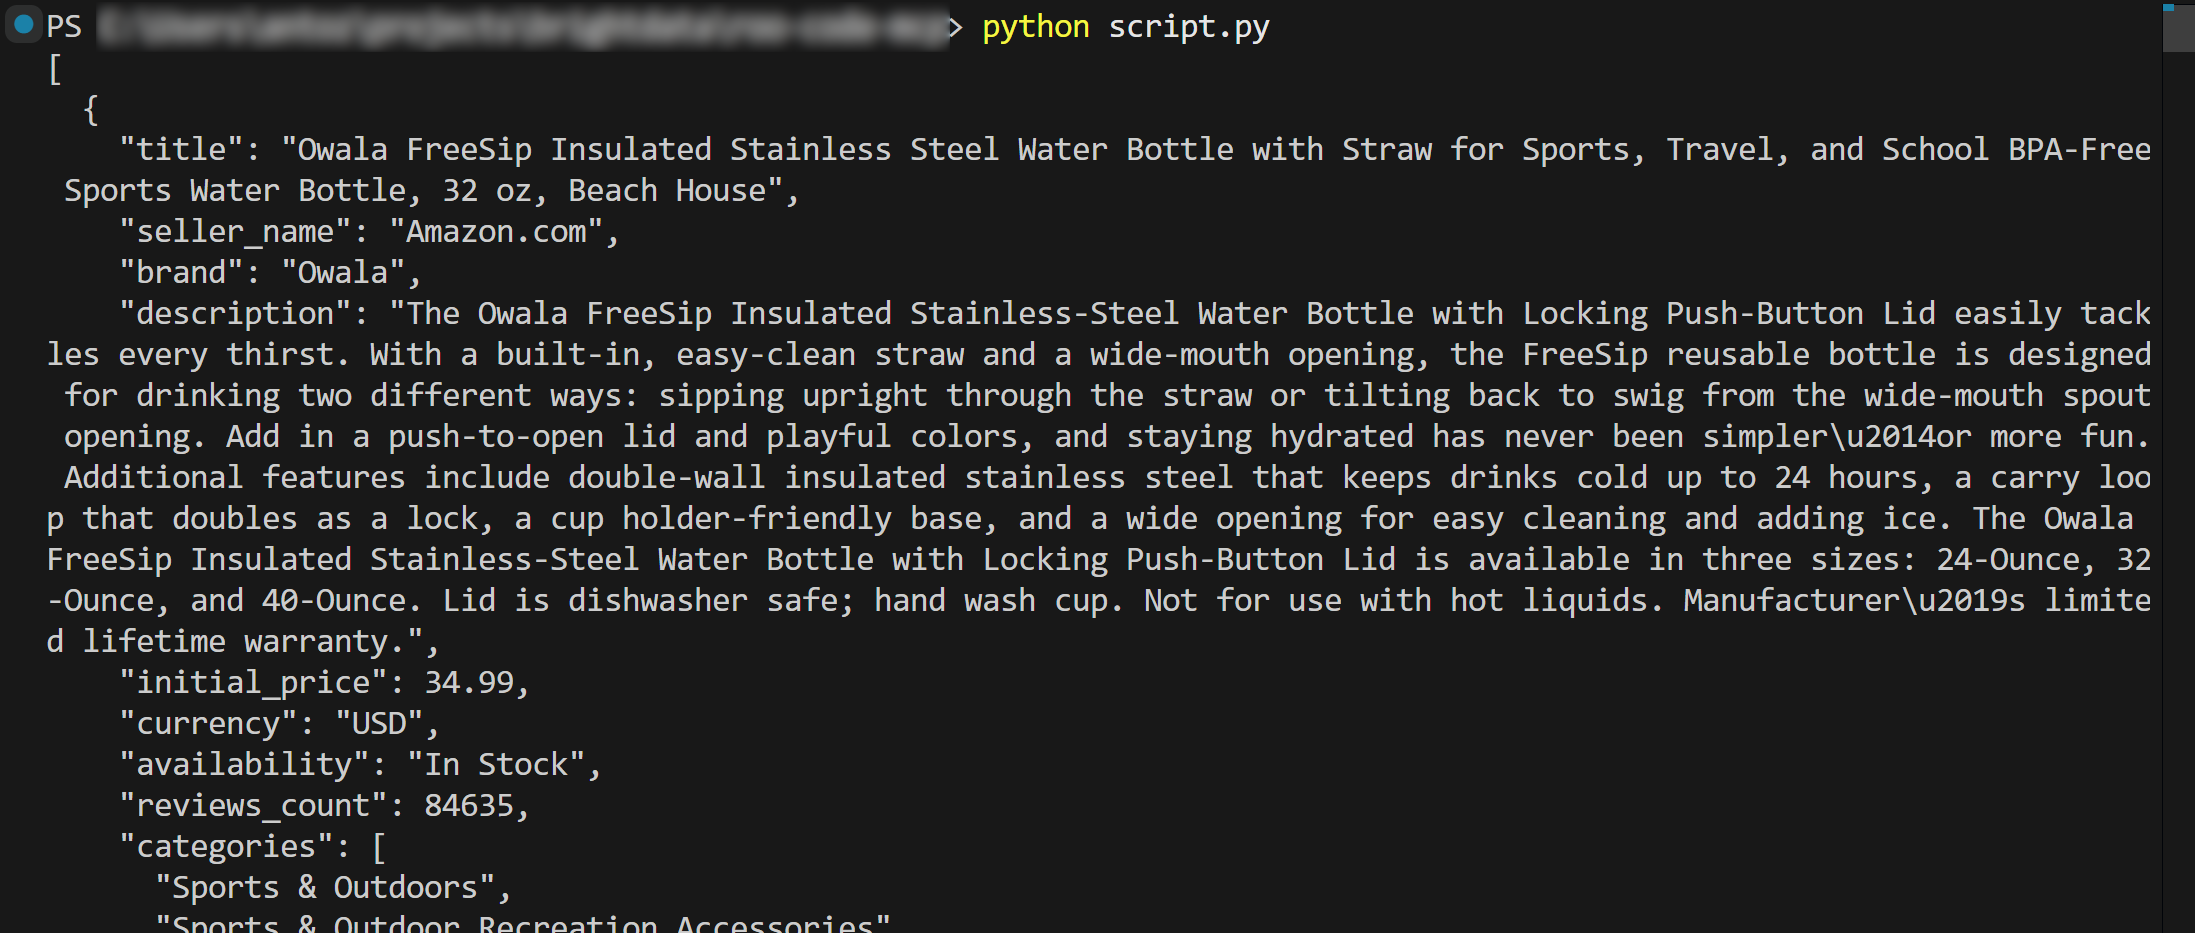
Run the above Python script with:
python script.pyThe result will be the product data loaded from product.json:
That is the power of Bright Data + Roo Code. Remember that the example above was just a simple use case, so experiment with more prompts. Explore advanced LLM-driven data workflows, right inside Visual Studio Code.
Et voilà! You completed Bright Data’s MCP integration in Roo Code.
Conclusion
In this blog post, you saw how to connect Roo Code with the Bright Data Web MCP server (which now offers a free tier!) in Visual Studio Code. The result is a feature-rich AI coding agent capable of fetching data from the web and interacting with it intelligently.
We used this enhanced agent to generate a simple Python script with access to Amazon product data. For more complex projects or inspiration, remember that the tools exposed by the Web MCP can support a wide variety of agentic workflows and scenarios.
To build powerful AI agents, explore the full range of services available in the Bright Data AI infrastructure.
Create a Bright Data account for free and start experimenting with our AI-ready web tools!

Technical Writer
Antonello Zanini is a technical writer, editor, and software engineer with 5M+ views. Expert in technical content strategy, web development, and project management.


