

Learn how to connect Zed’s AI-native editor to Bright Data’s Web MCP to enable real-time web access, clean data extraction, and web-aware AI workflows directly inside your development environment.
In this tutorial, you will learn:
- What Zed is and how its AI-native, agentic editing model works inside a modern code editor.
- Why extending Zed with real-time web interaction and data extraction capabilities is essential for accurate AI-assisted development.
- How to connect Zed to Bright Data’s Web MCP to enable a web-aware AI agent that can fetch and use live public web data directly inside the editor.
Let’s dive in!
What Is Zed?
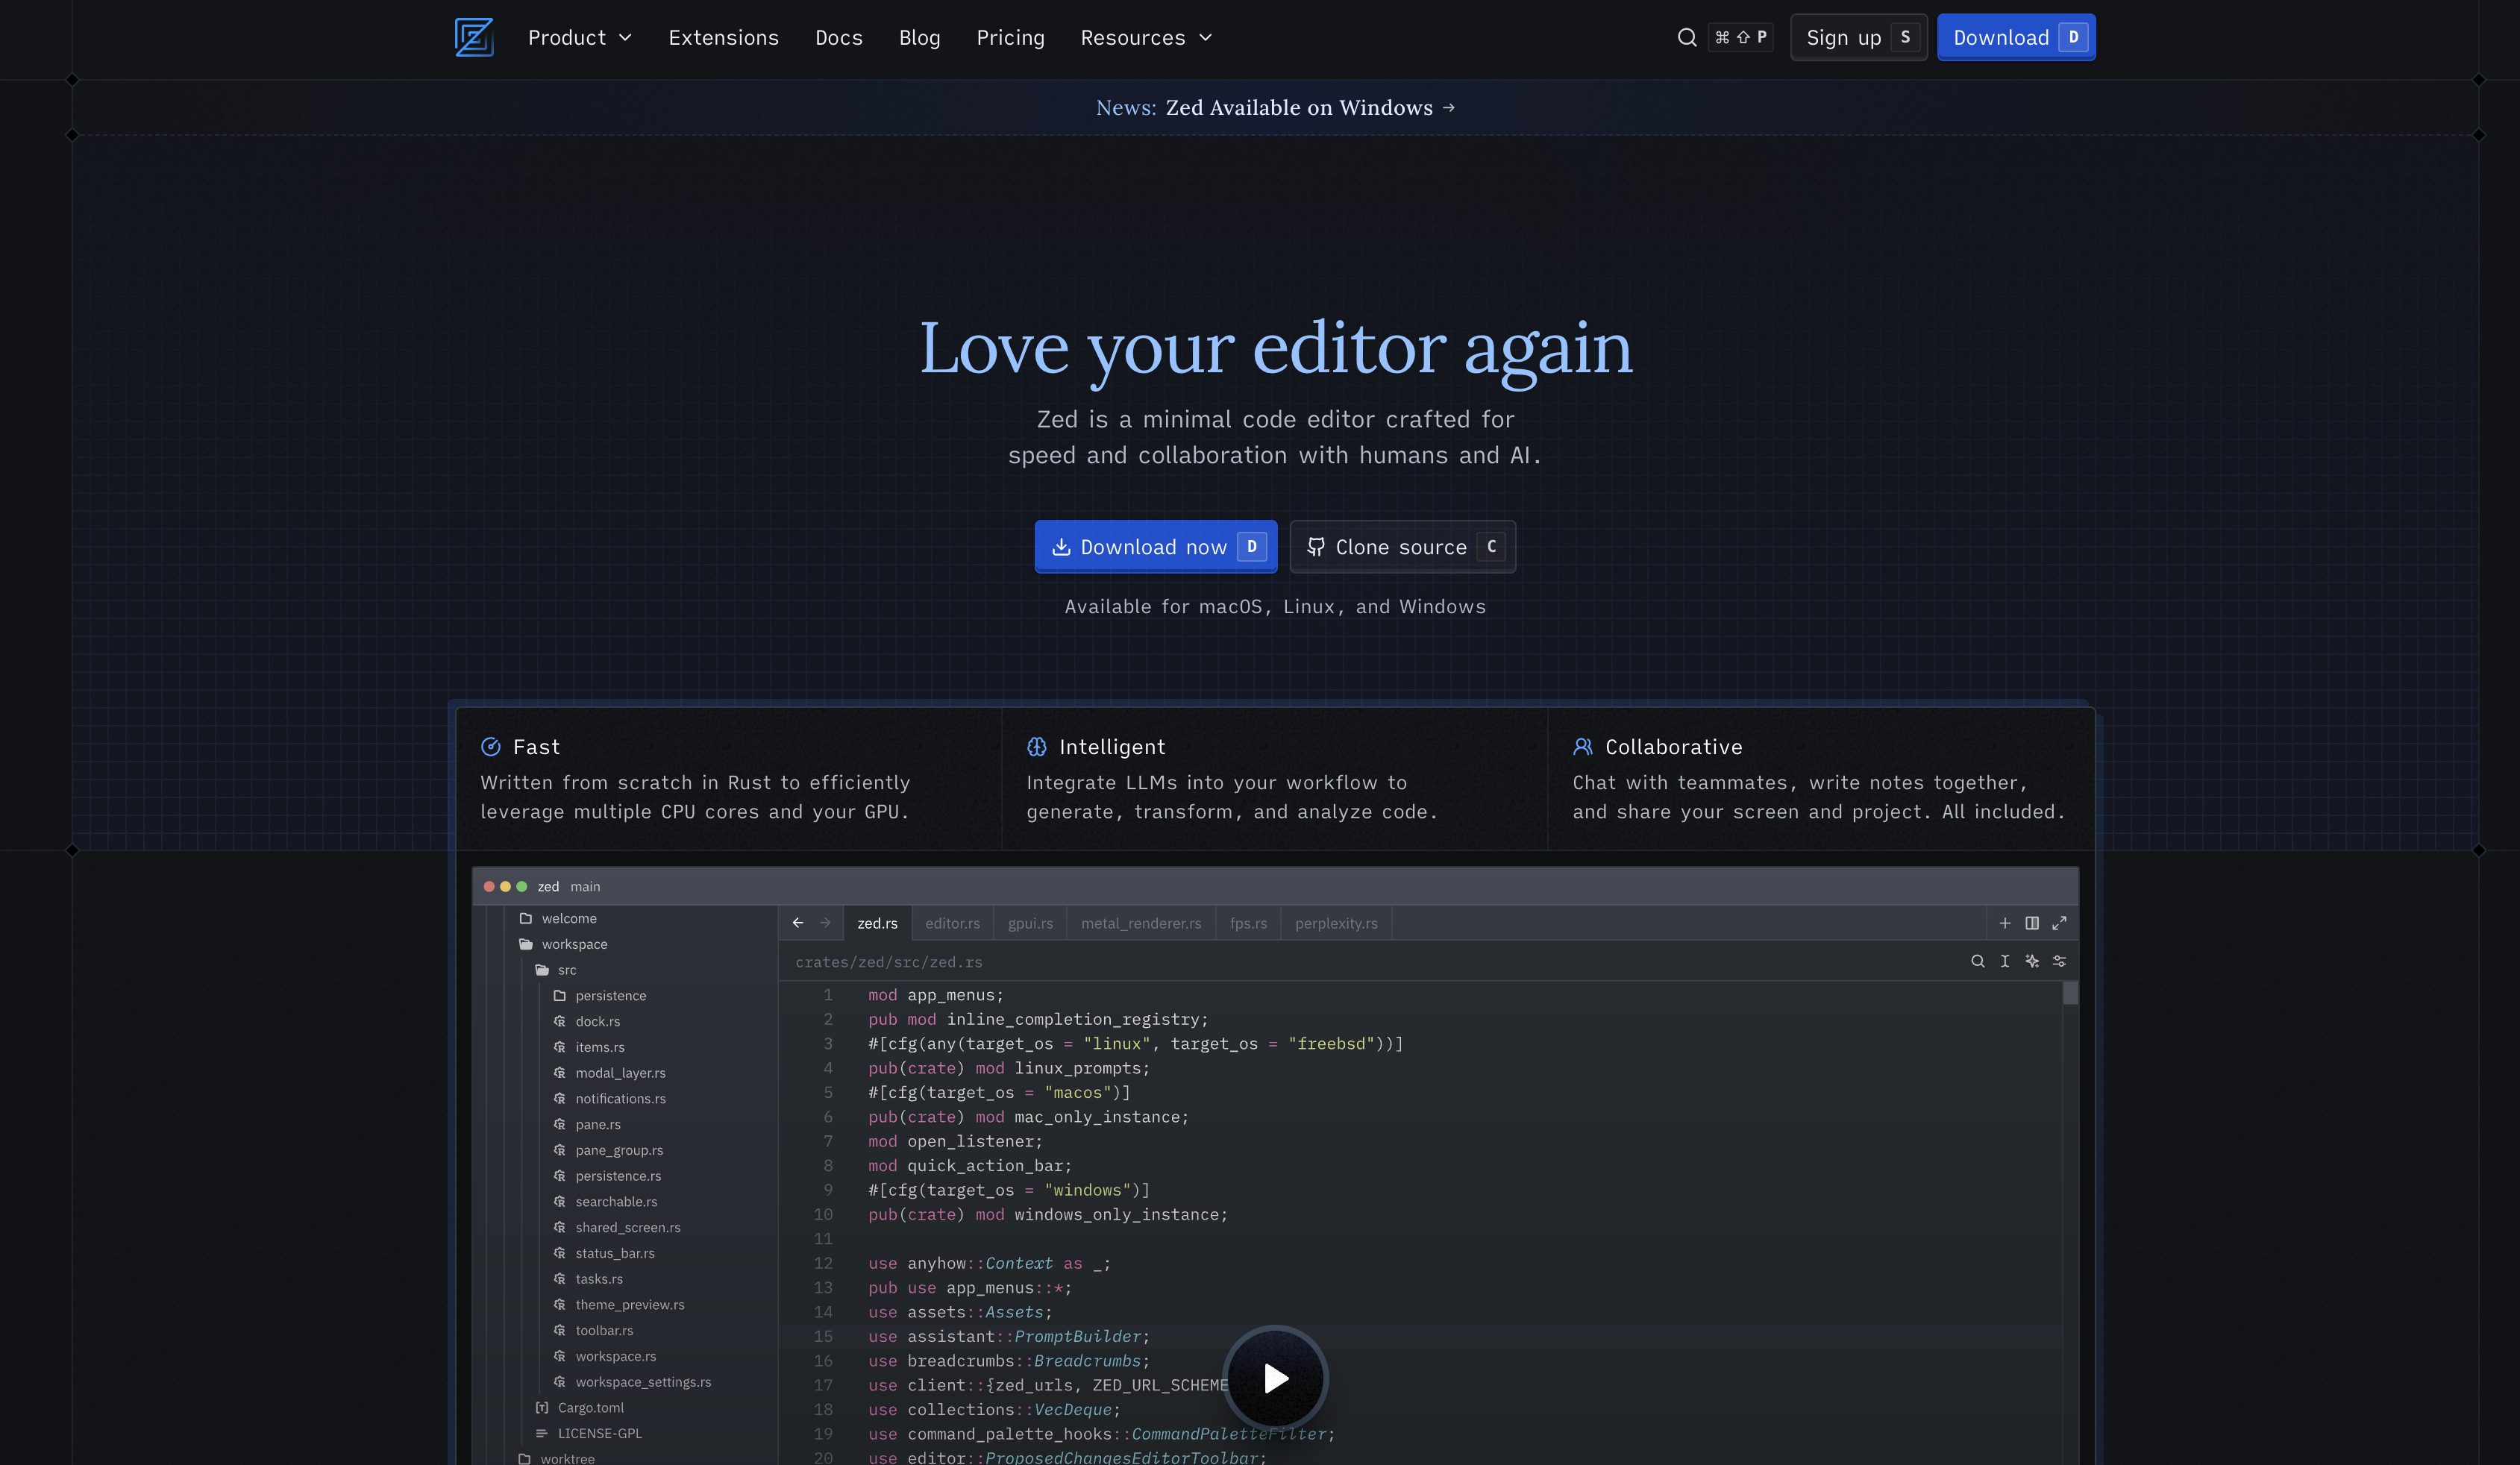
Zed is a modern, high-performance code editor designed for speed, collaboration, and AI-assisted development. It is built from the ground up with a focus on responsiveness and low latency, aiming to make coding feel immediate and fluid even on large codebases.
Zed is written entirely in Rust and is architected to efficiently utilize multiple CPU cores and GPU acceleration. This design choice allows Zed to deliver fast startup times, smooth UI interactions, and minimal typing latency, which are core aspects of its developer experience.
Zed is available on macOS, Linux, and Windows, offering a consistent native experience across platforms.
Out of the box, Zed includes a wide range of core developer features, including:
- Native Git support for staging, committing, pulling, pushing, and viewing diffs.
- Debugging support built on the Debug Adapter Protocol (DAP).
- Language Server Protocol (LSP) support for multiple programming languages.
- Multibuffer editing for composing and editing content from different files in a single view.
- Built-in collaboration features such as shared editing, chat, and screen sharing.
- Vim-style modal editing for developers who prefer a modal workflow.
Why Supercharge Zed with Bright Data Web MCP
No matter which AI model you use inside Zed, it operates with a key limitation: LLMs do not have live access to the web. Their responses are based on training data that represents a snapshot in time, which can quickly become outdated.
This limitation becomes clear when working with evolving documentation, tools, or frameworks. An AI assistant inside an editor cannot verify current information, browse websites, or extract real content on its own.
Now, imagine extending Zed’s AI agent with the ability to:
- Read live documentation pages
- Pull in up-to-date guides and references
- Browse and extract content from real websites
These capabilities are unlocked by connecting Zed to Bright Data Web MCP. Bright Data’s Web MCP exposes over 60+ AI-ready tools, powered by Bright Data’s AI infrastructure, enabling real-time web interaction and data retrieval for AI agents.
The two most commonly used tools, also available in the free tier, are:
| Tool | Description |
|---|---|
scrape_as_markdown |
Extracts content from a webpage and returns clean Markdown, handling bot protection and CAPTCHAs. |
search_engine |
Retrieves search results from Google, Bing, or Yandex in JSON or Markdown format. |
Beyond the core tools, Web MCP includes many advanced options for browser interaction and structured data extraction. The free tier provides access to basic tools, while enabling Pro mode unlocks the full set for more advanced use cases.
By connecting Bright Data Web MCP to Zed, the AI agent can work with live web content instead of static knowledge, resulting in more accurate and reliable assistance directly inside the editor.
How to Integrate Bright Data Web MCP with Zed
In this section, you will:
- Configure Bright Data Web MCP as an MCP server inside Zed
- Authenticate the MCP server using a Bright Data API token
- Enable Zed’s AI agent to access live web content through MCP
- Verify that the integration is working correctly
Follow the steps below to get started!
Prerequisites
Before getting started, make sure you have the following:
- A supported operating system (macOS, Linux, or Windows)
- Zed installed and running
- Node.js installed (latest LTS recommended)
- A Bright Data account with an API token
You do not need to set up Bright Data in advance. The required configuration will be covered step by step in the following sections.
While not required, having some prior understanding can be helpful, such as:
- A basic idea of how Model Context Protocol (MCP) works
- General familiarity with Bright Data Web MCP and its available tools
Step #1: Install and Launch Zed
Download Zed from the official website and install it for your operating system (macOS, Linux, or Windows).
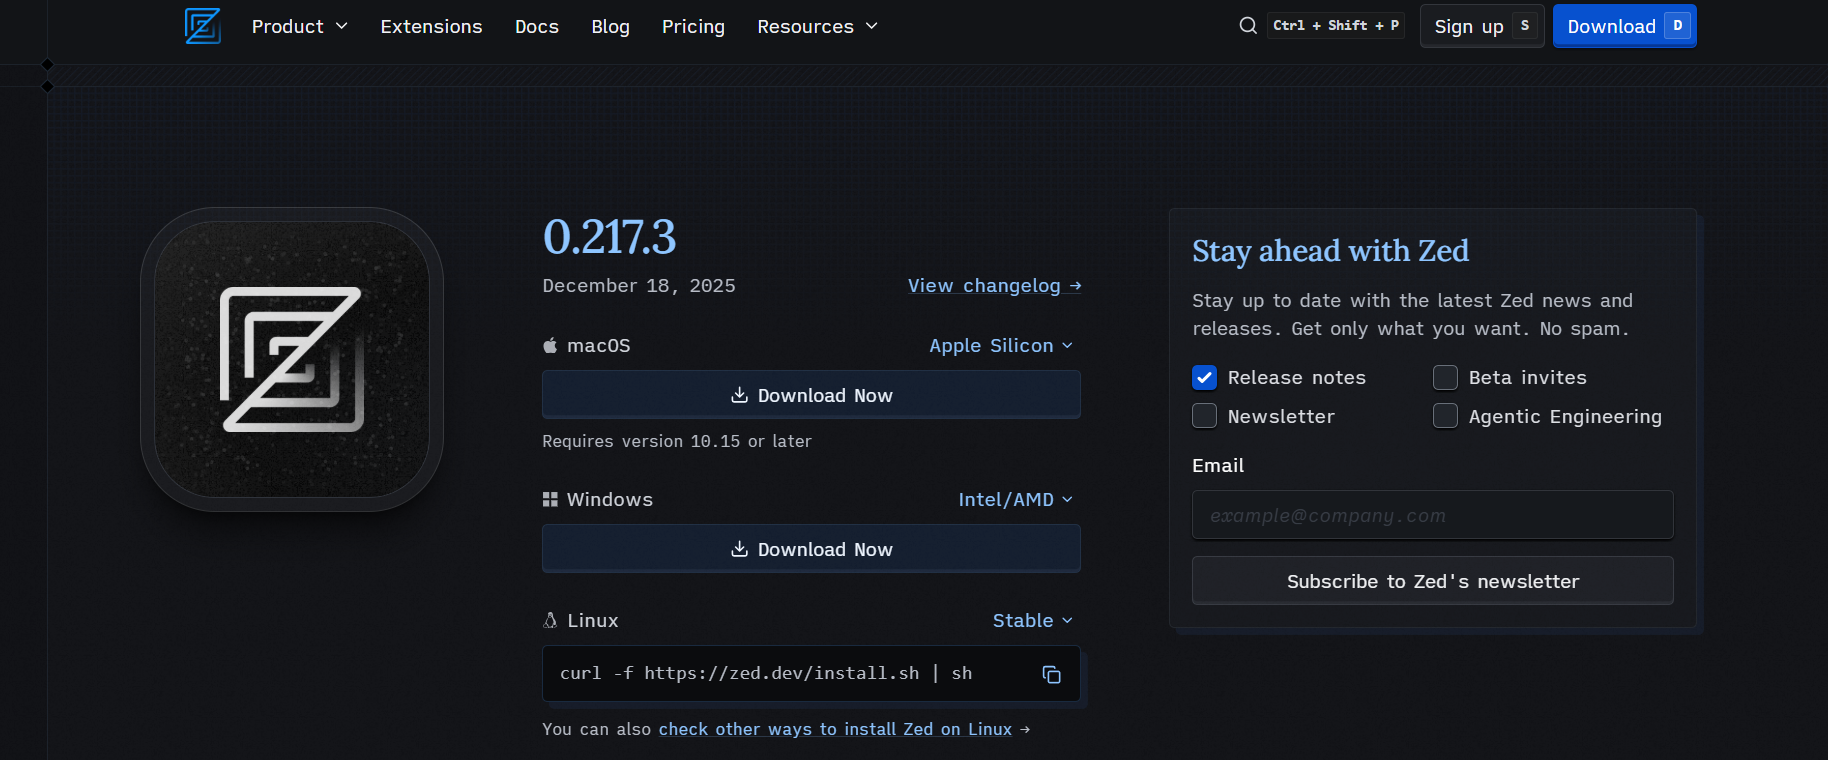
Once installed, open Zed from your applications menu and ensure the editor launches without errors.
You should see the main editor interface and be able to open the Settings panel. If Zed starts successfully, you are ready to proceed to the next step.
Step 2: Enable AI and Agentic Editing in Zed
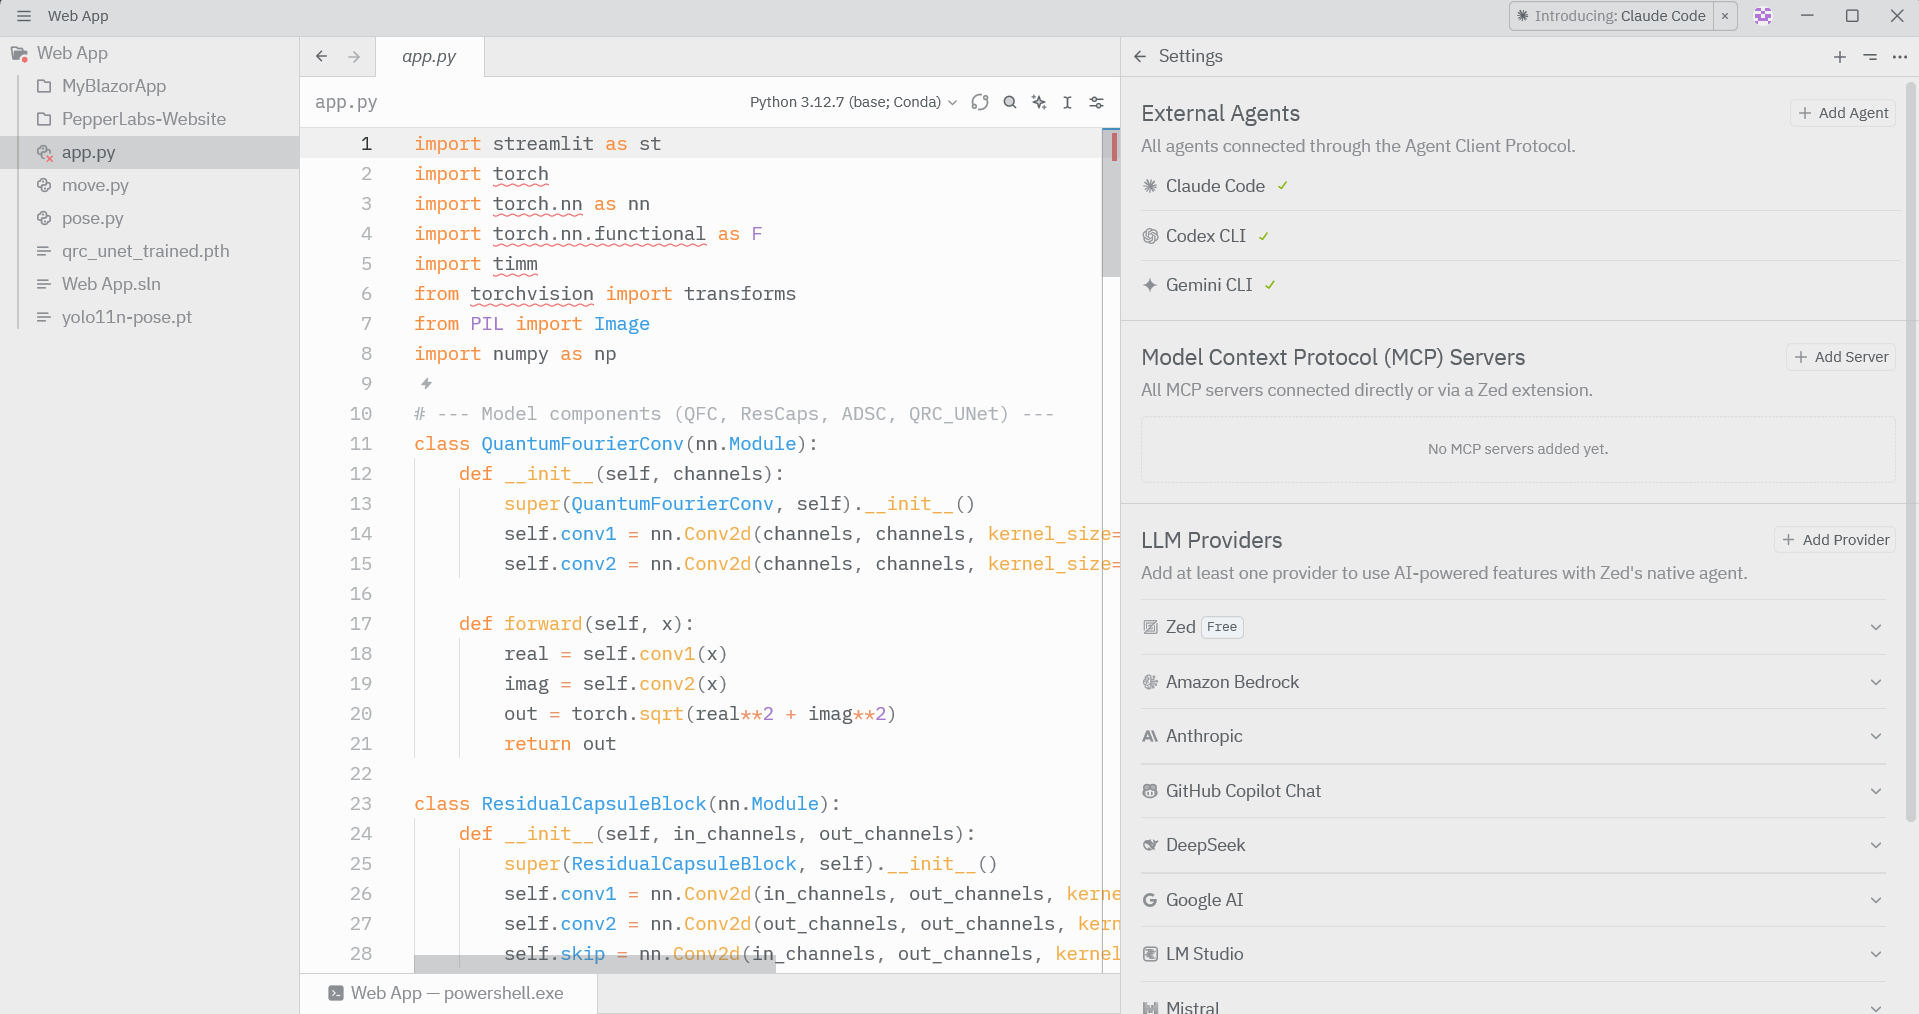
Open Settings in Zed and navigate to the LLM Providers section.
Sign in to Zed AI or configure any supported provider such as Anthropic, Google AI, or Amazon Bedrock to enable AI-powered features.
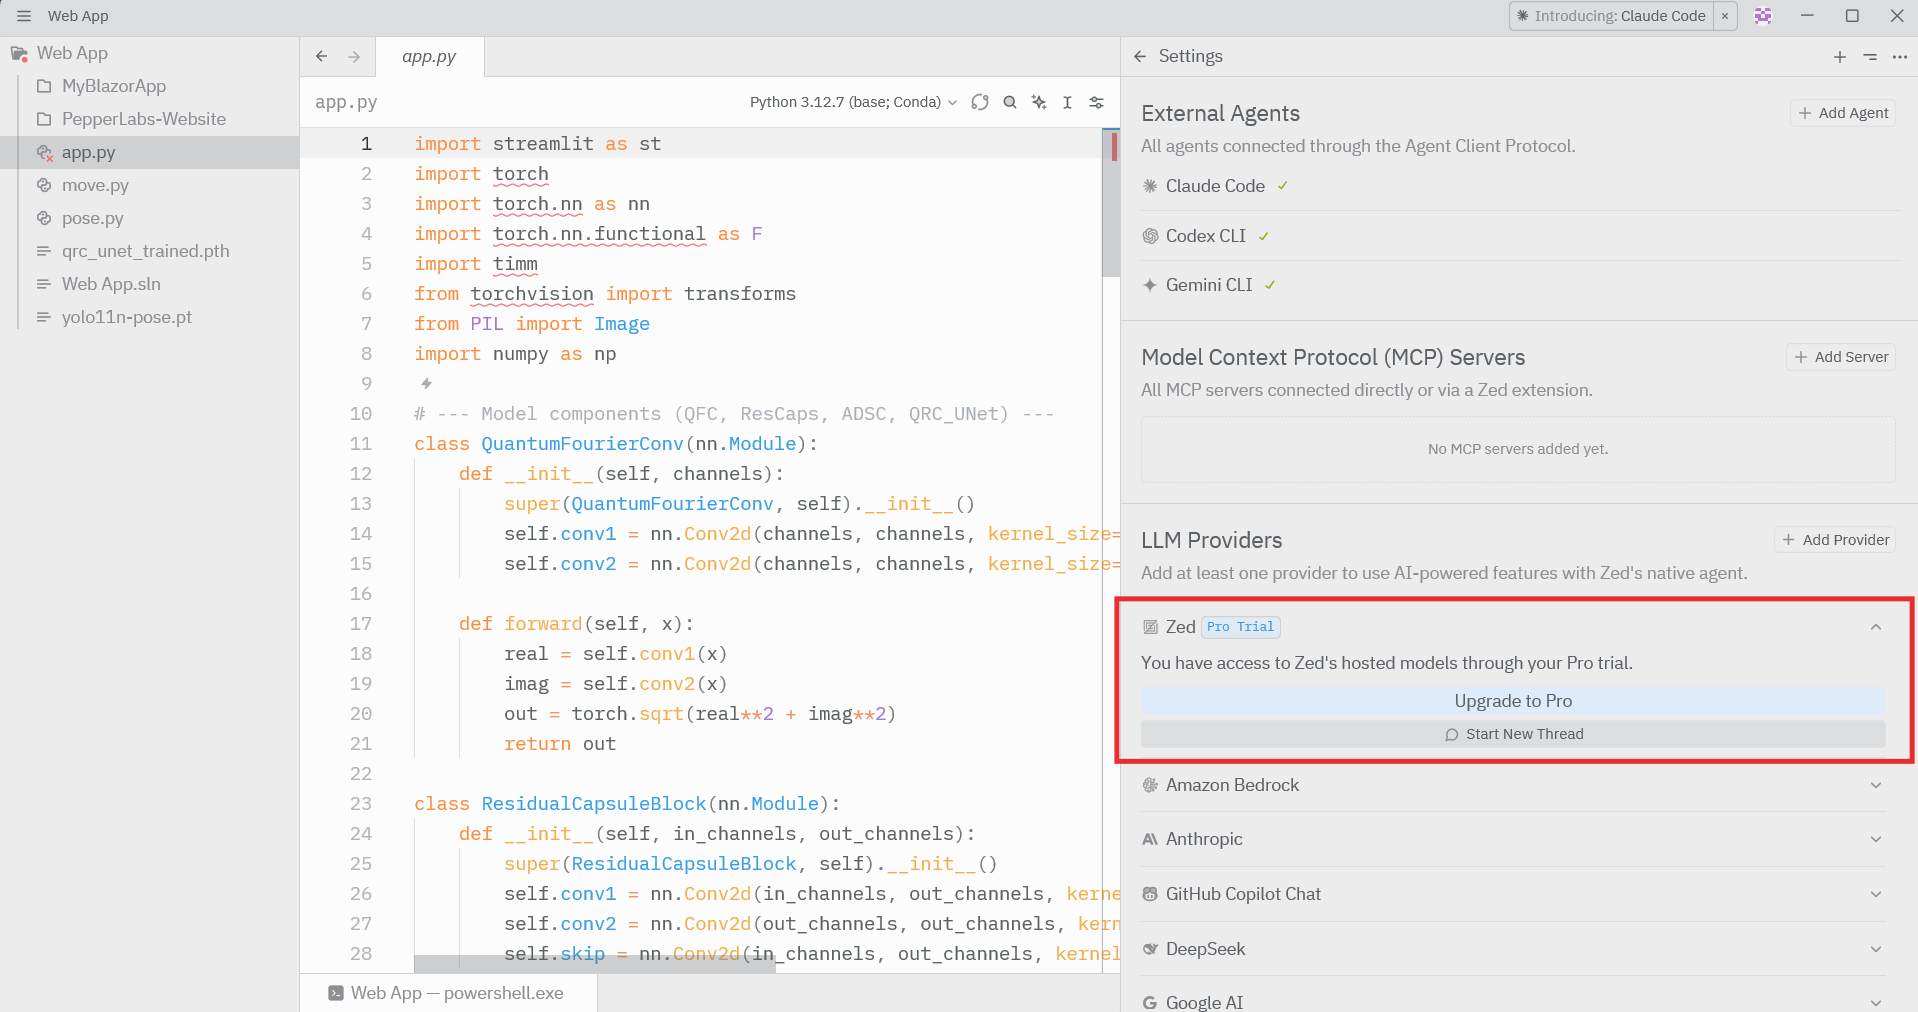
Once a provider is active, return to the editor and open the AI or chat panel to confirm that prompts are accepted and responses are generated. If the AI responds inside the editor, agentic editing is successfully enabled.
Step #3: Set Up Bright Data Web MCP Locally
To enable real-time web access for Zed’s AI agent, you need to set up Bright Data Web MCP on your local machine. This MCP server acts as the bridge between the AI agent and live web data.
Start by creating a Bright Data account from the Bright Data dashboard. If you already have an account, simply log in.
For a quick setup, open the “MCP” page in your account and follow the instructions:
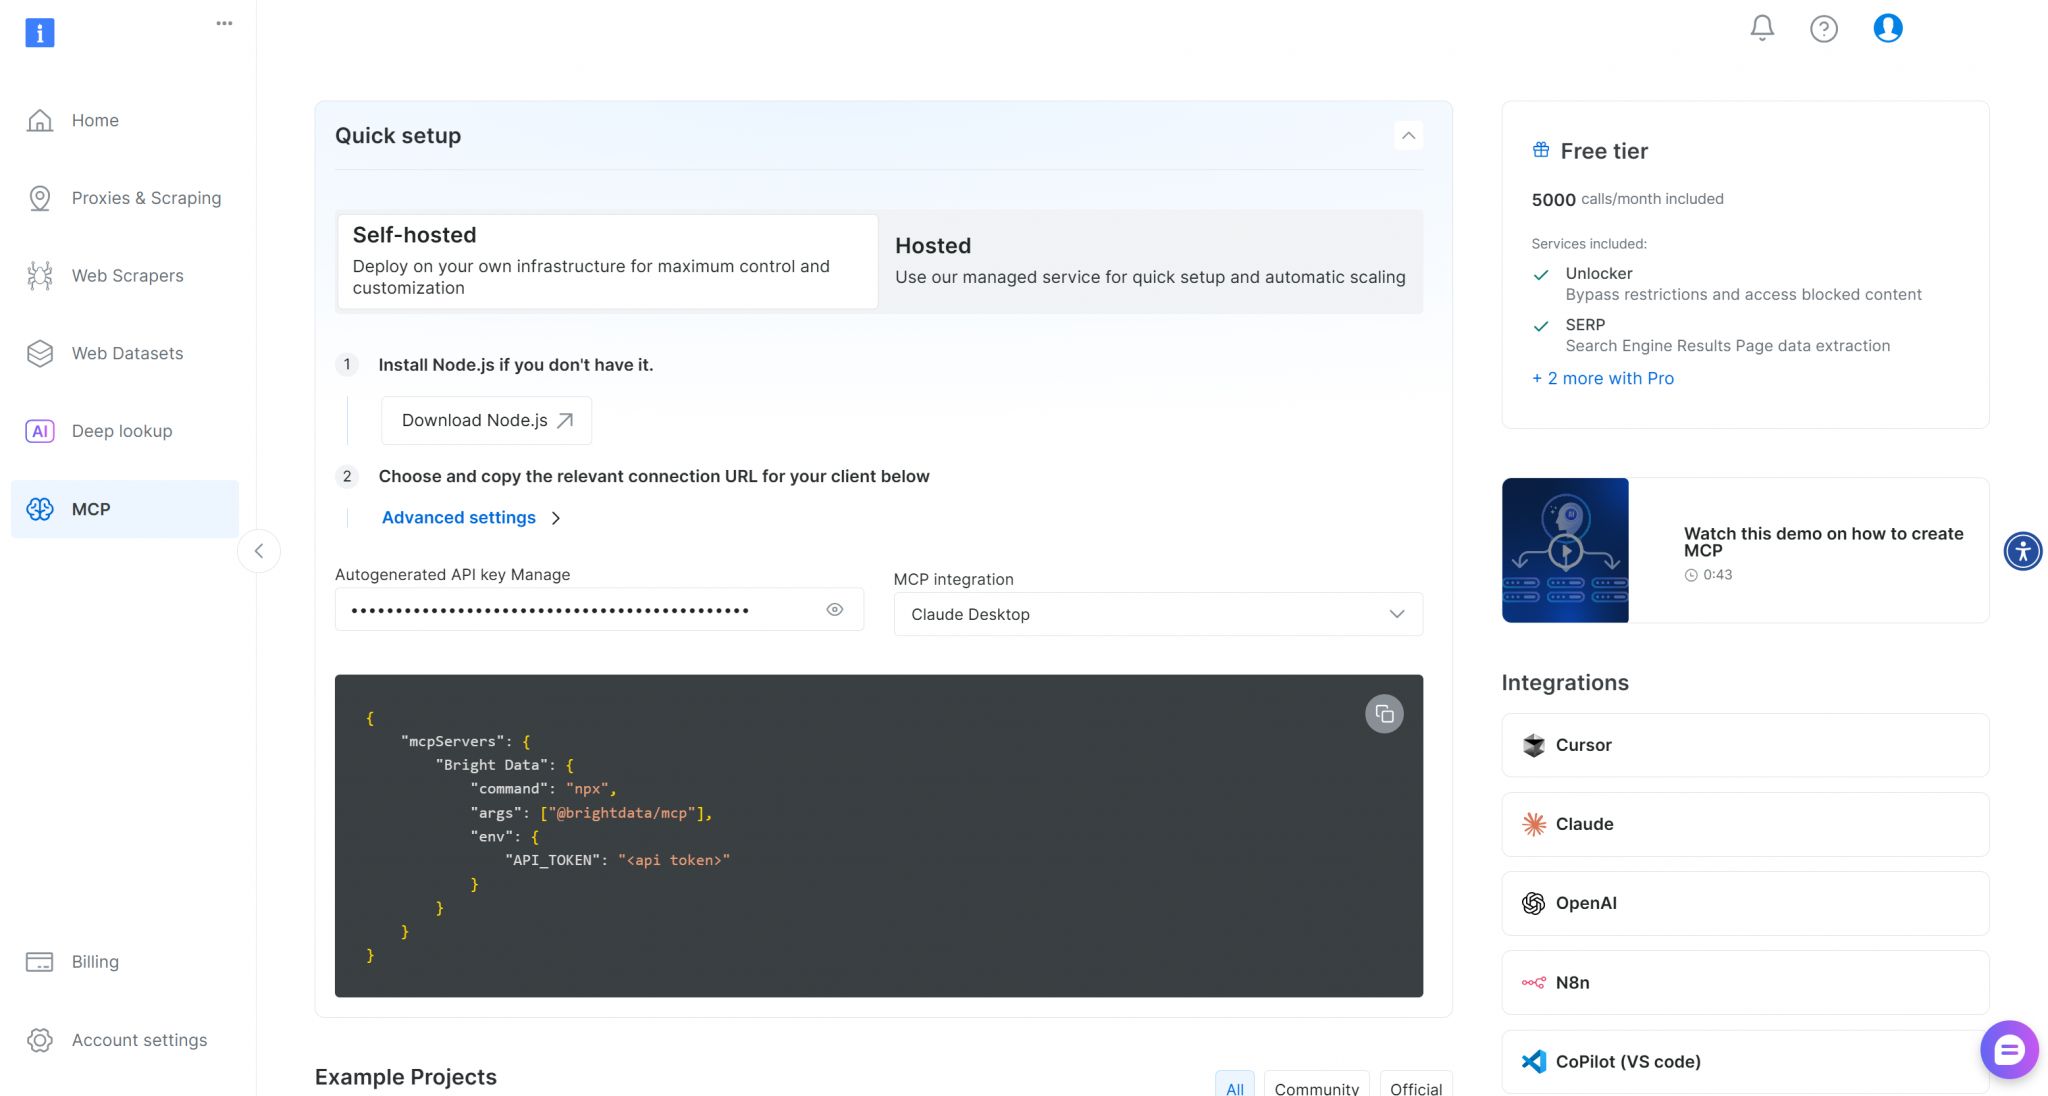
Otherwise, follow the below steps:
From the Bright Data dashboard, generate an API token and keep it secure. This token is used by the Web MCP server to authenticate requests and access Bright Data’s web tools.
For this tutorial, the API token is the only credential you need.
Bright Data Web MCP runs as a local server using Node.js. Install it globally by running the following command in your terminal:
npm install -g @brightdata/mcpThis installs the Web MCP package that Zed will later connect to.
Start the Web MCP server by running:
API_TOKEN="YOUR_BRIGHT_DATA_API_TOKEN" npx -y @brightdata/mcpReplace YOUR_BRIGHT_DATA_API_TOKEN with your actual API token.

If the server starts successfully, you should see log messages indicating that the MCP server is running and ready to accept requests.
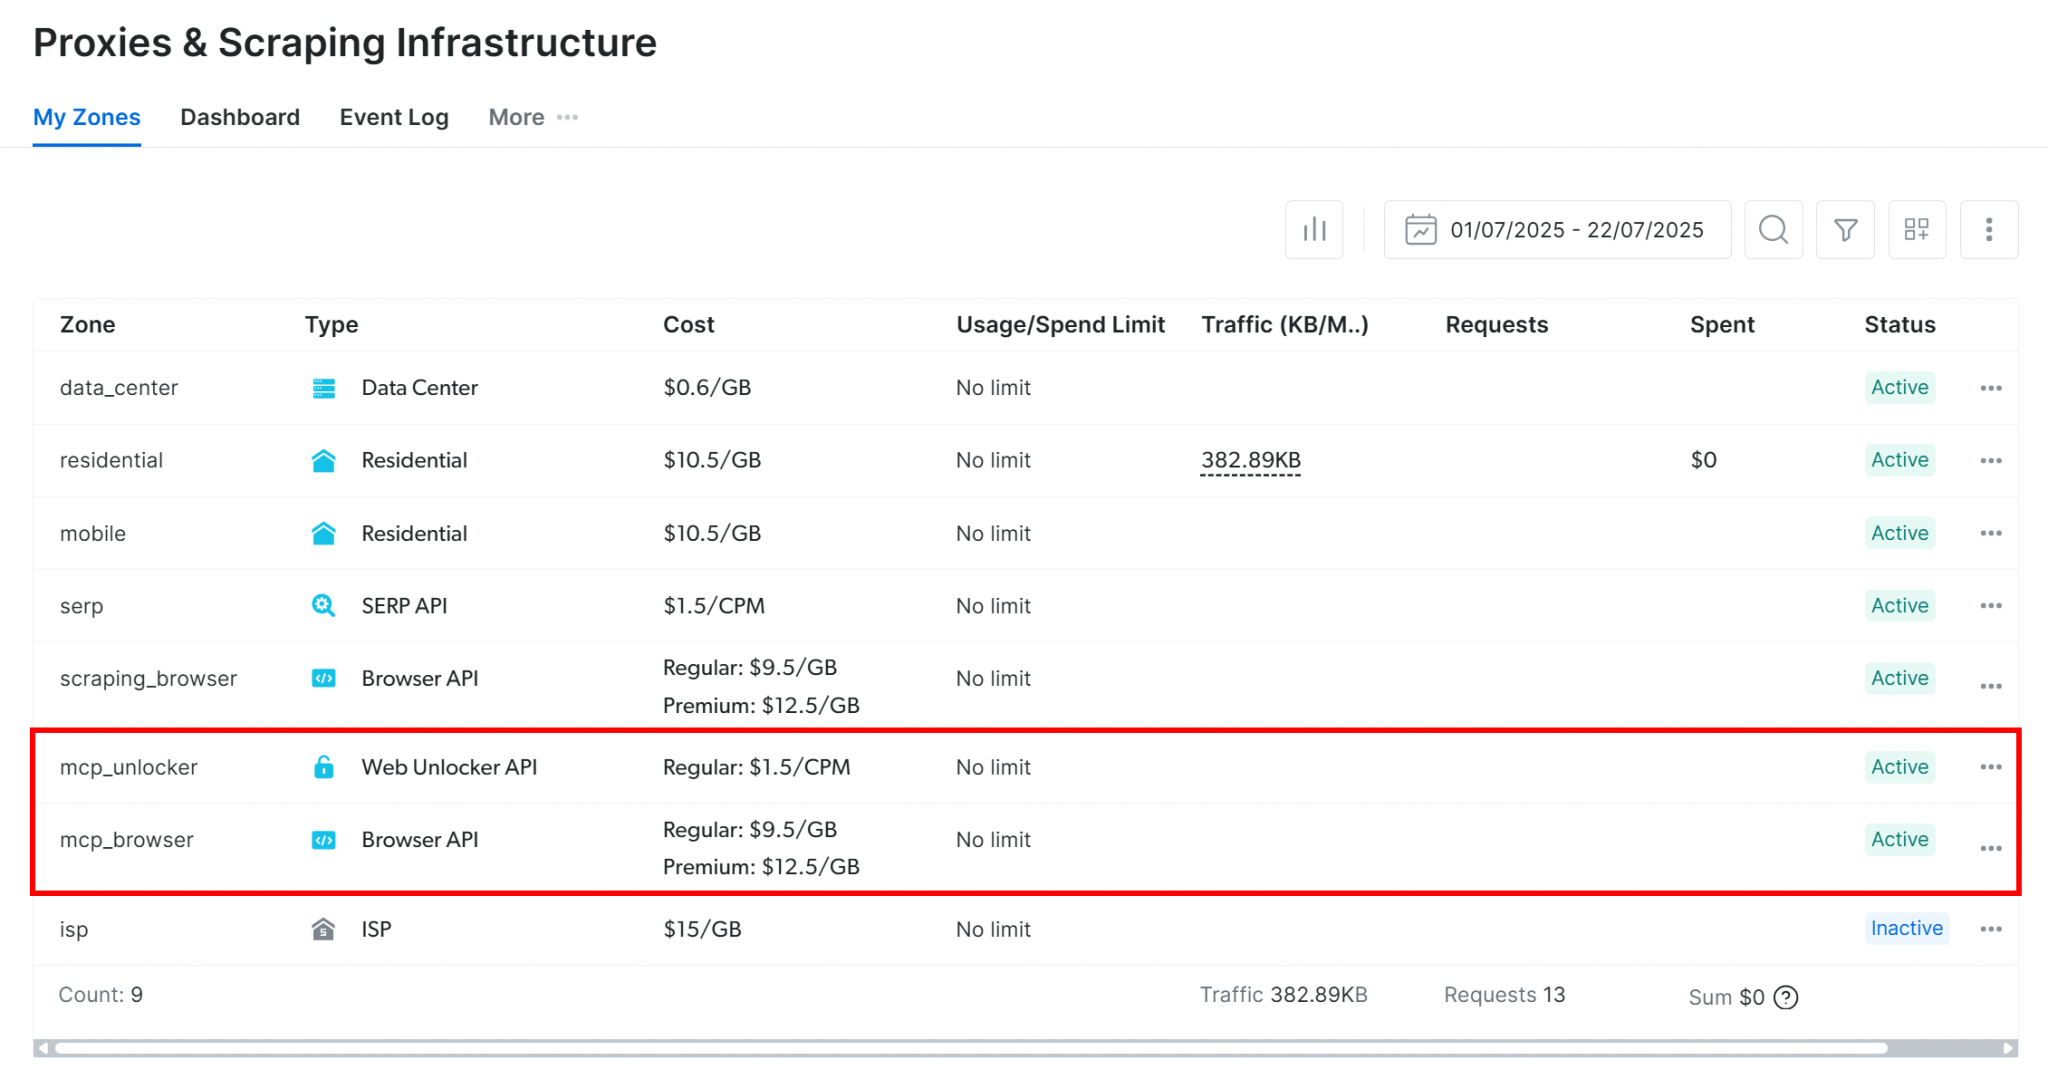
On its first run, the Bright Data Web MCP server automatically creates two required zones in your Bright Data account: one for Web Unlocker and one for the Browser API. These zones are used internally by Web MCP to support its available tools.
You can verify their creation by visiting the Proxies & Scraping Infrastructure section of the Bright Data dashboard. If your API token does not have admin access, the zones may need to be created manually and referenced through environment variables.
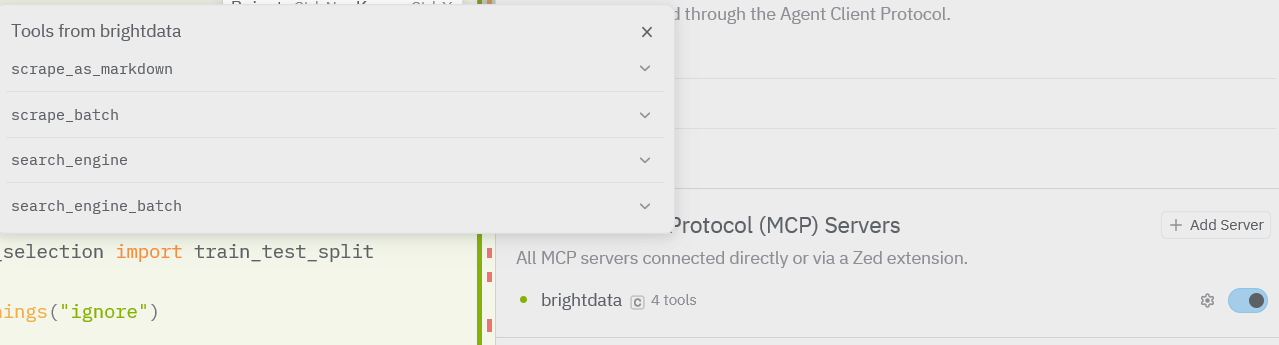
By default, Web MCP exposes only the search_engine and scrape_as_markdown tools, which are available in the free tier. Enabling Pro mode unlocks the full set of tools, including advanced browser automation, and may incur additional charges.
To access advanced capabilities such as browser automation and structured data extraction, enable Pro mode by setting PRO_MODE=true before starting the Web MCP server.
API_TOKEN="<YOUR_BRIGHT_DATA_API>" PRO_MODE="true" npx -y @brightdata/mcpOnce you confirm the server is running correctly, stop it for now. Zed will be configured to start and connect to the Web MCP server automatically in the next step.
Step #4: Configure Bright Data Web MCP in Zed
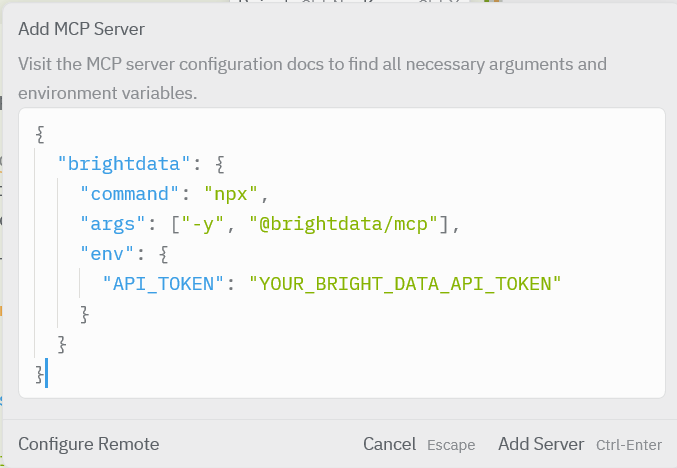
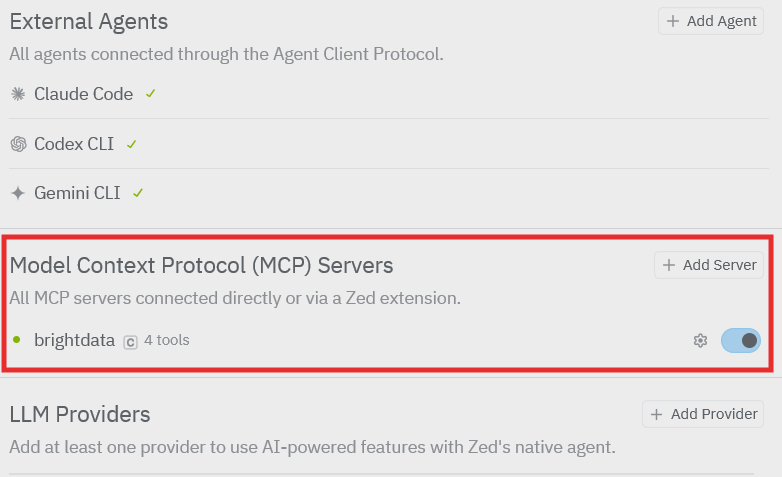
Open Settings in Zed and navigate to the Model Context Protocol (MCP) Servers section. Click Add Server to register a new local MCP server.

When prompted, define the Bright Data MCP server by setting the command to run the Web MCP package (npx @brightdata/mcp) and add the required environment variable for authentication (API_TOKEN). Save the configuration to make the MCP server available to Zed’s AI agent.
Once added, Bright Data will appear under the MCP Servers list, indicating that Zed is ready to connect to the Web MCP during AI-assisted workflows.
With the MCP server enabled, Zed’s AI agent is now ready to use Bright Data’s web tools during AI-assisted workflows inside the editor.
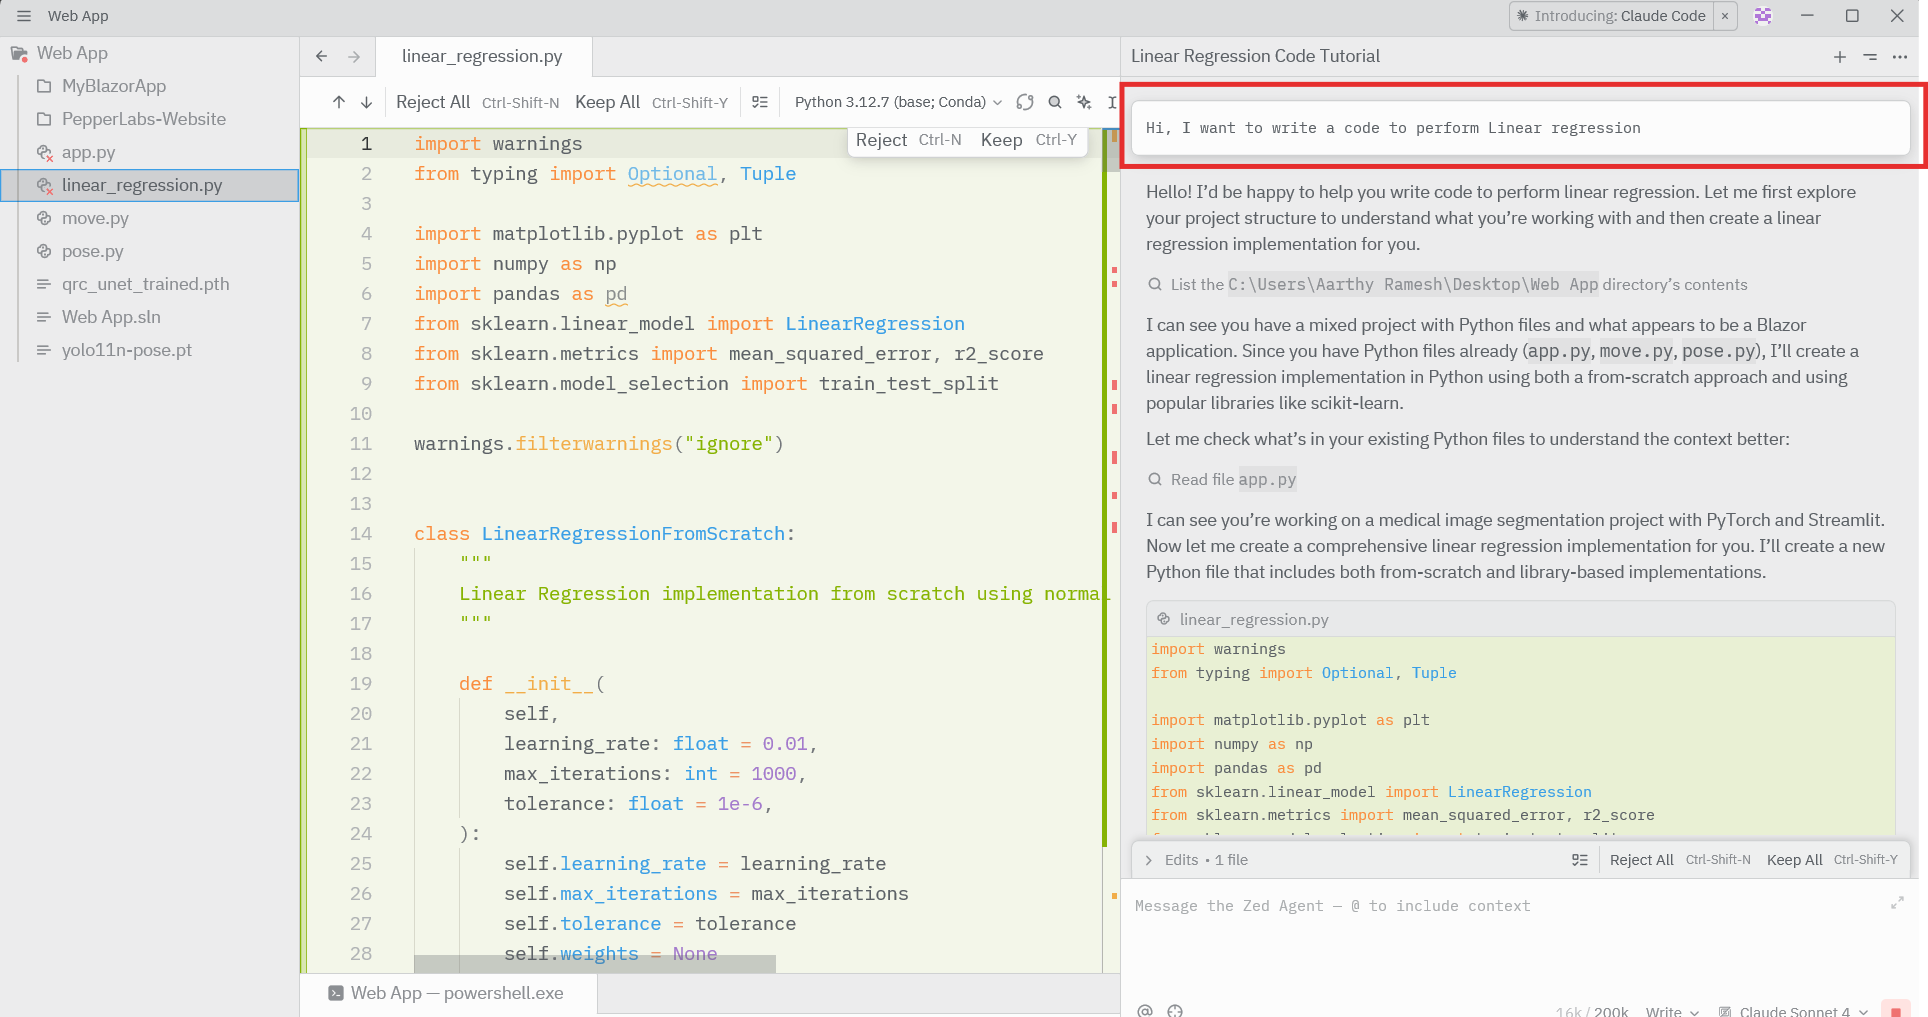
Step #6: Run a Real-World Task in Zed
In this step, you will use Zed’s AI agent together with Bright Data Web MCP to fetch live web content, store it locally, and generate a small script based on real data.
Open Zed’s AI or chat panel (the same one you used to test AI responses earlier)
- This is where you will type your prompt
- You are now talking to Zed’s AI agent, not writing code.
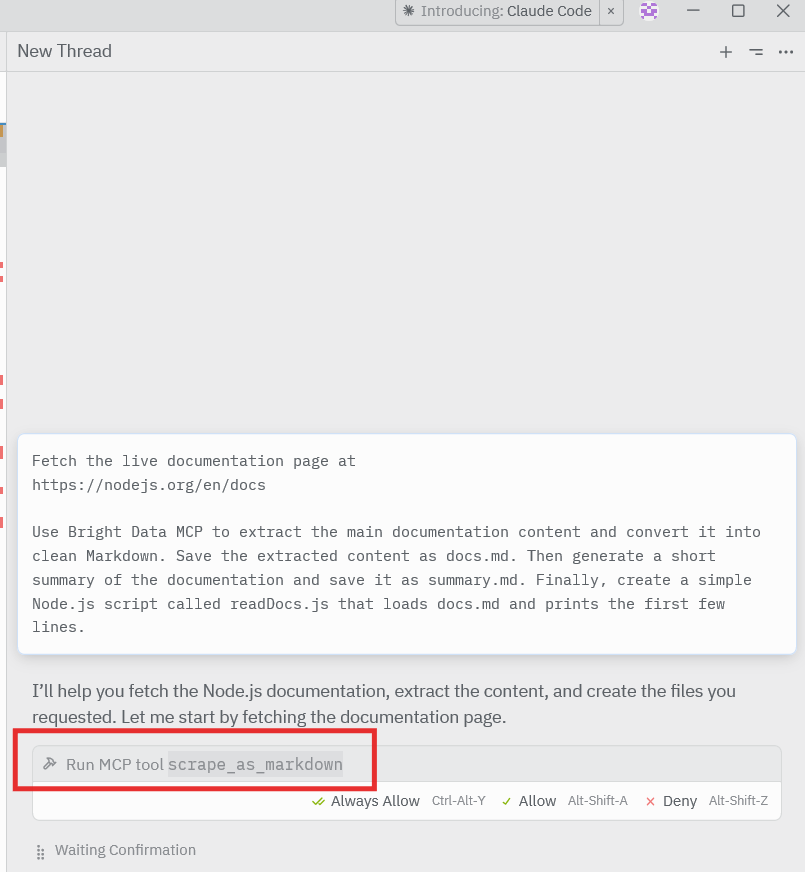
Copy and paste exactly this prompt into Zed:
Fetch the live documentation page at
https://nodejs.org/en/docs

Use Bright Data MCP to extract the main documentation content and convert it into clean Markdown. Save the extracted content as docs.md. Then generate a short summary of the documentation and save it as summary.md. Finally, create a simple Node.js script called readDocs.js that loads docs.md and prints the first few lines.
After submitting the prompt, watch what happens:
- The AI agent explains or plans the steps it will take
- It identifies that web access is required
- It selects a Bright Data MCP tool (typically scrape_as_markdown)
- Zed may ask you to approve the tool execution
After the task completes, check that the generated files are present in your project directory. Open the Markdown files to confirm they contain content extracted from the live documentation page.
Running the generated script should print data from the scraped content, verifying that the workflow executed successfully.

Conclusion
In this tutorial, you learned how to integrate Zed with Bright Data Web MCP to enable real-time web interaction inside an AI-native editor. By combining Zed’s agentic editing model with Bright Data’s web tools, you created a workflow where AI can fetch live content, store it locally, and generate usable code and files based on real data.
Bright Data’s Web MCP opens the door to building more reliable and context-aware AI-assisted development workflows by providing access to structured, up-to-date web data. This approach helps reduce reliance on static knowledge and improves the accuracy of AI-generated outputs.
To explore more advanced agentic use cases, take a look at the broader Bright Data platform and its AI-ready web data solutions.
You can start with a free Bright Data account and experiment further with Web MCP to power your own AI-driven development workflows.

Technical Writer
Arindam Majumder is a developer advocate, YouTuber, and technical writer who simplifies LLMs, agent workflows, and AI content for 5,000+ followers.


