
In this article, you will learn:
- What LibreChat is and what makes it special.
- Why integrating Bright Data’s Web MCP into LibreChat can make a real difference.
- How to connect Web MCP to LibreChat and use it with any supported AI model.
Let’s dive in!
What Is LibreChat?
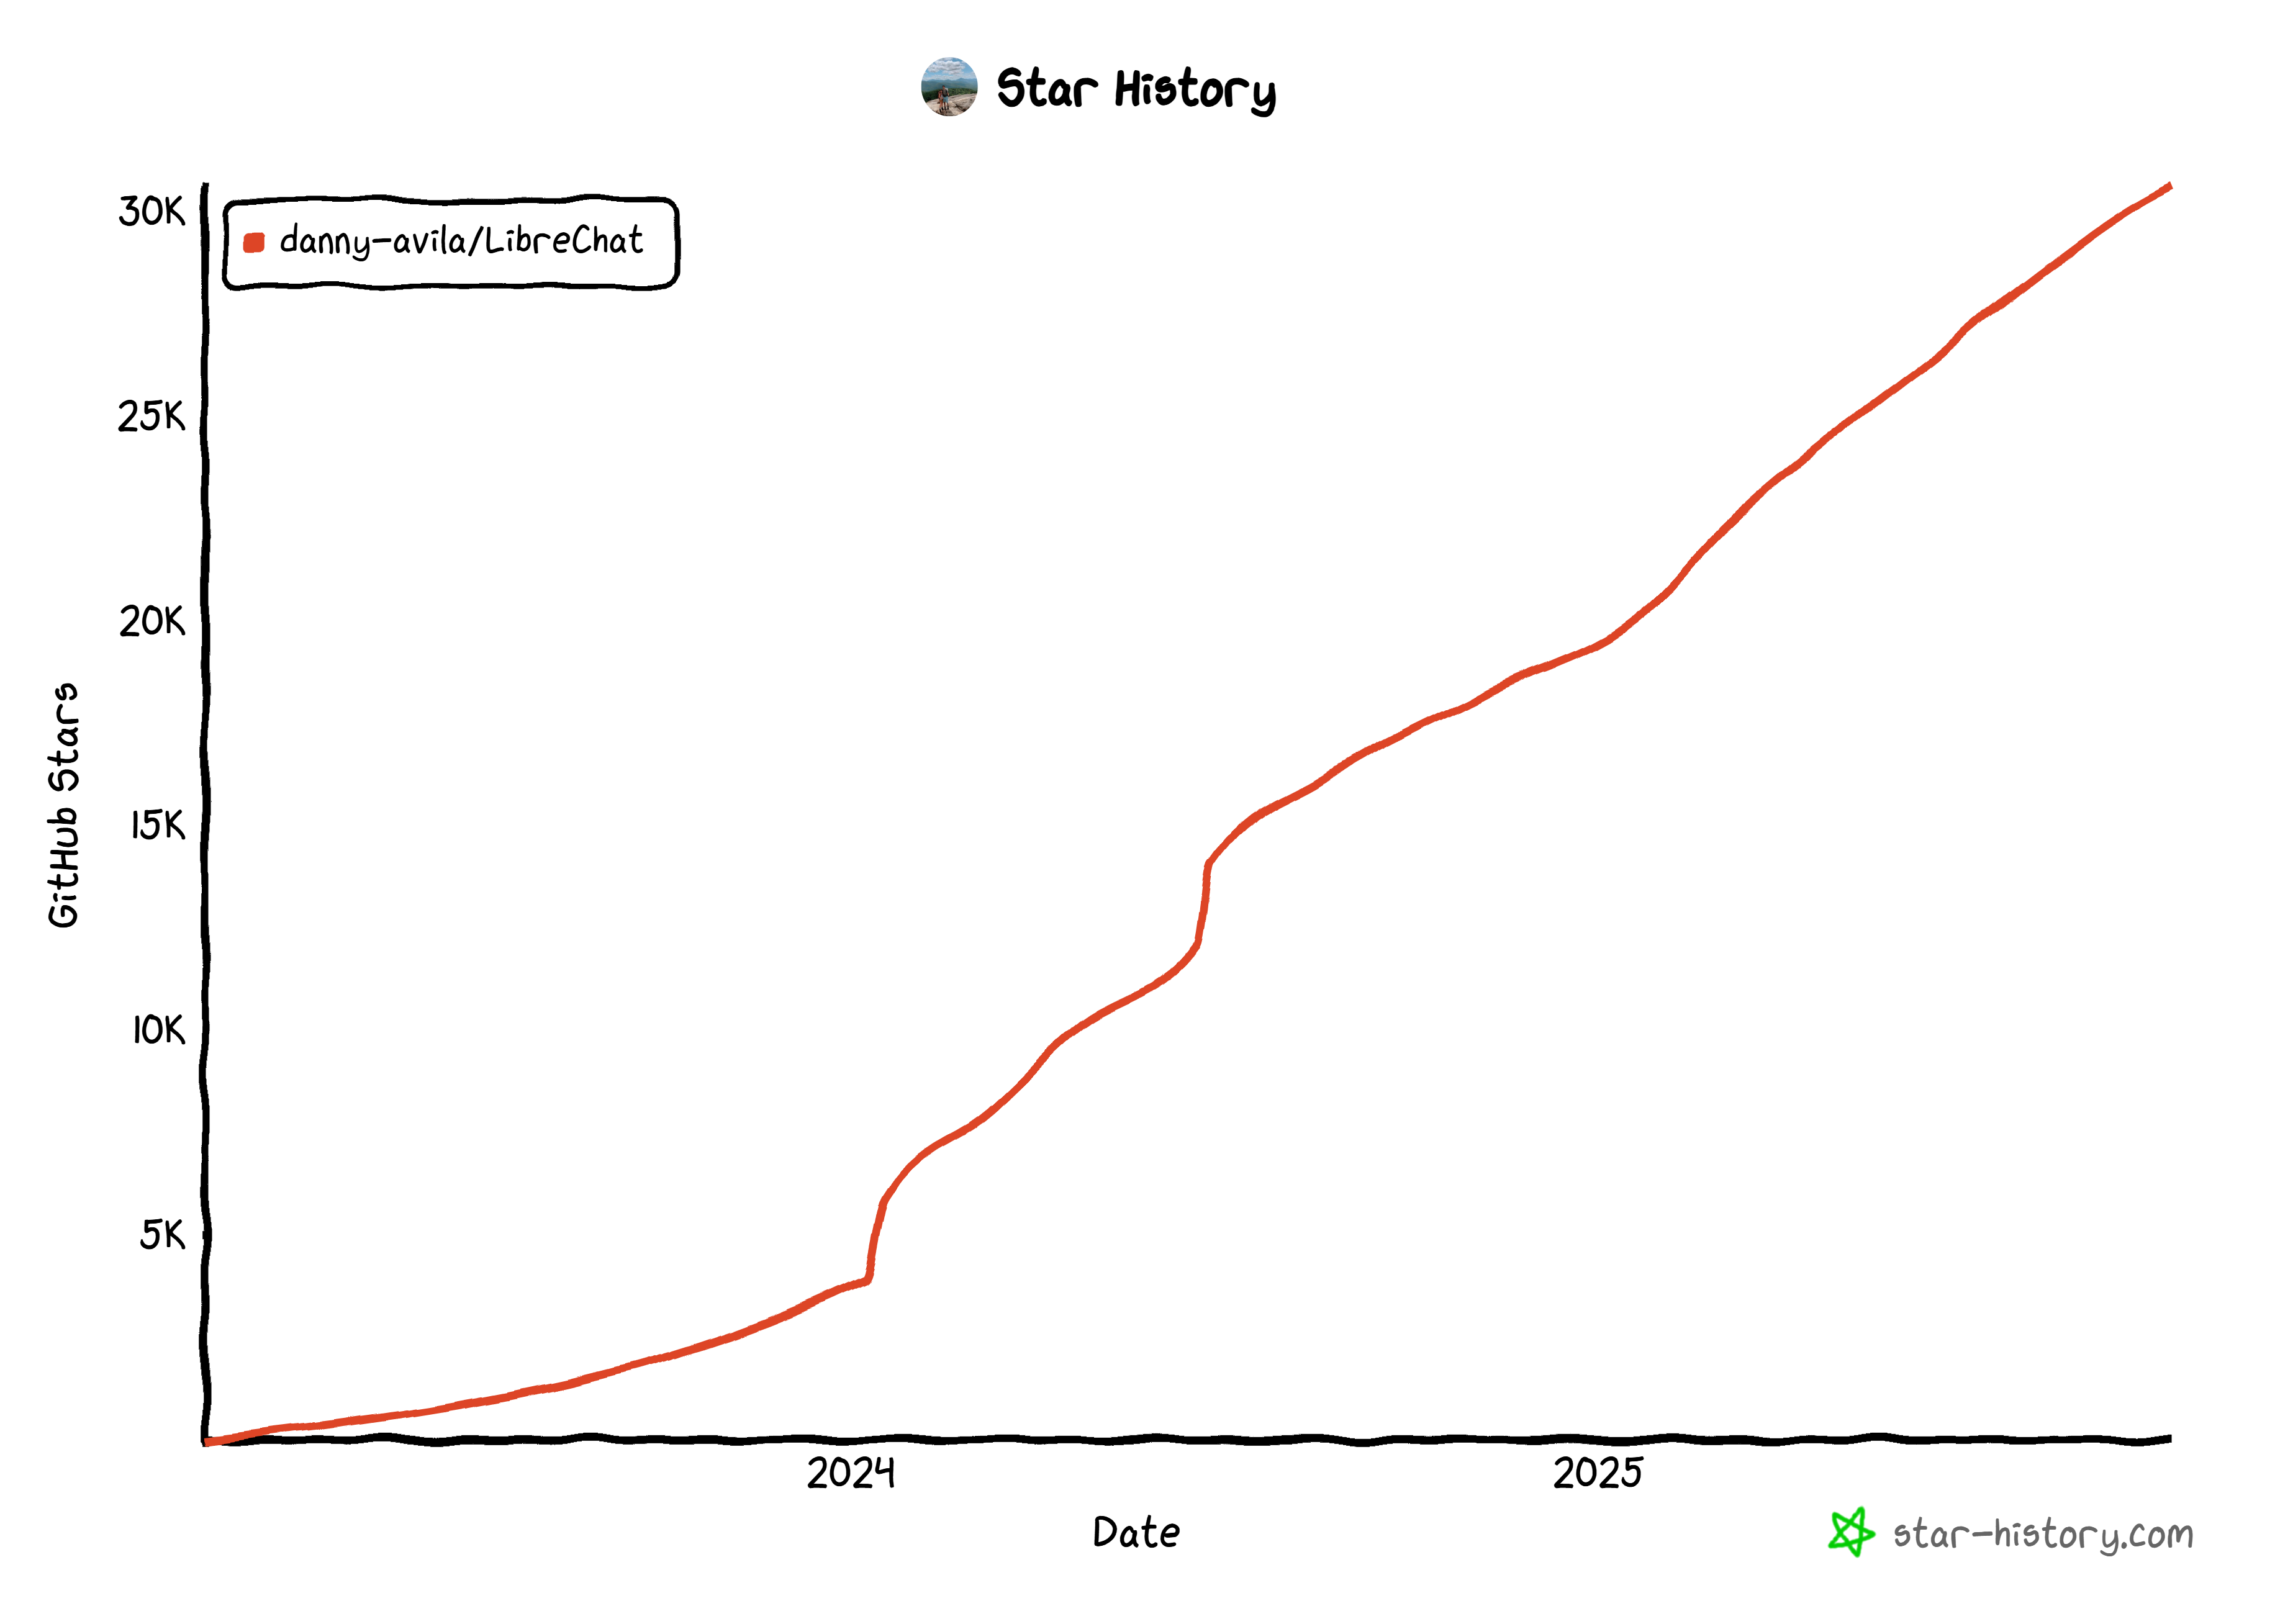
LibreChat is an open-source, web-based chat application with over 30k GitHub stars (and counting!), developed by Danny Aviles.
This application serves as a centralized interface for interacting with multiple AI models, acting as an all-in-one open-source AI hub.
LibreChat stands out for combining a ChatGPT-inspired interface. It supports nearly every major AI provider, from OpenAI and Anthropic to Google and Ollama, as well as any custom endpoint. From the same UI, it enables multimodal conversations, AI agent building, and comes with security features like authentication and moderation capabilities.
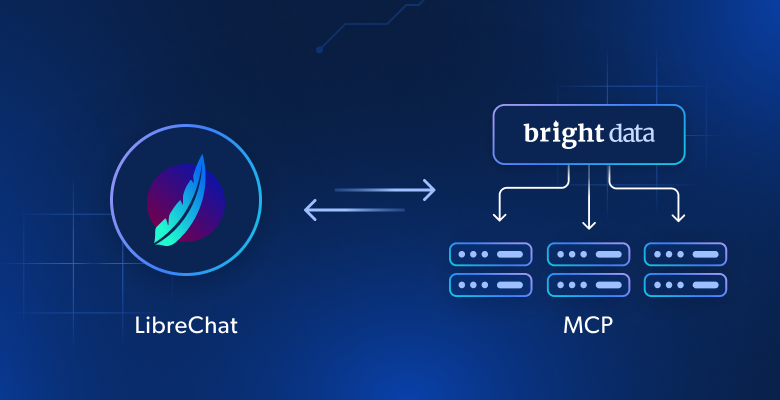
Why Extend AI Models in LibreChat with Bright Data’s Web MCP
LibreChat allows you to connect MCP servers to the application and make their tools available to the AI models. The configuration is done once at the application level, and from that point on, it becomes accessible to any configured LLM model. This makes MCP tool usage truly seamless.
Let’s say you are not satisfied with the output of one LLM. You can simply switch to another with a few clicks, and it will still have access to your MCP server, no extra setup required. This is the power of LibreChat!
Now, which MCP servers should you absolutely consider? The answer is simple: those that help AI models overcome their biggest limitations, which are outdated knowledge and the inability to search or browse the web.
That is exactly what Web MCP, Bright Data’s web MCP server, is built for. Available both as an open-source package and a remote server, it lets AI models retrieve live web data and interact with web pages like humans.
More specifically, Web MCP provides over 60 AI-ready tools powered by Bright Data’s infrastructure for web interaction and data collection.
Even on the free tier, you gain access to two game-changing tools:
| Tool | Description |
|---|---|
search_engine |
Retrieve search results from Google, Bing, or Yandex in JSON or Markdown. |
scrape_as_markdown |
Scrape any webpage into clean Markdown format, bypassing bot detection and CAPTCHA. |
Beyond those two, Web MCP includes tools for cloud-based browser automation and structured data extraction from platforms like YouTube, Amazon, LinkedIn, TikTok, Google Maps, and Yahoo Finance, among many others.
See Web MCP in action with LibreChat!
How to Connect LibreChat to the Web MCP
In this guided section, you will learn how to use Web MCP in LibreChat. This setup delivers an enhanced AI experience, no matter which LLM you configure.
As you are about to experience, the configured AI model will leverage the tools exposed by the MCP server to perform stock analysis. This is just one of the long list of use cases supported by this integration.
Note: The same procedure can also be applied to enable Web MCP tools in LibreChat AI agents.
Follow the instructions below!
Prerequisites
To follow along with this tutorial, make sure you have:
- Git installed locally.
- Docker installed locally.
- An LLM API key from one of the supported providers (here, we will use Gemini, so you will need a Google API key).
- A Bright Data account with an API key.
Do not worry about setting up the Bright Data account right now, as you will be guided through that in the following steps. Knowledge of how MCP works and the tools available in Bright Data Web MCP will also be helpful.
Step #1: Get Started with LibreChat
The easiest way to complete a local setup for LibreChat is by launching it via Docker. Start by cloning the project’s repository with:
git clone https://github.com/danny-avila/LibreChat.gitNow, load the LibreChat/ directory in your favorite IDE, such as Visual Studio Code or IntelliJ IDEA.
In the cloned repository, you will find a .env.example file. This is an example of the environment configuration file required by LibreChat. Copy it and paste it as .env:
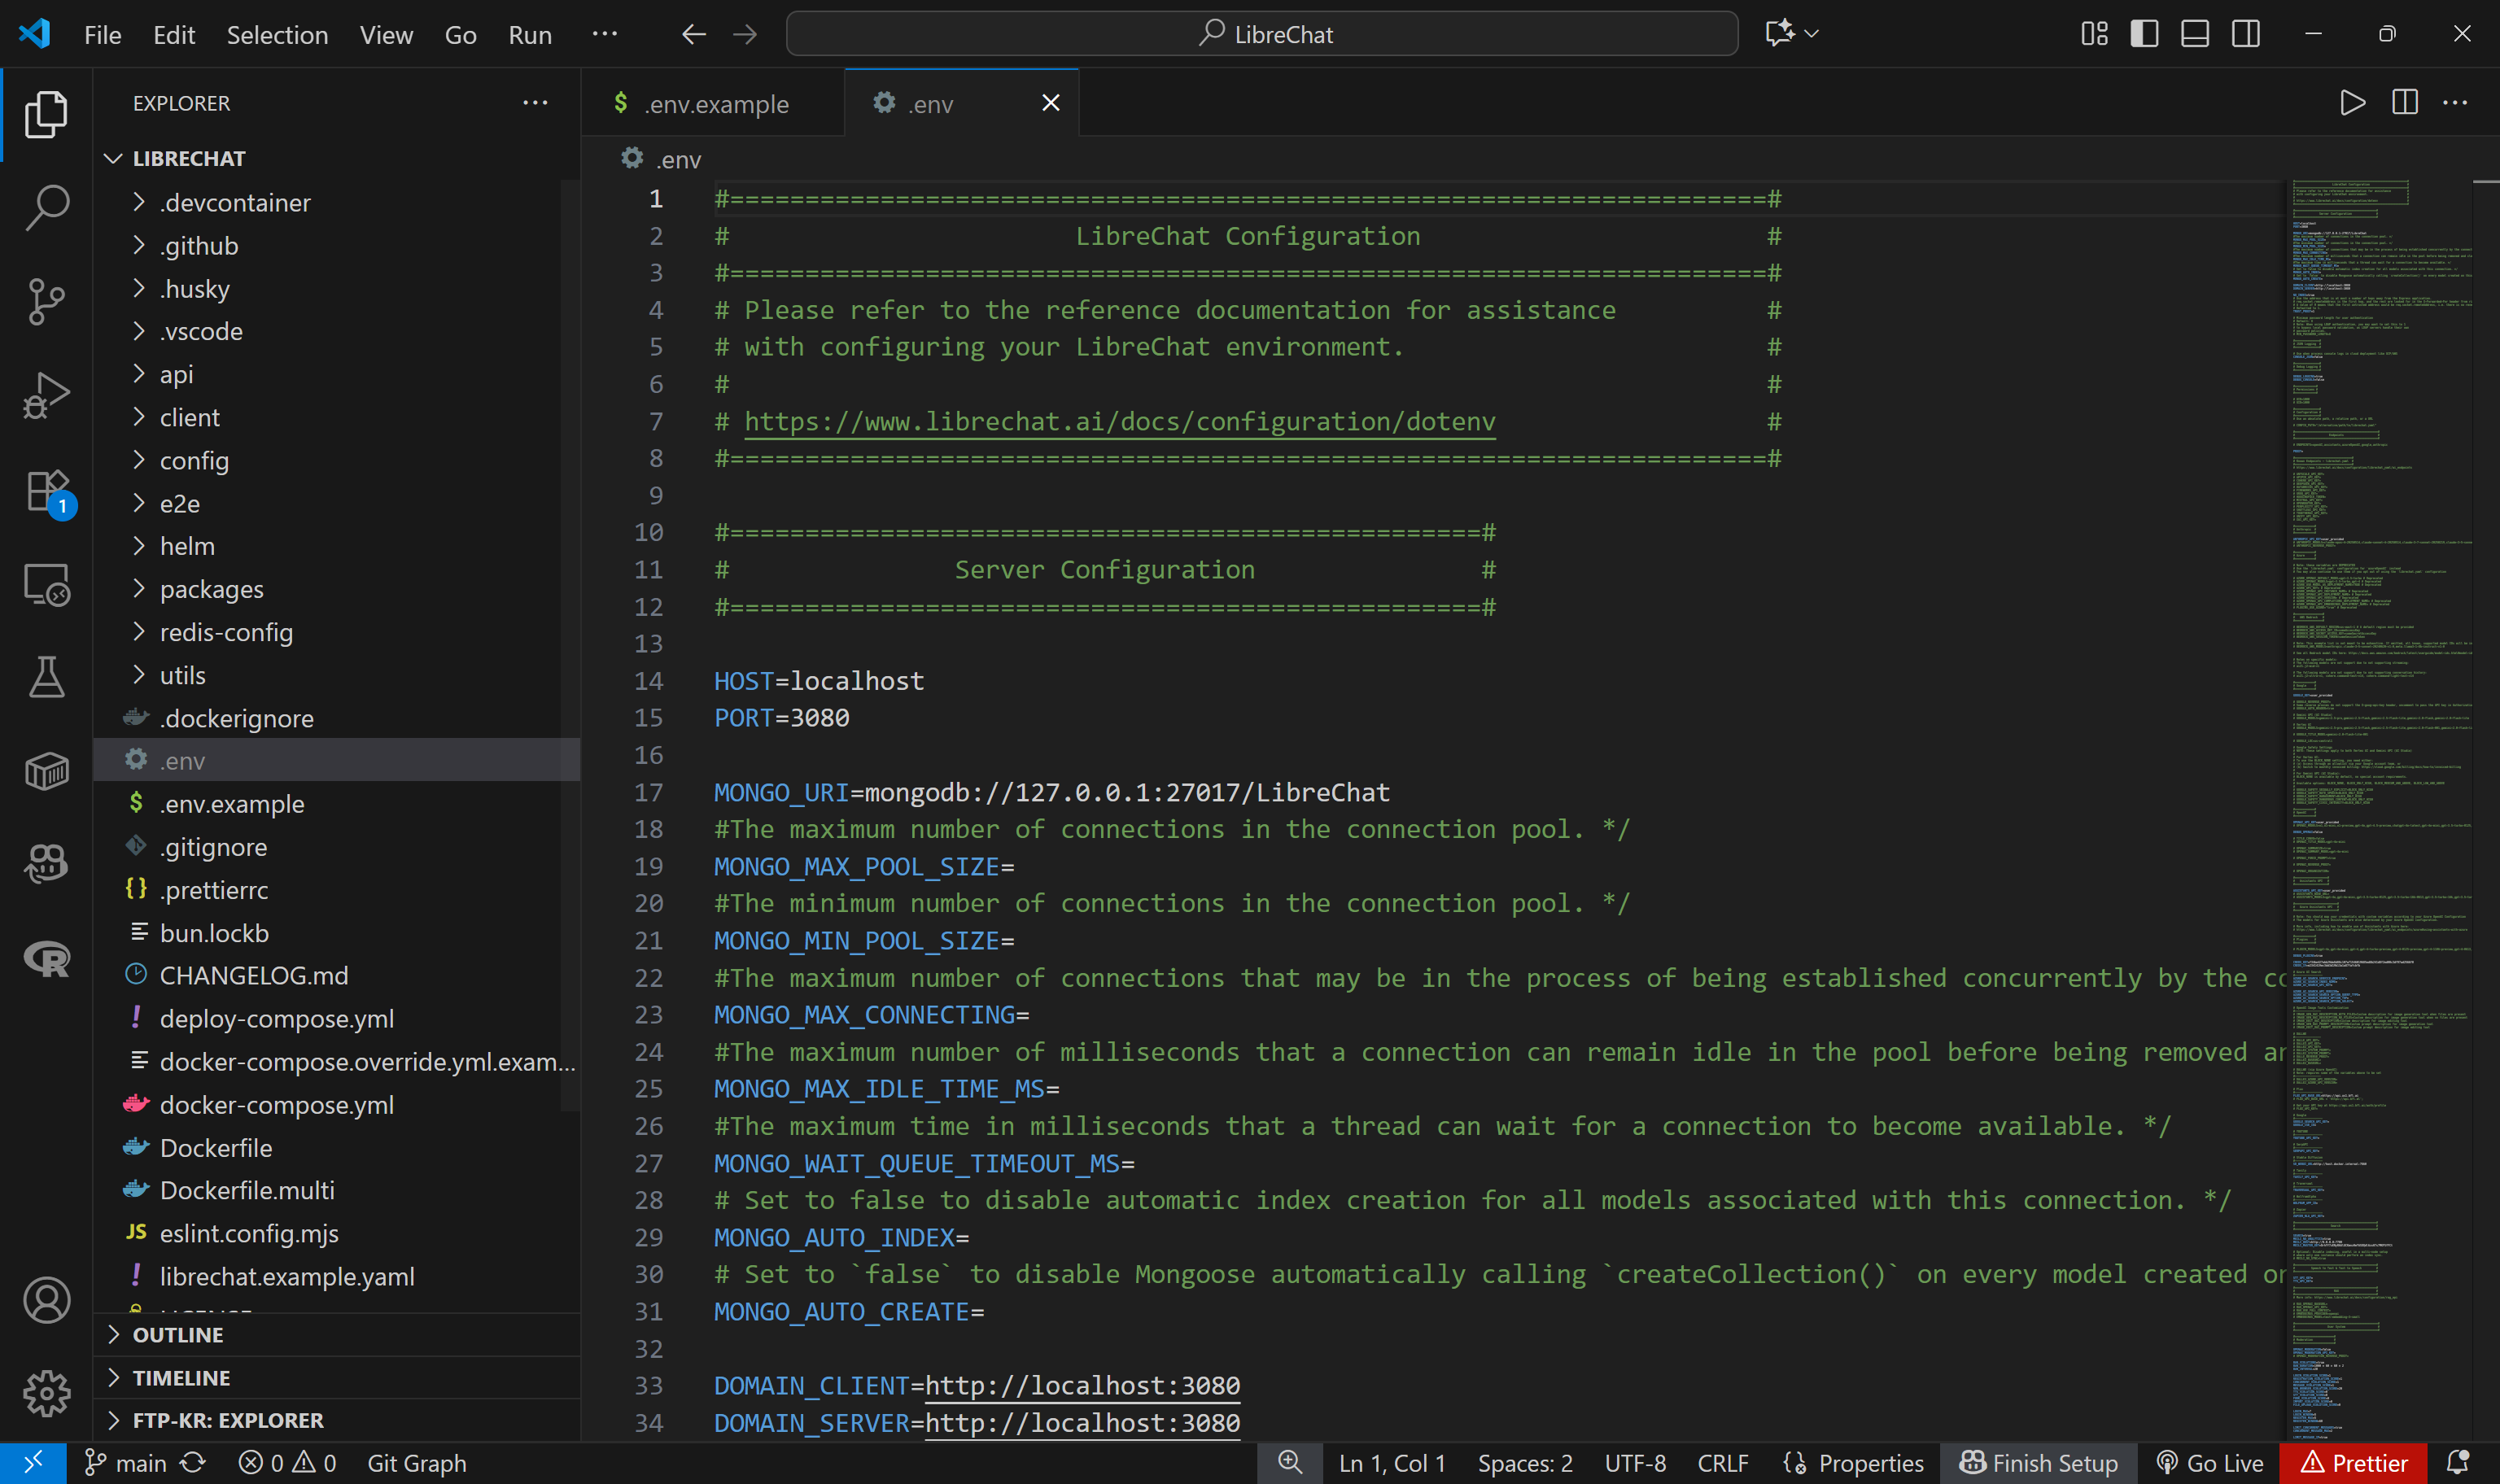
A plain copy of the .env.example file is enough, but for more information, refer to the official .env file configuration guide.
Now, note that the project contains a docker-compose.yml file. This allows you to run the application via Docker. Start the application via Docker with this command:
docker compose up -dThis is the output you should see in the terminal:
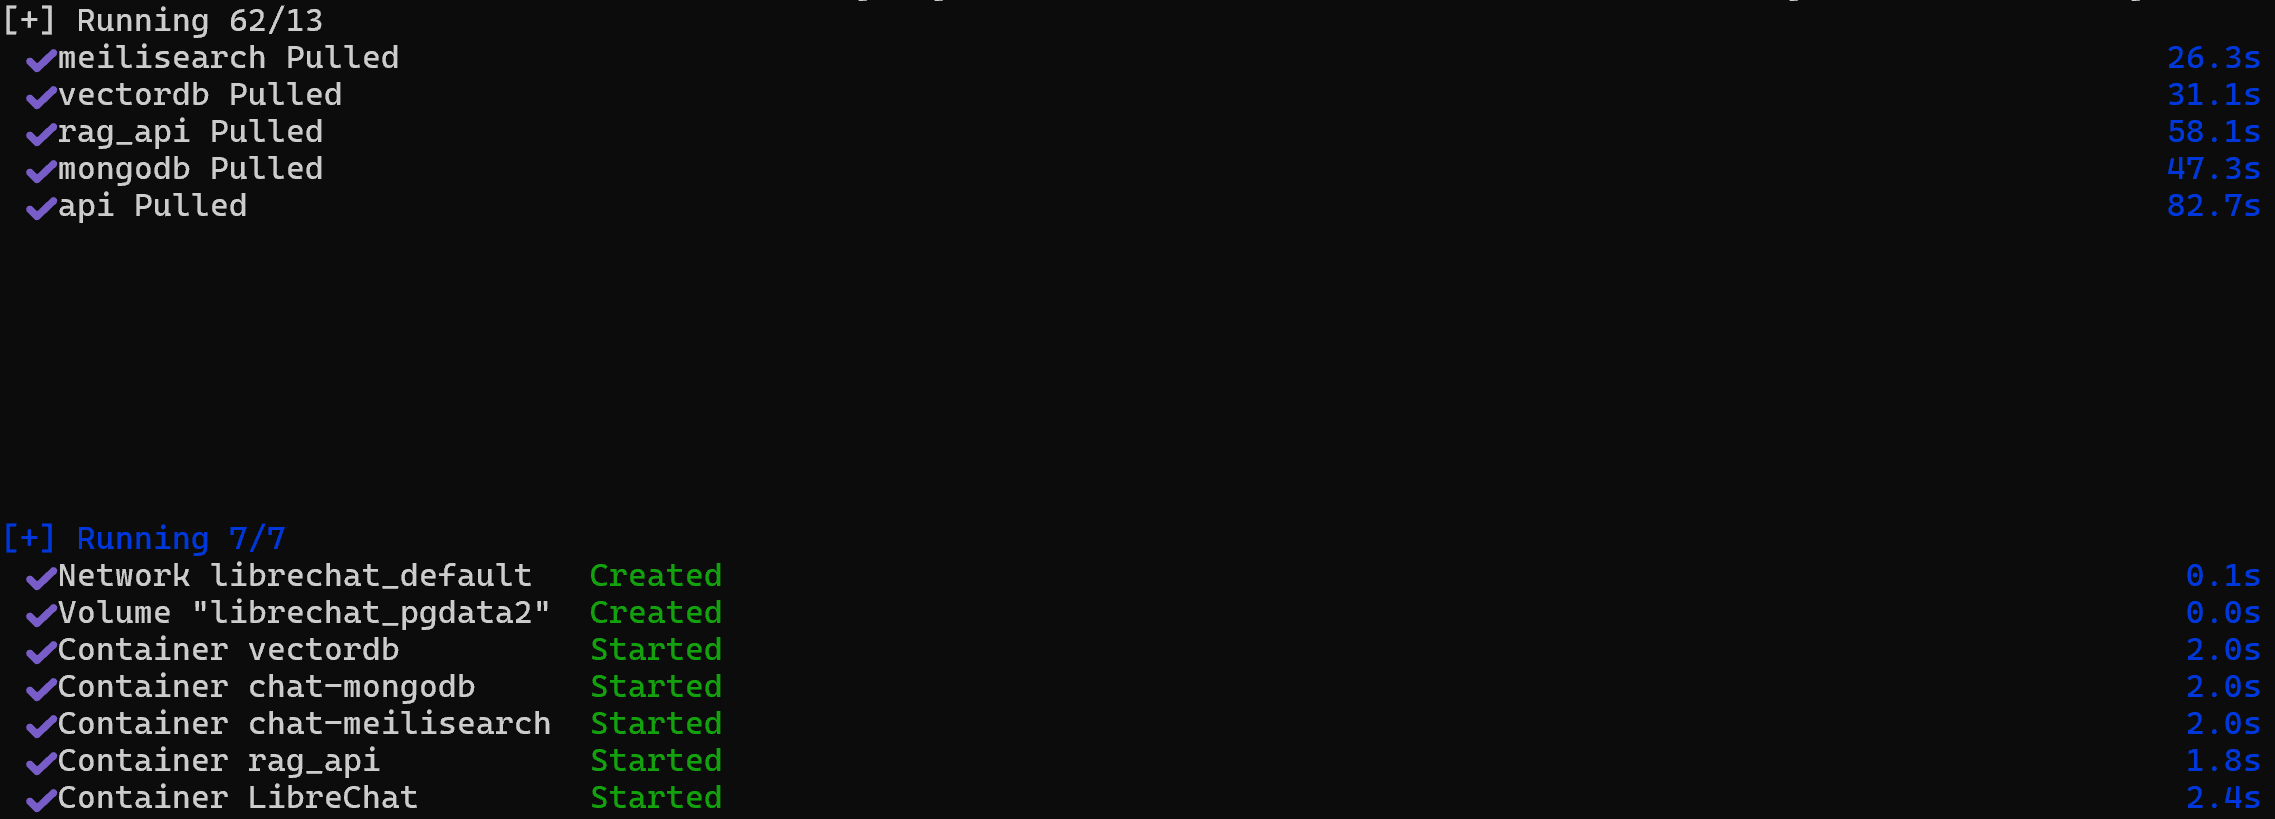
Note that all required images have been retrieved and started. LibreChat will now be listening at http://localhost:3080 (as configured in the .env file). Proceed by opening that page in your browser.
LibreChat comes with a built-in local authentication system, so this is what you should see:

Follow the “Sign up” link and create a local account. Then log in, and you should get access to the following chat view:

Done! You now have LibreChat up and running.
Step #2: Configure an LLM
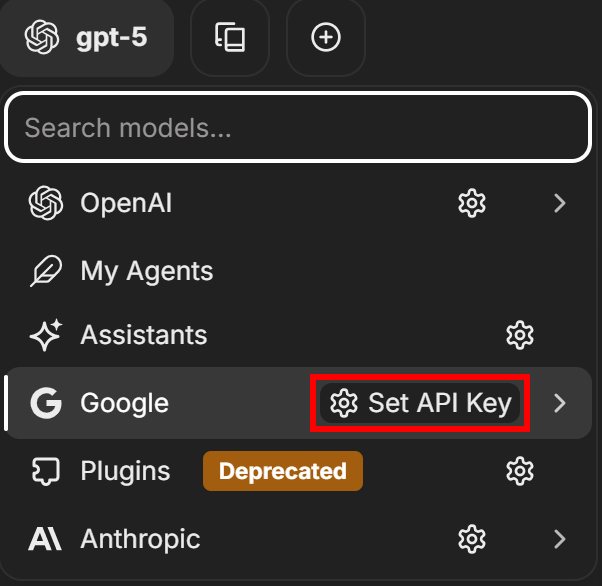
As of this writing, by default, LibreChat is configured to use GPT-5 as the default LLM. To change that, click on the “gpt-5” label in the top-left corner, select an LLM provider (“Google” in this case), and press the “Set API Key” button:
You will then see a modal like the one below for entering your Google API key:
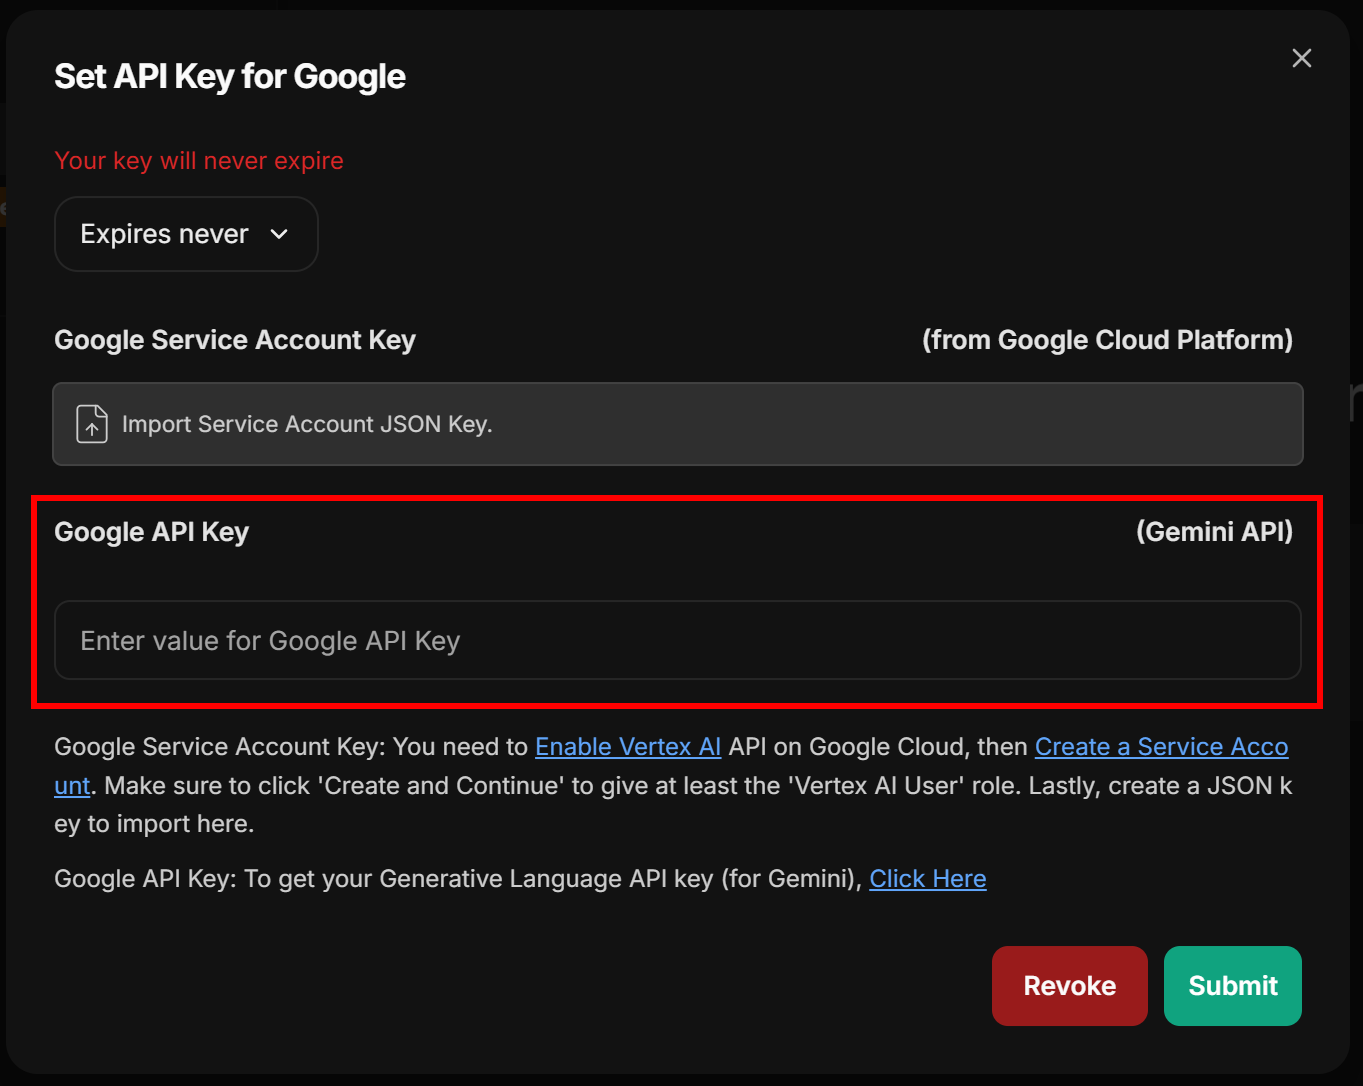
Paste your Google/Gemini API key and press the “Submit” button to confirm. Now you can select one of the available Google AI models, such as gemini-2.5-pro:
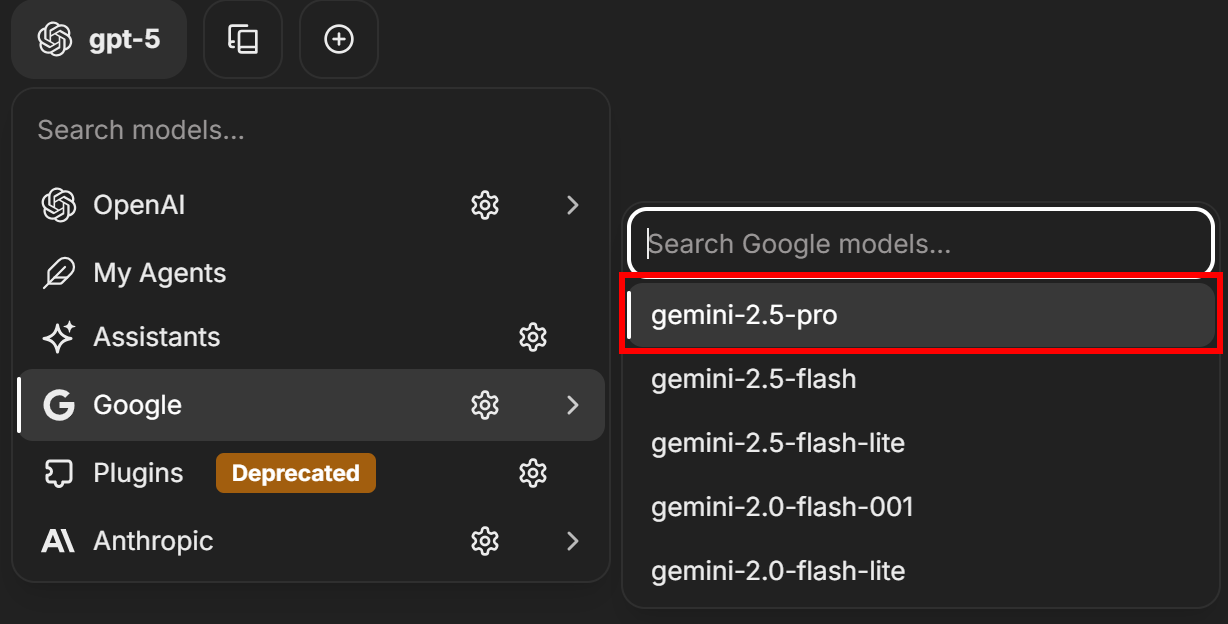
Remember that Gemini 2.5 Pro includes 10,000 grounded prompts per day at no additional charge.
Note: You can configure any other supported AI models through the same procedure.
Great! You now have an LLM ready to use in LibreChat.
Step #3: Test Bright Data’s Web MCP Locally
Before connecting LM Studio to Bright Data’s Web MCP, ensure your local machine can run the MCP server. This is important because we will demonstrate connect to the Web MCP server locally. A similar setup can also be applied if you choose to use the remote server via SSE.
Now, begin by creating a Bright Data account. Otherwise, if you already have one, just log in. For a quick setup, follow the instructions in the “MCP” section of your account:
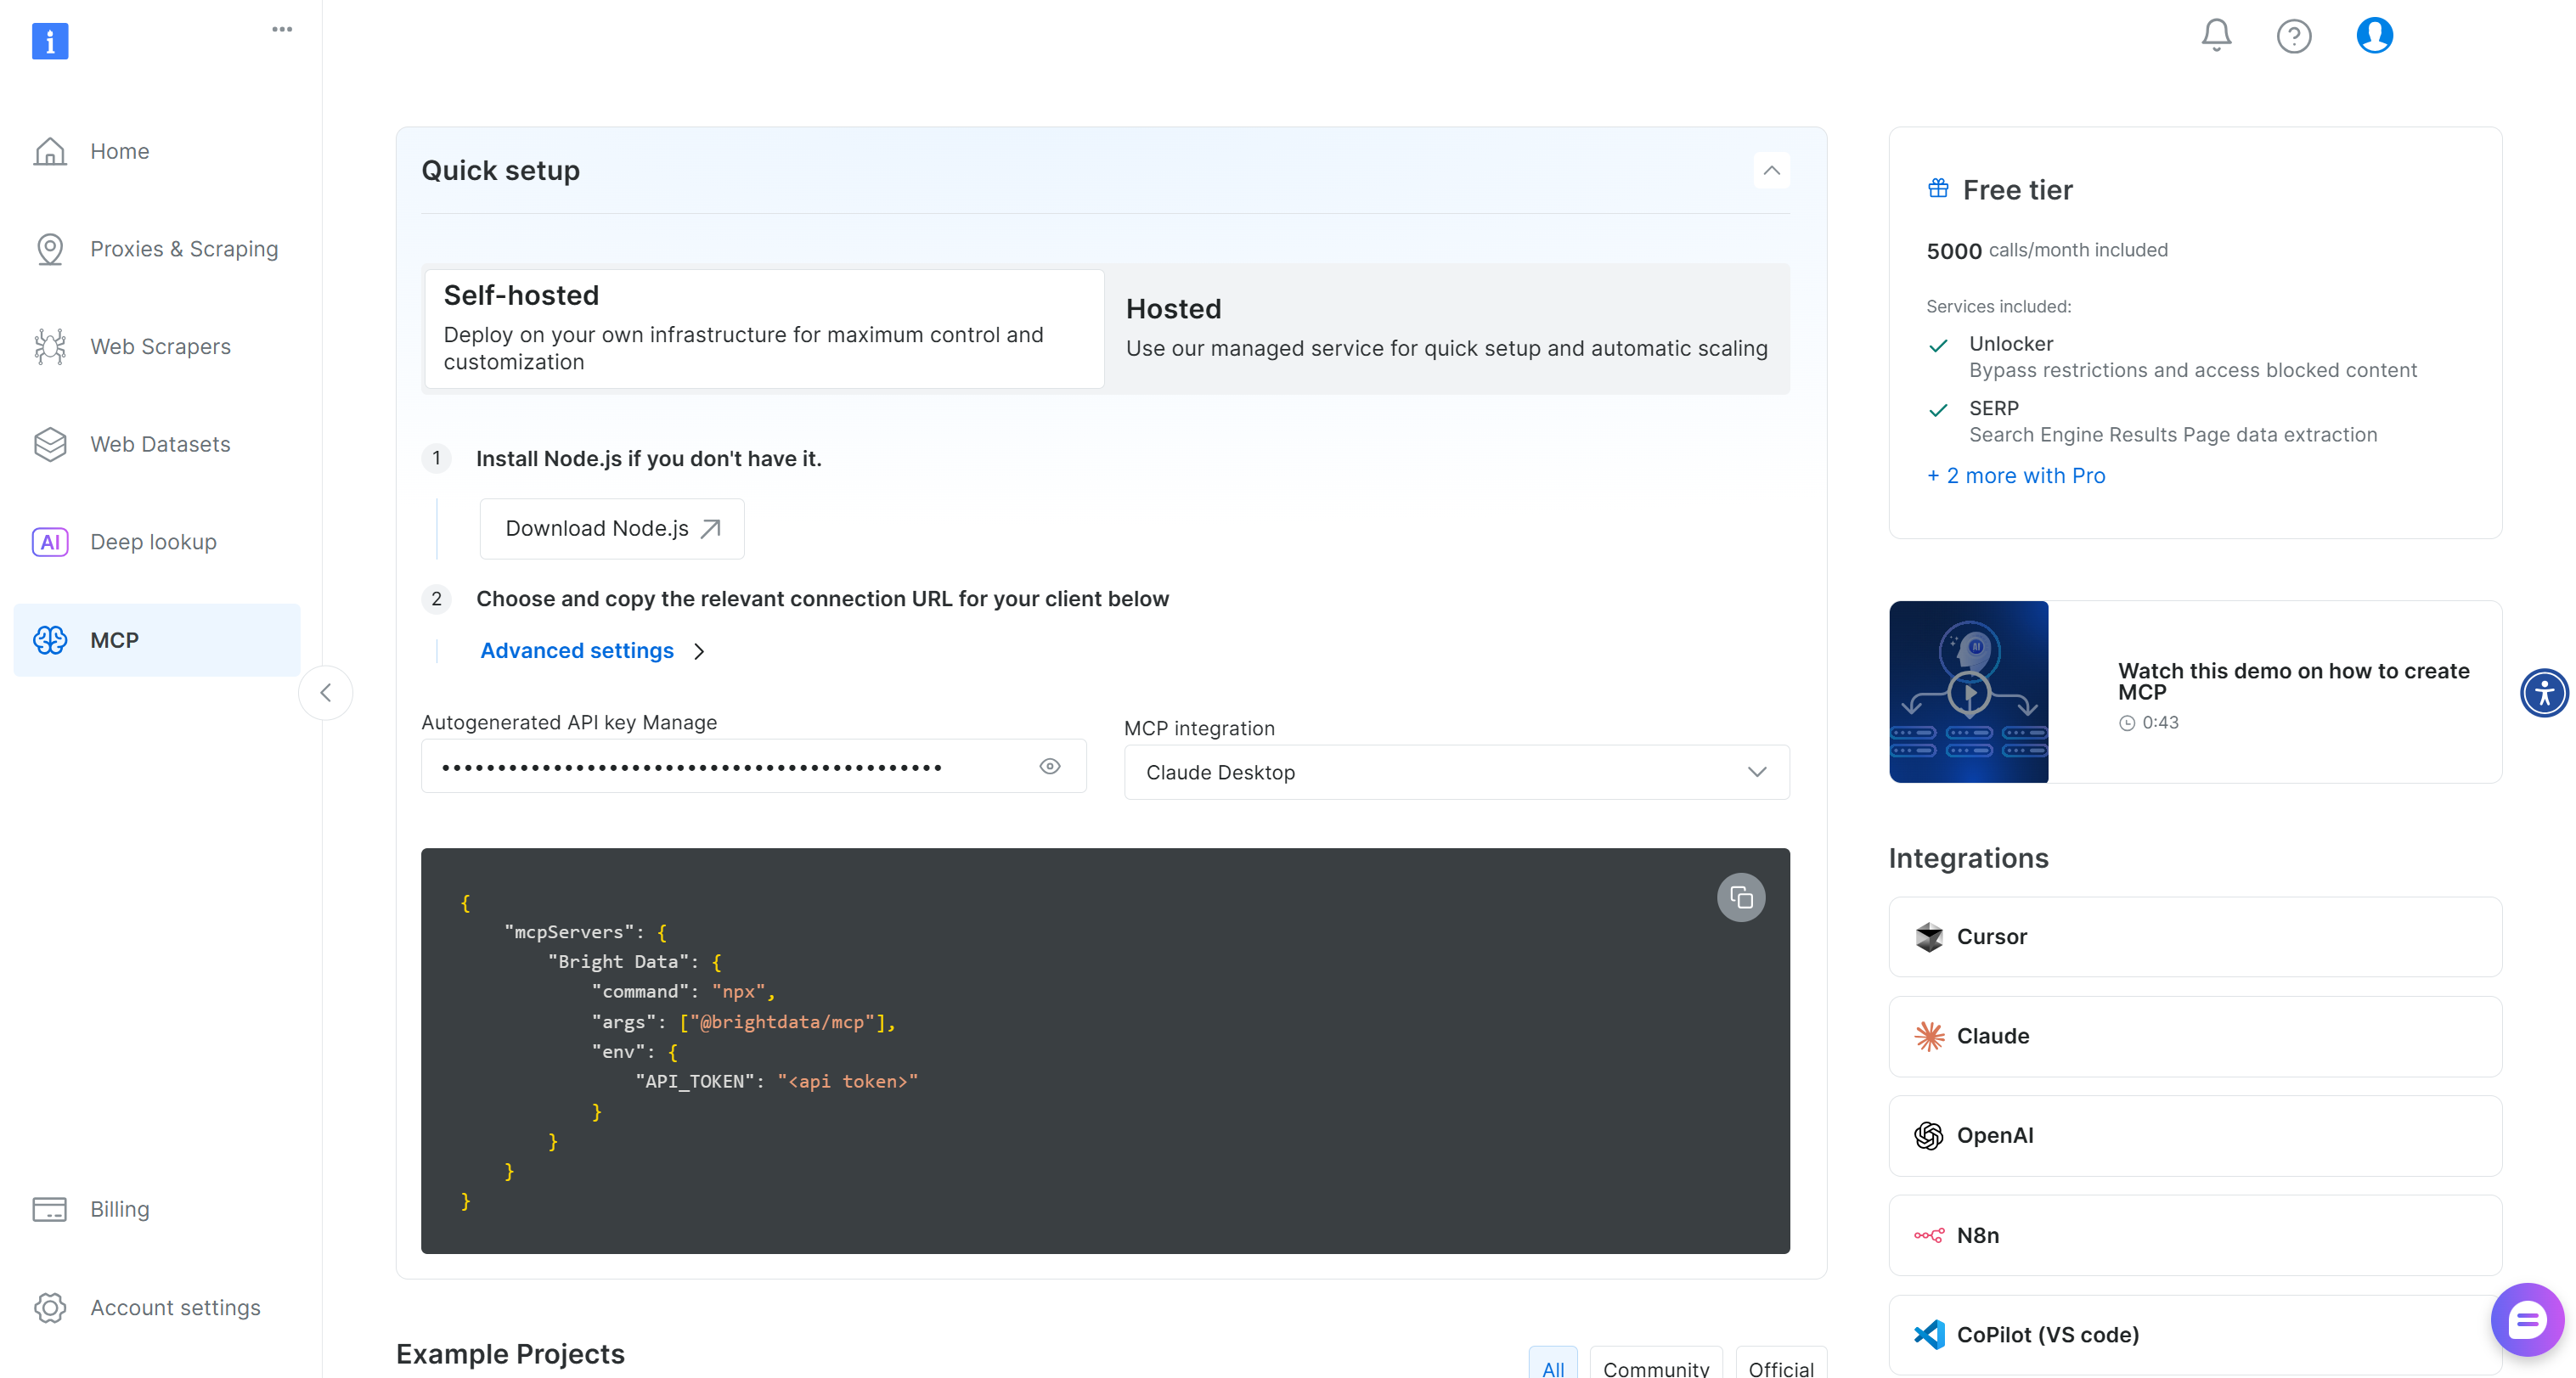
For more guidance, you can take a look at the following instructions.
First, get your Bright Data API key. Store it in a safe place, as you will need it in the next step. We will assume that your API key has Admin permissions, as this simplifies the Web MCP integration process.
Now, install the Web MCP globally on your machine with the npm command below:
npm install -g @brightdata/mcpVerify that the MCP server works locally by running:
API_TOKEN="<YOUR_BRIGHT_DATA_API>" npx -y @brightdata/mcpOr, equivalently, in PowerShell:
$Env:API_TOKEN="<YOUR_BRIGHT_DATA_API>"; npx -y @brightdata/mcpReplace the <YOUR_BRIGHT_DATA_API> placeholder with your Bright Data API token. The two (equivalent) commands set the required API_TOKEN environment variable and start the Web MCP locally by running the @brightdata/mcp package.
If successful, you should see an output like this:

As you can tell, on the first launch, the Web MCP automatically creates two default zones in your Bright Data account:
mcp_unlocker: A zone for Web Unlocker.mcp_browser: A zone for Browser API.
To power its 60+ tools, Web MCP relies on those two Bright Data services.
If you want to verify that the zones were created, reach the “Proxies & Scraping Infrastructure” page in your Bright Data dashboard. You should see the two zones in the table:
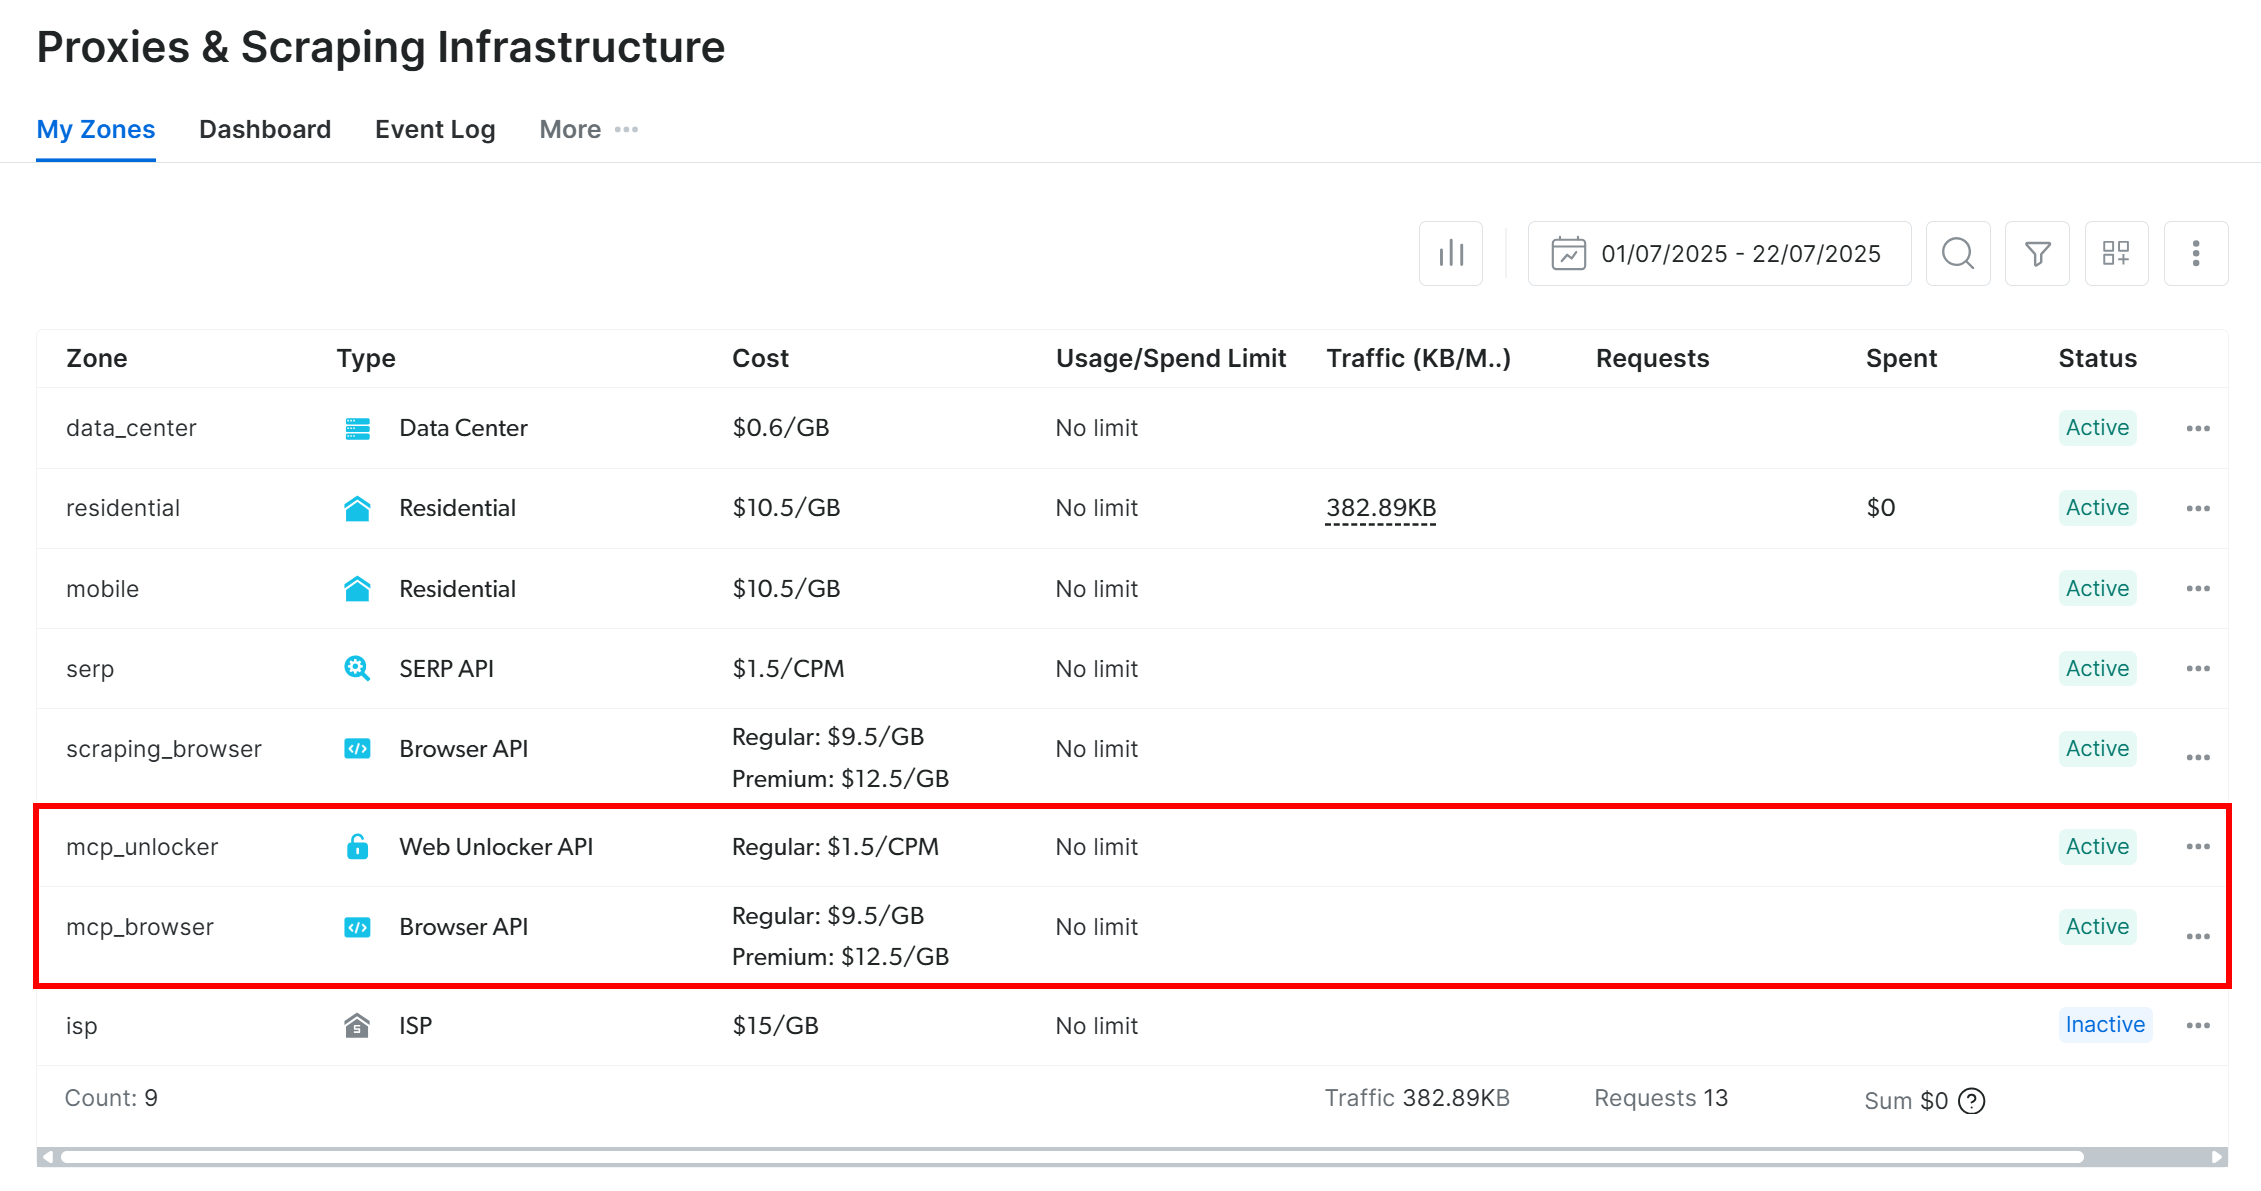
Note: If your API token does not have Admin permissions, the two zones will not be set up. In that case, you must define them manually and configure them via environment variables as shown on GitHub.
On the Web MCP free tier, the MCP server only exposes the search_engine and scrape_as_markdown tools (and their batch versions). To unlock all tools, you must enable Pro mode **by setting the PRO_MODE="true" environment variable:
API_TOKEN="<YOUR_BRIGHT_DATA_API>" PRO_MODE="true" npx -y @brightdata/mcpOr, on Windows:
$Env:API_TOKEN="<YOUR_BRIGHT_DATA_API>"; $Env:PRO_MODE="true"; npx -y @brightdata/mcpPro mode unlocks all 60+ tools, but it is not included in the free tier and will incur additional charges.
Awesome! You just verified that the Web MCP server works on your machine. Stop the MCP process, as you are ready to configure LibreChat to connect to it.
Step #4: Integrate Web MCP into LibreChat
MCP integration in LibreChat is available through the librechat.yaml configuration file. Just like the .env file, this file does not come in the cloned repository. It is your task to create one, and you can refer to the example in librechat.example.yaml:
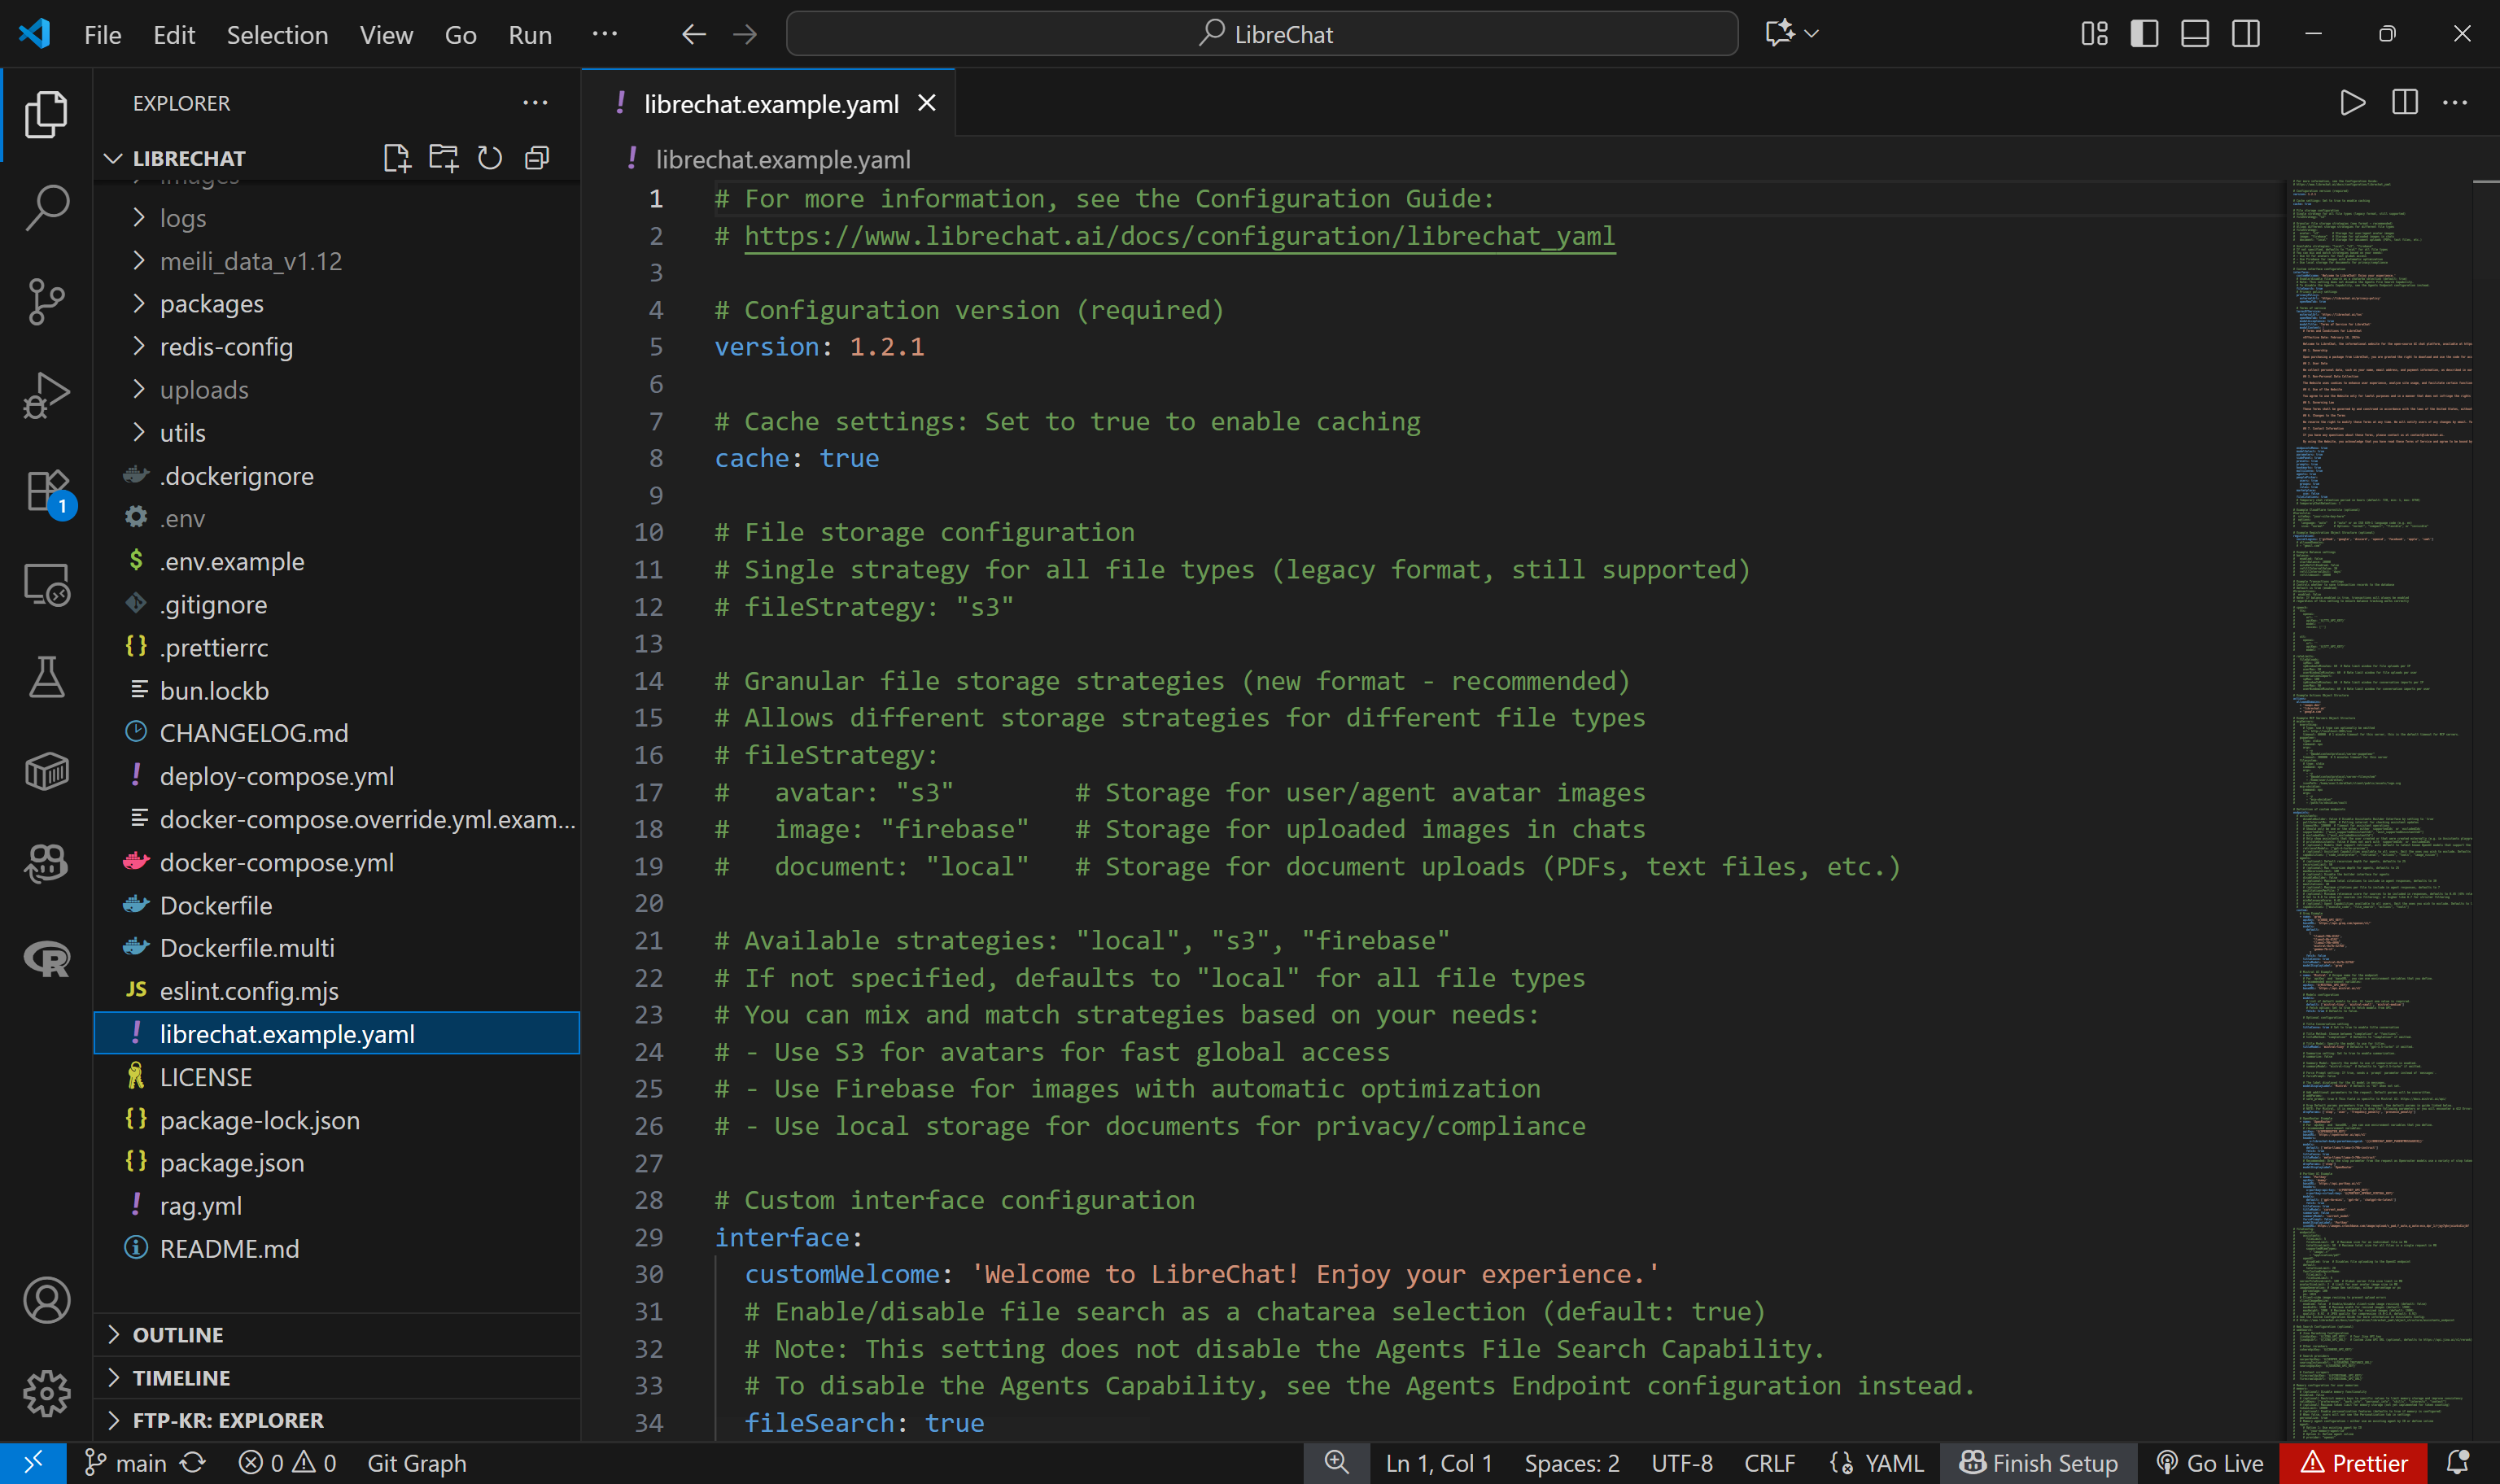
Now, the default librechat.example.yaml contains many configurations. Most of them are not needed for this example. To keep things simple, define a librechat.yaml as follows:
version: "1.3.0"
mcpServers:
  bright-data:
    type: stdio
    command: npx
    args:
      - -y
      - "@brightdata/mcp"
    env:
      API_TOKEN: "<YOUR_BRIGHT_DATA_API_KEY>"
      PRO_MODE: "true" # Optional
    timeout: 300000 # 5 mins
This setup mirrors the npx command tested earlier, using environment variables as credentials and settings:
API_TOKENis required. Set it to your Bright Data API key obtained earlier.PRO_MODEis optional. Remove it if you do not want to enable Pro mode.
Notice that the timeout for tool runs is set to 300000 milliseconds (5 minutes). You may need to increase this value in case of timeout errors on tools that take some time to complete.
Now, reload your Docker setup with:
docker compose -f ./deploy-compose.yml downAnd run the project again with:
docker compose -f ./deploy-compose.yml upOnce the application has reloaded, visit http://localhost:3080 in your browser. In the chat textarea, you should now have access to an “MCP Servers” dropdown. Open it, and you should see the “bright-data” MCP option configured above. Click on it to load the Web MCP tools in LibreChat:
Wonderful! Bright Data’s Web MCP integration in LibreChat is now complete.
Note: LibreChat also supports MCP integration through Smithery. Learn more in the documentation and check out the Web MCP server on Smithery.
Step #5: Verify the MCP Tool Availability
After enabling the Web MCP server in LibreChat and waiting for it to load, your configured AI model should have access to all exposed tools. To verify that, run a prompt like this:
Which tools from Bright Data’s Web MCP do you have access to?The result should be a list of all 60+ tools if you are in Pro mode, or the 4/5 free tools if you are not in Pro mode:
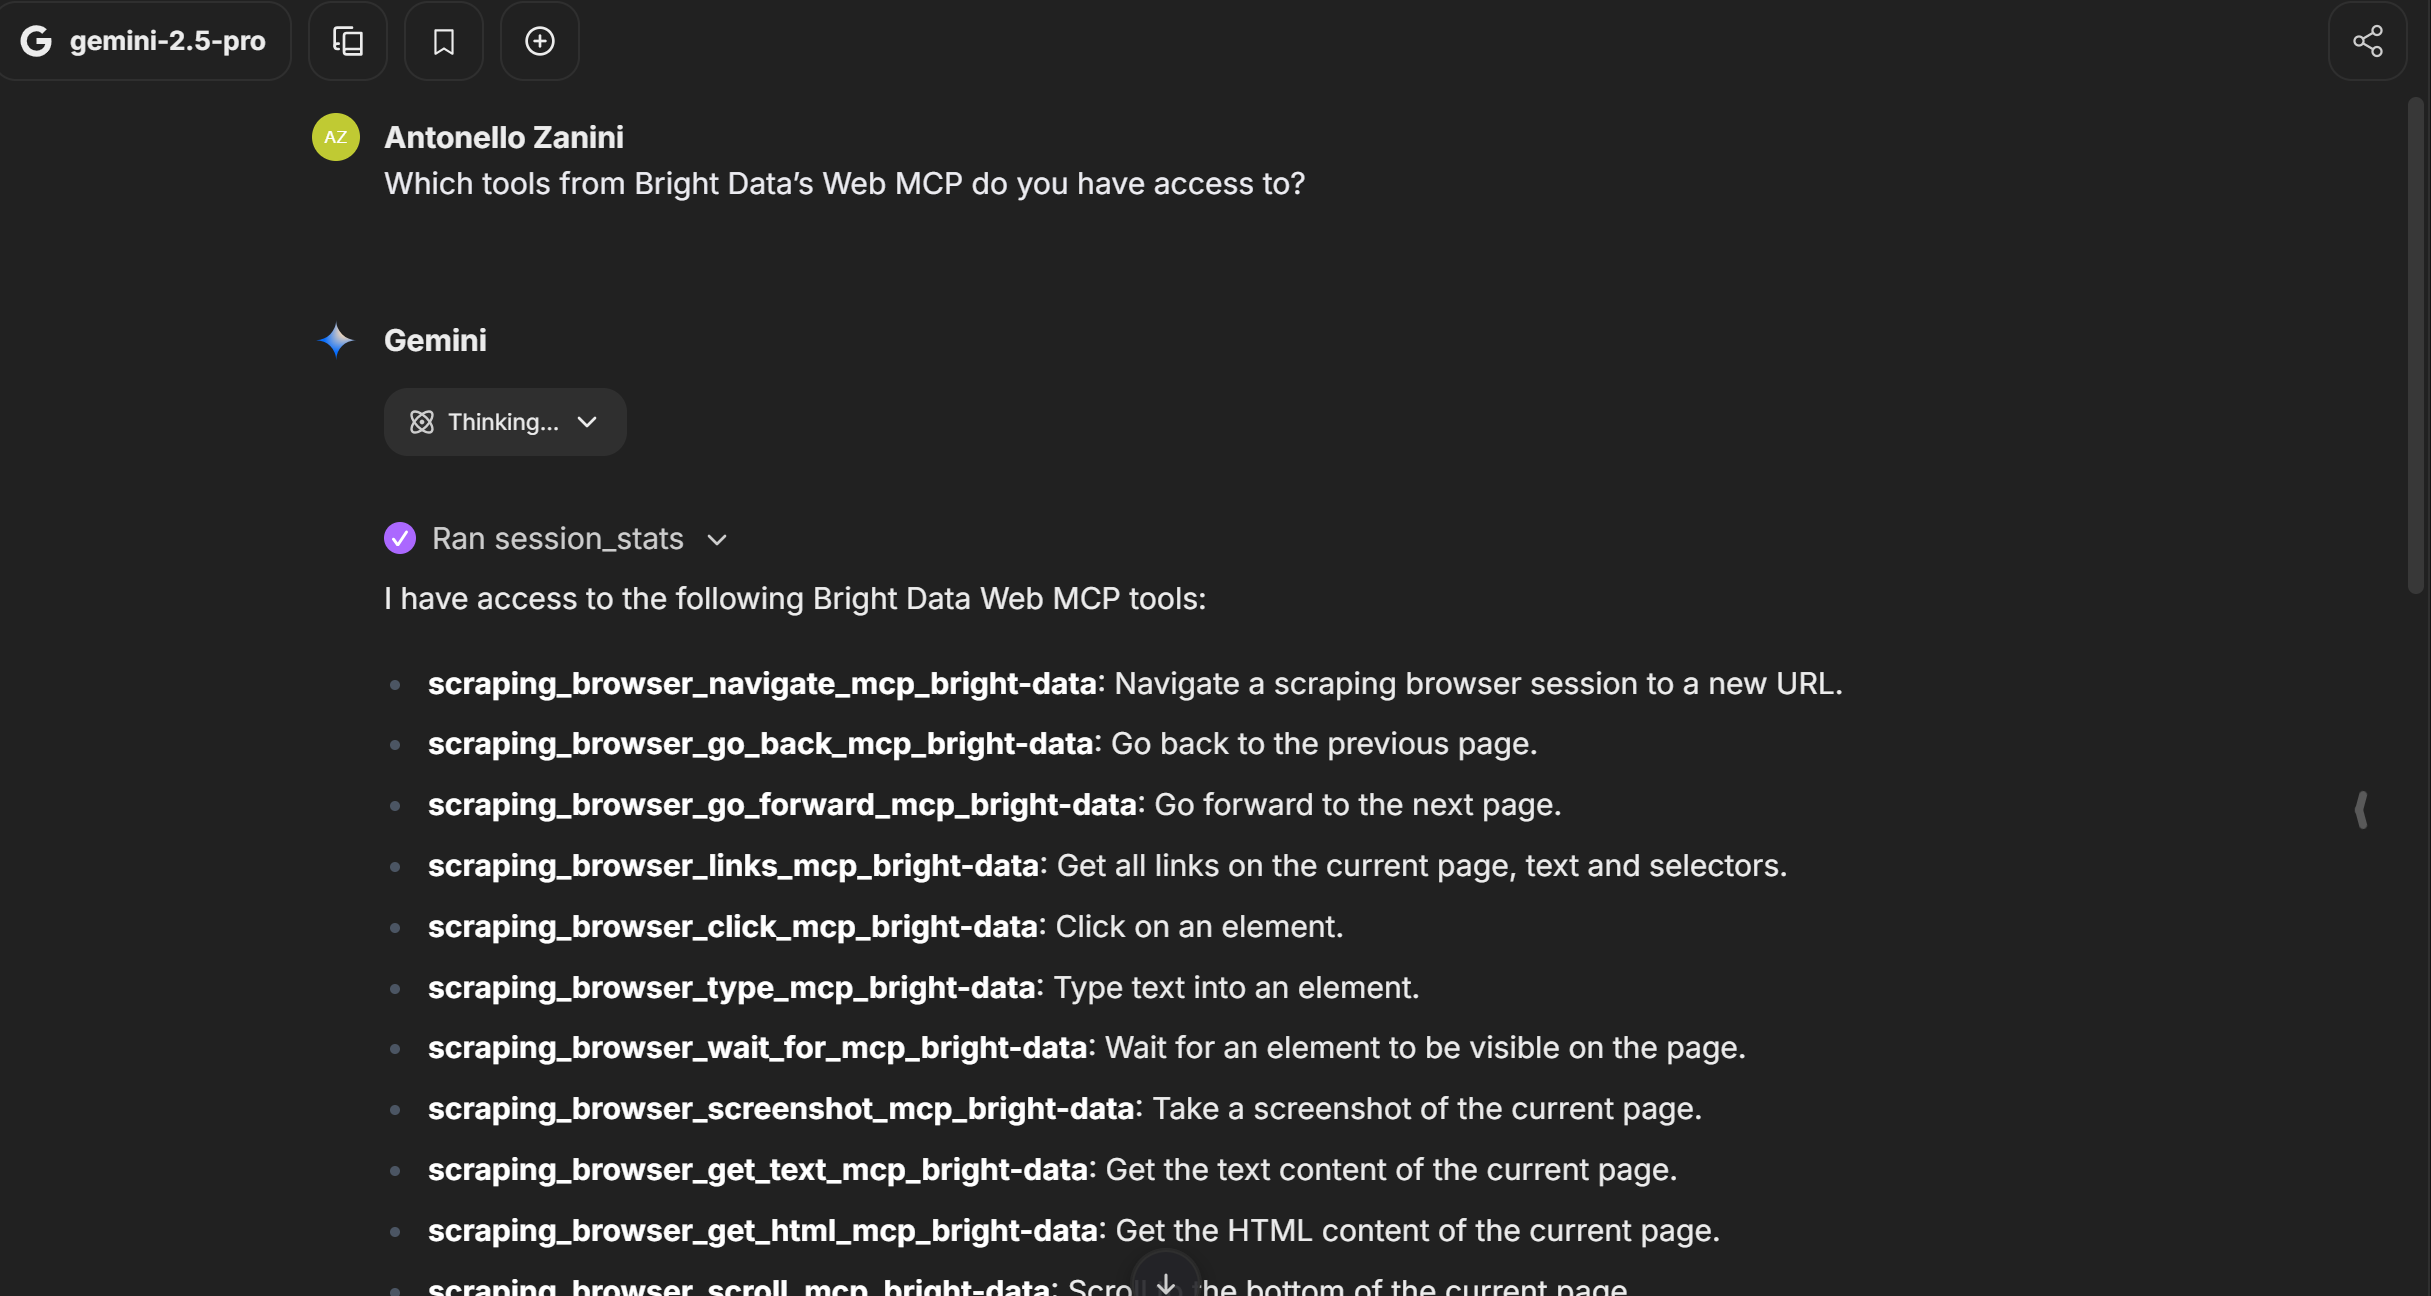
The output should match the list of tools exposed by Web MCP, based on your chosen mode (Pro or not), as shown in the image above.
Step #6: Test the Web Capabilities Exposed by the MCP Server
The configured AI model in LibreChat now has access to all web data retrieval and interaction capabilities provided by Web MCP.
To test that, assume you identified an interesting stock and want to learn more about it. This is a great opportunity to test the Web MCP tools for web search and Yahoo Finance scraping.
For example, consider a prompt like this:
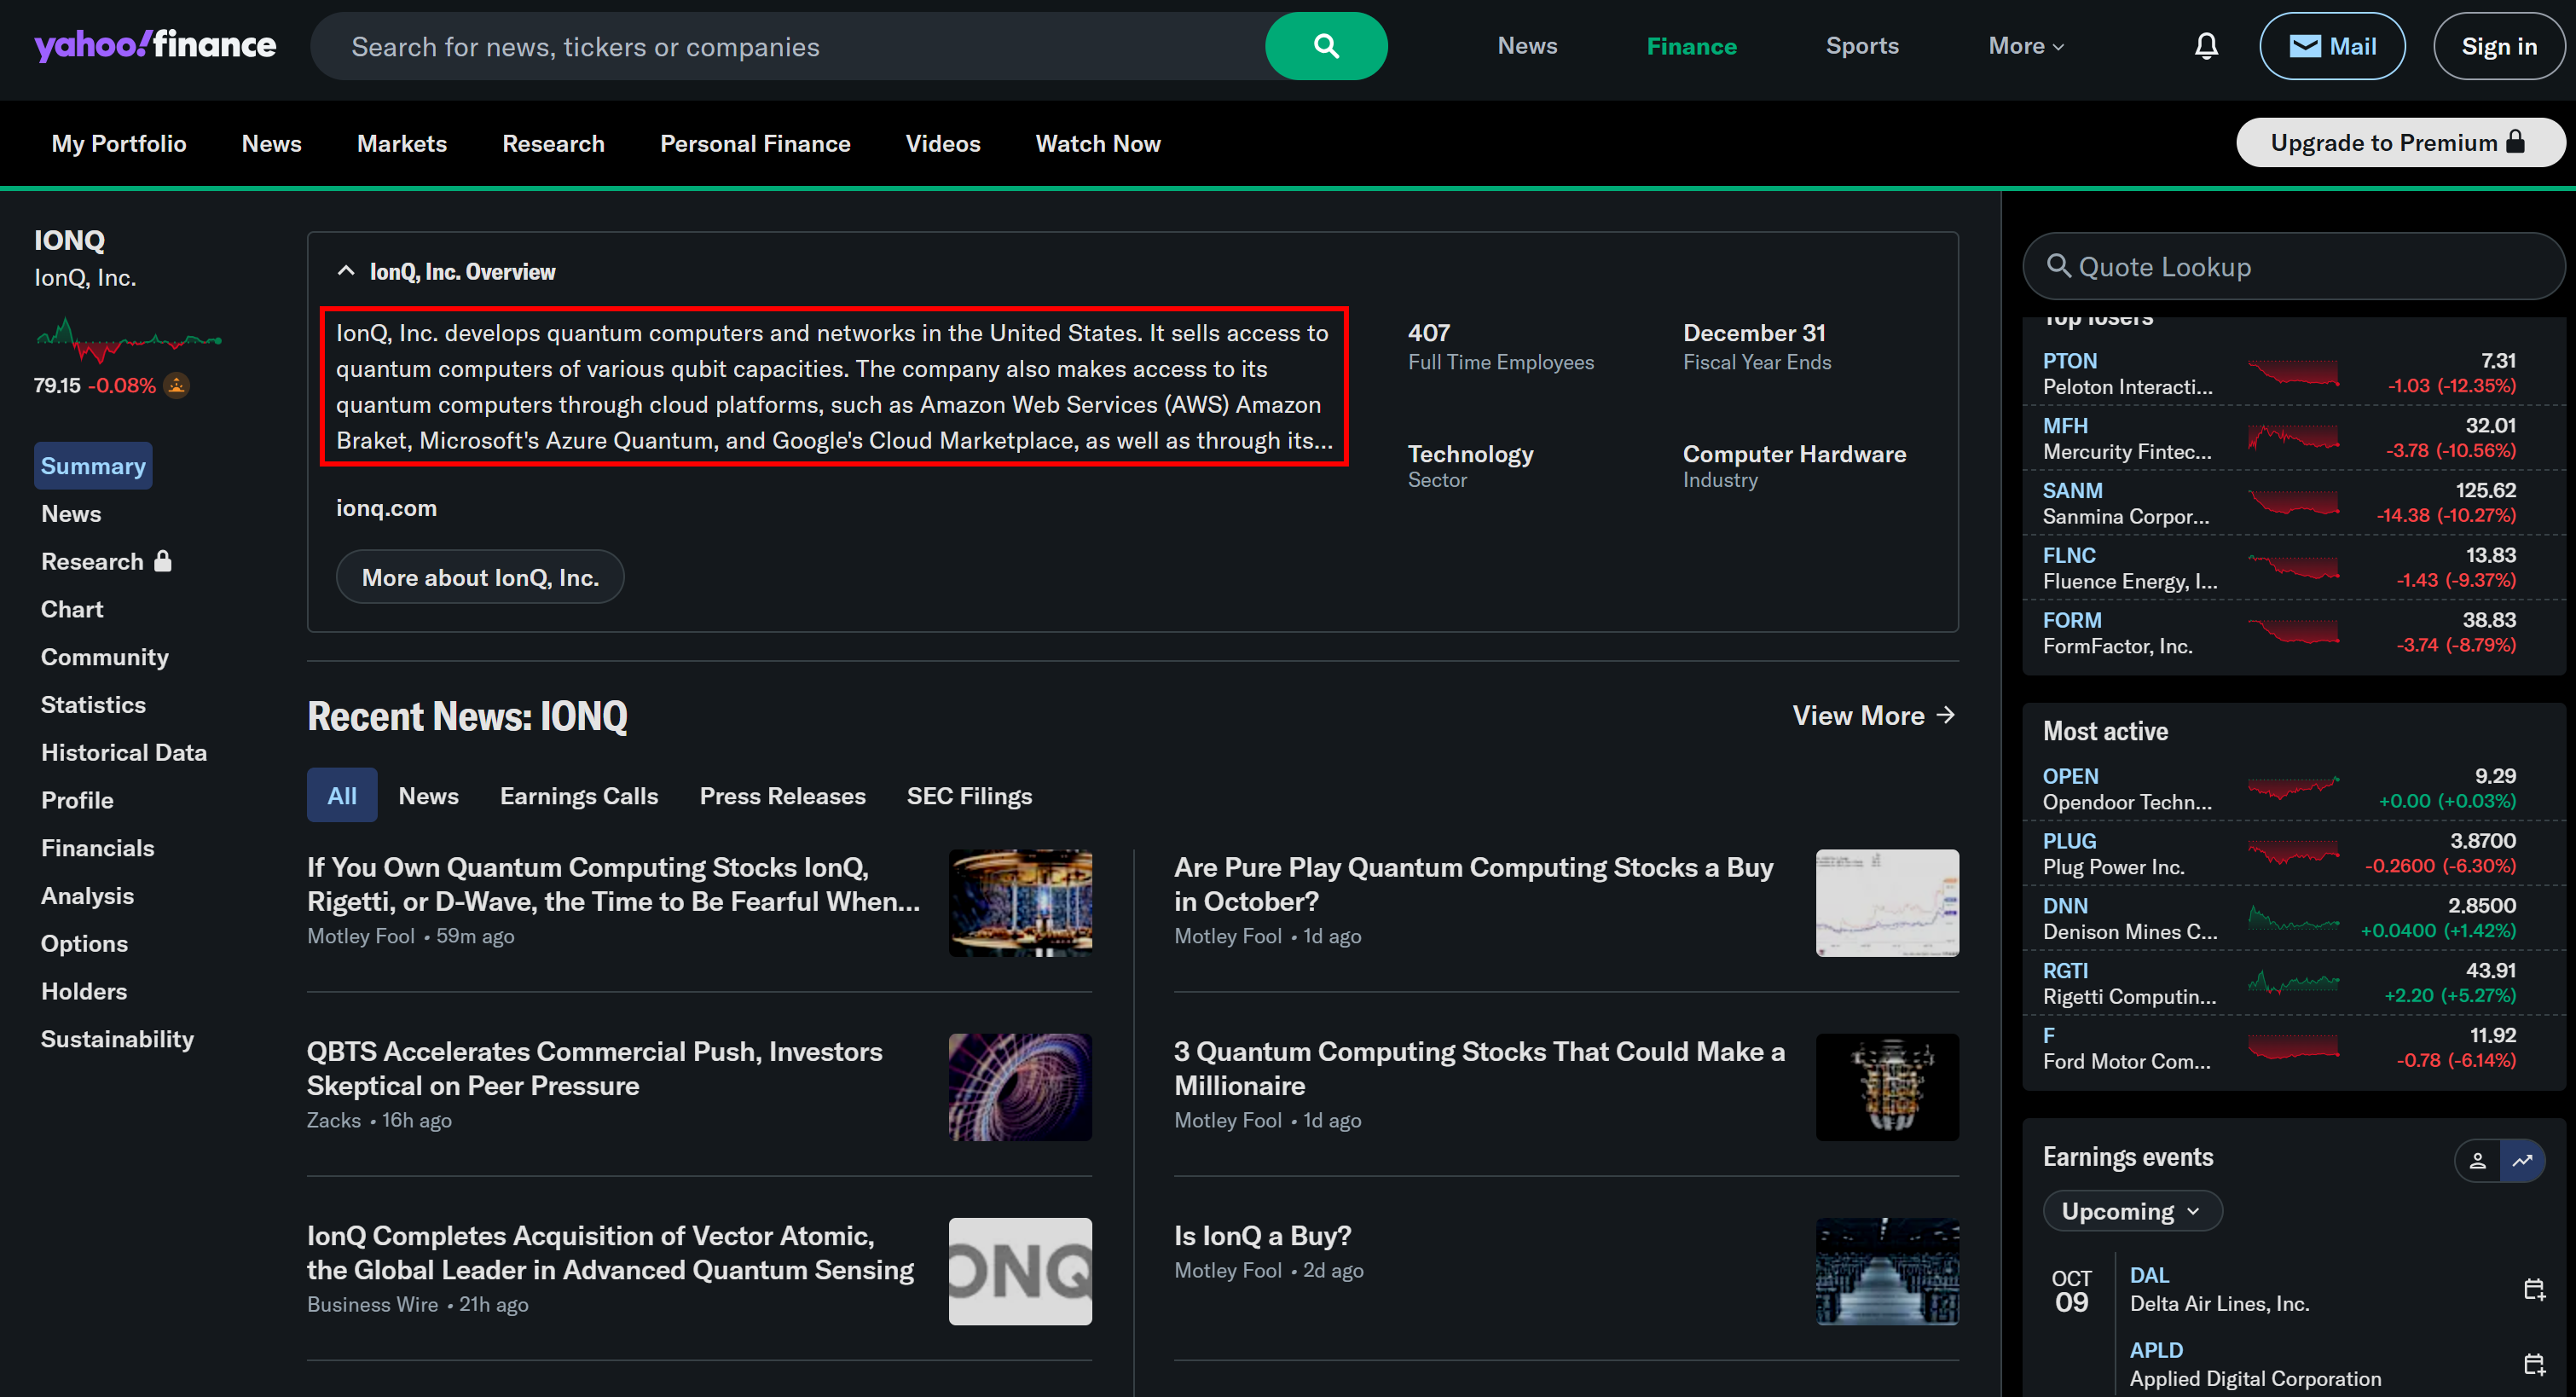
Give me all the main information about the following company from Yahoo Finance:
"https://finance.yahoo.com/quote/IONQ/"
Then, search the web for the top 5 recent news articles about it, and return a list with their titles and links.
Keep in mind that vanilla Gemini models cannot perform this task. The reason is that scraping Yahoo Finance is tricky due to their bot detection systems. As a result, a standard Gemini model would fail to retrieve the company’s data from Yahoo Finance and proceed with a different approach:
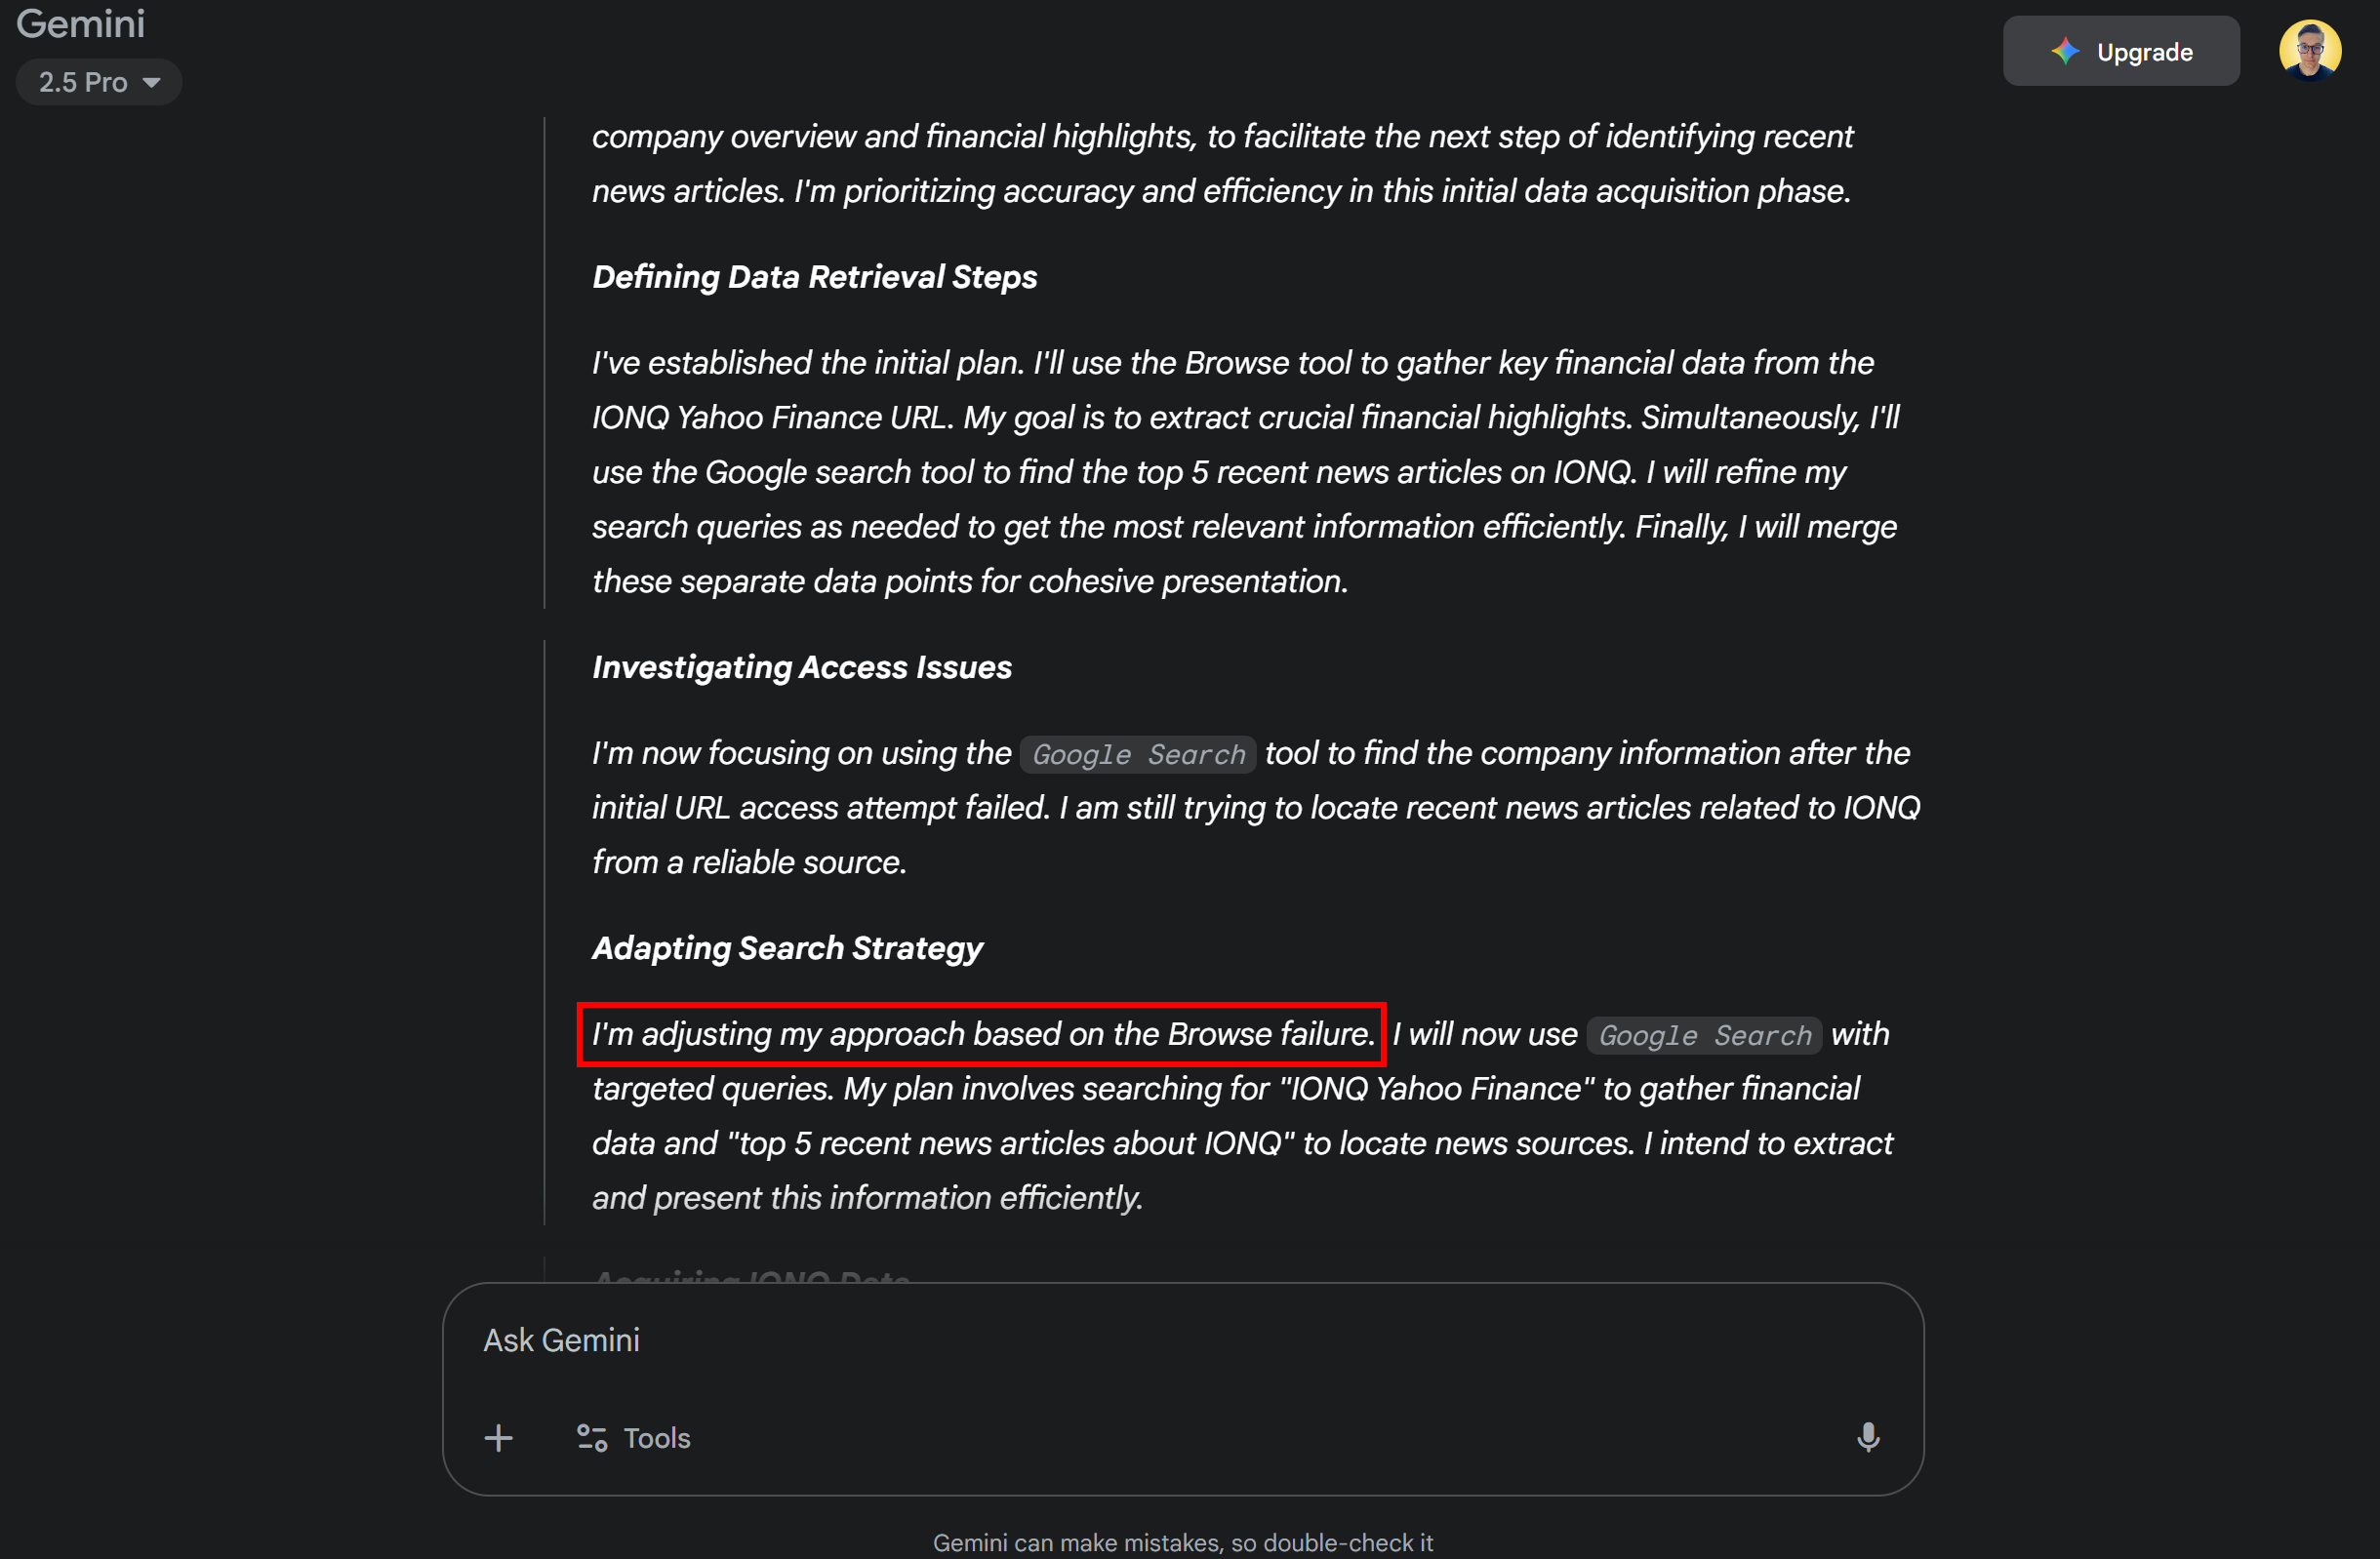
Instead, thanks to the integration with Web MCP, the same model in LibreChat can achieve the goal. Check that by configuring your MCP server in Pro mode and running the prompt in LibreChat.
See how the Gemini model detects web_data_yahoo_finance_business and search_engine as the two tools needed to complete the task, and it runs them in parallel. These tools are described as:
web_data_yahoo_finance_business: Quickly read structured Yahoo Finance business data. Requires a valid Yahoo Finance business URL. This can be a cache lookup, so it can be more reliable than scraping.search_engine: Scrape search results from Google, Bing, or Yandex. Returns SERP results in markdown (URL, title, description).
Thus, they are a perfect match for this task!
Expand their dropdowns to see the returned data:
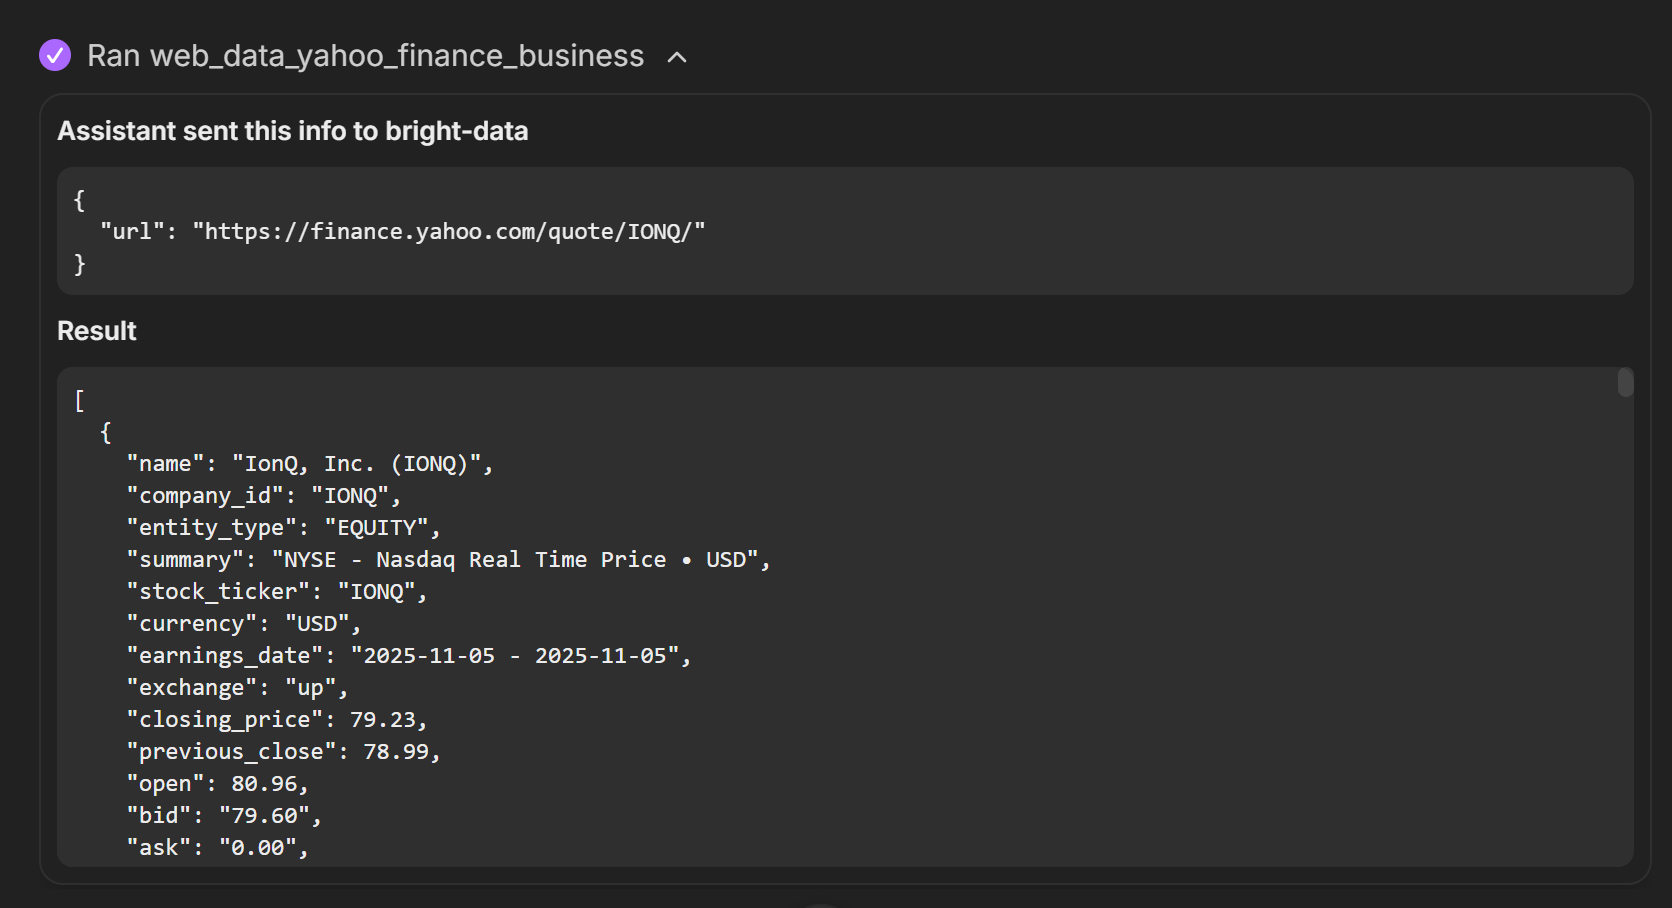
Notice how web_data_yahoo_finance_business returned structured data for Yahoo Finance. This is possible because the tool calls Yahoo Finance Scraper behind the scenes. That is a dedicated web data scraper for Yahoo Finance available in Bright Data’s infrastructure.
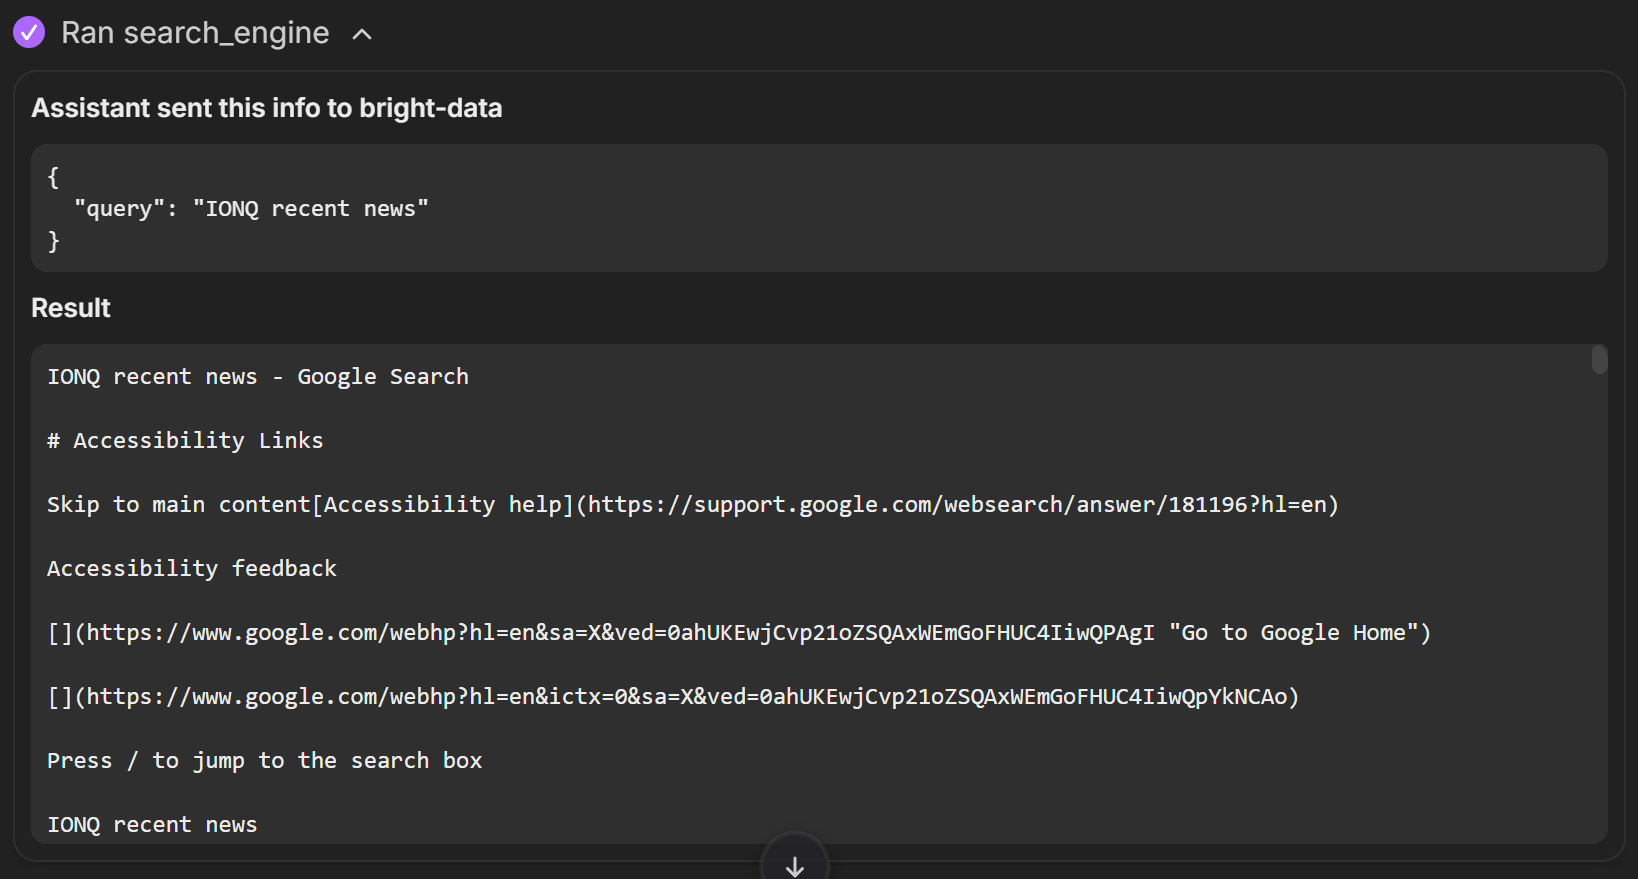
Meanwhile, the search_engine tool executed a query like “IONQ recent news” on Google and returned the resulting SERP in Markdown format:
Given the input data returned by the tools, the AI aggregated it into the report below, which contains all the relevant information:
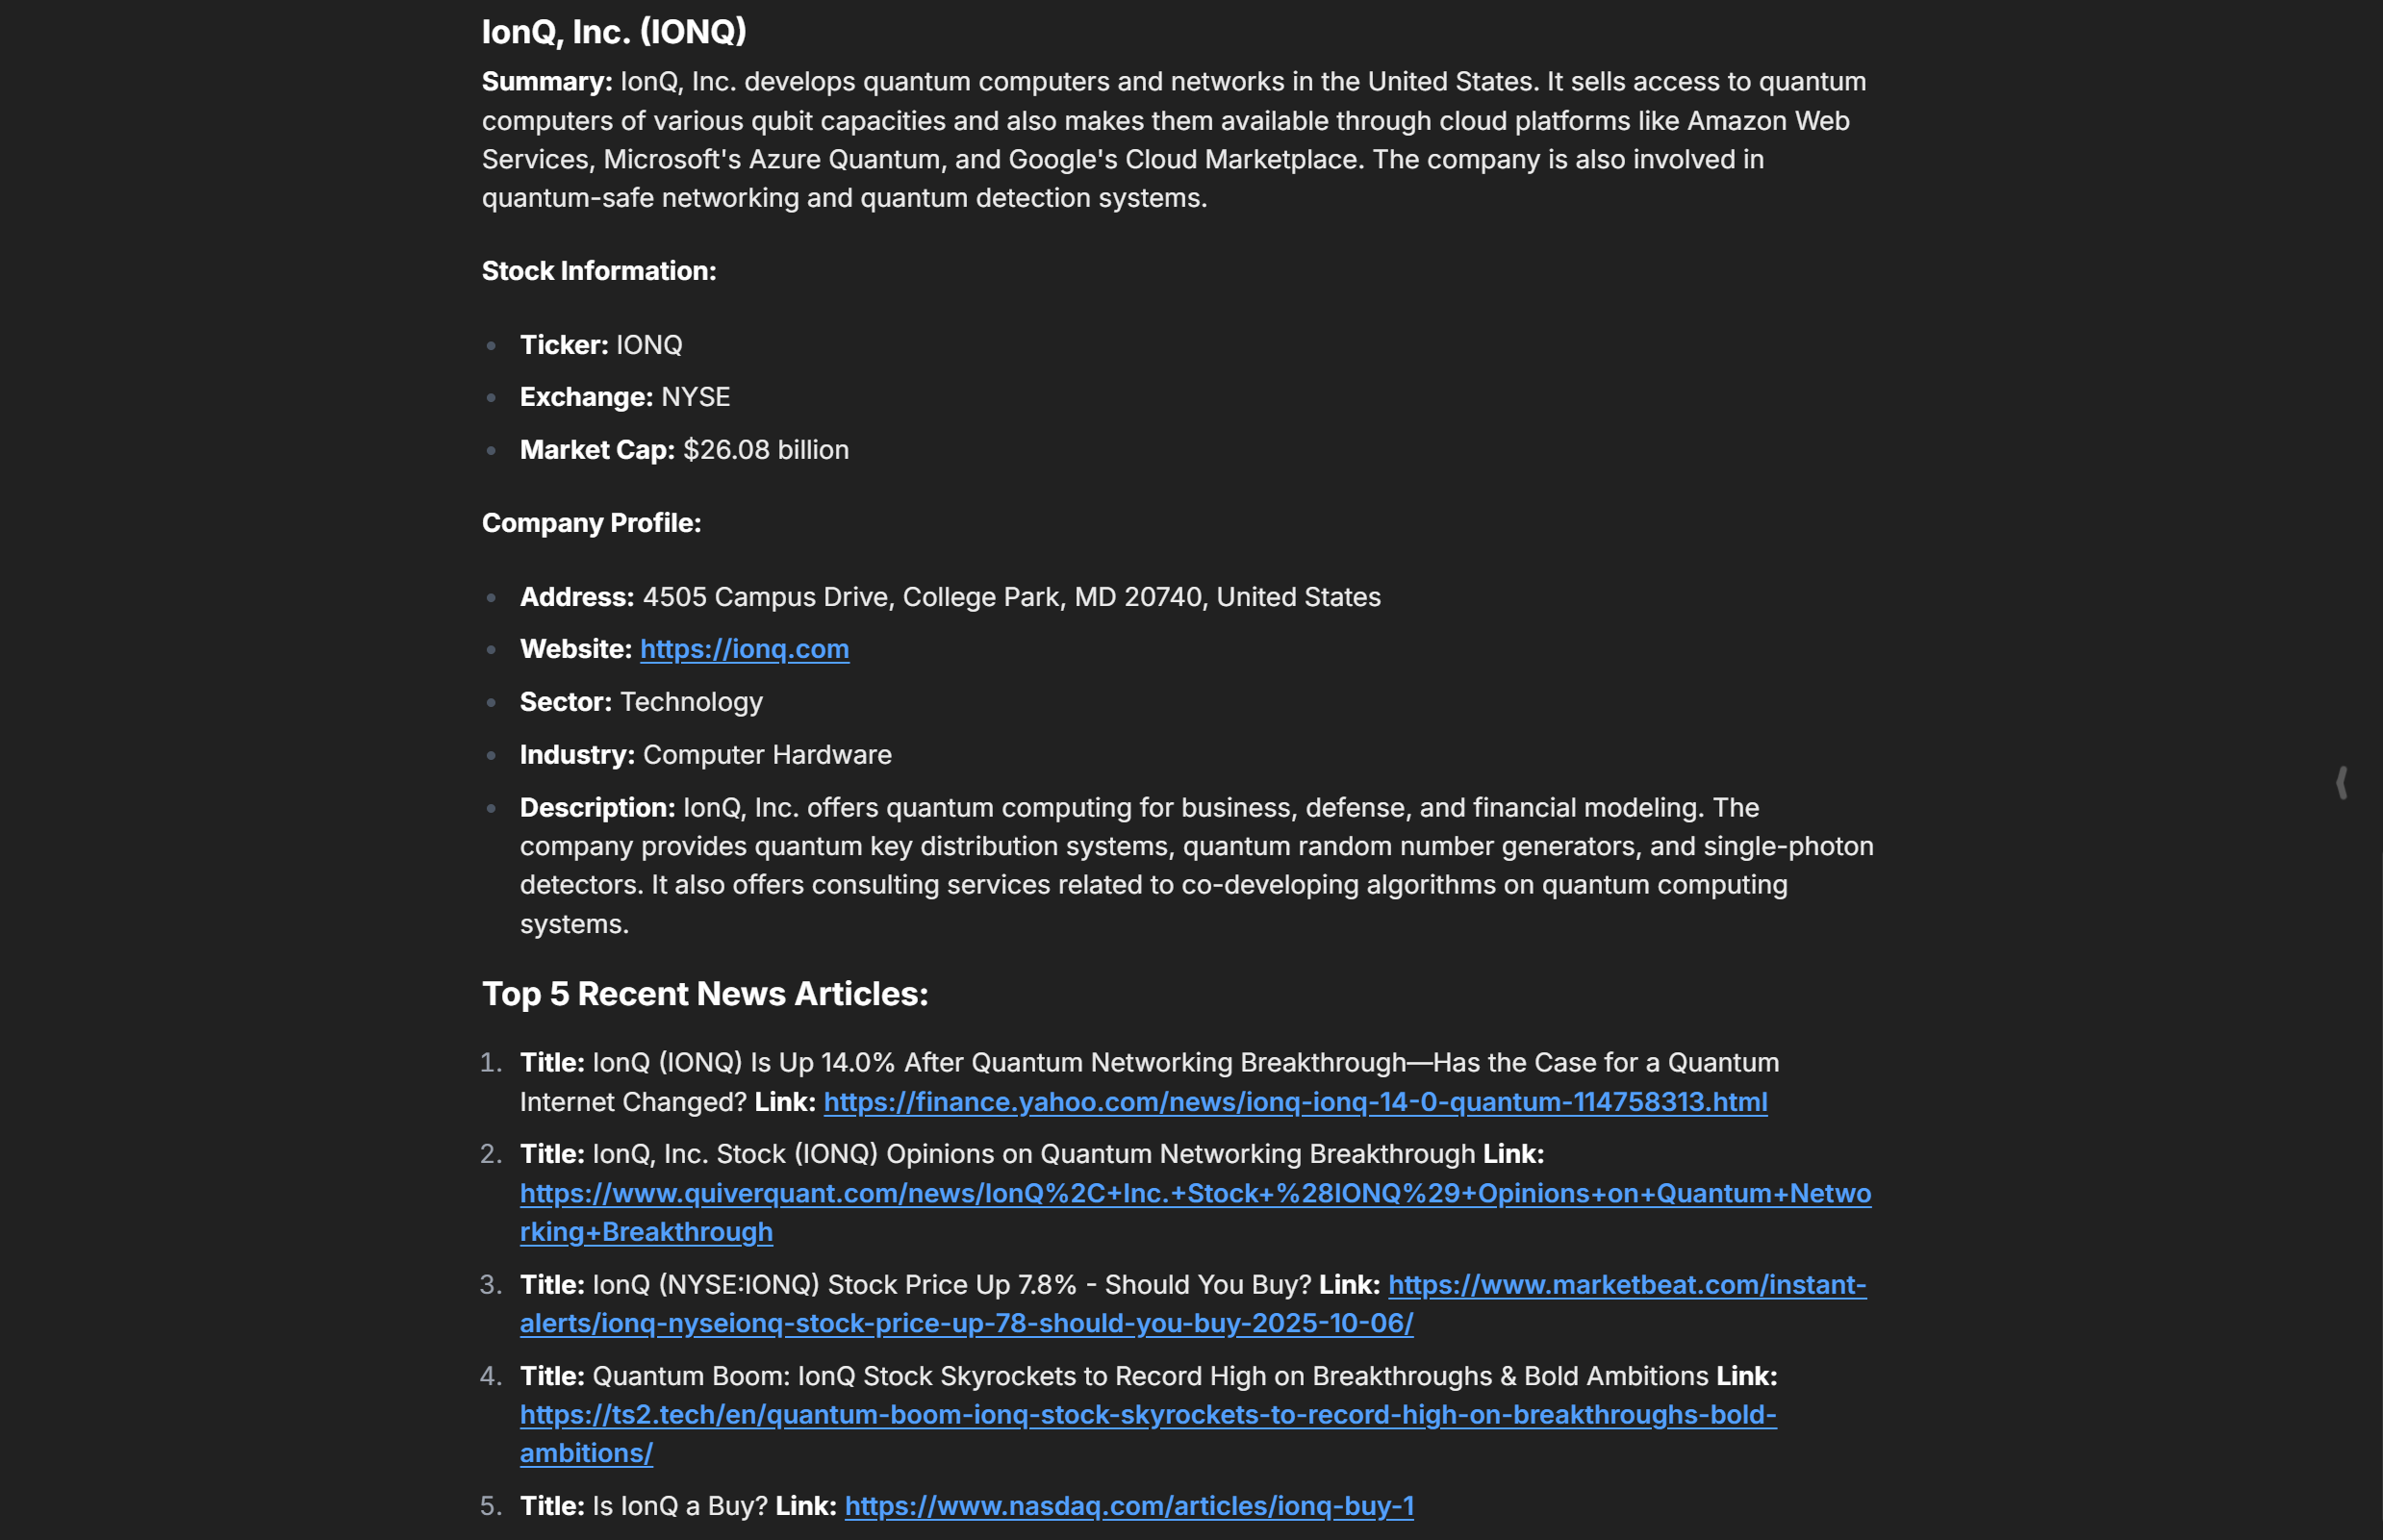
Notice how the company description matches the information on the Yahoo Finance page:
Similarly, the links refer to the latest news regarding the company, extracted from Google News. Cool! Mission complete.
Do not forget that this was just an example. Feel free to experiment with different prompts. With the wide range of Bright Data Web MCP tools, you can tackle many other scenarios.
Et voilà! You just experienced the power of connecting LibreChat to Bright Data’s Web MCP.
Conclusion
In this blog post, you learned how to take advantage of MCP integration in LibreChat. In detail, you saw how to extend popular AI models with tools from Bright Data’s Web MCP.
As proved here, thanks to LibreChat’s flexibility, any LLM you choose automatically gains access to all the tools exposed by the Web MCP server.
This integration empowers your model with advanced capabilities such as web search, structured data extraction, live web data feeds, and automated web interactions. To build complex AI workflows, explore the full range of AI-ready services available within Bright Data’s AI ecosystem.
Create a free Bright Data account today and start exploring our web data tools!

Technical Writer
Antonello Zanini is a technical writer, editor, and software engineer with 5M+ views. Expert in technical content strategy, web development, and project management.


