This guide shows you how to connect Bright Data Web MCP with LangGraph to build an AI research agent that can search, scrape, and reason over live web data.
In this guide, you’ll learn how to:
- Build a LangGraph agent that controls its own reasoning loop
- Give that agent live web access using Bright Data Web MCP free tier
- Wire search and extraction tools into a working agent
- Upgrade the same agent with browser automation using Web MCP premium tools
Introduction to LangGraph
LangGraph lets you build LLM applications where control flow is explicit and easily inspectable, not buried inside prompts or retries. Each step becomes a node. Each transition is one you define.
The agent runs as a loop. The LLM model reads the current state and either responds or asks for a tool. If it calls a tool (like web search), the result is added back to the state, and the model decides again. When it has enough information, the loop ends.

This is the key difference between workflows and agents. A workflow follows fixed steps. An agent loops: decide, act, observe, decide again. This loop is the same foundation used in agentic RAG systems, where retrieval happens dynamically instead of at fixed points.
LangGraph gives you a structured way to build that loop, with memory, tool calling, and explicit stop conditions. You can see every decision the agent makes and control when it stops.
Why Use Bright Data Web MCP with LangGraph
LLMs reason well, but they can’t see what’s happening on the web right now. Their knowledge stops at training time. So, when an agent needs current data, the model tend to fill the gap by guessing.
Bright Data Web MCP gives your agent direct access to live web data through search and extraction tools. Instead of guessing, the model grounds its answers in real, up-to-date sources.
LangGraph is what makes that access usable in an agent setting. An agent has to decide when it knows enough and when to fetch more data.
With Web MCP, when the agent answers a question, it can point to the sources it actually used instead of relying on memory. That makes the output easier to trust and debug.
How to Connect Bright Data Web MCP to a LangGraph Agent
LangGraph controls the agent loop. Bright Data Web MCP gives the agent access to live web data. What’s left is wiring them together without adding complexity.
In this section, you’ll set up a minimal Python project, connect to the Web MCP server, and expose its tools to a LangGraph agent.
Prerequisites
To follow along with this tutorial, you need:
- Python versions 3.11+
- Bright Data account
- OpenAI Platform account
Step #1: Generate OpenAI API Key
The agent needs an LLM API key to reason and decide when to use tools. In this setup, that key comes from OpenAI.
Create an API key from the OpenAI Platform dashboard. Open the “API keys” page and click “Create new secret key”.
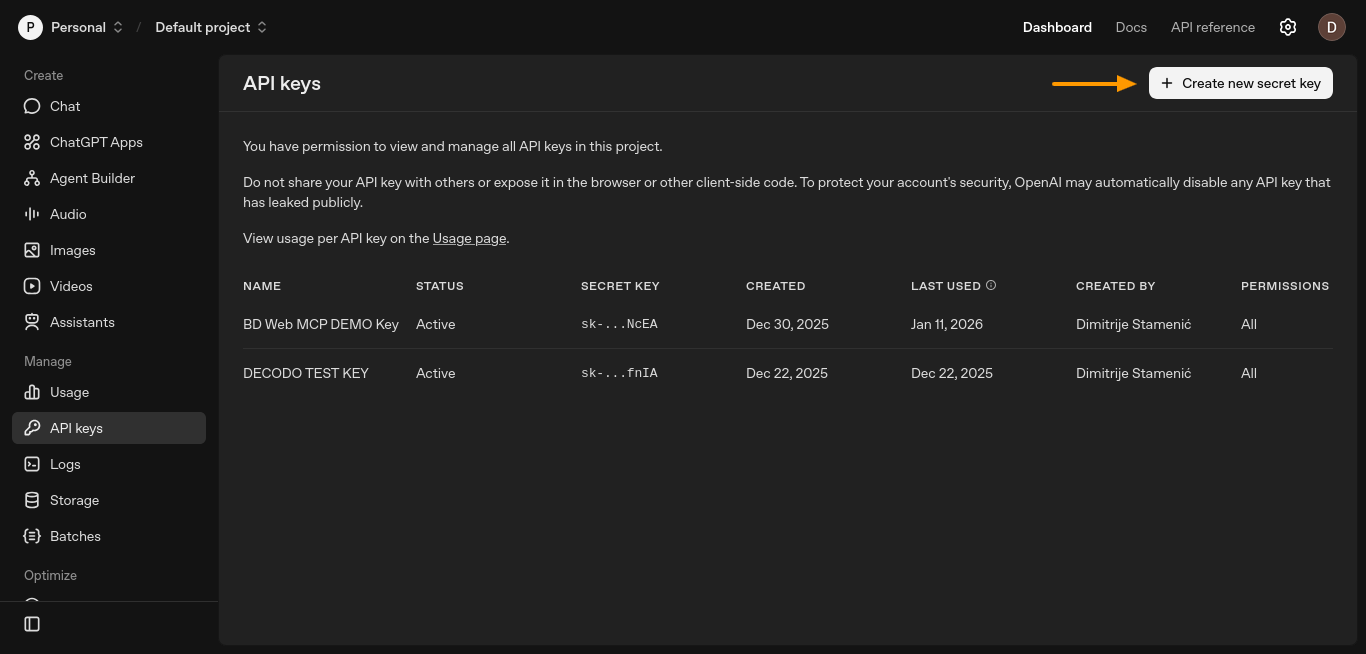
This will open a new window where you can set up your key.
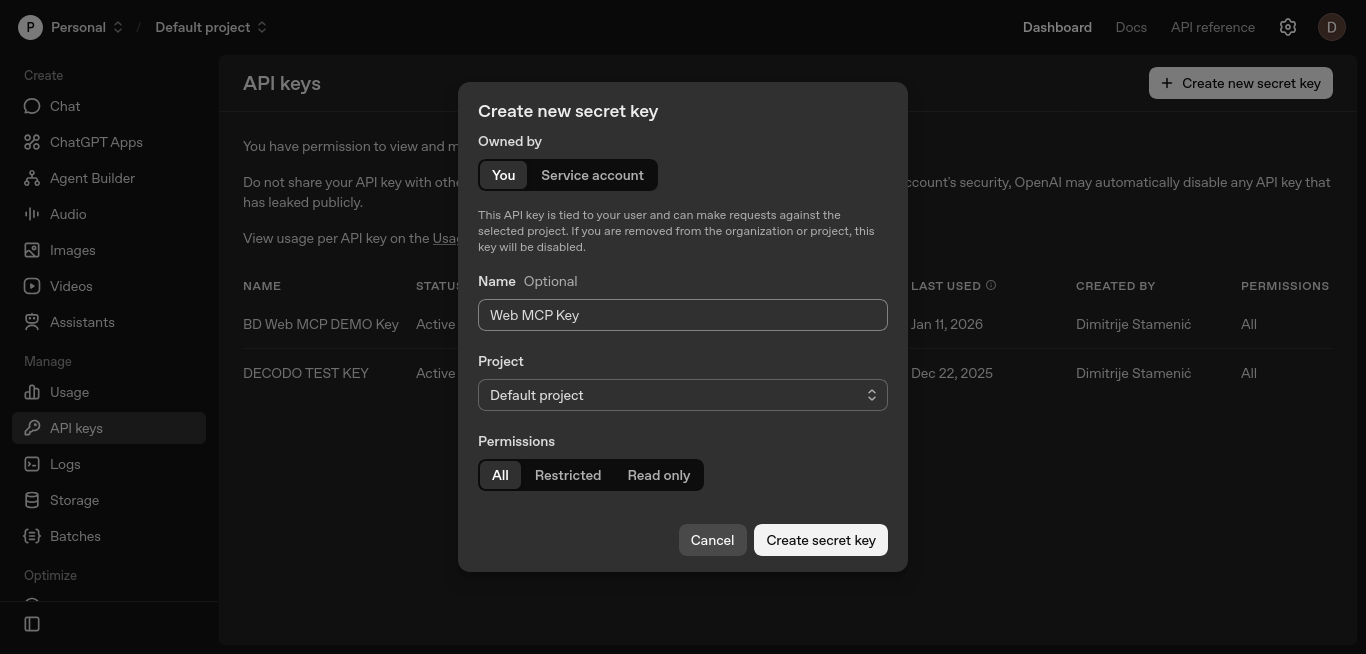
Keep the defaults, optionally name the key, and click “Create secret key”.
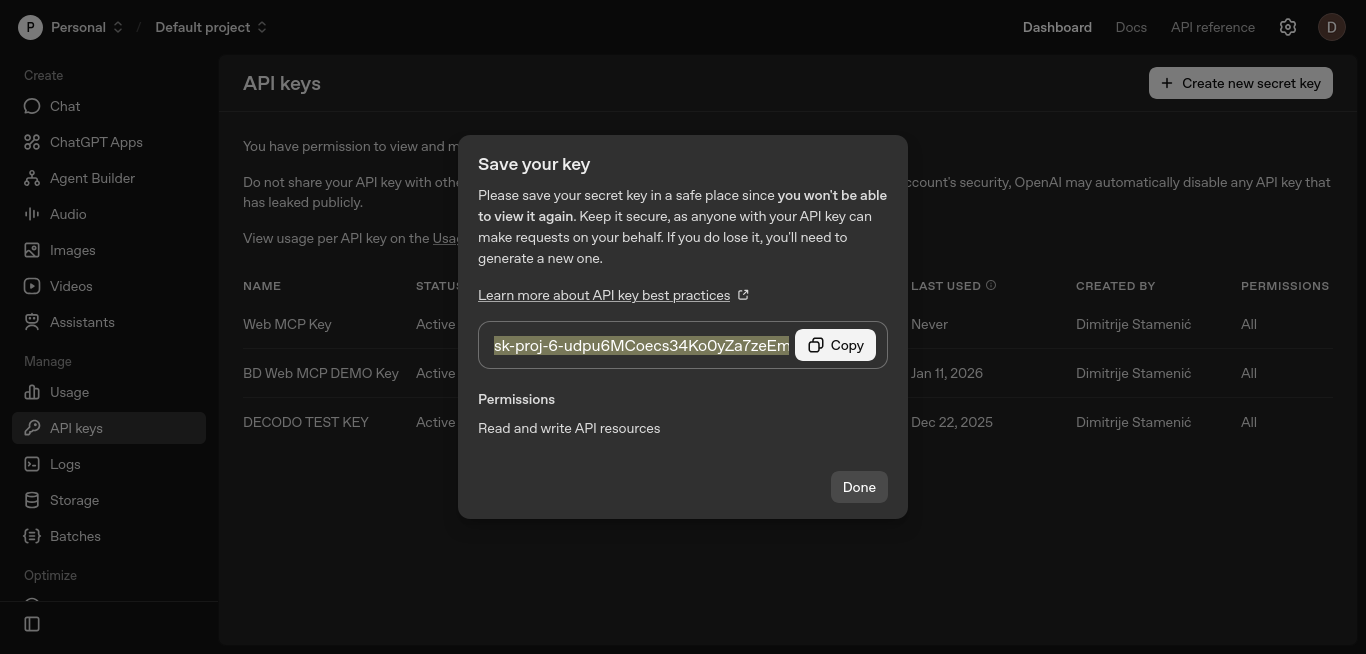
Copy the key and store it securely. You’ll add it to the OPENAI_API_KEY environment variable in the next steps.
This key allows LangGraph to call the LLM model which can decide when to invoke Web MCP tools.
Step #2: Generate Bright Data API Token
Next, you need an API token from Bright Data. This token authenticates your agent with the Web MCP server and allows it to call search and scraping tools.
Generate the token in the Bright Data dashboard. Open “Account settings”, go to “Users and API keys”, and click “+ Add key”.
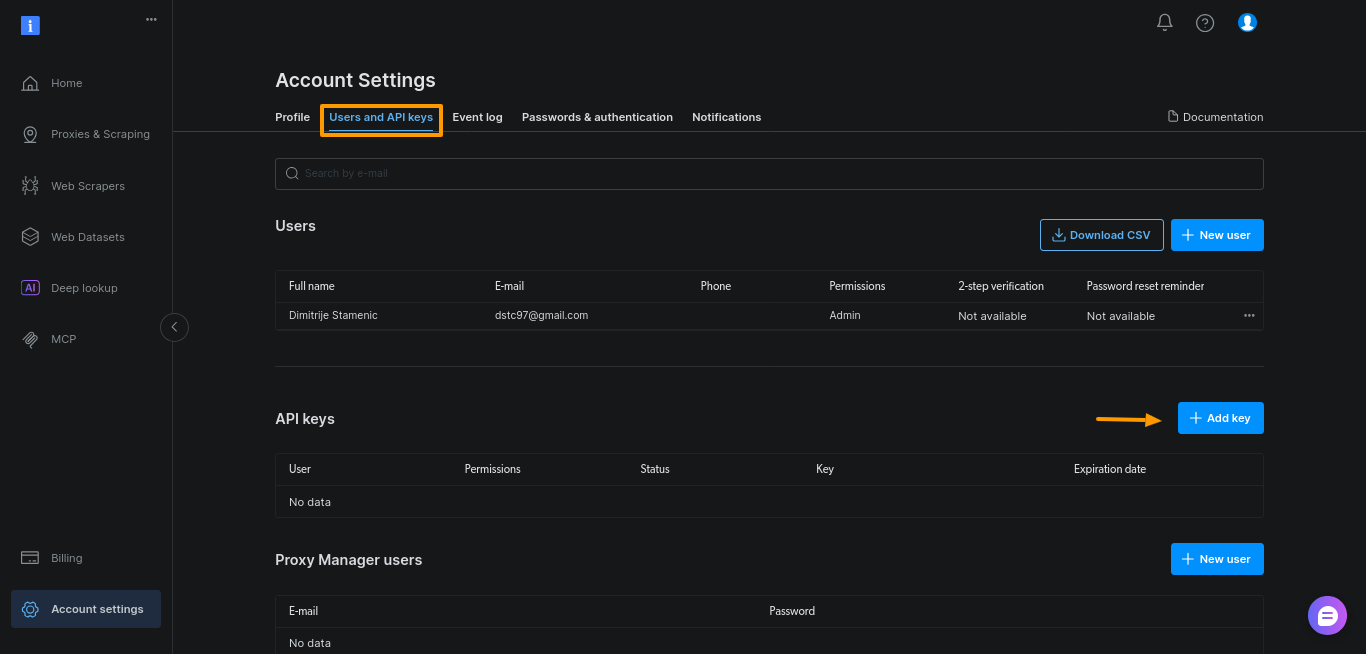
For this guide, just keep the defaults and click “Save”:
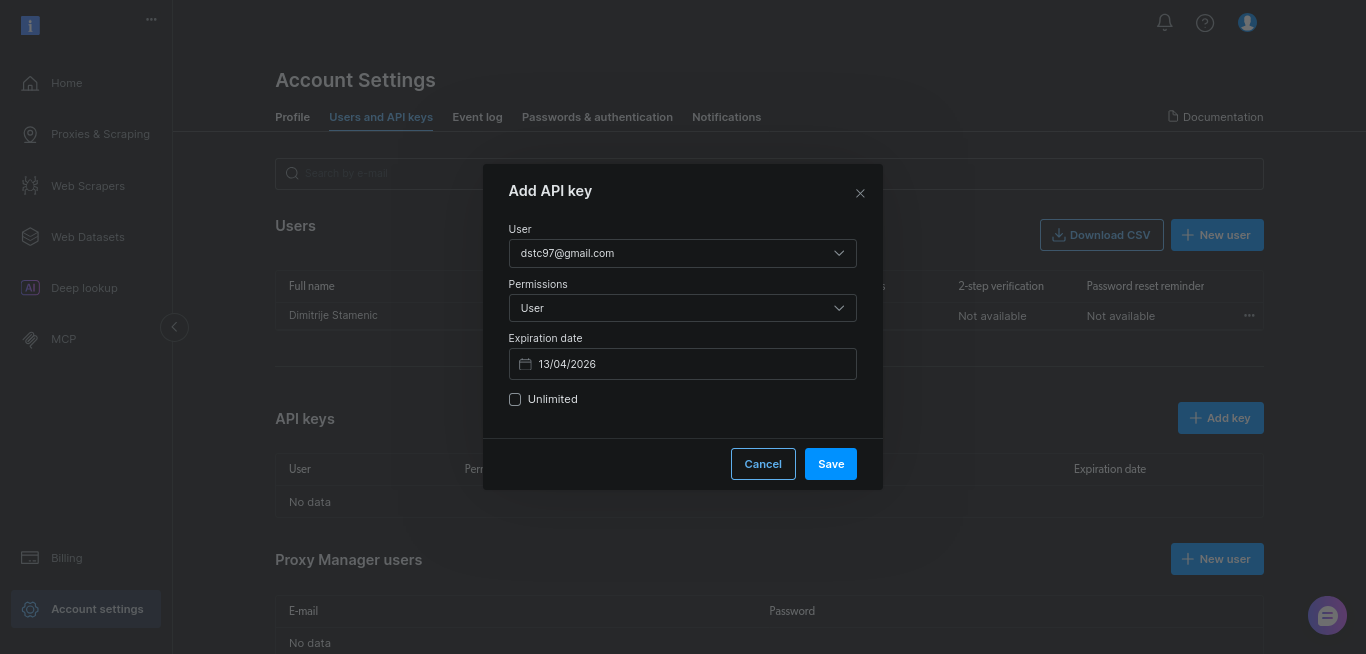
Copy the key and store it securely. You’ll add it to the BRIGHTDATA_TOKEN environment variable in the next steps.
This token is what gives your agent permission to access live web data through Web MCP.
Step #3: Set Up a Simple Python Project
Create a new project directory and virtual environment:
mkdir webmcp-langgraph-demo
cd webmcp-langgraph-demo
python3 -m venv webmcp-langgraph-venv
Activate the virtual environment:
source webmcp-langgraph-venv/bin/activateThis keeps dependencies isolated and avoids conflicts with other projects. With the environment active, install only the required dependencies. These are the same MCP adapters used across Bright Data’s LangChain and LangGraph integrations, so the setup stays consistent as your agent grows:
pip install \
  langgraph \
  langchain \
  langchain-openai \
  langchain-mcp-adapters \
  python-dotenv
Create a .env file to store your API keys:
touch .envPaste OpenAI API key and Bright Data key to the .env file:
OPENAI_API_KEY="your-openai-api-key"
BRIGHTDATA_TOKEN="your-brightdata-api-key"
Keep the OPENAI_API_KEY name unchanged. LangChain reads it automatically, so you don’t need to pass the key in code.
Finally, create a single Python file and define the system prompt that defines the agent’s role, boundaries, and tool usage rules:
# webmcp-langgraph-demo.py file

SYSTEM_PROMPT = """You are a web research assistant.

Task:
- Research the user's topic using Google search results and a few sources.
- Return 6–10 simple bullet points.
- Add a short "Sources:" list with only the URLs you used.

How to use tools:
- First call the search tool to get Google results.
- Select 3–5 reputable results and scrape them.
- If scraping fails, try a different result.

Constraints:
- Use at most 5 sources.
- Prefer official docs or primary sources.
- Keep it quick: no deep crawling.
"""
Step #4: Set Up LangGraph Nodes
This is the core of the agent. Once you understand this loop, everything else is implementation detail.
Before writing code, it helps to understand the agent loop you’re about to build. The diagram shows a simple LangGraph agent loop: the model reads the current state, decides whether it needs external data, calls a tool if needed, observes the result, and repeats until it can answer.
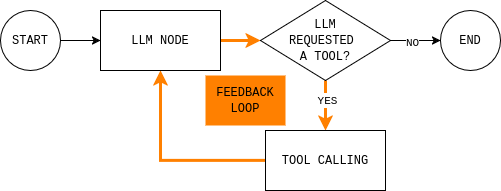
To implement this loop, you need two nodes (an LLM node and a tool execution node) and a routing function that decides whether to continue or end and give a final response.
The LLM node sends the current conversation state and system rules to the model and returns either a response or tool calls. The key detail is that every model response is appended to MessagesState, so later steps can see what the model decided and why.
def make_llm_call_node(llm_with_tools):
    async def llm_call(state: MessagesState):
        messages = [SystemMessage(content=SYSTEM_PROMPT)] + state["messages"]
        ai_message = await llm_with_tools.ainvoke(messages)
        return {"messages": [ai_message]}
    return llm_call
The tool execution node runs whatever tools the model requested and records the outputs as observations. This separation keeps reasoning in the model and execution in code.
def make_tool_node(tools_by_name: dict):
    async def tool_node(state: MessagesState):
        last_ai_msg = state["messages"][-1]
        tool_results = []

        for tool_call in last_ai_msg.tool_calls:
            tool = tools_by_name.get(tool_call["name"])

            if not tool:
                tool_results.append(
                    ToolMessage(
                        content=f"Tool not found: {tool_call['name']}",
                        tool_call_id=tool_call["id"],
                    )
                )
                continue

            # MCP tools are typically async
            observation = (
                await tool.ainvoke(tool_call["args"])
                if hasattr(tool, "ainvoke")
                else tool.invoke(tool_call["args"])
            )

            tool_results.append(
                ToolMessage(
                    content=str(observation),
                    tool_call_id=tool_call["id"],
                )
            )

        return {"messages": tool_results}
    return tool_node
Finally, the routing rule decides whether the graph should continue looping or stop. In practice, it answers a single question: did the model request tools?
def should_continue(state: MessagesState) -> Literal["tool_node", END]:
    last_message = state["messages"][-1]
    if getattr(last_message, "tool_calls", None):
        return "tool_node"
    return END
Step #5: Connect Everything Together
Everything in this step lives inside the main() function. This is where you configure credentials, connect to Web MCP, bind tools, build the graph, and run a query.
Start by loading environment variables and reading BRIGHTDATA_TOKEN. This keeps credentials out of source code and fails fast if the token is missing.
# Load environment variables from .env
load_dotenv()

# Read Bright Data token
bd_token = os.getenv("BRIGHTDATA_TOKEN")
if not bd_token:
    raise ValueError("Missing BRIGHTDATA_TOKEN")
Next, create a MultiServerMCPClient and point it at the Web MCP endpoint. This client connects the agent to live web data.
# Connect to Bright Data Web MCP server
client = MultiServerMCPClient({
    "bright_data": {
        "url": f"https://mcp.brightdata.com/mcp?token={bd_token}",
        "transport": "streamable_http",
    }
})
Note: Web MCP uses Streamable HTTP as its default transport, which simplifies tool streaming and retries compared to older SSE-based setups. This is why most newer MCP integrations standardize on this transport.
Then fetch the available MCP tools and index them by name. The tool execution node uses this map to route calls.
# Fetch all available MCP tools (search, scrape, etc.)
tools = await client.get_tools()
tools_by_name = {tool.name: tool for tool in tools}
Initialize the LLM and bind the MCP tools to it. This enables tool calling.
# Initialize the LLM and allow it to call MCP tools
llm = ChatOpenAI(model="gpt-4.1-mini", temperature=0)
llm_with_tools = llm.bind_tools(tools)
Now build the LangGraph agent shown earlier. Create a StateGraph(MessagesState), add the LLM and tool nodes, and connect the edges to match the loop.
# Build the LangGraph agent
graph = StateGraph(MessagesState)

graph.add_node("llm_call", make_llm_call_node(llm_with_tools))
graph.add_node("tool_node", make_tool_node(tools_by_name))

# Graph flow:
# START → LLM → (tools?) → LLM → END
graph.add_edge(START, "llm_call")
graph.add_conditional_edges("llm_call", should_continue, ["tool_node", END])
graph.add_edge("tool_node", "llm_call")

agent = graph.compile()
Finally, run the agent with a real prompt. Set a recursion_limit to prevent infinite loops.
# Example research query
topic = "What is Bright Data Web MCP?"

# Run the agent
result = await agent.ainvoke(
    {
        "messages": [
            HumanMessage(content=f"Research this topic:\n{topic}")
        ]
    },
    # Prevent infinite loops
    config={"recursion_limit": 12}
)

# Print the final response
print(result["messages"][-1].content)
Here’s what that looks like in main():
async def main():
    # Load environment variables from .env
    load_dotenv()

    # Read Bright Data token
    bd_token = os.getenv("BRIGHTDATA_TOKEN")
    if not bd_token:
        raise ValueError("Missing BRIGHTDATA_TOKEN")

    # Connect to Bright Data Web MCP server
    client = MultiServerMCPClient({
        "bright_data": {
            "url": f"https://mcp.brightdata.com/mcp?token={bd_token}",
            "transport": "streamable_http",
        }
    })

    # Fetch all available MCP tools (search, scrape, etc.)
    tools = await client.get_tools()
    tools_by_name = {tool.name: tool for tool in tools}

    # Initialize the LLM and allow it to call MCP tools
    llm = ChatOpenAI(model="gpt-4.1-mini", temperature=0)
    llm_with_tools = llm.bind_tools(tools)

    # Build the LangGraph agent
    graph = StateGraph(MessagesState)

    graph.add_node("llm_call", make_llm_call_node(llm_with_tools))
    graph.add_node("tool_node", make_tool_node(tools_by_name))

    # Graph flow:
    # START → LLM → (tools?) → LLM → END
    graph.add_edge(START, "llm_call")
    graph.add_conditional_edges("llm_call", should_continue, ["tool_node", END])
    graph.add_edge("tool_node", "llm_call")

    agent = graph.compile()

    # Example research query
    topic = "What is Model Context Protocol (MCP) and how is it used with LangGraph?"

    # Run the agent
    result = await agent.ainvoke(
        {
            "messages": [
                HumanMessage(content=f"Research this topic:\n{topic}")
            ]
        },
        # Prevent infinite loops
        config={"recursion_limit": 12}
    )

    # Print the final response
    print(result["messages"][-1].content)
Note: You can find a complete, runnable version of this agent in this GitHub repository. Clone the repo, add your API keys to a
.envfile, and run the script to see the full LangGraph + Web MCP loop in action.
Using Web MCP Paid Tools to Overcome Scraping Challenges with Browser Automation
Static scraping will break once you move beyond server-rendered pages and into JavaScript-heavy or interaction-driven sites. This is the same static-vs-dynamic split that determines when you need a real browser instead of raw HTML.
It also fails on pages that require real user interaction (infinite scroll, button-driven pagination) where browser automation becomes the only reliable option.
Web MCP exposes browser automation and advanced scraping as MCP tools. To the agent, they’re just additional options when simpler tools fall short.
Enable Browser Automation Tools In Web MCP
Since Web MCP Browser automation tools are not included in the free tier, you first need to add funds to your Bright Data account in the “Billing” menu in the left sidebar.
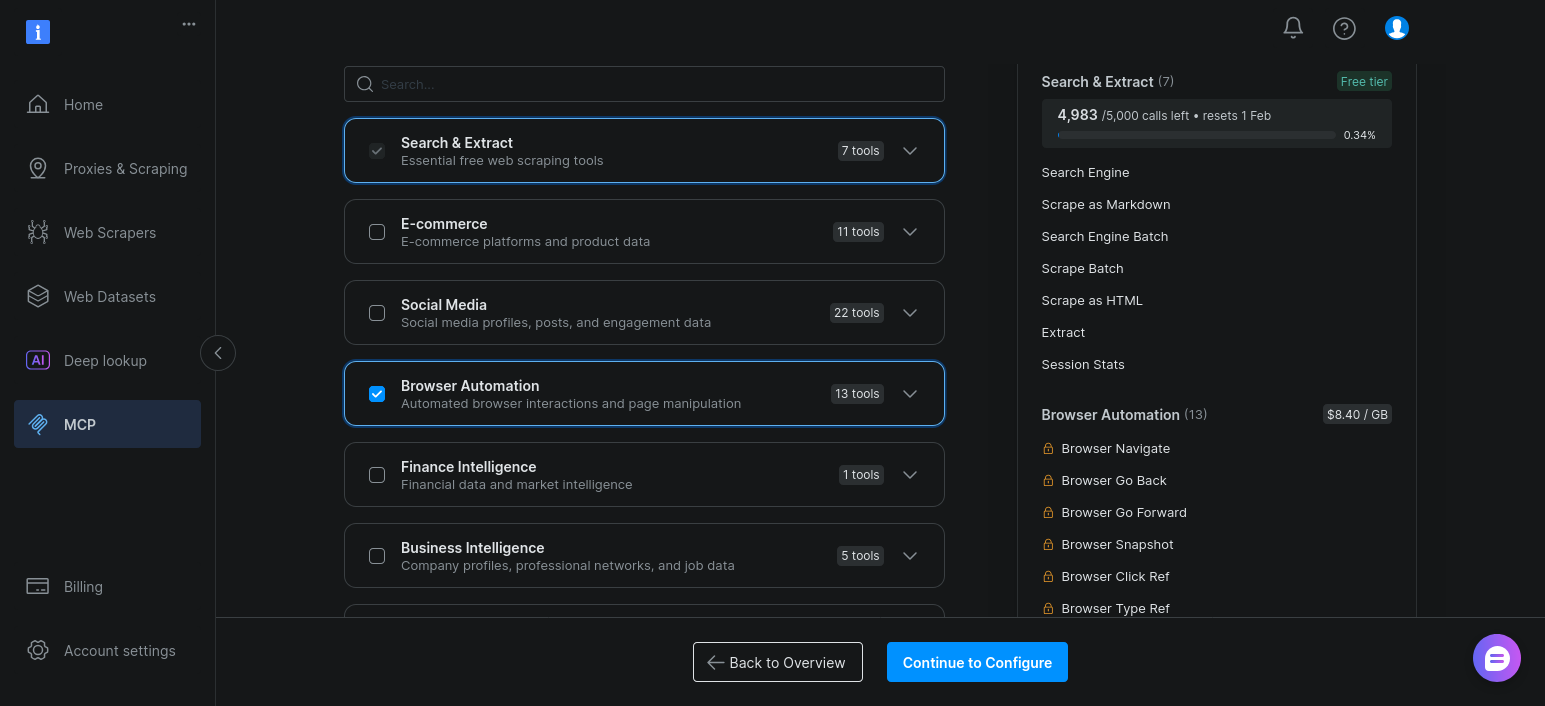
Next, enable the Browser Automation tools group for your MCP setup. Open the “MCP” section, and click “Edit”:
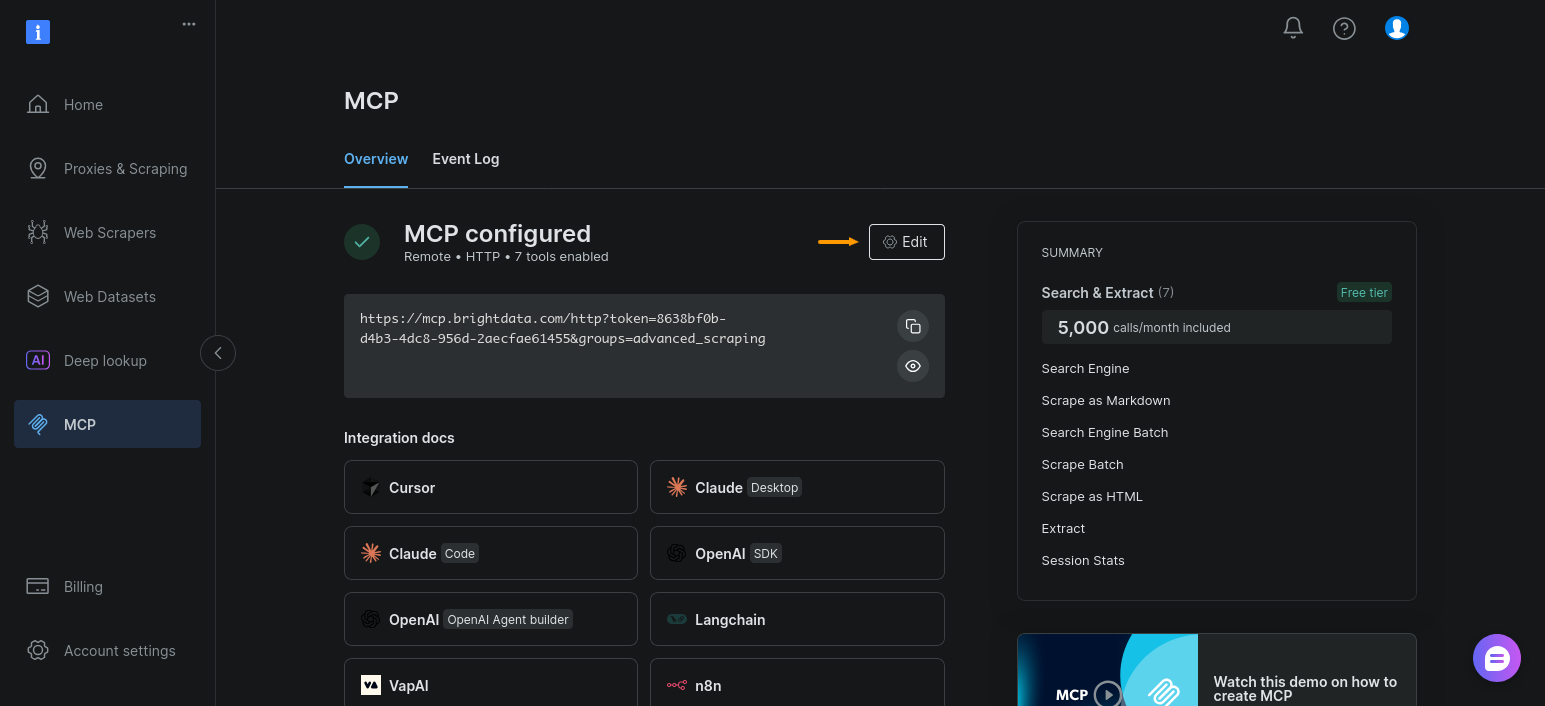
Now just enable “Browser Automation” and click “Continue to Configure”:
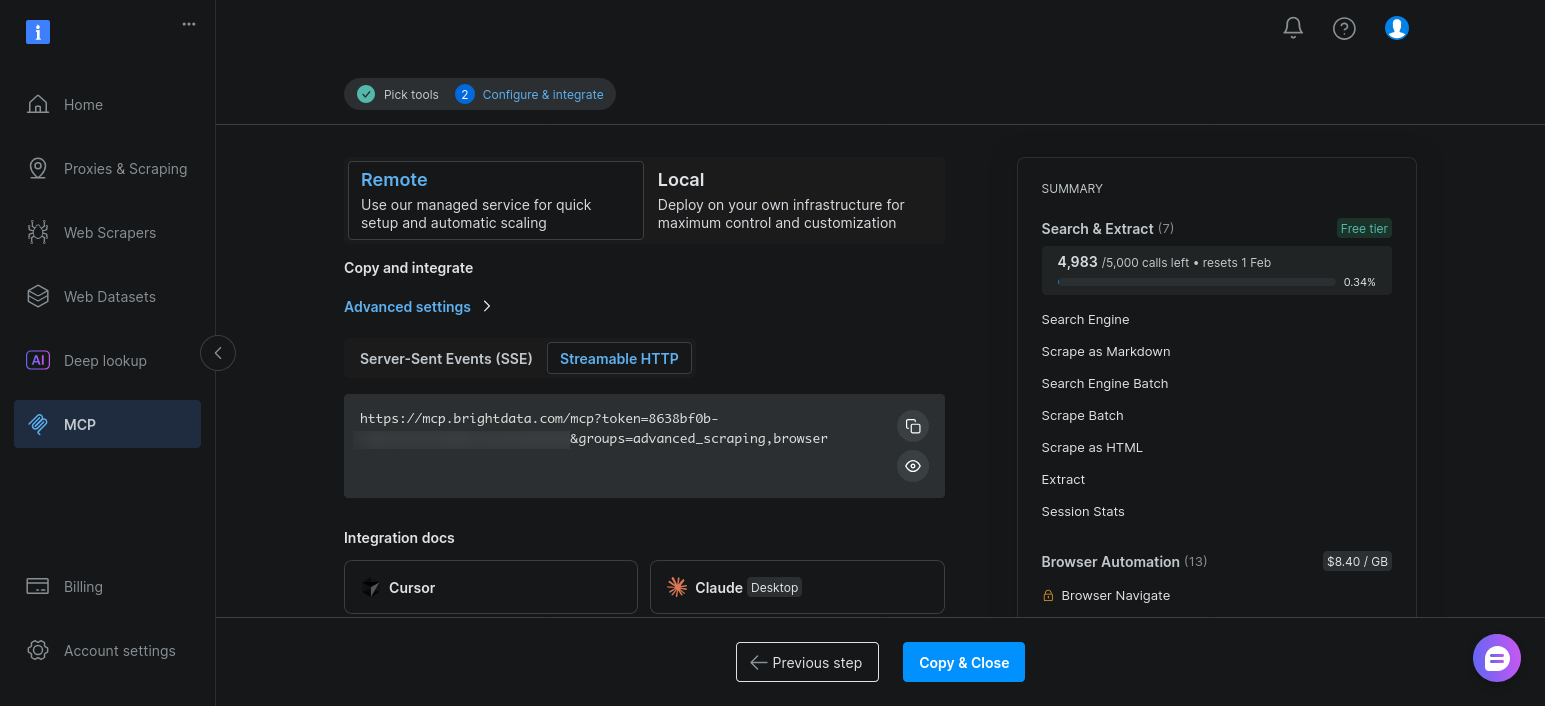
Keep the default settings and click “Copy & Close”:
Once enabled, these tools appear alongside search and scrape tools when the agent calls client.get_tools().
Extend the existing LangGraph Agent for Browser Automation Tools
The key point here is simple: you do not change your LangGraph architecture.
Your agent already:
- Discovers tools dynamically
- Binds them to the model
- Routes execution through the same
LLM -> tool -> observationloop
Adding Browser automation tools only changes which tools are available.
In practice, the only change is the MCP connection URL. Instead of connecting to the basic endpoint, request the advanced scraping and browser automation tool groups:
# Enable advanced scraping and browser automation
"url": f"https://mcp.brightdata.com/mcp?token={bd_token}&groups=advanced_scraping,browser"
When you rerun the script, client.get_tools() returns additional browser-based tools. The model can choose them when static scraping returns thin or incomplete results.
Conclusion
LangGraph gives you a clear, inspectable agent loop with state, routing, and stop conditions you control. Web MCP gives that loop reliable access to real web data without pushing scraping logic into prompts or code.
The result is a clean separation of concerns. The model decides what to do. LangGraph decides how the loop runs. Bright Data handles search, extraction, and blocking issues. When something fails, you can see where it failed and why.
Just as important, this setup doesn’t lock you into a dead end. You can start with basic Web MCP tools for fast research and move to Web MCP paid tools when static scraping breaks. The agent architecture stays the same. Only the agent’s reach expands.


