
In this tutorial, you will learn:
- What the Langchain MCP Adapters library is and what it offers.
- Why utilize it to provide an agent with web search, web data retrieval, and web interaction capabilities via the Bright Data Web MCP.
- How to connect Langchain MCP Adapters to Web MCP in a ReAct agent.
Let’s dive in!
What Is the LangChain MCP Adapters Library?
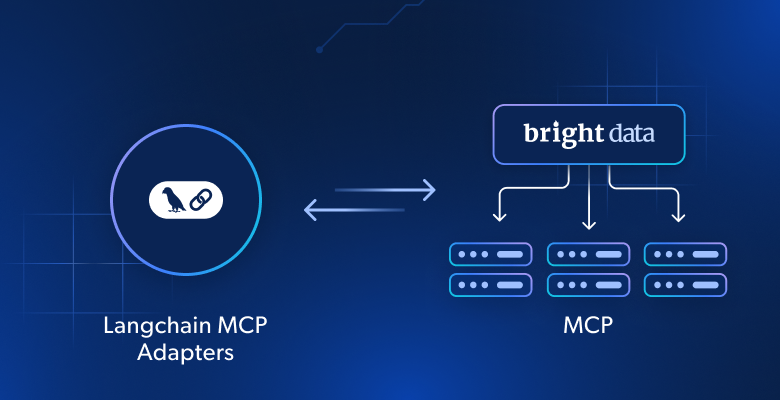
The Langchain MCP Adapters is a package that allows you to use MCP tools in Langchain and LangGraph. It is available via the open-source langchain-mcp-adapters package, which takes care of converting MCP tools into Langchain – and LangGraph-compatible tools.
Thanks to that conversion, you can use MCP tools from local or remote servers directly in your Langchain workflows or LangGraph agents. These MCP tools can be employed just like the hundreds of tools already published for LangGraph agents.
Specifically, the package also includes an MCP client implementation that lets you connect to multiple MCP servers and load tools from them. Learn more about how to use it in the official documentation.
Why Integrate a LangGraph Agent with Bright Data’s Web MCP
AI agents built with LangGraph AI inherit the limitations of the underlying LLM. These include a lack of access to real-time information, which can sometimes lead to inaccurate or outdated responses.
Fortunately, this limitation can be overcome by equipping the agent with up-to-date web data and the ability to perform live web exploration. This is where Bright Data’s Web MCP comes in!
Available as an open-source Node.js package, Web MCP integrates with Bright Data’s suite of AI-ready data retrieval tools, enabling your agent to access web content, query structured datasets, perform web searches, and interact with web pages on the fly.
In particular, two popular tools exposed by Web MCP are:
| Tool | Description |
|---|---|
scrape_as_markdown |
Scrape content from a single webpage URL with advanced extraction options, returning results as Markdown. Can bypass bot detection and CAPTCHA. |
search_engine |
Extract search results from Google, Bing, or Yandex, returning SERP data in JSON or Markdown format. |
In addition, Bright Data’s Web MCP offers around 60 specialized tools for interacting with web pages (e.g., scraping_browser_click) and collecting structured data from a wide range of websites, including Amazon, TikTok, Instagram, Yahoo Finance, LinkedIn, ZoomInfo, and more.
For example, the web_data_zoominfo_company_profile tool retrieves detailed, structured company profile information from ZoomInfo by accepting a valid company URL as input. Discover more on the official Web MCP docs!
If you are instead looking for direct Bright Data integrations via Langchain tools, refer to these guides:
- How to Set Up Bright Data with Langchain
- Web Scraping with Langchain and Bright Data
- Using Langchain and Bright Data for Web Search
How to Connect Web MCP in an AI Agent Using Langchain MCP Adapters
In this step-by-step section, you will learn how to integrate the Bright Data Web MCP into a LagnGraph agent using the MCP Adapters library. The result will be an AI agent with access to over 60 tools for web search, data access, and web interaction.
Once set up, the AI agent will be employed to fetch company data from ZoomInfo and generate a detailed report. This output can help you evaluate whether a company is worth investing in, applying to, or exploring further.
Follow the steps below to get started!
Note: This tutorial focuses on Langchain in Python, but it can easily be adapted to the Langchain JavaScript SDK. Similarly, while the agent will rely on OpenAI, you can substitute it with any other supported LLM.
Prerequisites
To follow along with this tutorial, make sure you have:
- Python 3.8+ installed locally.
- Node.js installed locally (we recommend the latest LTS version).
- A Bright Data API key.
- An OpenAI API key (or an API key from any other LLM supported by Langchain).
No need to worry about setting up Bright Data just yet, as you will be guided through that in the next steps.
It is also helpful (but optional) to have some background knowledge, such as:
- A general understanding of how MCP works.
- Some familiarity with Bright Data’s Web MCP and the tools it provides.
Step #1: Set Up Your Langchain Project
Open a terminal and create a new directory for your LangGraph MCP-powered AI agent:
mkdir langchain-mcp-agentThe langchain-mcp-agent/ folder will hold the Python code for your AI agent.
Next, navigate into the project directory and set up a virtual environment:
cd langchain-mcp-agent
python -m venv .venv
Now, open the project in your favorite Python IDE. We recommend Visual Studio Code with the Python extension or PyCharm Community Edition.
Inside the project folder, create a new file named agent.py. Your project should now look like this:
langchain-mcp-agent/
├── .venv/
└── agent.py
Here, agent.py will be your main Python file. Initialize it for asynchronous code execution with:
import asyncio

async def main():
    # Agent definition logic...

if __name__ == "__main__":
    asyncio.run(main())
Time to activate the virtual environment. In Linux or macOS, run:
source .venv/bin/activateEquivalently, on Windows, launch:
.venv/Scripts/activateWith the environment activated, install the required dependencies:
pip install langchain["openai"] langchain-mcp-adapters langgraphThis is what each package does:
langchain["openai"]: LangChain core library with OpenAI integration.langchain-mcp-adapters: Lightweight wrapper that makes MCP tools compatible with LangChain and LangGraphlanggraph: A low-level orchestration framework for building, managing, and deploying long-running, stateful agents, usually on top of LangChain.
Note: If you do not plan to use OpenAI for LLM integration, replace langchain["openai"] with the equivalent package for your AI provider.
Done! Your Python development environment is ready to support an AI agent that connects to the Bright Data Web MCP.
Step #2: Integrate Your LLM
Disclaimer: If you are using a different LLM provider instead of OpenAI, adjust this section accordingly.
First, set your OpenAI API key in the environment:
import os
os.environ["OPENAI_API_KEY"] = "<YOUR_OPENAI_API_KEY>"
In production, use a more secure and reliable method for environment variables (e.g., via python-dotenv) to avoid hardcoding secrets directly in your script.
Next, import ChatOpenAI from the langchain_openai package:
from langchain_openai import ChatOpenAIChatOpenAI will automatically read your API key from the OPENAI_API_KEY environment variable.
Now, in the main() function, initialize a ChatOpenAI instance with the desired model:
llm = ChatOpenAI(
    model="gpt-5-mini",
)
In this example, we are using gpt-5-mini, but you can replace it with any other available model. This LLM instance will serve as the engine for your AI agent. Great!
Step #3: Test the Bright Data Web MCP
Before connecting your agent to Bright Data’s Web MCP, first verify that your machine can actually run the MCP server.
If you have not already, begin by creating a Bright Data account. If you already have one, simply log in. For a quick setup, open the “MCP” page in your account and follow the instructions:

Otherwise, follow the steps below for a more guided approach.
First, generate a Bright Data API key and store it in a safe place (as you will need it soon). In this tutorial, we will assume the API key has Admin permissions, since that makes the integration process much simpler.
Open your terminal, and install the Web MCP globally via the @brightdata/mcp package:
npm install -g @brightdata/mcpVerify that the local MCP server works with this Bash command:
API_TOKEN="<YOUR_BRIGHT_DATA_API>" npx -y @brightdata/mcpOr, equivalently, on Windows PowerShell, execute:
$Env:API_TOKEN="<YOUR_BRIGHT_DATA_API>"; npx -y @brightdata/mcpReplace the <YOUR_BRIGHT_DATA_API> placeholder with the actual Bright Data API token. The above two commands set the required API_TOKEN environment variable and then fire the MCP server locally.
In case of success, you should see logs similar to this:

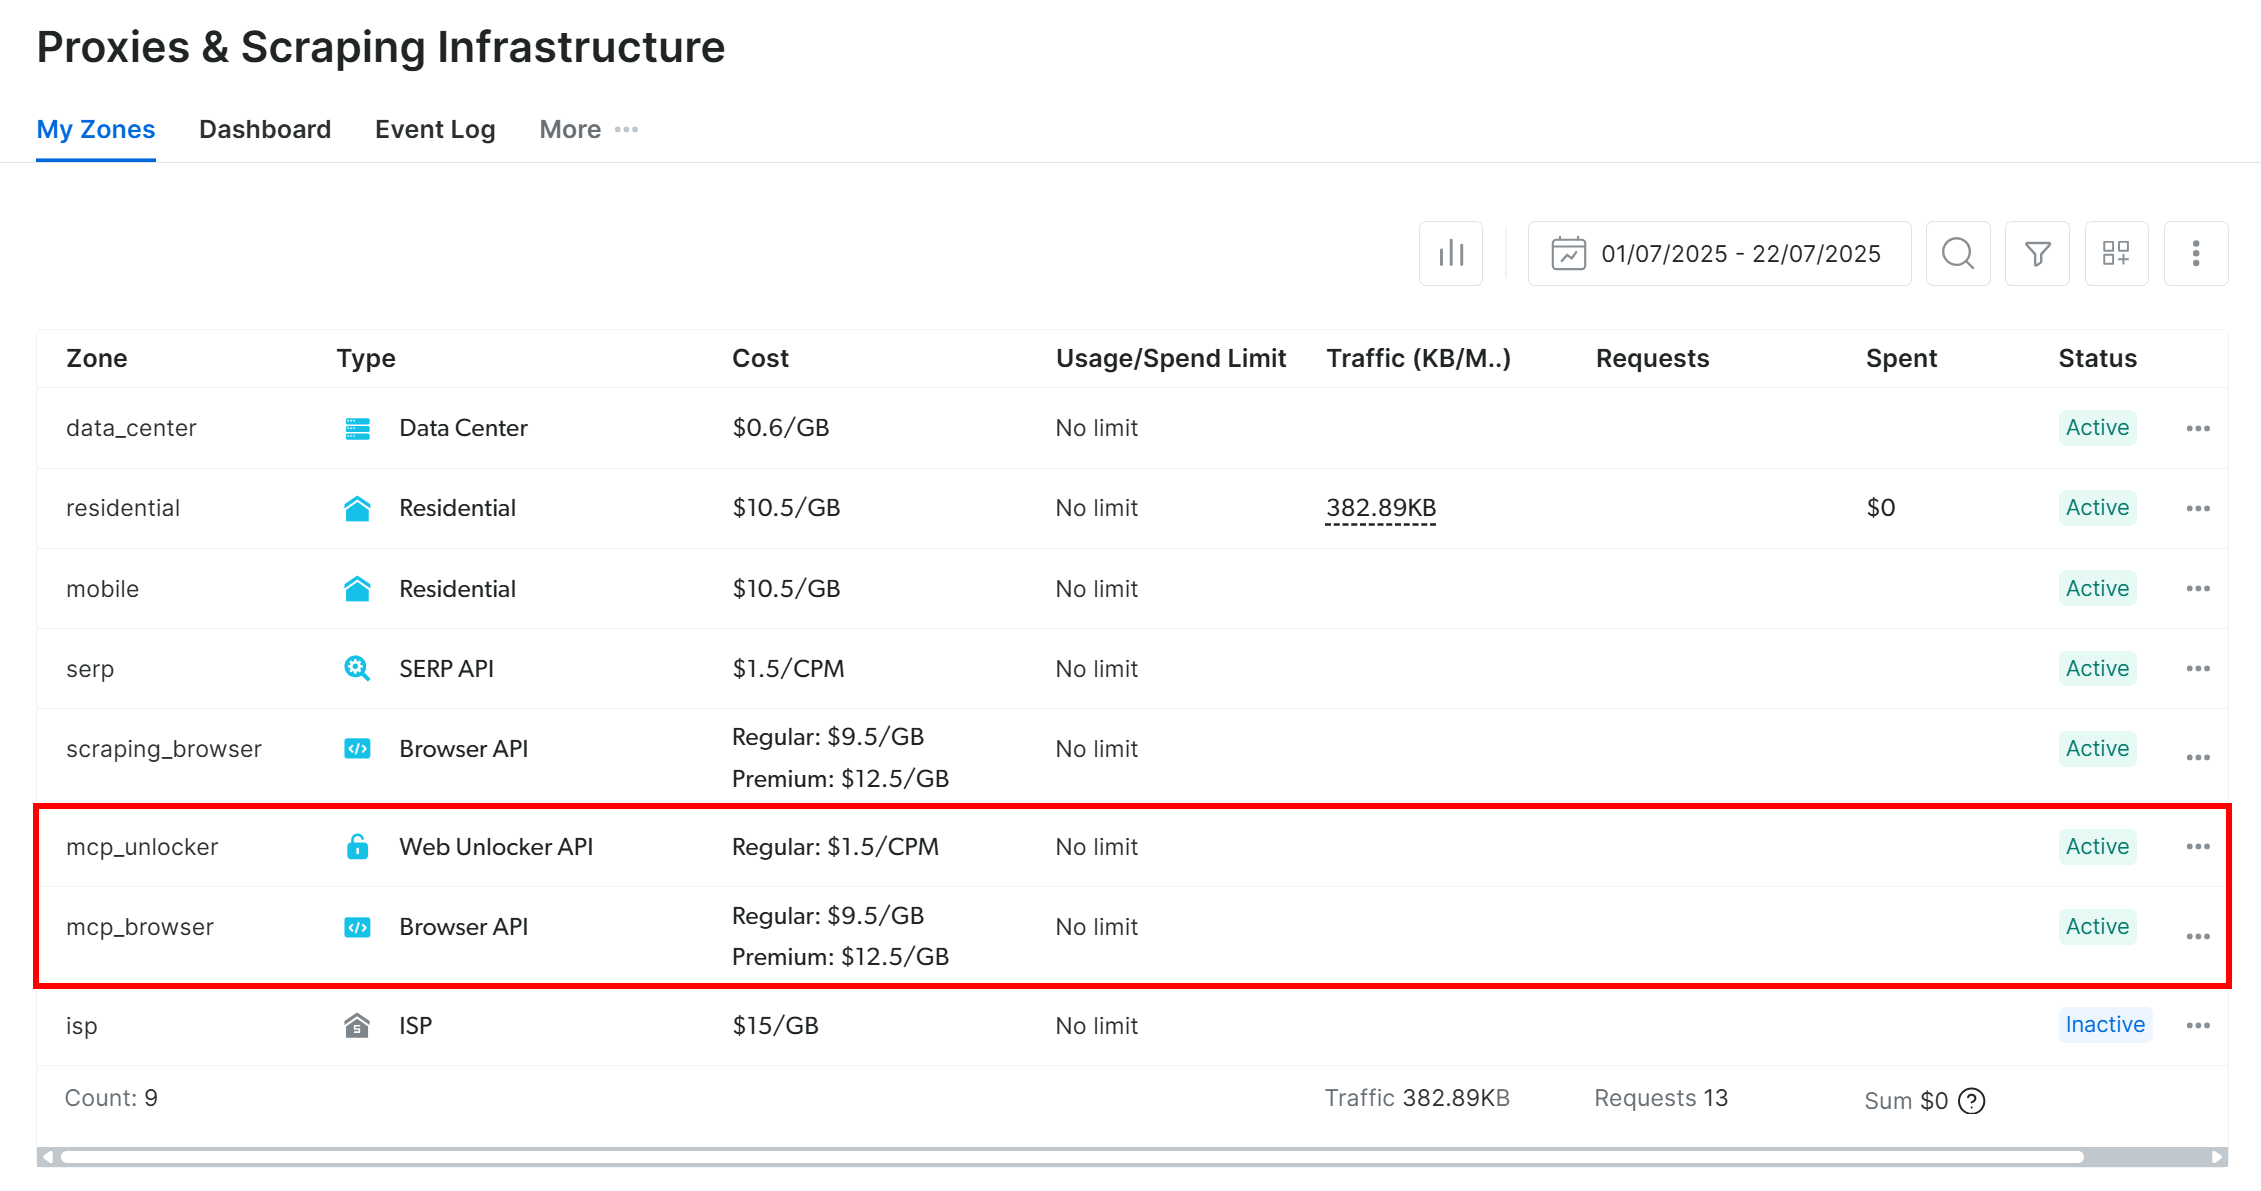
On first launch, the @brightdata/mcp package automatically sets up two default zones in your Bright Data account:
mcp_unlocker: A zone for Web Unlocker.mcp_browser: A zone for Browser API.
These two zones are required by the Web MCP to expose all 60+ tools.
To confirm that the above zones were created, log in to your Bright Data dashboard. Navigate to the “Proxies & Scraping Infrastructure” page, and you should see the two zones listed in the table:
If your API token does not have Admin permissions, these zones will not be set up for you. In this case, you can create them manually in the dashboard and specify their names through environment variables, as explained on the GitHub page of the package.
Note: By default, the Web MCP server exposes only the search_engine and scrape_as_markdown tools (which can be used even for free!). To unlock advanced tools for browser automation and structured data extraction, you need to enable Pro mode.
To enable Pro mode, set the PRO_MODE=true environment variable before launching the MCP server:
API_TOKEN="<YOUR_BRIGHT_DATA_API>" PRO_MODE="true" npx -y @brightdata/mcpOr, in PowerShell:
$Env:API_TOKEN="<YOUR_BRIGHT_DATA_API>"; $Env:PRO_MODE="true"; npx -y @brightdata/mcpImportant: If you choose to use Pro mode, you will gain access to all 60+ tools. On the other hand, Pro mode is not included in the free tier and will incur additional charges.
Perfect! You verified that your machine can run the Web MCP server. Kill the server process, as you will now configure Langchain to launch it automatically and connect to it.
Step #4: Initialize the Web MCP Connection via Langchain MCP Adapters
First, import the required libraries from the Langchain MCP Adapters package:
from mcp import ClientSession, StdioServerParameters
from mcp.client.stdio import stdio_client
from langchain_mcp_adapters.tools import load_mcp_tools
Since your machine can run a local Web MCP server, the easiest way to connect is via stdio (standard input/output) rather than SSE or Streamable HTTP. In simpler terms, you are configuring your AI application to start the MCP server as a subprocess and communicate with it directly using standard input/output.
To do so, define the StdioServerParameters configuration object like this:
server_params = StdioServerParameters(
    command="npx",
    args=["-y", "@brightdata/mcp"],
    env={
        "API_TOKEN": "<YOUR_BRIGHT_DATA_API_KEY>",
        "PRO_MODE": "true"
    }
)
This setup mirrors the command you previously ran manually to test the Web MCP. Your application will use that configuration to run npx with the required environment variables (remember that PRO_MODE is optional) and launch the Web MCP as a subprocess.
Next, initialize the MCP session and load the exposed tools:
async with stdio_client(server_params) as (read, write):
    async with ClientSession(read, write) as session:
        await session.initialize()

        tools = await load_mcp_tools(session)
The load_mcp_tools() function does the heavy lifting: it automatically converts the MCP tools into Langchain – and LangGraph-compatible tools.
Fantastic! You now have a list of tools ready to pass into your LangGraph agent definition.
Step #5: Create and Interrogate a ReAct Agent
Inside the inner with block, use the LLM engine along with the list of MCP tools to create your LangGraph agent with create_react_agent():
agent = create_react_agent(llm, tools) Note: When working with tools, it is best to rely on AI agents that follow the ReAct architecture. The reason is that this approach enables them to reason more thoroughly about the process and choose the right tools to complete the task.
Import create_react_agent() from LangGraph:
from langgraph.prebuilt import create_react_agentNext, interrogate the AI agent. Instead of waiting for the entire response and printing it all at once, it is better to stream the output directly to the console. Tool usage can take time, so streaming provides useful feedback as the agent processes the task:
input_prompt = """
    Scrape data from the ZoomInfo company page: 'https://www.zoominfo.com/c/nike-inc/27722128'. Then, using the retrieved data, produce a concise report in Markdown format summarizing the main information about the company.
"""

# Stream the agent’s response
async for step in agent.astream({"messages": [input_prompt]}, stream_mode="values"):
    step["messages"][-1].pretty_print()
In this example, the agent is asked to:
“Scrape data from the ZoomInfo company page: ‘https://www.zoominfo.com/c/nike-inc/27722128‘. Then, using the retrieved data, produce a concise report in Markdown format summarizing the main information about the company.”
Note: The ZoomInfo company page URL refers to Nike, but you can change it to any other company, or modify the prompt entirely for a different data retrieval scenario.
This mirrors exactly what was described in the introduction of this chapter. Importantly, such a task forces the agent to make use of the Web MCP tools to fetch and structure real data. So that makes it a perfect demonstration of the integration!
Cool! Your Web MCP + Langchain LangGraph AI agent is ready. It only remains to see it in action.
Step #6: Put It All Together
The final code in agent.py should be:
import asyncio
import os
os.environ["OPENAI_API_KEY"] = "<YOUR_OPENAI_API_KEY>" # Replace with your OpenAI API key

from langchain_openai import ChatOpenAI
from mcp import ClientSession, StdioServerParameters
from mcp.client.stdio import stdio_client
from langchain_mcp_adapters.tools import load_mcp_tools
from langgraph.prebuilt import create_react_agent

async def main():
    # Initialize the LLM engine
    llm = ChatOpenAI(
        model="gpt-5-mini",
    )

    # Configuration to connect to a local Bright Data Web MCP server instance
    server_params = StdioServerParameters(
        command="npx",
        args=["-y", "@brightdata/mcp"],
        env={
            "API_TOKEN": "<YOUR_BRIGHT_DATA_API_KEY>", # Replace with your Bright Data API key
            "PRO_MODE": "true"
        }
    )

    # Connect to the MCP server
    async with stdio_client(server_params) as (read, write):
        async with ClientSession(read, write) as session:
            # Initialize the MCP client session
            await session.initialize()

            # Get the MCP tools
            tools = await load_mcp_tools(session)

            # Create the ReAct agent
            agent = create_react_agent(llm, tools)

            # Agent task description
            input_prompt = """
                Scrape data from the ZoomInfo company page: 'https://www.zoominfo.com/c/nike-inc/27722128'. Then, using the retrieved data, produce a concise report in Markdown format summarizing the main information about the company.
            """

            # Stream the agent’s response
            async for step in agent.astream({"messages": [input_prompt]}, stream_mode="values"):
                step["messages"][-1].pretty_print()

if __name__ == "__main__":
    asyncio.run(main())
Wow! In just ~50 lines of code, you just built a ReAct agent with MCP integration, thanks to the Langchain MCP Adapters.
Launch your agent with:
python agent.pyIn the terminal, you should immediately see:

This proves that the LangGraph agent receives your prompt as intended. Then, the LLM engine processes it and immediately determines that web_data_zoominfo_company_profile is the correct MCP tool from the Web MCP to call to complete the task. In detail, it calls the tool with the right ZoomInfo URL argument inferred from the prompt (https://www.zoominfo.com/c/nike-inc/27722128).
The output of the tool call will be:

The web_data_zoominfo_company_profile tool returns the ZoomInfo company profile data in JSON format. Note that this is not hallucinated or made-up content by the GPT-5 mini model!
Instead, the data comes directly from the ZoomInfo Scraper available in the Bright Data infrastructure, which is called behind the scenes by the selected web_data_zoominfo_company_profile Web MCP tool.
ZoomInfo Scraper bypasses all anti-bot protections, collects data from the company’s public profile page on the fly, and returns it in a structured JSON format. As you can verify from the actual ZoomInfo page, the data retrieved is accurate and comes directly from the target page:
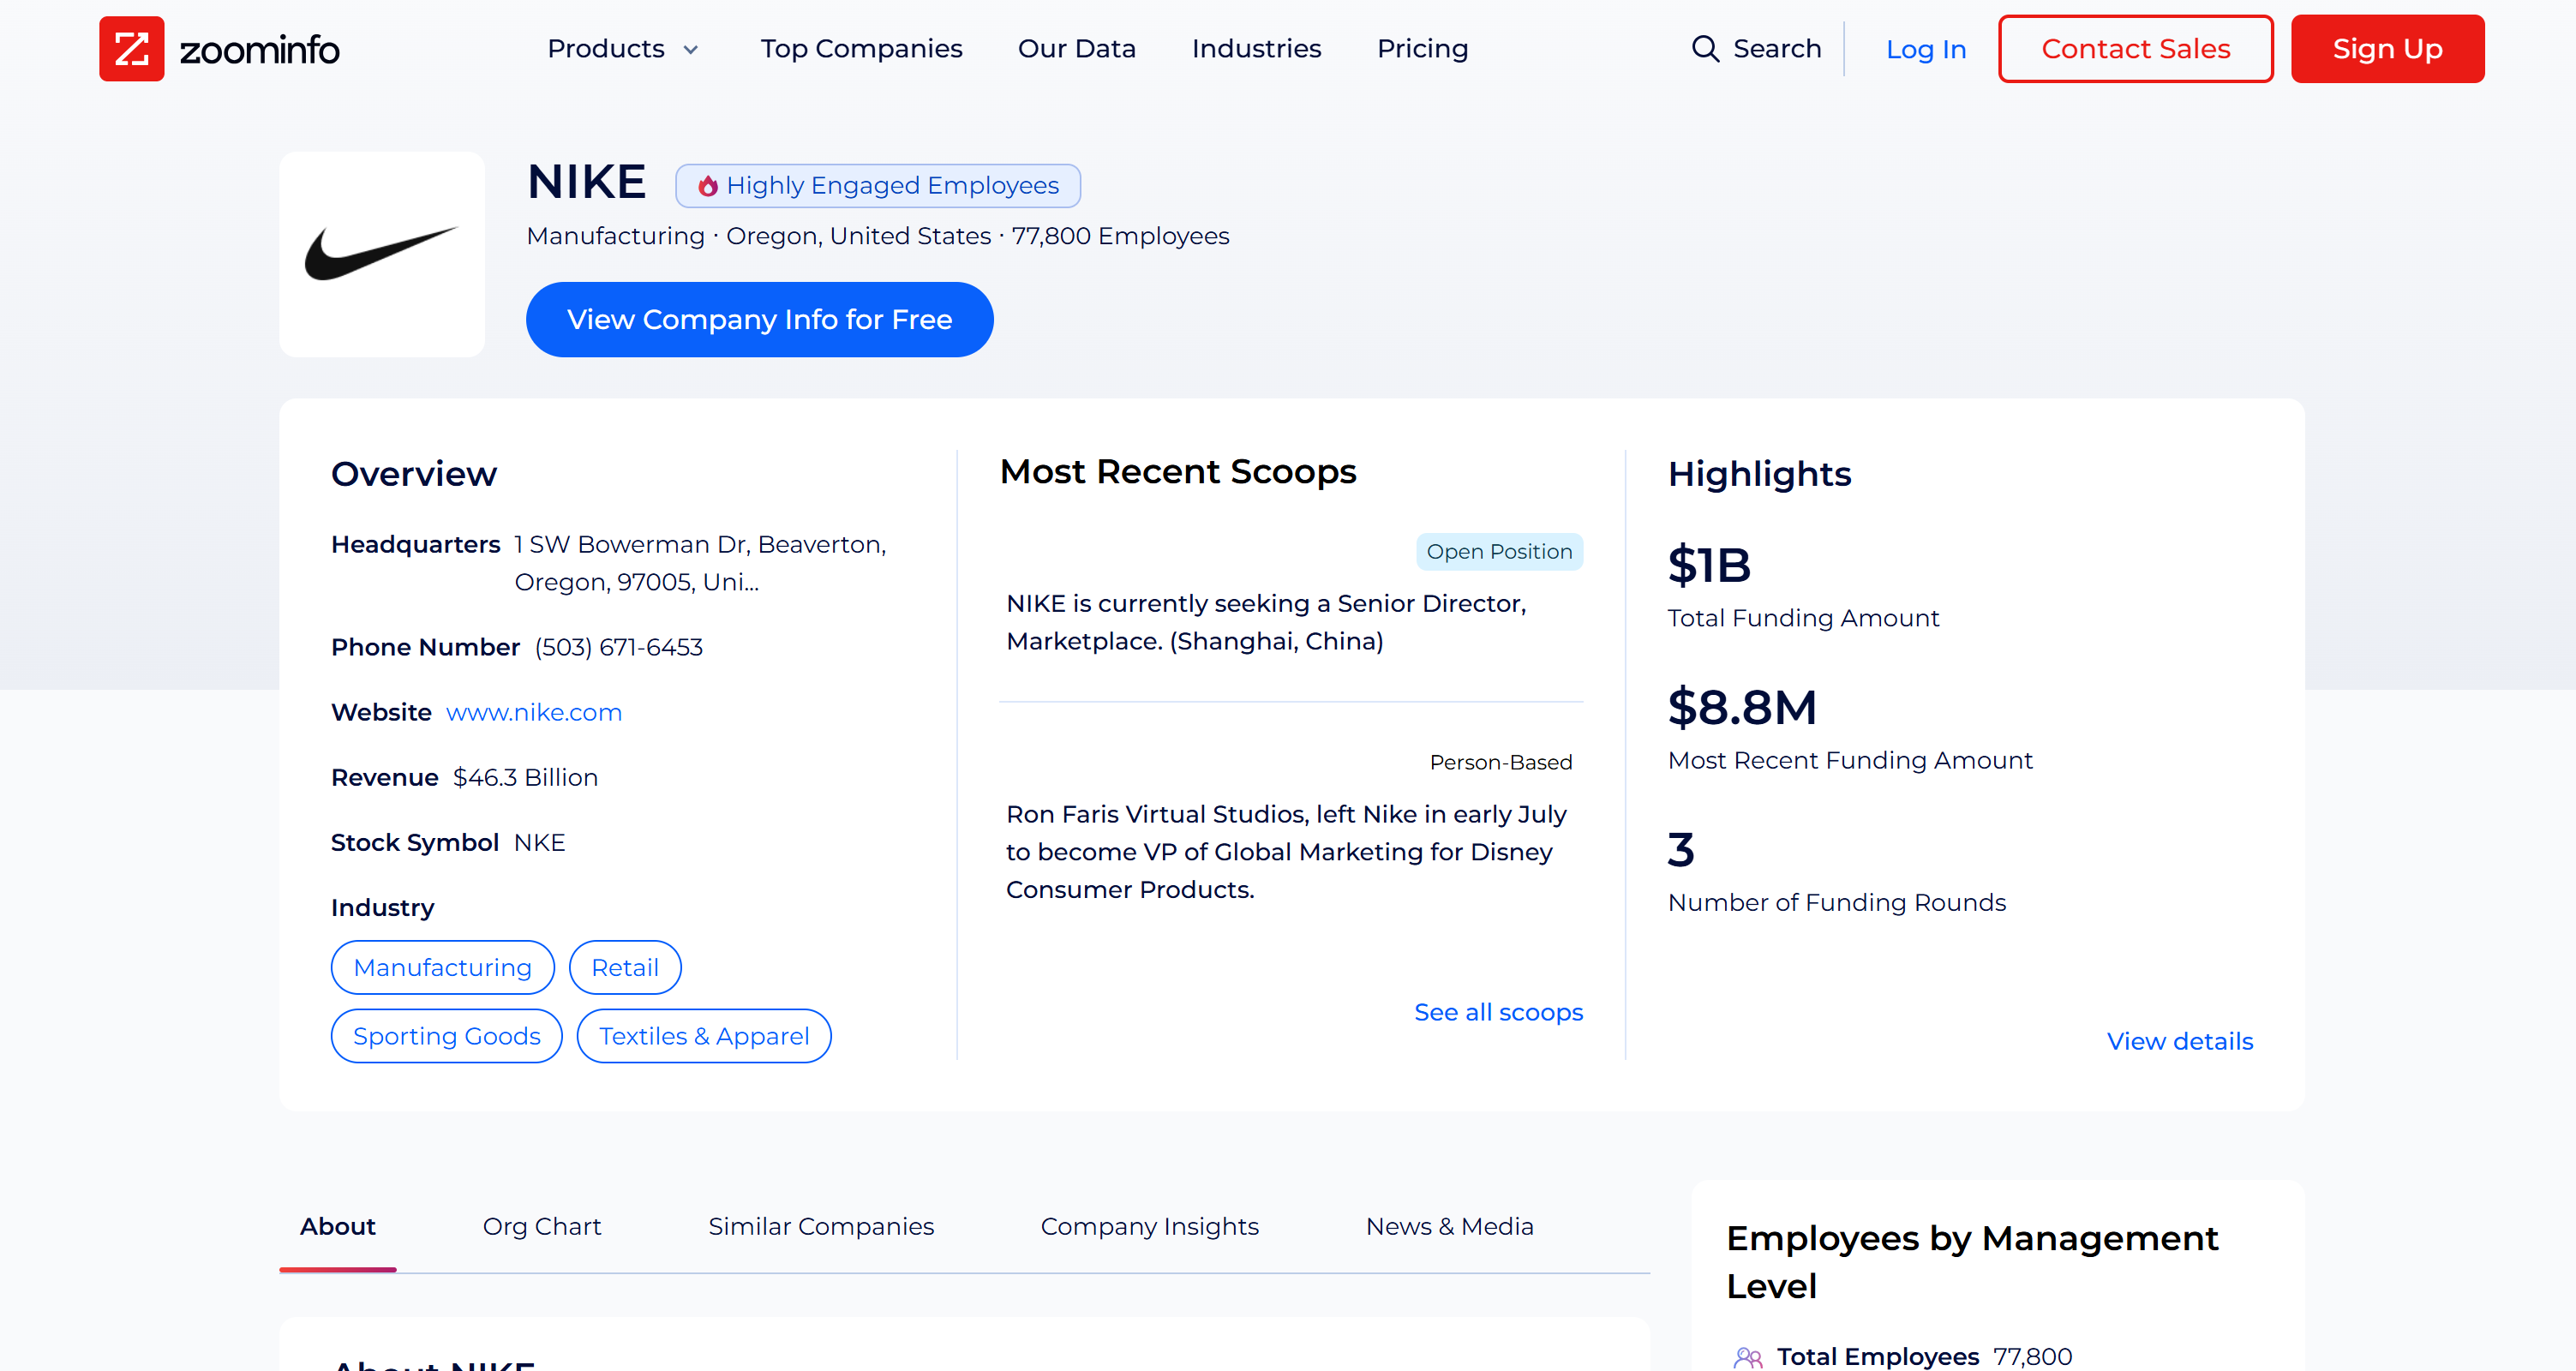
Keep in mind that scraping ZoomInfo is not an easy task due to their anti-scraping techniques, including a challenging CAPTCHA. Thus, this is not a task that any LLM can do. On the contrary, it can only be carried out by an agent with access to dedicated web data retrieval tools.
This simple example demonstrates the power of the Langchain + Bright Data Web MCP integration!
Given the ZoomInfo company profile data, the grounded Markdown report produced by the agent will look something like this:
# NIKE, Inc. — Company Snapshot

## Overview
NIKE, Inc. designs, develops, markets and sells athletic footwear, apparel, equipment and accessories worldwide.

## Quick Facts
- **Name:** NIKE, Inc.
- **Website:** [https://www.nike.com/](https://www.nike.com/)
- **Headquarters:** 1 SW Bowerman Dr, Beaverton, OR 97005, United States
- **Phone:** (503) 671-6453
- **Stock ticker:** NYSE: NKE
- **Revenue:** $46.3 Billion (reported)
- **Employees:** 77,800
- **Industries:** Manufacturing; Retail; Sporting Goods; Textiles & Apparel; Apparel & Accessories Retail
- **ZoomInfo timestamp:** 2026-09-02T08:47:19.789Z

## Financial / Funding
- **Reported revenue:** $46.3B
- **Funding (ZoomInfo):** Total funding $1.0B across 3 rounds *(figures may reflect historical or non-public datapoints; Nike is a public company)*

## Workforce & Culture
- **Total employees:** 77,800
- **Employee breakdown (ZoomInfo):**
  - C-level: 23
  - VPs: ~529
  - Directors: ~6,115
  - Managers: ~13,289
  - Non-managers: ~29,578
- **eNPS score:** 20 *(Promoters 50% / Passives 20% / Detractors 30%)*

## Leadership (Selected / from org chart)
- Amy Montagne — President, Nike
- Nicole Graham — Executive VP & Chief Marketing Officer
- Cheryan Jacob — Chief Information Officer
- Muge Dogan — Executive VP & Chief Technology Officer
- Chris George — Vice President & Chief Financial Officer (Geo...)
- Sarah Mensah — President, Jordan Brand
> *Note: ZoomInfo profile did not list a single CEO entry in the captured data.*

## Technology & Tools (Examples)
- SolidWorks (Dassault Systèmes)
- EventPro (Profit Systems)
- Microsoft IIS (Microsoft)
- SAP Sybase RAP (SAP)

## Recent Scoops / Media Highlights (Summarized)
- **Hiring:** Senior Director, Marketplace (Shanghai).
- **Personnel move:** Ron Faris Virtual Studios left Nike to join Disney Consumer Products (VP, Global Marketing).
- **Business notes:** Tariff/geopolitical headwinds impacted near-term results; company implementing mitigation actions and “win now” measures.
- **Layoffs:** Reports of a small corporate layoff (~1% of corporate employees).

## Comparable Companies (Examples)
- ANTA Sports Products
- adidas AG
- Foot Locker
- Guess
- Timberland
- Genesco

## Contacts & Outreach
- **Corporate website:** [https://www.nike.com/](https://www.nike.com/)
- **Typical email formats (observed):** `[email protected]` (also `@converse.com` for related brands)

## Data Source
- ZoomInfo company profile for NIKE, Inc.
  [https://www.zoominfo.com/c/nike-inc/27722128](https://www.zoominfo.com/c/nike-inc/27722128)
  **Snapshot timestamp:** 2026-09-02T08:47:19.789Z
Visualize it in a Markdown viewer and you will see:
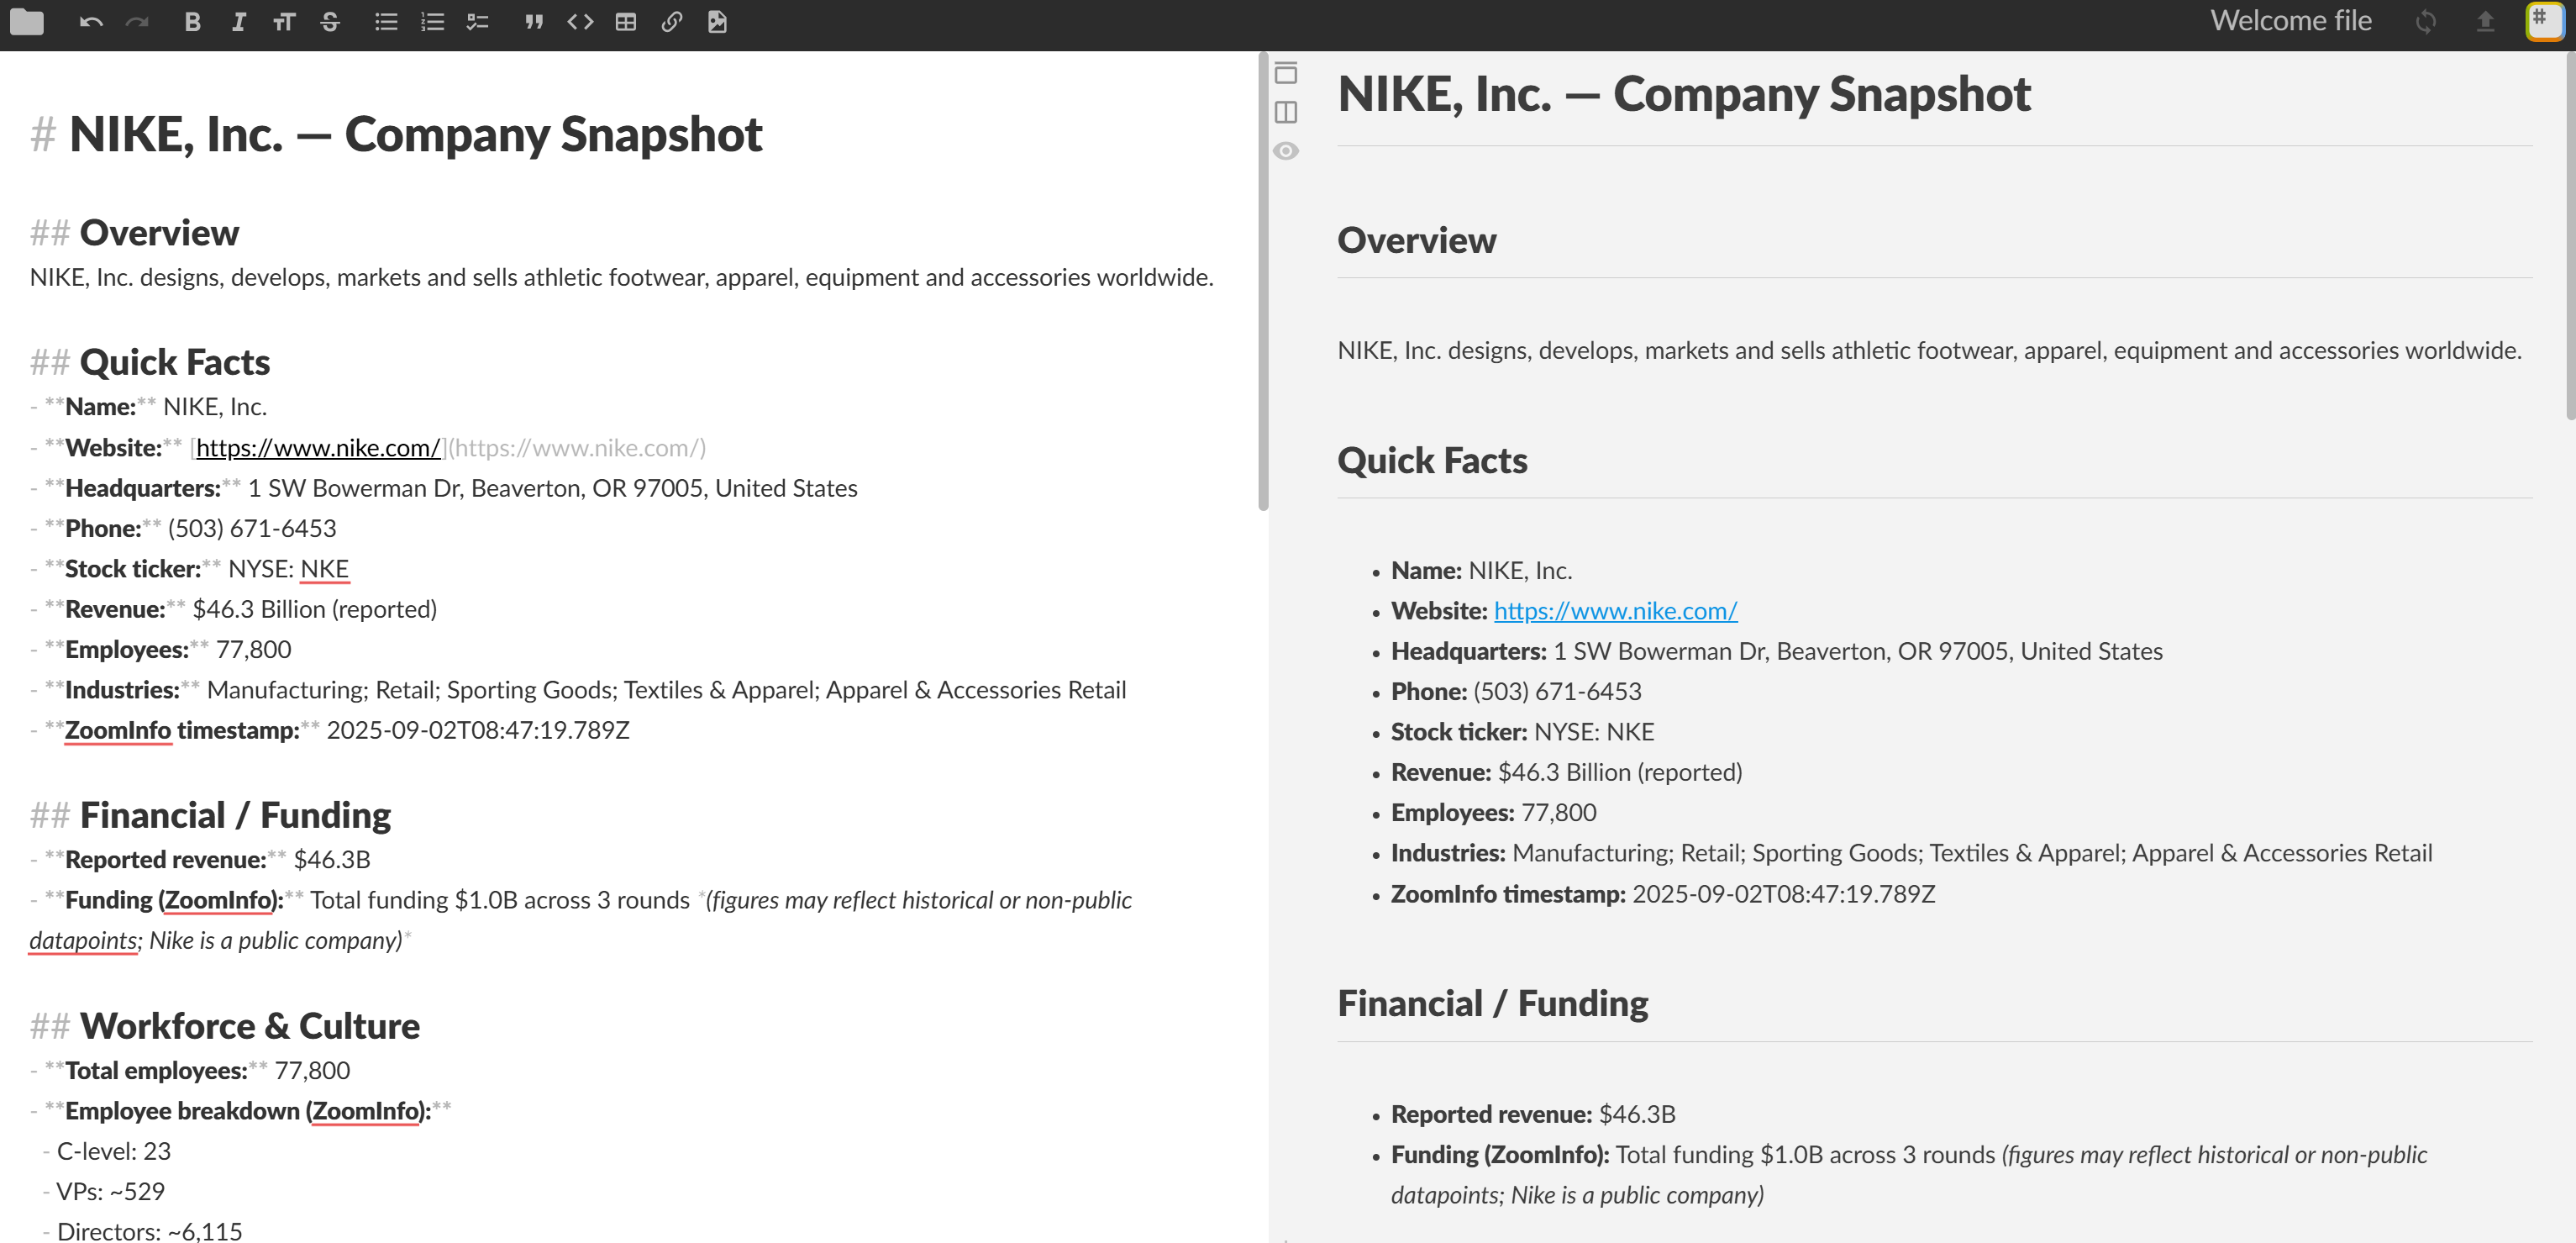
Et voilà! Your ReAct agent selected the right tool for the task and used it to produce an information-rich Markdown report with real-world company data extracted from ZoomInfo.
All this would not have been possible without Web MCP integration, which is now supported in Langchain thanks to the MCP Adapters library.
Next Steps
The Langchain MCP-powered agent developed here is a simple, yet functional, example. To make it production-ready, consider the following next steps:
- Implement a REPL: Add a REPL (Read-Eval-Print Loop) so that you can interact with your agent in real time. To maintain context and track previous interactions, introduce a memory layer—ideally stored in a temporary database or persistent storage.
- Export output to a file: Modify the output logic to allow saving the produced outputs (e.g., reports) to a local file. This makes it easy to share results with other team members.
- Deploy your agent: Deploy the AI agent to the cloud, on a hybrid cloud environment, or via self-hosted options, as explained in the Langchain documentation.
Try your Langchain + Web MCP agent with different prompts and explore other advanced agentic-driven workflows!
Conclusion
In this article, you learned how to leverage Bright Data’s Web MCP (now available with a free tier!) to build an AI agent in LangGraph. This is made possible thanks to the Langchain MCP Adapters library, which adds MCP support to both the Langchain and LangGraph ecosystems.
The task demonstrated in this article was just an example, but you can use the same integration to design much more complex workflows, including multi-agent setups. With the 60+ tools offered by Web MCP and the full range of solutions in Bright Data’s AI infrastructure, you can empower your AI agents to fetch, validate, and transform live web data effectively.
Create a Bright Data account for free and start experimenting with our AI-ready web data solutions today!

Technical Writer
Antonello Zanini is a technical writer, editor, and software engineer with 5M+ views. Expert in technical content strategy, web development, and project management.


