
At the end of this blog post, you will know:
- What Microsoft Copilot Studio is and what it offers for AI agent development.
- Why integrating your AI agents with Bright Data Web MCP helps support enterprise use cases.
- How to connect Web MCP to an AI agent in Copilot Studio through a step-by-step guided section.
Let’s dive in!
What Is Microsoft Copilot Studio?
Copilot Studio is a Microsoft platform that helps you build, test, and deploy custom AI-powered agents. These agents can answer questions, automate tasks, and extend Microsoft Copilot’s functionality.
Agents in Copilot Studio can be grounded in your organization’s data and configured to access external tools—either via open API specifications (as shown in our guide on SERP API integration in Copilot Studio) or through MCP (Model Context Protocol). The MCP connection is what we will demonstrate in this tutorial!
Why Bright Data Web MCP Is Key to Building Enterprise AI Agents in Copilot Studio
No matter which LLM you choose as the brain of your AI agent, its knowledge is limited to what it learned during training. In other words, the agent will not be aware of recent events, the latest news, or anything that happened after its training ended.
The problem is that LLMs generally try to infer answers even when they lack the necessary knowledge. That behavior leads to incorrect or hallucinated responses. In enterprise environments, this is particularly risky. Thus, AI should be grounded in real-world data and recent information.
Another limitation of regular AI agents is that LLMs cannot natively interact with websites. In detail, they cannot browse pages, follow links, or extract live data from web pages.
Those limitations can all be overcome by equipping AI agents with tools for web scraping, data access feeds, and web interaction. This is exactly what Bright Data’s Web MCP offers!
The enterprise-ready MCP server extends Copilot agents with over 60 AI-ready tools, all powered by Bright Data’s infrastructure for web interaction and data collection. These include tools for browser interaction and dozens of specialized tools for structured data feeds across platforms like Amazon, LinkedIn, TikTok, Google Maps, Yahoo Finance, and more.
Time to learn how to integrate Web MCP into an AI agent in Copilot Studio!
How to Extend Copilot Studio AI Agents with 60+ Tools via Web MCP
In this step-by-step section, you will see how to integrate Bright Data Web MCP into an AI agent in Microsoft Copilot Studio. This will give your agent access to 60+ enterprise-ready web tools, enabling it to support a wide range of enterprise use cases.
As an example, we will create a generic “Supercharged Web Agent” and test it in a brand reputation monitoring application. Keep in mind that the integration can be applied to many other use cases as well!
Prerequisites
To follow along with this guide, you need:
- A Microsoft Copilot Studio account.
- A Microsoft Power Apps account.
- A Bright Data account with an API key ready. (Do not worry about setting up Bright Data just yet, as you will be shown how to do this.)
Keep in mind that creating a Copilot Studio account requires a few extra prerequisites. When signing up, you may encounter this error:
“Microsoft Copilot Studio isn’t currently available for your work or school account”
In that case, try activating a Microsoft 365 Business Standard free trial. This will provide an account in the format <username>@<company>.onmicrosoft.com, which you can use to subscribe to Copilot Studio. Alternatively, follow the instructions from the official Microsoft forum.
Having prior knowledge of how MCP works and the tools available in Web MCP will also be helpful (though not strictly required).
Step #1: Add a New Agent in Copilot Studio
To get started, log in to Copilot Studio. Once logged in, you will land on the main dashboard: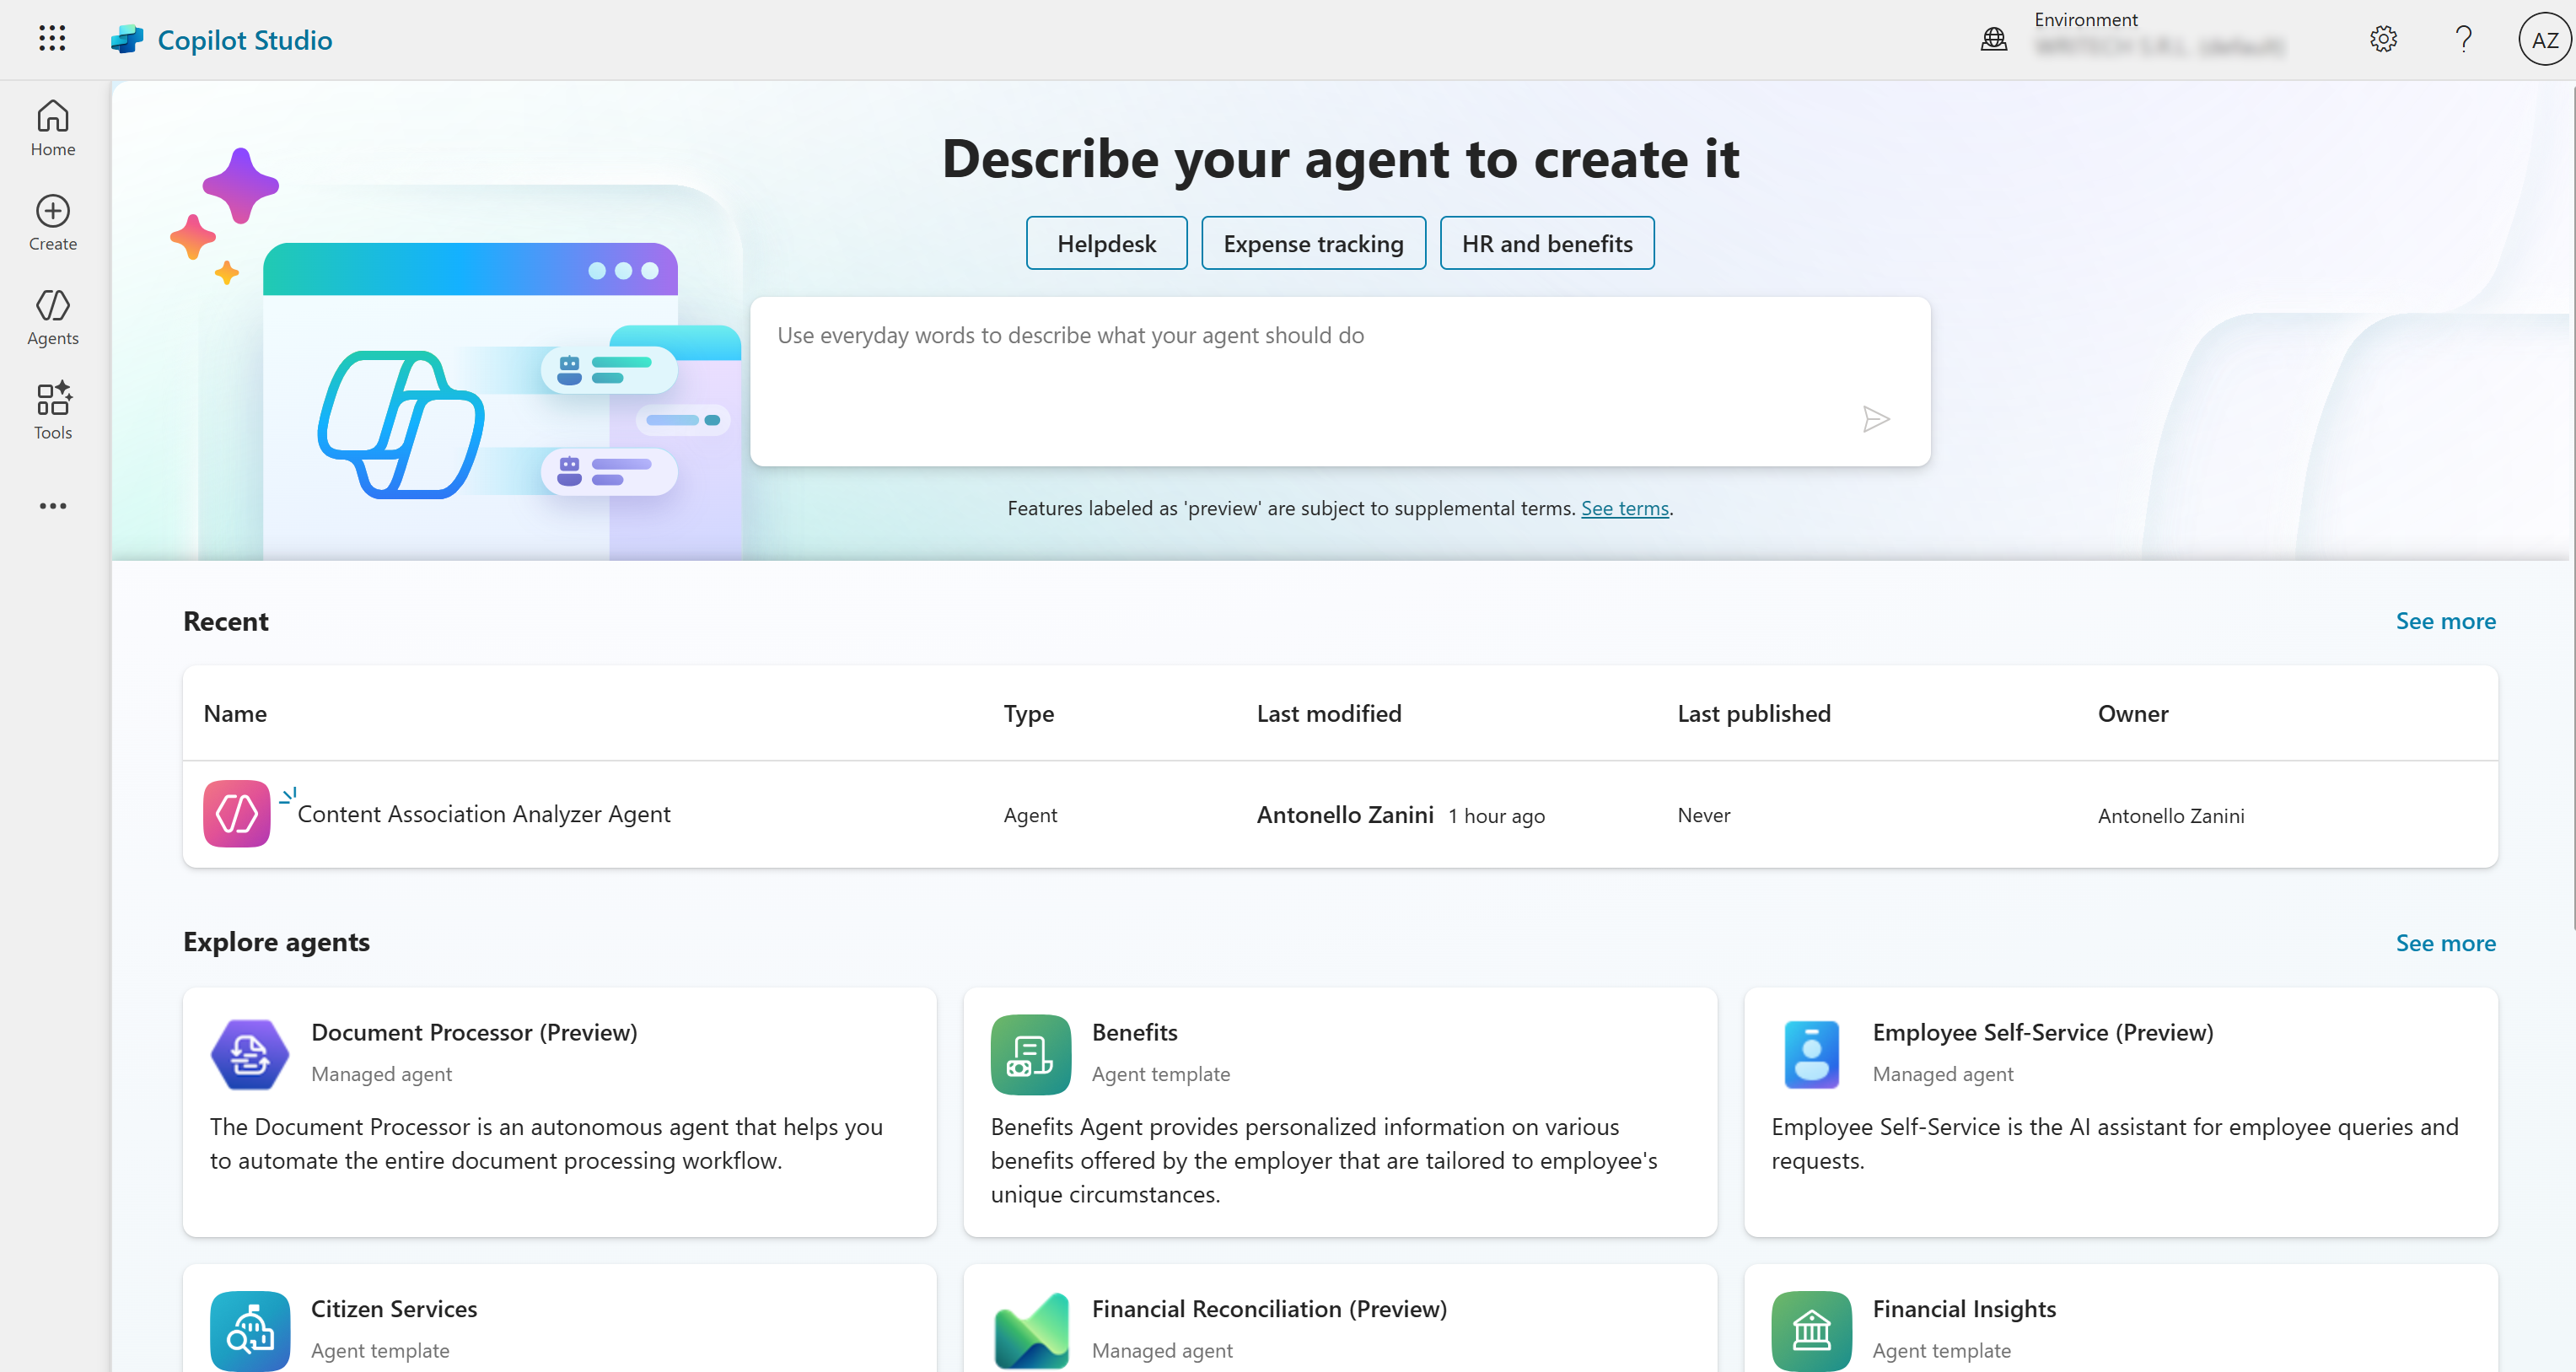
From the left-hand menu, click the button “Create”, then press “New agent”: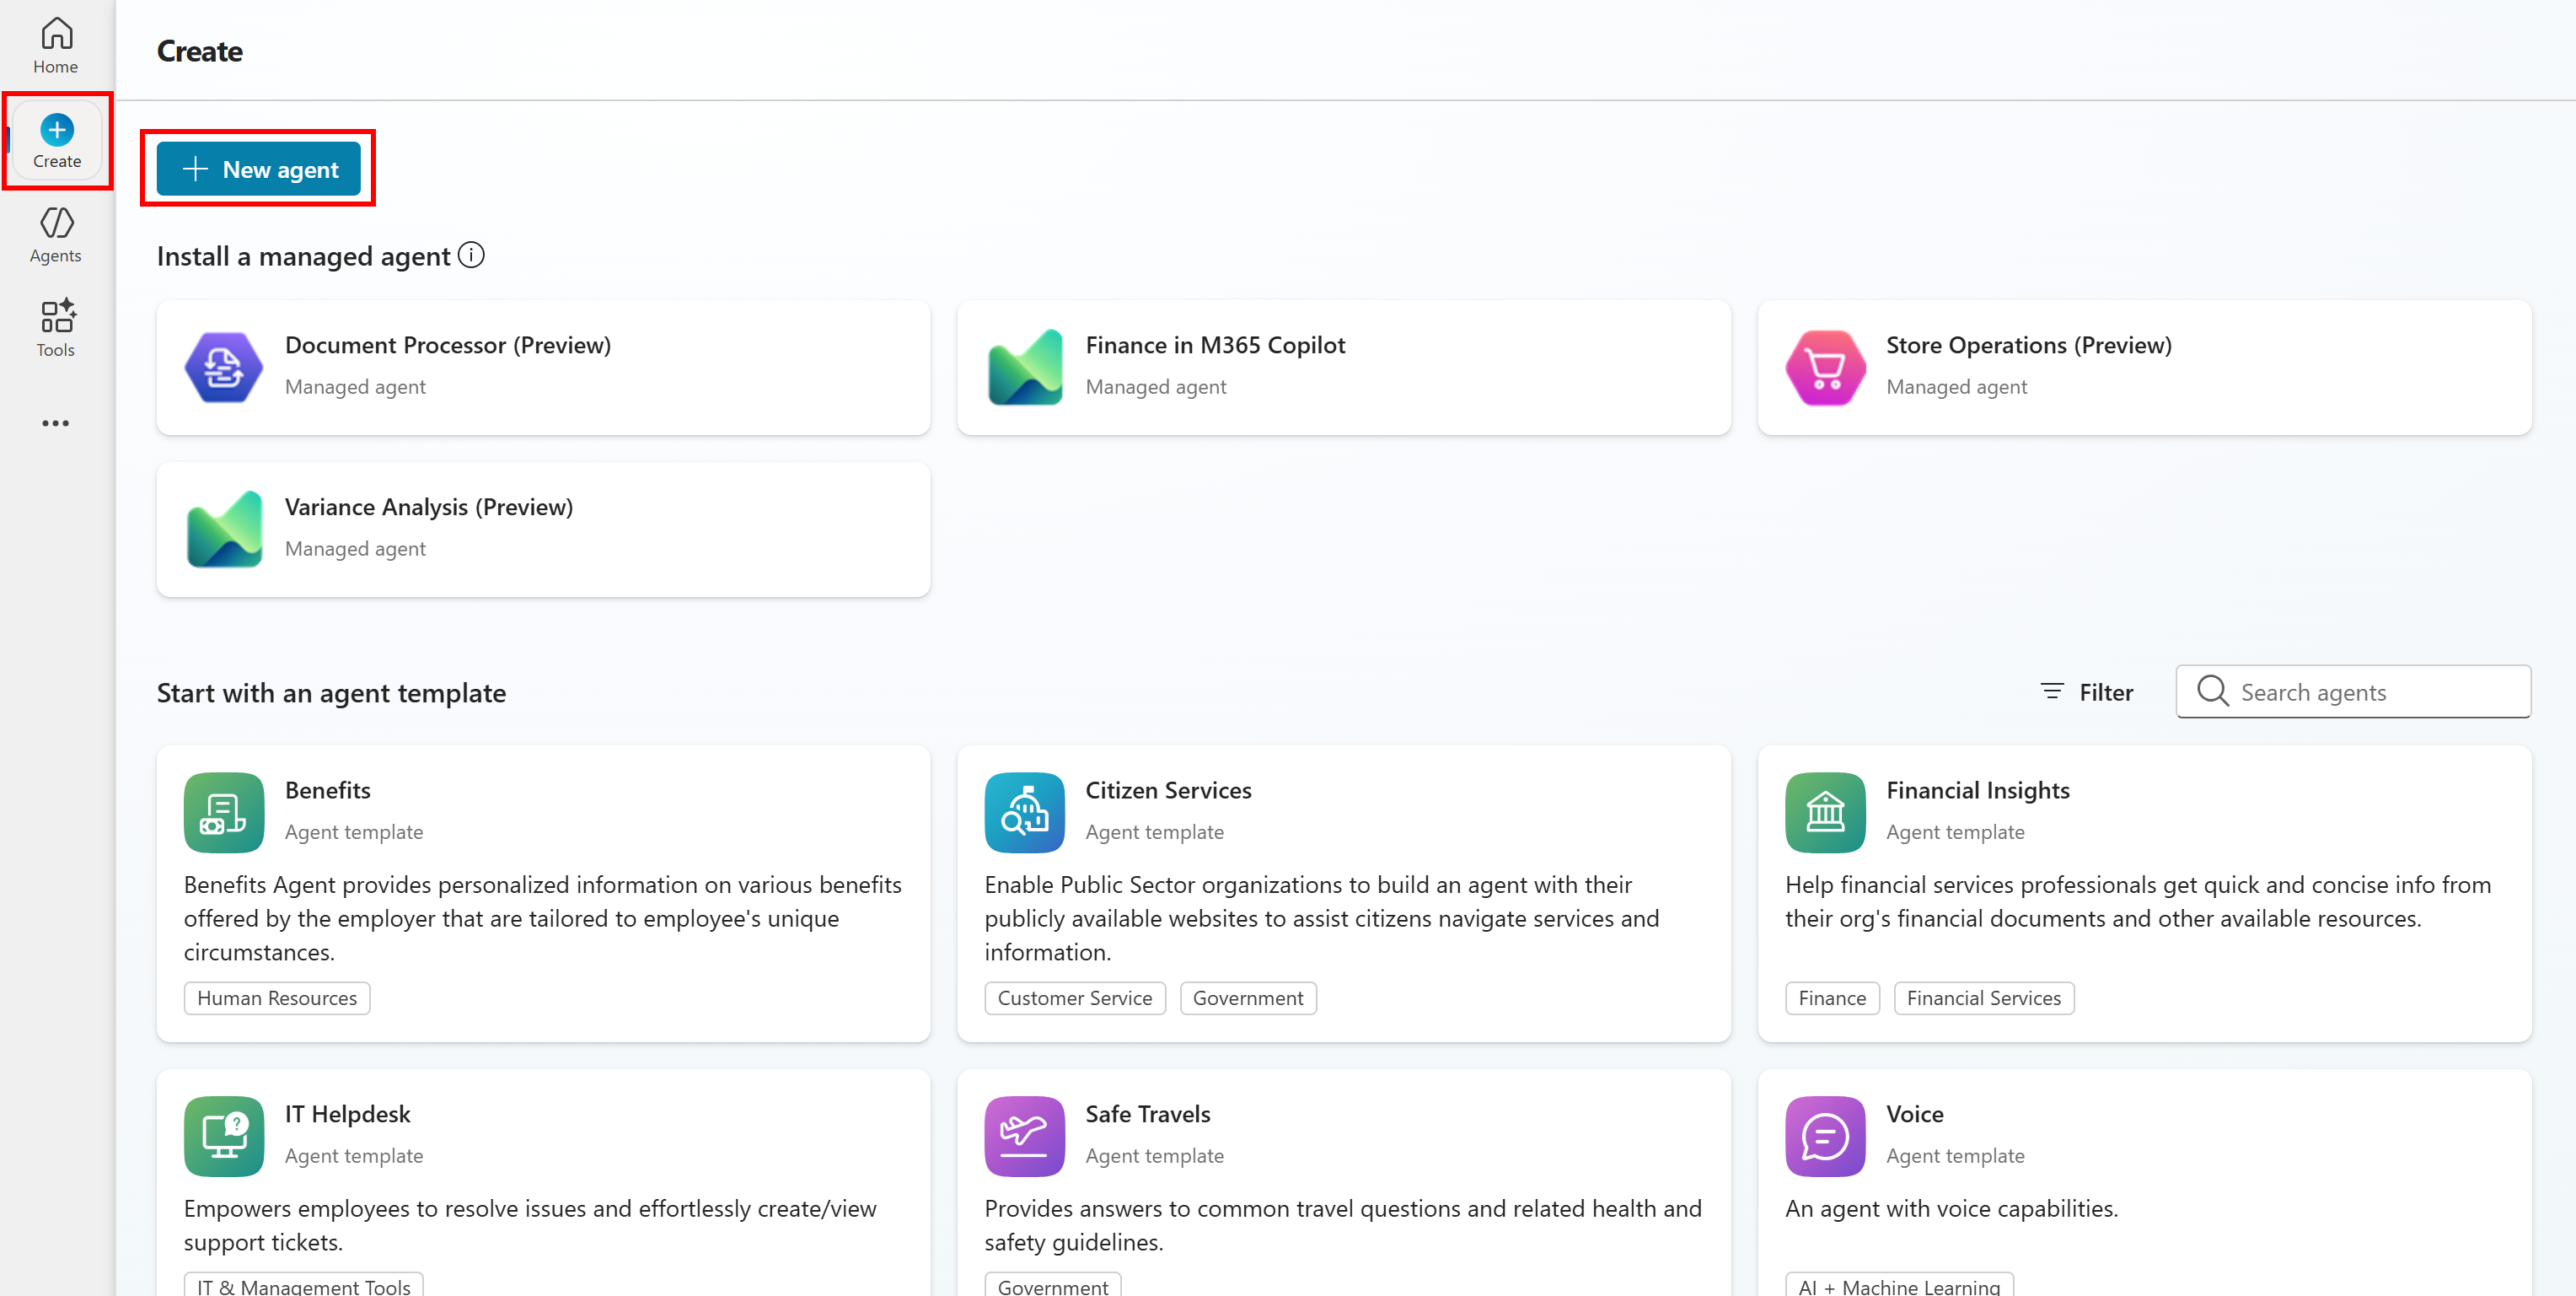
You will now access the AI Agent creation form. Since the goal is to build a general-purpose, web-ready agent, fill out the form as follows:
- Name: “Supercharged Web Agent”
- Description: “This agent can browse and scrape data from websites, interact with web pages, and access live data feeds to complete a wide range of tasks.”
- Instructions: “The agent leverages Bright Data’s Web MCP tools to search, extract, and navigate the web seamlessly—avoiding blocks while executing the given instructions accurately.”
Once you have filled out the form, click “Create” in the top-right corner to complete the AI agent creation: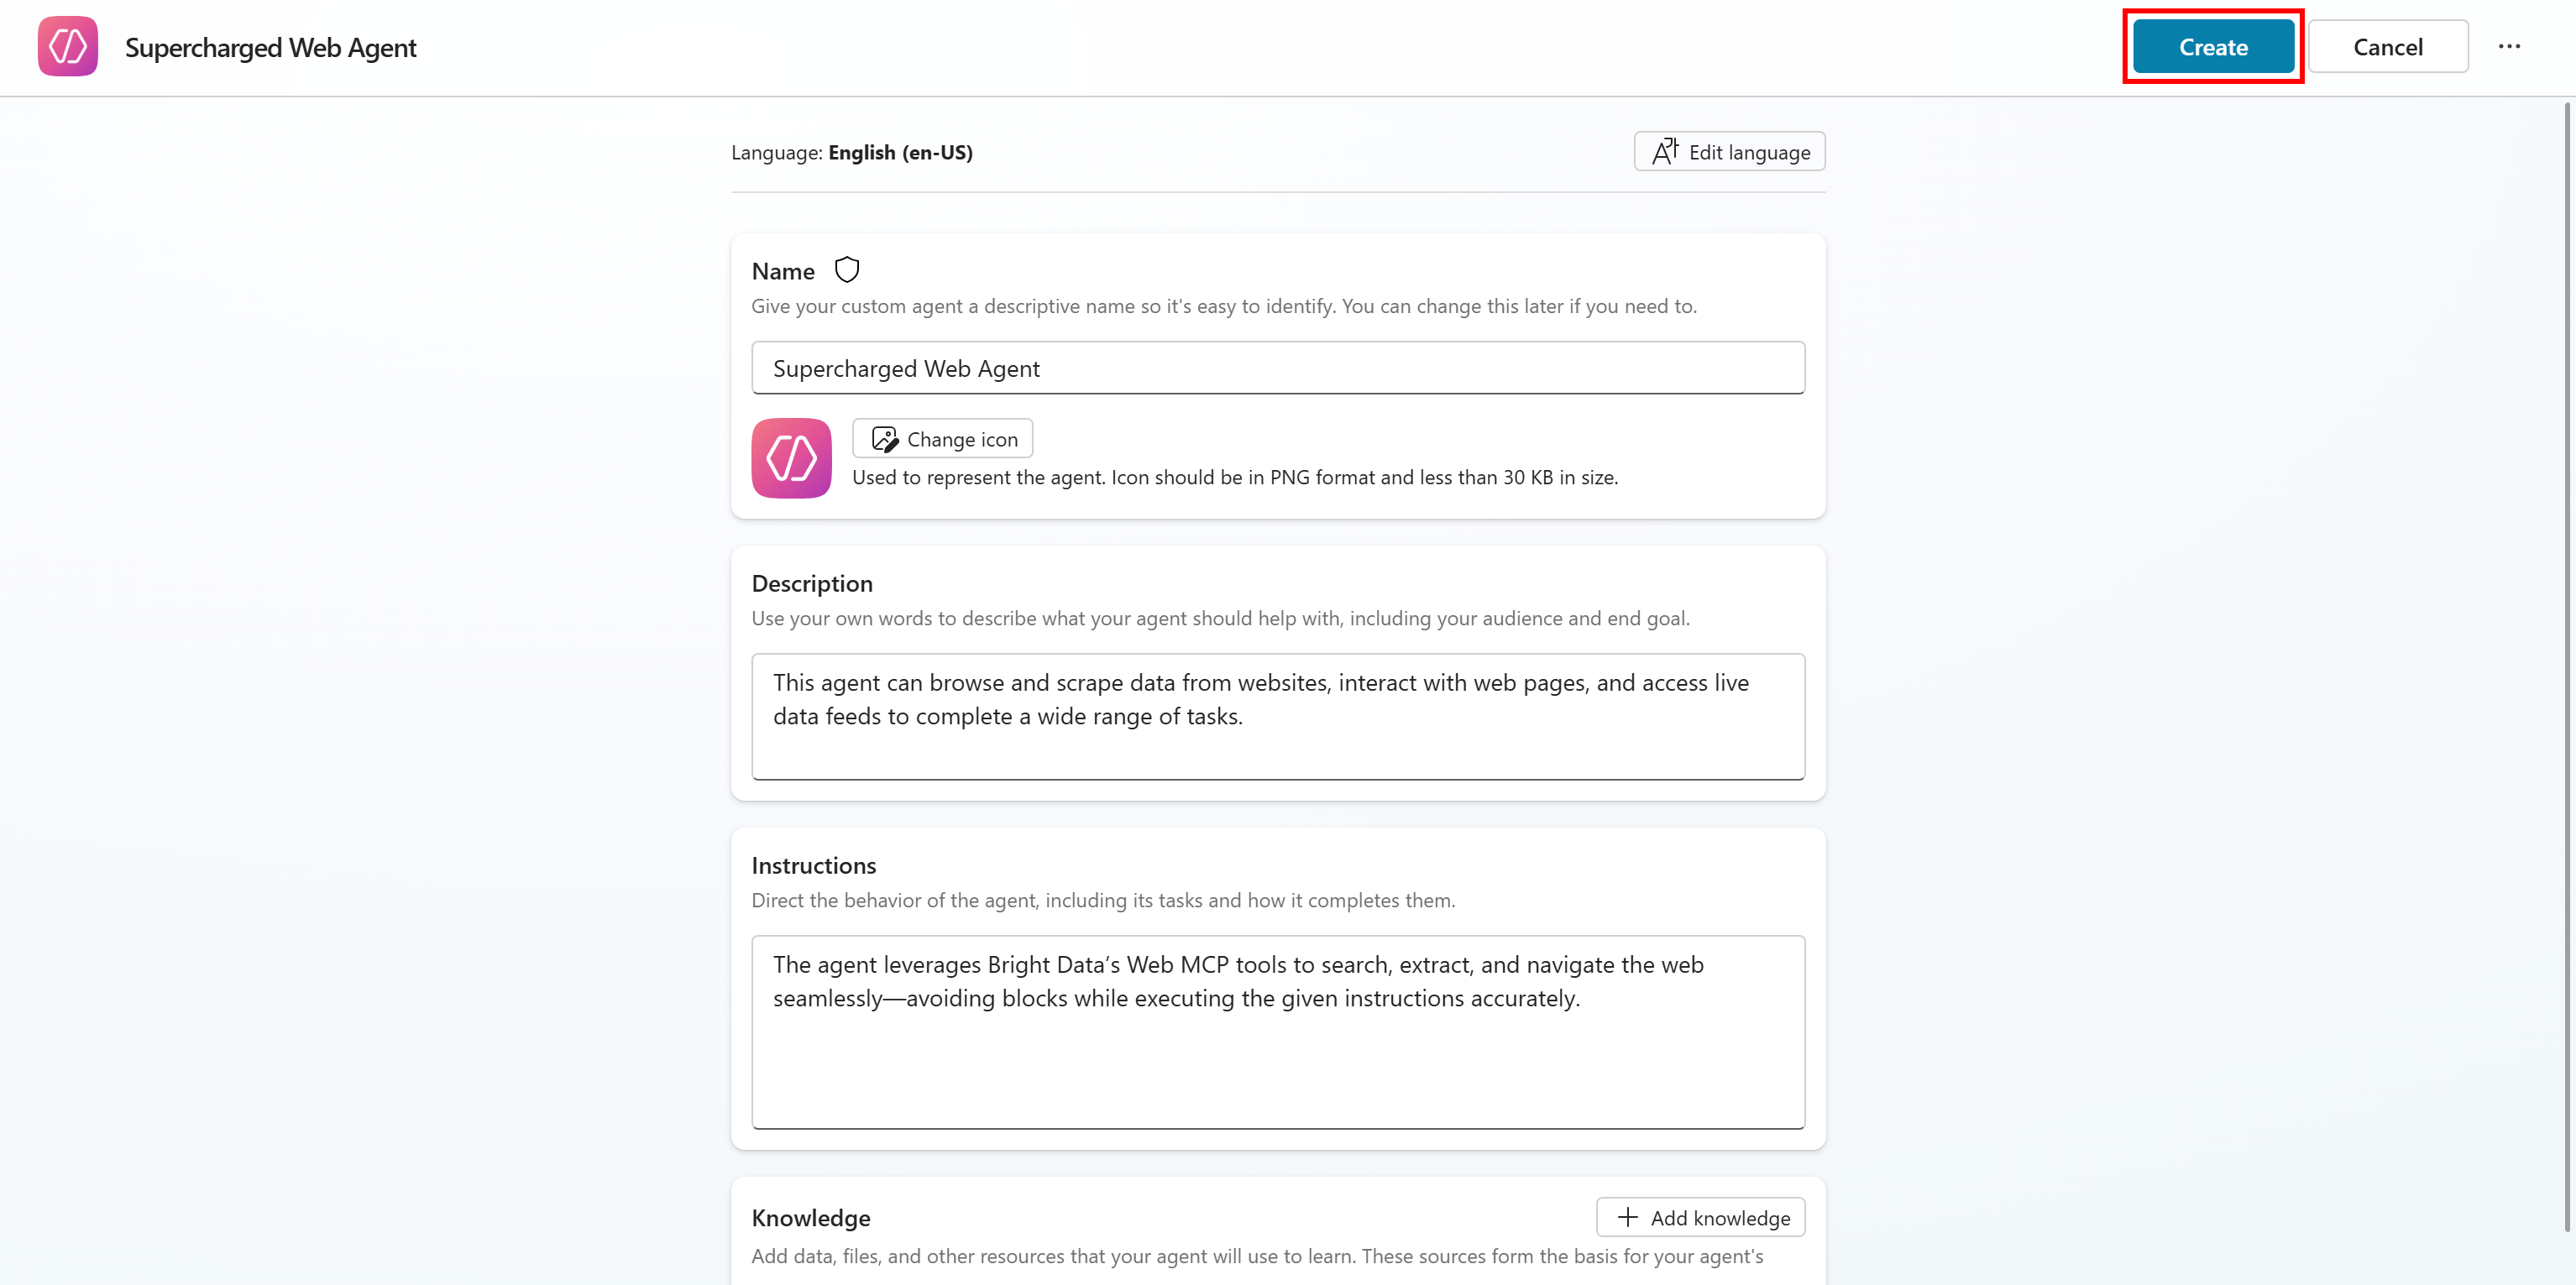
You will get a “Setting up your agent” message. Copilot Studio may take a few minutes to create the AI agent, so be patient. If the process takes a while, when the agent is ready, you will receive an email notification at the address you used to create the account.
When the setup is complete, the new AI agent will appear on the “Agents” page, accessible from the left-hand menu: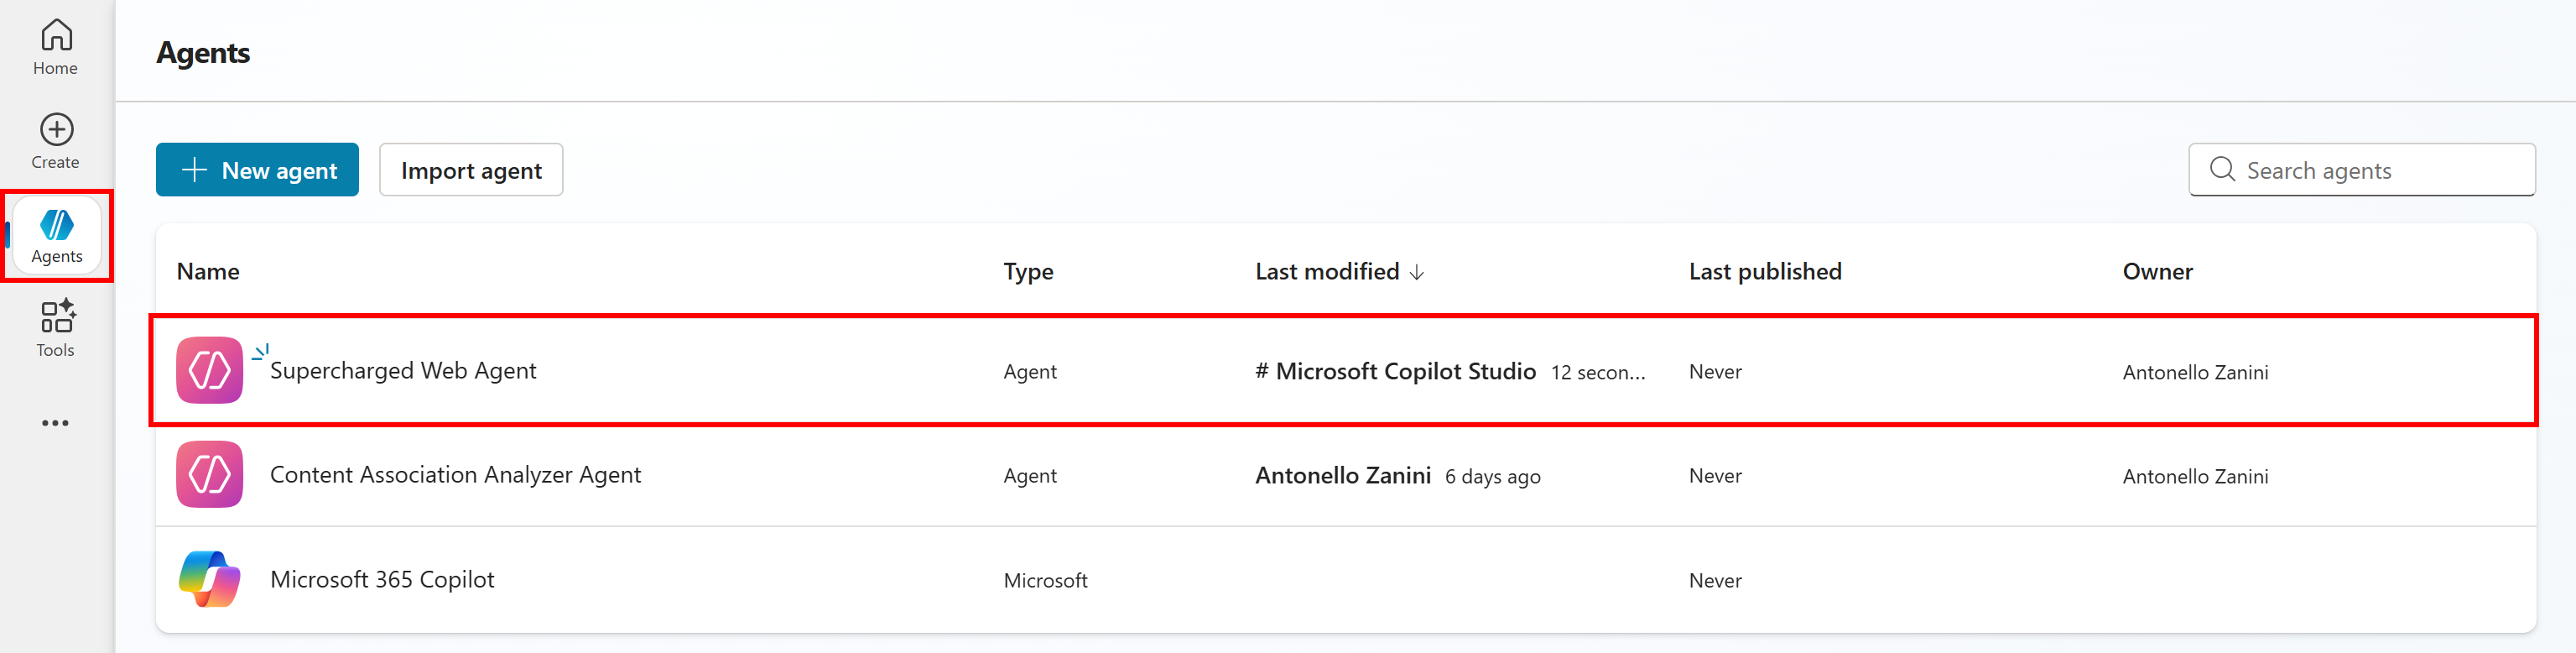
(Read our guide to see how to create the “Content Association Analyzer” agent, as shown in the image above.)
This is it! You now have a new AI agent available in Copilot Studio.
Step #2: Finalize the AI Agent Configuration
On the “Agents” page, click your agent’s entry. You will be taken to the “Supercharged Web Agent” page, precisely to the “Overview” tab: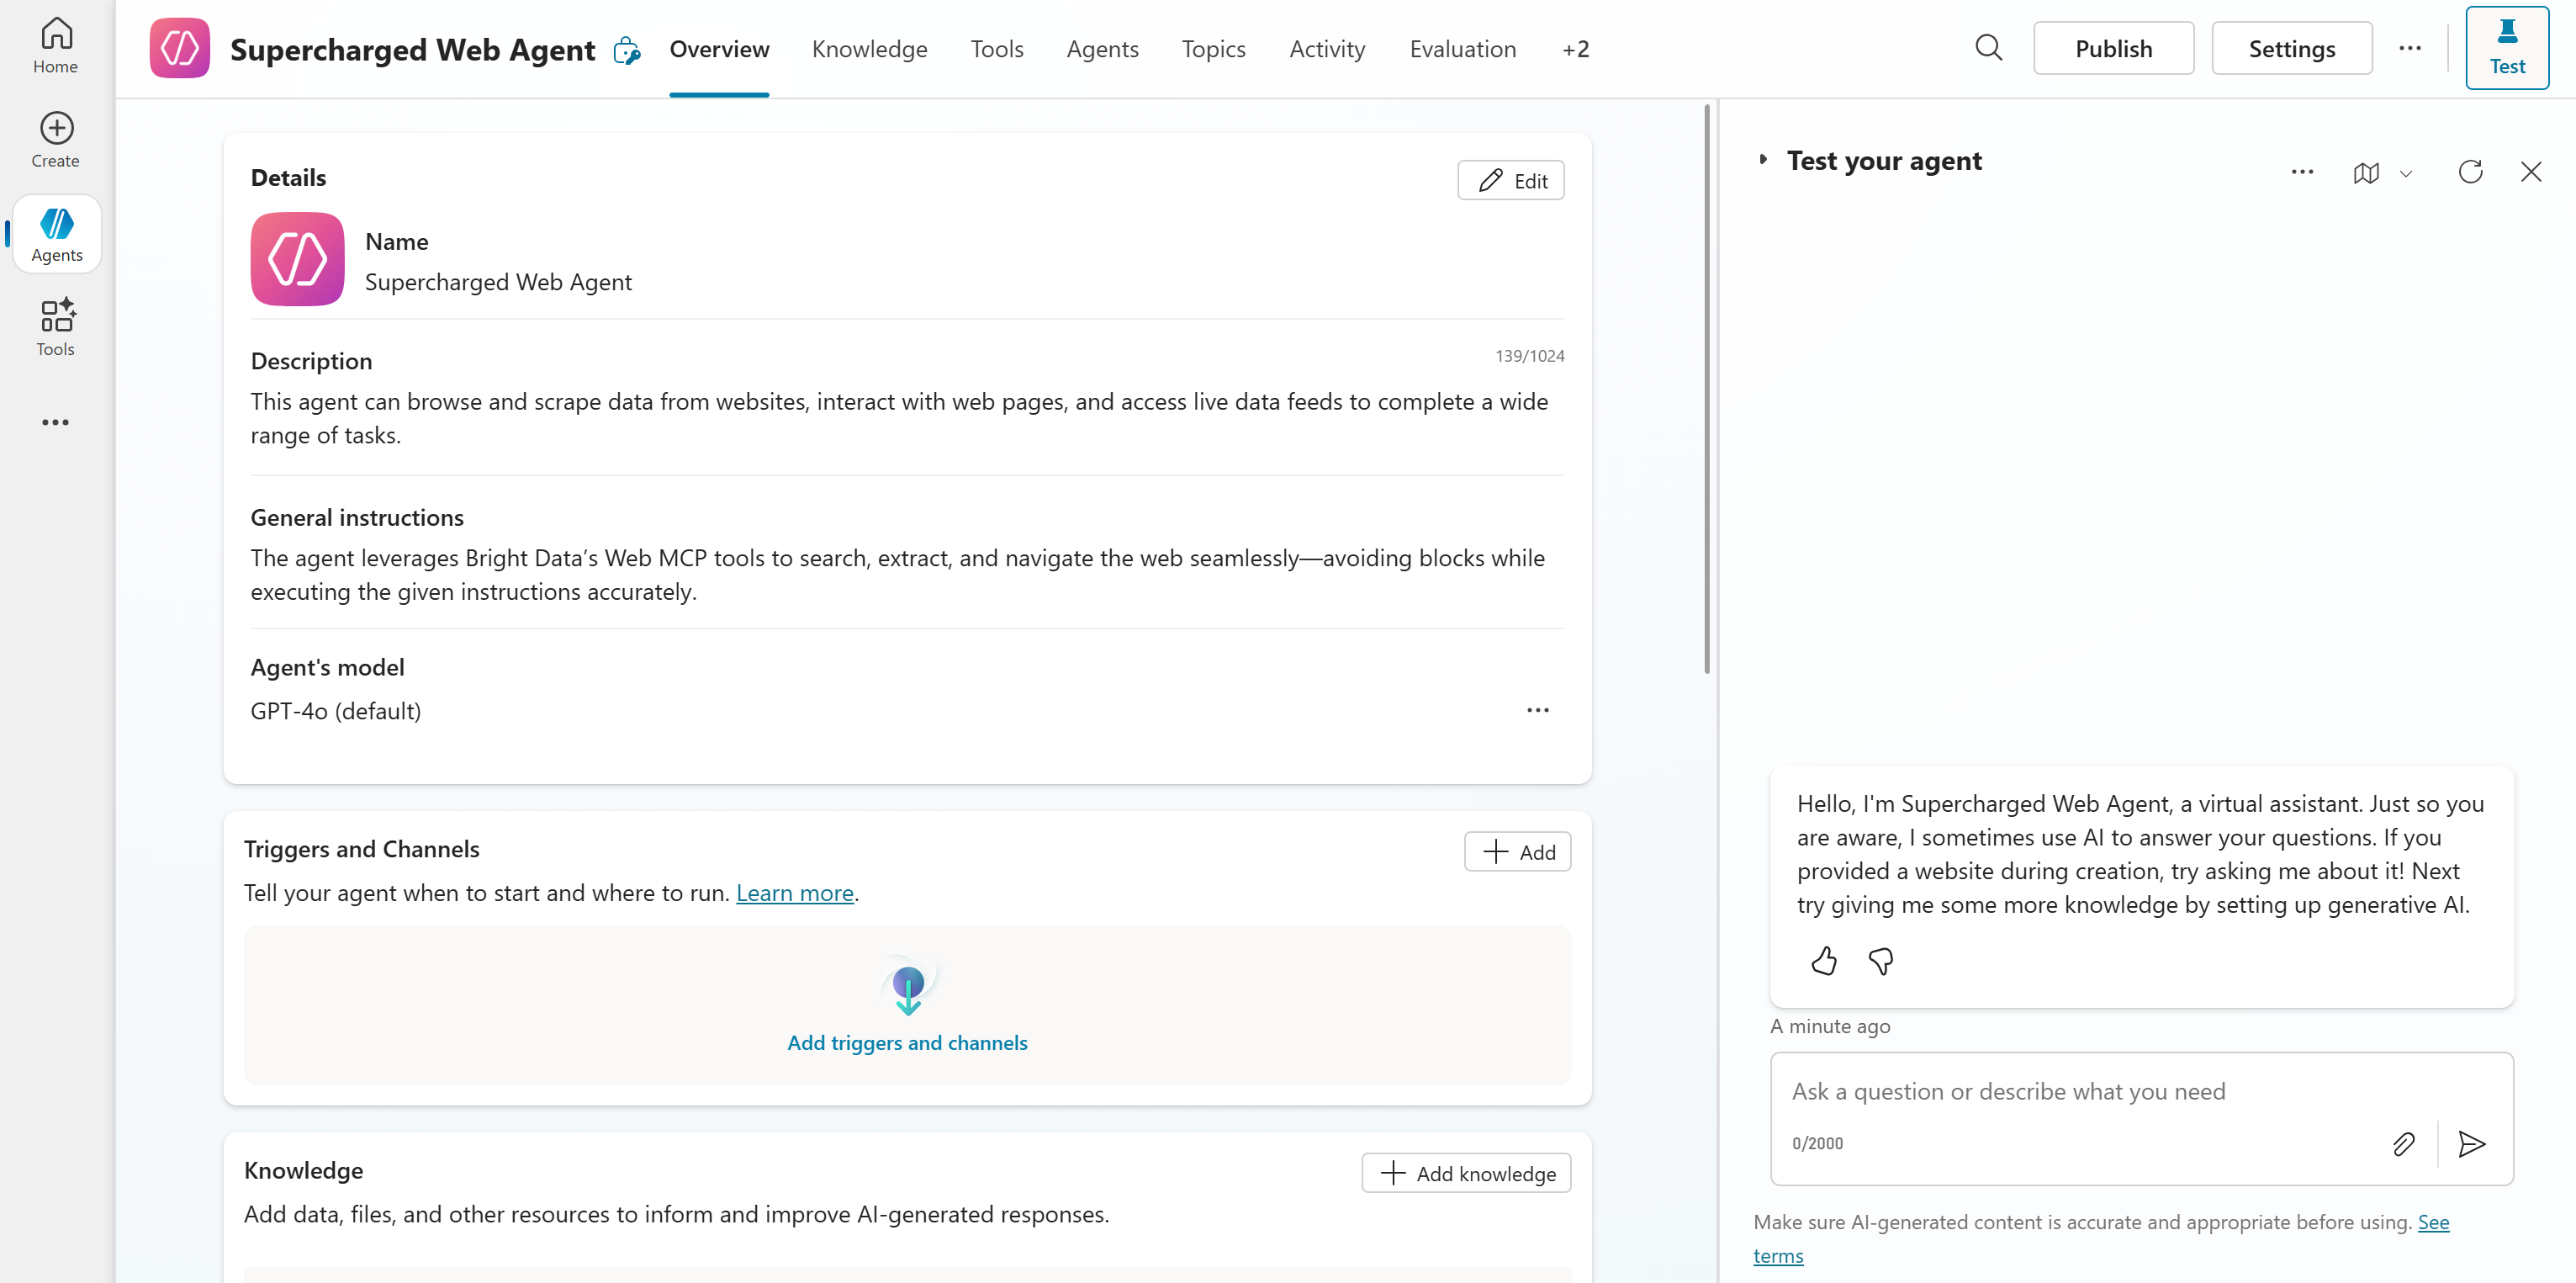
In this interface, you can fine-tune your agent’s behavior and complete its setup. Also, you can test it directly through the chat panel on the right-hand side.
By default, Copilot Studio assigns each agent a pre-selected AI model optimized for general use cases. In this example, the platform assigned the GPT-4.1 AI model.
To change the LLM powering the agent, access the “…” menu on the “Agent’s model” field and select the “Edit” option:

For additional customization and tweaking, reach the page below by clicking the “Settings” button in the top-right corner: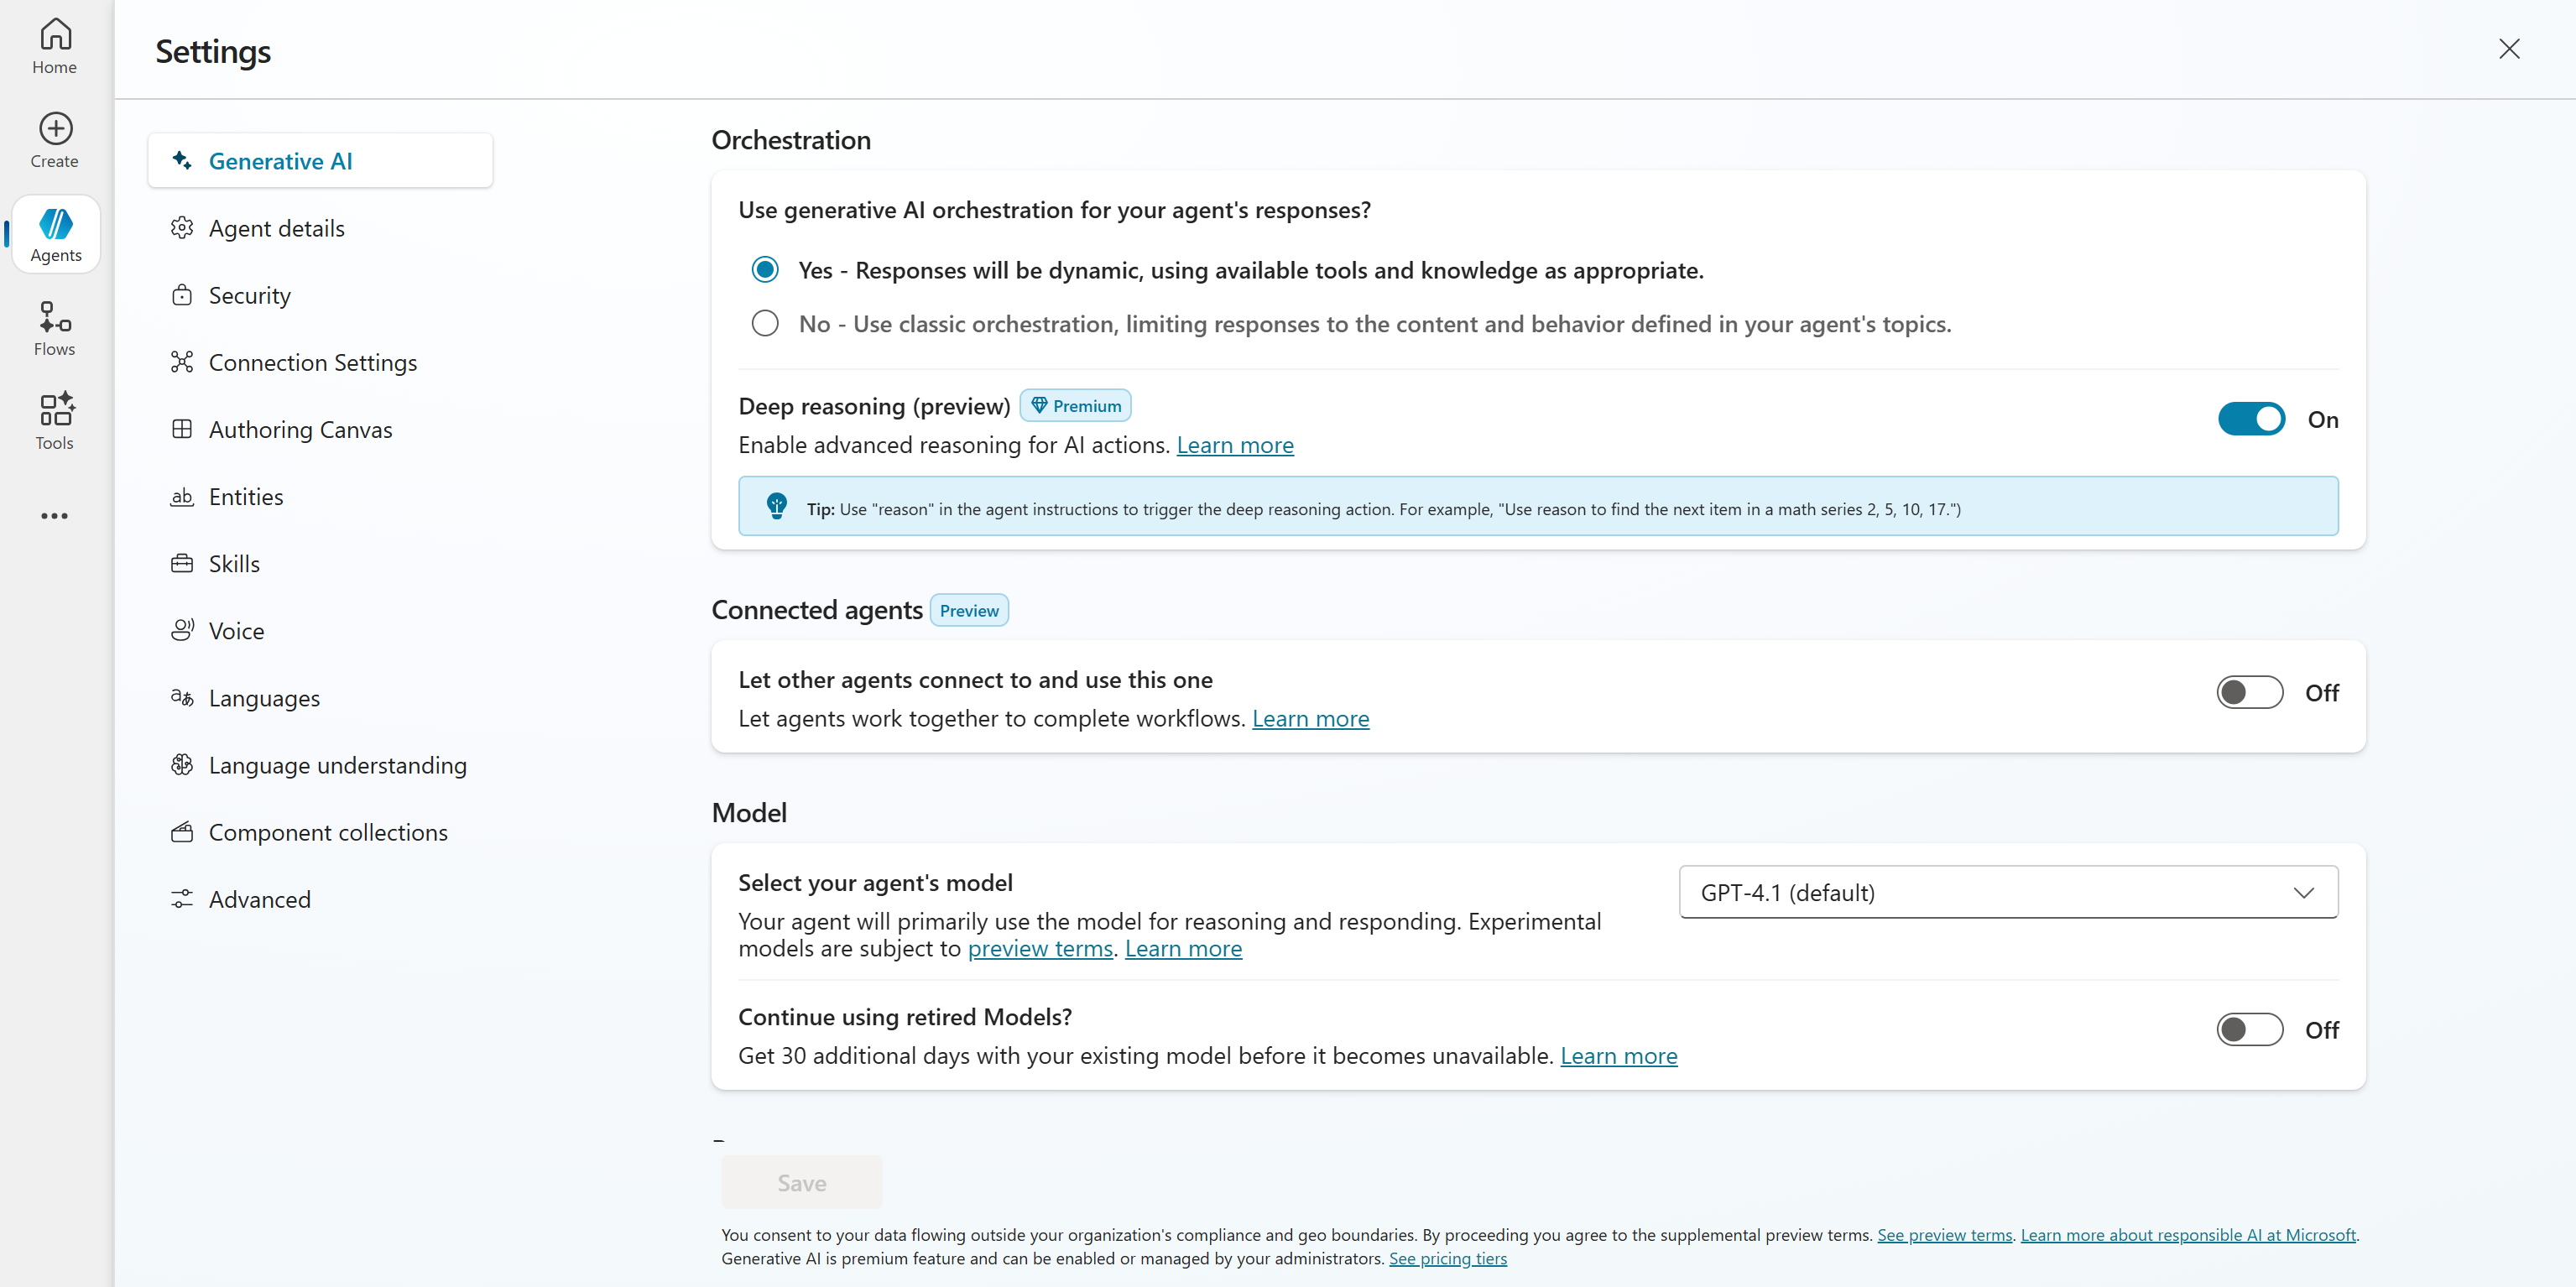
On this page, you can adjust your agent’s response formatting, tone, security options, and other advanced settings to suit your needs better.
Since this walkthrough is just a demonstration setup, you can keep the default settings for now.
In production scenarios, customize the agent’s configuration to align its responses with your enterprise requirenments.
Well done! You now have a customized AI agent in Copilot Studio.
Step #3: Get Started with Bright Data Web MCP Remote Server
To integrate Bright Data’s Web MCP into Microfost Copilot Studio, you first need to retrieve the connection URL. You can either follow the official Bright Data documentation or use the steps below.
If you have not already, sign up for Bright Data. Otherwise, log in to your existing account. Once logged in, navigate to the “MCP” section in the top-left menu: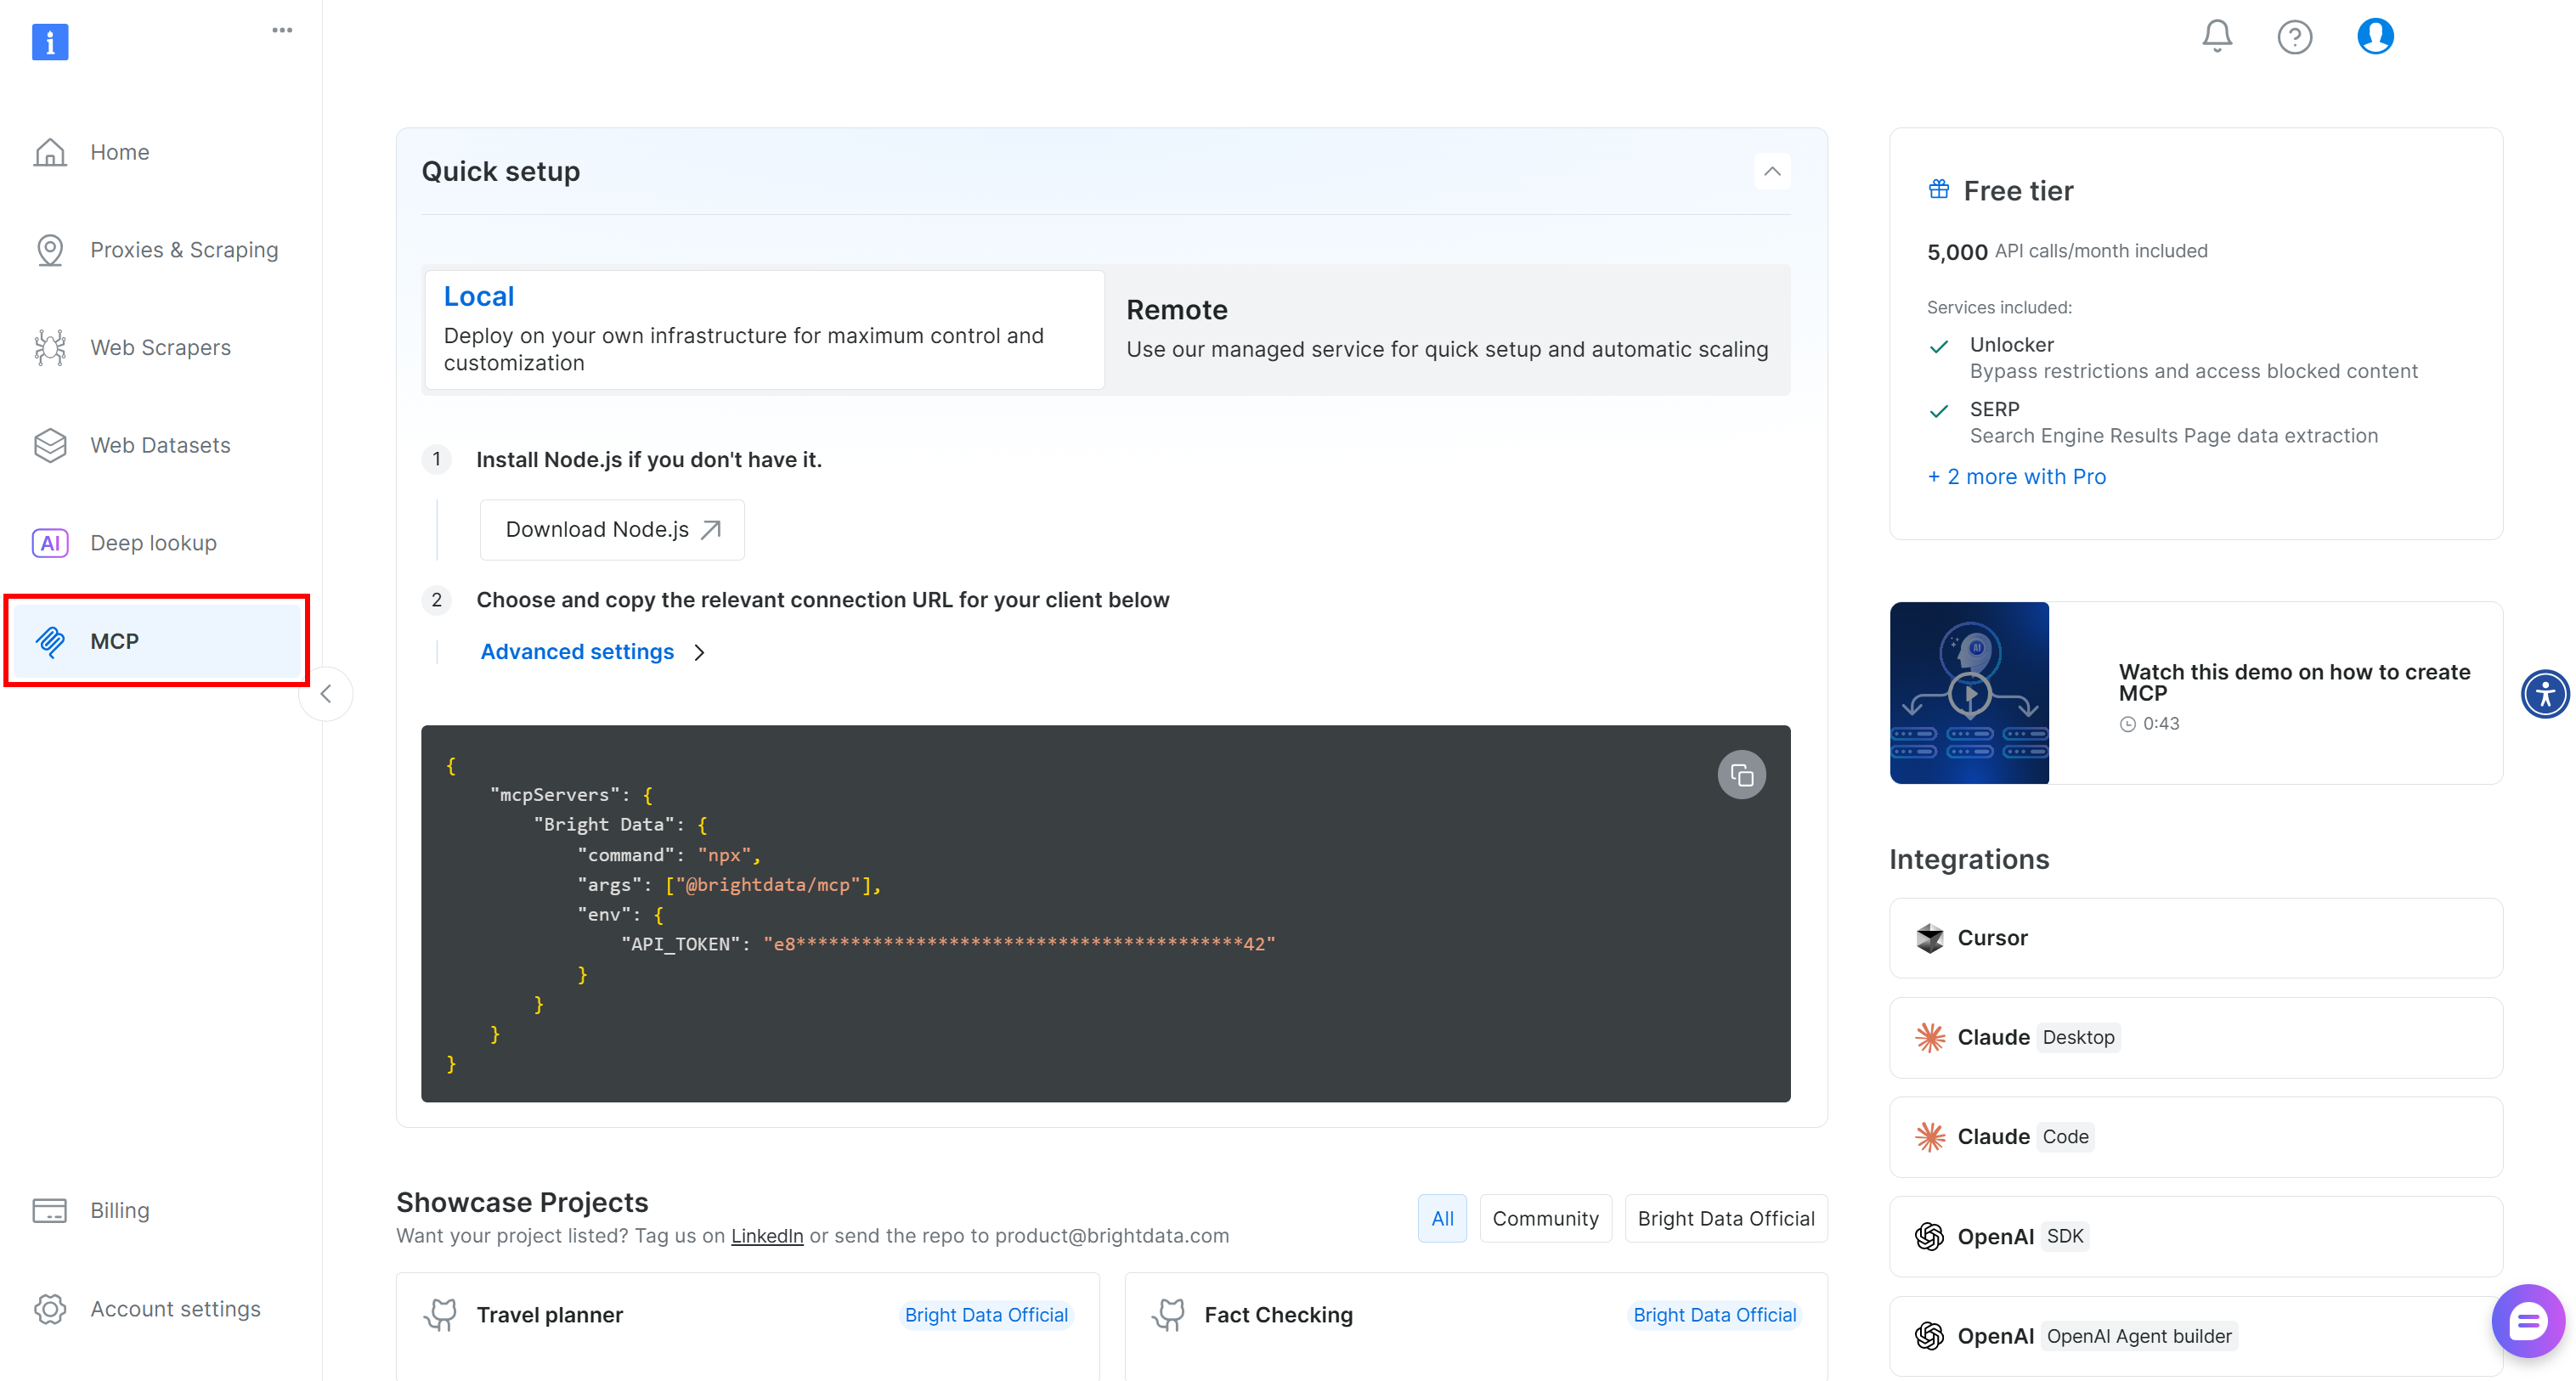
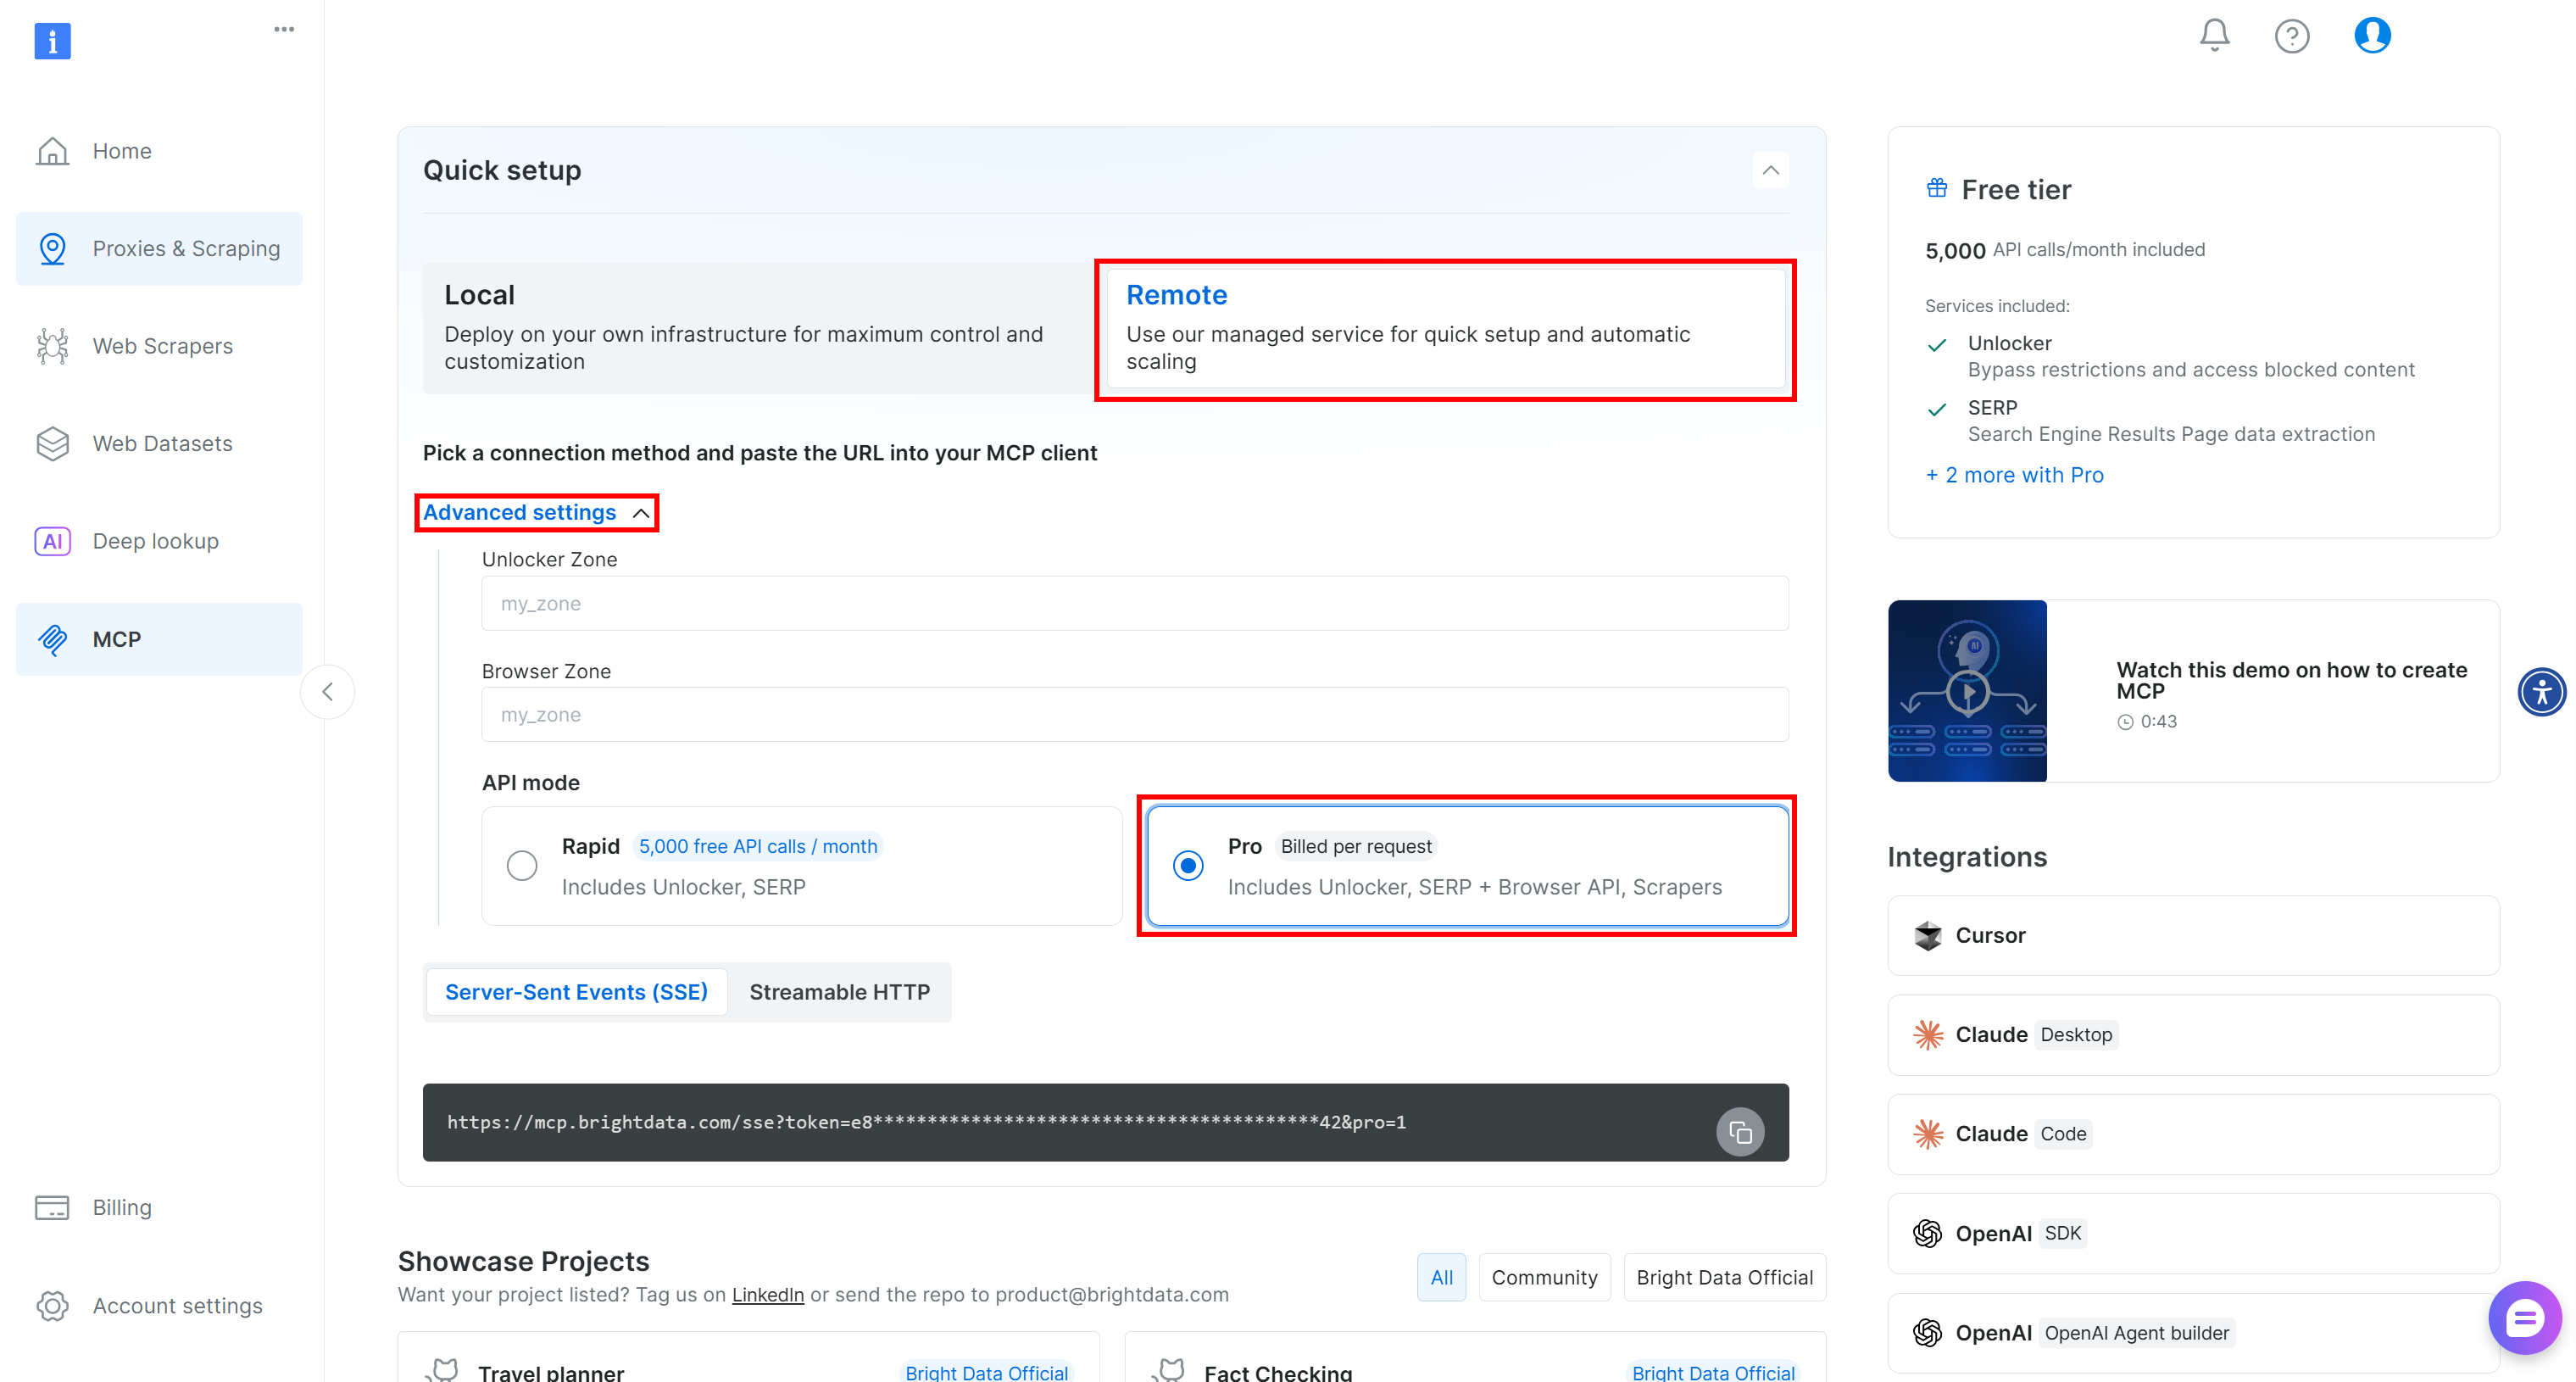
On this page, you will find instructions to connect to Bright Data Web MCP both locally and remotely, as well as sample integration examples and showcase projects across various technologies.
In this case, you must rely on the Bright Data Web MCP remote server (as installing Web MCP locally via the @brightdata/mcp package is not possible in the Copilot Studio environment). The Web MCP remote server ensures infinite scalability, so you do not need to worry about performance.
To get the most out of this integration and access all 60+ Web MCP tools for web data extraction, browser interaction, and more, you need to enable Pro mode. To obtain the remote connection URL in Pro mode:
- Select the “Remote” button.
- Expand the “Advanced settings” dropdown.
- Choose “Pro” mode.

Next, focus on the connection URL. Select the “Streamable HTTP” option, as this is the most current transport protocol supported by MCP. (For more details, read our deep dive on SSE vs Streamable HTTP.)

Note: Since SSE transport is deprecated, Copilot Studio will no longer support SSE for MCP starting August 2026.
You will end up with a connection URL like this:
https://mcp.brightdata.com/mcp?token=<YOUR_BRIGHT_DATA_API_TOKEN>&pro=1 In the above URL, replace the <YOUR_BRIGHT_DATA_API_TOKEN> placeholder with your Bright Data API key. Refer to the official guide to generate a new one. Note the &pro=1 query parameter, which enables Pro mode.
Note: Using the Web MCP in Pro mode will incur charges, so make sure your Bright Data account is funded.
Fantastic! That connection URL is all you need to integrate Web MCP in Pro mode with your Copilot Studio AI agent.
Step #4: Create the Tool for Web MCP Connection
Your AI agent in Copilot Studio needs access to Bright Data’s Web MCP server. To enable that, you must create and configure an MCP connection.
Navigate to the “Tools” tab in Copilot Studio, then click “Add a Tool”: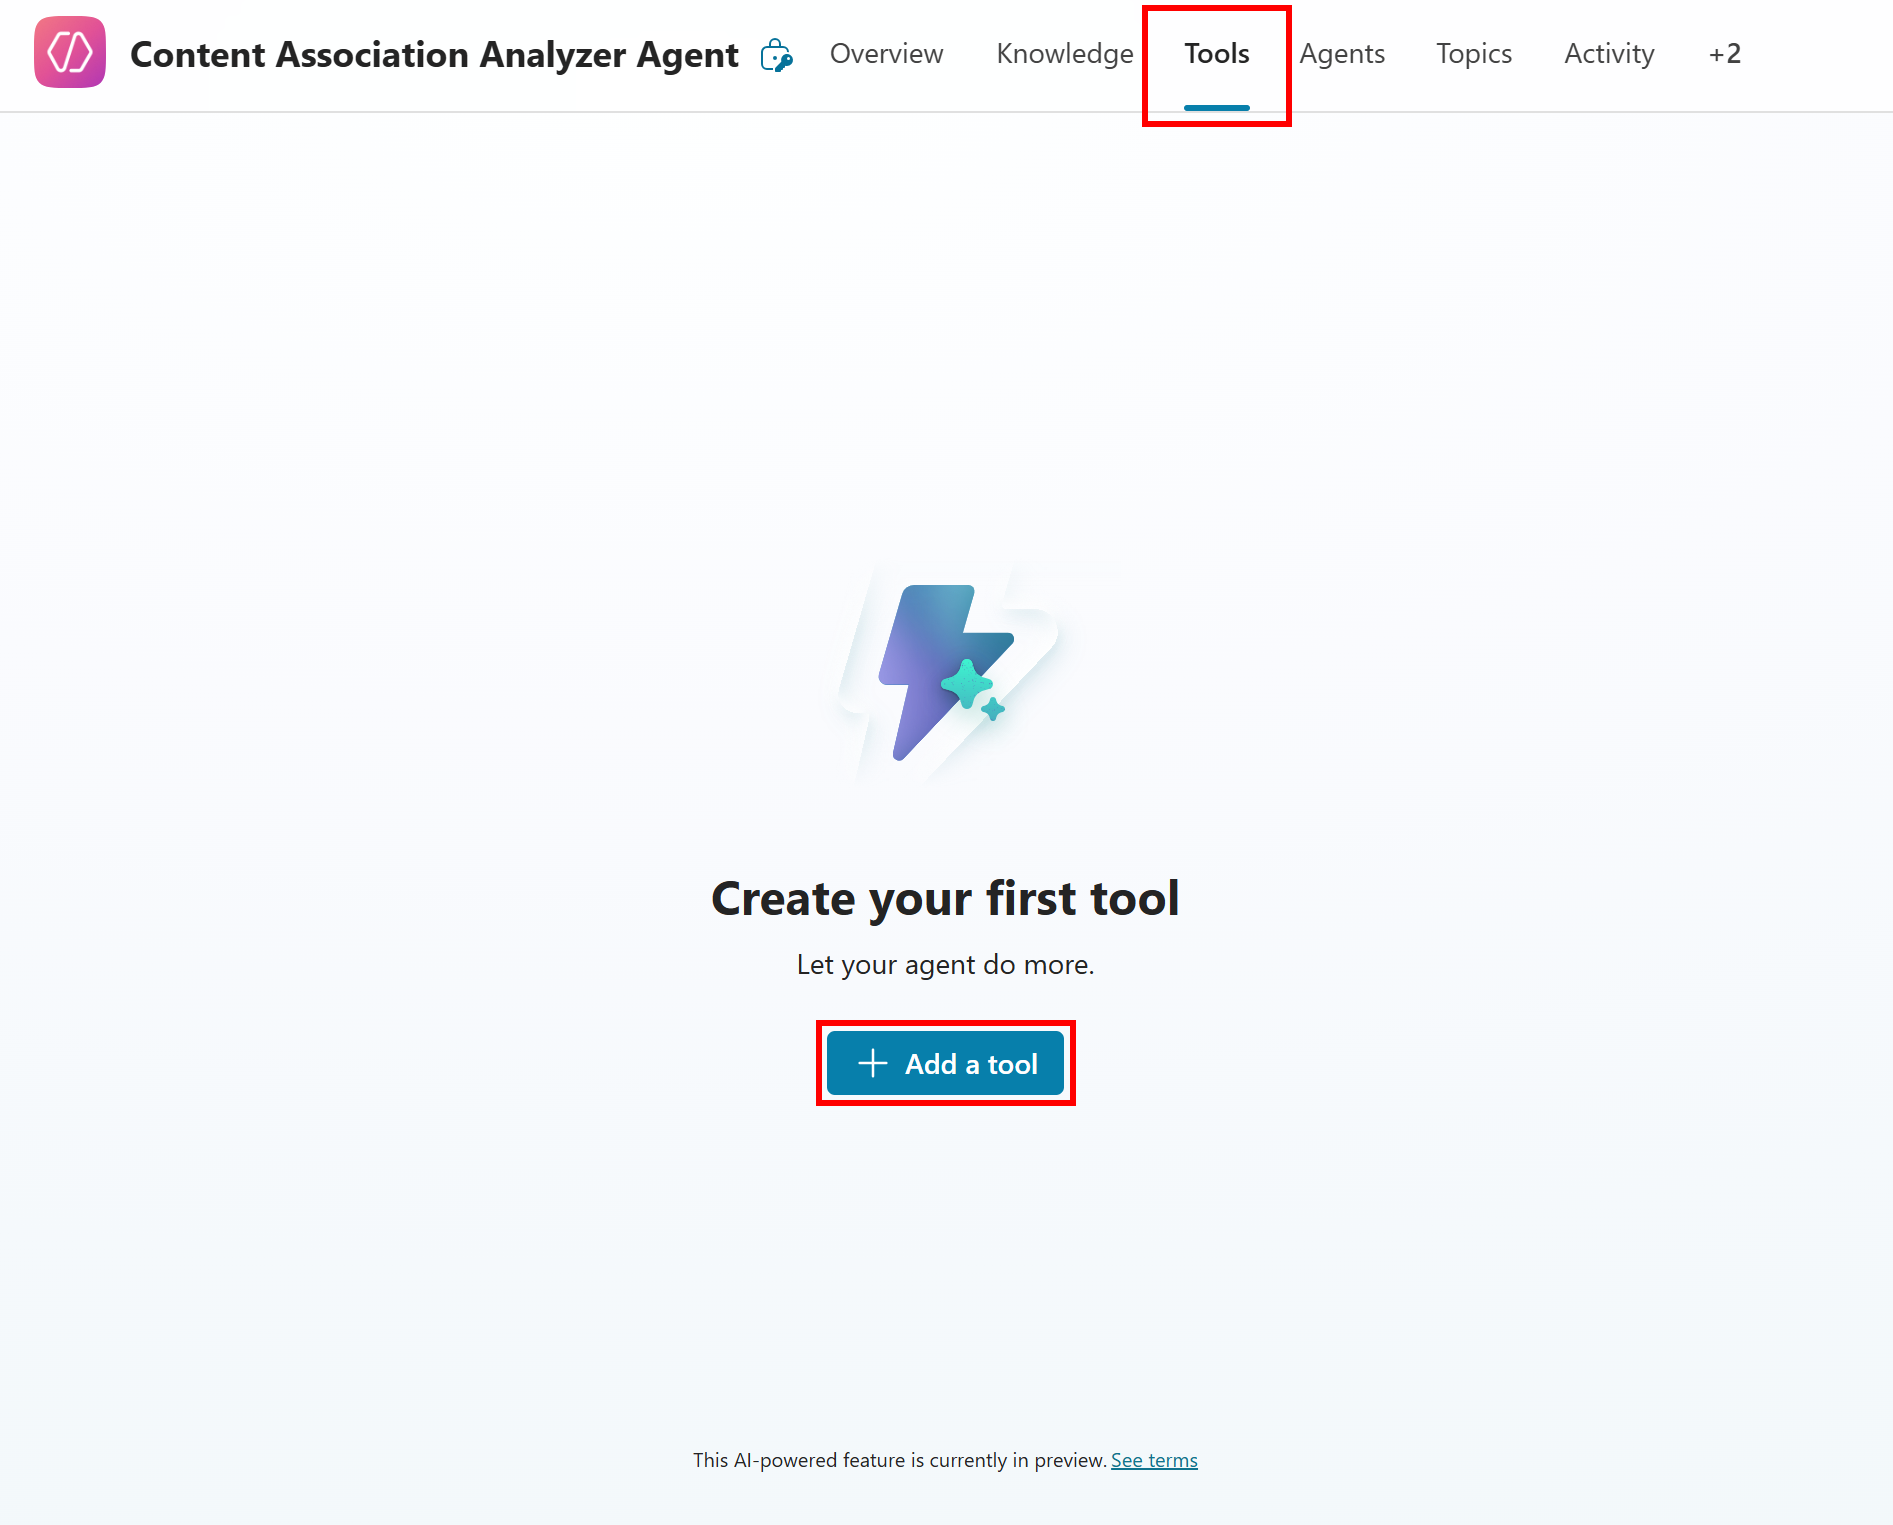
In the modal that opens, click the “New Tool” button: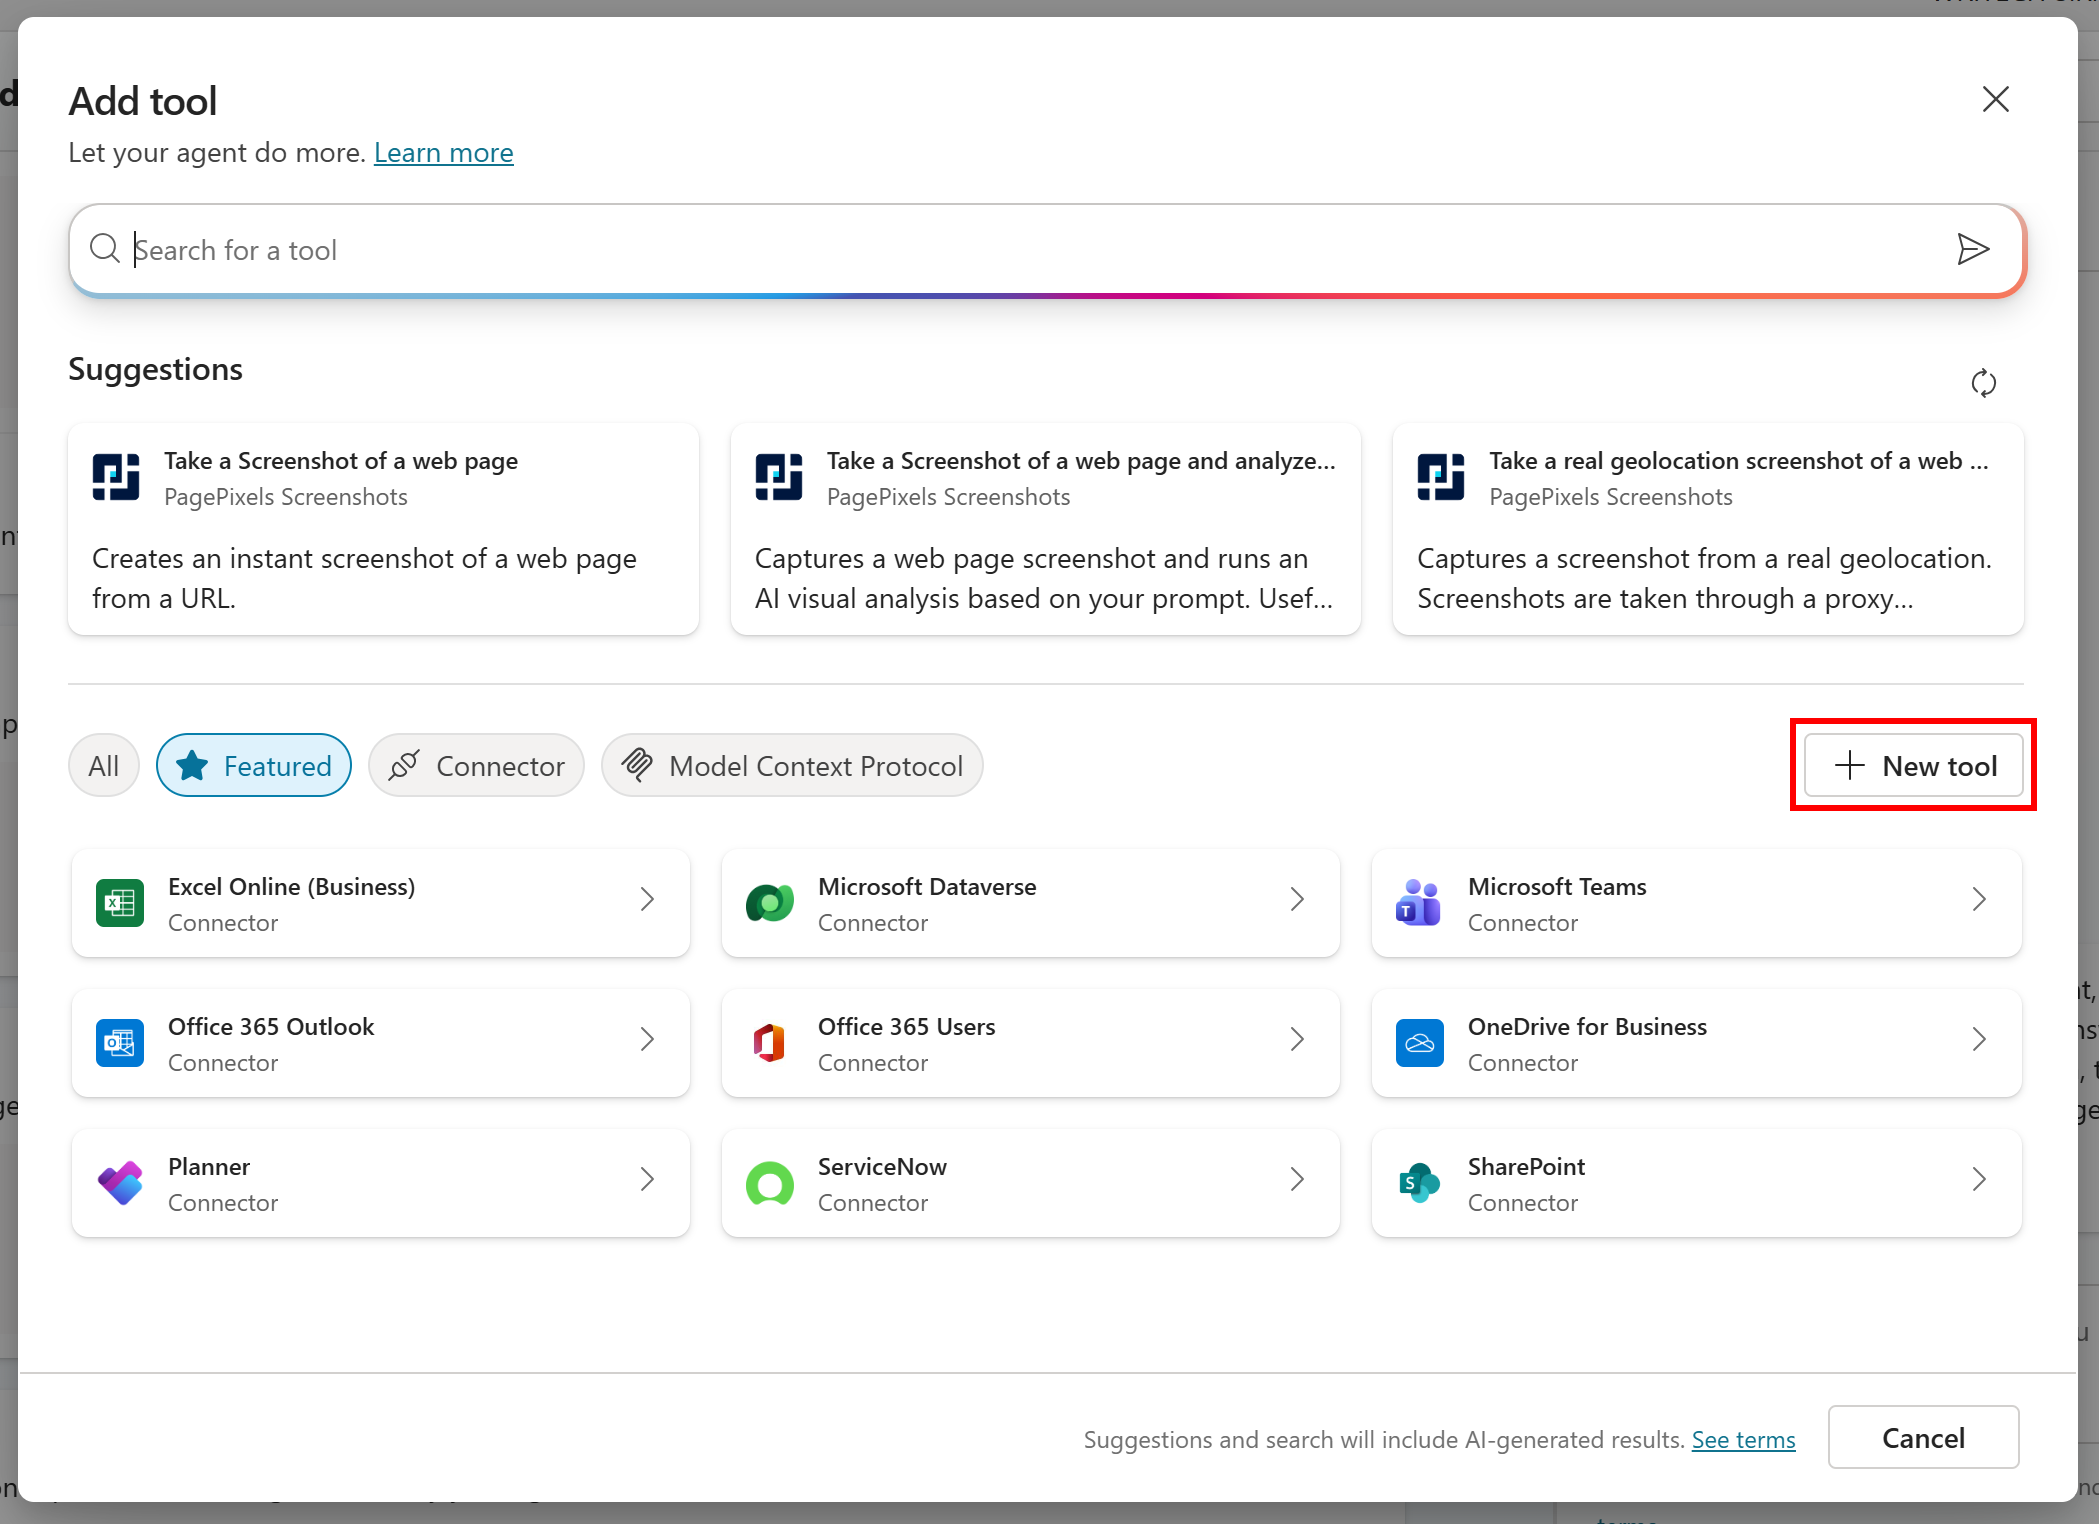
In the next step of the wizard, select the “Model Context Protocol” card: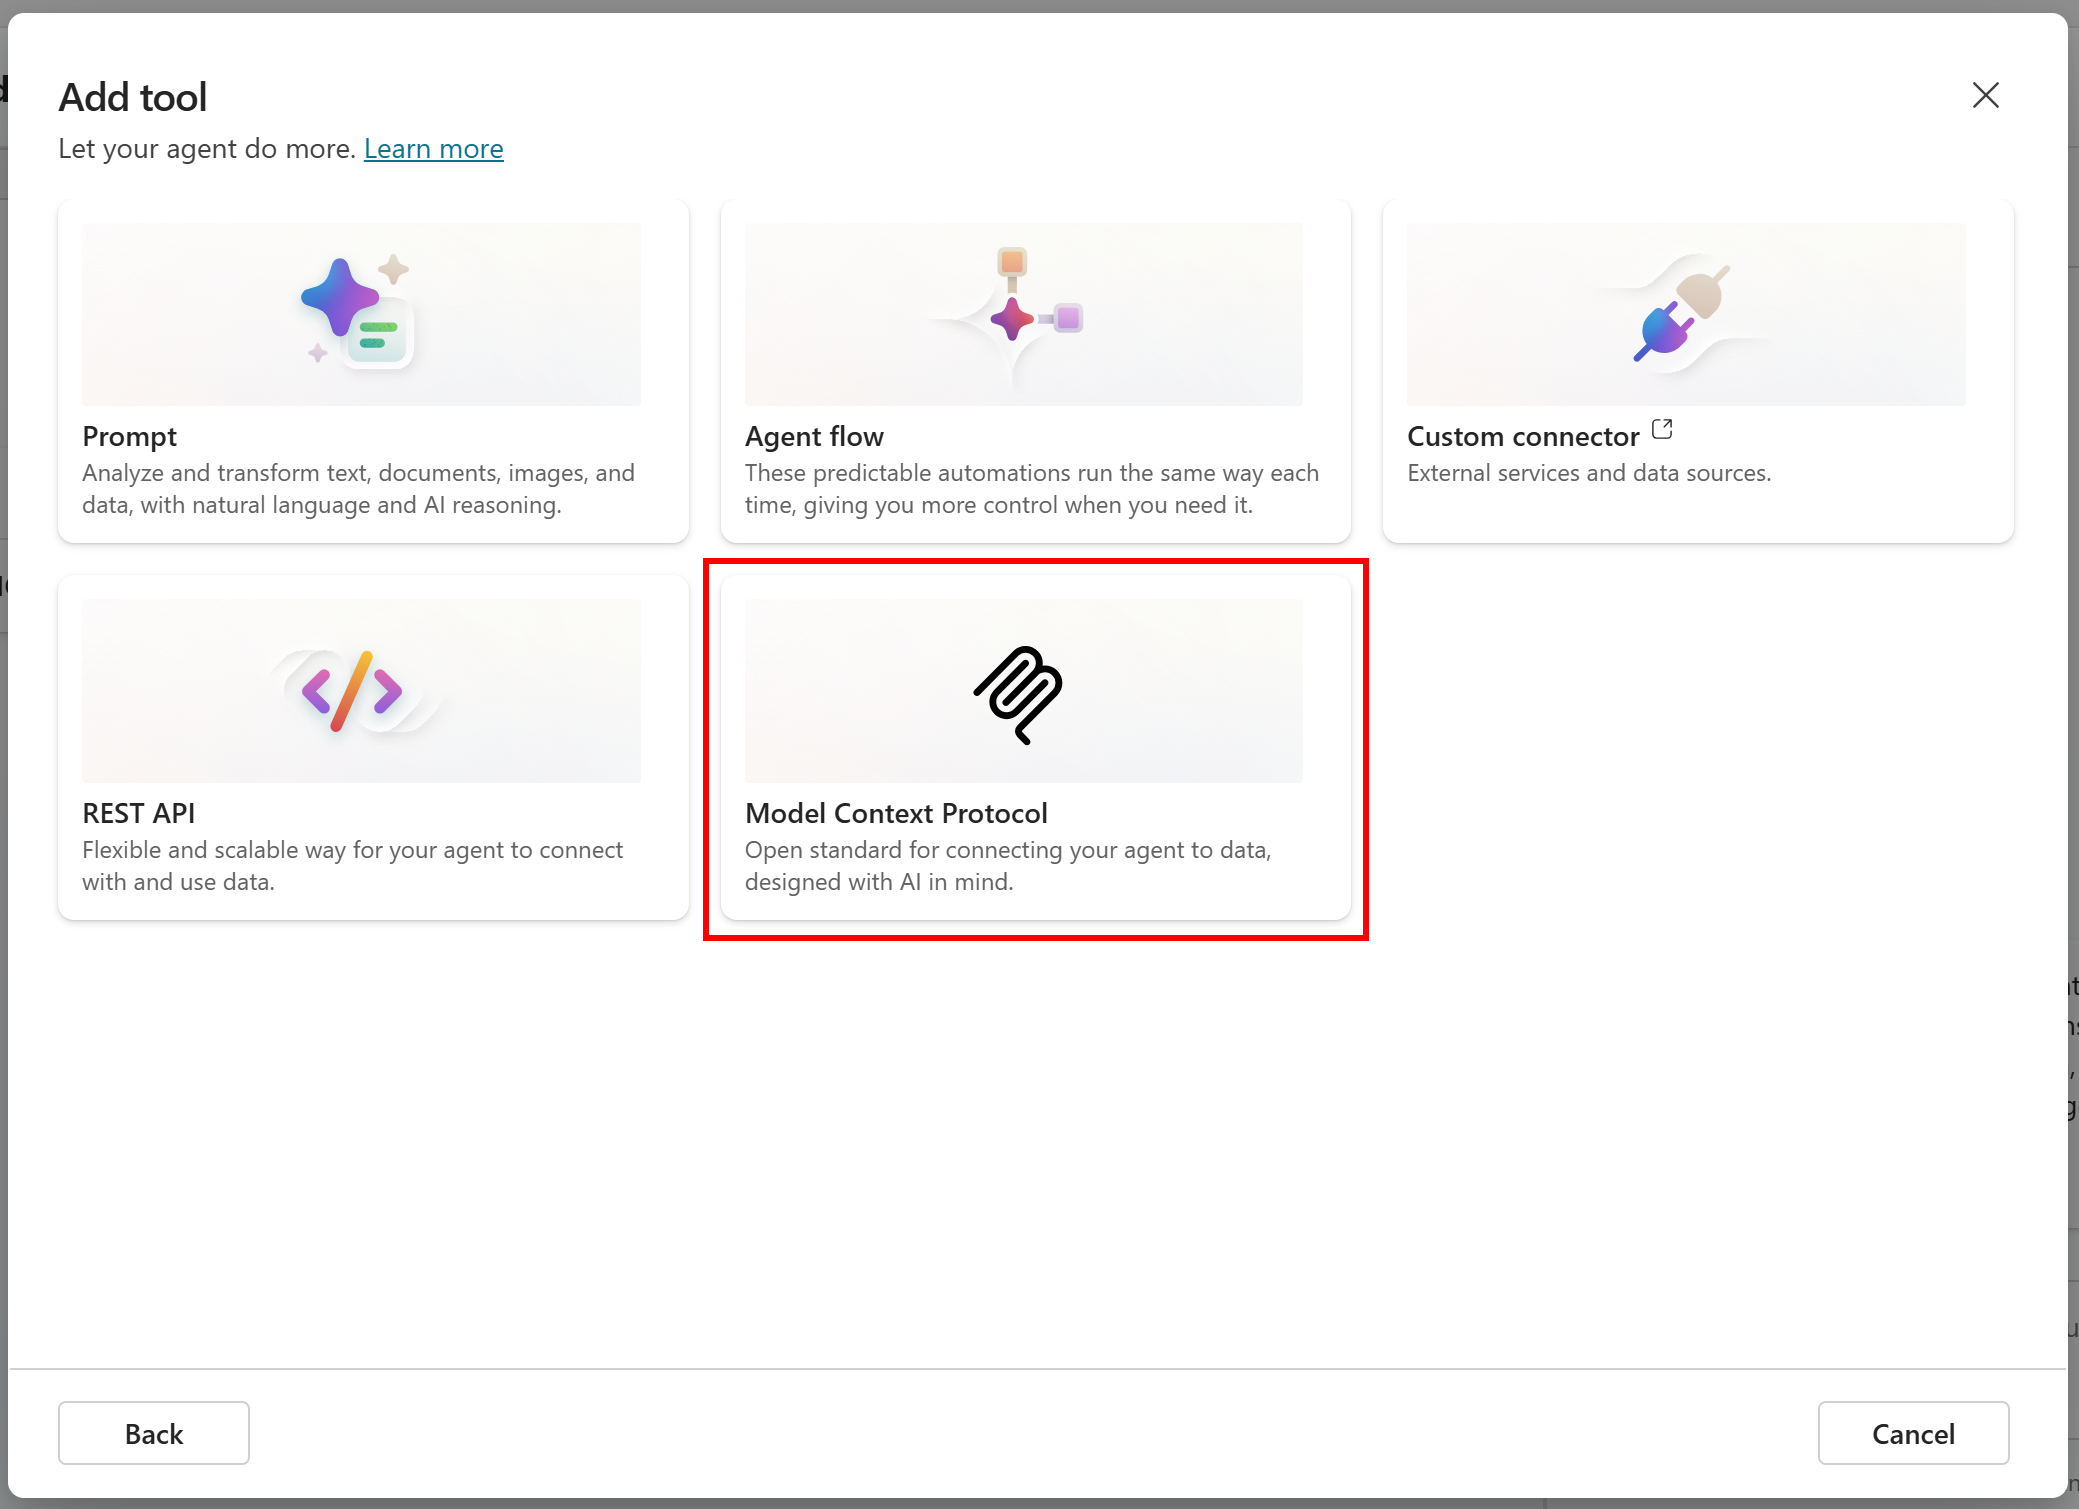
Fill out the “Add a Model Context Protocol server” form as below:
- Server name: “Bright Data Web MCP”
- Description: “An all-in-one tool for searching the web, navigating websites, taking action, and retrieving web data.”
- Server URL:
https://mcp.brightdata.com/mcp - Authentication: Select the “API key” option, and then these options:
- Type: “Query”
- Label: “token”
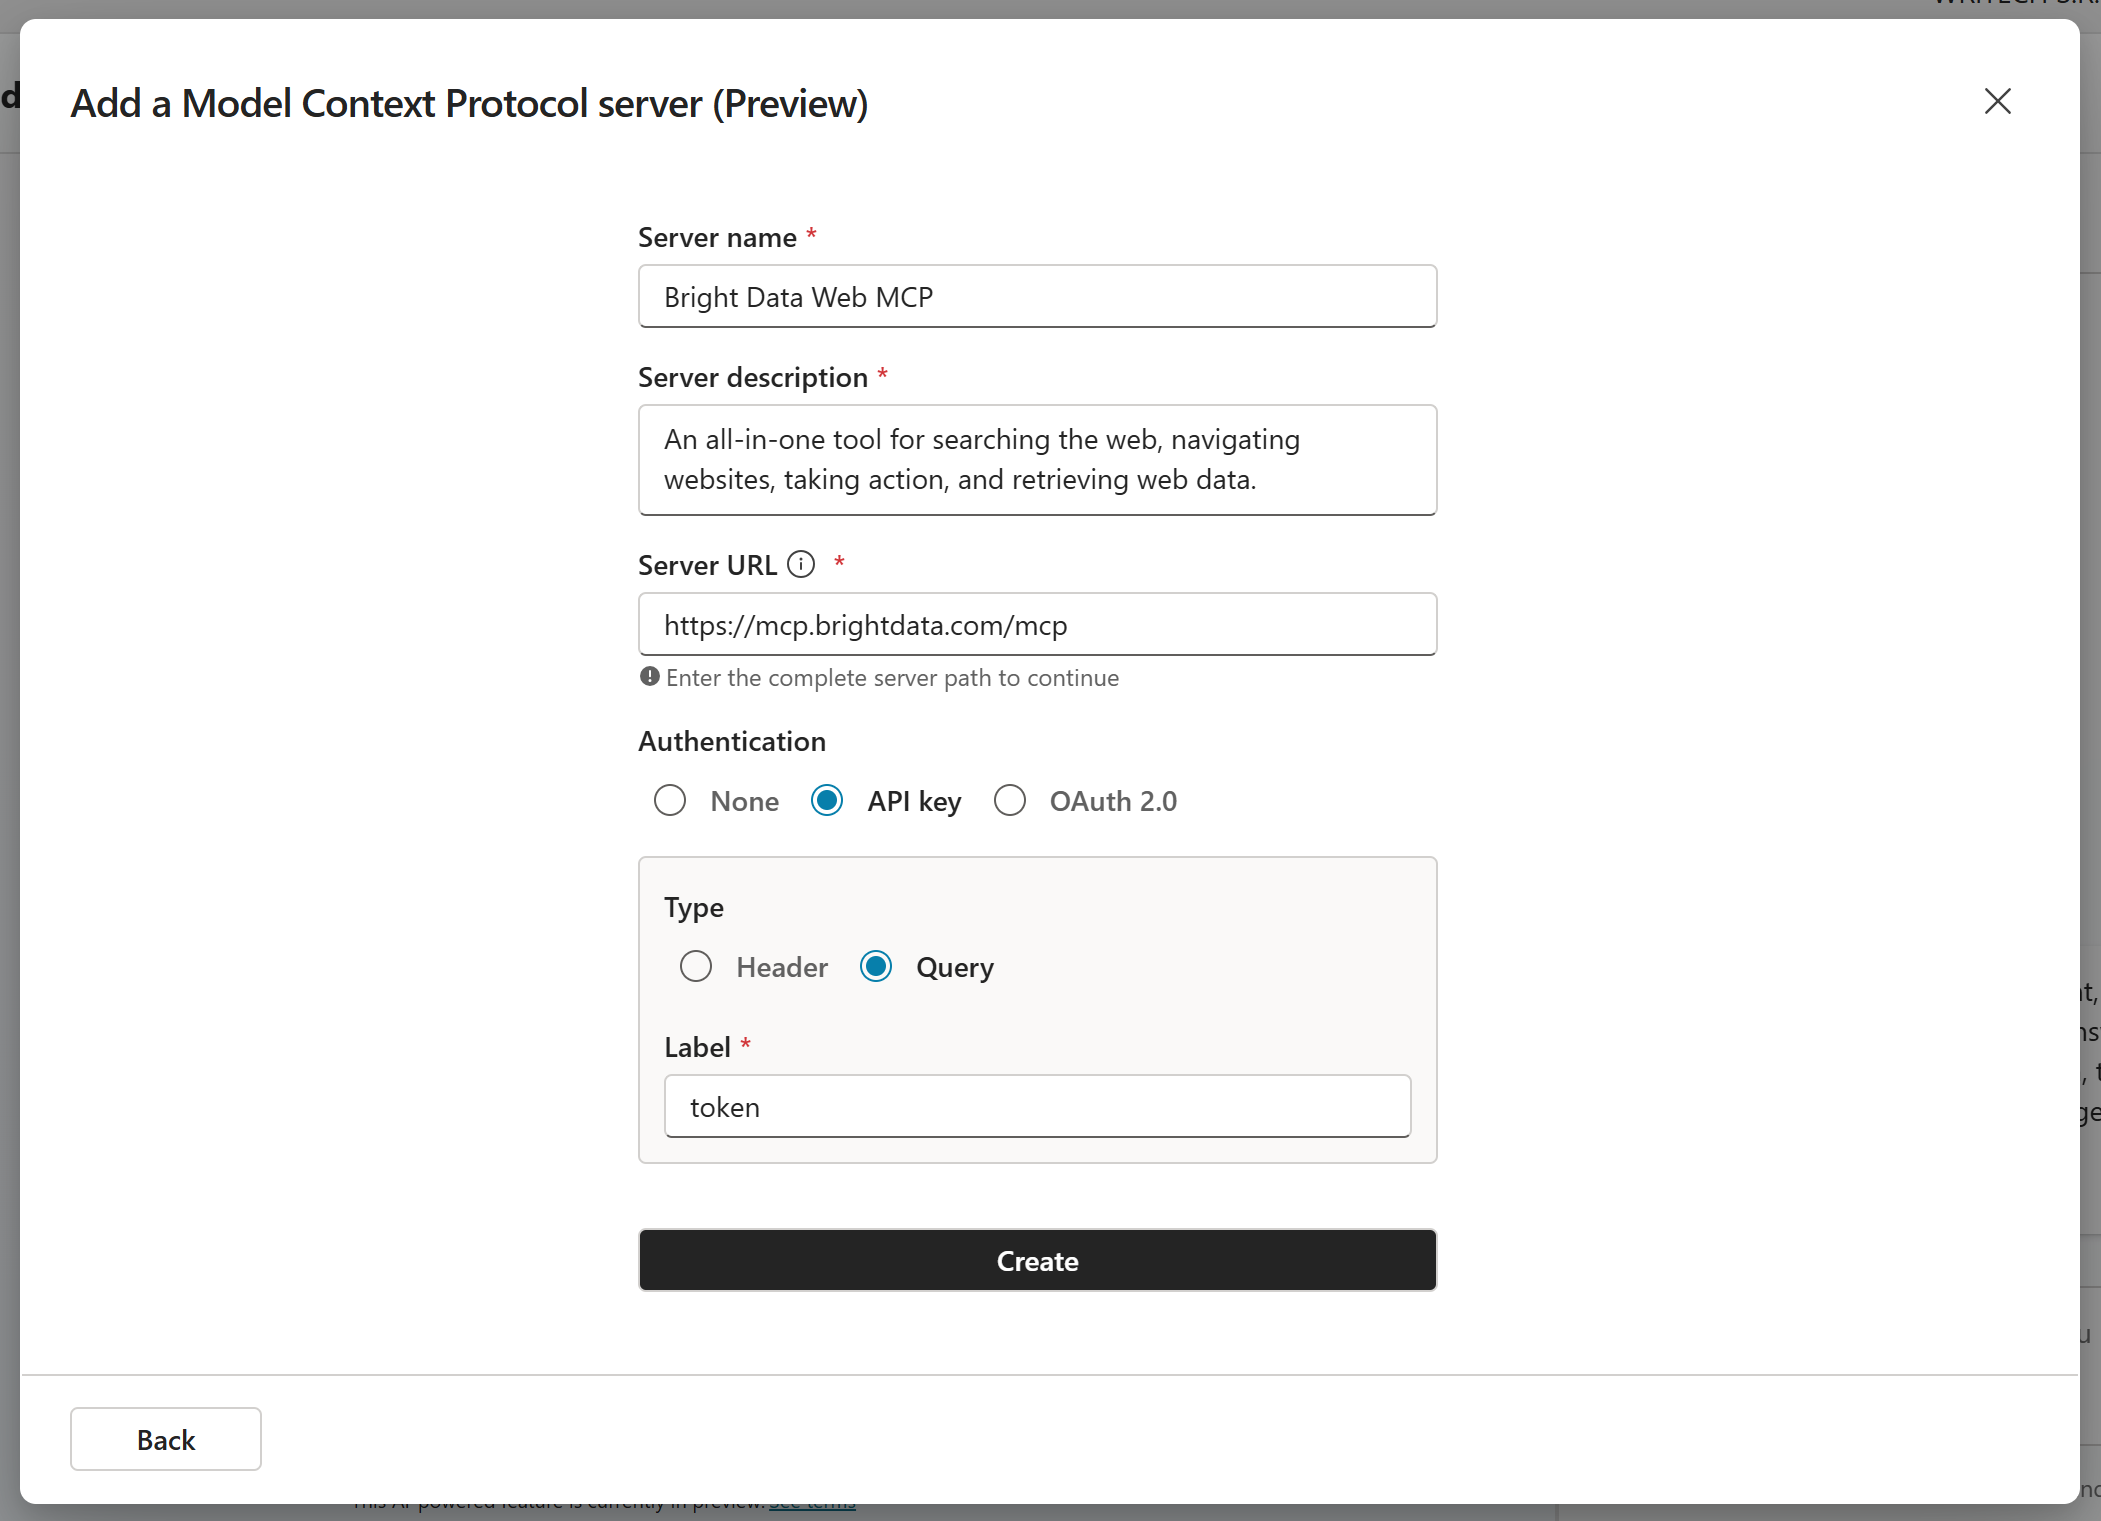
Important: As of this writing, Copilot Studio ignores query parameters specified in the “Server URL” field. The token query parameter is added via the authentication setup. Instead, to set the pro=1 query parameter and enable Pro mode, you will need to apply a special customization (as you will see in the next step).
Click “Create” to continue. You will then see the “Add Tool” modal. Here, open the “Not connected” dropdown and press “Create new connection”: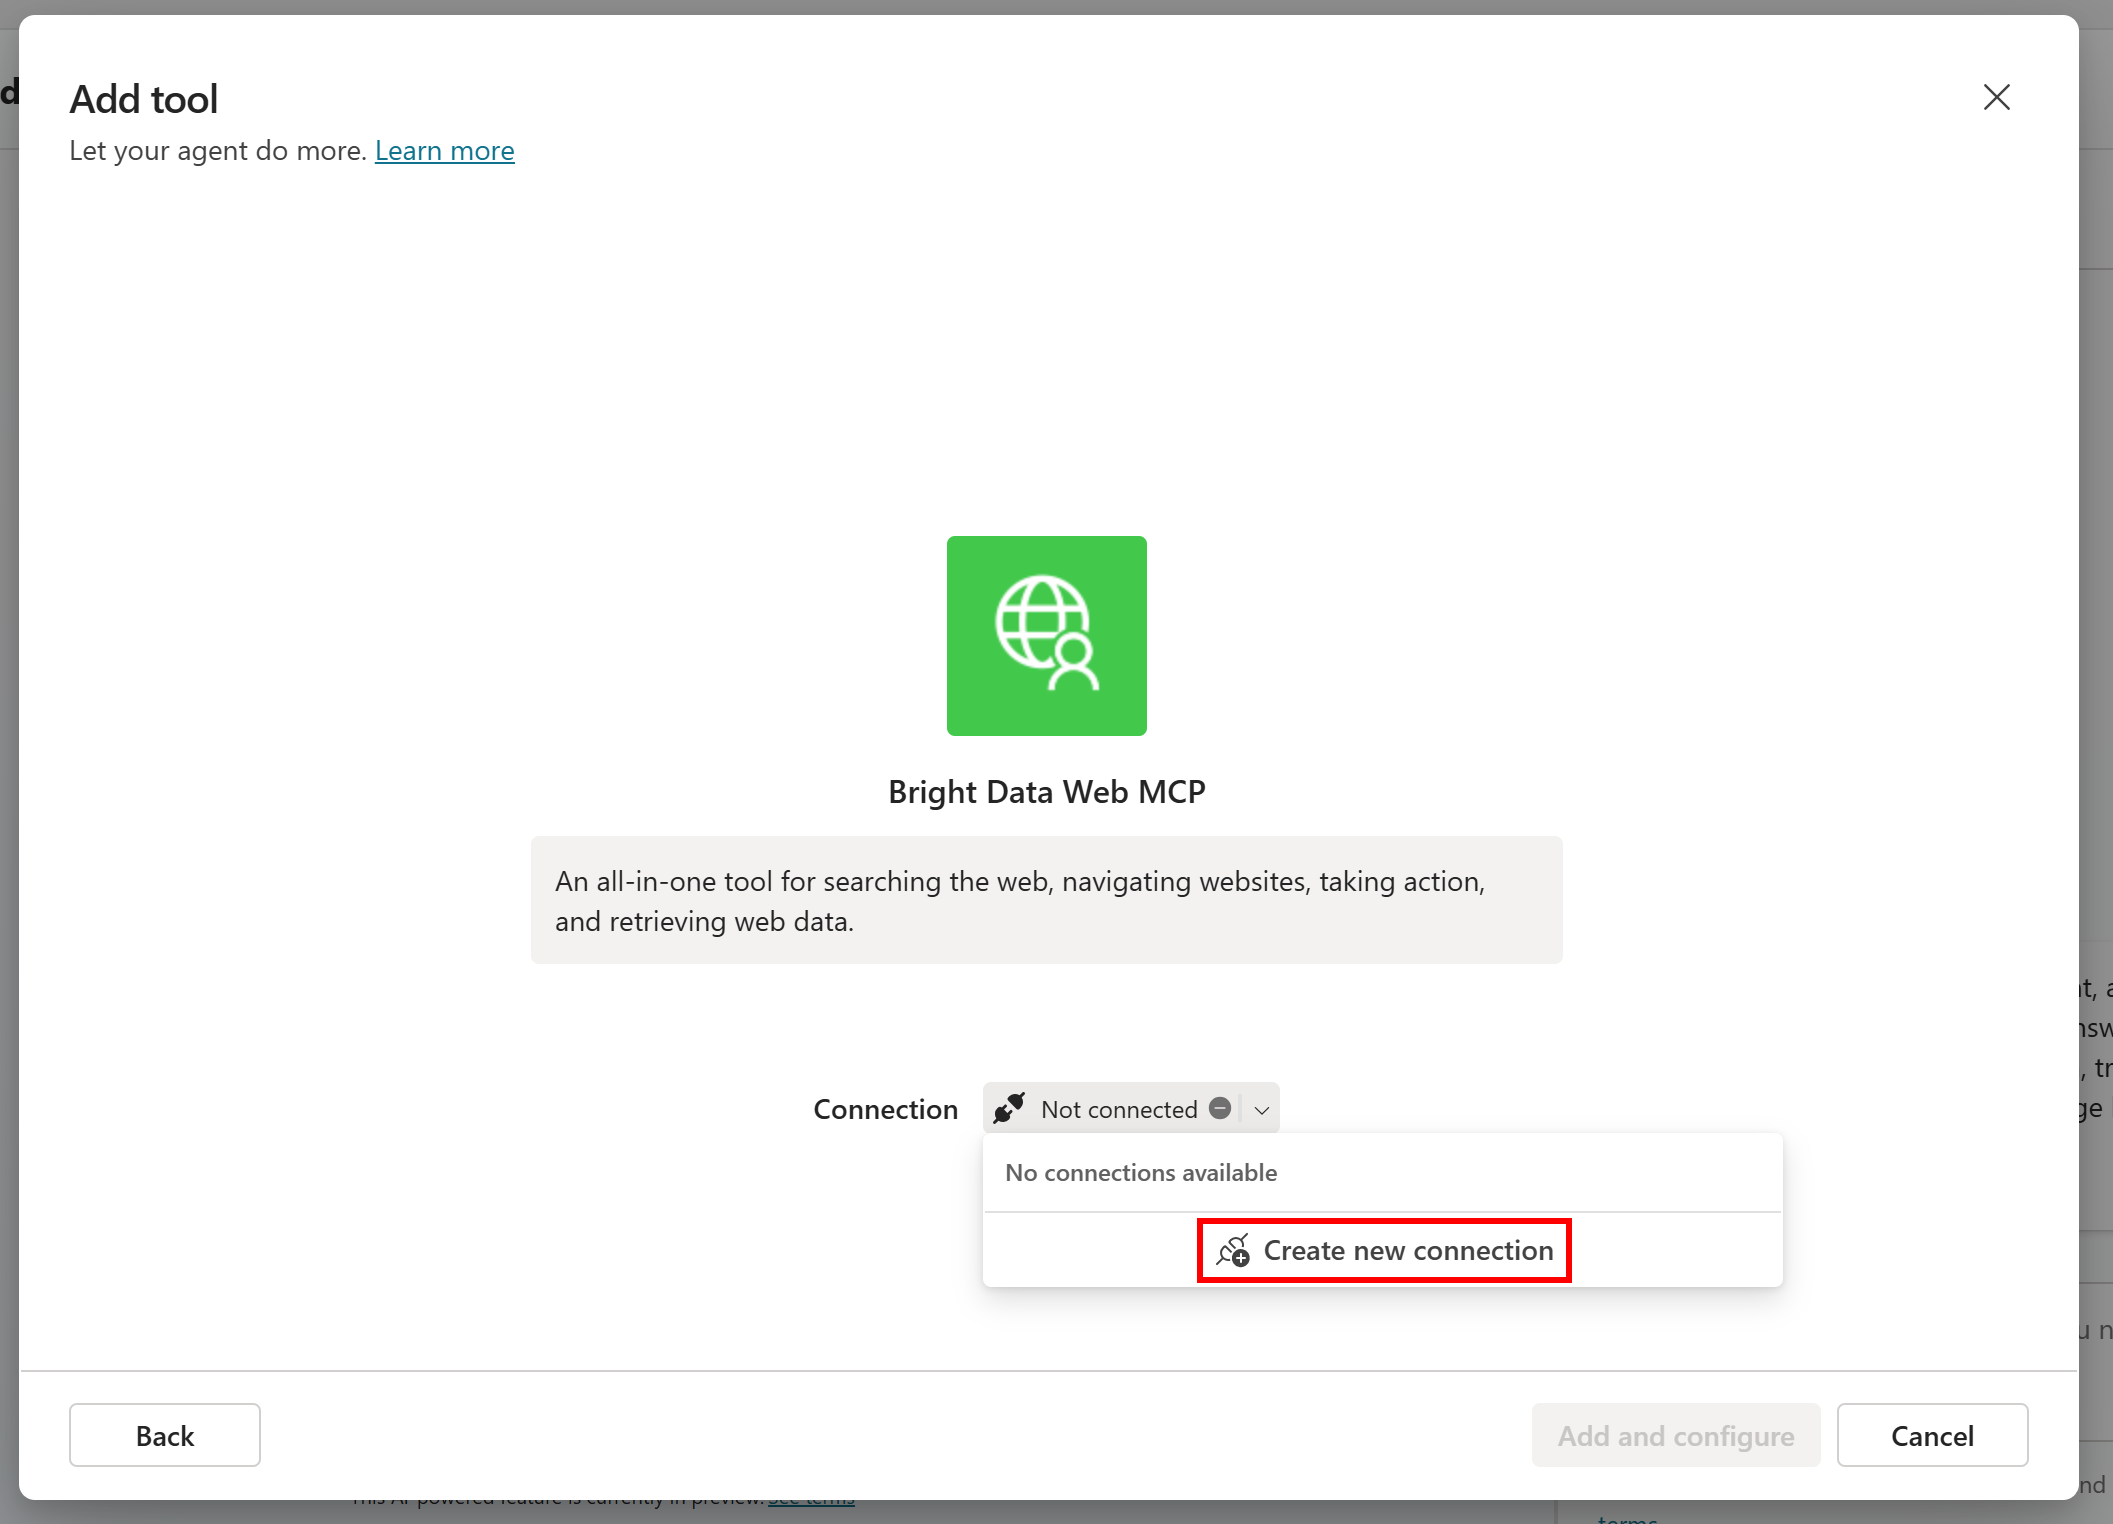
This will define a connection for your Web MCP server tool. Since you configured token as the query authentication method, you will be prompted for a “token” input. Paste your Bright Data API key and click “Create”: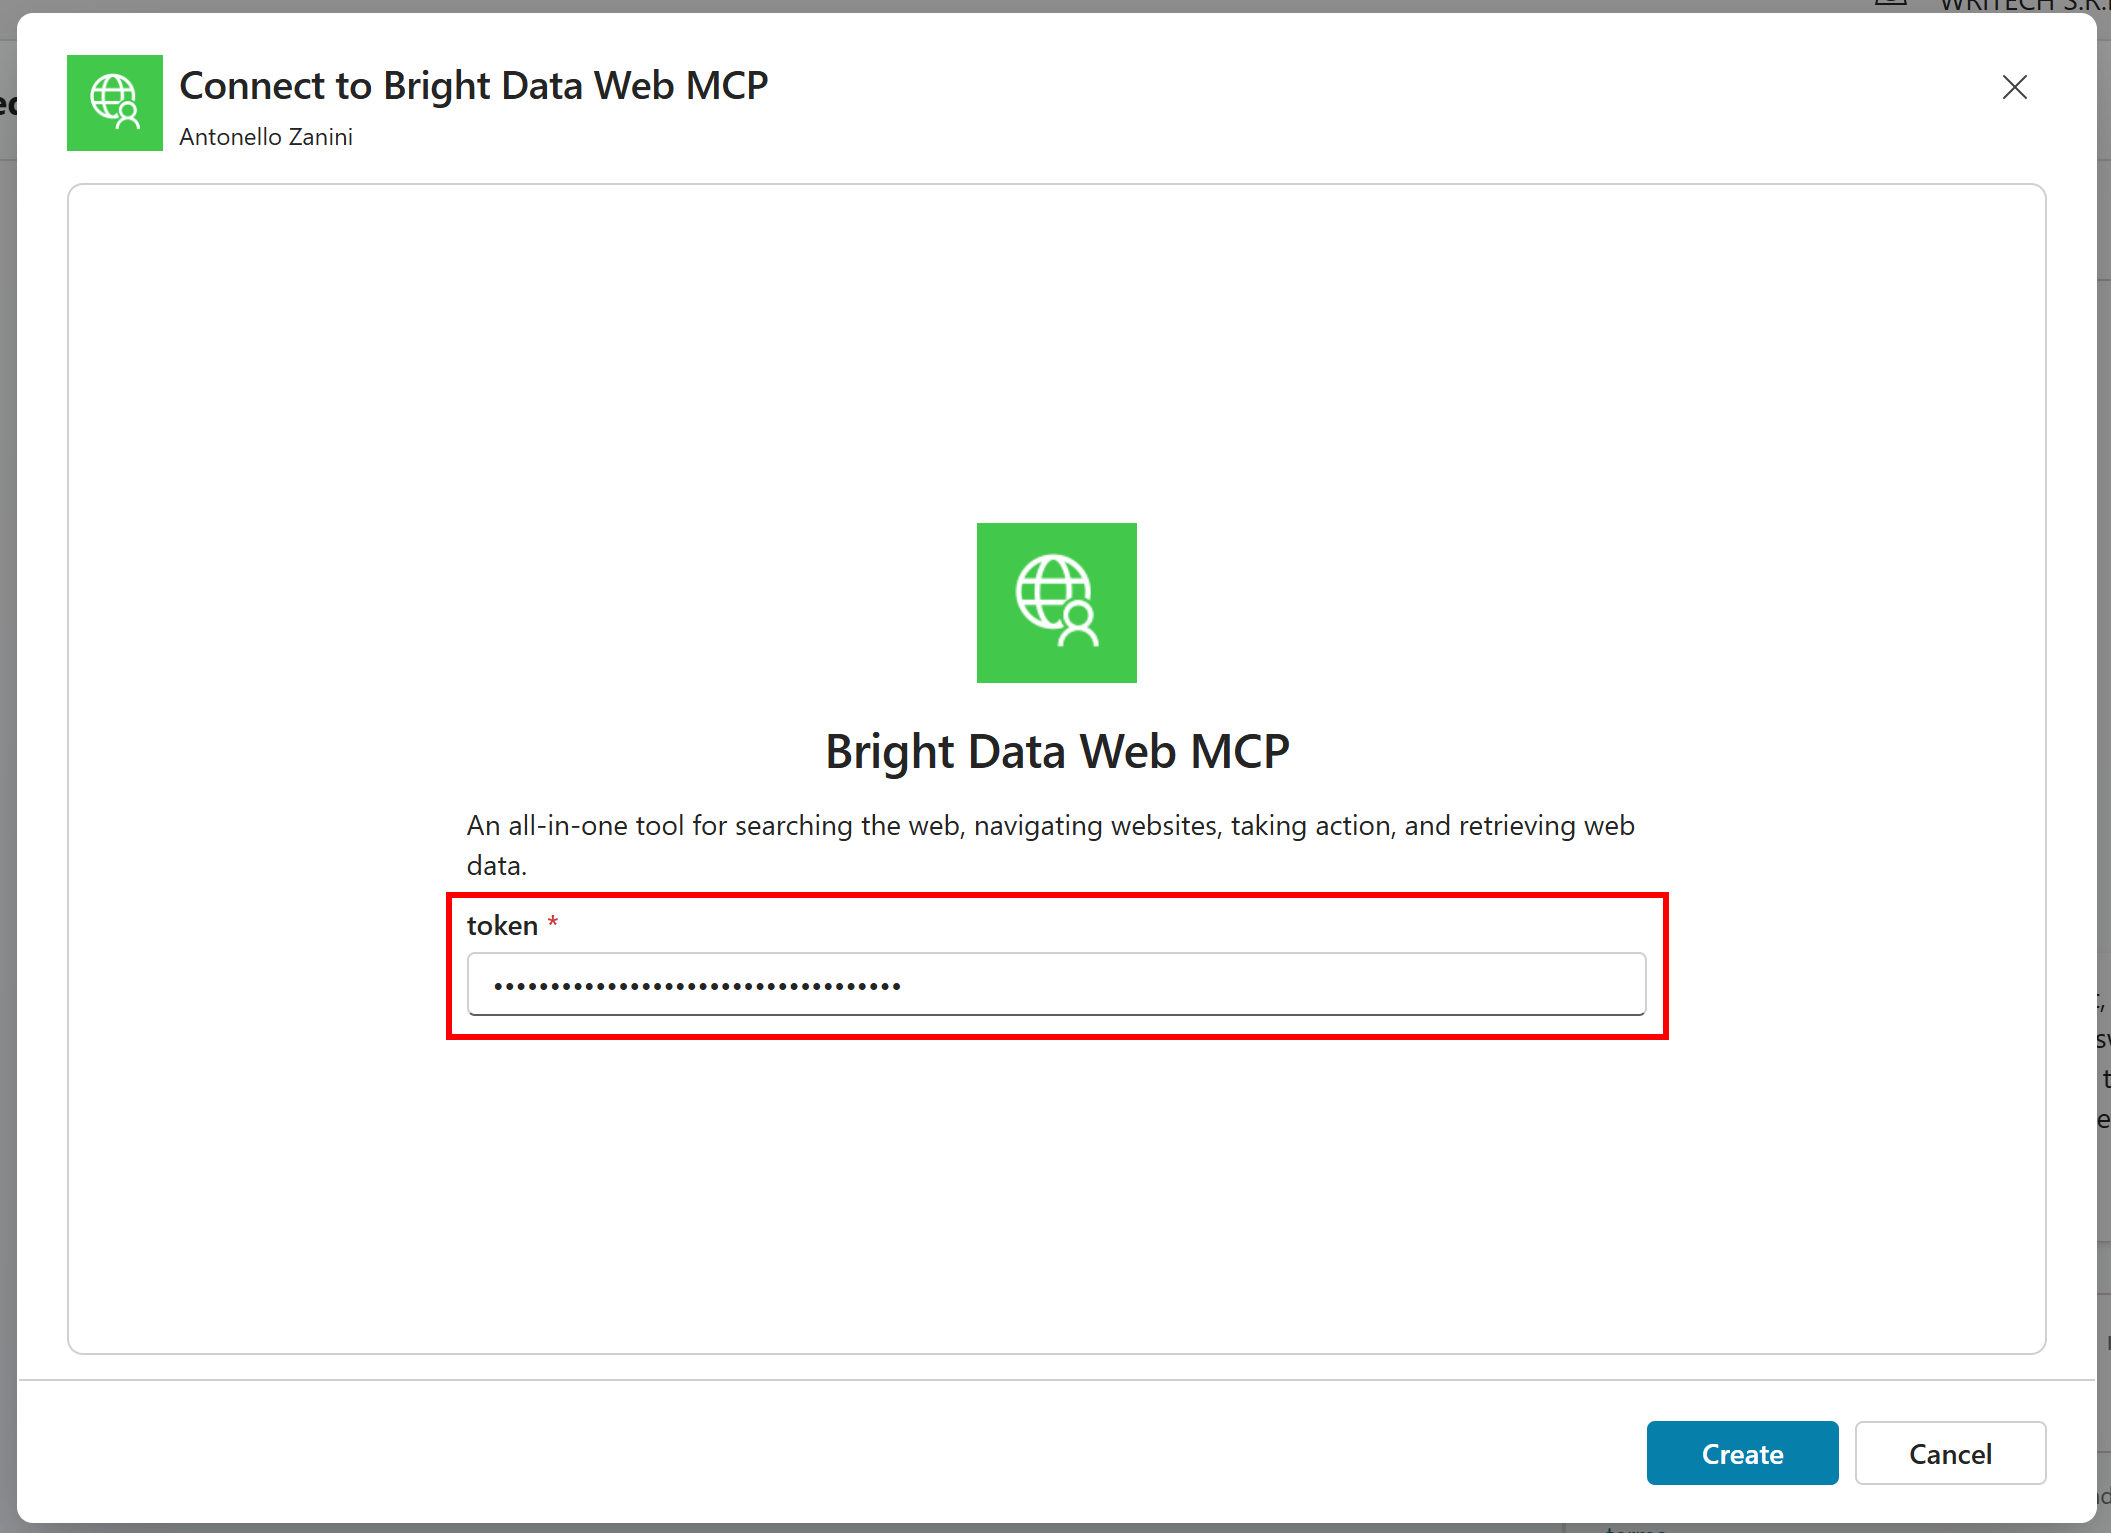
The token query parameter in the MCP connection URL will now be set to your Bright Data API key. That way, you will be able to authenticate the connection to the remote Web MCP server.
After the connection is created, add the tool to your agent via the “Add and configure” button: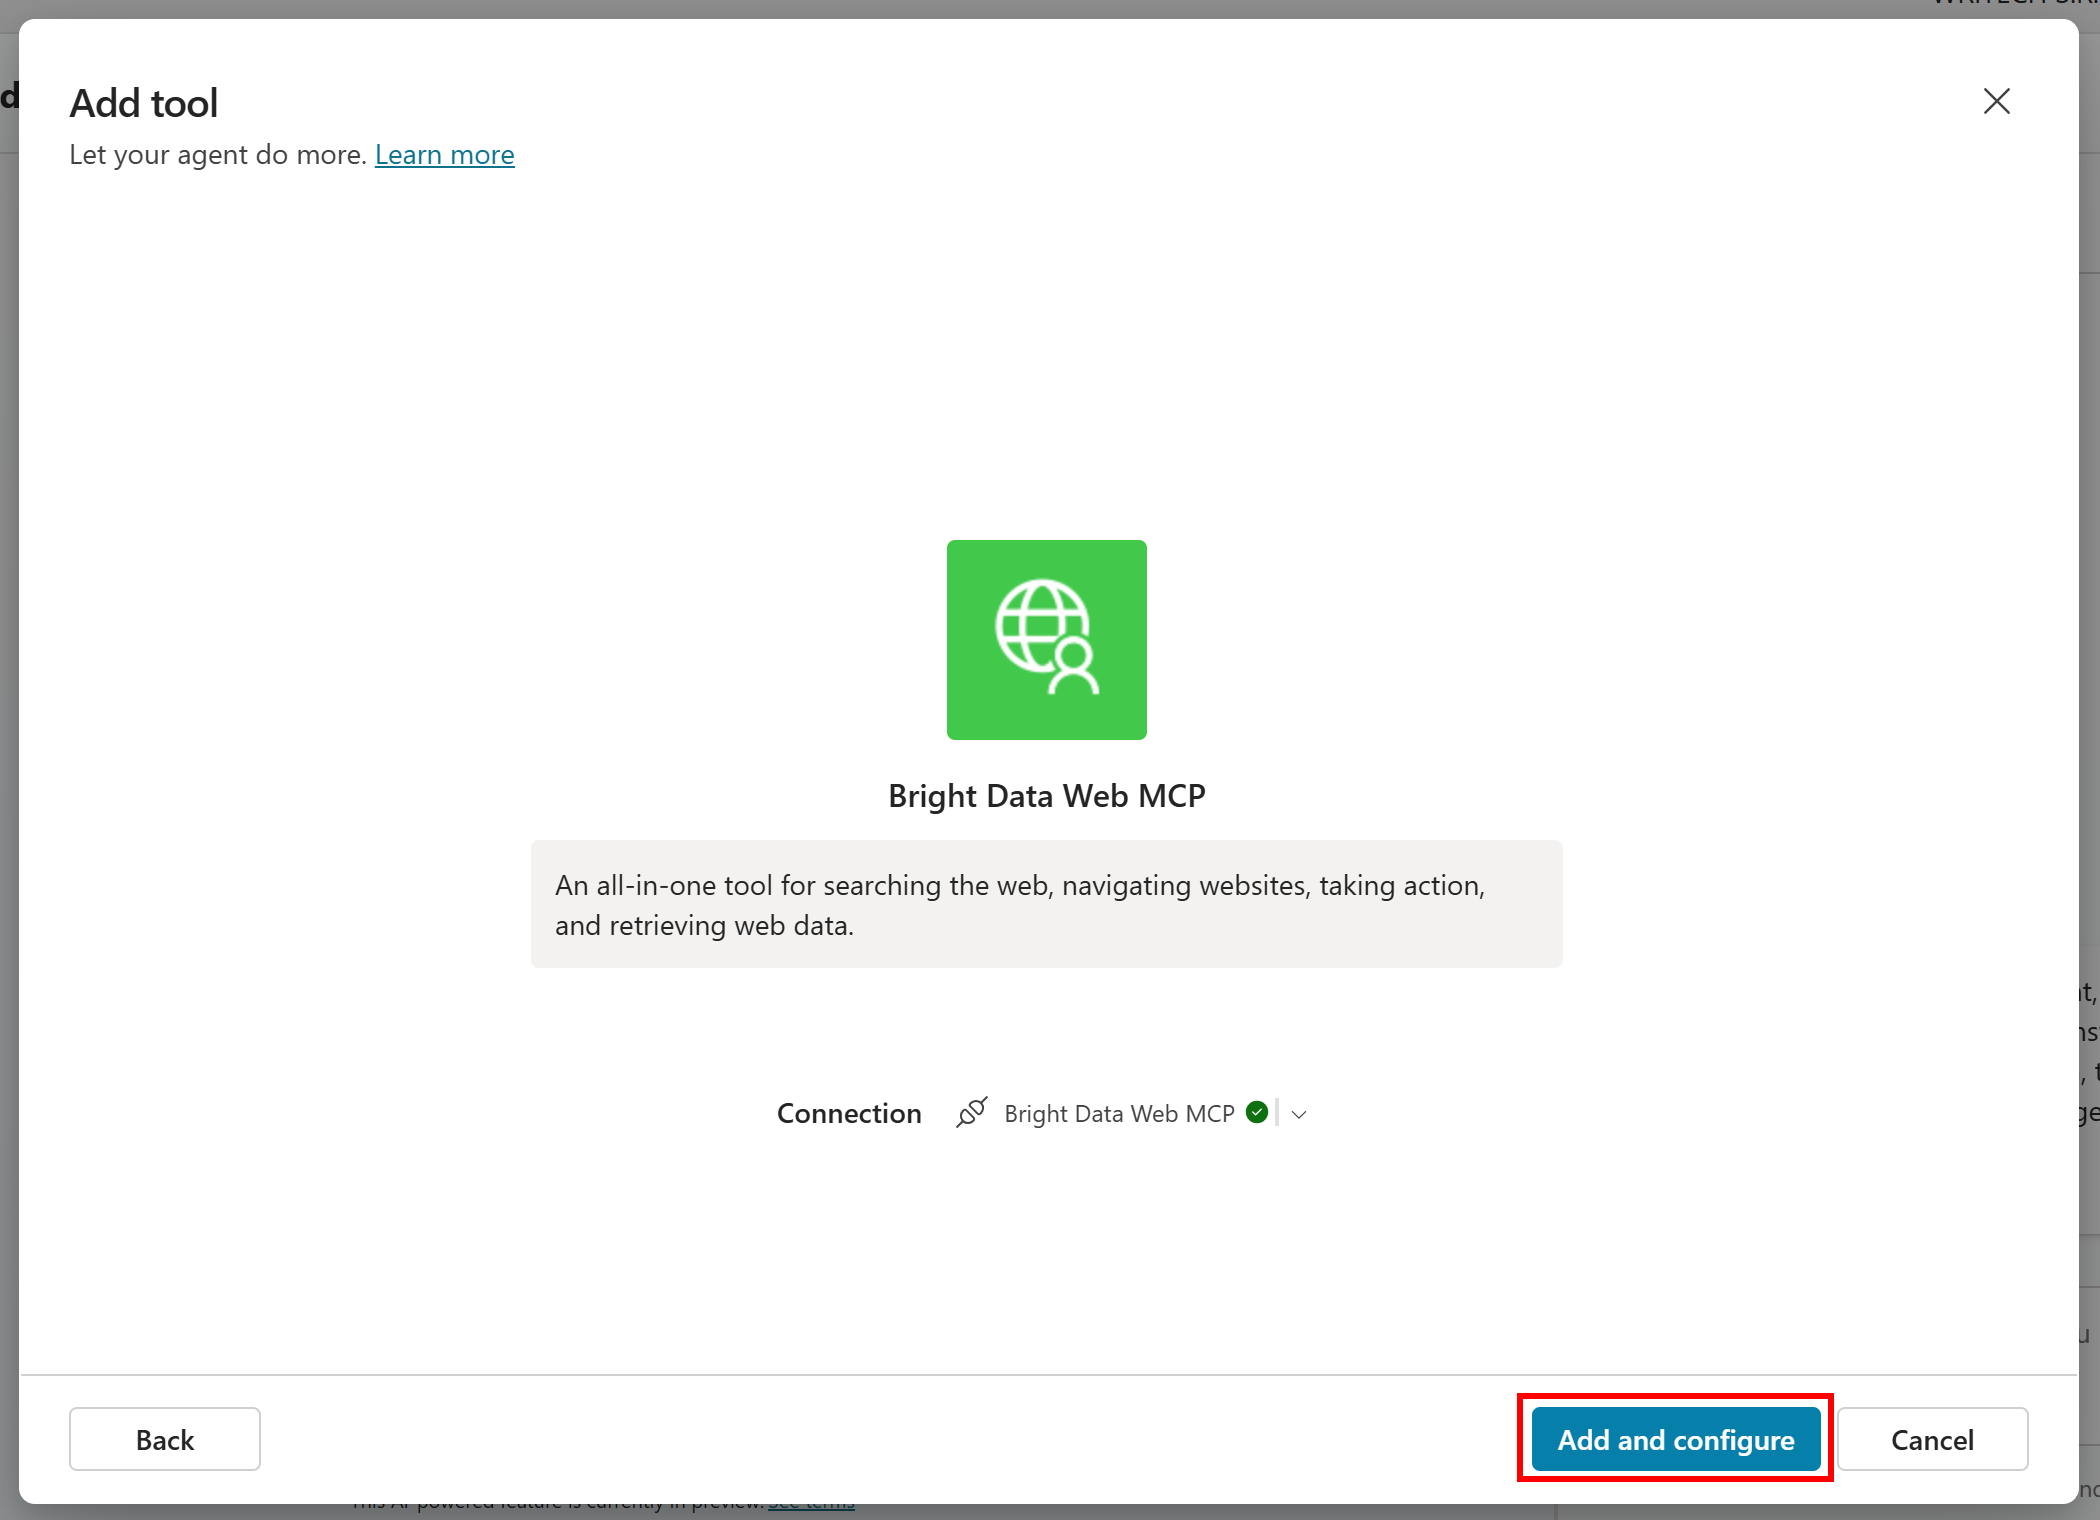
You will be redirected to the “Bright Data Web MCP” tool section inside the “Supercharged Web Agent” management page:
Currently, the Web MCP tool exposes only 4 tools. Those are exactly the tools included in the Web MCP free tier. Now, let’s configure the tool to work in Pro mode so that you can access all 60+ tools!
Step #5: Configure Pro Mode
In Copilot Studio, open the left-hand menu and select the “Tools” option. On the page, locate the “Bright Data Web MCP” entry and click it: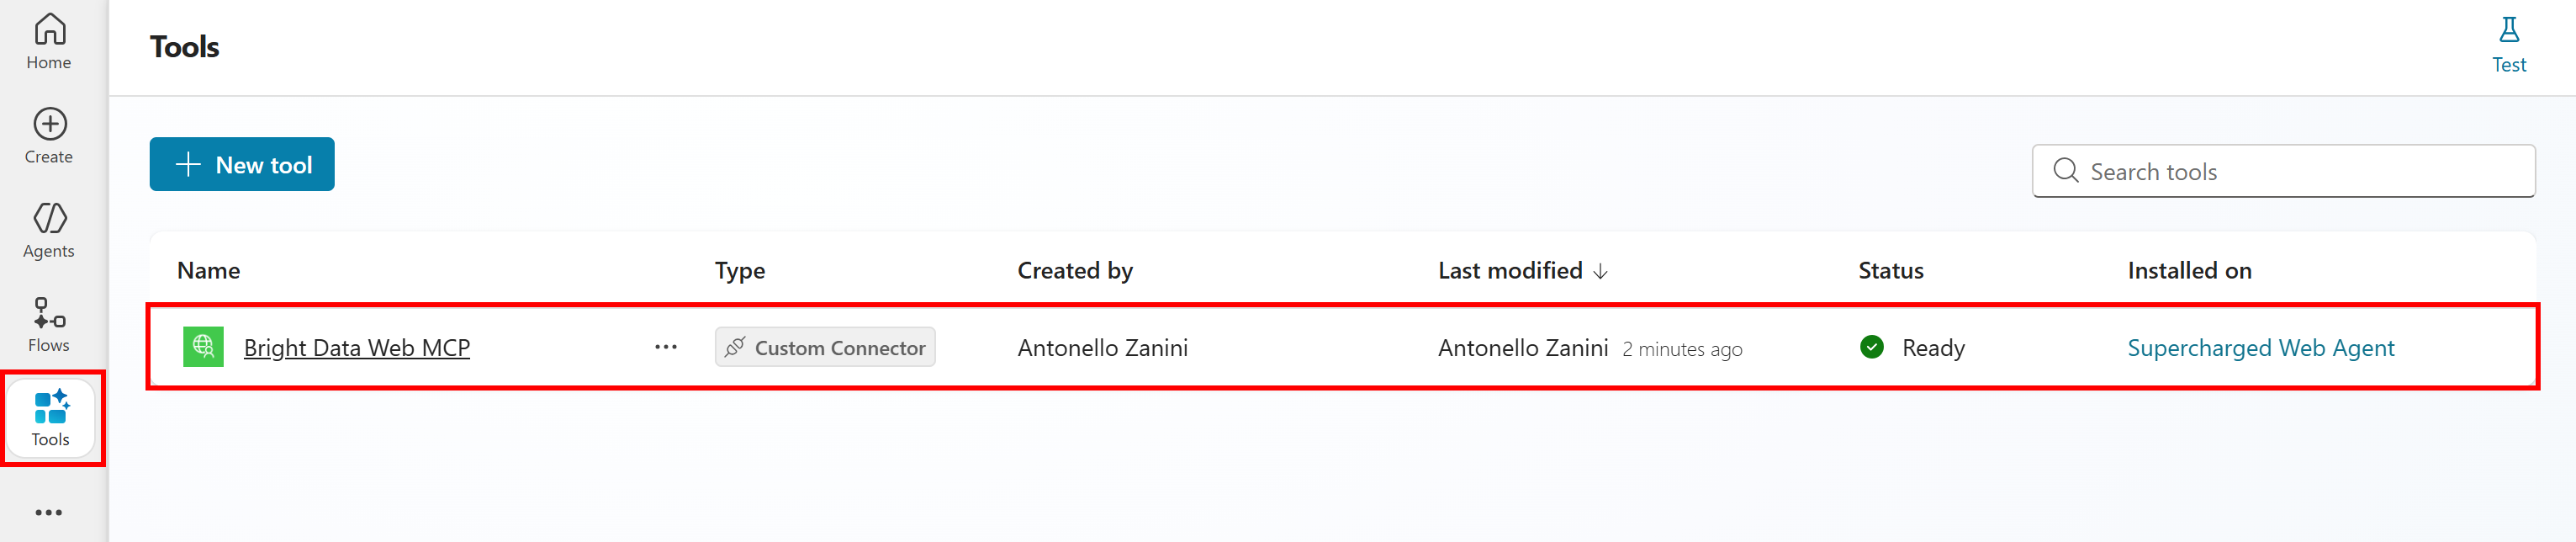
You will be redirected to the “Bright Data Web MCP” connector edit page in Microsoft Power Apps: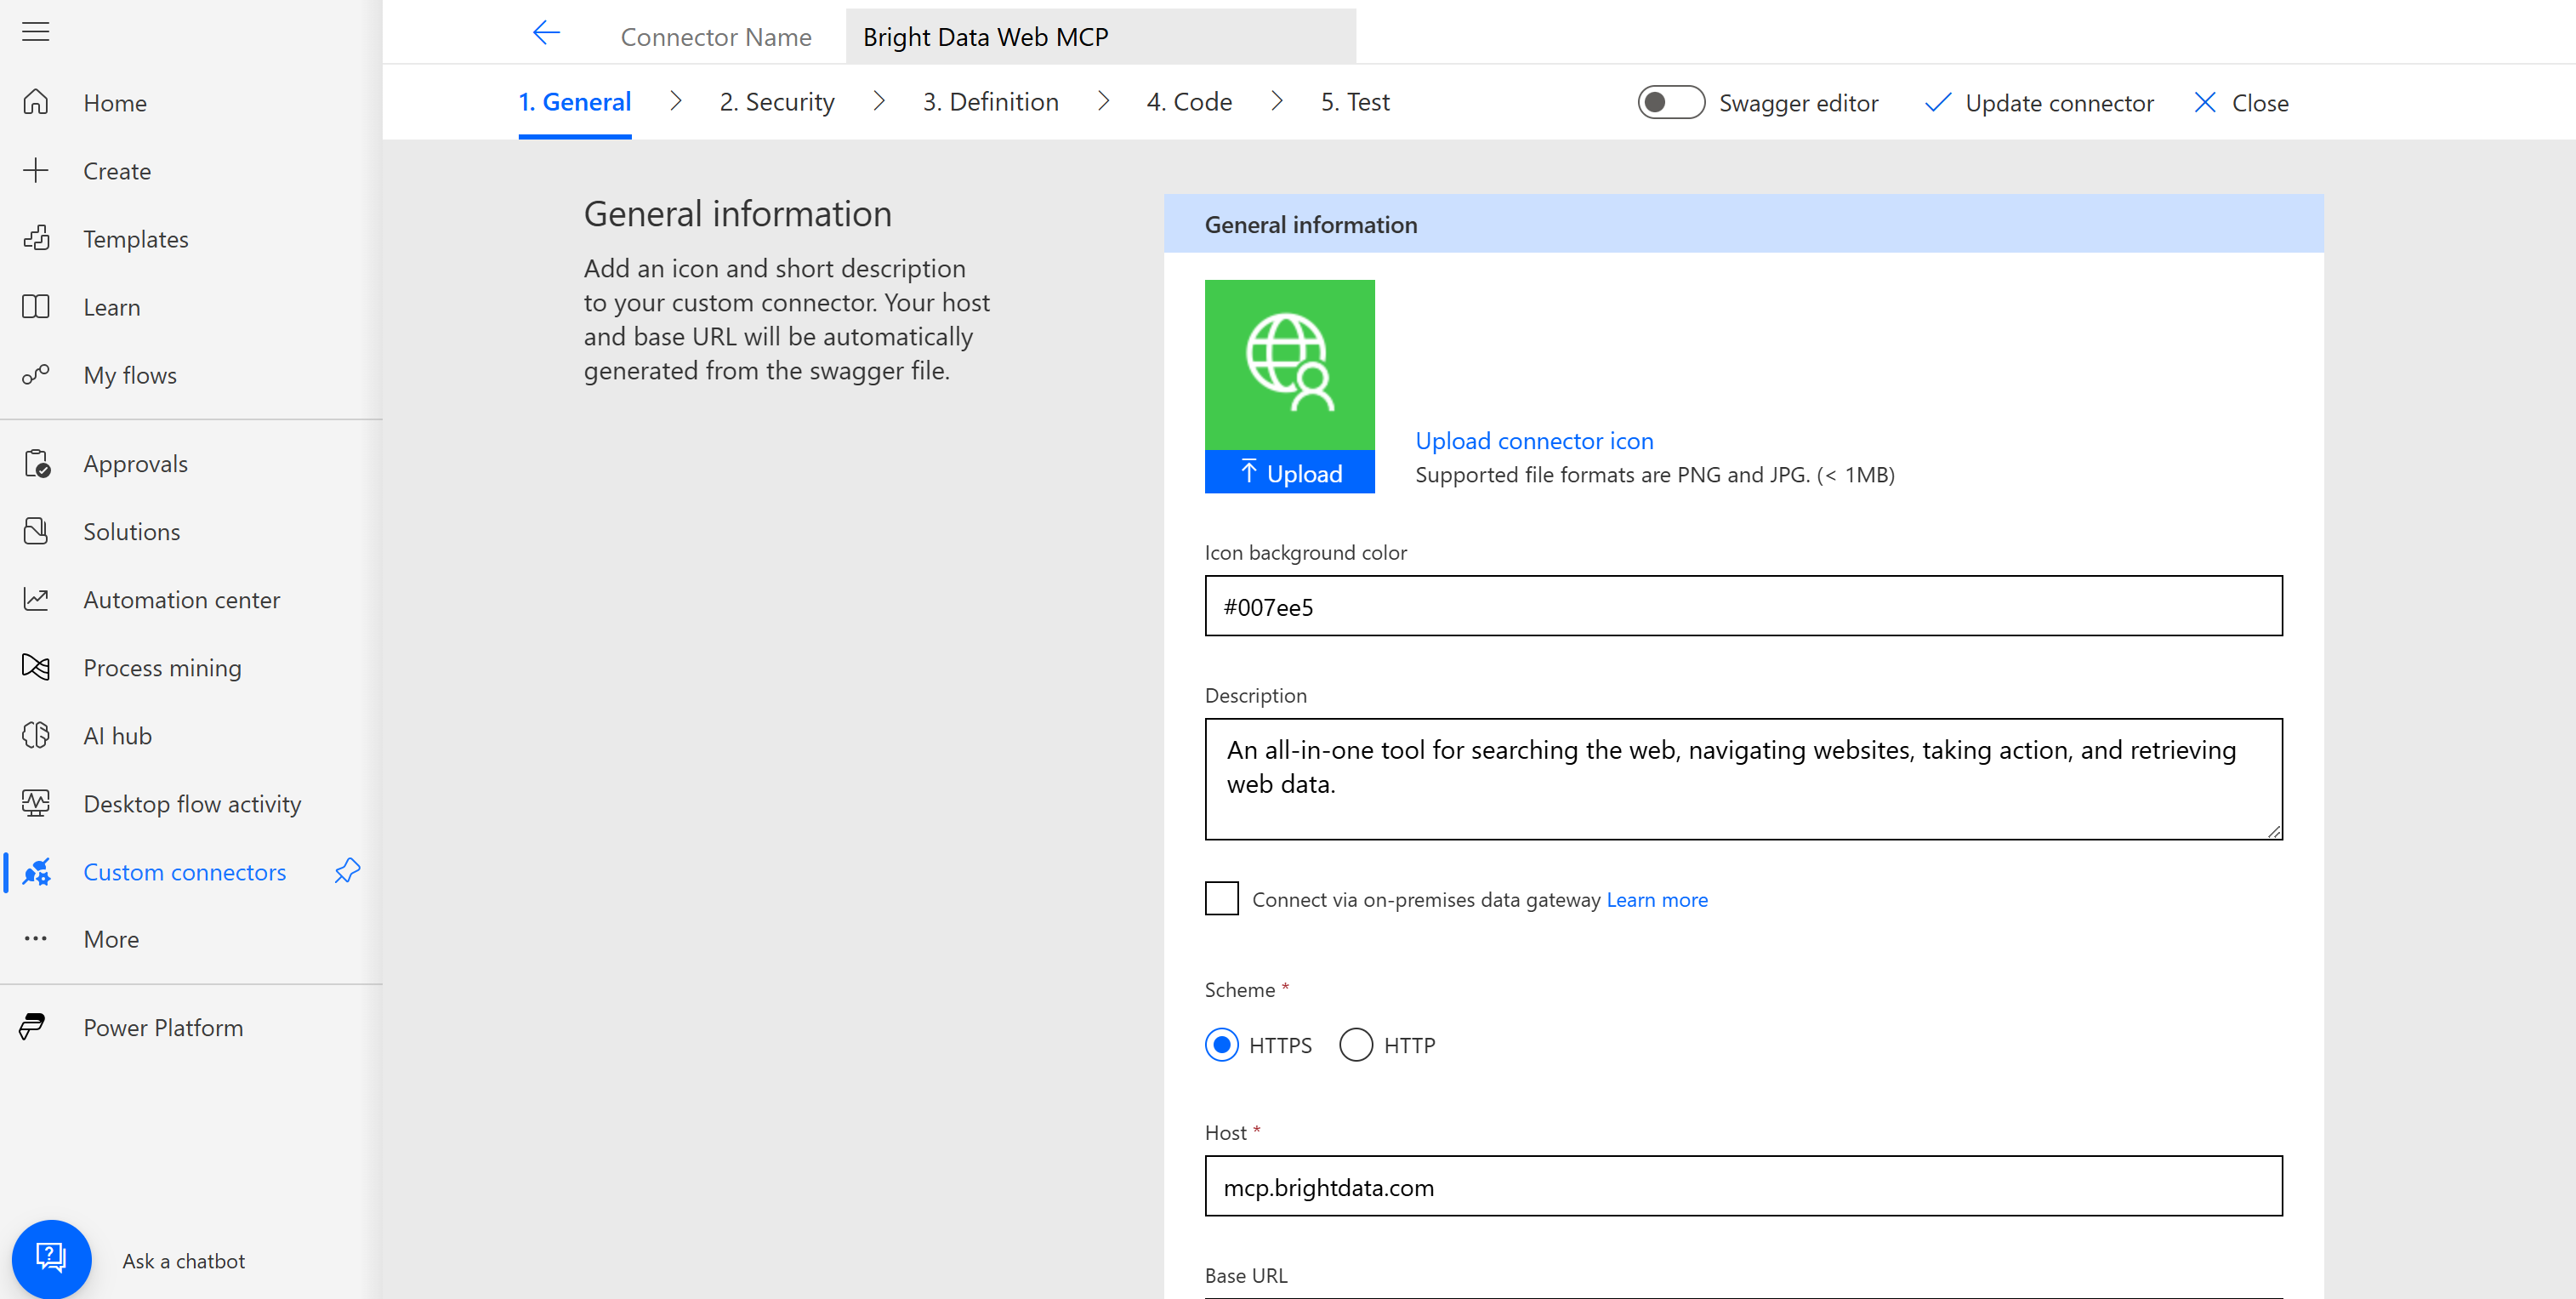
In this service, you can customize your tool’s connector. The goal is to add a pro query parameter and set it to 1. The easiest way to achieve that is by editing the tool configuration directly through its Swagger specification.
Thus, click the “Swagger editor” toggle:
You should see a Swagger 2.0 definition similar to the one below: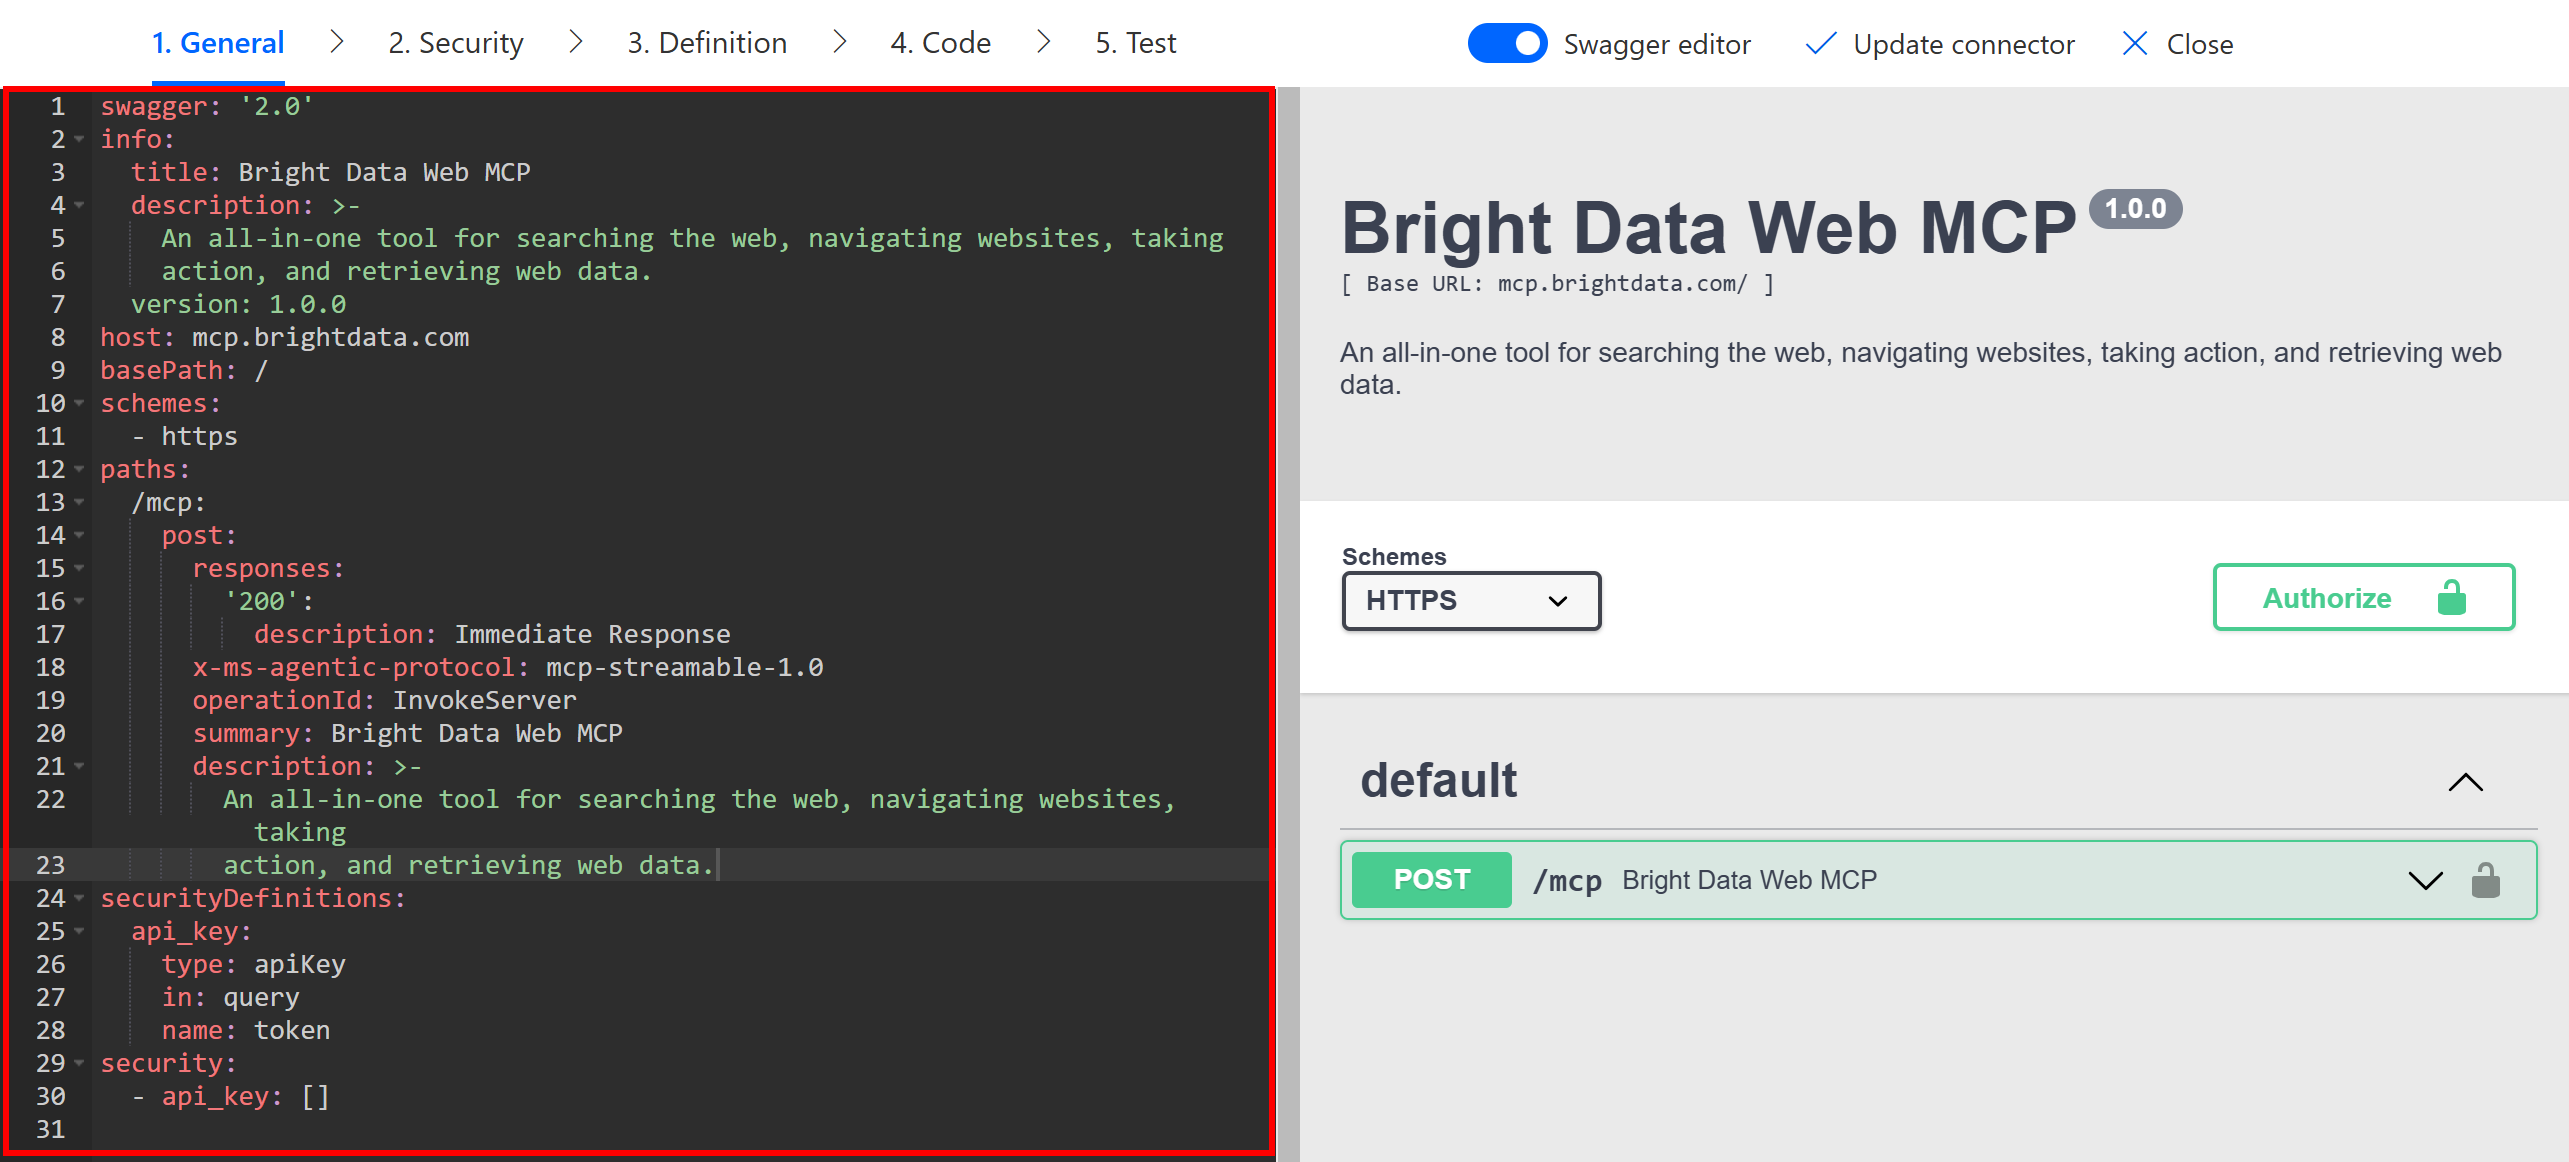
Update the Swagger configuration with this YAML configuration:
swagger: '2.0'
info:
  title: Bright Data Web MCP
  description: >-
    An all-in-one tool for searching the web, navigating websites, taking
    action, and retrieving web data.
  version: 1.0.0
host: mcp.brightdata.com
basePath: /
schemes:
  - https
paths:
  /mcp:
    post:
      responses:
        '200':
          description: Immediate Response
      x-ms-agentic-protocol: mcp-streamable-1.0
      operationId: InvokeServer
      summary: Bright Data Web MCP
      description: >-
        An all-in-one tool for searching the web, navigating websites, taking
        action, and retrieving web data.
      parameters:
        - name: pro
          in: query
          description: Enable Pro mode (1 = on, 0 = off)
          required: false
          type: integer
          default: 1
securityDefinitions:
  api_key:
    type: apiKey
    in: query
    name: token
security:
  - api_key: []
Pay special attention to the following section:
parameters:
  - name: pro
    in: query
    description: Enable Pro mode (1 = on, 0 = off)
    required: false
    type: integer
    default: 1
This defines the pro argument as an optional query parameter with a default value of 1. With this configuration, your connection URL (considering the token logic described earlier) will automatically look like this:
https://mcp.brightdata.com/mcp?token=<YOUR_BRIGHT_DATA_API_TOKEN>&pro=1 That is precisely the URL format required to connect to Bright Data Web MCP in Pro mode.
Once done, click the “Update connector” button to save your changes: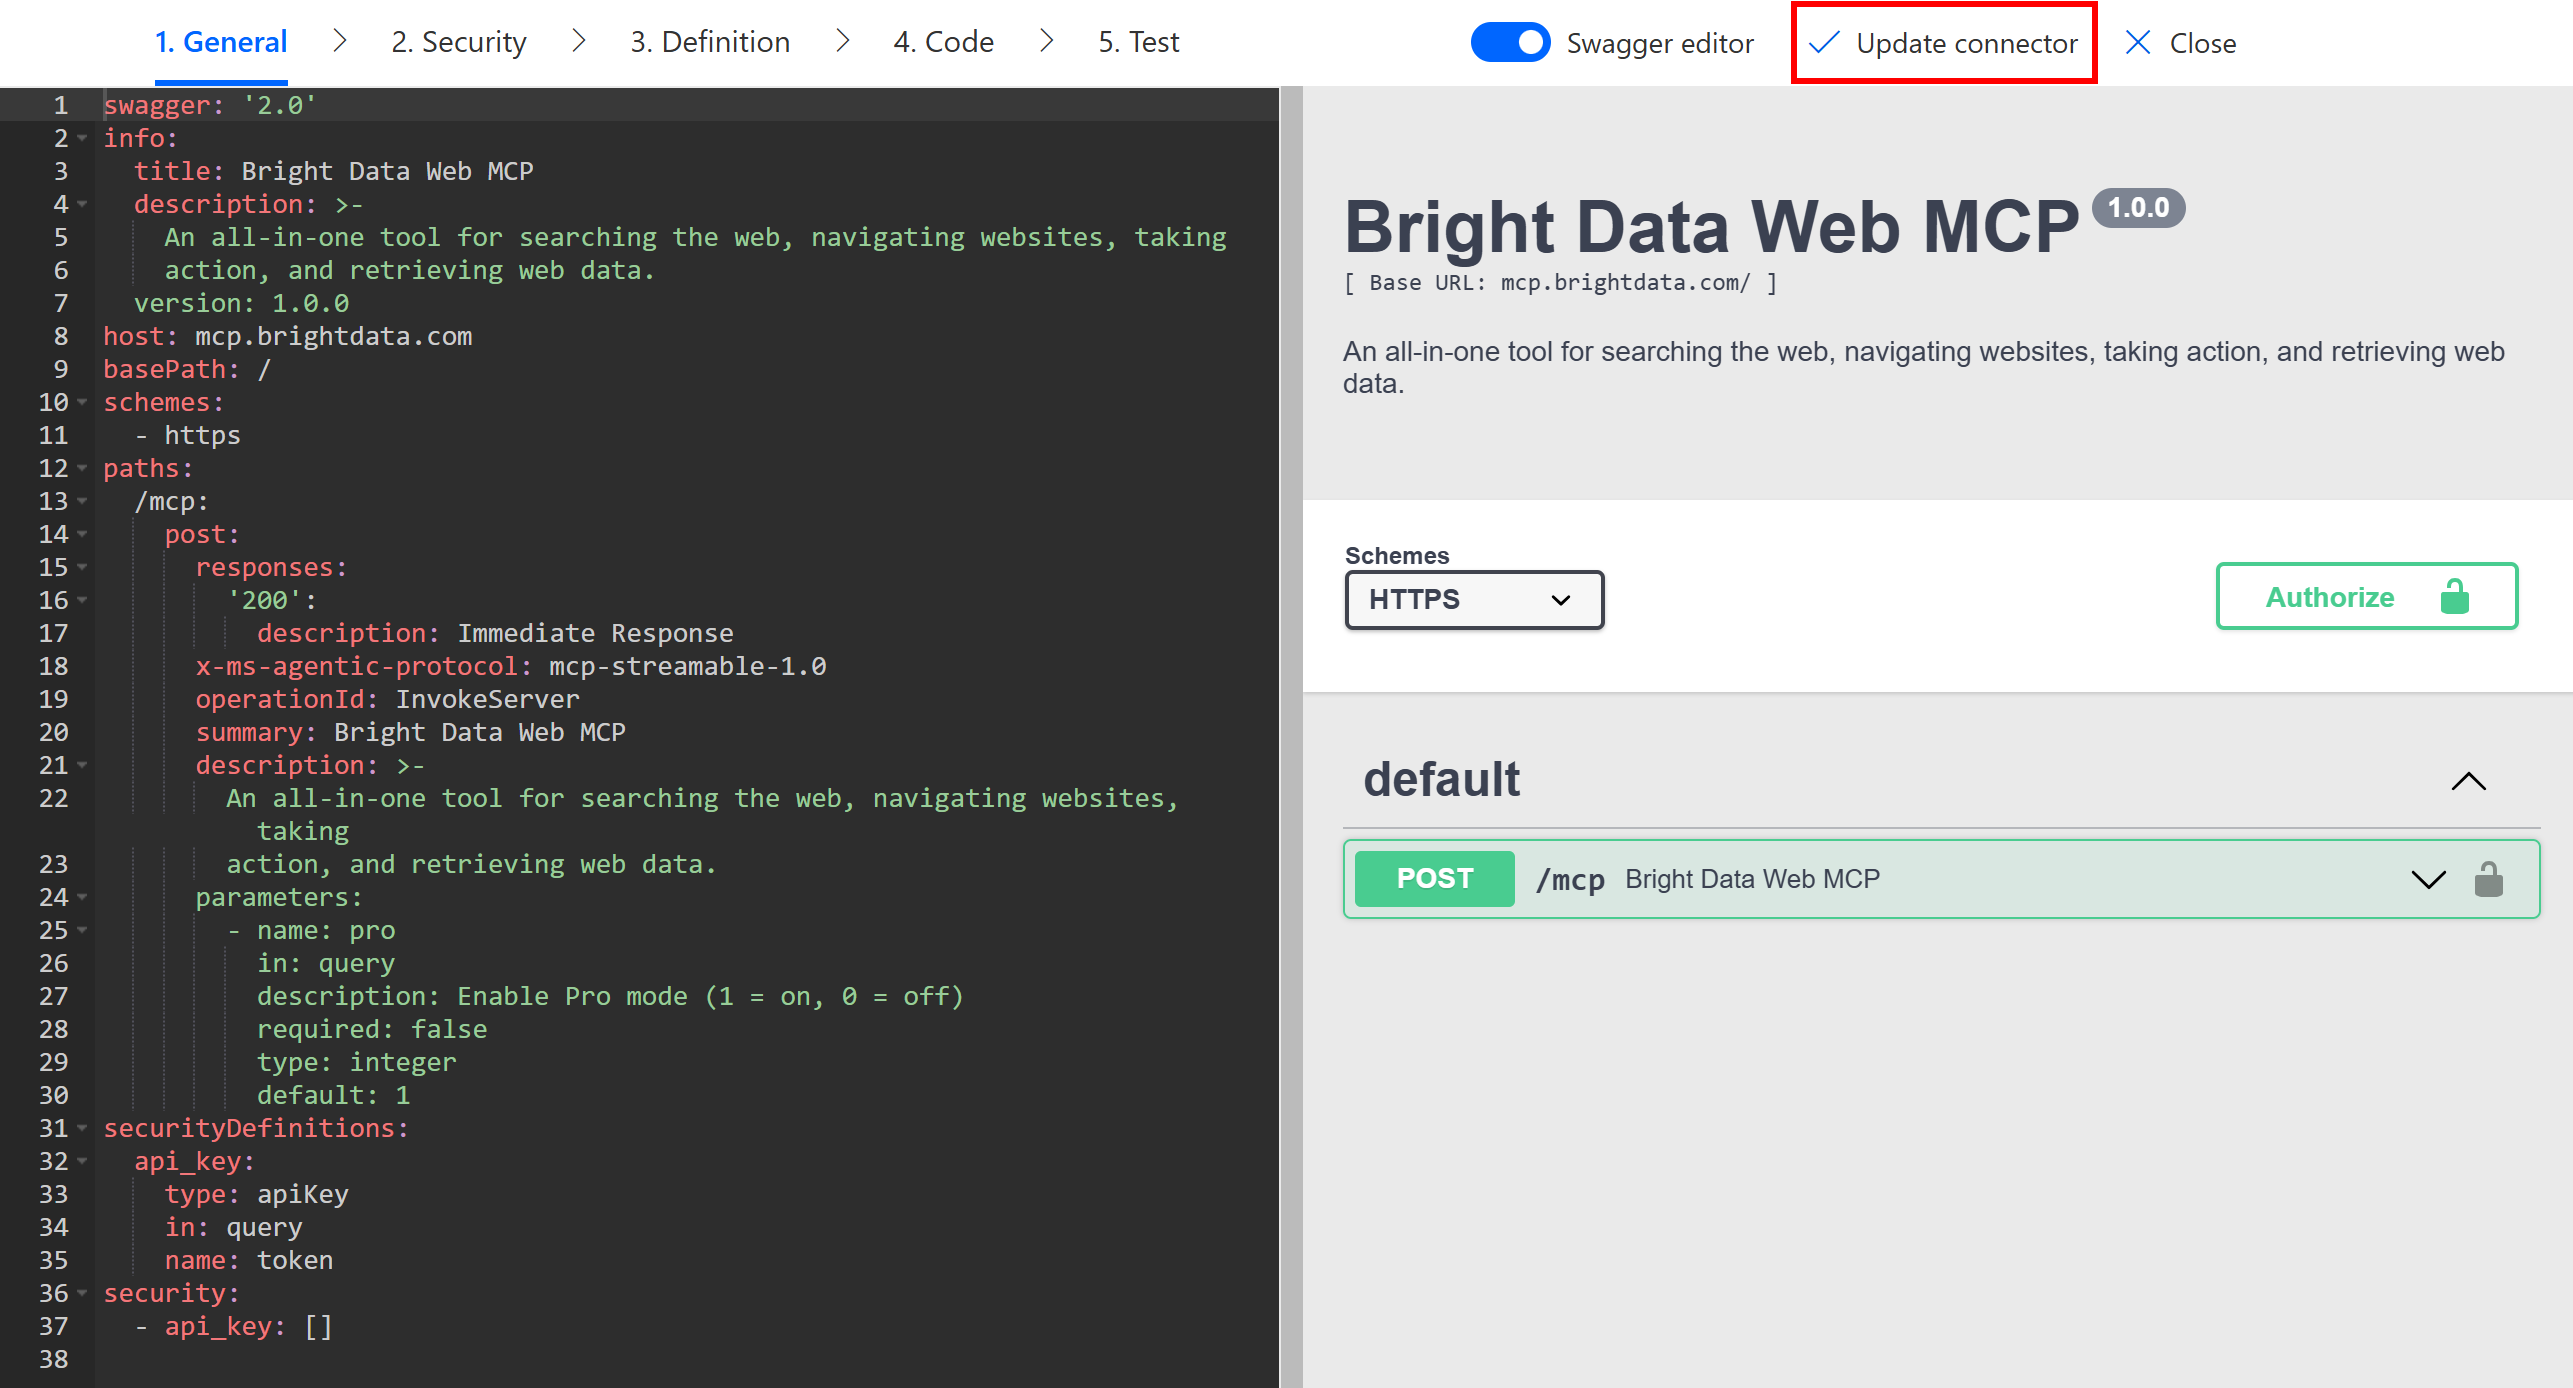
Return to the “Bright Data Web MCP” tool section in your agent. You should now see all 60+ tools available through Pro mode:
Here we go! You successfully unleashed the full power of Bright Data Web MCP inside Copilot Studio.
Step #6: Enable the Bright Data Web MCP Connection
Before you can use the tools provided by the Web MCP connection, you must enable it. To do so, start by clicking on the “Settings” button in your agent’s page:
On the “Settings” page, reach the “Connection Settings” section. There, click the “Connect” link in the “Bright Data Web MCP” entry:
Confirm the connection by clicking the “Submit” button, and you should now see the “Connected” status: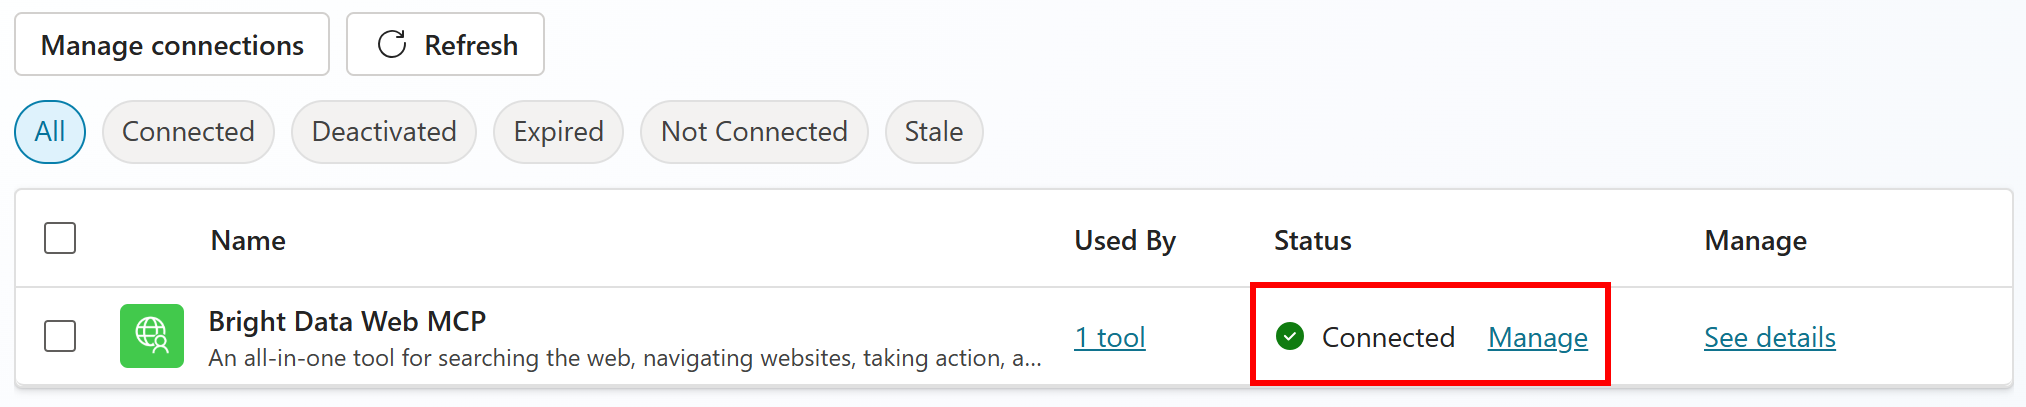
Congratulations! Your AI agent is now connected to the Bright Data Web MCP.
Step #7: Test Your Agent
Now that you have a Bright Data-powered agent in Copilot Studio, put it to the test. To verify that your agent can take full advantage of all Web MCP tools, let’s try a complex brand-monitoring task.
Suppose you want to analyze what experts and users are saying about a product or service produced by your company. For simplicity, we will assume that the product is the latest iPhone. Achieve the goal with the following prompt:
Perform the following tasks:
1. Retrieve the latest news about the latest iPhone from Google.
2. Select the top relevant news articles.
3. For each news article:
  3.1. Scrape their content and learn from it.
  3.2. Provide a summary of approximately 50 words.
  3.3. Add a sentiment analysis comment.
4. Search for opinions on the latest iPhone on Reddit.
5. Select the top Reddit posts.
6. For each Reddit post:
   6.1. Access its data in a structured format and learn from it.
   6.2. Select the most relevant excerpt.
7. Provide a global sentiment analysis comment summarizing what Reddit users think about the latest iPhone.
8. Aggregate all the information into a final report containing:
    - Each news article’s title, URL, summary, and sentiment analysis.
    - Relevant Reddit post excerpts, the post URLs they come from, and a sentiment analysis of users’ opinions.
This workflow does not just collect news, but it also captures real user opinions from Reddit for a complete brand sentiment analysis. This is just one example of the wide range of enterprise use cases supported by Bright Data’s Web MCP integration.
In the “Test your agent” section of your agent’s page, paste the prompt and launch it. You should get an output like this:
As you can see, the agent first connects to the Bright Data Web MCP. It then calls the search_engine tool twice: once to retrieve the latest iPhone news and once to fetch Reddit posts about it (iPhone 17, at the time of writing).
Next, it repeatedly calls the scrape_as_markdown endpoint to extract the readable Markdown version of each selected news article. (Remember: Markdown is an ideal format for AI data ingestion.) After that, it also utilizes the web_data_reddit_posts tool (powered by Bright Data’s Social Media Scraper) to retrieve structured data from the identified Reddit posts.
Finally, the agent organizes all collected information and generates a report like this:
The output includes actual news articles with their URLs, summaries, sentiment analysis comments, and excerpts from Reddit discussions—all presented in a single report.
Out of the entire report, take a look at the final comment:
- Base iPhone 17: Generally favorable. Users appreciate its value, lighter build, and improved display. It is described as a “massive hit,” though some still prefer Pro models for extra features.
- iPhone 17 Pro/Pro Max: Mixed-to-positive. Admired for performance and cameras, but criticized for size, weight, price, and battery life.
- iPhone Air: Highly polarized. Some celebrate its ultra-thin, light design, while others complain about the single camera, battery life, and high price, questioning its purpose and noting production cuts.
- Overall Mood: Cautiously positive toward the standard iPhone 17, skeptical about experimental models (Air) and accessories, and increasingly price-sensitive. Enthusiasm exists but is tempered by concerns over value, specs, and Apple’s recent product decisions.
That gives you a clear, data-driven understanding of what both experts and users think about a given product. Such a compelling result was achieved through a single prompt, without complex agentic architectures or manual integrations.
This example proves the resourcefulness of the Web MCP integration in Copilot Studio, which clearly supports enterprise-level use cases. After all, without its tools, a vanilla LLM would even come close to producing a report like that!
The next step? Publish your agent and deploy it to production! Thanks to the Web MCP’s cloud-native nature, scalability will not be an issue.
Now, experiment with different prompts to explore other enterprise scenarios—from real-time data feeds to dynamic web scraping and browser automation.
Et voilà! You just integrated Bright Data’s Web MCP into a Microsoft Copilot Studio AI agent, unlocking the full potential of web data intelligence.
Conclusion
In this article, you understood how to leverage Bright Data’s Web MCP tools in an AI agent within Copilot Studio for business-critical use cases. Specifically, you saw how the 60+ tools can easily support a wide range of scenarios, such as brand reputation monitoring.
This integration equips your AI agent with capabilities for web search, structured data extraction, live web data feeds, automated web interactions, and much more—all while ensuring enterprise-grade scalability and reliability.
To build even more advanced agents, explore the full suite of products and services available within Bright Data’s ecosystem for AI.
Sign up for a free Bright Data account today and start using our AI-ready web data tools!

Technical Writer
Antonello Zanini is a technical writer, editor, and software engineer with 5M+ views. Expert in technical content strategy, web development, and project management.


