
In this tutorial, you will learn:
- Why you need a custom brand monitoring solution in the first place.
- How to build one using the Bright Data SDK, OpenAI, and SendGrid.
- How to implement a brand reputation monitoring AI workflow in Python.
You can view the GitHub repository for all the project files. Now, let’s dive in!
Why Build a Custom Brand Monitoring Solution?
Brand monitoring is one of the most important tasks in marketing, and there are several online services available to help with it. The problem with those solutions is that they tend to be expensive and may not be tailored to your specific needs.
This is why building a custom brand reputation monitoring solution makes sense. At first, that might sound intimidating, as it may appear as a complex goal. However, with the right tools (as you are about to see), it is completely achievable.
Brand Reputation AI Workflow Workflow Explained
First and foremost, you cannot build an effective brand monitoring tool without reliable external information about your brand. A great source for that is Google News. By understanding what is being said about your brand in daily news articles and the sentiment behind them, you can make informed decisions. The end goal is to respond, protect, or promote your brand.
The problem is that scraping news articles is challenging. Google News, in particular, is protected with multiple anti-bot measures. On top of that, each news source has its own website with unique protections, making it difficult to programmatically collect news data consistently.
This is where Bright Data comes in. Thanks to its web search and scraping capabilities, it equips you with many products and integrations to programmatically access AI-ready public web data from any website.
Specifically, with the new Bright Data SDK, you can leverage the most useful Bright Data solutions in a simplified way via just a few lines of Python code!
Once you have the news data, you can rely on AI to select the most relevant articles and analyze them for sentiment and brand insights. Then, you can utilize a service like Twilio SendGrid to send the resulting report to your entire marketing team. At a high level, this is exactly what a custom brand reputation AI workflow does.
Now, let’s take a closer look at how to implement it from a technical perspective!
Technical Steps
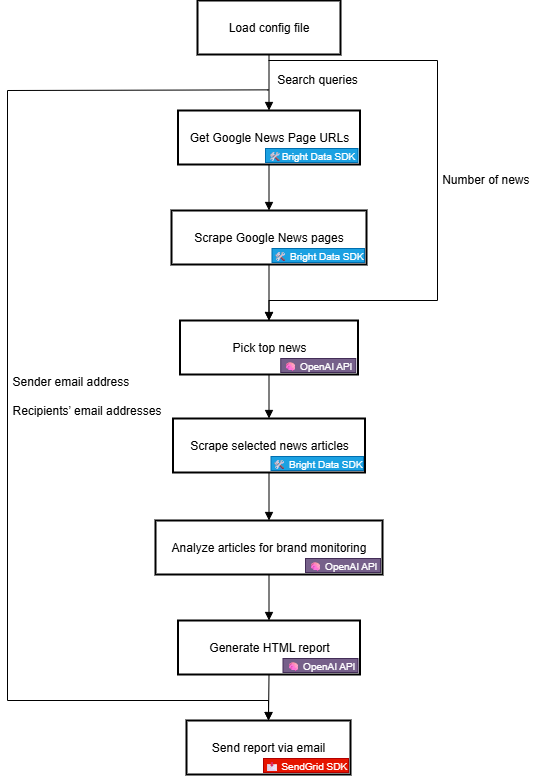
The steps to implement the brand reputation monitoring AI workflow are:
- Load environment variables: Load the Bright Data, OpenAI, and SendGrid API keys from environment variables. These keys are required to connect to the third-party services powering this workflow.
- Load the configuration file: Read a JSON configuration file (e.g.,
config.json) containing the initial search queries, the number of news articles to include in the report, along with the sender’s email address and the recipients’ email addresses. - Retrieve Google News page URLs: Use the Bright Data SDK to scrape search engine results pages (SERPs) for the configured search term. From each of them, access the Google News page URLs.
- Scrape Google News pages: Employ the Bright Data SDK to scrape the full Google News pages in Markdown format. Each of these pages contains multiple news article URLs.
- Let AI identify the top news: Feed the scraped Google News pages to an OpenAI model and have it select the most relevant news articles for brand monitoring.
- Scrape individual news articles: Use the Bright Data SDK to retrieve the content of each news article returned by the AI.
- Analyze news articles for brand reputation: Feed each news article to the AI and ask it to provide a summary, sentiment analysis indication, and key insights for brand reputation.
- Generate a final HTML report: Pass the news analysis results to the AI and ask it to produce a well-structured HTML report.
- Send the report via email: Utilize the SendGrid SDK to send the AI-generated HTML report to the specified recipients, providing a comprehensive overview of brand reputation.
See how to implement this AI workflow in Python!
Creating an AI-Powered Brand Reputation Workflow with the Bright Data SDK
In this tutorial section, you will learn how to build an AI workflow to monitor your brand reputation. The required brand news data will be sourced from Bright Data, through the Bright Data Python SDK. AI capabilities will be provided by OpenAI, and email delivery will be handled via SendGrid.
By the end of this tutorial, you will have a complete Python AI workflow that delivers results directly to your inbox. The output report will identify the key news your brand should be aware of, giving you everything you need to quickly respond and maintain a strong brand presence.
Let’s build a brand reputation AI workflow!
Prerequisites
To follow this tutorial, ensure you have the following:
- Python 3.8+ installed locally.
- A Bright Data API key.
- An OpenAI API key.
- A Twilio SendGrid API key.
If you do not have a Bright Data API token yet, sign up for Bright Data and follow the setup guide. Similarly, follow the official OpenAI instructions to get your OpenAI API key.
As for SendGrid, create an account, verify it, connect an email address, and verify your domain. Create an API key and check that you can send programmatically emails through it.
Step #1: Create Your Python Project
Open a terminal and create a new directory for your brand reputation monitoring AI workflow:
mkdir brand-reputation-monitoring-workflowThe brand-reputation-monitoring-workflow/ folder will contain the Python code for your AI workflow.
Next, navigate into the project directory and set up a virtual environment:
cd brand-reputation-monitoring-workflow
python -m venv .venv
Now, load the project in your favorite Python IDE. We recommend Visual Studio Code with the Python extension or PyCharm Community Edition.
Inside the project folder, add a new file named workflow.py. Your project should now contain:
brand-reputation-monitoring-workflow/
├── .venv/
└── workflow.py
workflow.py will be your main Python file.
Activate the virtual environment. In Linux or macOS, run:
source .venv/bin/activateEquivalently, on Windows, execute:
.venv/Scripts/activateWith the environment activated, install the required dependencies with:
pip install python-dotenv brightdata-sdk openai sendgrid pydanticThe libraries you just installed are:
python-dotenv: To load environment variables from a.envfile, making it easier to manage API keys securely.brightdata-sdk: To help you access Bright Data’s scraping tools and solutions in Python.openai: To interact with OpenAI’s language models.sendgrid: To quickly send emails using the Twilio SendGrid Web API v3.pydantic: To define models for AI outputs and your configuration.
Done! Your Python development environment is ready to build a brand reputation monitoring AI workflow with OpenAI, Bright Data SDK, and SendGrid.
Step #2: Set Up Environment Variable Reading
Configure your script to read secrets from environment variables. In your workflow.py file, import python-dotenv and call load_dotenv() to automatically load environment variables:
from dotenv import load_dotenv

load_dotenv()
Your script can now read variables from a local .env file. Thus, create a .env file in the root of your project directory:
brand-reputation-monitoring-workflow/
├── .venv/
├── .env         # <-----------
└── workflow.py
Open the .env file and add the OPENAI_API_KEY, BRIGHT_DATA_API_TOKEN, and SENDGRID_API_KEY envs:
OPENAI_API_KEY="<YOUR_OPENAI_API_KEY>"
BRIGHT_DATA_API_TOKEN="<YOUR_BRIGHT_DATA_API_TOKEN>"
SENDGRID_API_KEY="<YOUR_SENDGRID_API_TOKEN>"
Replace the placeholders with your actual credentials:
<YOUR_OPENAI_API_KEY>→ Your OpenAI API key.<YOUR_BRIGHT_DATA_API_TOKEN>→ Your Bright Data API token.<YOUR_SENDGRID_API_KEY>→ Your SendGrid API key.
Great! You have now securely configured third-party secrets using environment variables.
Step #3: Initialize the SDKs
Start by adding the required imports:
from brightdata import bdclient
from openai import OpenAI
from sendgrid import SendGridAPIClient
Then, initialize the SDK clients:
brightdata_client = bdclient()
openai_client = OpenAI()
sendgrid_client = SendGridAPIClient()
The three lines above initialize the following:
- Bright Data Python SDK
- OpenAI Python SDK
- SendGrid Python SDK
Note that you do not need to manually load the API key environment variables in your code and pass them to the constructors. That is because the OpenAI SDK, Bright Data SDK, and SendGrid SDK automatically look for OPENAI_API_KEY, BRIGHT_DATA_API_TOKEN, and SENDGRID_API_KEY in your environment, respectively. In other words, once those envs are set in .env, the SDKs handle loading for you.
In particular, the SDKs will use the configured API keys to authenticate the underlying API calls to their servers using your account.
Important: For more details on how the Bright Data SDK works and how to connect it to the required zones in your Bright Data account, check out the official GitHub page or documentation.
Perfect! The building blocks for crafting your brand reputation monitoring AI workflow are now ready.
Step #4: Retrieve the Google News URLs
The first step in the workflow logic is to scrape the SERPs for the brand-related search queries you want to monitor. Do that via the search() method from the Bright Data SDK, which calls the SERP API behind the scenes.
Then, parse the JSON text response you get from search() to access the Google News page URLs, which will look like this:
https://www.google.com/search?sca_esv=7fb9df9863b39f3b&hl=en&q=nike&tbm=nws&source=lnms&fbs=AIIjpHxU7SXXniUZfeShr2fp4giZjSkgYzz5-5RrRWAIniWd7tzPwkE1KJWcRvaH01D-XIVr2cowAnfeRRP_dme4bG4a8V_AkFVl-SqROia4syDA2-hwysjgAT-v0BCNgzLBnrhEWcFR7F5dffabwXi9c9pDyztBxQc1yfKVagSlUz7tFb_e8cyIqHDK7O6ZomxoJkHRwfaIn-HHOcZcyM2n-MrnKKBHZg&sa=X&ved=2ahUKEwiX1vu4_KePAxVWm2oFHT6tKsAQ0pQJegQIPhABAchieve all that with this function:
def get_google_news_page_urls(search_queries):
    # Retrieve SERPs for the given search queries
    serp_results = brightdata_client.search(
        search_queries,
        search_engine="google",
        parse=True # To get the SERP result as a parsed JSON string
    )

    news_page_urls = []
    for serp_result in serp_results:
        # Loading the JSON string into a dictionary
        serp_data = json.loads(serp_result)
        # Extract the Google News URL from each parsed SERP
        if serp_data.get("navigation"):
            for item in serp_data["navigation"]:
                if item["title"] == "News":
                    news_url = item["href"]
                    news_page_urls.append(news_url)

    return news_page_urls
When you pass an array of queries to search() (as in this case), the method returns an array of SERPs, one for each query, respectively. Since parse is set to True, each result comes back as a JSON string, which you then need to parse with Python’s built-in json module.
Remember to import json from the Python standard library:
import jsonTerrific! You can now programmatically retrieve a list of Google News page URLs related to your brand.
Step #5: Scrape the Google News Pages and Get the Best News URLs
Keep in mind that a single Google News page contains multiple news articles:
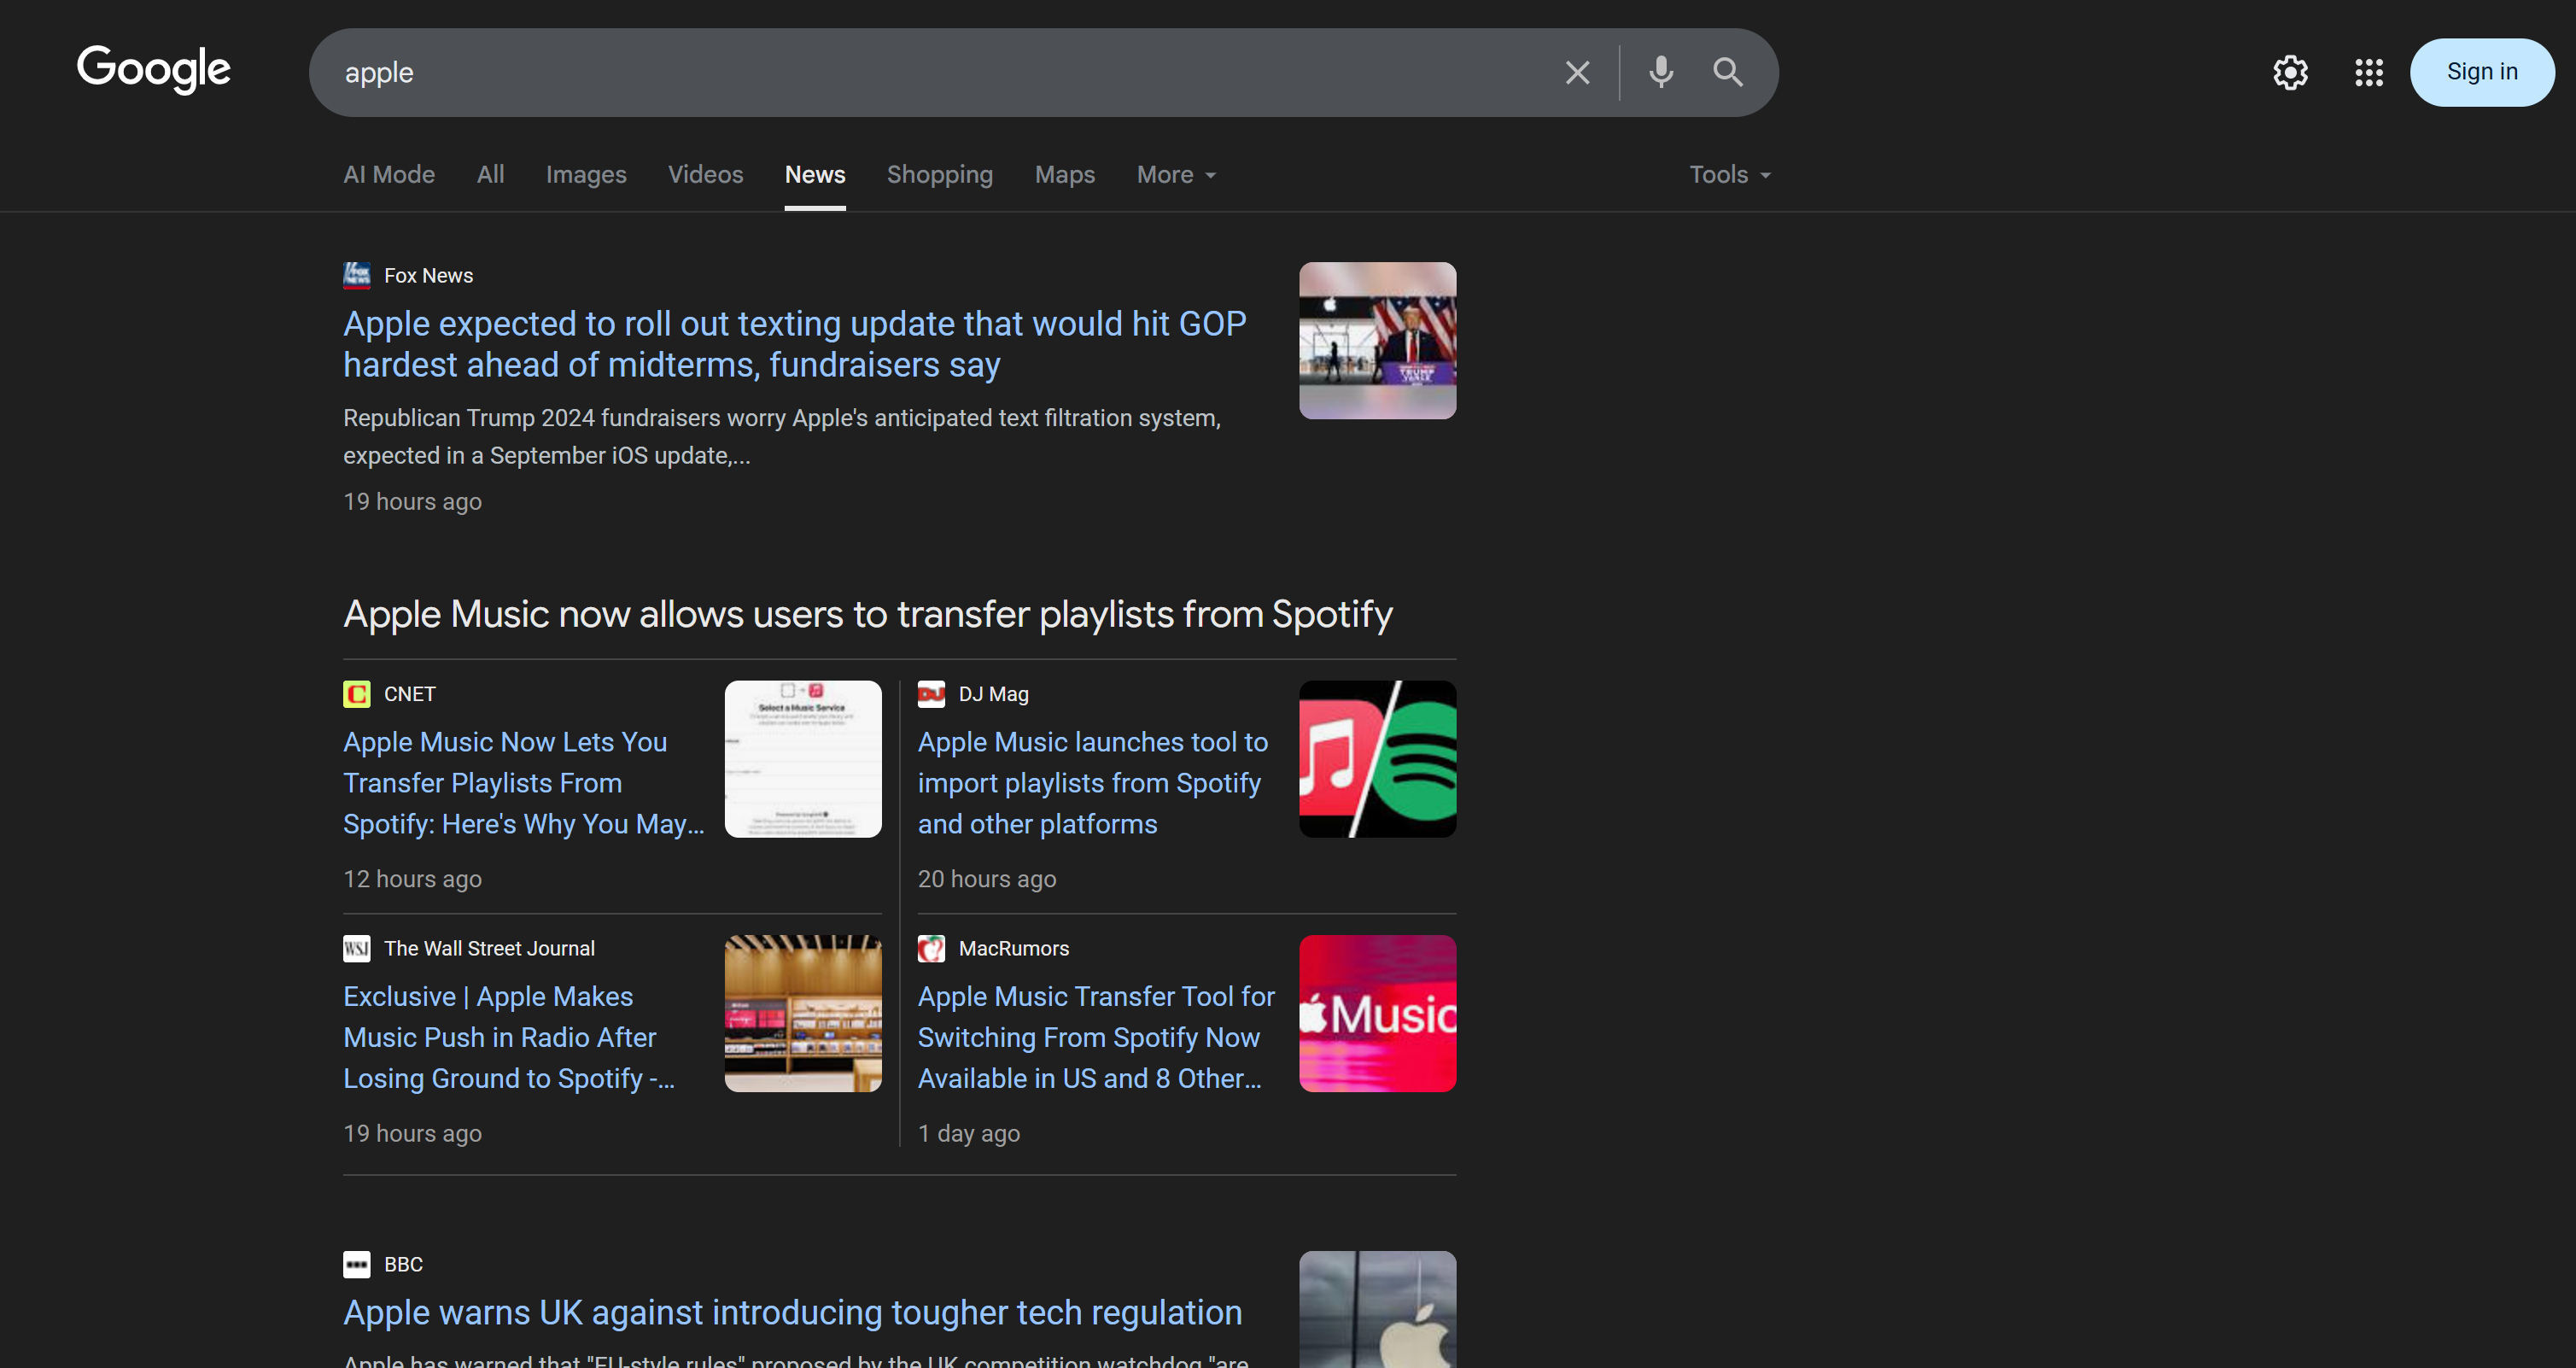
So, the idea is to:
- Scrape the content of Google News pages and get the results in Markdown format.
- Feed the Markdown content to an AI (an OpenAI model, in this case), asking it to select the top 5 news articles for brand reputation monitoring.
Achieve the first micro-step with this function:
def scrape_news_pages(news_page_urls):
    # Scrape each news page in parallel and return its content in Markdown
    return brightdata_client.scrape(
        url=news_page_urls,
        data_format="markdown"
    )
Under the hood, the scrape() method from the Bright Data SDK calls the Web Unlocker API. When you pass an array of URLs, scrape() performs the scraping task in parallel, fetching all pages concurrently. In this case, the API is configured to return data in Markdown, which is ideal for LLM ingestion (as proved in our data format benchmark on Kaggle).
Then, complete the second micro-step with:
def get_best_news_urls(news_pages, num_news):
    # Use GPT to extract the most relevant news URLs
    response = openai_client.responses.parse(
        model="gpt-5-mini",
        input=[
            {
                "role": "system",
                "content": f"Extract the {num_news} most relevant news for brand reputation monitoring from the text and return them as a list of URL strings."
            },
            {
                "role": "user",
                "content": "\n\n---------------\n\n".join(news_pages)
            },
        ],
        text_format=URLList,
    )

    return response.output_parsed.urls
This simply concatenates the Markdown text outputs from the previous function and passes them to the GPT-5-mini OpenAI model, asking it to extract the most relevant URLs.
The output is expected to follow the URLList model, which is a Pydantic model defined as:
class URLList(BaseModel):
    urls: List[str]
Thanks to the text_format option in the parse() method, you are instructing the OpenAI API to return the result as an instance of URLList. Basically, you are getting a list of strings, where each string represents a URL.
Import the required classes from pydantic:
from pydantic import BaseModel
from typing import List
Awesome! You now have a structured list of news URLs, ready to be scraped and analyzed for brand reputation.
Step #6: Scrape News Pages and Analyze Them for Brand Reputation Monitoring
Now that you have a list of the best news URLs, use scrape() again to get their content in Markdown:
def scrape_news_articles(news_urls):
    # Scrape each news URL and return a list of dicts with URL and content
    news_content_list = brightdata_client.scrape(
        url=news_urls,
        data_format="markdown"
    )

    news_list = []
    for url, content in zip(news_urls, news_content_list):
        news_list.append({
            "url": url,
            "content": content
        })

    return news_list
No matter which domain these news articles are hosted on, or what anti-scraping measures are in place, the Web Unlocker API will take care of that and return each article’s content in Markdown. In detail, the news articles will be scraped in parallel. To keep track of which news URL corresponds to which Markdown output, use zip().
Next, feed each Markdown news content to OpenAI to analyze it for brand reputation. For each article, extract:
- The title
- The URL
- A short summary
- A quick sentiment label (e.g., “positive,” “negative,” or “neutral”)
- 3–5 actionable, short, easy-to-understand insights
Achieve that with the following function:
def process_news_list(news_list):
    # Where to store the analyzed news articles
    news_analysis_list = []

    # Analyze each news article with GPT for brand reputation monitoring insights
    for news in news_list:
        response = openai_client.responses.parse(
            model="gpt-5-mini",
            input=[
                {
                    "role": "system",
                    "content": f"""
                        Given the news content:
                        1. Extract the title.
                        2. Extract the URL.
                        3. Write a summary in no more than 30 words.
                        4. Extract the sentiment of the news as one of the following: "positive", "negative", or "neutral".
                        5. Extract the top 3 to 5 actionable, short insights (no more than 10/12 words) about brand reputation from the news, presenting them in clear, concise, straightforward language.
                    """
                },
                {
                    "role": "user",
                    "content": f"NEWS URL: {news["url"]}\n\nNEWS CONTENT:{news["content"]}"
                },
            ],
            text_format=NewsAnalysis,
        )

        # Get the output analyzed news object and append it to the list
        news_analysis = response.output_parsed
        news_analysis_list.append(news_analysis)

    return news_analysis_list
This time, the Pydantic model set in text_format is:
class NewsAnalysis(BaseModel):
    title: str
    url: str
    summary: str
    sentiment_analysis: str
    insights: List[str]
So, the result of the process_news_list() function will be a list of NewsAnalysis objects.
Cool! AI-powered news processing for brand reputation monitoring is complete.
Step #7: Generate the Email Report and Send It
Have you ever wondered how emails are structured and appear nicely in your client’s inbox? That is because most email bodies are really just structured HTML pages. After all, the email protocol supports sending HTML documents.
Given the news analysis object list generated earlier, convert it to JSON, pass it to AI, and ask it to produce an HTML document ready to be sent via email:
def create_html_email_body(news_analysis_list):
    # Generate a structured HTML email body from analyzed news
    response = openai_client.responses.create(
        model="gpt-5-mini",
        input=f"""
        Given the content below, generate a structured HTML email body that is well-formatted, responsive, and ready to send.
        Ensure proper use of headings, paragraphs, colored labels, and links where appropriate.
        Do not include a header or footer section, and include only this information—nothing else.

        CONTENT:
        {[json.dumps([item.model_dump() for item in news_analysis_list], indent=2)]}
        """
    )
    return response.output_text
Finally, use the Twilio SendGrid SDK to programmatically send the email:
def send_email(sender, recipients, html_body):
    # Send the HTML email using SendGrid
    message = Mail(
        from_email=sender,
        to_emails=recipients,
        subject="Brand Monitoring Weekly Report",
        html_content=html_body
    )
    sendgrid_client.send(message)
This requires the following import:
from sendgrid.helpers.mail import MailHere we go! All functions to implement this brand reputation monitoring AI workflow have now been implemented.
Step #8: Load Your Preferences and Configurations
Some of the functions defined in the previous steps accept specific arguments (e.g., search_queries, num_news, sender, recipients). Those values may change from run to run, so you should not hardcode them in your Python script.
Instead, read them from a config.json file containing the following fields:
search_queries: The list of brand reputation queries to retrieve news for.num_news: The number of news articles to feature in the final report.sender: A SendGrid-approved email address from which the report will be sent.recipients: The list of email addresses to send the HTML report to.
Model the configuration object using the following Pydantic class:
class Config(BaseModel):
    search_queries: List[str] = Field(..., min_items=1)
    num_news: int = Field(..., gt=0)
    sender: str = Field(..., min_length=1)
    recipients: List[str] = Field(..., min_items=1)
The Field definitions specify validation rules to ensure that the configurations comply with the expected format. Import it with:
from pydantic import FieldNext, read the workflow configurations from a local config.json file and parse it into a Config object:
with open("config.json", "r", encoding="utf-8") as f:
    raw_config = json.load(f)
    config = Config.model_validate(raw_config)
Add a config.json file to your project’s directory:
brand-reputation-monitoring-workflow/
├── .venv/
├── .env
├── config.json         # <-----------
└── workflow.py
And populate it with something like this:
{
  "search_queries": ["apple", "iphone", "ipad"],
  "sender": "[email protected]",
  "recipients": ["[email protected]", "[email protected]", "[email protected]"],
  "num_news": 5
}
Adapt the values to your specific goals. Also, remember that the sender field must be an email address verified in your SendGrid account. Otherwise, the send_email() function will fail with a 403 Forbidden error.
Way to go! Another step and the workflow is complete.
Step #9: Define the Main Function
Time to compose everything. Call each predefined function in the correct order, giving the right inputs from the config:
search_queries = config.search_queries
print(f"Retrieving Google News page URLs for the following search queries: {", ".join(search_queries)}")
google_news_page_urls = get_google_news_page_urls(search_queries)
print(f"{len(google_news_page_urls)} Google News page URL(s) retrieved!\n")

print("Scraping content from each Google News page...")
scraped_news_pages = scrape_news_pages(google_news_page_urls)
print("Google News pages scraped!\n")

print("Extracting the most relevant news URLs...")
news_urls = get_best_news_urls(scraped_news_pages, config.num_news)
print(f"{len(news_urls)} news articles found:\n" + "\n".join(f"- {news}" for news in news_urls) + "\n")

print("Scraping the selected news articles...")
news_list = scrape_news_articles(news_urls)
print(f"{len(news_urls)} news articles scraped!")

print("Analyzing each news for brand reputation monitoring...")
news_analysis_list = process_news_list(news_list)
print("News analysis complete!\n")

print("Generating HTML email body...")
html = create_html_email_body(news_analysis_list)
print("HTML email body generated!\n")

print("Sending the email with the brand reputation monitoring HTML report...")
send_email(config.sender, config.recipients, html)
print("Email sent!")Note: The workflow may take a while to complete, so it is helpful to add logs to keep track of progress in the terminal. Mission complete!
Step #10: Put It All Together
The final code of the workflow.py file is:
from dotenv import load_dotenv
from brightdata import bdclient
from openai import OpenAI
from sendgrid import SendGridAPIClient
from pydantic import BaseModel, Field
from typing import List
import json
from sendgrid.helpers.mail import Mail

# Load environment variables from the .env file
load_dotenv()

# Initialize the Bright Data SDK client
brightdata_client = bdclient()
# Initialize the OpenAI SDK client
openai_client = OpenAI()
# Initialize the SendGrid SDK client
sendgrid_client = SendGridAPIClient()

# Pydantic models
class Config(BaseModel):
    search_queries: List[str] = Field(..., min_items=1)
    num_news: int = Field(..., gt=0)
    sender: str = Field(..., min_length=1)
    recipients: List[str] = Field(..., min_items=1)

class URLList(BaseModel):
    urls: List[str]

class NewsAnalysis(BaseModel):
    title: str
    url: str
    summary: str
    sentiment_analysis: str
    insights: List[str]

def get_google_news_page_urls(search_queries):
    # Retrieve SERPs for the given search queries
    serp_results = brightdata_client.search(
        search_queries,
        search_engine="google",
        parse=True # To get the SERP result as a parsed JSON string
    )

    news_page_urls = []
    for serp_result in serp_results:
        # Loading the JSON string into a dictionary
        serp_data = json.loads(serp_result)
        # Extract the Google News URL from each parsed SERP
        if serp_data.get("navigation"):
            for item in serp_data["navigation"]:
                if item["title"] == "News":
                    news_url = item["href"]
                    news_page_urls.append(news_url)

    return news_page_urls

def scrape_news_pages(news_page_urls):
    # Scrape each news page in parallel and return its content in Markdown
    return brightdata_client.scrape(
        url=news_page_urls,
        data_format="markdown"
    )

def get_best_news_urls(news_pages, num_news):
    # Use GPT to extract the most relevant news URLs
    response = openai_client.responses.parse(
        model="gpt-5-mini",
        input=[
            {
                "role": "system",
                "content": f"Extract the {num_news} most relevant news for brand reputation monitoring from the text and return them as a list of URL strings."
            },
            {
                "role": "user",
                "content": "\n\n---------------\n\n".join(news_pages)
            },
        ],
        text_format=URLList,
    )

    return response.output_parsed.urls

def scrape_news_articles(news_urls):
    # Scrape each news URL and return a list of dicts with URL and content
    news_content_list = brightdata_client.scrape(
        url=news_urls,
        data_format="markdown"
    )

    news_list = []
    for url, content in zip(news_urls, news_content_list):
        news_list.append({
            "url": url,
            "content": content
        })

    return news_list

def process_news_list(news_list):
    # Where to store the analyzed news articles
    news_analysis_list = []

    # Analyze each news article with GPT for brand reputation monitoring insights
    for news in news_list:
        response = openai_client.responses.parse(
            model="gpt-5-mini",
            input=[
                {
                    "role": "system",
                    "content": f"""
                        Given the news content:
                        1. Extract the title.
                        2. Extract the URL.
                        3. Write a summary in no more than 30 words.
                        4. Extract the sentiment of the news as one of the following: "positive", "negative", or "neutral".
                        5. Extract the top 3 to 5 actionable, short insights (no more than 10/12 words) about brand reputation from the news, presenting them in clear, concise, straightforward language.
                    """
                },
                {
                    "role": "user",
                    "content": f"NEWS URL: {news["url"]}\n\nNEWS CONTENT:{news["content"]}"
                },
            ],
            text_format=NewsAnalysis,
        )

        # Get the output analyzed news object and append it to the list
        news_analysis = response.output_parsed
        news_analysis_list.append(news_analysis)

    return news_analysis_list

def create_html_email_body(news_analysis_list):
    # Generate a structured HTML email body from analyzed news
    response = openai_client.responses.create(
        model="gpt-5-mini",
        input=f"""
        Given the content below, generate a structured HTML email body that is well-formatted, responsive, and ready to send.
        Ensure proper use of headings, paragraphs, colored labels, and links where appropriate.
        Do not include a header or footer section, and include only this information—nothing else.

        CONTENT:
        {[json.dumps([item.model_dump() for item in news_analysis_list], indent=2)]}
        """
    )
    return response.output_text

def send_email(sender, recipients, html_body):
    # Send the HTML email using SendGrid
    message = Mail(
        from_email=sender,
        to_emails=recipients,
        subject="Brand Monitoring Weekly Report",
        html_content=html_body
    )
    sendgrid_client.send(message)

def main():
    # Read the config file and validate it
    with open("config.json", "r", encoding="utf-8") as f:
        raw_config = json.load(f)
        config = Config.model_validate(raw_config)

    search_queries = config.search_queries
    print(f"Retrieving Google News page URLs for the following search queries: {", ".join(search_queries)}")
    google_news_page_urls = get_google_news_page_urls(search_queries)
    print(f"{len(google_news_page_urls)} Google News page URL(s) retrieved!\n")

    print("Scraping content from each Google News page...")
    scraped_news_pages = scrape_news_pages(google_news_page_urls)
    print("Google News pages scraped!\n")

    print("Extracting the most relevant news URLs...")
    news_urls = get_best_news_urls(scraped_news_pages, config.num_news)
    print(f"{len(news_urls)} news articles found:\n" + "\n".join(f"- {news}" for news in news_urls) + "\n")

    print("Scraping the selected news articles...")
    news_list = scrape_news_articles(news_urls)
    print(f"{len(news_urls)} news articles scraped!")

    print("Analyzing each news for brand reputation monitoring...")
    news_analysis_list = process_news_list(news_list)
    print("News analysis complete!\n")

    print("Generating HTML email body...")
    html = create_html_email_body(news_analysis_list)
    print("HTML email body generated!\n")

    print("Sending the email with the brand reputation monitoring HTML report...")
    send_email(config.sender, config.recipients, html)
    print("Email sent!")

# Run the main function
if __name__ == "__main__":
    main()
Et voilà! Thanks to the Bright Data SDK, OpenAI API, and Twilio SendGrid SDK, you were able to build an AI-powered brand reputation monitoring workflow in less than 200 lines of code.
Step #11: Test the Workflow
Assume your search_queries are "nike" and "nike shoes". num_news is set to 5, and the report is configured to be sent to your personal email (note that you can use the same email address both for the sender and the first item in recipients).
In your activated virtual environment, launch your workflow with:
python workflow.pyThe result in the terminal will be something like:
Retrieving Google News page URLs for the following search queries: nike, nike shoes
2 Google News page URL(s) retrieved!

Scraping content from each Google News page...
Google News pages scraped!

Extracting the most relevant news URLs...
5 news articles found:
- https://www.espn.com/wnba/story/_/id/46075454/caitlin-clark-becomes-nike-newest-signature-athlete
- https://wwd.com/footwear-news/sneaker-news/nike-acg-radical-airflow-ultrafly-release-dates-1238068936/
- https://www.runnersworld.com/news/a65881486/cooper-lutkenhaus-professional-contract-nike/
- https://hypebeast.com/2025/8/nike-kobe-3-protro-low-reveal-info
- https://wwd.com/footwear-news/sneaker-news/nike-air-diamond-turf-must-be-the-money-release-date-1238075256/

Scraping the selected news articles...
5 news articles scraped!

Analyzing each news article for brand reputation monitoring...
News analysis complete!

Generating HTML email body...
HTML email body generated!

Sending the email with the brand reputation monitoring HTML report...
Email sent!Note: The results will change based on the available news. So, they will never be the same as the above ones by the time you read this tutorial.
After the “Email sent!” message, you should see a “Brand Monitoring Weekly Report” email in your inbox:

Open it, and it will contain something like:
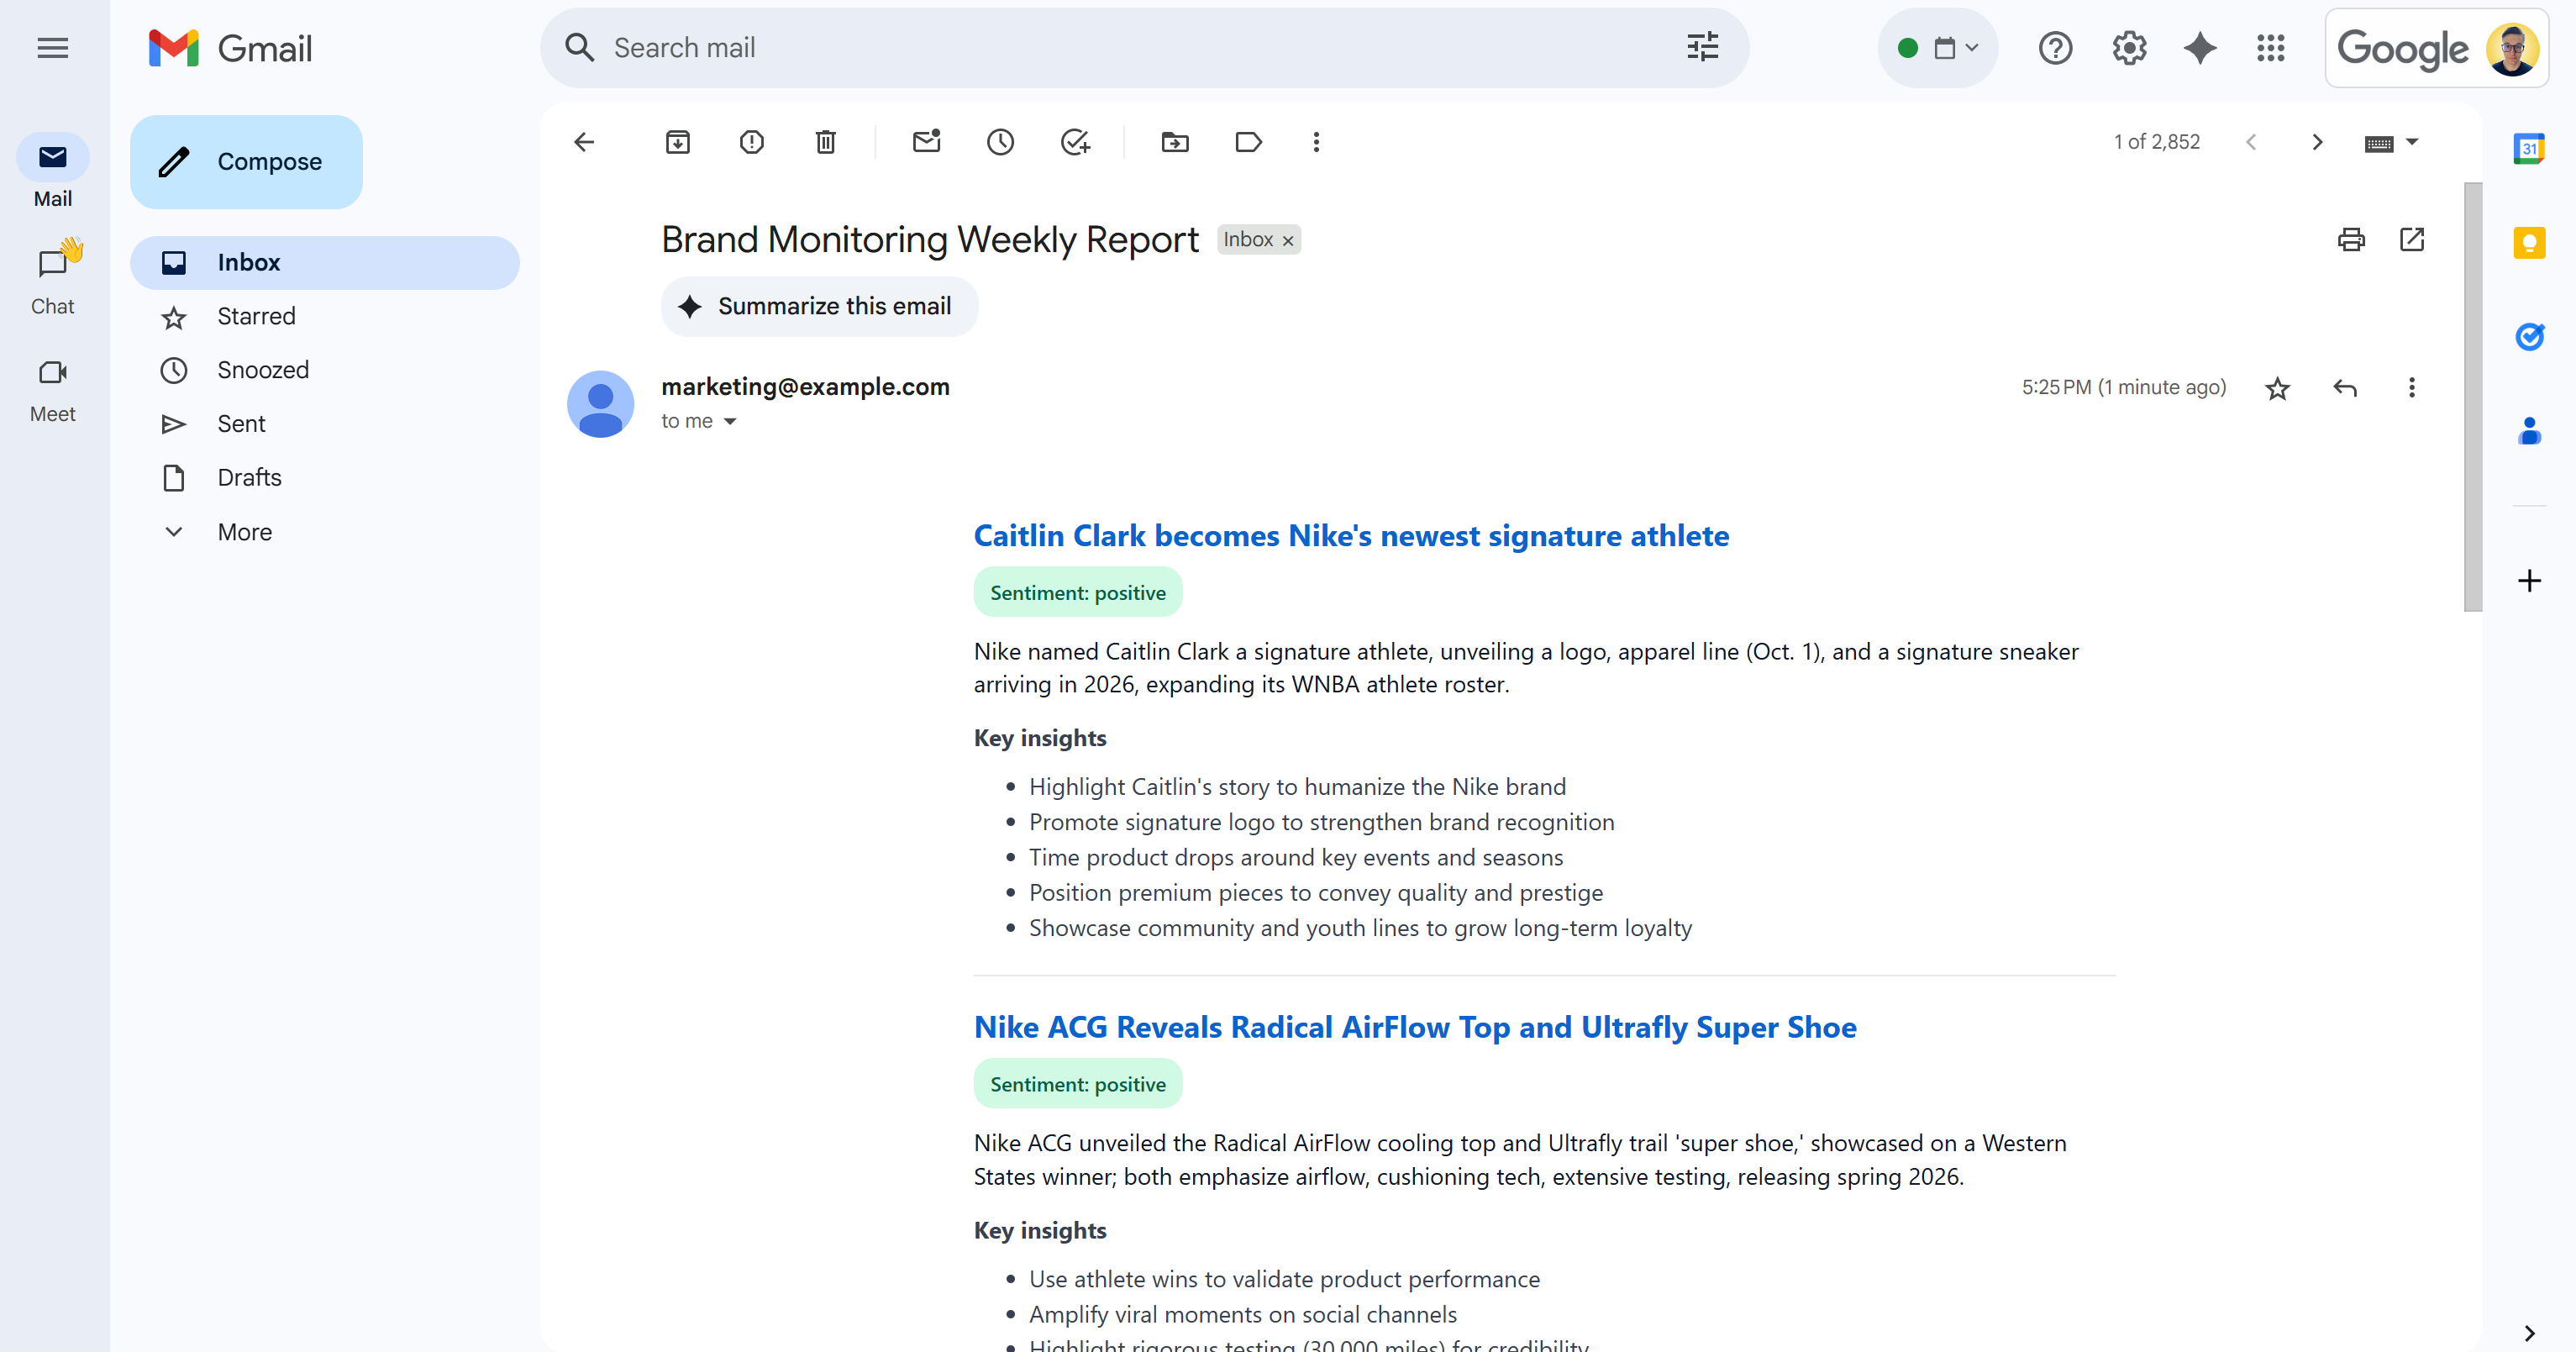
As you can see, the AI was able to produce a visually appealing brand monitoring report with all the requested data.
Scroll through the report, and you will see:
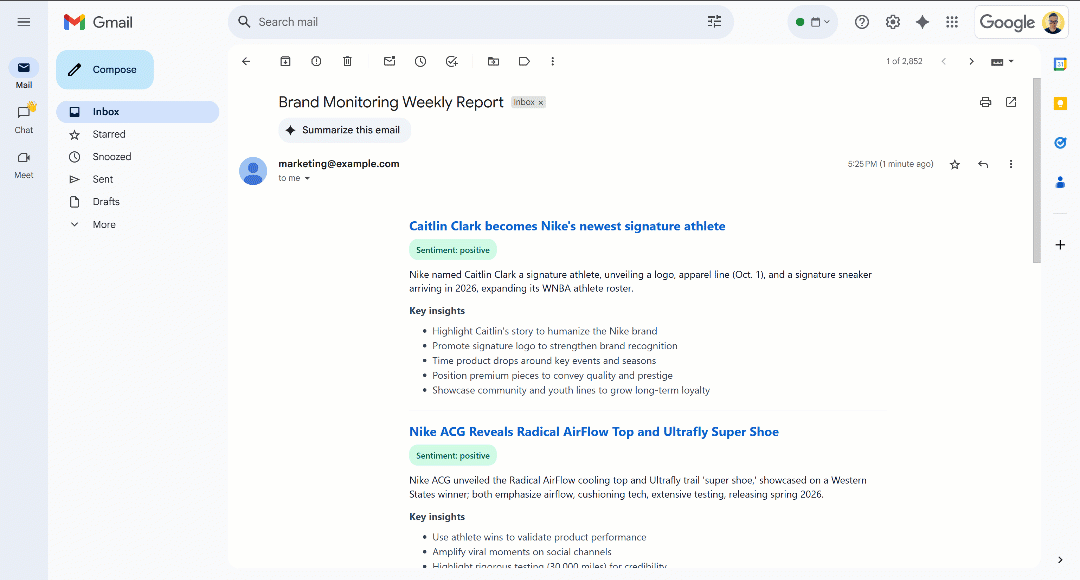
Notice that the sentiment labels are color-coded to help you quickly understand the sentiment. Also, the titles of news items are in blue, as they are links to the original articles.
Et voilà! You started with a few search queries and ended up with an email containing a well-structured brand monitoring report.
That was all possible thanks to the power of the web data scraping solutions available in the Bright Data SDK. Remember that the scraped pages are returned in LLM-optimized Markdown formats so that any AI model can analyze them for your needs. Explore other supported agentic and AI workflow use cases!
Next Steps
The current brand reputation monitoring AI workflow is already quite sophisticated, but you could improve it even further with these ideas:
- Add a memory layer for previously covered news: To avoid analyzing the same articles multiple times, enhancing report accuracy while reducing duplication.
- Introduce SendGrid templating for standardization: The AI may produce slightly different HTML reports with varying structures on each run. To make the layout consistent, define a SendGrid template, populate it with the generated news analysis data, and send it via the SendGrid SDK. Learn more in the official docs.
- Store the generated HTML report in the cloud: Save the report to S3 to make sure it is archived and available for historical brand monitoring analysis.
Conclusion
In this article, you learned how to leverage Bright Data’s web search and scraping capabilities to build an AI-powered brand reputation workflow. This process was made even easier thanks to the new Bright Data SDK, which allows access to Bright Data products with simple method calls.
The AI workflow presented here is ideal for marketing teams interested in monitoring their brand and receiving actionable insights at a low cost. It helps save time and effort by providing contextual instructions to support brand protection and decision-making.
To craft more advanced workflows, explore the full range of solutions in the Bright Data AI infrastructure for fetching, validating, and transforming live web data.
Create a free Bright Data account and start experimenting with our AI-ready web data solutions!

Technical Writer
Antonello Zanini is a technical writer, editor, and software engineer with 5M+ views. Expert in technical content strategy, web development, and project management.