

At the end of this tutorial, you will understand:
- Why PyTorch is a great option for building a multi-modal machine learning workflow.
- The necessity of a trusted source of trusted data from datasets containing several million records, such as those provided by Bright Data.
- How to take advantage of Bright Data datasets in PyTorch to fine-tune an ML model for product image classification in a multi-modal process.
Let’s dive in!
Why Use PyTorch for Multi-Modal Machine Learning
Data is only as valuable as the insights it enables. For businesses, leveraging data with the right approach can drive smarter decisions, refine strategies, and improve outcomes such as customer retention and marketing performance.
Modern machine learning allows you to process not only structured data like ratings or sales figures, but also unstructured data such as images, text, and even video. That opens the door to multi-modal insights. For example, combining review images with text can provide a richer understanding of what drives customer engagement.
This article is based on PyTorch, a Python machine learning framework widely used for building and training deep neural networks. The library supports a long list of tasks, including image classification, natural language processing, and combined workflows where multiple data types are analyzed together.
Some common PyTorch applications include:
- Assessing product image quality: Automatically determine whether images are visually appealing and likely to engage customers.
- Analyzing customer sentiment: Extract insights from textual reviews to understand user opinions and satisfaction.
- Building recommendation systems: Combine text and image features to generate more accurate and personalized product suggestions.
- Predictive modeling with multi-modal data: Use both visual and textual information together to forecast trends, sales, or customer behavior.
How to Source High-Quality Multi-Modal Data for Your Enterprise
No matter what type of machine learning or AI application you are developing, you must remember that these systems are only as effective as the data they are trained on.
In multi-modal applications, data sourcing can be particularly challenging, as it requires collecting information in both textual and visual formats. This is where trusted data providers, such as Bright Data, come in.
Bright Data comes with a suite of AI- and machine learning–ready solutions for businesses of all sizes, from startups to large enterprises:
- Web Scraper APIs: Provides programmatic access to structured data from hundreds of popular websites, enabling automated collection of fresh web data at scale.
- Dataset Marketplace: Offers ready-to-use, multi-modal datasets with billions of entries, including images, text, and structured fields.
- Managed Data Acquisition Services: Fully managed, enterprise-grade solutions that allow teams to acquire and maintain data without building or maintaining scraping pipelines.
- Data Annotation Services: Scalable and customizable annotation solutions for NLP, computer vision, and speech recognition tasks.
These solutions empower researchers, SMBs, and large enterprises to efficiently collect and integrate public web data. That can be harnessed to power multi-modal machine learning workflows, train sophisticated AI models, develop intelligent agents, and build analytics and business intelligence systems.
How to Build a Multi-Modal Machine Learning Analysis Pipeline Using PyTorch with a Bright Data Dataset
In this guided section, you will learn how to train a machine learning model on the Bright Data “Amazon products” dataset, which contains both textual and image data.
We will assume you sell online products and understand the importance of showcasing them with proper images. The goal is to use PyTorch to train a machine learning model on e-commerce product images along with their rating information. This model will then take care of automatically evaluating whether a product image is “good” or “bad.”
Thanks to this multi-modal ML workflow, your business can programmatically assess how likely your product images are to attract customers and drive engagement.
Note: This is just an example. By utilizing PyTorch together with Bright Data datasets and data feeds, you could cover many other use cases and scenarios.
Follow the instructions below!
Prerequisites
To follow along with this section, make sure you have:
- Python 3.9 or greater installed locally.
- A Bright Data account.
Also, familiarity with the ResNet-18 model and how fine-tuning works will be useful for fully understanding the multi-modal PyTorch image classification logic.
Step #1: Create a JupyterLab Project
When working with multi-modal data, it is helpful to visualize your datasets. For this reason, JupyterLab is an excellent choice as a development environment. Then, once your workflow is developed, the code can be easily converted into a production-ready machine learning pipeline.
Begin by creating a dedicated project folder and navigate into it:
mkdir pytorch-brightdata-product-image-analysis
cd pytorch-brightdata-product-image-analysis
Next, initialize a virtual environment inside it:
python -m venv .venvOn macOS/Linux, activate the virtual environment with:
source .venv/bin/activateOr, on Windows, run:
.venv\Scripts\activateWith the virtual environment active, install JupyterLab through the jupyterlab package:
pip install jupyterlabLaunch JupyterLab with:
jupyter labThe JupyterLab interface will open at http://localhost:8888/lab/ in your browser. Create a new notebook by clicking the “Python 3 (ipykernel)” button under the “Notebook” section:
You will see an Untitled.ipynb file:
Give your new notebook a name like “Bright Data + PyTorch” and save it.
Complete! You now have a fully set-up Python environment, ready for developing multi-modal machine learning workflows through PyTorch.
Step #2: Install and Import the Required Dependencies
In your notebook, add a new code cell with the following pip command
!pip install pillow tqdm requests scikit-learn torch torchvision pandasRun this block to install all the necessary libraries:
pillow: For loading and processing images.tqdm: For displaying progress bars for loops, which useful for tracking data loading and training.requests: For downloading images from URLs via HTTP requests.scikit-learn: Provides tools liketrain_test_splitfor splitting datasets.torch: The core PyTorch library for building and training machine learning models.torchvision: Provides datasets, pre-trained models, and image transformations.pandas: Handles structured data like CSV files and makes data manipulation easier.
In another code cell, import all required modules:
import os
import io
import json
import requests
from PIL import Image, ImageStat
from tqdm import tqdm
from sklearn.model_selection import train_test_split
import pandas as pd

import torch
import torch.nn as nn
from torch.utils.data import Dataset, DataLoader
from torchvision import transforms, models
from tqdm import tqdm

from PIL import Image
Wonderful! With these two cells, your notebook is fully ready to handle Bright Data multi-modal datasets and perform image and text processing using PyTorch.
Step #3: Download the Bright Data Dataset
Now that your notebook is set up for PyTorch development, it is time to get the most important component of this workflow: the input data!
For this tutorial, we will use the “Amazon products” dataset, one of many e-commerce datasets available on Bright Data. At the time of writing, that dataset contains over 311 million entries, each with 87 data fields. For each product, those fields list the images URLs, review rating, product ASIN, and much more information.
Note: You can collect fresh structured data from platforms like Amazon, eBay, Walmart, and many others using the Bright Data eCommerce Scraper.
To get started, if you do not already have a Bright Data account, create one. Otherwise, log in and go to your account’s “Dataset marketplace” page:
Select the “Amazon products” dataset among the “Most popular” ones: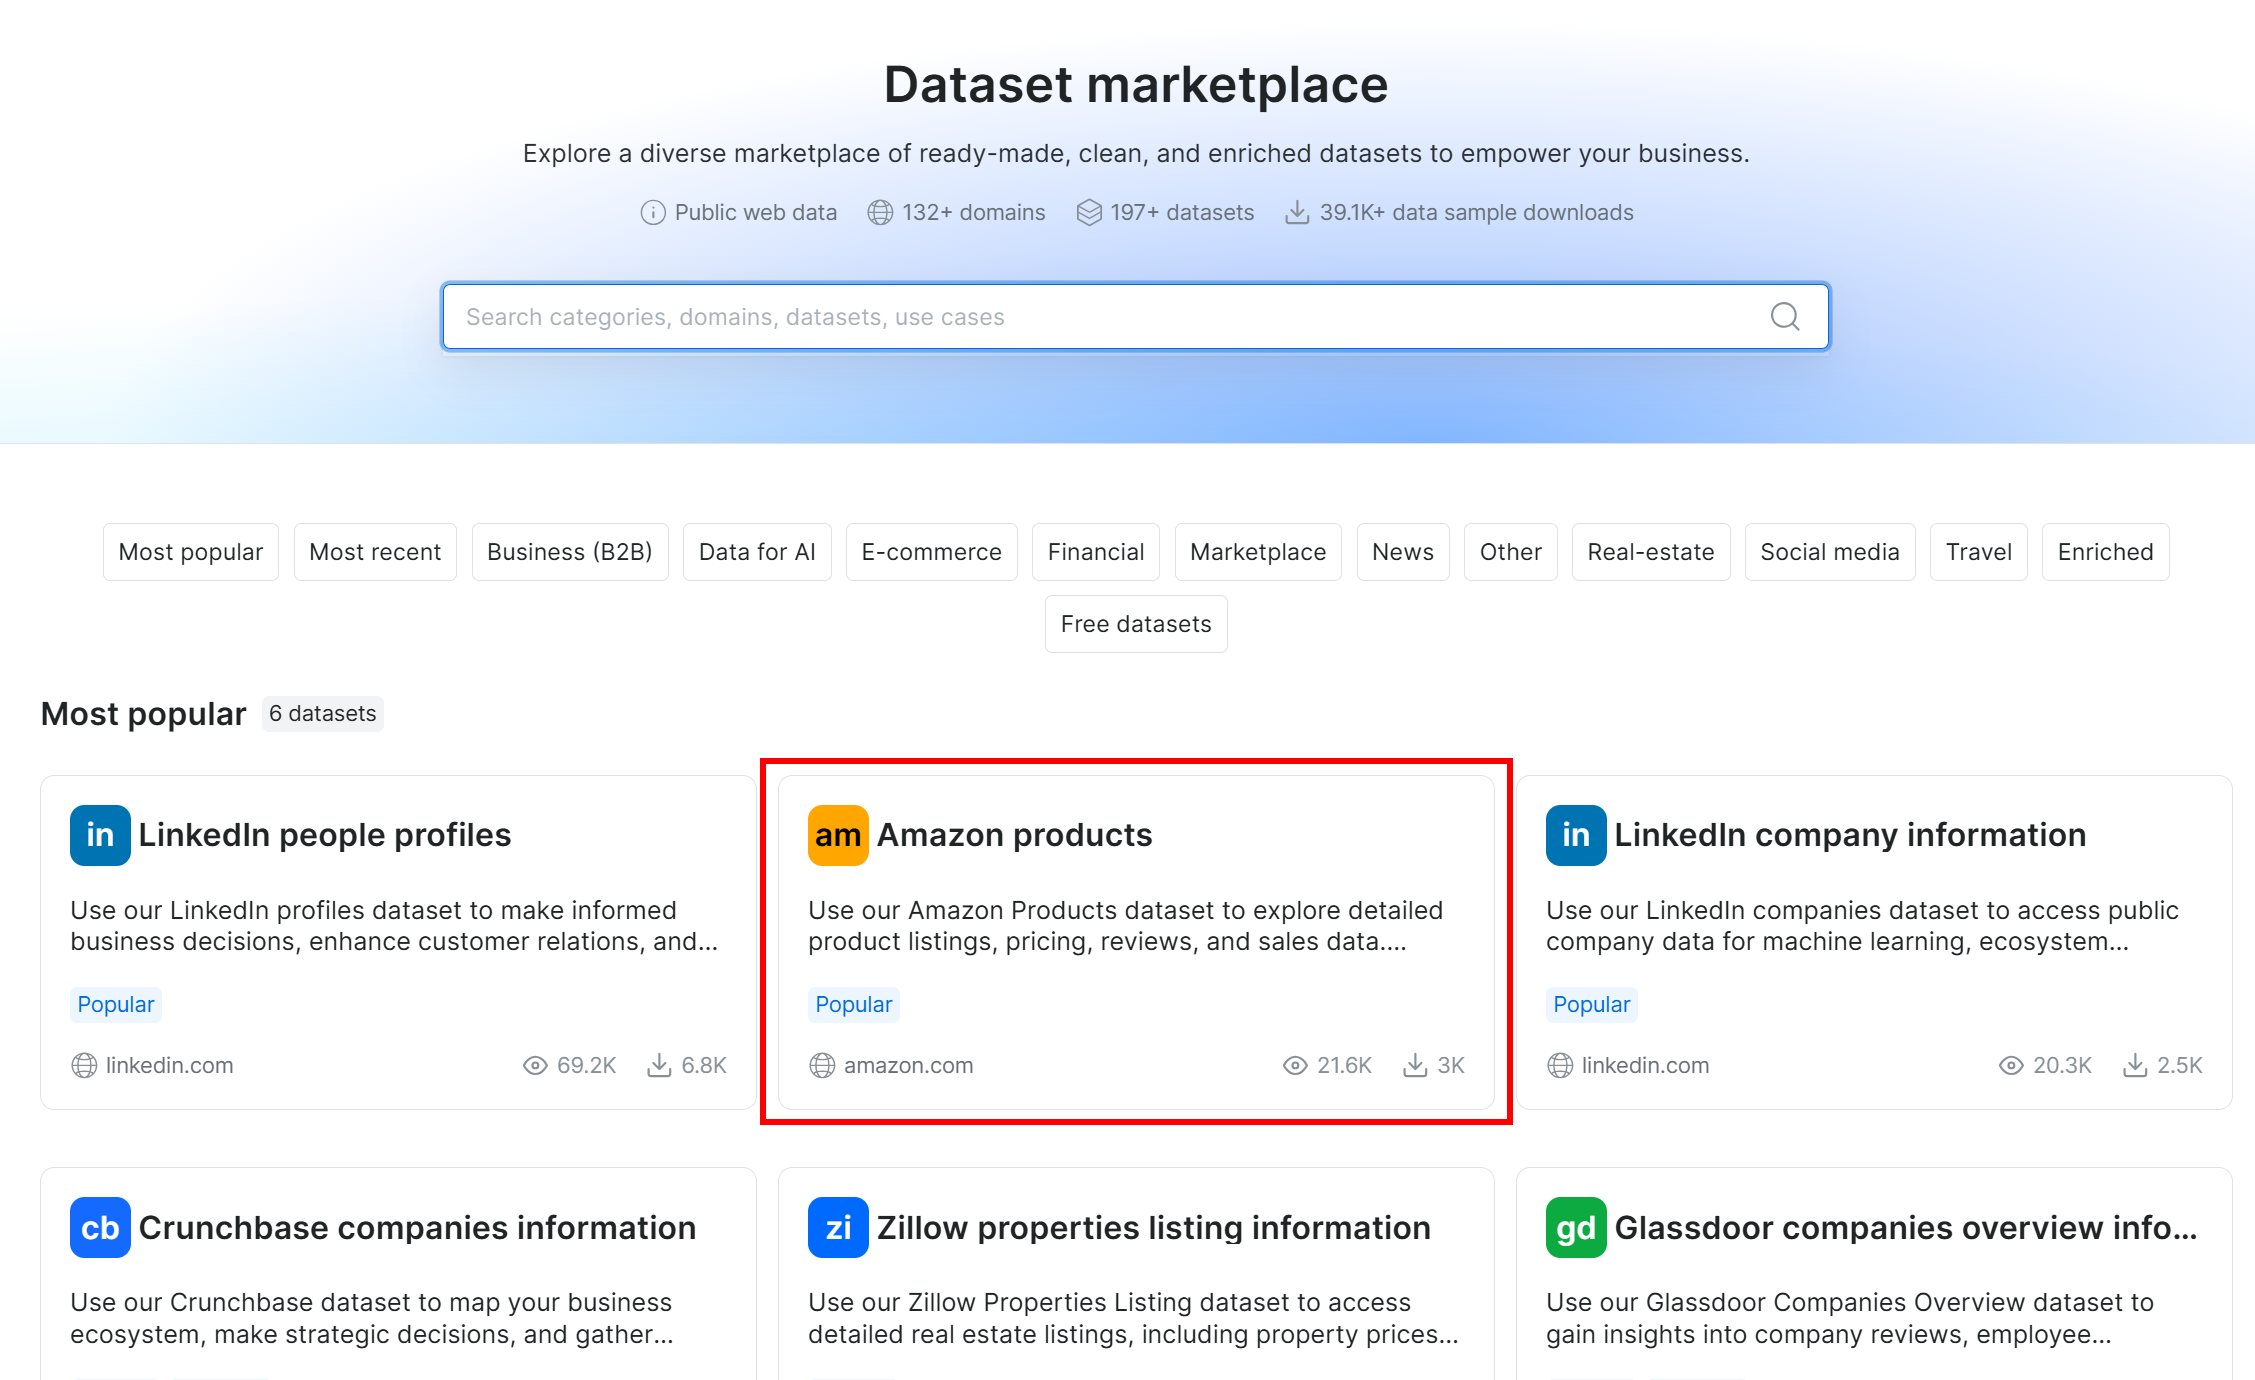
You will reach the dataset page: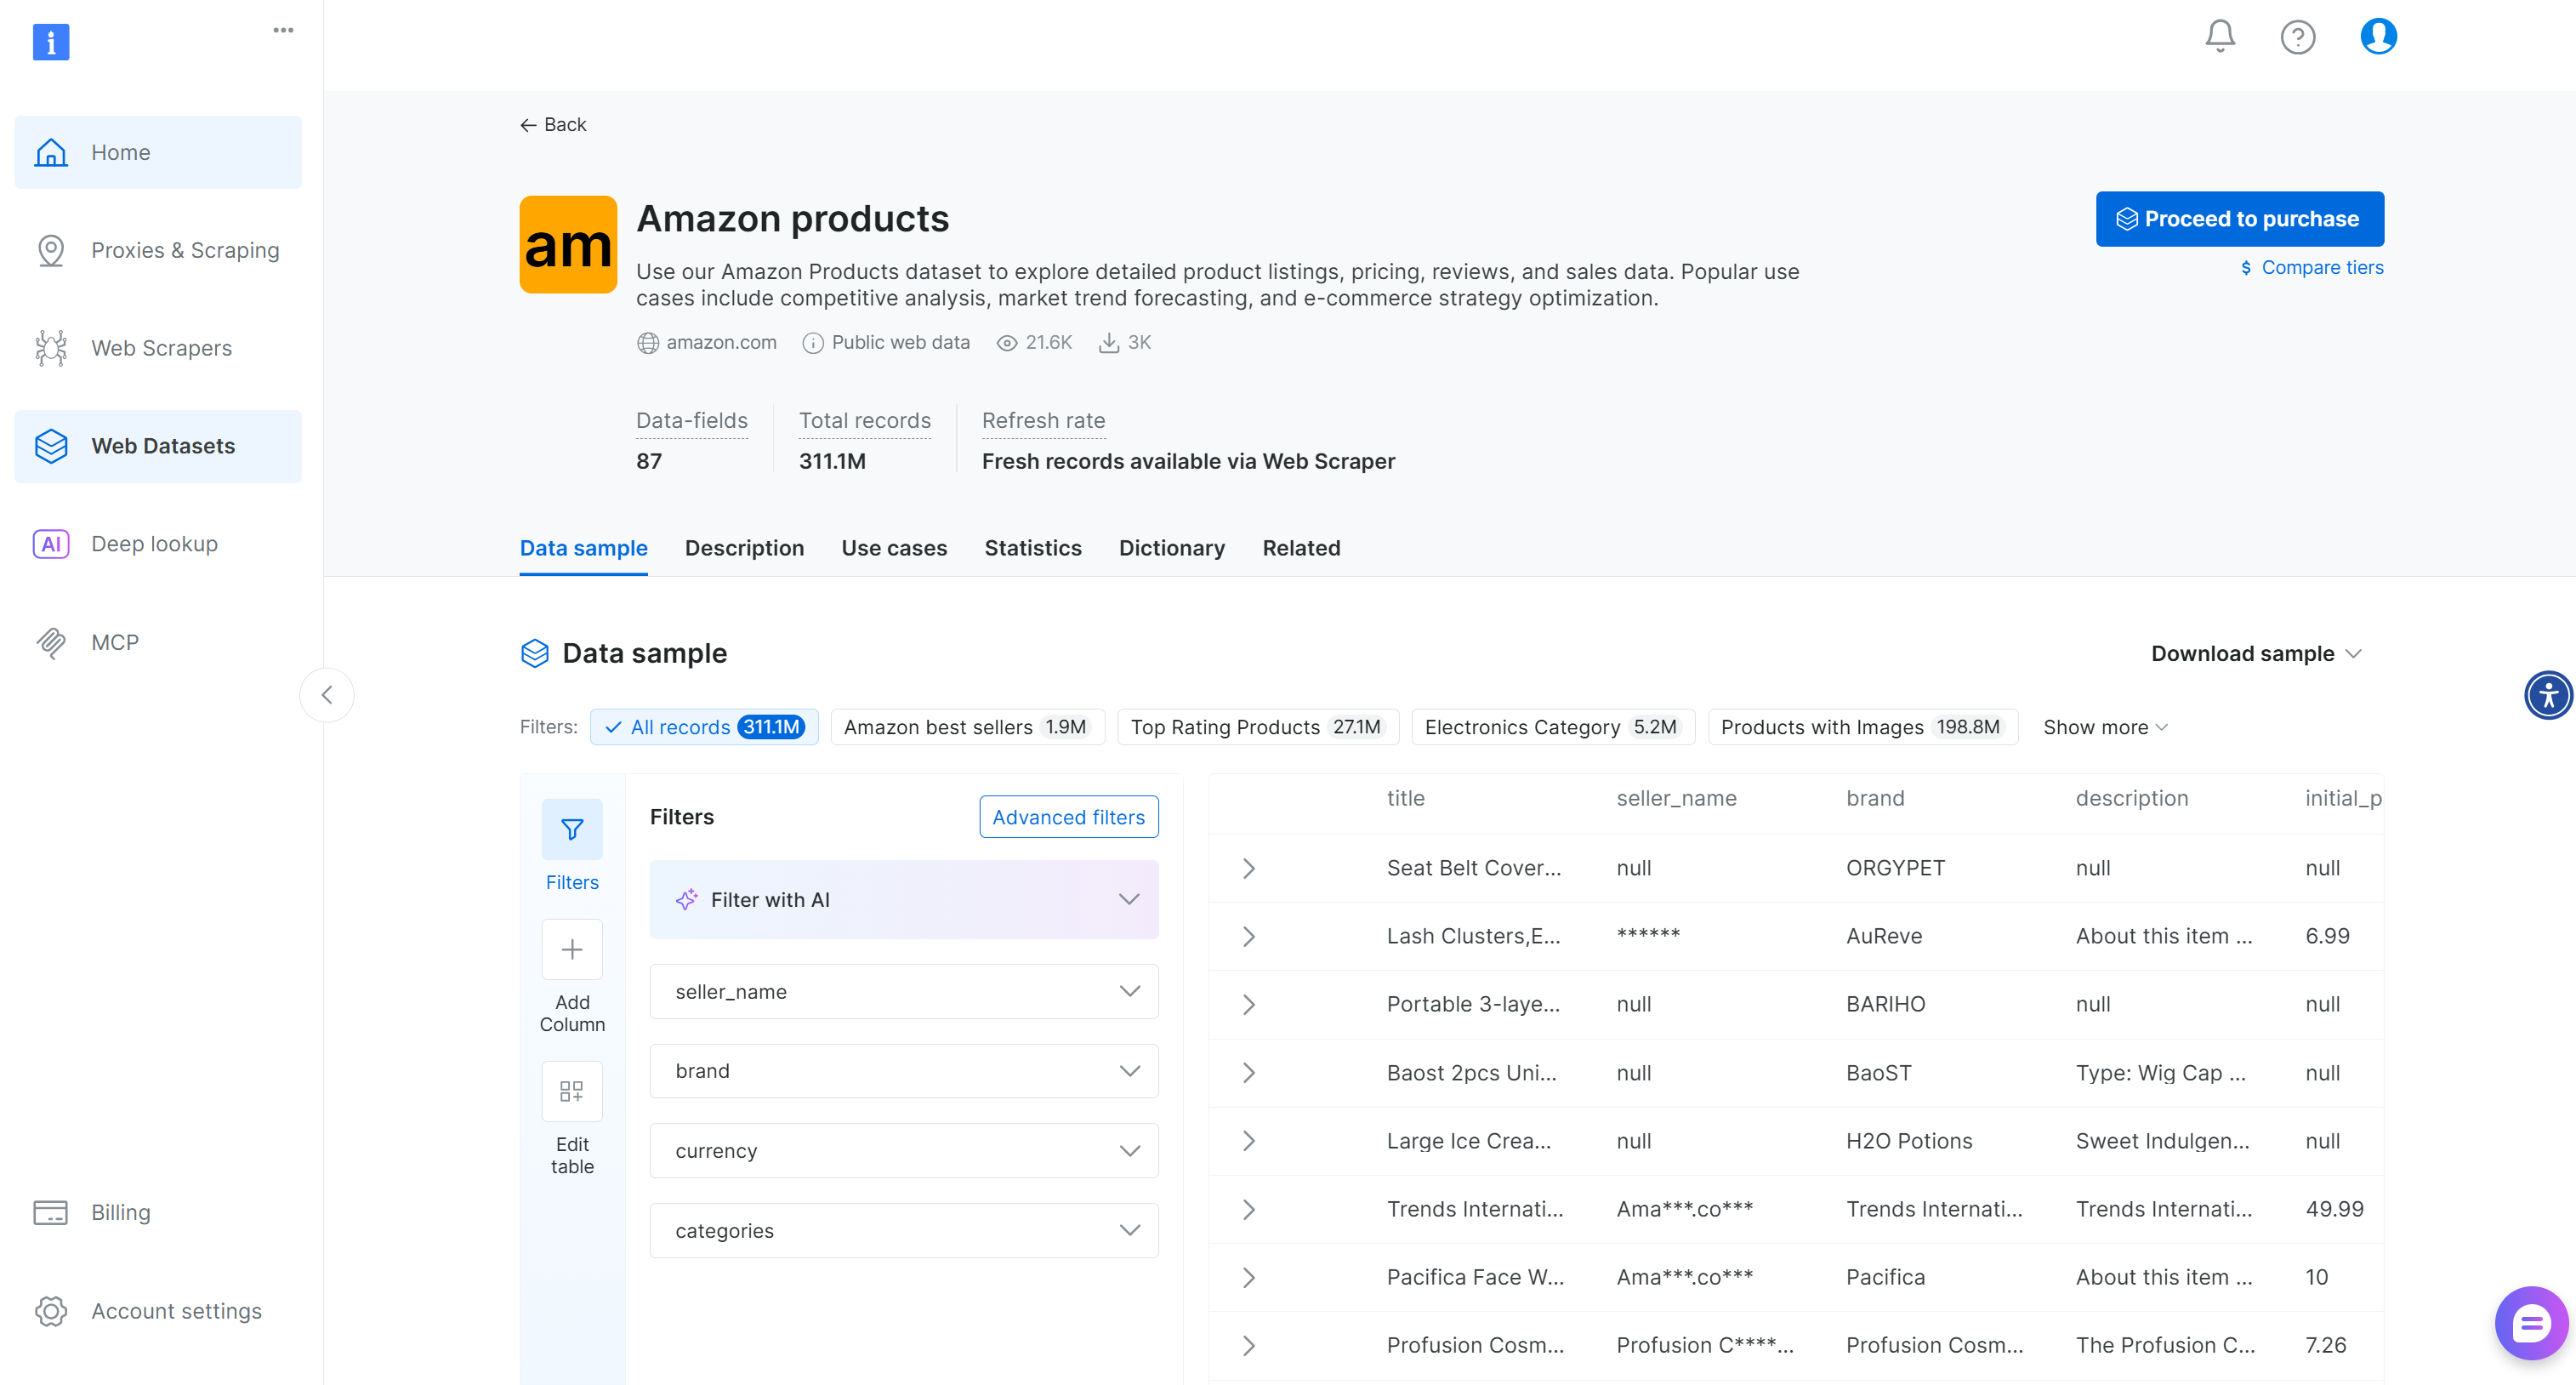
Here, you can filter entries manually or use AI-powered filters to create subsets tailored to your needs. Notice that those filters can also be applied programmatically via the Filter API, which allows you to create dataset snapshots based on specific criteria.
For this tutorial, we only need a small sample dataset to demonstrate a multi-modal ML workflow, so the free sample dataset is sufficient. For a production- or enterprise-ready workflow, you need to download a full dataset built around your specific needs.
To download the sample dataset, open the “Dataset sample” dropdown and select “Download as CSV”: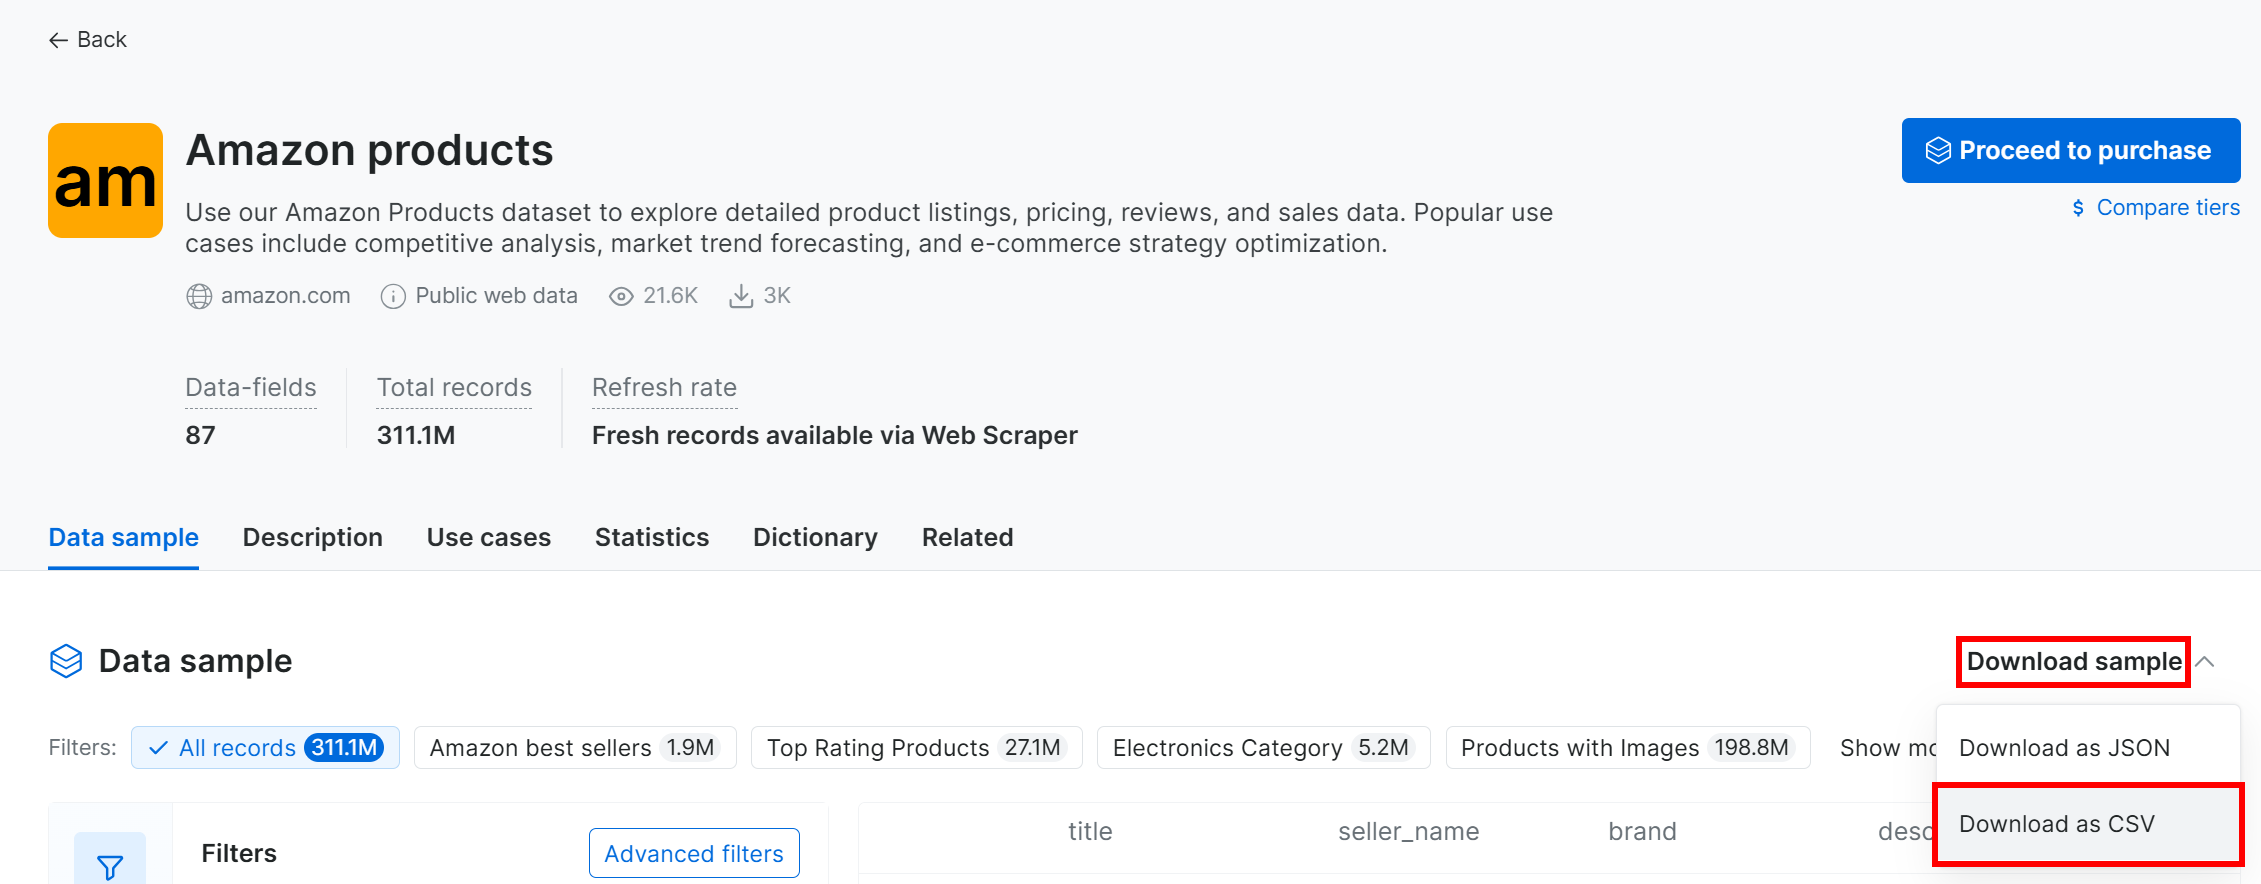
You will receive a file named Amazon products.csv, containing 1k products (~7.3 MB). Rename it to amazon_products.csv and place it in your project folder: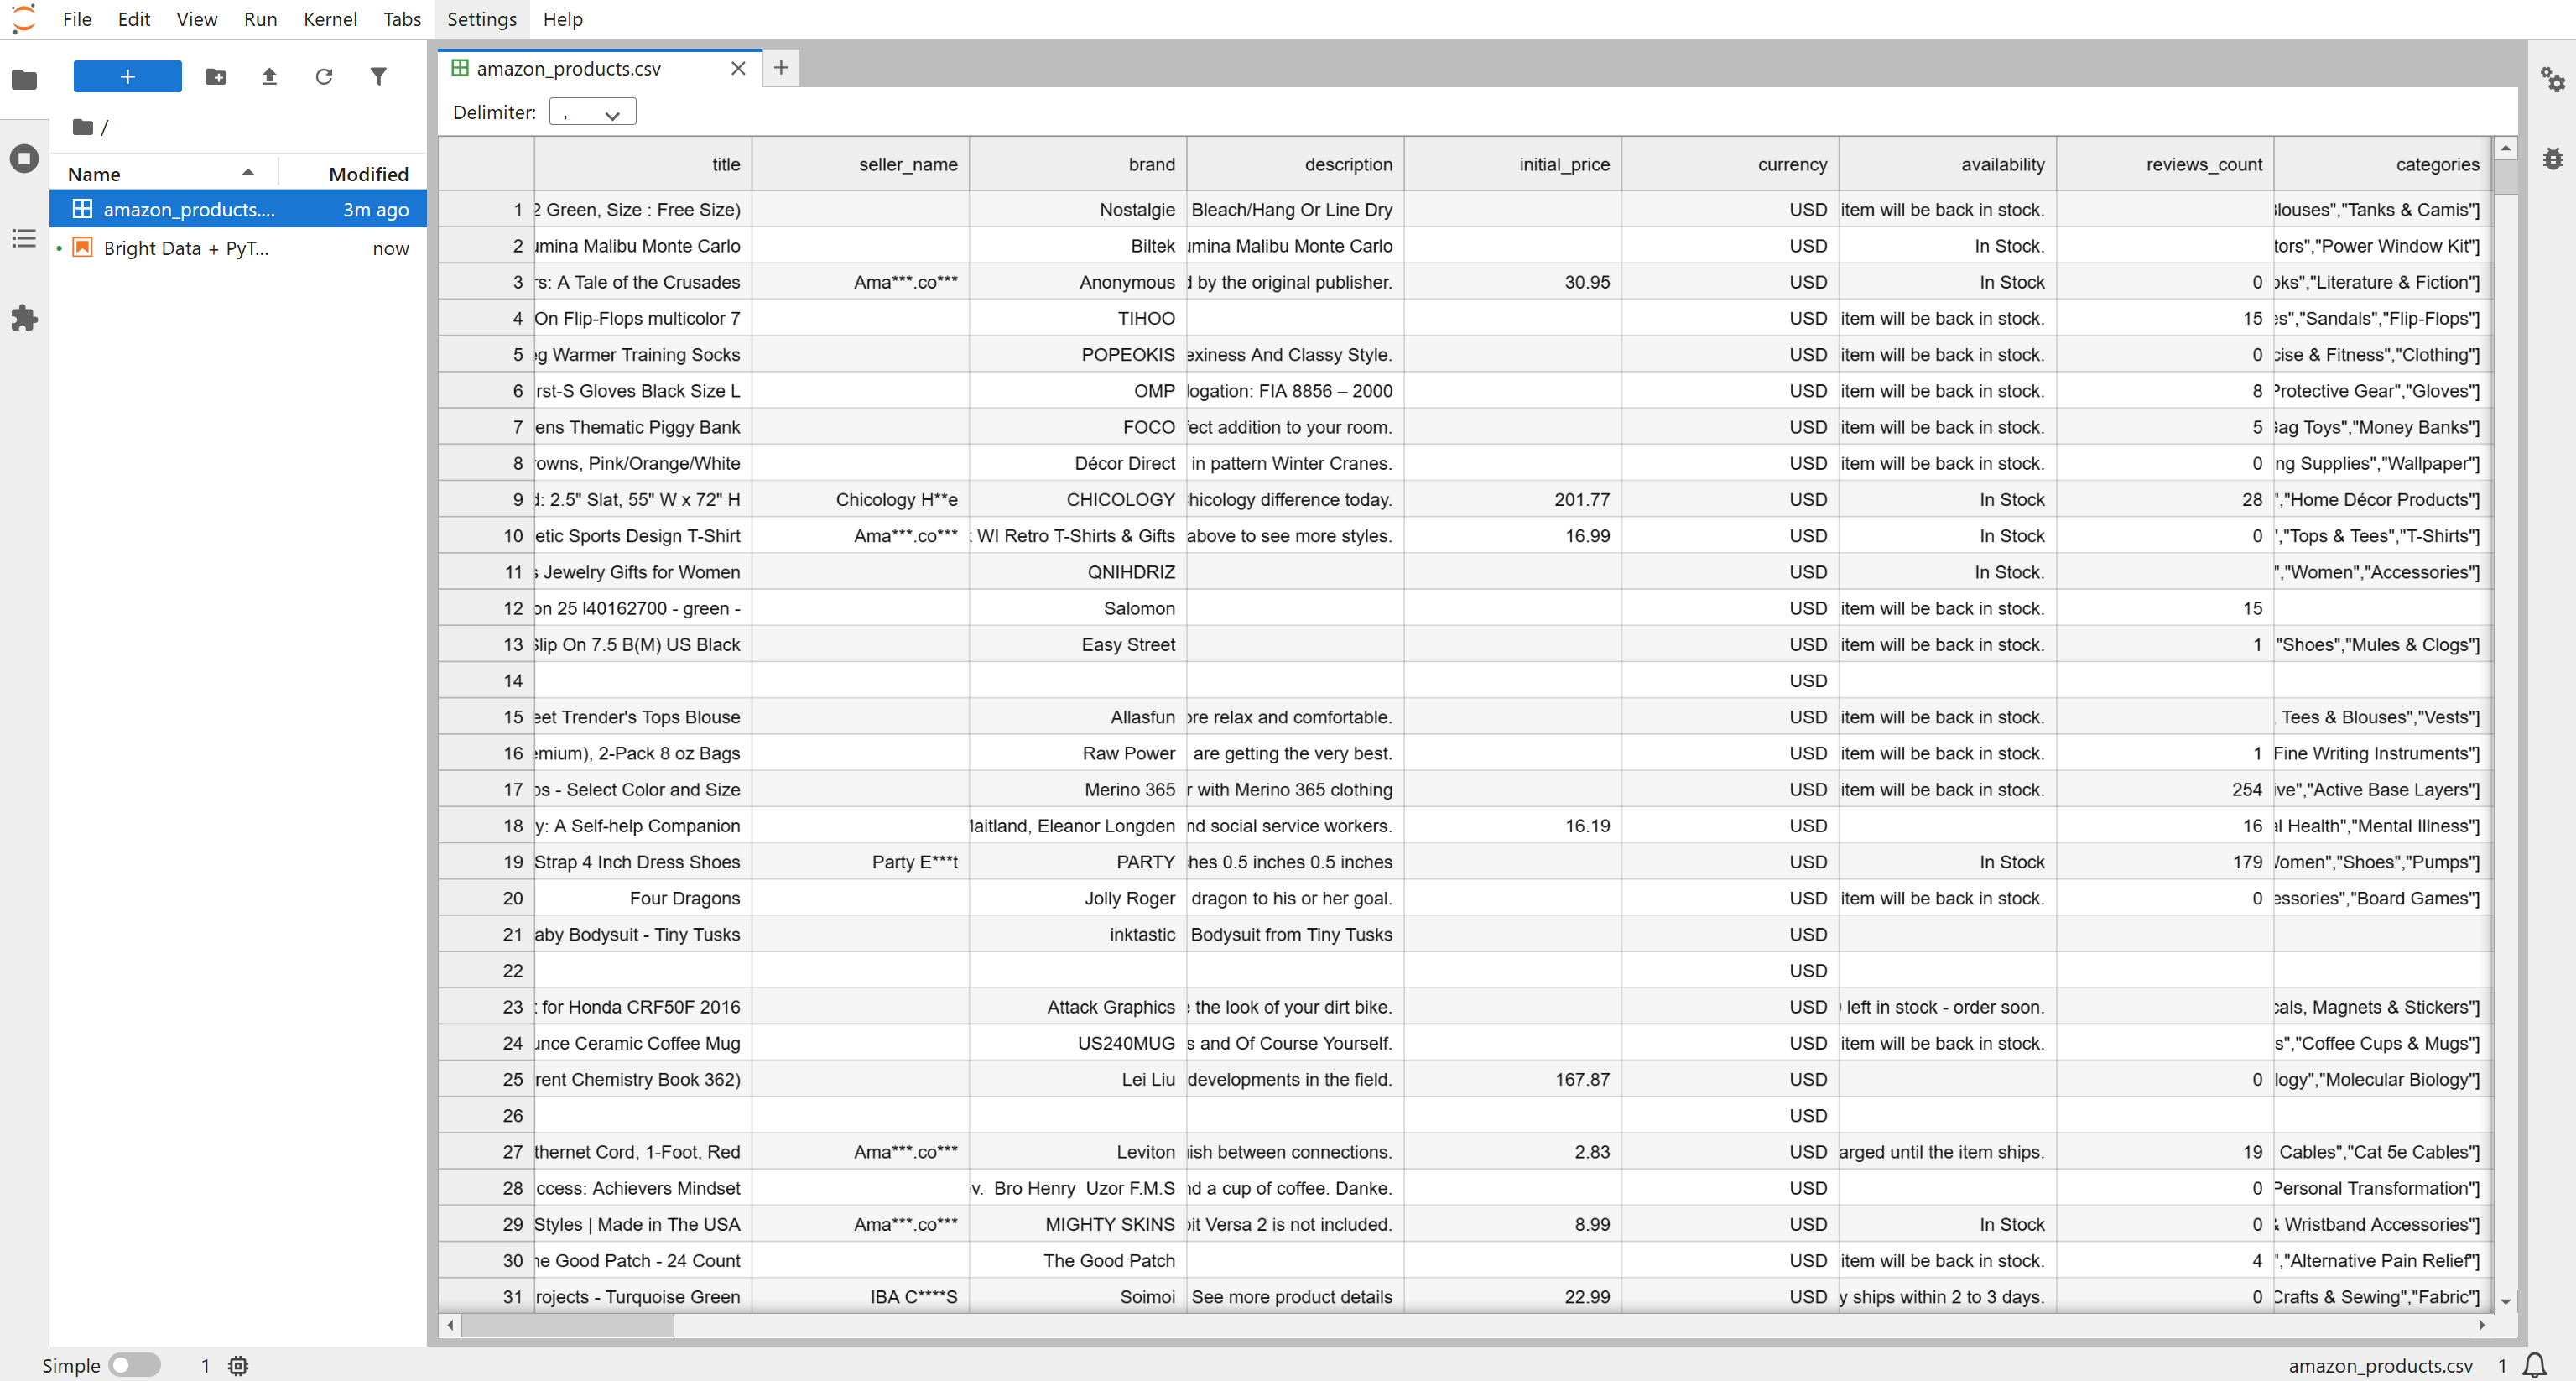
Out of the 87 available fields, the ones relevant to this multi-modal workflow are:
asin: The unique product identifier on Amazon.image_url: The main image URL for the product.images: A JSON-formatted array containing additional image URLs for the product.rating: The average customer review rating, on a 1–5 scale.
These fields enable you to combine visual data (images) with structured numeric data (ratings) in a multi-modal PyTorch ML workflow. Fantastic! You now have the input dataset.
Step #4: Define the Logic to Download and Label Product Images
Back in the notebook, initialize the core logic by adding the functions for image downloading and labeling. These two functions form the building blocks for implementing the ML image classification process, which requires these steps:
- Collect product data including
image_url,imagesarray,rating, andasinfrom the Bright Data “Amazon products” dataset. - Extract and deduplicate image URLs for each product entry.
- Download images from all URLs and store them locally.
- Label images, combining visual heuristics (white background, resolution) and review ratings.
- Prepare a PyTorch dataset using the labeled images, suitable for training a CNN (Convolutional Neural Network) model.
- Fine-tune a CNN to predict image quality (“GOOD” vs “BAD”) using the labeled dataset.
- Evaluate the model on a test set.
- Use the model to automatically assess new product images.
In a new code cell in your notebook, write the functions for downloading and labeling product images:
def download_image(url):
    # Send a GET request to the URL of the image
    response = requests.get(url)

    # Read the content of the response into a BytesIO object
    image_bytes = io.BytesIO(response.content)

    # Open the image with PIL and convert to RGB mode
    image = Image.open(image_bytes).convert("RGB")

    return image

def label_image(image, rating):
    # Get the width and height of the image
    w, h = image.size

    # Crop the top 10 pixels to analyze the border for brightness
    border = image.crop((0, 0, w, 10))

    # Compute statistics (mean) for the border
    stat = ImageStat.Stat(border)

    # Average brightness across RGB channels
    brightness = sum(stat.mean) / 3

    # Determine if the image has a white background
    is_white_bg = brightness > 240

    # Determine if the image is low resolution (smallest side < 400px)
    is_low_res = min(image.size) < 400

    # Heuristic label: 1=good if white background and not low-res, else 0=bad
    heuristic_label = 1 if (is_white_bg and not is_low_res) else 0

    # If rating is missing or zero, rely only on heuristic
    if rating is None or rating == 0:
        return heuristic_label

    # Normalize rating to range 0-1
    r = rating / 5

    # Apply weak supervision to adjust the label based on extreme ratings
    if heuristic_label == 1 and r < 0.5:   # very low rating → mark as bad
        return 0
    if heuristic_label == 0 and r > 0.9:   # excellent rating → mark as good
        return 1

    # Otherwise, keep the heuristic label
    return heuristic_label
The download_image() function simply downloads an image from a given URL and returns it as a PIL Image instance. Instead, the label_image() function implements a multi-modal evaluation of product images, combining visual cues and textual/numeric data like customer ratings.
label_image() first applies heuristics—checking for a white background and sufficient resolution—to assign an initial “good” or “bad” label. Then, if a rating is available, the function adjusts the label as follows:
- Very low ratings override a visually good image.
- Excellent ratings rescue a poor-looking one.
This logic makes sense because even if an image looks good, a poor rating indicates it is not beneficial. Conversely, an excellent rating can highlight a successful image despite poor images. Thus, both visual and numeric information are considered when assigning the final label.
Cool! Time to import the dataset and prepare your product entries to apply these two functions across all images.
Step #5: Load the Dataset and Get Ready to Download All Images
If you inspect the amazon_products.csv file, you will see that product images are stored in two data fields:
image_url: URL to the main product image.images: A JSON-formatted string containing an array of all additional product images.
In a new code block, load the CSV and retrieve all images for each product using a helper function:
def extract_image_list(row):
    image_urls = []

    # Check for a single main image_url and add it if it exists and is non-empty
    if isinstance(row.get("image_url"), str) and row["image_url"].strip():
        image_urls.append(row["image_url"].strip())

    # Check the "images" field, which can be a JSON string or a Python list
    images_field = row.get("images")

    if isinstance(images_field, str):
        # Decode JSON string into a Python list
        decoded = json.loads(images_field)
        if isinstance(decoded, list):
            # Add all images from the list to the image_urls
            image_urls.extend(decoded)

    # Deduplicate the URLs by converting to a set, then back to a list
    return list(set(image_urls))

# Load the Amazon products CSV into a DataFrame
df = pd.read_csv("amazon_products.csv")

# Drop rows that are missing required fields
df = df.dropna(subset=["asin", "image_url", "images", "rating"])

# Apply the extract_image_list function to each row to generate a list of all unique image URLs
df["all_image_urls"] = df.apply(extract_image_list, axis=1)
The imported dataset now has a new column called all_image_urls. This stores a deduplicated list of all its image URLs, combining the main image and any additional images. In the next step, you will access that field to download and process all images for each product!
Step #6: Download and Label All Images
In a cell, implement the logic to download all product images into a local images/ folder and label them:
# Create the "images" folder if it does not already exist
os.makedirs("images", exist_ok=True)

# Initialize a list to store metadata for each downloaded and labeled image
records = []

# Iterate over each product row in the DataFrame with a progress bar
for idx, row in tqdm(df.iterrows(), total=len(df)):
    # Access the required product data fields
    url_list = row["all_image_urls"]
    rating = float(row["rating"])
    asin = row.get("asin")

    # Iterate over each image URL for this product to download and label it
    for i, url in enumerate(url_list):
        # Download the image
        image = download_image(url)
        if image is None:
            continue

        # Construct a filename using ASIN and the image index
        filename = f"{asin}_{i}.jpg"
        path = os.path.join("images", filename)

        # Save the downloaded image to disk
        image.save(path)

        # Label the image using the multi-modal information
        label = label_image(image, rating)

        # Store relevant metadata for this image
        records.append({
            "asin": asin,
            "image_path": path,
            "image_url": url,
            "label": label
        })

# Convert the records list into a DataFrame and export it to a CSV file
labeled_df = pd.DataFrame(records)
labeled_df.to_csv("labeled_images.csv", index=False)
When running this code block in your notebook, the download process will start. This will have to download over 2,500 images, so be patient for a few minutes.
After completion, the output in your code cell should show a progress bar to 100%: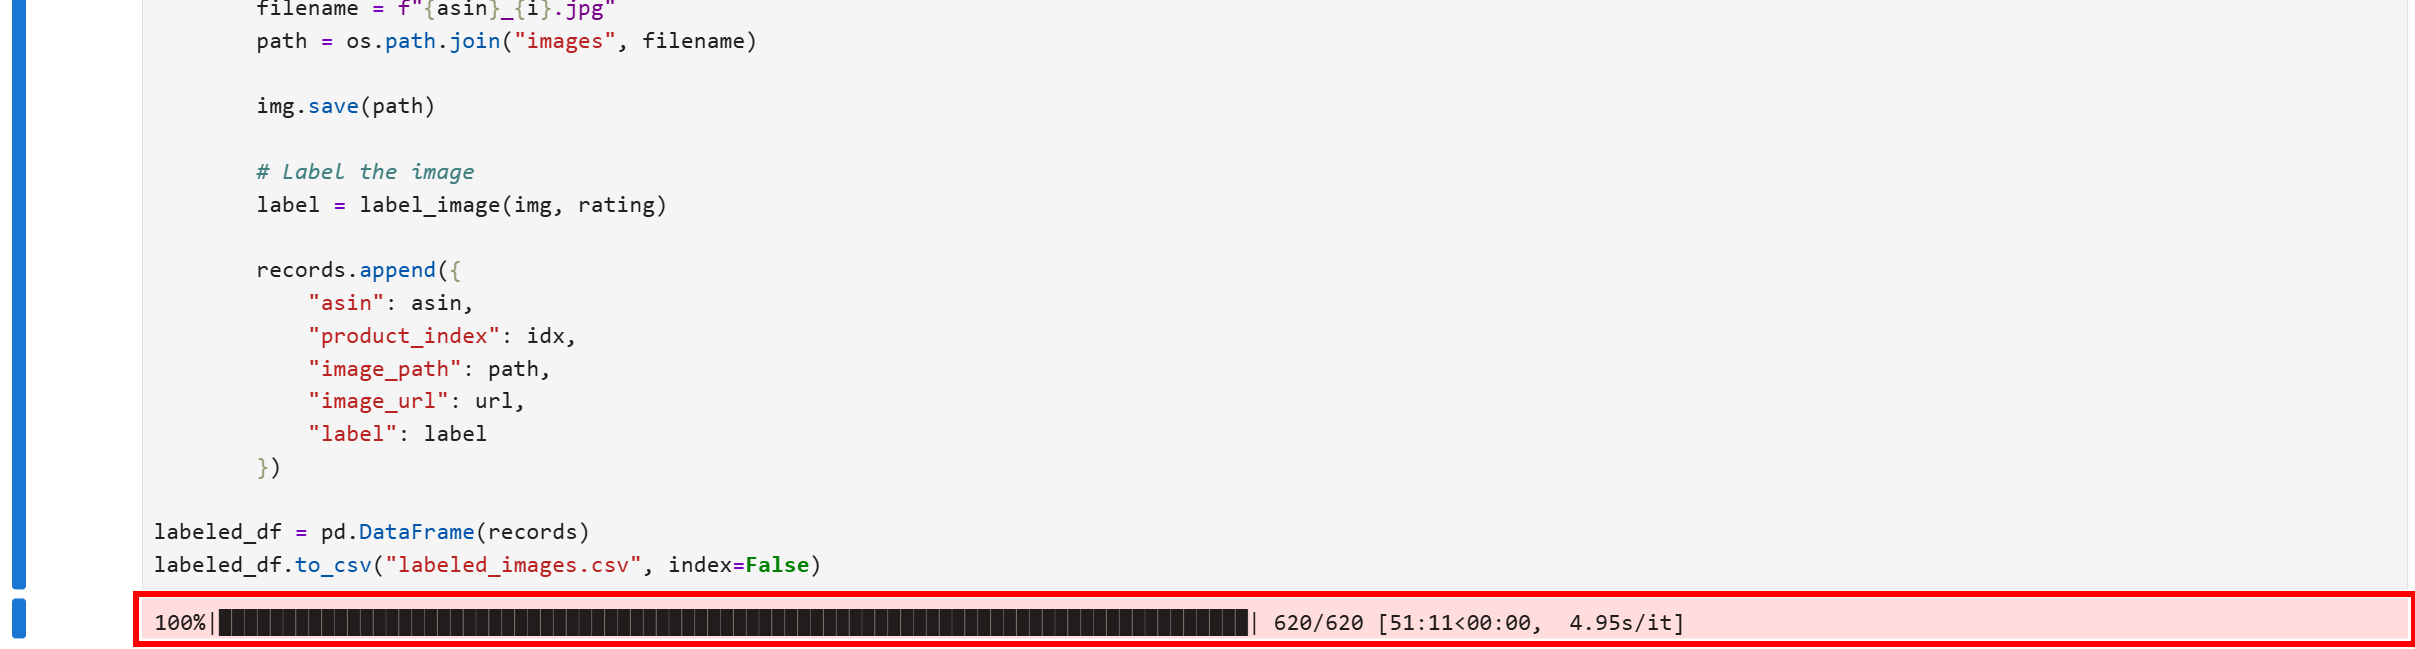
Now, the images/ folder in your project directory will contain all product images downloaded from the dataset: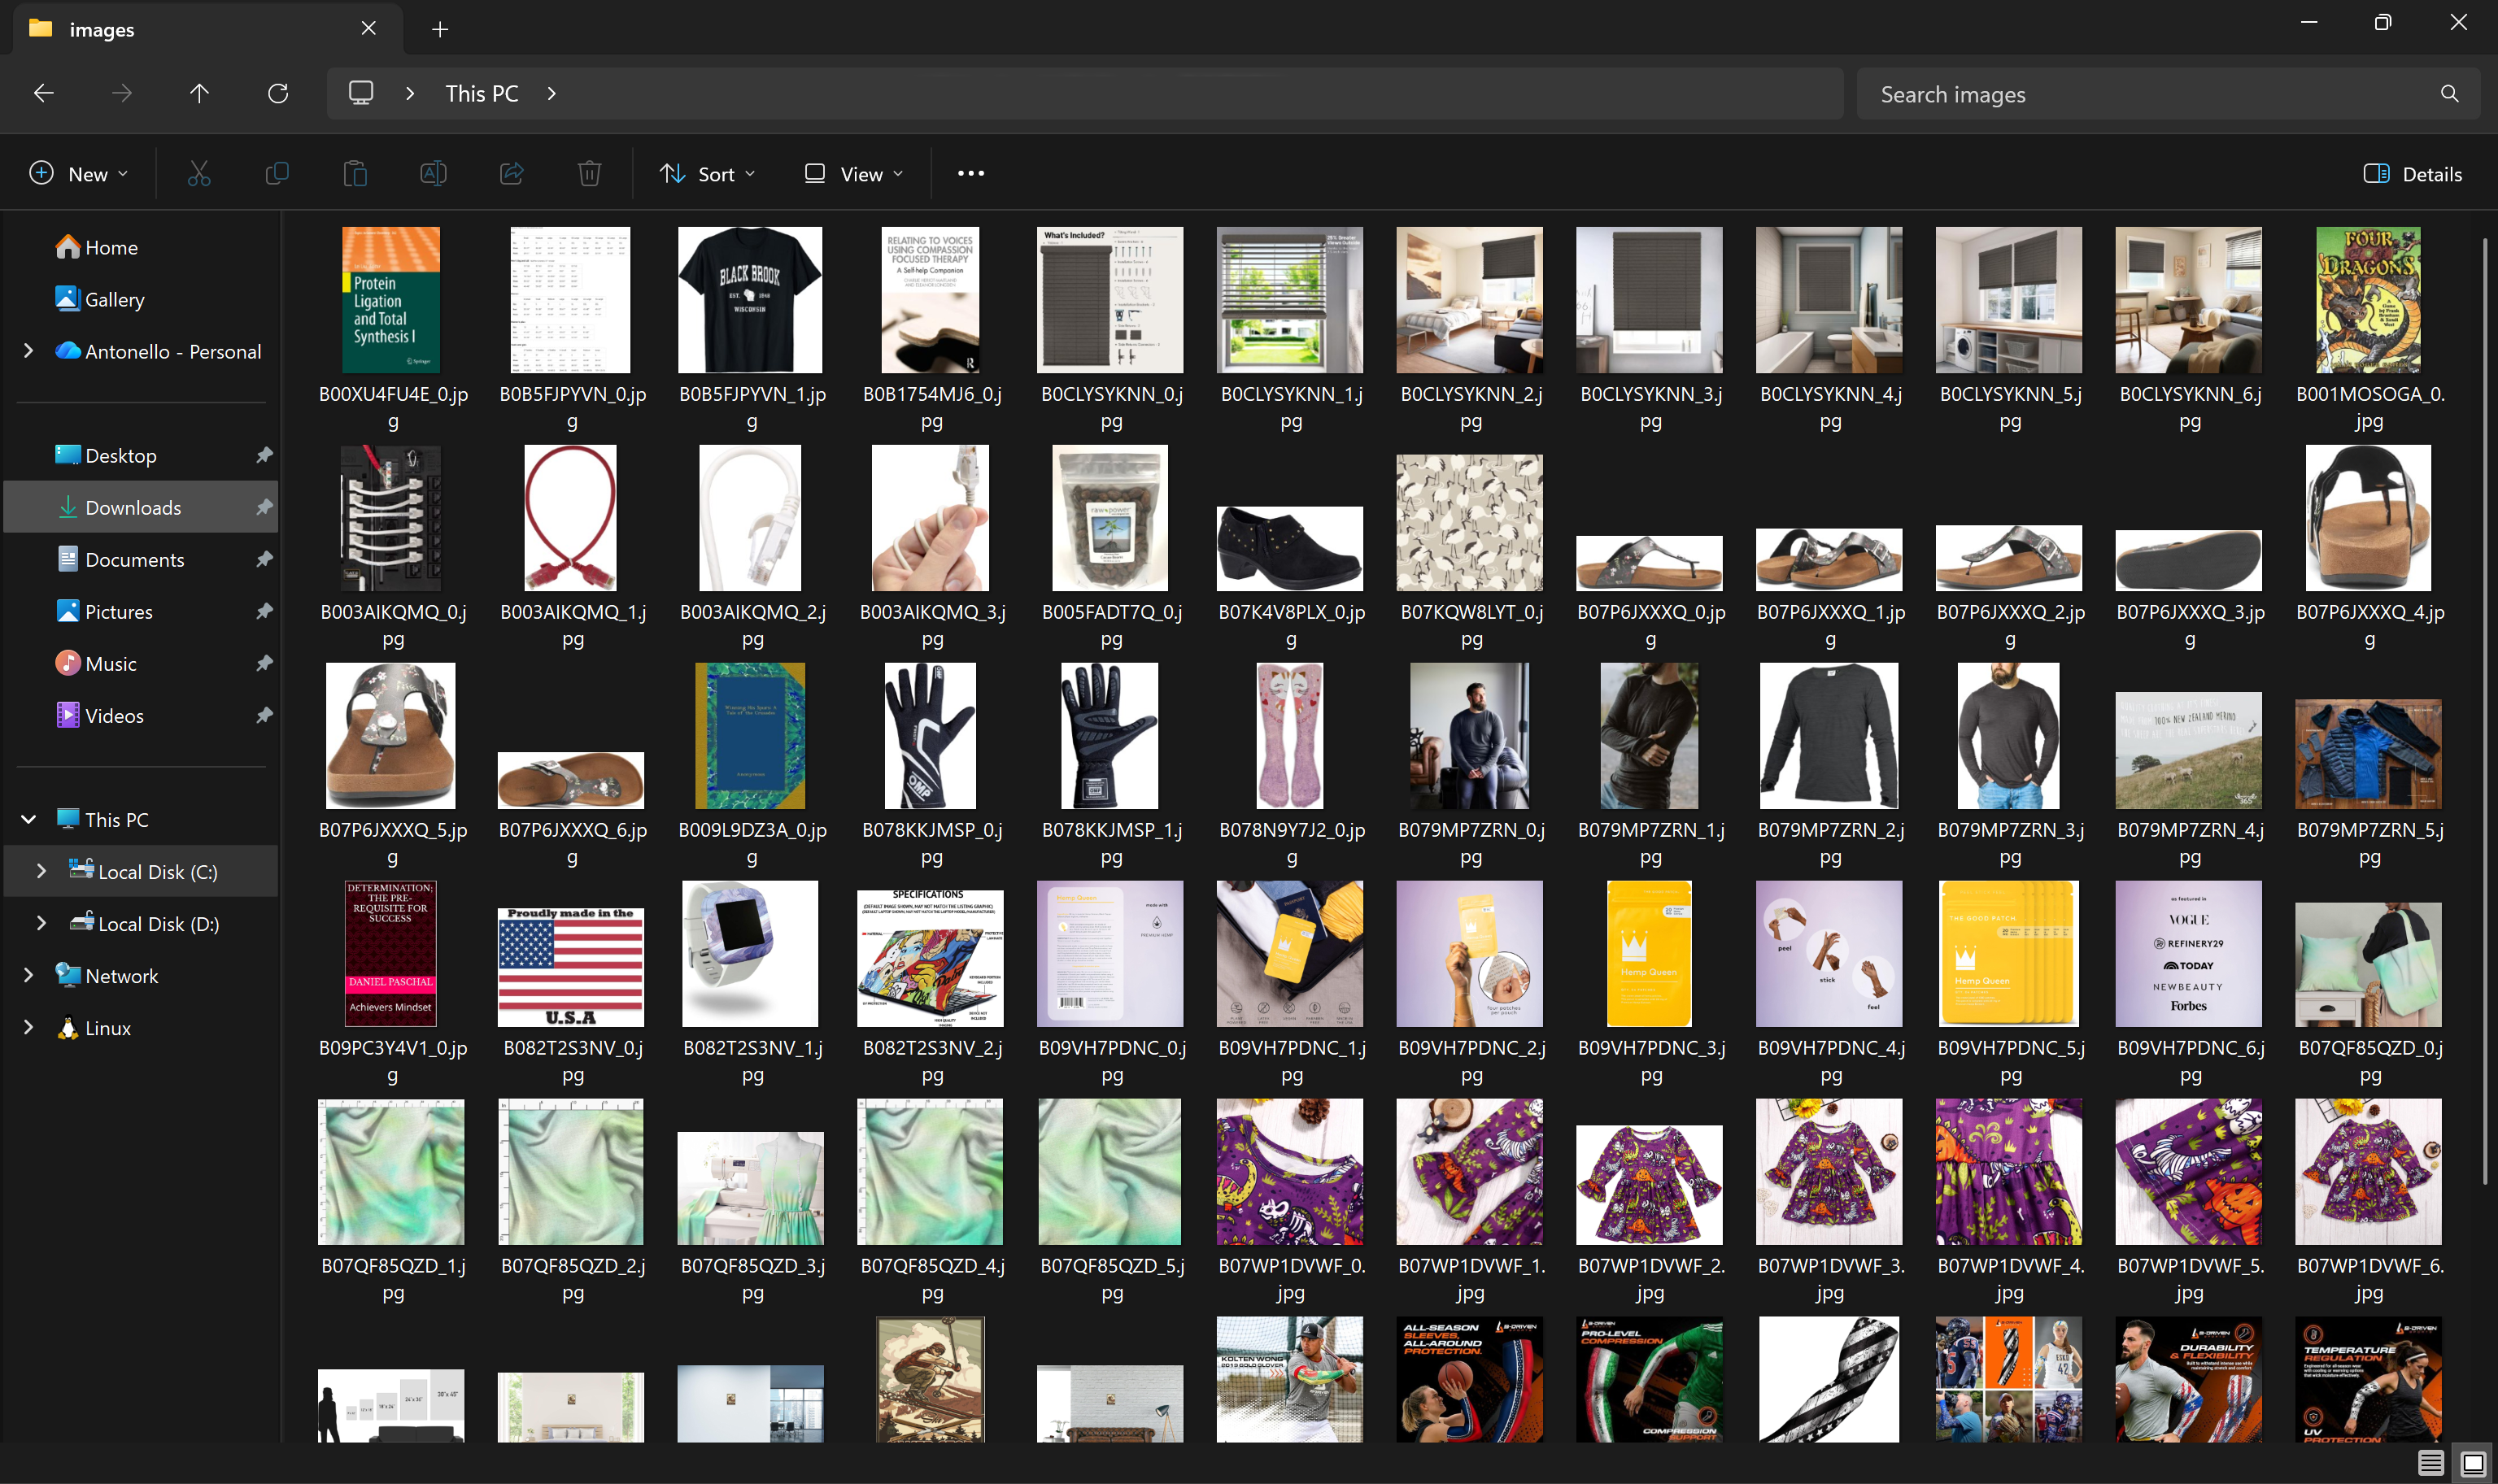
Additionally, the labeled_images.csv file will be created locally and populated with the labeling information for each image:
Awesome! You currently have all the local images and labeling information required to train the machine learning model in a multi-modal process.
Step #7: Prepare the Training and Test Datasets
Add a new block to read the labeling image information from the labeled_images.csv file and employ it to produce a training and test datasets that you will use for ML model fine-tuning:
# Define a custom PyTorch Dataset class for product images
class ProductImageDataset(Dataset):
    def __init__(self, df, transform=None):
        self.df = df
        self.transform = transform

    def __len__(self):
        # Return the total number of samples in the dataset
        return len(self.df)

    def __getitem__(self, idx):
        # Get the image path and label for a given index
        path, label = self.df.iloc[idx]["image_path"], self.df.iloc[idx]["label"]
        # Load the image and convert to RGB
        image = Image.open(path).convert("RGB")

        # Apply transformations if provided (e.g., resizing, tensor conversion)
        if self.transform:
            image = self.transform(image)

        # Return the image tensor and label as a torch tensor
        return image, torch.tensor(label, dtype=torch.long)

# Load the labeled images CSV
labeled_df = pd.read_csv("labeled_images.csv")

# Split the dataset into training and testing sets, keeping label distribution balanced
train_df, test_df = train_test_split(
    labeled_df,
    test_size=0.2,
    stratify=labeled_df["label"]
)

# Define transformations to resize images to 224x224 and convert to tensors
transform = transforms.Compose([
    transforms.Resize((224, 224)),
    transforms.ToTensor(),
])

# Initialize the dataset objects
train_ds = ProductImageDataset(train_df, transform)
test_ds = ProductImageDataset(test_df, transform)

# Wrap the datasets in DataLoaders for batching and shuffling
train_dl = DataLoader(train_ds, batch_size=32, shuffle=True)
test_dl = DataLoader(test_ds, batch_size=32)
This snippet prepares the labeled product images for training a PyTorch CNN. It does so by defining a custom Dataset and applying these image transformations:
transforms.Resize((224, 224)): Resizes images to224×224. That is important because the images in the dataset come in different resolutions and aspect ratios, while CNNs expect all inputs to have the same fixed size.transforms.ToTensor(): PyTorch models operate on tensors rather than raw PIL images. This converts each image into a normalized tensor of shape(C, H, W)(channels, height, width), making it compatible with the CNN.
Together, the transformations standardize every image in terms of size and format, allowing the model to focus on learning visual patterns instead of handling inconsistent inputs. The dataset is then split into training and test sets, preserving label distributions, and wrapped in DataLoader objects to generate data batches of images and labels.
Overall, this step guarantees that the CNN receives properly formatted data, laying the foundation for effective multi-modal machine learning training. Terrific!
Step #8: Train the Multi-Modal ML Model
With the training and test datasets ready, fine-tune a CNN in PyTorch for image classification with this code:
# Select the device for training (GPU if available, otherwise CPU)
device = "cuda" if torch.cuda.is_available() else "cpu"

# Load a pre-trained ResNet-18 model from torchvision
model = models.resnet18(weights=models.ResNet18_Weights.IMAGENET1K_V1)

# Replace the final fully connected layer to output 2 classes (GOOD/BAD)
model.fc = nn.Linear(model.fc.in_features, 2)

# Move the model to the selected device
model = model.to(device)

# Define the loss function for classification
criterion = nn.CrossEntropyLoss()

# Define the optimizer with a small learning rate
opt = torch.optim.Adam(model.parameters(), lr=1e-4)

# Training loop for 3 epochs
for epoch in range(3):
    model.train()
    total_loss = 0

    # Iterate over batches of images and labels
    for images, labels in tqdm(train_dl, desc=f"Epoch {epoch+1}"):
        images, labels = images.to(device), labels.to(device)

        opt.zero_grad()
        out = model(images)
        loss = criterion(out, labels)
        loss.backward()
        opt.step()

        total_loss += loss.item()

    # Print average loss for the epoch
    print(f"Epoch {epoch+1}: Average Loss={total_loss/len(train_dl):.4f}")
The above cell fine-tunes a pre-trained ResNet-18 CNN, a convolutional neural network that is 18 layers deep and primarily employed for classifying images into various categories.
In this case, the ML model will classify product images as good or bad. Using ImageNet weights accelerates convergence and leverages features already learned from millions of natural images. Then, the final fully connected layer is replaced to output two classes (“GOOD” vs “BAD,” as intended).
In the loop, the CrossEntropyLoss instance measures classification error, while the Adam optimizer updates model weights. Each epoch iterates over batches, performing a forward pass, computing loss, backpropagation, and weight updates.
Run the code block, and you will get an output like this: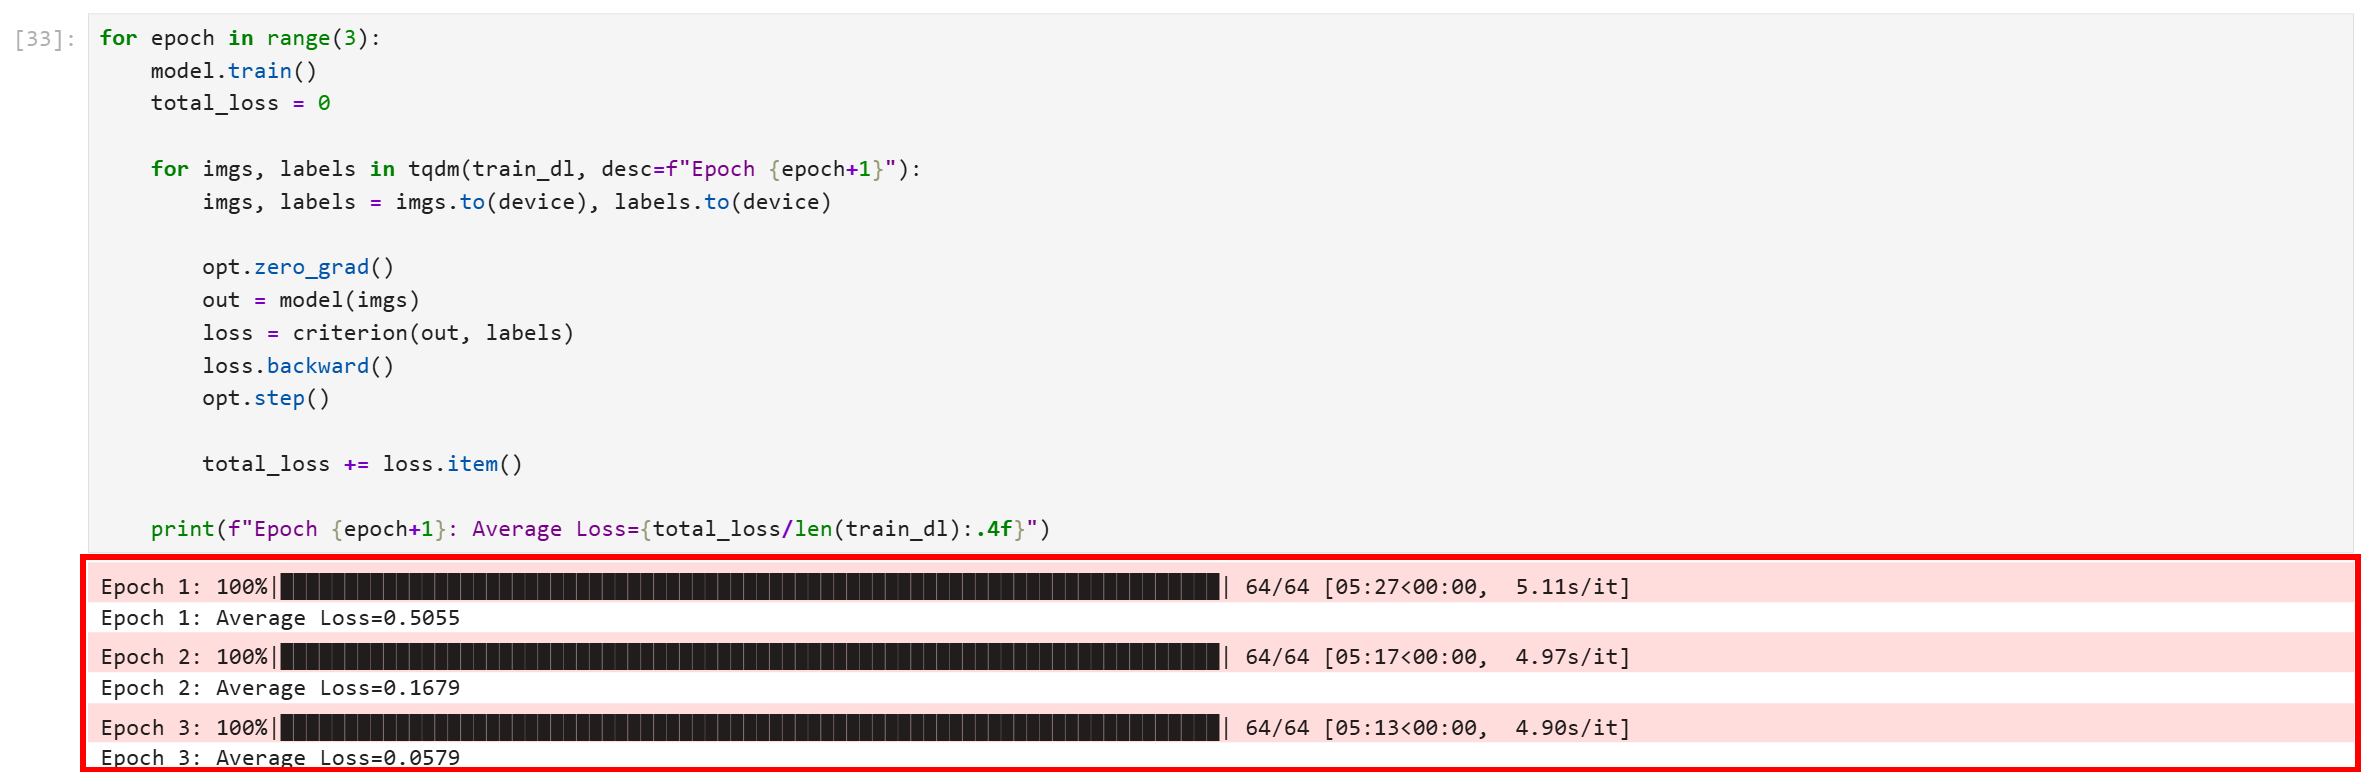
Note that all three epochs completed successfully. The final average loss is 0.0579, which is quite low and indicates that the model has converged well and learned to distinguish between the training images with high confidence.
Here we go! You just fine-tuned a CNN for e-commerce image quality distinction.
Step #9: Evaluate the Model Performance
To verify the model’s performance, run an evaluation step:
# Load the evaluation version of the model
model.eval()

# To keep track of the processed images
correct = 0
total = 0

# Evaluating the model against the train dataset
with torch.no_grad():
    for images, labels in test_dl:
        images, labels = images.to(device), labels.to(device)

        out = model(images)
        prediction = out.argmax(dim=1)
        correct += (prediction == labels).sum().item()
        total += len(labels)

# Output the results
print("Test Accuracy:", correct / total)
This measures how well the fine-tuned model generalizes on data it has never seen before (the test dataset). Specifically, it performs model evaluation via inference.
The code cell first switches the model to evaluation mode and disables gradient tracking to optimize speed and ensure consistent behavior. Next, the loop iterates through the test dataset, comparing the model’s predictions against the actual labels. Finally, it calculates the total accuracy, providing a clear metric of the model’s ability to generalize beyond the training set.
The result should be something like:

A test accuracy score of 0.924XXX means that your fine-tuned ResNet-18 model correctly classified 92.4+% of the product images in your unseen test dataset as either “GOOD” or “BAD.”
That can be considered an excellent result for binary classification on real-world data like e-commerce product images. It strongly suggests the model has successfully learned the difference between good and bad image quality features and is not just memorizing the training data.
Well done! Let’s now apply the fine-tuned model on a couple of new images to see if it works as expected.
Step #10: Utilize the ML Model to Predict Image Quality
To truly validate if the fine-tuned model works as expected, you must test its performance against images it has never encountered. Since the model is trained to work against any e-commerce product images, you can test it with images from platforms like eBay, Walmart, Alibaba, or your own internal product databases.
In this demonstration, we will test the model against the following two product images sourced from eBay: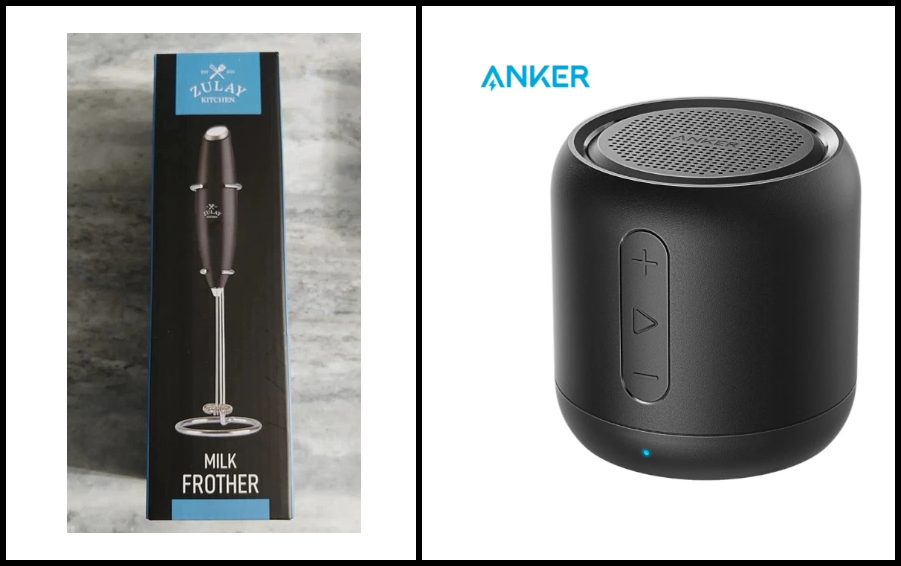
To do so, add the following code in a dedicated block:
def predict_image_quality(img: Image.Image) -> str:
    # Set model to evaluation mode
    model.eval()

    # Apply transformations and add a batch dimension
    x = transform(img).unsqueeze(0).to(device)

    with torch.no_grad():
        # Forward pass, get the predicted class index, and extract it as a scalar
        prediction = model(x).argmax().item()

    # Return the result string
    return "GOOD" if prediction == 1 else "BAD"

# Test images
image_urls = ["https://i.ebayimg.com/images/g/N5kAAOSwTlplqFTa/s-l500.webp", "https://i.ebayimg.com/images/g/yUsAAOSweMJd67Jd/s-l1600.webp"]

# Loop through image URLs, download, predict, and display
for image_url in image_urls:
    # Download the image content using HTTP request
    response = requests.get(image_url)
    image = Image.open(io.BytesIO(response.content)).convert("RGB")

    # Call the prediction function
    quality = predict_image_quality(image)

    # Display the image in the notebook together with the model results
    display(image)
    print(image_url, "→", quality)
Upon executing the cell, you will observe the following classifications:
Note that the model classified the image as “BAD.” This is a correct result, as the image is visibly low-quality, blurry, and the background lacks sharp contrast, failing to properly highlight the product.
Instead, on the second image, it produces:
This time, the classification is “GOOD,” which is a convincing result considering that the image is visually appealing, sharp, well-lit. Plus, it clearly shows the product.
Et voilà! Thanks to Bright Data’s rich datasets, you retrieved e-commerce product data (in this case, from Amazon). Then, you applied PyTorch for fine-tuning a CNN for image recognition by following a multi-modal ML data analysis approach.
Conclusion
In this blog post, you saw how to implement a multi-modal machine learning system. We used product datasets containing hundreds of millions of Amazon products and their corresponding images.
By feeding that data into a PyTorch workflow within a Python notebook, you successfully fine-tuned a CNN (Convolutional Neural Network) for classifying e-commerce product images as good or bad.
This project directly addresses the needs of small to medium-sized businesses or larger enterprises looking for ways to quickly evaluate image quality for product representation, especially for e-commerce purposes.
All of that would not be possible without Bright Data’s enterprise data services, which help you collect data from over 100 domains, including Amazon, Walmart, LinkedIn, Zillow, Airbnb, Yahoo Finance, and many others.
Sign up for a Bright Data account today to test our data solutions for free!

Technical Writer
Antonello Zanini is a technical writer, editor, and software engineer with 5M+ views. Expert in technical content strategy, web development, and project management.


