
In this tutorial, you will learn:
- What Qwen Code is and what it provides.
- Why extending it with web access helps overcome the limitations of the underlying LLMs.
- How Bright Data enables Qwen Code to search, scrape, and discover web content, among other capabilities.
- How to expose Bright Data capabilities to Qwen Code via MCP.
- How to equip Qwen Code with knowledge of Bright Data solutions through Agent Skills.
- The power of combining Qwen Code with Bright Data through a full example.
Let’s dive in!
What Is Qwen Code?
Qwen Code is an open-source AI agent that runs directly in your terminal. It is optimized for Qwen models and helps you better understand large codebases, automate repetitive tasks, and ship software faster.
It is backed by strong community adoption, as shown by its rapidly growing GitHub stars (now 20k+ stars and counting):

The main features provided by Qwen Code are:
- Terminal-first AI agent: Runs directly in the command line, enabling fast, focused development workflows without leaving the terminal.
- Multi-protocol support: Works with OpenAI, Anthropic, Gemini-compatible APIs, or custom providers via API keys.
- Agentic workflows: Includes built-in Skills and SubAgents to automate complex, multi-step tasks.
- Open-source and co-evolving: The tool and Qwen models evolve together with community contributions and frequent updates.
- IDE integration: Supports VS Code, Zed, and JetBrains IDEs for seamless AI assistance inside your editor.
- Interactive and headless modes: Use an interactive terminal UI for exploration or run in scripts/CI for automation.
Explore the official docs for more details.
Why Qwen Code Needs Web Data Retrieval and Discovery Tools
Eventually, Qwen Code encountered a universal barrier inherent to all large language models: the “knowledge cutoff.” Since an LLM is constructed from a massive but finite dataset frozen at the moment of training, the intelligence it provides is intrinsically constrained.
In fast-moving digital environments, what is considered best practice today can quickly become outdated. Relying on an agent that only has static internal knowledge introduces real risks. It may miss recent updates or suggest approaches that no longer reflect current realities.
To overcome those issues, you must evolve your CLI assistant into an entity capable of real-time web interaction. This is the exact point where Bright Data comes into play!
By leveraging the AI-optimized infrastructure provided by Bright Data, you empower Qwen Code to navigate, explore, and retrieve information from the Internet. In detail, the Bright Data integration in Qwen Code allows your agent to:
- Perform real-time searches across the web to gather up-to-date information on any topic or domain.
- Cross-check multiple online sources to ensure accuracy and consistency of retrieved information.
- Collect structured insights from different areas of knowledge to support analysis, research, or decision-making.
- Enrich documents, reports, or knowledge bases by fetching and incorporating the latest publicly available content.
The true advantage of Bright Data lies in its enterprise-grade infrastructure. This builds upon a massive pool of 400+ million residential proxies spanning 195 countries. The result is an agent that can scale its data-gathering efforts with 99.99% reliability and 99.95% success rates.
By anchoring Qwen Code in current, verifiable facts, you transform it from a static reference tool into a truly reliable AI partner!
Supercharging Qwen Code with Bright Data: 2 Approaches
Bright Data supports Qwen Code through two complementary approaches:
- Bright Data Web MCP: The official MCP server from Bright Data, exposing 70+ tools for web scraping, search, discovery, interaction, and more. It offers a free tier with useful tools, while advanced tools are available only in Pro mode.
- Bright Data skills: A collection of Agent Skills-compliant files to help your AI agent learn how to use Bright Data products more effectively.
Important: These two approaches are synergistic and work best when used together. In particular, Bright Data skills include a dedicated skill for better orchestrating and selecting the Web MCP tools.
Common Steps
Before exploring the integration of Bright Data into Qwen Access via MCP or Agent Skills, take care of some common prerequisite steps!
Prerequisites
To follow this tutorial, make sure you have a machine with:
- A Unix-based operating system (macOS, Linux, or WSL).
- Node.js 20+ installed locally.
You will also need:
- An Alibaba Cloud Coding plan or an Alibaba Cloud Model Studio Standard API key (here, we will refer to the API key configuration).
- A Bright Data account with an API key configured.
To generate a Bright Data API key, follow the official guide.
Step #1: Install Qwen Code
Run the following command to start the installation script:
curl -fsSL https://qwen-code-assets.oss-cn-hangzhou.aliyuncs.com/installation/install-qwen.sh | bashYou should see something like this:
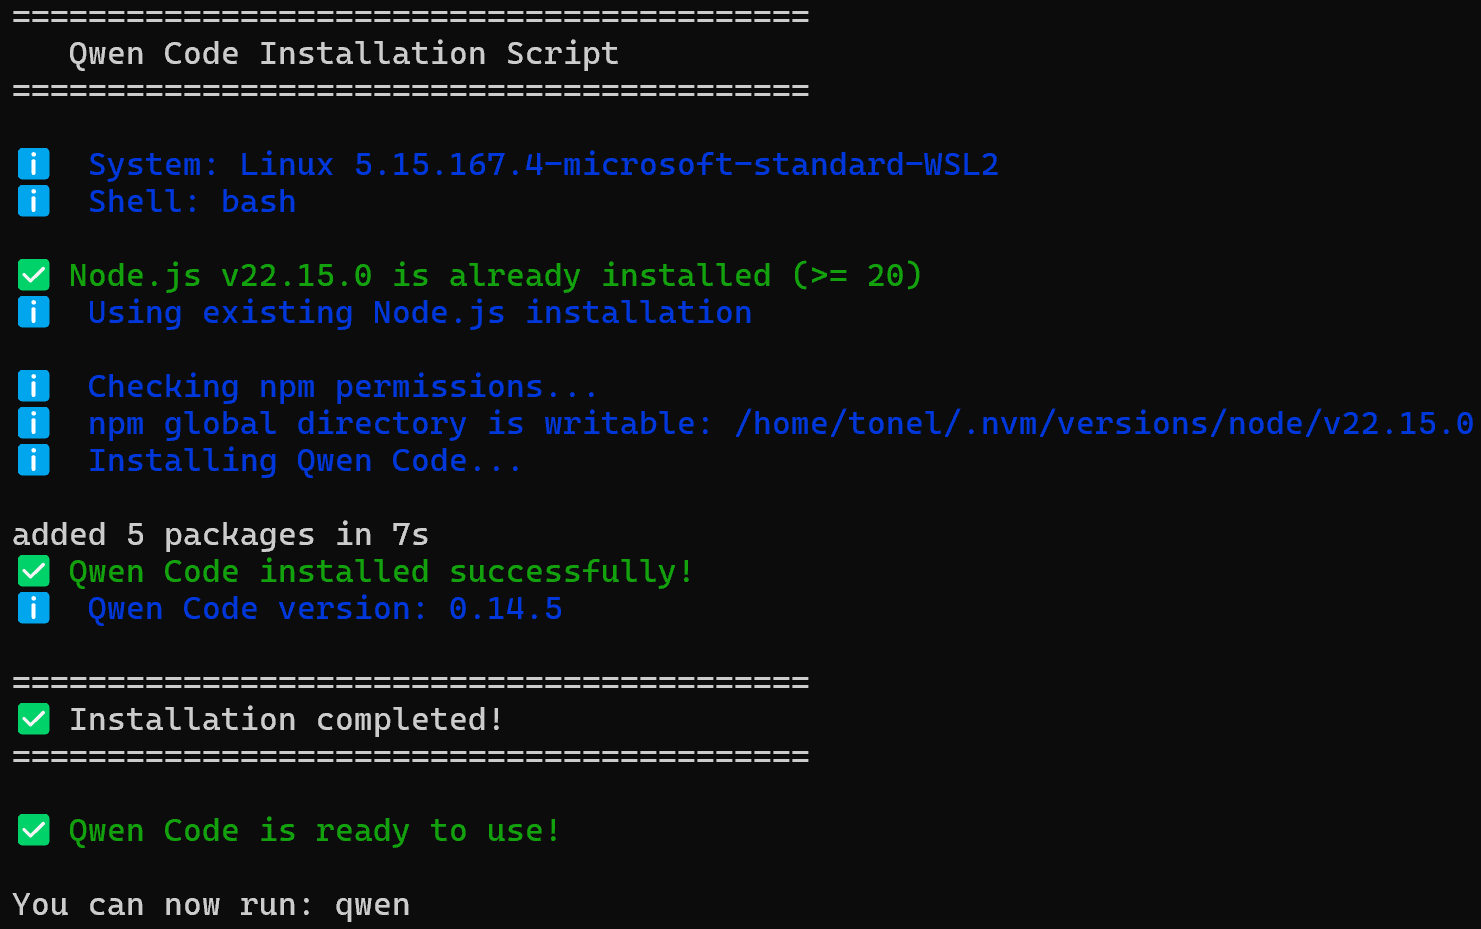
Behind the scenes, the Qwen Code installation script:
- Checks the prerequisites.
- Installs Qwen Code via the
@qwen-code/qwen-codenpm package. - Makes the CLI available through the
qwencommand.
Well done! Qwen Code is now set up locally.
Step #2: Complete the Qwen Code Setup
In this example, we will assume your project is located in a folder called bright-data-qwen-code-example/. Replace this with the actual name of your project directory.
Enter the project directory in your terminal:
cd bright-data-qwen-code-exampleThen, start Qwen Code with:
qwenComplete the setup by connecting the CLI to your Alibaba account using the following command:
/authYou will be asked to select an authentication method. In this case, proceed with the API key option:

To access the Qwen models, select the “Alibaba Cloud Model Studio Standard API Key” option:
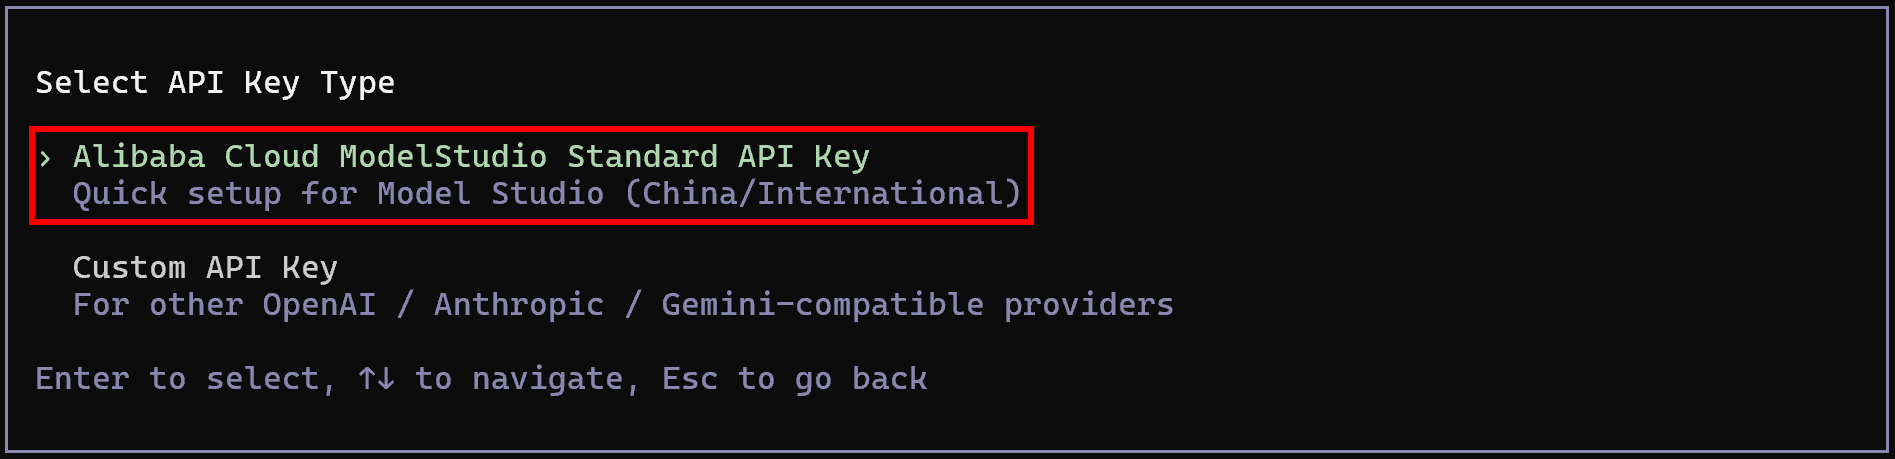
Paste your Alibaba Cloud Model Studio Standard API key. Then, configure the available models using a comma-separated list of model IDs, for example:
qwen3.6-flash,qwen3.5-plus,glm-5,kimi-k2.5
These will be the models available in your Qwen Code setup. Amazing! The CLI is now connected to your account and powered by Qwen LLMs.
Step #3: Configure Qwen Code
Change the default model utilized by Qwen Code with this command:
/modelFor example, select qwen3.6-flash:
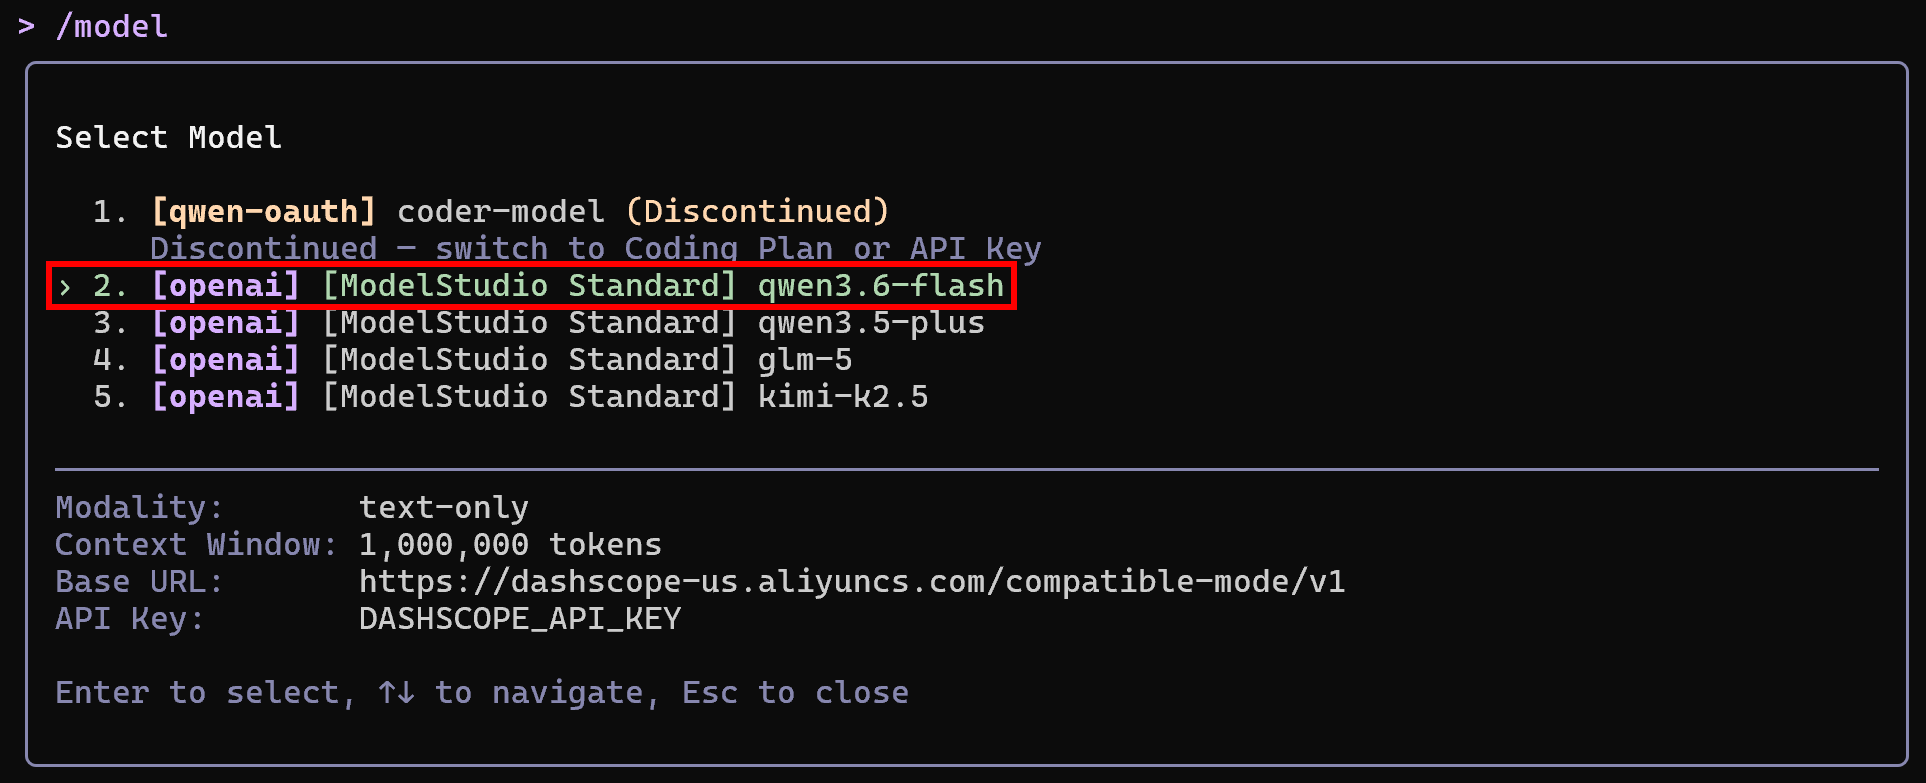
Note that the available models are those configured in the previous steps. Excellent! Qwen Code is now installed, authenticated, and configured for local use.
How to Connect Qwen Code to Bright Data’s Web MCP
This section will show you how to set up a local instance of the Bright Data Web MCP in Qwen Code.
Note: If you are looking at how to integrate Qwen-Agent with Web MCP instead, read our dedicated guide.
Prerequisites
To follow this section, you should have:
- Some understanding of how MCP works.
- Basic familiarity with the tools exposed by the Bright Data Web MCP.
Also, note that the prerequisites described in the “Common Steps” section still apply.
Step #1: Launch Bright Data’s Web MCP
First, check that the Bright Data MCP server can run correctly on your machine.
Begin by logging into your Bright Data account. For a quick setup, you can follow the wizard in the “MCP” section of the control panel:
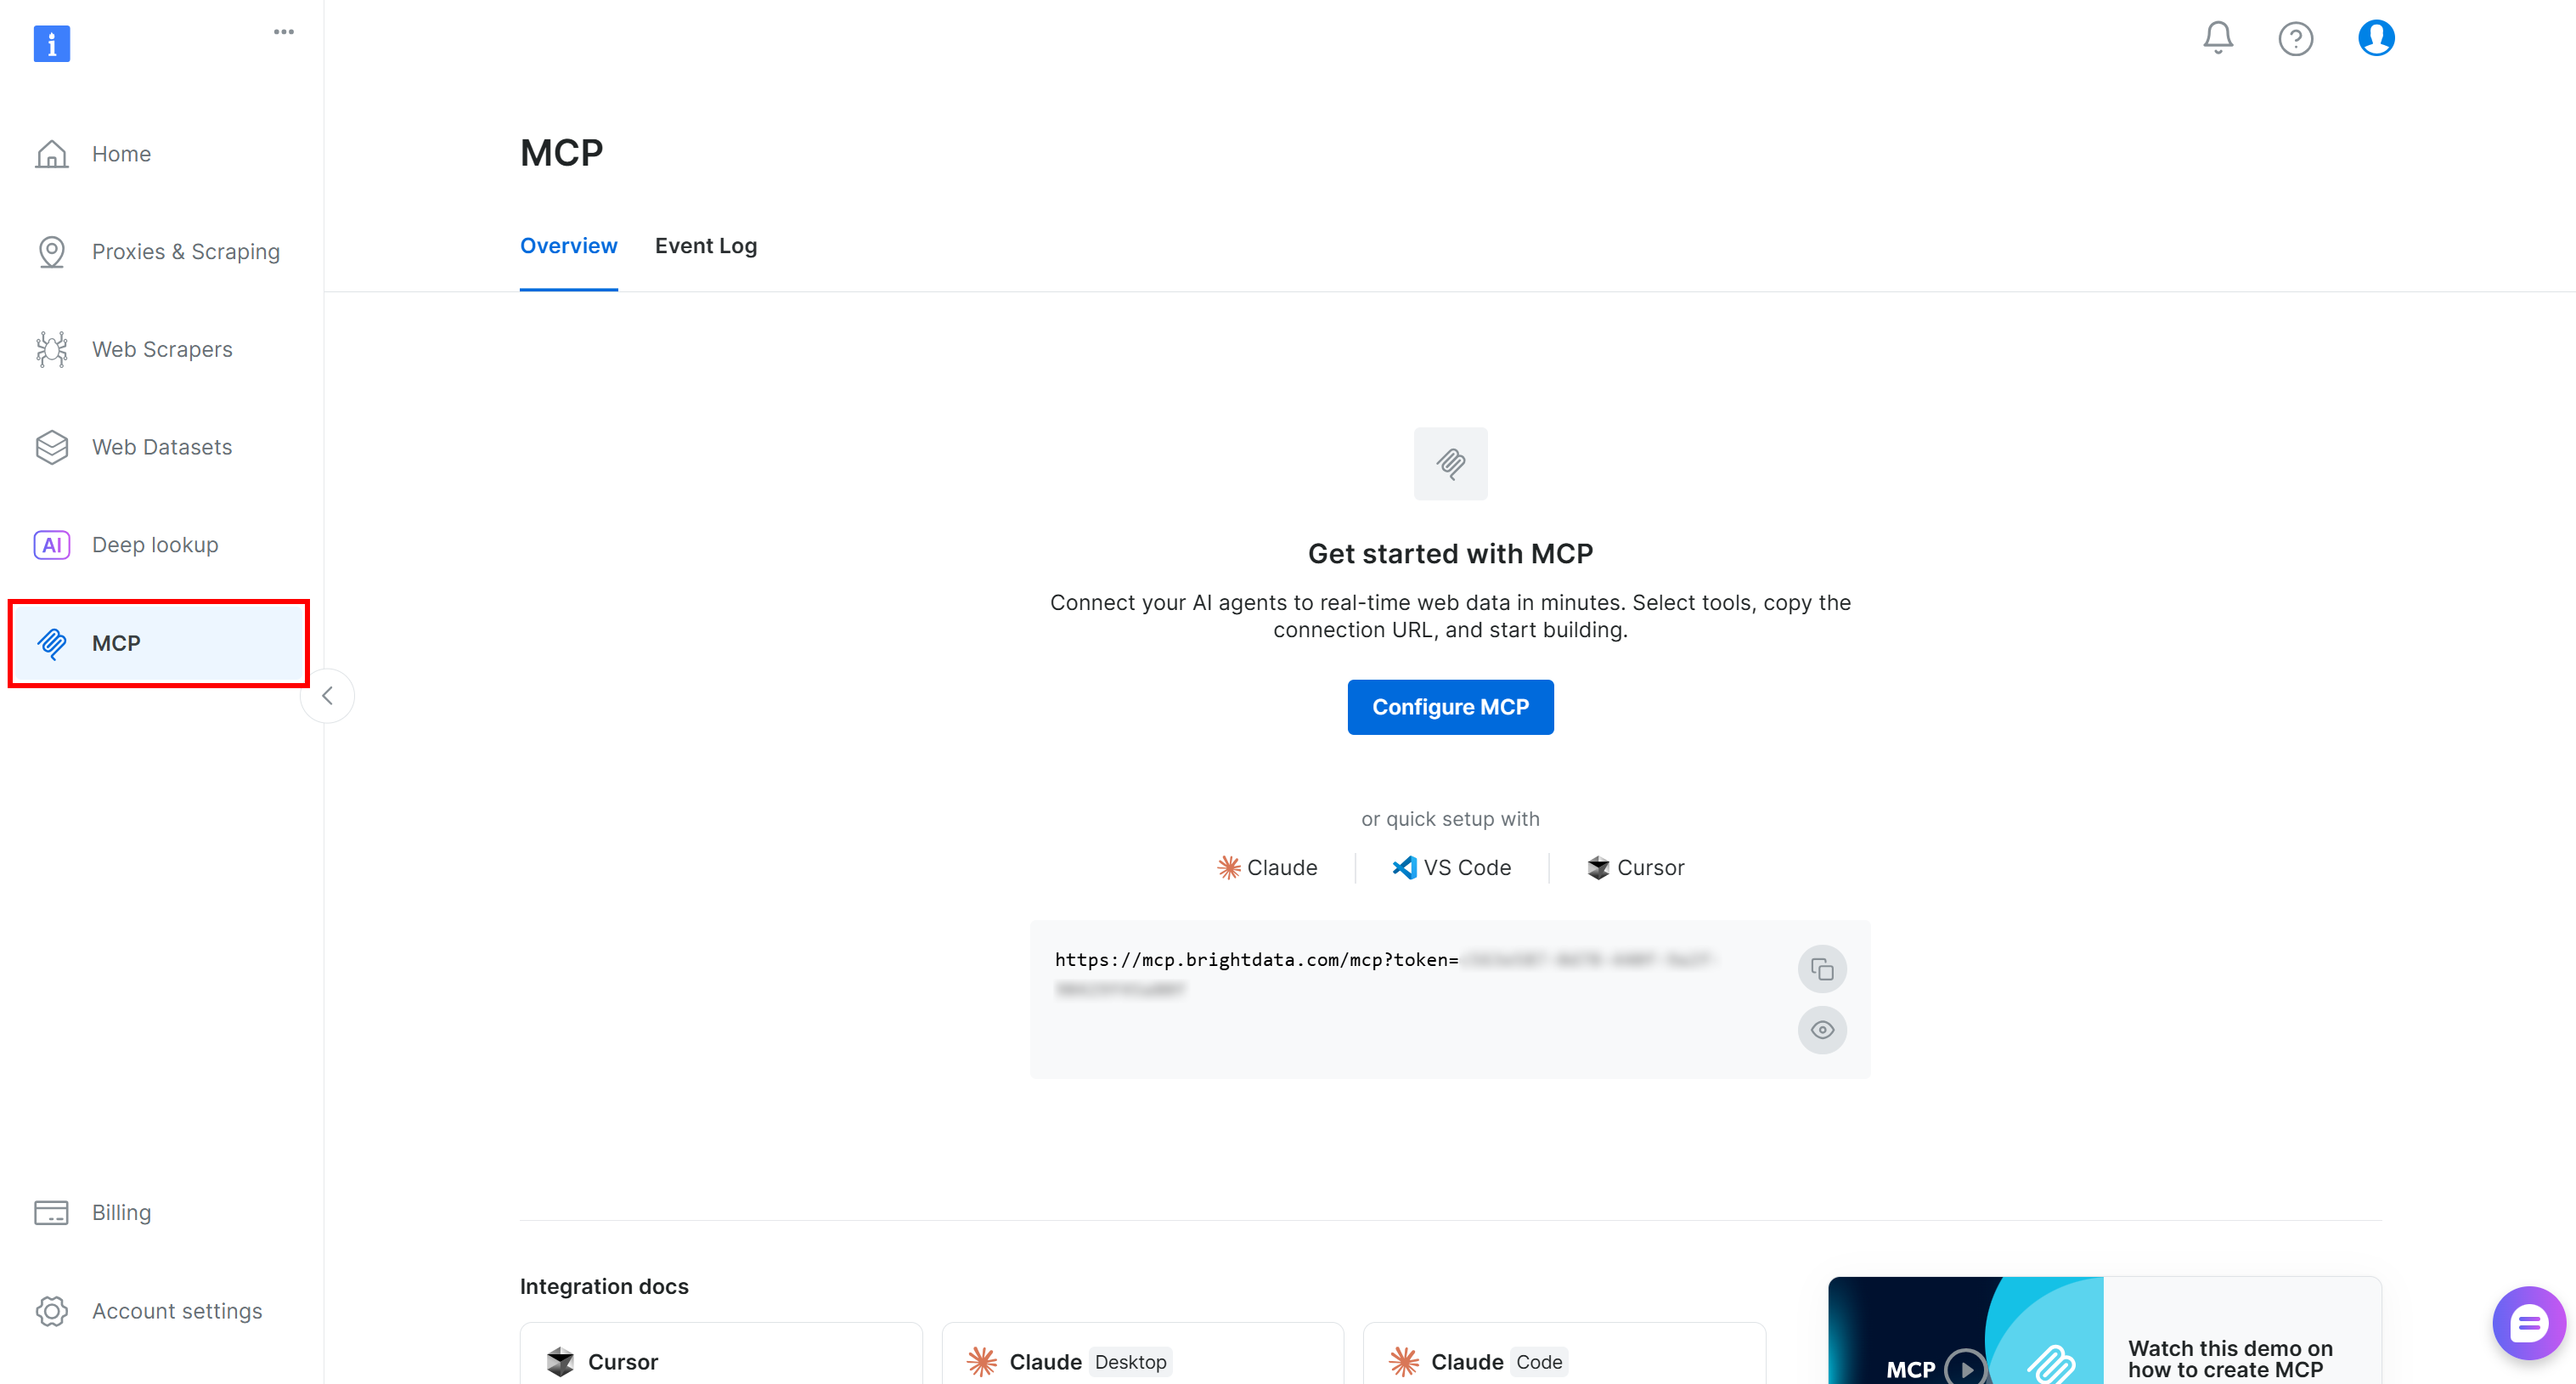
Alternatively, follow the step-by-step instructions below for a more guided setup.
Next, install the Web MCP globally using the @brightdata/mcp package:
npm install -g @brightdata/mcpTo verify that the MCP server starts locally, run:
API_TOKEN="<YOUR_BRIGHT_DATA_API>" npx -y @brightdata/mcpReplace <YOUR_BRIGHT_DATA_API> with your actual Bright Data API key. The above command sets the required API_TOKEN environment variable and launches a local instance of the Web MCP server.
If everything is working correctly, you should see output similar to this:

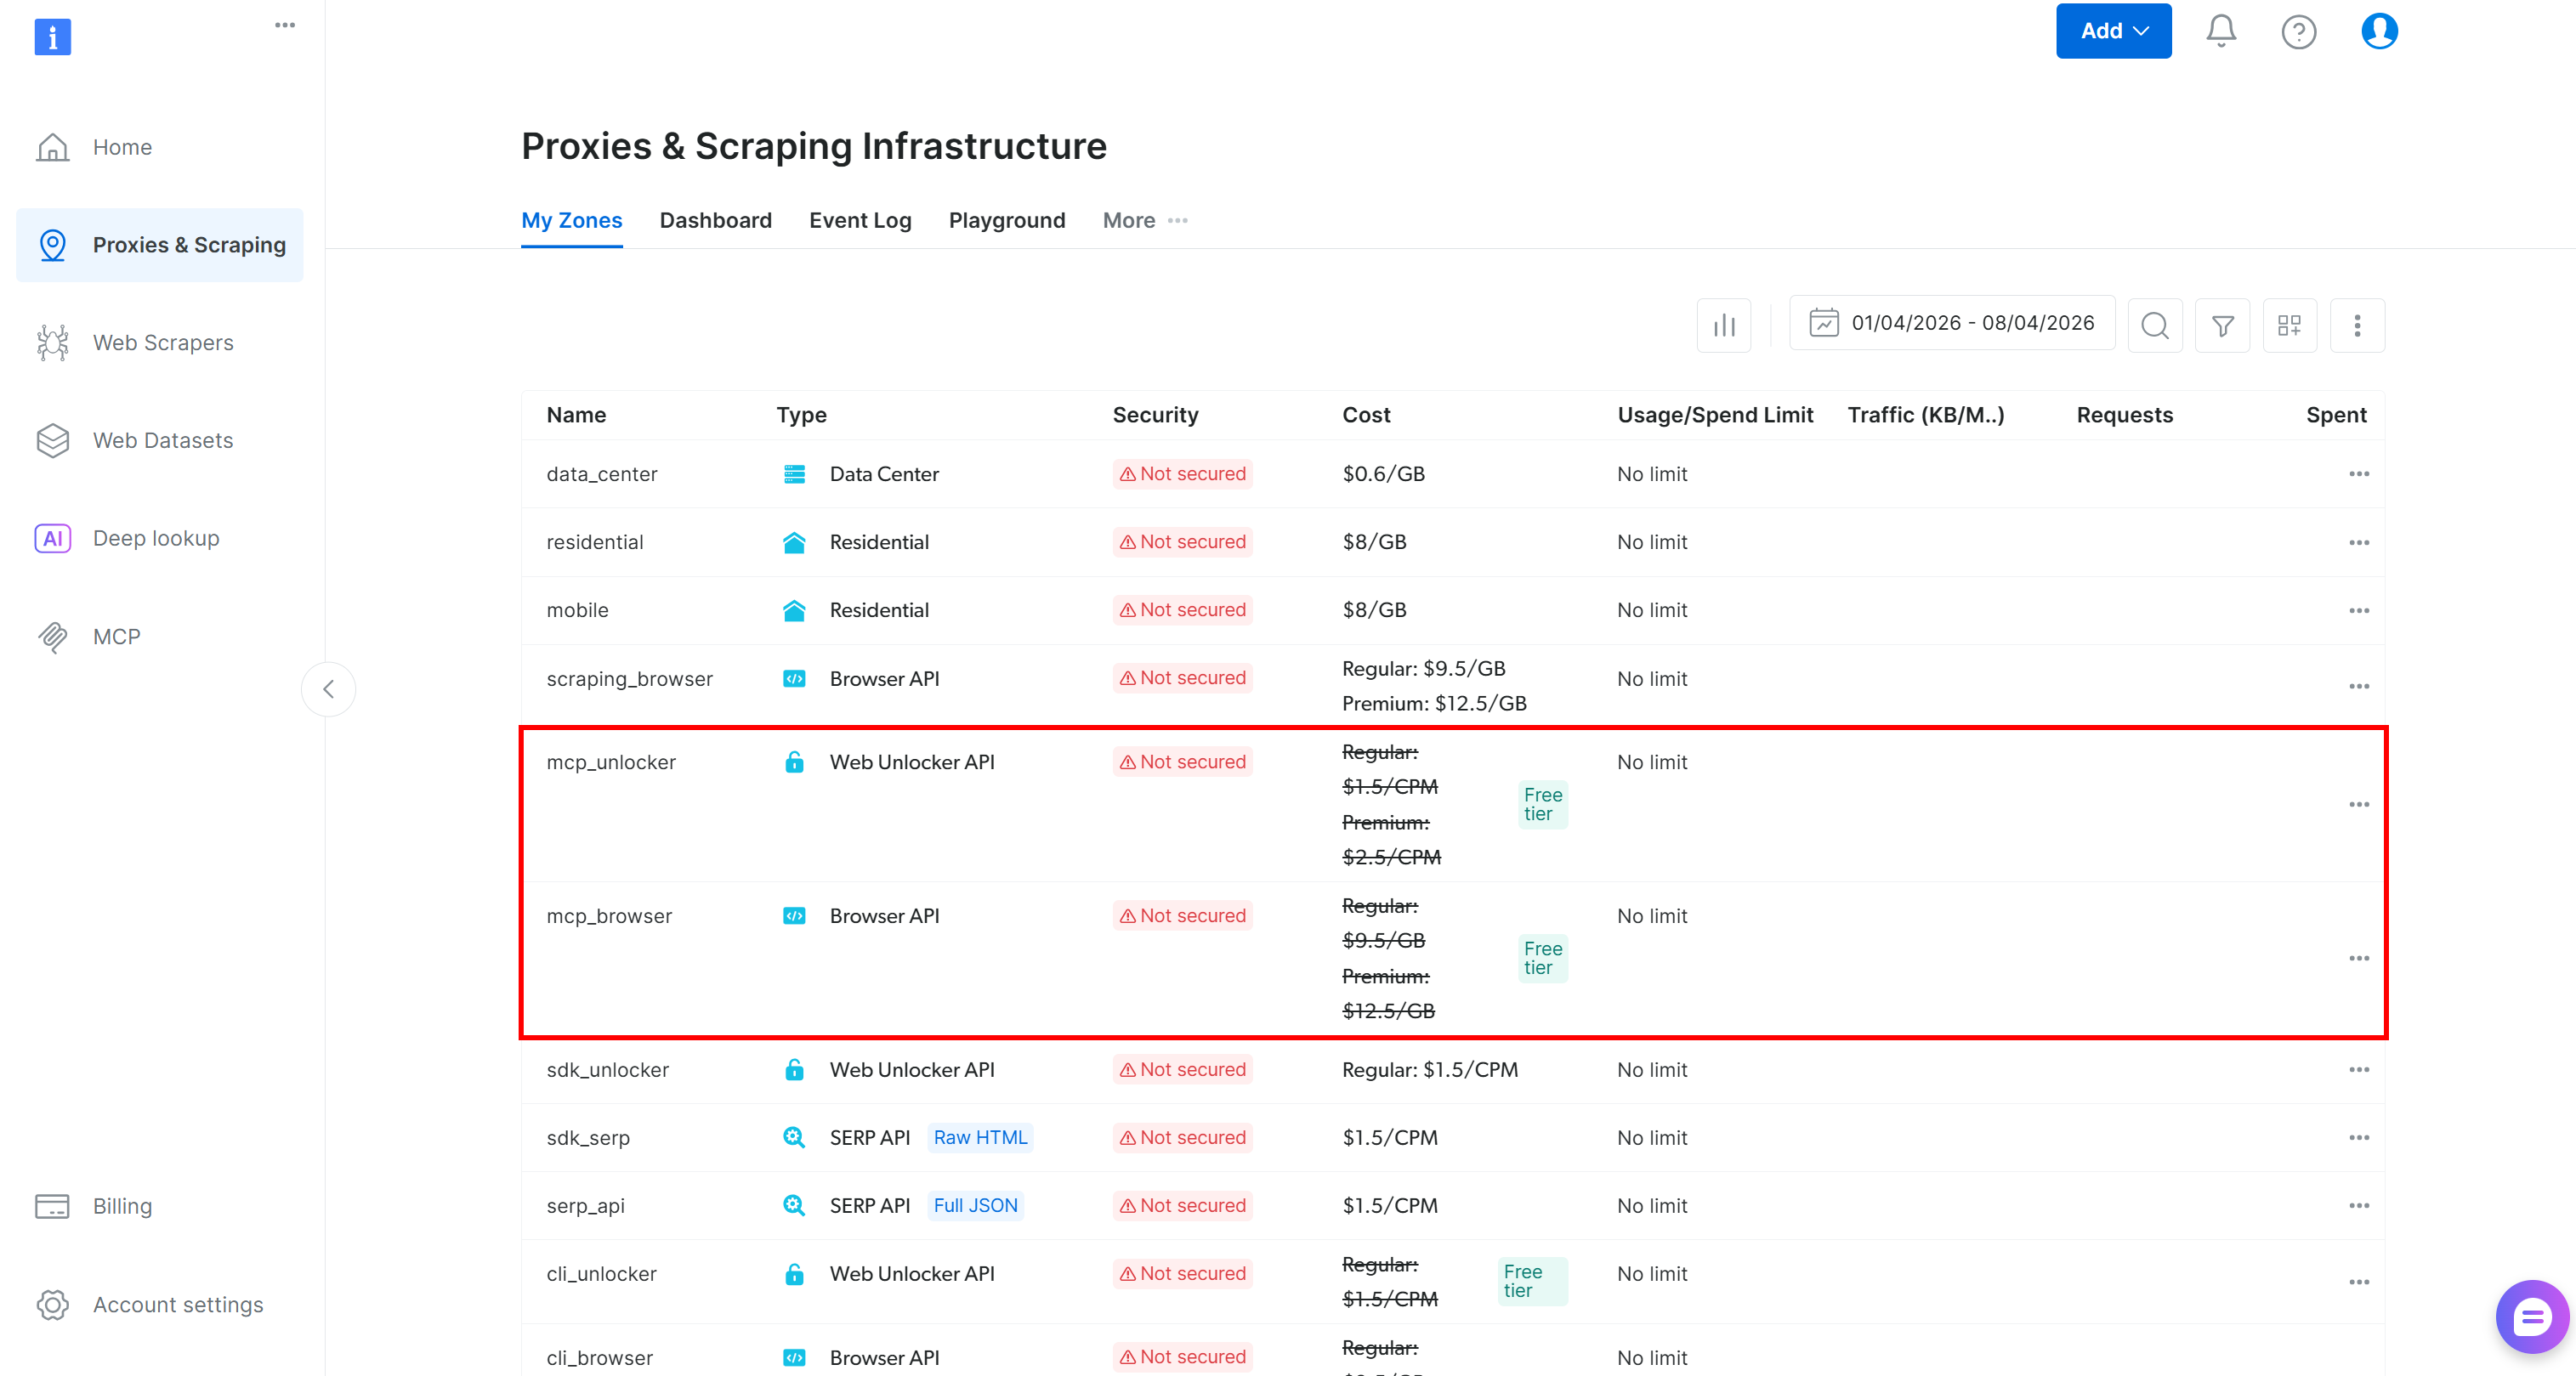
On first launch, the @brightdata/mcp package automatically creates the following zones in your Bright Data account:
mcp_unlocker: A zone for Web Unlocker.mcp_browser: A zone for Browser API.
These two zones power all the tools exposed by the Web MCP server. You can also configure custom zones if needed, as described in the repository.
To confirm that the standard zones have been created, reach the “Proxies & Scraping Infrastructure” page in the Bright Data control panel. You should see both zones listed in the table:
Now, on the Web MCP free tier, you gain access only to these tools:
search_engine(+ its batch version)scrape_as_markdown(+ its batch version)discover
To unlock all 70+ tools, you must enable Pro mode. Achieve that by setting the PRO_MODE="true" environment variable:
API_TOKEN="<YOUR_BRIGHT_DATA_API>" PRO_MODE="true" npx -y @brightdata/mcpRemember that Pro mode is not included in the free tier and [incurs additional charges](https://github.com/brightdata/brightdata-mcp?tab=readme-ov-file#-pricing, modes).
Perfect! You just verified that the Web MCP server runs on your machine. Next, you will configure Qwen Code to connect to it.
Step #2: Configure the Web MCP in Qwen Code
To configure MCP servers in Qwen Code, start by creating a .qwen folder in the root directory of your project. Inside it, add a settings.json file, which defines the project-level configuration for Qwen Code:
bright-data-qwen-code-example/
├── .qwen/
│    └── settings.json
└── ...
Make sure the .qwen/settings.json file contains the following:
{
  "mcpServers": {
    "bright-data-web-mcp": {
      "command": "npx",
      "args": [
        "@brightdata/mcp"
      ],
      "env": {
        "API_TOKEN": "<YOUR_BRIGHT_DATA_API_KEY>",
        "PRO_MODE": "true"
      }
    }
  }
}
The above config mirrors the npx command you tested earlier, using environment variables for authentication and setup:
API_TOKEN: Required. Set this to your Bright Data API key.PRO_MODE: Optional. Set it to"false"or remove it if you do not want to enable Pro mode.
Now, at startup, Qwen Code will use this configuration to launch a local instance of the Web MCP server and connect to it. To make the setup global, add the same configuration to the ~/.qwen/settings.json file.
Note: You can also connect to the remote Bright Data Web MCP via Streamable HTTP using a different configuration, as described in the official documentation. This approach is better suited for enterprise-grade setups or if you do not want a local server running on your machine.
Great! The Web MCP should now be available in Qwen Code.
Step #3: Check the Connection
Open Qwen Code again:
qwenThis time, you should see a “Connecting to MCP servers…” message at startup. Once the process is complete, launch:
/mcpIn the list of available MCP servers, you should see the bright-data-web-mcp entry:

Press Enter to explore it, then select the “View tools” option:
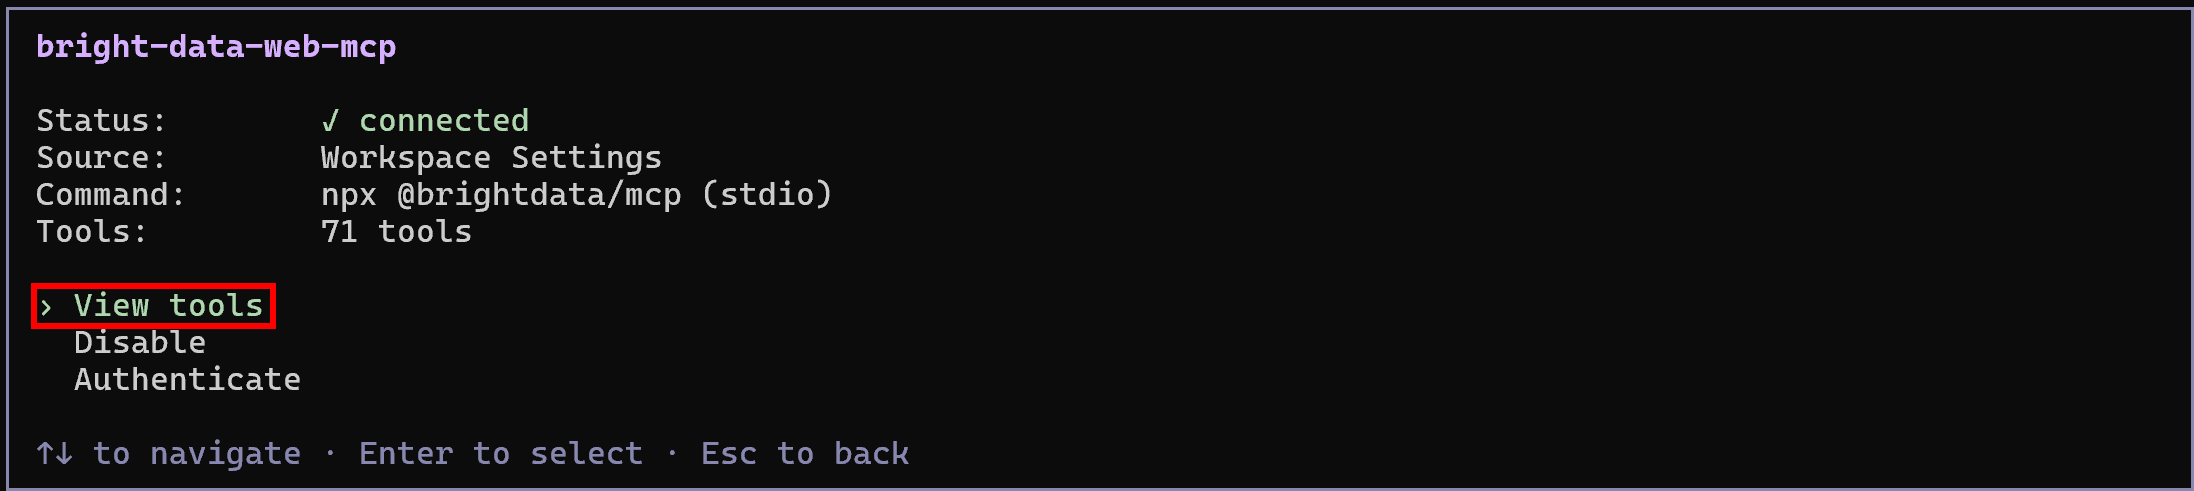
In Rapid mode (free tier, when PRO_MODE is omitted or set to "false"), you will see a limited set of tools. In Pro mode (as configured above), you will have access to the full set of 70+ tools.
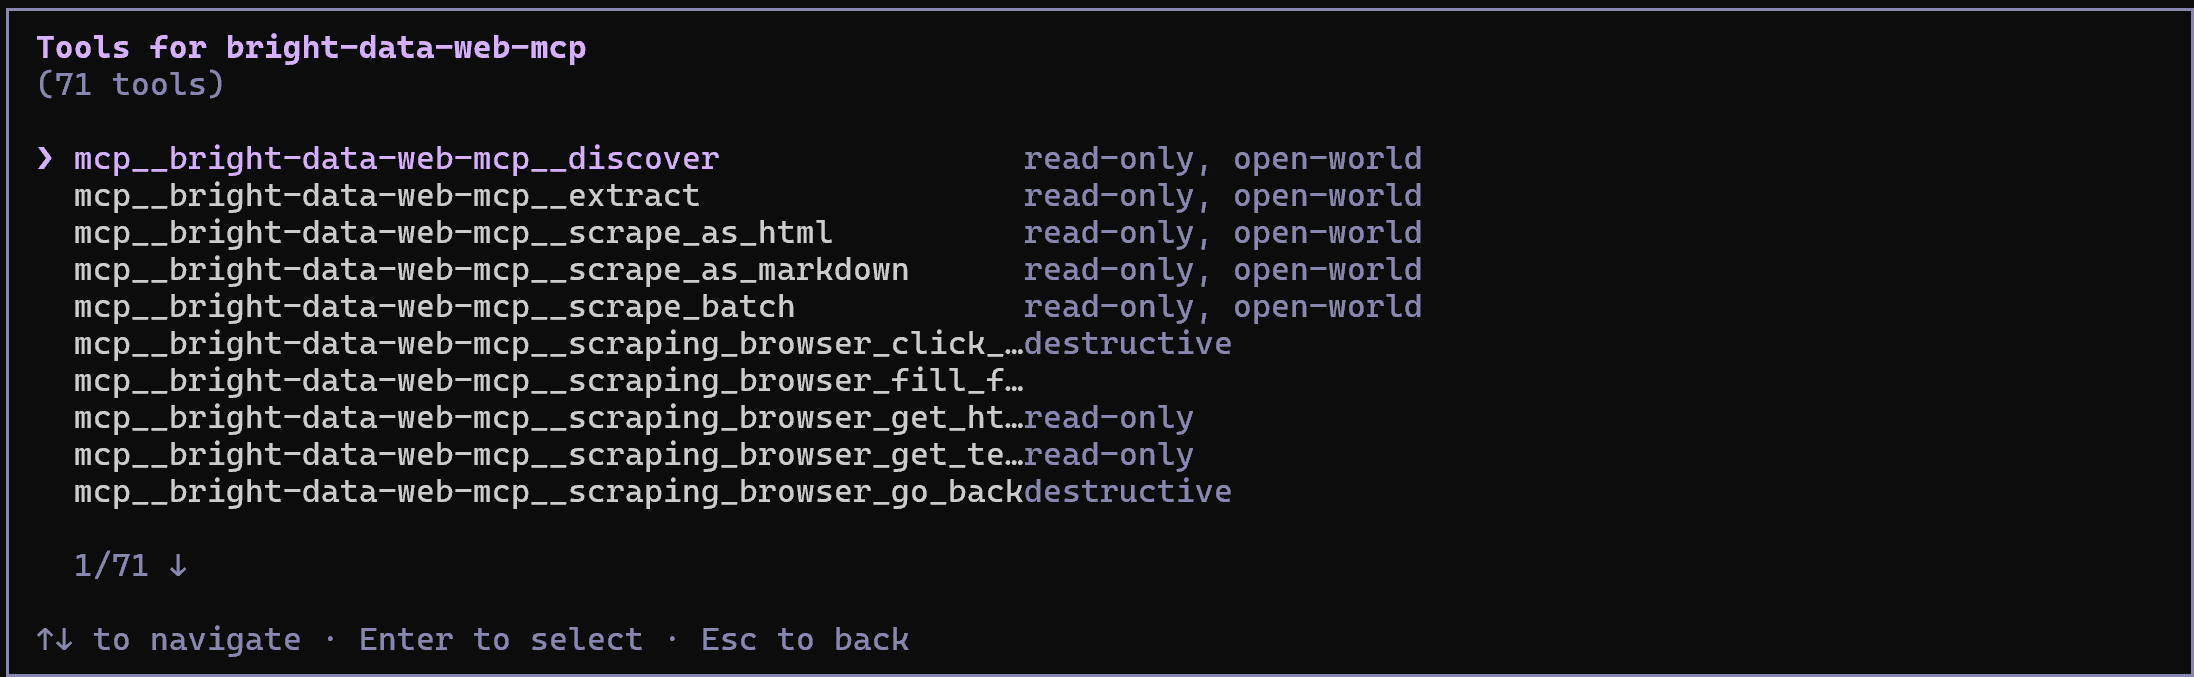
Congrats! This confirms that the Bright Data Web MCP is correctly exposing tools to Qwen Code. (Later, we will demonstrate the Web MCP in action together with the Bright Data skills.)
How to Add Bright Data’s Skills to Qwen Code
In this chapter, you will be guided through the process of installing Bright Data skills in your local Qwen Code setup. The procedure will be handled automatically via Vercel’s skills CLI.
Note: If you prefer a manual setup, start by cloning the Bright Data Skills repository. Then, just copy the required files into the .qwen/skills/ folder of your project:
git clone https://github.com/brightdata/skills
cp -r skills/skills/* <PATH_TO_YOUR_PROJECT>/.qwen/skills/
For a more guided, reliable approach, follow the instructions below!
Prerequisites
Before getting started, it is recommended to have:
- A basic understanding of how the Agent Skills standard works.
- Familiarity with how Agent Skills standards work.
- Some knowledge of the Bright Data skills.
Alongside the prerequisites listed in the “Common Steps” section, you will also need:
- A Web Unlocker API zone set up in your Bright Data account.
- The
jqlibrary installed locally.
To install jq (a command-line tool for processing JSON) on Debian-based systems, run:
sudo apt-get install curl jqAlternatively, on macOS, fire:
brew install curl jqFor a quick setup of the Web Unlocker API zone, refer to the “Create Your First Unlocker API” guide, or proceed with the next step.
Step #1: Add a Web Unlocker API Zone
Start by logging in to your Bright Data account. In the control panel, reach the “Proxies & Scraping” page and inspect the “My Zones” table:
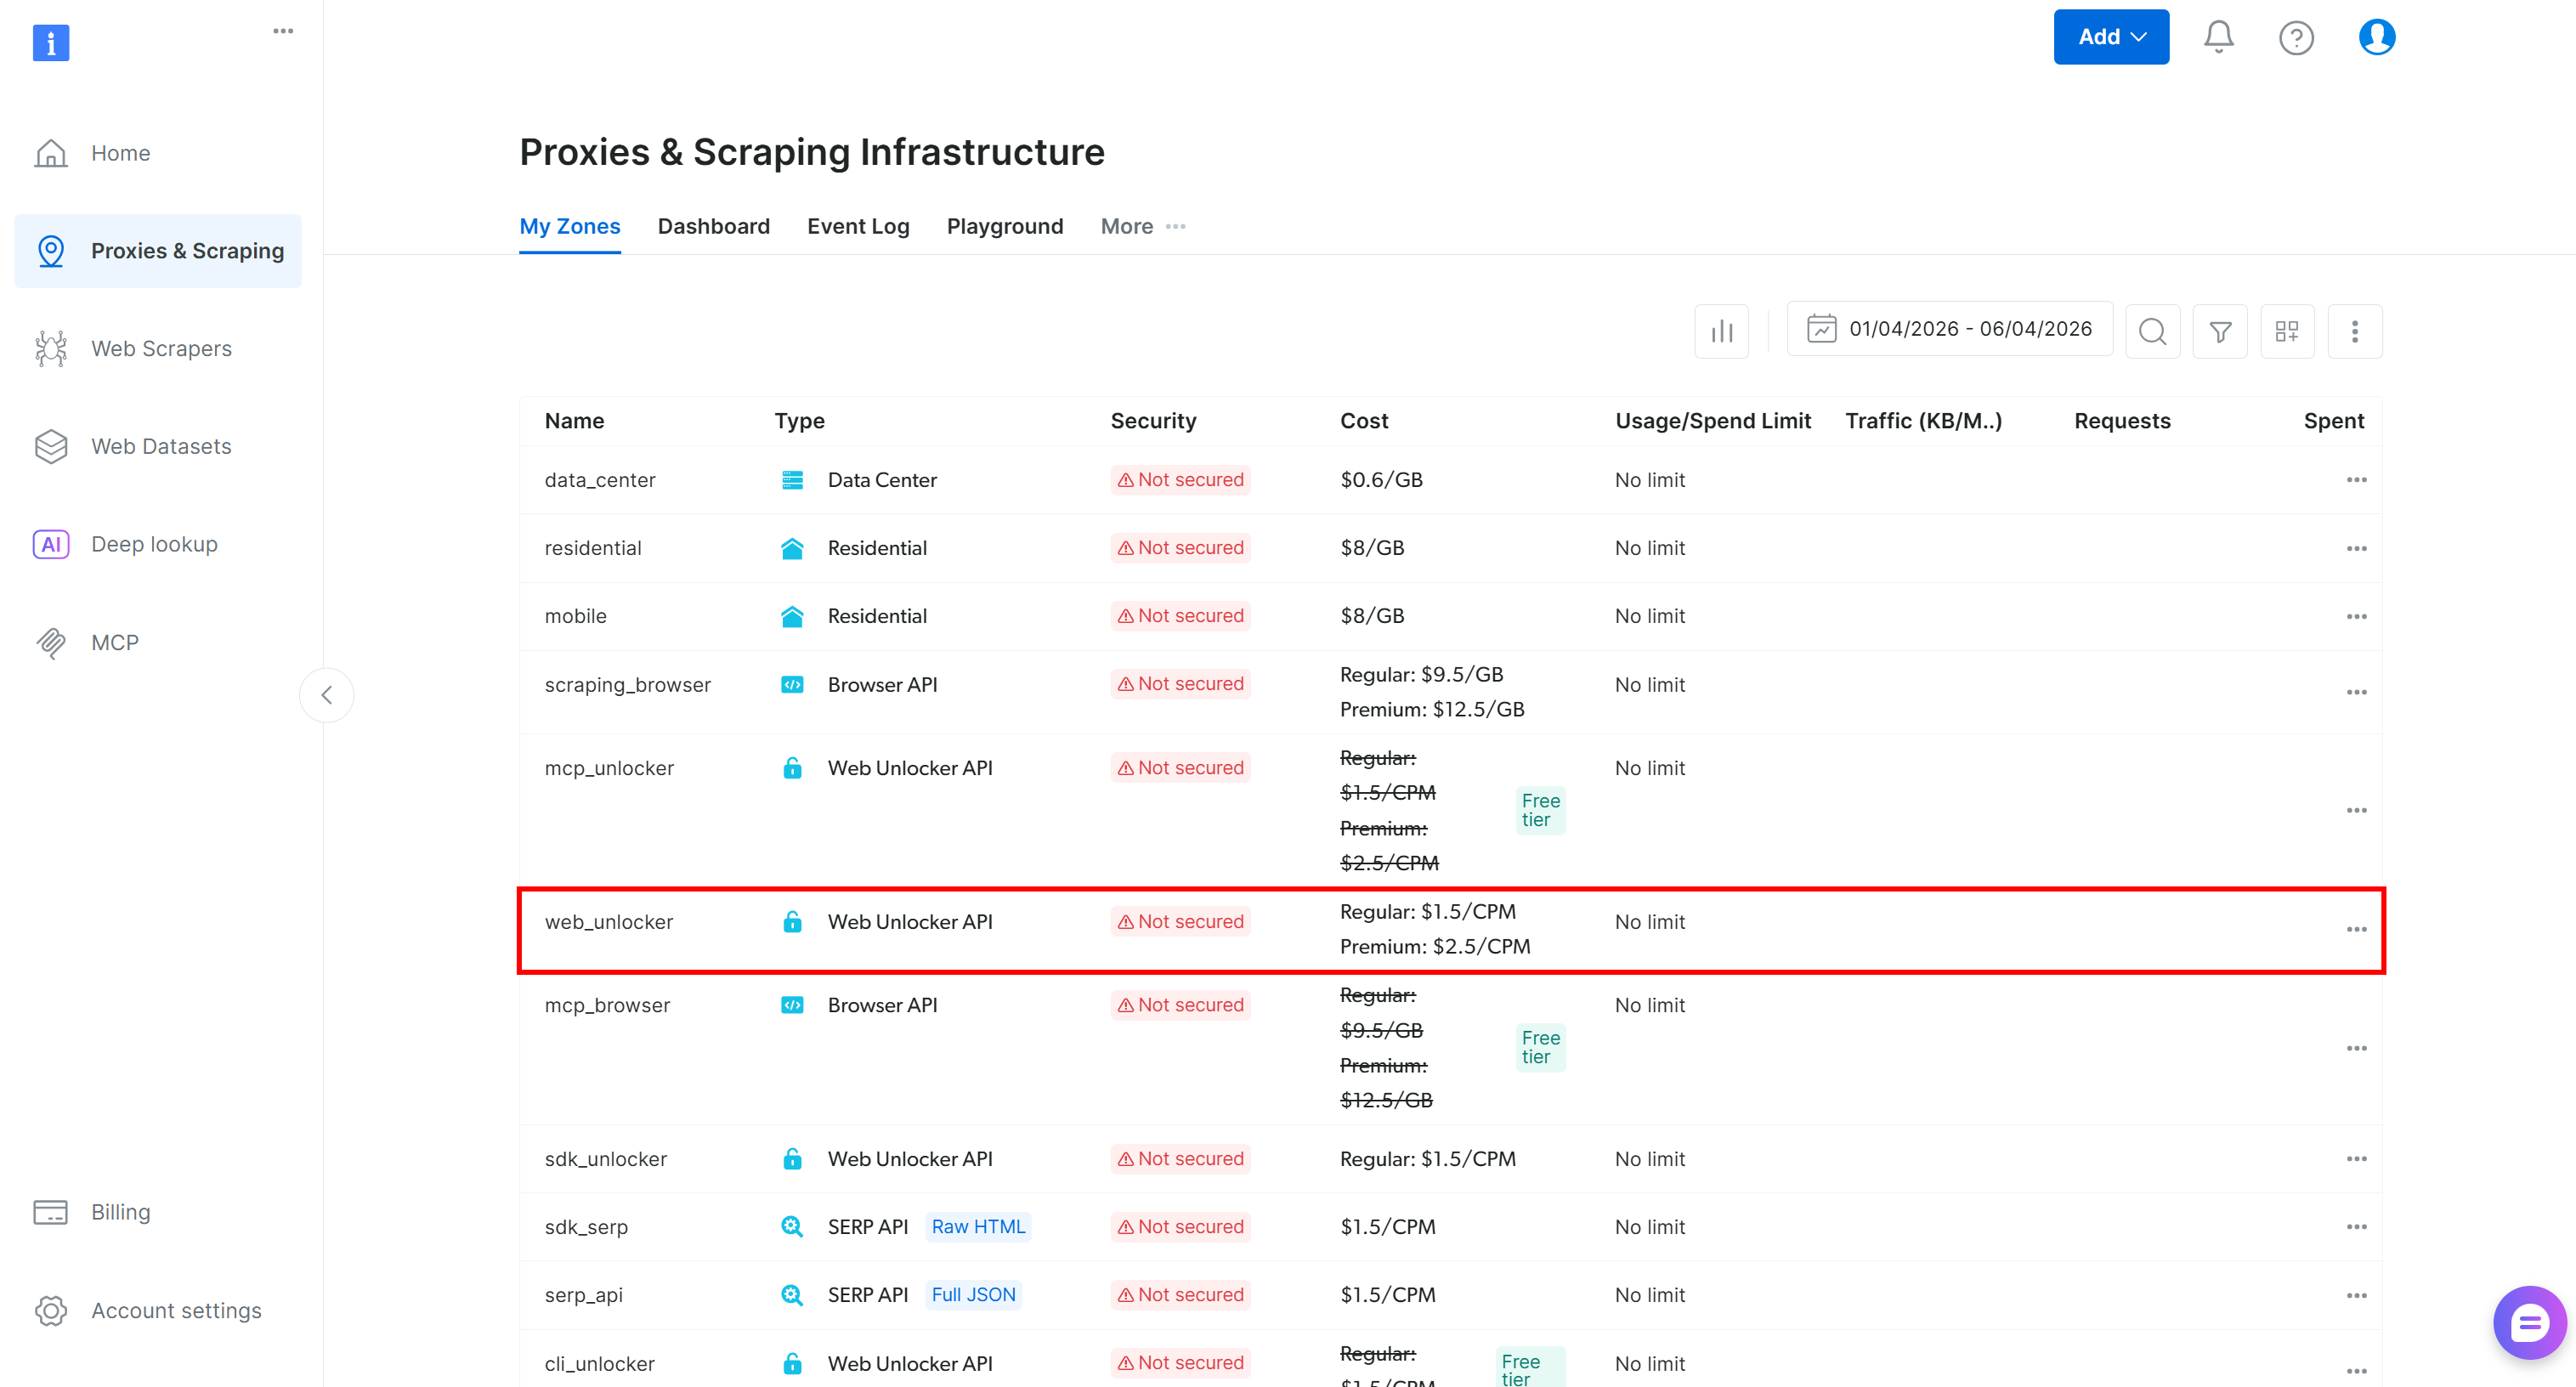
If a Web Unlocker API zone already exists, such as web_unlocker, cool!
If not, scroll to the “Unblocker API” section and press “Create zone”:

Choose a clear name for your zone and follow the setup wizard until it is fully activated. Done!
Step #2: Configure the Bright Data Skills
The Bright Data skills require two environment variables:
BRIGHTDATA_API_KEY: Utilized to authenticate the underlying HTTP requests to the Bright Data APIs.BRIGHTDATA_UNLOCKER_ZONE: Used to connect to your Web Unlocker API zone (used for both scraping and search tasks, as it can also function as a SERP API zone).
Set them in your environment:
export BRIGHTDATA_API_KEY="<YOUR_BRIGHT_DATA_API_KEY>"
export BRIGHTDATA_UNLOCKER_ZONE="<YOUR_BRIGHT_DATA_WEB_UNLOCKER_API_ZONE_NAME>"
Replace the placeholder values, and you are ready to add the Bright Data skills!
Step #3: Install the Bright Data Skills
From your project directory, to install the Bright Data skills, run:
npx skills add brightdata/skills -a qwen-codeThis command installs Vercel’s skills CLI (if it is not already installed) and launches an interactive setup that will:
- Fetch the Bright Data skills from the official Agent Skills Directory.
- Set them up in your IBM Bob project.
You will first see a screen to select which skills to install:
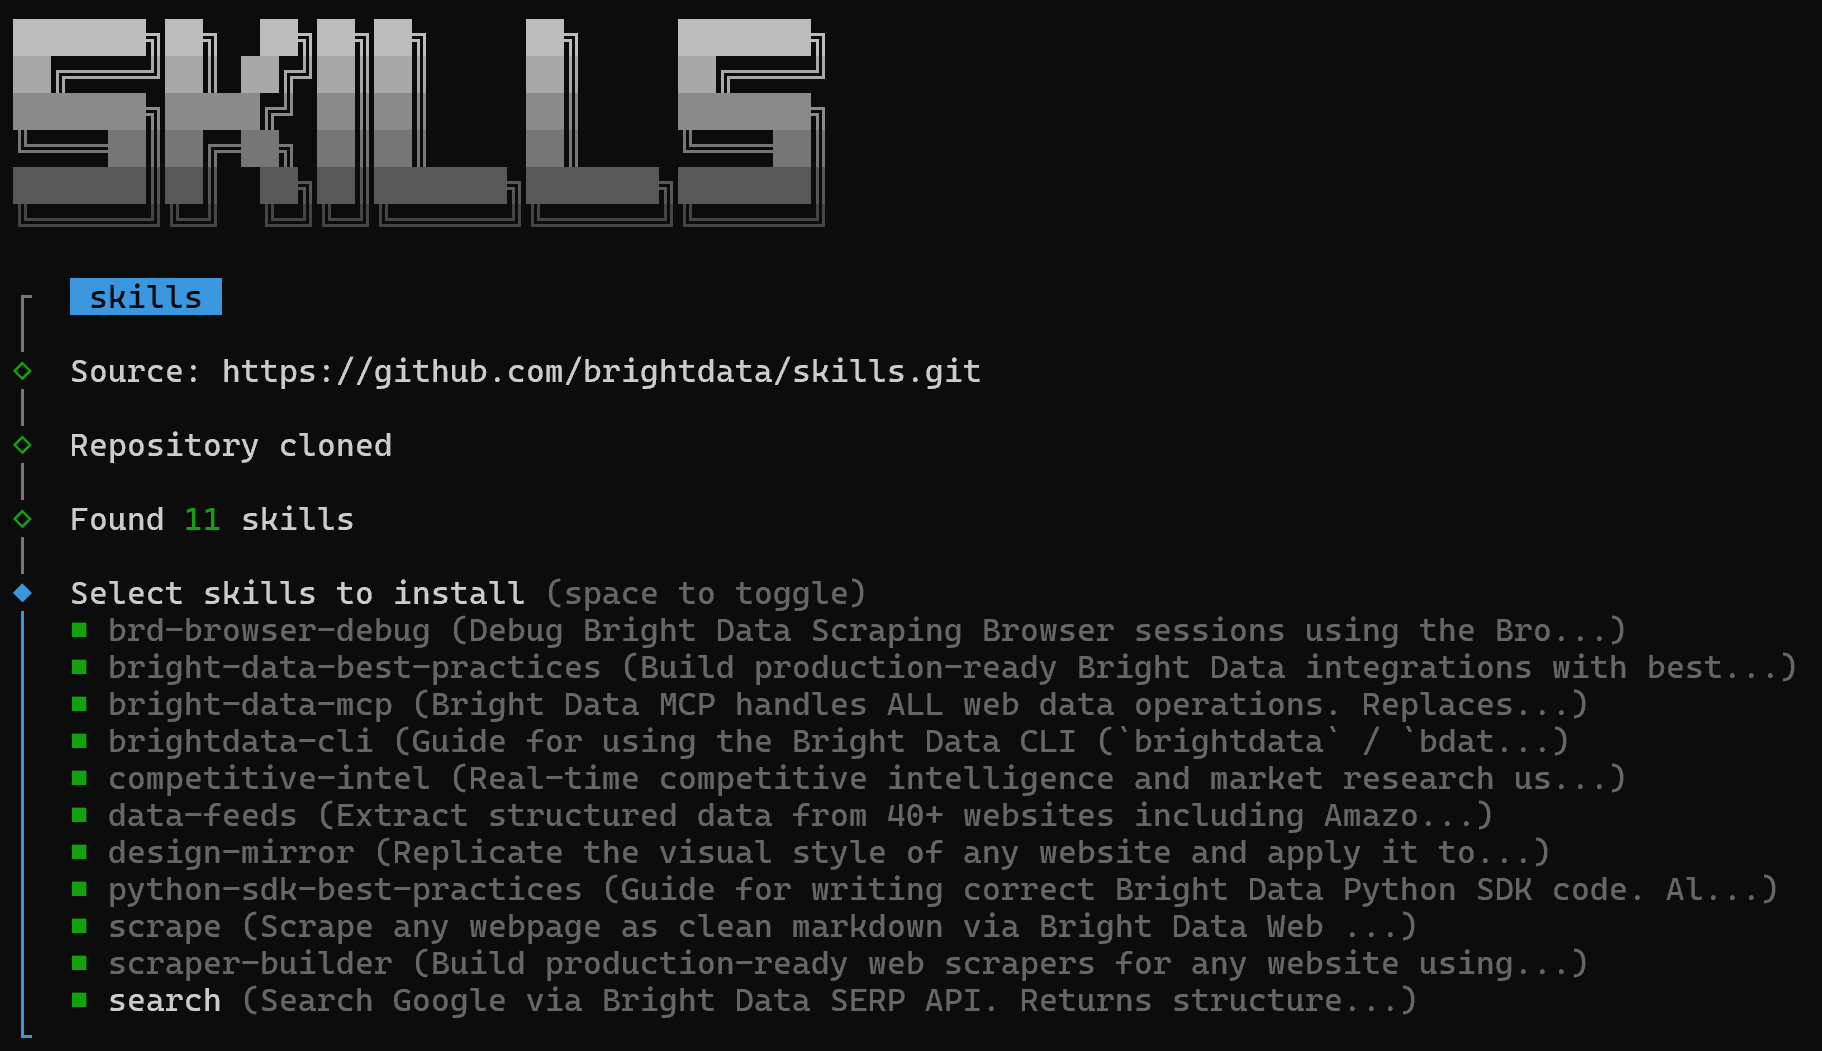
To install all of them, toggle each option using the spacebar, then press Enter.
Choose the installation scope (project-level is recommended) and proceed:

You will be shown the “Installation Summary” and “Security Risk Assessment” sections. Review them and press Enter to confirm.
Once the process completes, you will receive a final confirmation message like this:
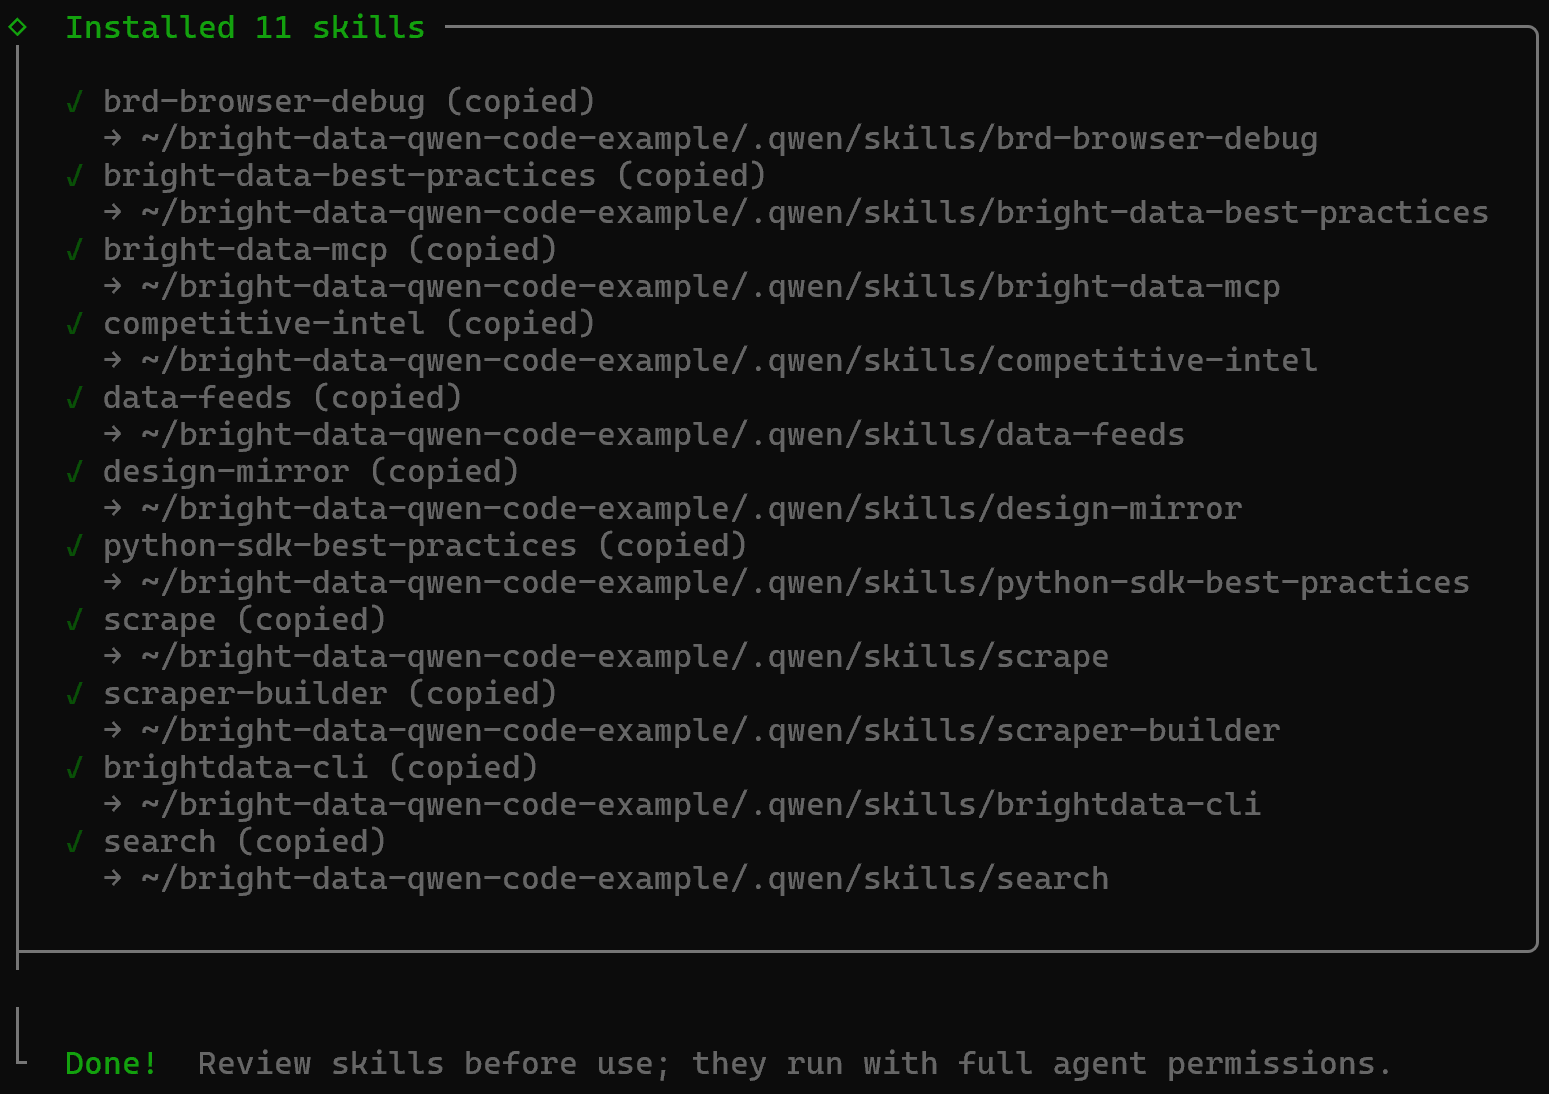
The Bright Data skills will be added to your project under the .qwen/skills directory:
bright-data-qwen-code-example/
├── .qwen/
│    ├── skills/
│    │   ├── brd-browser-debug/
│    │   ├── bright-data-best-practices/
│    │   ├── bright-data-mcp/
│    │   ├── brightdata-cli/
│    │   ├── competitive-intel/
│    │   ├── data-feeds/
│    │   ├── design-mirror/
│    │   ├── python-sdk-best-practices/
│    │   ├── scrape/
│    │   ├── scraper-builder/
│    │   └── search/
│    └── settings.json
└── ...
Terrific! The Bright Data skills are now installed in your Qwen Code local setup.
Step #4: Verify the Skills Availability
Restart Qwen Code to ensure the changes take effect. Then, check that the Bright Data skills are available in your Qwen Code setup with:
/skillsYou should see something like this:
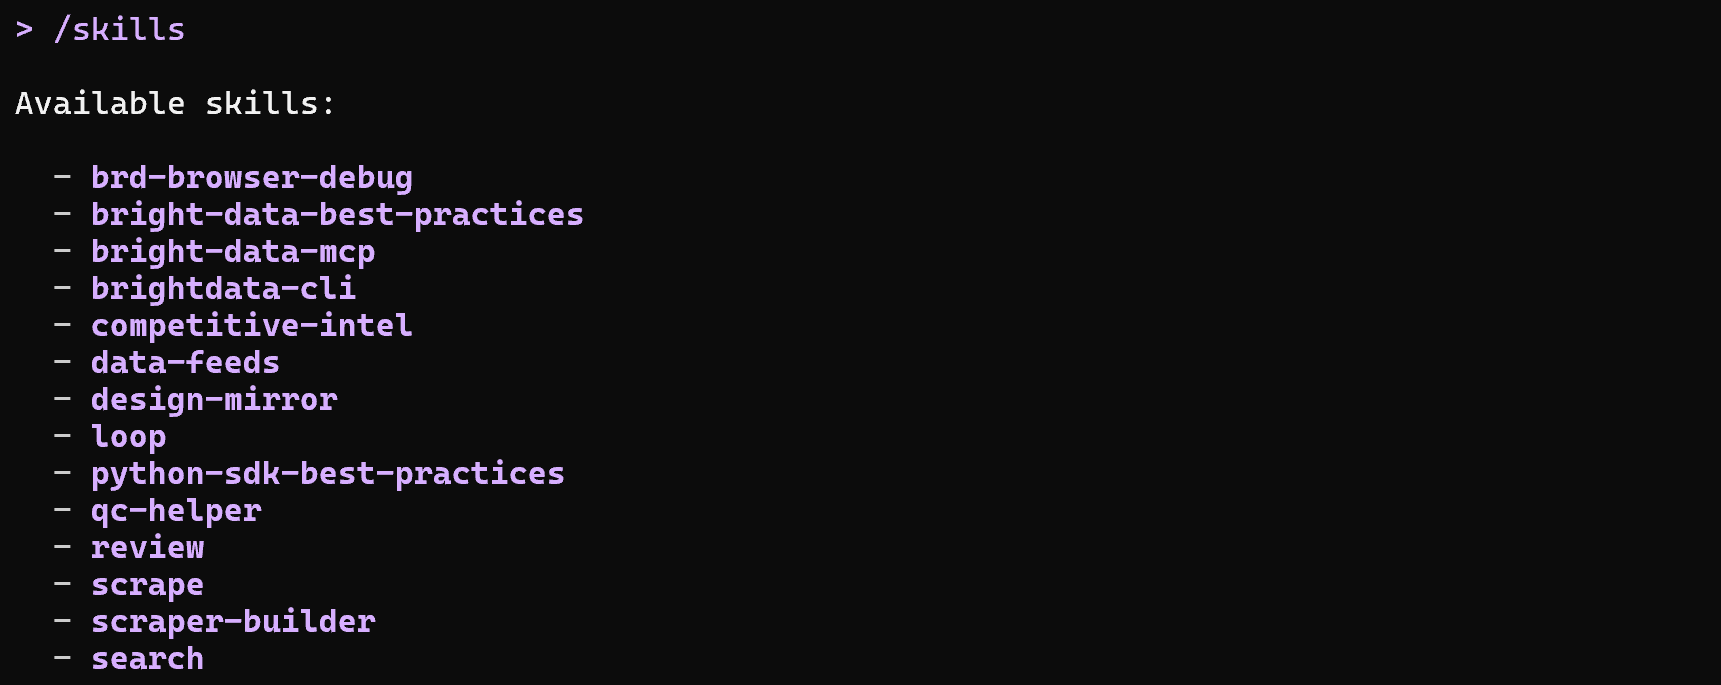
Note that the list includes both the Bright Data skills and some built-in Qwen Code skills.
Mission complete! The only thing left is to test the Qwen Code + Bright Data integration.
Qwen Code + Bright Data: Integration in Action
Now you have Bright Data integrated into Qwen Code via both MCP and skills. Time to see what this setup enables in practice. We will walk through a concrete real-world example,although many other use cases are possible.
Imagine you want to update the data in a products table with real-world product information. The goal is to discover the latest arrivals on Zara for both men and women, scrape their data, and add it to your database.
Instead of manually searching for products and collecting the data yourself, you can delegate the entire task to your CLI assistant. Do that with a prompt like this:
Search online for the Zara US New Arrivals page for men and select only the most relevant source. Then repeat the process for the Zara US New Arrivals page for women, again selecting only the most relevant source.

Using these two New Arrivals pages (men and women), scrape their content in Markdown format. From the scraped data, extract high-level product information and generate a SQL script to update an existing `products` table with the following columns: `product_url`, `type` ("male" | "female"), `image_url`, `name`, `price`.

Finally, save the SQL script to disk.Note: Any Qwen model (or any other LLM) would not be able to complete this task. That is because it requires web discovery, navigation, and scraping. Those are capabilities that AI models do not have by default. You gain them by connecting your Qwen model to Bright Data’s infrastructure.
Run the prompt, and this is what you should see:
Below is how the Qwen Code agent handled the task:
- Used the
search_enginetool twice to query “Zara US New Arrivals men 2026” and “Zara US New Arrivals women 2026” on Google, respectively. - Retrieved structured Google SERP results (thanks to Bright Data’s Web SERP API) and selected the correct Zara Men’s New Arrivals (
https://www.zara.com/us/en/man-new-in-l711.html) and Women’s New Arrivals (https://www.zara.com/us/en/woman-new-in-l1180.html) pages. - Passed the two product URLs to the
scrape_as_markdowntool (powered by Bright Data’s Web Unlocker API). - Converted the scraped Markdown into structured product data via Qwen.
- Employed the scraped data to generate a
zara_new_arrivals_update.sqlscript.
Take a look at the generated zara_new_arrivals_update.sql file:

This includes INSERT statements where the product data comes directly from the Zara new arrivals pages. If you have any doubts, visit the selected pages in your browser.
Now, assume you want to extract more detailed data about a specific product. Run a prompt like this:
Extract structured data from the following Zara product page and save it as a JSON file: "https://www.zara.com/us/en/paisley-print-bandana-p03534410.html"Note: The product URL in the prompt comes directly from the first INSERT statement in the SQL script.
This time, if you are using Pro mode with Web MCP, the web_data_zara_products tool will be called:
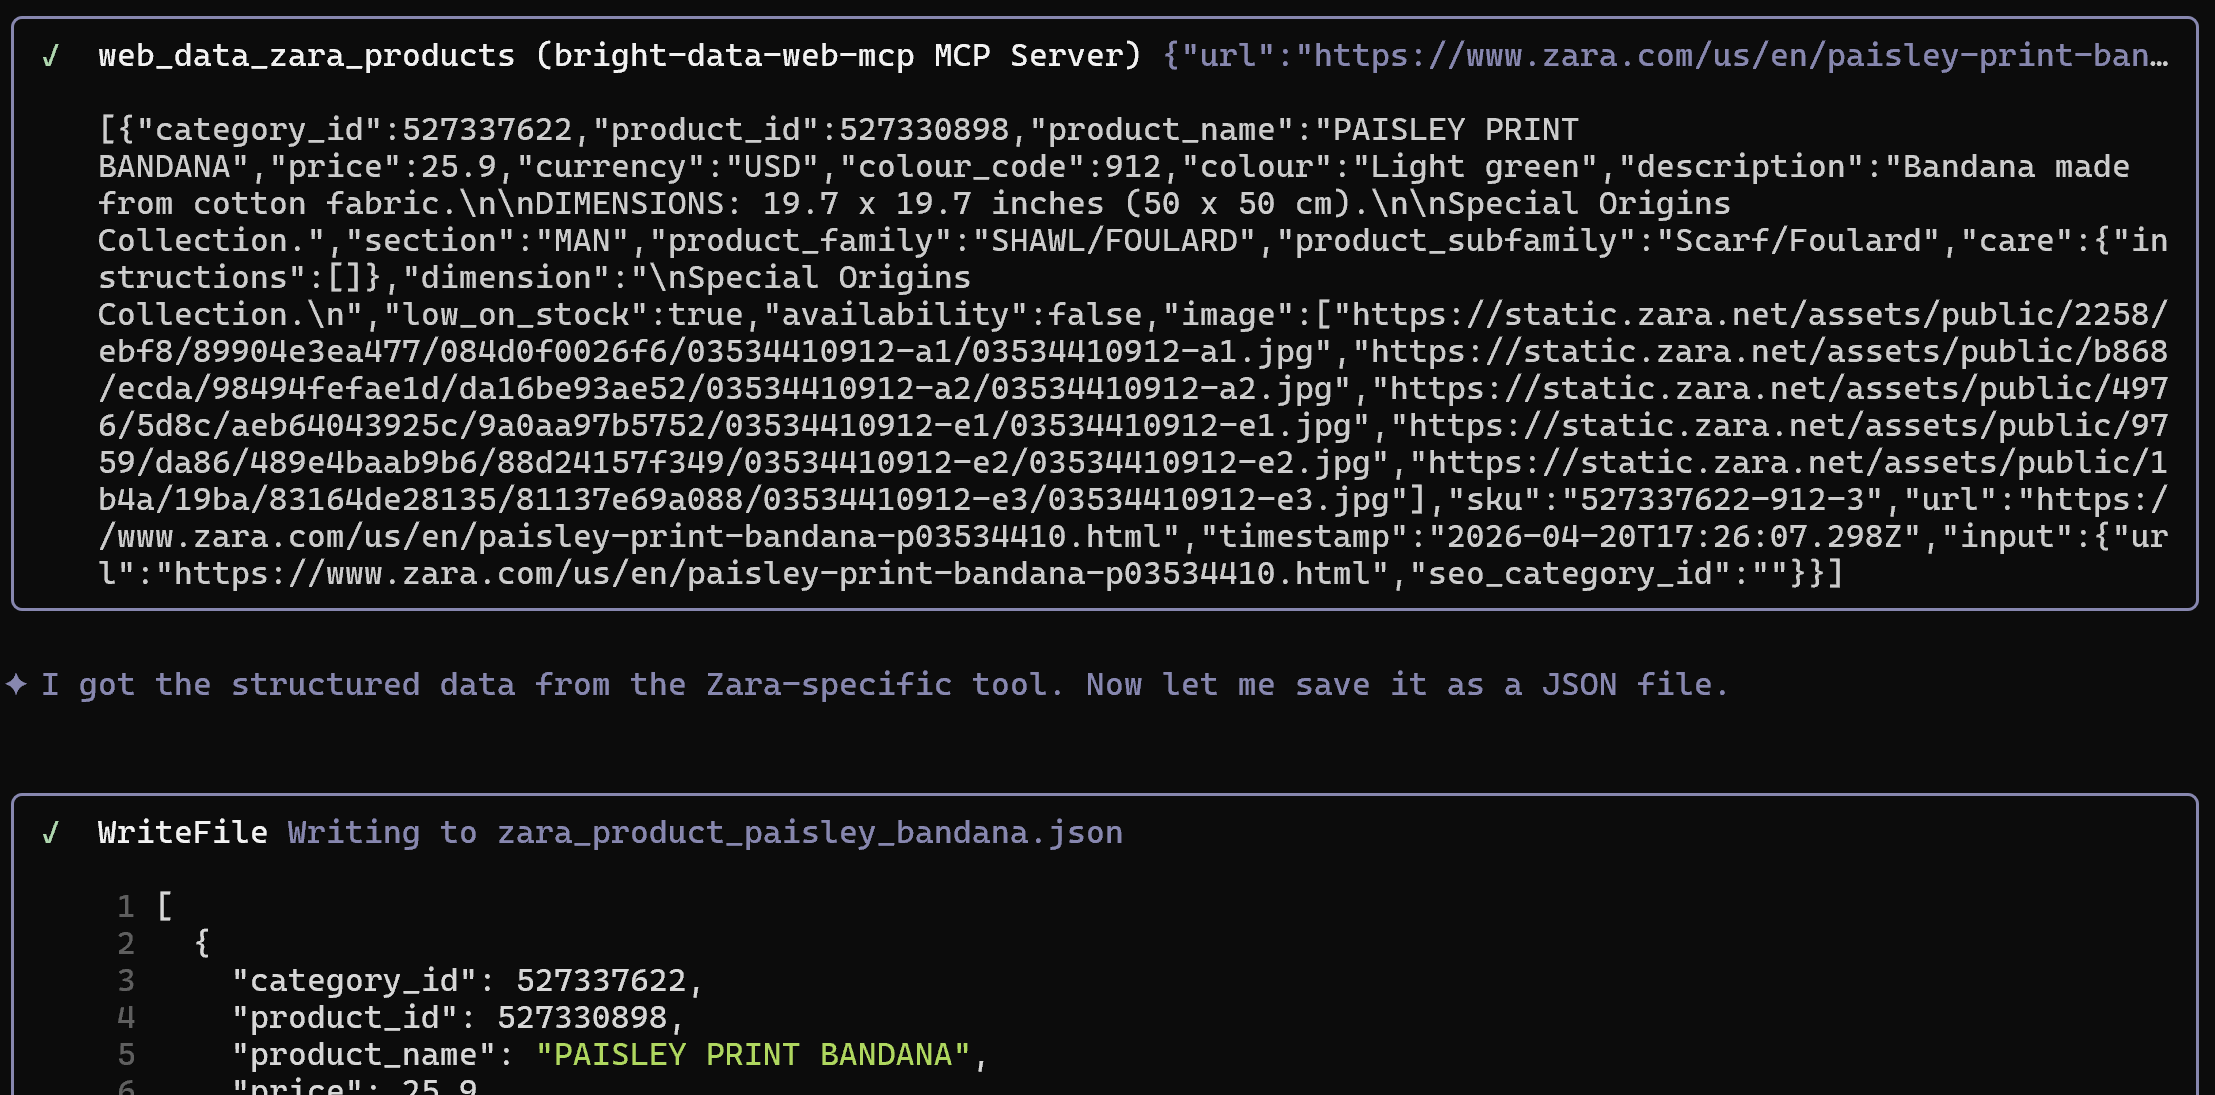
This connects to Bright Data’s Zara Scraper to retrieve structured data from a Zara page, bypassing anti-bot and anti-scraping systems.
The result is a JSON file like this:
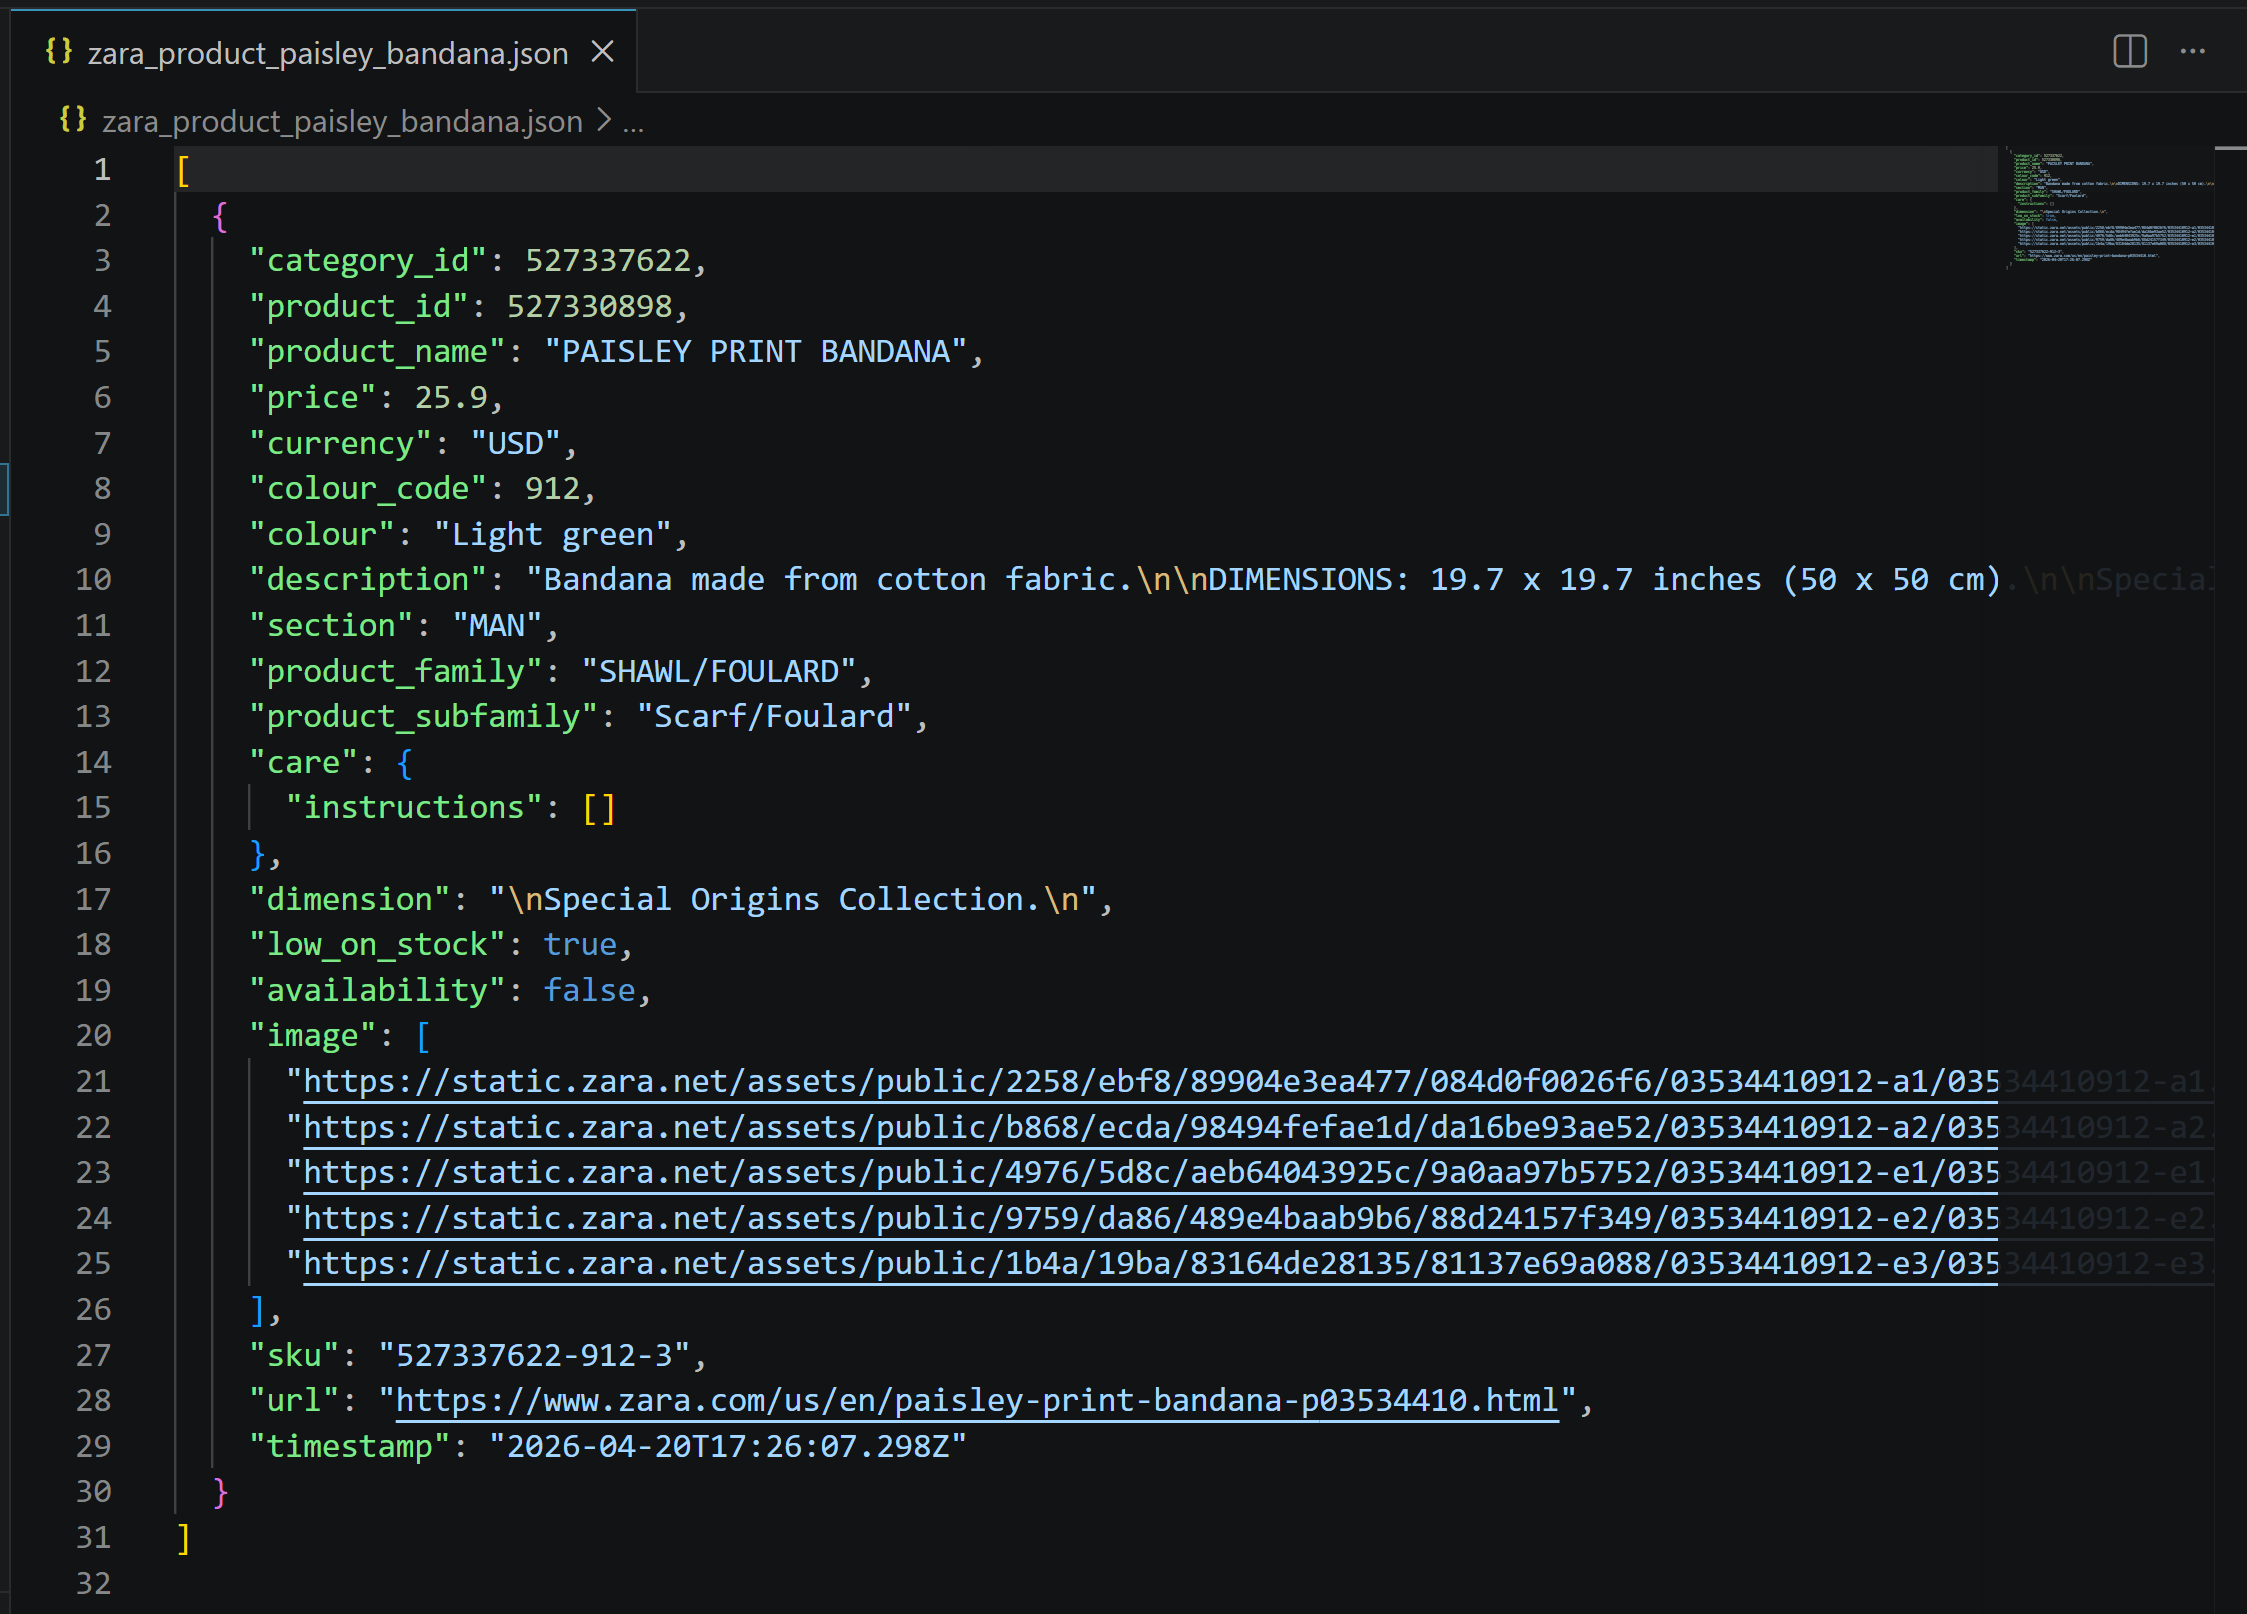
It contains exactly the data from the Zara product page, but structured and ready for use in mocking, analysis, or downstream processing:

Et voilà! This simple example clearly shows how powerful Qwen Code becomes when combined with Bright Data’s web access capabilities.
Conclusion
In this blog post, you learned what Qwen Code brings to terminal-based AI-powered software development. In particular, you saw why and how to extend it by connecting it to Bright Data through Web MCP and Agent Skills.
This integration equips Qwen Code with enterprise-ready tools for web search, discovery, structured data extraction, automated web interactions, and more. These features greatly enhance its effectiveness.
For even more advanced workflows, you can explore the full range of AI-ready services in the Bright Data ecosystem.

Technical Writer
Antonello Zanini is a technical writer, editor, and software engineer with 5M+ views. Expert in technical content strategy, web development, and project management.


