







In this article, you will learn:
- What Kimi Code CLI is and what it offers as a terminal-based AI coding agent.
- Why adding live web access helps Kimi models produce more reliable results.
- How Bright Data extends Kimi Code CLI with web search, web scraping, and browser automation capabilities.
- How to extend Kimi Code CLI by giving it knowledge of the Bright Data CLI.
- How to connect the Bright Data CLI to Kimi Code CLI.
Let’s dive in!
What Is Kimi Code CLI?
Kimi Code CLI is an open-source AI coding agent developed by Moonshot AI, with over 7.8k GitHub stars. It runs in the terminal, using Kimi’s models to understand codebases, edit files, run shell commands, search files, fetch web pages, and execute multi-step development tasks.
It enables workflows ranging from code analysis and debugging to feature development, refactoring, and automation. Kimi Code CLI also supports MCP, Agent Skills, subagents, and IDE integration. Find out more in the official docs.
Why Extend Kimi Code CLI with Production-Ready Web Search, Scraping, and Navigation Tools
Kimi Code CLI provides a powerful terminal-based AI coding agent. However, regardless of how recent the configured Kimi model is, it cannot provide information published after its training cutoff.
In the fast-moving software development landscape, this can mean missing critical updates about security vulnerabilities, software releases, documentation changes, and evolving best practices.
A capable AI coding agent should be able to access the latest documentation, inspect live websites, discover new sources, and retrieve data from platforms that were not included in its original training data.
Kimi Code CLI comes with built-in web search tools, but these are designed for basic web access. As a result, they may not be well suited for working at scale or accessing websites protected by anti-bot mechanisms such as rate limits and CAPTCHAs.
This is where Bright Data can help. By connecting Kimi Code CLI with Bright Data’s infrastructure, you can give the CLI agent access to production-ready tools for live web search, data extraction, structured data, and browser automation retrieval.
Bright Data’s global infrastructure is designed to support demanding web data workflows, with 400+ million residential IPs. It provides the scalability, reliability, and performance needed to access web data at scale, with support for high concurrency, 99.99% SLA-backed uptime, and a reported 99.95% success rate.
How Bright Data Works with Kimi Code CLI
Bright Data supports Kimi Code CLI through two main interfaces:
- Bright Data CLI
- Bright Data Web MCP
Each provides a different way for Kimi Code CLI to search, retrieve, scrape, and interact with web content.
Bright Data CLI
If you are not familiar with it, the Bright Data CLI lets you access Bright Data’s suite of web data products directly from the terminal. Its CLI commands include:
| Command | Description | Bright Data product |
|---|---|---|
brightdata scrape <url> |
Scrapes a URL while handling JavaScript, CAPTCHAs, and anti-bot protections. | Web Unlocker API |
brightdata search <query> |
Searches Google, Bing, or Yandex and returns structured search results. | SERP API |
brightdata pipelines <type> |
Extracts structured data from supported platforms such as Amazon, LinkedIn, Instagram, YouTube, and more. | Web Scraping API |
brightdata browser open <url> |
Opens a URL in a persistent, real browser session. | Browser API |
brightdata browser screenshot |
Captures a screenshot of the current browser viewport or the full page. | Browser API |
brightdata browser click / type / fill / scroll / etc. |
Performs actions on web pages, such as clicking, typing, filling forms, and scrolling. | Browser API |
brightdata browser snapshot |
Captures the current page as an accessibility tree that AI agents can read and interact with. | Browser API |
Note: Bright Data CLI includes a recurring monthly free tier with up to 5,000 credits. See the Free Tier documentation for full details.
With these commands available, Kimi Code CLI can search for information, discover relevant sources, extract web content, retrieve structured datasets, and interact with websites more reliably, including when anti-bot protections are in place.
Bright Data MCP
The Bright Data MCP provides Kimi Code CLI with a comprehensive set of tools for accessing and interacting with web data, including:
- Webpage extraction: Fetch any webpage and extract its content as clean Markdown.
- Pre-built scrapers: Access 60+ ready-to-use scrapers for popular domains and platforms.
- Web search: Search Google, Bing, and Yandex for relevant and up-to-date information.
- Web unlocking: Access websites protected by bot detection, CAPTCHAs, and other anti-bot mechanisms using proxy rotation and related capabilities.
- Browser automation: Navigate and interact with websites programmatically using a real browser.
- Geo-targeting: Access web content from specific geographic locations.
Note: Bright Data MCP comes with a free tier with up to 5,000 requests per month.
How to Instruct Kimi Code CLI to Use the Bright Data CLI
In this guided section, you will learn how to integrate the Bright Data CLI with Kimi Code CLI. This gives the agent reliable web access with enterprise-level scalability and stability.
Prerequisites
To follow this tutorial, make sure you have:
- Node.js installed locally.
- A Bright Data account.
- An API key for any of the LLMs supported by Octop. Here, we will use OpenAI as an example, so you will need an OpenAI API key.
A basic understanding of how AI agents can use the Bright Data CLI will also be helpful.
Step #1: Install Kimi Code CLI
On macOS or Linux, run the following command to install the Kimi Code CLI using the official installation script:
curl -fsSL https://code.kimi.com/kimi-code/install.sh | bashOn Windows (PowerShell), run:
irm https://code.kimi.com/kimi-code/install.ps1 | iexNote: On Windows, install Git for Windows before launching Kimi Code for the first time. Kimi Code CLI uses the bundled Git Bash as its shell environment.
If you prefer to install Kimi Code through npm, or want instructions for upgrading or uninstalling it, see the official Getting Started documentation.
For npm install or upgrade, see the official focs Getting Started.
On Windows, the installation script should produce output similar to the following:
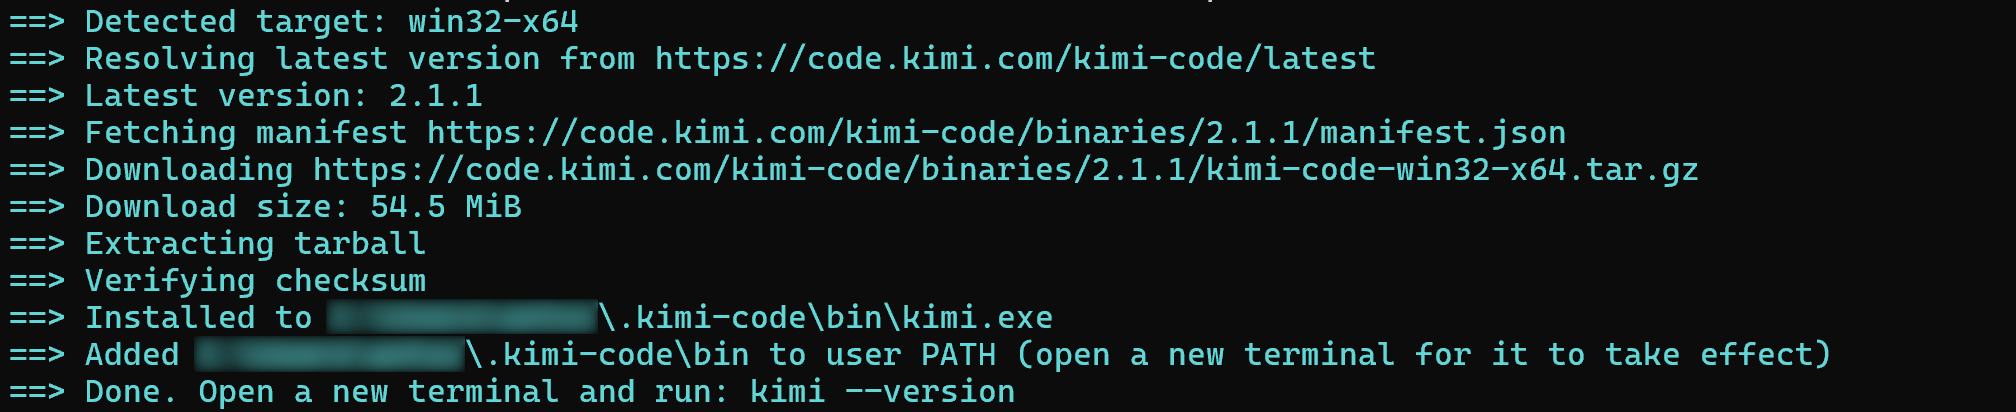
After the installation finishes, restart your terminal so that the new kimi command is available in your PATH. Then, open a new terminal session and verify that Kimi Code CLI is installed:
kimi --versionYou should see a version number similar to:
2.1.1Well done! Kimi Code CLI is now installed locally.
Step #2: Set Up the Kimi Model
Navigate to your project folder and start Kimi Code CLI by running:
kimiYou will be prompted to log in to Kimi Code, so run:
/loginStart by selecting the platform you want to use for authentication:

Note: .com domains are intended for users in mainland China, while .ai domains are intended for users outside mainland China.
For this tutorial, we will authenticate using a Kimi Platform API key. Thus, select the last authentication option and enter your Kimi API key when prompted.
Next, Kimi Code CLI will ask you to select the model it should use:
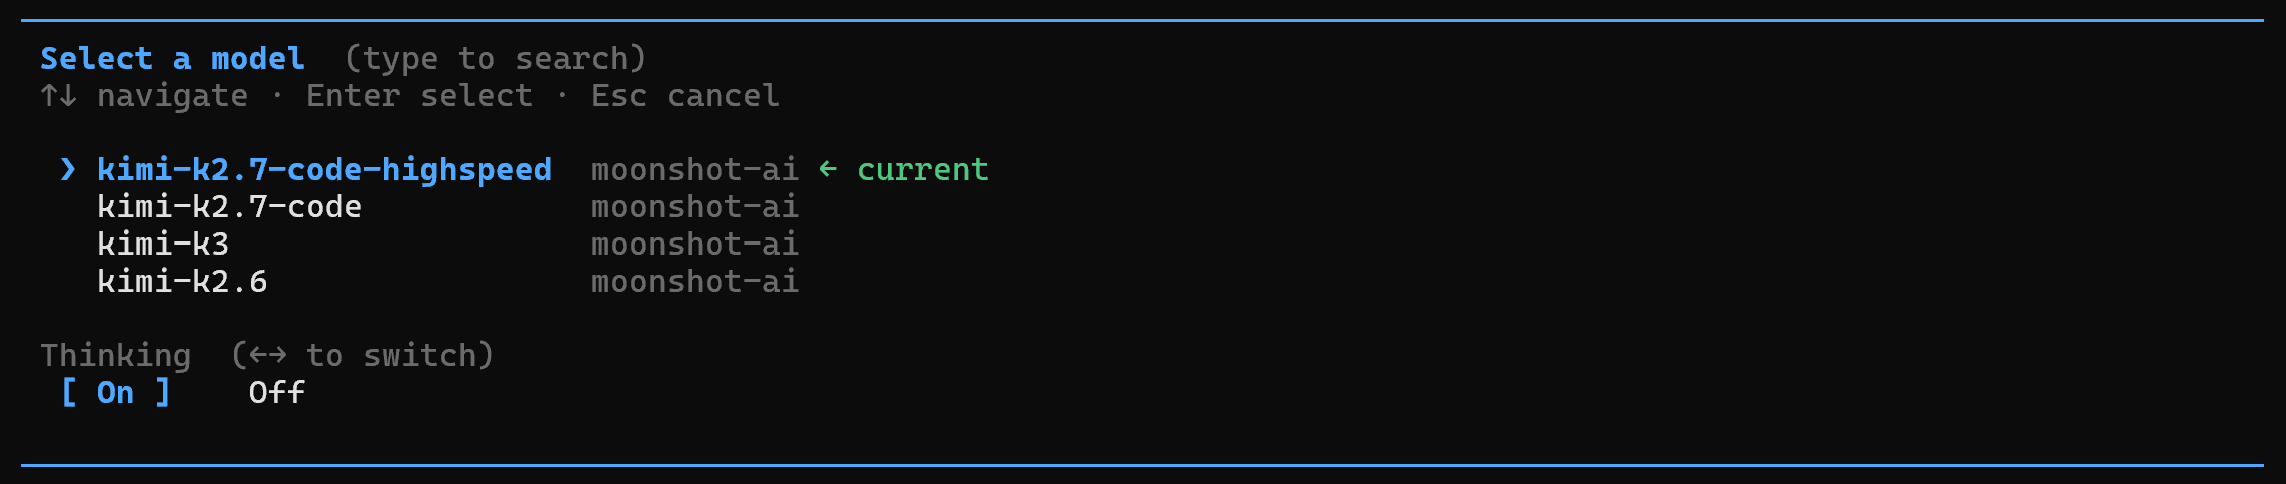
The default kimi-k2.7-code-highspeed model is the recommended option.
Open Kimi Code CLI again, and you will now see:
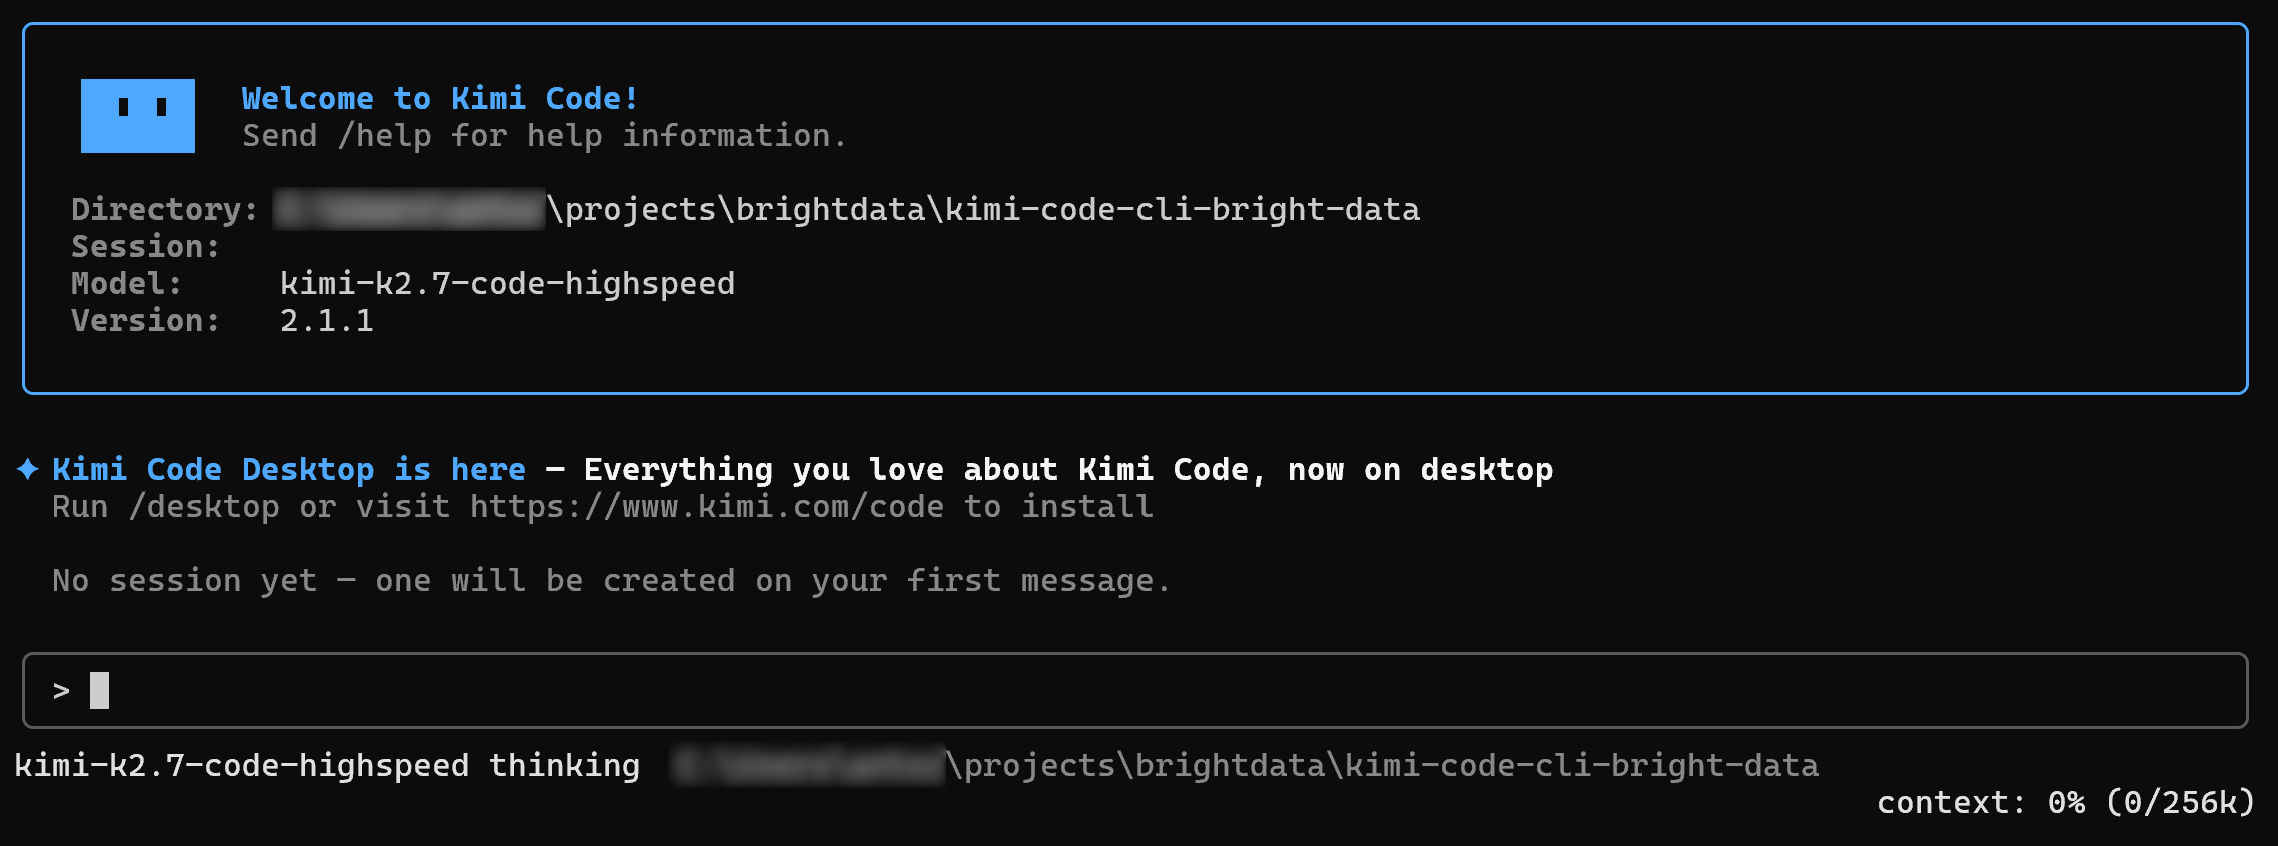
This is where you can interact with the selected Kimi AI model. You can chat with it, give it instructions, and ask it to perform tasks within your project. Great!
Step #3: Get Started with the Bright Data CLI
For a guided setup, see the official documentation on installing and configuring the Bright Data CLI. You can also check out our blog post, “Meet the Bright Data CLI: Extract Data and Interact with the Web from Your Terminal,” for a more in-depth introduction.
Alternatively, follow the steps below.
Start by installing the Bright Data CLI globally using the @brightdata/cli npm package:
npm install -g @brightdata/cliThis installs the brightdata command and its bdata alias, making the CLI available from your terminal.
Verify that the installation was successful by checking the installed version:
bdata --versionThe output shows the installed version, for example 0.3.8.
Next, connect the Bright Data CLI to your Bright Data account:
bdata loginThis opens your browser and starts a secure OAuth authentication flow. Once authentication is complete, the CLI configures the required APIs and applies the necessary defaults.
This is it! The Bright Data CLI is now ready. Time to instruct Kimi Code CLI to use it.
Step #4: Configure the Bright Data CLI in Kimi Code CLI
A straightforward way to give Kimi Code CLI the context it needs to use the Bright Data CLI confidently is to install the brightdata-cli skill. Remember that Kimi Code CLI supports Agent Skills through the .agents/skills folder, as well as other supported locations.
brightdata-cli is part of the official Bright Data Agent Skills. It provides AI agents with the knowledge they need to install, configure, and use the Bright Data CLI.
Alternative approach: You can also manually instruct Kimi Code CLI to utilize the Bright Data CLI by providing it with the relevant context, as explained in our “Using Bright Data CLI with Claude Code, Codex CLI, and Other Local AI Agents” tutorial. This approach can provide more consistent results.
The easiest way to install the Bright Data skill is with the Vercel skills tool, a CLI for the open agent skills ecosystem. In your terminal, run:
npx skills add brightdata/skills --agent kimi-code-cliYou will first be prompted to select which Bright Data skill you want to install:
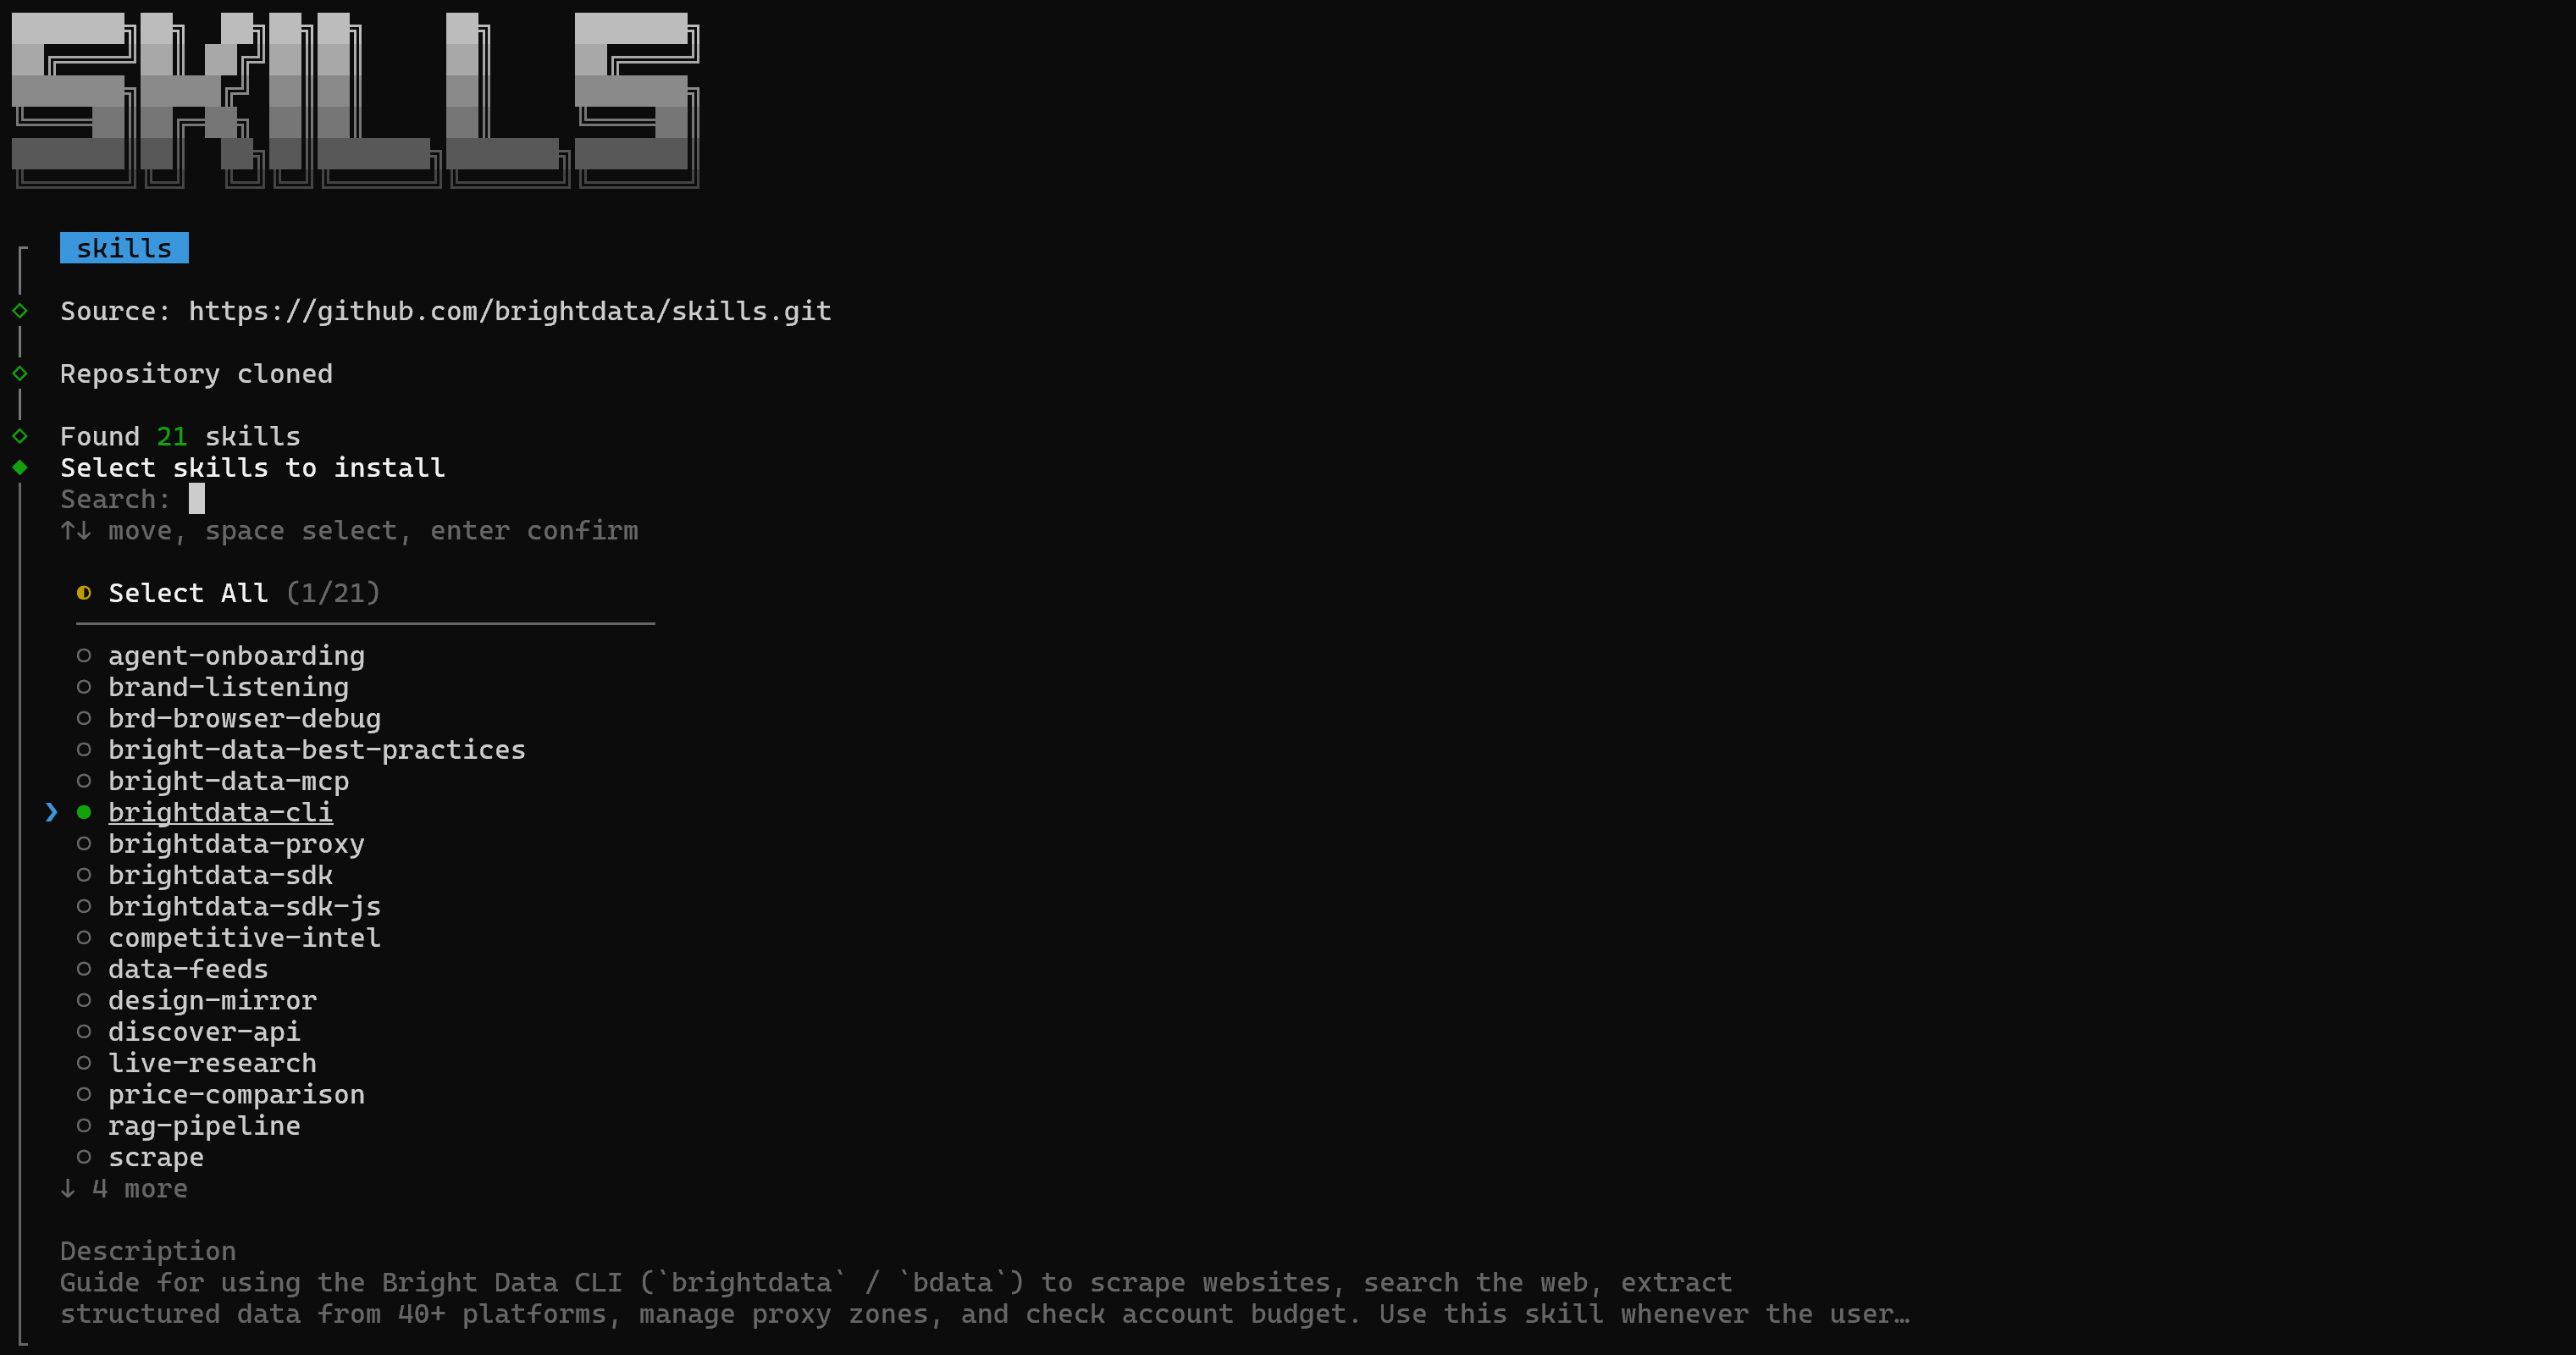
Use the Space key to select brightdata-cli and press Enter to continue. You can also select any of the other Bright Data skills if needed. Learn more about the available skills in our article.
Next, select the installation scope. For a local project setup, “Project” is a good choice:

Confirm the installation by selecting “Yes”. The skill will then be installed in the .agents/skills/brightdata-cli directory inside your project:

Amazing! Kimi Code CLI now has the knowledge it needs to employ the Bright Data CLI effectively.
Step #5: Verify the Skill Installation
Kimi Code CLI does not provide a dedicated command for listing installed skills. However, you can verify that the skill is available by invoking it directly.
In Kimi Code CLI, type:
/brightdata-cliYou should see that the skill is available as a command:

This confirms that the brightdata-cli skill has been installed correctly and is available to Kimi Code CLI. Perfect!
Step #6: Test the Integration
Now that the Bright Data CLI skill is installed, let’s verify that Kimi Code CLI can actually use the Bright Data CLI to perform tasks that require web access.
Try with a prompt like this:
Use the Bright Data CLI for web access. Perform this workflow:
1. Search online for the Emporio Armani Men’s New Arrivals page.
2. Scrape the page and return a products.json file containing a structured list of all products found on the page.
3. Identify the top 4 products as they appear on the page.
4. Scrape those 4 products in detail and return separate JSON files containing all product data available on the page for each product.
Preserve the original product names, prices, descriptions, URLs, images, and any other relevant product attributes found during scraping. Do not invent or infer data that is not present on the page.
This is just one example of what you can do with Kimi Code CLI and Bright Data. The integration supports many other use cases.
To complete the task, the Kimi Code CLI agent first loads the brightdata-cli skill:
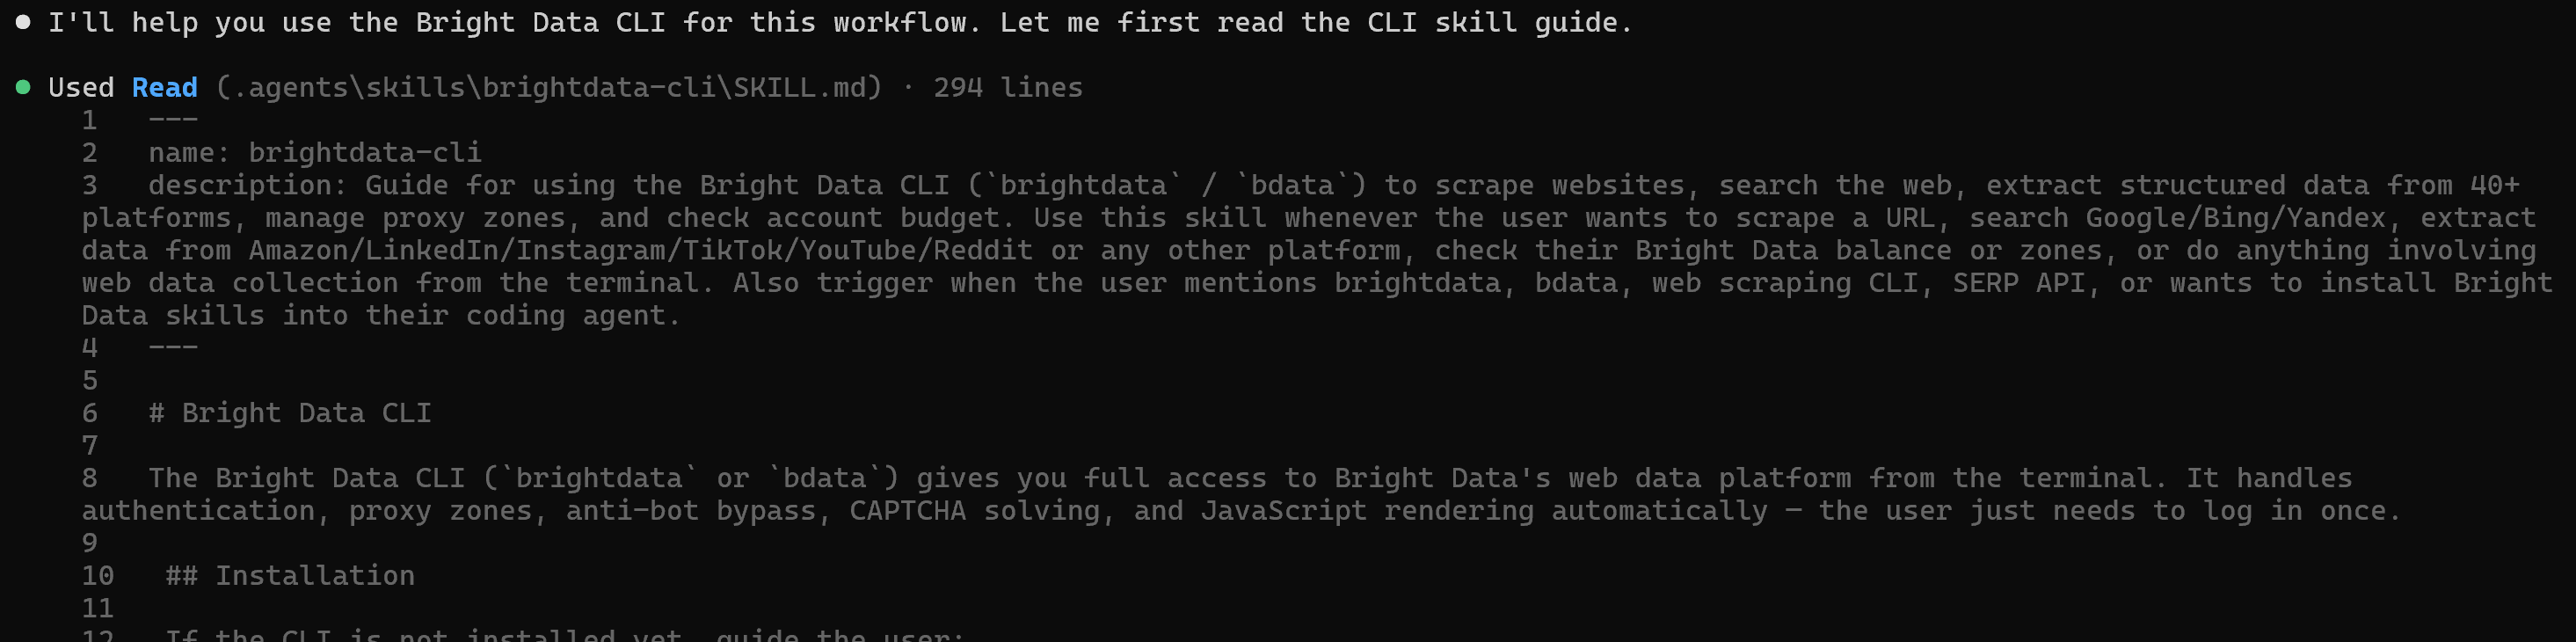
It then uses the bdata search command to search Google for the “Emporio Armani Men’s New Arrivals” query:

Behind the scenes, bdata search uses the Bright Data SERP API to retrieve Google search results as structured JSON.
Kimi Code CLI analyzes the returned results, identifies the relevant page, and passes its URL to bdata scrape to retrieve the page content in Markdown using the Web Unlocker API.
The agent uses the retrieved Markdown content to extract the product information and populate the products.json file with the products found on the page.
Next, the agent identifies the product page URLs for the top four products and uses bdata scrape to retrieve each product page individually:

Finally, Kimi Code CLI parses the retrieved content, extracts the available product information, and saves each product’s data in its own JSON file.
Mission complete! Kimi Code CLI has successfully used Bright Data to discover, scrape, and structure the product data.
Step #7: Inspect the Output
The project folder should now contain the following files:
<product>
├── .agents/
├── products.json
├── product_1_double_jersey_sweatshirt.json
├── product_2_lyocell_tshirt.json
├── product_3_slim_fit_jeans.json
└── product_4_baseball_cap.json
Open products.json and you should see the structured product data produced by the agent:
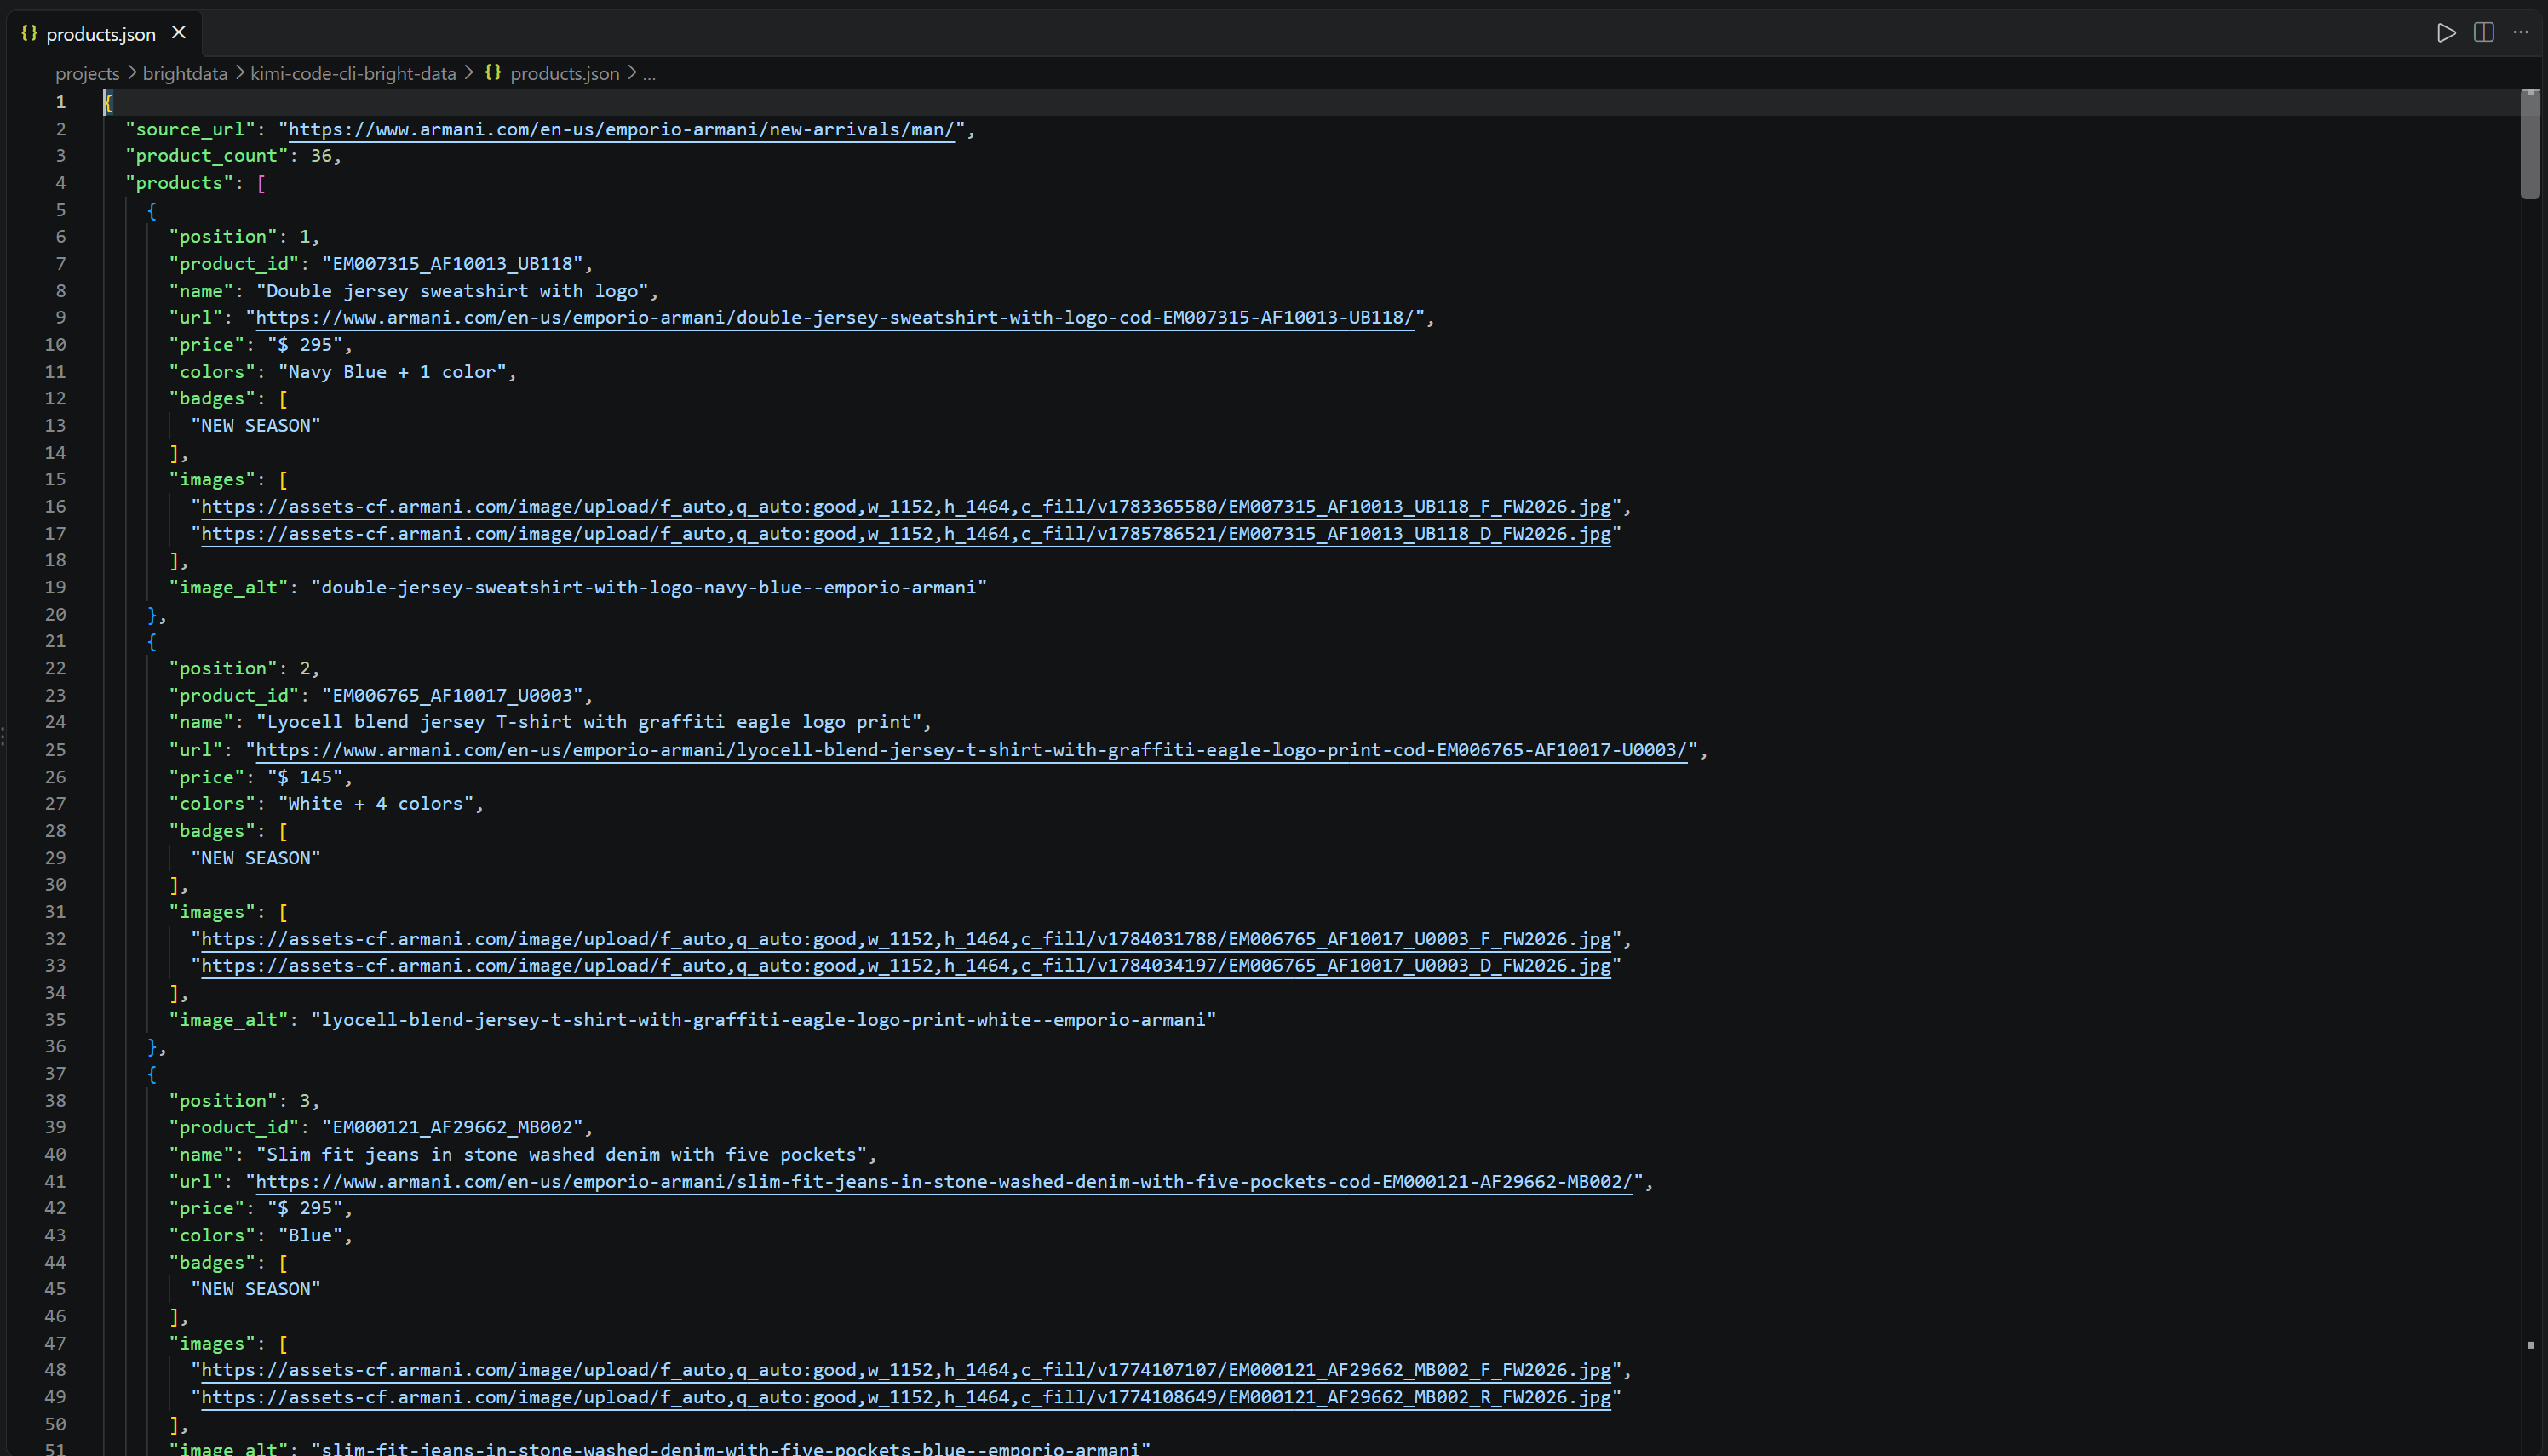
The file contains all 36 products found on the Emporio Armani Men’s New Arrivals page:
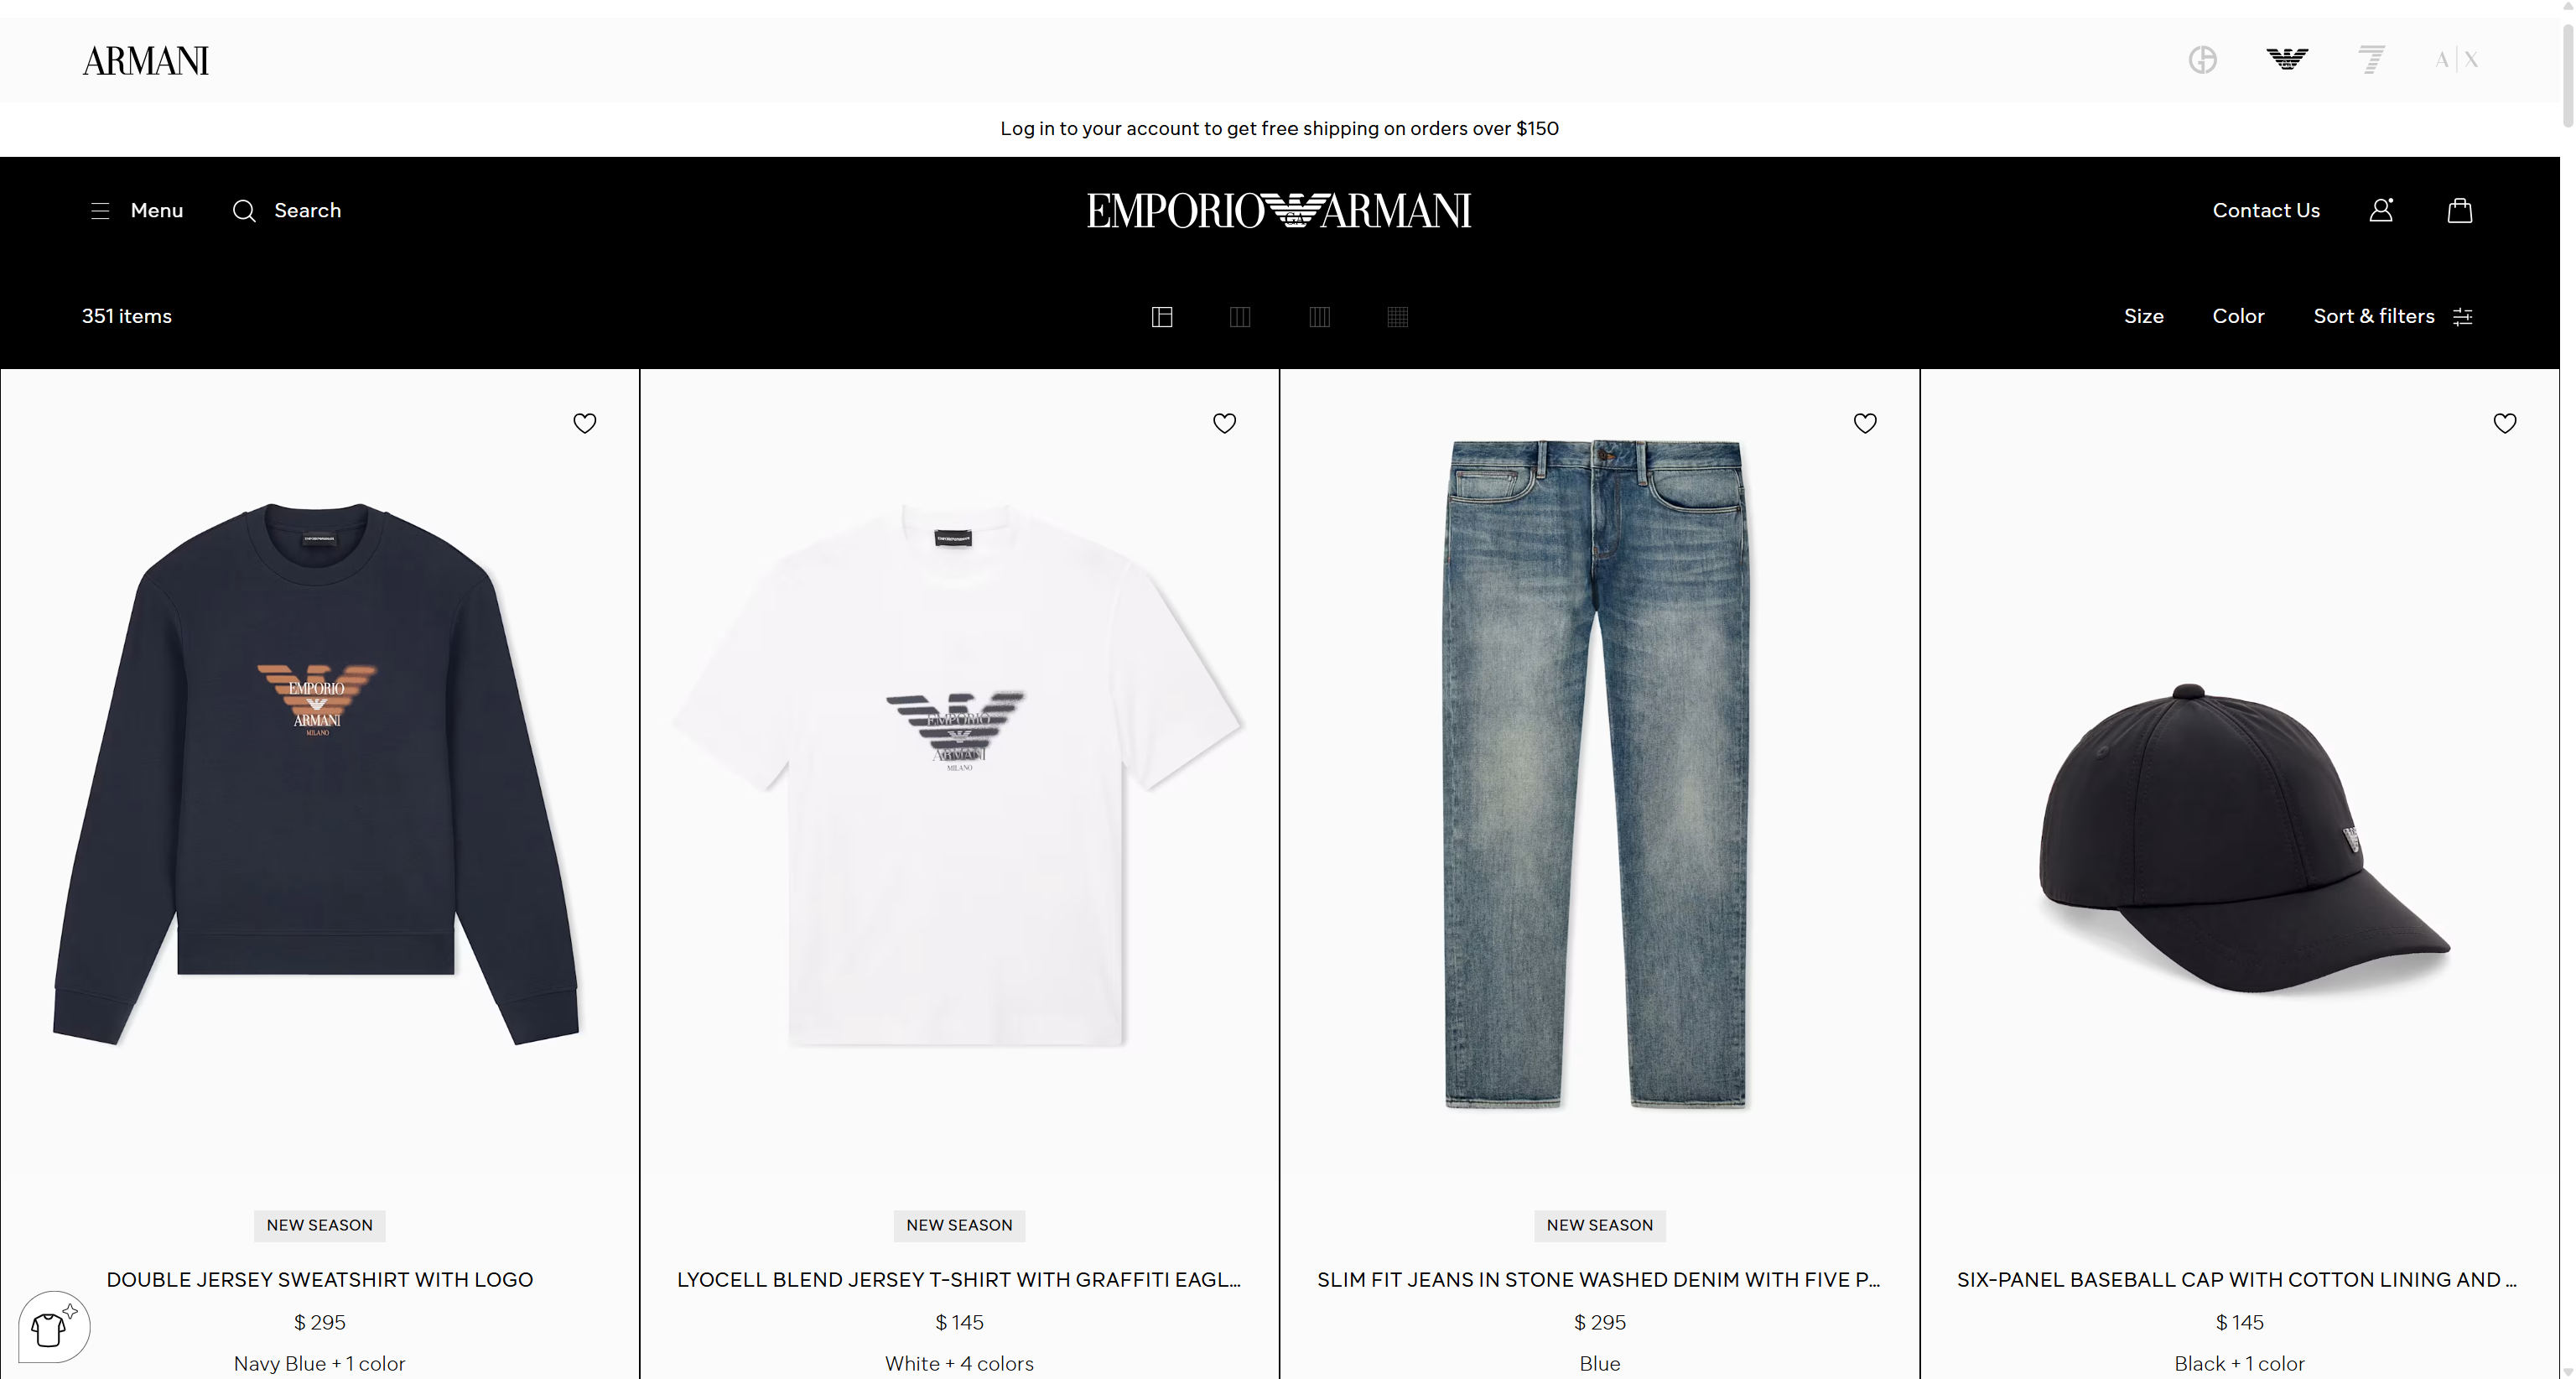
The agent also created individual JSON files for the four products it identified as the top products. Open product_1_double_jersey_sweatshirt.json, for example, to see the structured data extracted from that product page:
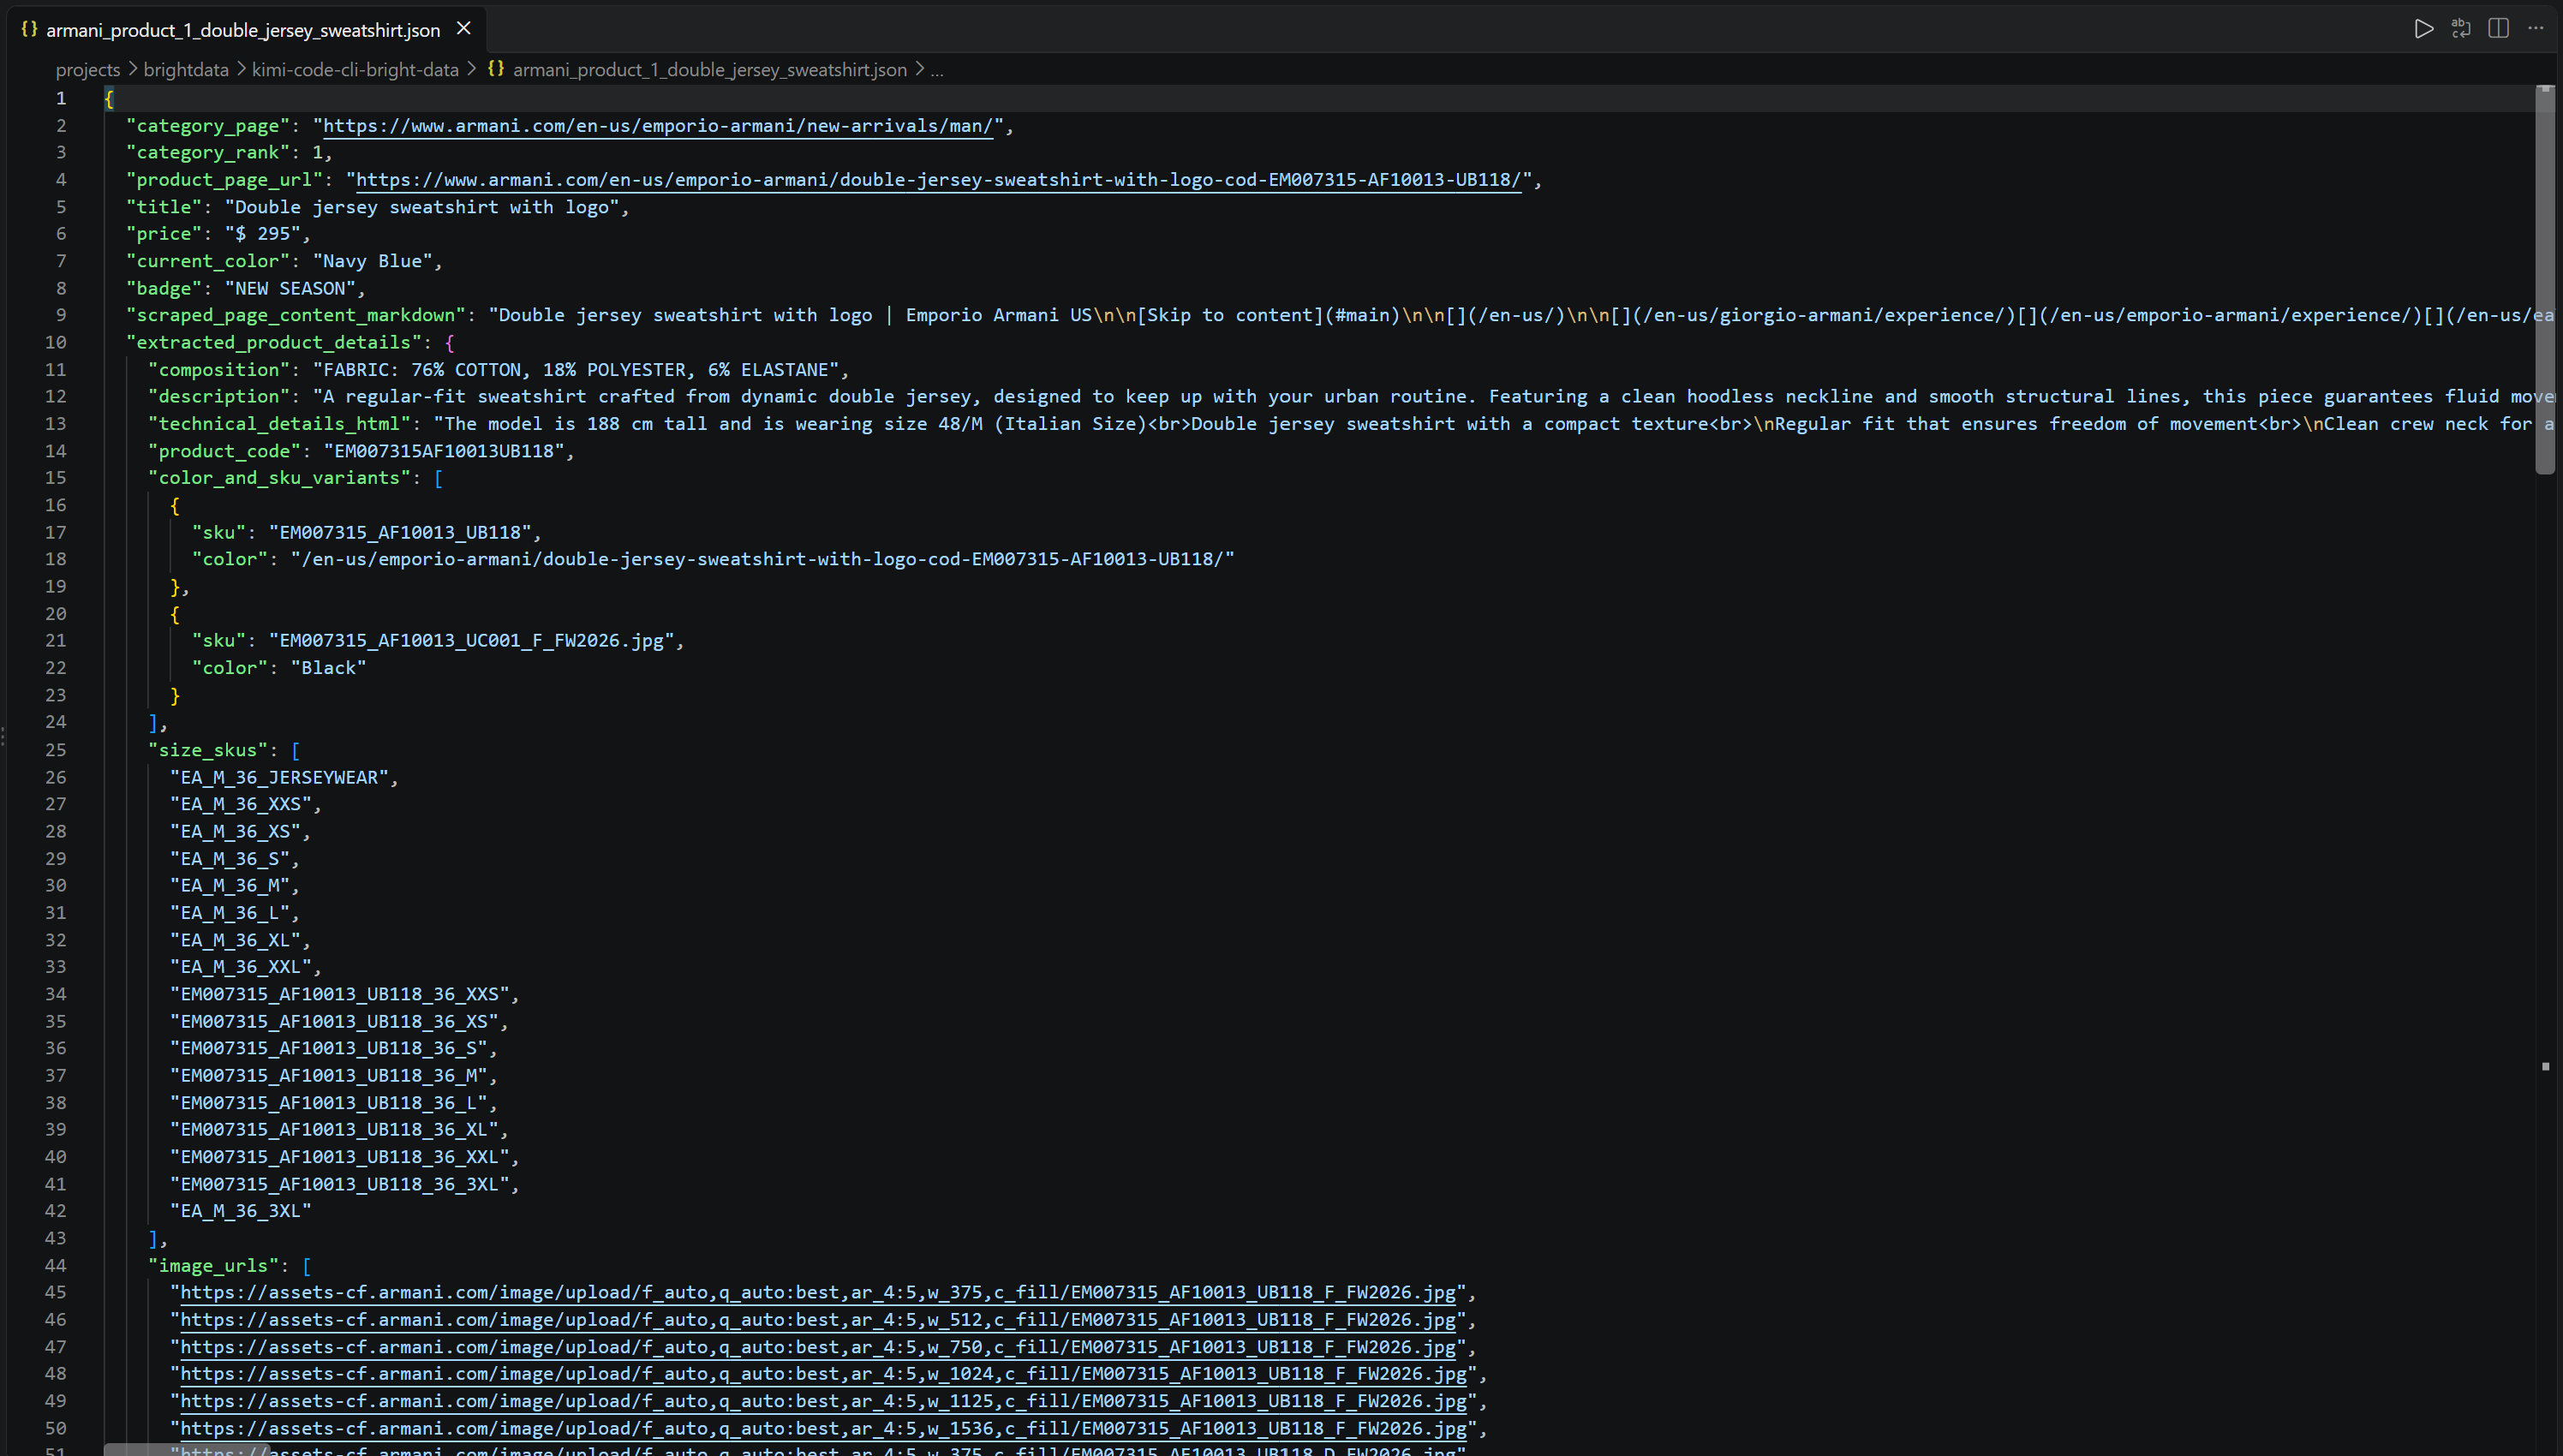
The file contains the product information discovered on the product page in a structured JSON format:
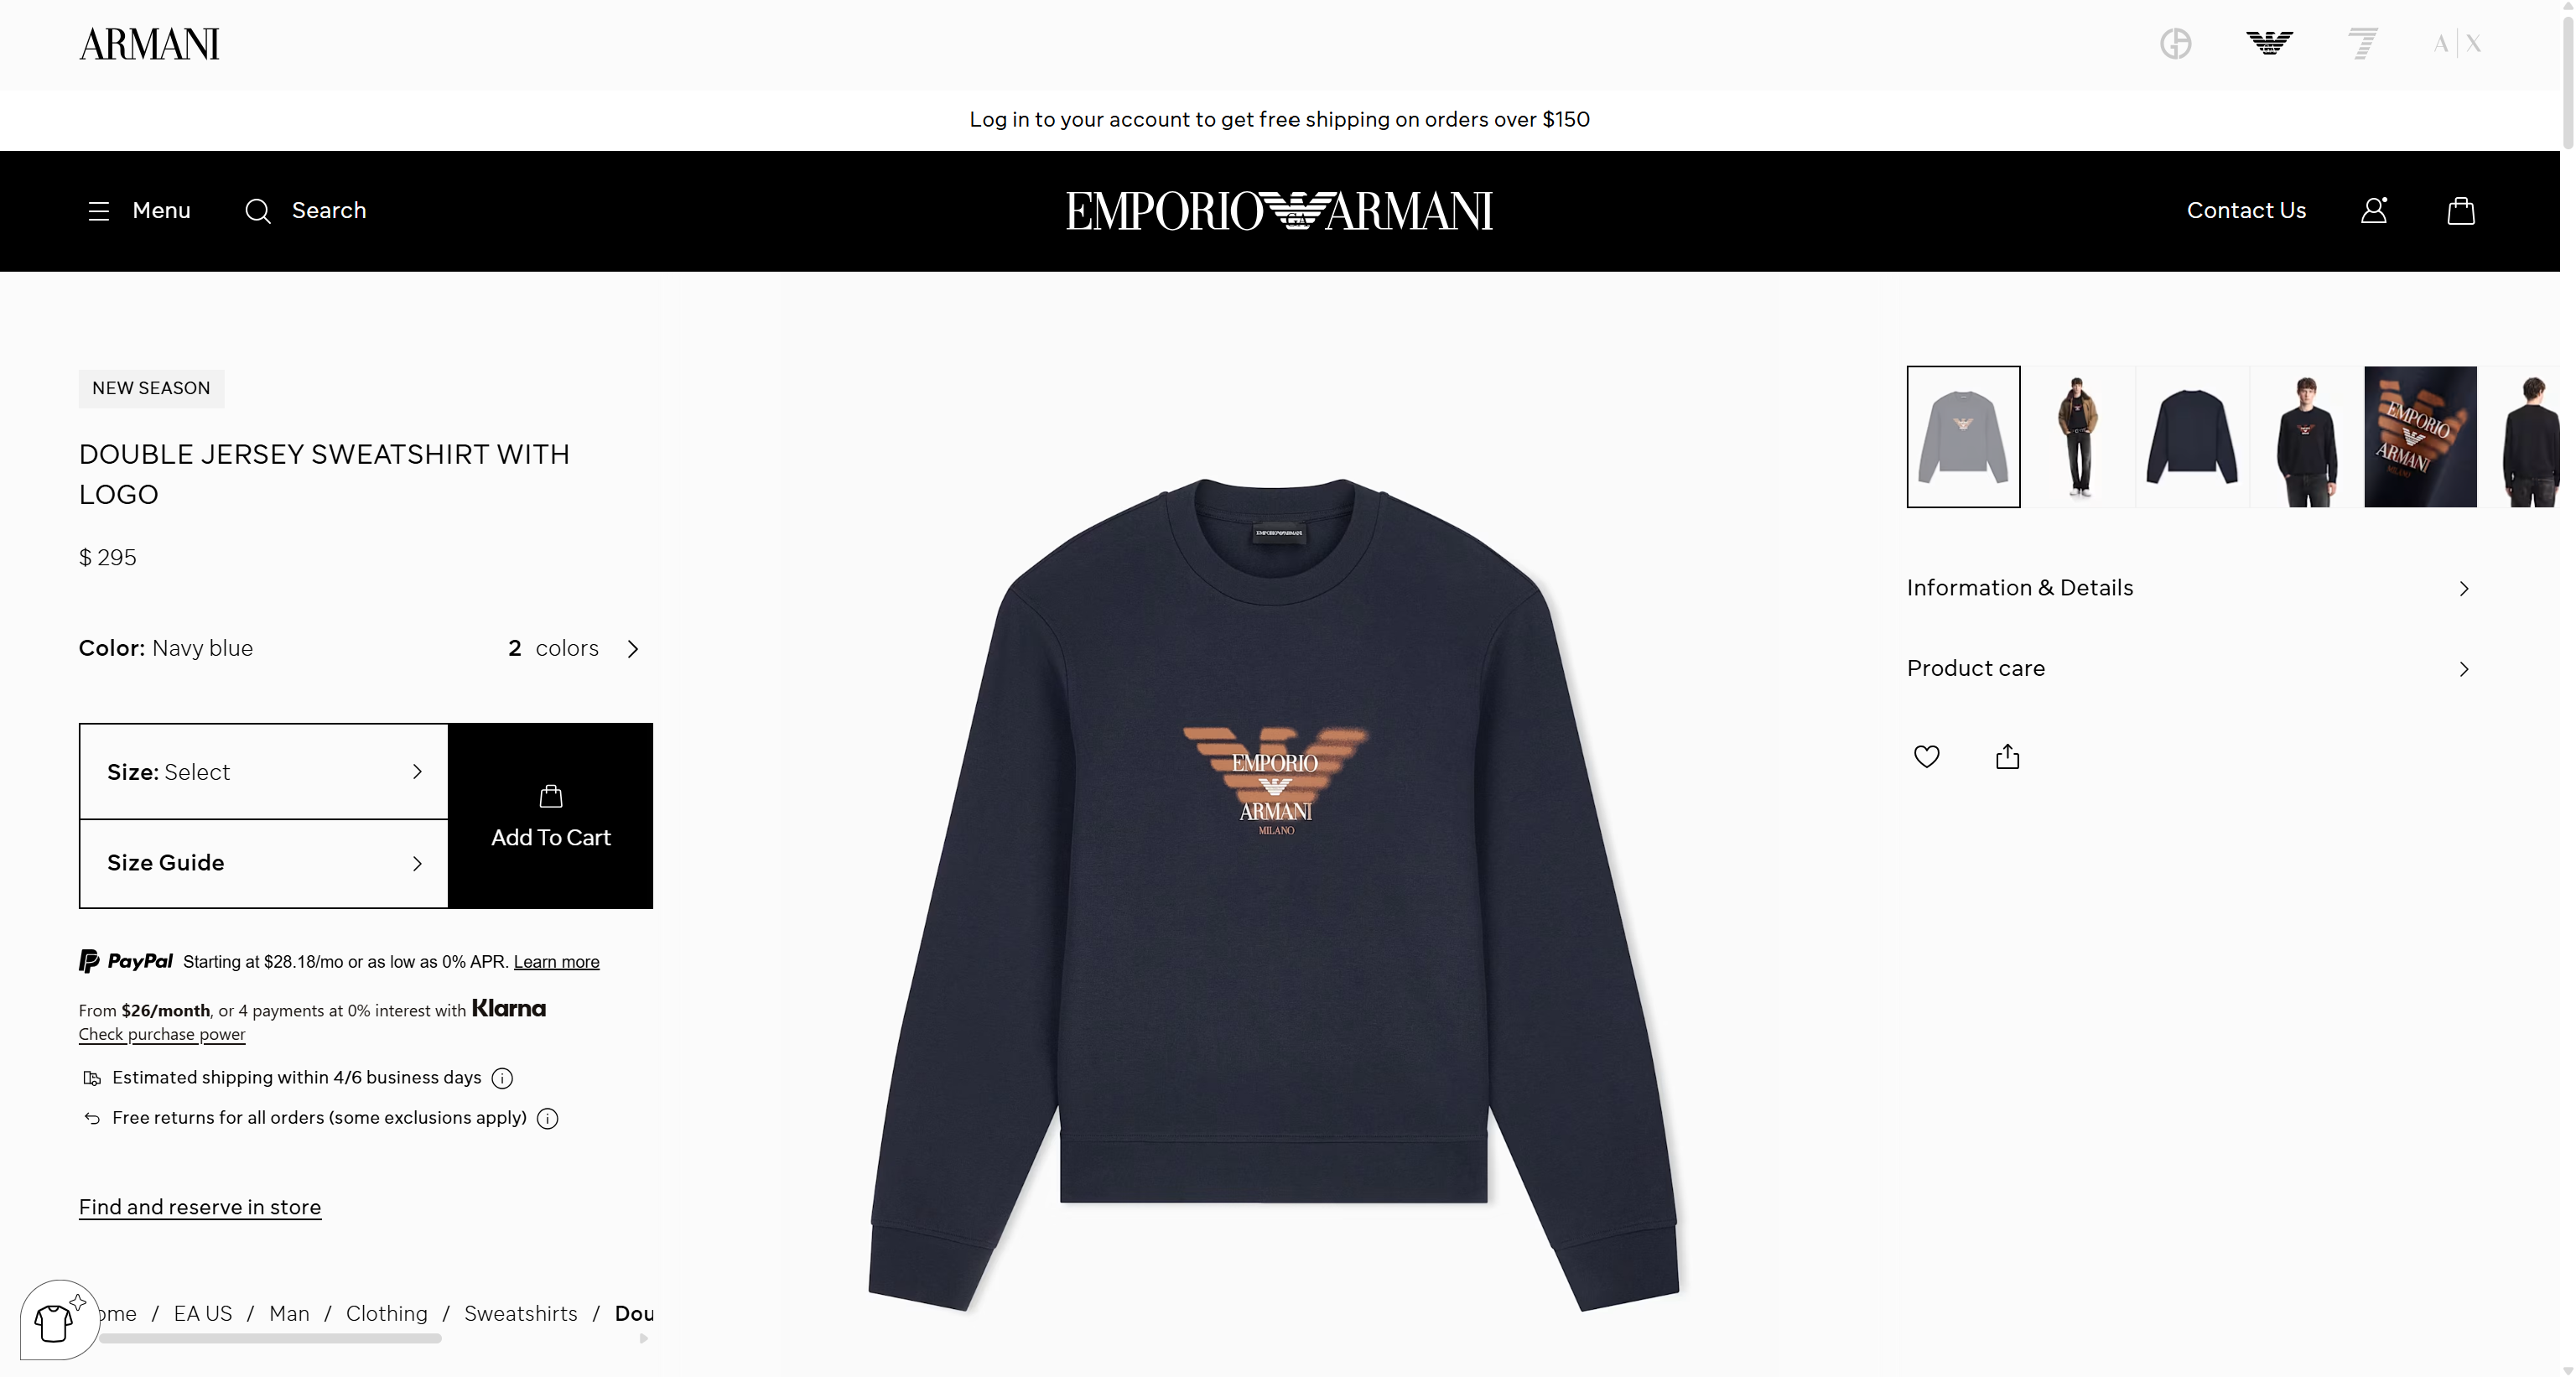
Et voilà! Thanks to the Bright Data CLI, Kimi Code CLI can now search the web, scrape pages, extract structured data, and navigate between web pages, even when accessing websites protected by anti-scraping measures.
Kimi Code CLI + Bright Data MCP: Quick Setup
Here, you will see how to connect Kimi Code CLI to Bright Data MCP to give the agent access to web access and exploration tools.
Prerequisites
To follow this section, you will need a Bright Data API key. A basic understanding of MCP and familiarity with the tools exposed by the Bright Data MCP server will also be helpful.
Step #1: Get the Bright Data MCP Connection URL
Kimi Code CLI supports connections to both local and remote MCP servers. Bright Data MCP can run locally through @brightdata/mcp or remotely through the Streamable HTTP (or SSE) server. The remote option is simpler to set up because it does not require any local package installation.
For accessing all tools, the Bright Data MCP connection URL format for Streamable HTTP is:
https://mcp.brightdata.com/mcp?token=<YOUR_BRIGHT_DATA_API_KEY>&pro=1The URL contains two required query parameters:
token: Authenticates requests and links them to your Bright Data account. Replace<YOUR_BRIGHT_DATA_API_KEY>with your actual Bright Data API key.pro=1: Enables access to the full catalog of 70+ tools. Without this parameter, you can access only the free tools available in Rapid mode, which supports up to 5,000 requests per month.
If you need more control over which tools to expose to the agent, you can generate a custom MCP connection URL directly from the Bright Data dashboard. To do so, log in to your Bright Data account and navigate to the “AI Gateways > MCP” page. Follow the setup wizard to configure your MCP server and generate a custom connection URL:
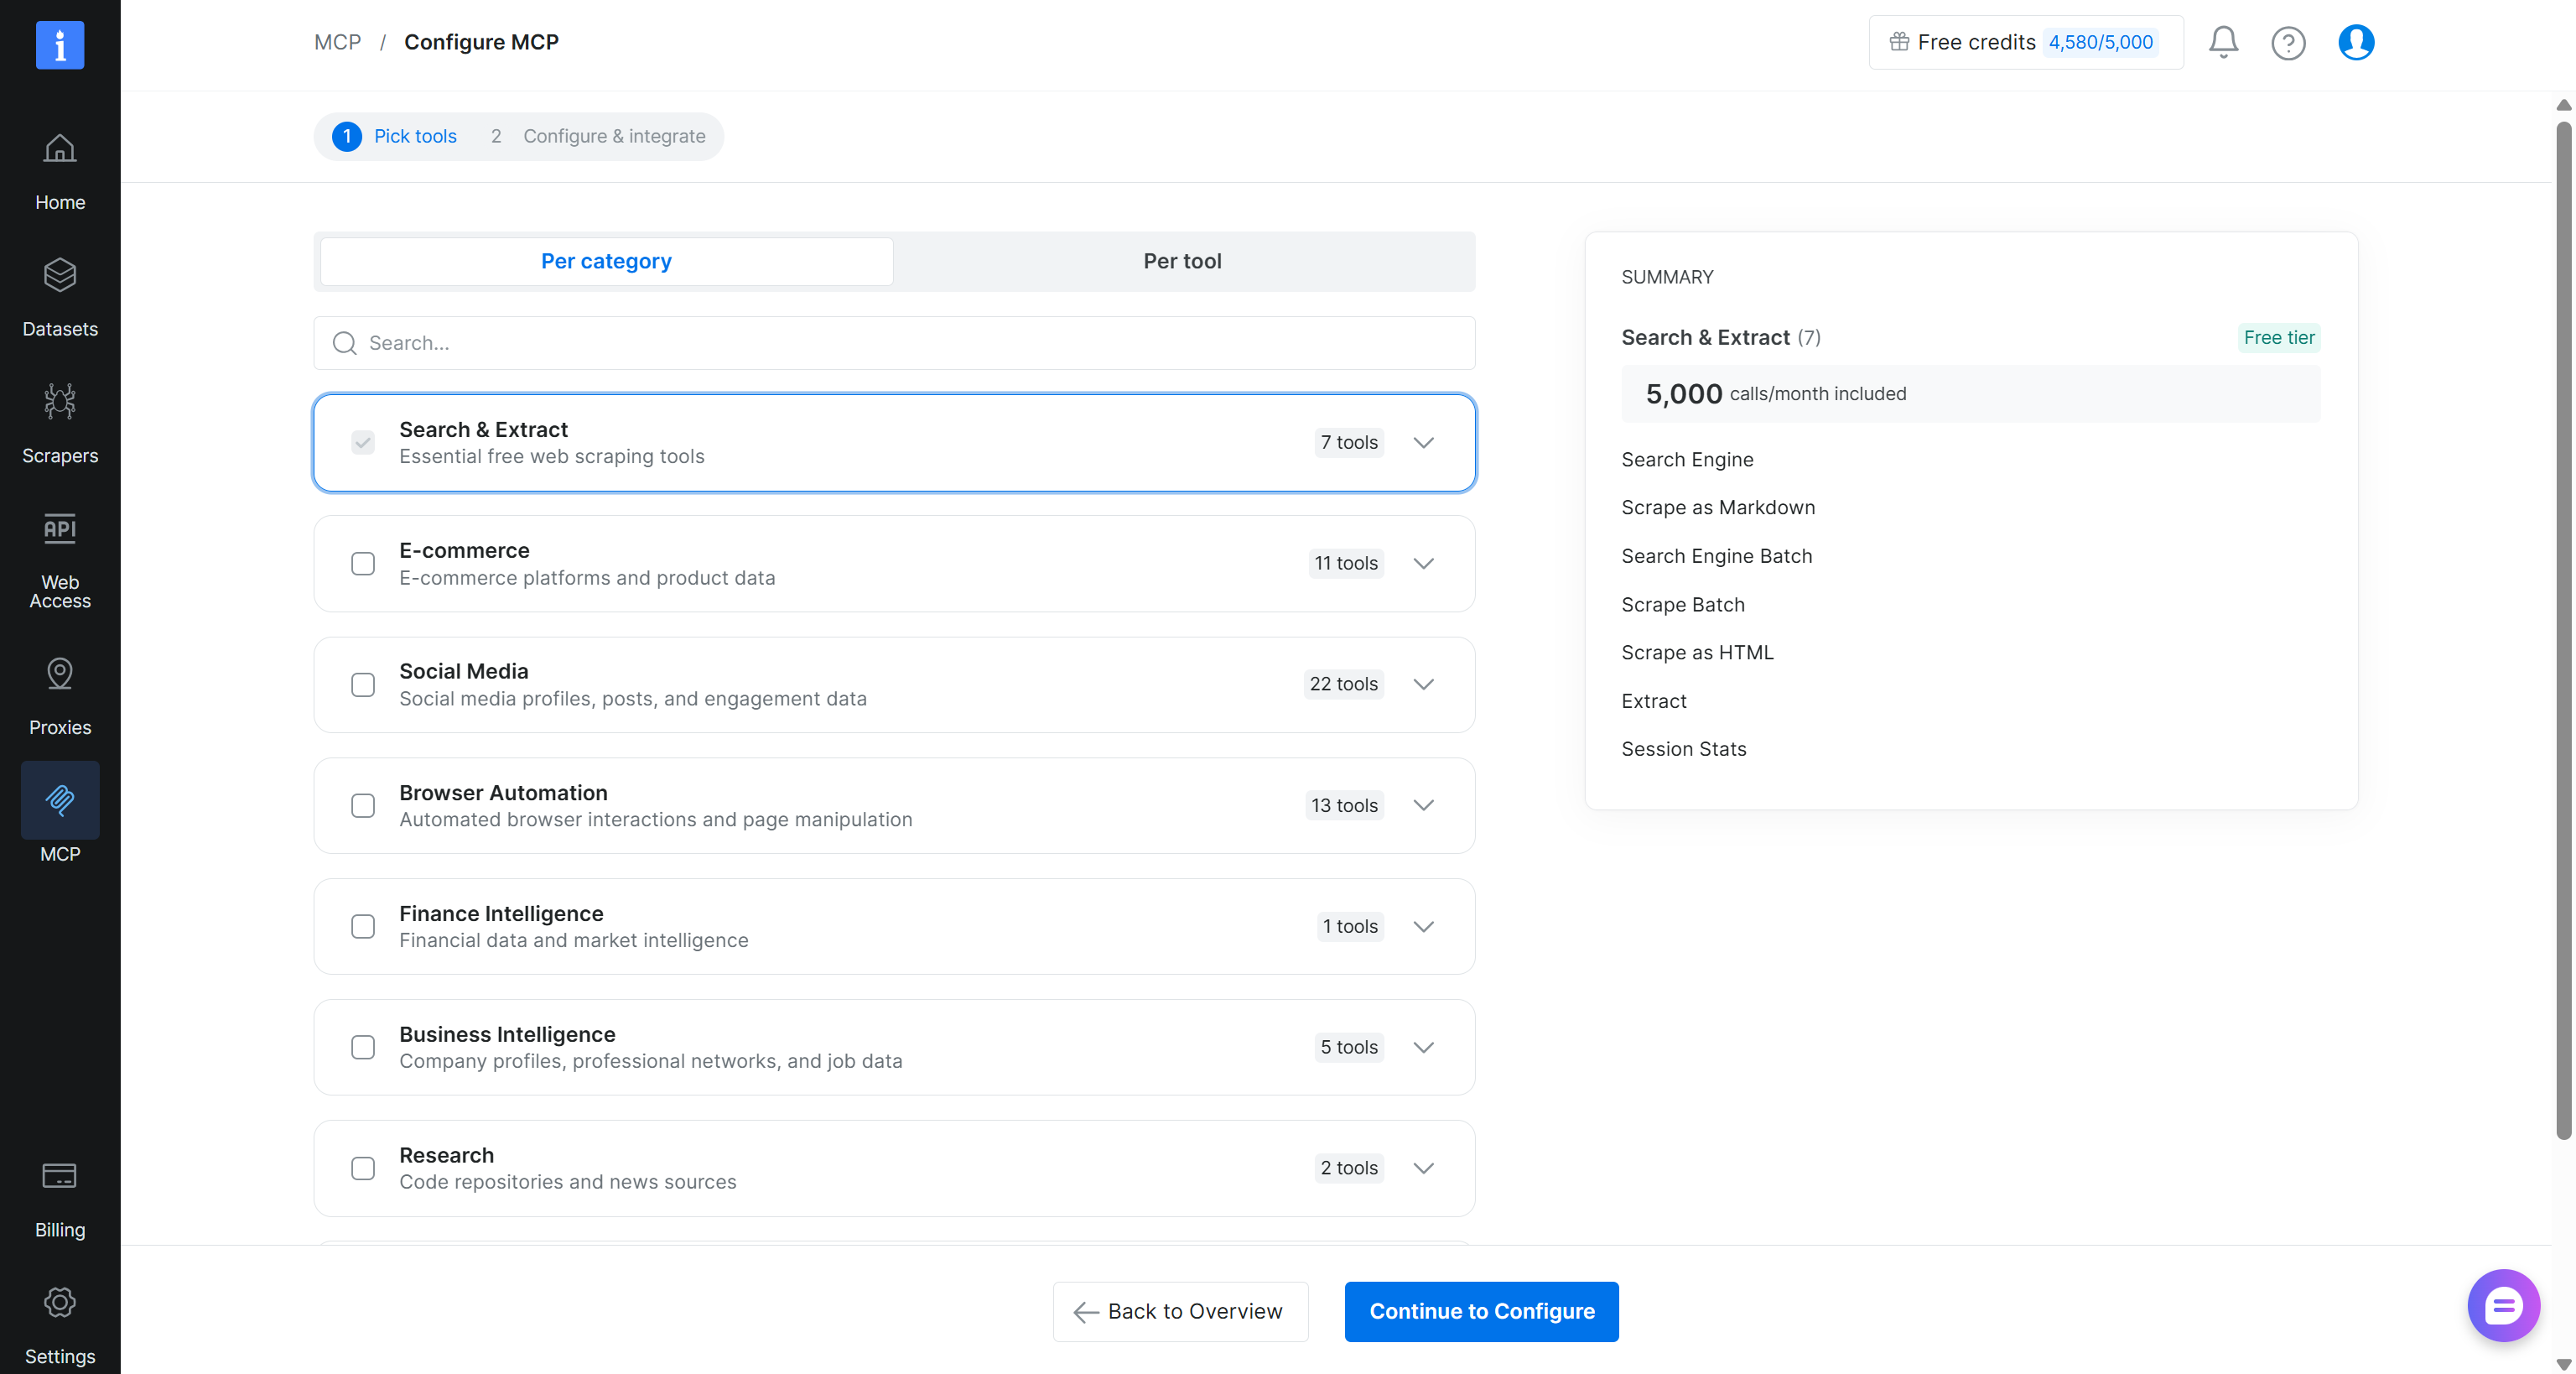
Once the setup is complete, copy the generated Bright Data MCP connection URL. You will need this URL in the next step. Wonderful!
Step #2: Connect Kimi Code CLI to the Bright Data MCP
To configure Bright Data MCP in Kimi Code CLI, start by creating a .kimi-code/mcp.json file in your project folder. Then, populate it with:
{
  "mcpServers": {
    "bright-data-mcp": {
      "url": "<BRIGHT_DATA_MCP_CONNECTION_URL>"
    }
  }
}
This configuration instructs Kimi Code CLI to connect to Bright Data MCP through a remote HTTP server. Replace the <BRIGHT_DATA_MCP_CONNECTION_URL> placeholder with your actual Bright Data MCP connection URL retrieved earlier. Cool!
Step #3: Check the Connection
Open Kimi Code CLI and run:
/mcpYou should see the bright-data-mcp connection:
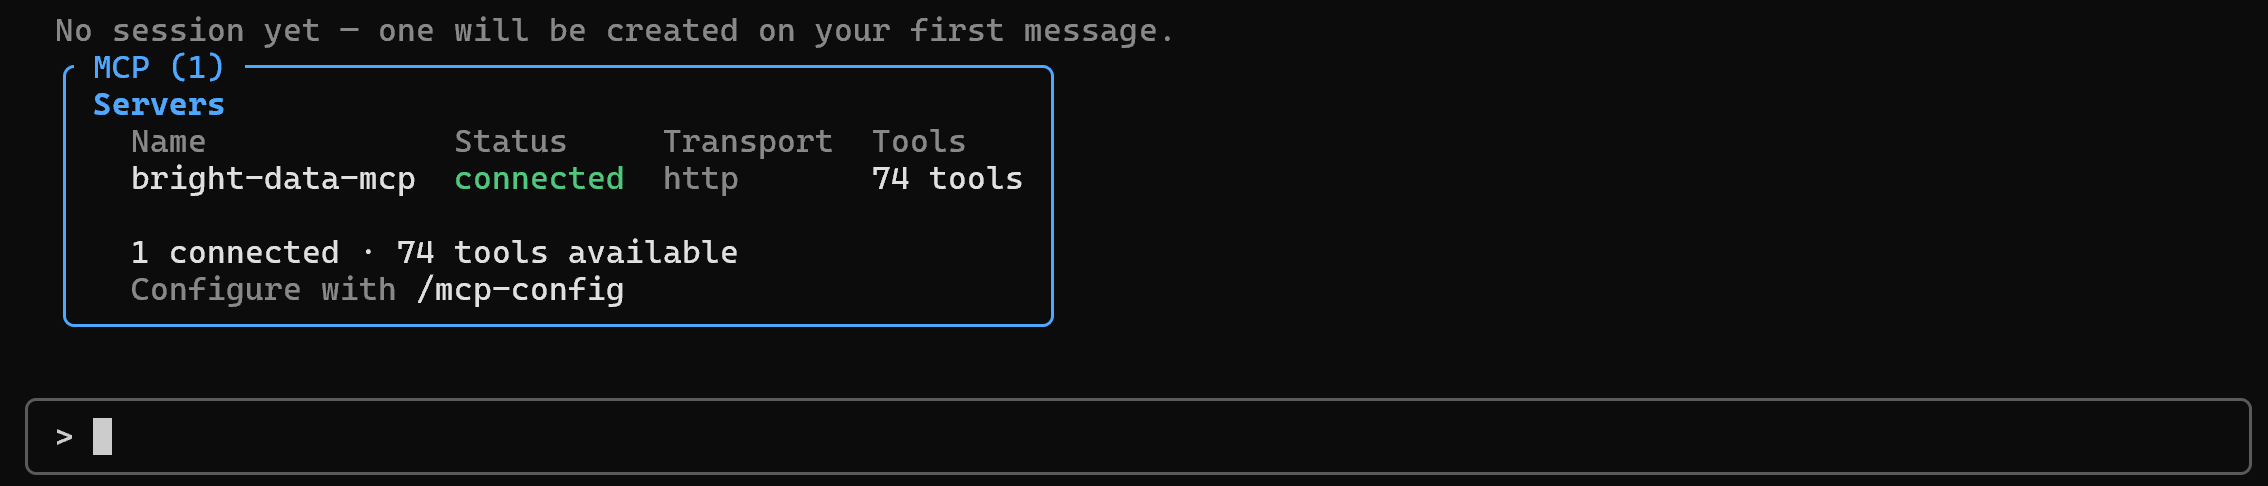
The 74 available tools confirm that the Bright Data MCP connection has been successfully configured in Pro mode.
From this point on, you can use Kimi Code CLI for tasks that require web access, as shown before. Terrific!
Conclusion
In this blog post, you learned what Kimi Code CLI is and the use cases it supports. You also saw how to integrate it with the Bright Data CLI through an official skill and with Bright Data MCP.
With Bright Data, Kimi Code CLI can work with live web data for research, helping it produce more accurate and up-to-date results. This integration also enables powerful web scraping and browser automation directly from the CLI. Explore the full range of AI-ready web data solutions available in the Bright Data ecosystem.
Sign up for a Bright Data account for free today and start exploring our web data and automation tools for AI agents!



Technical Writer
 5.5 years experience
Antonello Zanini is a technical writer, editor, and software engineer with 5M+ views. Expert in technical content strategy, web development, and project management.