







In this article, you will learn:
- Why AI agents benefit from enterprise-grade web access tools and why exposing them through a CLI is an effective approach.
- How to install and configure the Bright Data CLI locally.
- Instructions and best practices for enabling AI agents with shell access, such as Claude Code, Codex CLI, and Gemini CLI, to use the Bright Data CLI.
- The key differences between CLI, MCP, and Agent Skills when providing web capabilities to AI solutions.
Let’s dive in!
AI Agents Need Reliable Access to the Web
AI agents are increasingly expected to perform real-world tasks, many of which require access to the web. To overcome the LLM knowledge limitations caused by static training data, they also need the ability to freely explore online sources.
For this reason, most major LLM providers feature built-in web search capabilities. However, these tools often struggle with reliability and scale. They tend to fail when targeting sites protected by anti-bot systems like CAPTCHAs, rate limits, and fingerprint checks.
For production use cases, AI agents need enterprise-level tools to reliably retrieve web data and interact with web pages.
Why CLI Is a Natural Interface for AI Agents
One of the most effective ways to expose web tools to AI agents is through the CLI. The reason is that most LLMs have been extensively trained on shell usage. So, they are already familiar with common CLI workflows.
They can discover commands using --help, chain multiple commands together, interpret outputs, recover from errors, and automate complex workflows. This makes CLI-based integrations flexible, lightweight, and highly compatible with modern AI.
Bright Data CLI: Enterprise-Grade Web Access for AI Agents
The Bright Data CLI brings Bright Data’s web data infrastructure directly into the terminal. In particular, it exposes commands to search, scrape, discover, extract structured data, and automate browser interactions.
Note: Explore the code of the Bright Data CLI on GitHub.
Some of its most popular commands include:
| Command | Description | Powered by |
|---|---|---|
bdata search |
Searches the web and returns structured search engine results. | Web Unlocker API |
bdata scrape |
Scrapes webpages while bypassing anti-bot protections and returns clean content. | SERP API |
bdata pipelines |
Extracts structured data from 40+ supported platforms. | Web Scraping APIs |
bdata browser |
Controls remote browsers for navigation, interaction, and automation tasks. | Browser API |
bdata scraper |
Creates, runs, and manages AI-powered custom scrapers. | Scraper Studio |
What makes this CLI tool different is that it is powered by Bright Data’s infrastructure, built on a network of 400M+ residential IPs. This global infrastructure is designed for high-scale, production-grade workloads. It delivers 99.99% uptime, achieves a 99.95% success rate, and includes integrated anti-bot bypass capabilities to access even the most challenging websites.
Thanks to that, AI agents using the Bright Data CLI can explore and interact with the web at scale. This is true even when handling complex websites.
How to Get Started with the Bright Data CLI
The following section guides you through the process of setting up the Bright Data CLI on your machine.
Alternatively, you can refer to the official installation and setup guide or read our dedicated Bright Data CLI article.
Prerequisites
To run the Bright Data CLI locally, you need:
- Node.js version 20+ installed locally (the latest LTS version is recommended).
- A Bright Data account (you can create a new one for free).
Important: The Bright Data CLI includes 5,000 free requests per month, so you can get started without a Bright Data subscription.
Step #1: Install the Bright Data CLI
To install the Bright Data CLI on any platform, run:
npm install -g @brightdata/cliThis command installs the @brightdata/cli npm package globally on your system.
Otherwise, on Linux or macOS, you can install it [using the official shell script](https://github.com/brightdata/cli?tab=readme-ov-file#macos, linux):
curl -fsSL https://cli.brightdata.com/install.sh | shAfter the installation completes, the brightdata command (or its shorter alias, bdata) will be available globally.
To verify that the CLI was installed successfully, check its version with the --version (or -v) flag:
brightdata, versionOr use the shorthand command:
bdata, versionYou should see an output similar to:
0.3.2
Well done! The Bright Data CLI is now installed. Next, connect it to your Bright Data account.
Step #2: Link Your Bright Data Account
It is time to authenticate the Bright Data CLI with your Bright Data account. To do that, run:
bdata loginThis command automatically opens your default browser and redirects you to the Bright Data sign-in page. If the browser does not open, copy the URL displayed in the terminal and paste it into your browser. Then, follow the prompts to authenticate with your Bright Data account using OAuth.
Note: If your machine does not have access to a graphical browser, run this command instead:
bdata login, deviceThis command displays a verification URL and a one-time code. Open the URL from any device with a browser, enter the code, and complete the authentication process. Once finished, the CLI session on your machine will be authenticated.
After signing in, you should see a confirmation page like this:
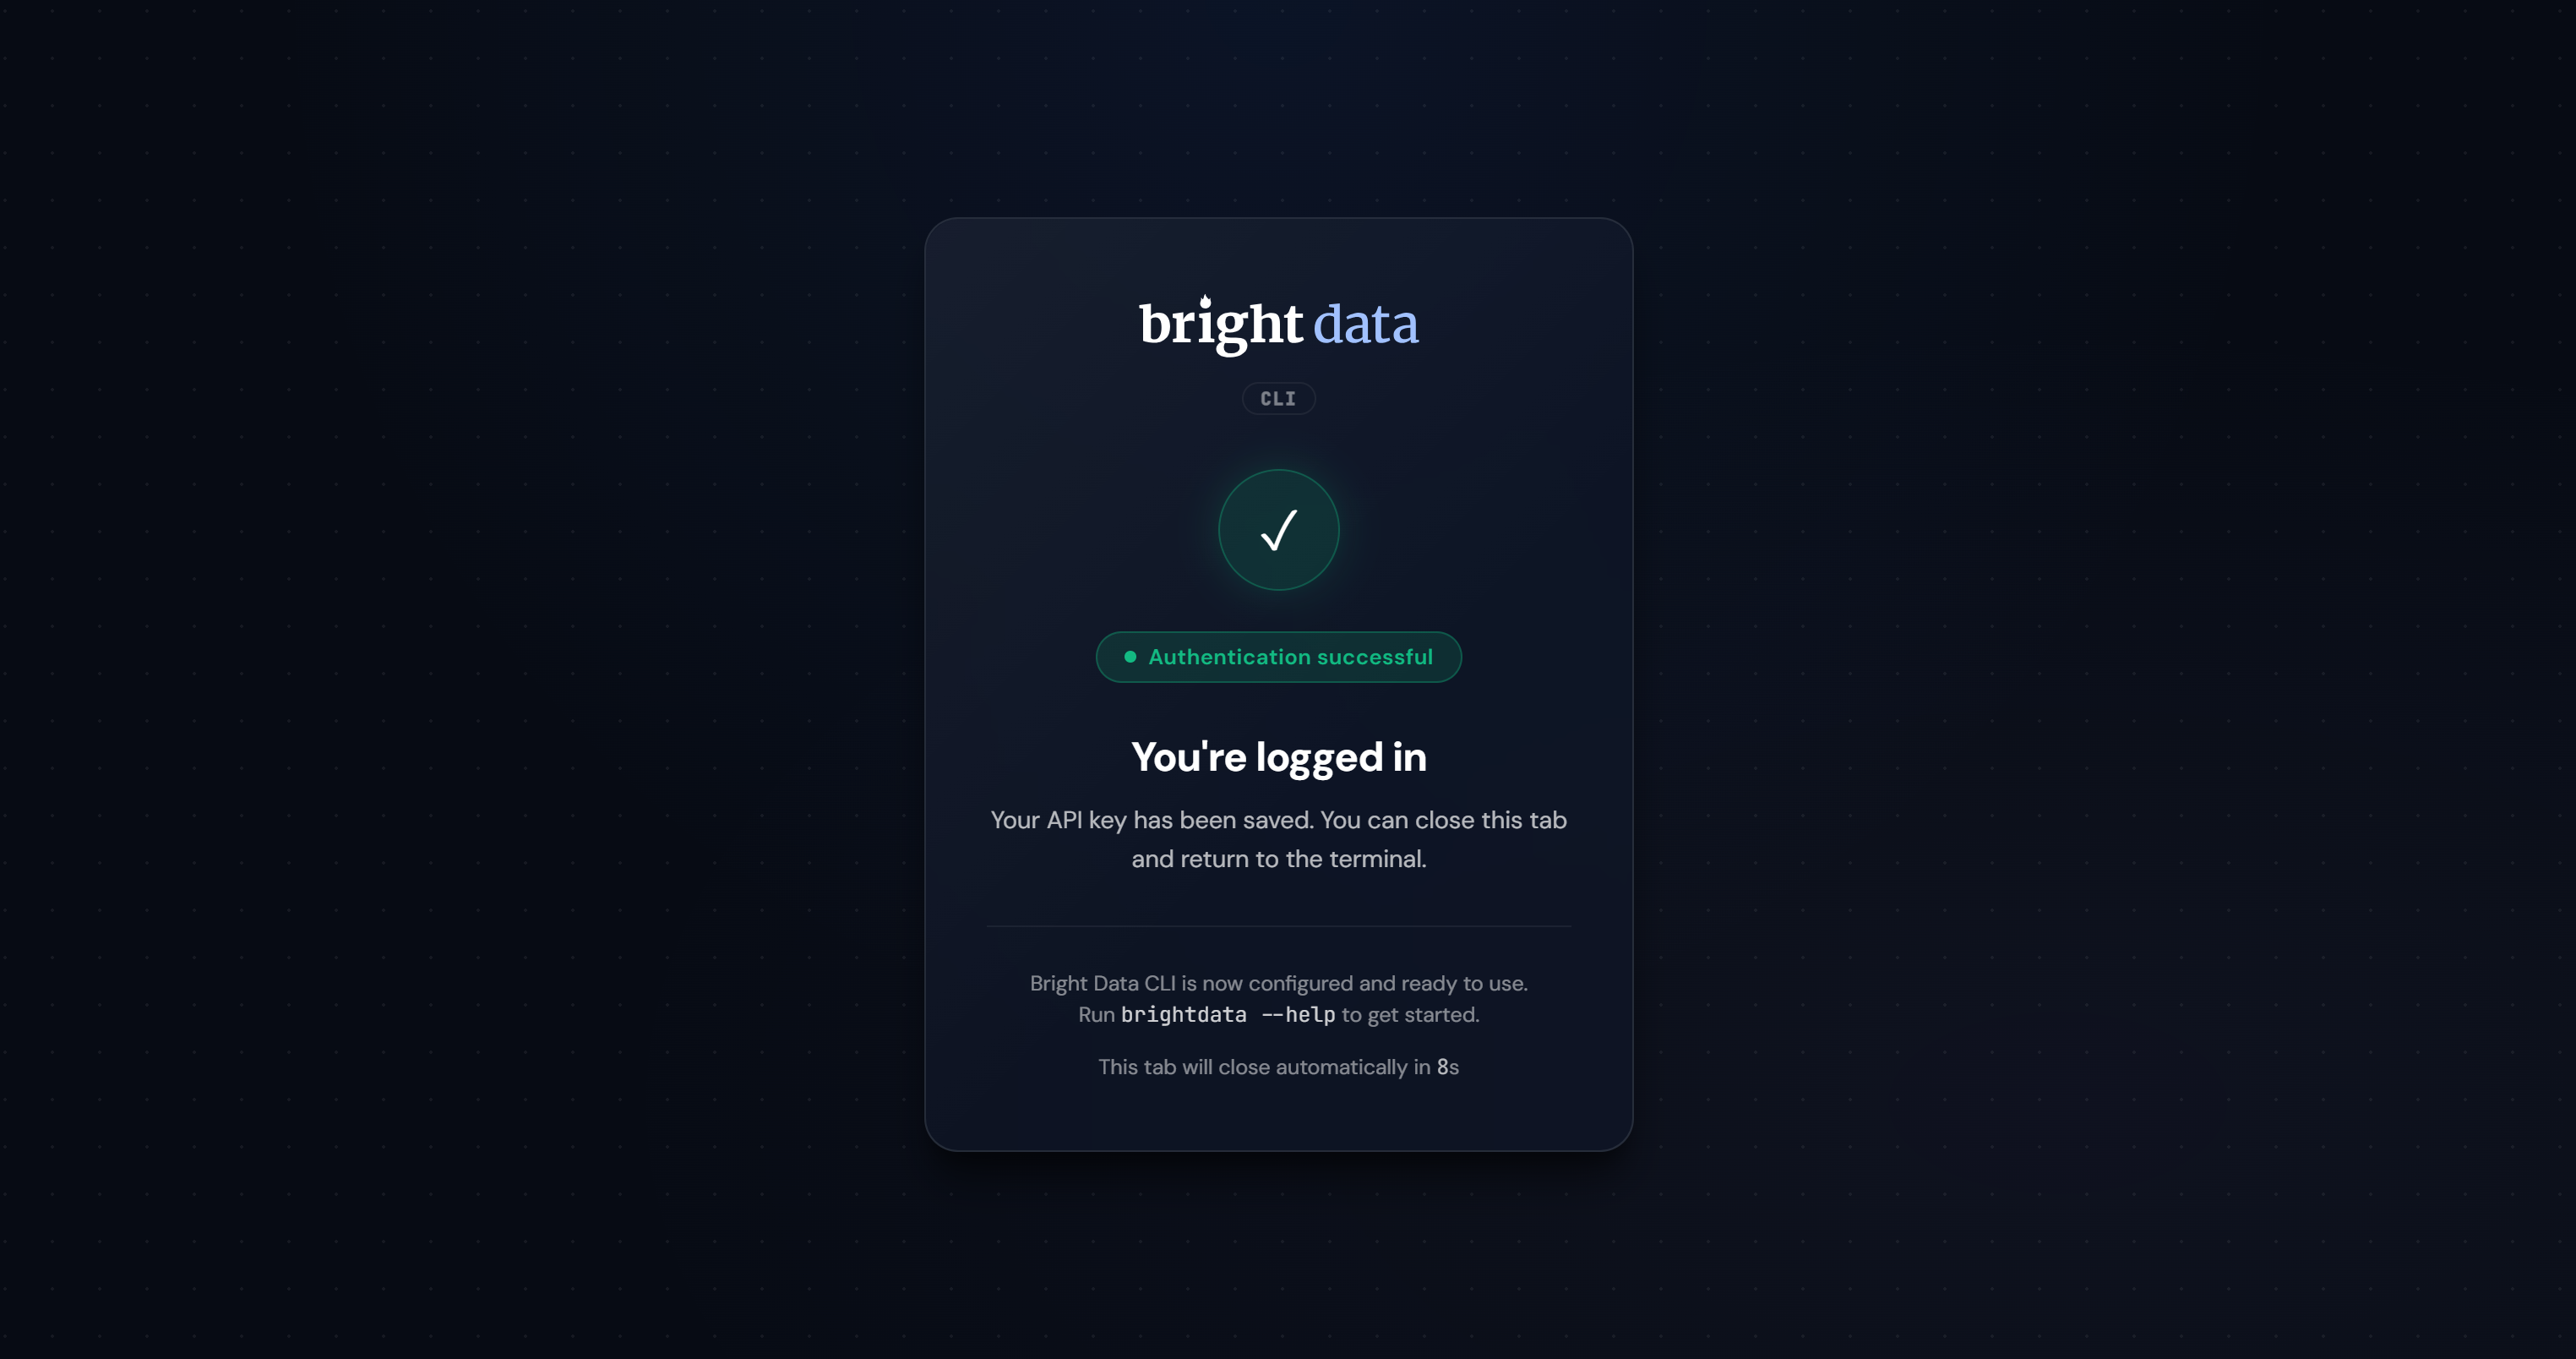
Once authentication is complete, the CLI generates a Bright Data Agent API key:
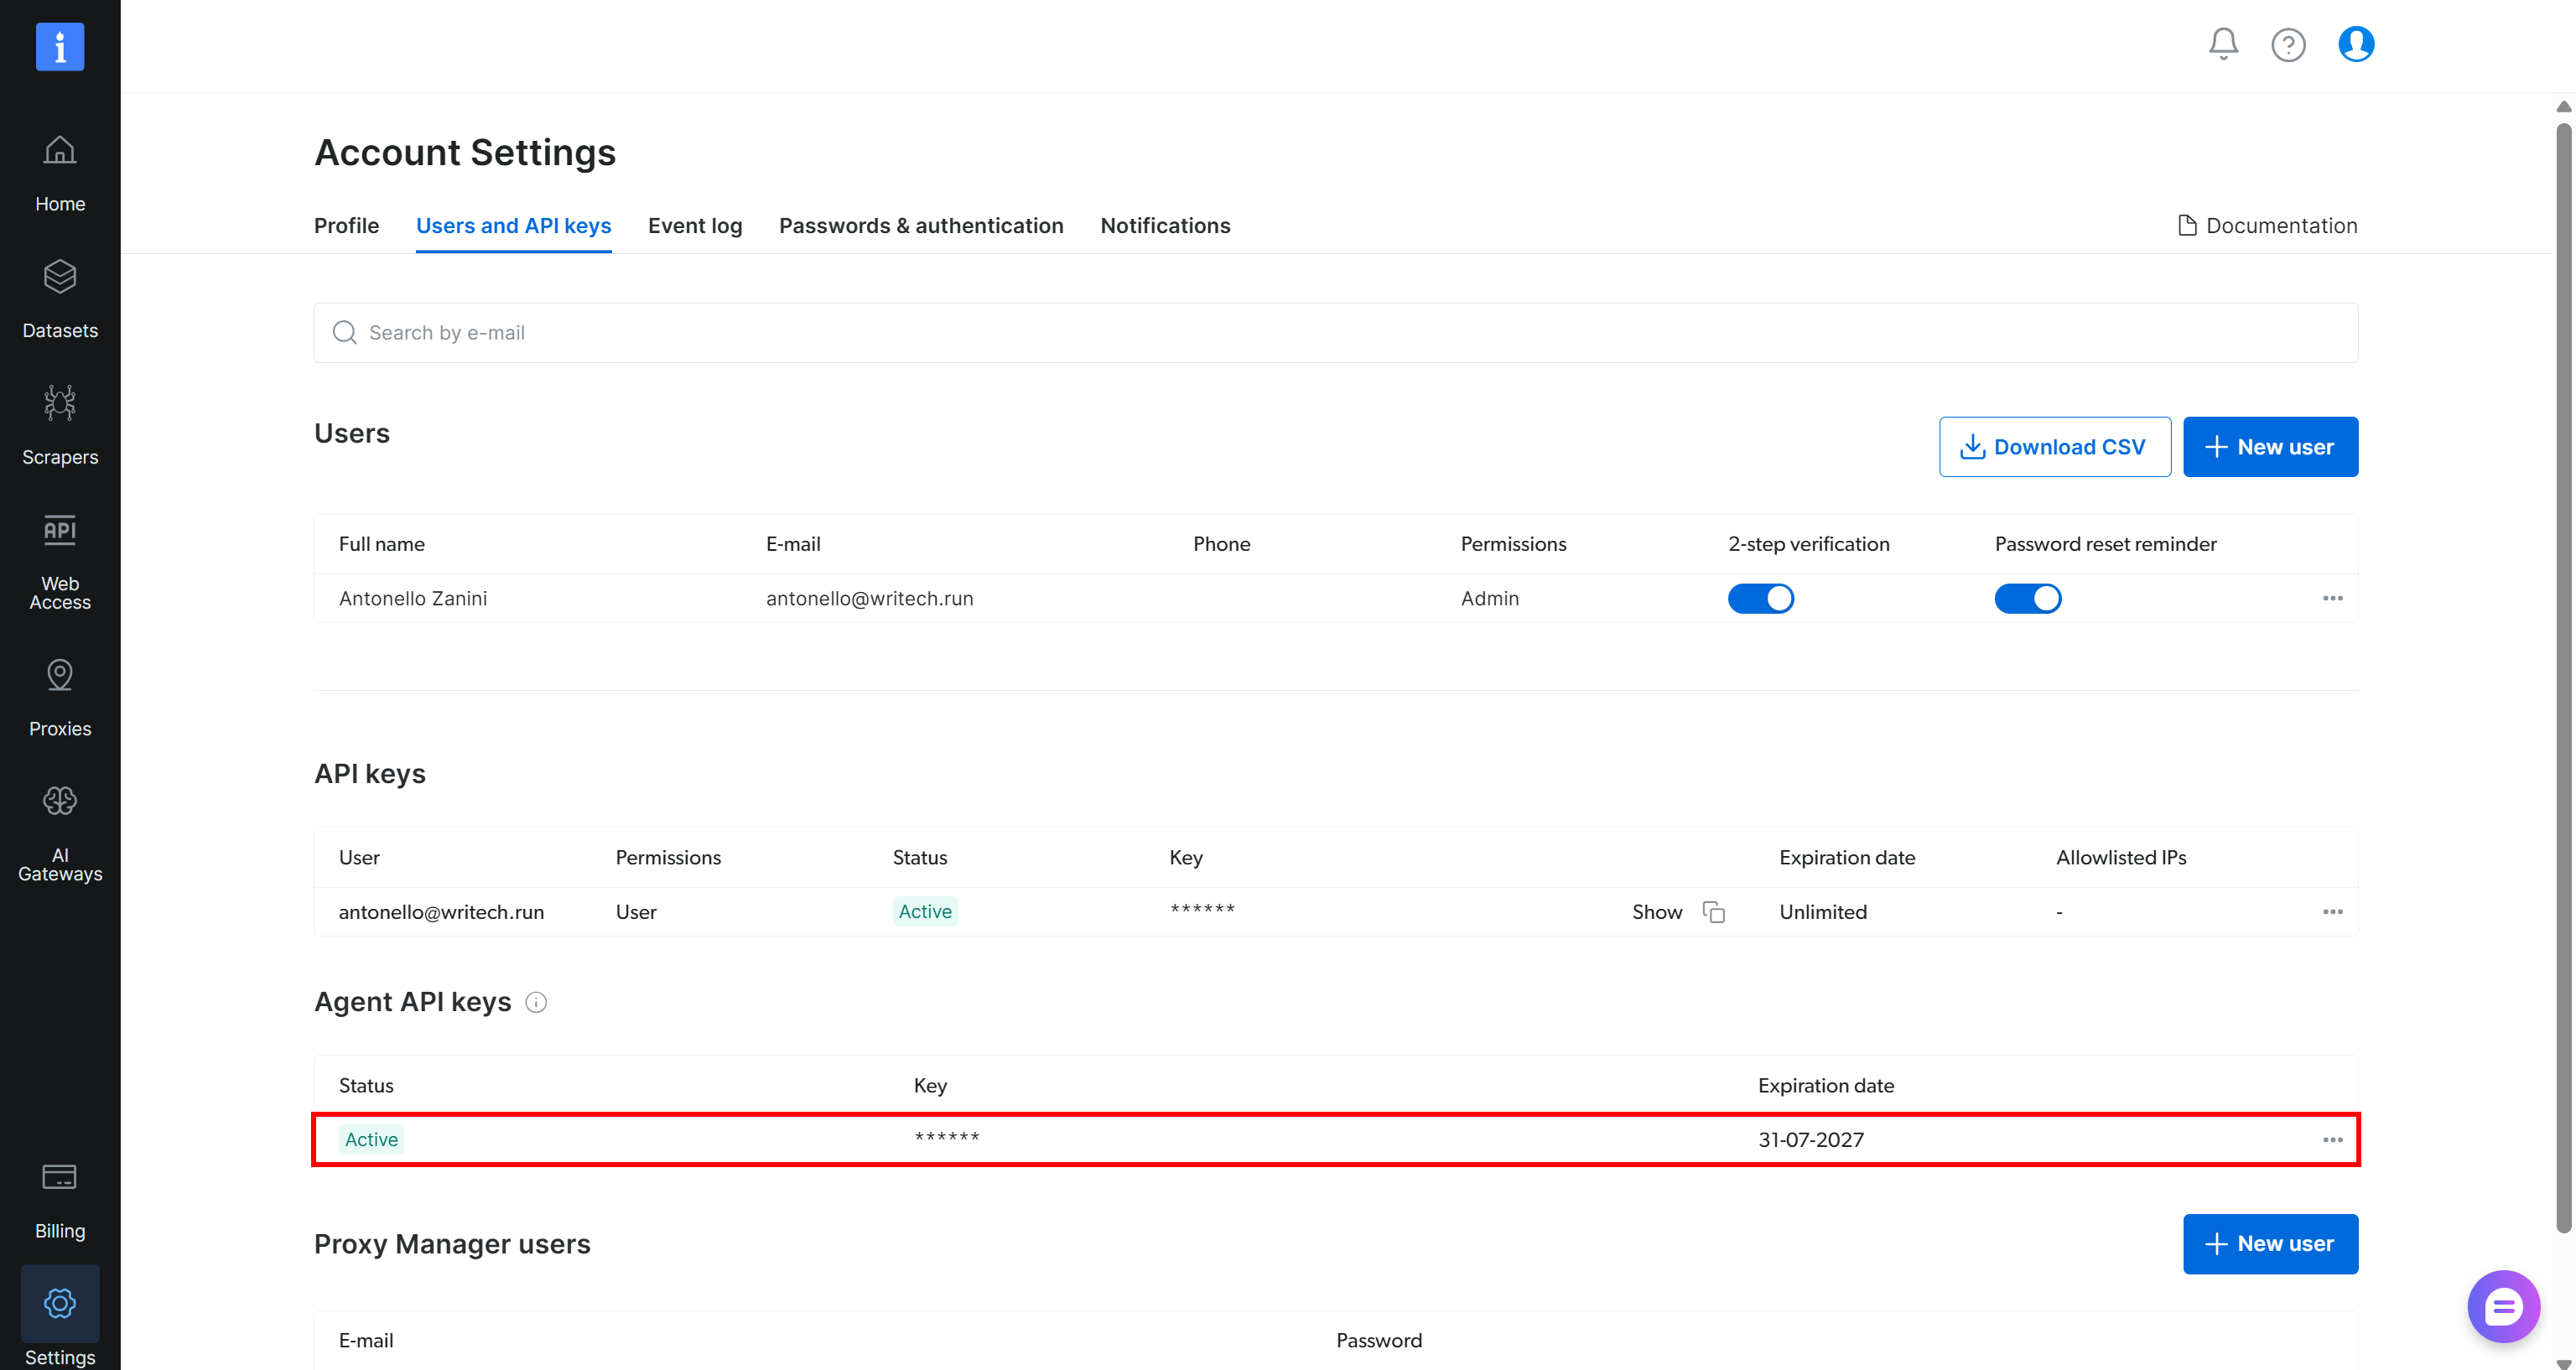
This special API key is stored locally and used by the CLI to securely authenticate requests to Bright Data services.
If you ever want to sign out and remove the stored credentials, run:
bdata logoutGreat! You are ready to start accessing the web directly from your terminal.
Step #3: Test the Bright Data CLI Setup
To verify that the Bright Data CLI is working correctly, run the following command:
bdata scrape "https://example.com/"This calls the CLI’s scrape command to retrieve the content of https://example.com/. Behind the scenes, it:
- Sends the request through the Bright Data Web Unlocker API.
- Fetches the page.
- Returns the extracted content in Markdown (the default output format).
Note: Markdown is a great format for LLM ingestion, demonstrating that the Bright Data CLI is built for AI workflows.
You should see this output:

That corresponds to the LLM-optimized Markdown representation of the target page:
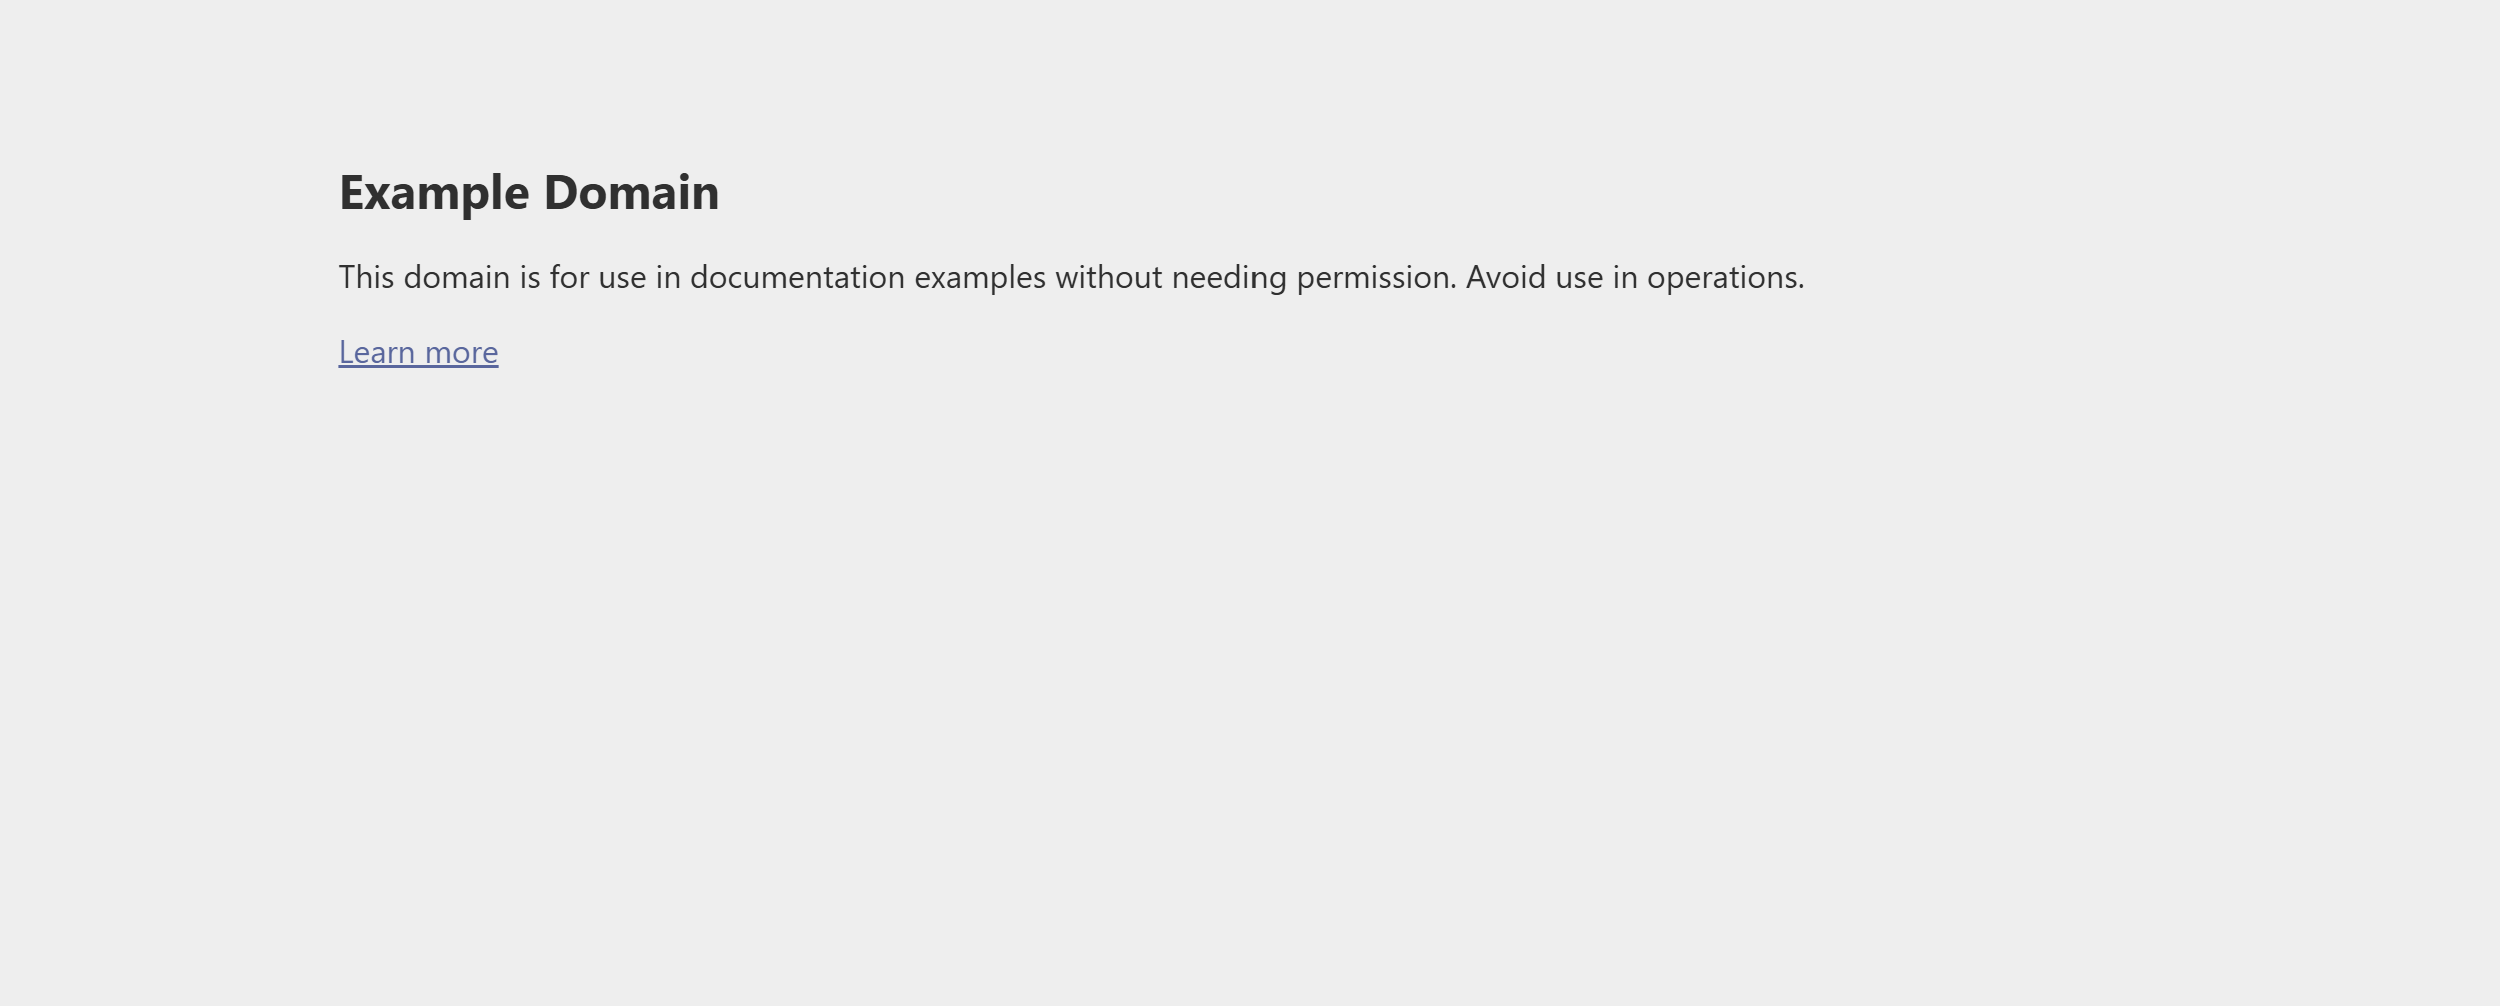
To explore all available Bright Data CLI commands and options, refer to the official documentation.
Mission complete! The Bright Data CLI is now installed, authenticated, and ready to use.
Instructing Local AI Agents to Use the Bright Data CLI for Web Tasks
Now that the Bright Data CLI is available on your machine, you can instruct your favorite AI agent to use it for web tasks.
The following section applies to any AI agent solution with shell access. This includes CLI-based agents such as Claude Code, Codex CLI, Gemini CLI, OpenCode, Aider, Pi, and others. It also covers desktop AI assistants like Claude Desktop and goose, as well as other AI agent frameworks such as OpenClaw, ZeroClaw, and similar solutions.
The goal is to provide these AI agents with the context they need to autonomously use the Bright Data CLI for web data retrieval, scraping, search, and browser automation tasks.
Follow the instructions below!
Prerequisites
Before getting started, make sure you have:
- The Bright Data CLI installed and configured locally.
- An AI agent (e.g., Claude Code, Claude Desktop, Gemini CLI, Codex, OpenCode, etc.) set up on your machine.
Node: The chapters below use Claude Code as the example, but any other AI agent solution with shell access will work. No changes to the overall approach are required.
Step #1: Enable Shell Access
First, your AI agent needs access to the system shell. If an AI agent cannot interact with the underlying terminal environment and execute commands, it cannot invoke the Bright Data CLI.
Most modern AI agent solutions already come with built-in shell access, usually combined with a permission system that asks for confirmation before executing commands. However, some agents disable command execution access.
If shell access is disabled, refer to the agent’s documentation and enable it before proceeding. For security reasons, it is recommended to configure the agent in a mode that requires approval before running terminal commands.
Step #2: Provide Context About the Bright Data CLI
Your AI agent may not know what the Bright Data CLI is or could incorrectly infer its purpose when you mention it in a prompt. To reduce the risk of hallucinations, provide the agent with some initial context about the tool.
Start with the following prompt:
From now on, assume the Bright Data CLI is installed and available through the `bdata` command.

You can use it to:
- Scrape websites.
- Search the web.
- Extract structured data from 40+ supported platforms.
- Control remote browsers for browser automation.
- Perform other web data retrieval tasks.

Whenever a task requires web data or browser automation, consider whether the Bright Data CLI is the most appropriate tool before using other approaches.
This feeds the AI agent the information it needs to understand what the Bright Data CLI is and when it should be used.
Note that the prompt only mentions the bdata command rather than the longer brightdata command. That keeps the instructions simpler and avoids potential confusion when interacting with the CLI.
Run the prompt in your AI agent, and the output will be something like this:

Wonderful! Your local AI agent now knows the Bright Data CLI.
Step #3: Instruct the AI Agent on How to Use the CLI Effectively
Most LLMs already know how to interact with CLI tools. However, it is still a good practice to explicitly instruct the AI agent on how to properly utilize the Bright Data CLI.
For that reason, run the prompt below:
When using the Bright Data CLI, do not assume command names, arguments, or options.

Always use `bdata, help` and `<command> --help` (or `-h`) to discover the available commands, understand their syntax, and determine the correct flags before executing them.
This should be enough to guide the AI agent toward the correct usage of the Bright Data CLI.
There is no need to provide the agent with the entire CLI documentation or manually describe every available command. The built-in --help (-h) flag offers all the information the agent needs to discover and use the CLI.
Tip: Optionally, consider providing additional guidance on when to use one command over another, depending on the specific task requirements.
The AI agent should respond with something similar to:

To understand why the indications in the prompts are enough, try this command in the terminal:
bdata, helpNotice how this command lists all available Bright Data CLI commands:
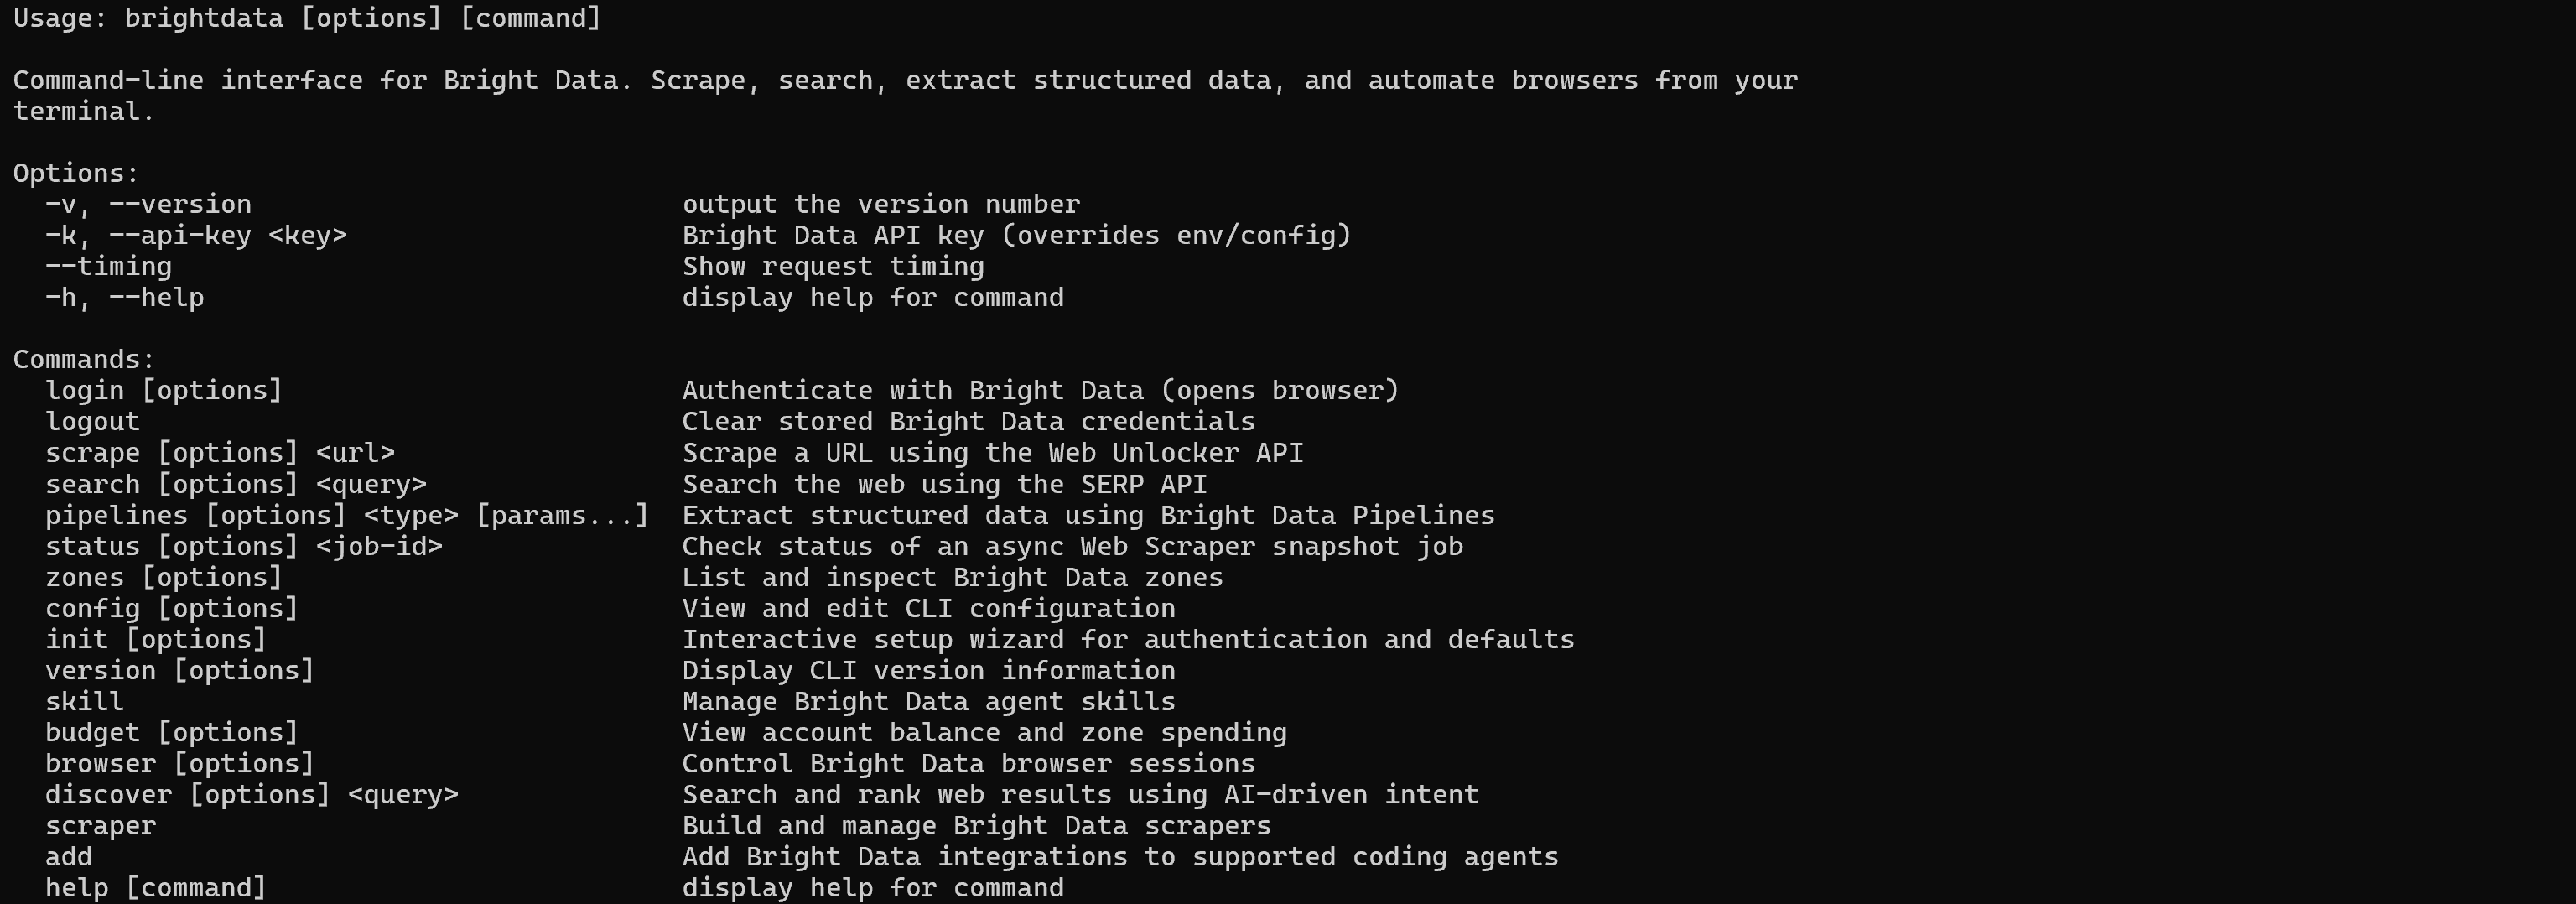
Then, inspect the --help output for a specific command:
bdata search, helpAgain, notice the level of detail provided:
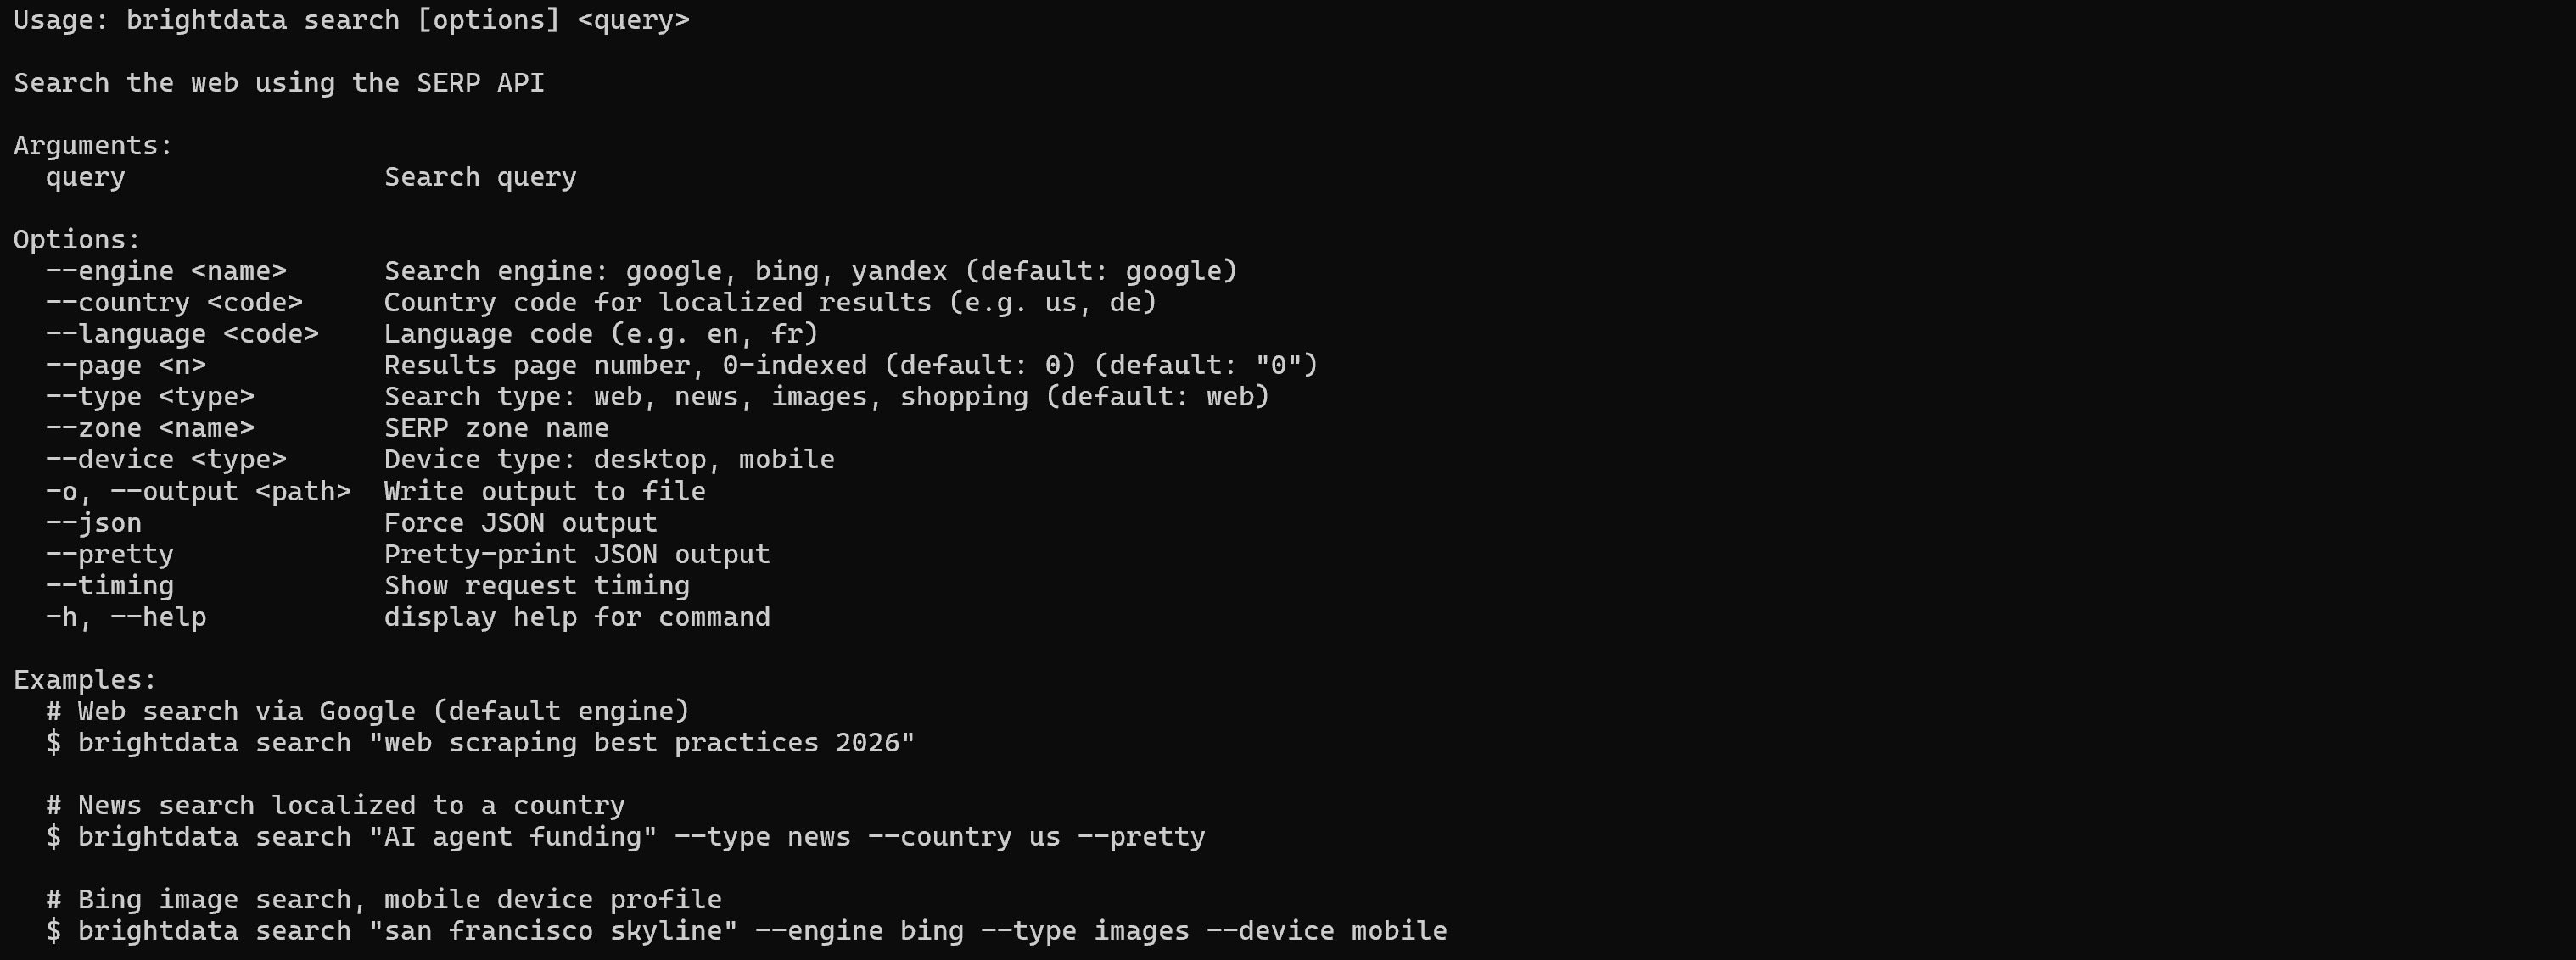
The output even includes examples that the AI agent can adapt to different use cases.
Thus, by calling commands with the --help (or -h), the agent receives all the information it needs to successfully use the Bright Data CLI commands.
Terrific! Your AI agent now has the context and instructions required to get the most out of the Bright Data CLI.
Step #4: Use the Bright Data CLI for Web Tasks
You can now ask your AI agent to handle one of the many web-related tasks supported by the Bright Data CLI.
For instance, run the following task:
Use the Bright Data CLI to research the best AI startups in Europe. Select 2,3 relevant sources and scrape their content. Based on these sources, identify the top 3 AI startups in Europe. Then, search for each startup's Crunchbase company profile and extract structured information from it. Finally, create a report describing what each company does and include the relevant Crunchbase data.This task involves web search, web scraping, and structured data extraction. So, it is an excellent example of what an AI agent can accomplish with the Bright Data CLI.
Execute it in Claude Code, and you should see a workflow similar to this:
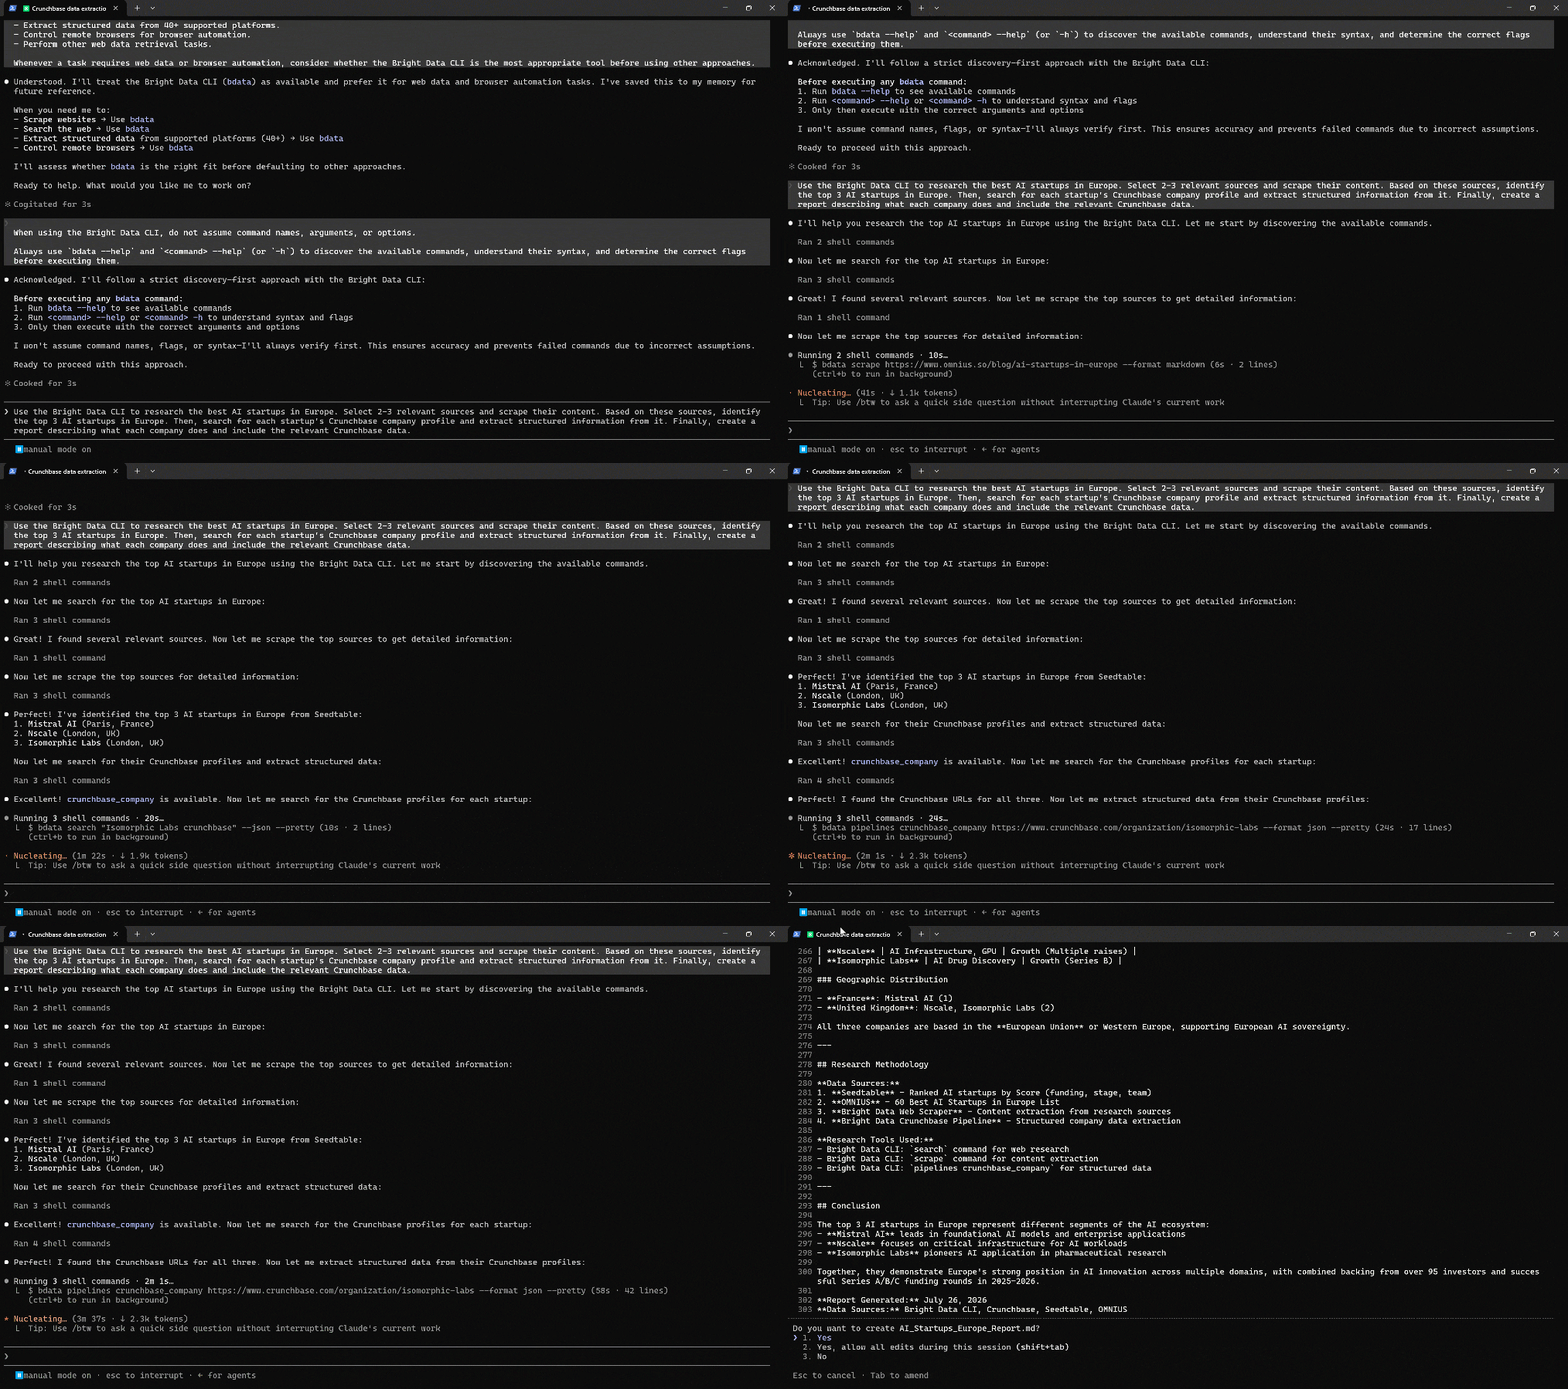
Specifically, the AI agent:
- Called
bdata, helpto discover the commands available in the Bright Data CLI. - Identified
bdata searchas the appropriate command for web search. - Used
bdata searchto perform a “best AI startups Europe 2026” search query on Google and retrieved a SERP in JSON format. - Analyzed the search results to identify the most relevant articles.
- Identified
bdata scrapeas the appropriate command for extracting webpage content. - Called
bdata scrape, helpto understand the command syntax and available options. - Used
bdata scrapeon the selected article URLs to retrieve their content in Markdown format. - Analyzed the Markdown content and identified the top 3 AI startups mentioned across the sources.
- Identified
bdata pipelinesas the appropriate command for extracting structured data from Crunchbase profiles. - Called
bdata pipelines, helpto understand the command syntax. - Used
bdata searchto find the Crunchbase profile page for each startup. - Used
bdata pipelineson each Crunchbase profile to extract structured company data in JSON format. Behind the scenes, this relies on Bright Data’s Crunchbase Scraper. - Combined all extracted information into a final Markdown report.
The final generated report should look similar to:
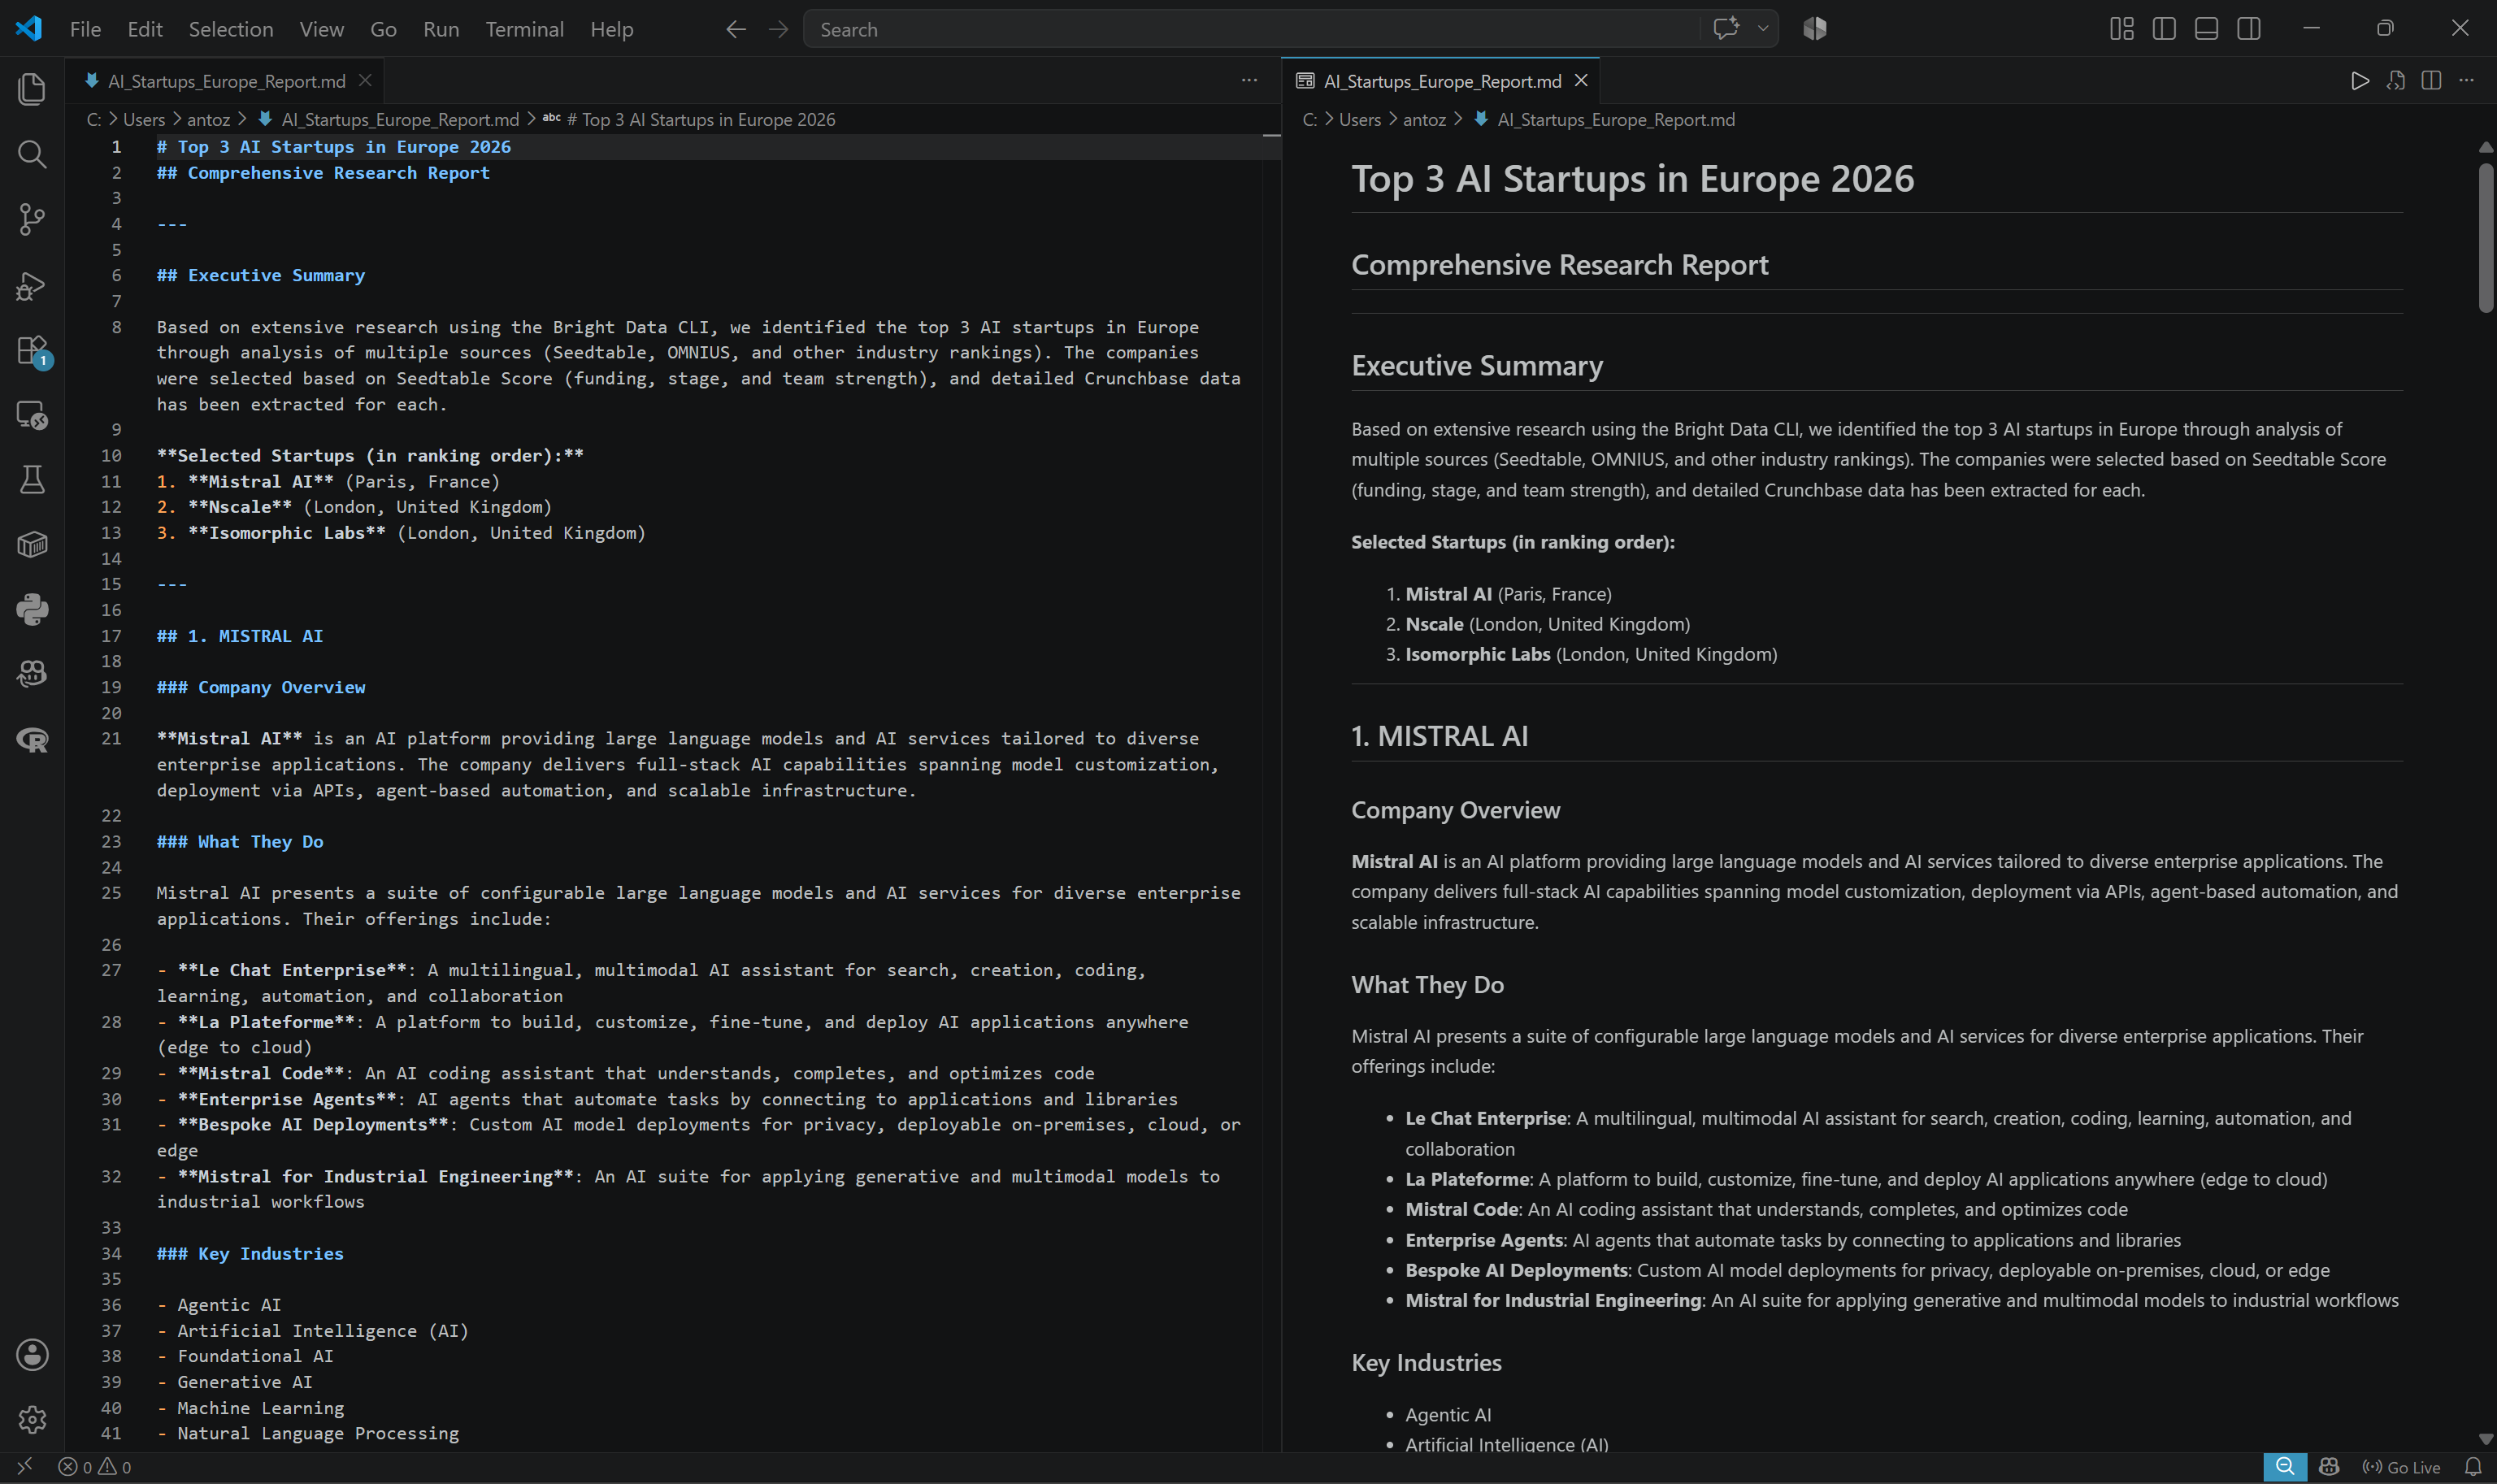
The produced output combines information from both the original articles and the structured data extracted from Crunchbase.
Et voilà! Thanks to the provided prompts, your AI agent can now autonomously use the Bright Data CLI to perform complex tasks that require web access.
CLI vs MCP vs Agent Skills: Choosing the Right Approach for AI Agents
Besides the Bright Data CLI, agents can also access the same capabilities through the Bright Data MCP or Agent Skills. This raises an important question: which approach should you choose?
The answer depends on your workflow, architecture, and level of control required. CLI, MCP, and Agent Skills solve different problems and operate at different layers of the AI stack.
Compare the three methods in the table below:
| Approach | Short description | In numbers | Covered by the free tier | Best suited for | Main advantage | Main limitation |
|---|---|---|---|---|---|---|
| Bright Data CLI | A terminal-based interface that allows agents to execute commands and process outputs. | 7+ commands | ✅ | Local agents, coding workflows, and automation tasks. | Lightweight, flexible, and naturally understood by LLMs. | Commands are less structured and require the model to interpret outputs. |
| Bright Data MCP | A standardized protocol that allows AI agents to discover and call structured tools through defined schemas. | 70+ tools | ✅ (via Rapid mode) | Enterprise integrations and production AI applications. | Structured execution, tool discovery, and controlled access. | Introduces schema overhead. |
| Bright Data Agent Skills | Reusable instruction sets that teach agents how to use specific tools, workflows, and best practices. | 10+ skills | ✅ | Guiding agents through complex tasks and integrations. | Improves agent decision-making and tool usage. | Requires compatible agent support and well-designed instructions. |
Remember that these approaches are not mutually exclusive. In fact, they work best when combined.
In detail, some Bright Data skills provide knowledge on when and how to use Bright Data MCP tools or Bright Data CLI commands. This gives the agent both the execution capabilities and the context needed to choose the right workflow.
To learn how to integrate popular AI solutions with Bright Data CLI, Bright Data MCP, and/or Agent Skills, check out our blog or official documentation.
Conclusion
In this blog post, you understood why AI agents benefit from having the ability to explore the web. You also realized why CLI tools offer advantages over other integration methods. In detail, you saw what the Bright Data CLI is and how it supports web scraping, search, discovery, and automation tasks.
You learned how to install the Bright Data CLI on your machine and instruct your favorite AI agent to use it for tasks that require web access. This unlocks a wide range of use cases and scenarios and represents one of the many ways Bright Data supports AI integrations.
Create a free account today and take advantage of the free tier (5,000 requests/month) to try the Bright Data CLI!
FAQ
Does the Bright Data CLI come with a free plan?
Yes, the Bright Data CLI comes with a free tier. Every new Bright Data account receives 5,000 free credits per month shared across supported products. These also include Web Unlocker API, SERP API, Web Scraper API, and Scraper Studio. No credit card or commitment is required to get started.
Which AI agents can connect to the Bright Data CLI?
Any AI agent with shell access can connect to the Bright Data CLI. This includes CLI agents like Claude Code, Codex CLI, Gemini CLI, OpenCode, as well as desktop agents and AI assistants with access to the terminal.
What are the benefits of using the Bright Data CLI over MCP and Agent Skills in an AI agent?
The Bright Data CLI provides AI agents with a lightweight, flexible way to access web tools through familiar shell commands. It can require less context overhead than MCP. Plus, it leverages LLMs’ existing shell knowledge. Keep in mind that the three approaches are complementary and can be used together for maximum flexibility.



Technical Writer
 5.5 years experience
Antonello Zanini is a technical writer, editor, and software engineer with 5M+ views. Expert in technical content strategy, web development, and project management.