
In this blog post, you will learn:
- What Forge Code is and what makes it a unique AI-powered development tool.
- Why integrating Bright Data’s Web MCP improves your terminal workflow with richer AI capabilities.
- How to use Web MCP within Forge to give your AI coding agent more power and flexibility.
Let’s dive in!
What Is Forge Code?
Forge Code (also called Forge or ForgeCode) is an open-source AI-powered software engineering agent that runs directly in your terminal. Its goal is to supercharge your coding workflow without leaving your existing environment.
Forge integrates directly with your CLI to give you real-time assistance while maintaining full control over your code. This AI terminal development tool works alongside your IDEs and coding solutions, complementing them to provide a better development experience.
As of this writing, its GitHub repository has more than 4.6k stars, reflecting strong and growing interest from the developer community.
What makes Forge particularly interesting is its combination of multi-agent architecture, context awareness, and flexible AI provider integration. It understands your project files, Git history, dependencies, and environment to deliver intelligent suggestions, code analysis, and efficient task management.
A Smarter AI-Powered Terminal Development Environment Experience
Forge integrates with over 300 LLMs and AI models. However, they all share a fundamental limitation: static knowledge. After all, LLMs can only generate answers based on the data they were trained on.
The problem is that LLM training data is a snapshot of the past. In a fast-evolving world like IT, even the most advanced and sophisticated LLMs may suggest outdated coding practices or obsolete documentation.
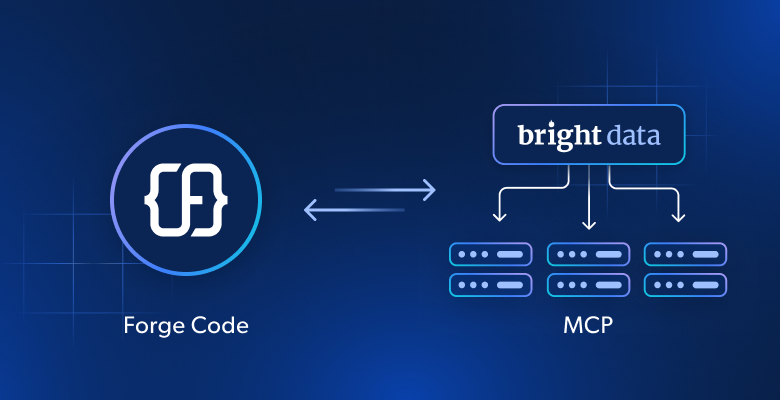
Forge overcomes that limitation by supporting connections to external systems via MCP. For example, integrating Forge with Bright Data’s Web MCP gives the AI coding agent real-time access to tutorials, documentation, and guides.
More specifically, the Forge + Web MCP system equips the AI coding agent to:
- Fetch and learn from tutorials and documentation pages.
- Search the web for accurate, up-to-date information.
- Scrape real websites to get data for analysis, processing, or mocking, and more.
- Interact with web applications and automate workflows.
- Take care of much more…
This is possible because Web MCP provides 60+ AI-ready tools, enabling automated web data collection, structured data extraction, and browser interactions.
Even on the free tier, it exposes two useful tools (with batch versions):
| Tool | Description |
|---|---|
search_engine |
Retrieve Google, Bing, or Yandex results in JSON or Markdown format. |
scrape_as_markdown |
Scrape any webpage into clean Markdown, bypassing anti-bot measures. |
But [Pro mode is where Web MCP truly shines](https://github.com/brightdata/brightdata-mcp?tab=readme-ov-file#-pricing, modes), unlocking premium tools for structured extraction from platforms like Amazon, LinkedIn, YouTube, TikTok, Yahoo Finance, Zillow, Google Maps, and more.
Let’s see how to integrate Bright Data Web MCP into Forge!
How to Connect the Forge Code AI Terminal Agent to Bright Data’s Web MCP
In this section of the tutorial, you will learn how to connect Forge to a local instance of Bright Data Web MCP. This setup gives you a supercharged AI development experience directly in your terminal.
Follow the instructions below to get started!
Prerequisites
To follow along with this tutorial, make sure you have:
- Node.js 16+ installed locally.
- A Bright Data account with an API key (you will be guided through the account setup in a dedicated step).
- An API key from one of the supported LLM providers (here, we will use OpenRouter) or a Forge account.
Some basic familiarity with the MCP protocol and the tools exposed by the Web MCP server will also be helpful.
Step #1: Install and Launch Forge
There are two ways to set up Forge Code. The easiest option is to run it immediately using the npx command below:
npx forgecode@latest <PATH_TO_YOUR_PROJECT_FOLDER>This command initializes the Forge AI terminal development agent in the specified directory.
Alternatively, you can launch it using two commands:
cd <PATH_TO_YOUR_PROJECT_FOLDER>
npx forgecode@latestNote: In this tutorial, the project folder is named forge-project. So, you will see this name in the following screenshots.
As a second approach, if you prefer not to type npx forgecode@latest every time, install Forge Code globally:
npm install -g forgecode@latestOnce installed globally, you can start it with:
forge Otherwise, you will have to start it in your project’s folder with:
npx forgecode@latestWell done! You now have Forge running locally in your project folder.
Step #2: Configure the LLM Provider
After launching Forge for the first time, this is what you should see:
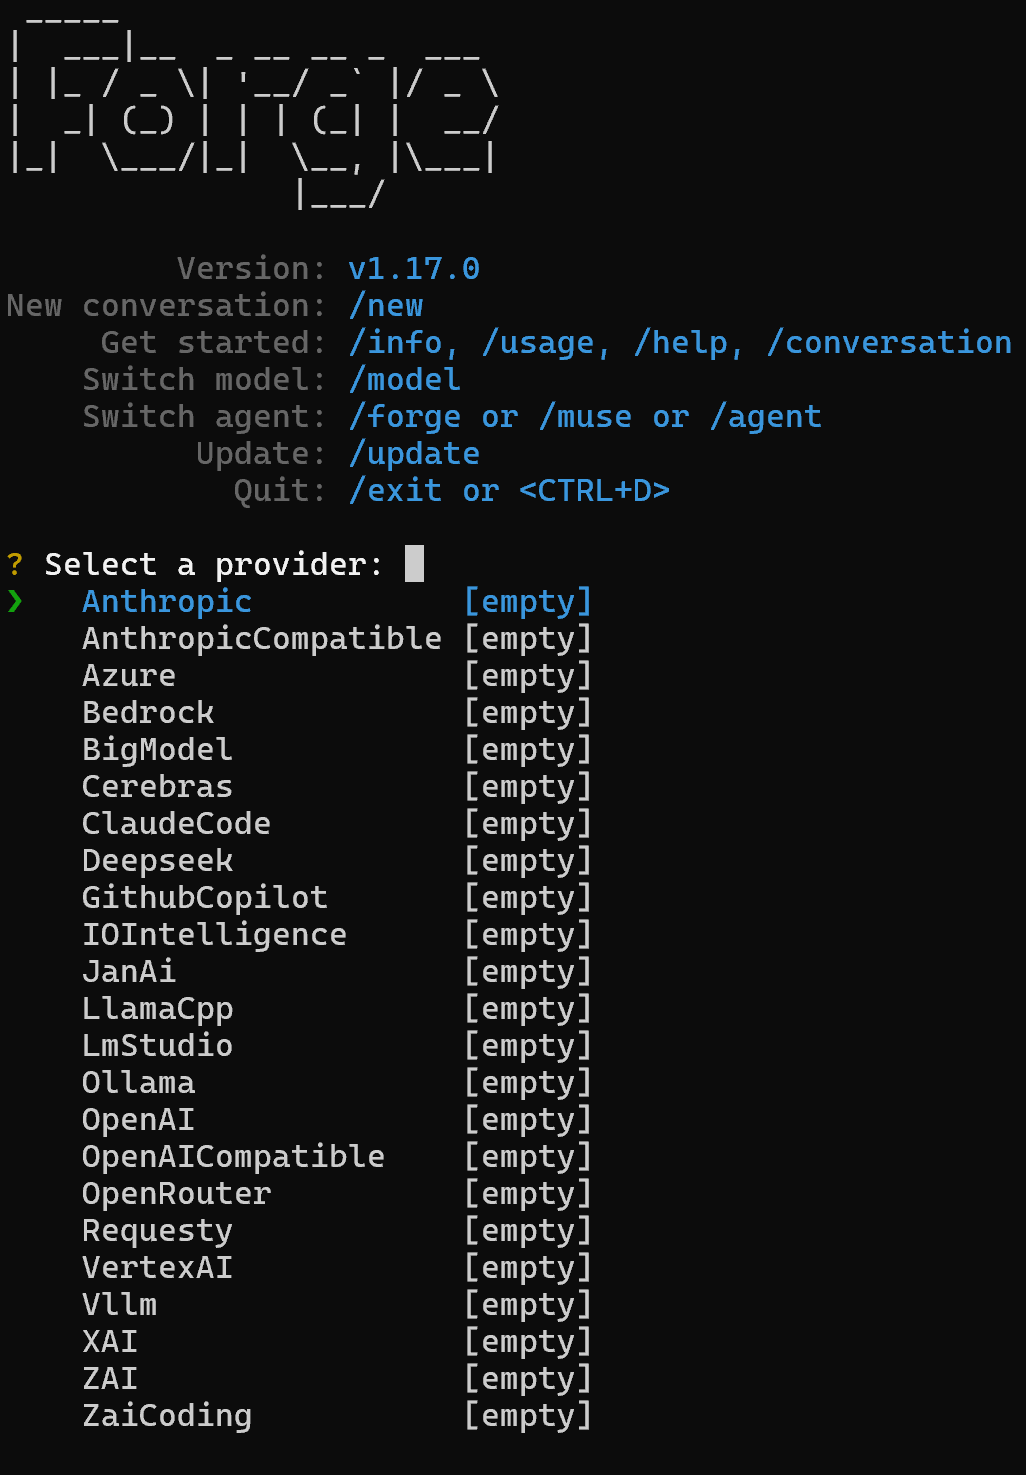
As you can tell, Forge initially prompts you to configure an AI provider, allowing you to choose from one of the supported options. Note that you can also connect it to your Forge account, as explained in the official documentation.
In this tutorial, we will assume you want to use an OpenRouter model (the process is the same for any other supported LLM).
Select the “OpenRouter” entry, paste your OpenRouter API key, and you will then be prompted to choose one of the available models:
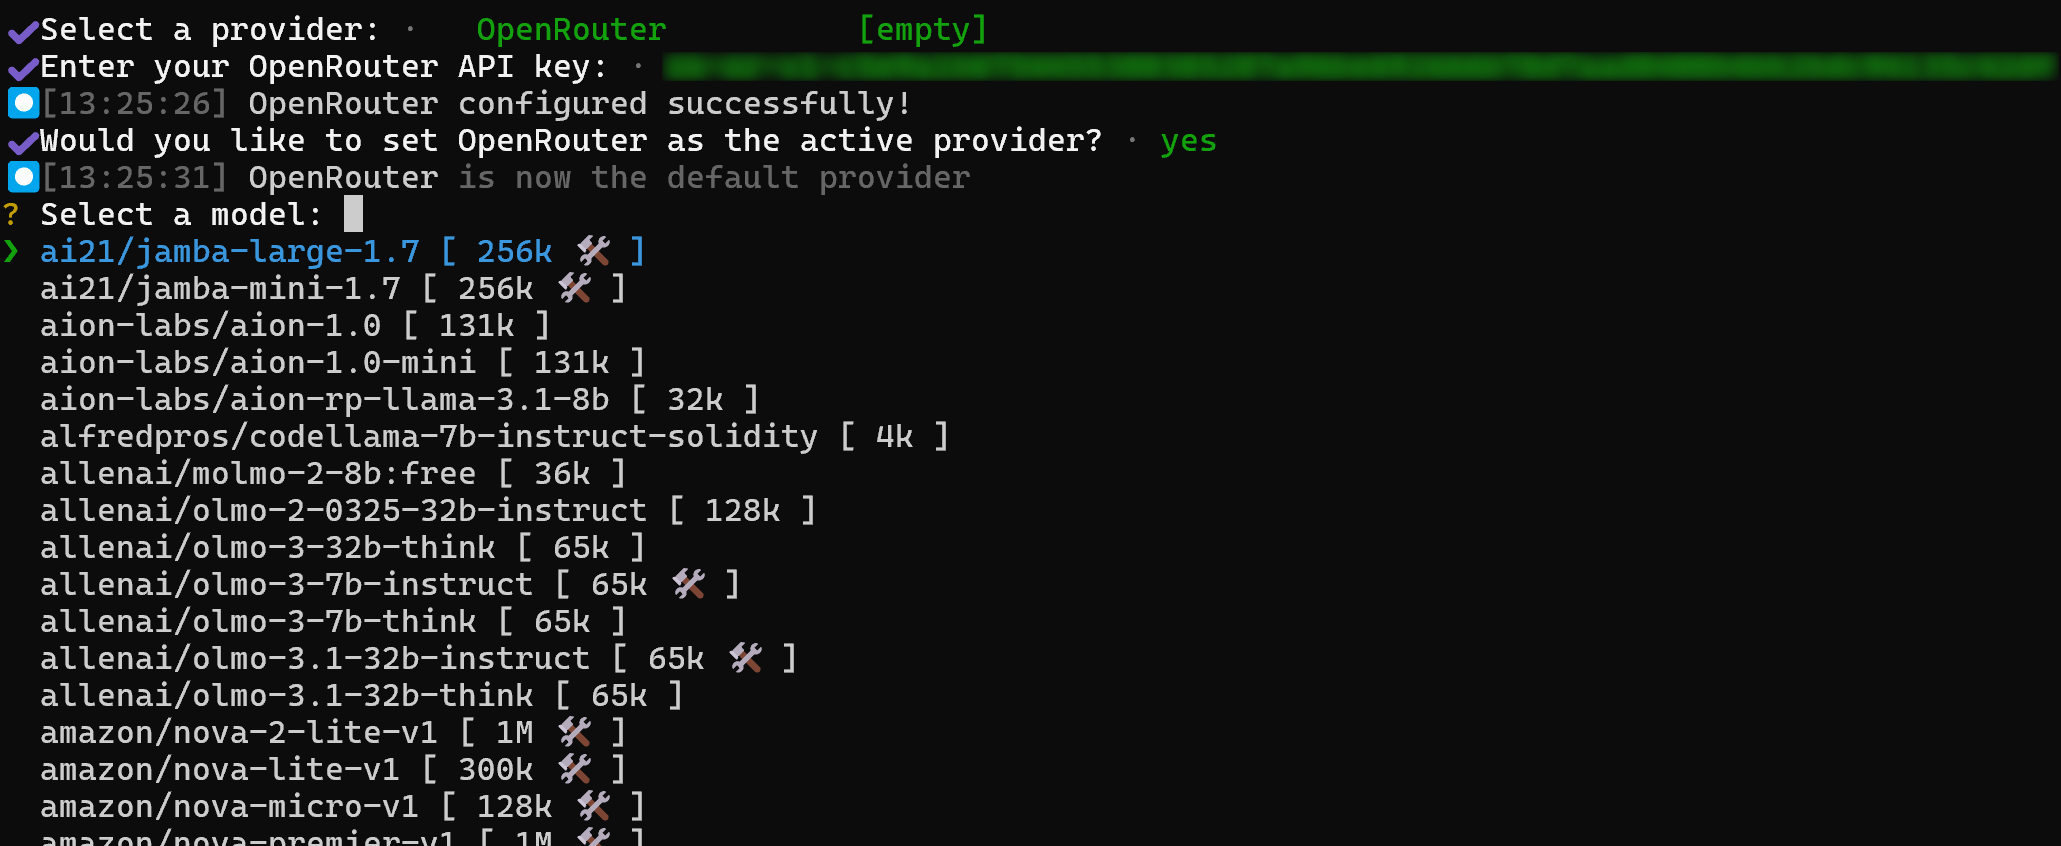
Search for the model you are interested in (qwen/qwen3-coder:free, in this example), and select it by pressing Enter:

qwen/qwen3-coder:free is the identifier for “Qwen3 Coder 480B A35B (free),” a powerful free LLM specialized in coding tasks. This model is an ideal choice for powering your Forge AI terminal development agent.
If you want to discover other Bright Data integrations with Qwen, explore these resources:
- Integrate Qwen-Agent with MCP to Build Agents with Live Data Access
- Web Scraping with Qwen3 in 2026: A Complete Tutorial
To verify that the LLM integration is working correctly, try running a simple prompt such as “Hey!”. You should receive a response similar to “Hello! How can I assist you today?”

Amazing! This proves that the integration with the configured LLM provider is working perfectly.
Step #3: Familiarize Yourself with the Forge CLI Interface
Forge supports many CLI commands, which you should understand to get the most out of it. For more details, run the /help command to see a complete list of all commands and what they do:
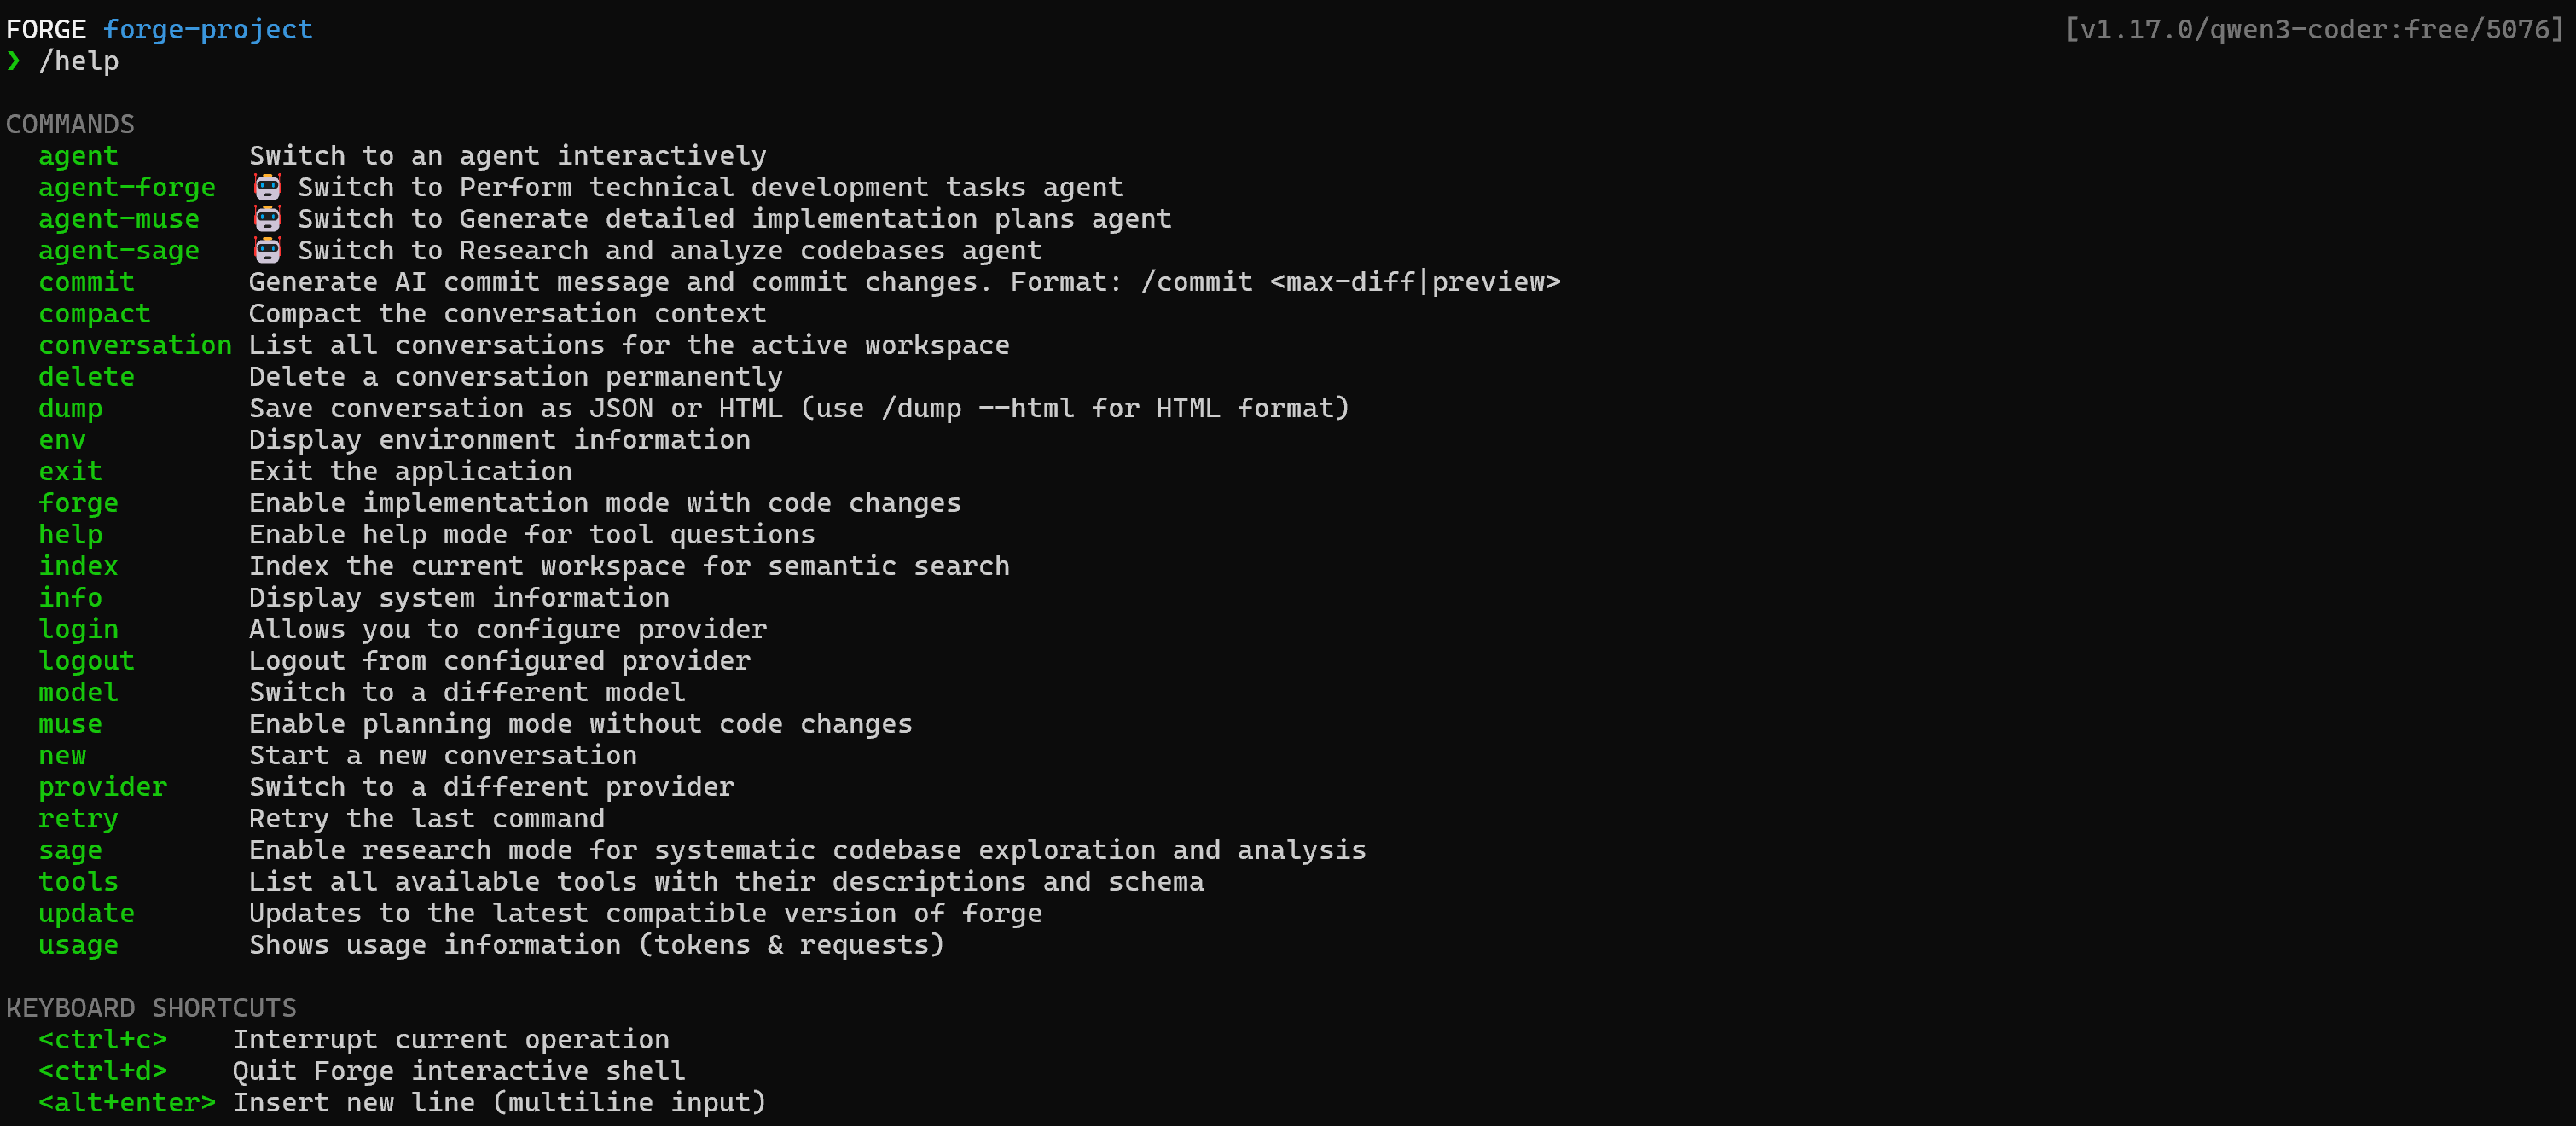
For additional information on each command, check out the official documentation.
Wonderful! You now know how to use Forge.
Step #4: Get Started with Bright Data’s Web MCP
Before connecting Forge to Bright Data’s Web MCP, you need to verify that the MCP server runs on your machine.
First, you need a Bright Data account. If you already have one, simply log in. For a quick setup, follow the wizard in the “MCP” section of your dashboard:
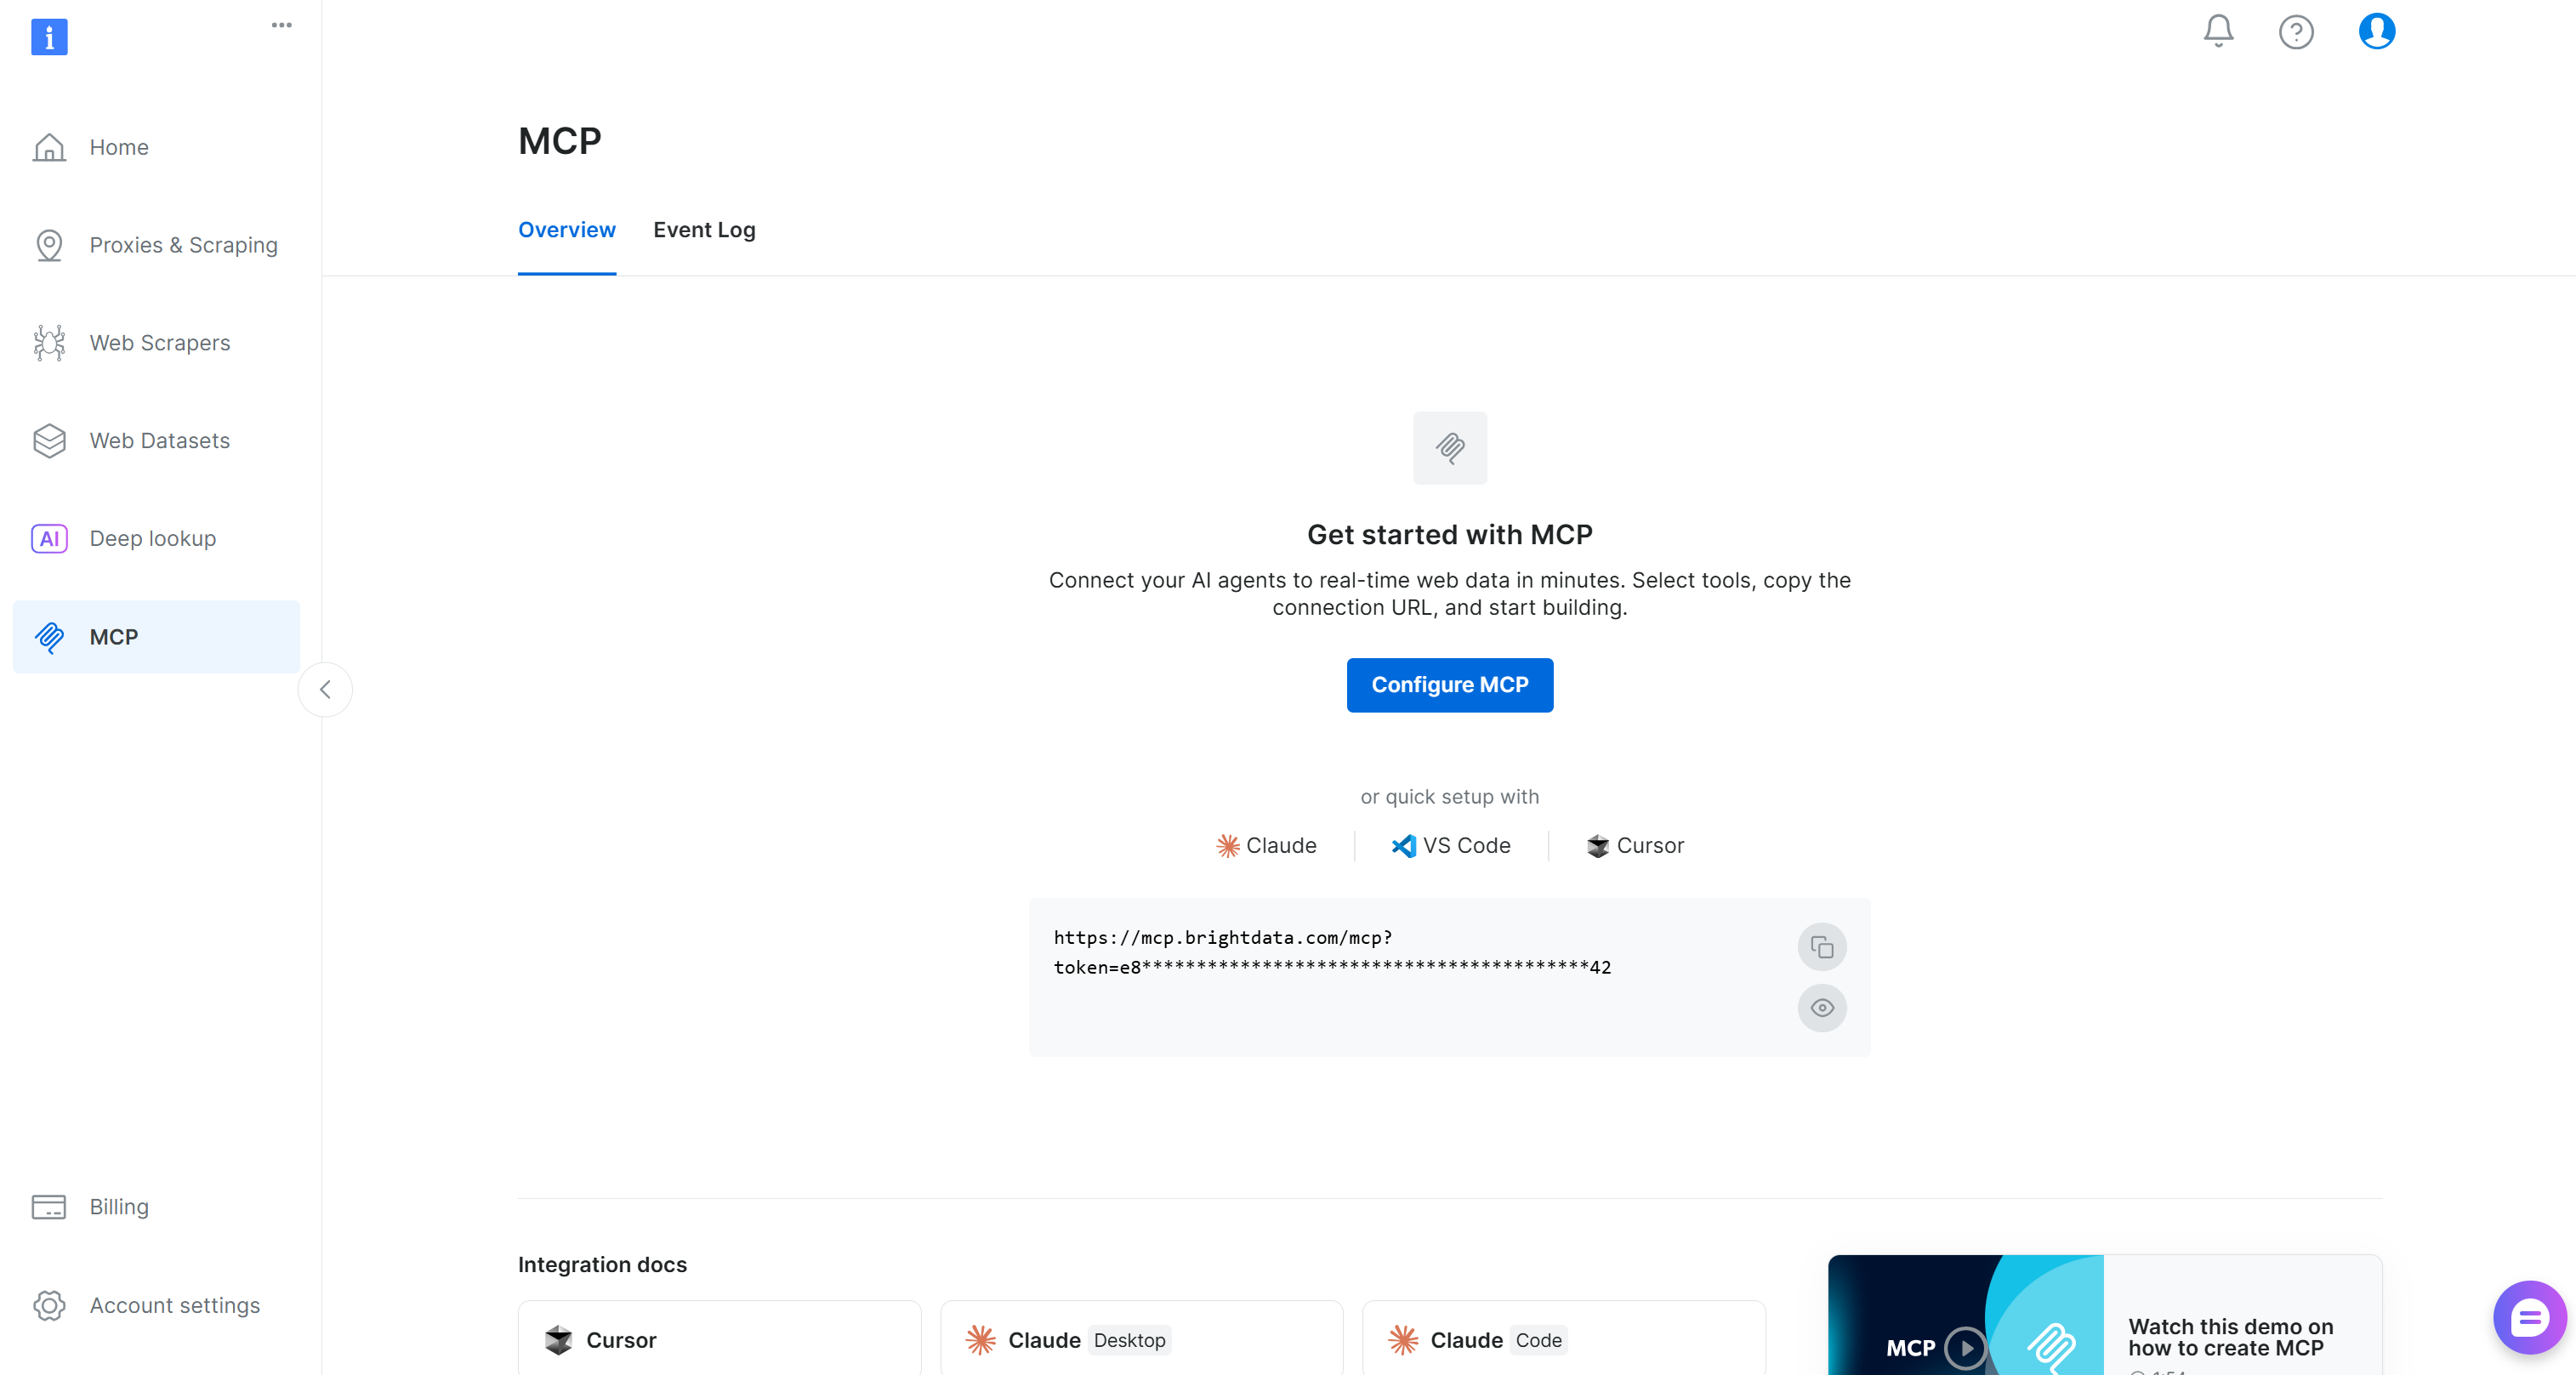
For additional guidance, refer to the instructions below.
Start by generating your Bright Data API key. Next, store it safely. You will use it shortly to authenticate your local Web MCP instance with your account.
Then, install the Web MCP globally using the @brightdata/mcp package:
npm install -g @brightdata/mcpVerify that the MCP server runs locally with:
API_TOKEN="<YOUR_BRIGHT_DATA_API>" npx -y @brightdata/mcpOr, equivalently, in PowerShell:
$Env:API_TOKEN="<YOUR_BRIGHT_DATA_API>"; npx -y @brightdata/mcpReplace <YOUR_BRIGHT_DATA_API> with your actual Bright Data API token. These (equivalent) commands set the required API_TOKEN environment variable and launch the Web MCP server locally.
If successful, you should see output similar to this:

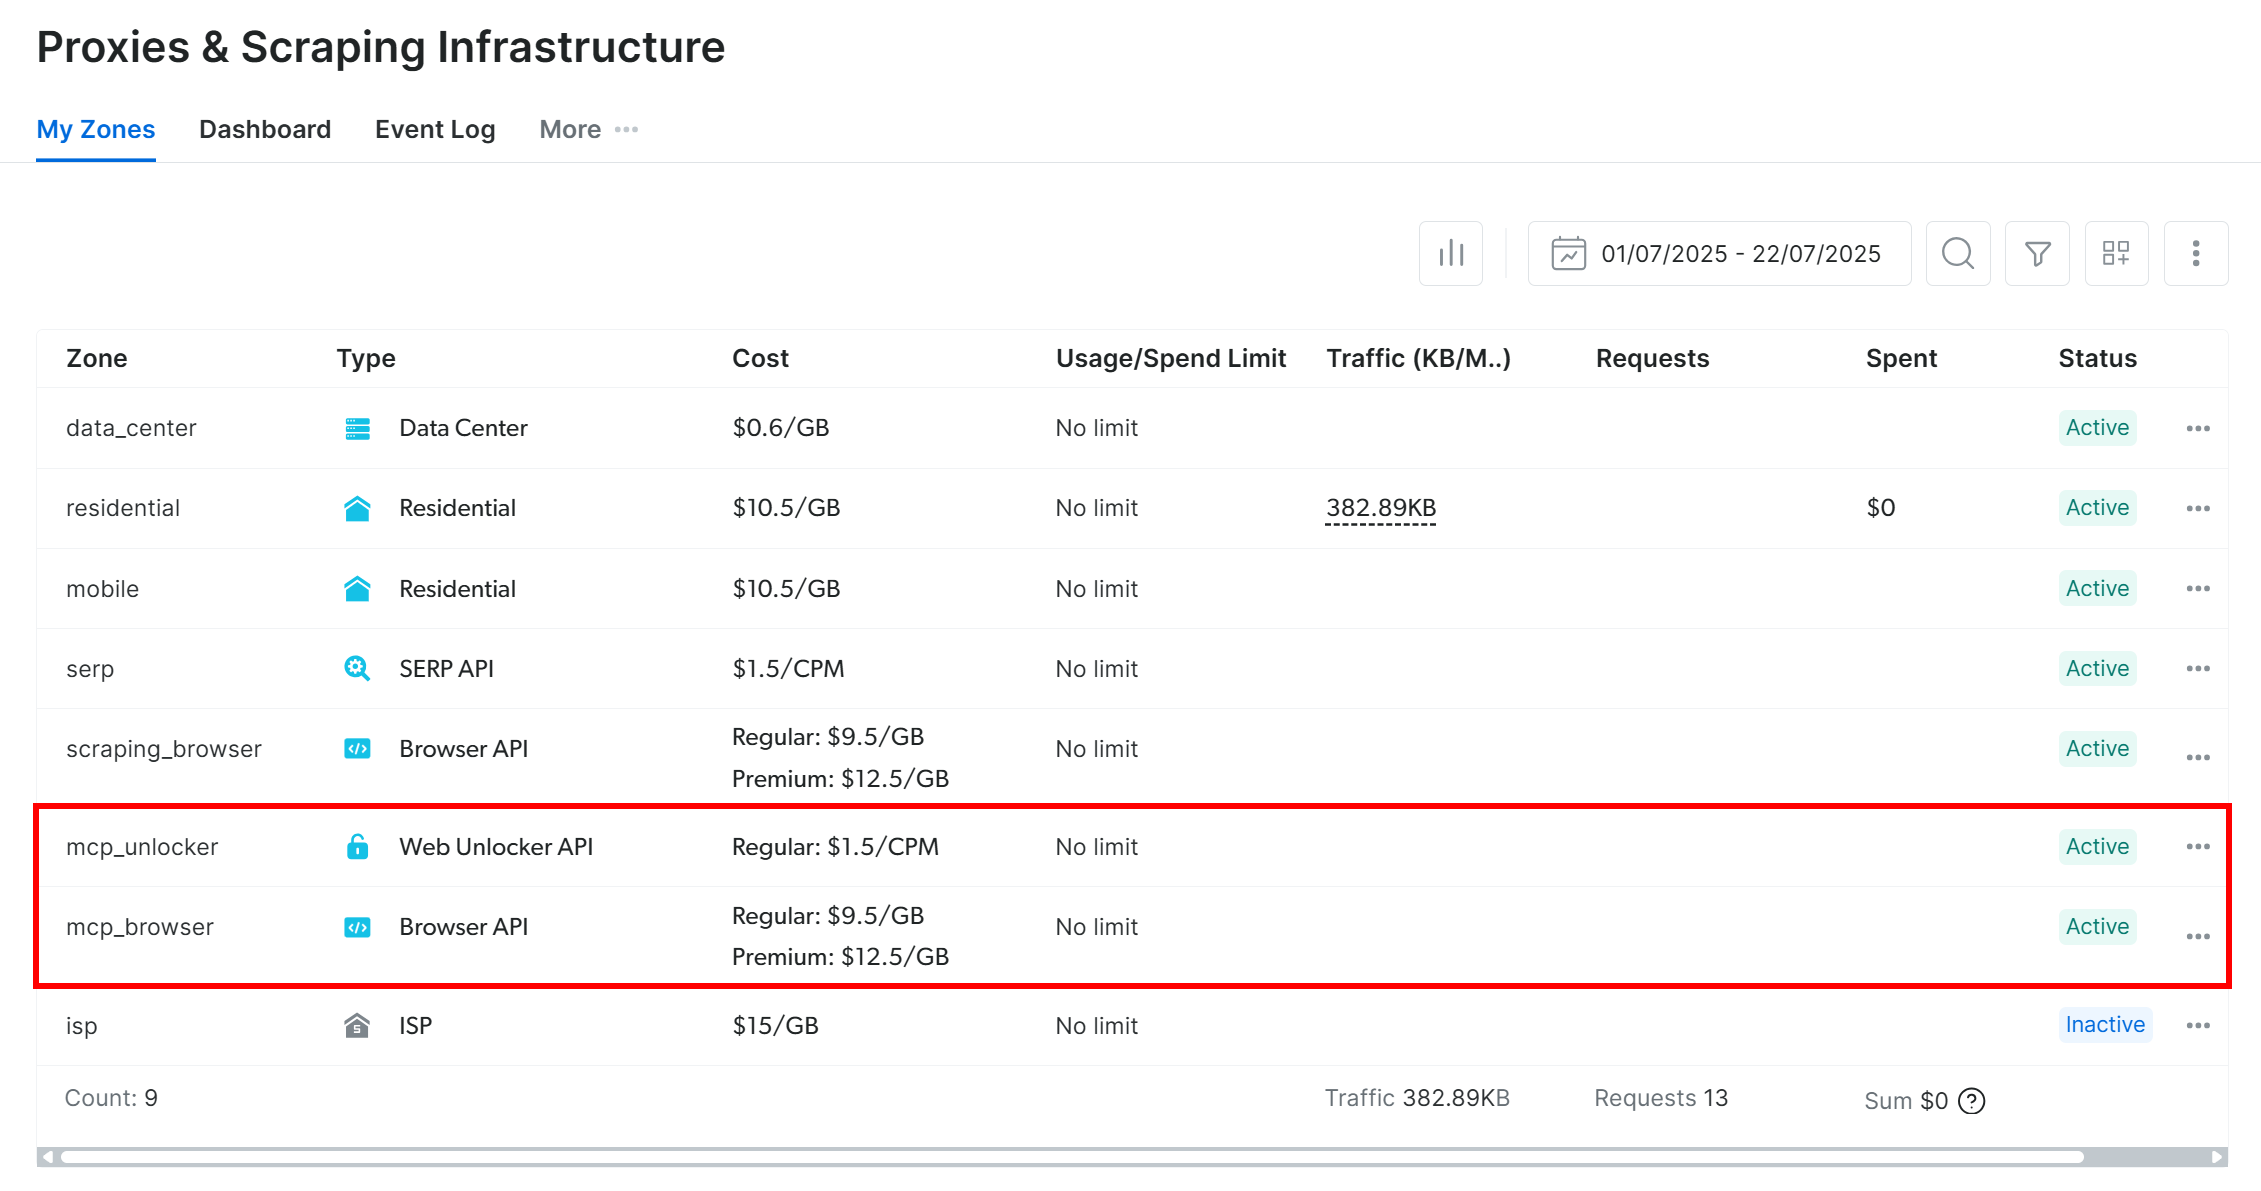
On the first launch, the Web MCP package automatically creates two zones in your Bright Data account:
mcp_unlocker: A zone for Web Unlocker.mcp_browser: A zone for Browser API.
These two zones power the 60+ tools available in Web MCP. Note that you can also configure them with other zones, as explained in the docs.
To confirm they were created, go to the “Proxies & Scraping Infrastructure” page in your Bright Data dashboard. You should see both zones listed in the table:
Now, remember that on the Web MCP free tier, only the search_engine and scrape_as_markdown tools (and their batch versions) are available.
To unlock all 60+ tools, enable Pro mode by setting the PRO_MODE="true" environment variable:
API_TOKEN="<YOUR_BRIGHT_DATA_API>" PRO_MODE="true" npx -y @brightdata/mcpOr, on Windows:
$Env:API_TOKEN="<YOUR_BRIGHT_DATA_API>"; $Env:PRO_MODE="true"; npx -y @brightdata/mcpPro mode is not included in the free tier and [incurs additional charges](https://github.com/brightdata/brightdata-mcp?tab=readme-ov-file#-pricing, modes).
Great! You have now verified that the Web MCP server runs on your machine. Next, you will configure Forge to start the server autonomously and connect to it.
Step #5: Configure the Web MCP Integration
Forge provides two ways to integrate with MCP servers. The first method involves creating a .mcp.json file in your project folder with the following structure:
{
  "mcpServers": {
    "bright_data": {
      "command": "npx",
      "args": ["@brightdata/mcp"],
      "env": {
        "API_TOKEN": "<YOUR_BRIGHT_DATA_API_TOKEN>",
        "PRO_MODE": "true"
      }
    }
  }
}
This setup mirrors the npx command you tested earlier, using environment variables for credentials and configuration:
API_TOKEN: Required. Set it to your Bright Data API key.PRO_MODE: Optional. Remove it if you do not want to enable Pro mode.
Thanks to the .mcp.json file, the MCP integration will only be available locally for the current project folder.
Note: In a similar way, instead of running the server locally, you can connect to the remote Bright Data Web MCP via Streamable HTTP. This approach is better suited for enterprise-grade scenarios.
As a second option, for a global setup, fire this command:
forge mcp import, scope user '{
  "mcpServers": {
    "bright_data": {
      "command": "npx",
      "args": ["@brightdata/mcp"],
      "env": {
        "API_TOKEN": "<YOUR_BRIGHT_DATA_API_TOKEN>",
        "PRO_MODE": "true"
      }
    }
  }
}'Note: If you did not install Forge globally, replace forge with npx forgecode@latest.
This achieves the same effect as the project-level setup, but makes the MCP configuration available globally for all Forge projects.
Now, Forge will launch the Web MCP locally through the npx command and connect to it.
Important: If you are on Windows, replace npx with npx.cmd in the command field. This is required to avoid the “program not found” error:

Terrific! Your AI-powered terminal development agent in Forge Code should now be fully integrated with Bright Data Web MCP.
Time to verify that the connection works!
Step #6: Load the Web MCP Connection
Run the following command to reload all MCP servers:
forge mcp reloadOr, if you did not install Forge globally, write:
npx forgecode@latest mcp reloadIf you configured the Web MCP in Pro mode, the output should look similar to this:
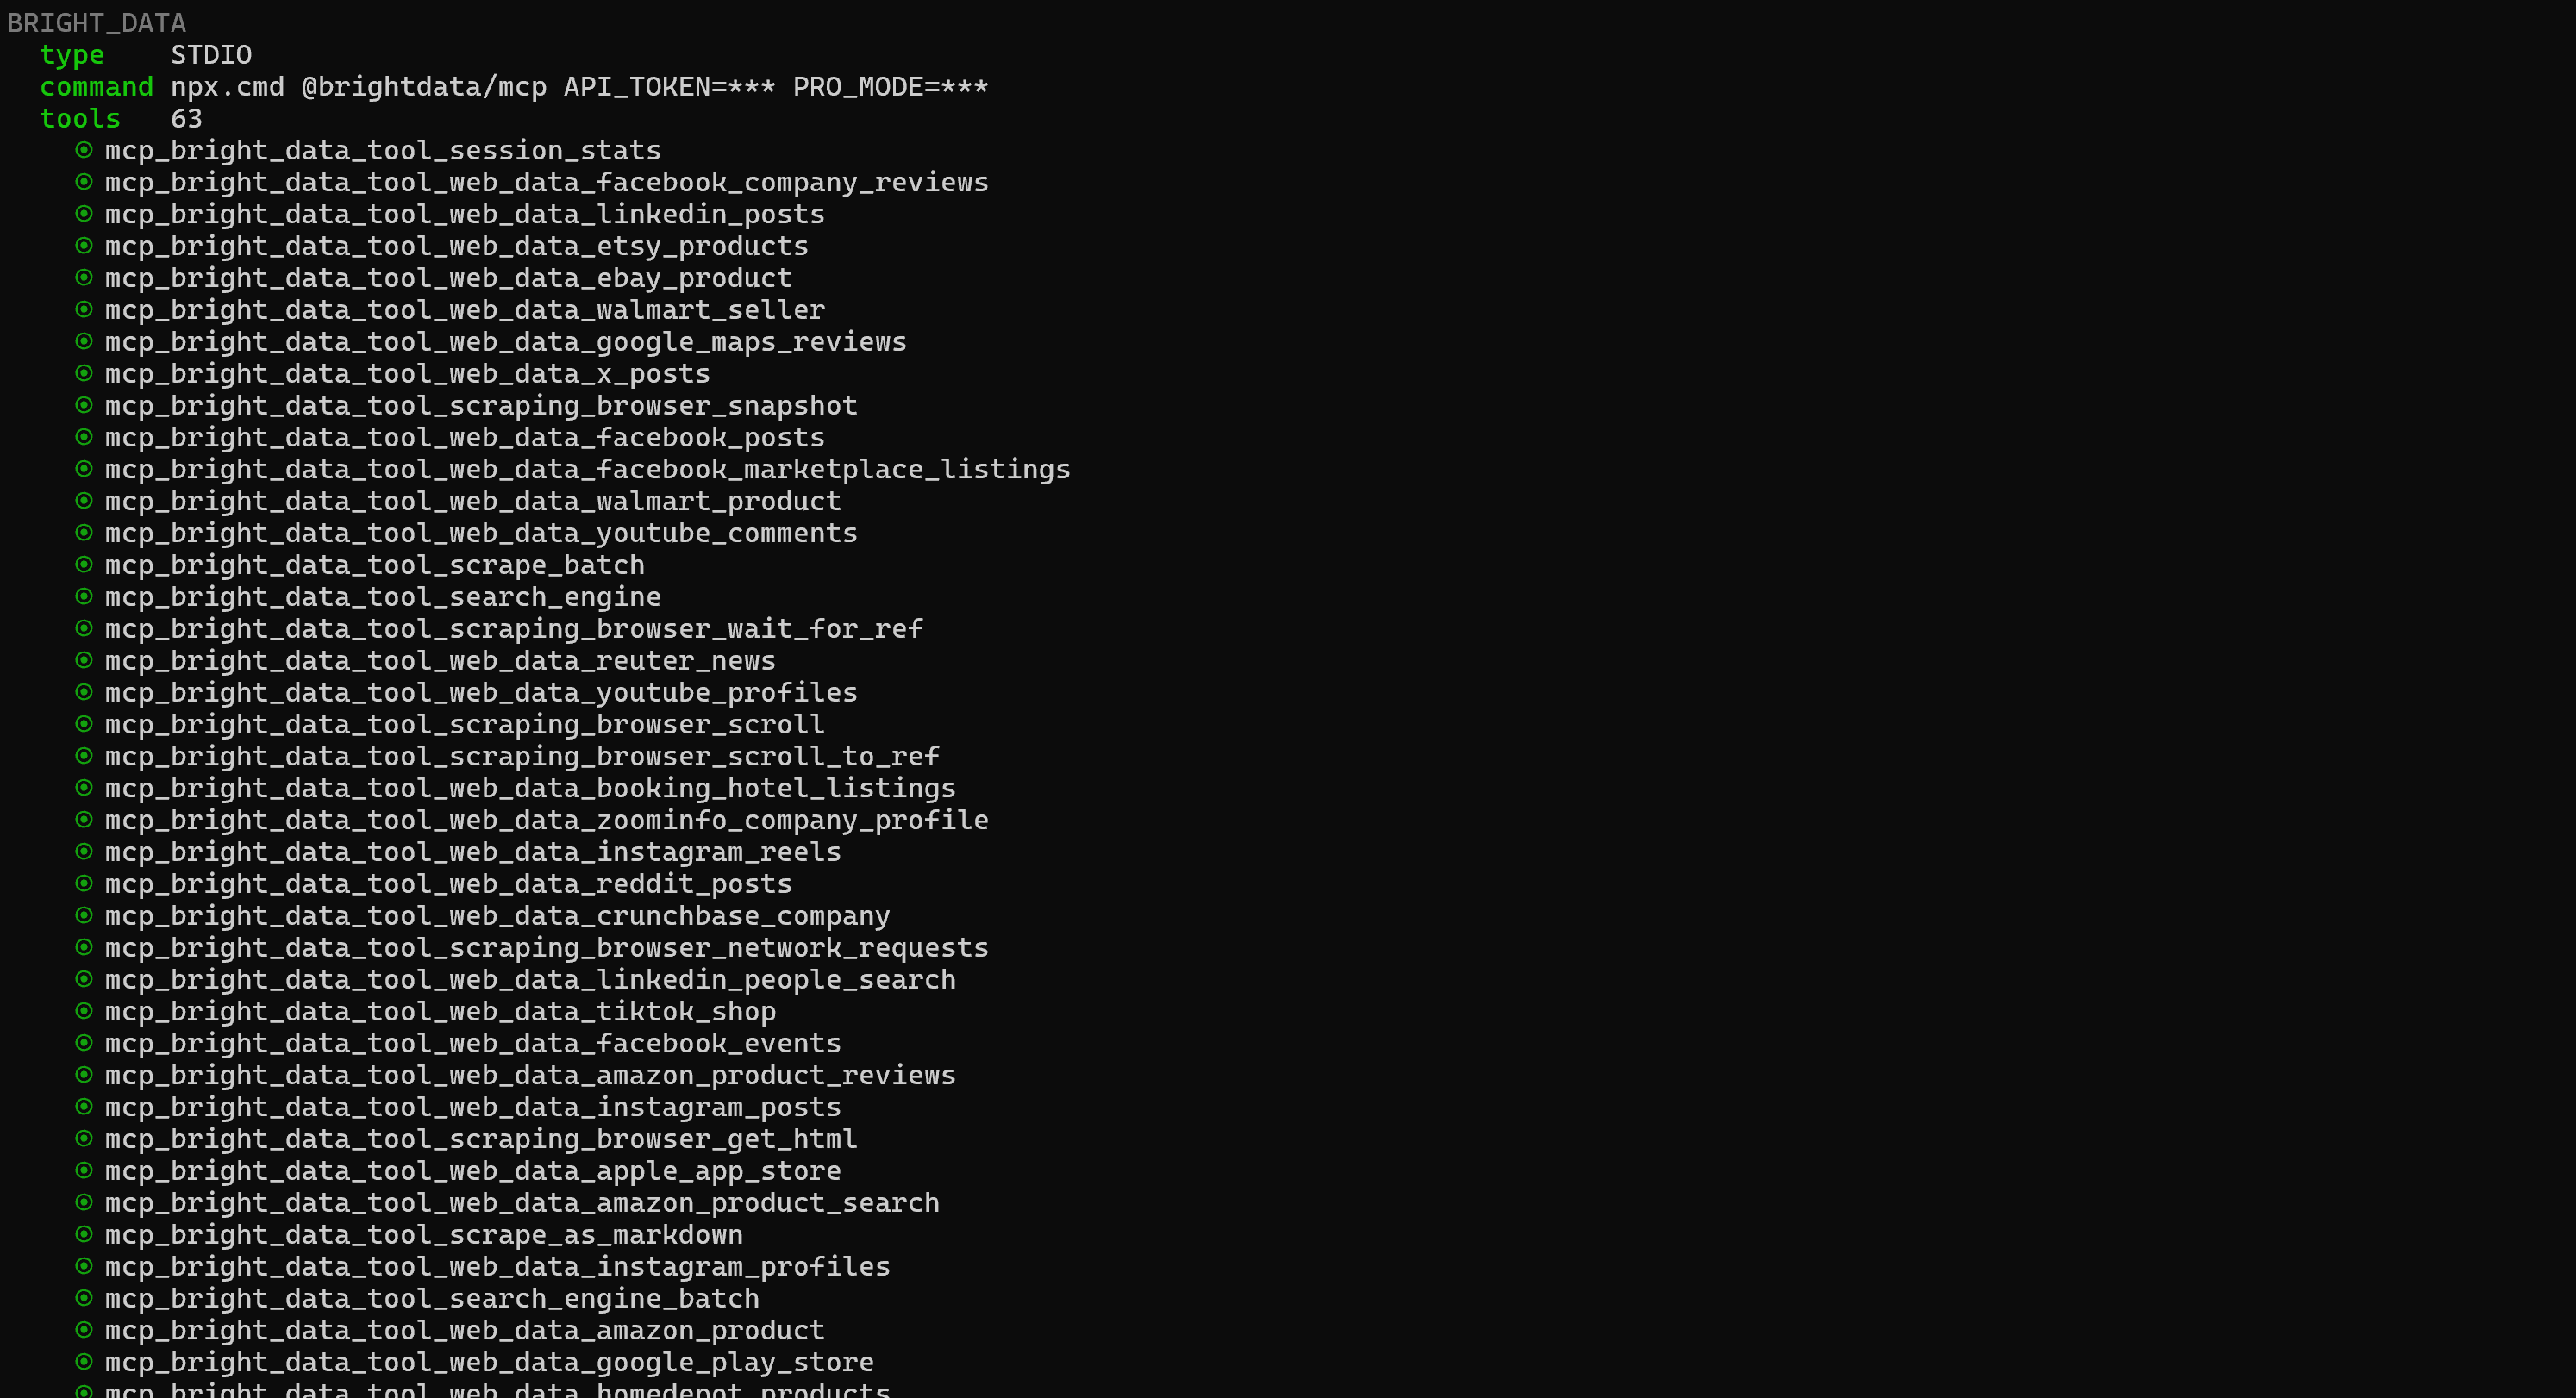
Forge will take a few seconds to connect to the server and display all 60+ available tools. On the free tier, you will only see the four free tools (search_engine and scrape_as_markdown, plus their batch versions).
This confirms that Forge is now successfully connected to Bright Data Web MCP. Mission complete!
Step #7: Test the Integration
To test the Forge + Bright Data Web MCP integration, start Forge Code and ask the AI agent to perform a task like the following:
Retrieve structured information from the following Best Buy product page URL: "https://www.etsy.com/listing/1876990811/personalized-baby-beanie-newborn-baby". Wait for the data to be retrieved, then store it locally in a JSON file, read it, and set up a simple Flask application with an endpoint that exposes this data.This is not something a standard LLM could do on its own, as it requires fetching fresh, real-time data from the web.
Launch the prompt in Forge, and this is what should happen:
As you can see, the AI terminal development agent automatically identifies
mcp_bright_data_tool_web_data_etsy_products as the correct tool to achieve the goal. That is a premium Web MCP tool designed to retrieve structured product data from Etsy using a product URL.
In this case, the tool is invoked with the URL provided in the prompt. Once the data is retrieved, Forge creates a product.json file containing the scraped data:
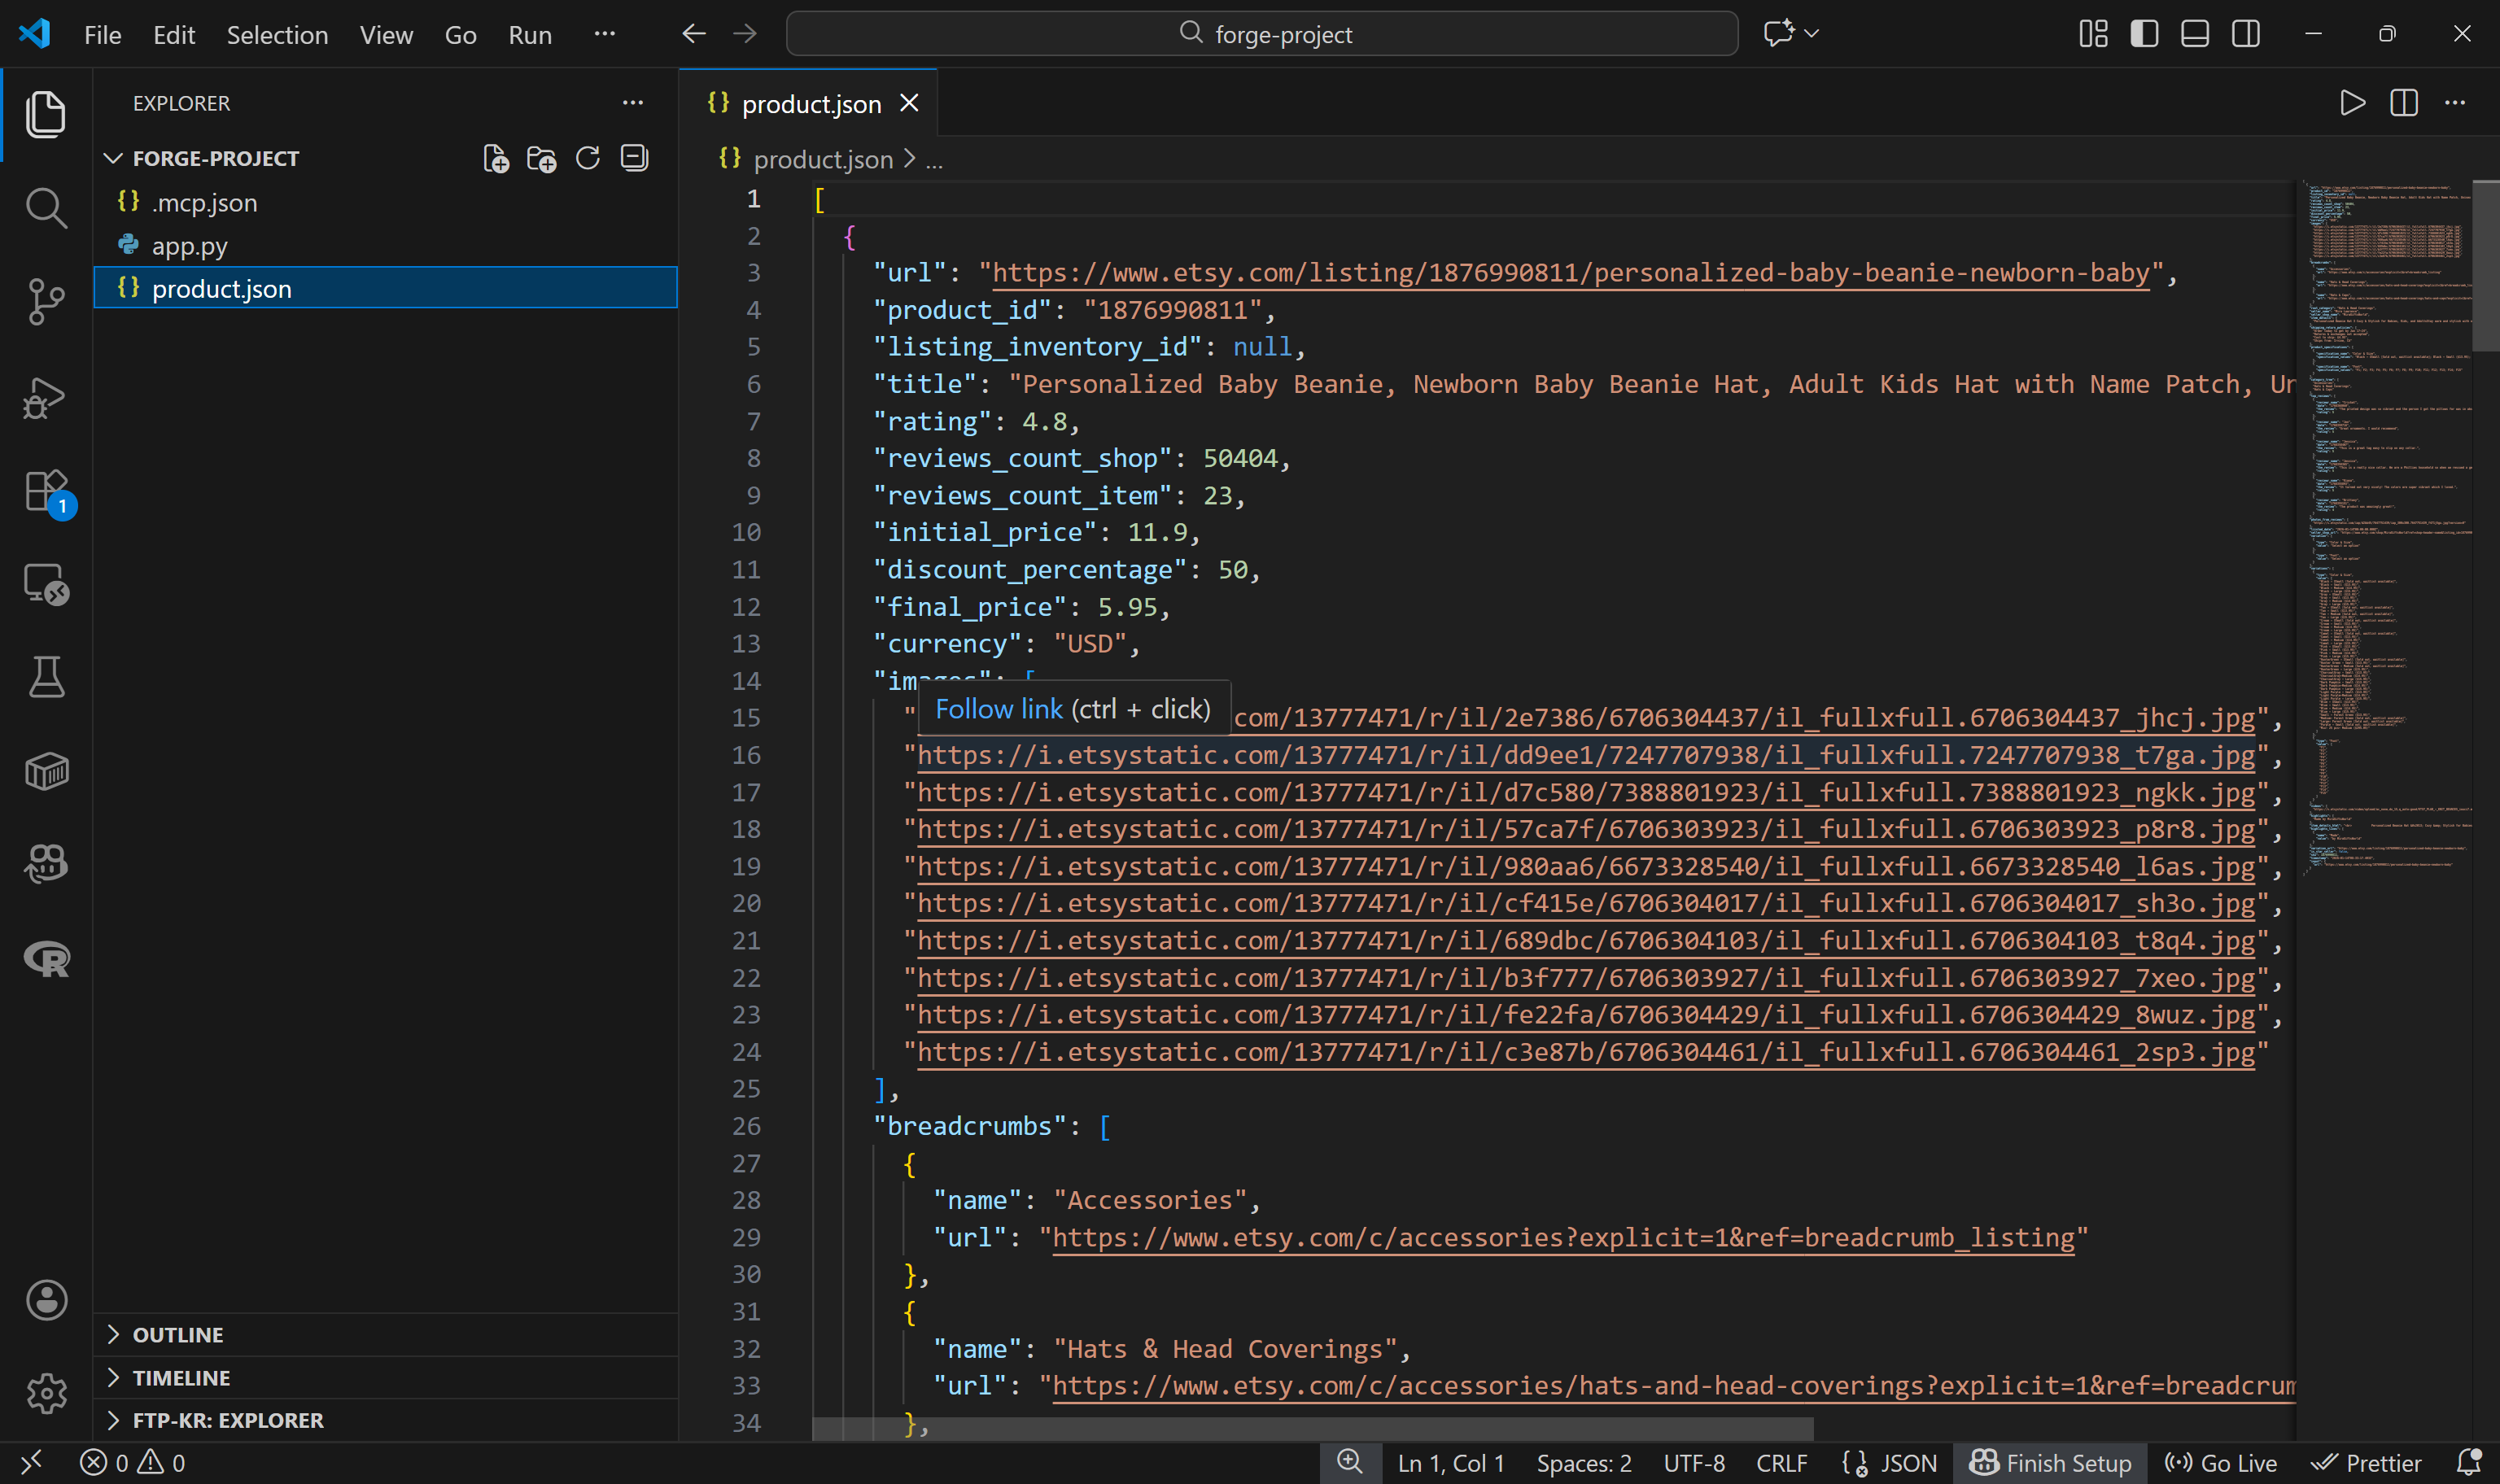
Keep in mind that the data you see here is real, live-scraped data, not AI-generated or hallucinated content. Verify that by visiting the target Etsy product page:

Forge also generates a simple app.py Flask application. This application reads the JSON file and exposes the data through a /products endpoint, effectively serving it as mocked API data:
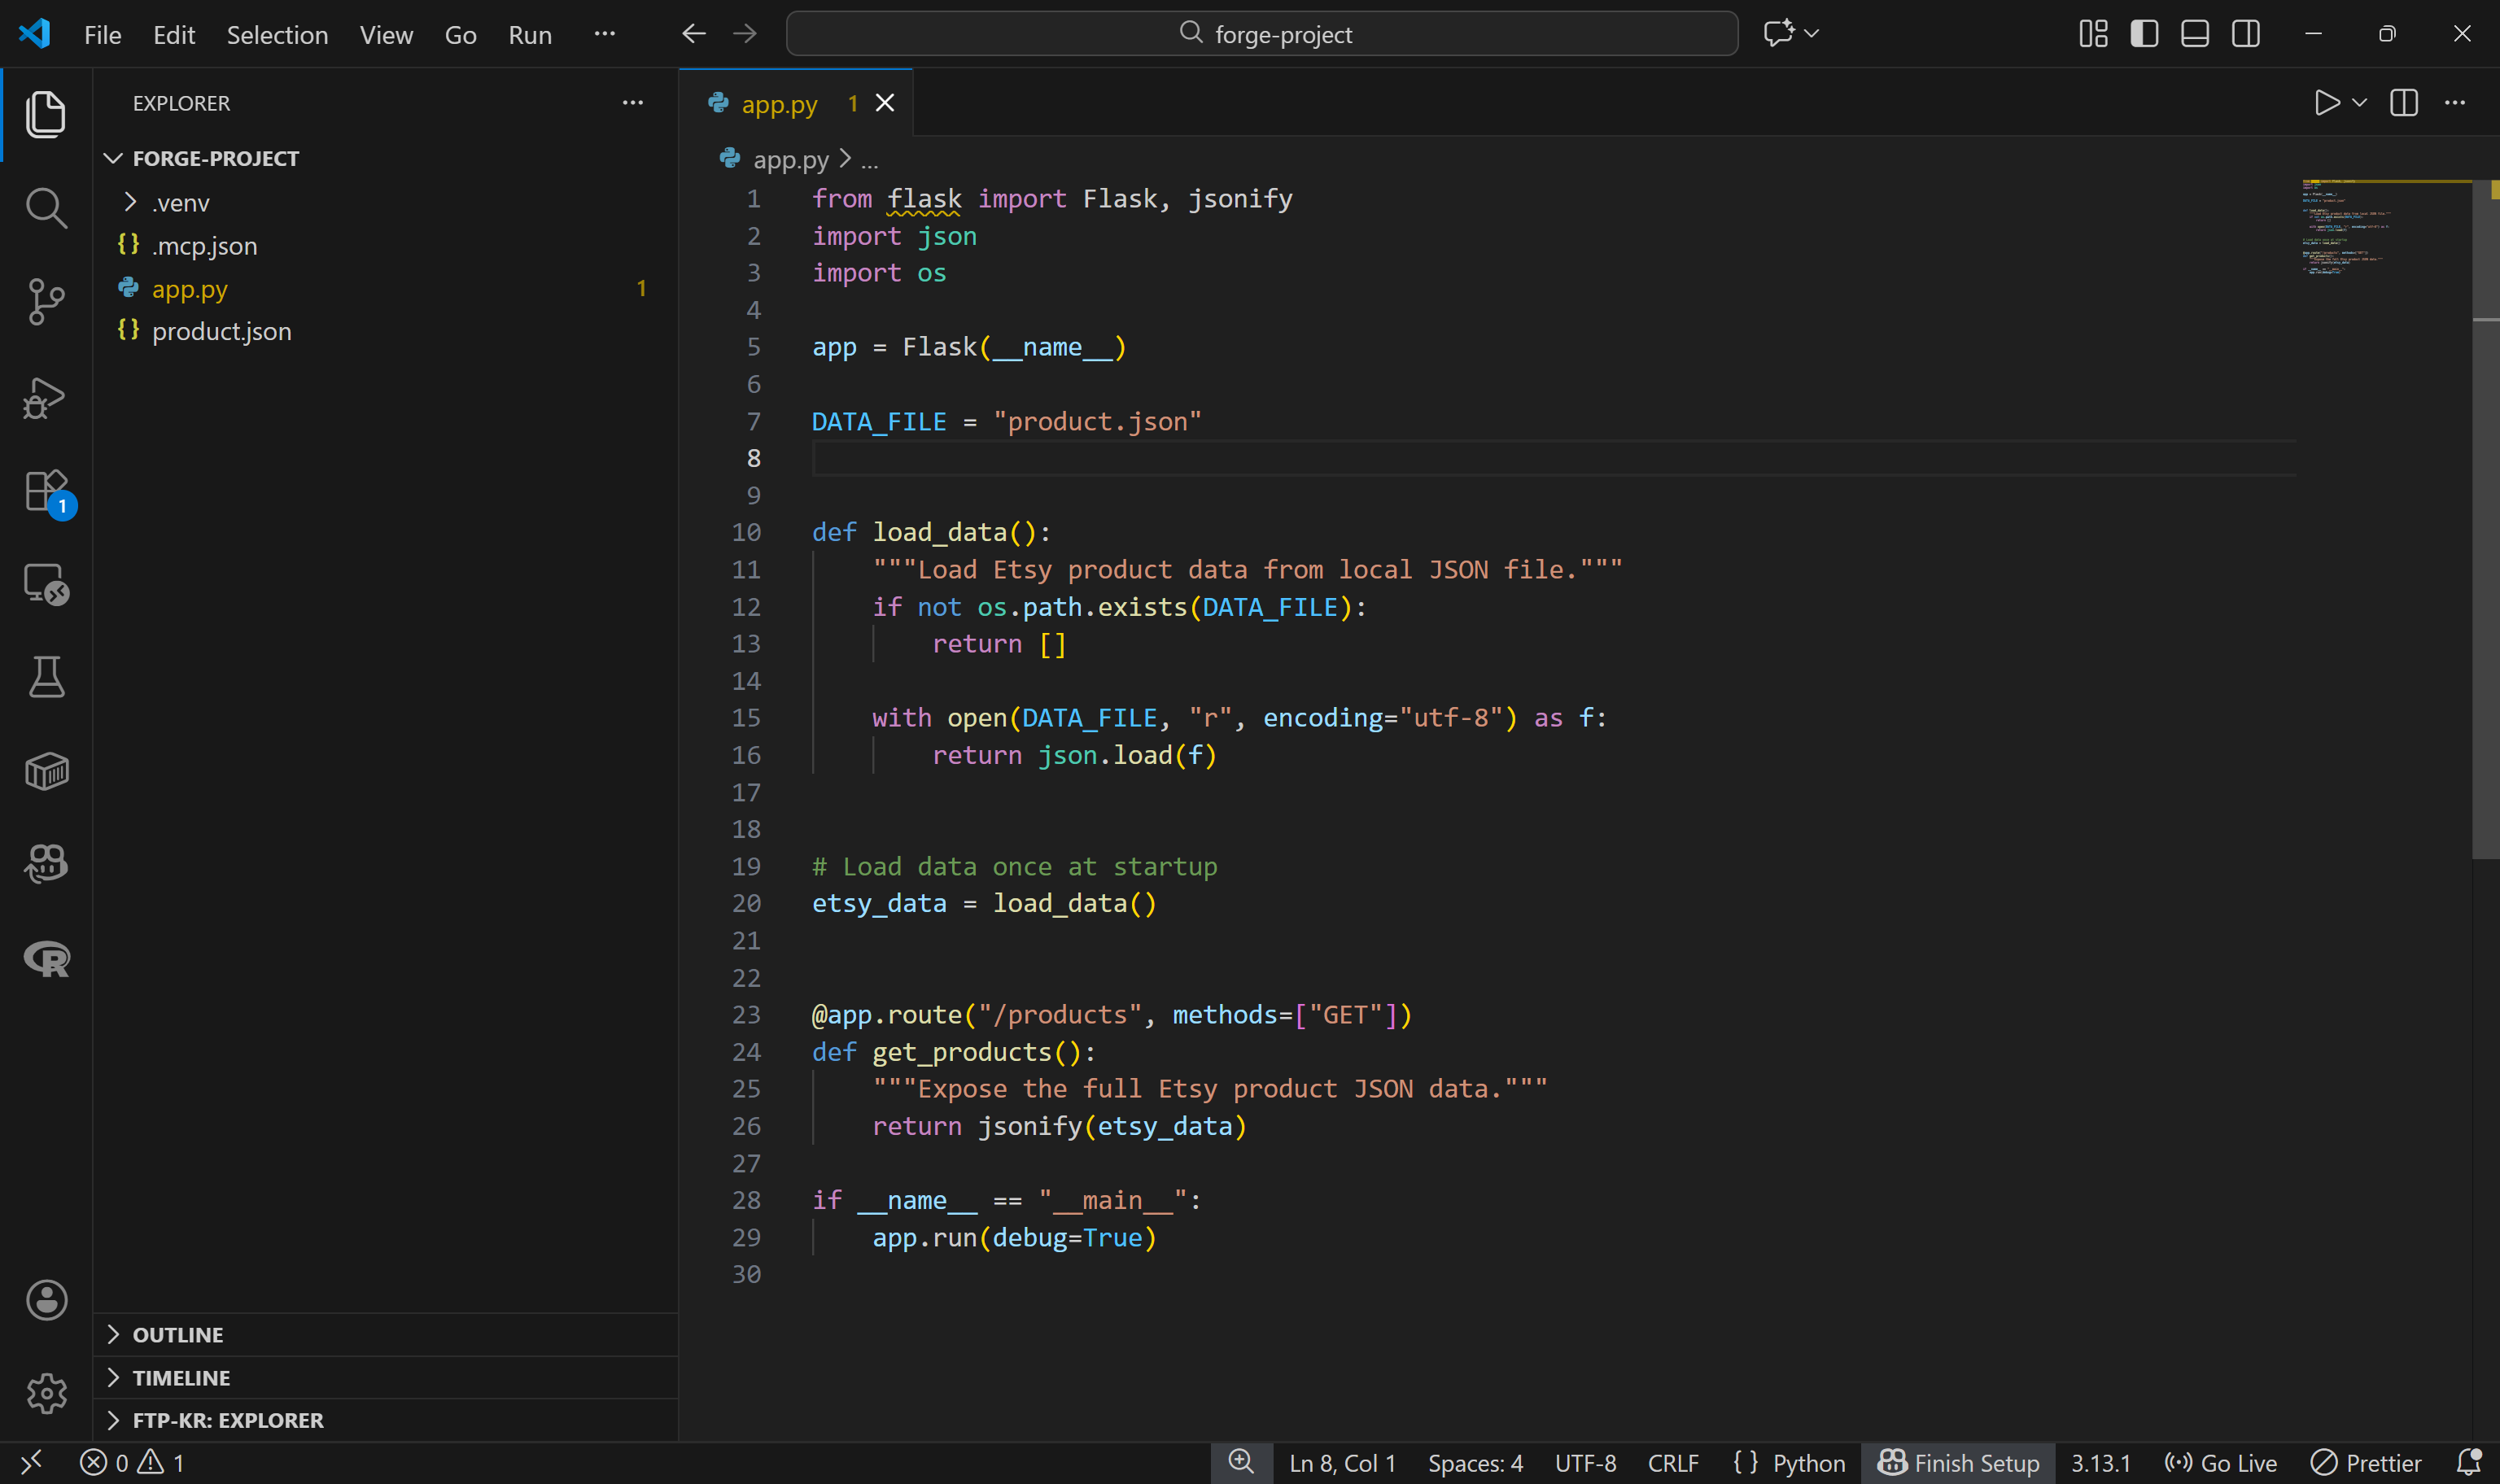
Install the dependencies (pip install flask) and run the application (python app.py). Call the /products endpoint and check that it returns the expected data:

Et voilà! The generated Flask application works like a charm (the fields in the output response have been ordered alphabetically).
This was just a simple example, but it clearly demonstrates the power of combining Forge with Bright Data’s Web MCP server. From here, you can experiment with more advanced prompts and unlock increasingly sophisticated, LLM-driven data workflows powered by live web data.
Conclusion
In this article, you understood how to leverage MCP integration in Forge. In particular, you saw why and how to extend the Forge CLI AI terminal development agent by connecting it to Bright Data’s Web MCP.
This integration equips the Forge AI coding agent with new functionality, making its coding abilities far more effective. These include web search, structured data extraction, live web data retrieval, and automated web interactions.
For even more advanced workflows, you can explore the full range of services available in Bright Data’s ecosystem for AI.
Create a Bright Data account for free today and get your hands on our AI-ready web data tools!

Technical Writer
Antonello Zanini is a technical writer, editor, and software engineer with 5M+ views. Expert in technical content strategy, web development, and project management.


