







In this tutorial, you will learn:
- What Dataiku is and what it brings to the table for AI agent development in enterprises.
- The main limitations of AI agents and how to overcome them using web access tools.
- How to connect a Dataiku AI agent to the Bright Data MCP for web scraping, search, discovery, automation, and more.
Let’s dive in!
How Dataiku Supports AI Agents
Dataiku is a centralized, collaborative platform that helps organizations turn raw data into actionable insights, predictive models, and GenAI applications. It provides an end-to-end environment where data teams and business users can work together on analytics and AI projects.
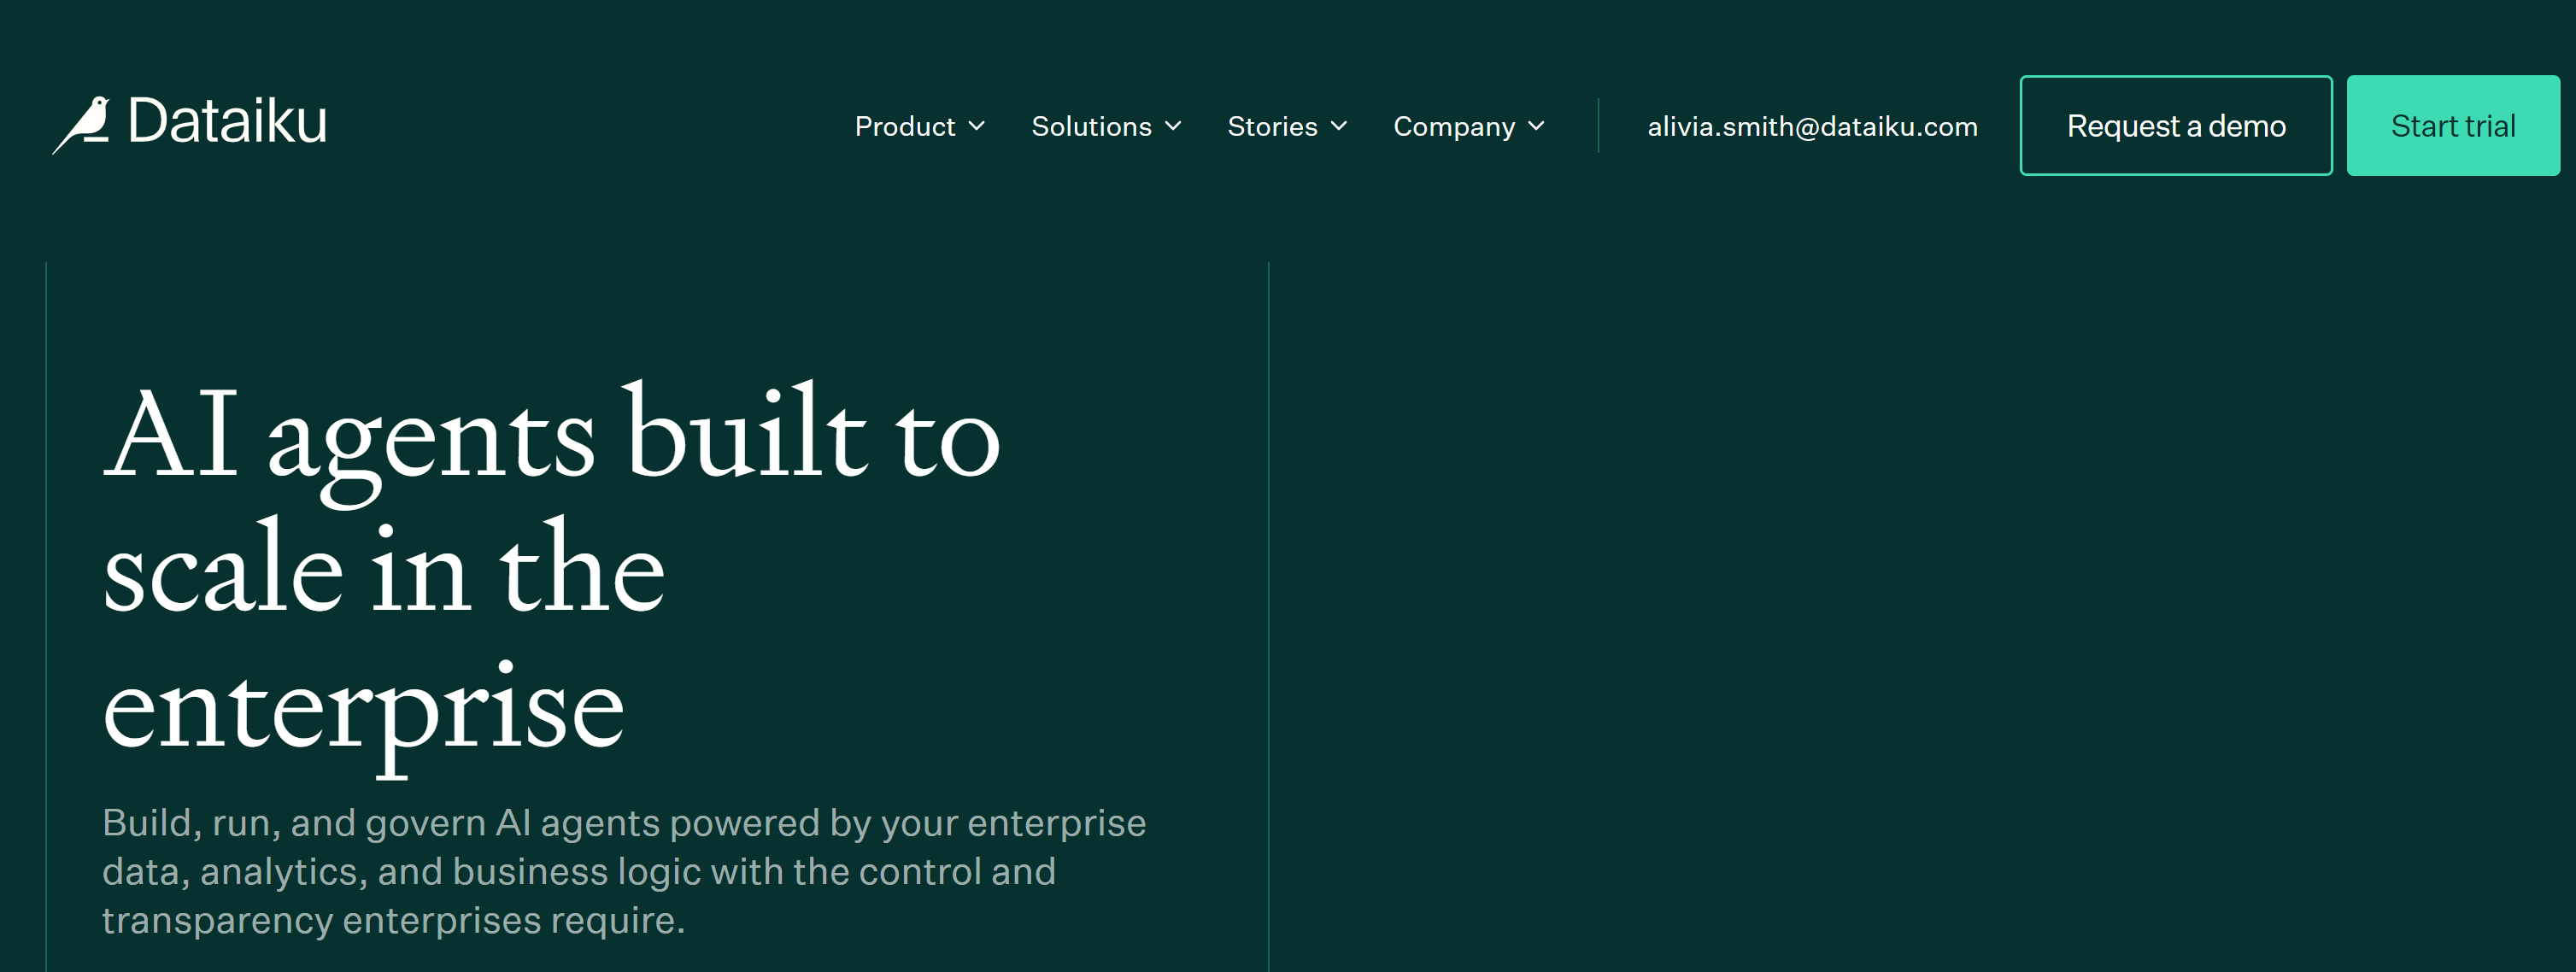
Dataiku supports AI agents by offering a full environment to build, deploy, and manage agents securely at scale. This provides the tools, governance, and integrations needed to connect agents to data, models, and external systems. It ensures agents can operate reliably within enterprise workflows while remaining controlled and auditable.
The main capabilities provided by the Dataiku platform for AI agents are:
- Flexible agent building: Visual and code-based agent creation for both non-technical users and advanced developers.
- Built-in support for tools: Integrations with third-party services for querying datasets, connecting to AI models, and calling web services.
- LLM Mesh: Centralized abstraction layer to manage and route LLM usage across providers like OpenAI, Anthropic, and Mistral.
- Enterprise governance: Role-based access control, auditing, traceability, testing, and performance monitoring for safe production use.
Why Extend Dataiku AI Agents with Web Scraping, Discovery, Search, and Interaction Tools
Dataiku AI agents, like all LLM-powered systems, are constrained by a fundamental limitation: information stagnation…
Large language models generate outputs based on training data that reflects the past, not the present. As a result, they can produce outdated recommendations, hallucinated facts, or incomplete insights when used in fast-changing enterprise environments.
In practice, this becomes a serious bottleneck for Dataiku workflows. An AI agent without access to fresh data may rely on deprecated best practices, miss recent updates in APIs or platforms, or fail to incorporate newly available datasets and business signals. That reduces reliability and limits the value of AI-driven automation inside enterprise pipelines.
To overcome this limitation, Dataiku agents can be natively connected to a real-time web data infrastructure. This is where Bright Data becomes a critical enhancement.
Bright Data MCP
The Bright Data MCP equips Dataiku AI agents with live web search, data discovery, structured extraction, and automated browser interaction. It enables agents to operate with current, verifiable information instead of relying solely on static knowledge.
Bright Data MCP exposes 70+ tools for interacting with Bright Data’s API-based products and services. Even in Rapid mode (free tier), it features useful tools like:
| Tool | Description |
|---|---|
search_engine + batch version for parallel usage |
Retrieve Google, Bing, or Yandex results in structured JSON or Markdown |
scrape_as_markdown + batch version for parallel usage |
Convert any web page into clean Markdown while handling anti-scraping protection bypass |
discover |
AI-powered search returning ranked, relevant web results |
Then, [Pro mode](https://github.com/brightdata/brightdata-mcp?tab=readme-ov-file#-pricing, modes) unlocks advanced capabilities for structured data extraction from platforms like Yahoo Finance, Amazon, LinkedIn, YouTube, Zillow, Google Maps, and 40+ others. Also, it offers tools for full web browser automation.
Important: The Bright Data MCP tools build on Bright Data’s large-scale infrastructure, powered by a global residential proxy network of over 400 million IPs across 195+ countries. This ensures high reliability, scalability, and consistent access to web resources, even at enterprise load levels.
How to Give Dataiku Agents Access to the Web via Bright Data MCP
In this step-by-step guide, you will be guided through the process of configuring the Bright Data MCP in Dataiku agents. That way, they will gain the ability to explore the web and ground their responses in real-world, current, and verifiable information.
Follow the instructions below!
Prerequisites
To follow along with this tutorial section, make sure you have:
- A Dataiku Cloud account (even a free trial is fine).
- An API key for one of the supported LLM providers by Dataiku (we will use an OpenAI API key in this example).
- A Bright Data account with an API key configured.
- Familiarity with how MCP works.
- Familiarity with the tools exposed by the Bright Data MCP server.
Note: Follow the official guide to set up your Bright Data API key.
Step #1: Create Your Dataiku Space
After logging in to Dataiku Cloud for the first time, you will be prompted to create your first Dataiku space.
Enter a name for your space, select a region, and then click the “CREATE MY SPACE” button:
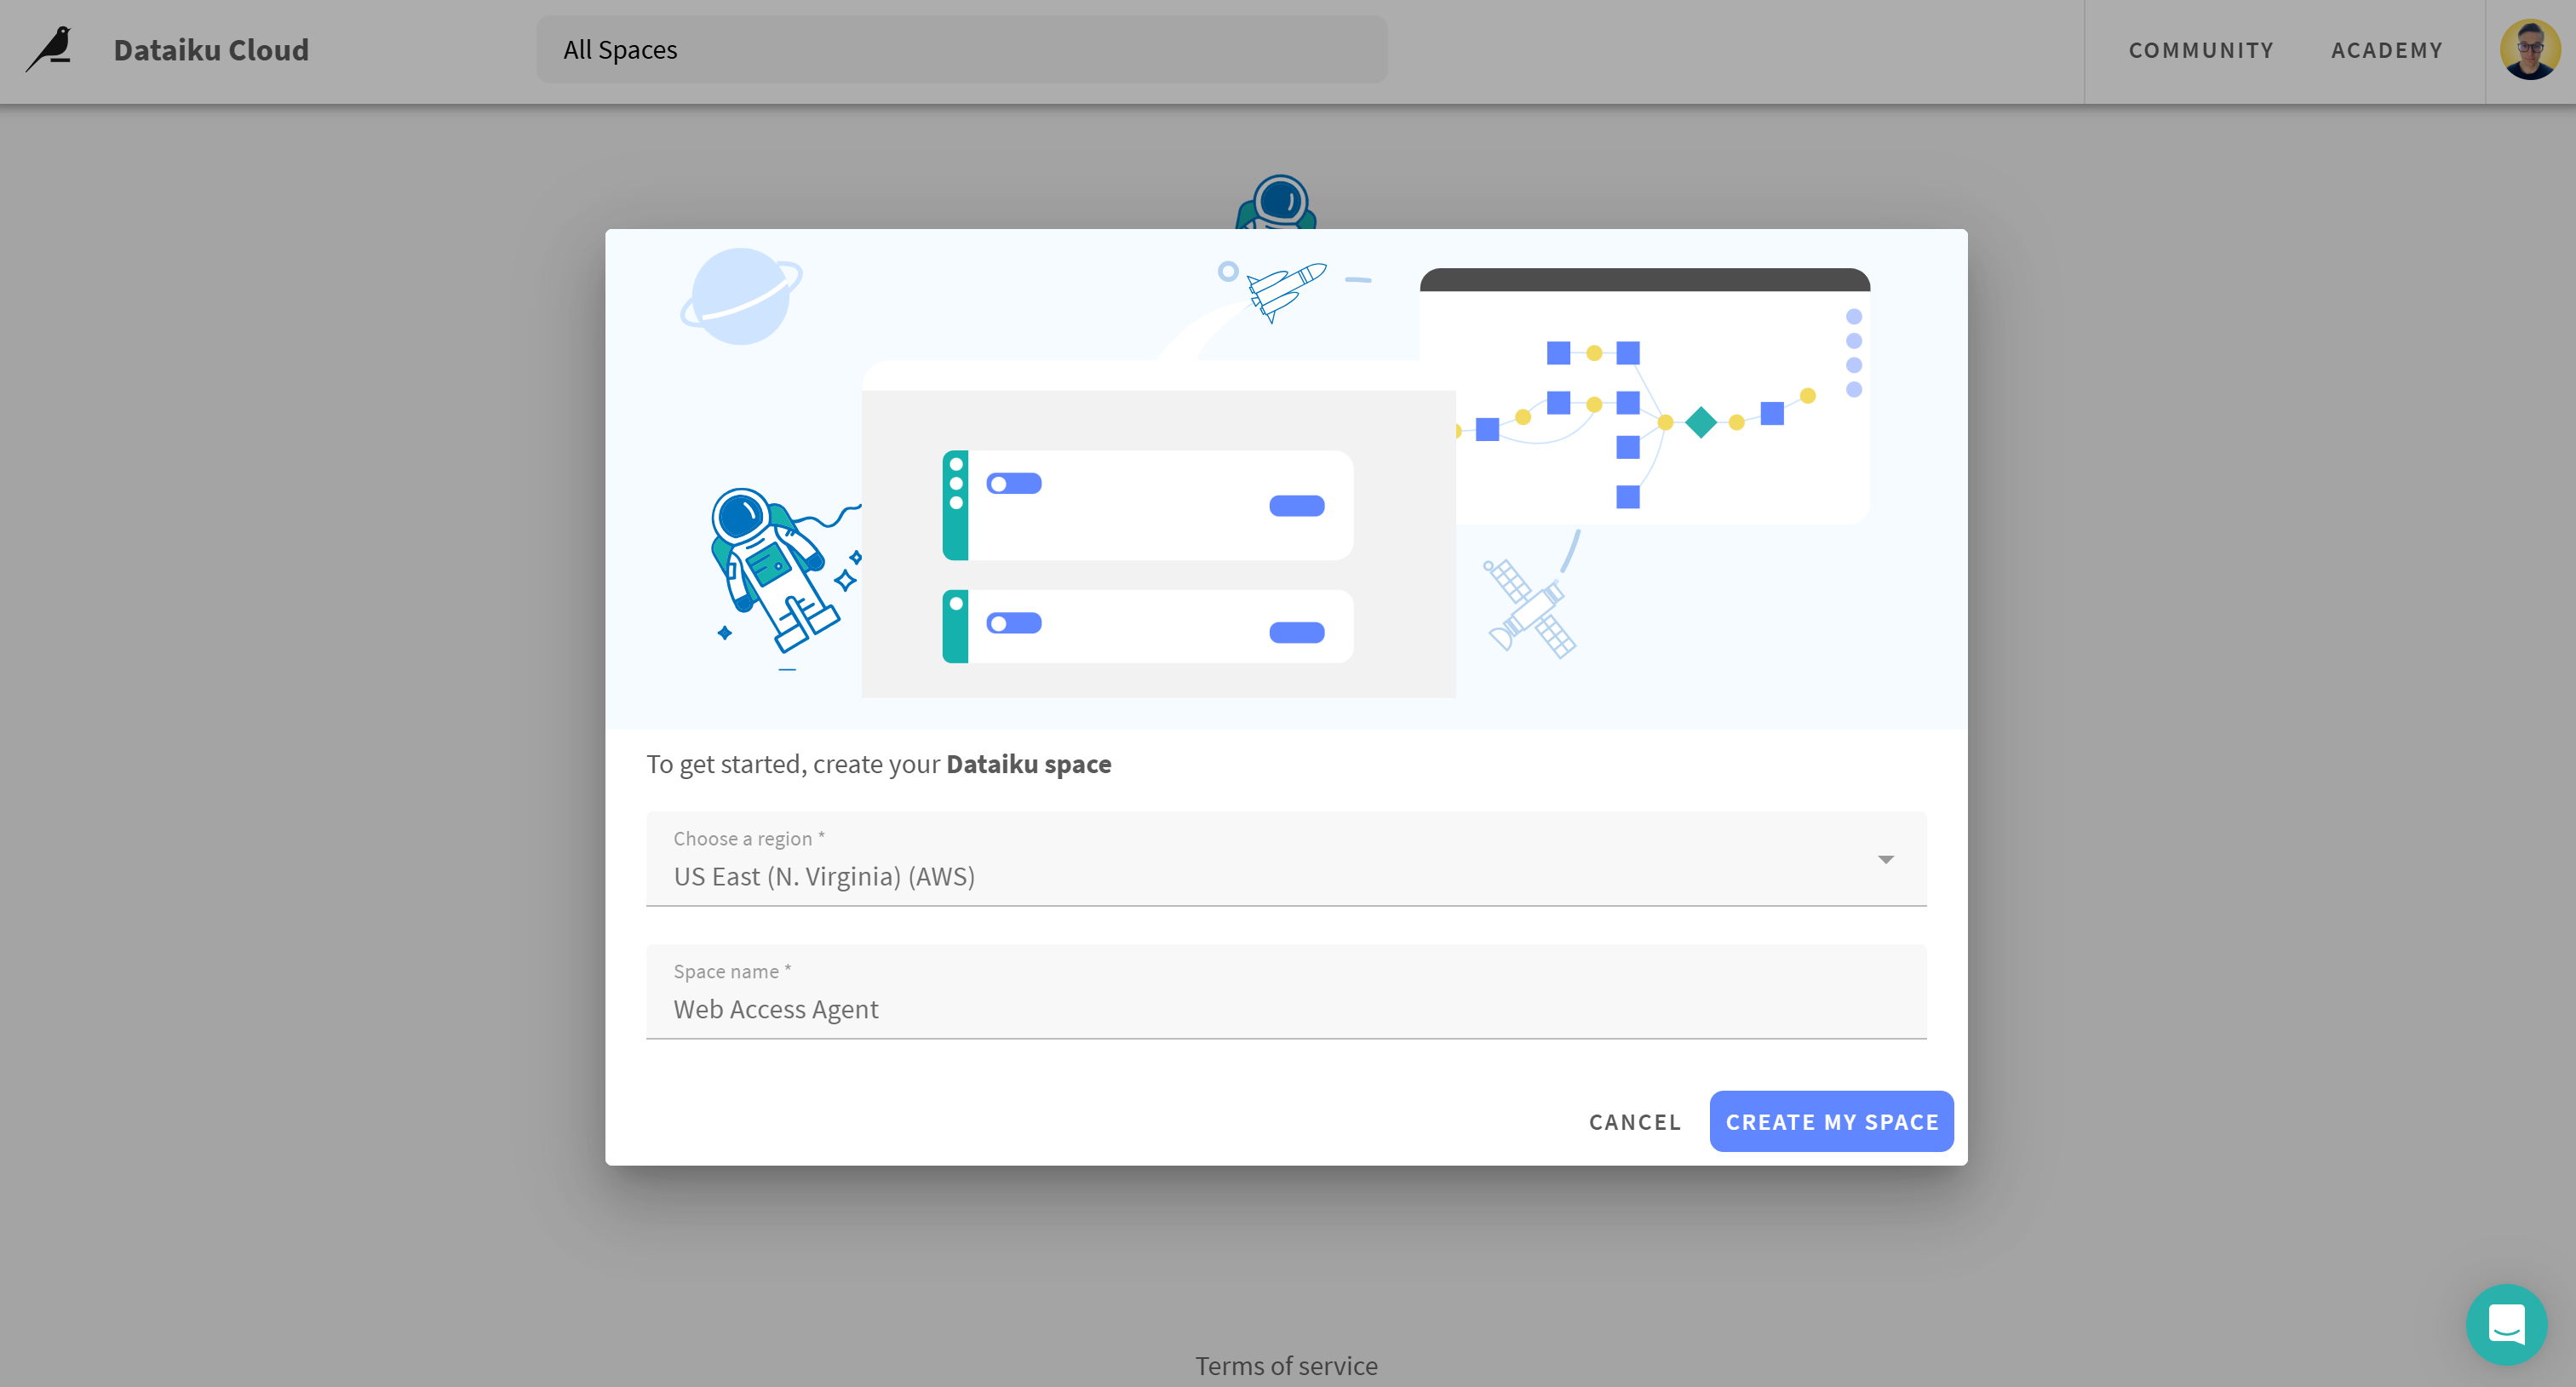
You can think of a space as an isolated Dataiku environment with its own configuration. Each space runs a specific version of the Dataiku platform. Since Dataiku regularly releases updates, spaces are periodically upgraded to provide access to the latest features and improvements.
Once your space is created, you will be taken to the Dataiku space dashboard:
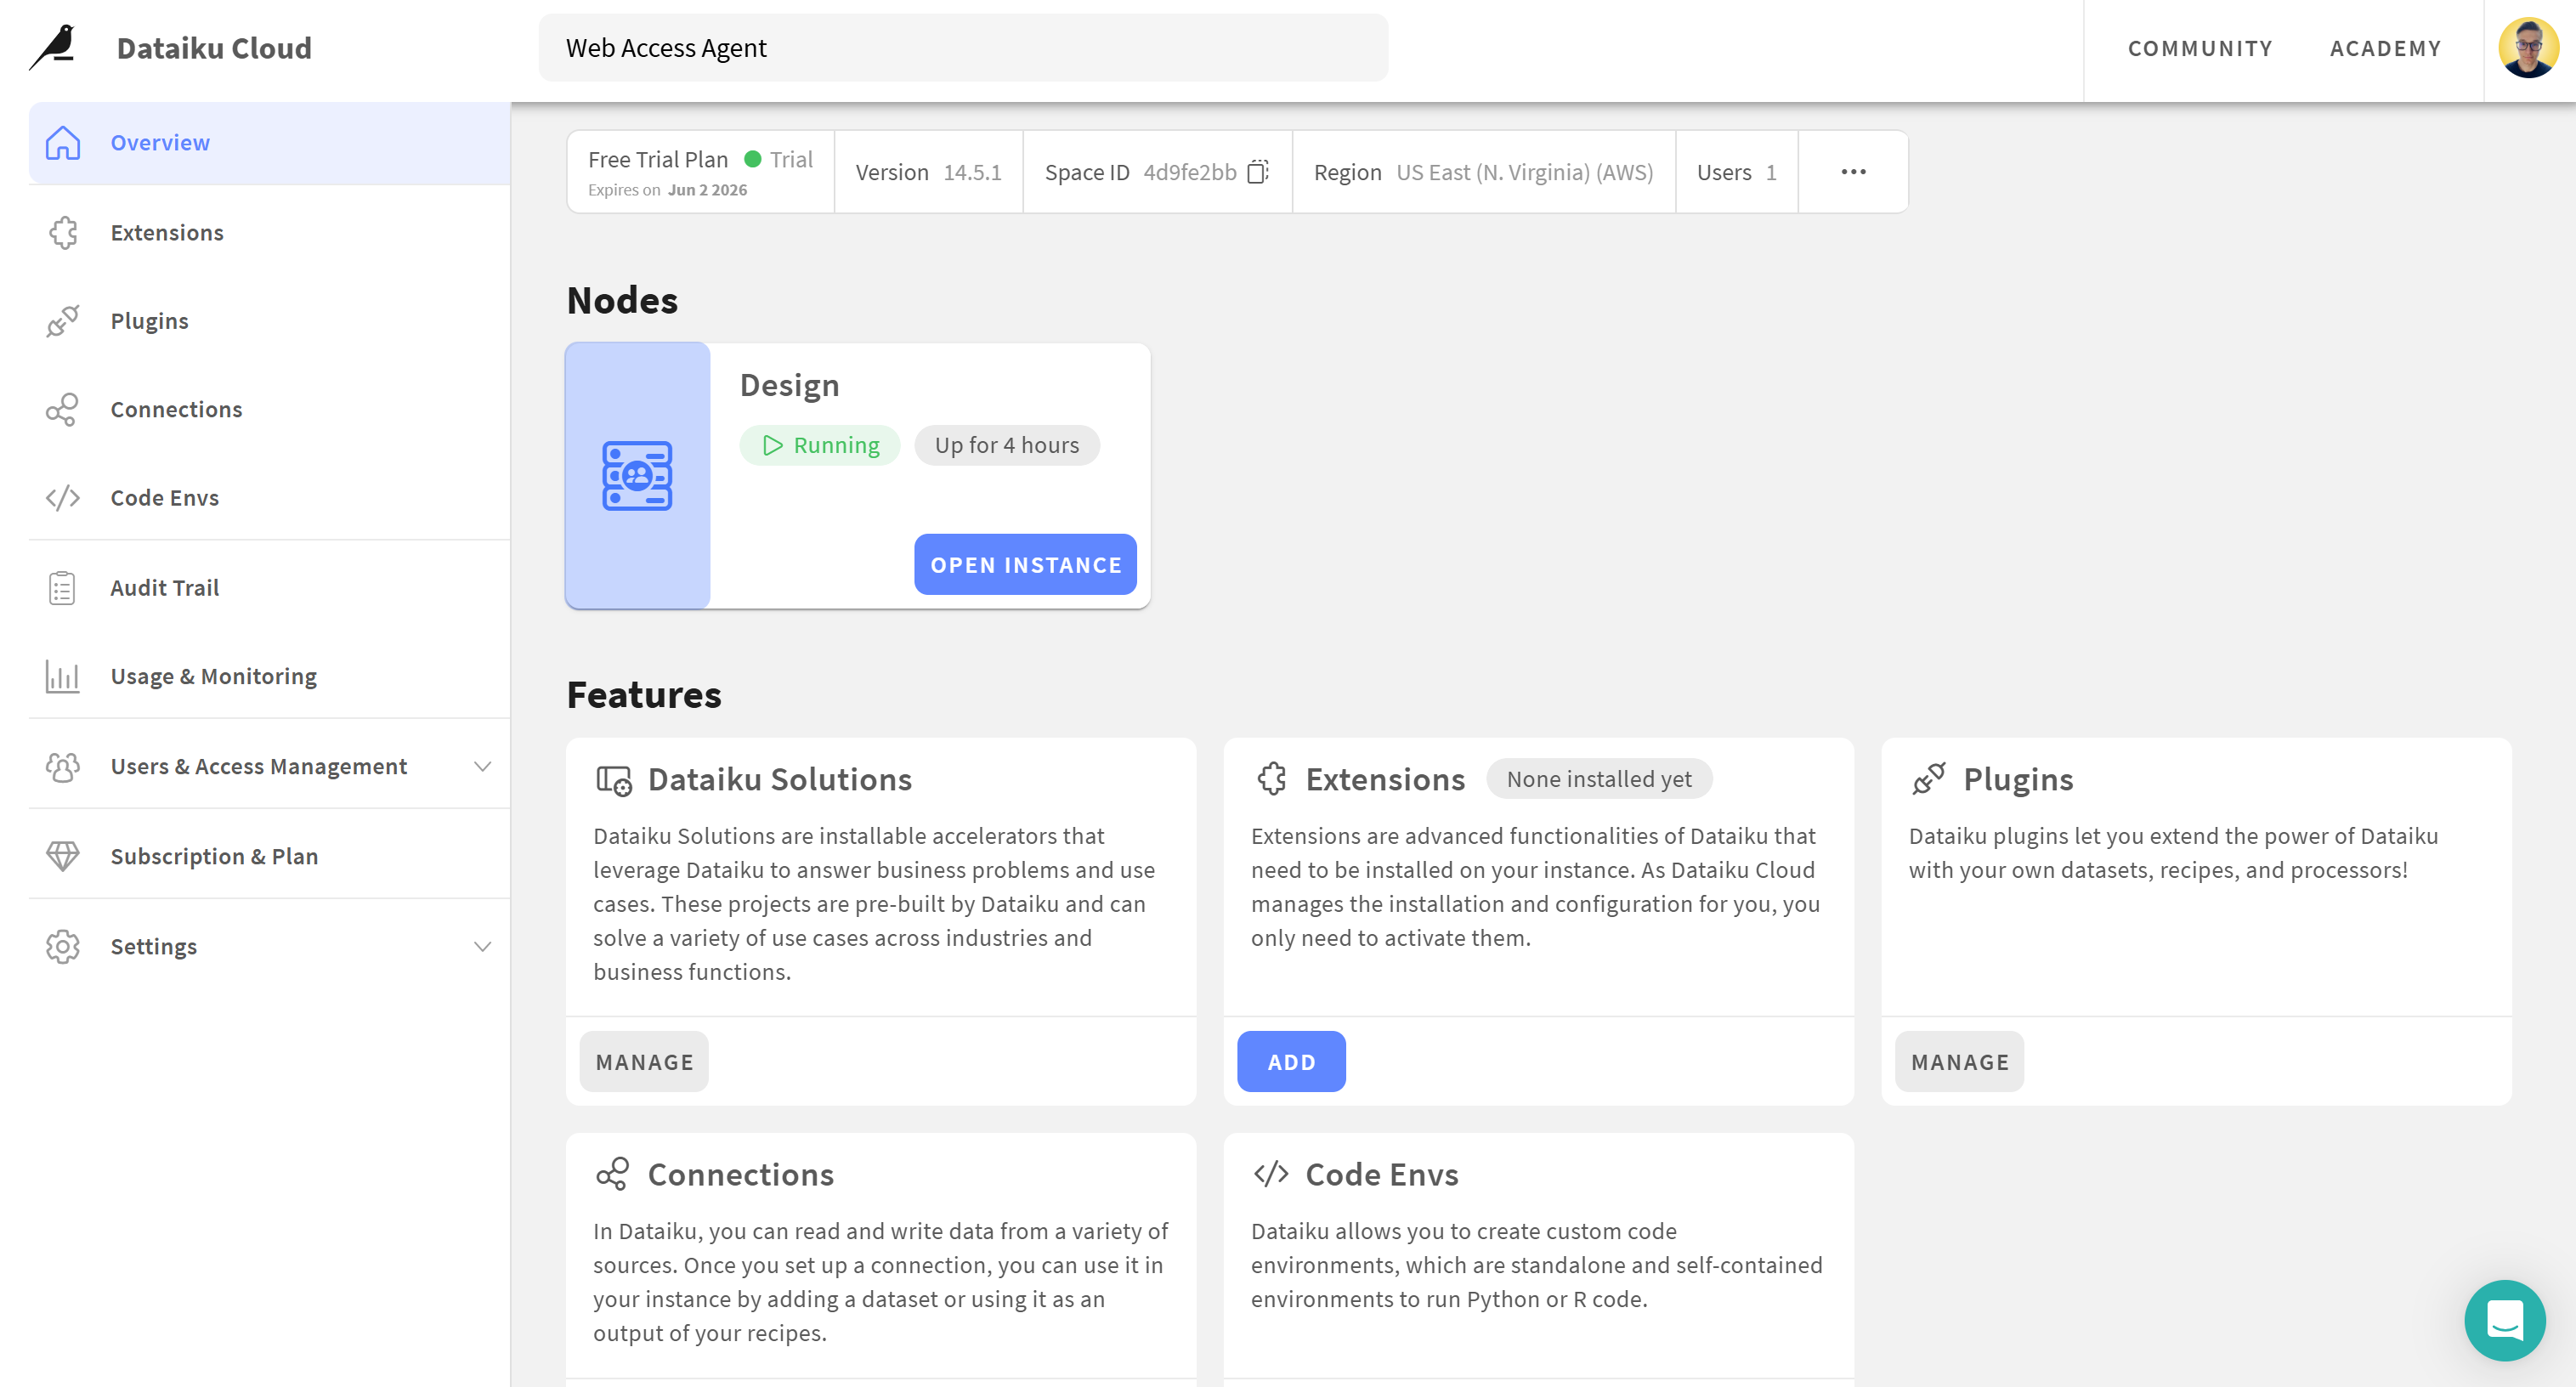
Great! Your Dataiku Cloud account and space are now ready to use.
Step #2: Configure the LLM Integration
Your Dataiku agent needs access to an LLM to work. In this section, we will connect an OpenAI account, but the process is similar for other supported providers.
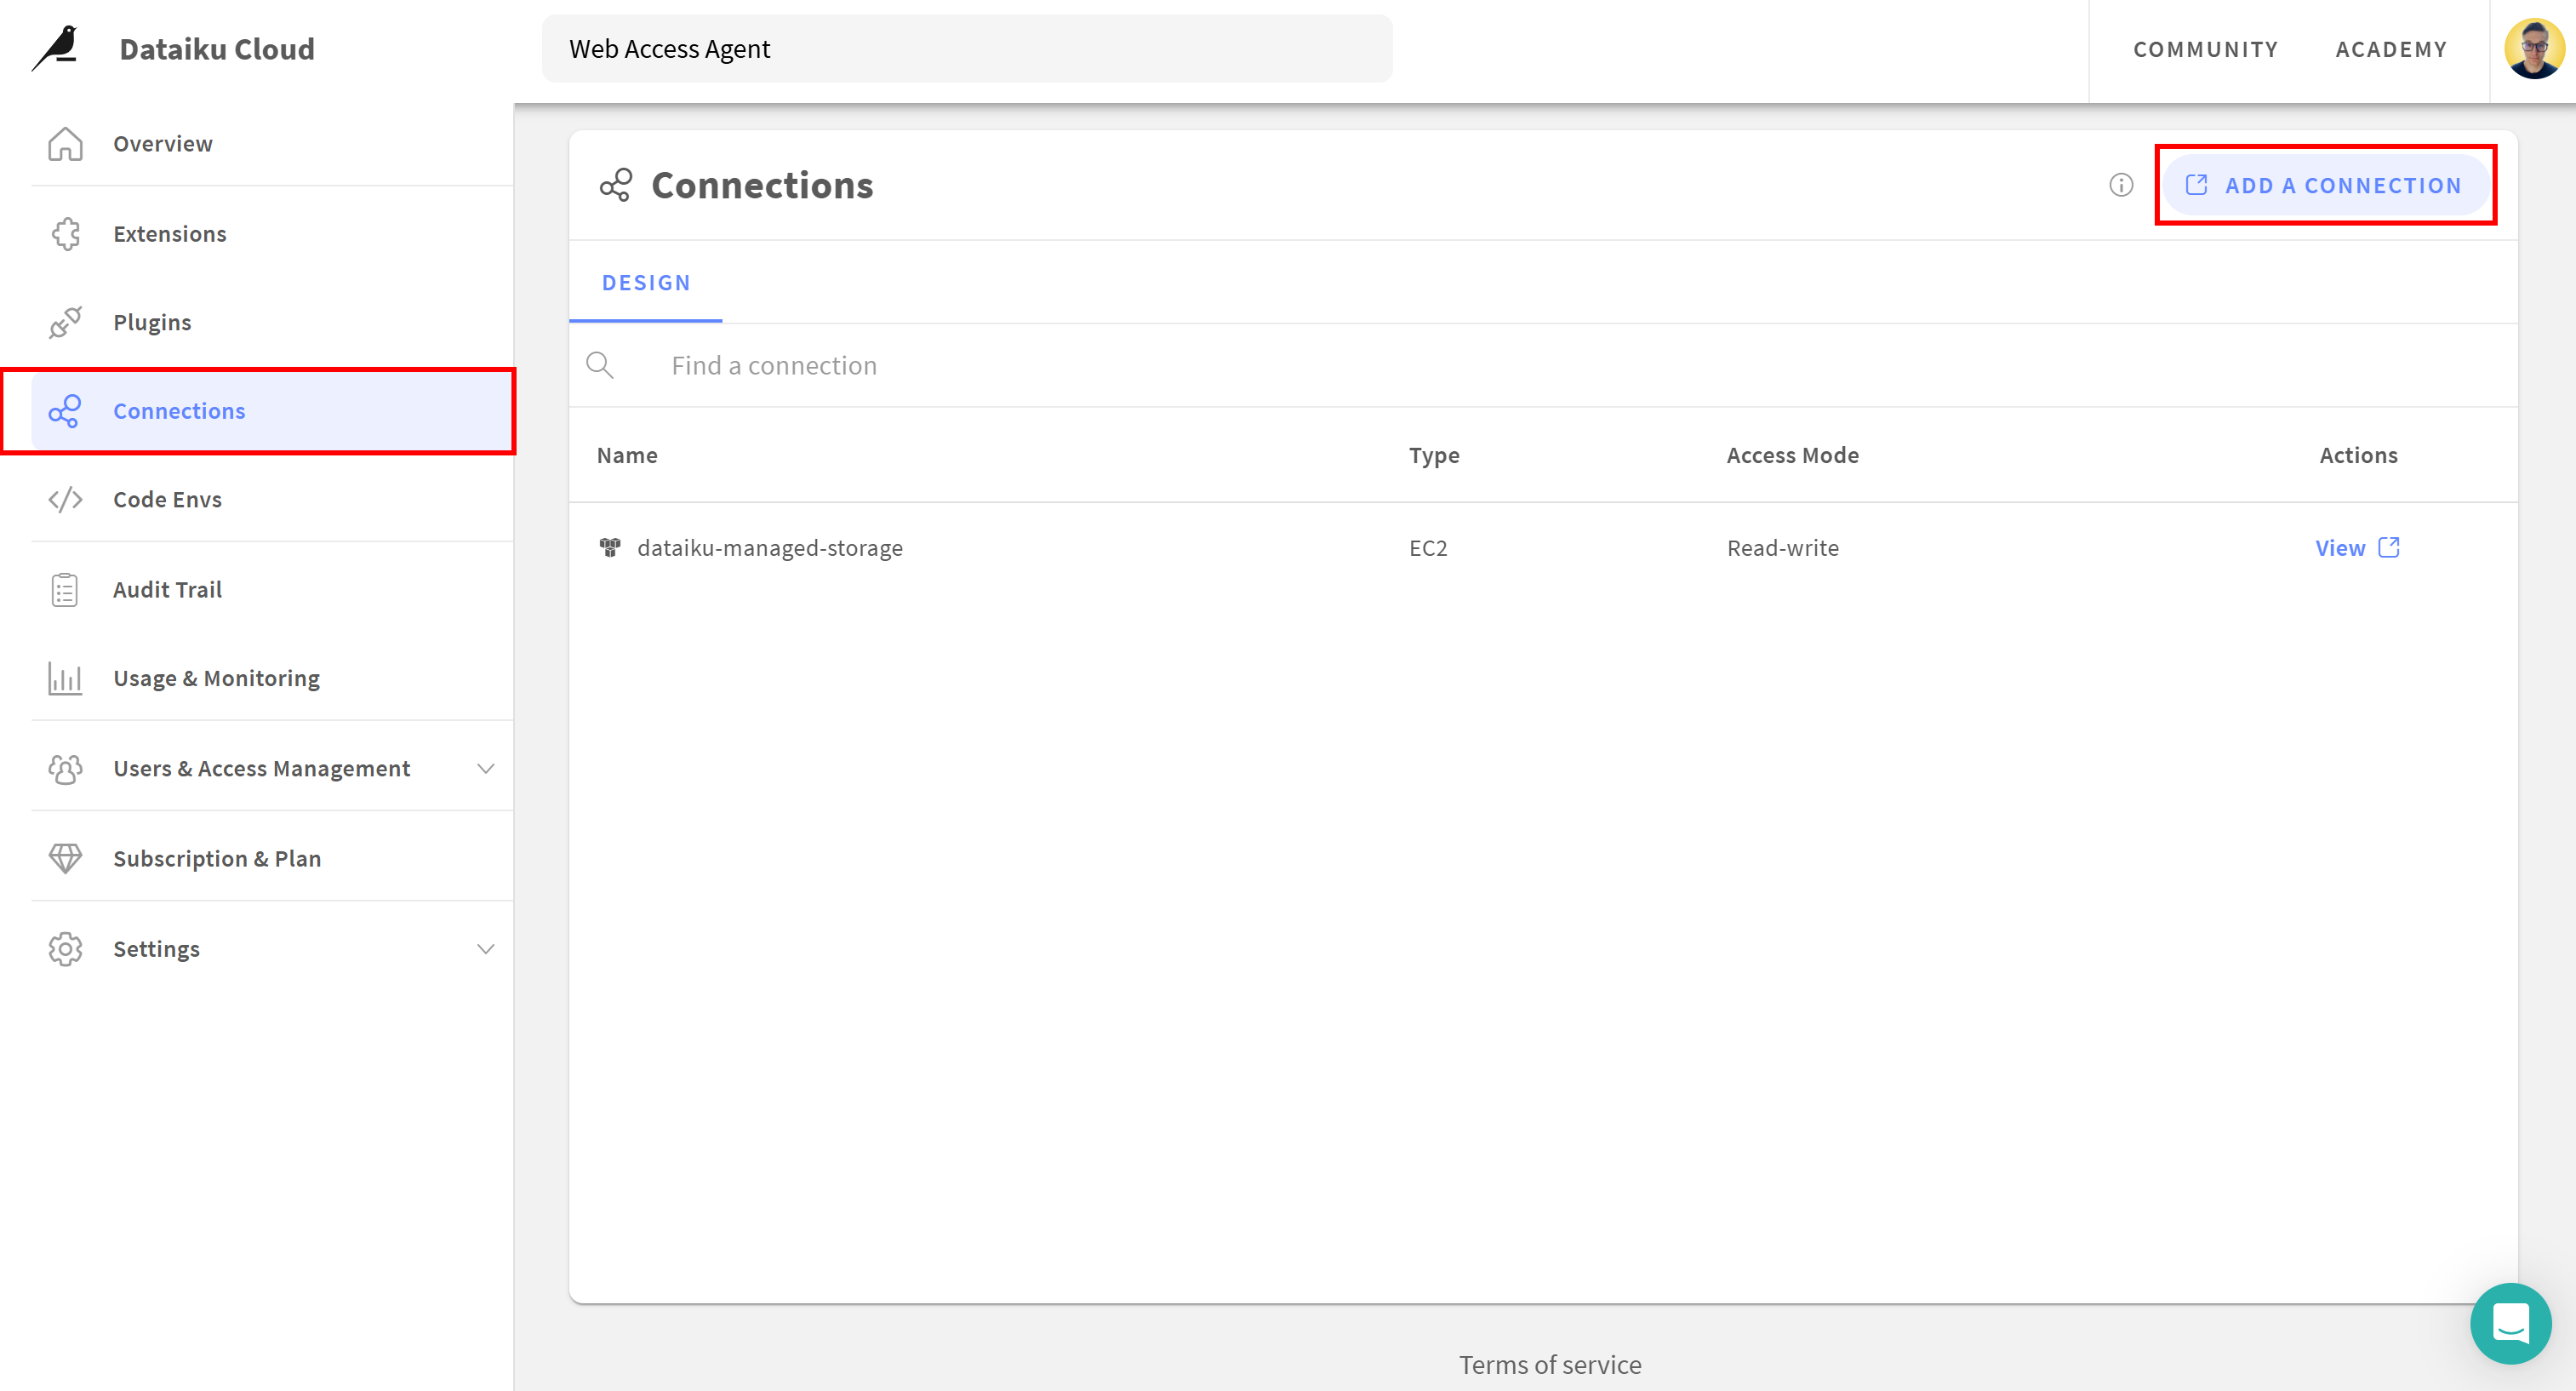
Start by opening the “Connections” page. Then, click “ADD A CONNECTION”:
You will be redirected to the “DSS Settings” page:
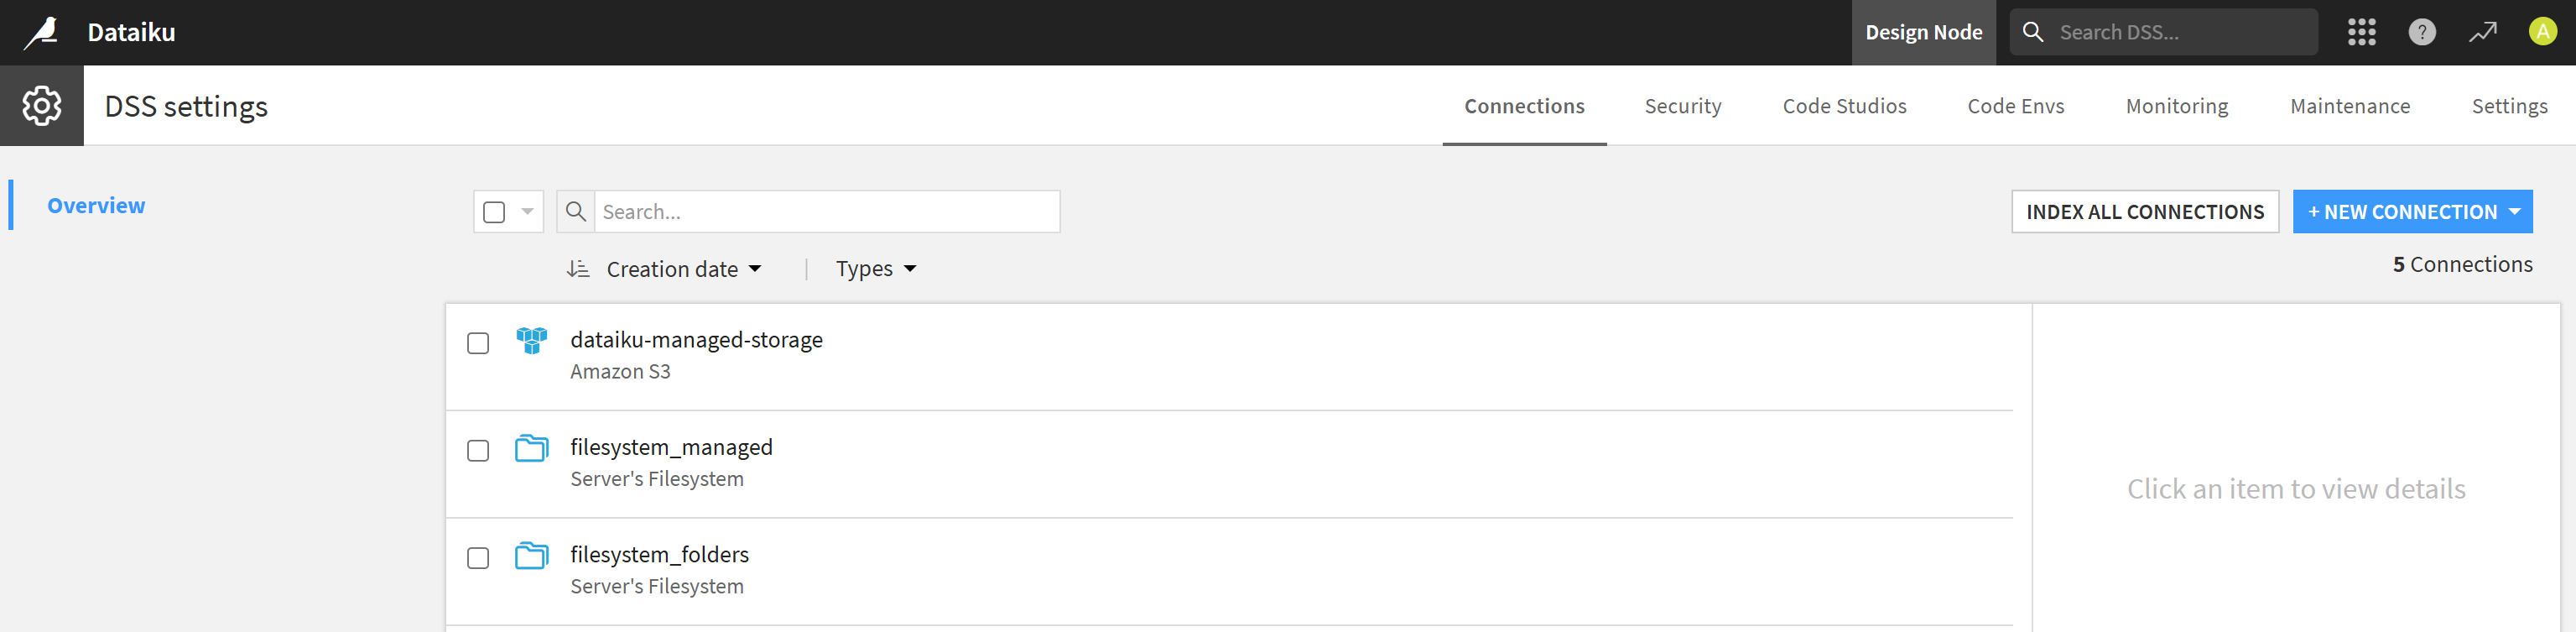
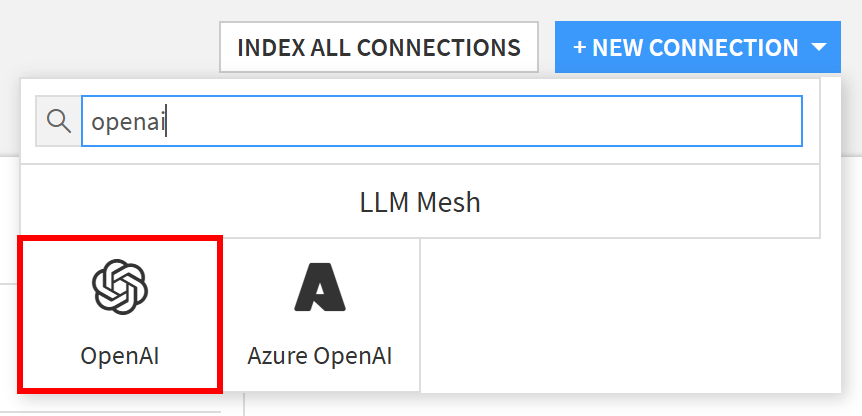
Here, click the “NEW CONNECTION” dropdown, search for the “openai” string, and select the corresponding option:
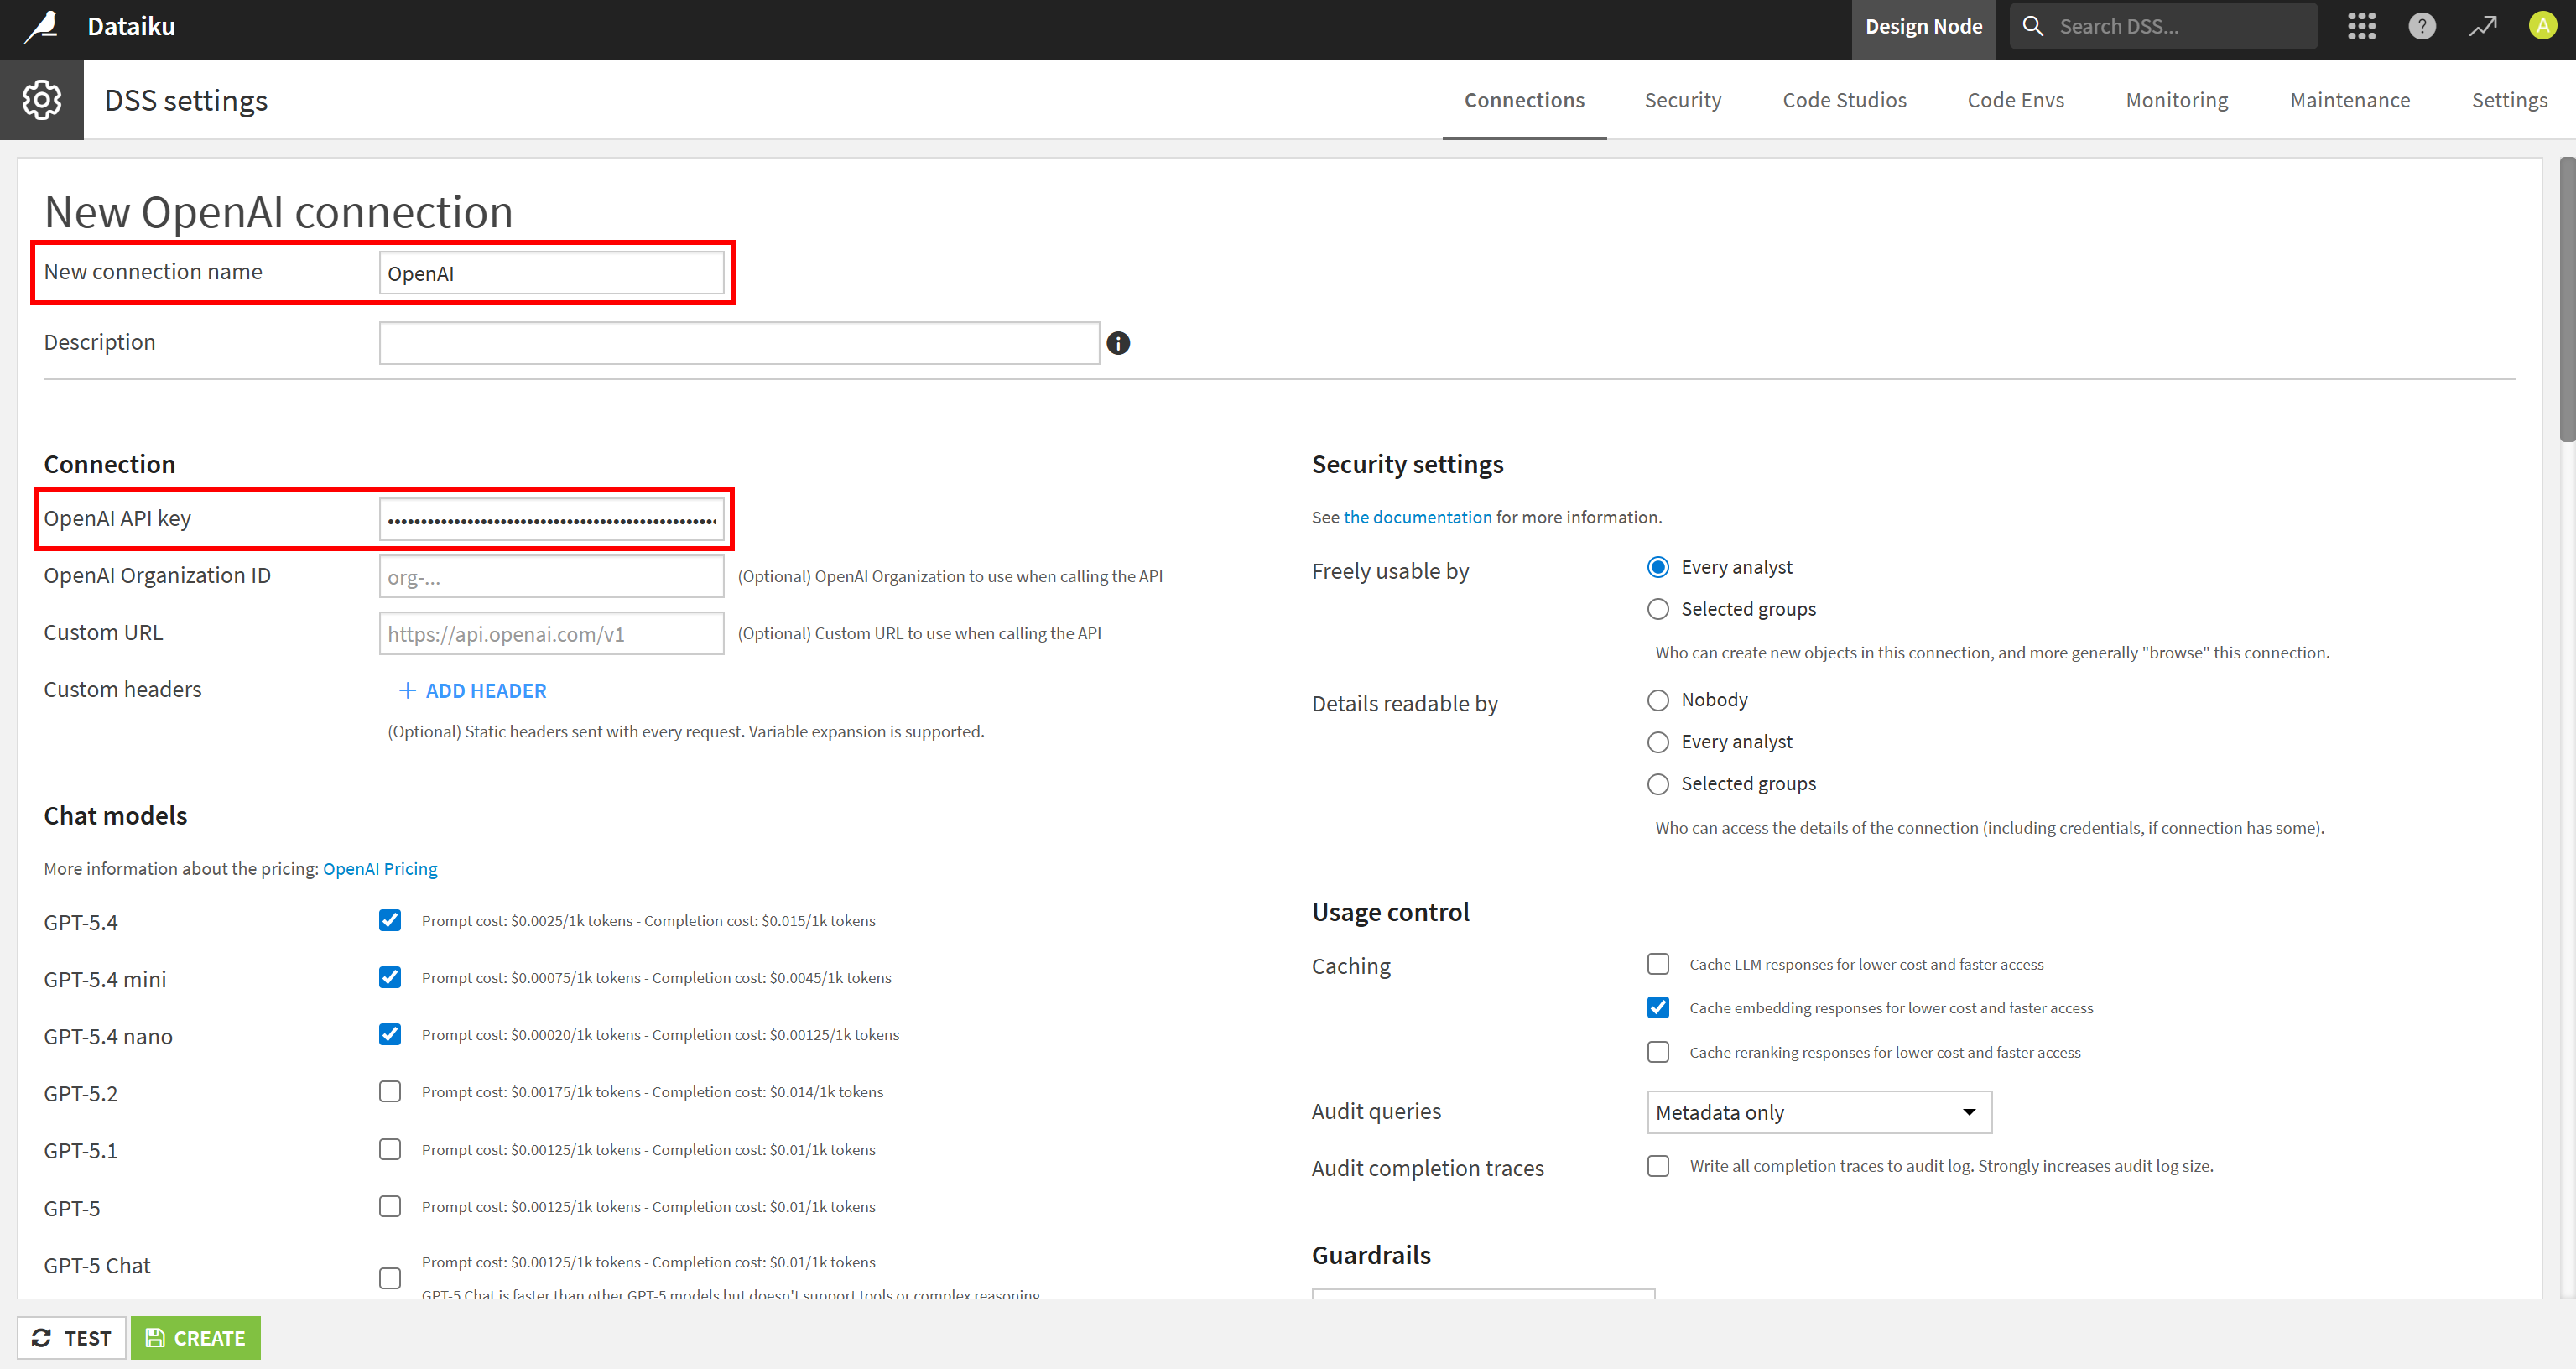
Enter a name for the connection (for example, “OpenAI”) and paste your OpenAI API key. Click “TEST” to verify that the connection works, then select “CREATE” to add it:
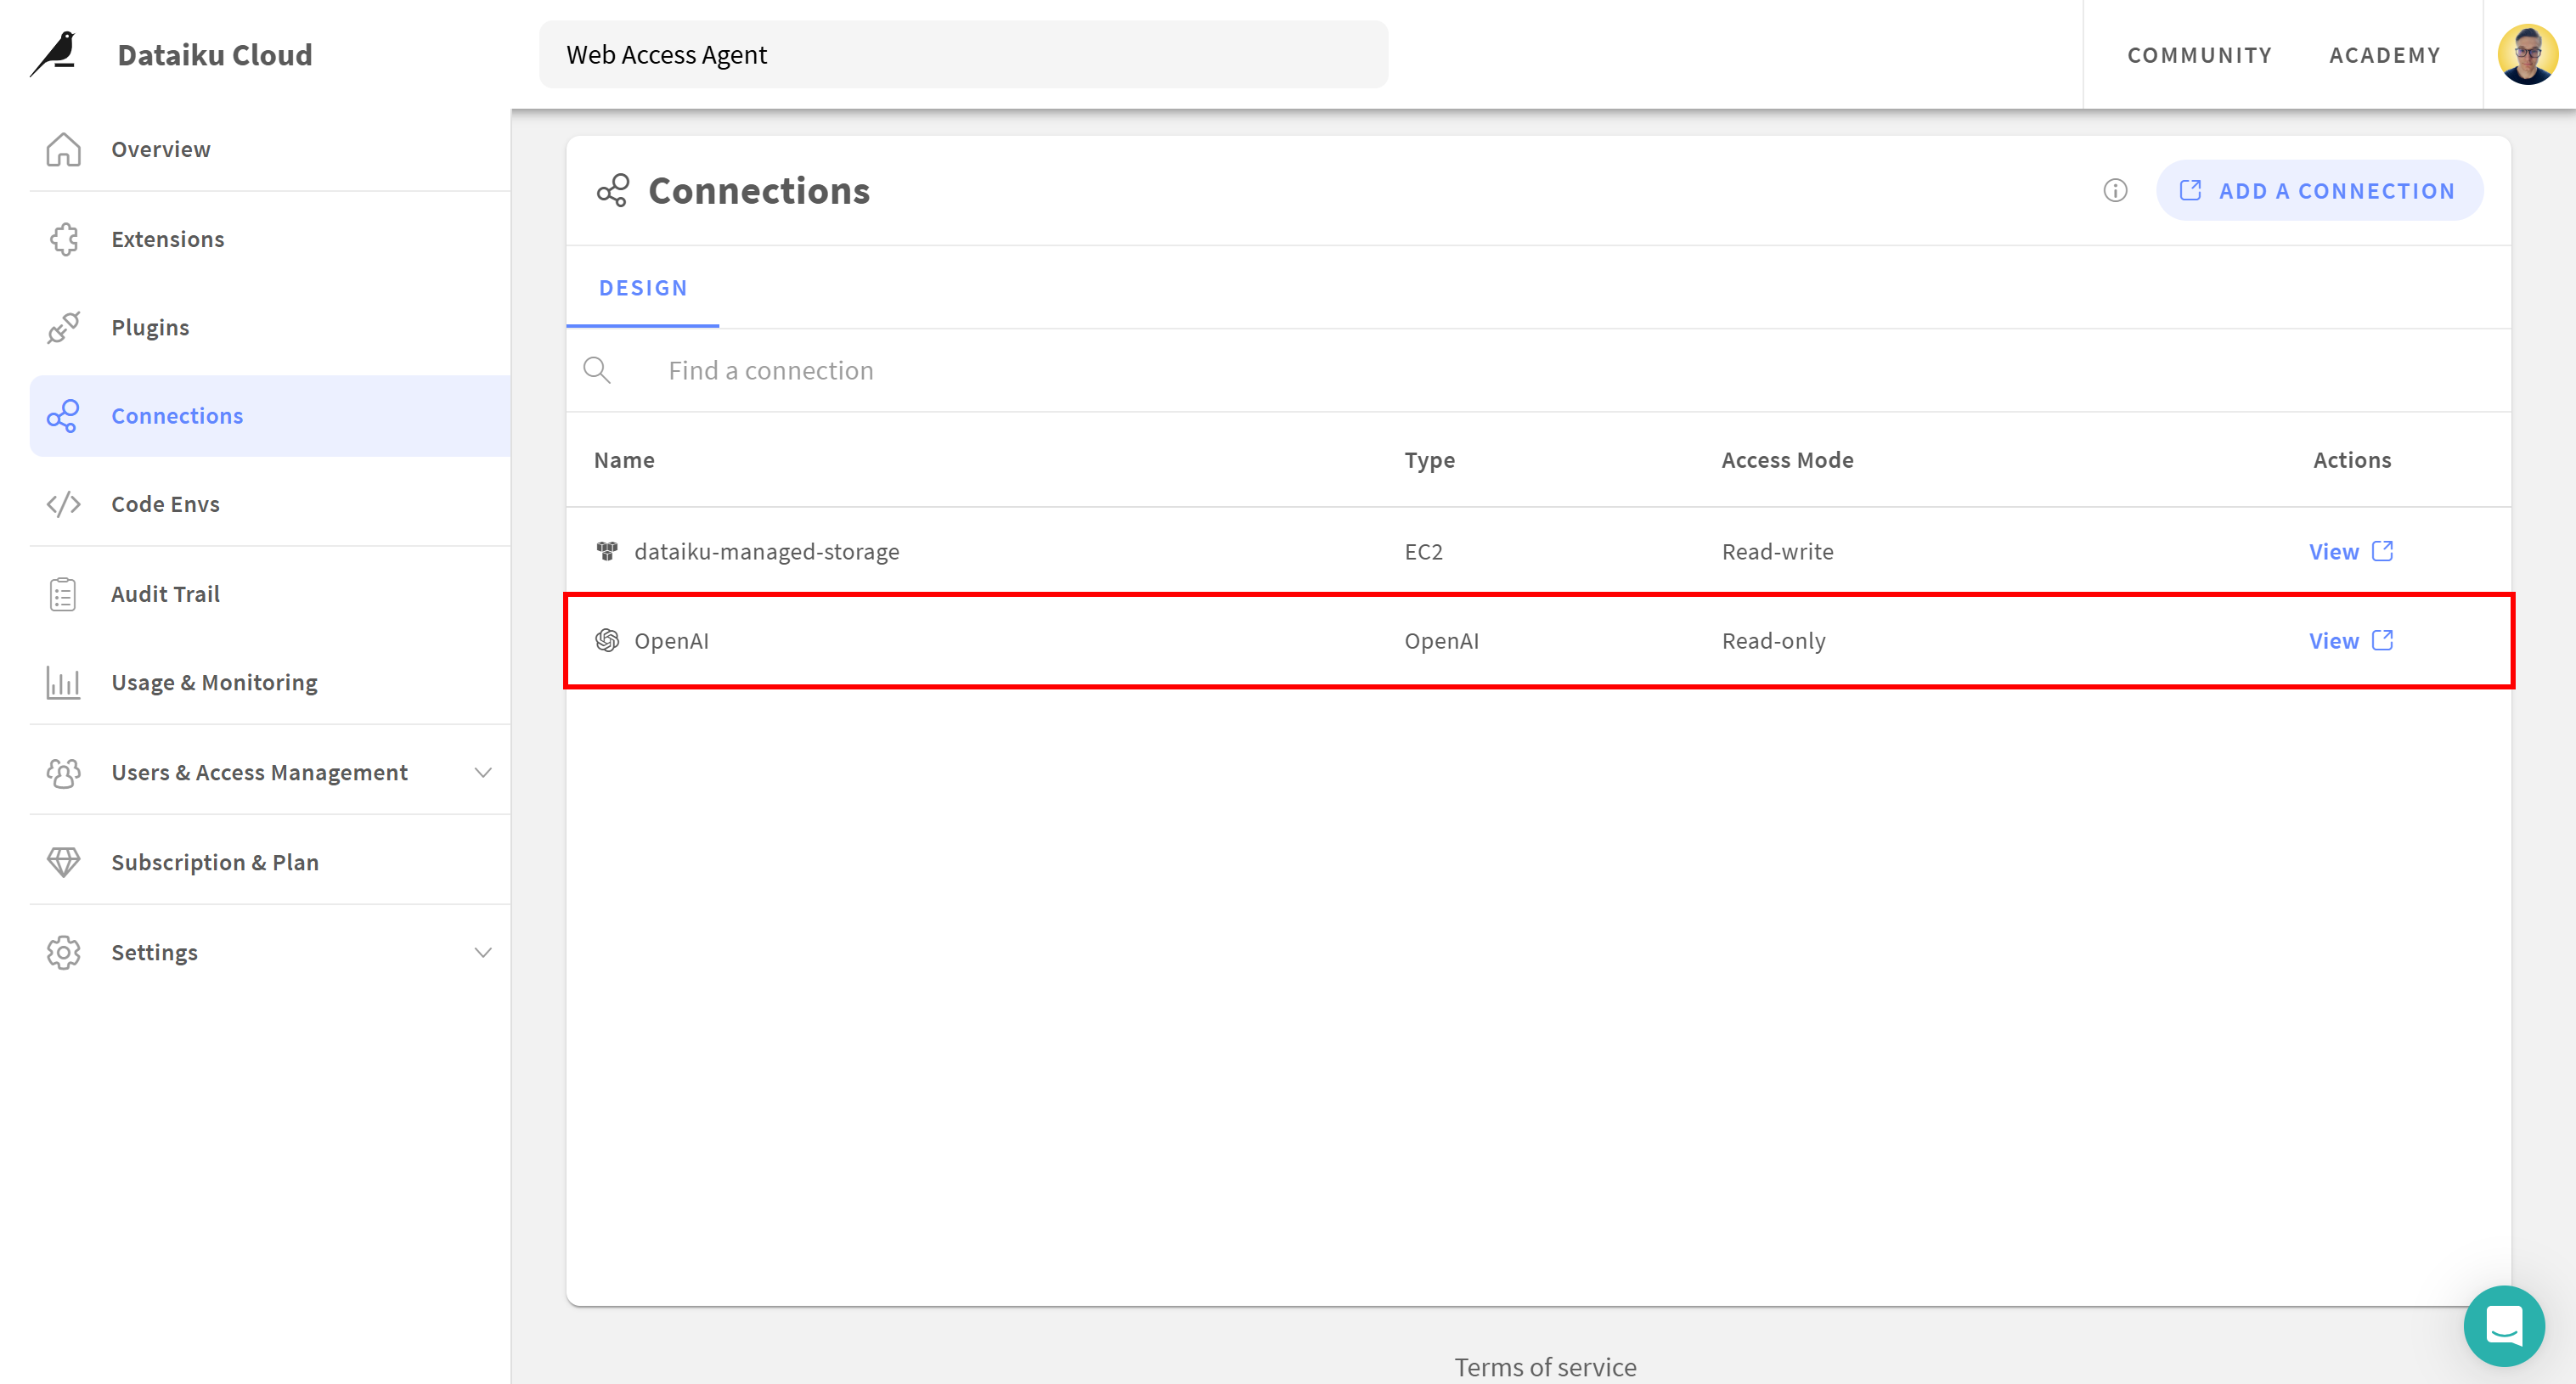
Once created, the OpenAI connection will appear on the “Connections” page:
Your Dataiku account can now access OpenAI LLM models. You are ready to build AI agents powered by external models. Cool!
Step #3: Prepare for the Bright Data MCP Remote Connection
Before creating your agent, you need to configure a connection to the Bright Data MCP server.
Unlike local AI agent solutions, Dataiku runs in the cloud. This means you must connect to the remote version of the Bright Data MCP server. In other words, you cannot install the Bright Data MCP server locally and connect to it from Dataiku.
Note: The Bright Data MCP remote server is enterprise-ready. It supports unlimited connections and high scalability, just like all other Bright Data products.
To get started, familiarize yourself with the Bright Data MCP remote connection URL format:
https://mcp.brightdata.com/mcp?token=<YOUR_BRIGHT_DATA_API_KEY>&pro=1Remember that the &pro=1 parameter is optional:
- Without
&pro=1: You get access only to the free tools (5,000 requests/month) in Rapid mode. - With
&pro=1: You gain access to the full suite of 70+ tools and advanced capabilities, but usage charges apply.
If you want more granular control, such as enabling only specific tools or tool groups, you can generate a custom remote MCP URL directly from the Bright Data dashboard.
Log in to your Bright Data account and navigate to the “AI Gateways > MCP” page. Follow the setup wizard to configure your MCP server access. At the end of the process, you will get a customized connection URL as follows:
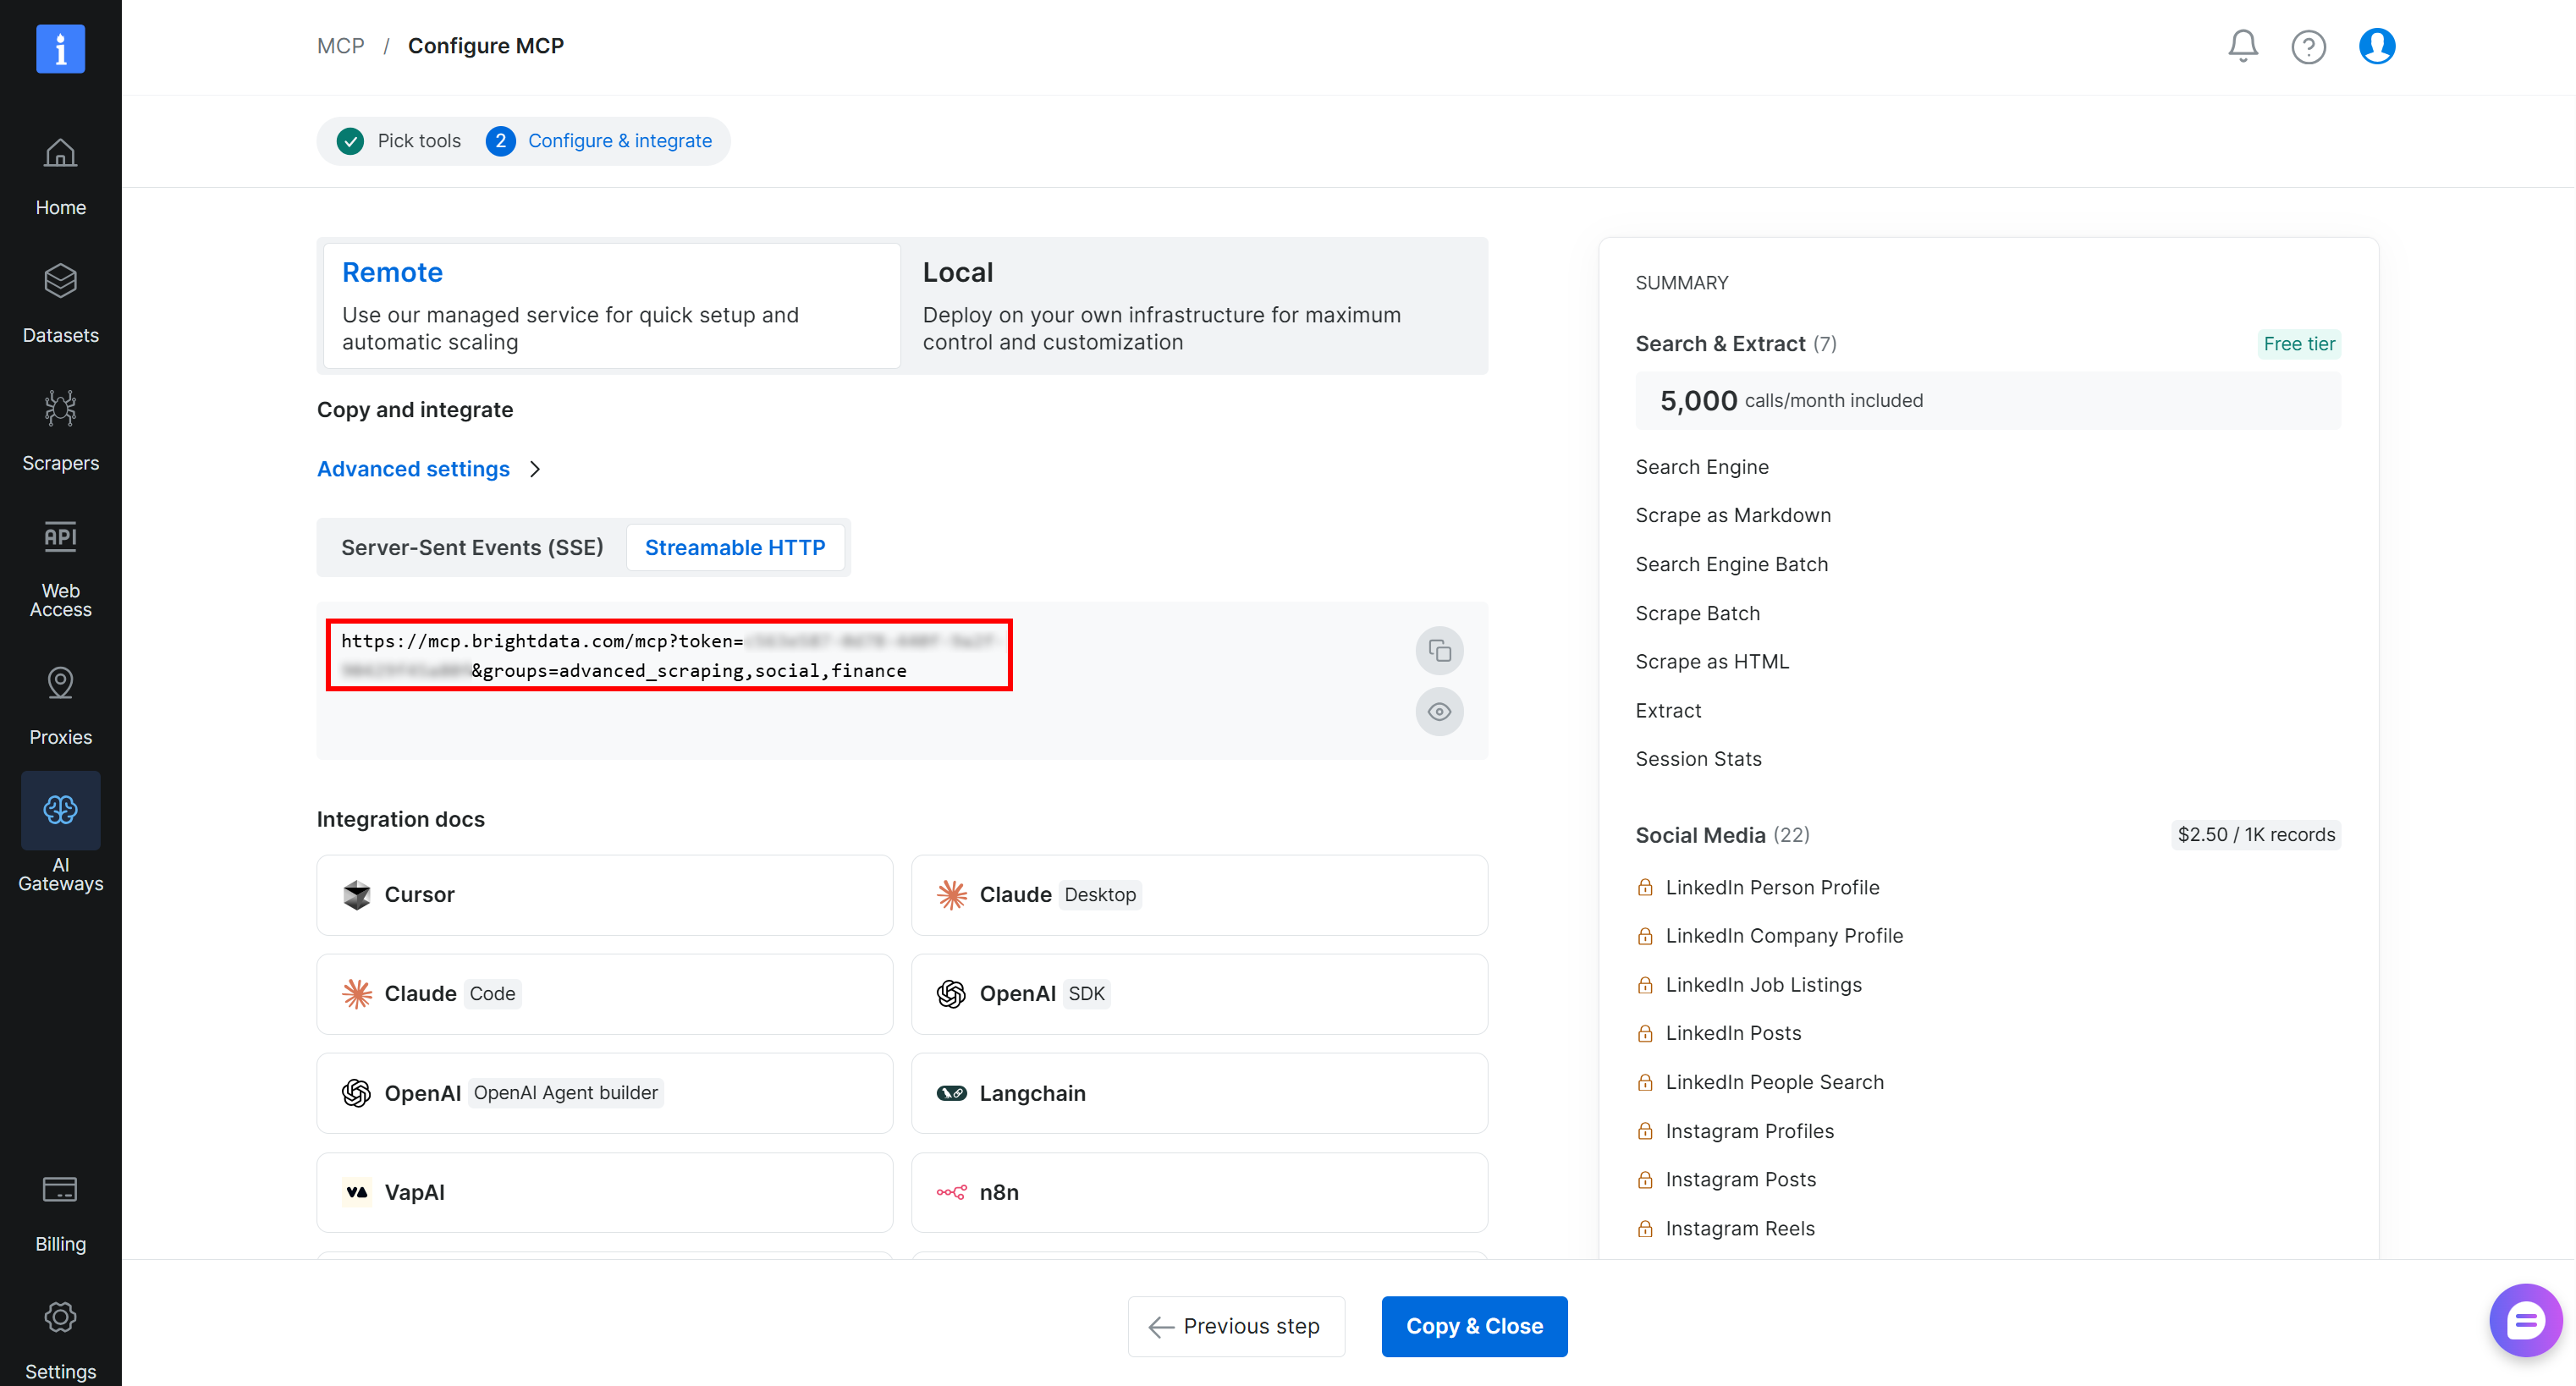
Copy the “Streamable HTTP” connection URL, as you will need it shortly to configure the Bright Data MCP connection in your Dataiku space. Great!
Step #4: Connect Dataiku to the Bright Data MCP
Now that you have the Bright Data MCP connection URL, the next step is to create an MCP connection in your Dataiku space.
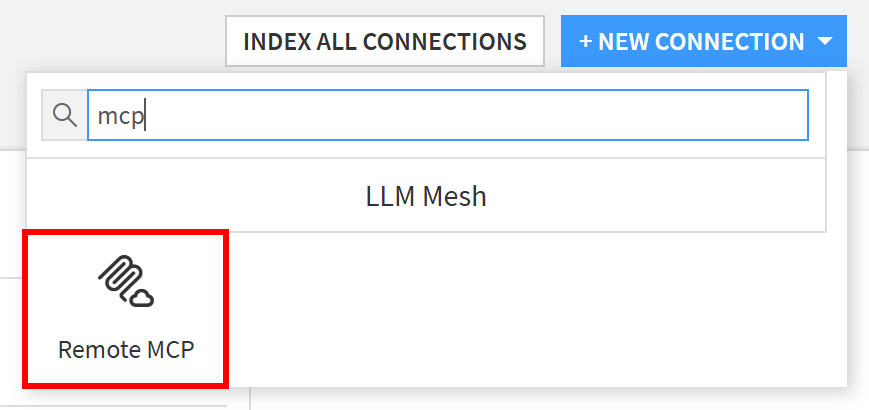
As before, open the “NEW CONNECTION” dropdown. This time, search for “mcp” and select the “Remote MCP” option:
Give your MCP connection a name (e.g., bright-data-web-mcp) and paste the remote Bright Data MCP connection URL you got earlier:
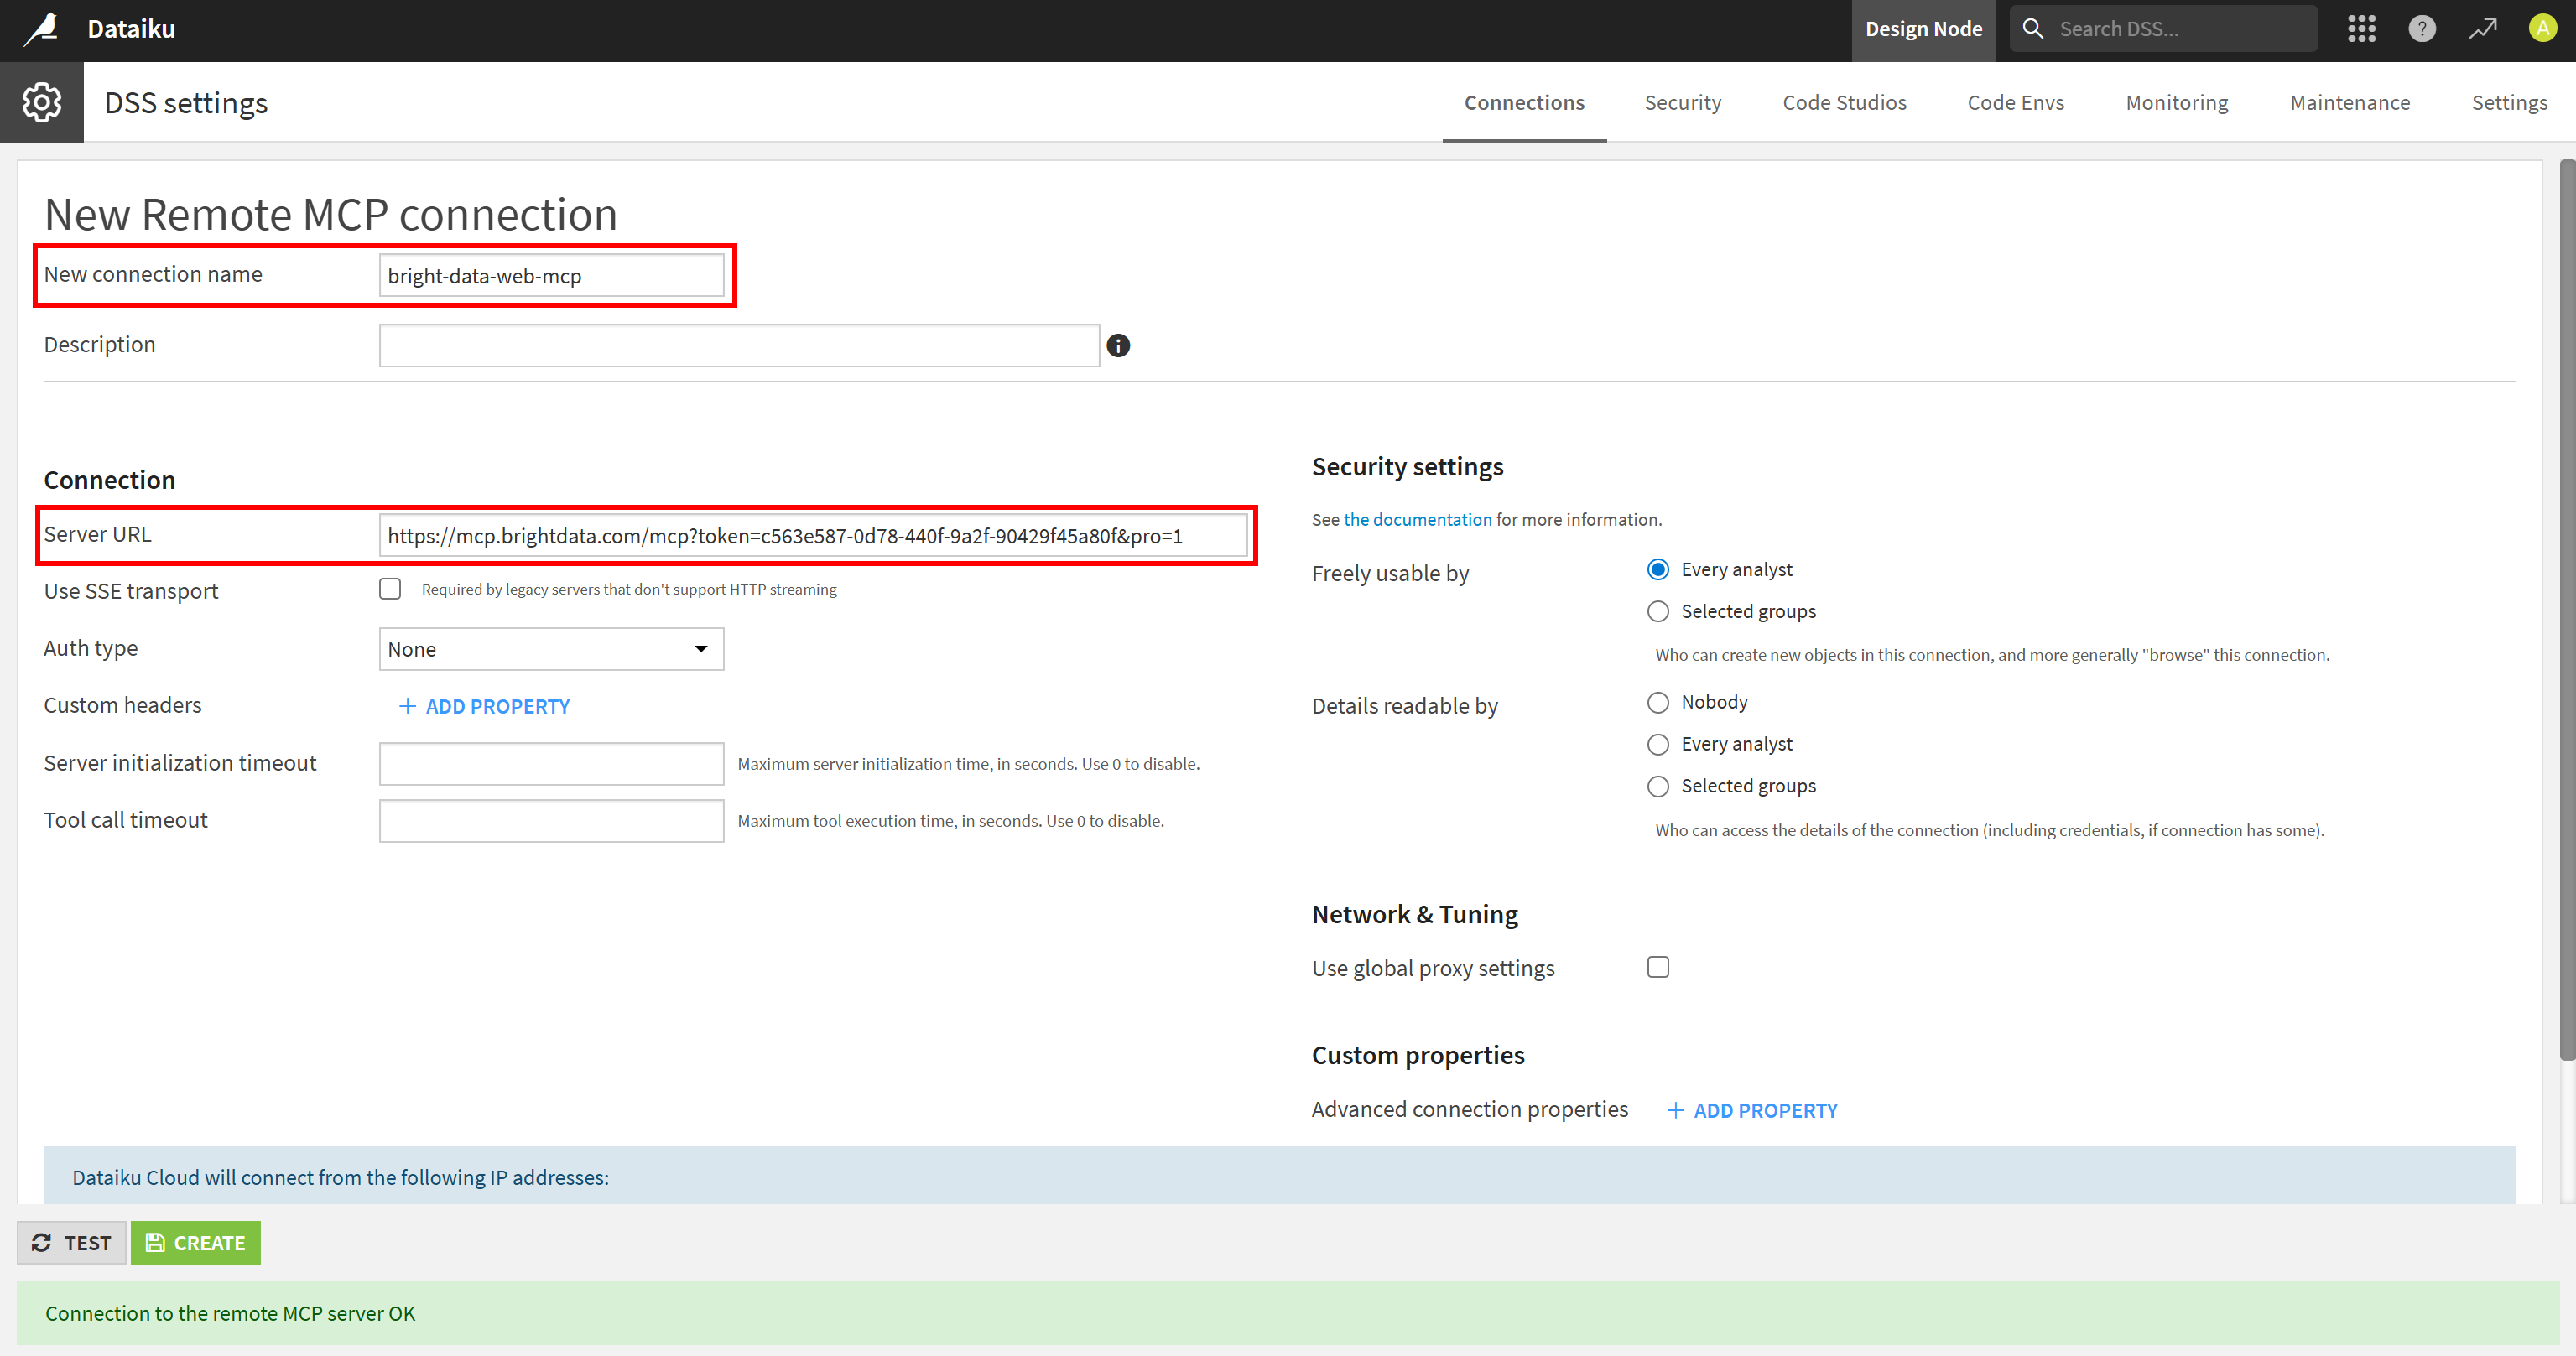
Press “TEST” to verify that the connection works correctly, then select “CREATE” to add it. Once created, the MCP connection will appear in the “DSS Settings” page:
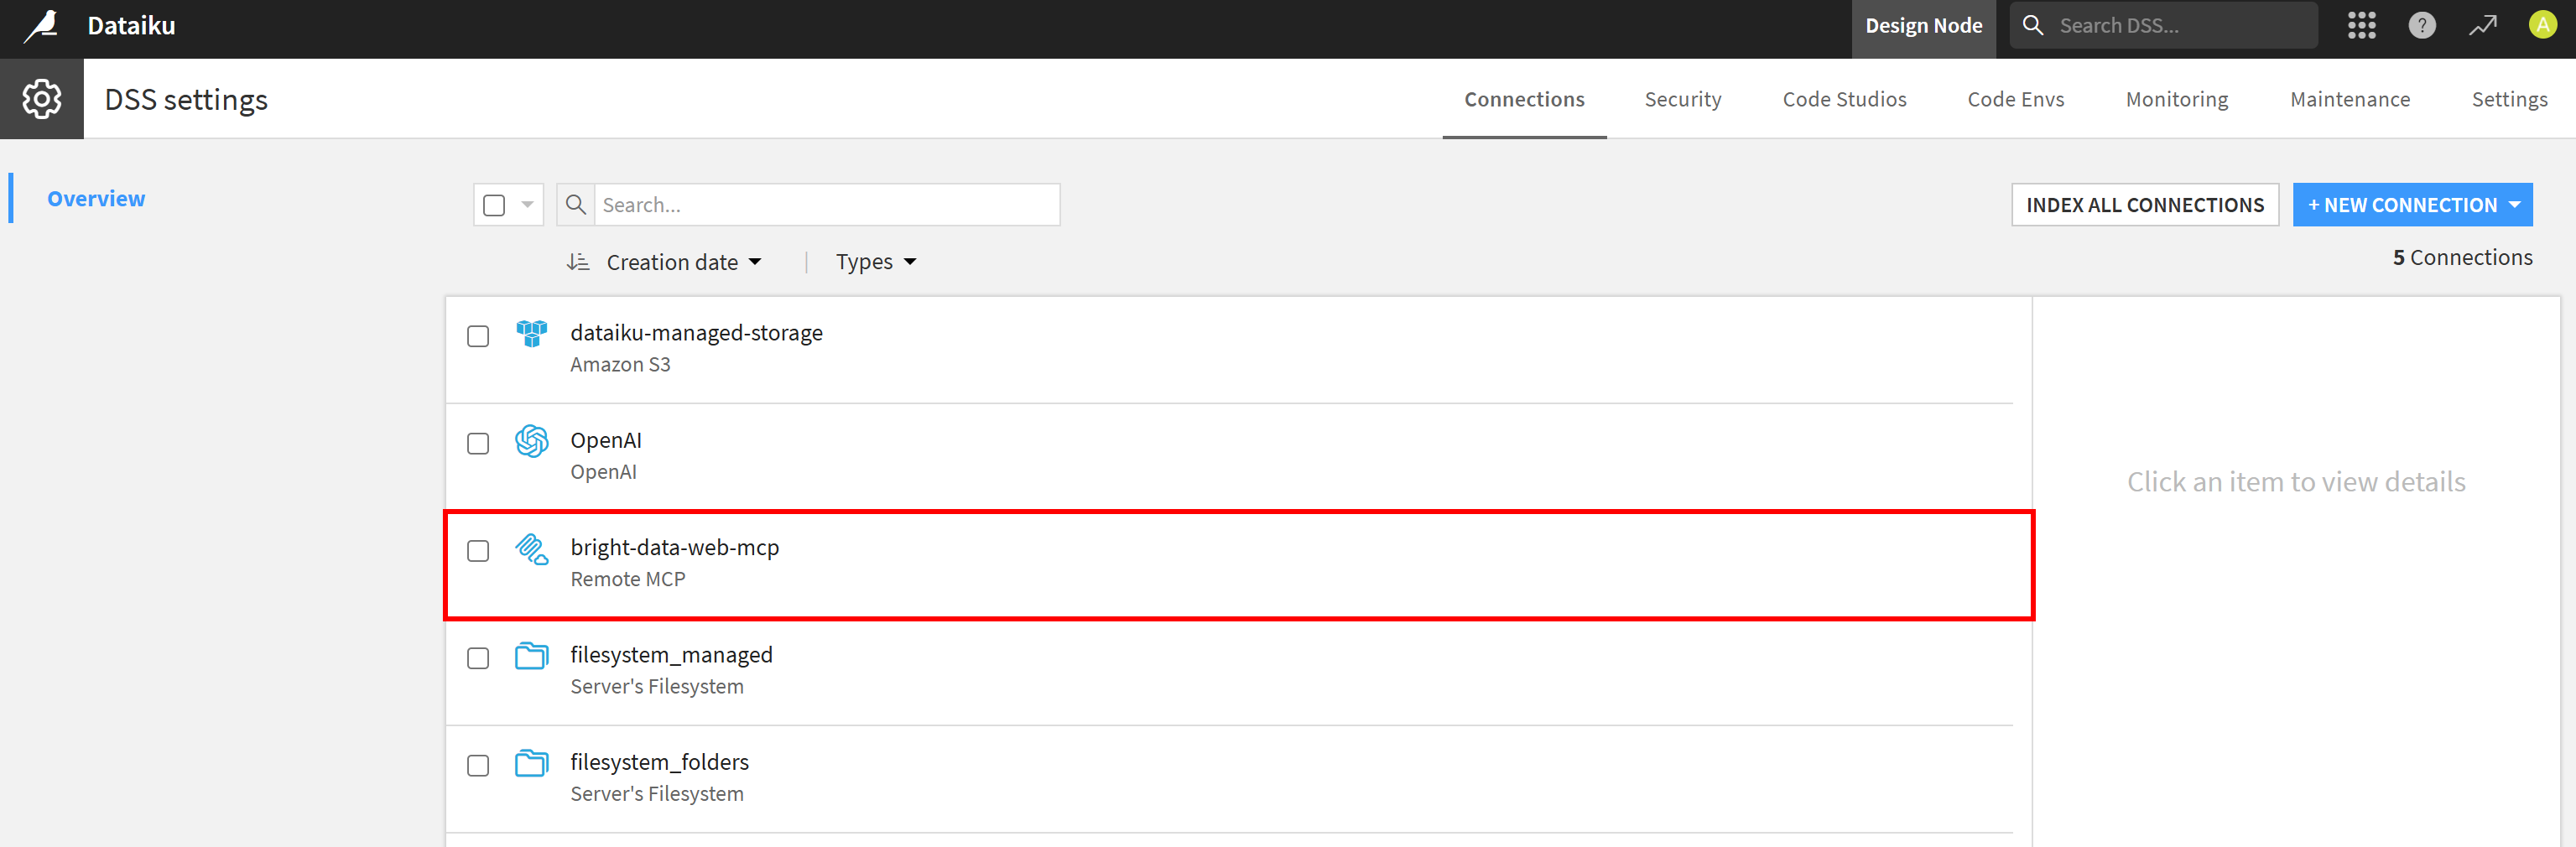
Excellent! Your Dataiku space can now connect to the Bright Data MCP server, giving your future AI agents access to live web capabilities.
Step #5: Create your Dataiku AI Agent
Back to the Dataiku “Overview” page, click “MANAGE” on the “Dataiku Solutions” card:
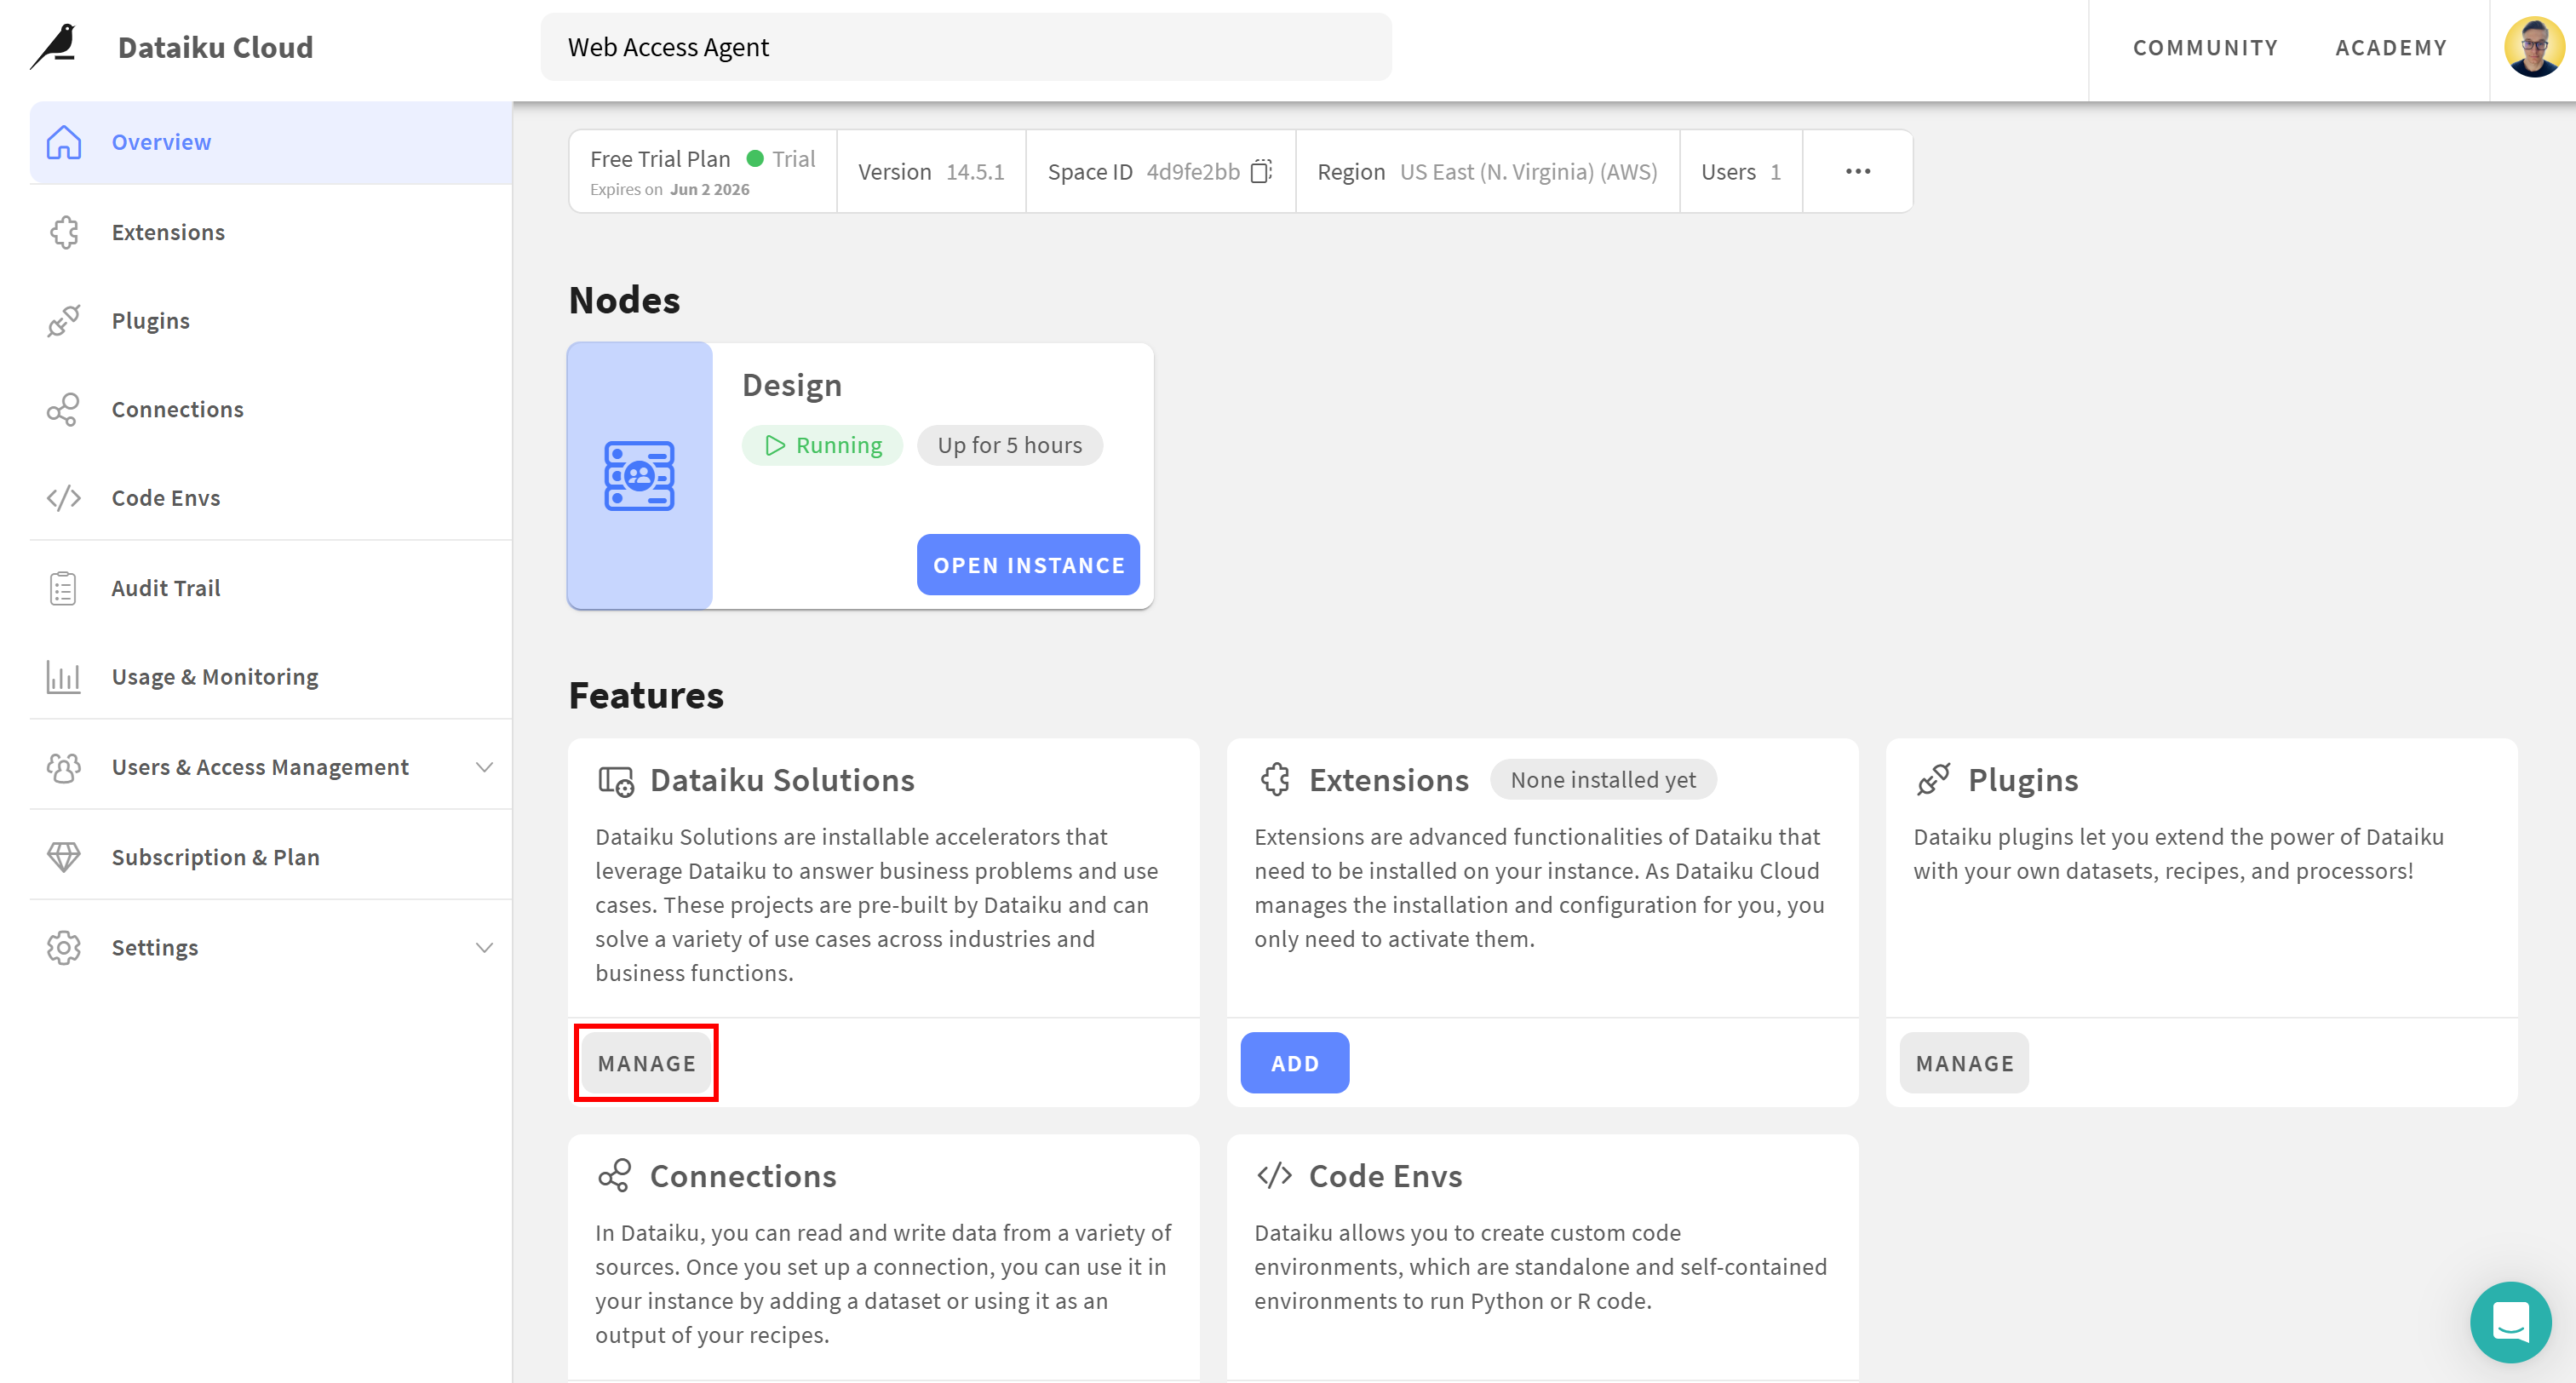
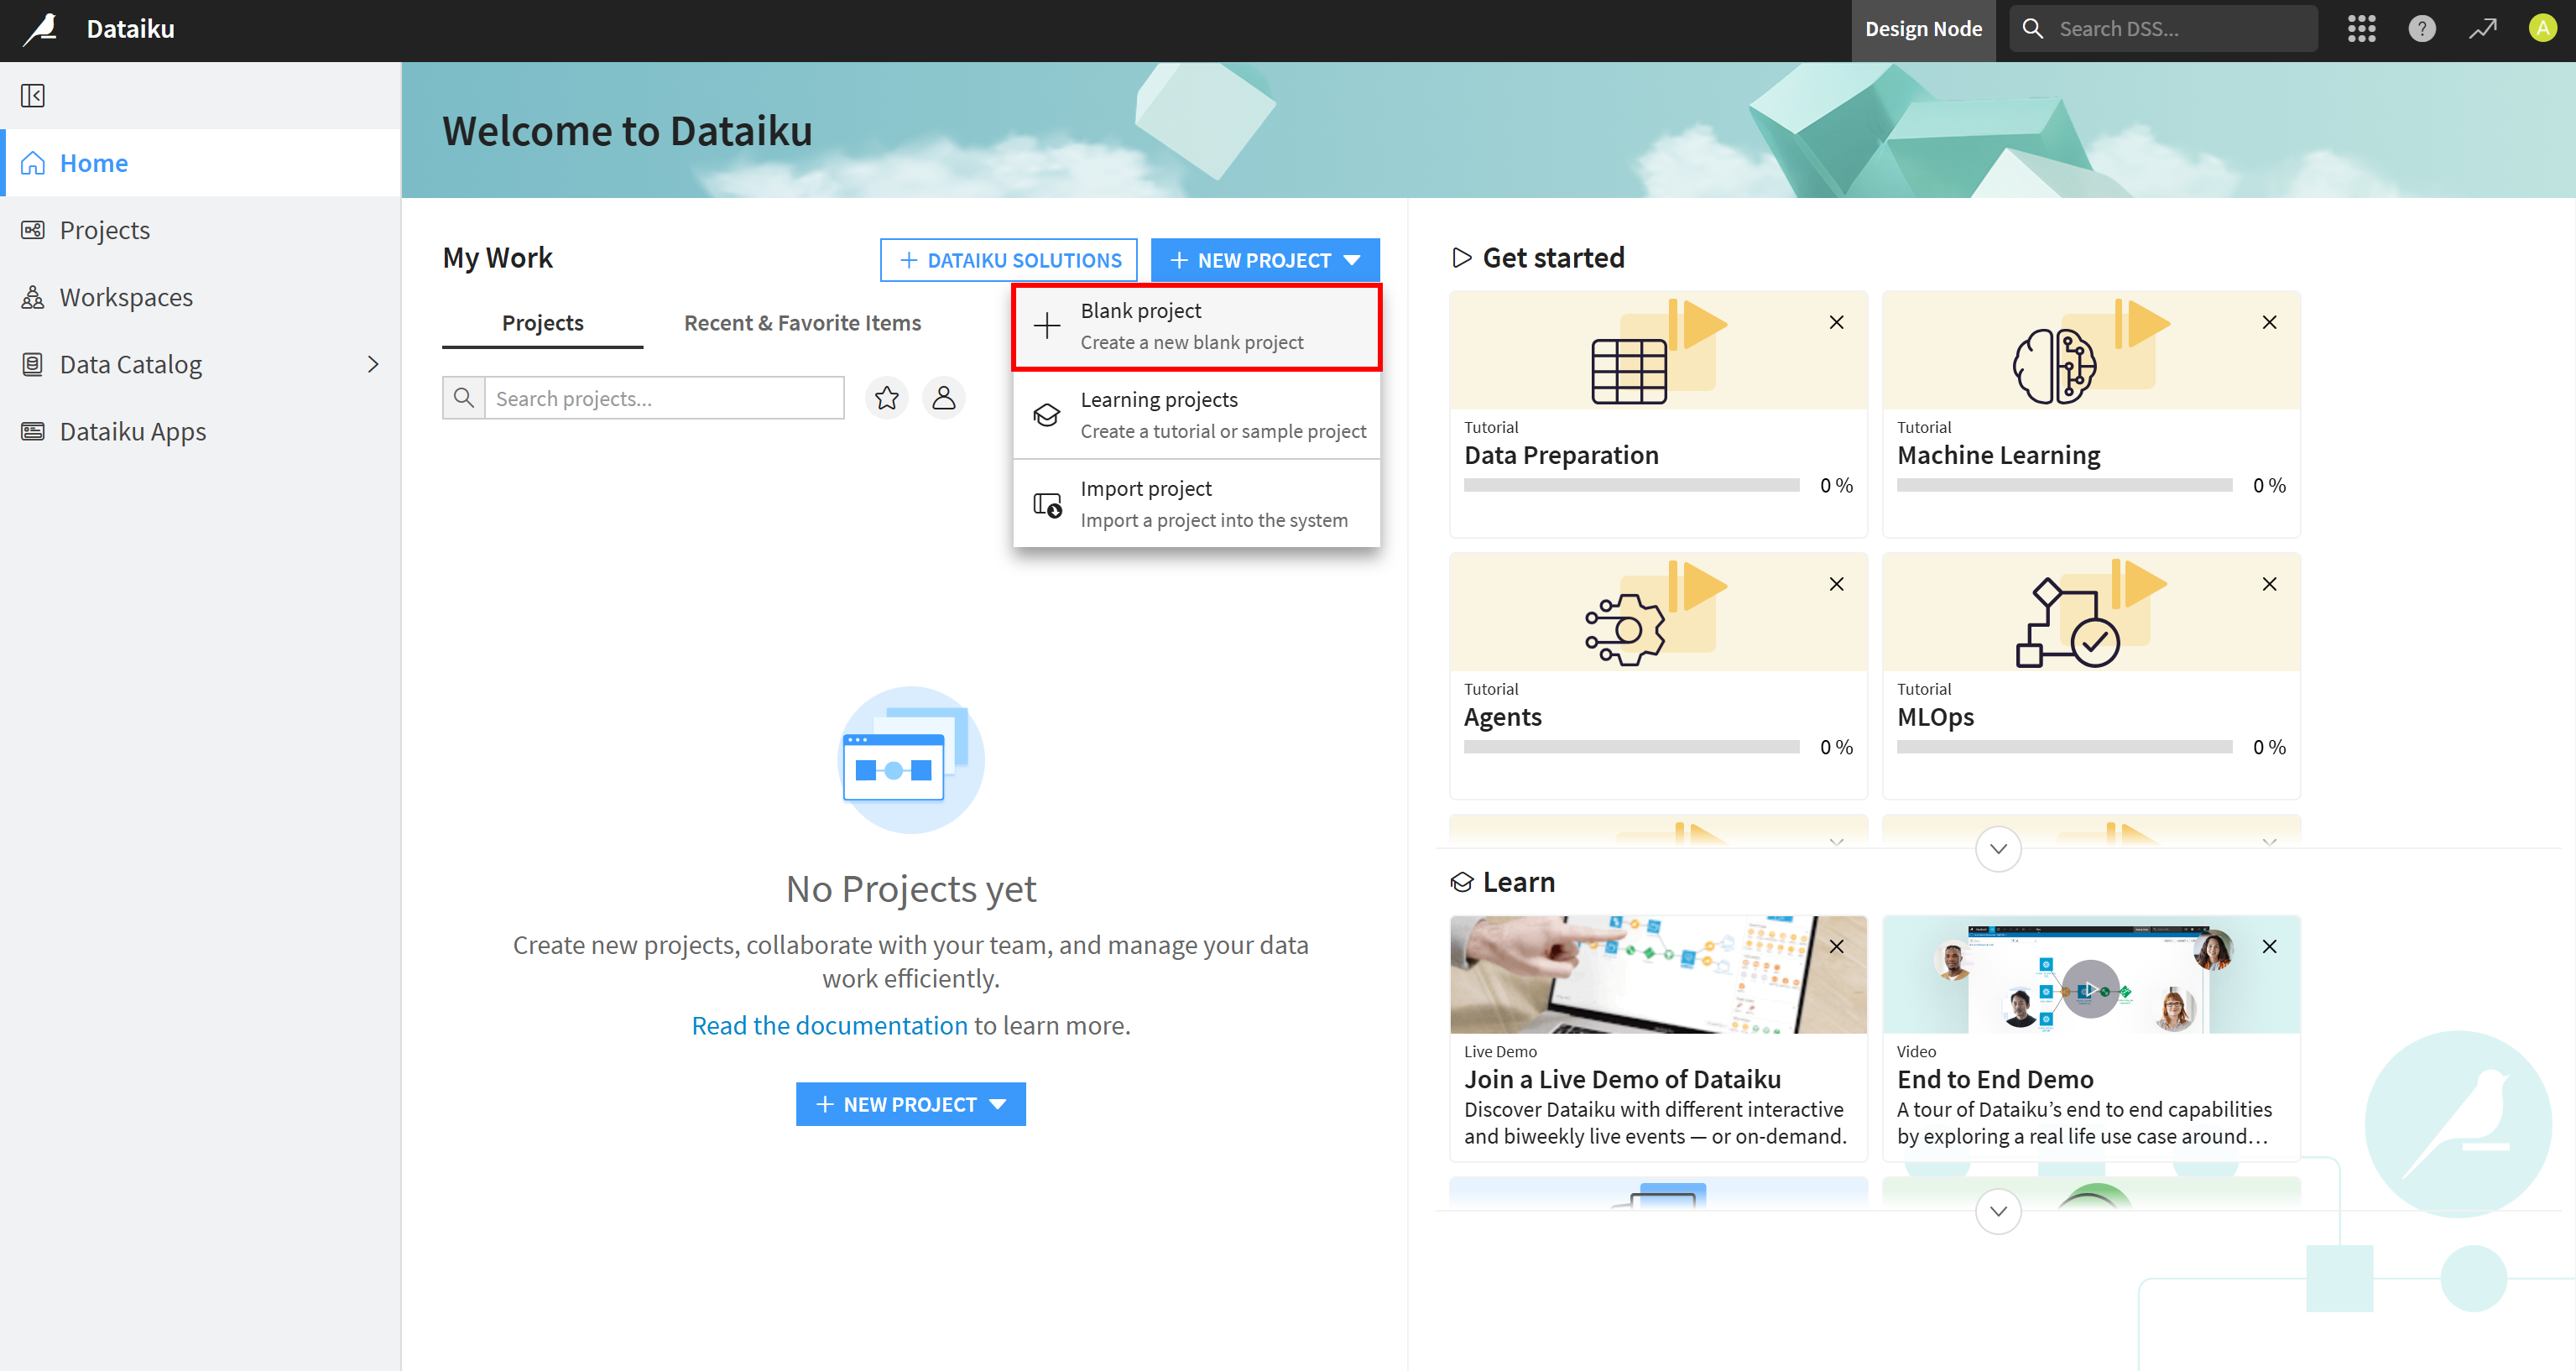
This will take you to the project management page. Click the “NEW PROJECT” dropdown and select the “Blank project” option:
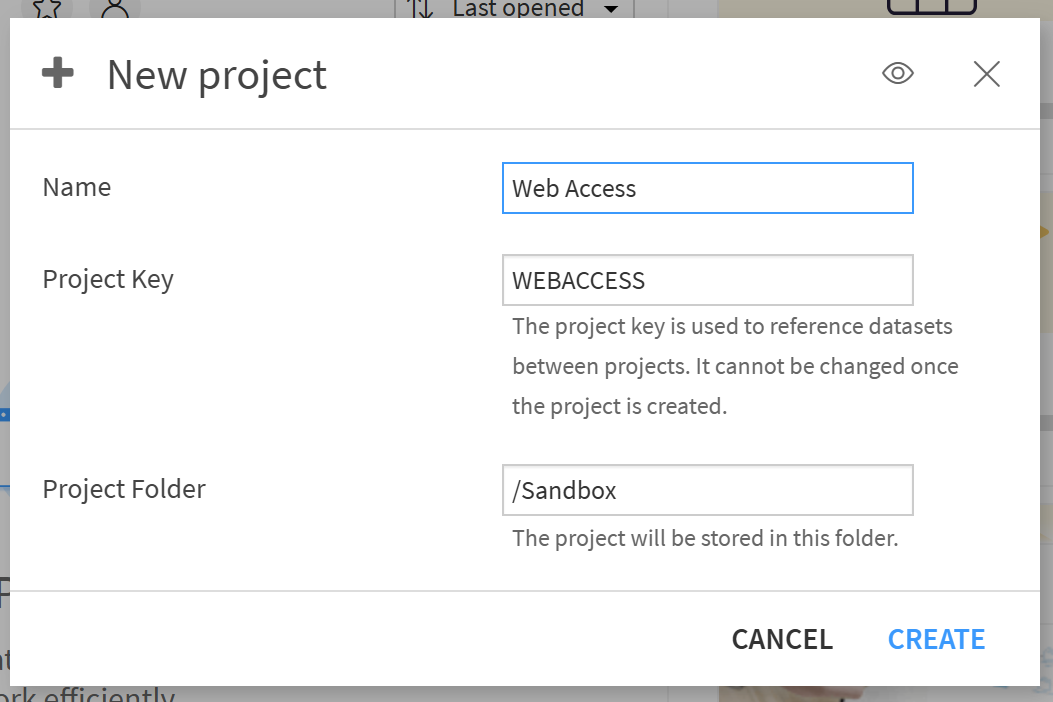
Give your Dataiku project a name, such as “Web Access”, and click “CREATE”:
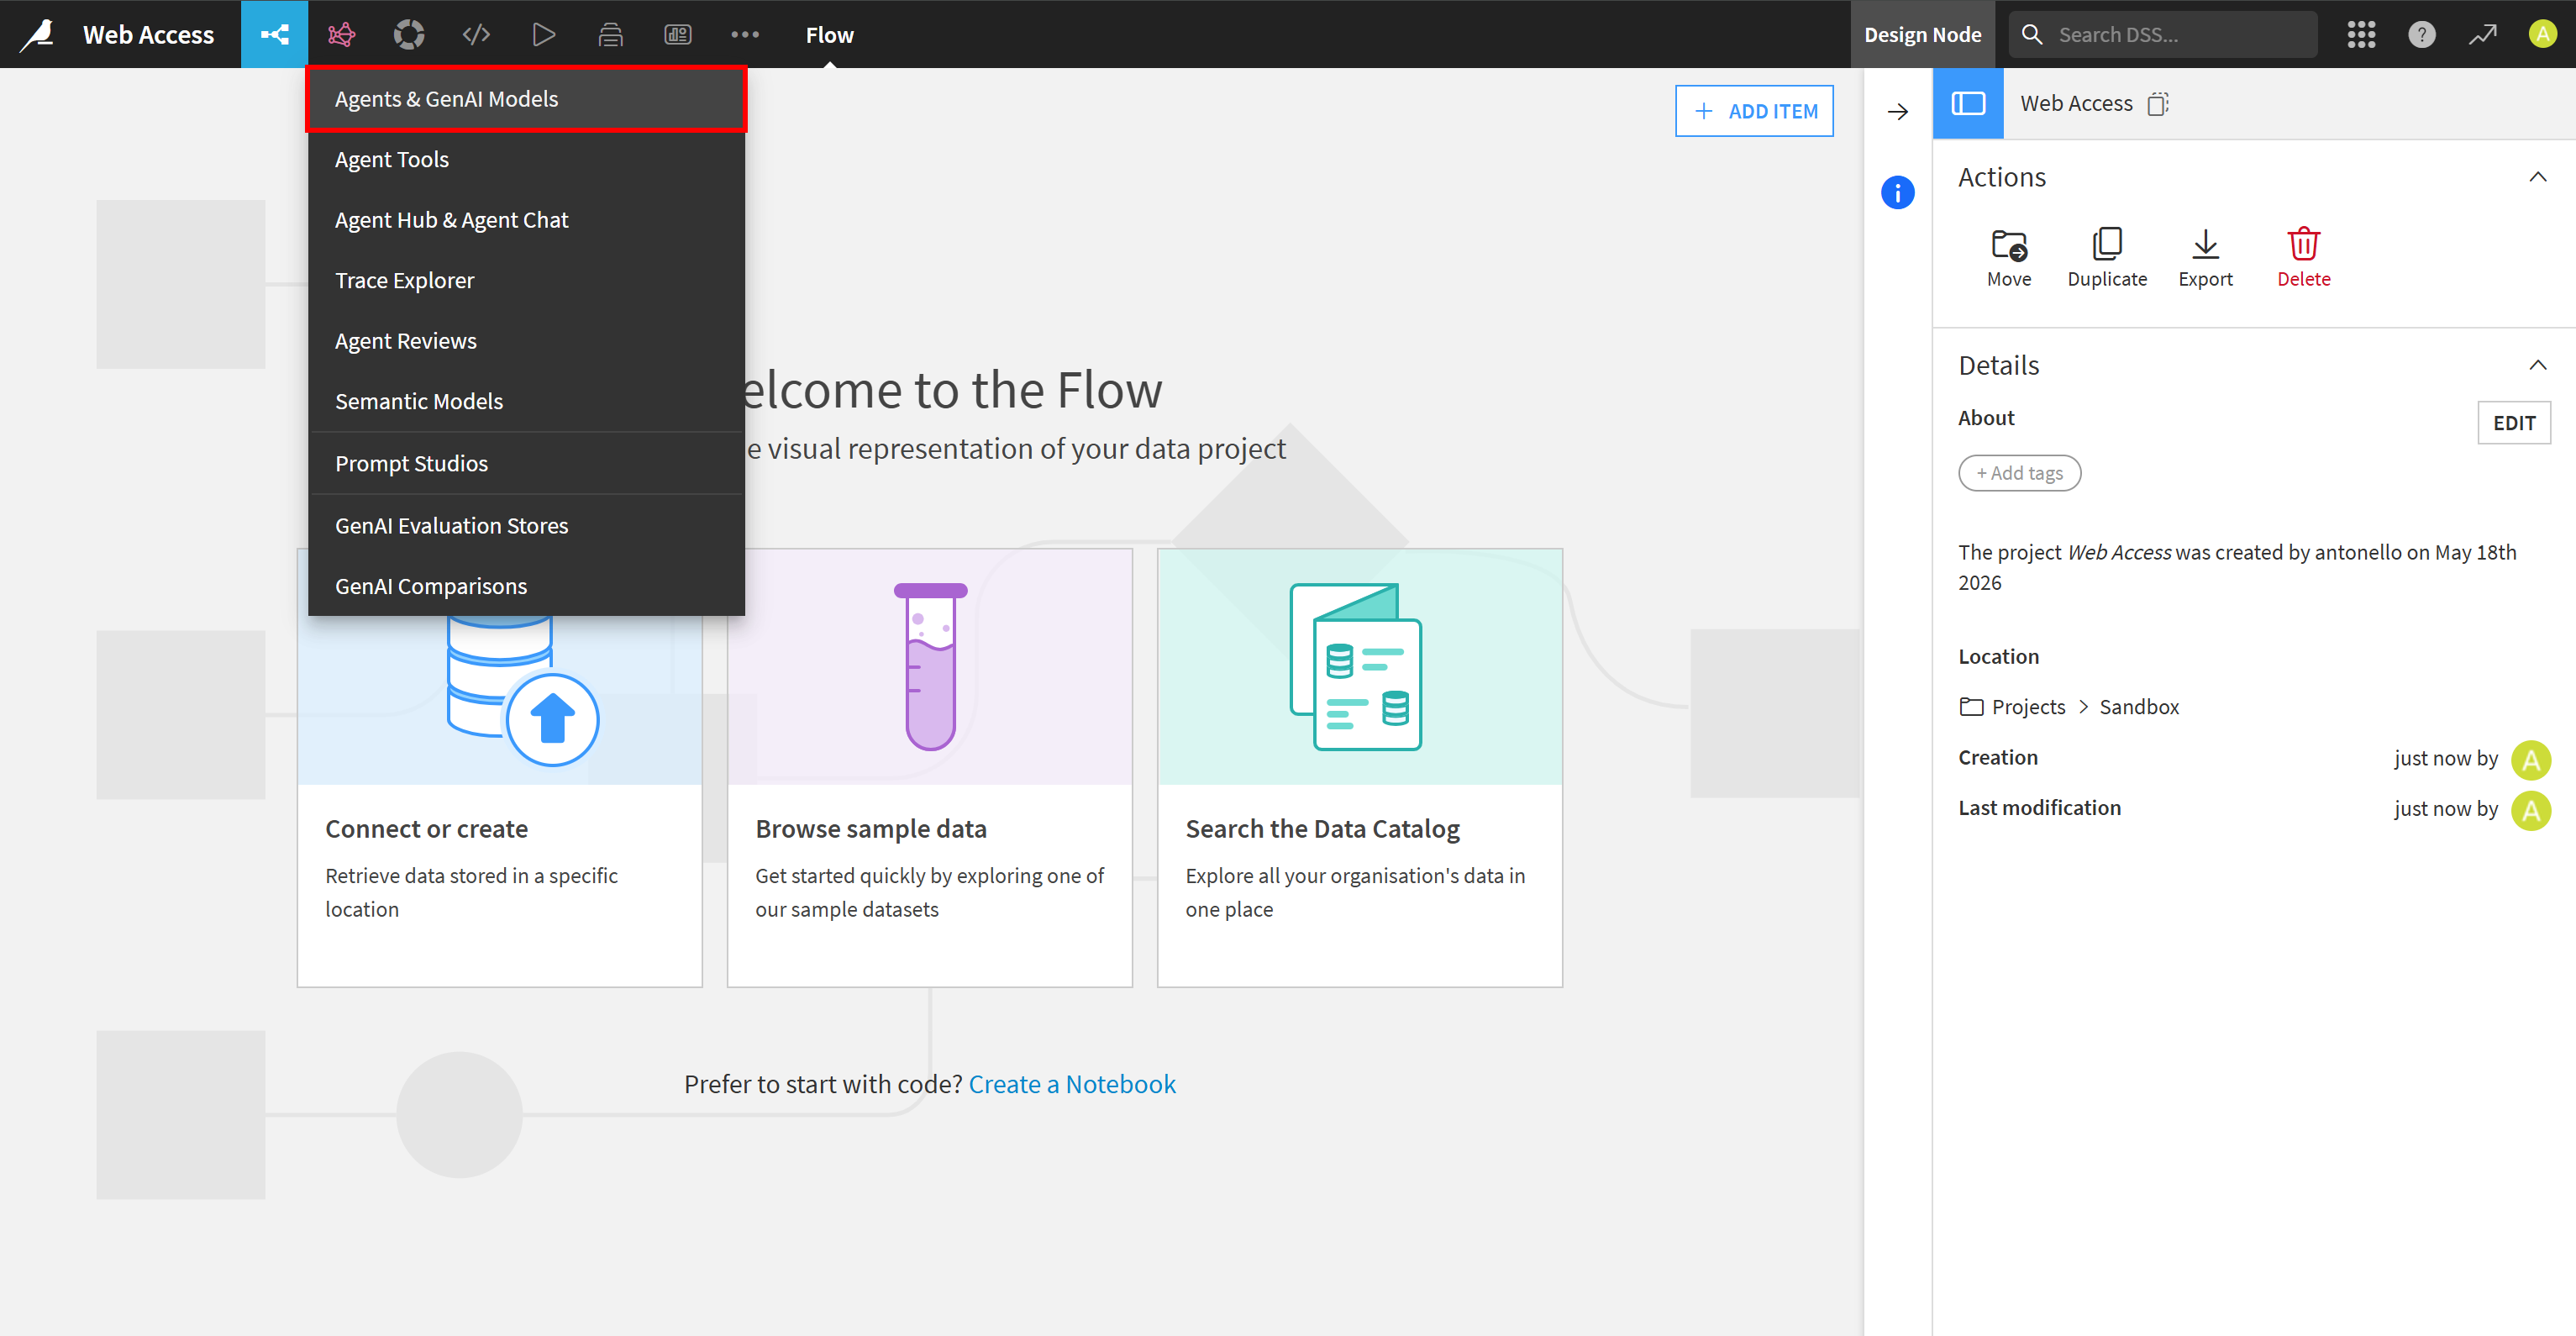
Once inside the project, click the “GenAI” icon and select “Agents & GenAI Models”:
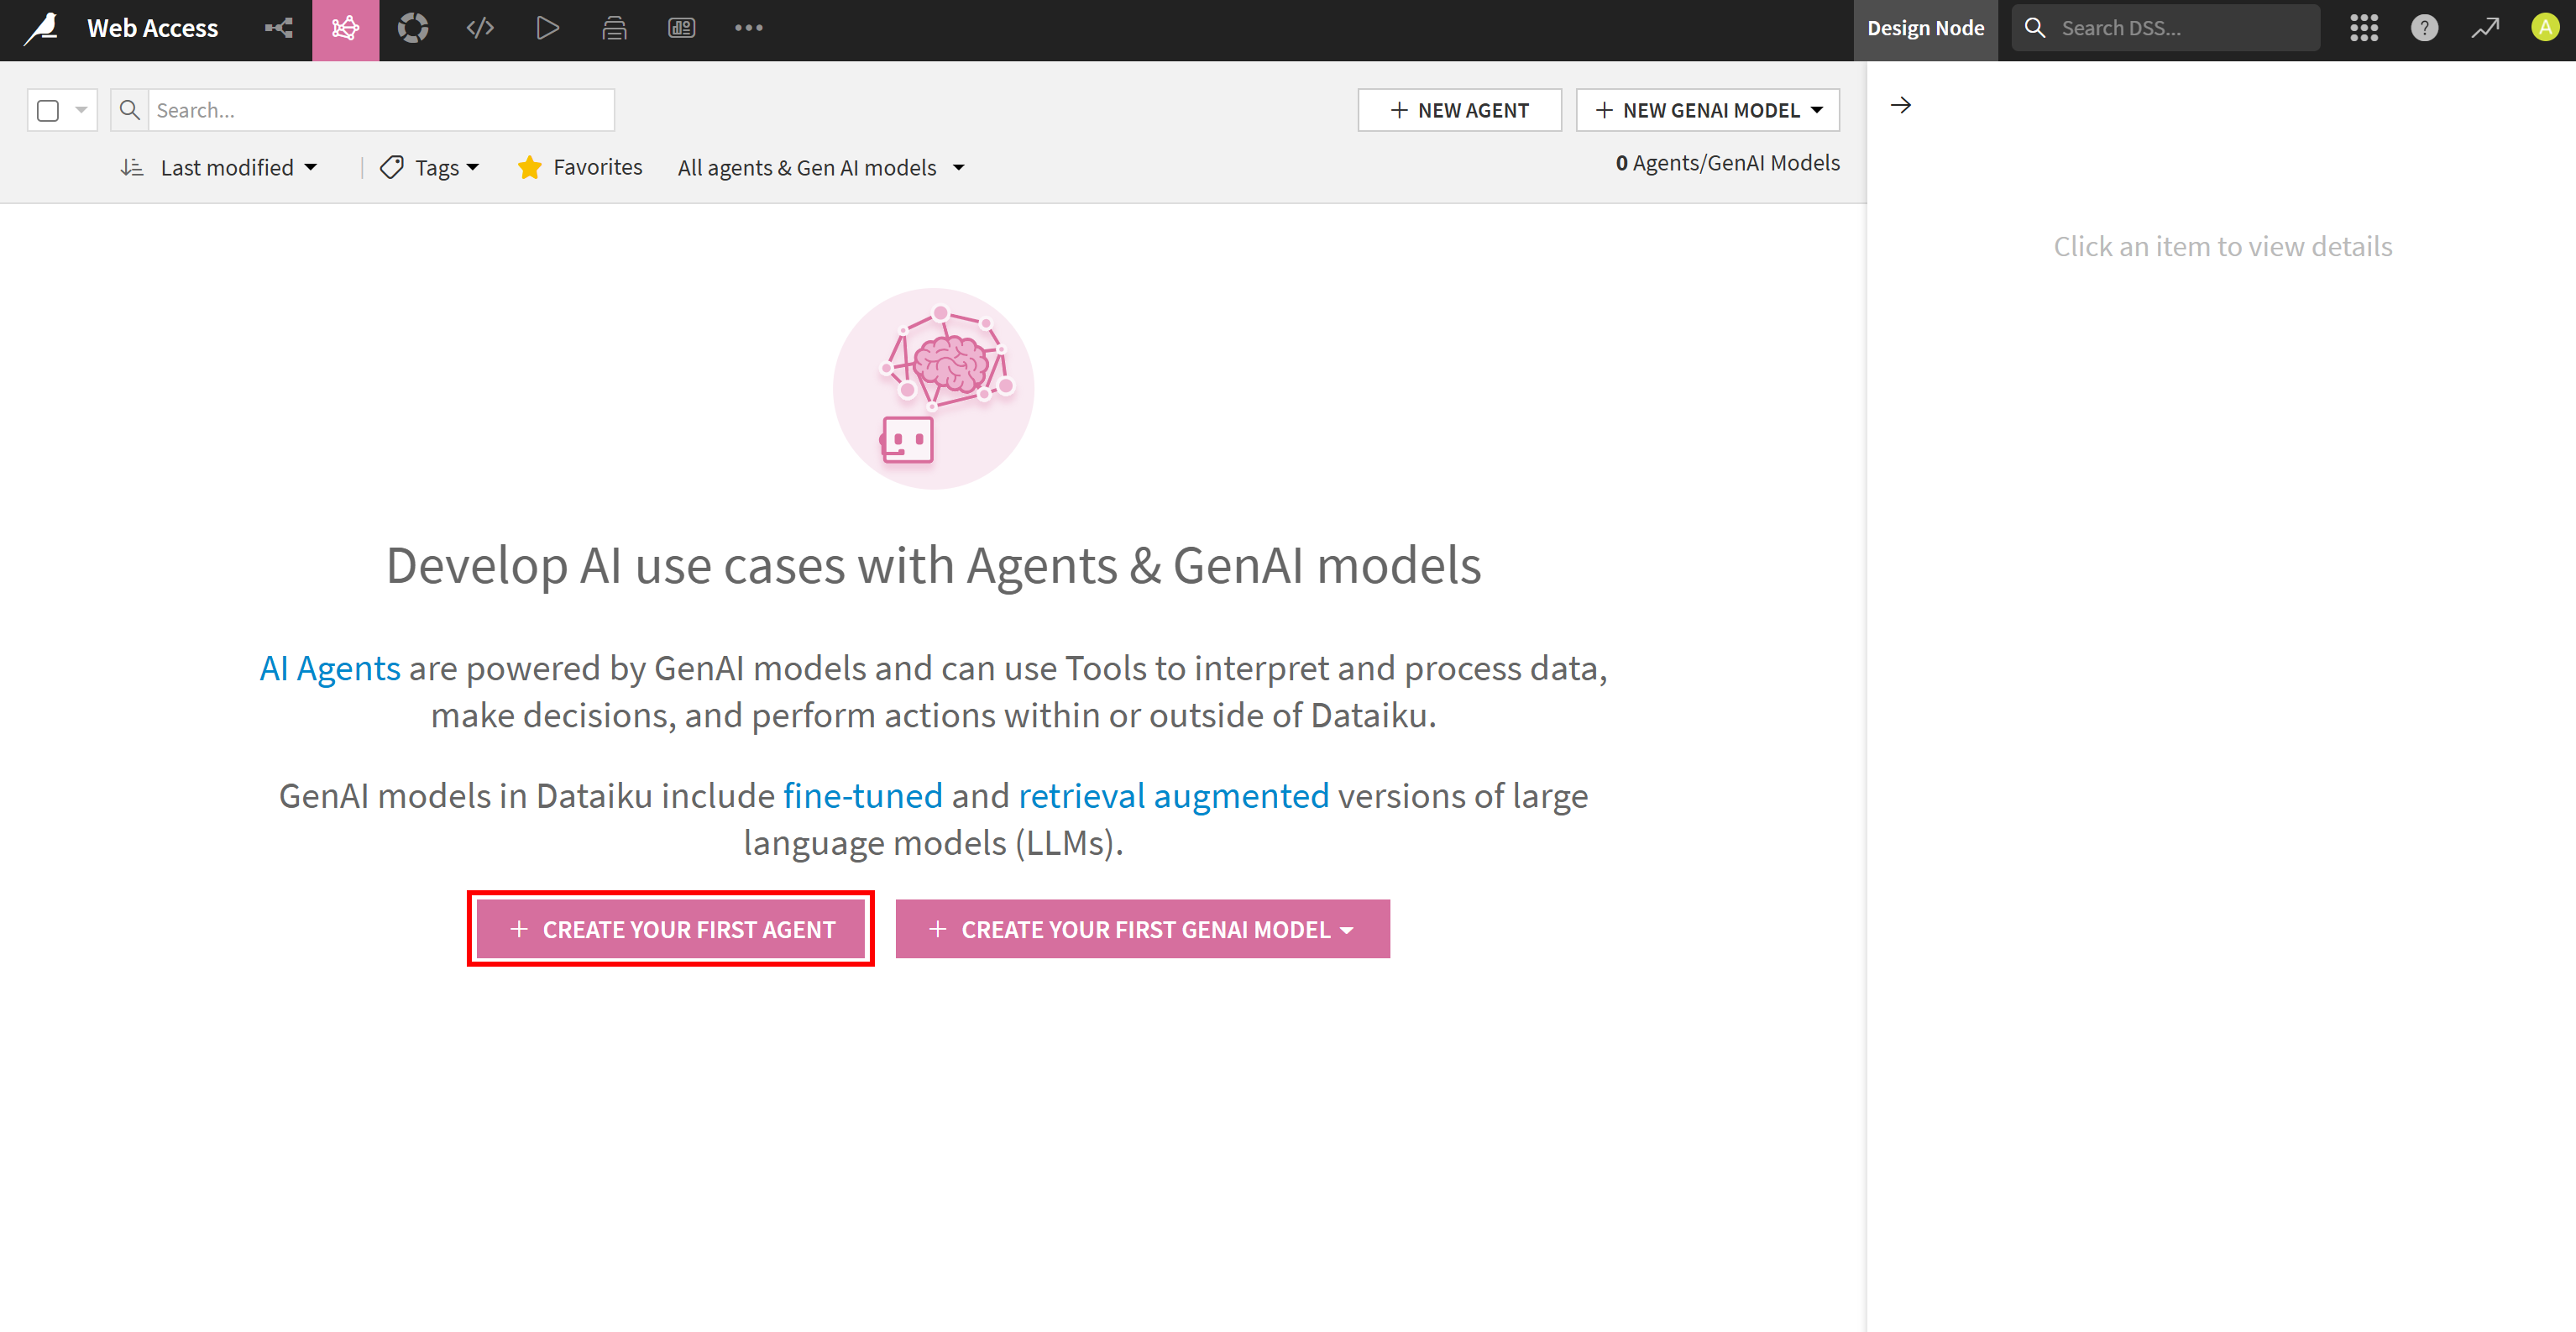
Here, click “CREATE YOUR FIRST AGENT” to get started:
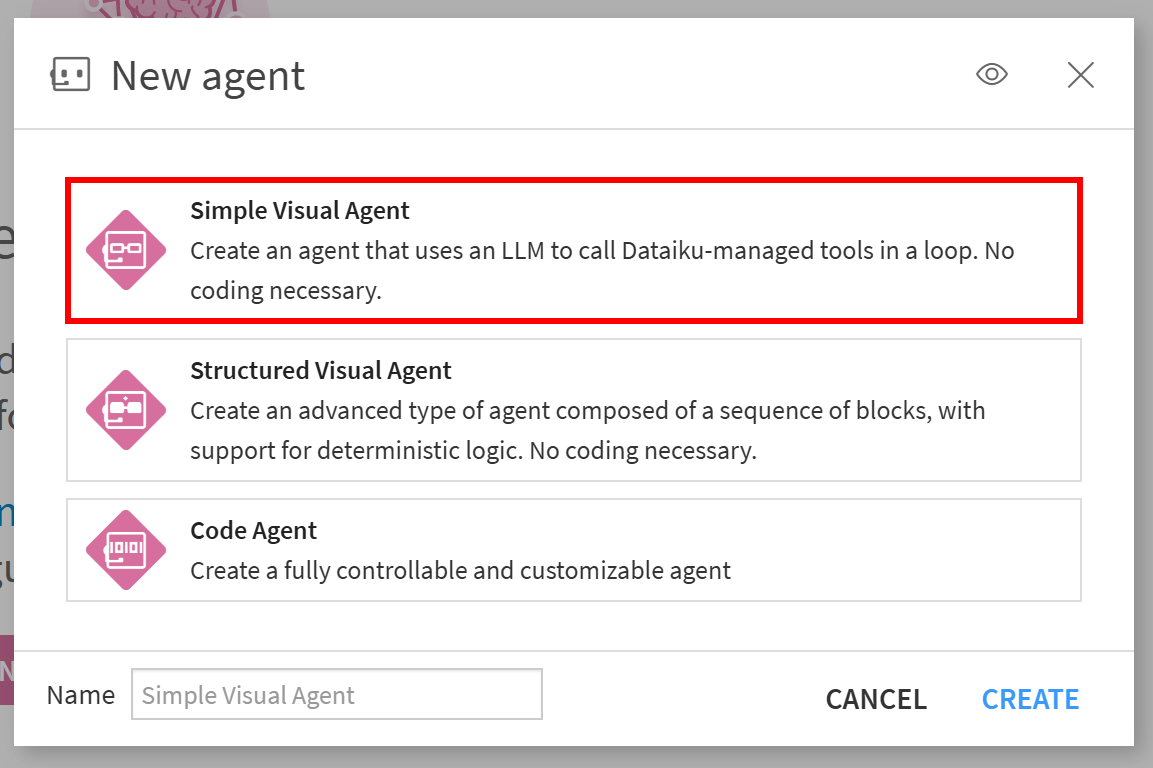
Choose the agent type you prefer (in this example, we will use “Simple Visual Agent”) and click “CREATE”:
You will now reach the AI agent configuration page:
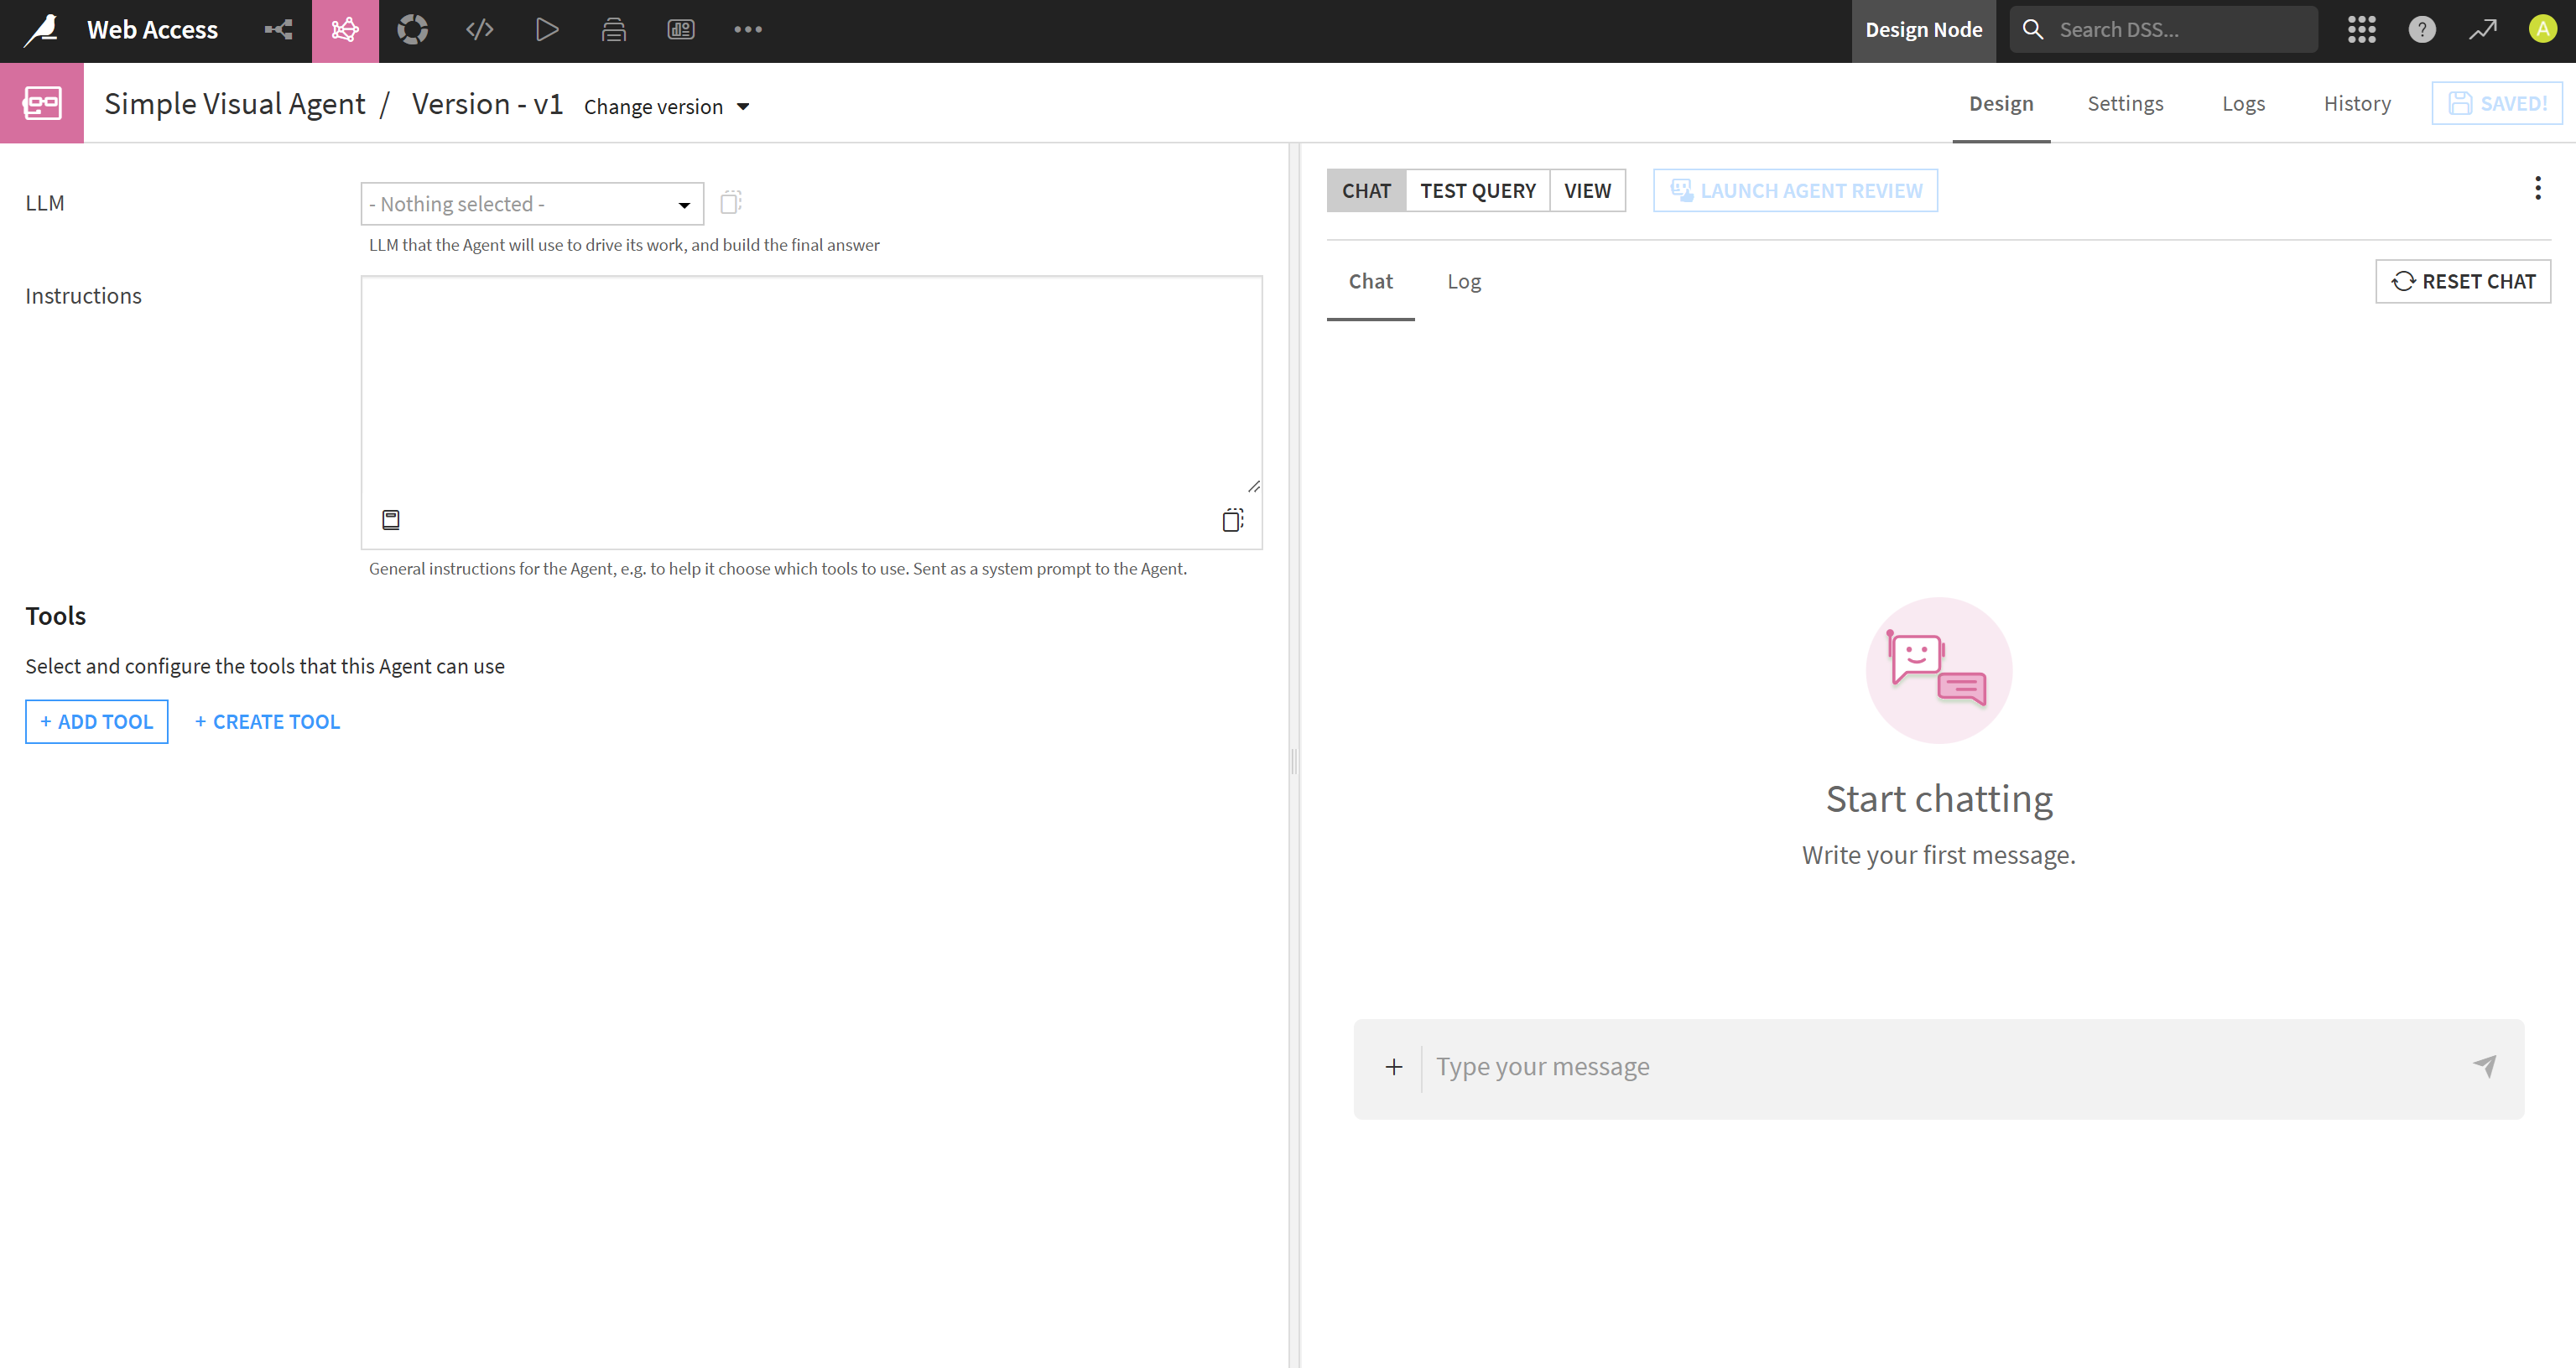
Perfect! You are ready to equip the AI agent with Bright Data MCP tools.
Step #7: Create the Bright Data MCP Agent Tools
Before continuing with the AI agent configuration, you need to convert the Remote MCP connection you created earlier into AI agent tools.
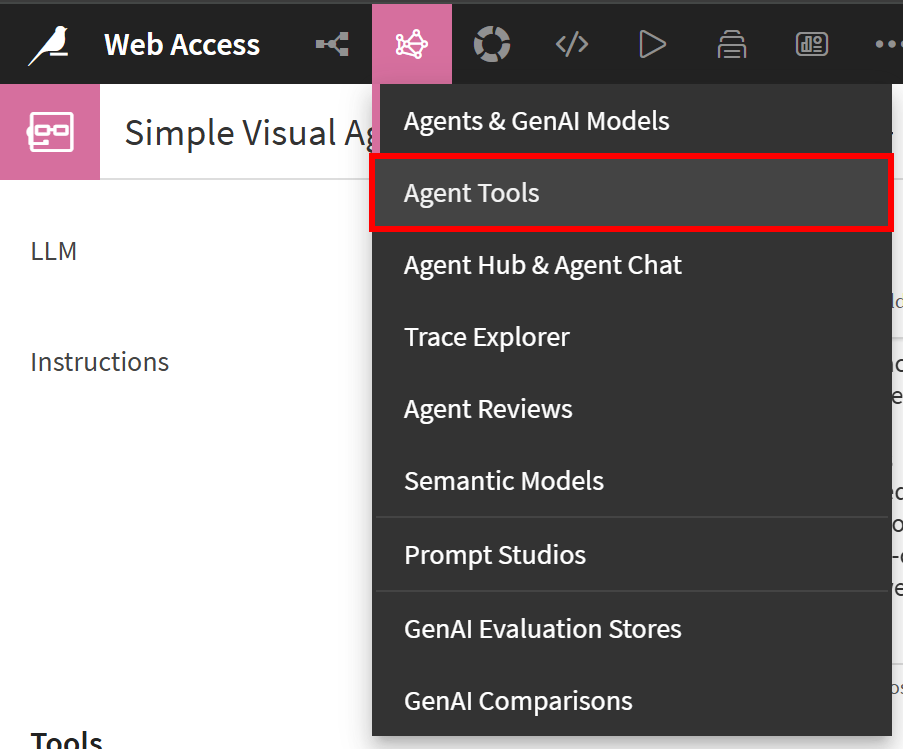
Start by opening the “Agent Tools” page from the “GenAI” icon:
On the “Agent Tools” page, click “NEW AGENT TOOL”:

Select the “MCP” option and press “CREATE”:
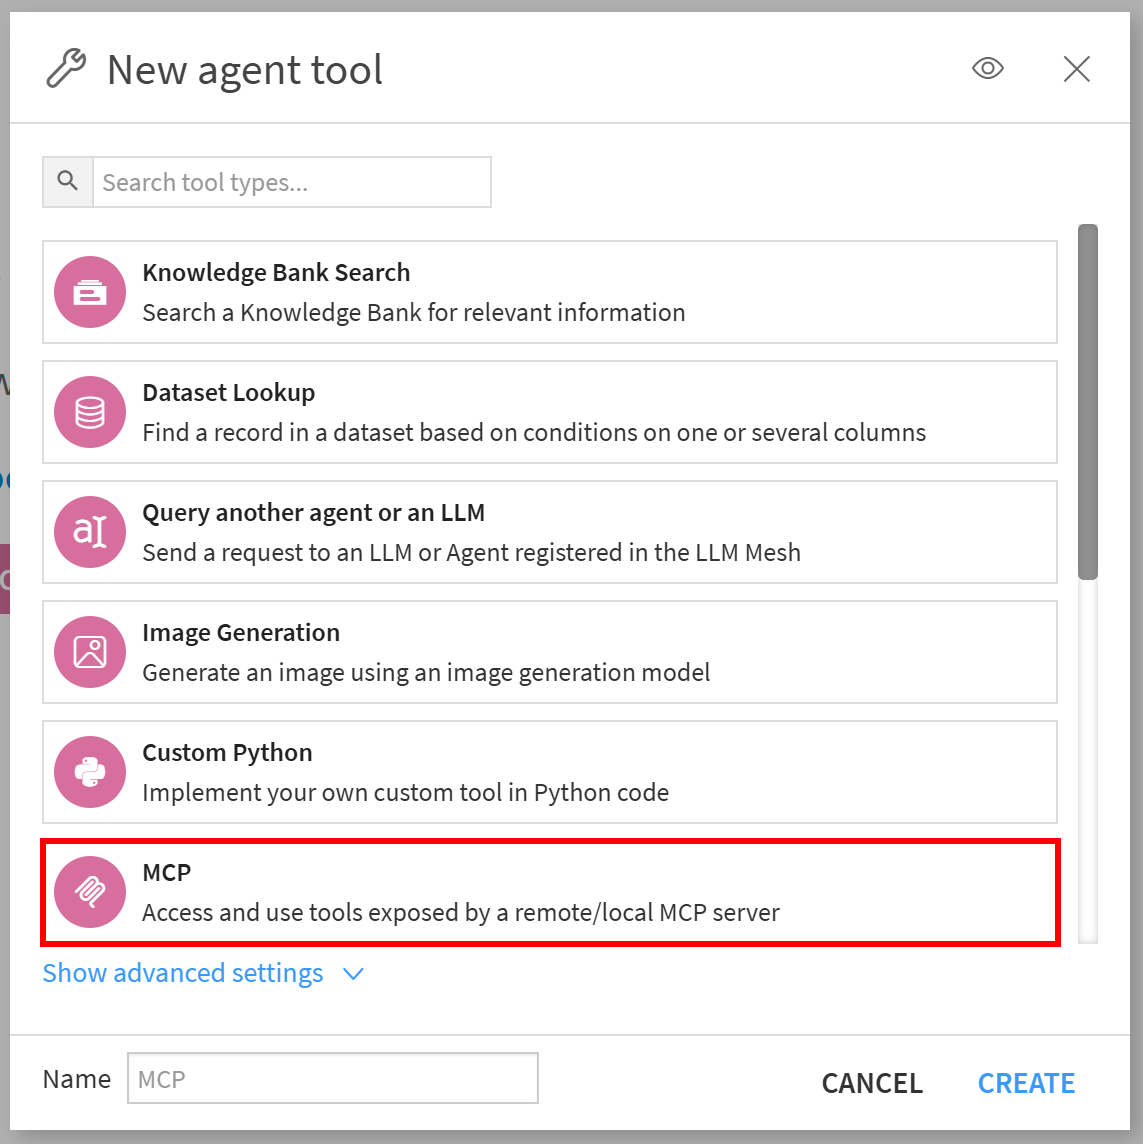
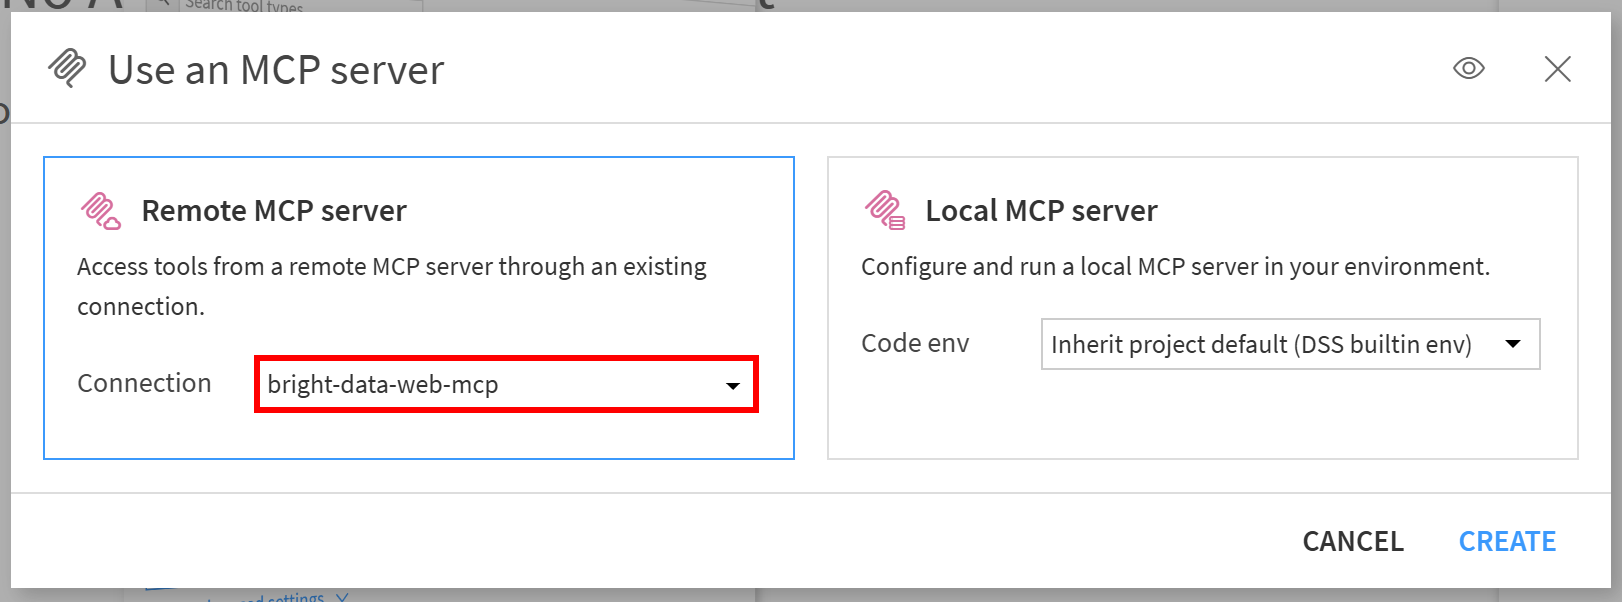
Next, configure the Remote MCP server by selecting the “bright-data-web-mcp” connection you created earlier. Then click “CREATE”:
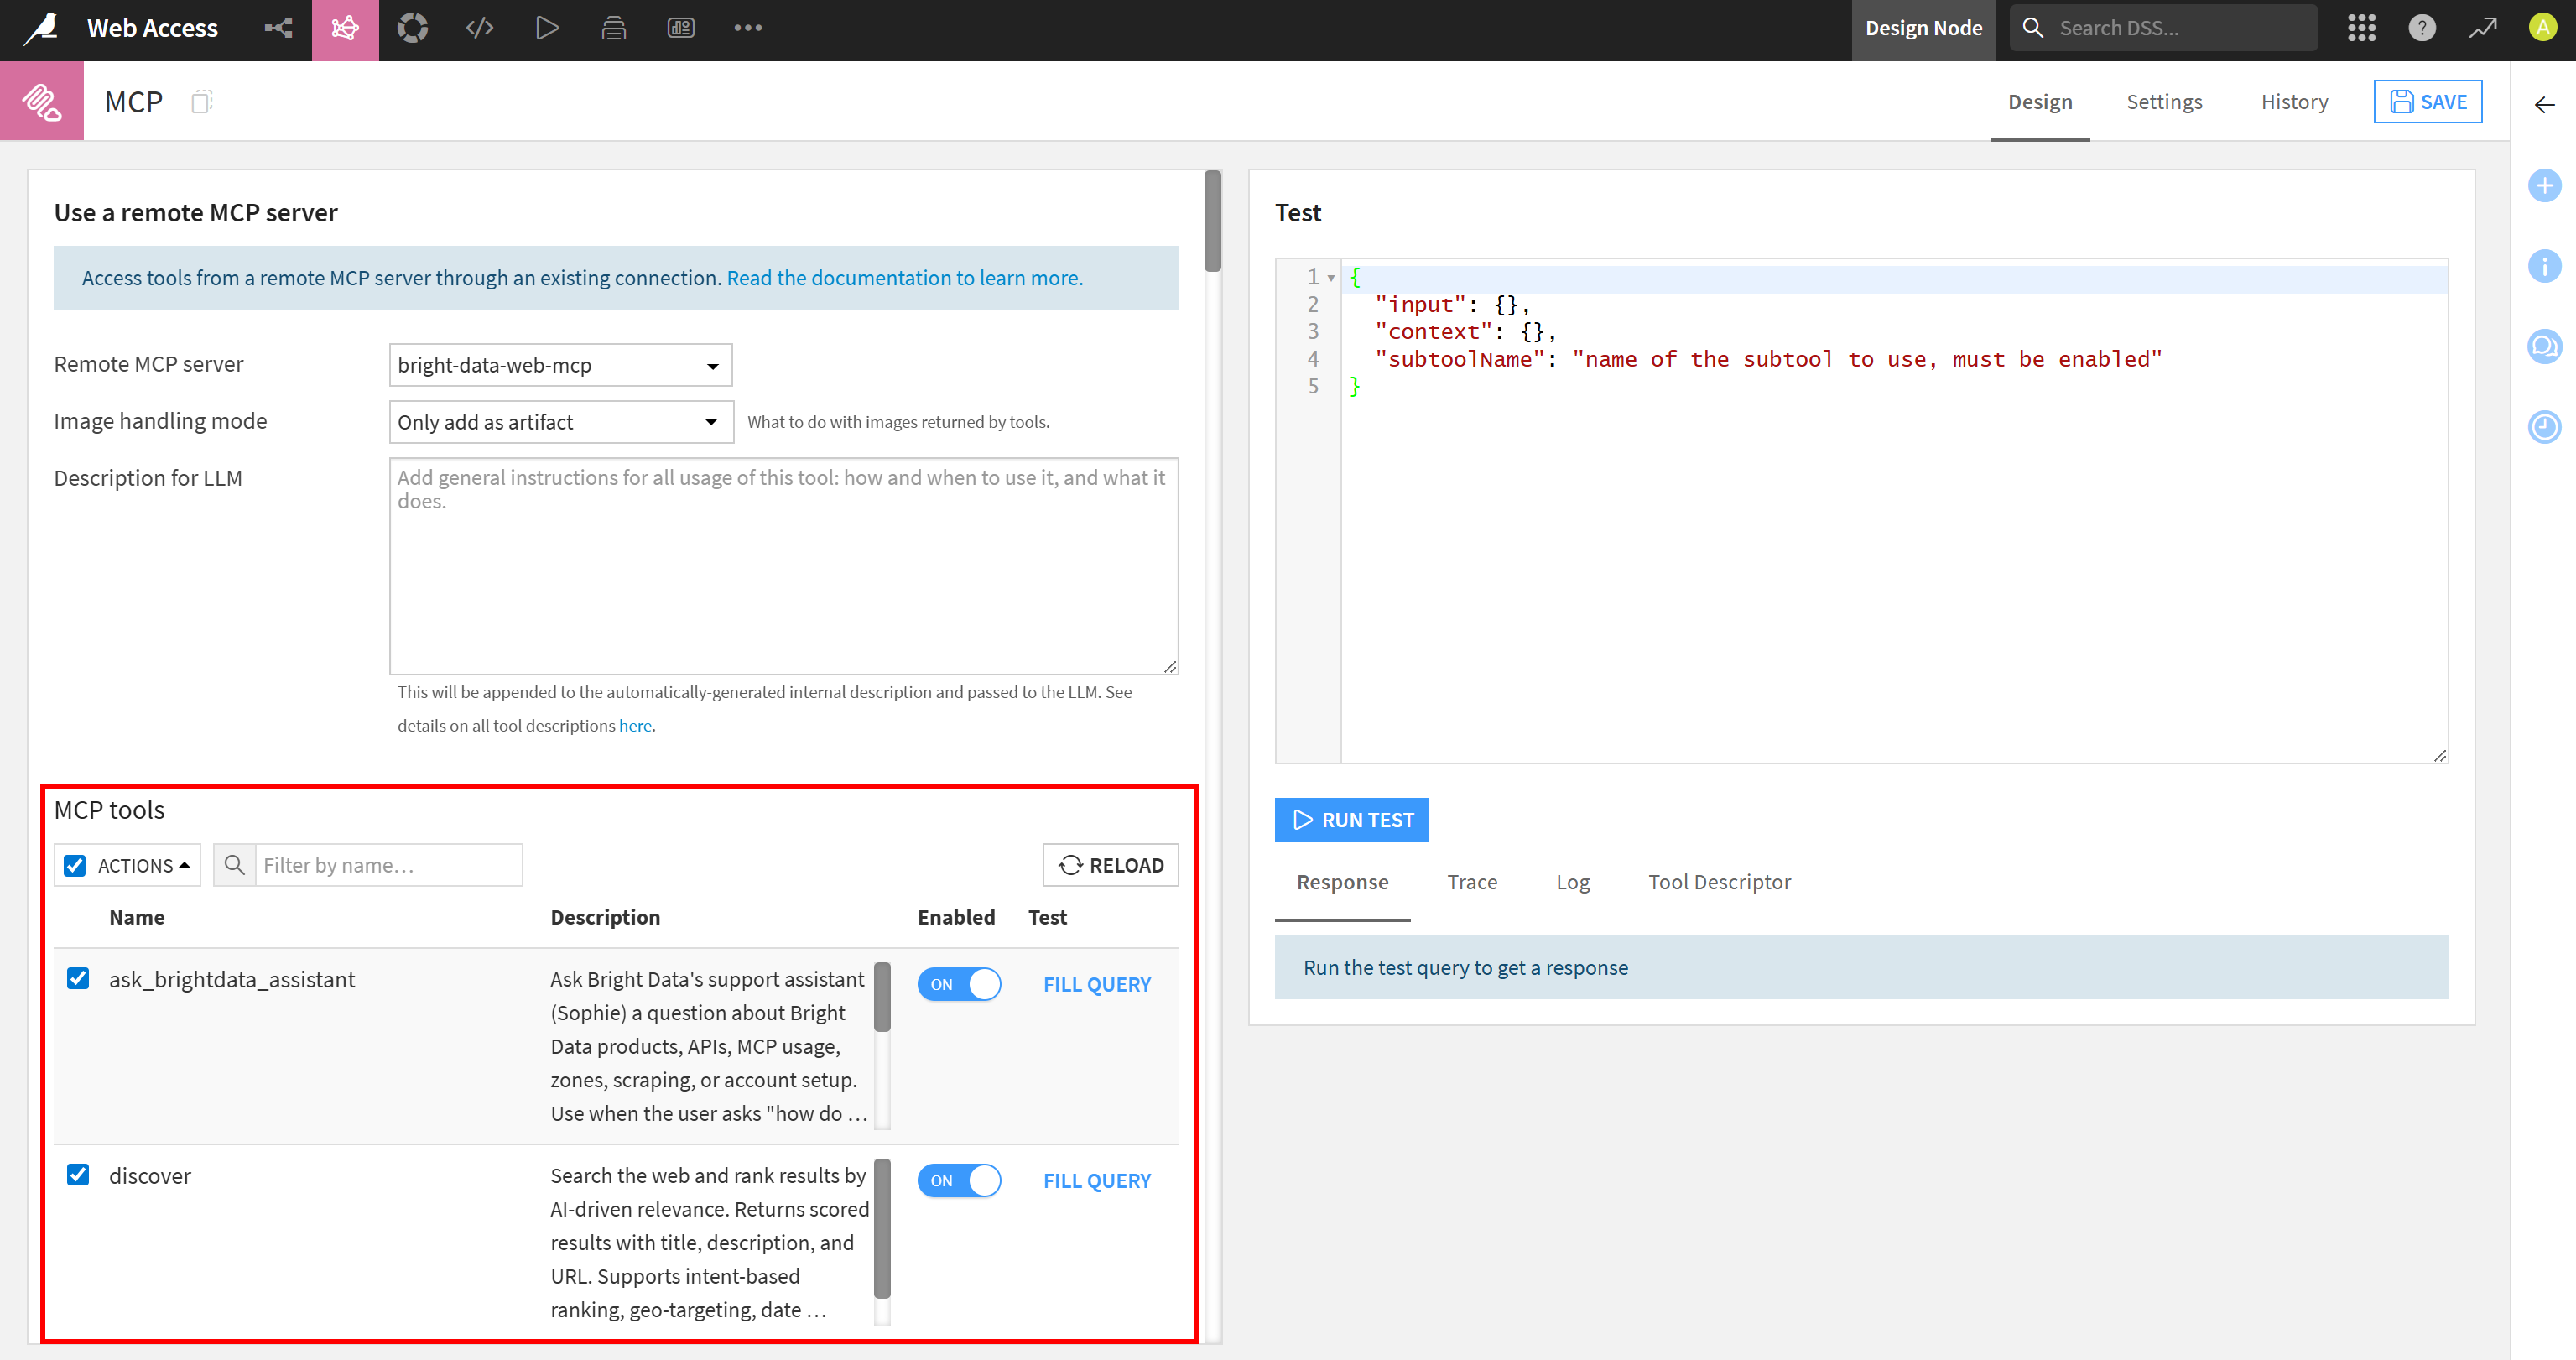
You will now arrive at the MCP AI agent tools configuration page. Here, you can test the tools and define a general description for the MCP tool set. Select all available tools and enable them:
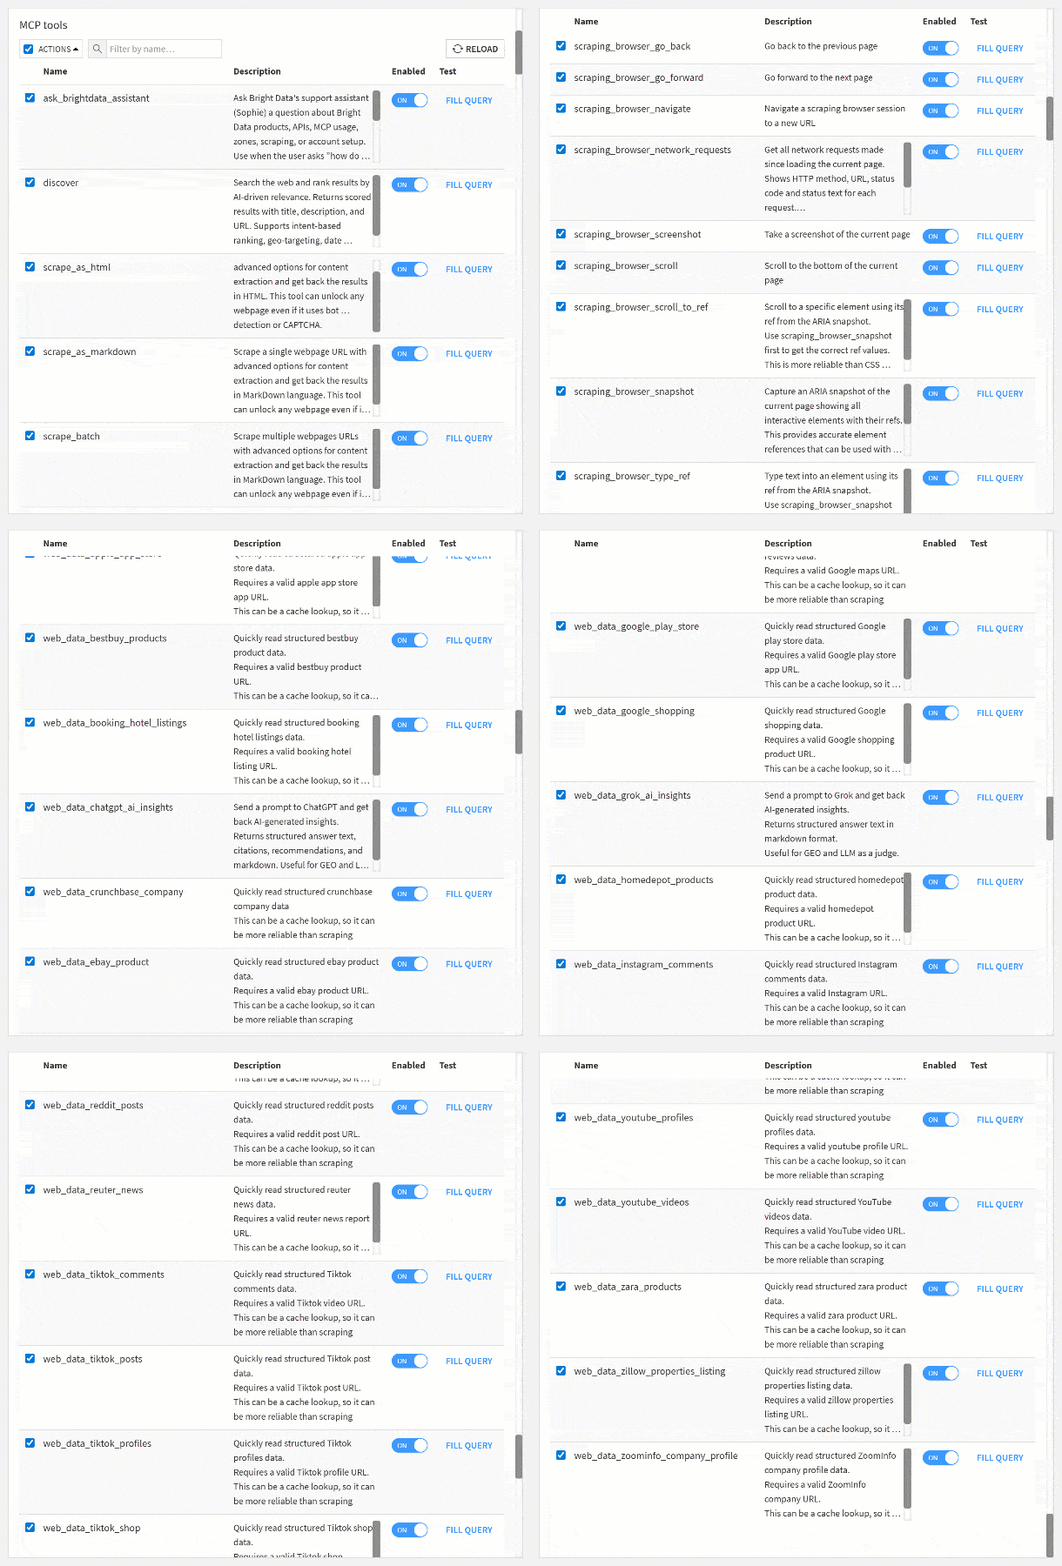
If you configured the server in Pro mode, you will see the full set of 70+ Bright Data MCP tools:
Otherwise, you will only see the tools available in Rapid (free) mode.
Press “SAVE” in the top-right corner. The Bright Data MCP tools are now available for your Dataiku agent. Well done!
Step #8: Configure Your Dataiku Agent for Web Access
You now have all the building blocks needed to complete your Bright Data,powered AI agent for web-related tasks.
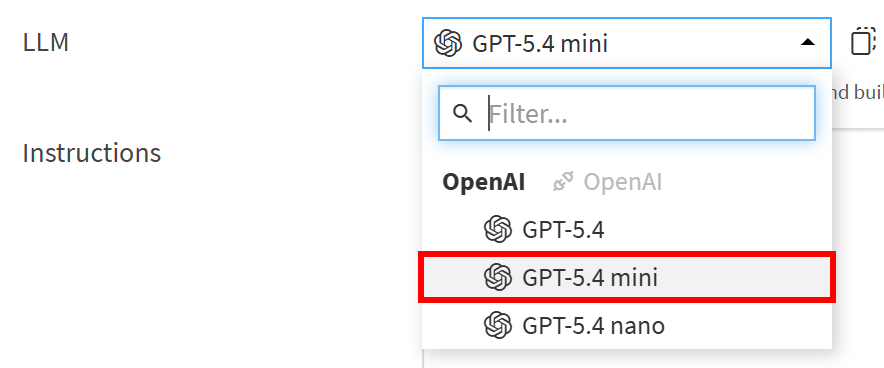
Go back to the “Simple Visual Agent” page. In the “LLM” dropdown, you will see the OpenAI models from your previously created connection. In this example, we will use the “GPT-5.4 mini” model:
Next, you need to provide clear instructions to define how the agent should behave. In the “Instructions“ field, paste a prompt like this:
You are a general-purpose assistant with access to the web. Use the Bright Data MCP tools whenever you are asked to perform web-related tasks, such as:
- Searching the web
- Fetching, reading, or scraping web pages
- Extracting structured data from supported platforms
- Running browser automation or web automation workflows
- Conducting research, investigations, fact-checking, or news lookups
- Any other task involving URLs, links, or web content
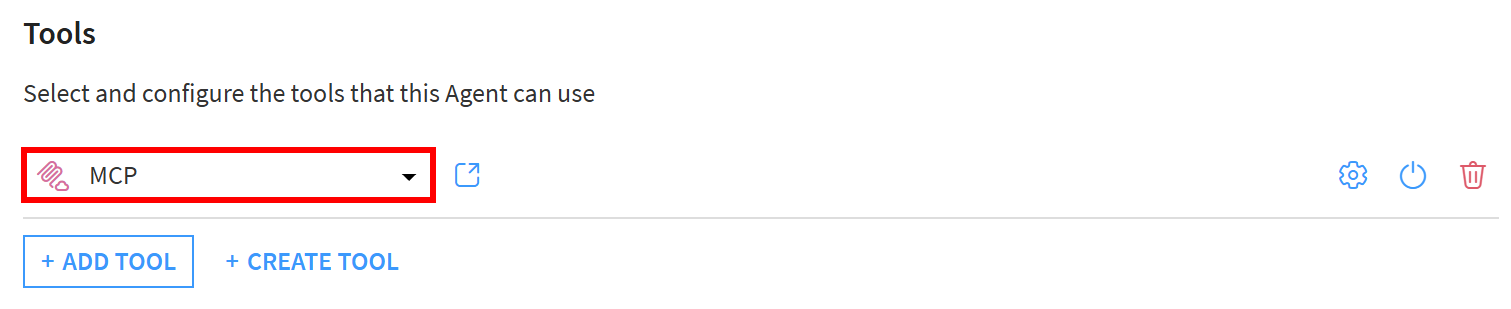
Now click “ADD TOOL” and select the “MCP” option (which corresponds to the Bright Data MCP toolset you configured earlier):
Your final web-enabled Dataiku AI agent should look like this:
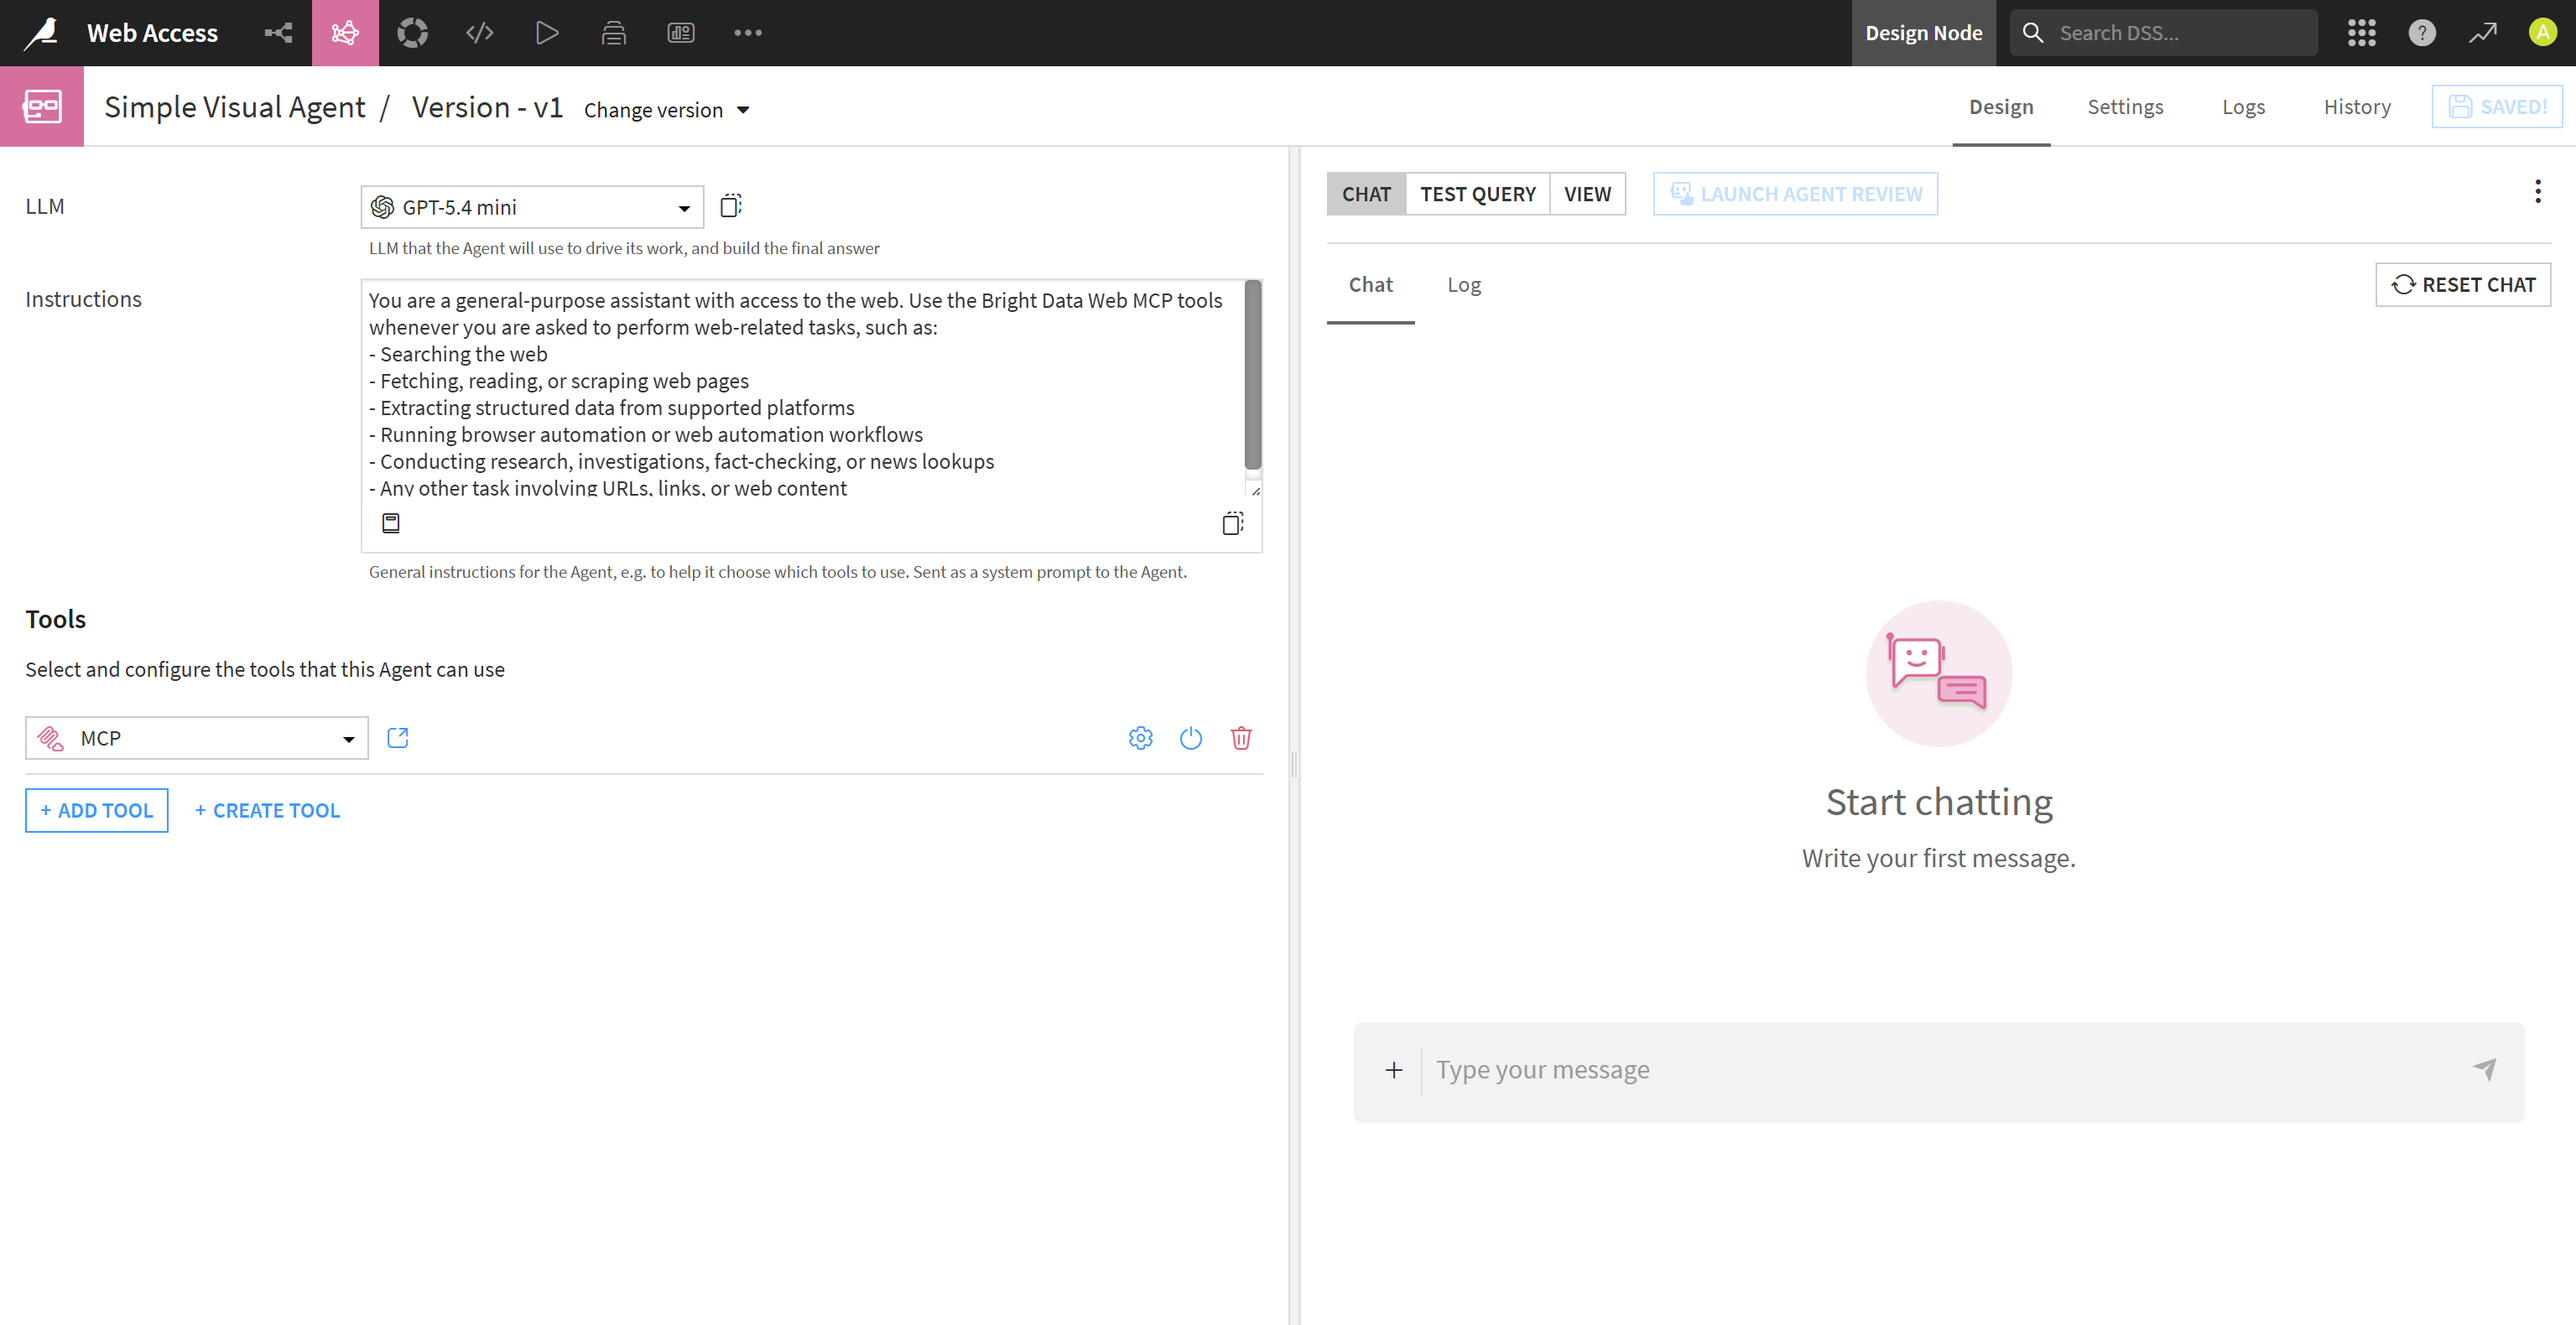
Mission complete. You have successfully created a Dataiku AI agent integrated with Bright Data via MCP for web-related tasks. The only step left is to test it!
Step #9: Test the Agent
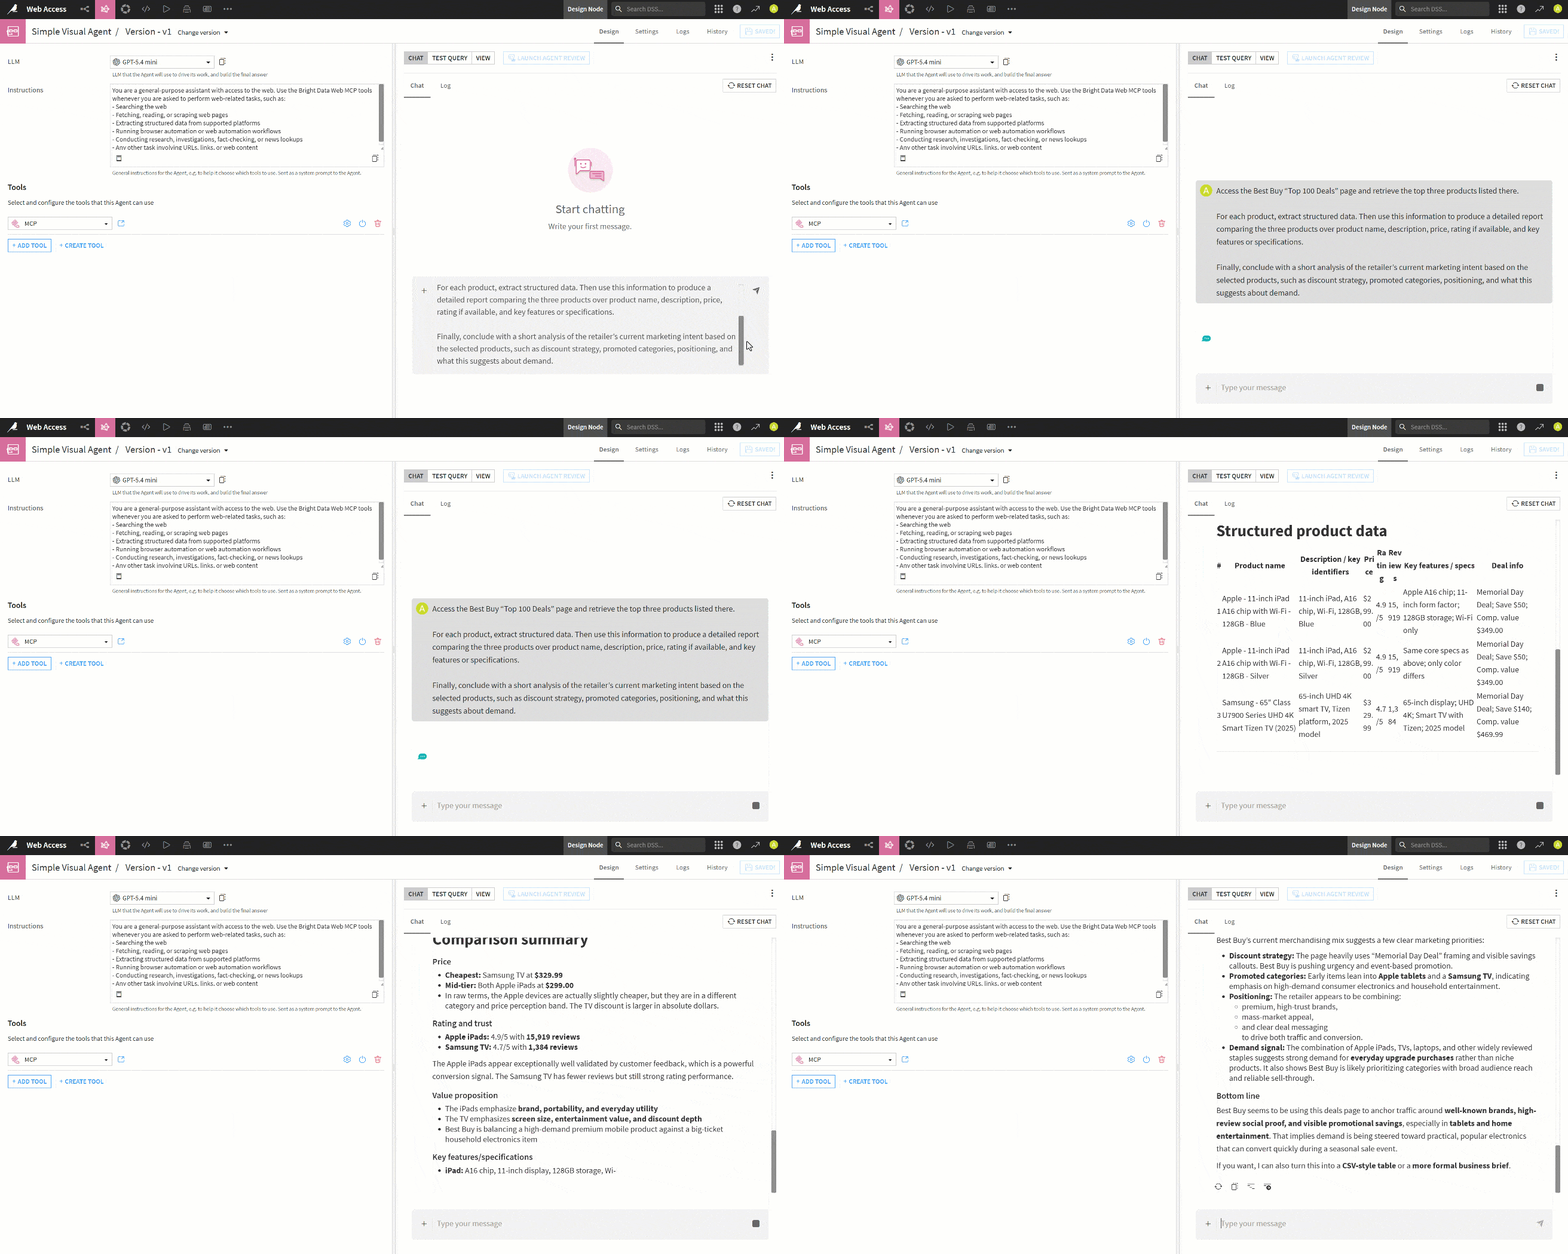
To verify that your AI agent is working correctly, run it with a web-related task. For example, write a prompt like this:
Access the Best Buy “Top 100 Deals” page and retrieve the top three products listed there.

For each product, extract structured data. Then use this information to produce a detailed report comparing the three products over product name, description, price, rating if available, and key features or specifications.

Finally, conclude with a short analysis of the retailer’s current marketing intent based on the selected products, such as discount strategy, promoted categories, positioning, and what this suggests about demand.
Note that this is something a standard LLM cannot do on its own, as it requires web search and scraping capabilities.
Execute the prompt, and this should happen:
Focus on the Best Buy product comparison table:
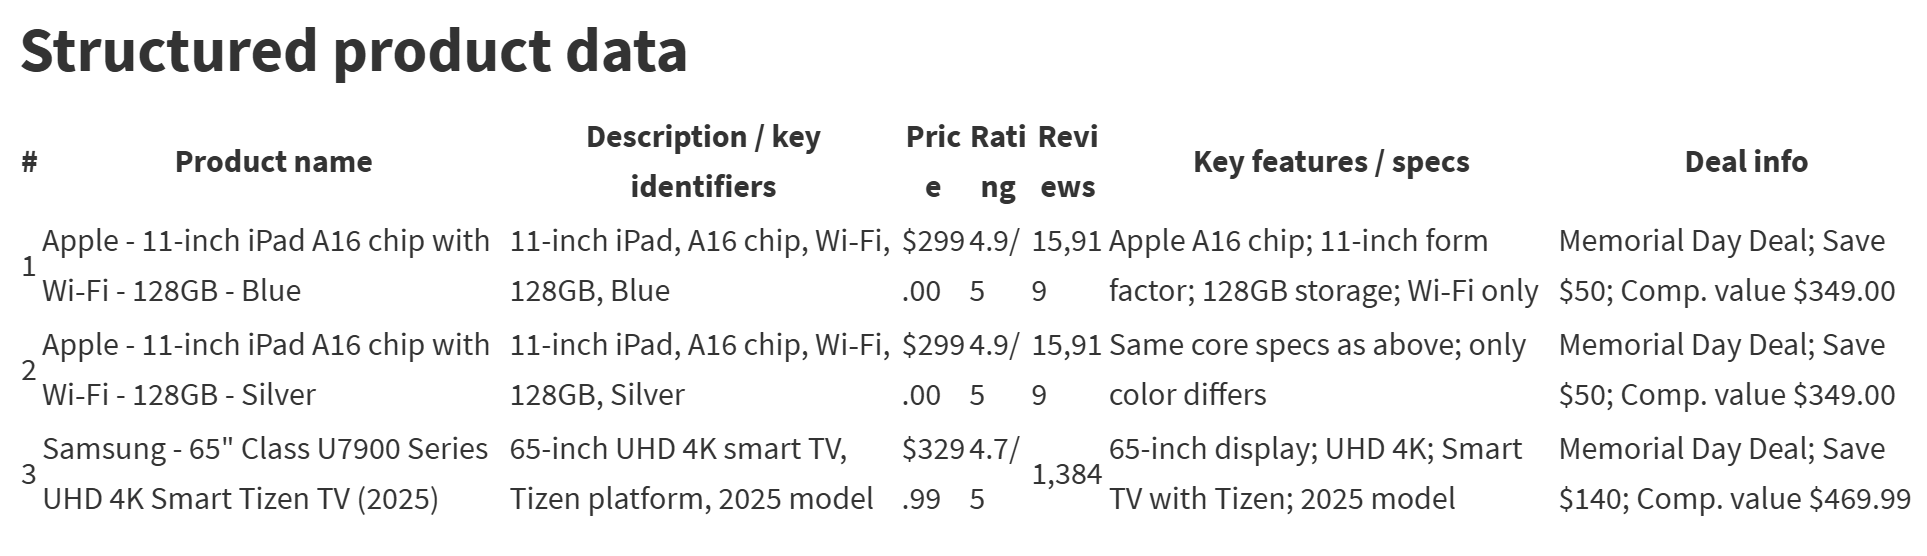
Note that the report includes a detailed analysis of the top three products from Best Buy’s “Top 100 Deals of the Season” page, which you can view directly by opening the same page in your browser:
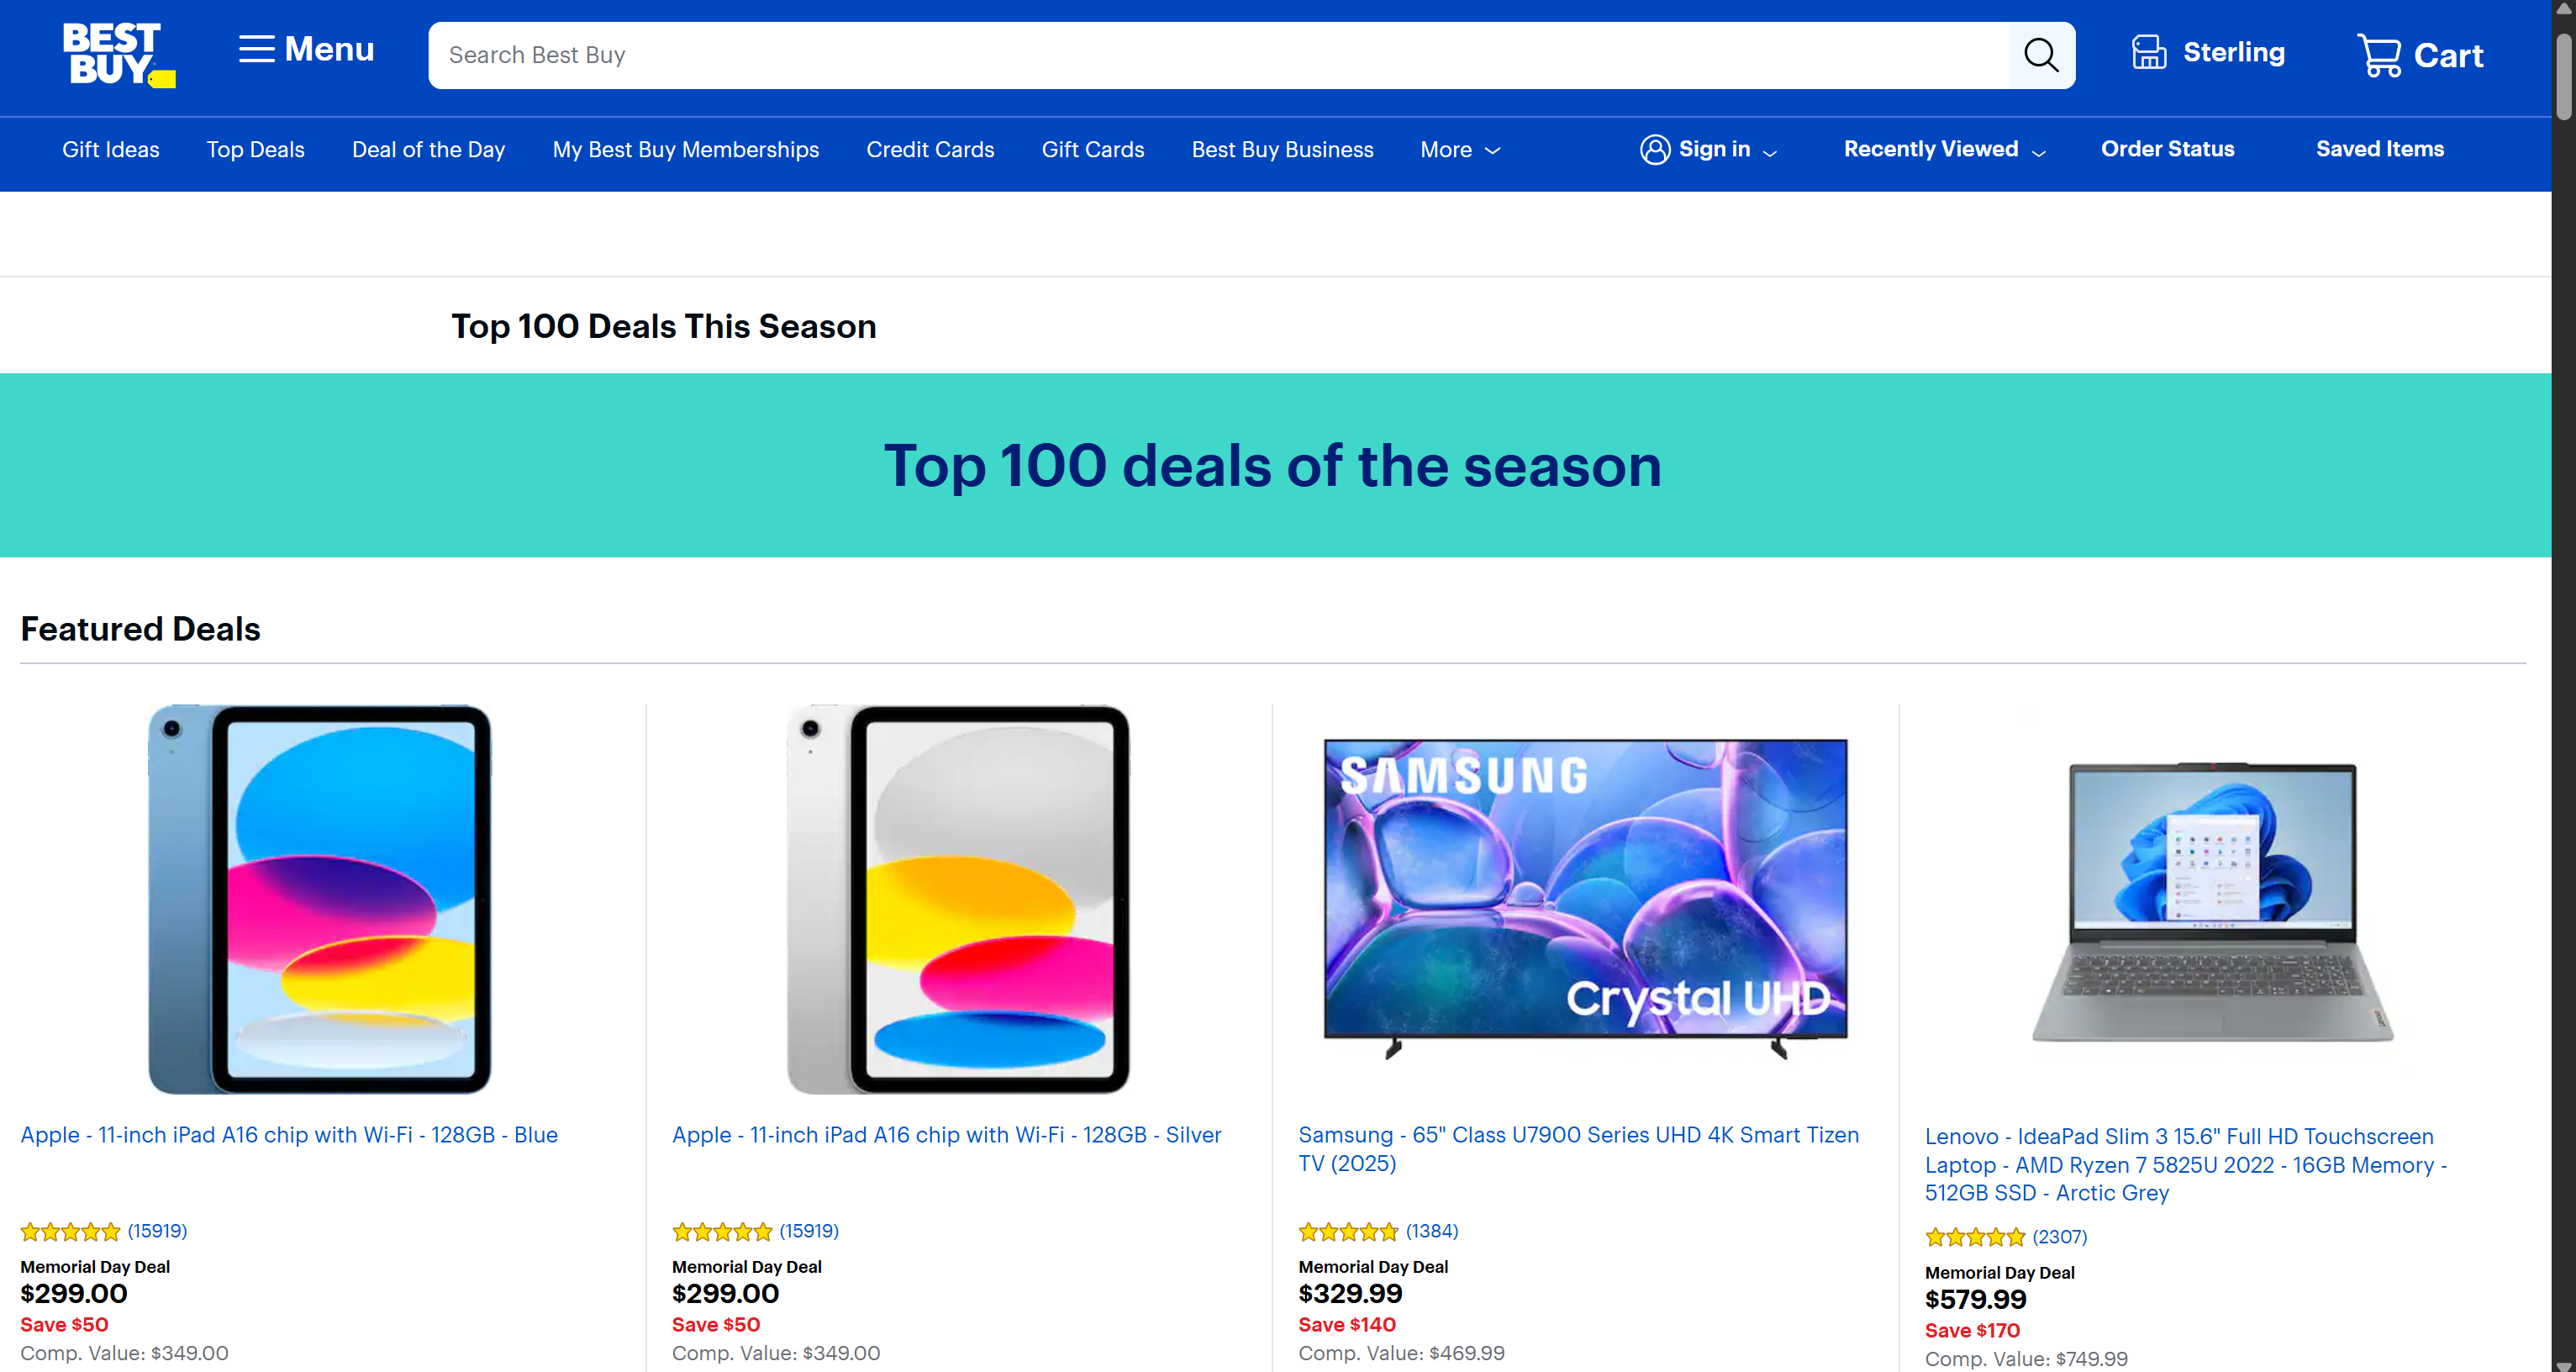
In particular, by inspecting the agent logs, you will see that it:
- Called the
search_engineBright Data MCP tool (backed by SERP API) to search Google for the Best Buy Top 100 Deals page. - Retrieved structured SERP data and analyzed it to identify the correct target URL.
- Accessed the page via the
scrape_as_markdowntool (powered by Web Unlocker API), which returns a Markdown version of the page. - Detected the top 3 Best Buy product URLs by analyzing the Markdown content.
- Scraped each product using the
web_data_bestbuy_productsBright Data MCP Pro tool (which connects to Bright Data’s Best Buy Scraper). - Aggregated all retrieved information into the final report.
This confirms that the Bright Data MCP tools are being used to ground the AI agent in real-world web data.
Et voilà! The Dataiku + Bright Data integration in an AI agent works like a charm. Keep in mind that this was just an example. Thanks to the Bright Data integration, this agent can handle many other use cases and scenarios!
Next Steps
For a real-world, enterprise-ready Dataiku Cloud AI agent, consider adding additional third-party connections such as Slack, Google Drive, and other collaboration tools. Plus, consider integrating data connections with your databases.
That allows the generated results to be automatically shared across your organization’s workflows and systems. You may also consider deploying your agent so you can employ it in production.
Conclusion
In this article, you saw how to build Dataiku AI agents and extend them with real-world web access using the Bright Data MCP. In particular, you saw how and why to integrate a Dataiku agent with Bright Data MCP tools to ground its outputs in live, verifiable web data.
This integration takes Dataiku agents to the next level. It enables them to search the web, autonomously discover new sources, extract structured data, and interact with real-world websites in real time.
Sign up for Bright Data for free today and start integrating AI-ready web tools!



Technical Writer
 5.5 years experience
Antonello Zanini is a technical writer, editor, and software engineer with 5M+ views. Expert in technical content strategy, web development, and project management.