
In this blog post, you will learn:
- What Stagehand is and what it offers for browser automation.
- The benefits of using Stagehand together with cloud-based stealth browser sessions provided by Bright Data’s Browser API.
- A step-by-step guide to setting up Browser API in Stagehand.
Let’s dive in!
What Is Stagehand?
Stagehand is an open-source browser automation framework developed by Browserbase. It combines natural language AI with deterministic code. It solves the tradeoff between brittle selector-based tools (like Playwright) and unpredictable AI agents by letting you choose when to use each approach.
It works by translating instructions into browser actions and structured outputs, using an underlying LLM plus a controlled execution layer. Stagehand also supports the development of browser-based AI agents.
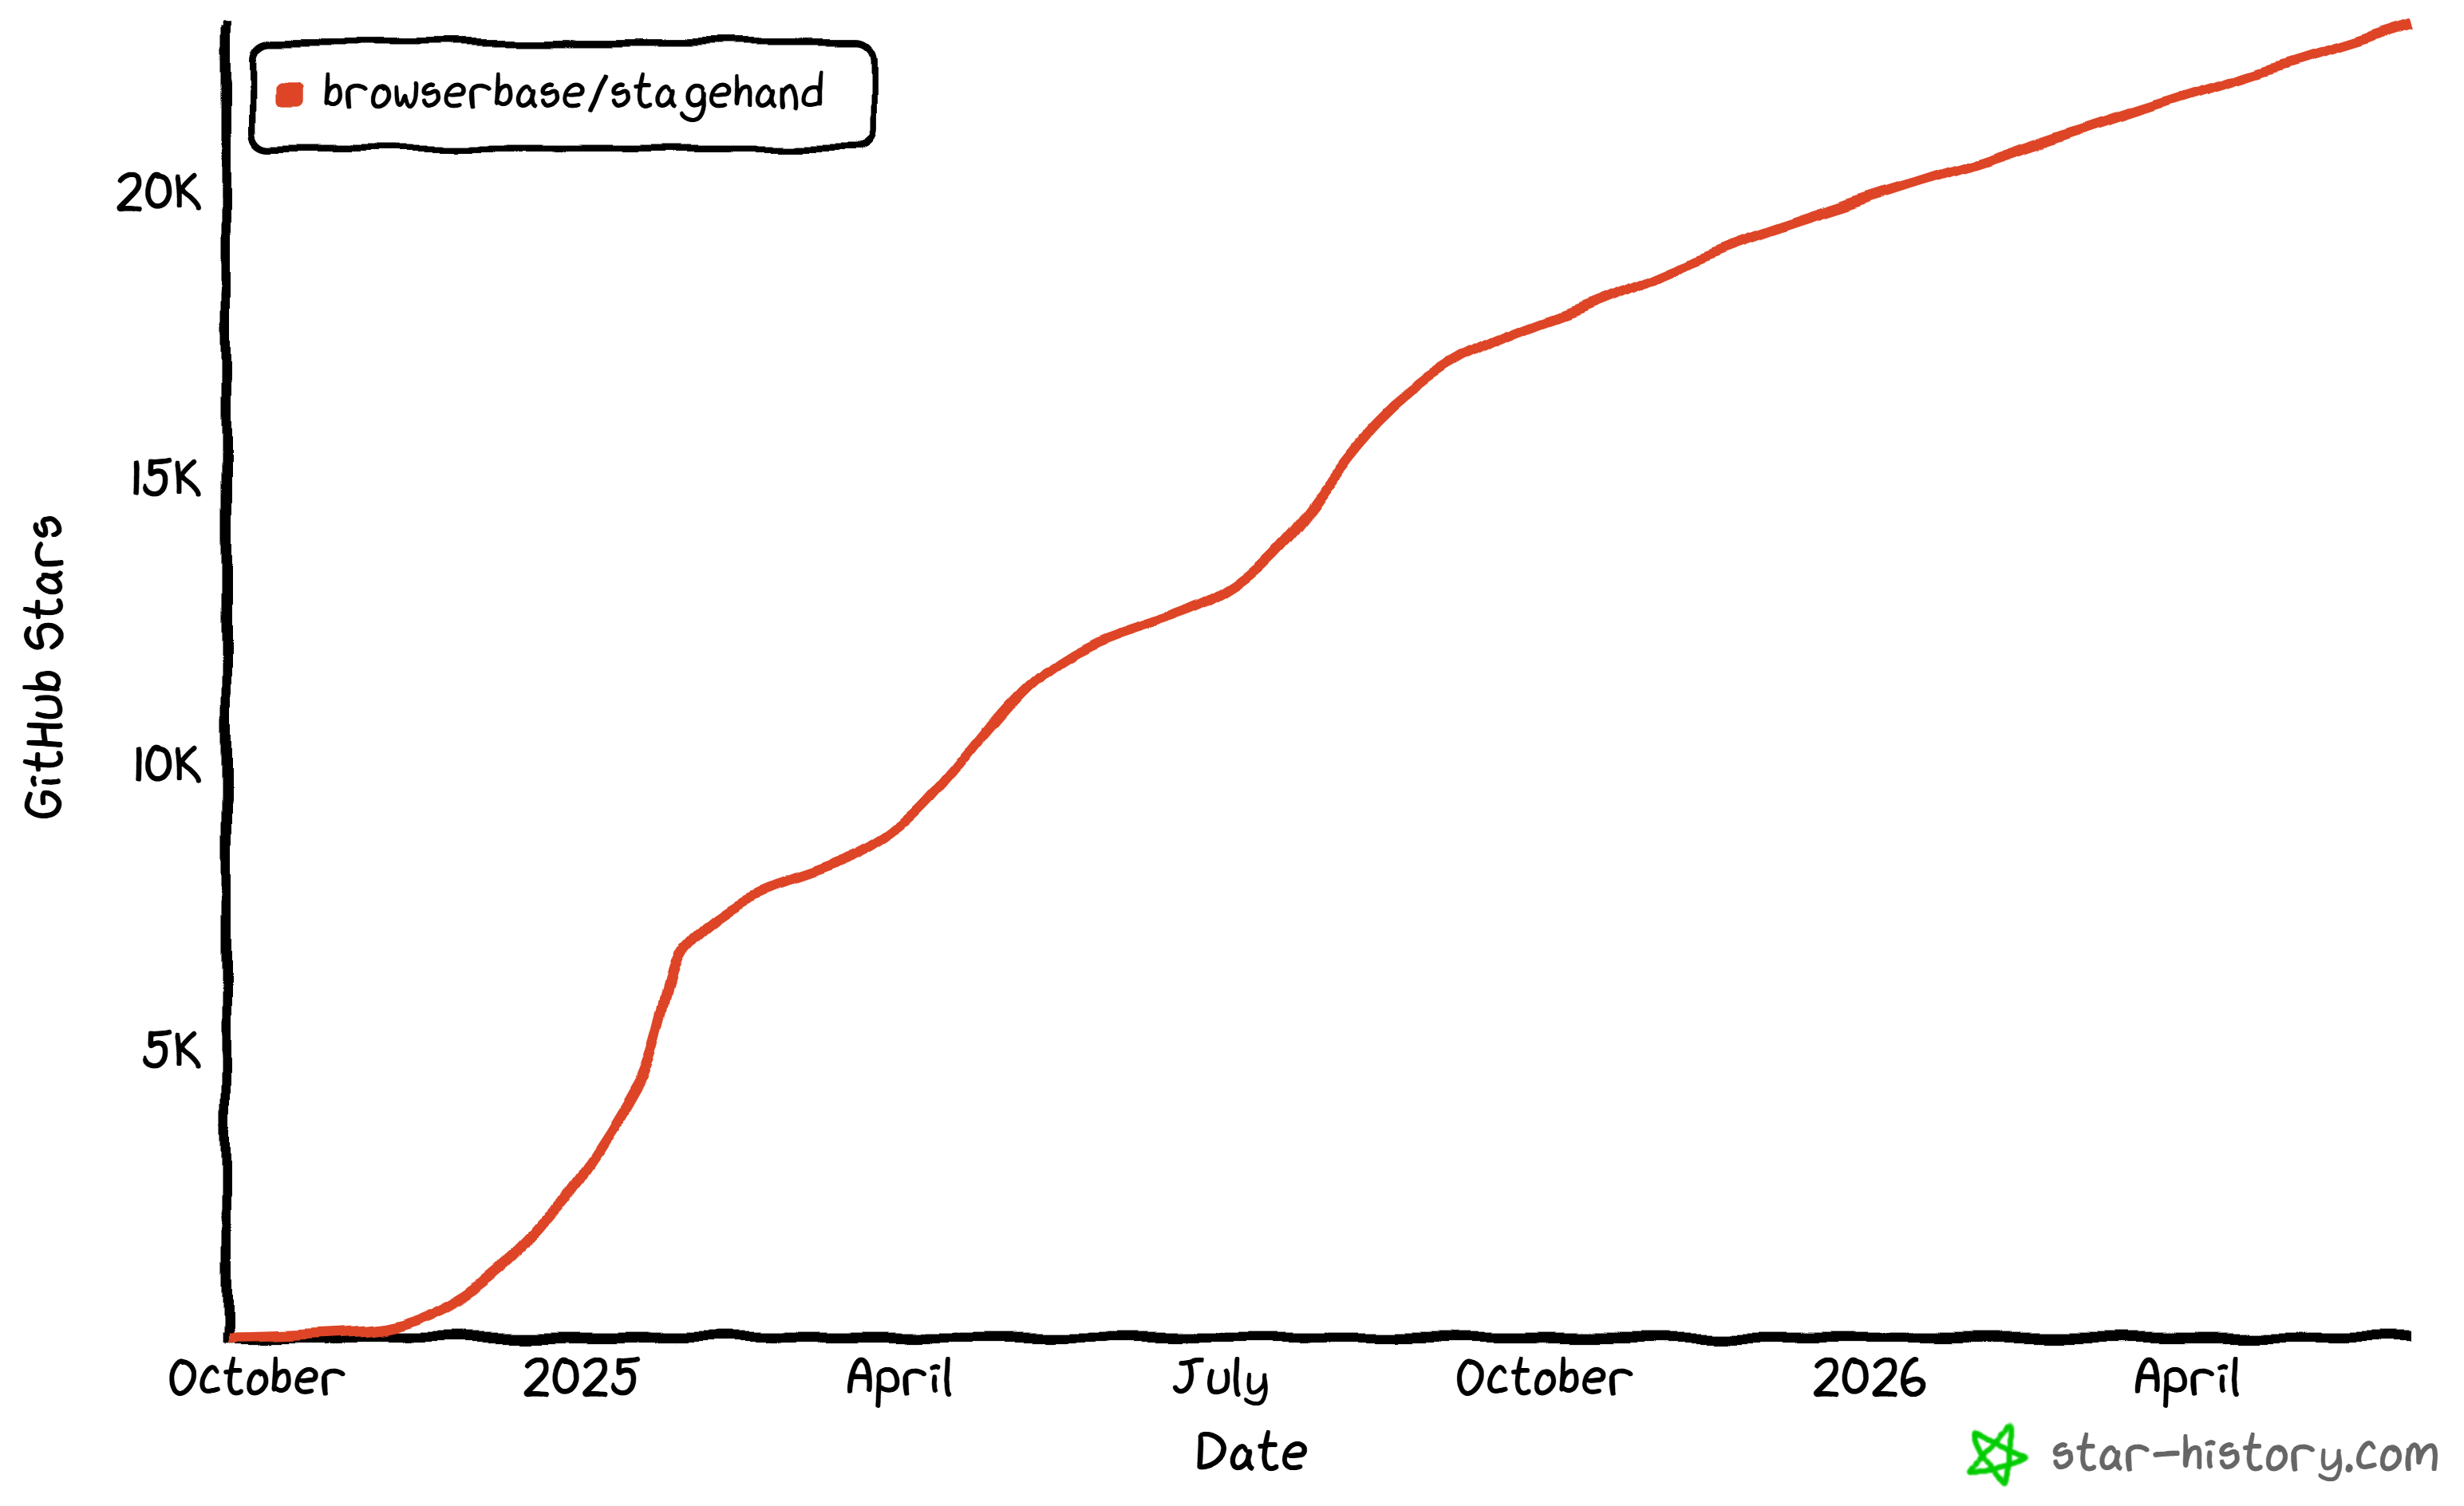
It also comes with capabilities that make it operate as an AI web scraping tool. Stagehand is backed by a large developer community, with over 22.9k stars on GitHub and over 1 million weekly downloads on npm.
Stagehand Features
The main features provided by Stagehand are:
act()execution: Perform browser actions like clicking, scrolling, and filling forms using plain-English prompts.extract()structured data: Extract page content into strict Zod-validated schemas for reliable downstream use.observe()page awareness: Detect actionable elements on a page before executing operations, improving safety and precision.agent()autonomous workflows: Run multi-step browser tasks end-to-end with minimal supervision.- Self-healing automation: Adapts to UI changes, reducing brittle selector-based failures.
- Action caching: Avoid redundant LLM calls by caching actions, ensuring highly predictable and budget-conscious execution across multiple runs.
- LLM flexibility: Works with multiple providers while keeping execution deterministic and debuggable.
- Composable primitives: Combine act, extract, observe, and agent to build custom automation pipelines.
- Developer-focused tooling: Designed for maintainability, reproducibility, and integration into modern AI systems.
Find out more in the official docs.
Why Combine Stagehand with Bright Data’s Browser API
Browser automation tools like Stagehand run into the same core problems:
- Websites actively block automated traffic using bot detection systems, CAPTCHAs, fingerprinting, and IP reputation checks. This makes automations fragile, as a script may work in testing but fail unpredictably in production.
- Running many browser instances locally or on self-managed infrastructure is resource-intensive. Browsers are resource-intensive, requiring substantial CPU and memory. That makes running many instances at the same time costly and difficult to scale reliably.
- Managing proxies and geo-distribution adds operational overhead. Over time, this complexity becomes hard to maintain for production-grade scraping or AI agent workloads.
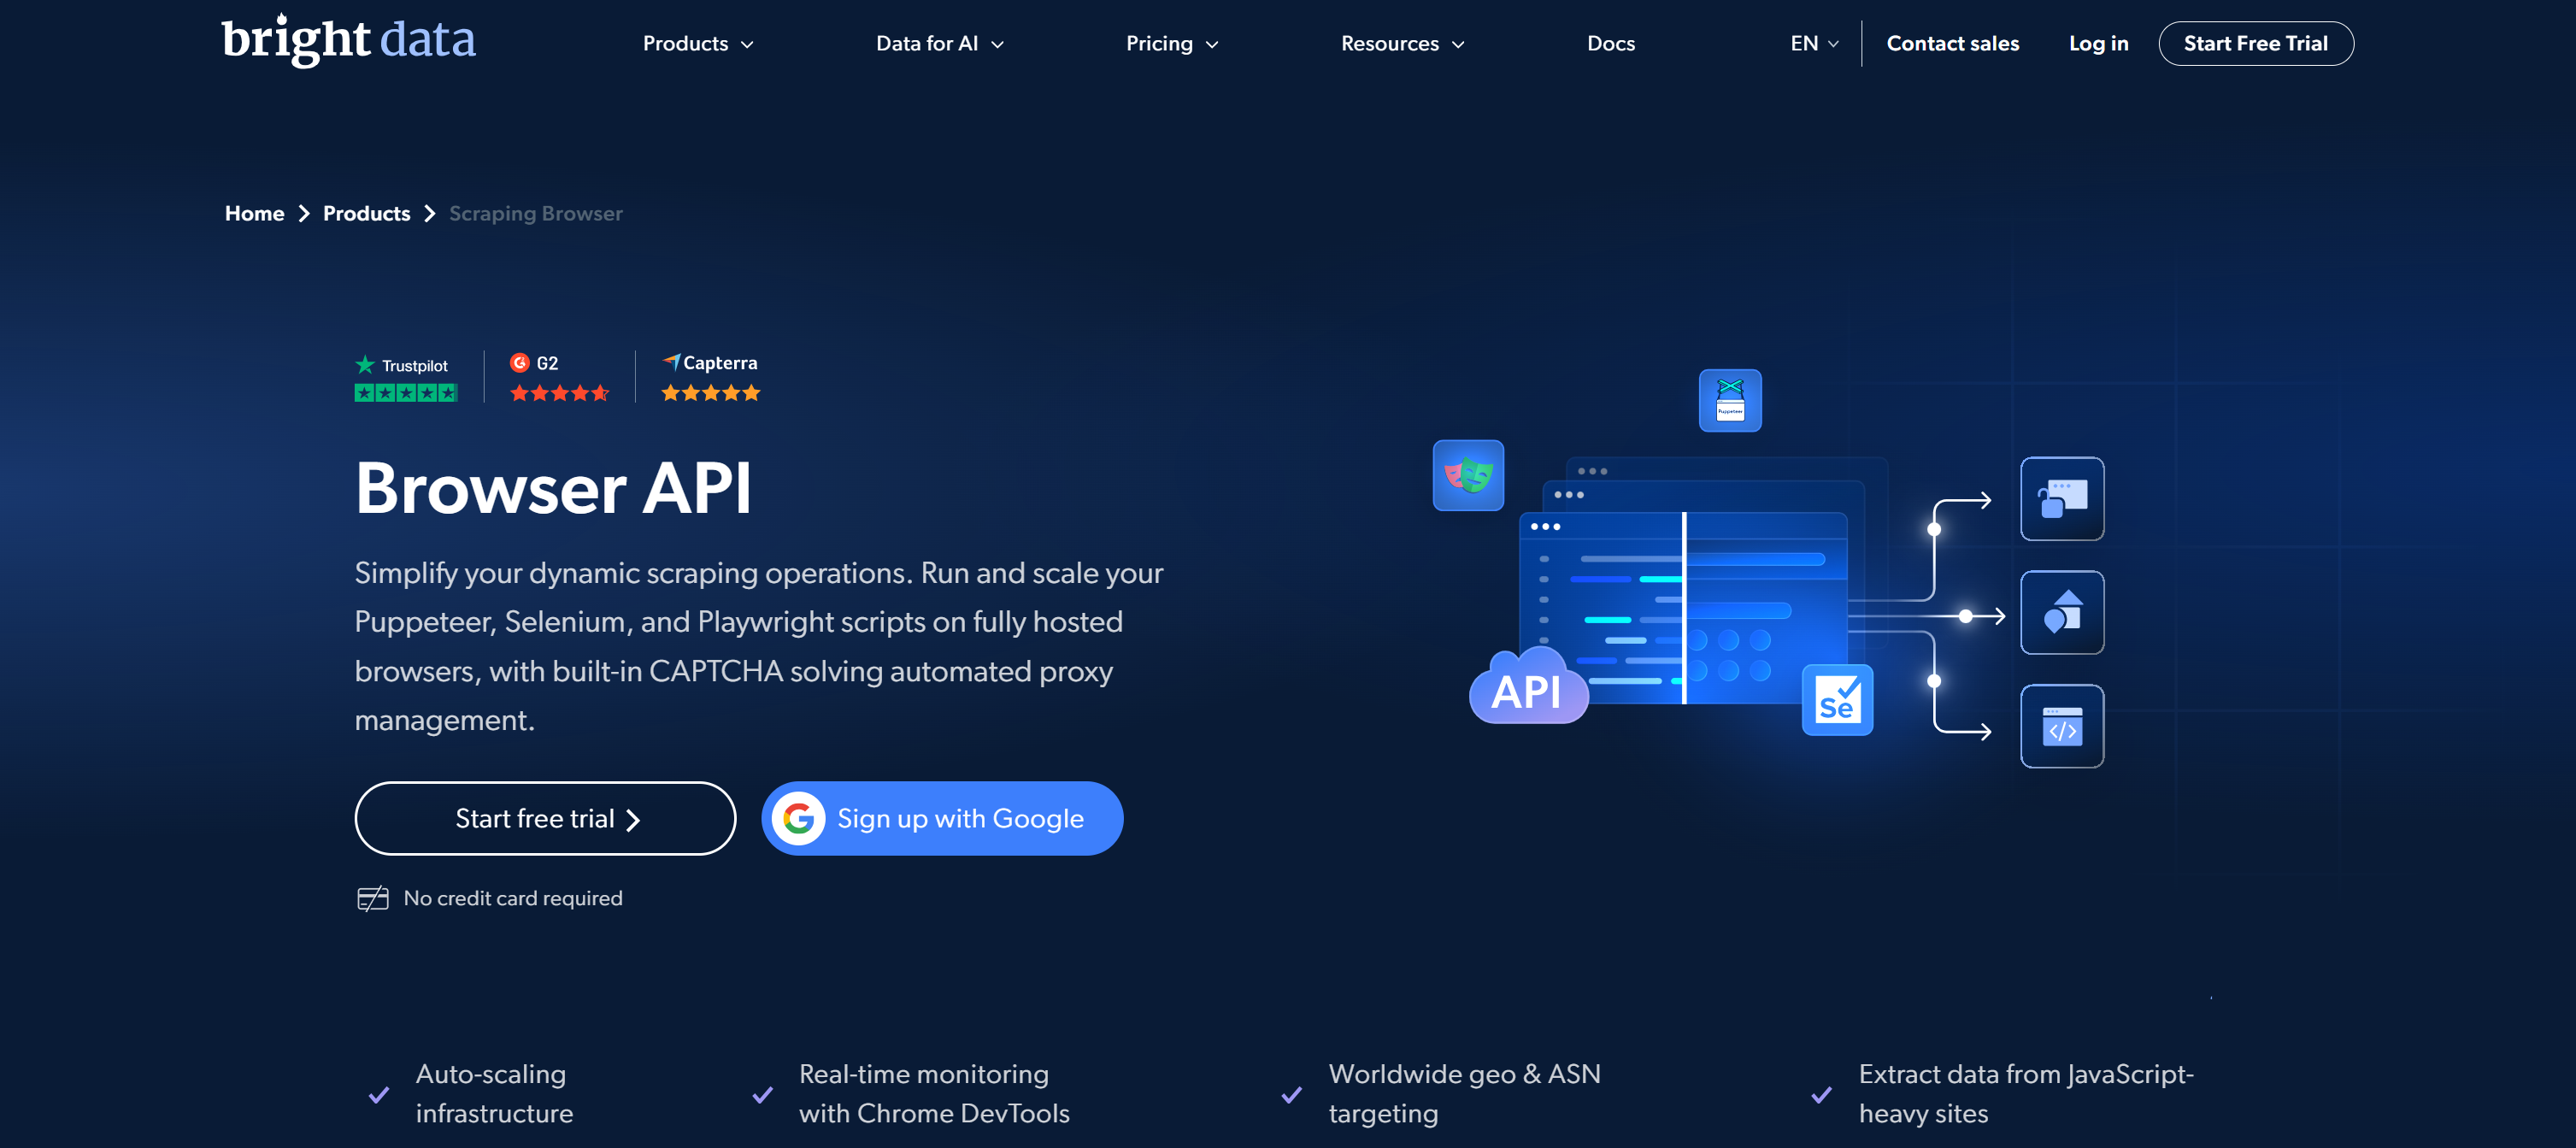
Bright Data’s Browser API addresses those issues by shifting local browser execution to a fully managed, cloud-based infrastructure engineered for scale and stealth.
Instead of handling browsers locally, you can connect through a single CDP endpoint. You gain access to remote, pre-configured browsers with built-in proxy rotation, CAPTCHA solving, and advanced fingerprinting evasion.
What makes Bright Data stand out is its enterprise-grade architecture, backed by a proxy network of over 400 million residential IPs. This enables high anonymity, global geo-targeting, and infinite concurrency while achieving a 99.95% success rate and delivering SLA-backed 99.99% uptime.
How to Integrate Stagehand with Browser API
In this chapter, you will see how to use Stagehand to automate remote browser instances. In detail, you will connect to stealth, anti-detect, infinitely scalable cloud browser sessions via Bright Data’s Browser API.
Follow the instructions below.
Prerequisites
To follow along with this tutorial section, make sure you have:
- Node.js 20+ installed locally (Node.js 22+ recommended).
- An API key from a supported Stagehand AI provider (here, we will use an OpenAI API key).
- A Bright Data account.
- Basic knowledge of the Stagehand API and its AI-driven browser automation capabilities.
Step #1: Initialize the Stagehand Project
Set up a new Stagehand project by following the quickstart guide. Alternatively, run the command below:
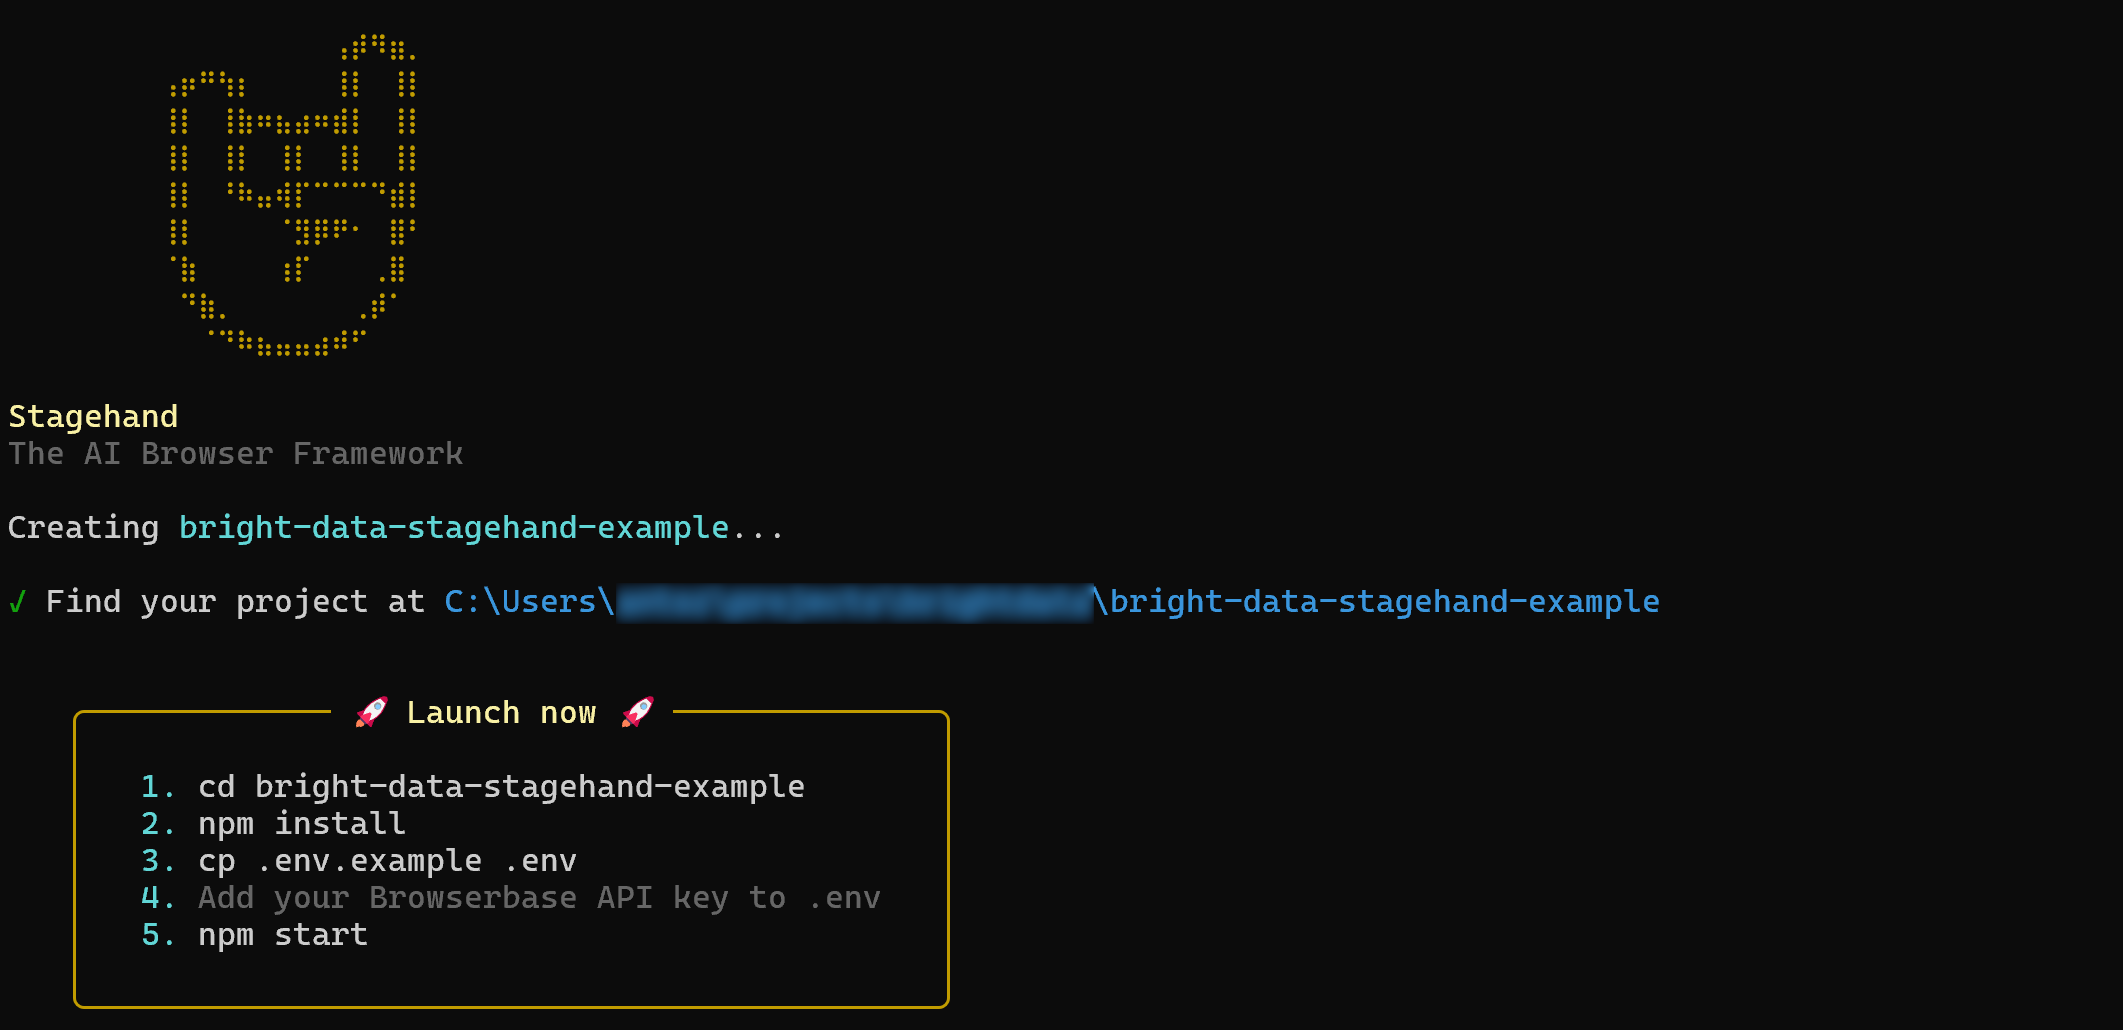
npx create-browser-app bright-data-stagehand-exampleThe npx create-browser-app command creates a new Stagehand project in the bright-data-stagehand-example directory.
After running it, you should get:
Next, enter the project directory:
cd bright-data-stagehand-exampleYour project structure should look like this:
bright-data-stagehand-example/
├── .cursorrules
├── .env.example
├── claude.md
├── index.ts
├── package.json
├── README.md
└── tsconfig.json
Take a few minutes to explore the generated files and get familiar with the project structure. Focus on index.ts, which represents the Stagehand main file.
Now, clean the index.ts file by leaving only:
import { Stagehand } from "@browserbasehq/stagehand";You will soon see how to connect Stagehand to Bright Data’s Browser API. Well done!
Step #2: Configure Environment Variable Reading
Your Stagehand cloud automation project will rely on a few secrets (e.g., AI provider API key, Bright Data Browser API credentials, etc.). Instead of hardcoding them in the code, the best practice is to load them from environment variables.
By default, Stagehand does not automatically load .env files. To enable that, start by installing the `dotenv package:
npm install dotenvNext, in index.ts, add the following:
import dotenv from "dotenv";

dotenv.config({
  path: ".env",
});
Now, you need to define a .env file. You can create it by copying the .env.example file generated when you ran npx create-browser-app. Otherwise, manually add a .env file to your Stagehand project:
bright-data-stagehand-example/
├── .cursorrules
├── .env           # <---------
├── .env.example
├── claude.md
├── index.ts
├── package.json
├── README.md
└── tsconfig.json
Populate the .env file with your AI provider API key (in this case, OpenAI):
OPENAI_API_KEY="<YOUR_OPENAI_API_KEY>"Replace your <YOUR_OPENAI_API_KEY> placeholder with your actual OpenAI API key.
Stagehand will automatically read the OPENAI_API_KEY env at runtime, so no additional configuration is needed. Excellent!
Step #3: Get Started with Bright Data Browser API
It is time to retrieve the CDP-based remote connection URL for the Bright Data Browser API.
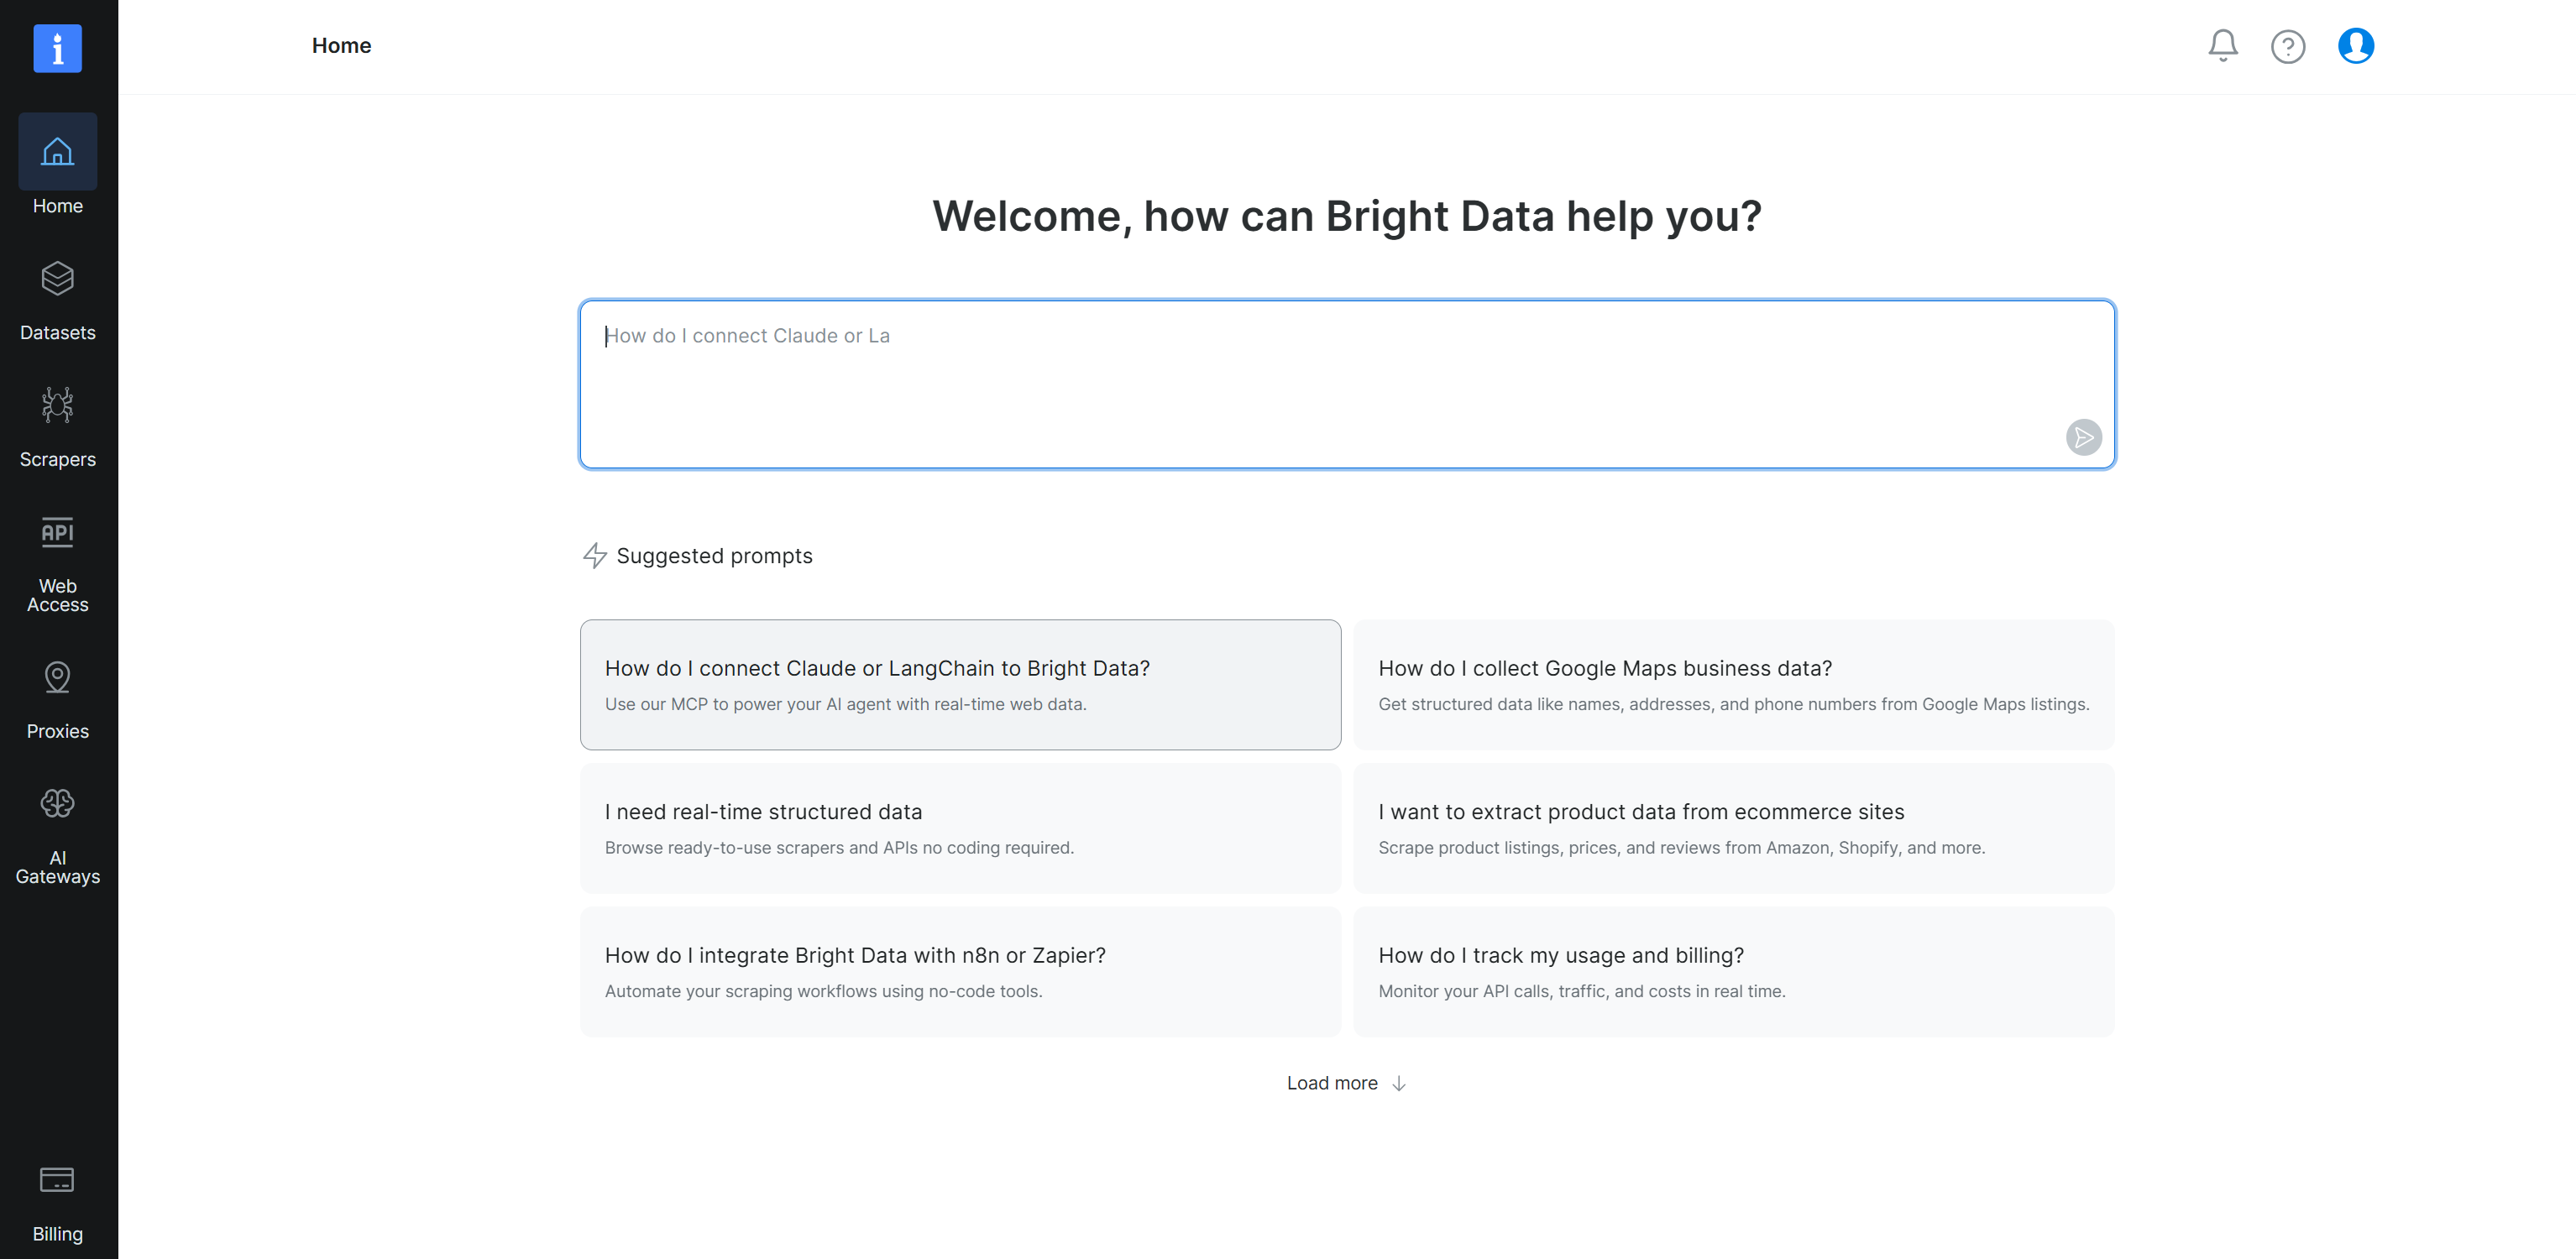
If you have not already, create a Bright Data account. If you have, log in and reach the control panel:
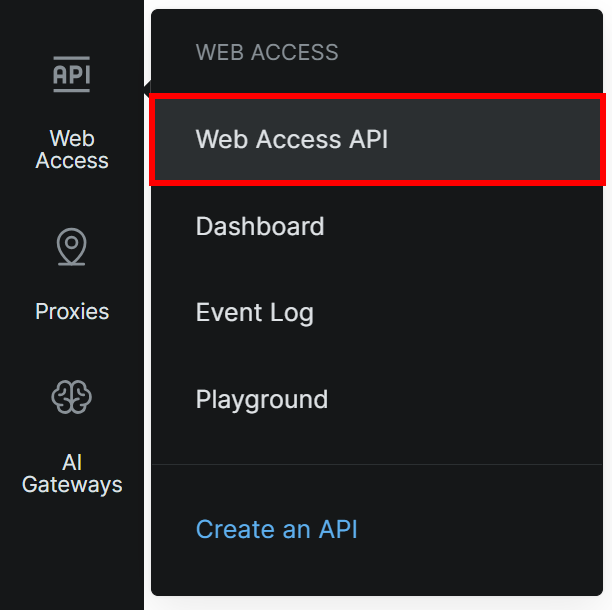
Next, navigate to the “Web Access > Web Access API” option from the left menu:
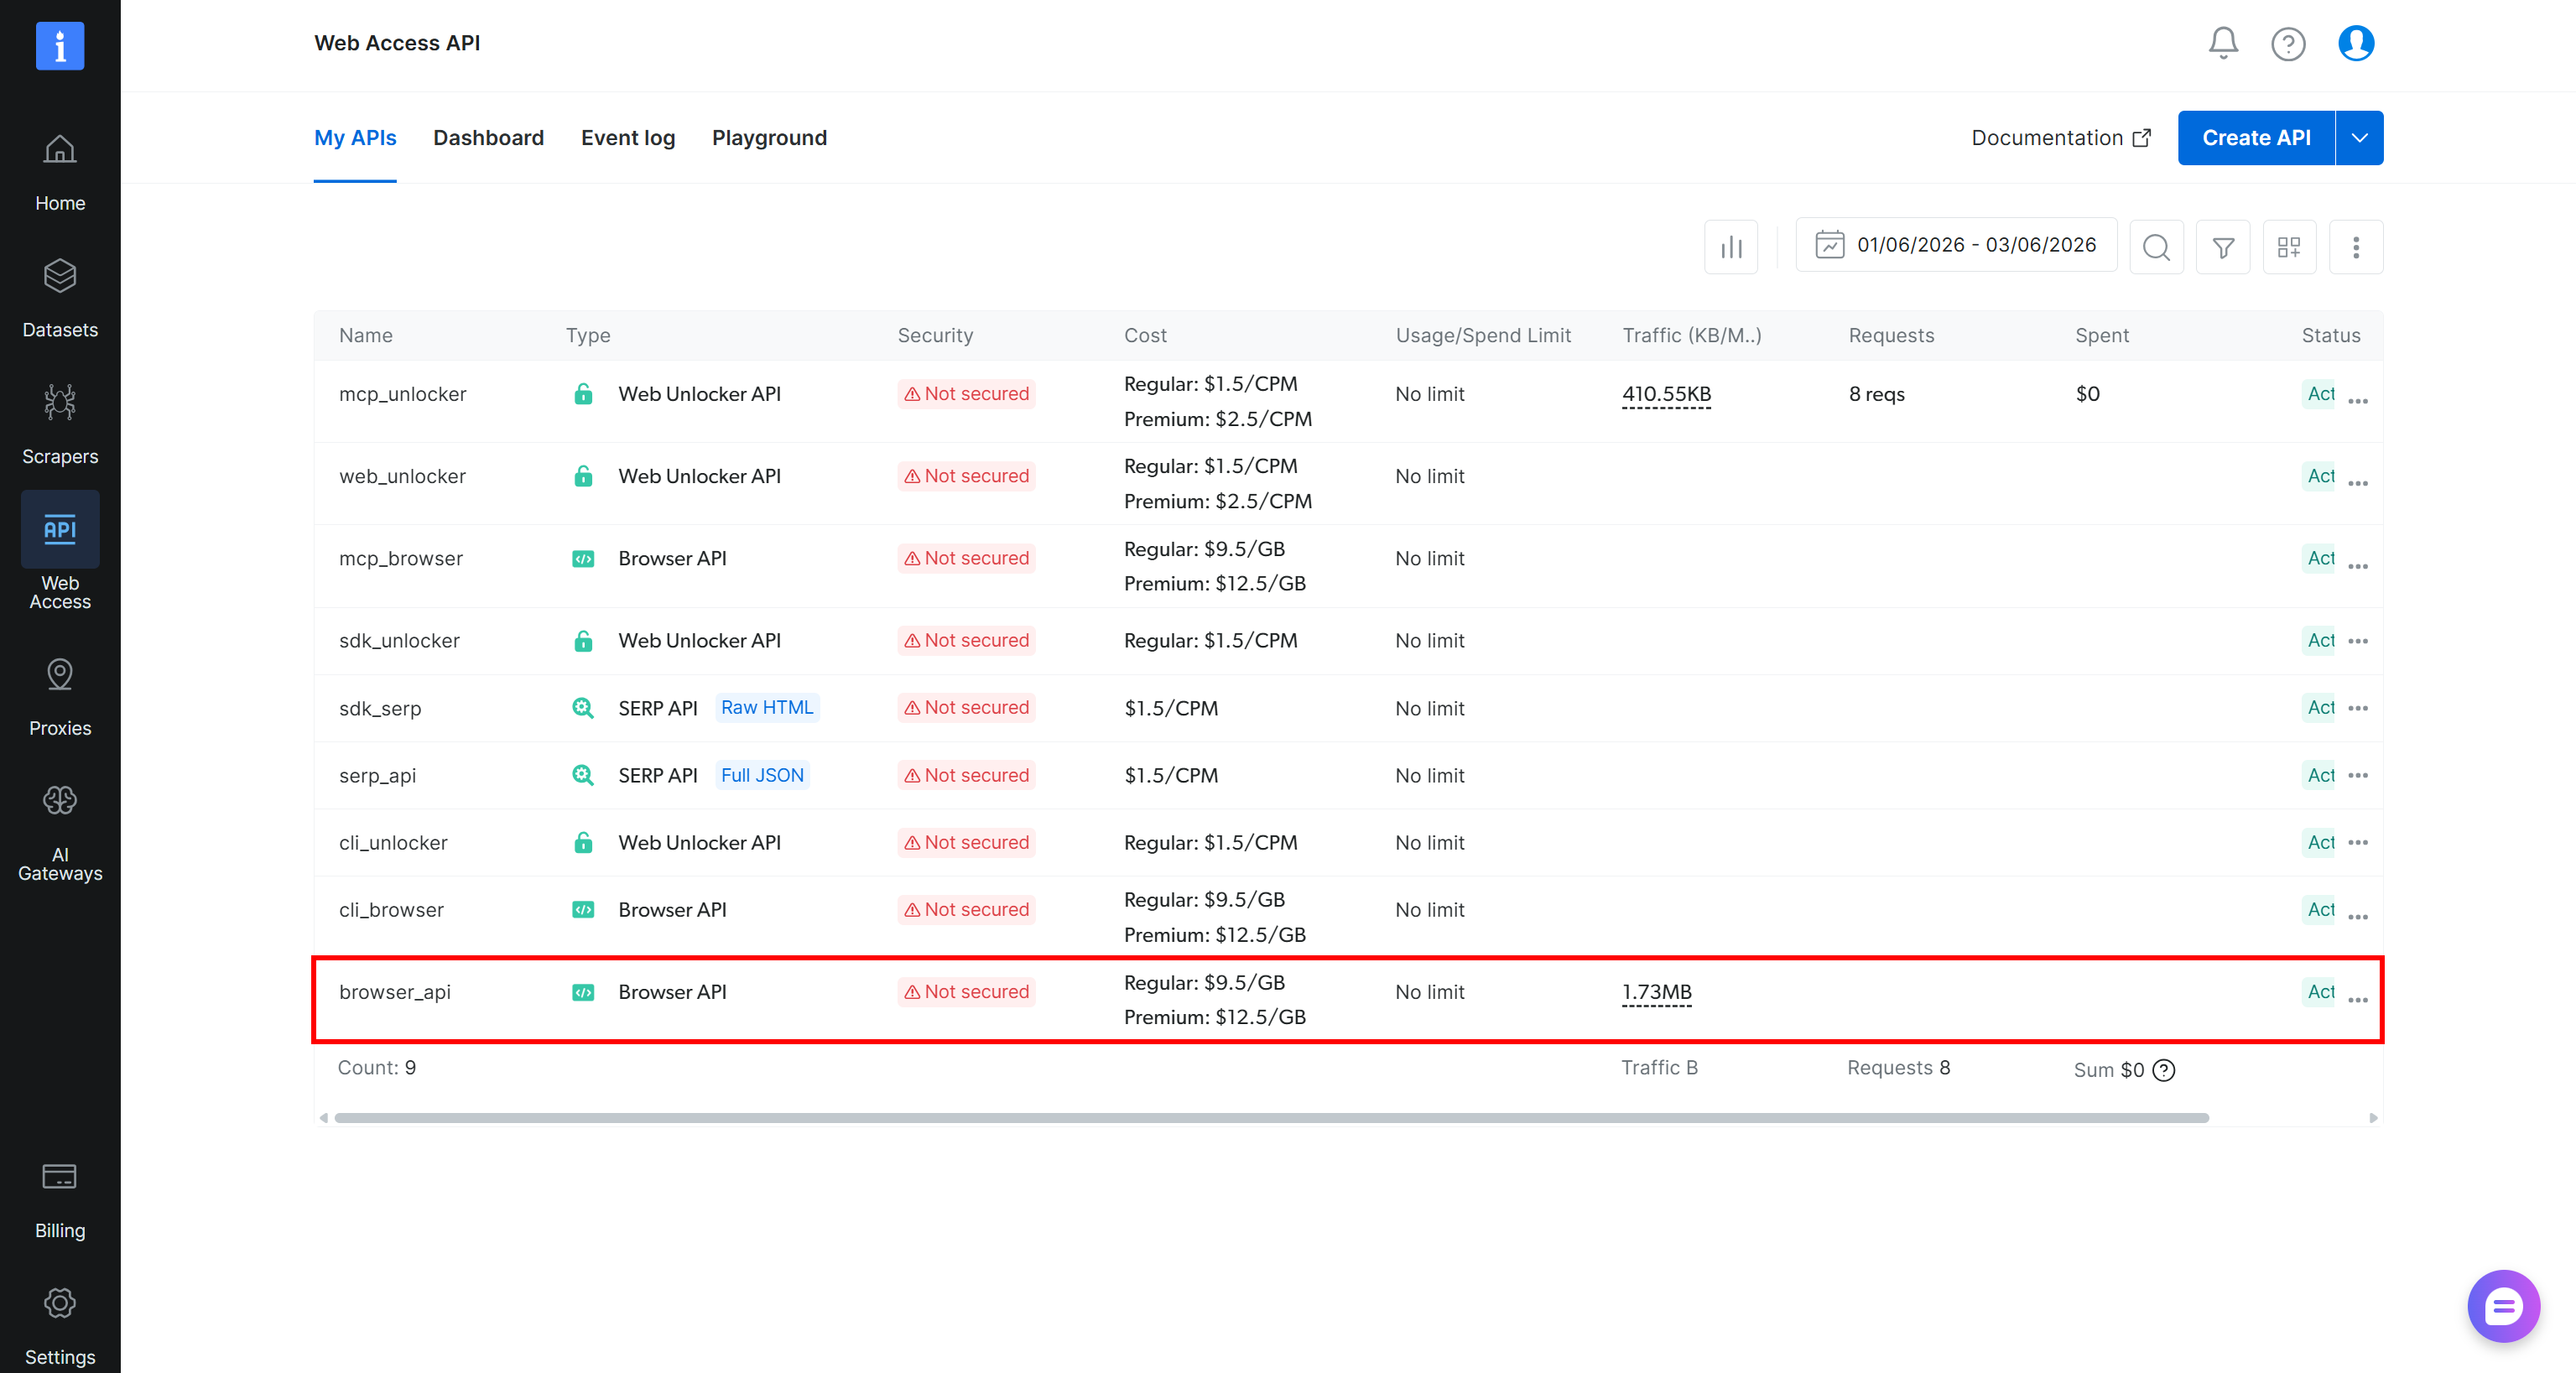
If you already see a Browser API entry in the “My APIs” table (as below, via the browser_api API), you are good to go:
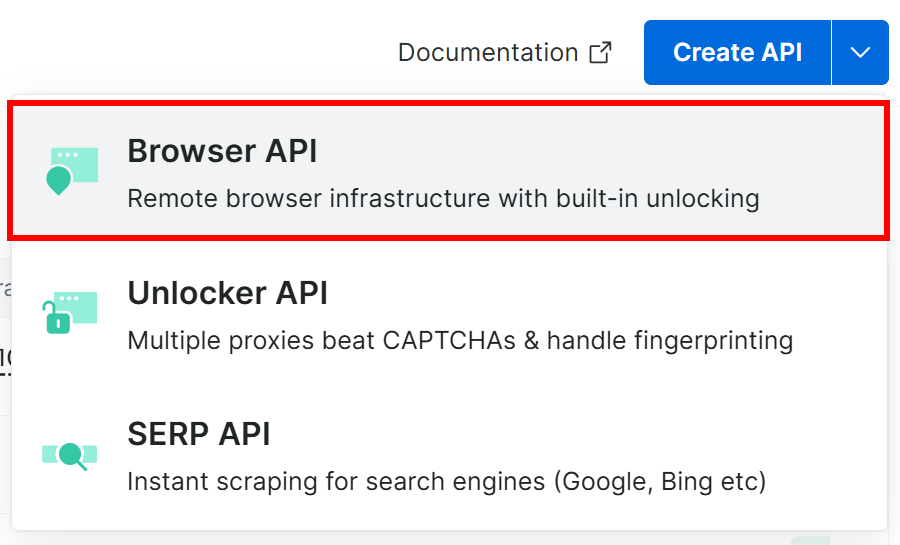
Otherwise, click the dropdown on the “Create API” button and select “Browser API”:
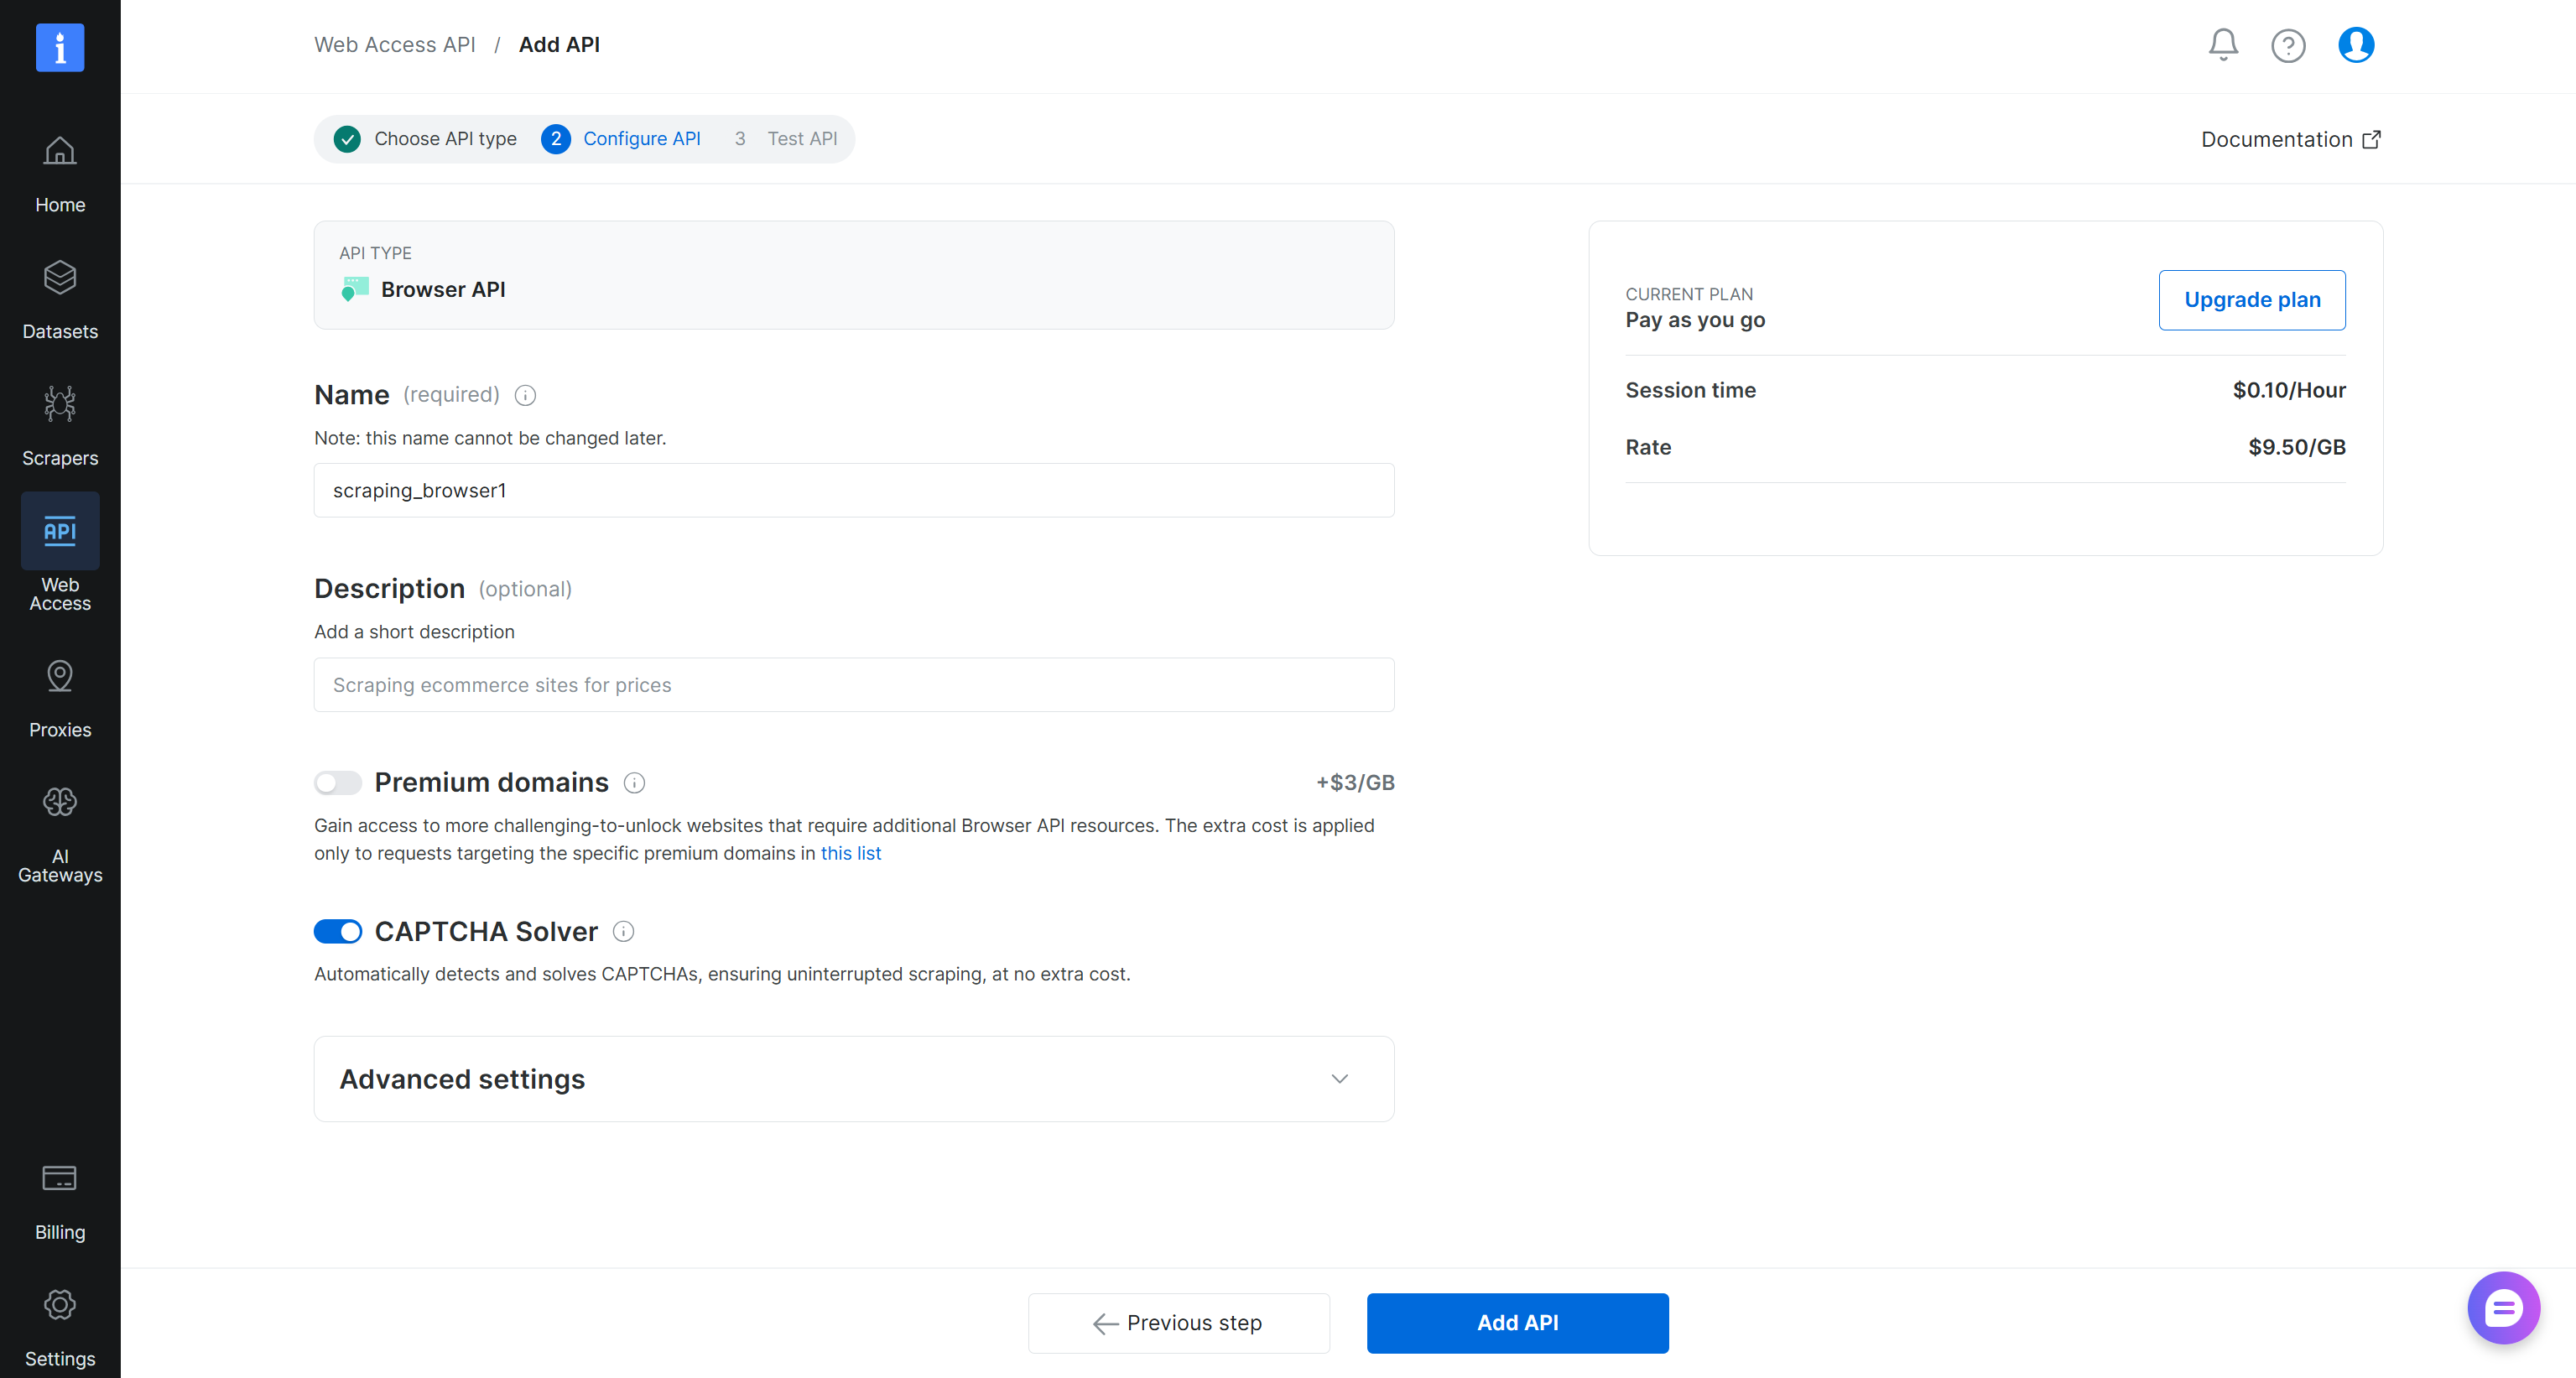
This will launch the Browser API setup wizard. Give your Browser API a name (e.g., browser_api) and configure the API according to your needs:
When you are done, click the “Add API” button. Reach the Browser API details page:
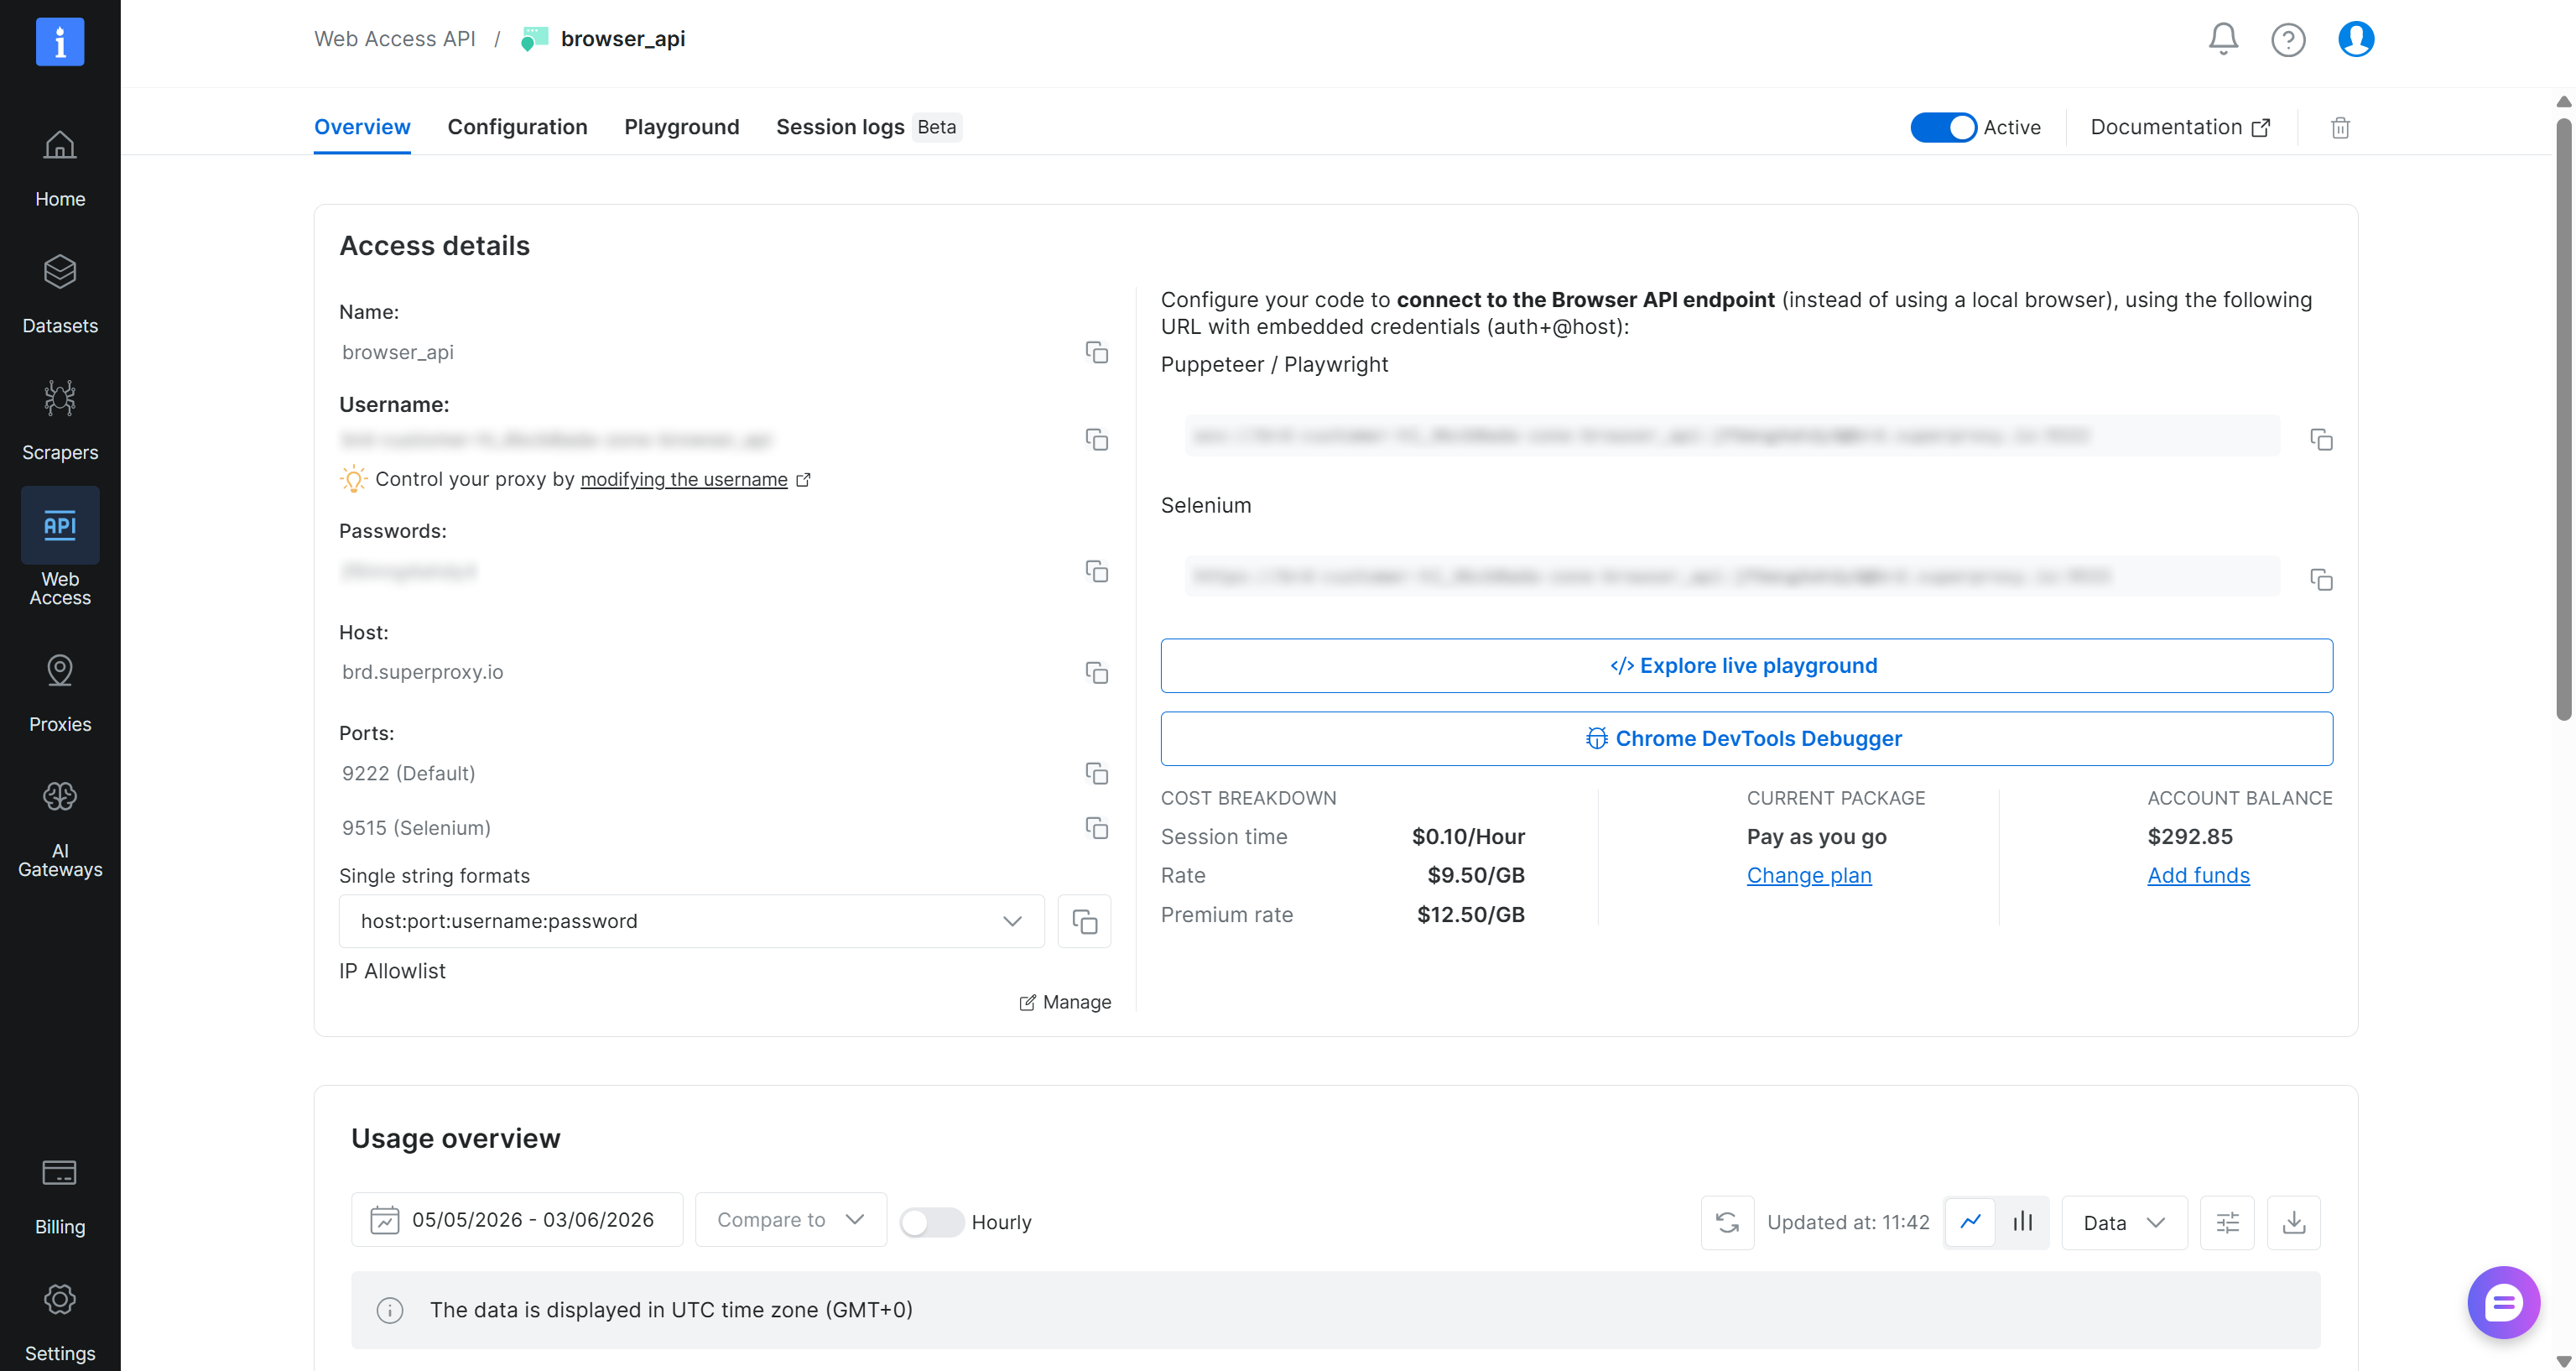
Here, you will find the connection details for CDP-based integrations (the URL under “Puppeteer / Playwright”). The Browser API WebSocket URL follows this format:
wss://<BROWSER_API_USERNAME>:<BROWSER_API_USERNAME>@brd.superproxy.io:9222Copy the Browser API username and password from the Browser API page and add them to your .env file:
BRIGHT_DATA_BROWSER_API_USERNAME="<BROWSER_API_USERNAME>"
BRIGHT_DATA_BROWSER_API_PASSWORD="<BROWSER_API_PASSWORD>"
You will later use these variables in index.ts to construct the remote CDP connection URL.
You now have all the building blocks needed for cloud browser automation with Stagehand via the Bright Data Browser API. Excellent!
Step #4: Connect to the Bright Data Browser API in Stagehand
In index.ts, start by reading the Browser API credentials from your environment variables:
const BRIGHT_DATA_BROWSER_API_USERNAME = process.env.BRIGHT_DATA_BROWSER_API_USERNAME || "";
const BRIGHT_DATA_BROWSER_API_PASSWORD = process.env.BRIGHT_DATA_BROWSER_API_PASSWORD || "";
Next, initialize Stagehand inside a main() function for connection to the Bright Data Browser API via the CDP WebSocket URL:
async function main() {
  // configure Stagehand to connect remotely to Bright Data's Browser API
  // and use an OpenAI model
  const stagehand = new Stagehand({
    env: "LOCAL",
    localBrowserLaunchOptions: {
      cdpUrl: `wss://${BRIGHT_DATA_BROWSER_API_USERNAME}:${BRIGHT_DATA_BROWSER_API_PASSWORD}@brd.superproxy.io:9222`,
    },
    model: "openai/gpt-5.4-mini",
  });

  // launch Stagehand and get the browser page
  await stagehand.init();
  const page = stagehand.context.pages()[0];

  // browser automation logic...

  // close the Stagehand instance and release the browser resources
  await stagehand.close();
}

main().catch(console.error);
The snippet above configures Stagehand with the authenticated Browser API WSS URL built using the credentials read from the environment variables. It then launches a remote browser session and exposes a page object for automation. After running your automation logic, it shuts down the session and releases all remote browser resources.
In the example above, we configured OpenAI GPT-5.4 Mini. Note that any other OpenAI model (or a supported AI provider setup) will also work.
The key part is in the Stagehand constructor. The configuration may look slightly confusing at first because, to connect to a remote browser, you still need to set env to "LOCAL". Then, inside localBrowserLaunchOptions, you need to provide the Bright Data Browser API WSS URL via the cdpUrl field.
So even though env is set to "LOCAL", Stagehand actually connects to Bright Data’s remote anti-detection cloud browser instances.
Now you can test the integration with a simple example to confirm everything is working correctly.
Step #5: Verify the Bright Data Browser API Integration
To check that the integration with Browser API works, try the following automation logic:
// connect to the example.com page
await page.goto("https://example.com");

// take the screenshot of the page
await page.screenshot({
  path: "screenshot.png",
  type: "png",
  fullPage: false,
});
This instructs the remote browser (exposed via the Bright Data Browser API) to open example.com and capture a screenshot.
Put it all together:
// index.ts

import { Stagehand } from "@browserbasehq/stagehand";
import dotenv from "dotenv";

// load the environment variables from the .env file
dotenv.config({
  path: ".env",
});

// read the Bright Data Browser API credentials
const BRIGHT_DATA_BROWSER_API_USERNAME = process.env.BRIGHT_DATA_BROWSER_API_USERNAME || "";
const BRIGHT_DATA_BROWSER_API_PASSWORD = process.env.BRIGHT_DATA_BROWSER_API_PASSWORD || "";

async function main() {
  // configure Stagehand to connect remotely to Bright Data's Browser API
  // and use an OpenAI model
  const stagehand = new Stagehand({
    env: "LOCAL",
    localBrowserLaunchOptions: {
      cdpUrl: `wss://${BRIGHT_DATA_BROWSER_API_USERNAME}:${BRIGHT_DATA_BROWSER_API_PASSWORD}@brd.superproxy.io:9222`,
    },
    model: "openai/gpt-5.4-mini",
  });

  // launch Stagehand and get the browser page
  await stagehand.init();
  const page = stagehand.context.pages()[0];

  // connect to the example.com page
  await page.goto("https://example.com");

  // take the screenshot of the page
  await page.screenshot({
    path: "screenshot.png",
    type: "png",
    fullPage: false,
  });

  // close the Stagehand instance and release the browser resources
  await stagehand.close();
}

main().catch(console.error);
Run the script with:
npm run startIn the terminal, you should see logs similar to:

Important: The logs may mention “connecting to local browser.” This is due to the required env: "LOCAL" configuration. However, the actual connection is made to Bright Data’s remote Browser API.
After execution completes, a screenshot.png file will appear in your project directory:
bright-data-stagehand-example/
├── .cursorrules
├── .env
├── .env.example
├── claude.md
├── index.ts
├── package.json
├── README.md
├── screenshot.png       # <---------
└── tsconfig.json
Open screenshot.png, and you should see the rendered example.com page:
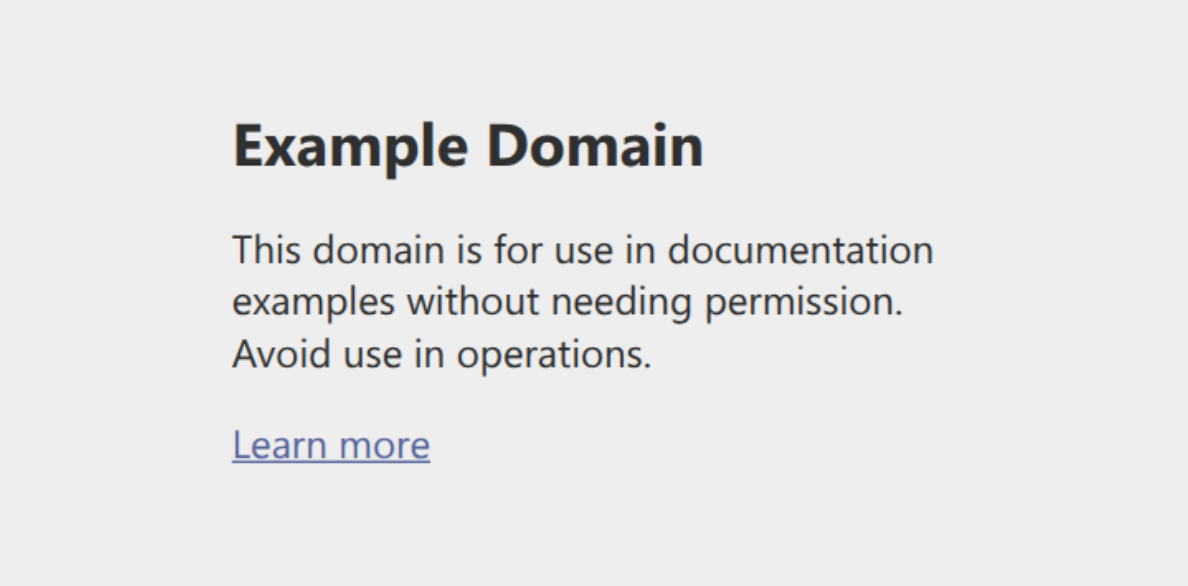
This confirms that Stagehand successfully connected to the target site and executed browser automation as expected.
To verify that the Bright Data Browser API was used, check your Bright Data dashboard:
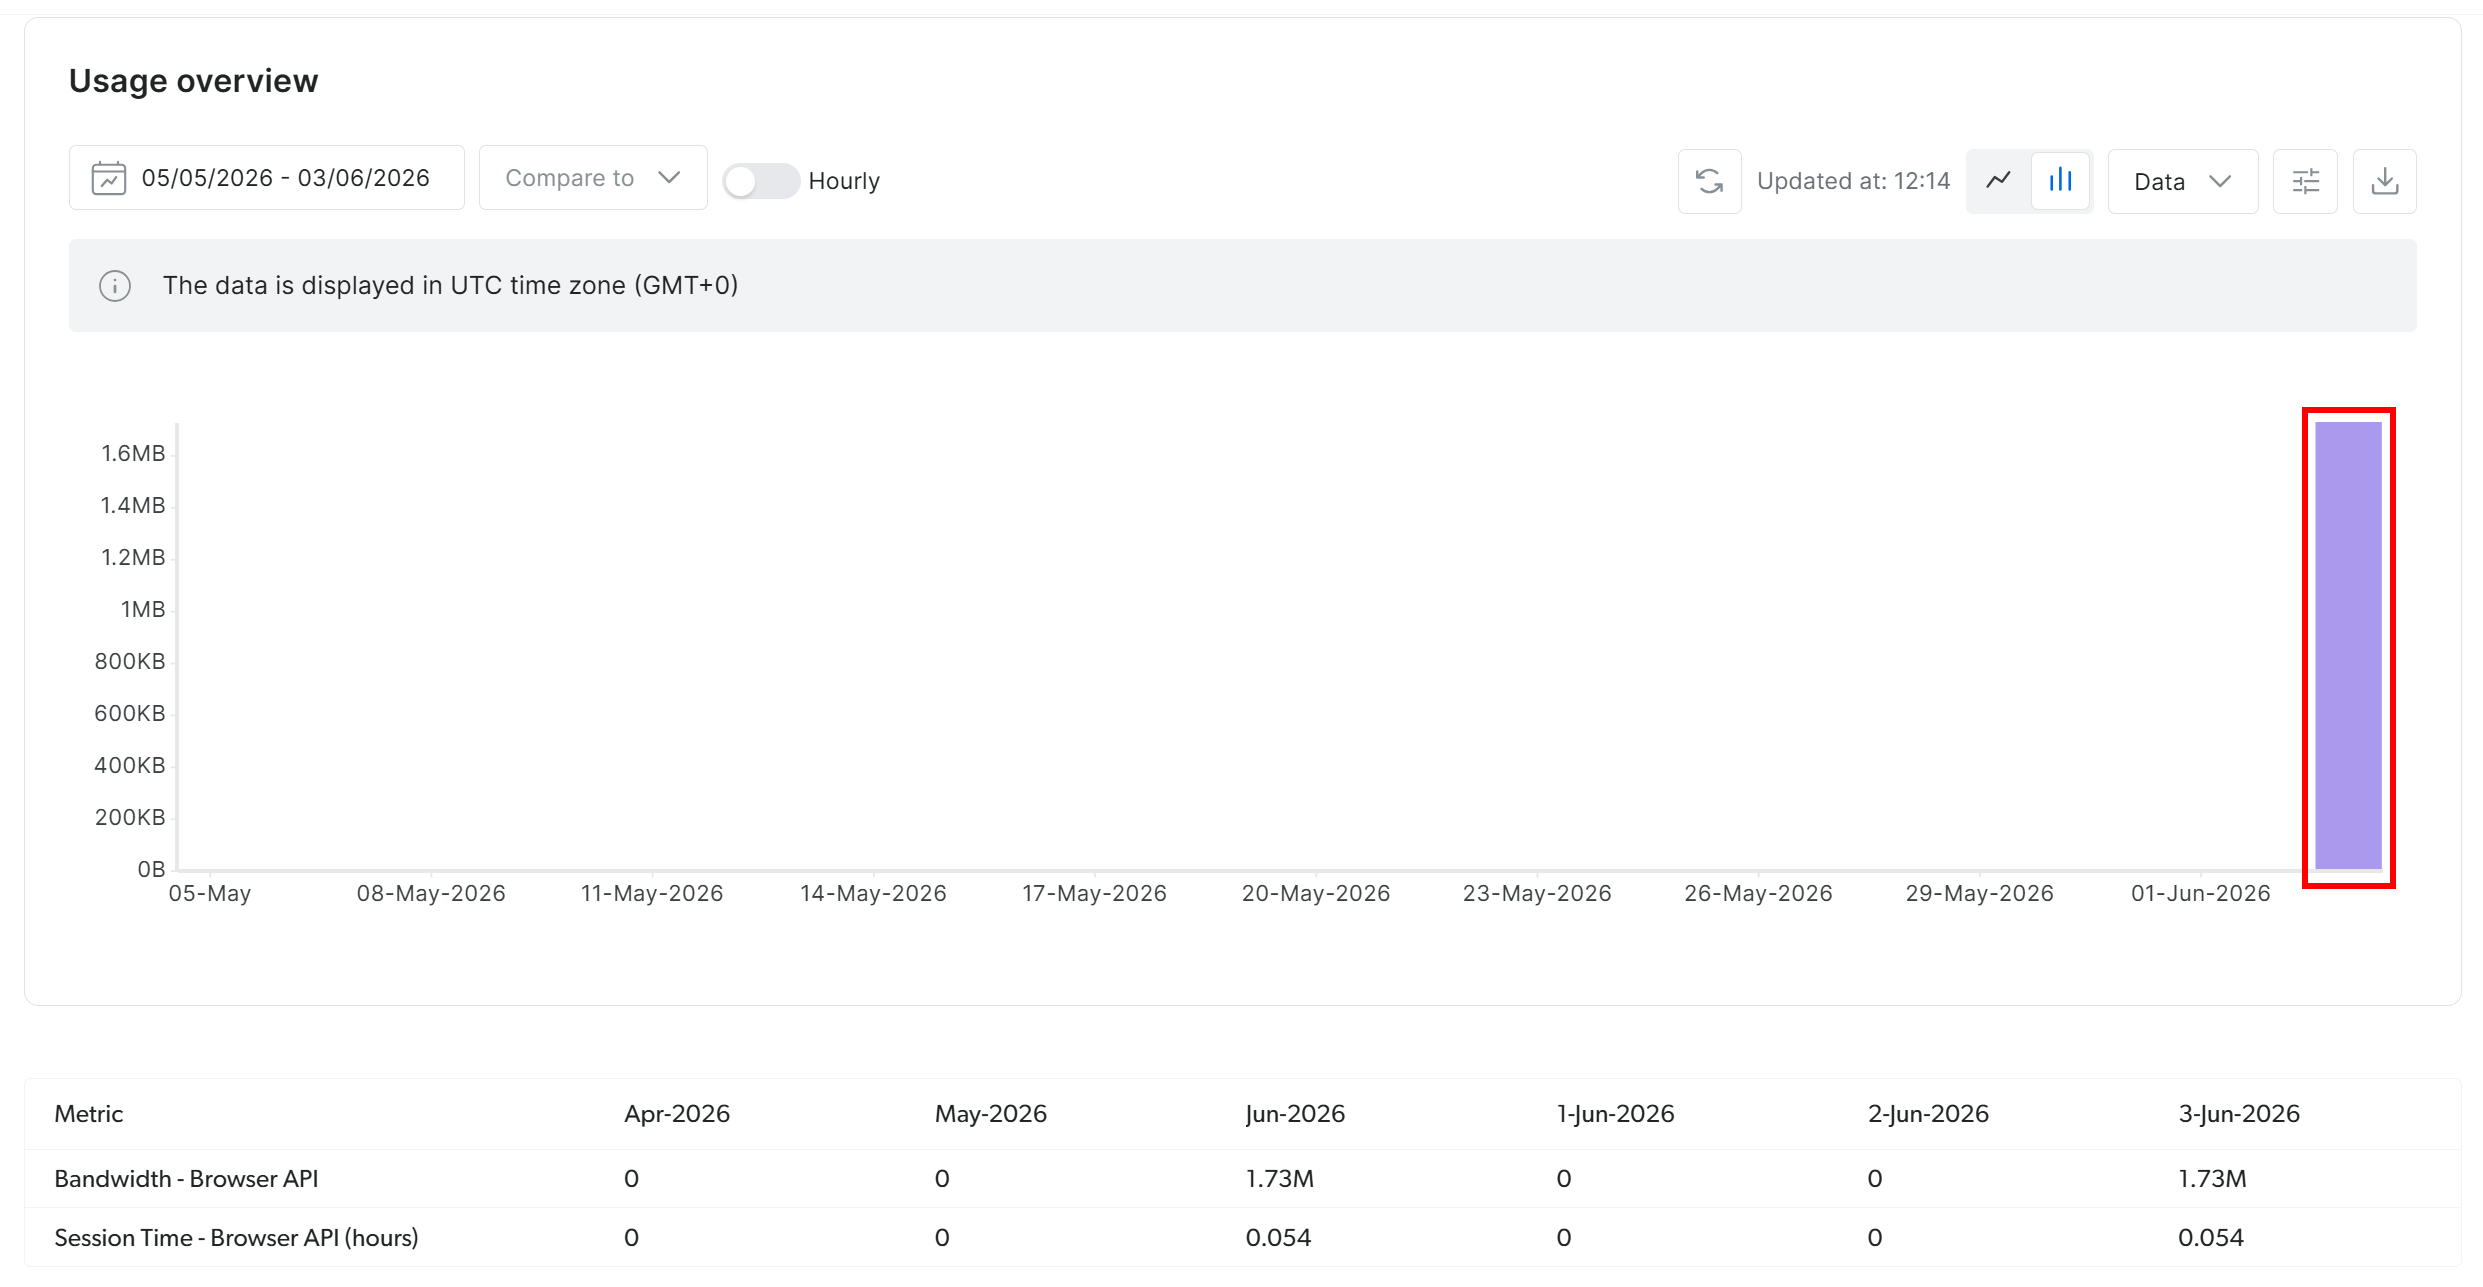
You should see a spike in traffic indicating active usage from the configured Browser API session via the remote CDP connection. This confirms that all Stagehand automation is correctly routed through Bright Data’s Browser API. Awesome!
Step #6: Implement Real-World AI-Powered Remote Browser Automation
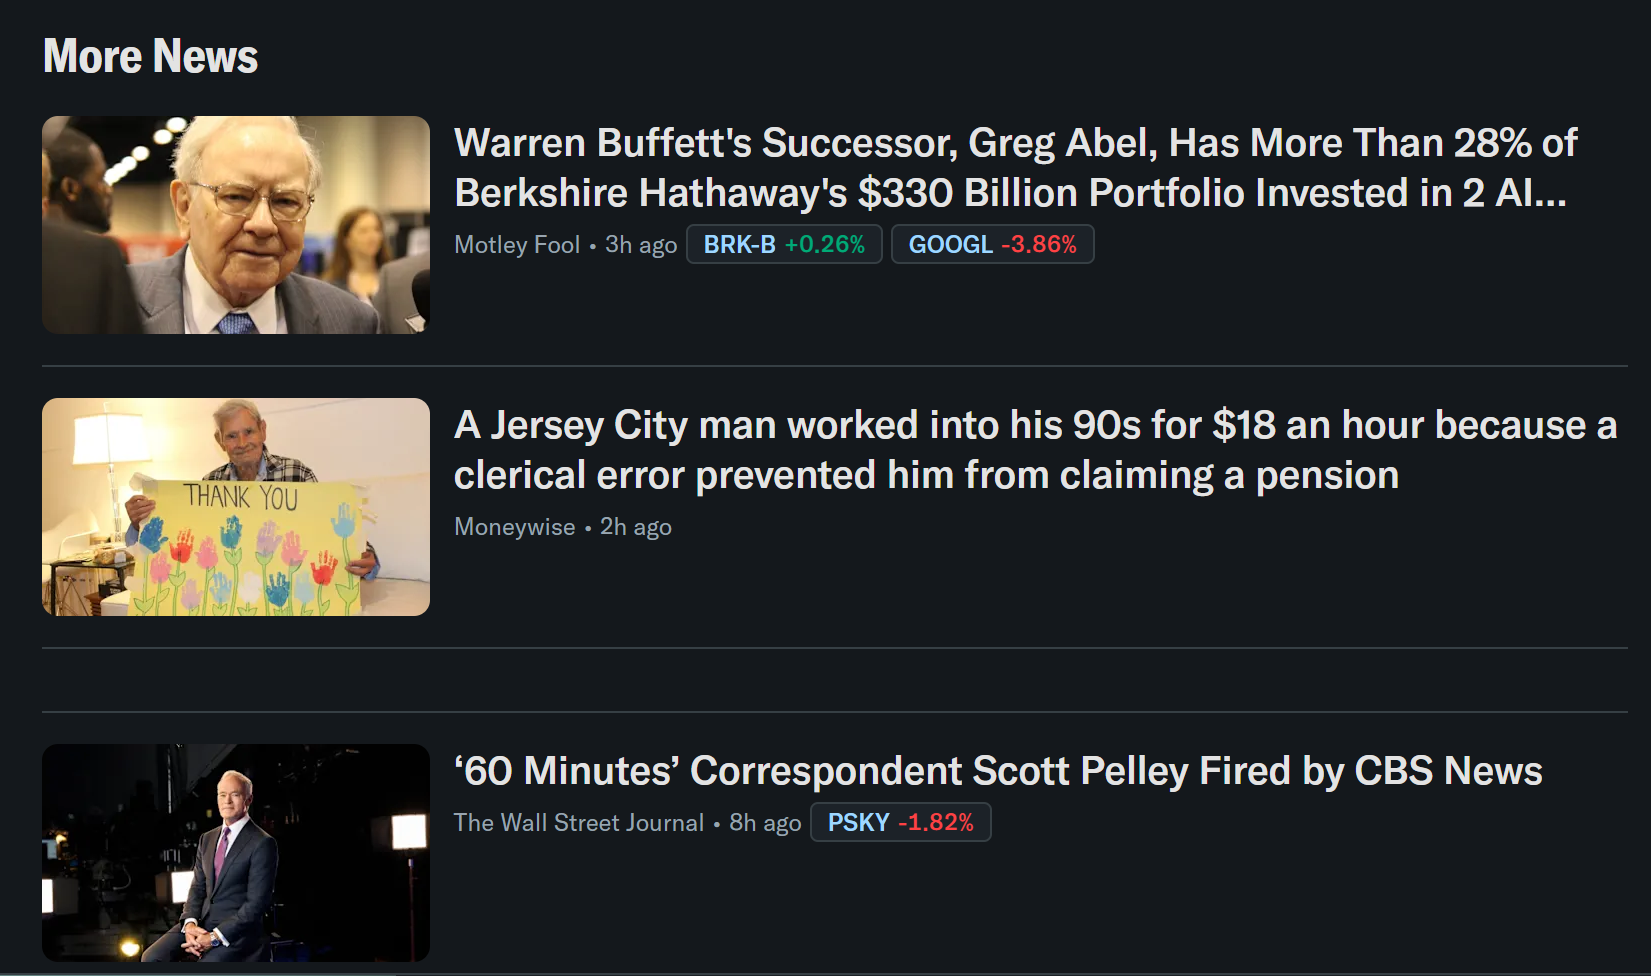
Now, assume you want to automate browser logic to collect news article data from Yahoo Finance.
This is a good example because the Yahoo Finance homepage uses infinite scrolling to load new articles dynamically. It is also a site known for its strict anti-bot and anti-scraping protections.
Thanks to the stealth and anti-bot bypass capabilities provided by Browser API, you can access Yahoo Finance via Stagehand without being blocked.
Since you want the scraped data to follow a specific structure, start by defining an output data type with Zod:
import { z } from "zod";

// ...

// structured output schema
const YahooFinanceNewsSchema = z.object({
  news: z.array(
    z.object({
      title: z
        .string()
        .describe("The visible headline text of the news article"),

      articleUrl: z
        .string()
        .describe("The full article URL"),

      imageUrl: z
        .string()
        .describe("The full image URL"),

      source: z
        .string()
        .optional()
        .describe("The publisher name, such as Reuters or Yahoo Finance"),

      timestamp: z
        .string()
        .optional()
        .describe("The visible publication time, such as '4h ago'"),

      marketMoves: z
        .array(
          z.object({
            ticker: z
              .string()
              .describe("The stock ticker symbol, such as NVDA or ^GSPC"),

            changePercent: z
              .string()
              .optional()
              .describe(
                "The visible market percentage change, such as '+2.4%' or '-0.69%'"
              ),
          })
        )
        .optional()
        .describe(
          "List of stock tickers mentioned in the article footer with their change percentages"
        ),
    })
  ),
});
This defines the expected output structure for the scraped data. In particular, it matches the information available in Yahoo Finance news cards:
If you initialize your Stagehand app via npx create-browser-app, you do not need to manually install zod. It is already included in the project dependencies. Otherwise, install it with:
npm install zod Now, you can automate the browsing and extraction flow with:
// automate the news article loading
await stagehand.act(
  `Scroll down multiple times and wait for articles to load in the "More News" section. Repeat until at least 20 news articles are loaded.`,
  {
    timeout: 90000, // 90-second timeout
  }
);

// scrape the news information
const data = await stagehand.extract(
  `Scrape all visible news articles`,
  YahooFinanceNewsSchema,
  {
    "timeout": 120000, // 120-second timeout
  }
);
This replicates the behavior of a real user scrolling the page to load more articles, but driven by AI instructions. It then uses AI-powered structured extraction to convert the page content into the defined schema.
Notice how the automation script relies on two Stagehand AI-powered APIs:
.act(): Performs actions in the browser session (e.g., scrolling, clicking, navigation).extract(): Extracts structured data from the page using a schema
Fantastic! The next step is to export the scraped data.
Step #7: Extract the Scraped Data
At this point, the scraped data is already stored in the data object returned by stagehand.extract(). The final step is to export it into a news.json file so it can be reused or processed later.
Achieve that using Node.js’s native fs/promises API:
import fs from "fs/promises";

// ...

// save extracted news to a JSON file
await fs.writeFile(
  "news.json",
  JSON.stringify(data.news, null, 2),
  "utf-8"
);
This writes a news.json file containing the structured news data in a clean, readable format.
Mission complete! The Stagehand scraping workflow employing Browser API as a browser AI agent is now fully implemented.
Step #8: Put It All Together
Your final index.ts script for automating Yahoo Finance scraping with Stagehand will look like this:
import { Stagehand } from "@browserbasehq/stagehand";
import dotenv from "dotenv";
import { z } from "zod";
import fs from "fs/promises";

// load the environment variables from the .env file
dotenv.config({
  path: ".env",
});

// read the Bright Data Browser API credentials
const BRIGHT_DATA_BROWSER_API_USERNAME = process.env.BRIGHT_DATA_BROWSER_API_USERNAME || "";
const BRIGHT_DATA_BROWSER_API_PASSWORD = process.env.BRIGHT_DATA_BROWSER_API_PASSWORD || "";

// structured output schema
const YahooFinanceNewsSchema = z.object({
  news: z.array(
    z.object({
      title: z
        .string()
        .describe("The visible headline text of the news article"),

      articleUrl: z
        .string()
        .describe(
          "The full article URL."
        ),

      imageUrl: z
        .string()
        .describe(
          "The full image URL."
        ),

      source: z
        .string()
        .optional()
        .describe("The publisher name, such as Reuters or Yahoo Finance"),

      timestamp: z
        .string()
        .optional()
        .describe("The visible publication time, such as '4h ago'"),

      marketMoves: z
        .array(
          z.object({
            ticker: z
              .string()
              .describe("The stock ticker symbol, such as NVDA or ^GSPC"),

            changePercent: z
              .string()
              .optional()
              .describe(
                "The visible market percentage change, such as '+2.4%' or '-0.69%'"
              ),
          })
        )
        .optional()
        .describe(
          "List of stock tickers mentioned in the article footer with their market change percentages"
        ),
    })
  ),
});

async function main() {
  // configure Stagehand to connect remotely to Bright Data's Browser API
  // and use an OpenAI model
  const stagehand = new Stagehand({
    env: "LOCAL",
    localBrowserLaunchOptions: {
      cdpUrl: `wss://${BRIGHT_DATA_BROWSER_API_USERNAME}:${BRIGHT_DATA_BROWSER_API_PASSWORD}@brd.superproxy.io:9222`,
    },
    model: "openai/gpt-5.4-mini",
    keepAlive: true,
    verbose: 1,
  });

  // launch Stagehand and get the browser page
  await stagehand.init();
  const page = stagehand.context.pages()[0];

  // go to Yahoo Finance
  await page.goto("https://finance.yahoo.com/");

  // automate the news article loading
  await stagehand.act(
    `Scroll down multiple times and wait for articles to load in the "More News" section. Repeat until at least 20 news articles are loaded.`,
    {
      timeout: 90000, // 90-second timeout
    }
  );

  // scrape the news information
  const data = await stagehand.extract(
    `Scrape all visible news articles`,
    YahooFinanceNewsSchema,
    {
      "timeout": 120000, // 120-second timeout
    }
  );

  // save extracted news to a JSON file
  await fs.writeFile(
    "news.json",
    JSON.stringify(data.news, null, 2),
    "utf-8"
  );
  console.log("News exported to news.json");

  // close the Stagehand instance and release the browser resources
  await stagehand.close();
}

main().catch(console.error);
Then, the .env file will store:
OPENAI_API_KEY="<YOUR_OPENAI_API_KEY>"
BRIGHT_DATA_BROWSER_API_USERNAME="<BROWSER_API_USERNAME>"
BRIGHT_DATA_BROWSER_API_PASSWORD="<BROWSER_API_PASSWORD>"
Launch the script with:
npm run startOnce the script finishes running, a news.json file will appear in your project folder. If you open it, you should see structured data like this:
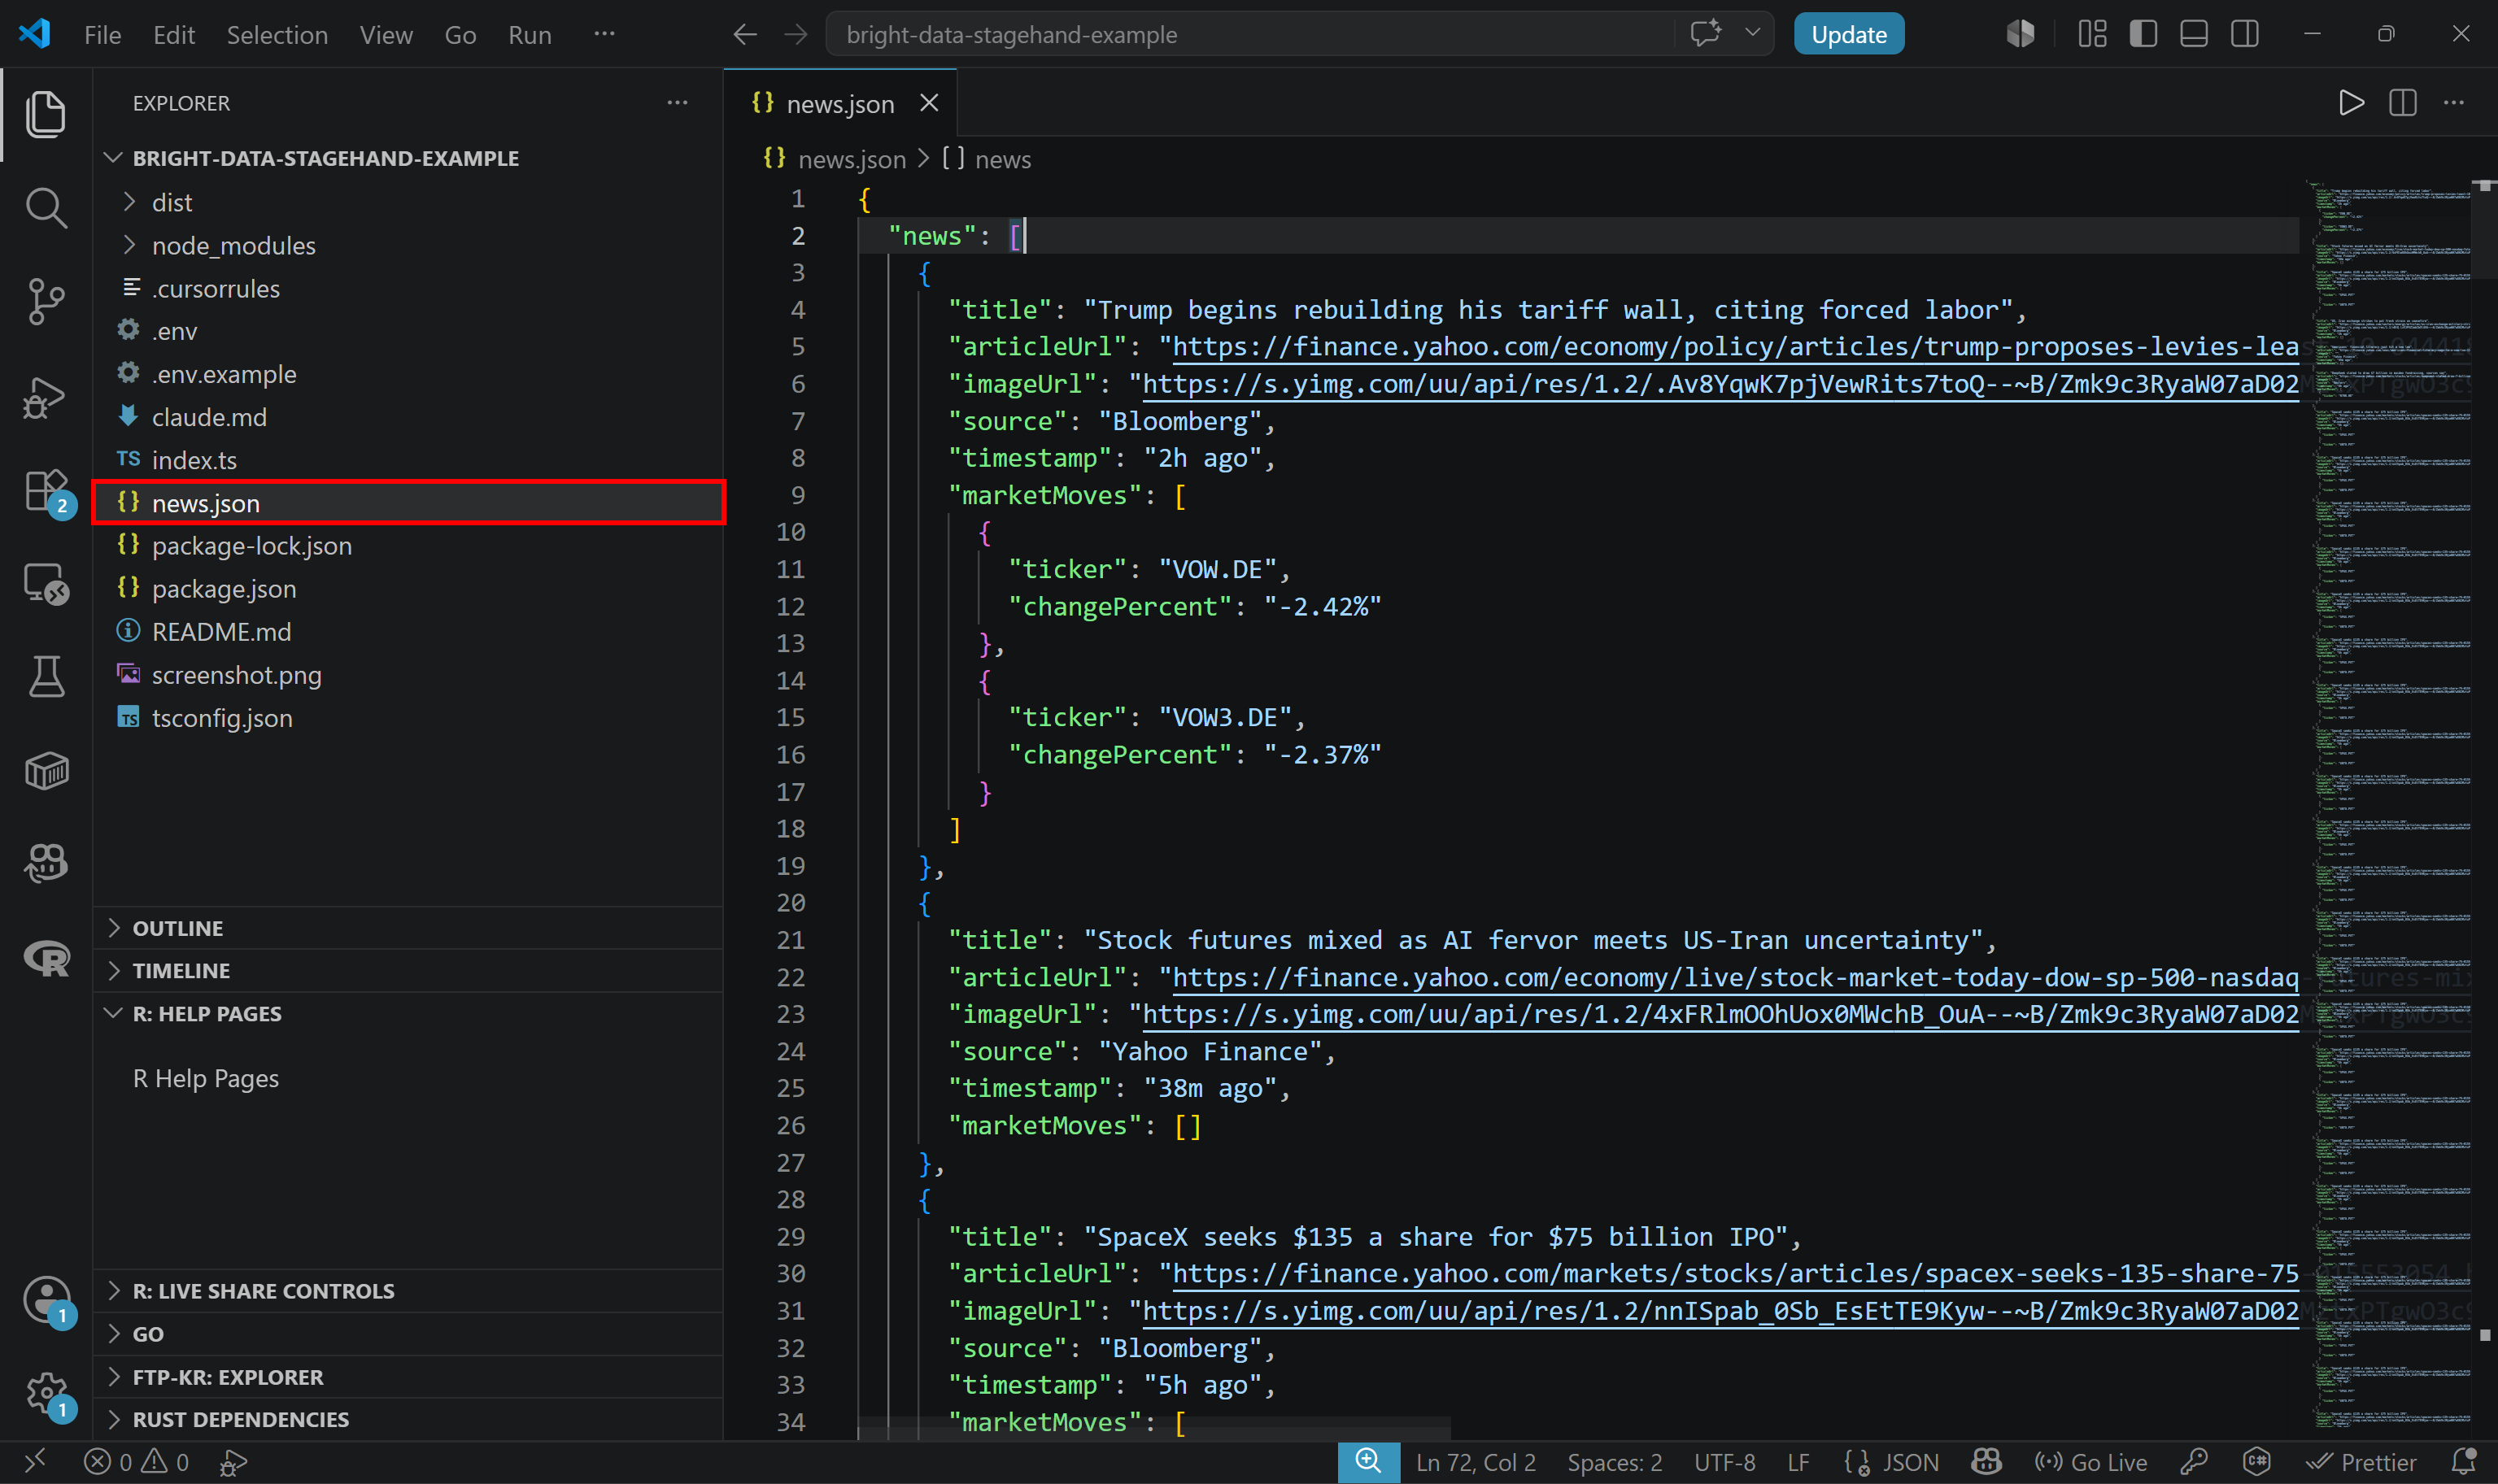
Notice how the file contains the same articles that appear on the Yahoo Finance homepage after scrolling multiple times, but now in a clean, structured format.
That proves how Browser API can access dynamic content and extract data at scale, even from a site with anti-bot protections.
Et voilà! This was just one example, but you can use Stagehand to automate Bright Data Browser API workflows across many other scenarios and use cases.
Conclusion
In this article, you learned what Stagehand is and how it supports browser automation. Specifically, you saw how to use it with Bright Data’s Browser API to run highly scalable, undetected cloud browser sessions.
The result is a browser automation setup that can scale to enterprise-level workloads. With the same integration, you can also implement agentic browser AI operations backed by large-scale cloud infrastructure.
Create a new Bright Data account and explore our AI-ready web data scraping and browser automation solutions!

Technical Writer
Antonello Zanini is a technical writer, editor, and software engineer with 5M+ views. Expert in technical content strategy, web development, and project management.


