
In this blog post, you will see:
- What Warp is and why it has become a favorite terminal for over 500,000 developers seeking AI-powered coding assistance.
- How extending it with web interaction and data extraction makes it far more effective.
- How to connect the Warp CLI with the Bright Data Web MCP server to create an enhanced AI coding agent.
Let’s dive in!
What Is Warp?
Warp is a modern, AI-powered terminal built from the ground up in Rust. Unlike traditional terminals, Warp reimagines the command-line experience with an IDE-like interface, intelligent autocompletion, and built-in AI agents that understand natural language.
With over 500,000 engineers using Warp daily, it has quickly become a go-to tool for developers who want a smarter, faster terminal.
Here is what makes Warp special:
- Native AI agents: Warp Agent understands natural language commands, helping you write scripts, debug issues, and automate workflows without memorizing complex CLI syntax.
- Modern text editing: Unlike legacy terminals, Warp lets you edit commands like you would in VS Code, with multi-cursor support, selections, and syntax highlighting.
- Blocks: Commands and their outputs are grouped into “blocks,” making it easy to navigate, copy, and share terminal sessions.
- Warp Drive: Save and share commonly used commands, workflows, and scripts across your team with Warp Drive.
- Cross-platform: Warp runs on macOS, Linux, and Windows, so your workflow stays consistent regardless of your operating system.
- MCP support: Warp natively supports the Model Context Protocol (MCP), allowing you to extend its AI capabilities with external tools and data sources.
This last point is especially important. Warp’s native MCP support means you can plug in powerful data sources and let the AI agent use them directly from your terminal.
Overcoming the LLM Knowledge Gap in Warp with the Web MCP
Like all LLMs, the AI models powering Warp have a knowledge cutoff. They are trained on a fixed dataset representing a snapshot of the past. That means they do not know about recent events, newly released libraries, updated documentation, or the latest best practices.
This limitation is significant in the fast-paced world of software development. Without access to fresh information, an AI assistant might suggest deprecated APIs, outdated syntax, or simply be unaware of new tools and frameworks that could solve your problem more elegantly.
But what if Warp’s AI agent could search the web for the latest documentation, scrape real-time data from websites, and use that information to give you accurate, up-to-date assistance?
That is exactly what you get with Bright Data’s Web MCP server. This open-source server (now with a free tier!) provides 60+ AI-ready tools for web interaction and data collection.
Bright Data Web MCP Integration
Here are two of the core tools available on the Web MCP server:
search_engine: Connects to SERP API to perform searches on Google, Bing, or Yandex and returns search engine results in HTML or Markdown format.scrape_as_markdown: Utilizes Web Unlocker to scrape the content of any web page. It bypasses bot detection systems and solves CAPTCHAs automatically.
Beyond these, there are 55+ specialized tools for browser automation (like scraping_browser_click, scraping_browser_type, scraping_browser_screenshot) and structured data feeds from domains including Amazon, LinkedIn, Instagram, YouTube, and Zillow. For example, the web_data_amazon_product tool pulls detailed, structured product information directly from Amazon using just a product URL.
With Bright Data’s Web MCP connected to Warp, you can:
- Fetch the latest documentation for any library or framework, ensuring the AI suggests current, non-deprecated code.
- Scrape real-time data from websites and save it to local files for analysis, testing, or mocking.
- Monitor prices, reviews, or inventory from e-commerce sites directly from your terminal.
- Research competitors, collect social media data, or gather market intelligence without leaving the command line.
How to Connect Warp to Bright Data’s Web MCP
Prerequisites
Before getting started, make sure you have the following:
- Node.js installed locally (the latest LTS version is recommended).
- Warp installed on your system (available for macOS, Linux, and Windows).
- A Bright Data account with an API key ready (do not worry, you will be guided through creating one if you do not have it yet).
Also, optional but helpful background knowledge is:
- A general understanding of how MCP works.
- Some familiarity with the Bright Data Web MCP server and its tools.
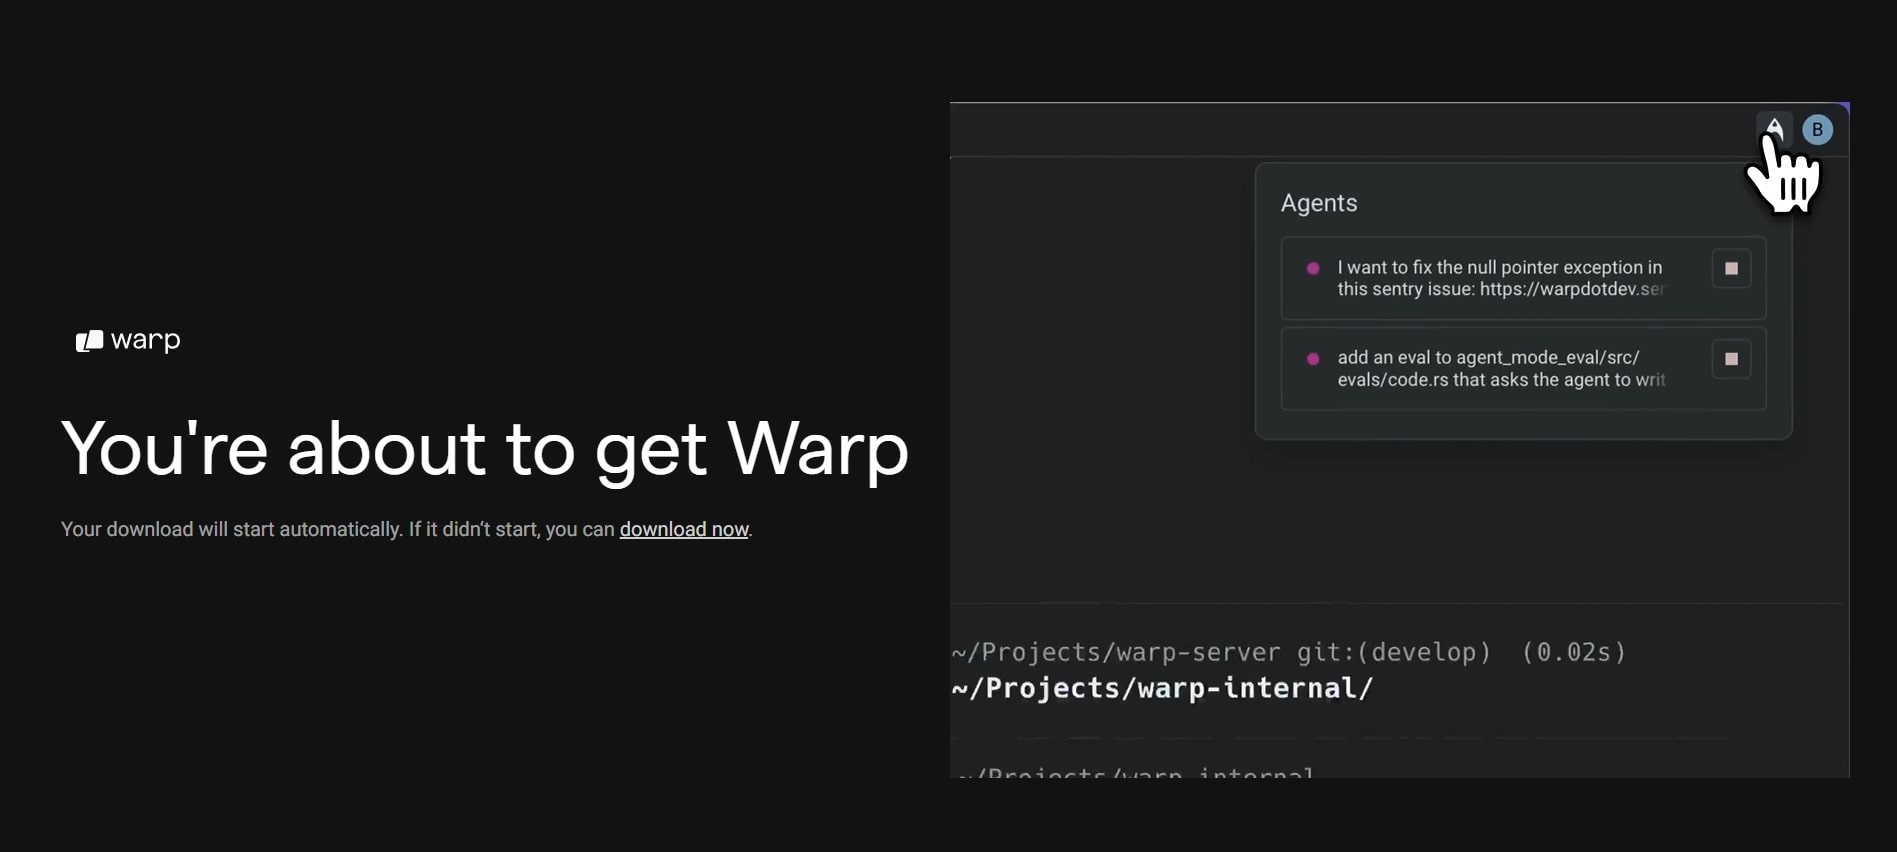
Step #1: Install Warp
If you do not already have Warp installed, head to warp.dev and download the version for your operating system.
On macOS:
Download the .dmg file from the website and drag Warp to your Applications folder. Alternatively, if you use Homebrew:
brew install --cask warpOn Linux:
Follow the official installation guide for your distribution. Warp is available for Ubuntu, Fedora, Arch, and other major distributions.
On Windows:
Download and run the Windows installer from the Warp website, or install via winget:
winget install Warp.WarpOnce installed, launch Warp and complete the initial setup (you can sign in or continue as a guest).
Step #2: Get Your Bright Data API Key
If you do not already have a Bright Data account, create one for free. Otherwise, just log in to your existing account.
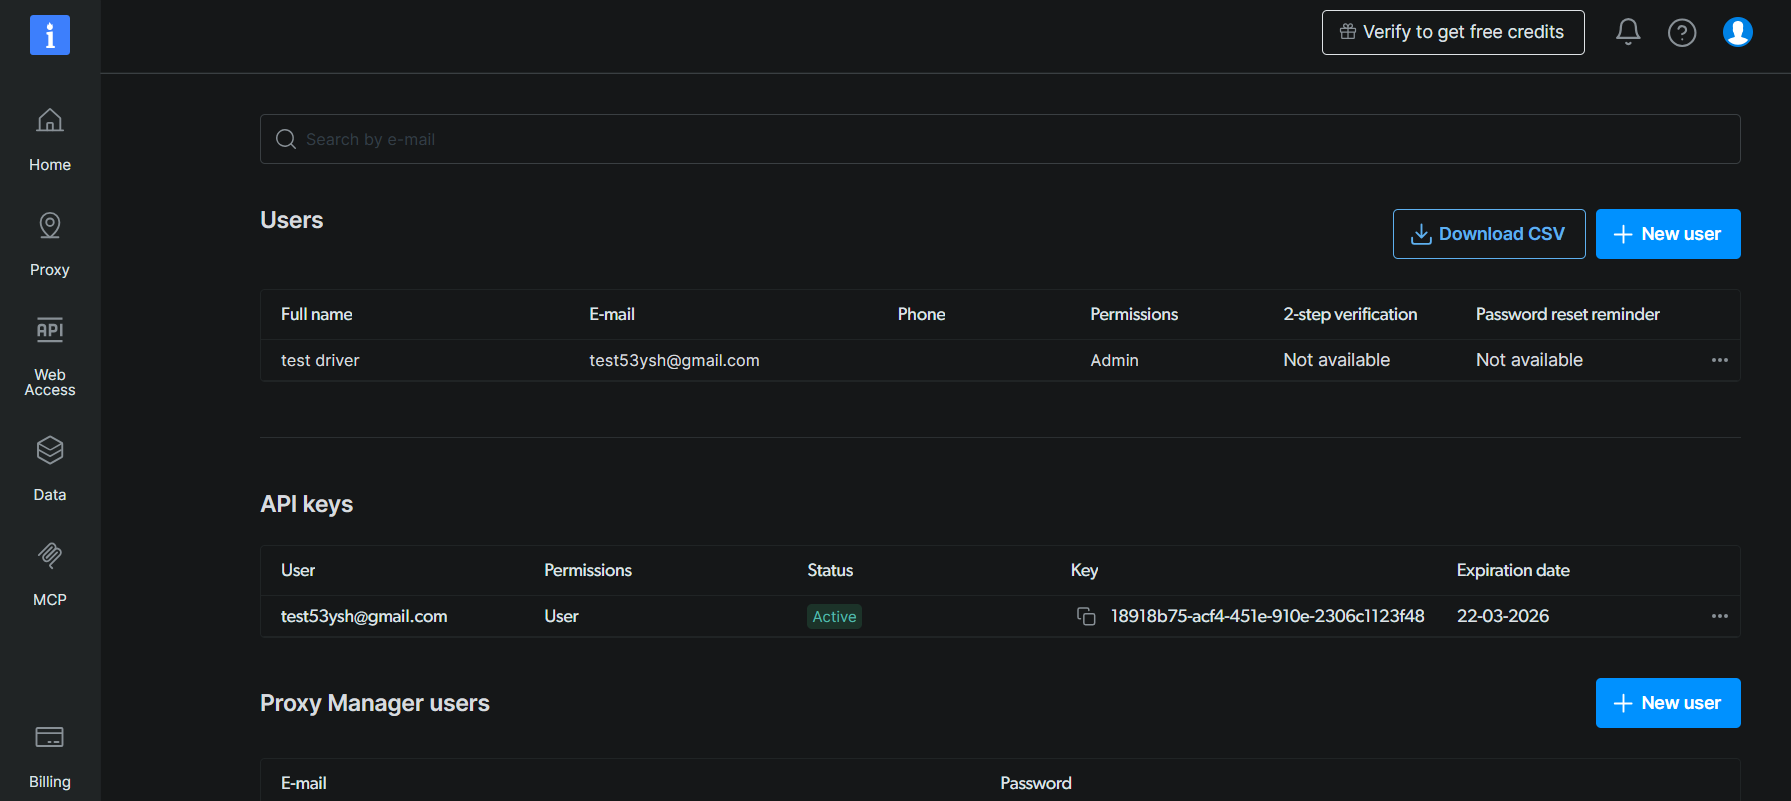
Next, follow the official instructions to generate your Bright Data API key:
- Navigate to Account Settings in your Bright Data Control Panel.
- Click Add API key.
- Set the permissions (Admin is recommended for full access).
- Click Save.
Your API key will be displayed once. Copy it and store it somewhere safe, as you will need it in the next steps.
Step #3: Test the Web MCP Server Locally
Before configuring Warp, let’s verify that the Bright Data Web MCP server works on your machine.
First, ensure you have Node.js installed by running:
node --versionYou should see a version number like v20.x.x or higher.
Now, test the MCP server with this command:
On Bash (macOS/Linux):
API_TOKEN="<YOUR_BRIGHT_DATA_API_KEY>" npx -y @brightdata/mcpOn PowerShell (Windows):
$Env:API_TOKEN="<YOUR_BRIGHT_DATA_API_KEY>"; npx -y @brightdata/mcpReplace <YOUR_BRIGHT_DATA_API_KEY> with the API key you generated earlier. The command sets the required API_TOKEN environment variable and starts the MCP server via the @brightdata/mcp npm package.
If everything works correctly, you should see output like this:
On the first launch, the MCP server automatically creates two zones in your Bright Data account:
mcp_unlocker: A zone for Web Unlocker.mcp_browser: A zone for Browser API.
To confirm they were created, log in to your Bright Data dashboard and navigate to the “Proxies & Scraping Infrastructure” page. You should see the two zones listed there.
Note: If your API token does not have Admin permissions, these zones may not be created automatically. In that case, you can set them up manually and specify their names using environment variables, as described in the official documentation.
Important: By default, the MCP server runs in Rapid Mode with 4 tools (search_engine, search_engine_batch, scrape_as_markdown, scrape_batch). To unlock all 60+ tools including browser automation and structured data feeds, enable Pro Mode by setting PRO_MODE=true:
API_TOKEN="<YOUR_BRIGHT_DATA_API_KEY>" PRO_MODE="true" npx -y @brightdata/mcpWith Pro Mode enabled, you will see:
[Bright Data MCP] Server started successfully
[Bright Data MCP] Available tools: 60+ (Pro Mode)
Note: The additional tools in Pro Mode are not included in the free tier and will incur usage charges.
Stop the server with Ctrl+C. We are now ready to configure Warp.
Step #4: Configure the Web MCP in Warp
Warp provides a built-in interface for configuring MCP servers. Here is how to add Bright Data’s Web MCP:
- Open Warp.
- Open the Command Palette with
Cmd+P(macOS) orCtrl+P(Windows/Linux). - Type “MCP” and select Open MCP Servers.
Alternatively, navigate to Settings (gear icon) > AI > Manage MCP servers.
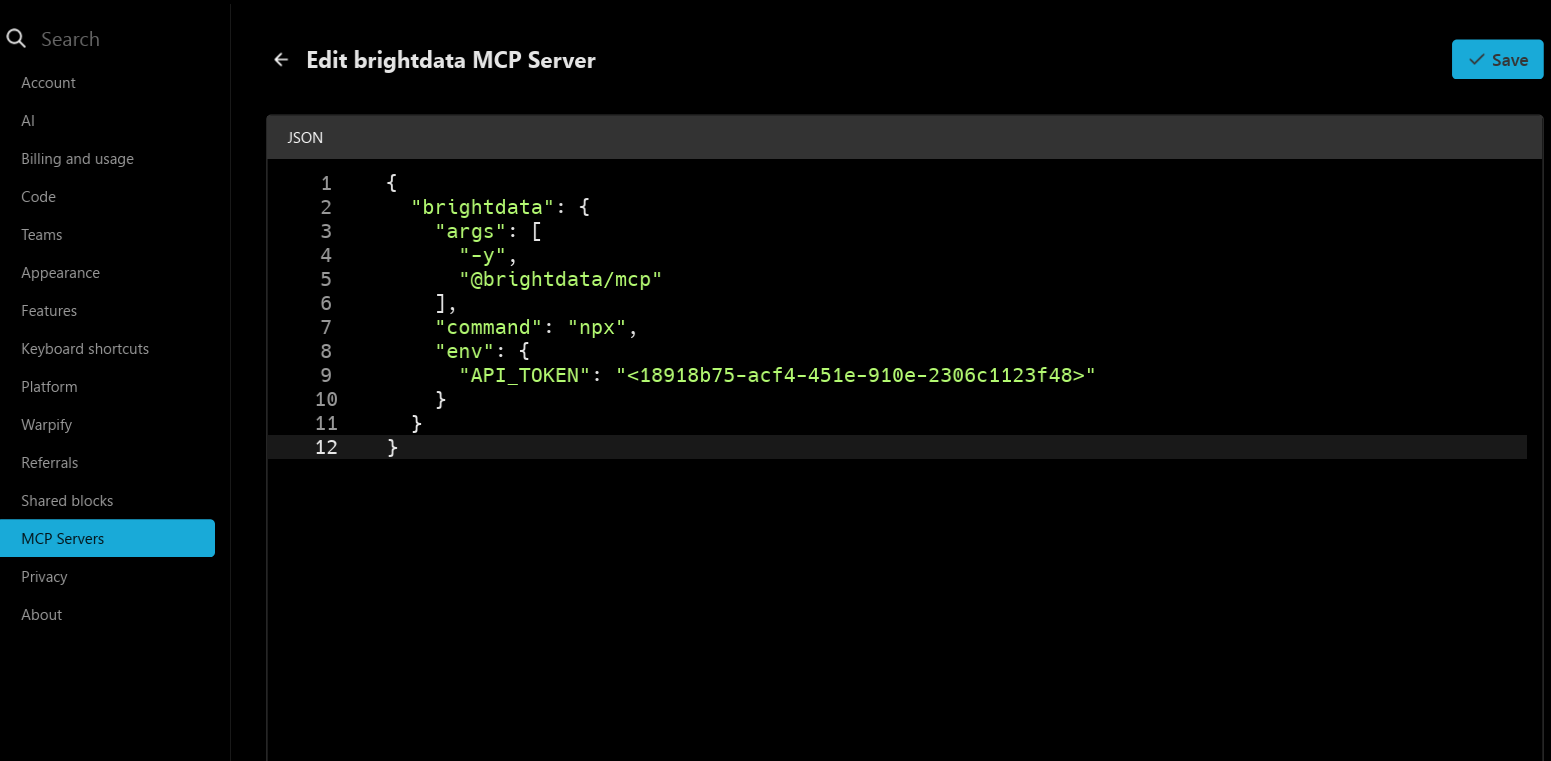
In the MCP configuration panel, add the following JSON configuration:
{
  "brightdata": {
    "command": "npx",
    "args": ["-y", "@brightdata/mcp"],
    "env": {
      "API_TOKEN": "<YOUR_BRIGHT_DATA_API_KEY>"
    }
  }
}
Replace <YOUR_BRIGHT_DATA_API_KEY> with your actual Bright Data API key.
For Pro Mode (60+ tools):
{
  "brightdata": {
    "command": "npx",
    "args": ["-y", "@brightdata/mcp"],
    "env": {
      "API_TOKEN": "<YOUR_BRIGHT_DATA_API_KEY>",
      "PRO_MODE": "true"
    }
  }
}
Optional settings:
- Add
"start_on_launch": trueto automatically start the MCP server when Warp launches. - Specify custom zone names with
WEB_UNLOCKER_ZONEandBROWSER_ZONEif you created zones manually.
Save the configuration.
Step #5: Verify the MCP Connection
After saving the configuration, Warp will attempt to connect to the Bright Data MCP server.
To verify the connection:
- Open a new Warp terminal session.
- Look for the MCP indicator in the AI panel. You should see “brightdata” listed as an available MCP server.

- If using Pro Mode, you will see 55+ tools available. In Rapid Mode, you will see only 4 tools.

You can also check the connection by running a simple prompt with the AI agent. Press Ctrl+Shift+A (or Cmd+Shift+A on macOS) to open the AI panel and type:
What MCP tools do you have available?The AI should respond with a list that includes Bright Data tools like search_engine and scrape_as_markdown.

Terrific! Warp is now connected to Bright Data’s Web MCP server.
Step #6: Run Your First Web-Enabled Task
Now let’s put the integration to the test. We will ask Warp’s AI agent to:
- Scrape product data from an Amazon page.
- Save the data to a local JSON file.
- Create a Node.js script to read and display that data.
Open the Warp AI panel (Ctrl+Shift+A or Cmd+Shift+A) and enter this prompt:
Scrape data from "https://www.amazon.com/Microfiber-Cleaning-Cloth-Performance-Washes/dp/B08BRJHJF9/", save it to a local "product.json" file, and create a Node.js "script.js" file to load and print the product details in the terminal.Here is what happens step by step:
- Warp’s AI identifies that the
web_data_amazon_producttool (in Pro Mode) orscrape_as_markdowntool (in Rapid Mode) is needed and asks for your approval. - Once approved, the scraping task runs via the MCP integration.
- The scraped product data is displayed in the terminal.
- The AI creates a
product.jsonfile with the structured data. - The AI generates a
script.jsfile that loads and prints the JSON contents. - Optionally, the AI may offer to run the script to verify it works.
After the task completes, your working directory should contain a product.json and script.js files.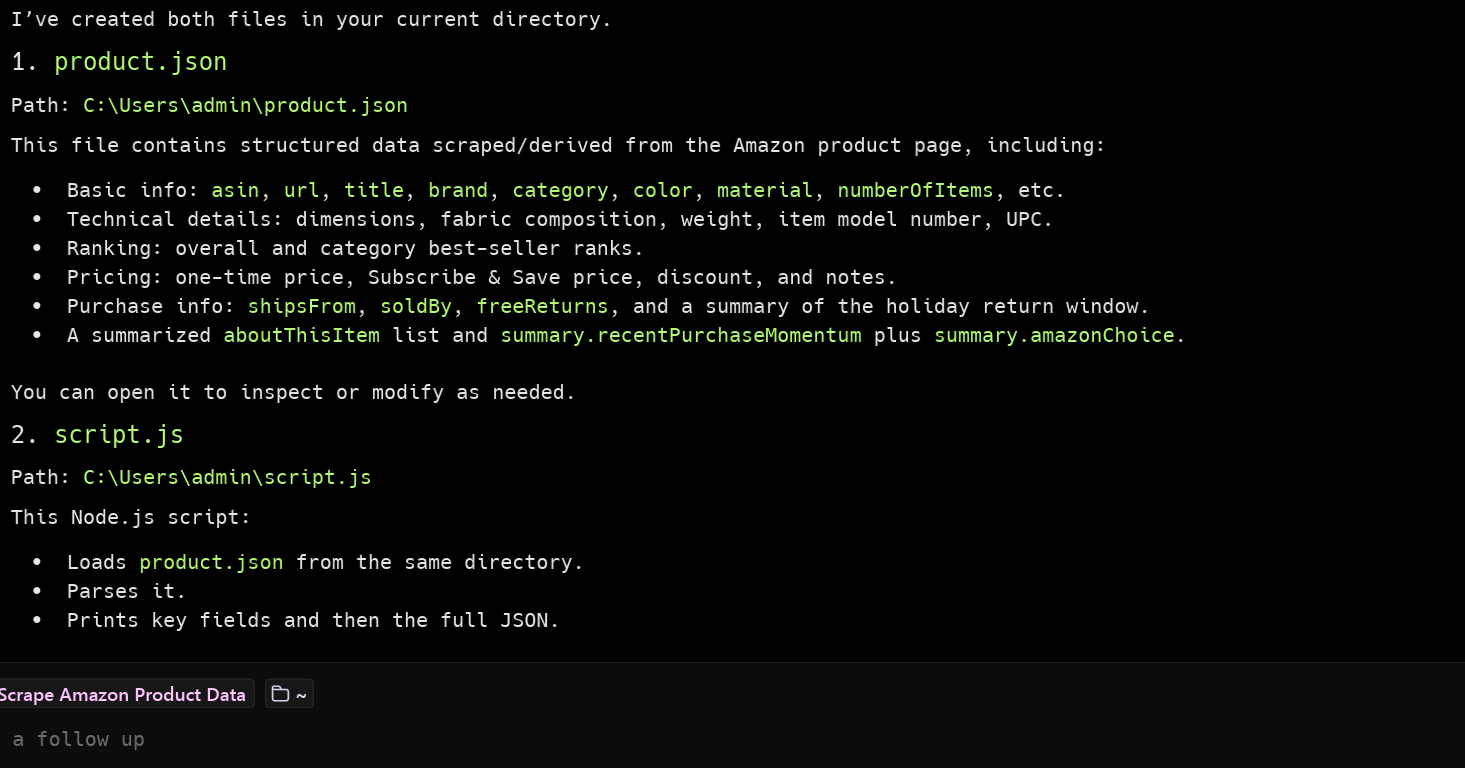
The product.json will contain the scraped information, while the script.js file will contain something like:
const fs = require('fs');

const data = JSON.parse(fs.readFileSync('product.json', 'utf8'));

console.log('Product Details:');
console.log('================');
console.log(`Title: ${data.title}`);
console.log(`Price: ${data.price}`);
console.log(`Rating: ${data.rating}`);
console.log(`Reviews: ${data.reviews_count}`);
console.log(`Availability: ${data.availability}`);
console.log('\nFeatures:');
data.features.forEach((feature, index) => {
  console.log(`  ${index + 1}. ${feature}`);
});
Run the script to verify everything works:
node script.jsYou should see the product details printed in your terminal:
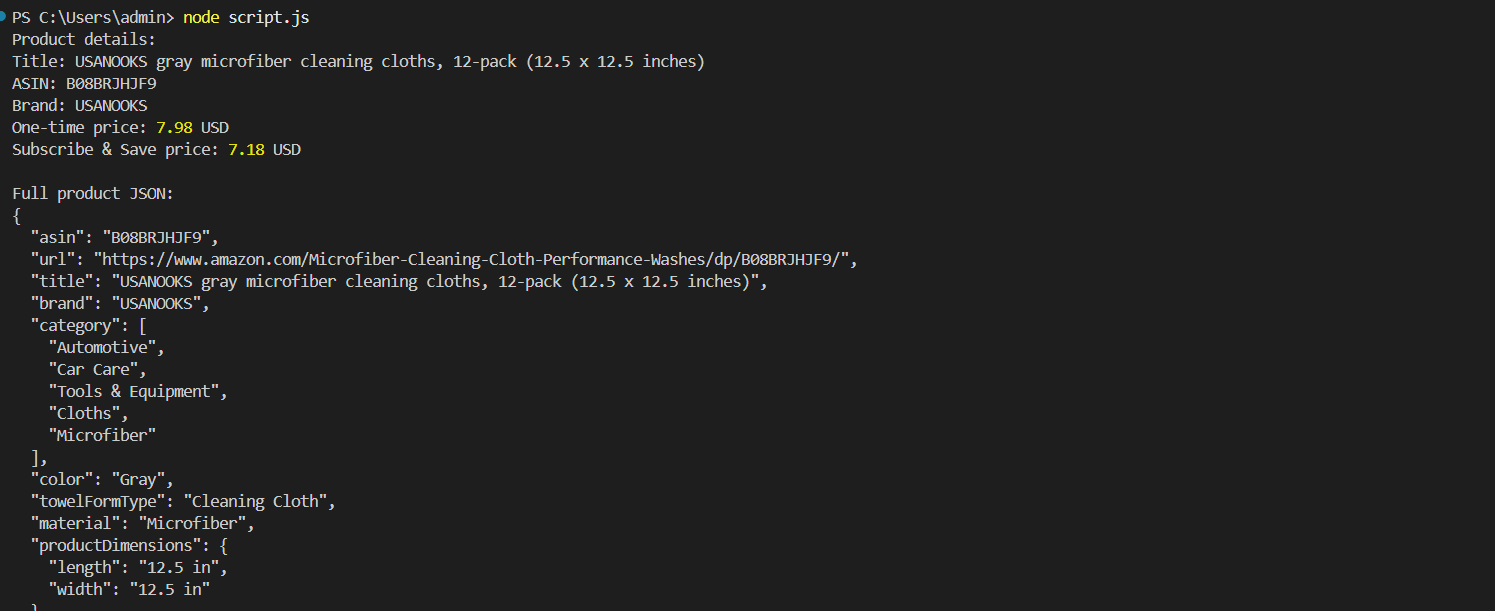
Et voilà! The workflow succeeded.
The data in product.json is real, scraped product information, not hallucinated content from the AI. This is crucial because scraping Amazon is notoriously difficult due to its advanced anti-bot protections. A regular LLM alone could not retrieve this data. The combination of Warp’s AI agent and Bright Data’s Web MCP makes it possible.
Conclusion
In this tutorial, you learned how to connect Warp with Bright Data’s Web MCP (which now offers a free tier!). The result is a powerful CLI coding agent capable of accessing and interacting with the web in real time. This integration is made possible thanks to Warp’s native support for MCP servers.
The example task in this guide was intentionally straightforward, but do not forget that with this integration, you can tackle much more complex use cases. Bright Data’s Web MCP tools support a wide variety of agentic scenarios, from automated research to competitive intelligence to real-time data monitoring.
To build more advanced agents, explore the full range of services available in the Bright Data AI infrastructure.
Sign up for a free Bright Data account and start experimenting with AI-ready web tools today!

Technical Writer
Amitesh Anand is a developer advocate and technical writer sharing content on AI, software, and devtools, with 10k followers and 400k+ views.


