
In this blog post, you will learn:
- What Pi is and what it brings to the table as a CLI agent solution.
- Why extending it with web access tools makes it significantly more powerful.
- How to enable these capabilities in Pi Agent using Bright Data Web MCP integration.
Let’s dive in!
What Is Pi?
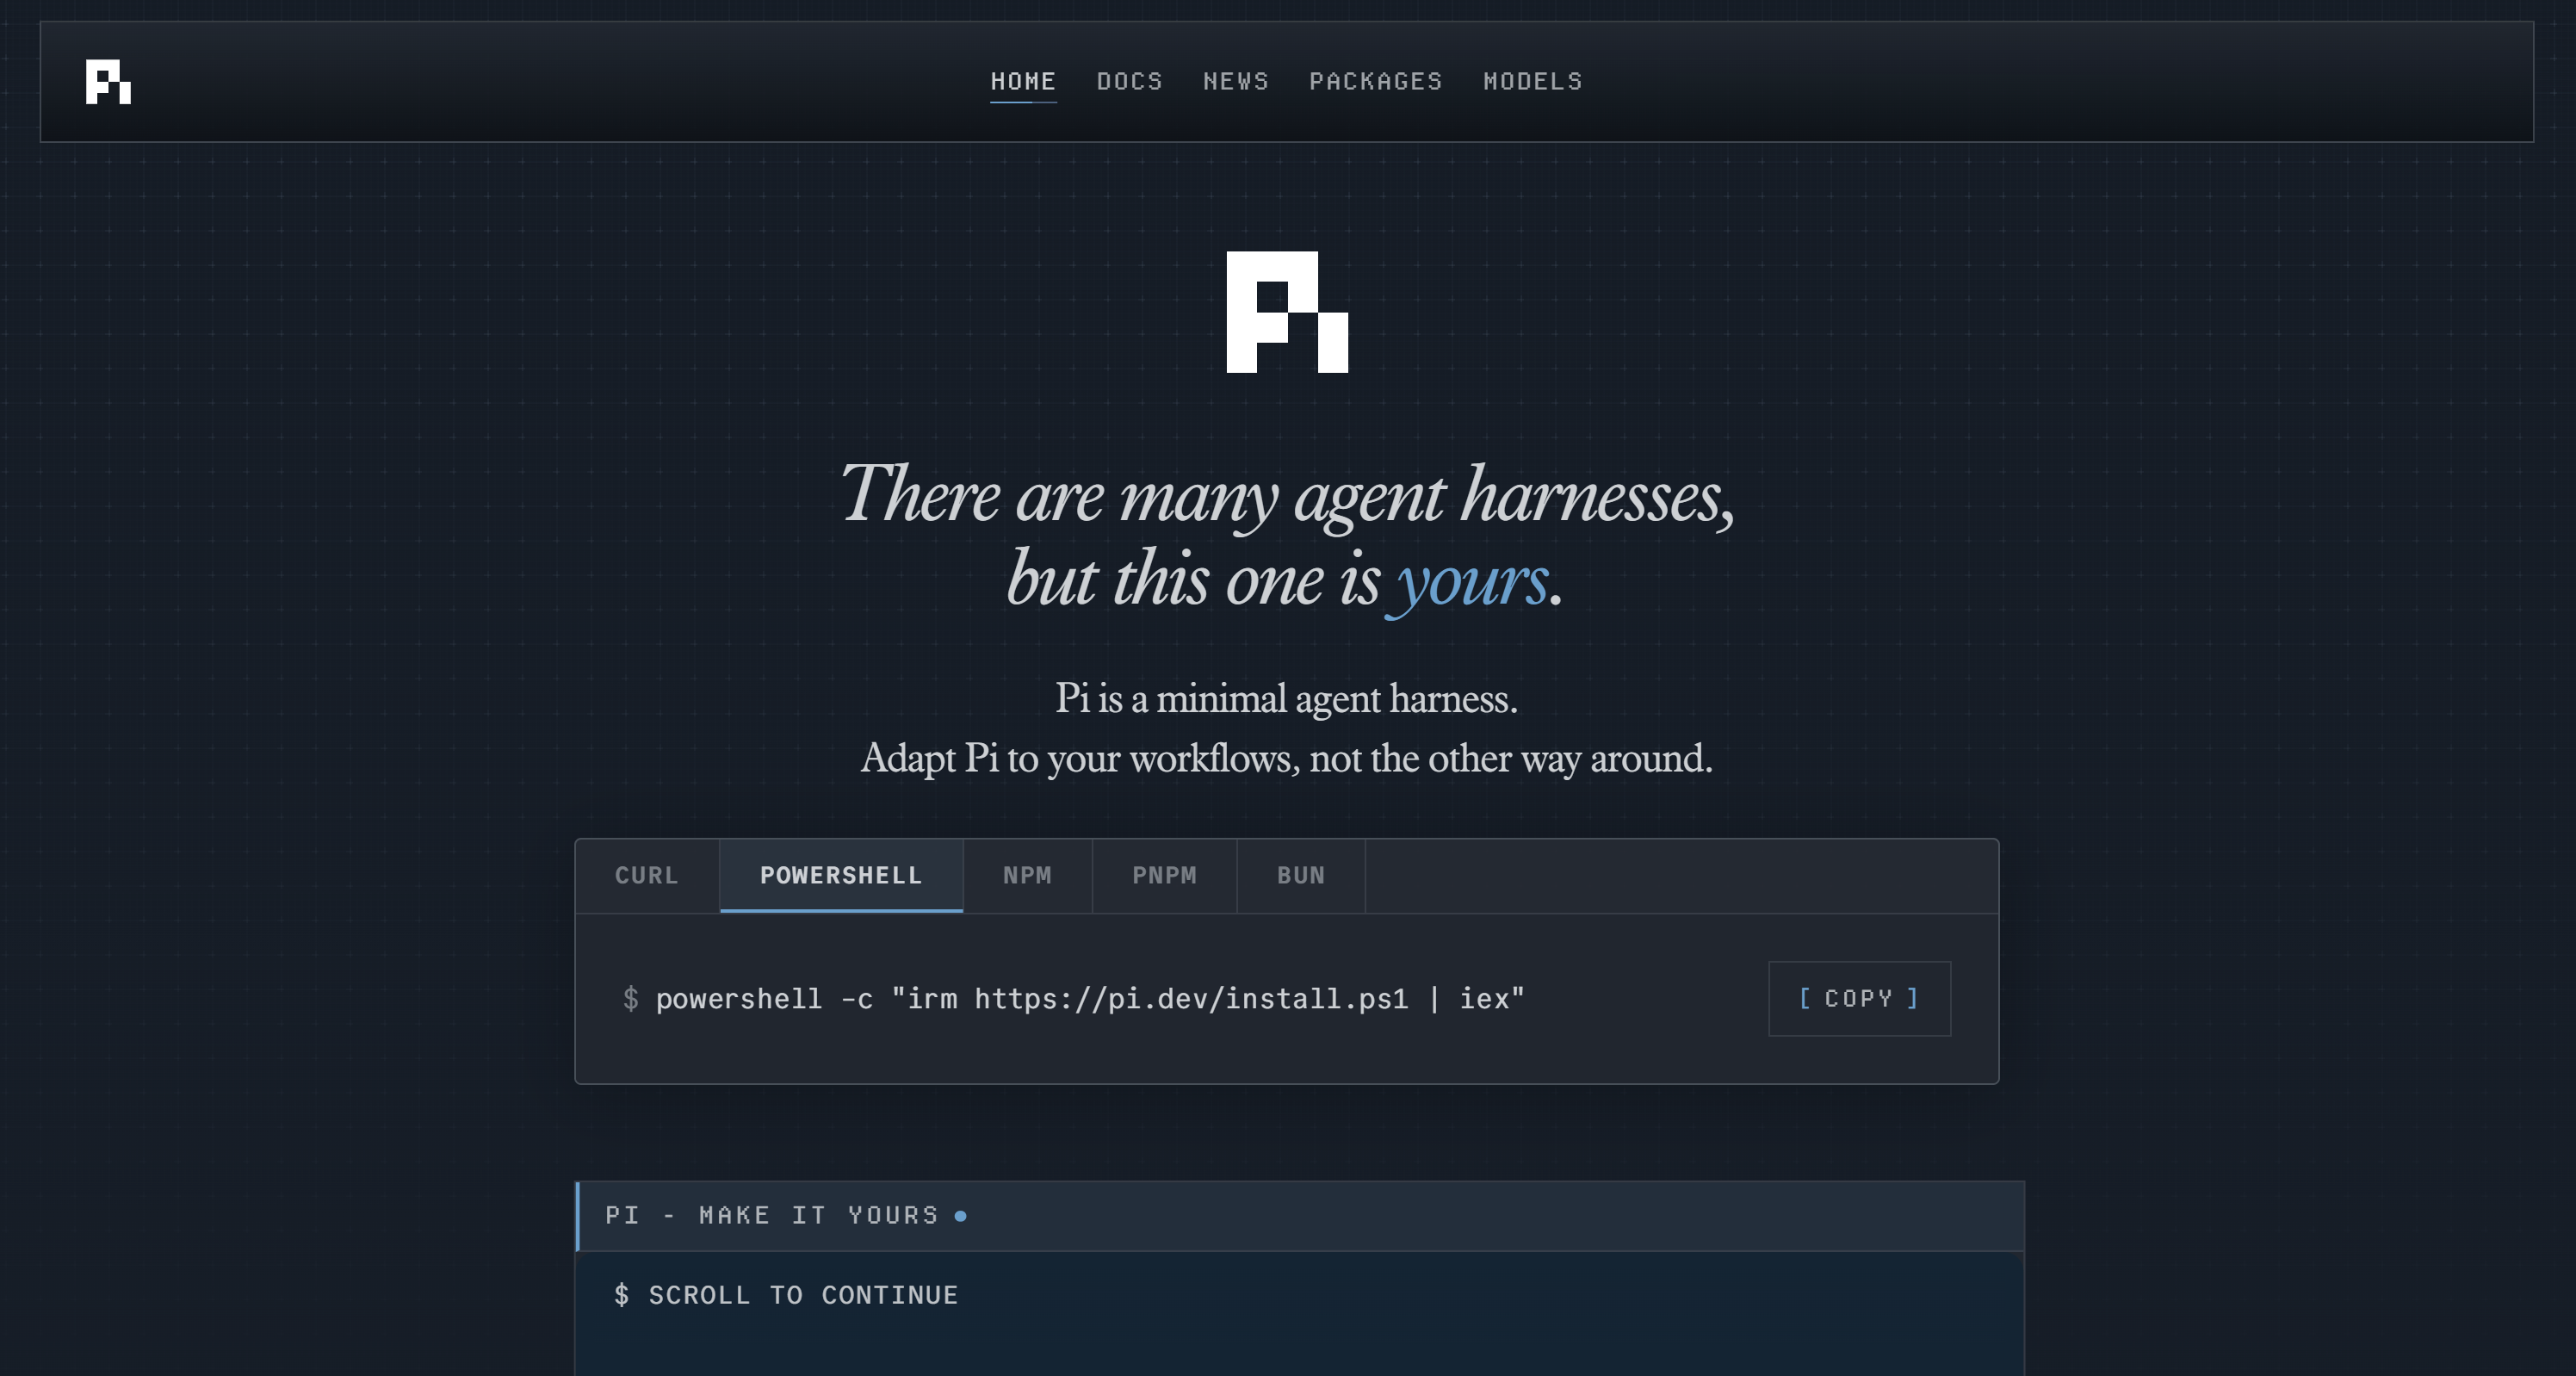
Pi, also known as Pi Agent or Pi Coding Agent, is an extensible CLI agent. Its goal is to help you run AI-driven coding workflows directly in the terminal.
Unlike other CLI agents that lock you into fixed features like planning modes or sub-agents, Pi stays lightweight at its core. Instead, it lets you extend everything through TypeScript extensions, skills, prompt templates, and plugins.
What makes Pi special is its flexibility, as you can shape its behavior, tools, and even UI. It supports multiple LLM providers, session trees, and customization primitives that make it closer to a programmable agent runtime than a fixed CLI assistant.
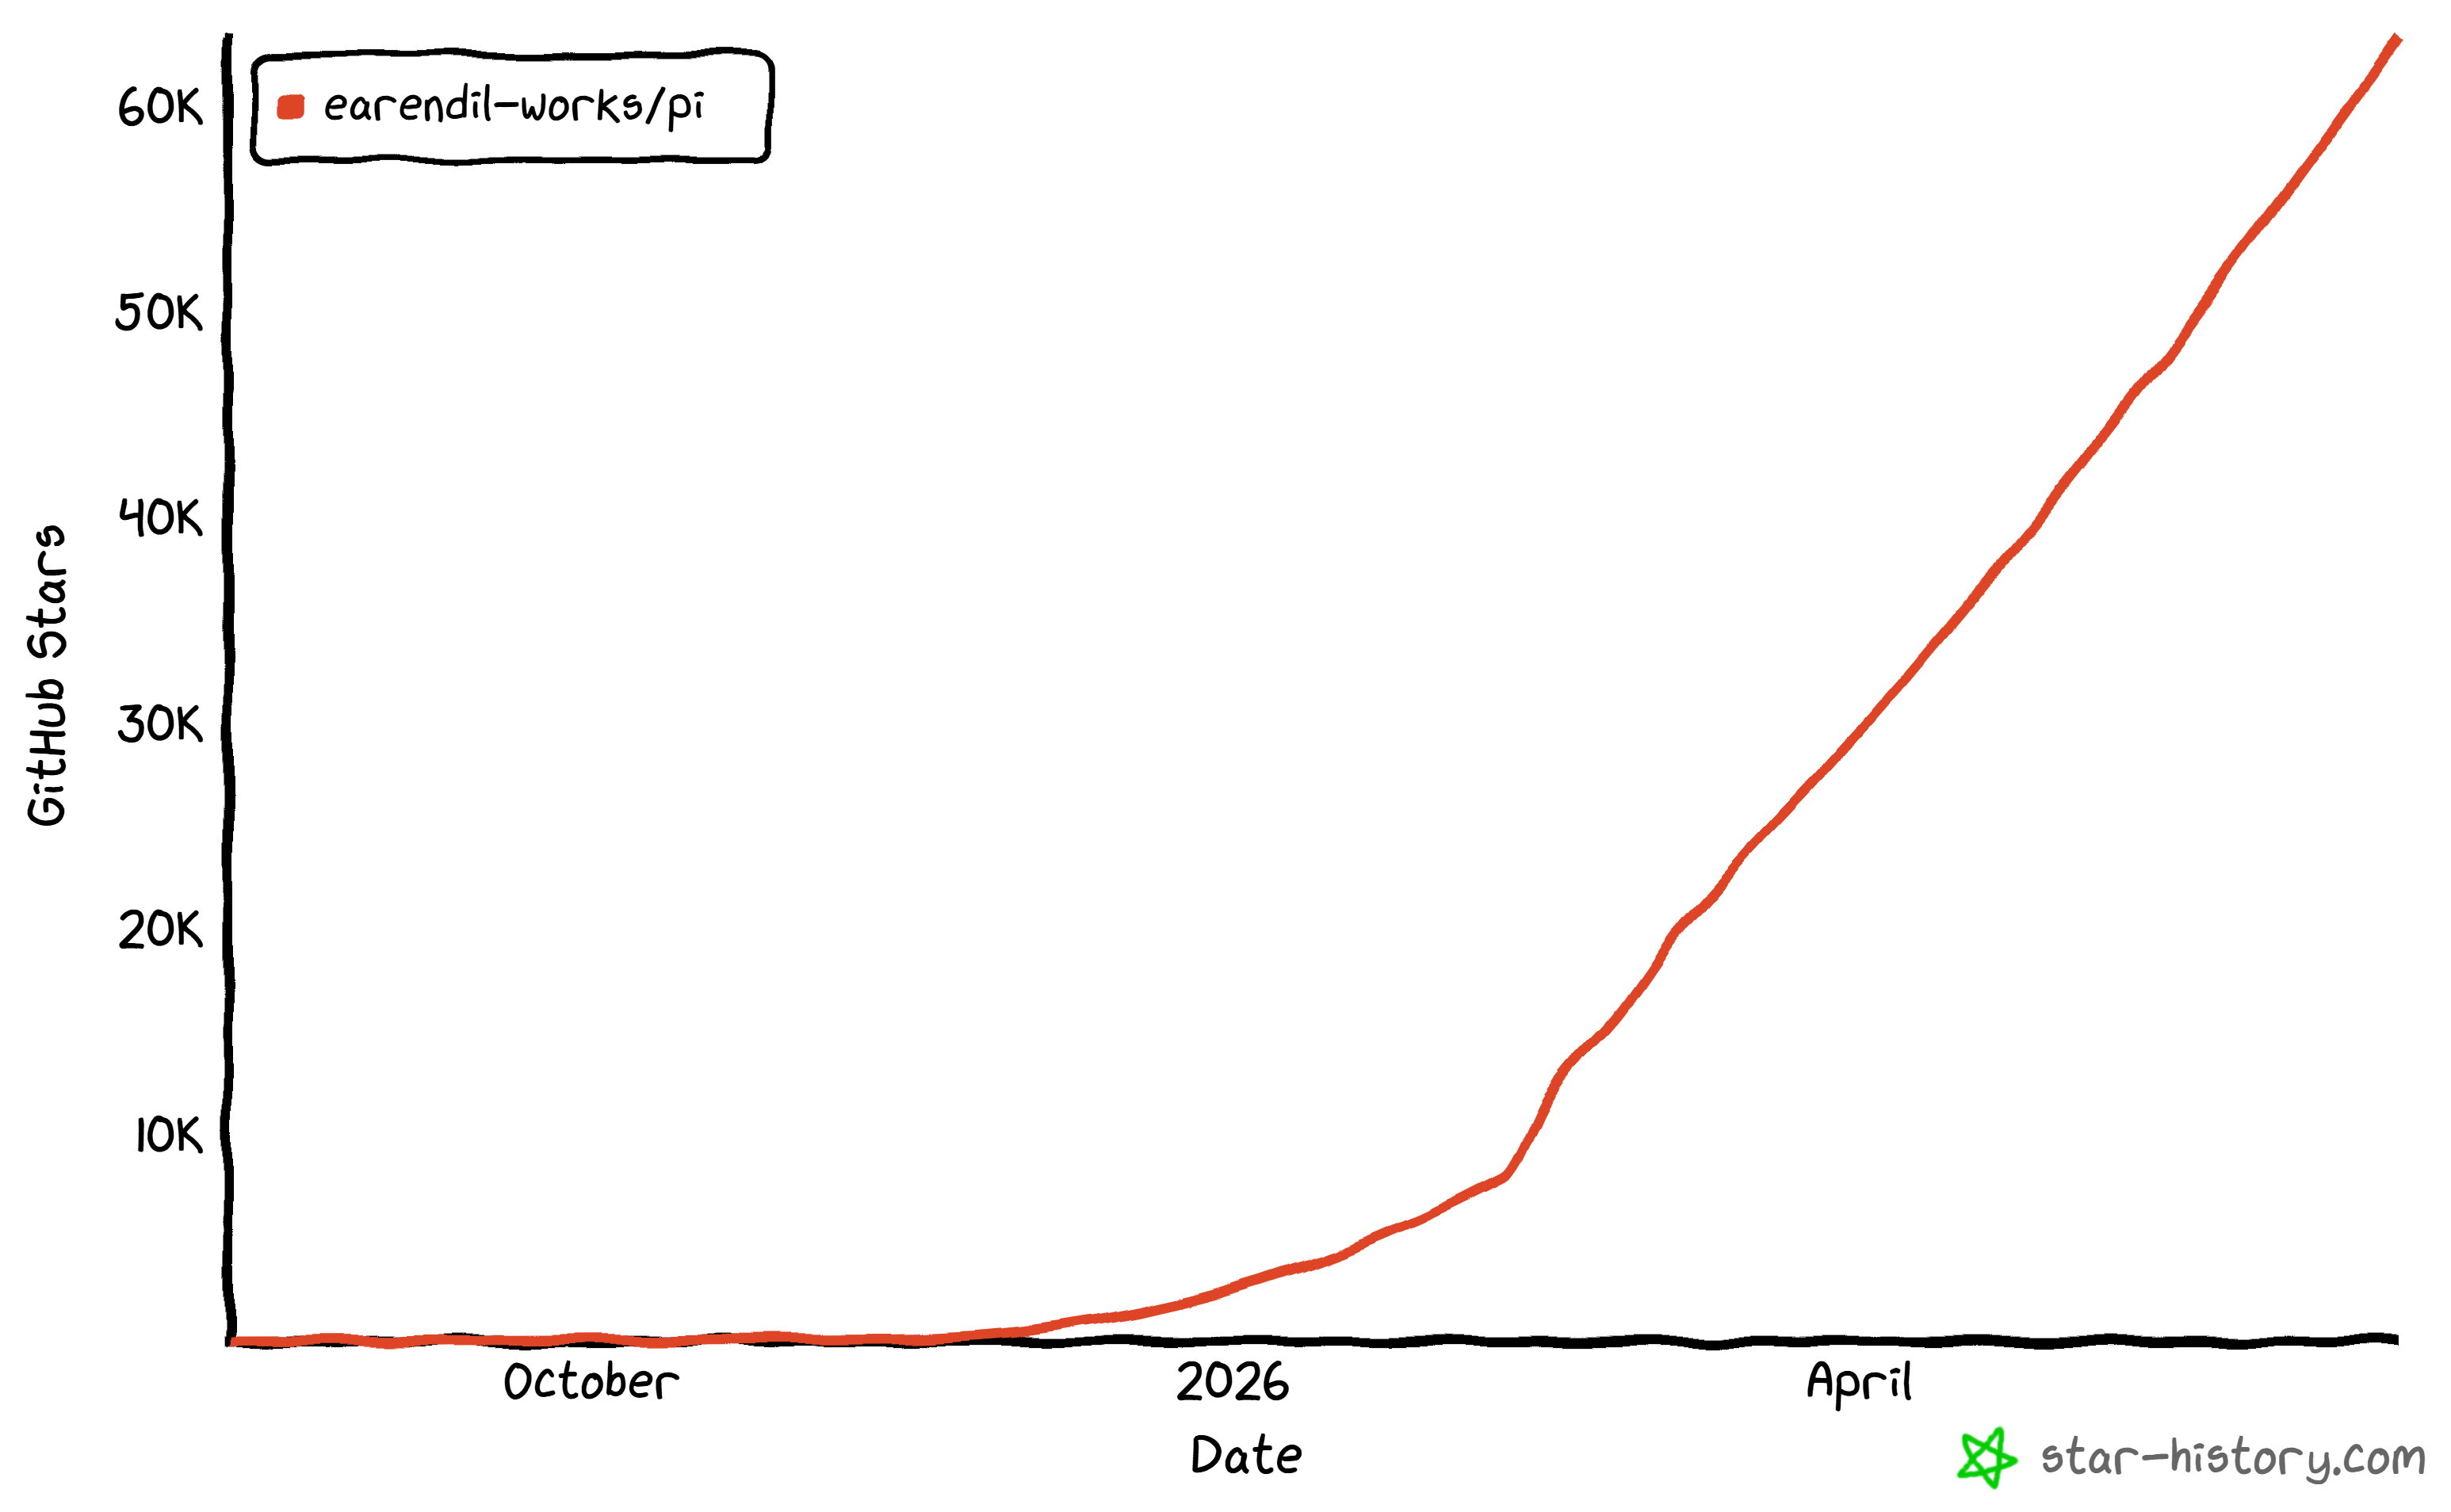
This minimal approach to CLI agents has been widely appreciated by the community, with the project reaching over 63k GitHub stars. It has also surpassed 1.7 million weekly downloads on npm.
Main Features
The key capabilities provided by Pi Agent are:
- Full extensibility model: Modify almost every layer (e.g., tools, history handling, compaction, UI, and context injection) to build fully custom agent behaviors.
- Multi-provider LLM support: Works with OpenAI, Anthropic, Google, Azure, Bedrock, and more, with easy switching between models mid-session.
- Interactive CLI agent: A full terminal-based coding agent with real-time tool use, context awareness, and conversational control.
- Session tree management: Stores conversations as branches, allowing you to rewind, fork, and explore alternative execution paths.
- Skills system: Load Agent skills dynamically to extend the agent without bloating the context window.
- Prompt templates and custom commands: Define reusable prompts that can be triggered via slash commands for faster workflows.
- Print, RPC, and SDK modes: Use Pi in scripts, backend services, or embedded applications via structured output or programmatic APIs.
Why Pi Coding Agent Needs Reliable Web Access
No matter which LLM you configure in Pi, the underlying coding agent still faces a common limitation of language models: outdated knowledge. An LLM can only generate responses based on the static data it was trained on, which is essentially a snapshot of the past.
Given how fast the tech landscape evolves, this limitation becomes critical. Models may suggest outdated coding patterns, rely on deprecated methods, or miss newly released features entirely.
This creates a clear bottleneck for coding and automation tasks in your Pi Agent setup. And even when you add basic web search tools, these are often unreliable at scale and can be blocked by anti-bot protections used on many websites.
Now imagine Pi Coding Agent being able to reliably fetch up-to-date tutorials, documentation, and guides, and learn from them in real time. It could also take screenshots of web pages to visually analyze them, interact with sites, and perform far more complex workflows directly from the CLI.
This is exactly what becomes possible with Bright Data’s Web MCP server!
Bright Data Web MCP as the Solution
The Bright Data Web MCP exposes over 70 tools. Under the hood, these tools interact with Bright Data’s API-based products.
Web MCP comes with [two modes](https://github.com/brightdata/brightdata-mcp?tab=readme-ov-file#-pricing, modes):
- Rapid mode: A free tier with up to 5,000 requests per month and a limited set of tools for web search, scraping, and discovery.
- Pro mode: A paid tier that unlocks all 70+ tools, including structured data extraction from platforms like Amazon, LinkedIn, Yahoo Finance, YouTube, Zillow, Google Maps, and 40+ others, as well as full browser automation capabilities.
The most relevant Bright Data Web MCP tools are:
| Tool | Description | Underlying Bright Data Product |
|---|---|---|
search_engine |
Runs web searches (Google, Bing, Yandex) and returns parsed SERPs | SERP API |
scrape_as_markdown |
Extracts a full webpage and converts it into clean Markdown | Unlocker API |
discover |
Searches the web and ranks results using AI-based relevance scoring | Discover API |
scraping_browser_navigate |
Opens a real browser session and navigates to a URL | Browser API |
scraping_browser_snapshot |
Captures an ARIA snapshot of the page structure and interactive elements | Browser API |
scraping_browser_click_ref |
Clicks elements using references from a snapshot | Browser API |
scraping_browser_screenshot |
Takes a screenshot of the current page (optionally full page) | Browser API |
What makes Bright Data unique is its global network of 400M+ residential IPs across 195 countries. This infrastructure is the foundation for all its products, designed to deliver enterprise-grade reliability with support for unlimited concurrency, massive scalability, and SLA-backed 99.99% uptime.
How to Set Up Bright Data Web MCP in Pi Agent
In this step-by-step tutorial section, you will be guided through configuring the Bright Data Web MCP integration in Pi Agent. This way, the underlying coding agent will gain access to web discovery, scraping, and browser automation capabilities.
Follow the instructions below!
Prerequisites
To follow along with this section, make sure you have:
- Node.js installed locally (the latest LTS version is recommended).
- An API key from one of the many LLM providers supported by Pi Agent (we will use an OpenAI API key in this guide).
- A Bright Data account with an API key. Follow the official guide to generate a Bright Data API key.
While not strictly required, it also helps to be familiar with how MCP works and with the Bright Data Web MCP tools.
Step #1: Install Pi
Install Pi via npm by running the following command:
npm install -g, ignore-scripts @earendil-works/pi-coding-agentThis installs the @earendil-works/pi-coding-agent package globally, which registers the pi command on your system.
If you prefer a different installation method, such as PowerShell, the cURL installer, pnpm, Yarn, or Bun, refer to the official documentation.
Once the installation is complete, launch Pi Coding Agent with:
piThe first time you run the command, you should see something like this:
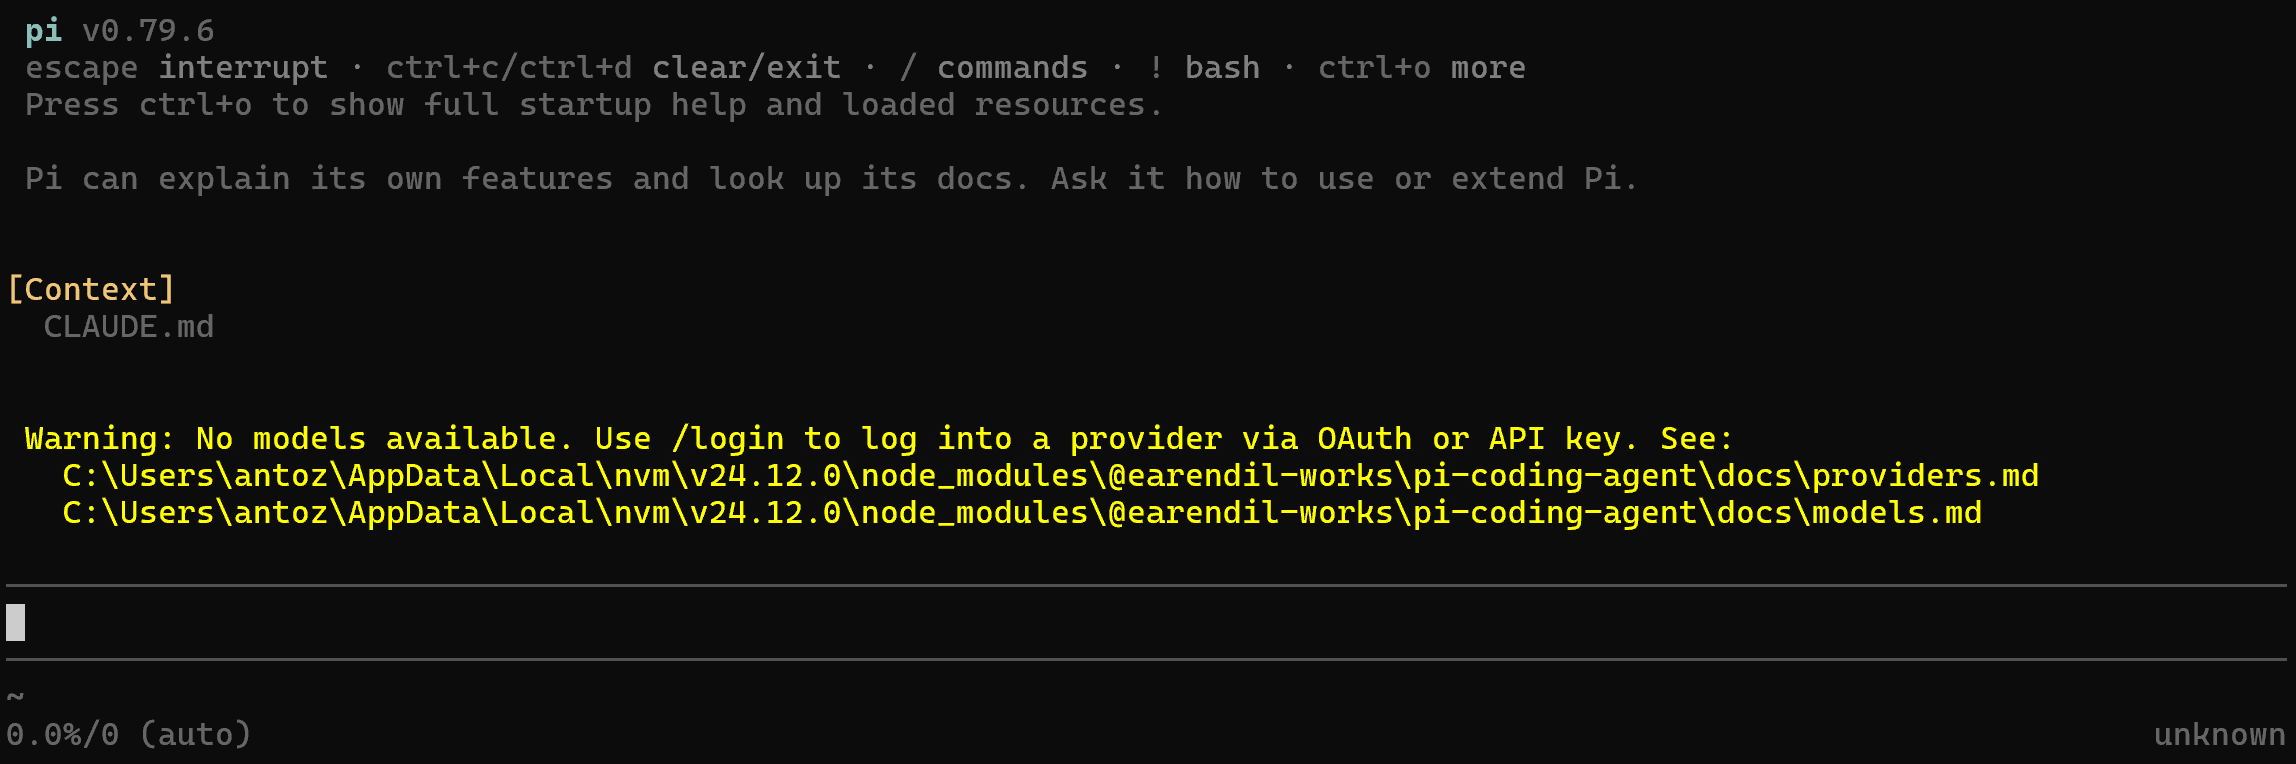
The returned message indicates that no AI providers are currently configured in Pi. In the next step, you will learn how to connect and configure one!
Step #2: Configure an LLM
Configure an LLM in Pi Coding Agent by running:
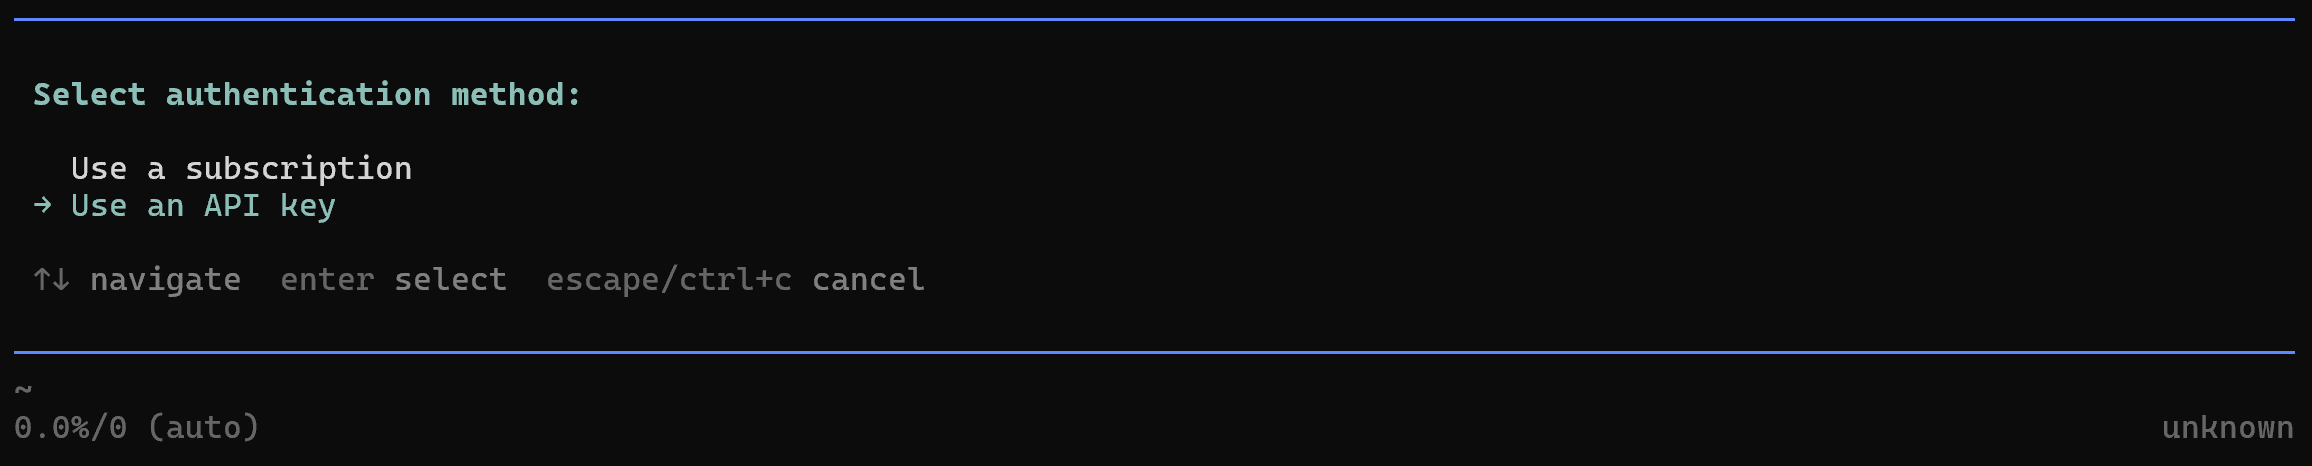
/loginPi will prompt you to select an authentication method for your preferred LLM provider. In this case, select “Use an API key”:
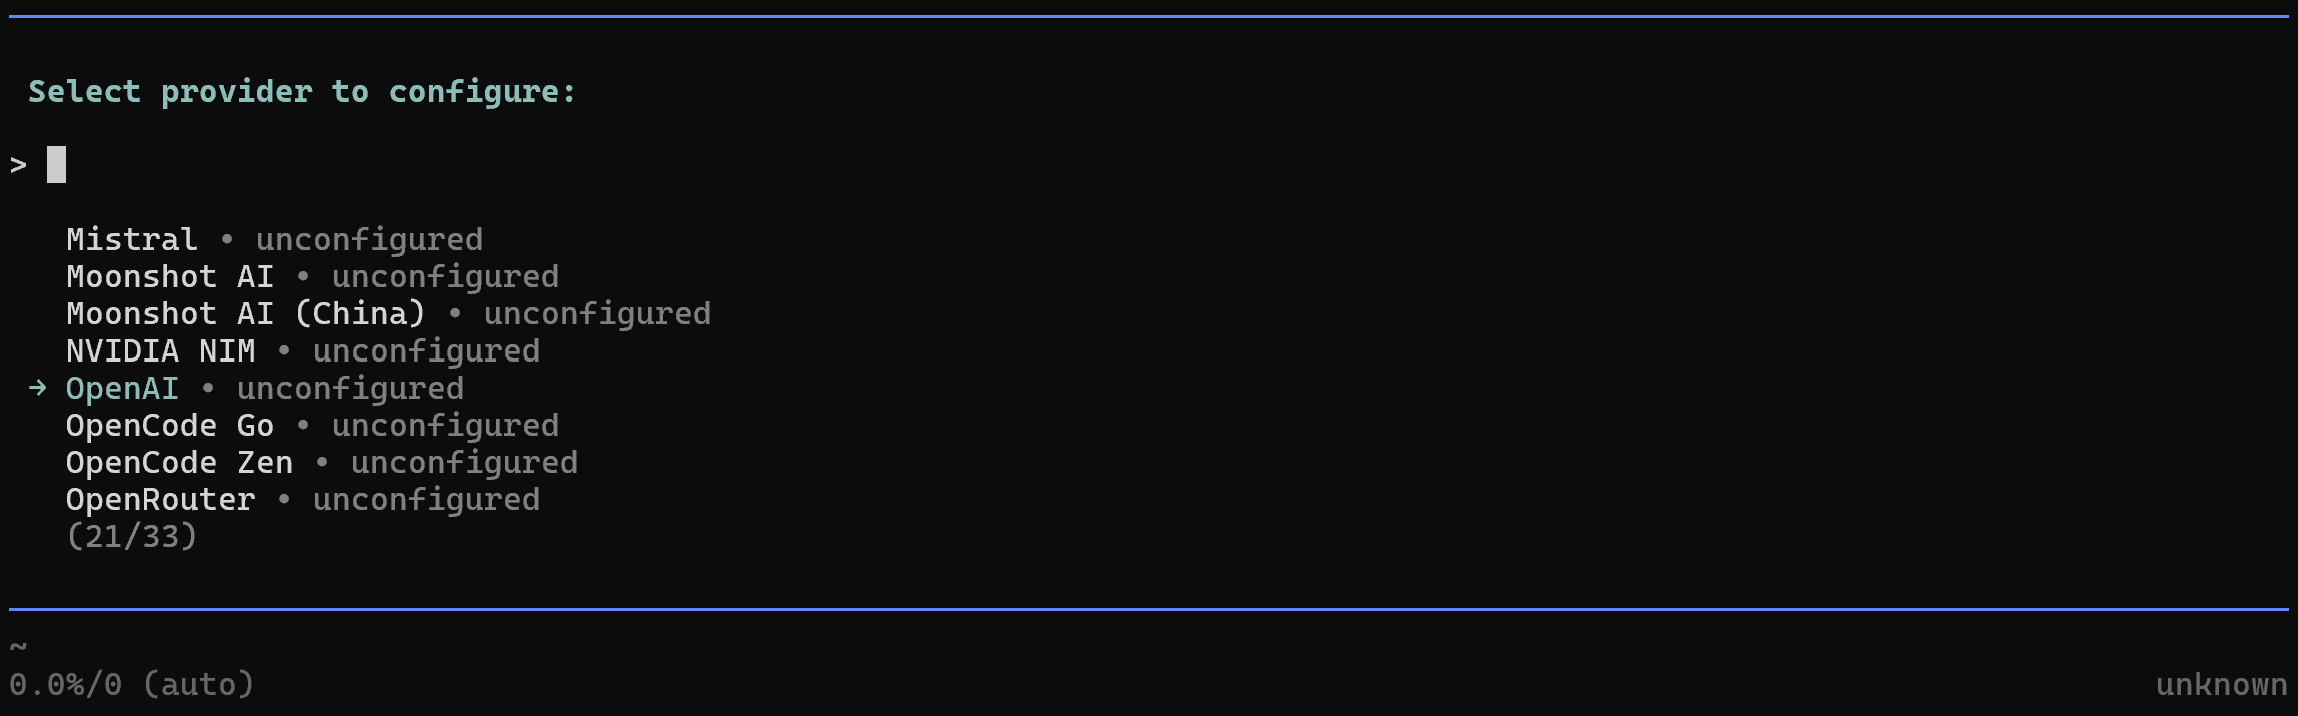
Next, choose your AI provider. In this guide, we will use OpenAI:
Paste your OpenAI API key when prompted:

If everything goes as expected, Pi will authenticate with OpenAI and securely store your API key in its configuration. Then, it will automatically select a default model for you (gpt-5.4 in this example).
You should then see a confirmation message similar to the following:

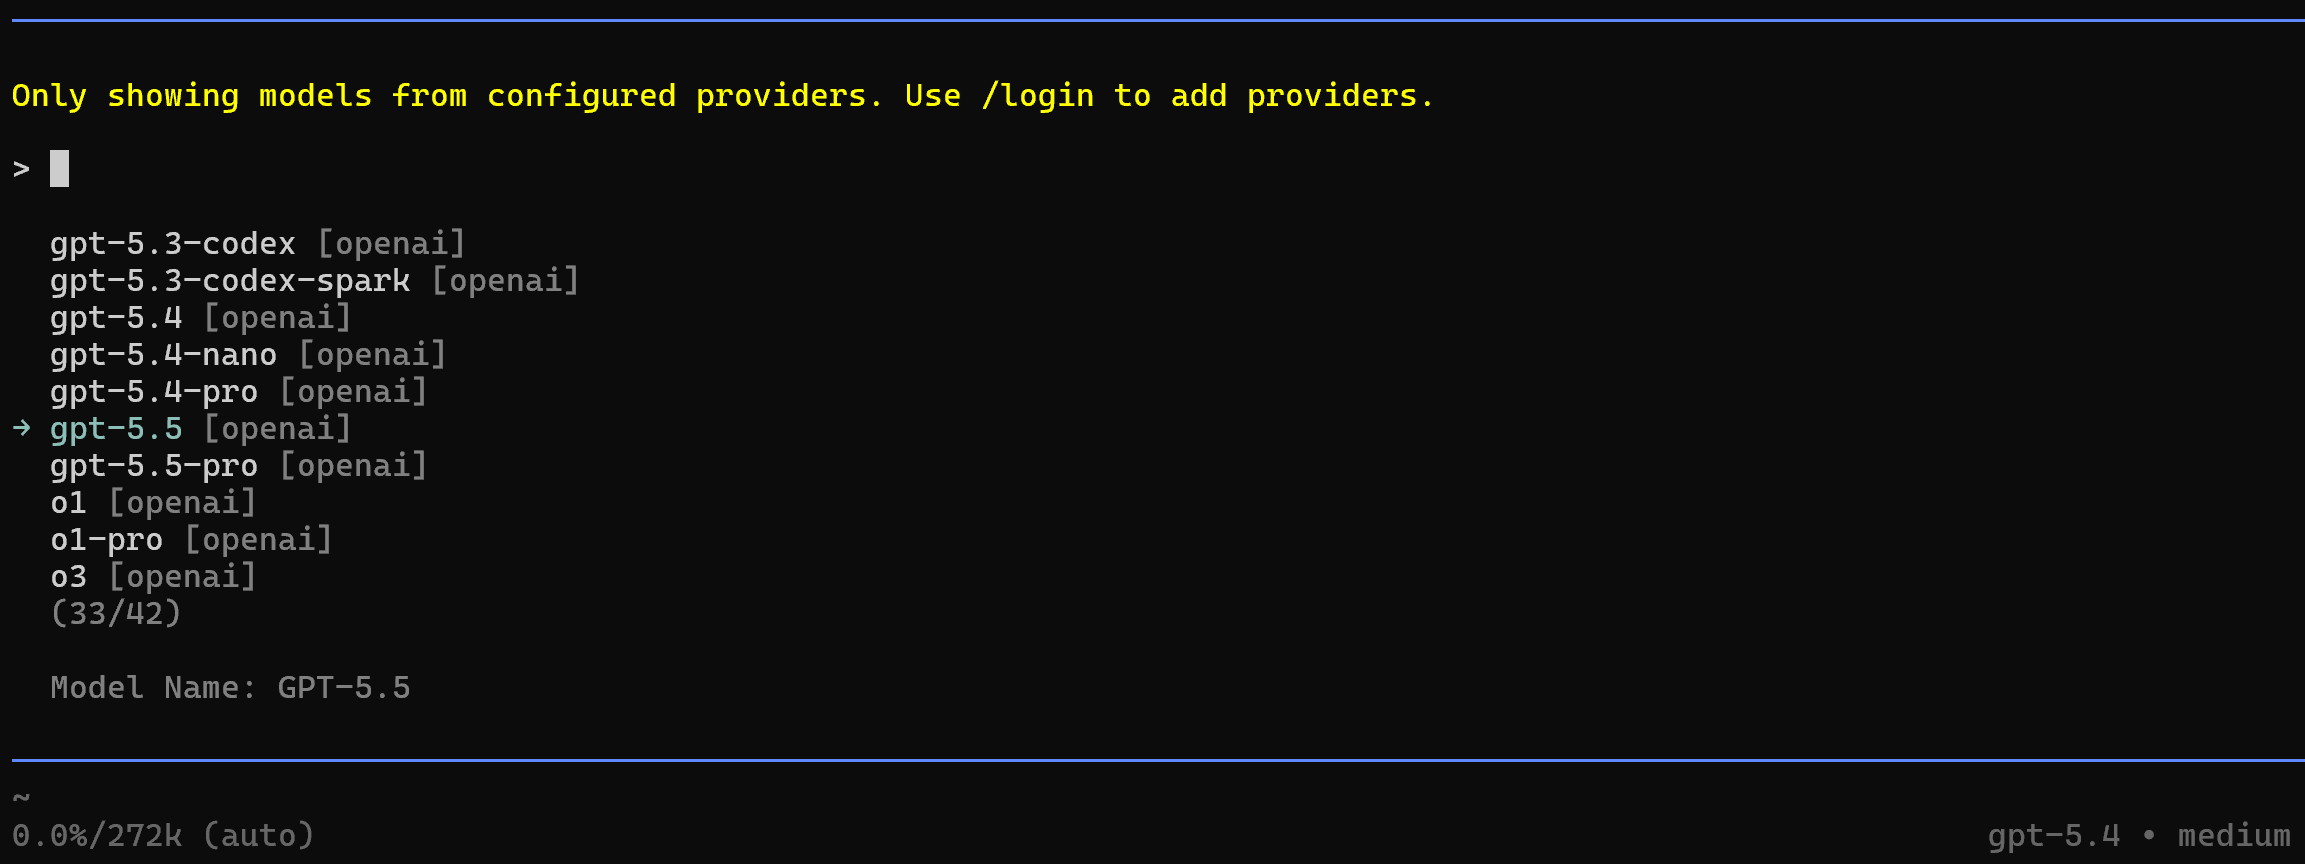
To change the model later, run:
/modelThen select the model you want to use from the available options:
Well done! Pi is now installed and configured on your machine.
Step #3: Add the Pi MCP Adapter Extension
By default, Pi comes with a minimal setup and does not include MCP support out of the box. To enable MCP integration, install the pi-mcp-adapter extension with this command:
pi install npm:pi-mcp-adapterOnce the extension is installed, restart Pi. The pi-mcp-adapter extension expects an MCP configuration file located in either:
.mcp.jsonin your project directory, or~/.config/mcp/mcp.json(%USERPROFILE%/.config/mcp/mcp.jsonon Windows).
That file contains the configuration for your MCP servers. You can create the configuration file manually, or let Pi generate it for you by running:
/mcp setupThen, select the “Scaffold project .mcp.json” option:
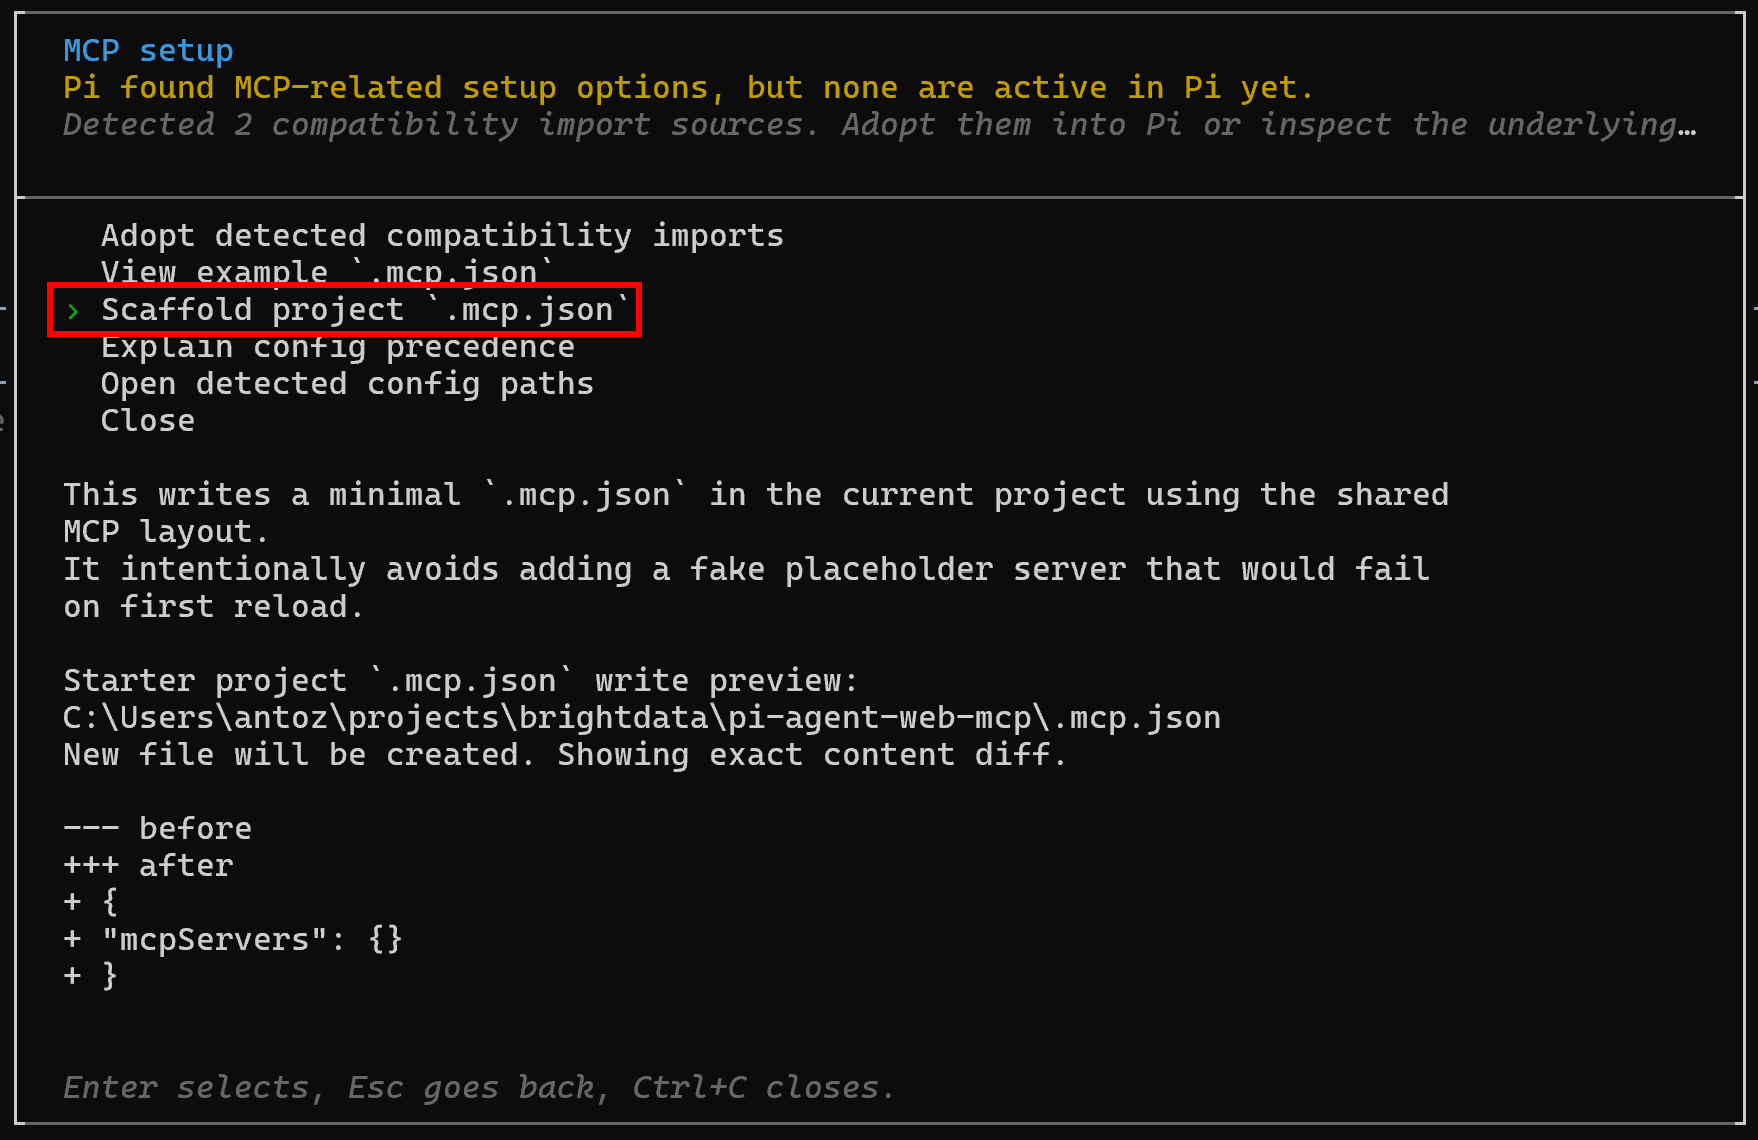
Pi will create a .mcp.json file in your project directory. Open it, and you will see:
{
  "mcpServers": {}
}
Perfect! Pi Coding Agent can now act as an MCP client and expose MCP tools to the underlying AI agent.
Step #4: Get Started with Bright Data’s Web MCP
Before connecting Bright Data’s Web MCP to Pi Agent, verify that the MCP server runs correctly on your machine. For additional details, refer to the Web MCP documentation.
Start by installing Web MCP globally with:
npm install -g @brightdata/mcpOn Linux, macOS, or WSL, start the Bright Data Web MCP server with:
API_TOKEN="<YOUR_BRIGHT_DATA_API>" npx -y @brightdata/mcpAlternatively, in PowerShell:
$Env:API_TOKEN="<YOUR_BRIGHT_DATA_API>"; npx -y @brightdata/mcpReplace <YOUR_BRIGHT_DATA_API> with your Bright Data API key. This command sets the required API_TOKEN environment variable and launches the Web MCP server locally through the @brightdata/mcp package.
If everything is configured correctly, you should see output similar to the following:

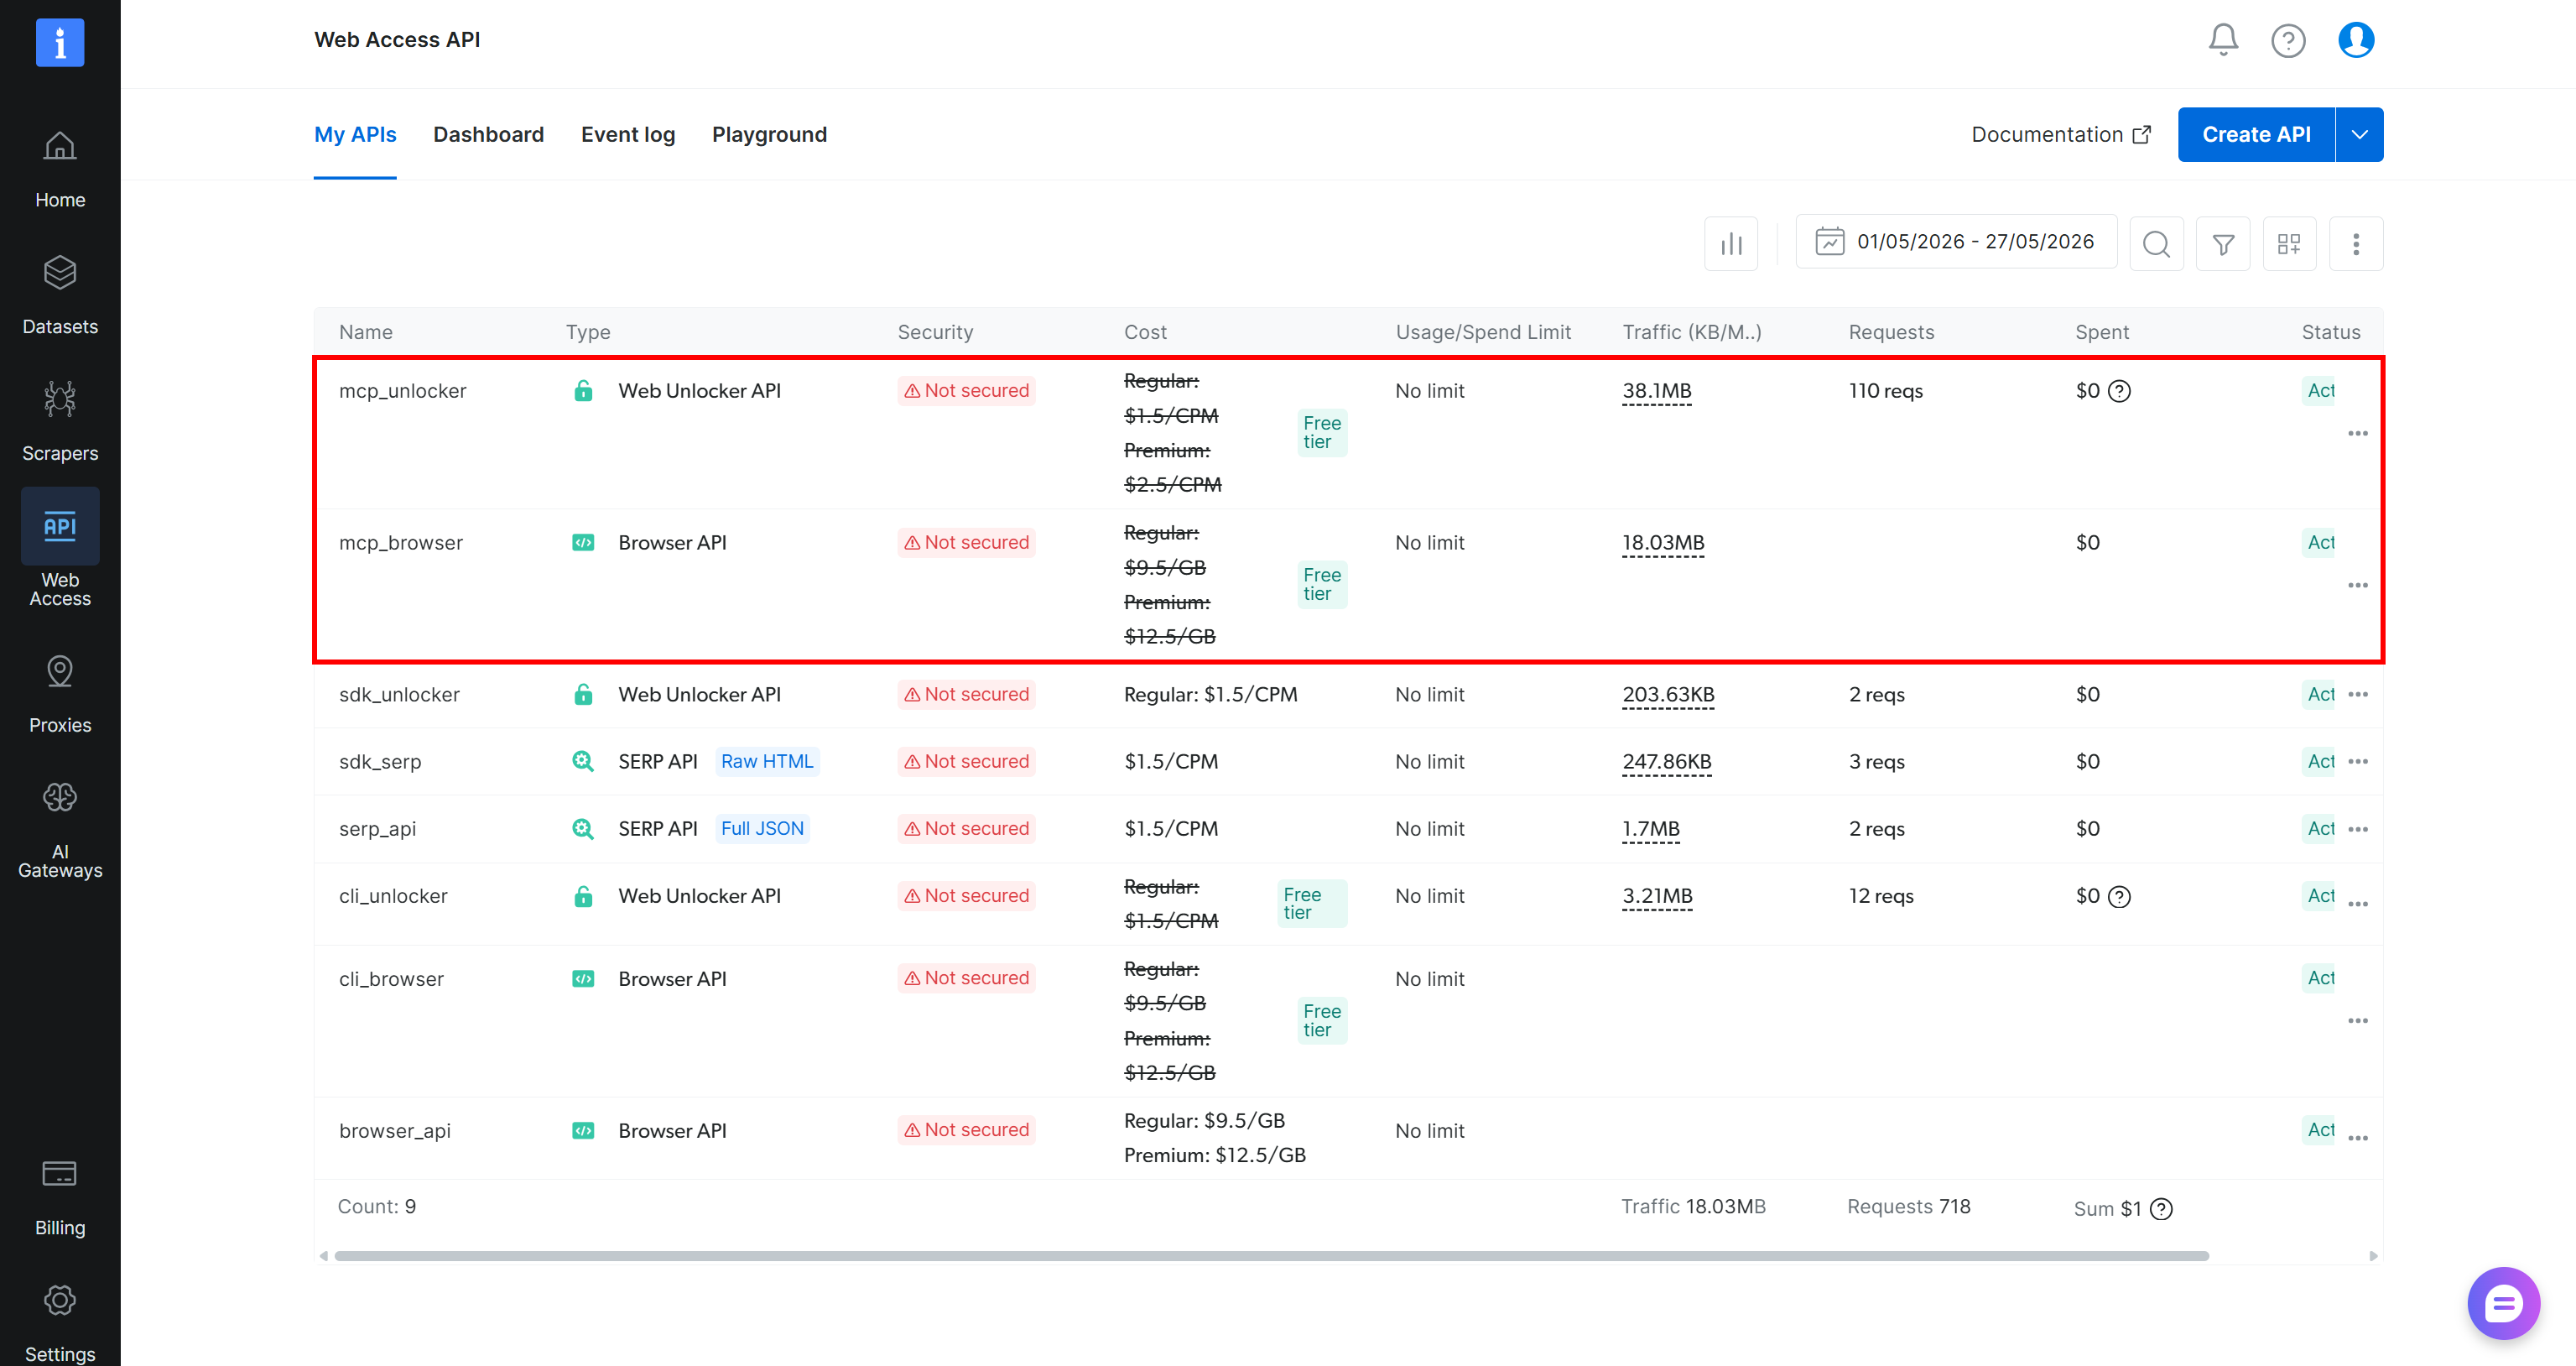
During the first startup, the @brightdata/mcp package automatically creates two APIs in your Bright Data account:
mcp_unlocker: Used to access the Bright Data Web Unlocker API (and SERP API).mcp_browser: Used to interact with the Bright Data Browser API.
Together, these APIs power the 70+ tools available through Web MCP. If needed, you can also define custom API names, as described in the official repository.
To confirm that the APIs were created, reach the “Web Access > Web Access API” page in the Bright Data control panel. You should find both APIs listed under the “My APIs” table:
Keep in mind that the Web MCP free tier (Rapid mode) provides access to only a subset of tools.
To unlock the full set of 70+ tools, enable Pro mode by setting the PRO_MODE="true" environment variable:
API_TOKEN="<YOUR_BRIGHT_DATA_API>" PRO_MODE="true" npx -y @brightdata/mcpOr, on Windows:
$Env:API_TOKEN="<YOUR_BRIGHT_DATA_API>"; $Env:PRO_MODE="true"; npx -y @brightdata/mcpNote: Pro mode is not included in the free tier and [incurs additional charges](https://github.com/brightdata/brightdata-mcp?tab=readme-ov-file#-pricing, modes).
Great! You have confirmed that Bright Data Web MCP runs on your machine. In the next step, you will connect it to Pi Agent.
Step #5: Configure the Web MCP in Pi Agent
To set up the Bright Data Web MCP integration in Pi, add the following configuration to your .mcp.json file (or ~/.config/mcp/mcp.json):
{
  "mcpServers": {
    "bright-data-web-mcp": {
      "command": "npx",
      "args": ["-y", "@brightdata/mcp"],
      "env": {
        "API_TOKEN": "<YOUR_BRIGHT_DATA_API_KEY>",
        "PRO_MODE": "true"
      }
    }
  }
}
At startup, the pi-mcp-adapter extension will read the file. Then, it will start the local Web MCP server by executing the npx -y @brightdata/mcp command while setting these envs:
API_TOKEN(required): Your Bright Data API key.PRO_MODE(optional): Set it totrueto enable Pro features. Set it tofalseor remove it entirely to run Web MCP in Rapid (free) mode.
From now on, Pi will connect to a local instance of Web MCP. Perfect!
Step #6: Verify the Web MCP Integration
Verify that the tools exposed by Web MCP are available by restarting Pi and running:
/mcp toolsIf you configured Web MCP in Pro mode, you should see the full list of available tools:

Notice that the list includes all 70+ tools. If you are using Rapid mode, only the tools included in the free tier will appear. This confirms that Pi can successfully connect to your local Web MCP instance and access the tools it exposes.
Excellent! Your Pi Agent + Bright Data Web MCP integration is now fully configured. The only thing left is to see it in action.
Step #7: Test the Enhanced AI Agent
Suppose you want to build an e-commerce website and need inspiration for its design. A good approach is to start with a mockup based on a successful online store.
For example, you can ask your AI agent to visit a Nike product category page, capture a screenshot, and then generate a static HTML/CSS mockup inspired by the page’s layout and design patterns.
To achieve that, write the following prompt:
Search online for the Nike men’s shoes & sneakers page. Open the page and take a full viewport screenshot from a US IP. Then, create a mock e-commerce webpage using plain HTML and CSS that replicates the same visual style, layout structure, and overall design patterns shown in the screenshot. Do not copy brand assets or proprietary text,only reproduce general layout, spacing, and styling.This is an excellent test of the web capabilities added through Web MCP, as it involves web search and browser automation. These capabilities are provided by Bright Data Web MCP (in Pro mode).
Note: The prompt explicitly requests a US IP address to avoid EU GDPR cookie banners, which can limit the view on the page screenshot and make it harder for the AI agent to analyze the page structure correctly.
Open Pi and run the prompt. The execution should look something like this:

This is what Pi Coding Agent did behind the scenes:
- Used the
search_engineWeb MCP tool to locate the Nike “Men’s Shoes & Sneakers” page through a US-based Google search query. Under the hood, this request is powered by Bright Data’s SERP API. - Opened the page using the
scraping_browser_navigateWeb MCP tool with a US geolocation. This capability is provided by Bright Data’s Browser API. - Verified that the page loaded successfully and confirmed the page title and URL.
- Captured a screenshot of the page using the
scraping_browser_screenshotWeb MCP tool. - Analyzed the screenshot to understand the site’s layout, structure, and design patterns.
- Planned a brand-neutral e-commerce mockup inspired by the original page while avoiding the use of proprietary branding and assets.
- Designed a responsive page structure featuring a utility bar, navigation menu, promotional banner, filter sidebar, and product grid.
- Generated a self-contained
src/index.htmlfile using plain HTML and CSS.
This workflow highlights the power of Web MCP-enabled agents. A standalone LLM cannot perform these tasks because it lacks direct access to search engines and cloud web browsers. Plus, websites such as Nike.com use sophisticated anti-bot systems that block automated traffic.
Another major advantage of Web MCP is that it is built on top of Bright Data’s proxy infrastructure. This allows the agent to route requests through specific countries and even city-level locations. As a result, the agent can access and analyze region-specific versions of websites with much greater reliability.
Fantastic! Let’s take a look at the generated output.
Step #8: Analyze the Results
After the agent completes the task, your project structure should look like this:
├── .mcp.json
└── src/
    └── index.html
Open the generated src/index.html file in your browser, and you will see a result similar to the following:

Compare it to the original Nike “Men’s Shoes & Sneakers” page used as inspiration:

Notice how the generated page closely matches the original layout, spacing, navigation structure, product grid, and overall visual hierarchy while avoiding the use of Nike branding, proprietary content, and copyrighted assets.
Et voilà! This simple example demonstrates how much more capable Pi Agent becomes when connected to Bright Data Web MCP.
By combining web search, scraping, and browser automation together with AI-powered code generation, the agent can complete complex workflows that would be impossible for a vanilla LLM.
Now it is your turn to experiment. Try different prompts and explore the many use cases enabled by the 70+ tools available through Web MCP!
Conclusion
In this blog post, you learned what Pi is and the capabilities it offers. In detail, you saw how to extend it by integrating with Bright Data’s Web MCP.
This integration gives Pi Agent the tools required to handle web search, discovery, scraping, and browser automation scenarios. These capabilities help it manage more complex automation and coding workflows. Explore the full range of web services for AI in Bright Data’s ecosystem.
Sign up for a Bright Data account today and start exploring our AI-ready web tools!

Technical Writer
Antonello Zanini is a technical writer, editor, and software engineer with 5M+ views. Expert in technical content strategy, web development, and project management.


