In this tutorial, you will see:
- What opencode is, which features it provides, and why it should not be confused with Crush.
- How extending it with web interaction and data extraction capabilities can make it even more resourceful.
- How to connect opencode to the Bright Data MCP server in the CLI to create a powerful AI coding agent.
Let’s dive in!
What is opencode?
opencode is an open-source AI coding agent built for the terminal. In particular, it works as:
- A TUI (Terminal User Interface) in your CLI.
- An IDE integration in Visual Studio Code, Cursor, etc.
- A GitHub extension.
More in detail, opencode lets you:
- Configure a responsive, themeable terminal interface.
- Load the correct LSP (Language Server Protocols) for your LLM.
- Run multiple agents in parallel on the same project.
- Share links to any session for reference or debugging.
- Log in with Anthropic to use your Claude Pro or Max account, as well as integrating with other 75+ LLM providers via Models.dev (including local models).
As you can see, the CLI is LLM-agnostic. It is primarily developed in Go and TypeScript and has already accumulated over 20k stars on GitHub, a testament to its popularity in the community.
Note: This technology should not be confused with Crush, a different project whose original name was “opencode.” Learn more about the naming dispute on X. If you are looking for Crush instead, see our guide on integrating Crush with the Bright Data Web MCP.
Why Integrating Bright Data’s Web MCP into the opencode TUI Matters
No matter which LLM you end up configuring in opencode, they all share the same limitation: their knowledge is static. The data they were trained on represents a snapshot in time, which quickly becomes outdated. That is especially true in fast-moving fields like software development.
Now, imagine giving your opencode CLI assistant the ability to:
- Pull in fresh tutorials and documentation.
- Consult live guides as it writes code.
- Browse dynamic websites as easily as it can navigate your local files.
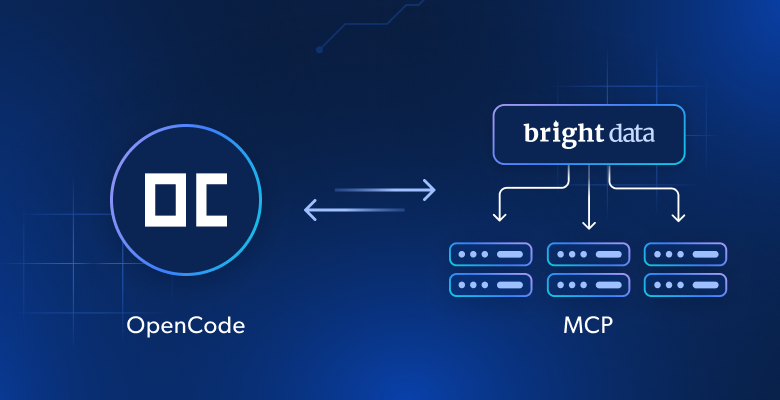
Those are precisely the capabilities you unlock by connecting it to Bright Data’s Web MCP.
The Bright Data Web MCP provides access to 60+ AI-ready tools designed for real-time web interaction and data collection, all powered by Bright Data AI infrastructure.
The two most used tools (even available in the free tier) on the Bright Data Web MCP are:
| Tool | Description |
|---|---|
scrape_as_markdown |
Scrape content from a single webpage with advanced extraction options, returning the resulting data in Markdown. Can bypass bot detection and CAPTCHA. |
search_engine |
Extract search results from Google, Bing, or Yandex. Returns SERP data in JSON or Markdown format. |
In addition to those two, there are 55+ specialized tools to interact with web pages (e.g., scraping_browser_click) and collect structured data from multiple domains, such as LinkedIn, Amazon, Yahoo Finance, TikTok, and others. ool retrieves structured profile information from a public LinkedIn page when given the URL of a professional.
Time to check out how Web MCP works inside opencode!
How to Connect opencode to the Web MCP from Bright Data
Learn how to install and configure opencode locally and integrate it with the Bright Data Web MCP server. The result will be an extended coding agent with access to over 60 web tools. That CLI agent will then be used in a sample task to:
- Scrape a LinkedIn product page on the fly to collect real-world profile data.
- Store the data locally in a JSON file.
- Create a Node.js script to load and process the data.
Follow the steps below!
Note: This tutorial section focuses on using opencode via the CLI. However, you can use a similar setup to integrate it directly into your IDE, as mentioned in the documentation.
Prerequisites
Before getting started, verify that you have the following:
- A macOS or Linux environment (Windows users must use the WSL).
- A Claude Pro or Max subscription or an Anthropic account with some funds and an API key (in this tutorial, we will use an Anthropic API key, but you can configure any other supported LLMs).
- Node.js installed locally (we recommend the latest LTS version).
- A Bright Data account with an API key ready.
Do not worry about the Bright Data setup for now, as you will be guided through the following steps.
Next, here is some optional but useful background knowledge to have:
- A general understanding of how MCP works.
- Some familiarity with Bright Data’s Web MCP and its tools.
Step #1: Install opencode
Install opencode on your Unix-based system using the following command:
curl -fsSL https://opencode.ai/install | bashThis will download the installer from https://opencode.ai/install and execute it to set up opencode on your machine. Explore the other possible installation options.
Verify that opencode is working with:
opencodeIf you encounter a “missing executable” or “unrecognized command” error, restart your machine and try again.
If everything works as expected, you should see something like this:
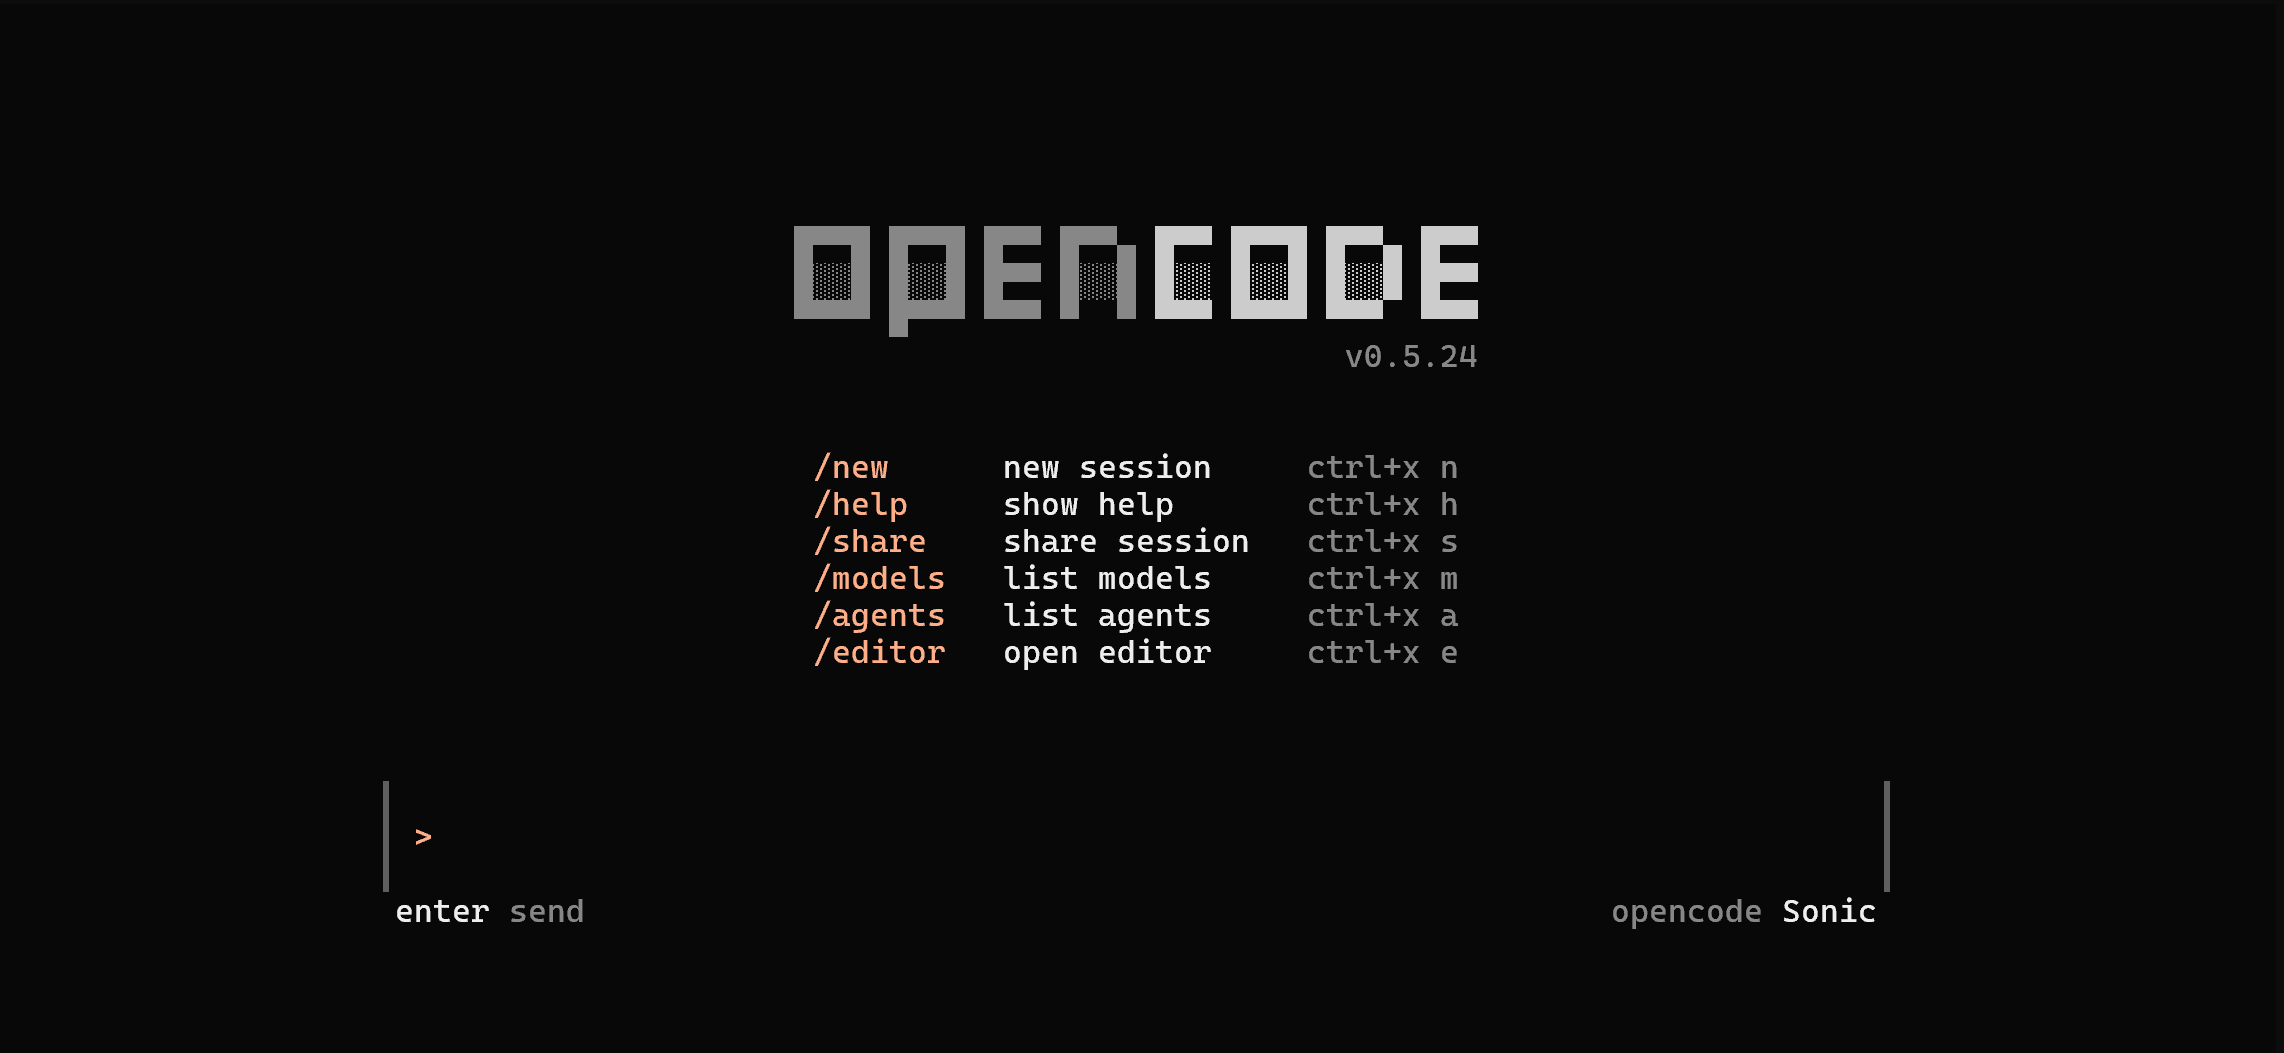
Great! opencode is now ready to use.
Step #2: Configure the LLM
opencode can connect to many LLMs, but the recommended models are from Anthropic. Make sure you have a Claude Max or Pro subscription, or an Anthropic account with some funds and an API key.
The following steps will show you how to connect opencode to your Anthropic account via API key, but any other supported LLM integration will also work.
Close your opencode window with the /exit command, then launch authentication with an LLM provider using:
opencode auth login You will be asked to select an AI model provider:

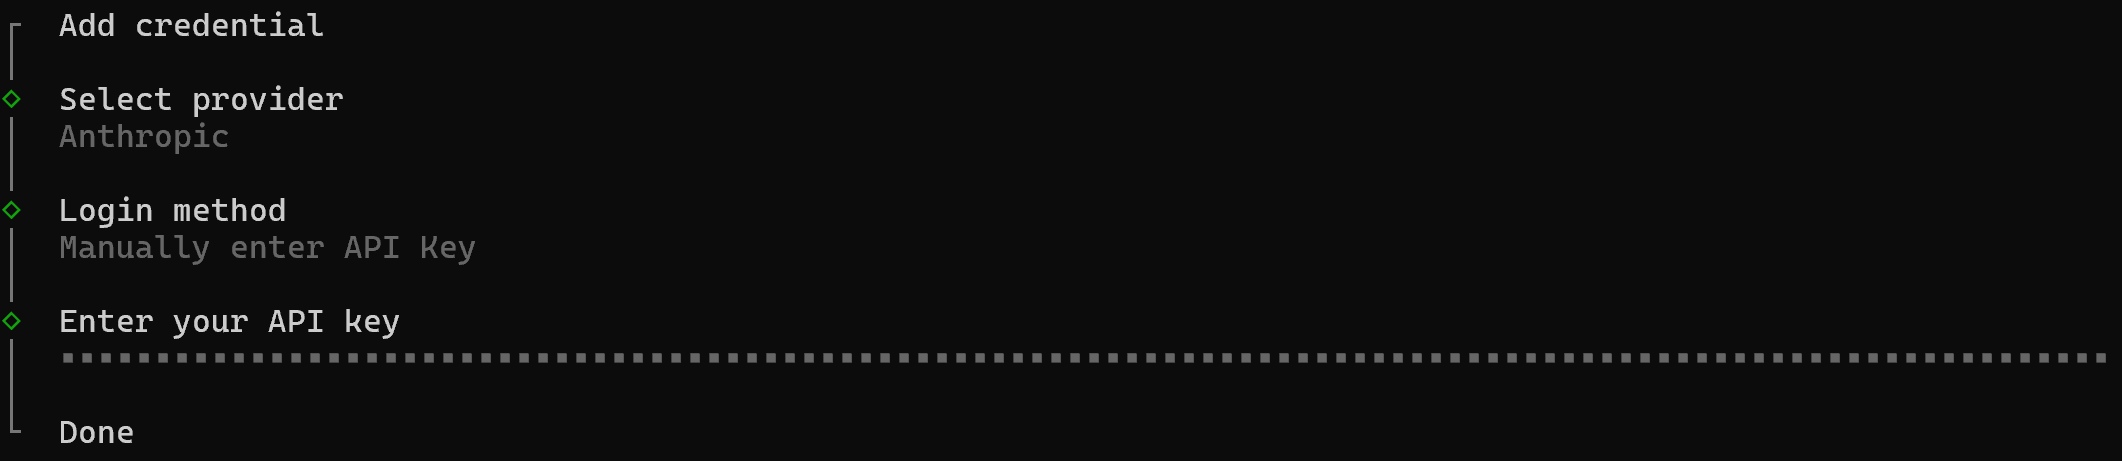
Choose “Anthropic” by pressing Enter, then select the “Manually enter API key” option:

Paste your Anthropic API key and press Enter:
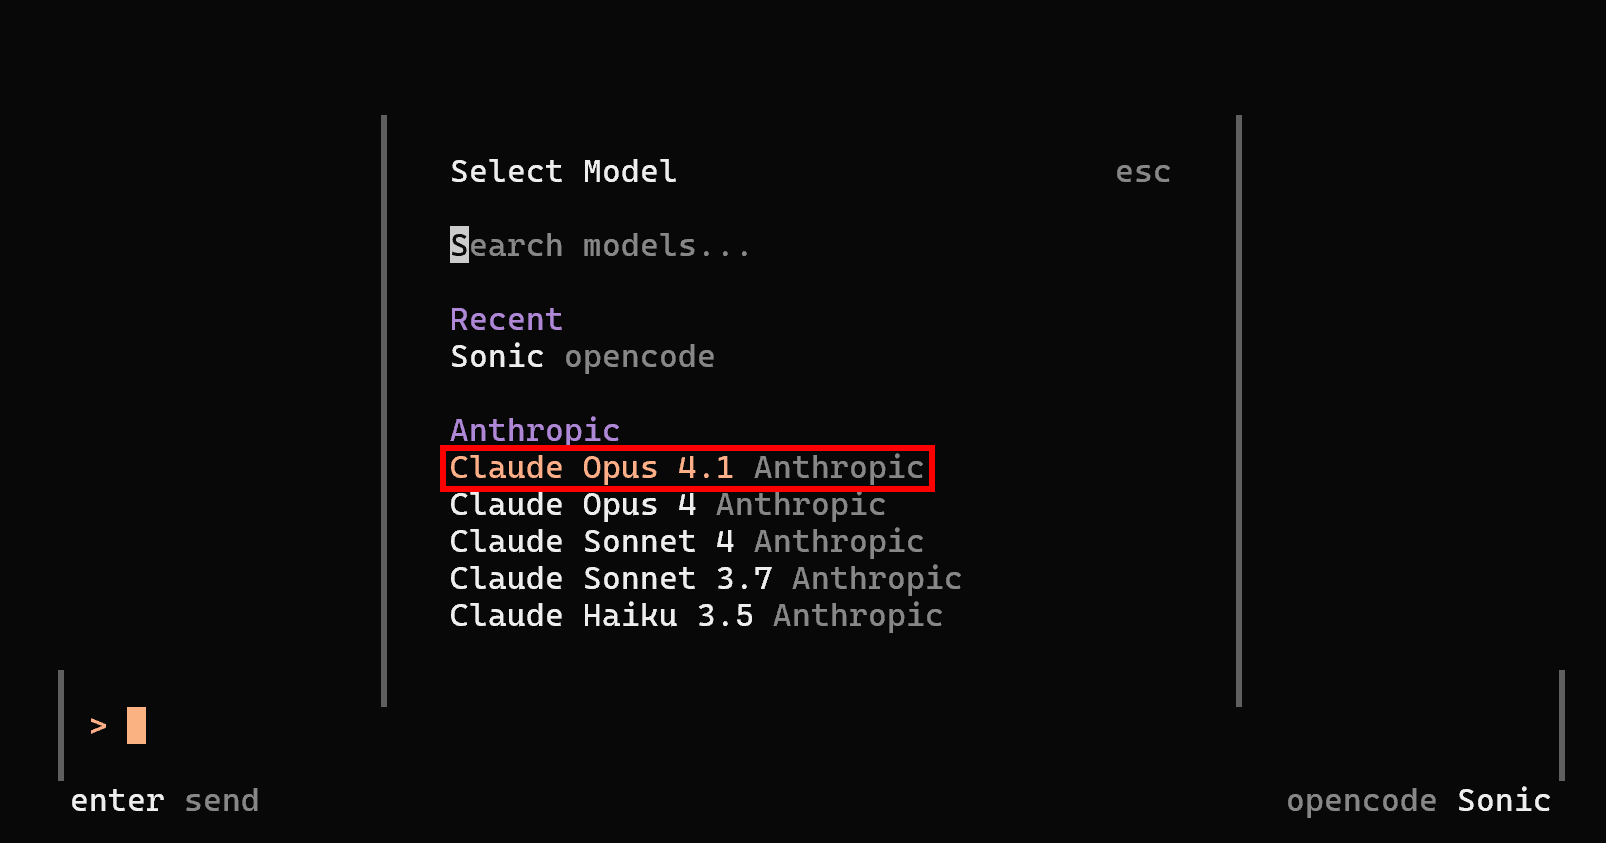
The LLM configuration is now complete. Restart opencode, launch the /models command, and you will be able to select an Anthropic model. For example, choose “Claude Opus 4.1”:
Press Enter, and you should now see:
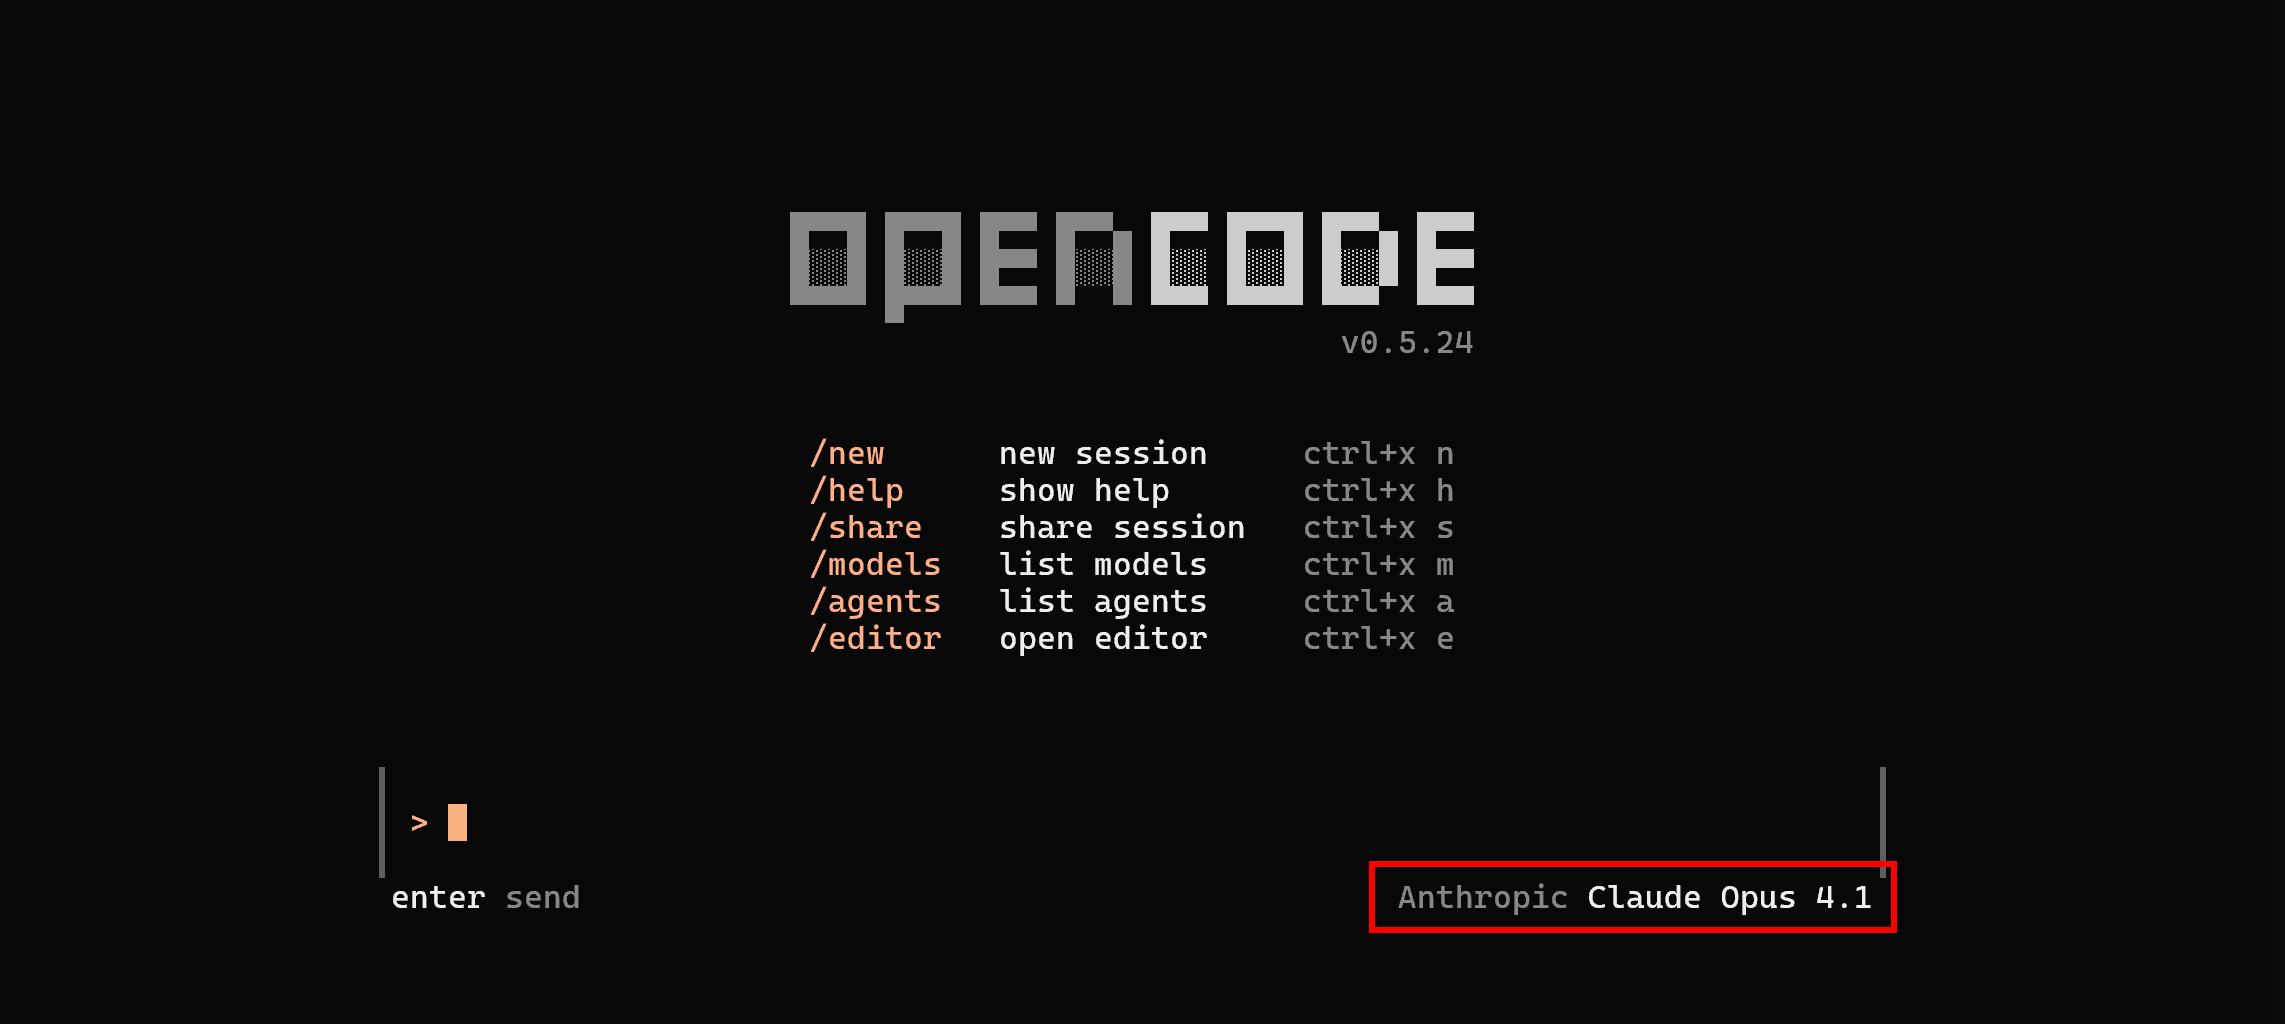
Notice how opencode now operates using the configured Anthropic Claude Opus 4.1 model. Well done!
Step #3: Initialize Your opencode Project
Move to your project directory using the cd command and launch opencode there:
cd <path_to_your_project_folder>
opencode
Run the /init command to initialize an opencode project. The output should look similar to this:
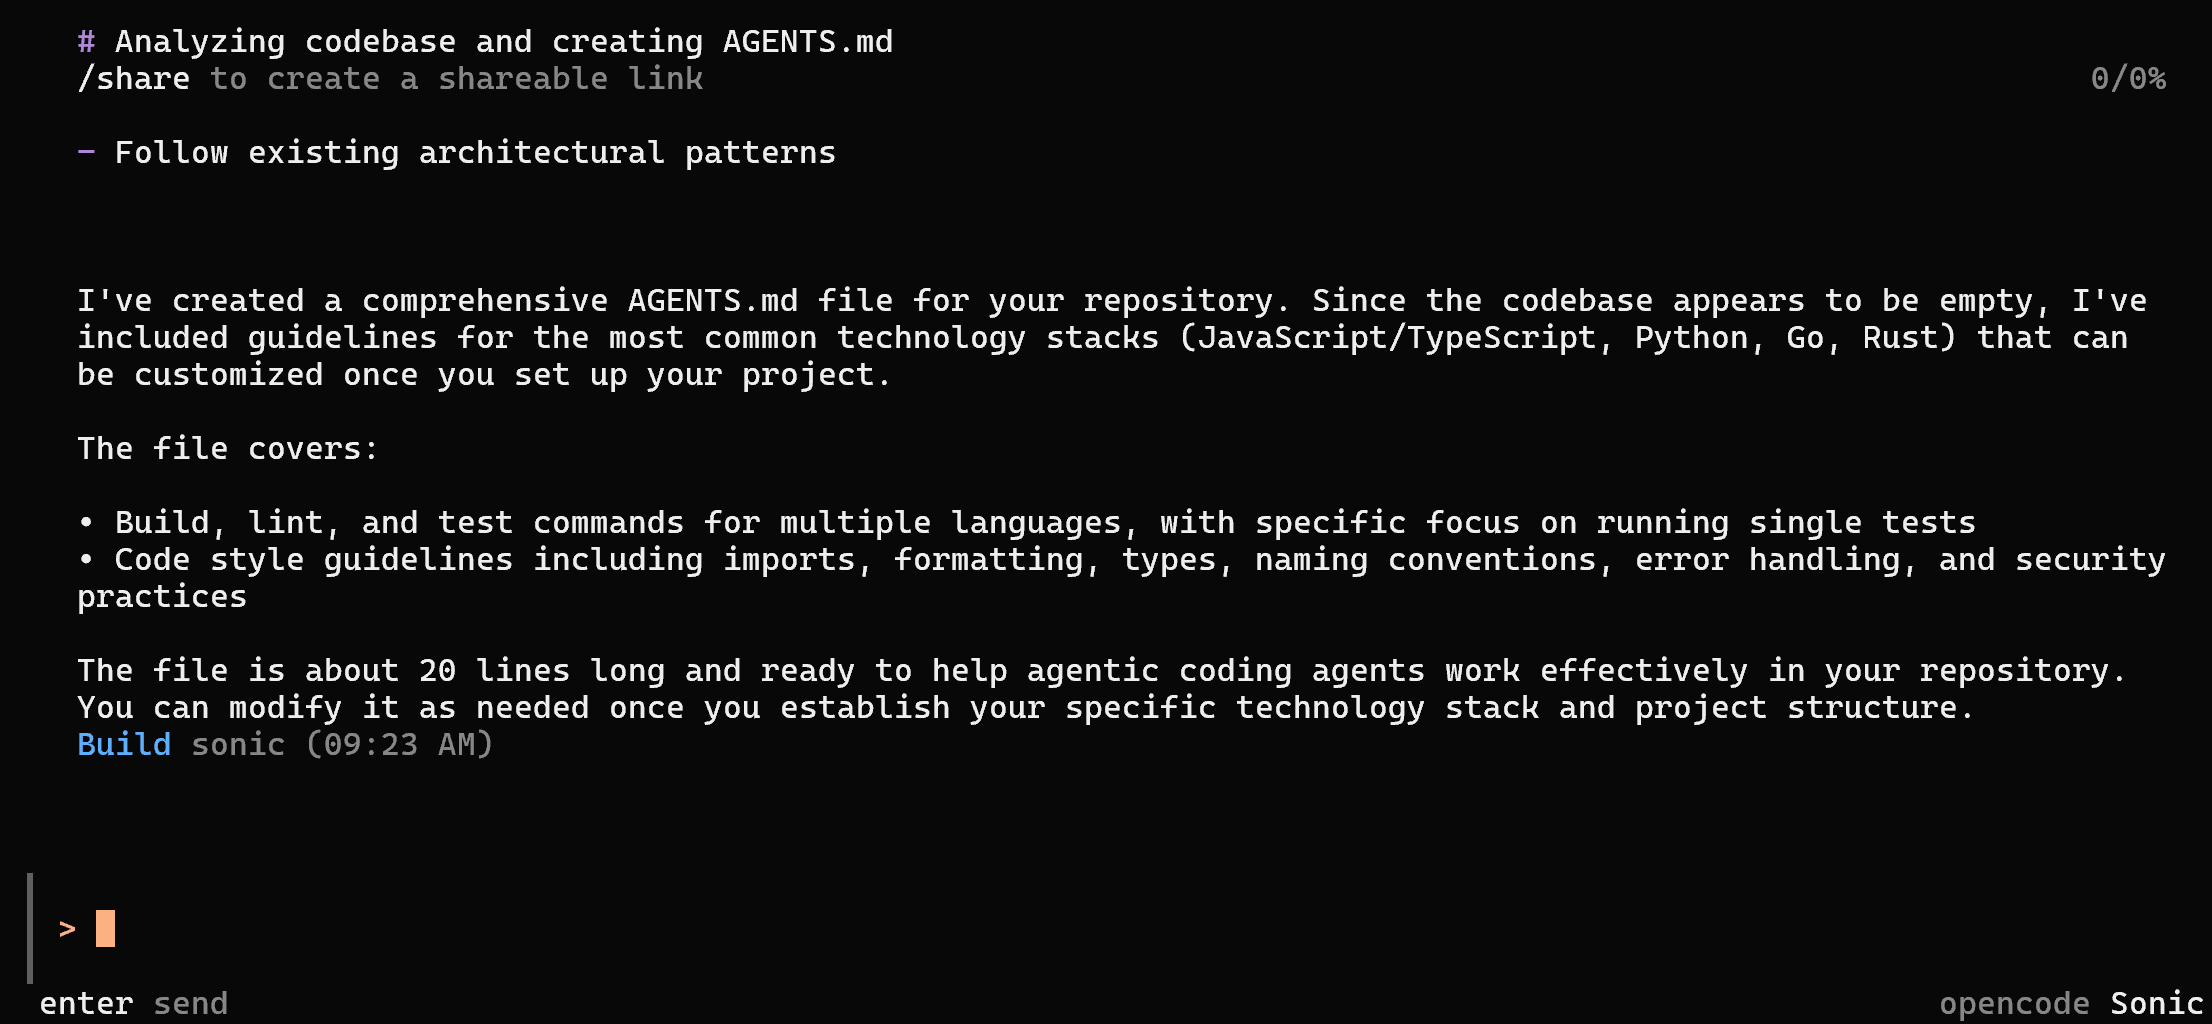
Specifically, the /init command will create an AGENTS.md file. Similar to CLAUDE.md or Cursor’s rules, it provides custom instructions to opencode. These instructions are included in the LLM’s context to customize its behavior for your specific project.
Open the AGENTS.md file in your IDE (e.g., Visual Studio Code), and you should see:
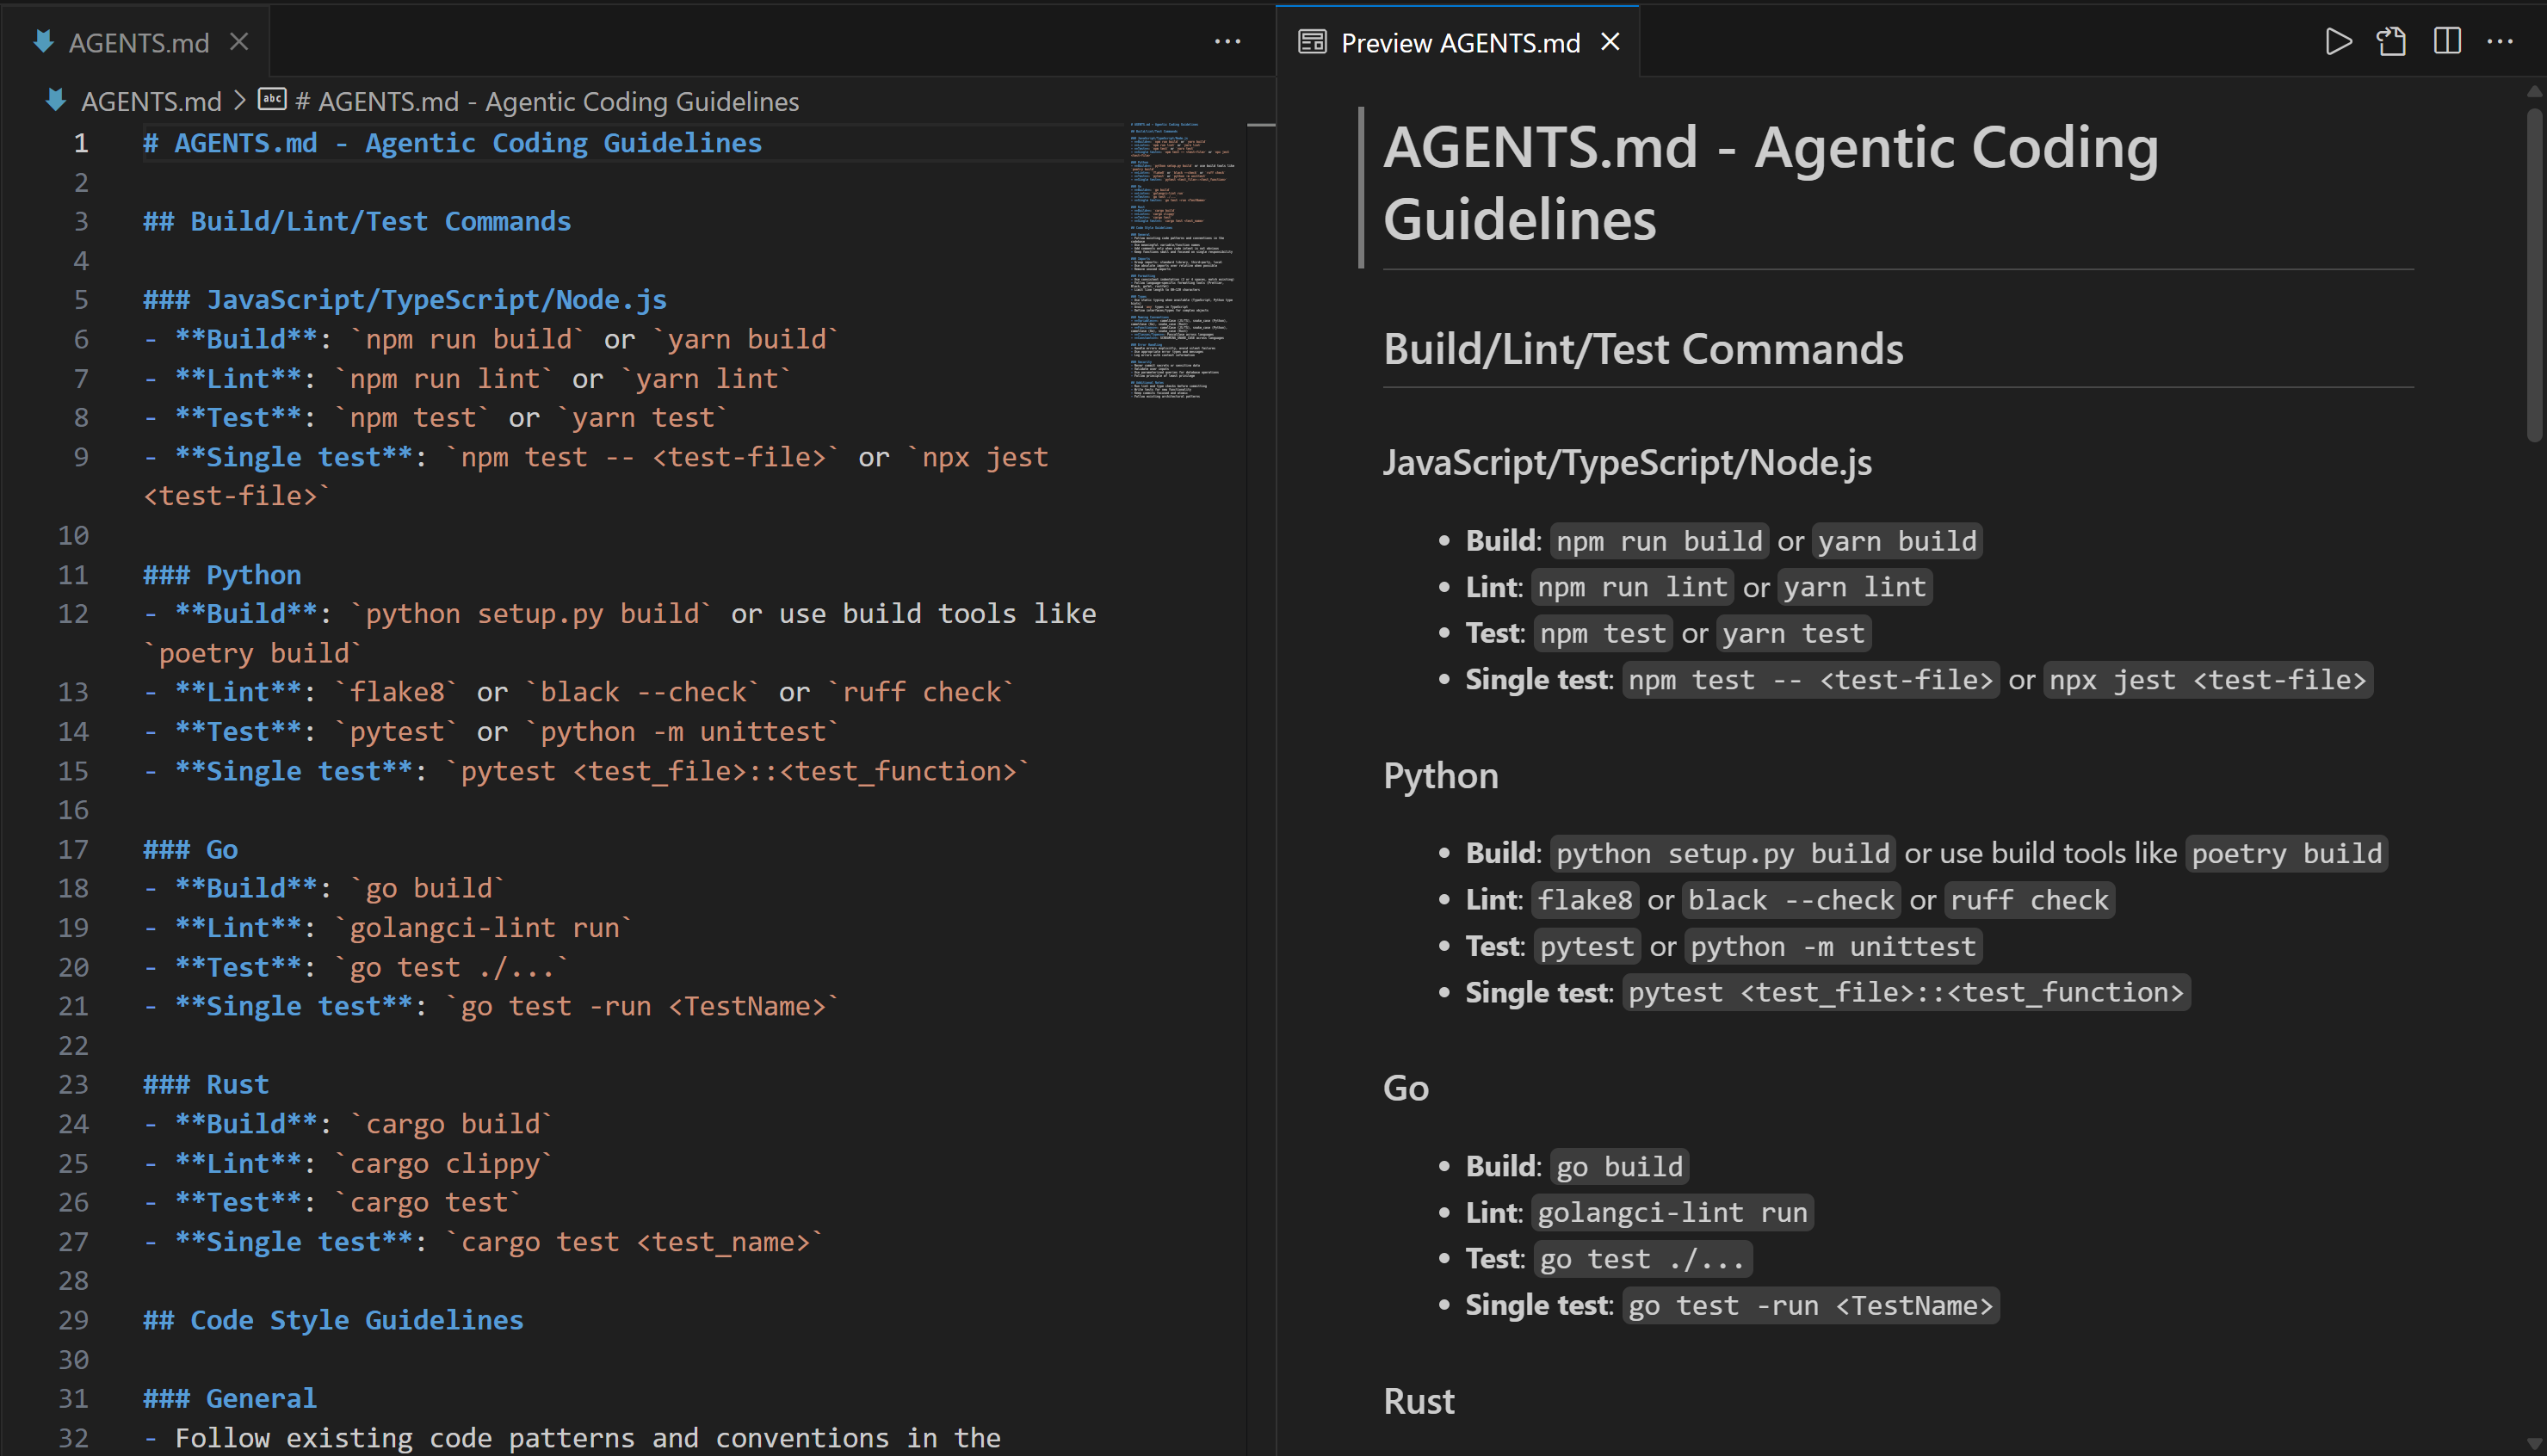
Customize it according to your needs to instruct the AI coding agent on how to operate within your project directory.
Tip: The AGENTS.md file should be committed to your project folder’s Git repository.
Step #4: Test Bright Data’s Web MCP
Before trying to integrate your opencode agent with the Bright Data Web MCP server, it is important to understand how this server works and whether your machine can run it.
If you have not already, begin by creating a Bright Data account. Otherwise, if you already have one, simply log in. For a quick setup, take a look at the “MCP” page in your account:
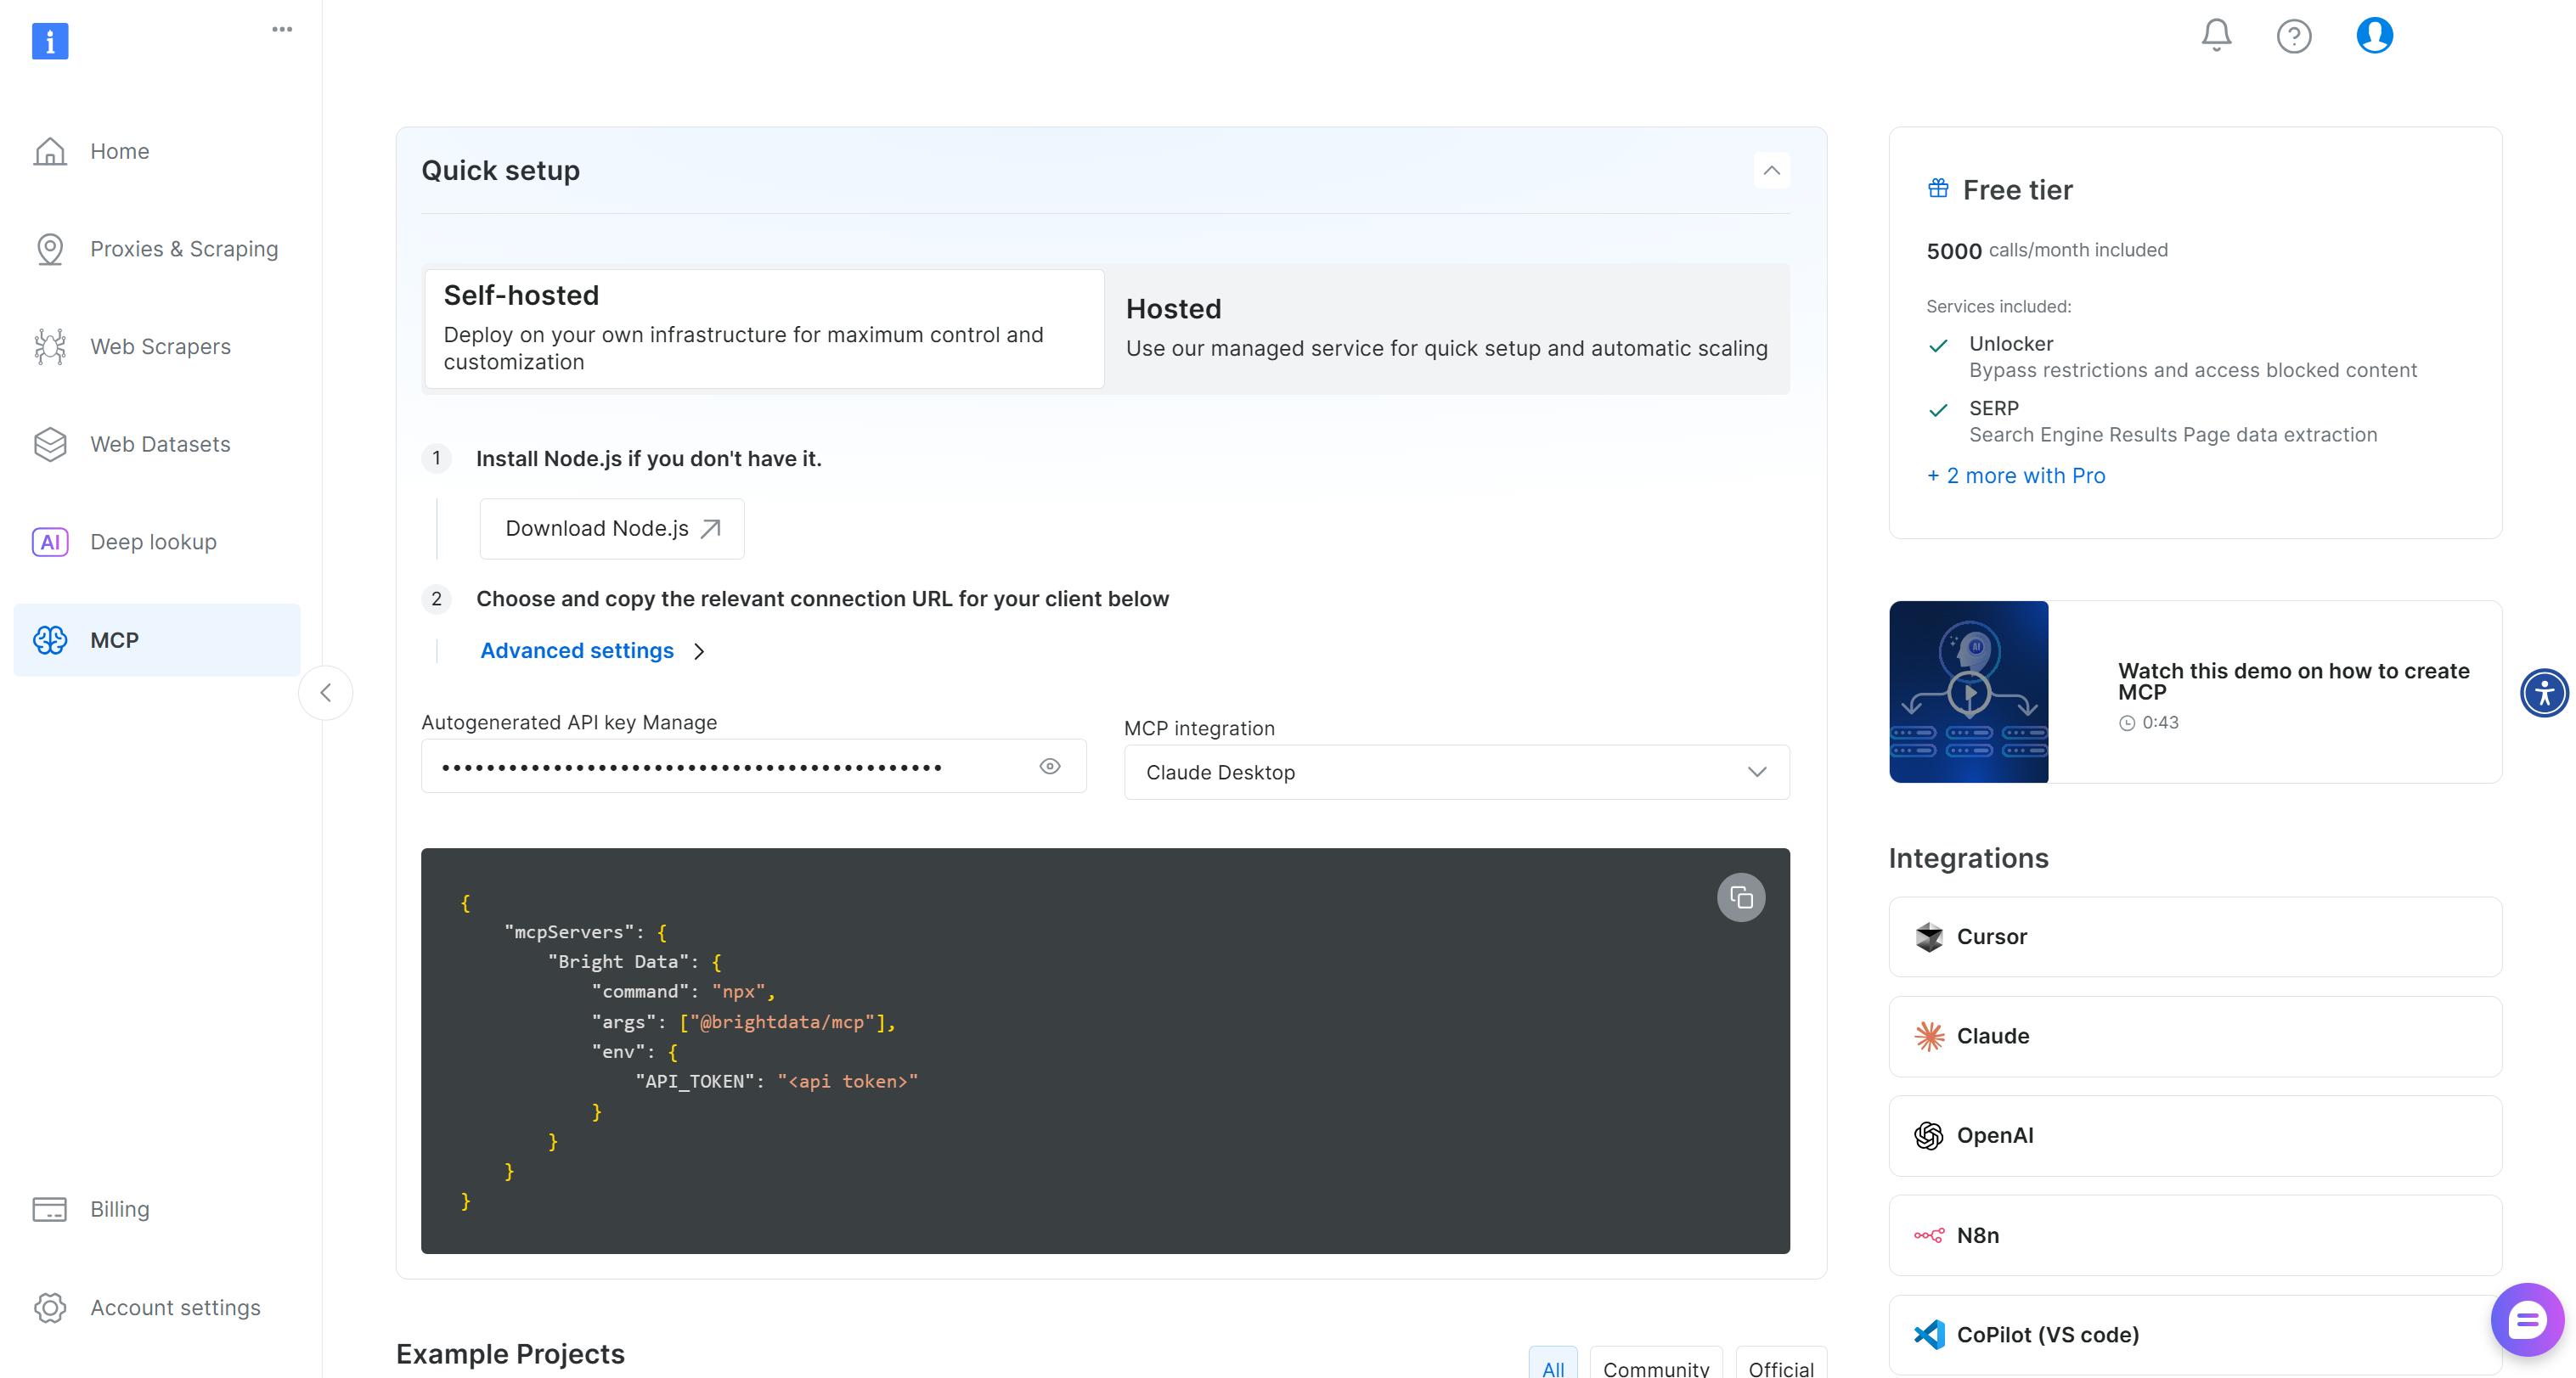
Otherwise, follow the instructions below.
Now, generate your Bright Data API key. Make sure to store it in a safe place, as you will need it soon. Here, we will assume you are using an API key with Admin permissions, as that makes the integration easier.
In the terminal, install the Web MCP globally via the @brightdata/mcp package:
npm install -g @brightdata/mcpCheck that the local MCP server works with this Bash command:
API_TOKEN="<YOUR_BRIGHT_DATA_API>" npx -y @brightdata/mcpReplace the <YOUR_BRIGHT_DATA_API> placeholder with the actual Bright Data API token. The command sets the required API_TOKEN environment variable and then fires the Web MCP through the @brightdata/mcp package.
In case of success, you should see logs similar to this:

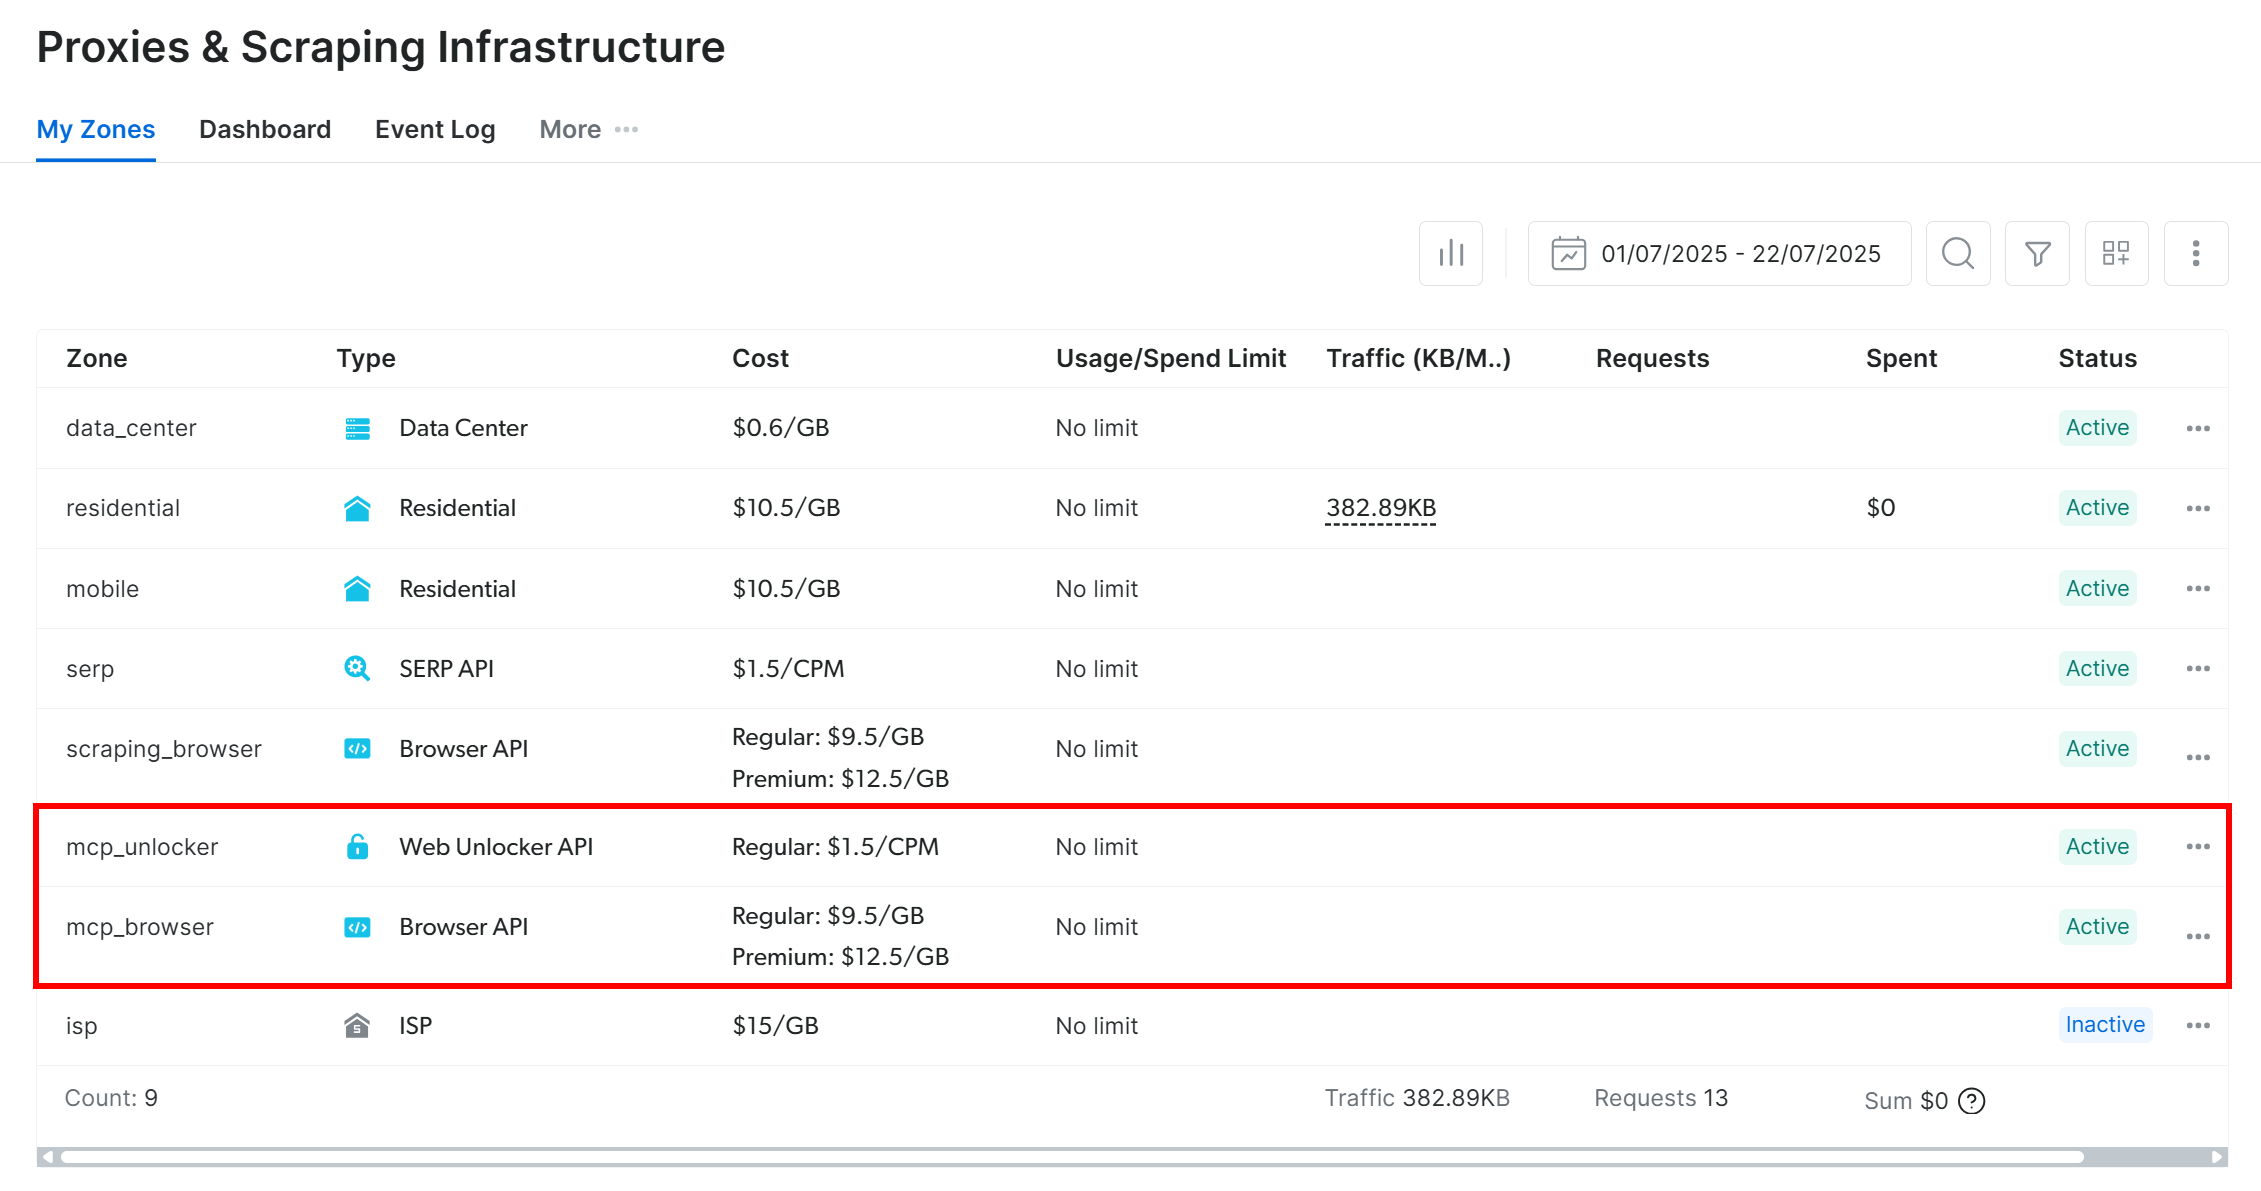
On first launch, the package automatically sets up two default zones in your Bright Data account:
mcp_unlocker: A zone for Web Unlocker.mcp_browser: A zone for Browser API.
These two zones are required by the Web MCP to power all the tools it exposes.
To confirm that the above two zones were created, log in to your Bright Data account. In the dashboard, navigate to the “Proxies & Scraping Infrastructure” page. There, you should see the two zones in the table:
Note: If your API token does not have Admin permissions, these zones might not be created automatically. In that case, you can set them up manually in the dashboard and specify their names through environment variables, as explained on the GitHub page of the package.
By default, the MCP server exposes only the search_engine and scrape_as_markdown tools (which can be used for free!).
To unlock advanced features like browser automation and structured data feed retrieval, you must enable Pro mode. To do so, set the PRO_MODE=true environment variable before launching the MCP server:
API_TOKEN="<YOUR_BRIGHT_DATA_API>" PRO_MODE="true" npx -y @brightdata/mcpImportant: Once Pro mode is enabled, you will gain access to all 60+ tools. On the other hand, Pro mode is not included in the free tier and will incur additional charges.
Perfect! You just verified that the Web MCP server works on your machine. Stop the server process, as you will now configure opencode to launch it for you and connect to it.
Step #5: Integrate the Web MCP into opencode
opencode supports MCP integration via the mcp entry in the configuration file. Keep in mind that there are two supported configuration approaches:
- Globally: Via the file at
~/.config/opencode/opencode.json. The global config is useful for settings like themes, providers, or keybinds. - Per project: Via a local
opencode.jsonfile in your project’s directory.
Assume you want to configure the MCP integration locally. Start by adding an opencode.json file inside your working directory.
Then, open the file and make sure it contains the following lines:
{
  "$schema": "https://opencode.ai/config.json",
  "mcp": {
    "brightData": {
      "type": "local",
      "enabled": true,
      "command": [
        "npx",
        "-y",
        "@brightdata/mcp"
      ],
      "environment": {
        "API_TOKEN": "<YOUR_BRIGHT_DATA_API_KEY>",
        "PRO_MODE": "true"
      }
    }
  }
}
Replace <YOUR_BRIGHT_DATA_API_KEY> with the Bright Data API key you generated and tested earlier.
In this configuration:
- The
mcpobject tells opencode how to start external MCP servers. - The
brightDataentry specifies the command (npx) and environment variables needed to launch the Web MCP. (PRO_MODEis optional, but enabling it unlocks the full set of available tools.)
In other words, the above opencode.json configuration instructs the CLI to run the same npx command with the environment variables defined earlier. This gives opencode the ability to launch and connect to the Bright Data Web MCP server.
As of this writing, there is no dedicated command to check MCP server connections or available tools. So, let’s move straight to testing!
Step #6: Run a Task in opencode
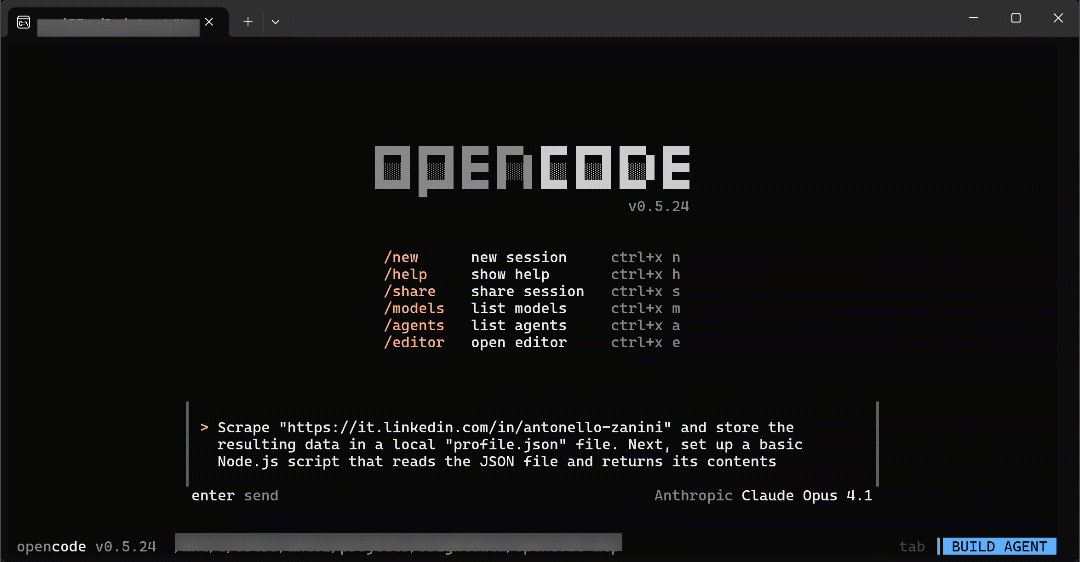
To check the web capabilities of your enhanced opencode coding agent, launch a prompt like the following:
Scrape "https://it.linkedin.com/in/antonello-zanini" and store the resulting data in a local "profile.json" file. Next, set up a basic Node.js script that reads the JSON file and returns its contentsThis represents a real-world use case, as it collects actual data and then uses it in a Node.js script.
Start opencode, type the prompt, and press Enter to execute it. You should see behavior similar to this:
The GIF has been sped up, but this is what happens step by step:
- The Claude Opus model defines a plan.
- The first step of the plan is to retrieve the LinkedIn data. To do this, the LLM selects the appropriate MCP tool (
web_data_linkedin_person_profile, referenced asBrightdata_web_data_linkedin_person_profilein the CLI) with the correct arguments extracted from the prompt (https://it.linkedin.com/in/antonello-zanini). - The LLM gathers the target data via the LinkedIn scraping tool and updates the plan.
- The data is stored in a local
profile.jsonfile. - A Node.js script (called
readProfile.js) is created to read the data fromprofile.jsonand print it. - You are shown a summary of the executed steps, with instructions to run the produced Node.js script.
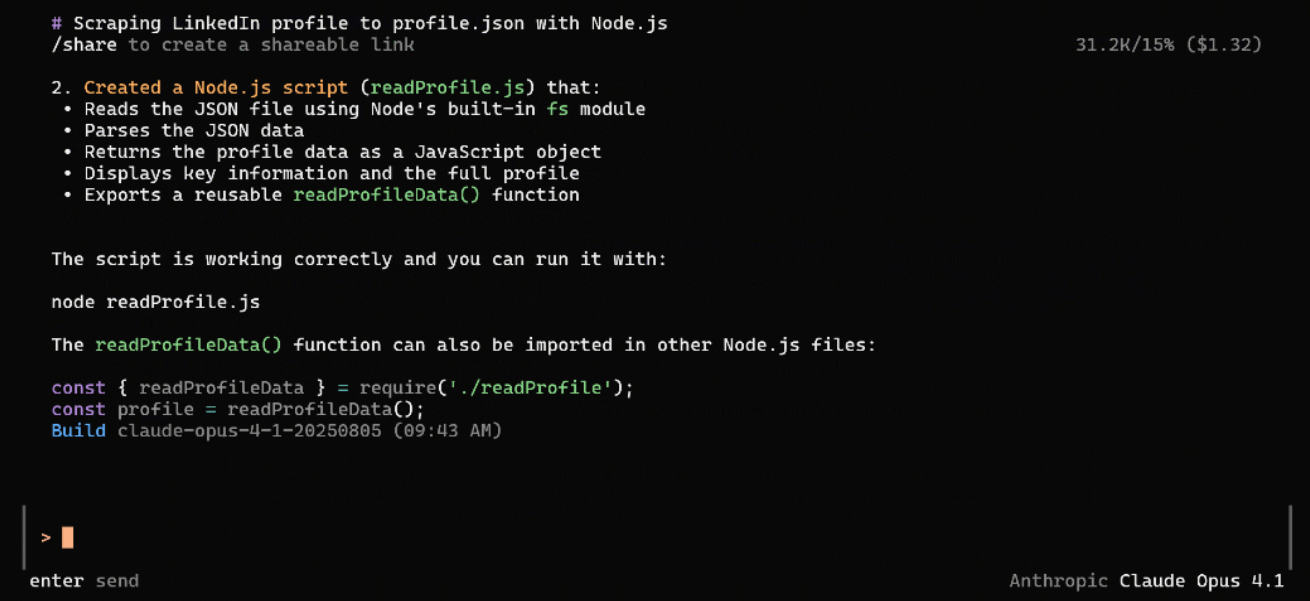
In this example, the final output produced by the task looks like this:
At the end of the interaction, your working directory should contain these files:
├── AGENTS.md
├── opencode.json
├── profile.json   # <-- created by the CLI
└── readProfile.js # <-- created by the CLI
Wonderful! Let’s now check if the generated files contain the intended data and logic.
Step #7: Explore and Test the Output
Open the project directory in Visual Studio Code and start by inspecting the profile.json file:
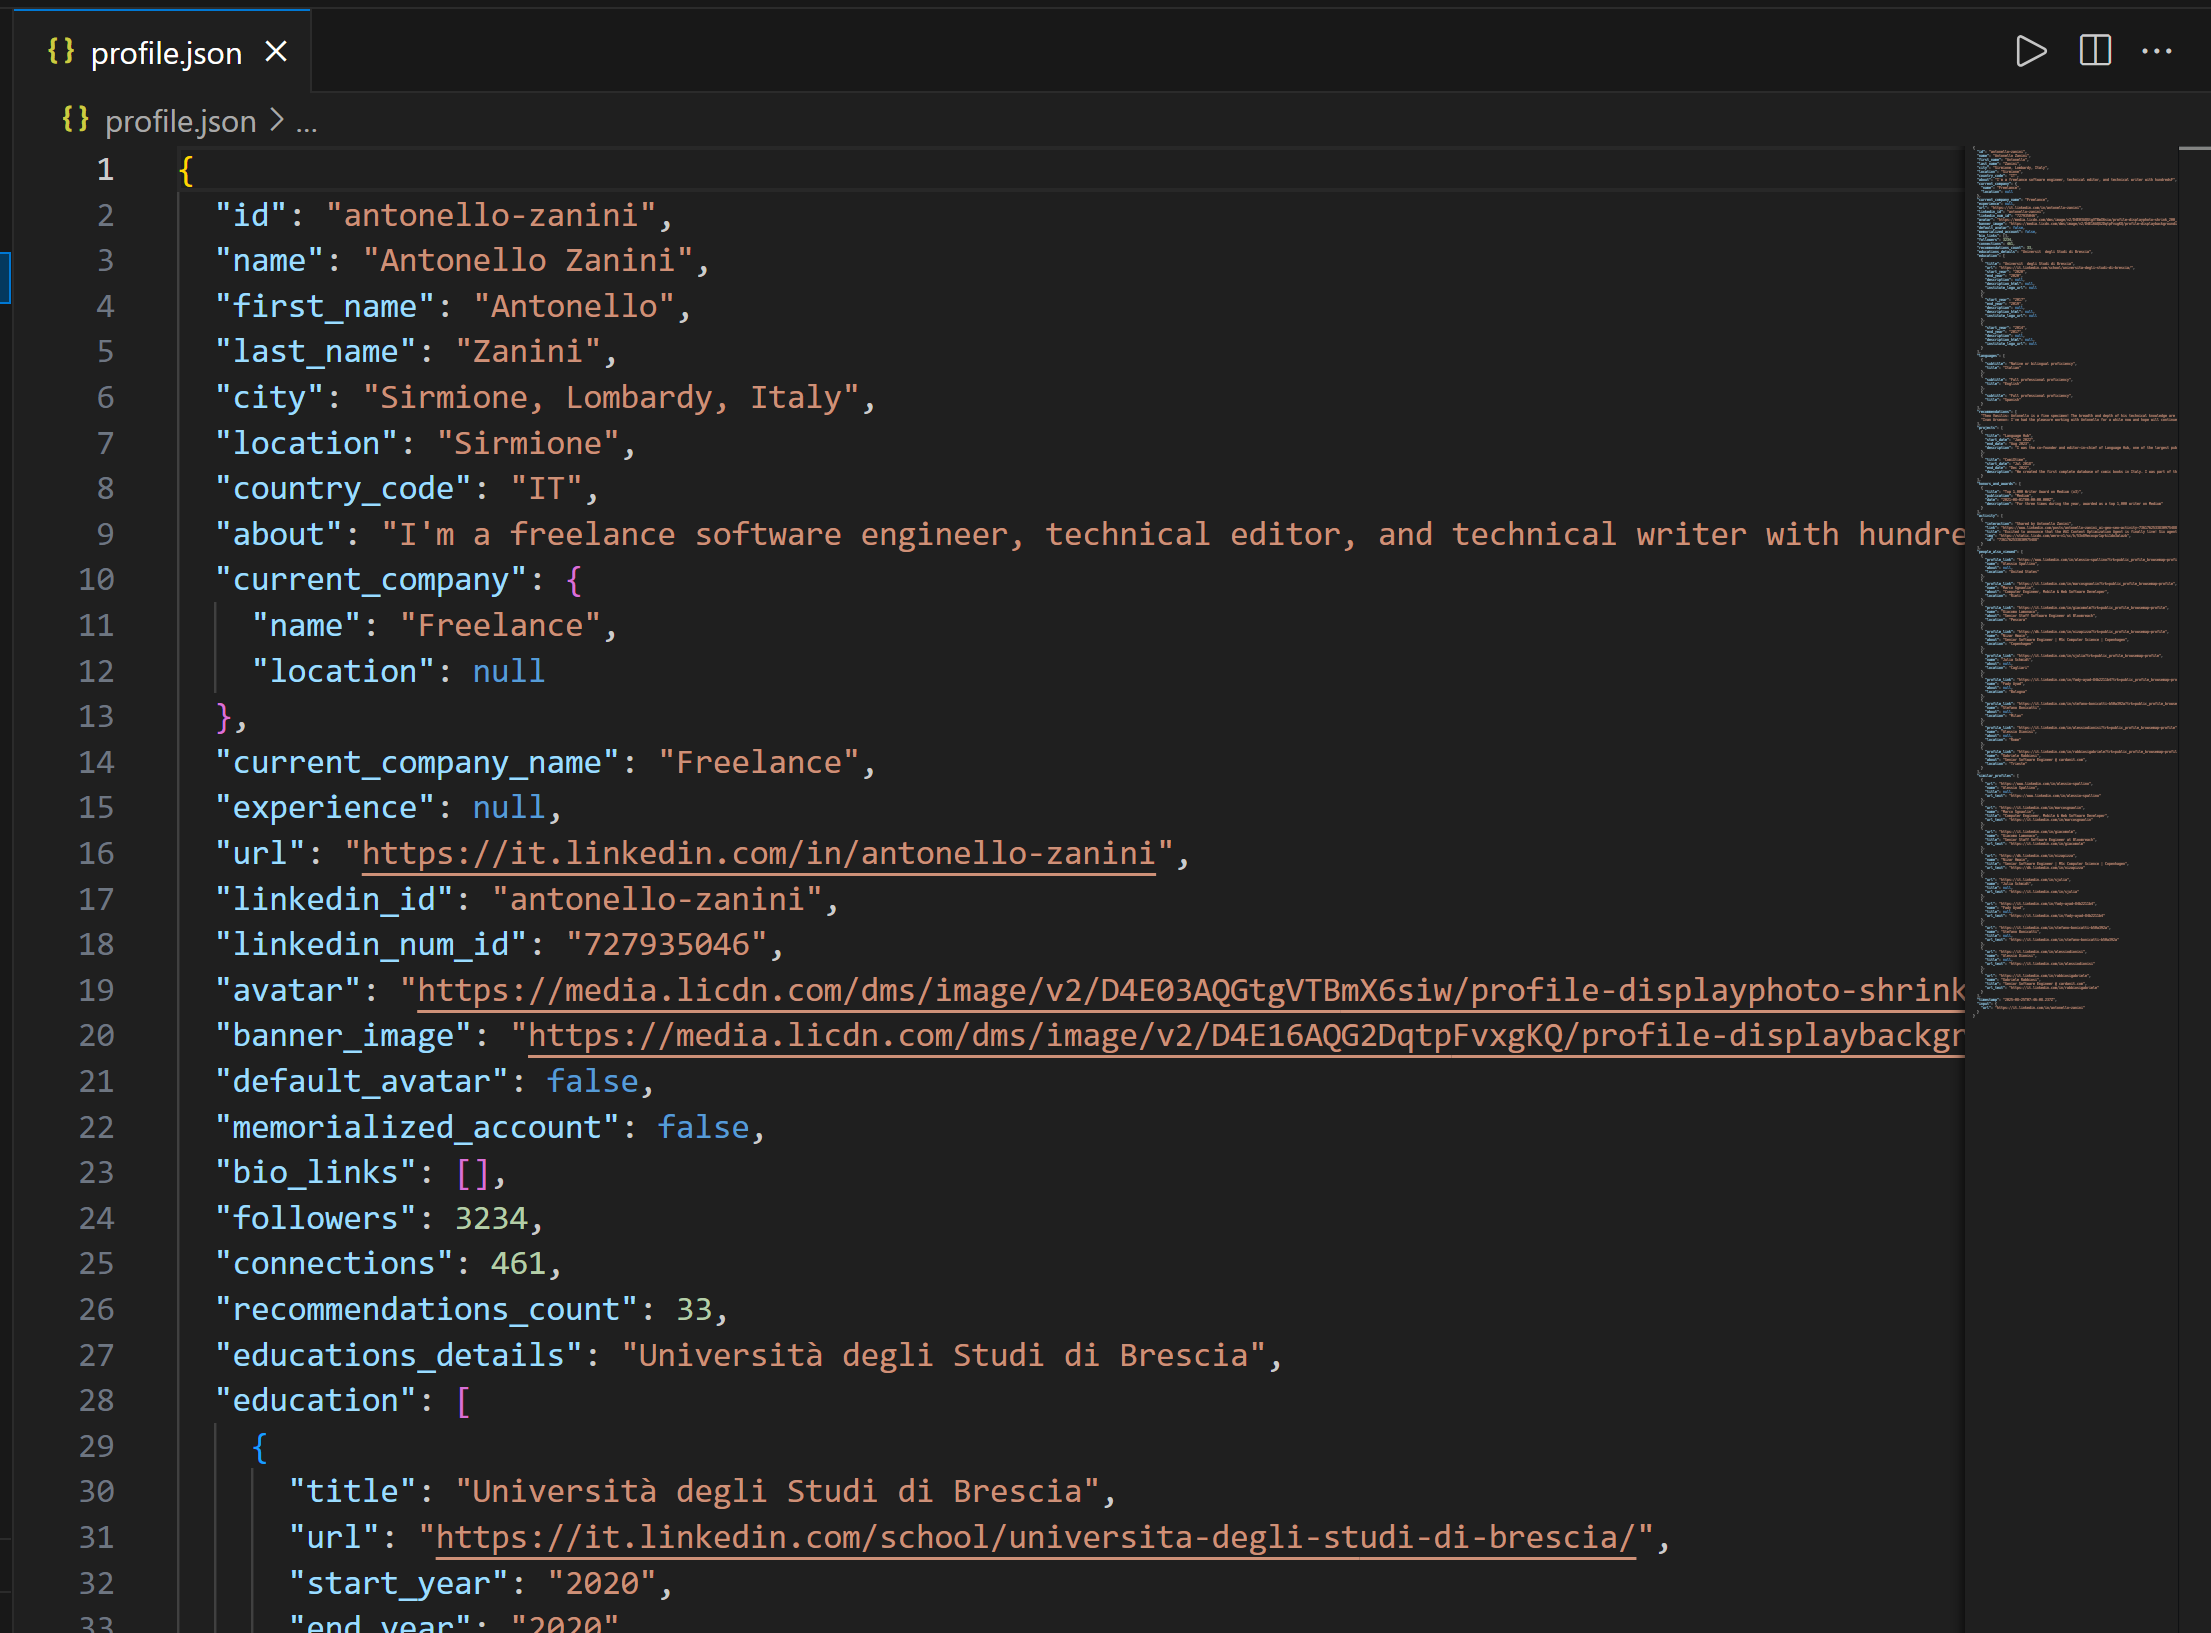
Important: The data in profile.json is real LinkedIn data collected by the Bright Data LinkedIn Scraper via the dedicated web_data_linkedin_person_profile MCP tool. That is not hallucinated, or made-up content generated by the Claude model!
The LinkedIn data was retrieved successfully, as you can verify by inspecting the public LinkedIn profile page mentioned in the prompt:
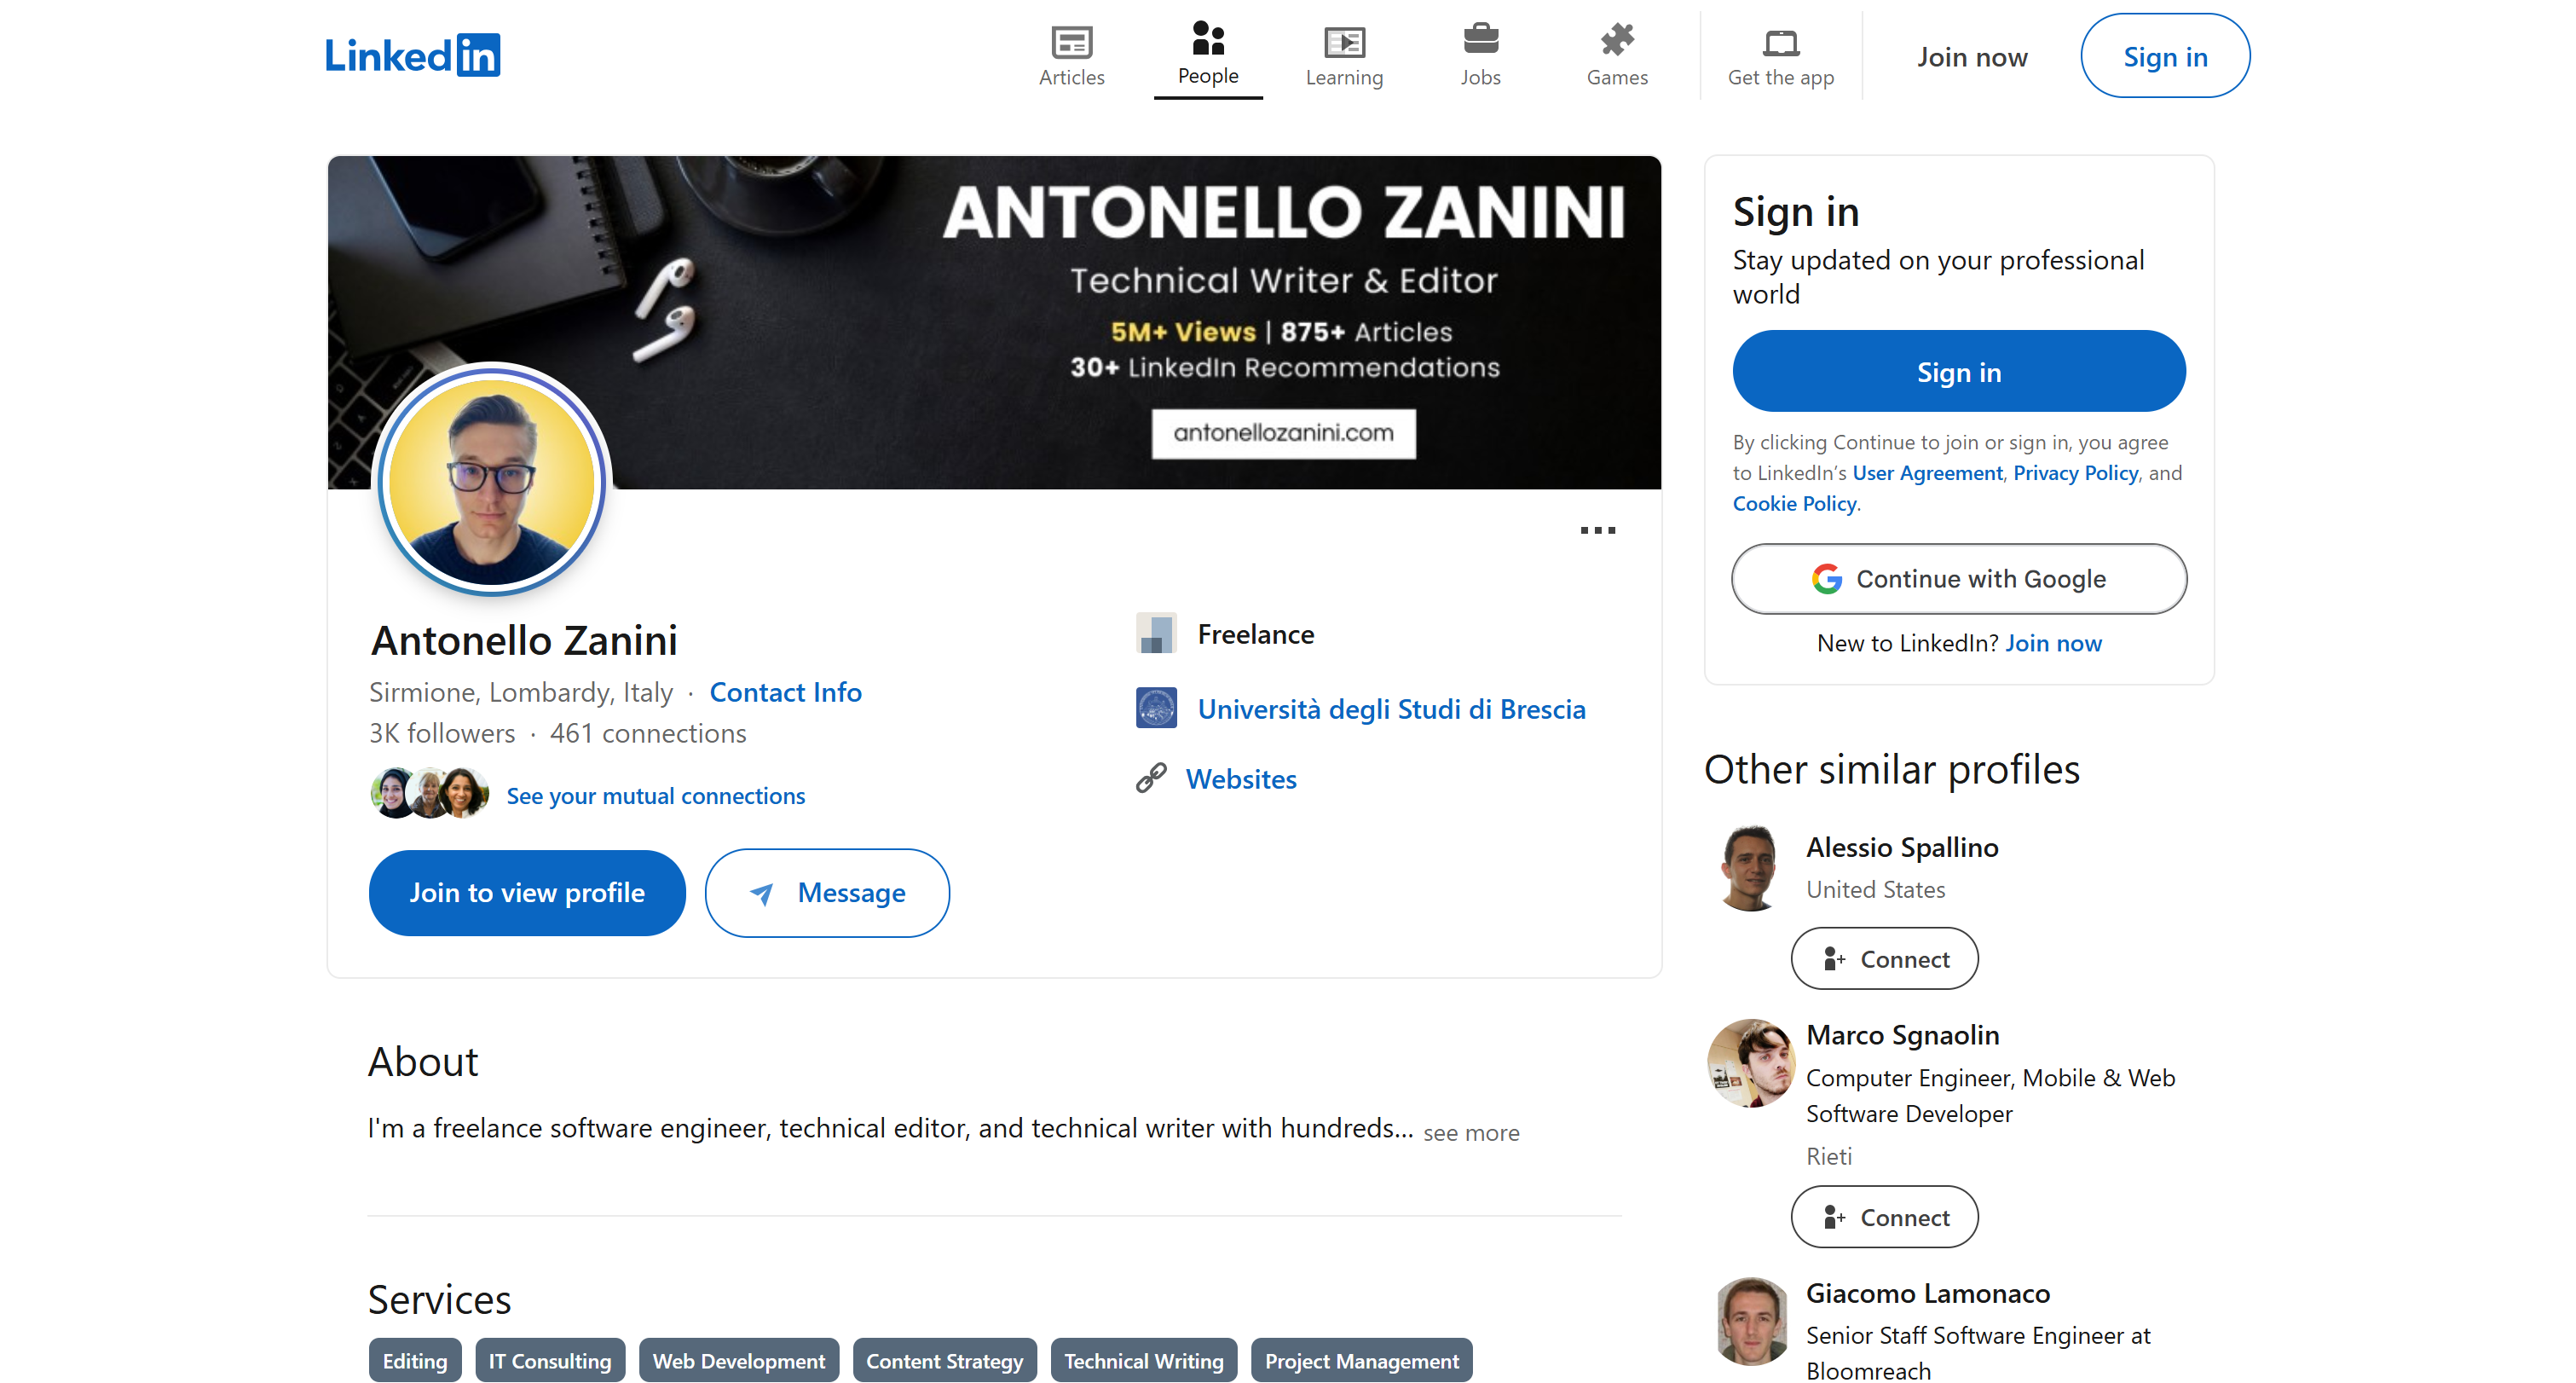
Note: Scraping LinkedIn is notoriously challenging due to its sophisticated anti-bot protections. A regular LLM cannot perform this task reliably, which demonstrates how powerful your coding agent has become thanks to the Bright Data Web MCP integration.
Next, take a look at the readProfile.js file:
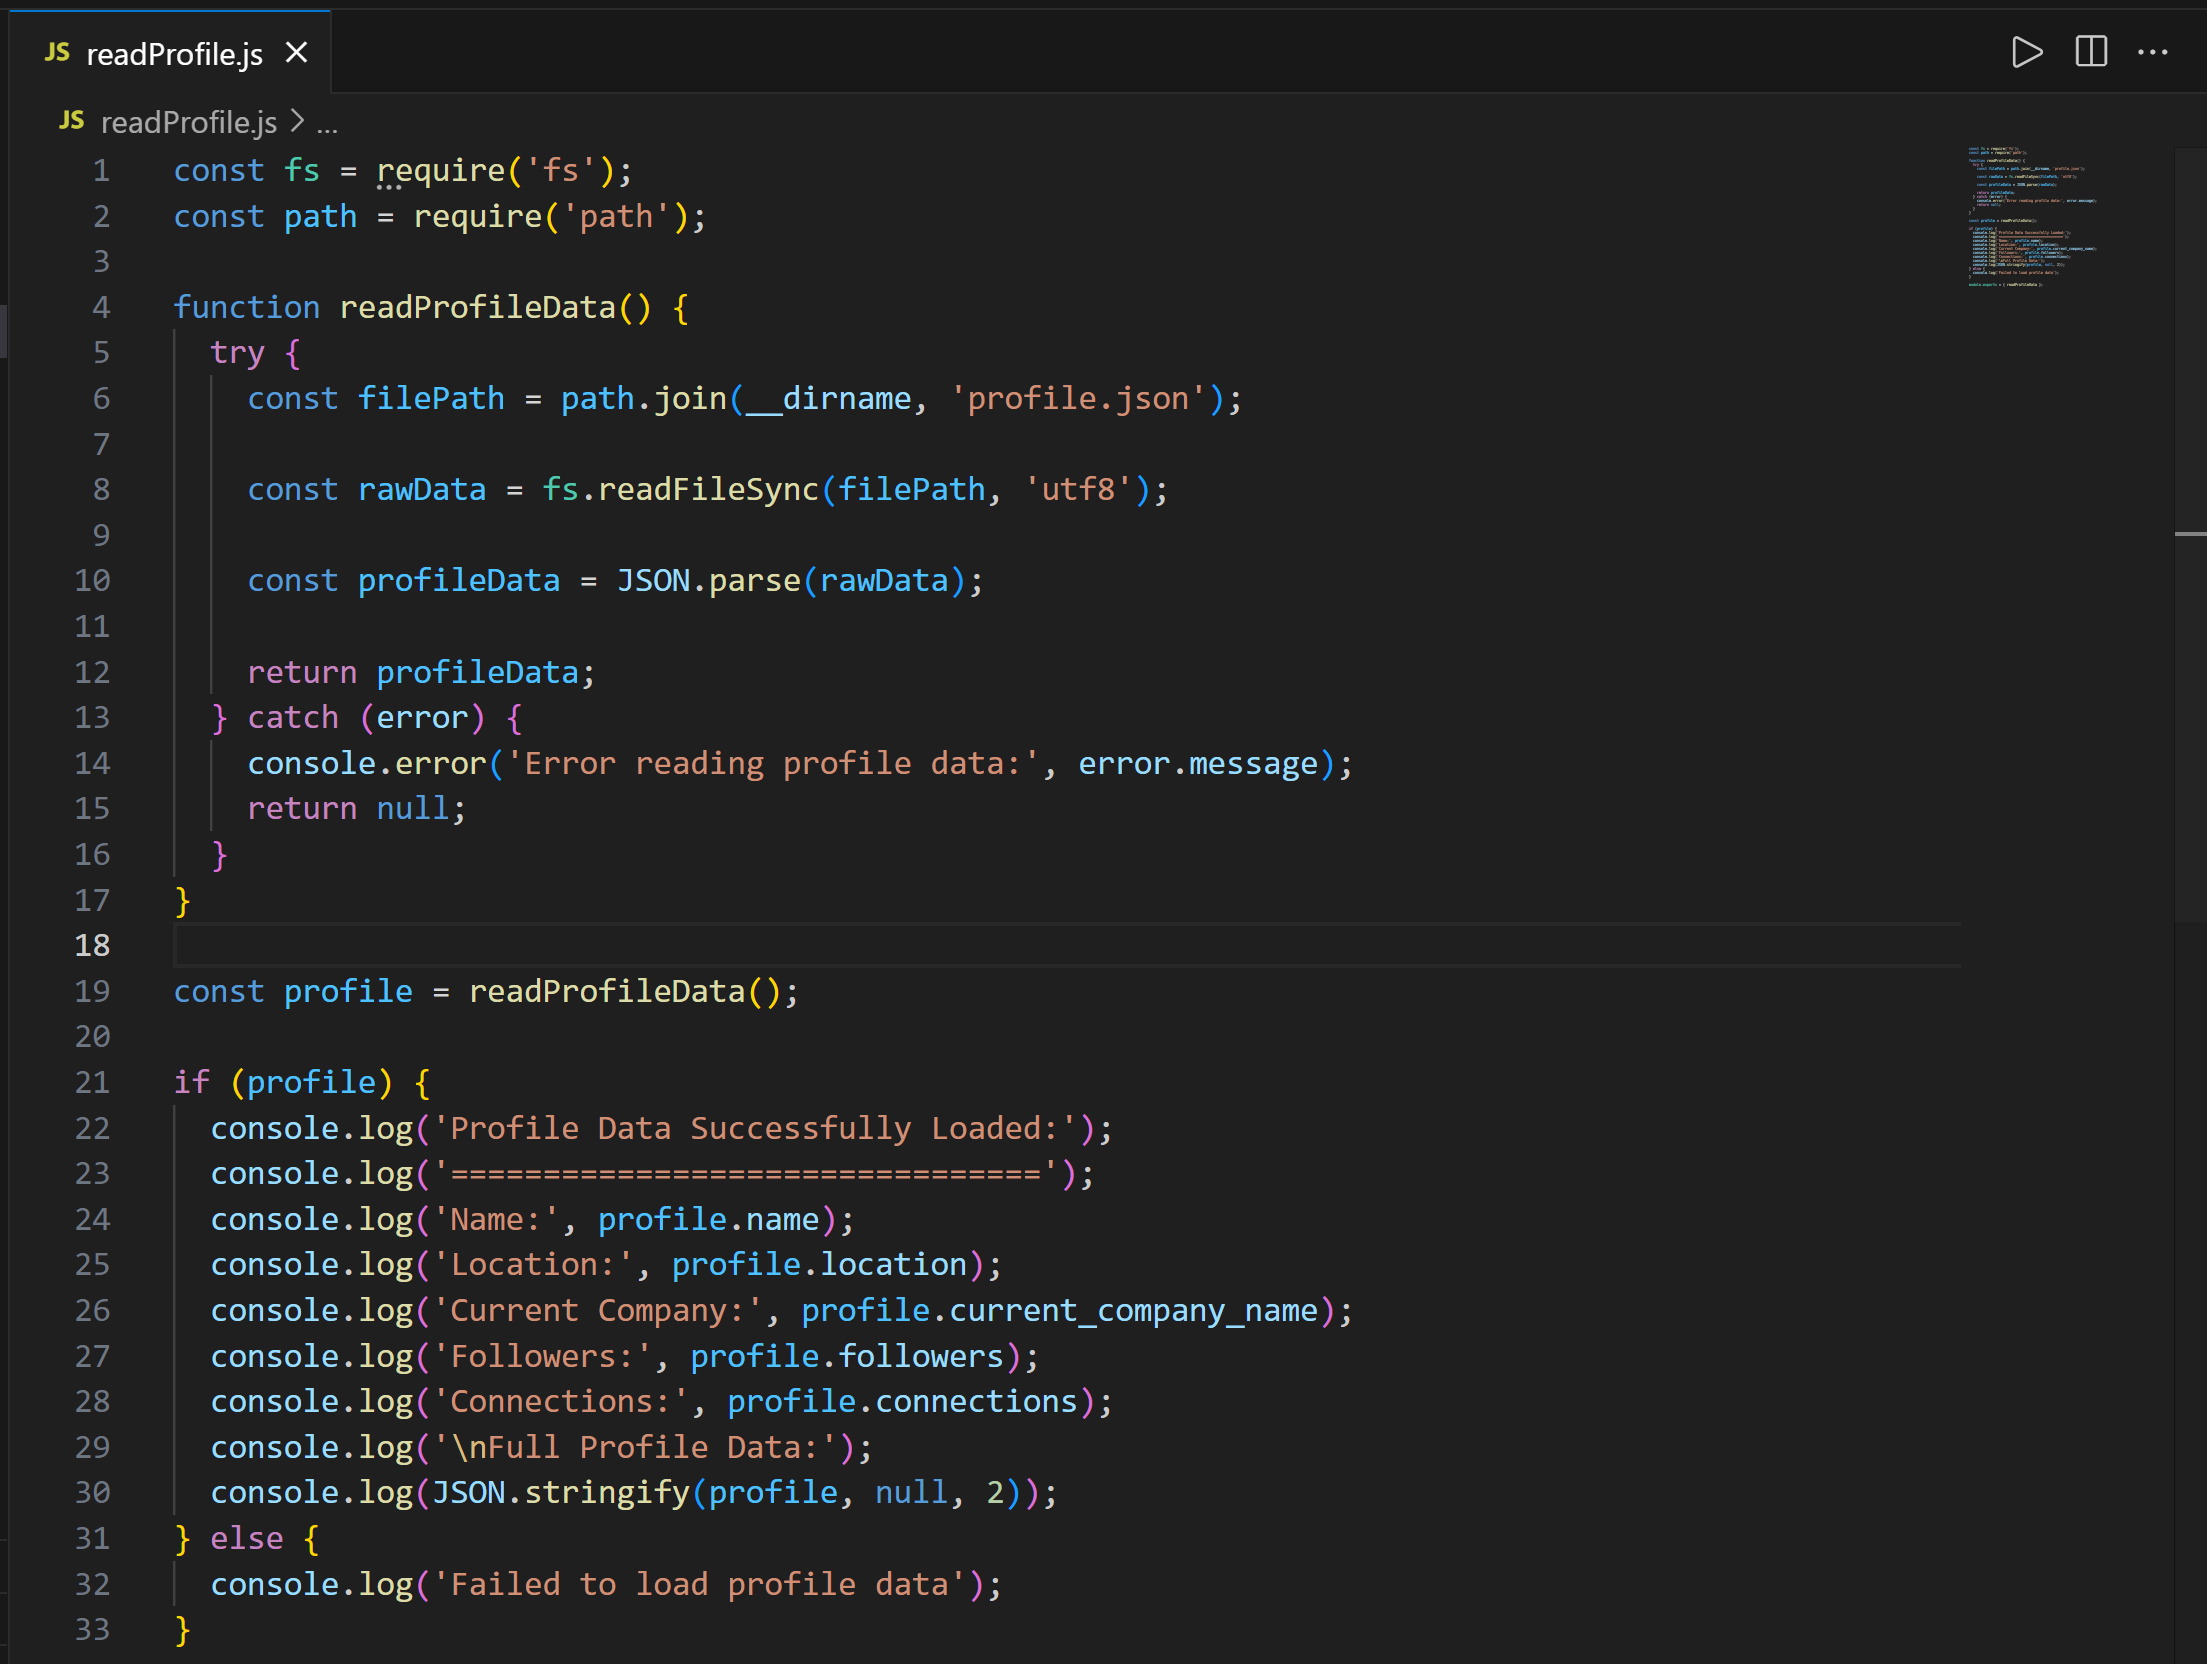
Notice that the code defines a readProfileData() function to read the LinkedIn profile data from profile.json. This function is then called to print the profile data with all details.
Test the script with:
node readProfile.jsThe output should be:
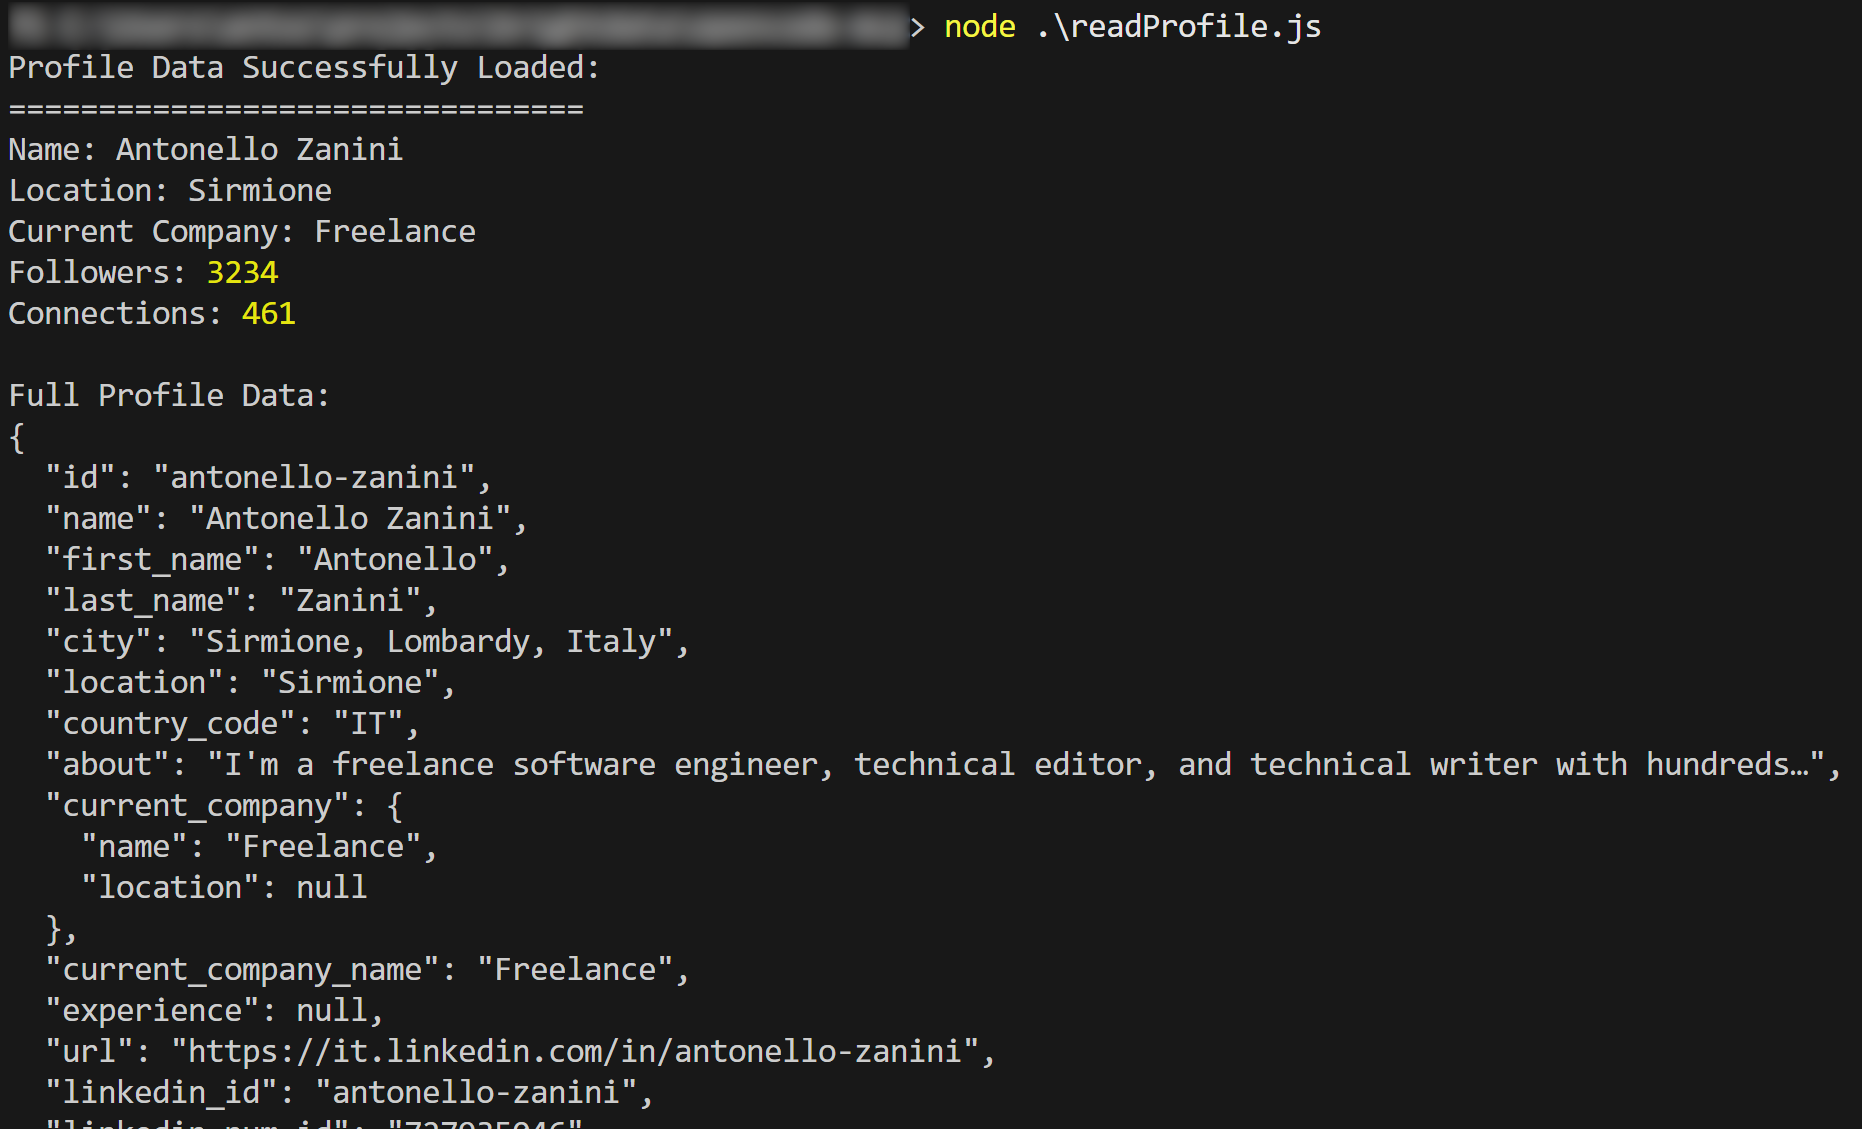
See how the produced script prints the LinkedIn scraped data as planned.
Mission complete! Try different prompts and test advanced LLM-driven data workflows directly in the CLI.
Conclusion
In this article, you saw how to connect opencode with Bright Data’s Web MCP (which now offers a free tier!). The result is a tool-rich AI coding agent capable of extracting data from the web and interacting with it.
To build more complex AI agents, explore the full range of services and products available in the Bright Data AI infrastructure. These solutions support a wide variety of agentic scenarios, including several CLI integrations.
Sign up for Bright Data for free and start experimenting with our AI-ready web tools!


Technical Writer
 5.5 years experience
Antonello Zanini is a technical writer, editor, and software engineer with 5M+ views. Expert in technical content strategy, web development, and project management.