







In this blog post, you will learn:
- What Grok Build is and the capabilities it provides as a terminal-based AI coding agent.
- Why adding live web access can help Grok Build produce more up-to-date results.
- How Bright Data extends Grok Build with web search, scraping, discovery, and browser automation capabilities.
- How to connect Bright Data MCP to Grok Build.
- How to enhance Grok Build with Bright Data product knowledge using Agent Skills.
- How Grok Build and Bright Data work together in a real-world workflow.
Let’s dive in!
What Is Grok Build?
Grok Build is an open-source, terminal-based AI coding agent developed by SpaceXAI. It combines a full-screen terminal UI (TUI) with an extensible agent runtime that understands your codebase, edits files, executes shell commands, and automates development tasks.
It can be used interactively from the terminal, in headless mode for scripts and CI/CD pipelines, or embedded into editors through ACP (Agent Client Protocol).
Main Features
The key capabilities provided by Grok Build are:
- AI-powered coding and automation: Understands codebases, writes and refactors code, reviews changes, edits multiple files, executes shell commands, runs builds and tests, and automates development workflows directly from the CLI.
- Planning and reasoning: Generates execution plans for complex tasks, lets you review and approve them, and displays every change as a clean diff.
- Parallel subagents: Launches specialized AI subagents that work concurrently on independent tasks such as research, implementation, and testing.
- Extensibility: Supports MCP servers, Agent Skills, plugins, hooks, and
AGENTS.mdfiles to customize capabilities and integrate external tools. - Open-source architecture: Published on GitHub under the Apache 2.0 license, so that you can inspect the source code, understand how the agent works, and extend its functionality.
- Headless execution: Runs non-interactively for scripting, automation, and CI/CD workflows while supporting the ACP.
- Persistent context: Maintains configuration, project conventions, and session memory to provide more consistent assistance across development sessions.
Learn more in the official documentation.
Why Extend Grok Build CLI with Web Search, Scraping, and Navigation Capabilities
There is no doubt that Grok Build is a powerful terminal-based AI coding agent. However, like any LLM-powered system, its built-in knowledge is limited by the data available during training.
Regardless of how recent the AI model is, it does not have information published after its training cutoff. In the fast-moving IT landscape, this can mean missing critical updates about security vulnerabilities, software releases, documentation changes, and evolving best practices.
For developers, relying only on static LLM knowledge can reduce the effectiveness of research, troubleshooting, and automation workflows. A capable AI coding agent must be able to consult the latest documentation, inspect live websites, discover new sources, and retrieve data from platforms that were not included in its original training data.
Grok Build addresses part of this challenge with built-in web search capabilities. Yet, such web access methods struggle at scale or when interacting with protected websites due to anti-bot mechanisms like rate limits and CAPTCHAs.
This is where Bright Data integration makes a difference. By connecting Grok Build with Bright Data’s infrastructure, the CLI agent gains access to enterprise-ready tools for live web search, data extraction, source discovery, browser automation, and dataset retrieval.
What makes Bright Data integration stand out is its global infrastructure, including 400+ million residential IPs. This architecture provides the scalability, reliability, and performance required for demanding web data workflows. It supports unlimited concurrency, has 99.99% SLA-backed uptime, and achieves a 99.95% success rate.
How Bright Data Supports Integration with Grok Build
Bright Data extends Grok Build through two complementary integrations:
- Bright Data MCP: An MCP server that exposes 70+ tools for web search, scraping, structured extraction, and browser automation.
- Bright Data Skills: Agent Skills that provide Grok Build with specialized knowledge about Bright Data products, recommended workflows, and best practices.
The Bright Data skills help the agent understand when and how to use Bright Data MCP tools effectively, together with the commands exposed by the Bright Data CLI.
Together, Bright Data MCP and skills transform Grok Build into a more capable CLI agent that can combine local development workflows with real-time web intelligence, automation, and structured data extraction.
Bright Data MCP
The Bright Data MCP equips Grok Build with a broad set of web interaction capabilities powered by Bright Data APIs.
In Rapid mode (the free tier with 5K requests per month), you get access to essential tools for web research and data extraction. These include:
| Tool | Description |
|---|---|
search_engine and search_engine_batch |
Retrieves Google, Bing, and Yandex search results in structured formats, with support for parallel queries. |
scrape_as_markdown and scrape_batch |
Extracts clean Markdown content from webpages while handling bot protection and access restrictions. |
discover |
Performs AI-powered web discovery with relevance ranking, intent filtering, and enriched results. |
By enabling Pro mode, Grok Build receives tools for structured data retrieval from platforms such as Amazon, LinkedIn, YouTube, Zillow, Google Maps, and 40+ other domains. Also, it gains access to production-ready tools for browser automation.
Bright Data’s Skills
The Bright Data skills extend Grok Build with reusable knowledge and workflows for working with Bright Data products. They help the agent select the right tools, follow recommended approaches, and automate common web data tasks.
Some of the available skills include:
| Skill | Description |
|---|---|
agent-onboarding |
Guides new agents through Bright Data setup and routes workflows toward MCP, CLI, APIs, or authentication options. |
search |
Enables live search workflows by retrieving structured results from Google with titles, links, and descriptions. |
scrape |
Teaches agents how to extract webpage content as clean Markdown with automatic anti-bot bypass handling. |
bright-data-mcp |
Provides guidance for orchestrating 70+ Bright Data MCP tools across search, scraping, extraction, and browser automation. |
scraper-builder |
Helps create production-ready scrapers by analyzing websites, selecting APIs, and generating extraction logic. |
scraper-studio |
Enables AI-driven scraper creation and execution through Bright Data CLI commands from natural-language instructions. |
bright-data-best-practices |
Provides recommended patterns for using Bright Data APIs, including Web Unlocker, SERP API, Browser API, and Web Scraper API. |
brightdata-cli |
Allows the agent to use Bright Data CLI for scraping, search, datasets, proxy management, and account operations. |
competitive-intel |
Supports real-time competitor research, pricing analysis, review monitoring, and market intelligence workflows. |
brand-listening |
Helps analyze brand mentions, sentiment, and discussions across social platforms, forums, and review websites. |
price-comparison |
Enables product comparison workflows by collecting pricing and availability data across major retailers. |
seo-audit |
Performs SEO analysis using live website data, technical signals, and search visibility insights. |
live-research |
Builds multi-source research reports by combining discovery, extraction, ranking, and AI-generated summaries. |
rag-pipeline |
Helps create retrieval-augmented generation workflows using live web data as the retrieval source. |
brightdata-proxy |
Generates proxy integration code for different environments, including Python, Node.js, Playwright, Puppeteer, and Selenium. |
Grok Build Setup: Common Steps
In the following two chapters, you will learn how to integrate Bright Data into Grok Build using MCP and Agent Skills, respectively. Before exploring these integrations, let’s go through the common setup steps required to prepare your local Grok Build environment.
Prerequisites
To follow this tutorial, make sure you have:
- An active SuperGrok/X Premium+ subscription or a SpaceXAI API key.
- A Bright Data account with an API key configured. Follow the official guide to generate your Bright Data API token.
Install Grok Build
To install Grok Build on macOS, Linux, or WSL, run:
curl -fsSL https://x.ai/cli/install.sh | bashThis command downloads and executes the Grok Build installation script. The output should look similar to this:

To install Grok Build on Windows, open PowerShell and run:
irm https://x.ai/cli/install.ps1 | iexThe grok command should now be available globally on your system. Well done!
Authenticate and Configure Grok Build
Launch Grok Build for the first time by running:
grokYou will receive instructions to connect Grok Build to your Grok account with an active subscription:
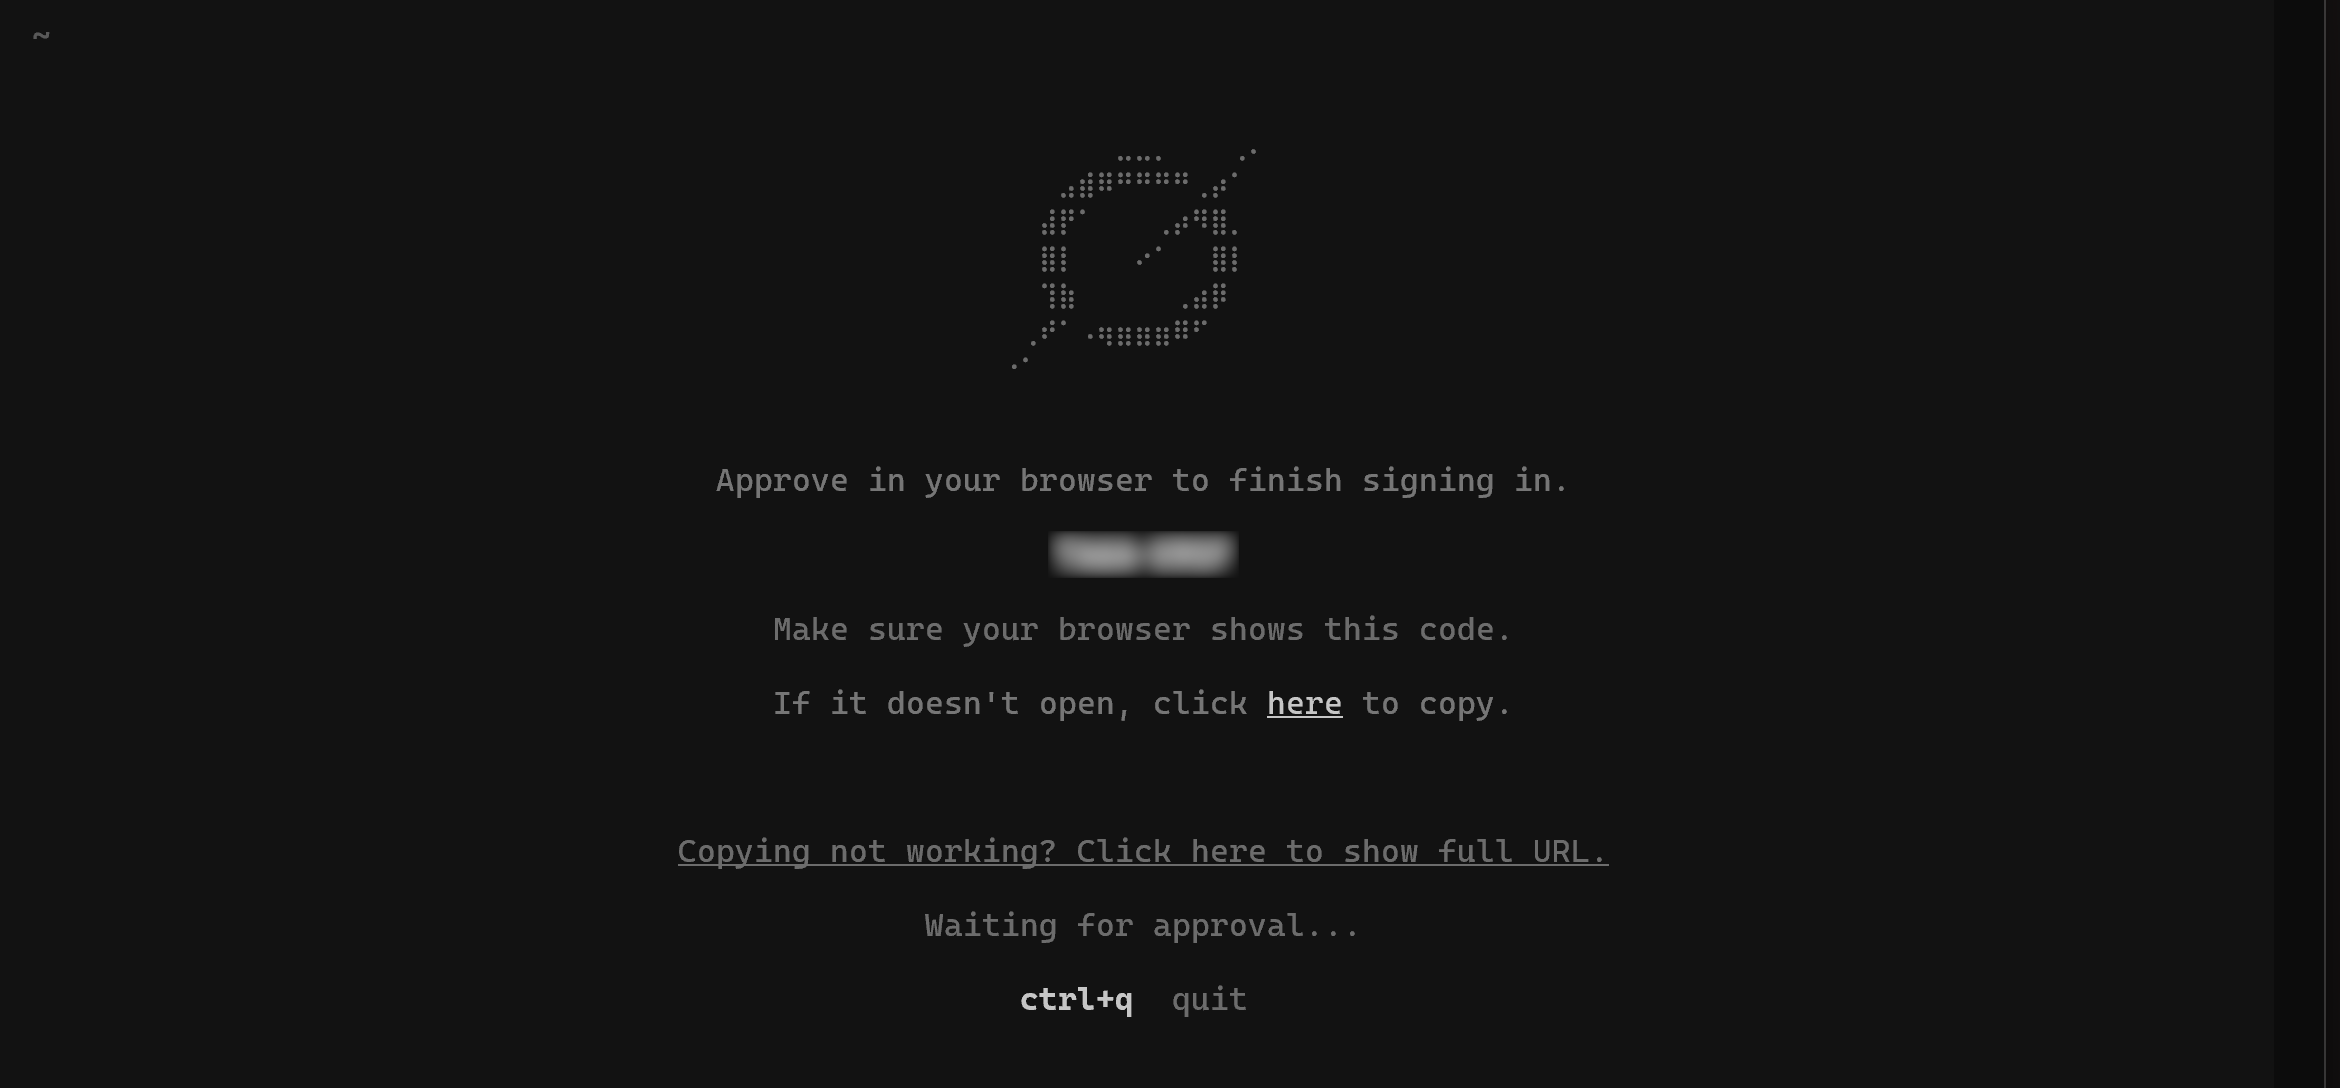
Alternatively, you can authenticate using a SpaceXAI API key by setting the XAI_API_KEY environment variable:
export XAI_API_KEY="<YOUR_SPACEXAI_API_KEY>"On Windows, set the variable with the equivalent PowerShell command:
$Env:XAI_API_KEY="<YOUR_SPACEXAI_API_KEY>"Replace the <YOUR_SPACEXAI_API_KEY> placeholder with your actual SpaceXAI API key.
Then, launch Grok Build:
grokAfter successful authentication, you will see the Grok Build TUI:
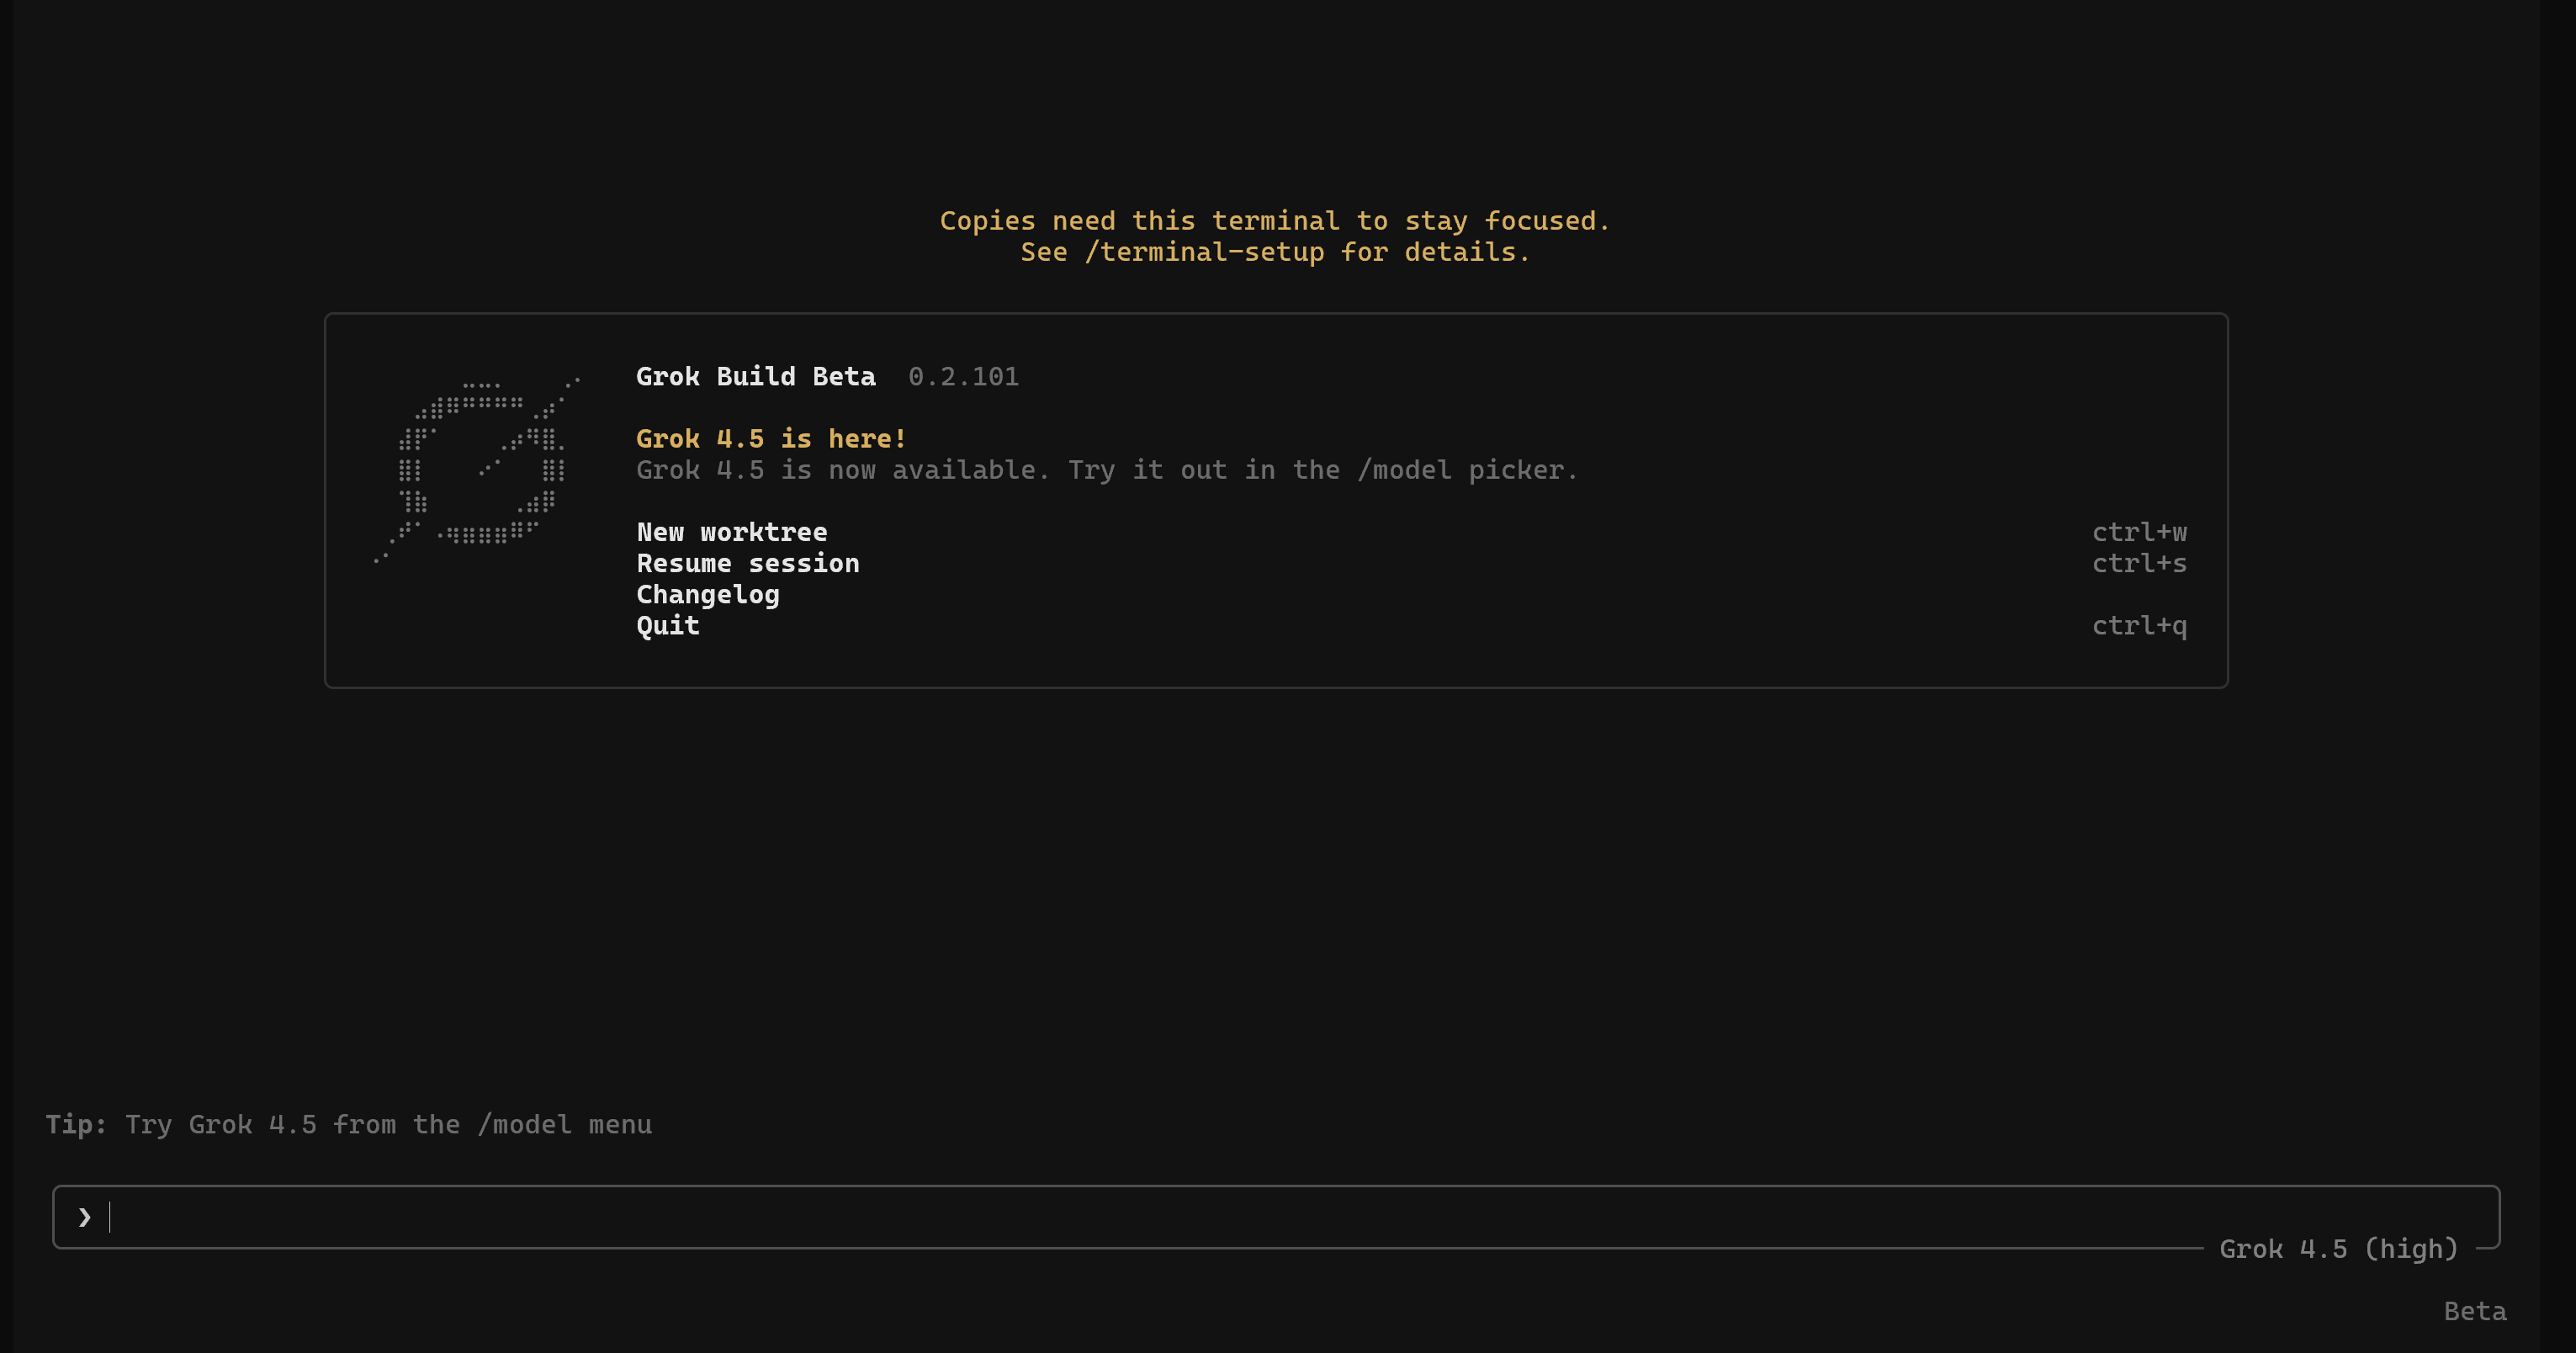
Finally, configure Grok Build based on your preferences. For example, you can use the /model command to select the LLM model you want to use (Grok 4.5 by default).
Grok Build is now installed and configured locally. You are ready to integrate Bright Data using MCP and Agent Skills. Excellent!
Connecting Grok Build to Bright Data MCP
Here, you will learn how to configure the Bright Data MCP server in Grok Build.
Prerequisites
To follow along more easily, you should have:
- Basic knowledge of how MCP works.
- Familiarity with the tools provided by the Bright Data MCP.
Note: The prerequisites described in the “Common Steps” chapter also apply here.
Step #1: Get Started with Bright Data MCP
Before connecting Bright Data MCP to Grok Build, make sure the MCP server can run correctly on your machine. For more details, refer to the official Bright Data MCP documentation.
Start by installing the Bright Data MCP package globally with:
npm install -g @brightdata/mcpOn Linux, macOS, or WSL, verify that the MCP server starts correctly by running:
API_TOKEN="<YOUR_BRIGHT_DATA_API>" npx -y @brightdata/mcpInstead, on PowerShell, execute:
$Env:API_TOKEN="<YOUR_BRIGHT_DATA_API>"; npx -y @brightdata/mcpReplace <YOUR_BRIGHT_DATA_API> with your actual Bright Data API key. This command sets the required API_TOKEN environment variable and starts the Bright Data MCP server locally via the @brightdata/mcp package.
If everything works correctly, you should see logs similar to these:

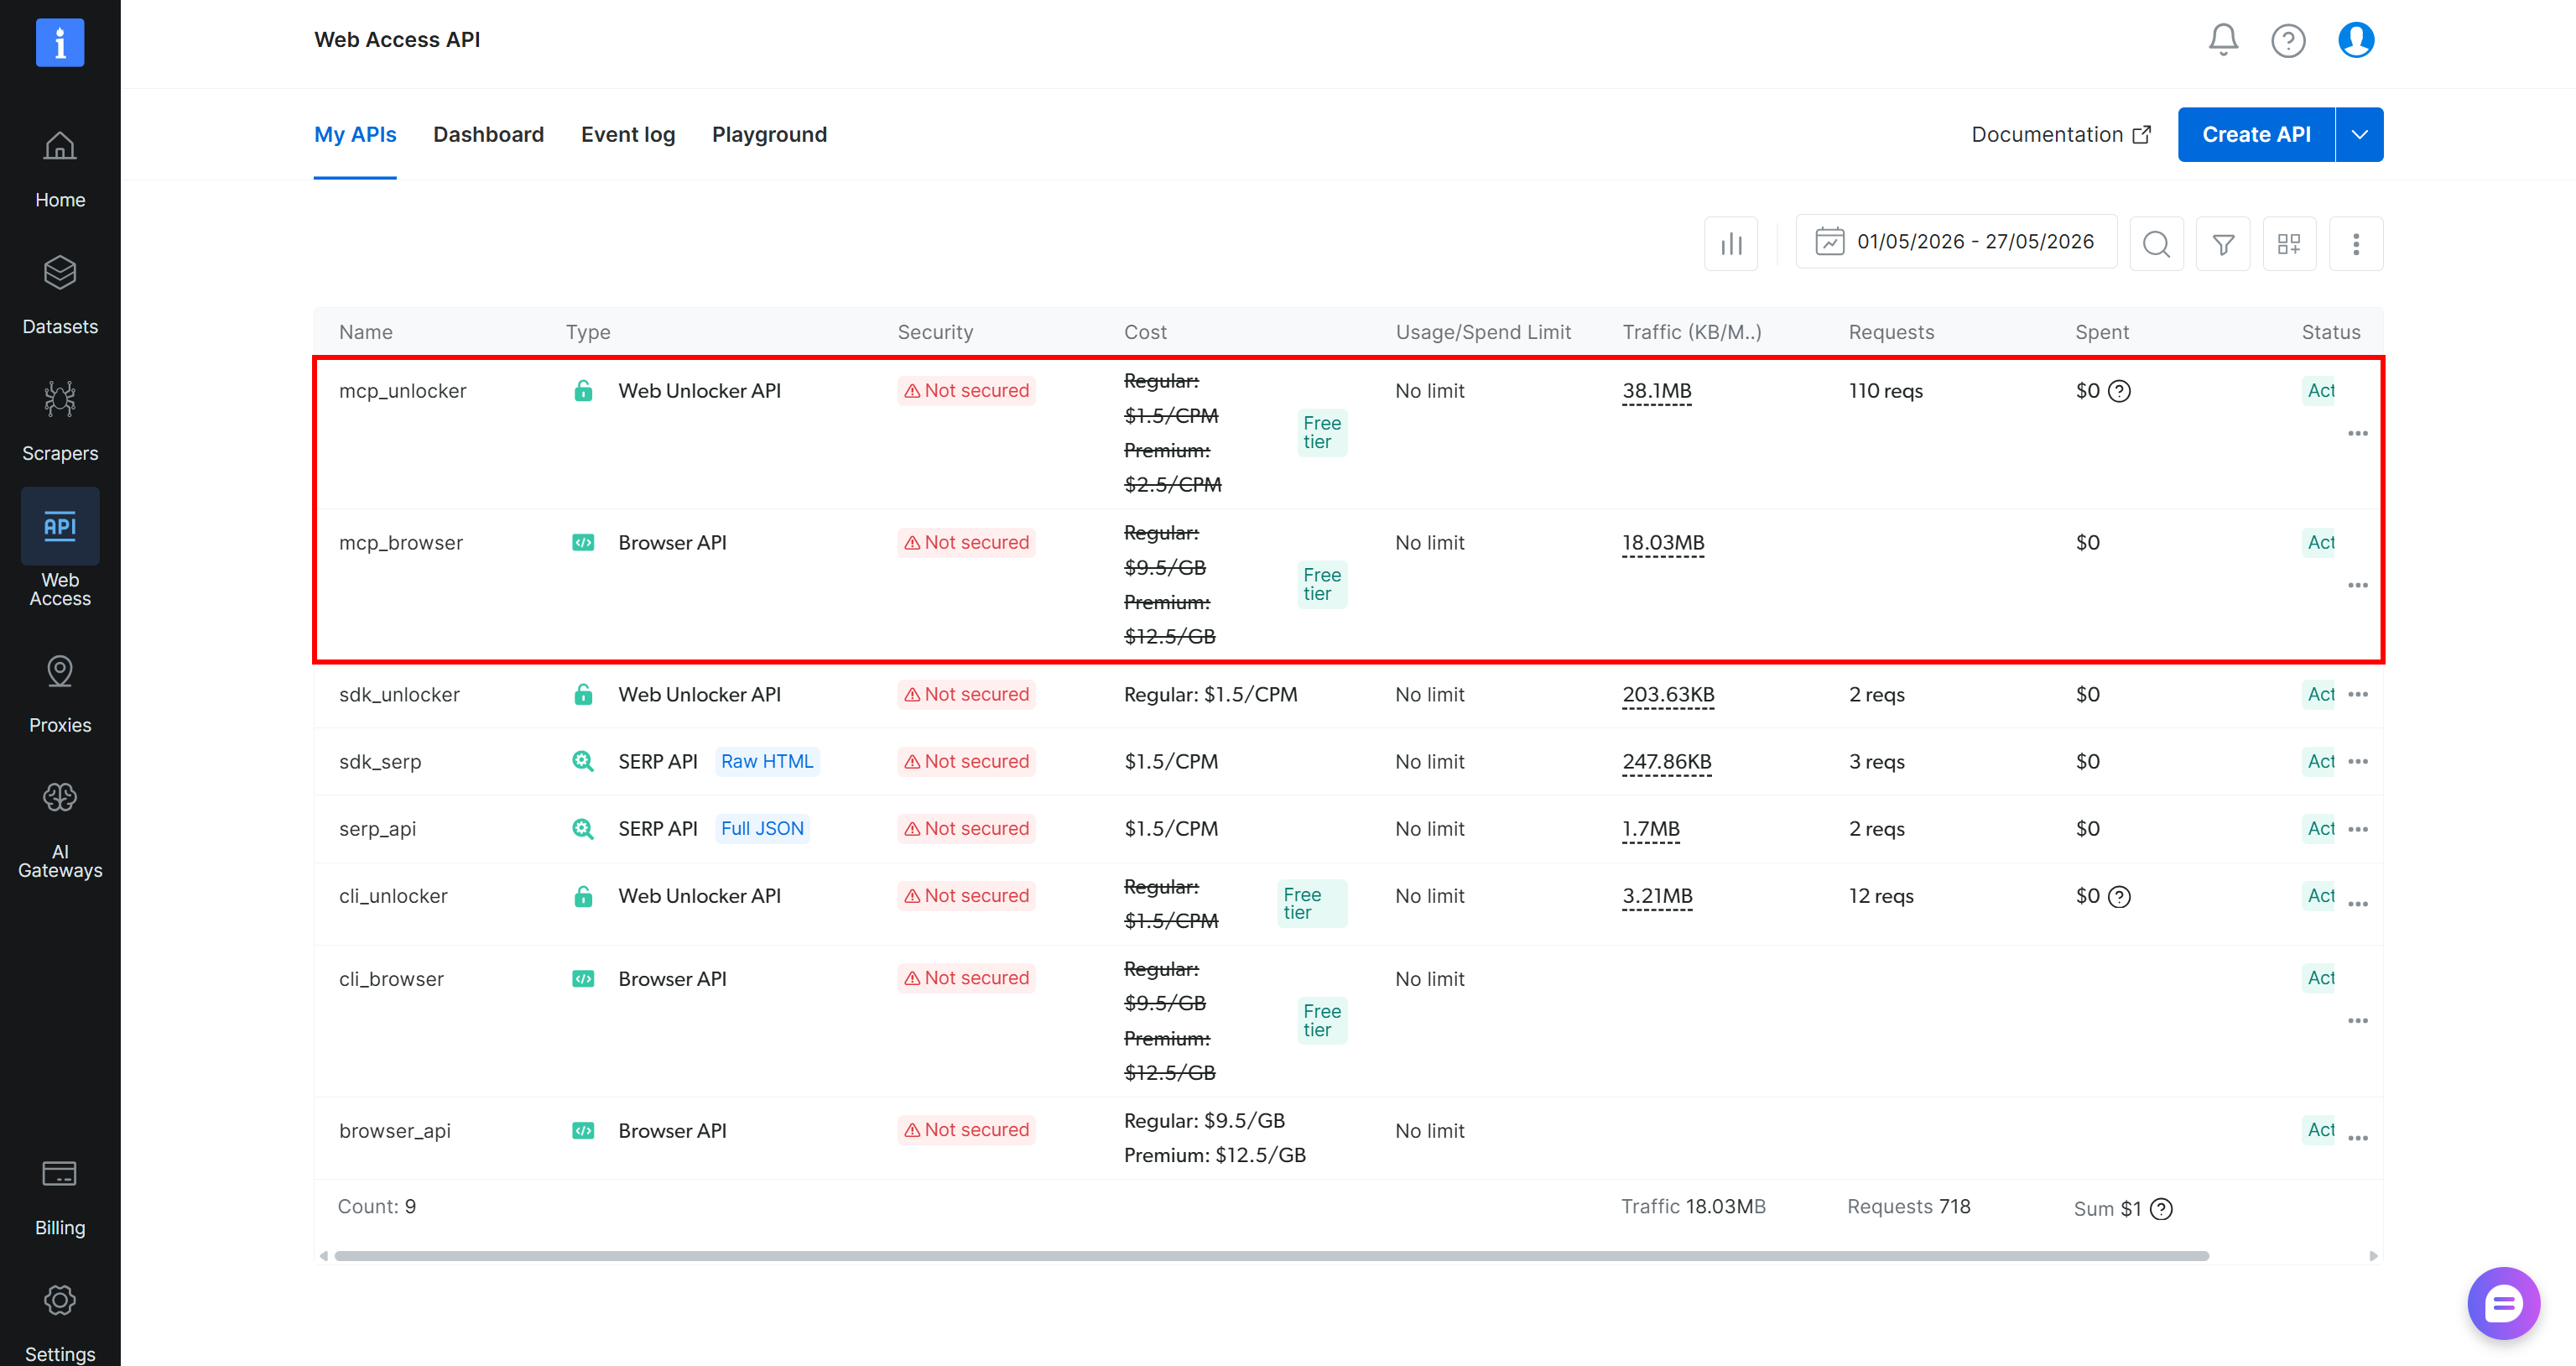
During the first run, the @brightdata/mcp package creates two APIs in your Bright Data account:
mcp_unlocker: Connects to the Bright Data Web Unlocker API (and SERP API).mcp_browser: Enables interaction with the Bright Data Browser API.
These APIs power the 70+ tools exposed by Bright Data MCP. You can also configure custom API names, as described in the official repository.
To verify that these APIs were created, open the “Web Access > Web Access API” section in the Bright Data control panel. The two APIs will appear in the “My APIs” table:
By default, Bright Data MCP runs in Rapid mode (free tier), which provides access to a limited set of tools.
To unlock all 70+ tools, enable Pro mode by setting the PRO_MODE=true environment variable:
API_TOKEN="<YOUR_BRIGHT_DATA_API>" PRO_MODE="true" npx -y @brightdata/mcpOr, on Windows:
$Env:API_TOKEN="<YOUR_BRIGHT_DATA_API>"; $Env:PRO_MODE="true"; npx -y @brightdata/mcpNote: Pro mode is not included in the free tier and [incurs additional charges](https://github.com/brightdata/brightdata-mcp?tab=readme-ov-file#-pricing, modes).
Perfect! You have verified that Bright Data MCP runs correctly on your machine. Next, configure it in Grok Build.
Step #2: Configure the Bright Data MCP in Grok Build
Grok Build supports MCP configuration through the dedicated grok mcp CLI command.
To add Bright Data MCP to Grok Build, run:
grok mcp add brightdata -e API_TOKEN=<YOUR_BRIGHT_DATA_API_KEY> -e PRO_MODE=true, npx -y @brightdata/mcpReplace the <YOUR_BRIGHT_DATA_API_KEY> placeholder with your actual Bright Data API key.
Note: If you want to store the configuration only for the current project, add the --scope project option.
The command output should look similar to this:

By default, this command stores this MCP configuration globally in ~/.grok/config.toml (or %USERPROFILE%\.grok\config.toml in Windows):
[mcp_servers.brightdata]
command = "npx"
args = [
    "-y",
    "@brightdata/mcp",
]
enabled = true

[mcp_servers.brightdata.env]
API_TOKEN = "<YOUR_BRIGHT_DATA_API_KEY>"
PRO_MODE = "true"
You can also achieve the same result by manually editing the Grok Build configuration file and adding the above content.
The configuration above specifies the brightdata server to run through npx -y @brightdata/mcp and sets these environment variables:
API_TOKEN(required): Your Bright Data API key.PRO_MODE(optional): Set totrueto enable Pro features. Remove-e PRO_MODE=truefrom thegrok mcp addcommand to configure Bright Data MCP in Rapid (free) mode.
Grok Build will now automatically start the local Bright Data MCP server and connect to it. Wonderful!
Step #3: Check the Bright Data MCP Connection
Restart Grok Build by closing the CLI. Proceed by launching it again:
grokInside Grok Build, run:
/mcpsThis opens the “MCP Servers” view. You should see the brightdata MCP server listed. Expand it to inspect the available tools:
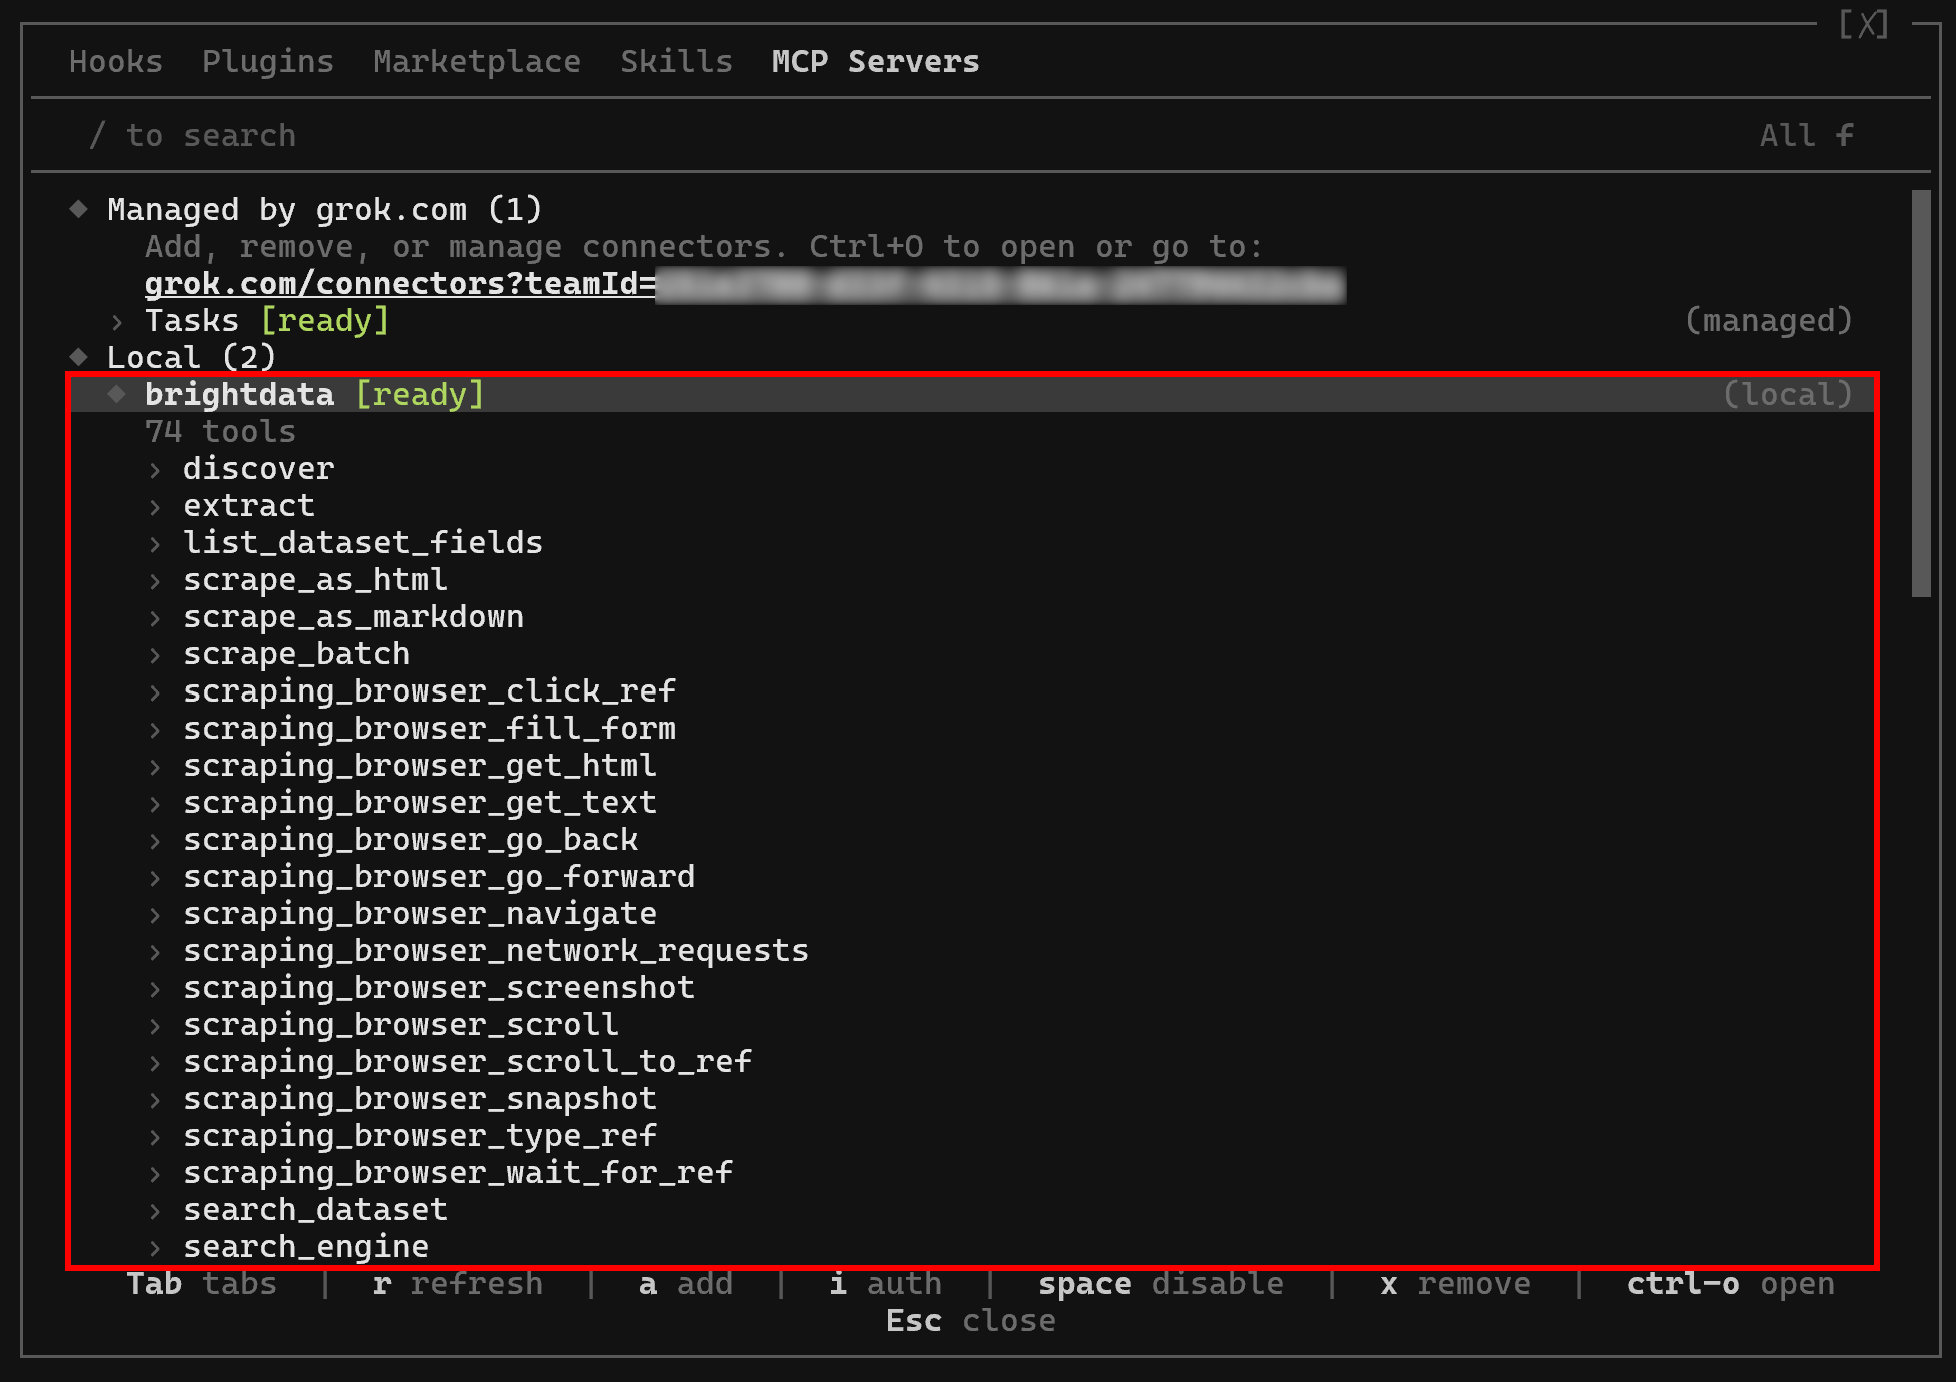
When running in Pro mode, Grok Build will have access to the 70+ Bright Data MCP tools. In Rapid mode, only the free tools will be available.
This confirms that Bright Data MCP is correctly connected and exposing tools to Grok Build. In the next chapter, you will learn how to extend Grok Build further by adding Bright Data skills. Then, you’ll see the Grok Build + Bright Data MCP + skills setup in action!
Extending Grok Build with Bright Data Knowledge Using Official Skills
Below, you will be guided through the process of adding the Bright Data skills to Grok Build.
Prerequisites
Before following this section, make sure:
- You are operating on a UNIX-based system (Linux, macOS, or WSL).
- The Bright Data CLI installed and configured locally. This is the main prerequisite for using the Bright Data Skills. For a quick setup, refer to the “Bright Data CLI: Installation & Setup” guide or the dedicated blog post.
- You have a basic understanding of what the Bright Data Skills provide. For more information, read the Bright Data skills article on our blog.
Some familiarity with the Agent Skills standard is also helpful, but not required.
Step #1: Add the Bright Data Skills to Grok Build
Grok Build automatically discovers Agent Skills stored in either the global ~/.grok/skills/ directory (or the local .grok/skills/ directory within the current project).
Start by cloning the official Bright Data skills repository:
git clone https://github.com/brightdata/skills.gitNext, create the target directory if it does not already exist:
mkdir -p ~/.grok/skillsFinally, copy the Bright Data skills into Grok Build’s skills directory:
cp -r skills/skills/* ~/.grok/skills/The ~/.grok/skills/ directory should now contain this file structure:
~/.grok/skills/
├── agent-onboarding/
├── brand-listening/
├── brd-browser-debug/
├── bright-data-best-practices/
├── bright-data-mcp/
├── brightdata-cli/
├── competitive-intel/
├── create-skill/
├── data-feeds/
├── design-mirror/
├── discover-api/
├── js-sdk-best-practices/
├── live-research/
├── price-comparison/
├── proxy/
├── python-sdk-best-practices/
├── rag-pipeline/
├── scrape/
├── scraper-builder/
├── scraper-studio/
├── search/
├── seo-audit/
└── other built-in skills...
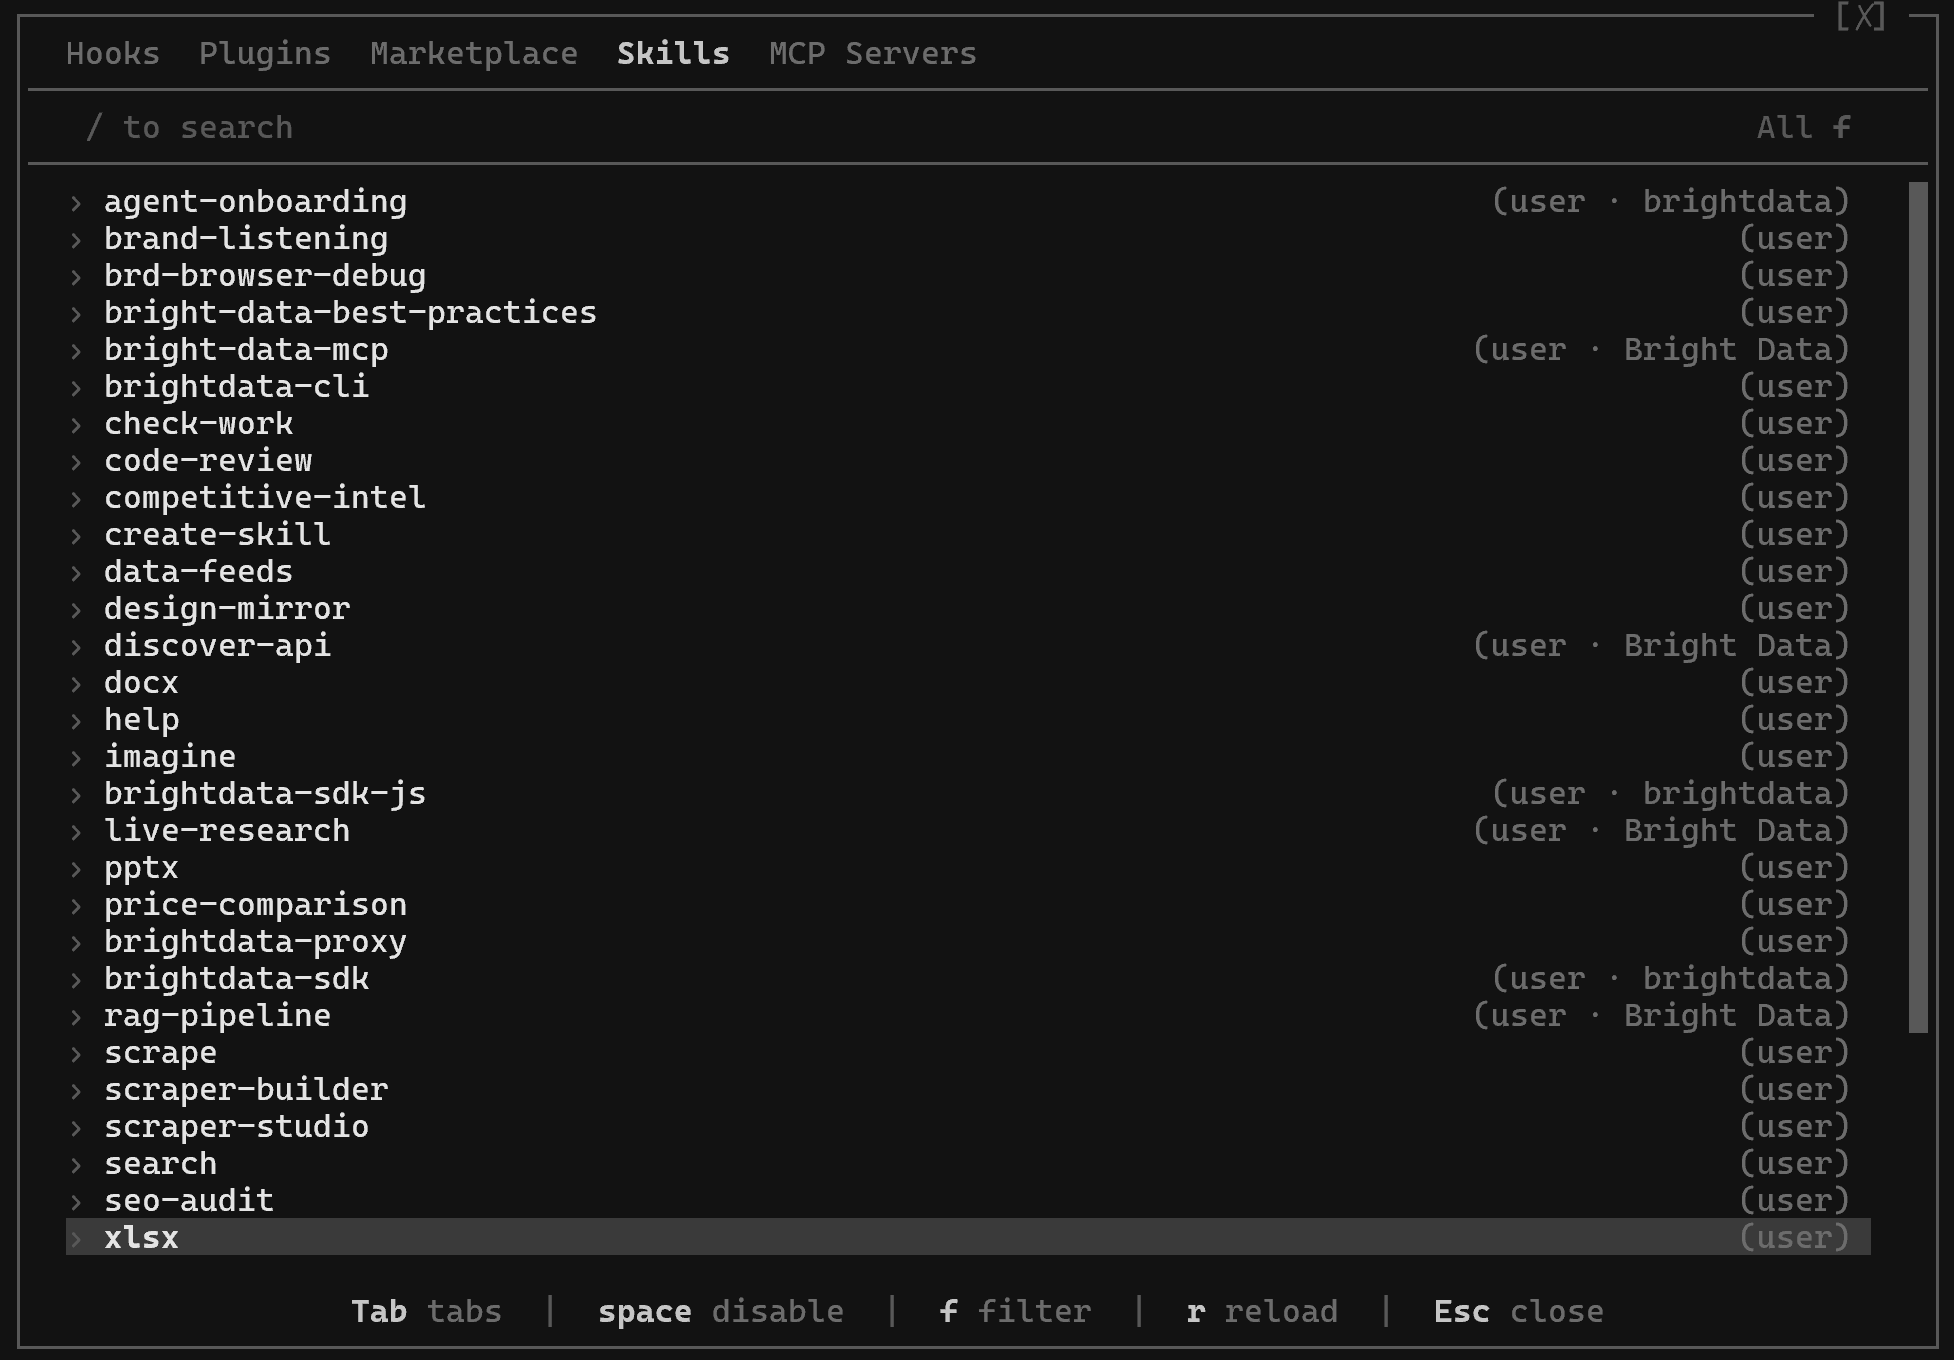
Each folder represents an Agent Skill that extends Grok Build with knowledge about Bright Data products, APIs, and recommended workflows. Cool!
Step #2: Verify That the Skills Are Available
Launch Grok Build, and run:
/skillsThis command lists all available Agent Skills. You should see the Bright Data skills you just installed:
Optional: If you have not yet configured the Bright Data CLI, run the onboarding skill directly from within Grok Build with:
/agent-onboarding
The skill will walk you through the required setup so that the other Bright Data skills can work correctly.
This is it! You have successfully added the Bright Data skills to Grok Build. In the next section, you will see how to combine them with the Bright Data MCP for a web-aware CLI assistant experience.
Grok Build + Bright Data MCP and Skills: Full Example
To verify that Grok Build can now access and interact with the web, try a prompt like this:
Using the Bright Data MCP, search online for the latest information about CVE-2026-6357. Scrape the Markdown content from the three most relevant articles, then combine it with the versioning information extracted from the official PyPI pip page. Finally, check whether my system is affected and, if so, recommend how to remediate the issue.This is a realistic task that Grok Build would struggle to complete on its own. Since the vulnerability has been disclosed only recently, the configured AI model may not even be aware of the referenced CVE. Completing the task requires Bright Data’s tools to retrieve up-to-date information from authoritative sources and use it to produce an accurate response.
Important: Keep in mind that this is only one example. The Grok Build + Bright Data setup supports many other use cases.
Launch the prompt in Grok Build:
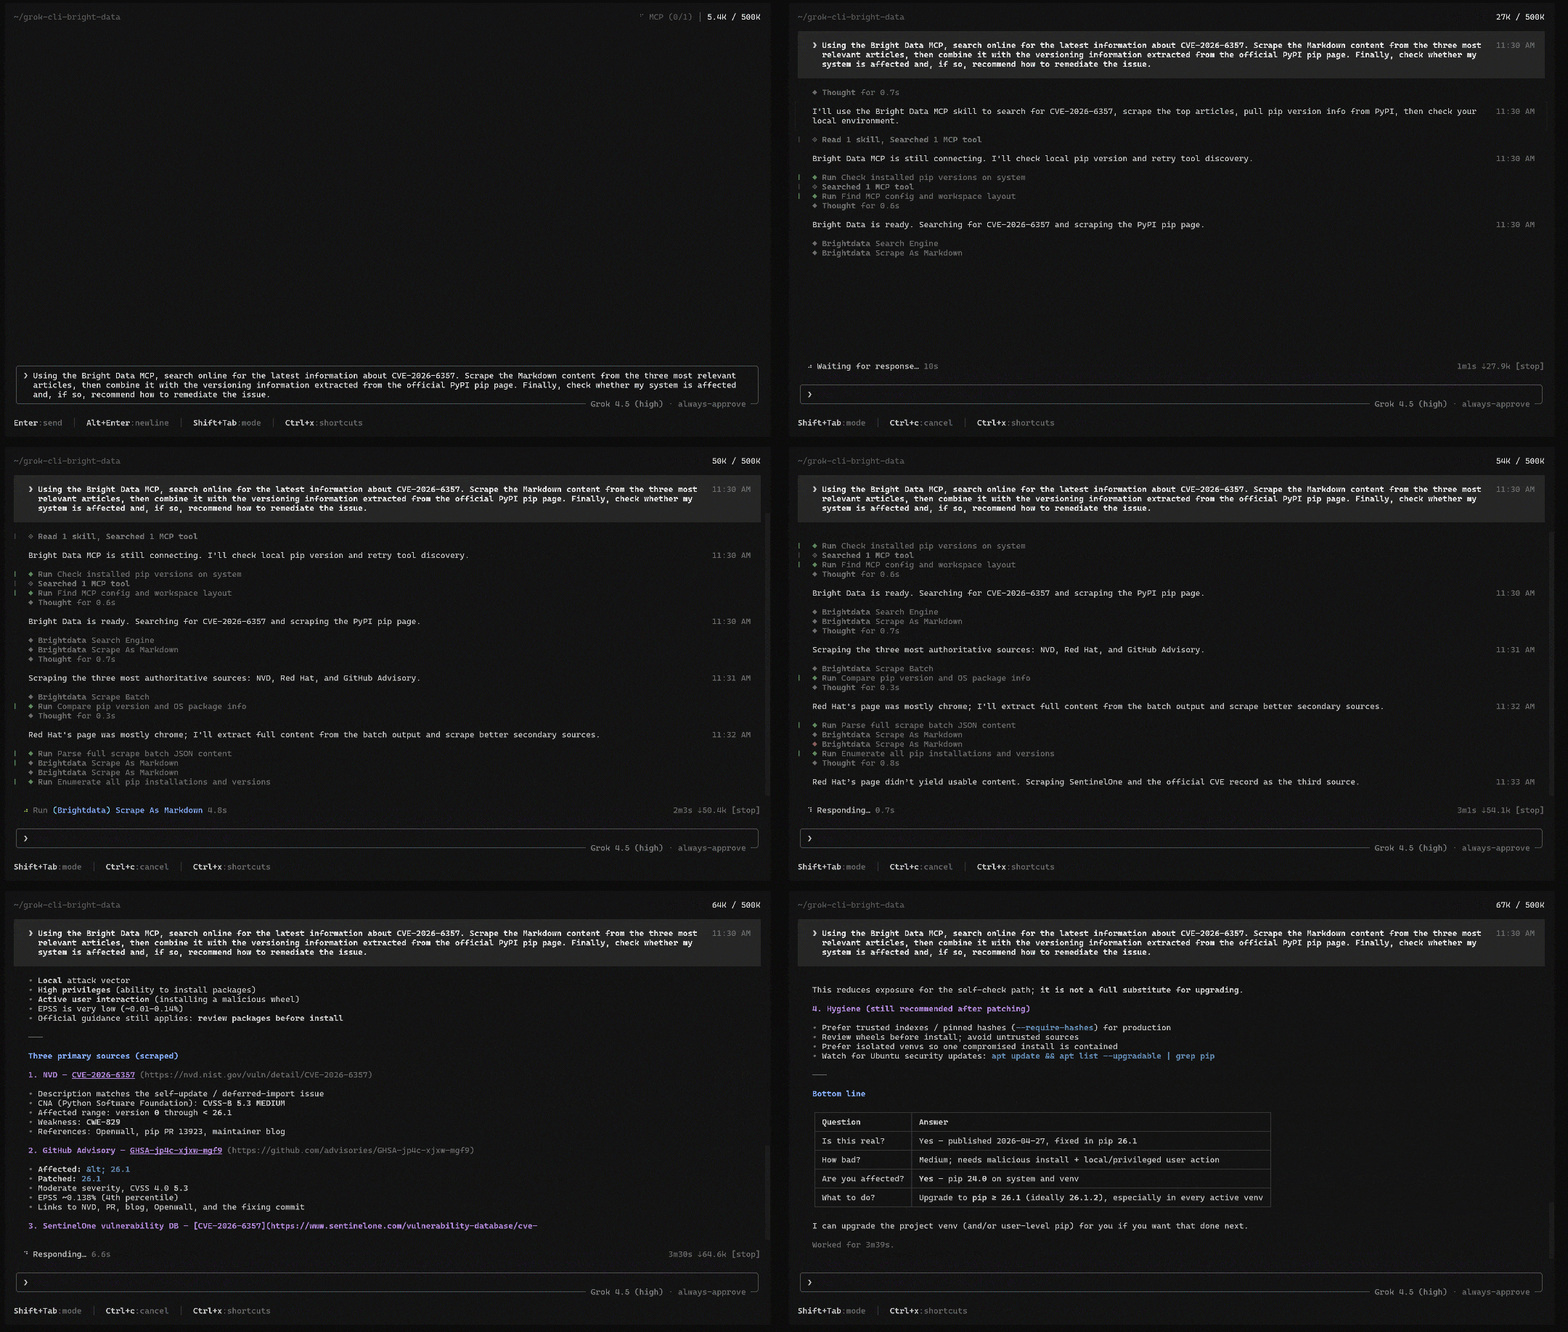
To achieve the goal, the agent performs the following steps:
- Loads the
bright-data-mcpskill to learn the recommended practices for interacting with the Bright Data MCP. - Verifies that the local Bright Data MCP server is available and inspects the tools it exposes.
- Checks the version of
pipinstalled on the local system. - Uses the Bright Data MCP
search_enginetool (powered by Bright Data’s SERP API) to search Google for “CVE-2026-6357 pip vulnerability”. - Selects the three most relevant sources from the returned SERP (a NIST vulnerability database page, a Red Hat advisory page, and a GitHub Security Advisory page).
- Uses the Bright Data MCP
scrape_batchtool (backed by Bright Data’s Web Unlocker API) to retrieve all three pages in parallel. - Scrapes the official PyPI
pippage to retrieve the latest version information. - Since the Red Hat advisory does not provide additional technical details, it identifies another relevant source from the retrieved SERP (a ichard26.github.io page) and retrieves it using Bright Data MCP’s
scrape_as_markdowntool. - Combines all the collected information with the locally installed
pipversion to determine whether the system is vulnerable and, if necessary, recommends the appropriate remediation steps.
The final report combines local system information with the latest publicly available security guidance. Specifically, it contains recommendations on how to address the issue:
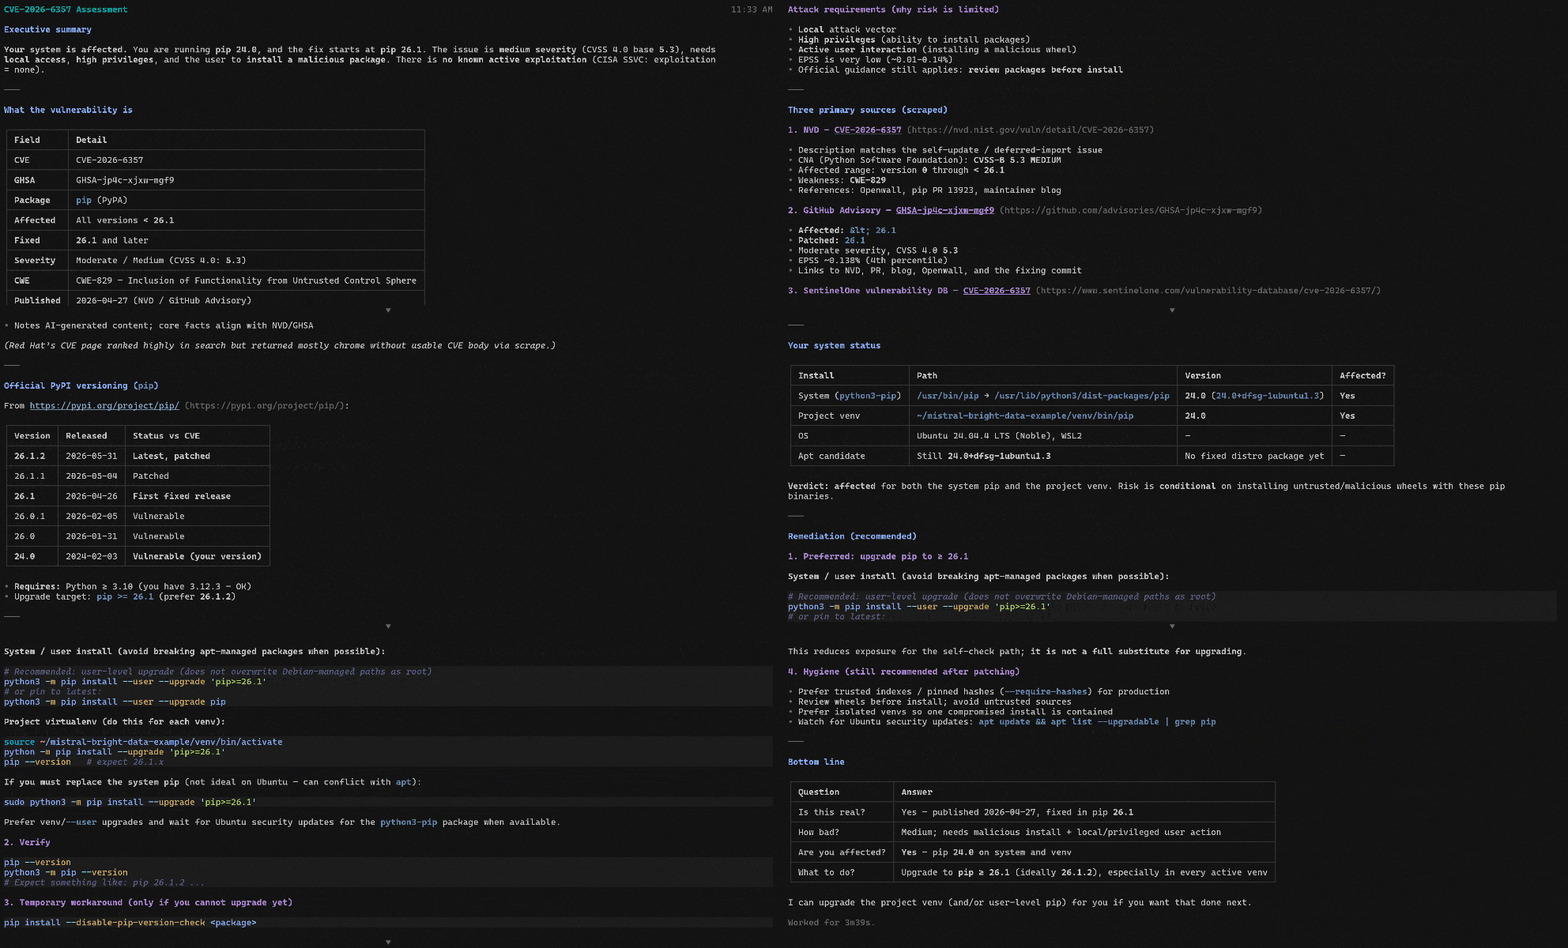
Et voilà! By integrating Bright Data MCP and skills with Grok Build, your CLI agent gains both the tools and the domain knowledge needed to produce more trustworthy results, take more informed actions, and generate outputs that are less prone to hallucinations.
Conclusion
In this article, you learned what Grok Build is and what it offers. In particular, you saw how to extend its capabilities by integrating Bright Data through the Bright Data MCP and its official agent skills.
With Bright Data, Grok Build gains access to live web data for research, enabling more accurate and up-to-date responses. At the same time, it unlocks powerful browser and web automation workflows directly from your CLI. For even more advanced use cases, explore the full range of AI-ready web data solutions available in the Bright Data ecosystem.
Create a Bright Data account for free today and start exploring our AI-ready web data tools!



Technical Writer
 5.5 years experience
Antonello Zanini is a technical writer, editor, and software engineer with 5M+ views. Expert in technical content strategy, web development, and project management.