
In this blog post, you will see:
- What AutoGPT is and what makes it special as an AI agent–building framework.
- Why AutoGPT agents benefit from access to web search, exploration, interaction, and data scraping capabilities.
- How Bright Data can be integrated into AutoGPT to provide AI agents with exactly these features.
Let’s dive in!
What Is AutoGPT
AutoGPT is an open-source platform for building, deploying, and running autonomous AI agents.
What makes it stand out is its low-code, block-based interface, continuous agent execution, and the ability to connect tools, APIs, and data sources into end-to-end automation pipelines.
Unlike simple scripts, AutoGPT agents can run persistently, react to triggers, and manage multi-step tasks. The project is backed by a large open-source community. It has achieved impressive traction on GitHub, with over 183k stars.
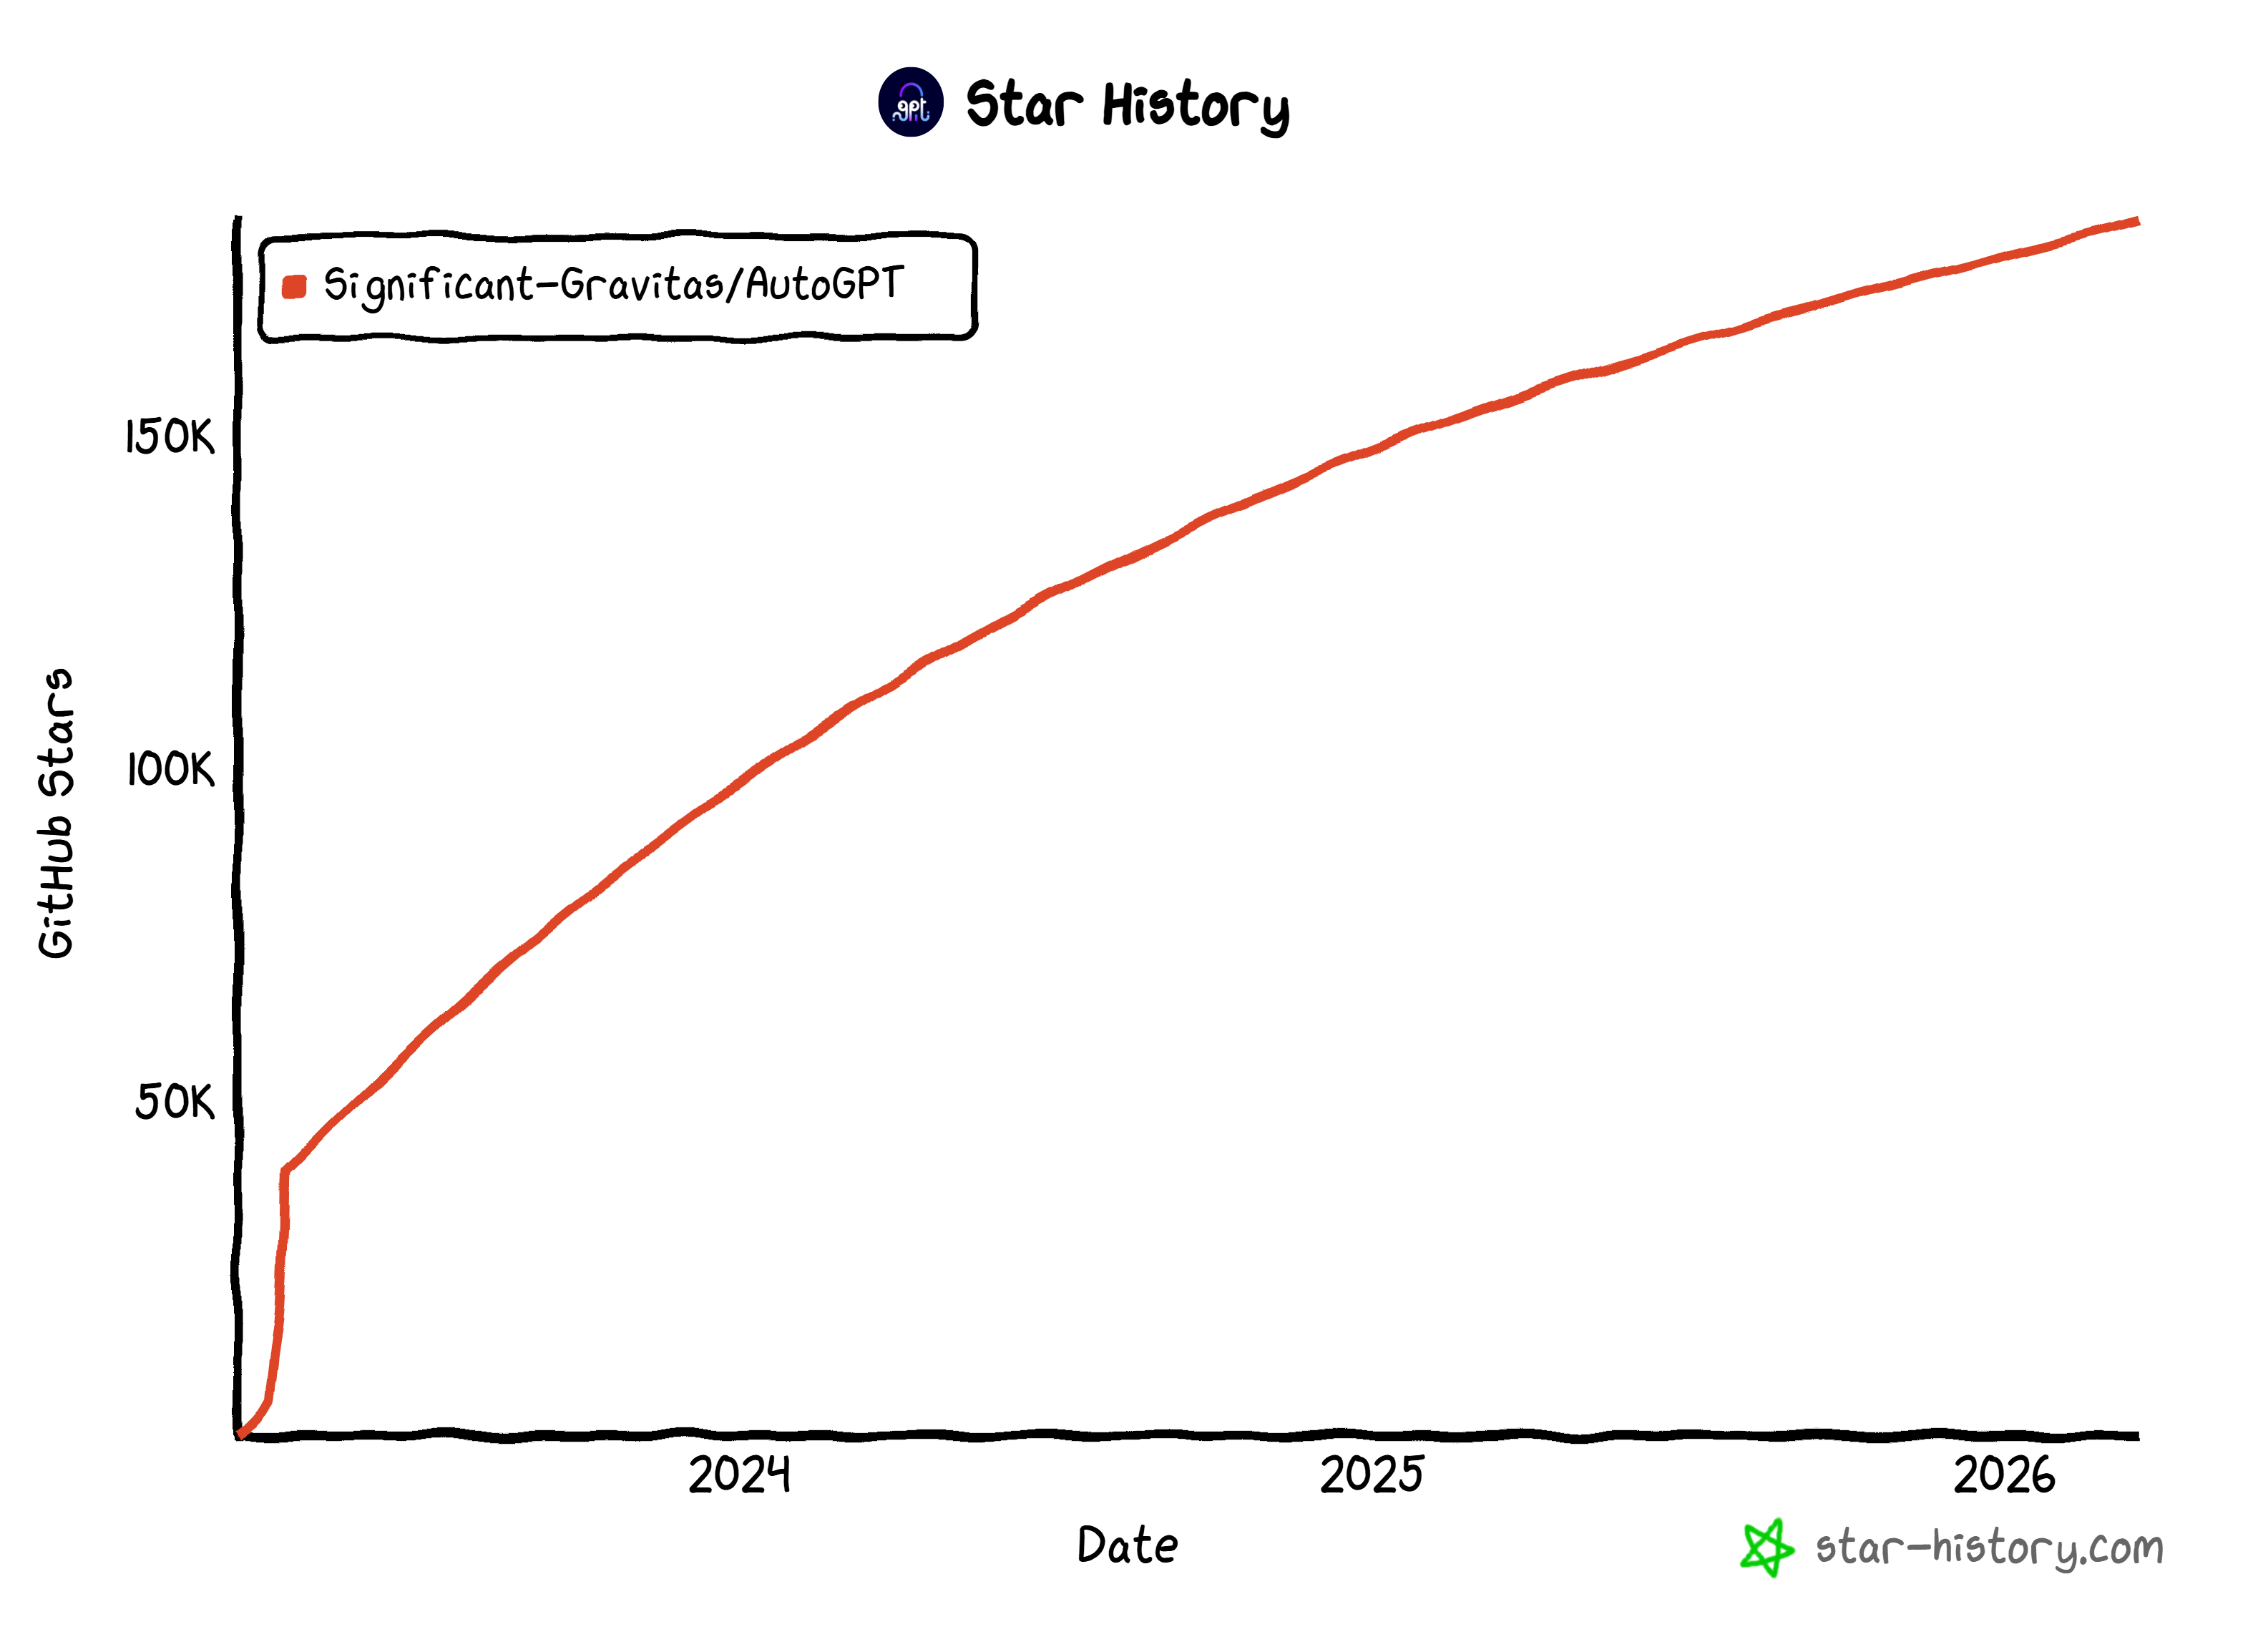
Those stats make it one of the most popular AI agent frameworks today.
Why Integrate Web Exploration and Data Retrieval Capabilities into AutoGPT
There is no doubt that AutoGPT is a feature-rich solution. Yet, all LLM-based AI agents face inherent limitations. Standard language models are trained on static datasets, meaning their knowledge is fixed at a specific point in time.
This can result in outdated information, hallucinations, or gaps when agents attempt real-world tasks that require current data. Moreover, LLMs cannot interact with the real world, including the web. So, basic AI agents are constrained by those native limitations.
AutoGPT does include native tools for web search, exploration, and other interactions. Yet, these built-in capabilities may struggle with scale, reliability, and sophisticated anti-bot measures compared to enterprise-grade solutions.
This is where Bright Data comes in. Built on one of the largest proxy networks in the world—with over 150 million IPs across 195 countries—its infrastructure delivers 99.99% uptime and unlimited concurrency.
Integrating Bright Data into AutoGPT allows agents to access live web content, search results, and structured data from any website. In detail, key Bright Data products that can enhance AutoGPT workflows include:
- Web Unlocker API: Access any website’s content in raw HTML or Markdown, bypassing CAPTCHAs and anti-bot protections.
- SERP API: Collect search engine results from Google, Bing, Yandex, and many other search engines.
- Web Scraper APIs: Extract structured data from platforms like Amazon, LinkedIn, Instagram, and Yahoo Finance.
- Crawl API: Convert entire websites into structured datasets for downstream AI processing.
By combining AutoGPT’s agentic capabilities with Bright Data’s solutions, AI agents can autonomously retrieve live information and execute complex workflows far beyond the limitations of standard LLMs.
How to Integrate Bright Data into AutoGPT: A Step-by-Step Guide
In this guided section, you will learn how to build an AI agent in AutoGPT that integrates with Bright Data for web data retrieval.
In particular, this agent will act as a bookmarking assistant, helping you decide whether an online article is worth saving for later reading. This is just a simple example to showcase the integration, but many other use cases are possible.
Follow the instructions below!
Prerequisites
To self-host AutoGPT, make sure your system meets the following hardware requirements:
- Operating system: Linux (Ubuntu 20.04 or newer recommended), macOS (10.15 or newer), or Windows 10/11 with WSL2.
- CPU: 4+ cores recommended.
- RAM: Minimum 8 GB (16 GB recommended).
- Storage: At least 10 GB of free space.
You must also have these tools installed locally on your machine:
- Docker Engine 20.10.0+
- Docker Compose 2.0.0+
- Git 2.30+
- Node.js 16.x+ (with npm 8.x+)
- Visual Studio Code 1.60+ or any modern code editor
Additionally, ensure the following network requirements are met:
- A stable internet connection.
- Access to required ports (which will be configured via Docker).
- Ability to make outbound HTTPS connections.
To implement the AI agent in AutoGPT, you will also need:
- A Bright Data account with a Web Unlocker API zone set up and an API key configured.
- An API key from one of the LLM providers supported by AutoGPT (in this example, we will use OpenAI).
Do not worry about configuring your Bright Data account just yet, as you will be guided through it in a dedicated chapter.
Step #1: Install AutoGPT Locally
Make sure your system meets the hardware, software, and network prerequisites. Also, verify that Docker is up and running.
To simplify the setup process for self-hosting AutoGPT, the recommended approach is to use the official one-line installation script. This installs all required dependencies, pulls the latest code, and launches the application for you.
On macOS or Linux, execute the one-line installation script with:
curl -fsSL https://setup.agpt.co/install.sh -o install.sh && bash install.shEquivalently, on Windows, run the following command in PowerShell:
powershell -c "iwr https://setup.agpt.co/install.bat -o install.bat; ./install.bat"The installation process may take a few minutes, so be patient. Once it completes, you should see output similar to the following: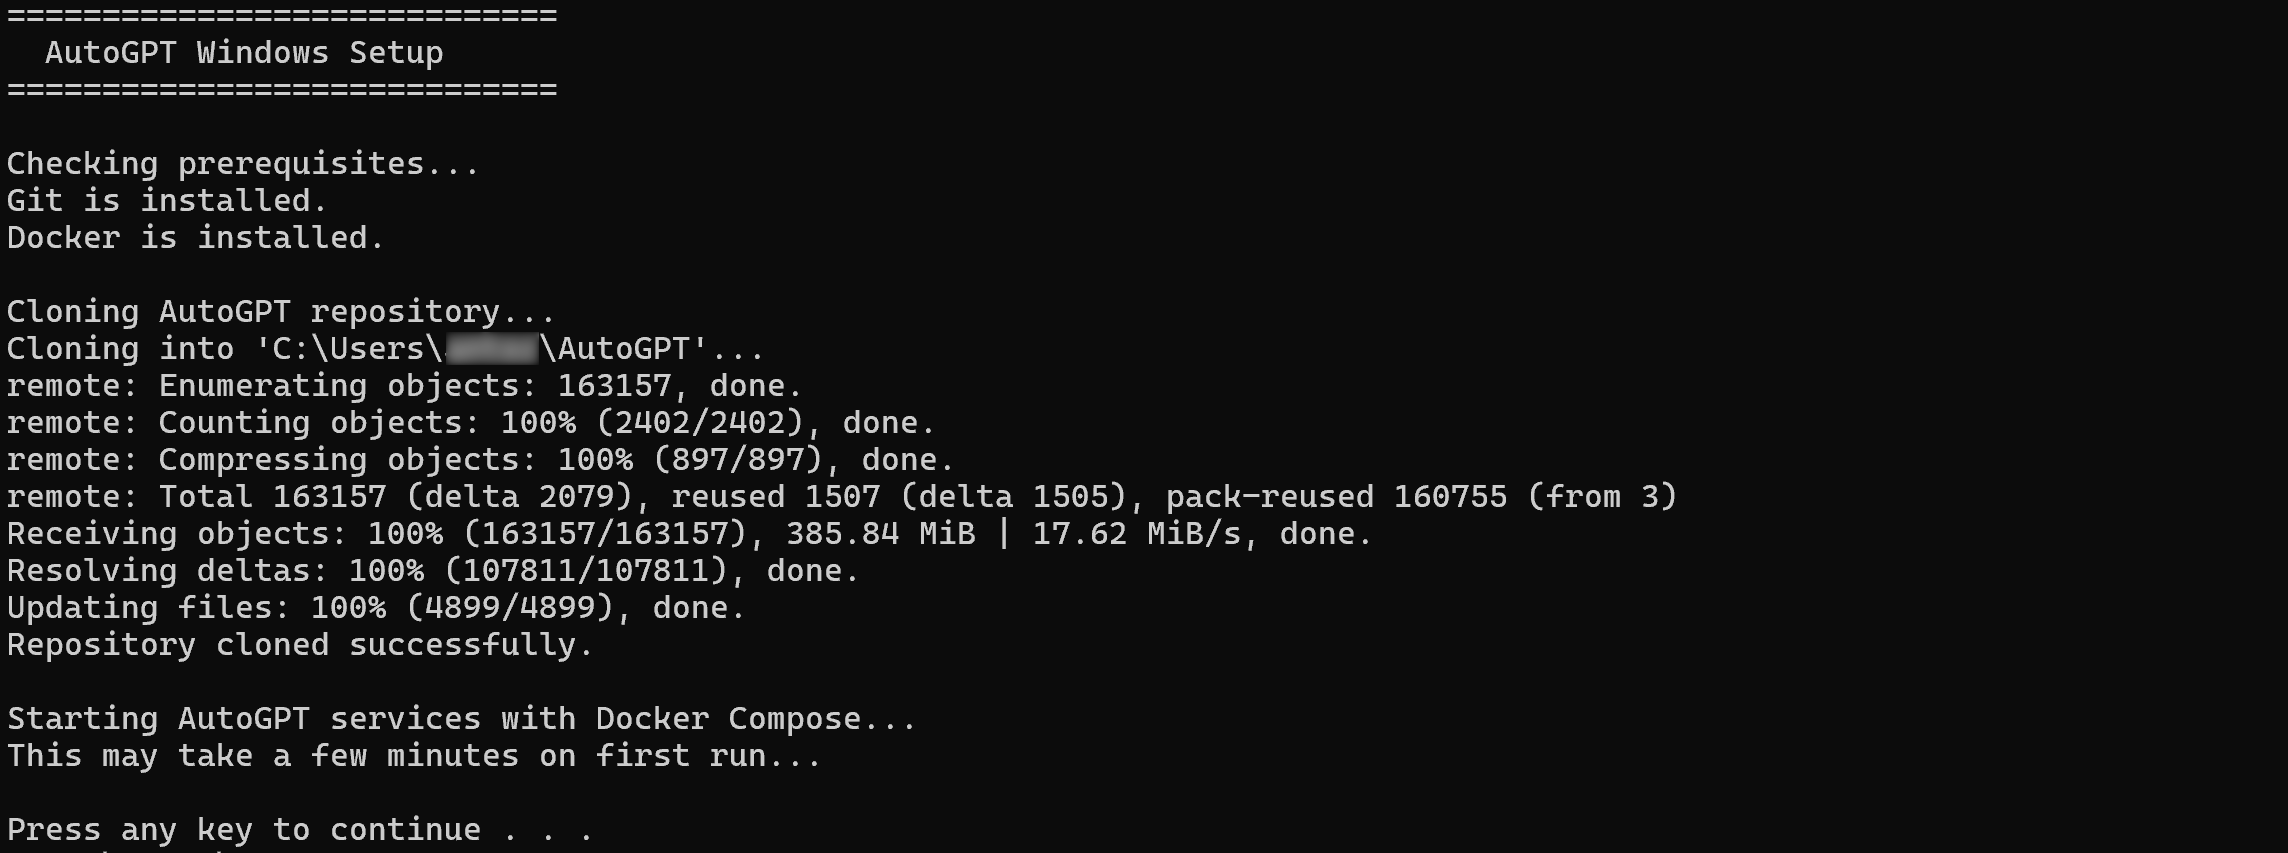
Wonderful! At this point, AutoGPT should be successfully set up locally and ready to run.
Step #2: Launch the Platform
Navigate to the installation folder:
cd AutoGPT/autogpt_platformThen, copy the .env.default file coming with the cloned repository to .env:
cp .env.default .envThis command creates a .env file in the autogpt_platform directory using the default configuration. Modify this file to define your own environment variables only if you need custom configuration. Otherwise, keep the default values.
Next, start the AutoGPT platform with:
docker compose up -d --buildThis command builds and launches all the required backend services defined in the docker-compose.yml file in detached mode.
Once the services are up and running, verify everything is working by visiting http://localhost in the browser.
By default, the different AutoGPT services are available at:
- Frontend UI Server:
http://localhost. - Backend WebSocket Server:
http://localhost:8001. - Execution API REST Server:
http://localhost:8006.
Below is what you should see: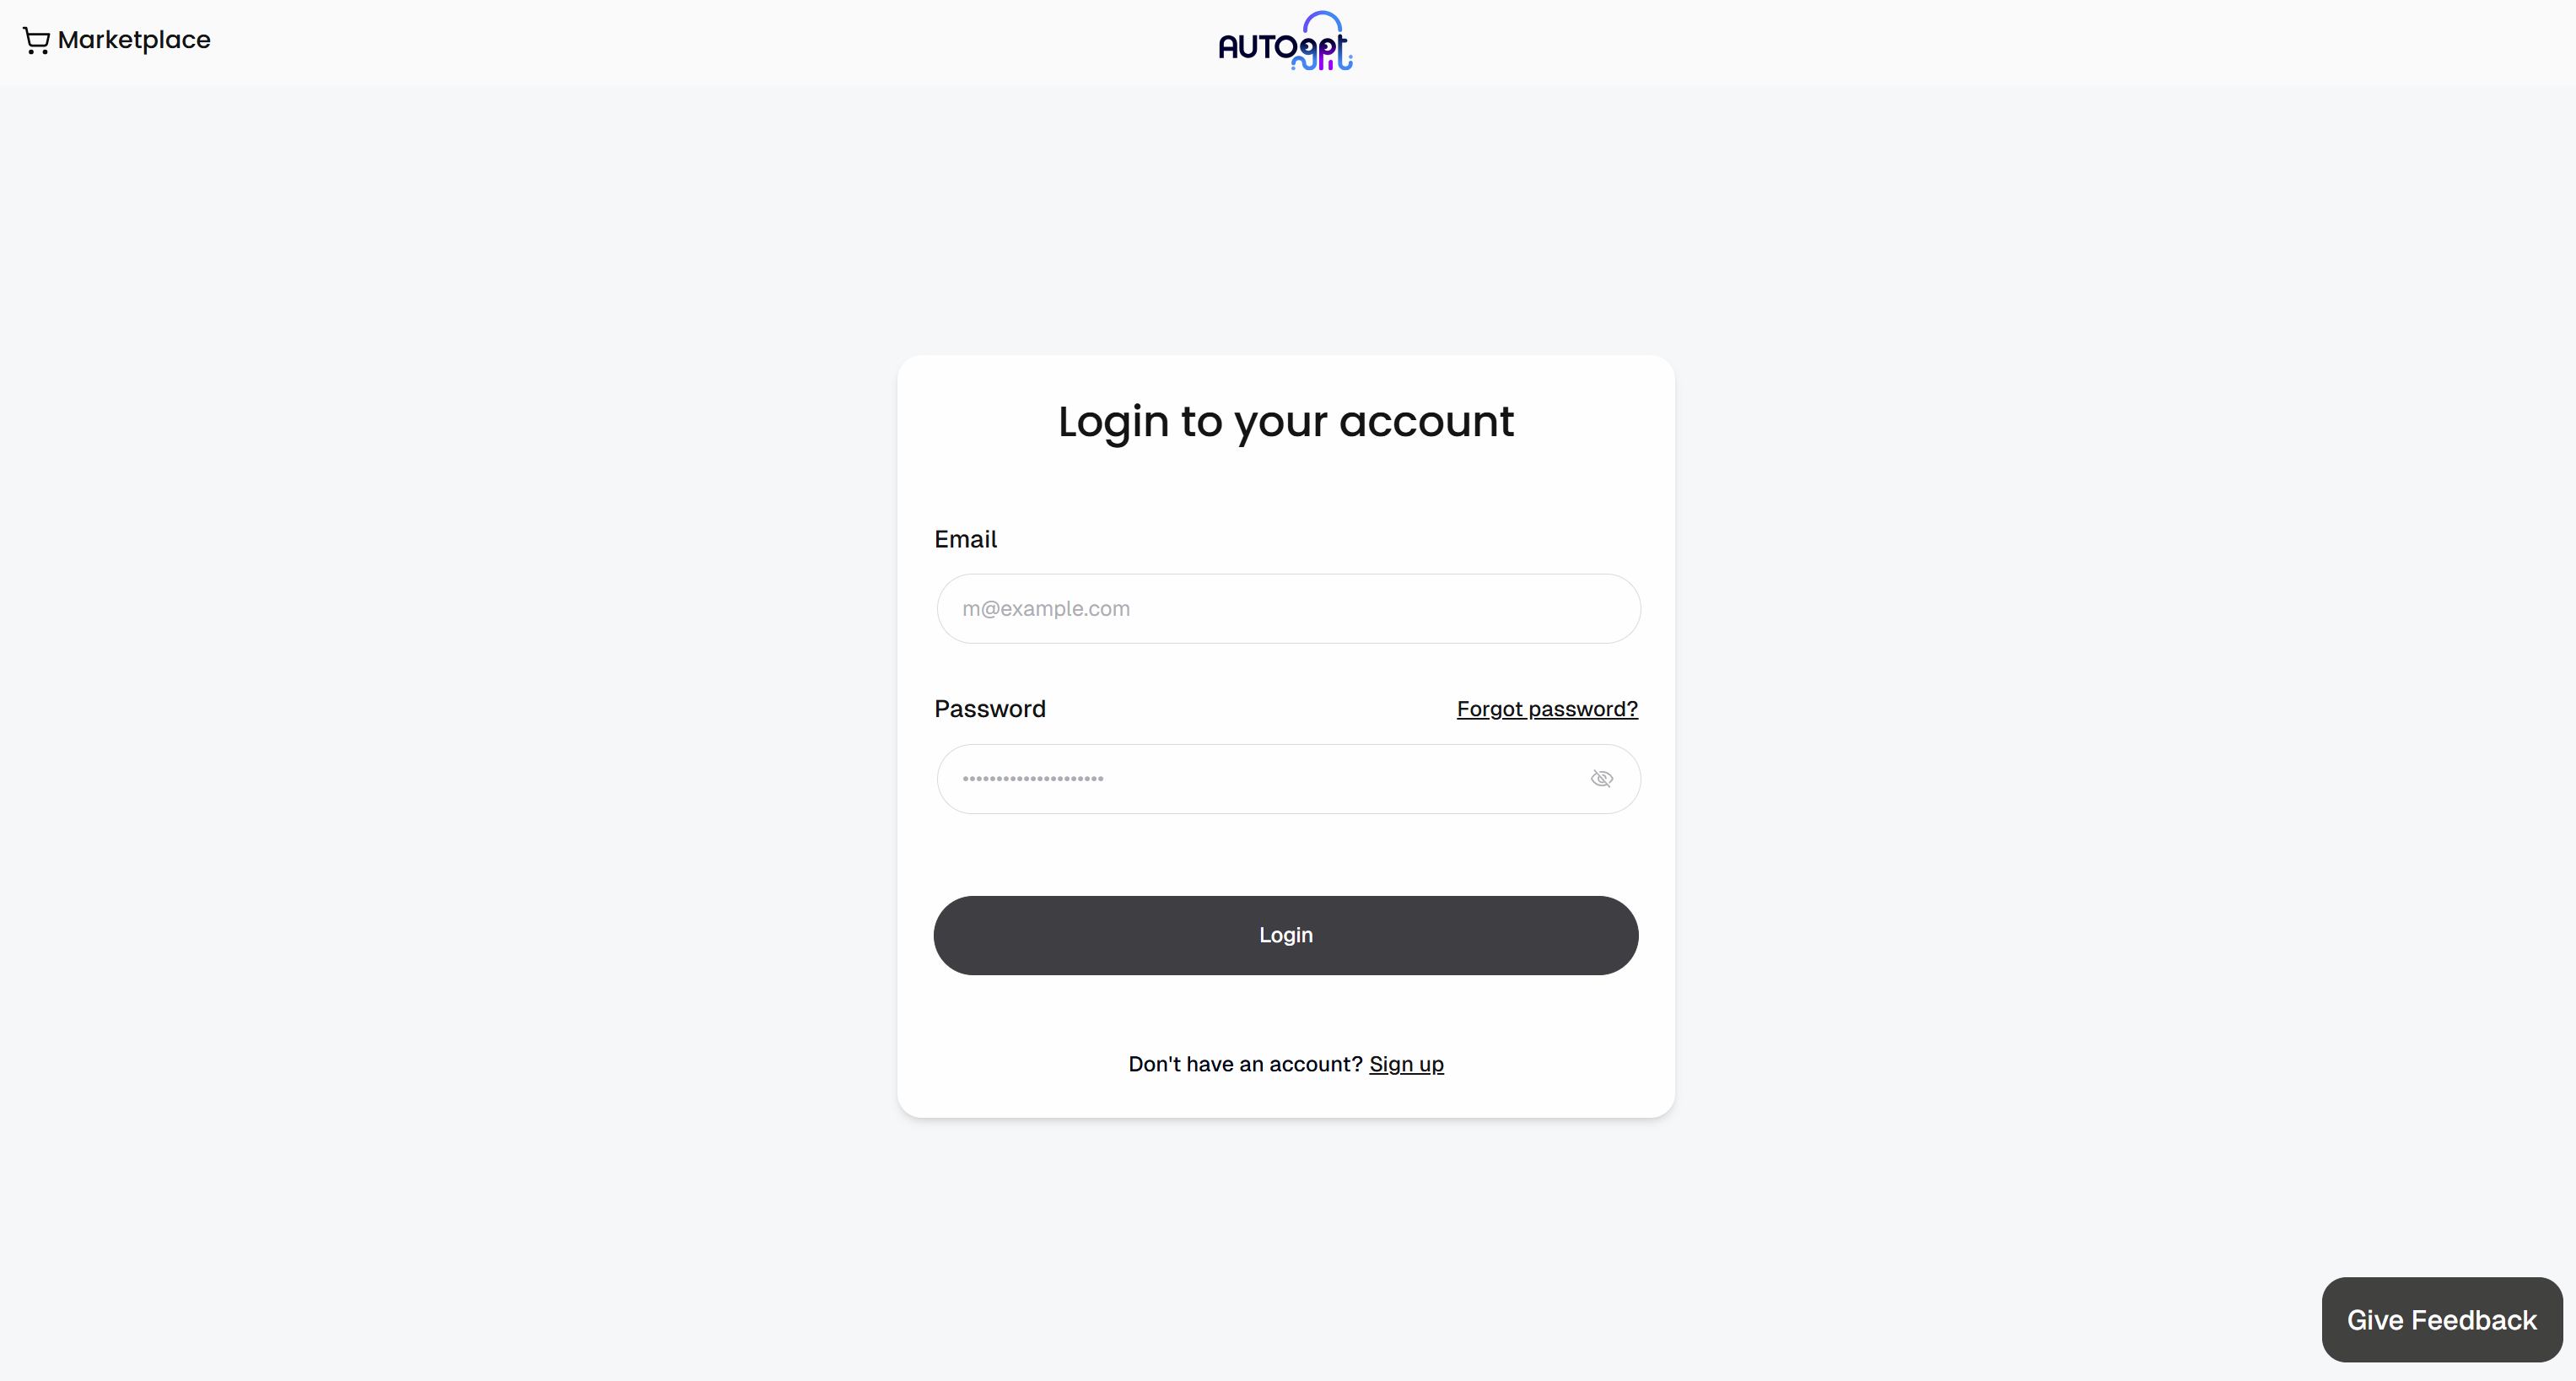
Sign up by creating your account. After logging in, you will be taken to the Agent Builder in the AutoGPT frontend: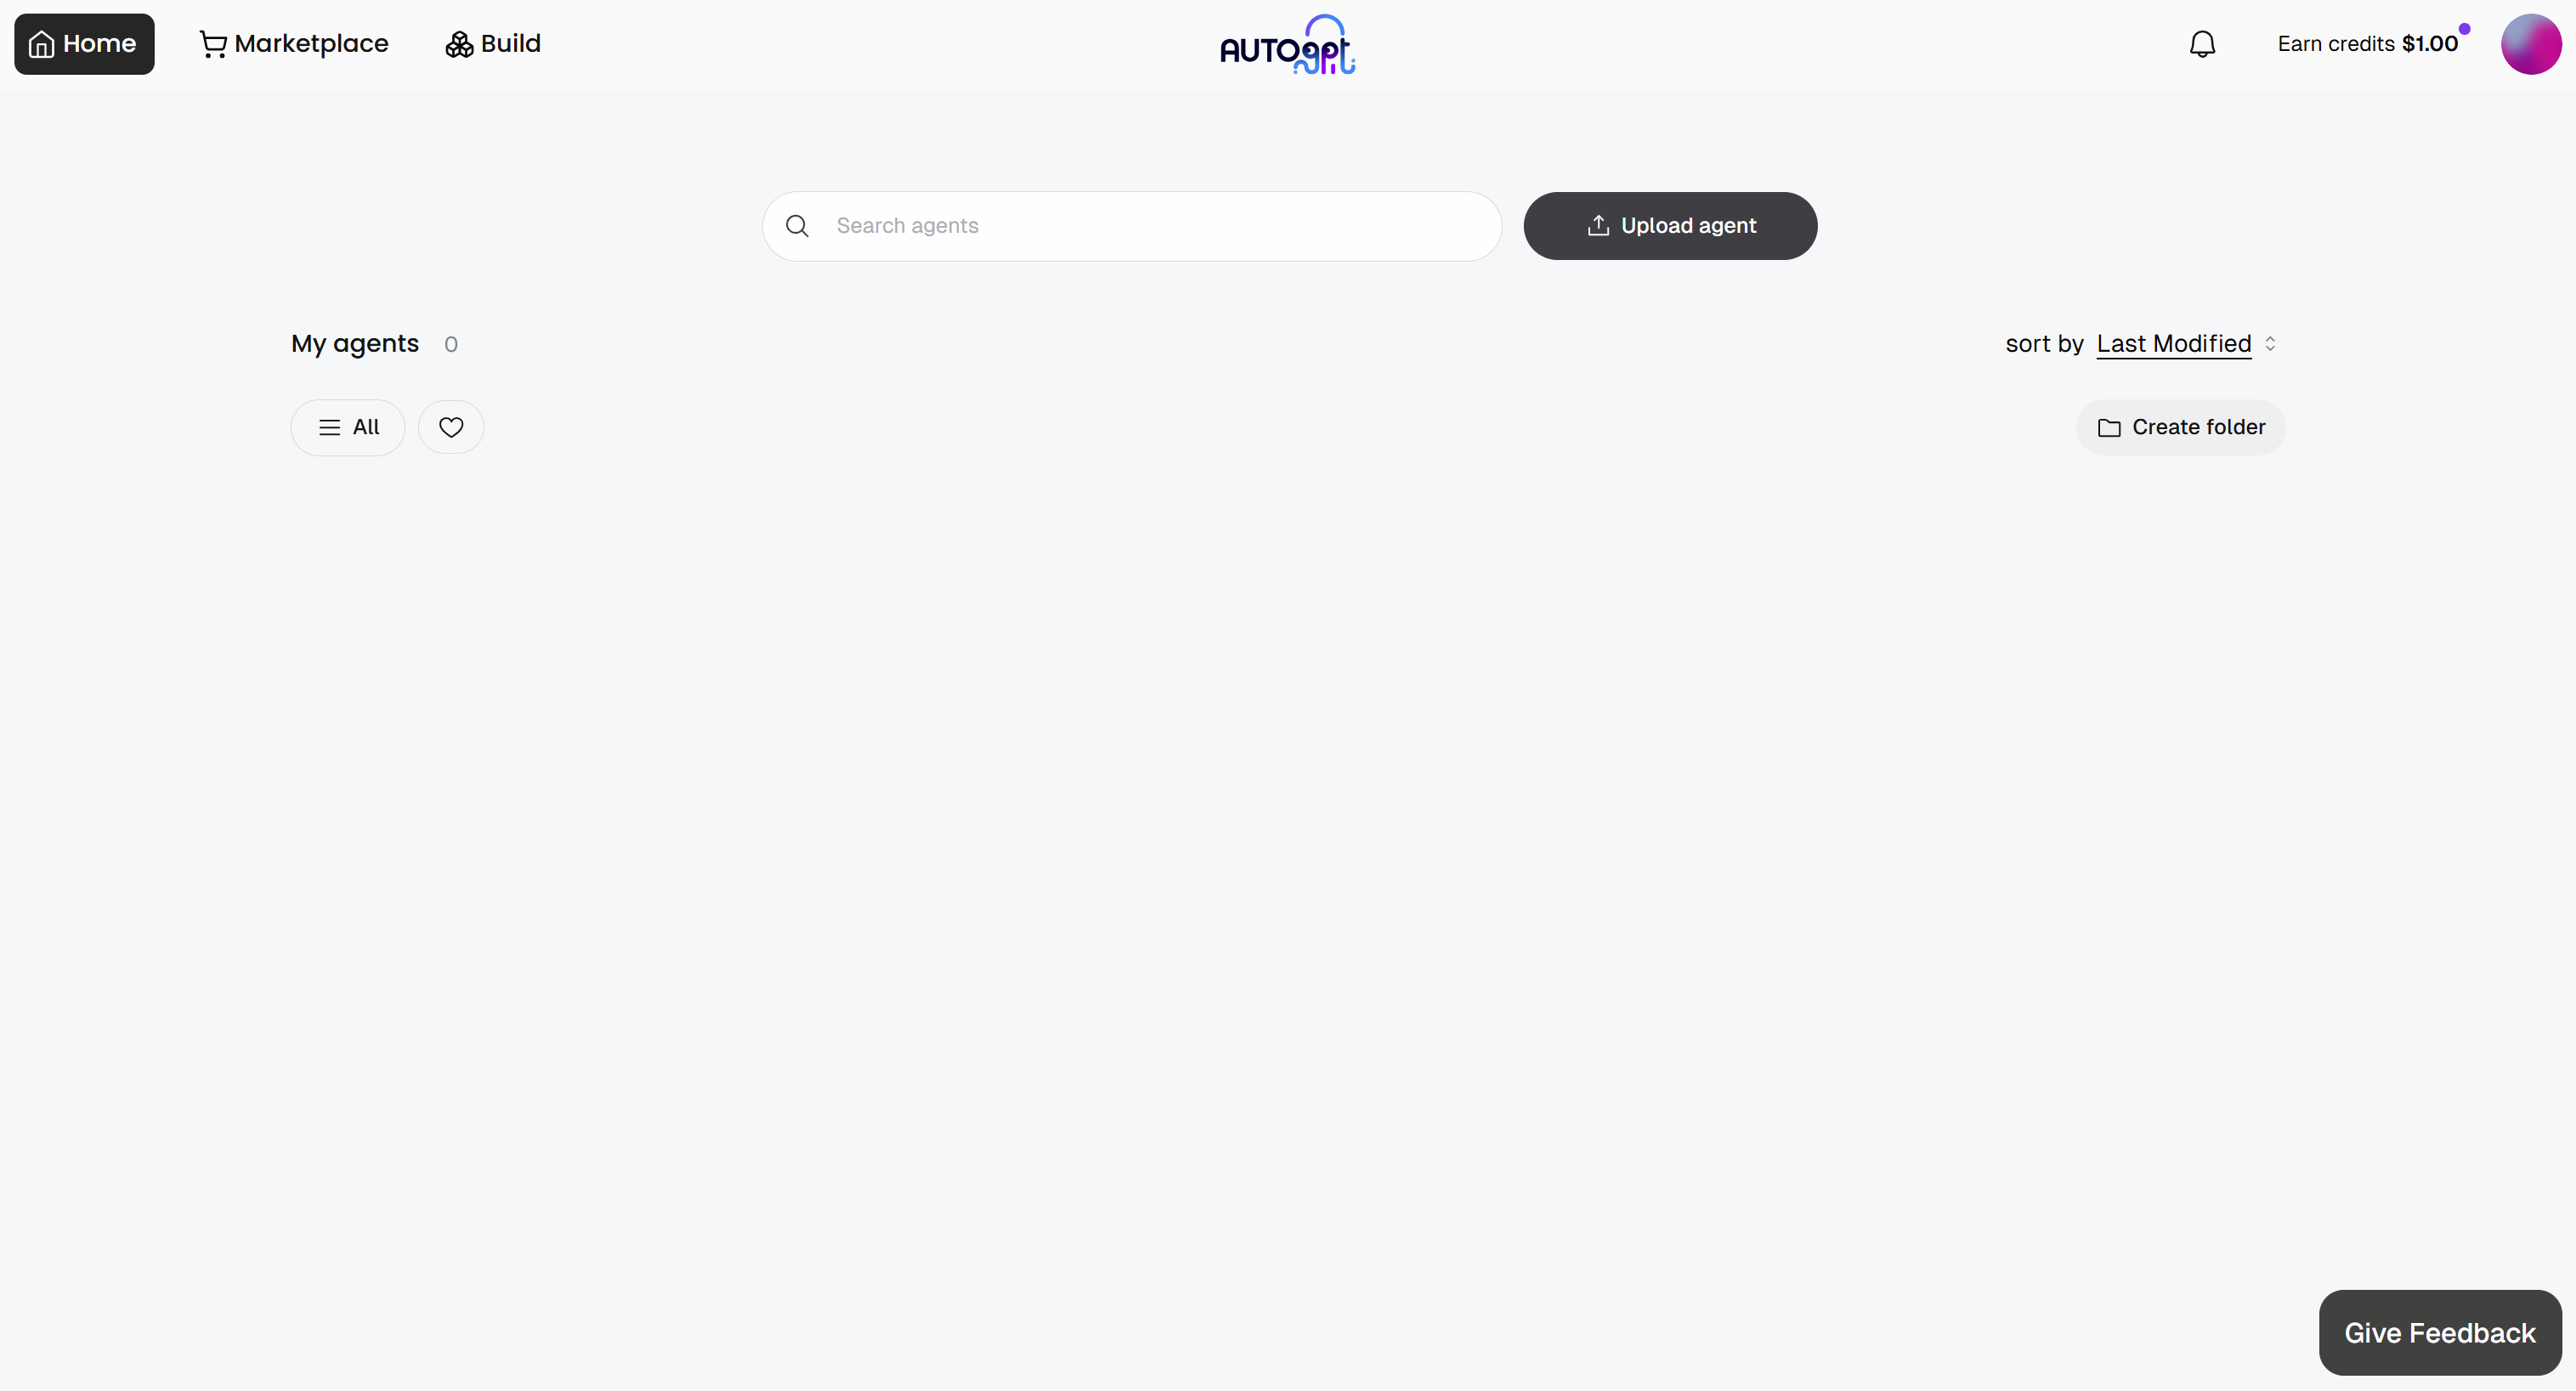
Nice! You are now ready to create your first agent and connect it to Bright Data.
Step #3: Design the AI Agent Workflow
AutoGPT provides several blocks, each handling a specific action or task. In this example, you want to build an agentic workflow that:
- Accepts an article URL (from any site) as input.
- Retrieves the article content in Markdown using the Bright Data Web Unlocker API.
- Passes the content to an LLM to produce a score from 1 to 10 indicating how valuable the article is to be bookmarked, as well as a human-like comment explaining the score.
- Returns the structured output.


In AutoGPT, this workflow can be implemented using the following blocks:
- Agent Input: Accepts the article URL from the user.
- Create Dictionary: Builds the request body for the Bright Data Web Unlocker API using the provided URL.
- Send Authenticated Web Request: Sends the request to the Bright Data Web Unlocker API and retrieves the article content.
- AI Structured Response Generator: Passes the article content to the LLM and generates a structured bookmark evaluation (score + comment).
- Agent Output: Returns the final structured result.
Perfect! Now that the steps of the agentic workflow are clear, the next step is to implement it. But first, let’s get started with Bright Data.
Step #4: Configure Your Bright Data Account
As outlined earlier, the AI agent workflow you want to implement relies on the Web Unlocker product from Bright Data. To connect to it in AutoGPT, you require a Bright Data account with a Web Unlocker API zone configured, along with an API key.
For quick guidance, refer to the “Quick Start Guide for Bright Data’s Web Unlocker API” article. Alternatively, follow the steps below.
If you do not have a Bright Data account, create a new one. Otherwise, just log in. Reach the control panel, and navigate to the “Proxies & Scraping” page. Take a look at the “My Zones” table: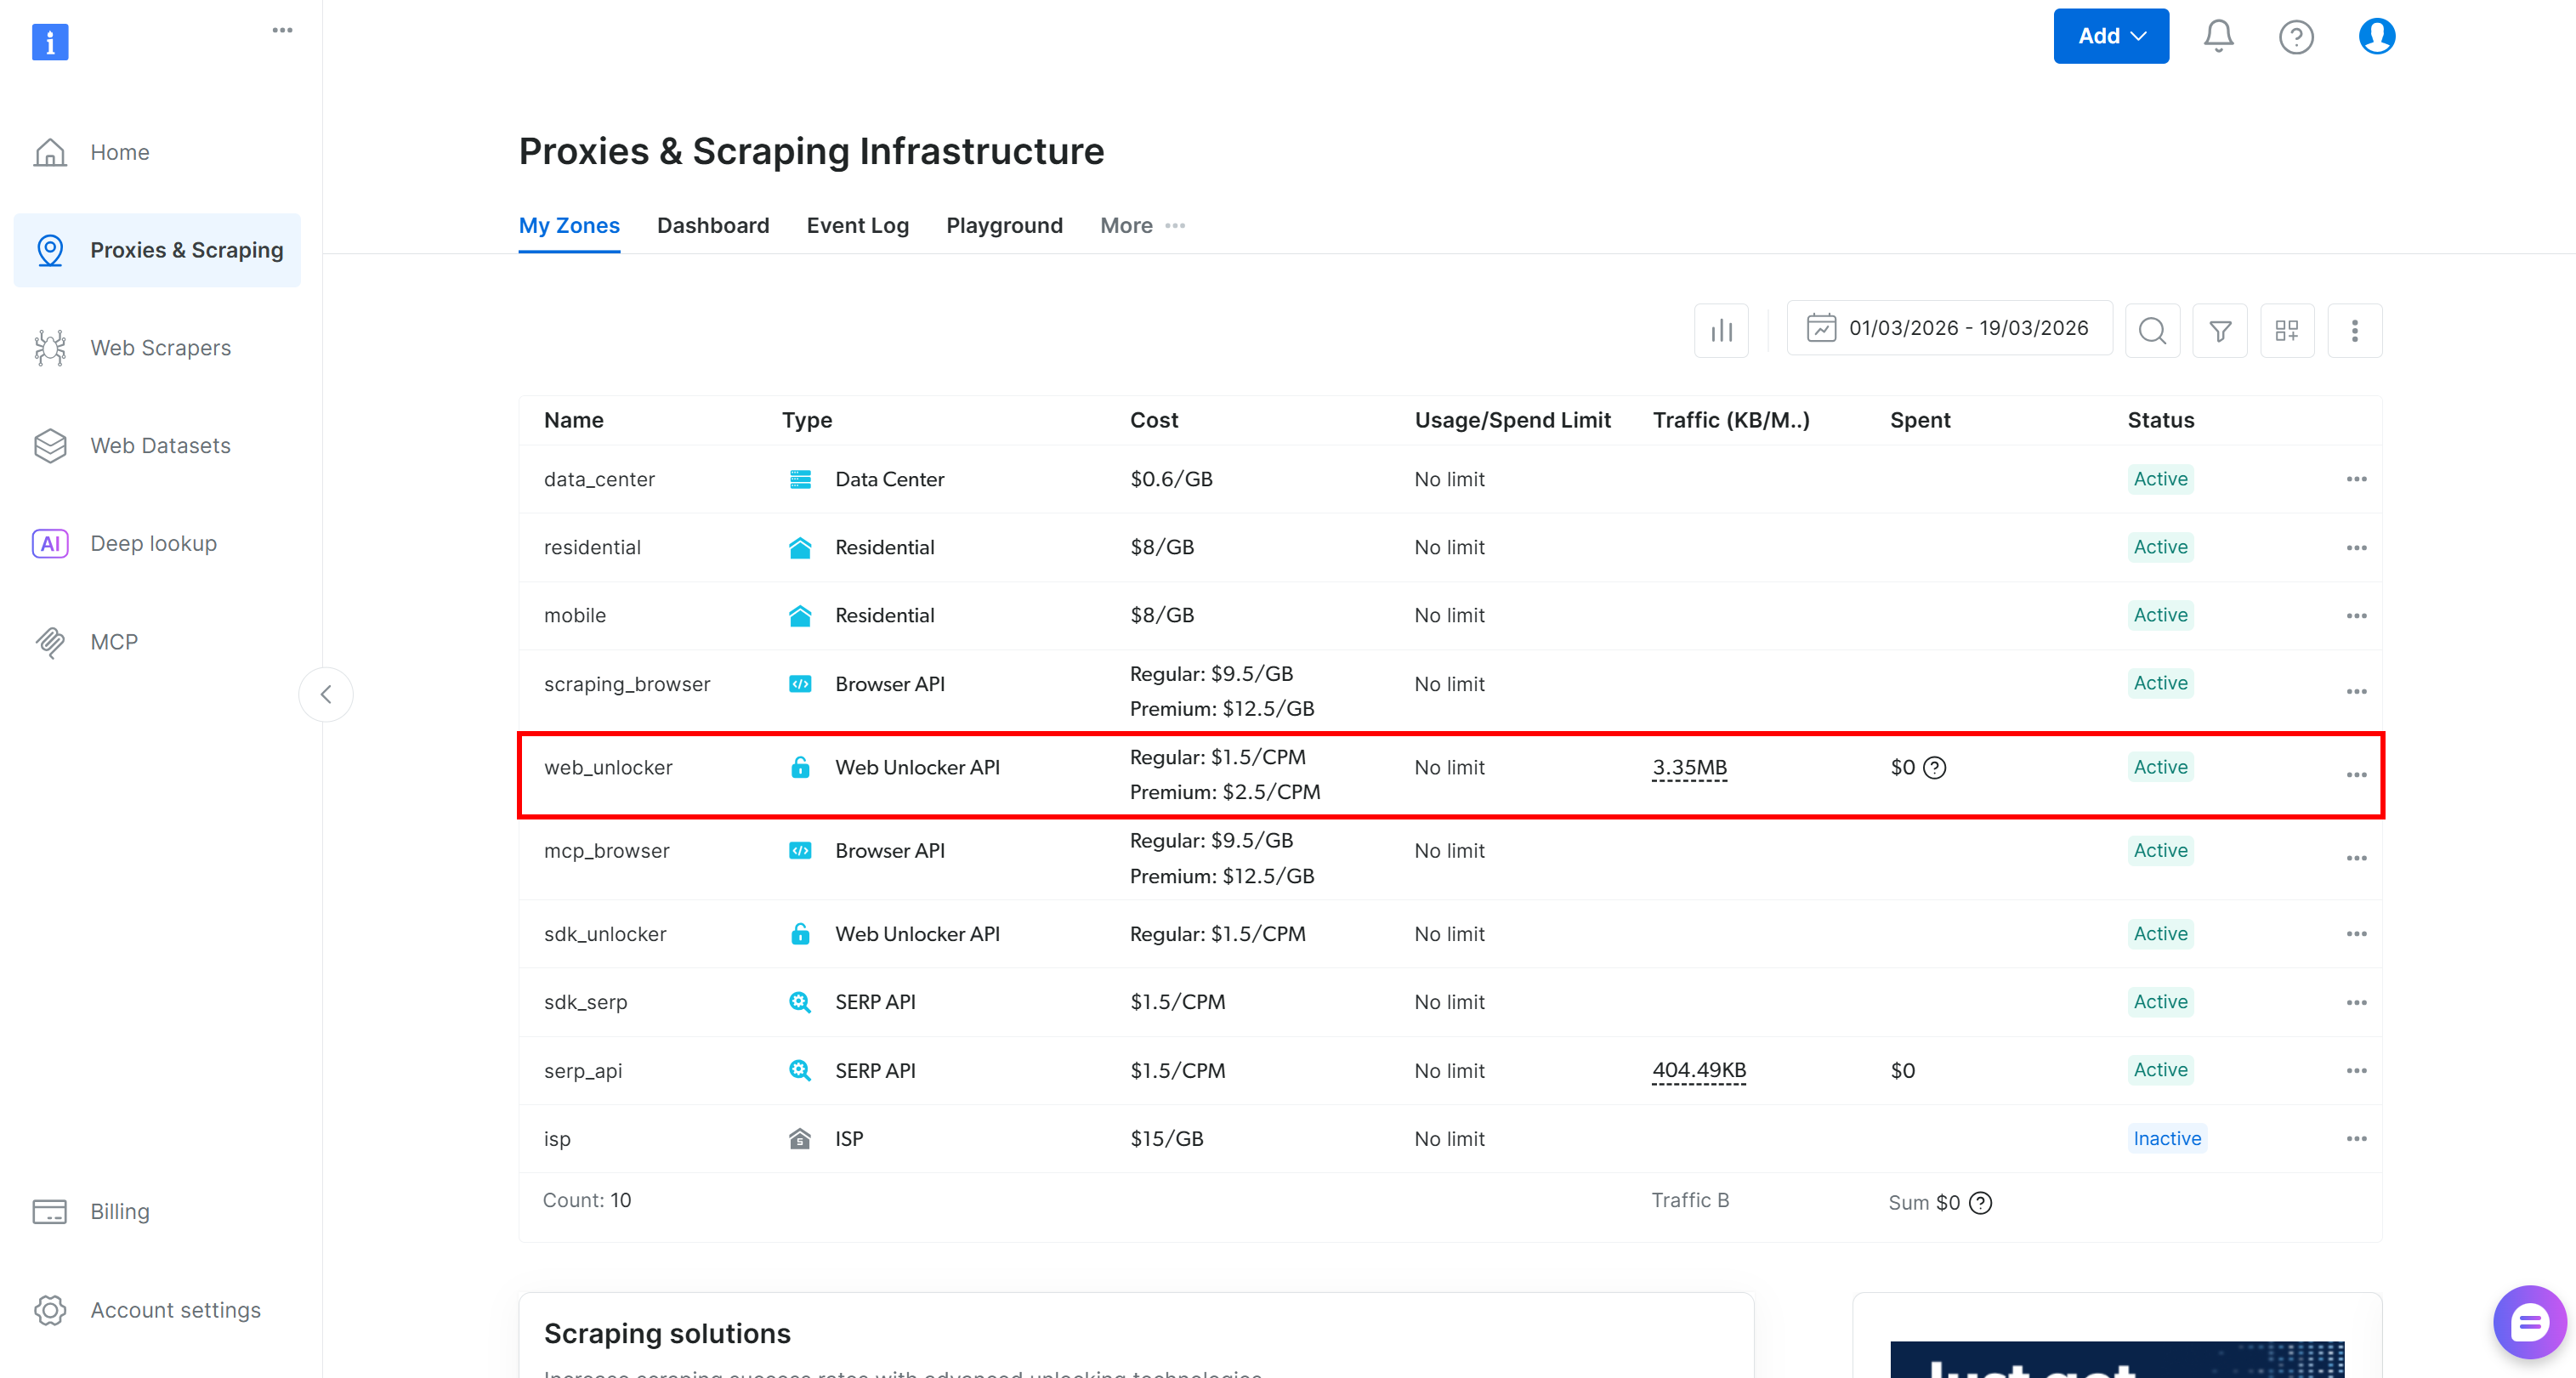
If a Web Unlocker API zone (e.g., web_unlocker) already exists in the table, you are good to go.
If it is missing, you must create one. Scroll to the “Unblocker API” card, click the “Create zone” button, and follow the wizard.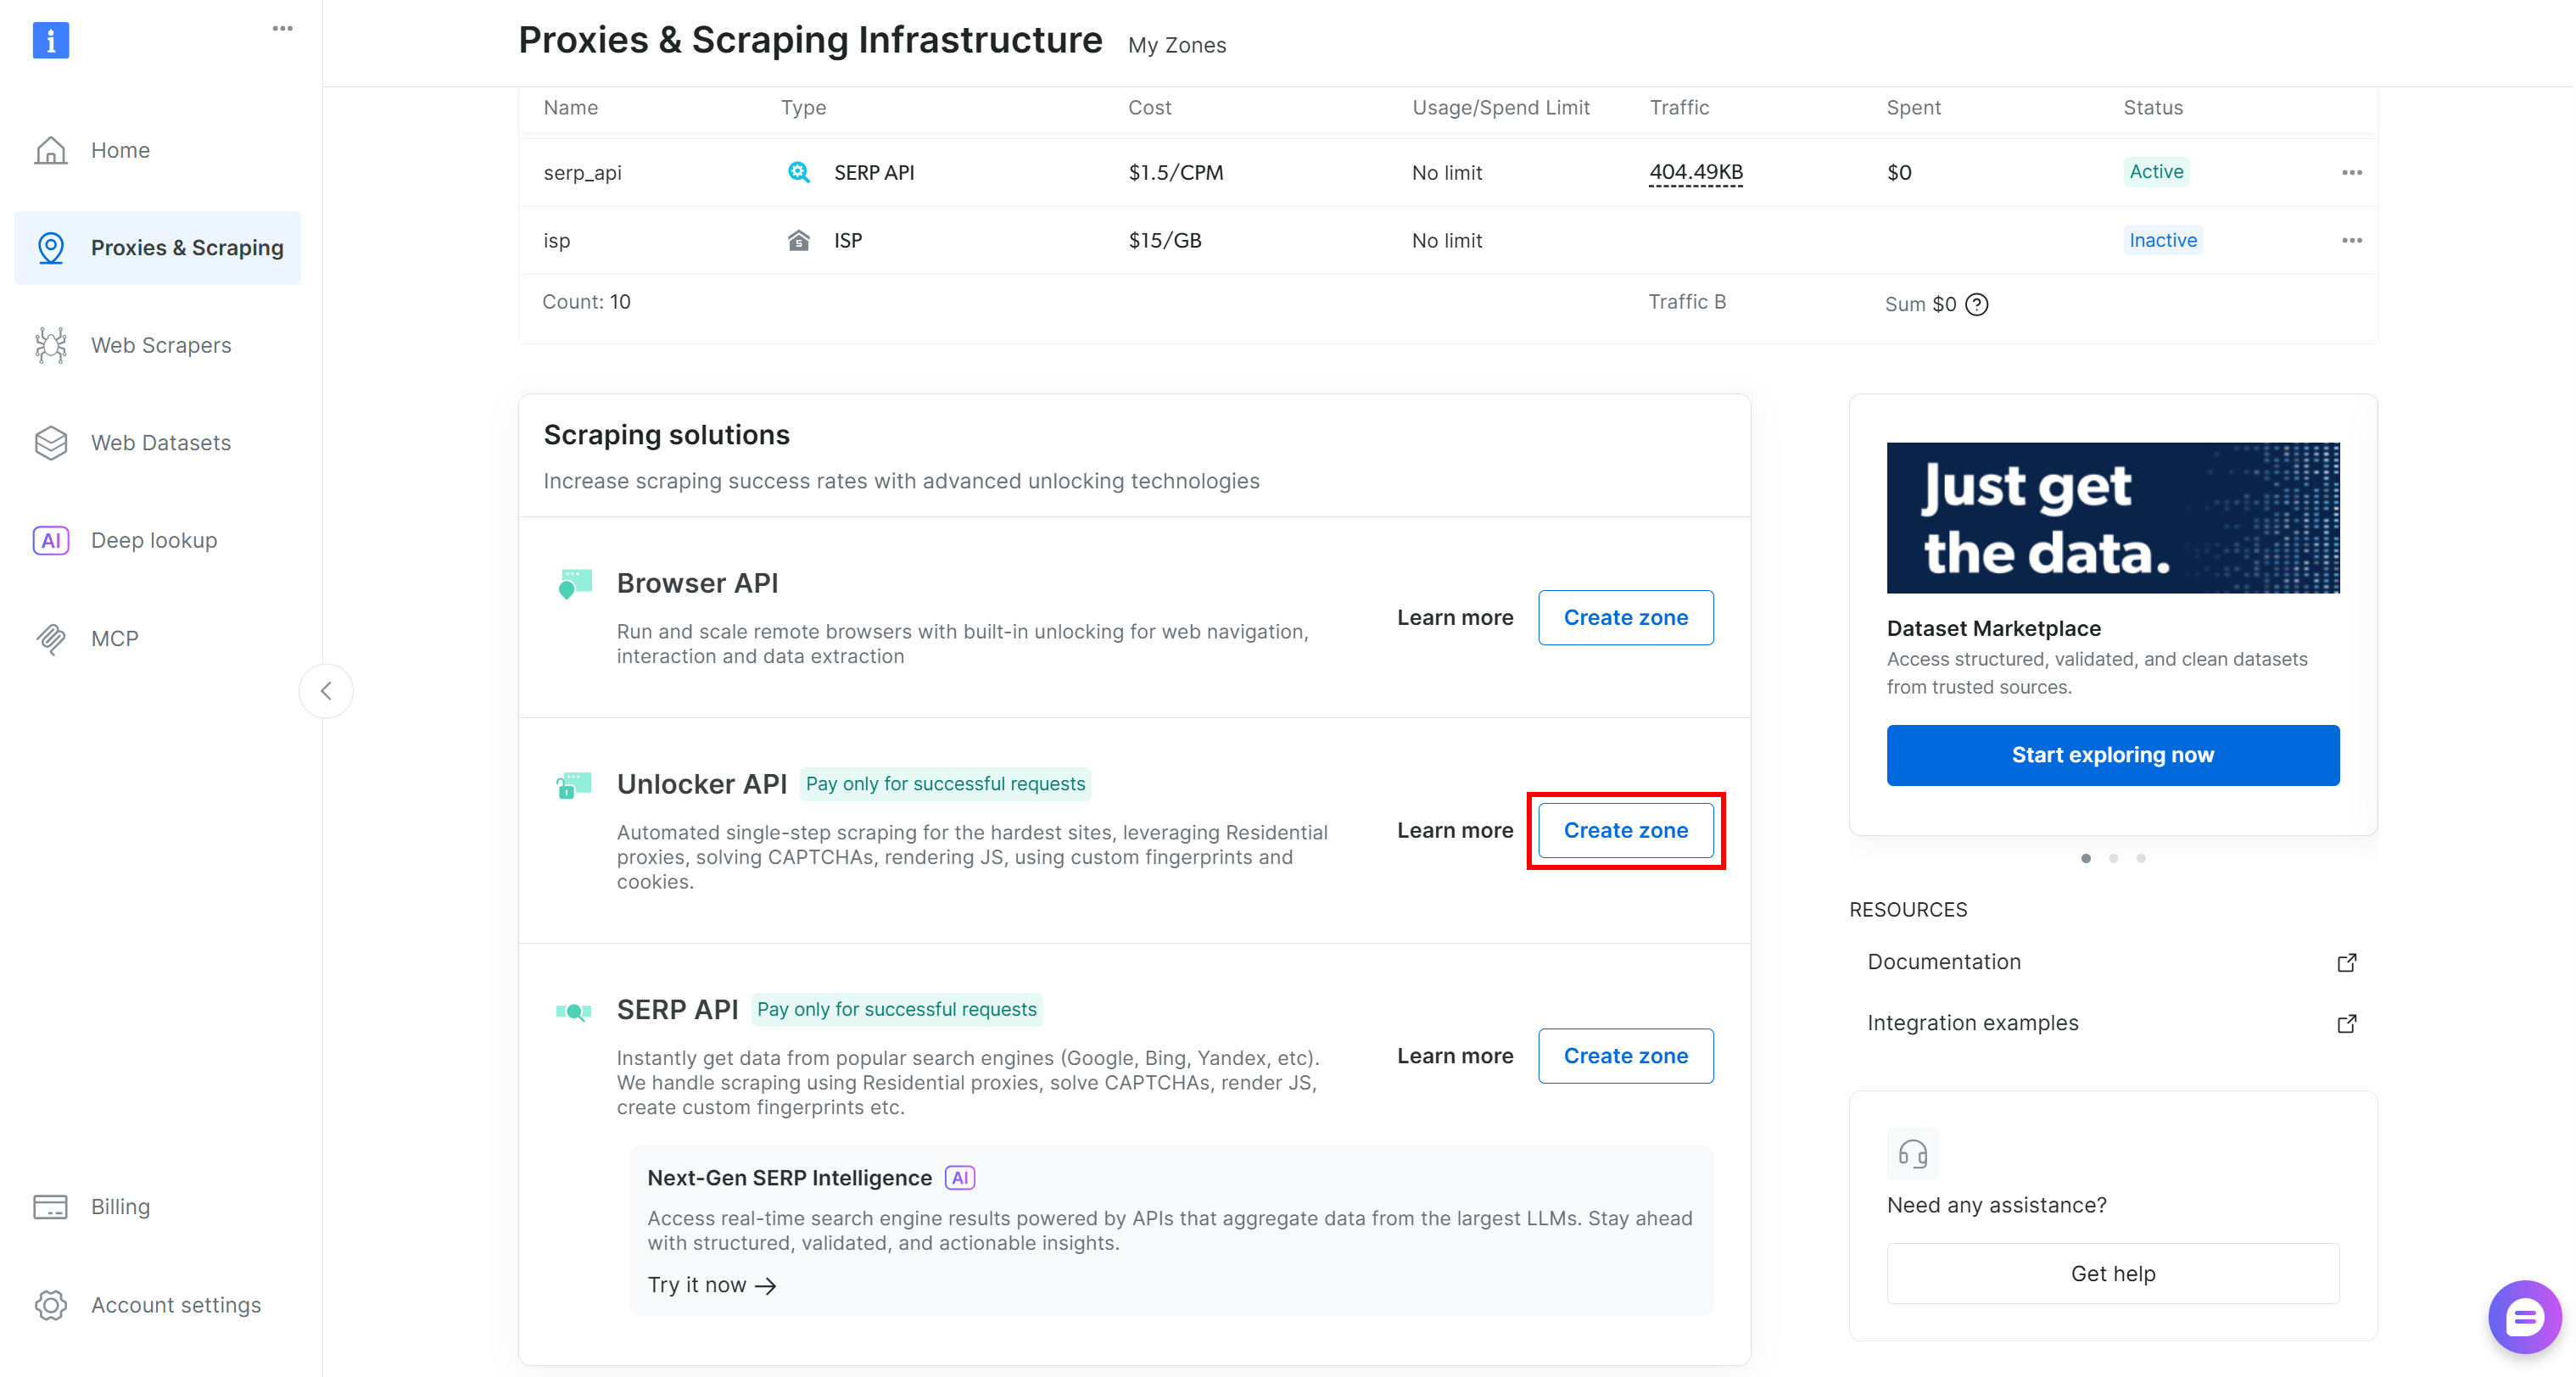
Name your zone carefully, as you will need it later. In this guide, we will assume the zone is named web_unlocker.
Finally, generate your Bright Data API key and store it securely. You will need it to authenticate HTTP requests made by AutoGPT to Bright Data.
This is it! The Bright Data prerequisites have been addressed.
Step #5: Initialize the Agent
Every AutoGPT agentic workflow needs an input and an output. Start by going to the “Build” section to access the Agent Builder page: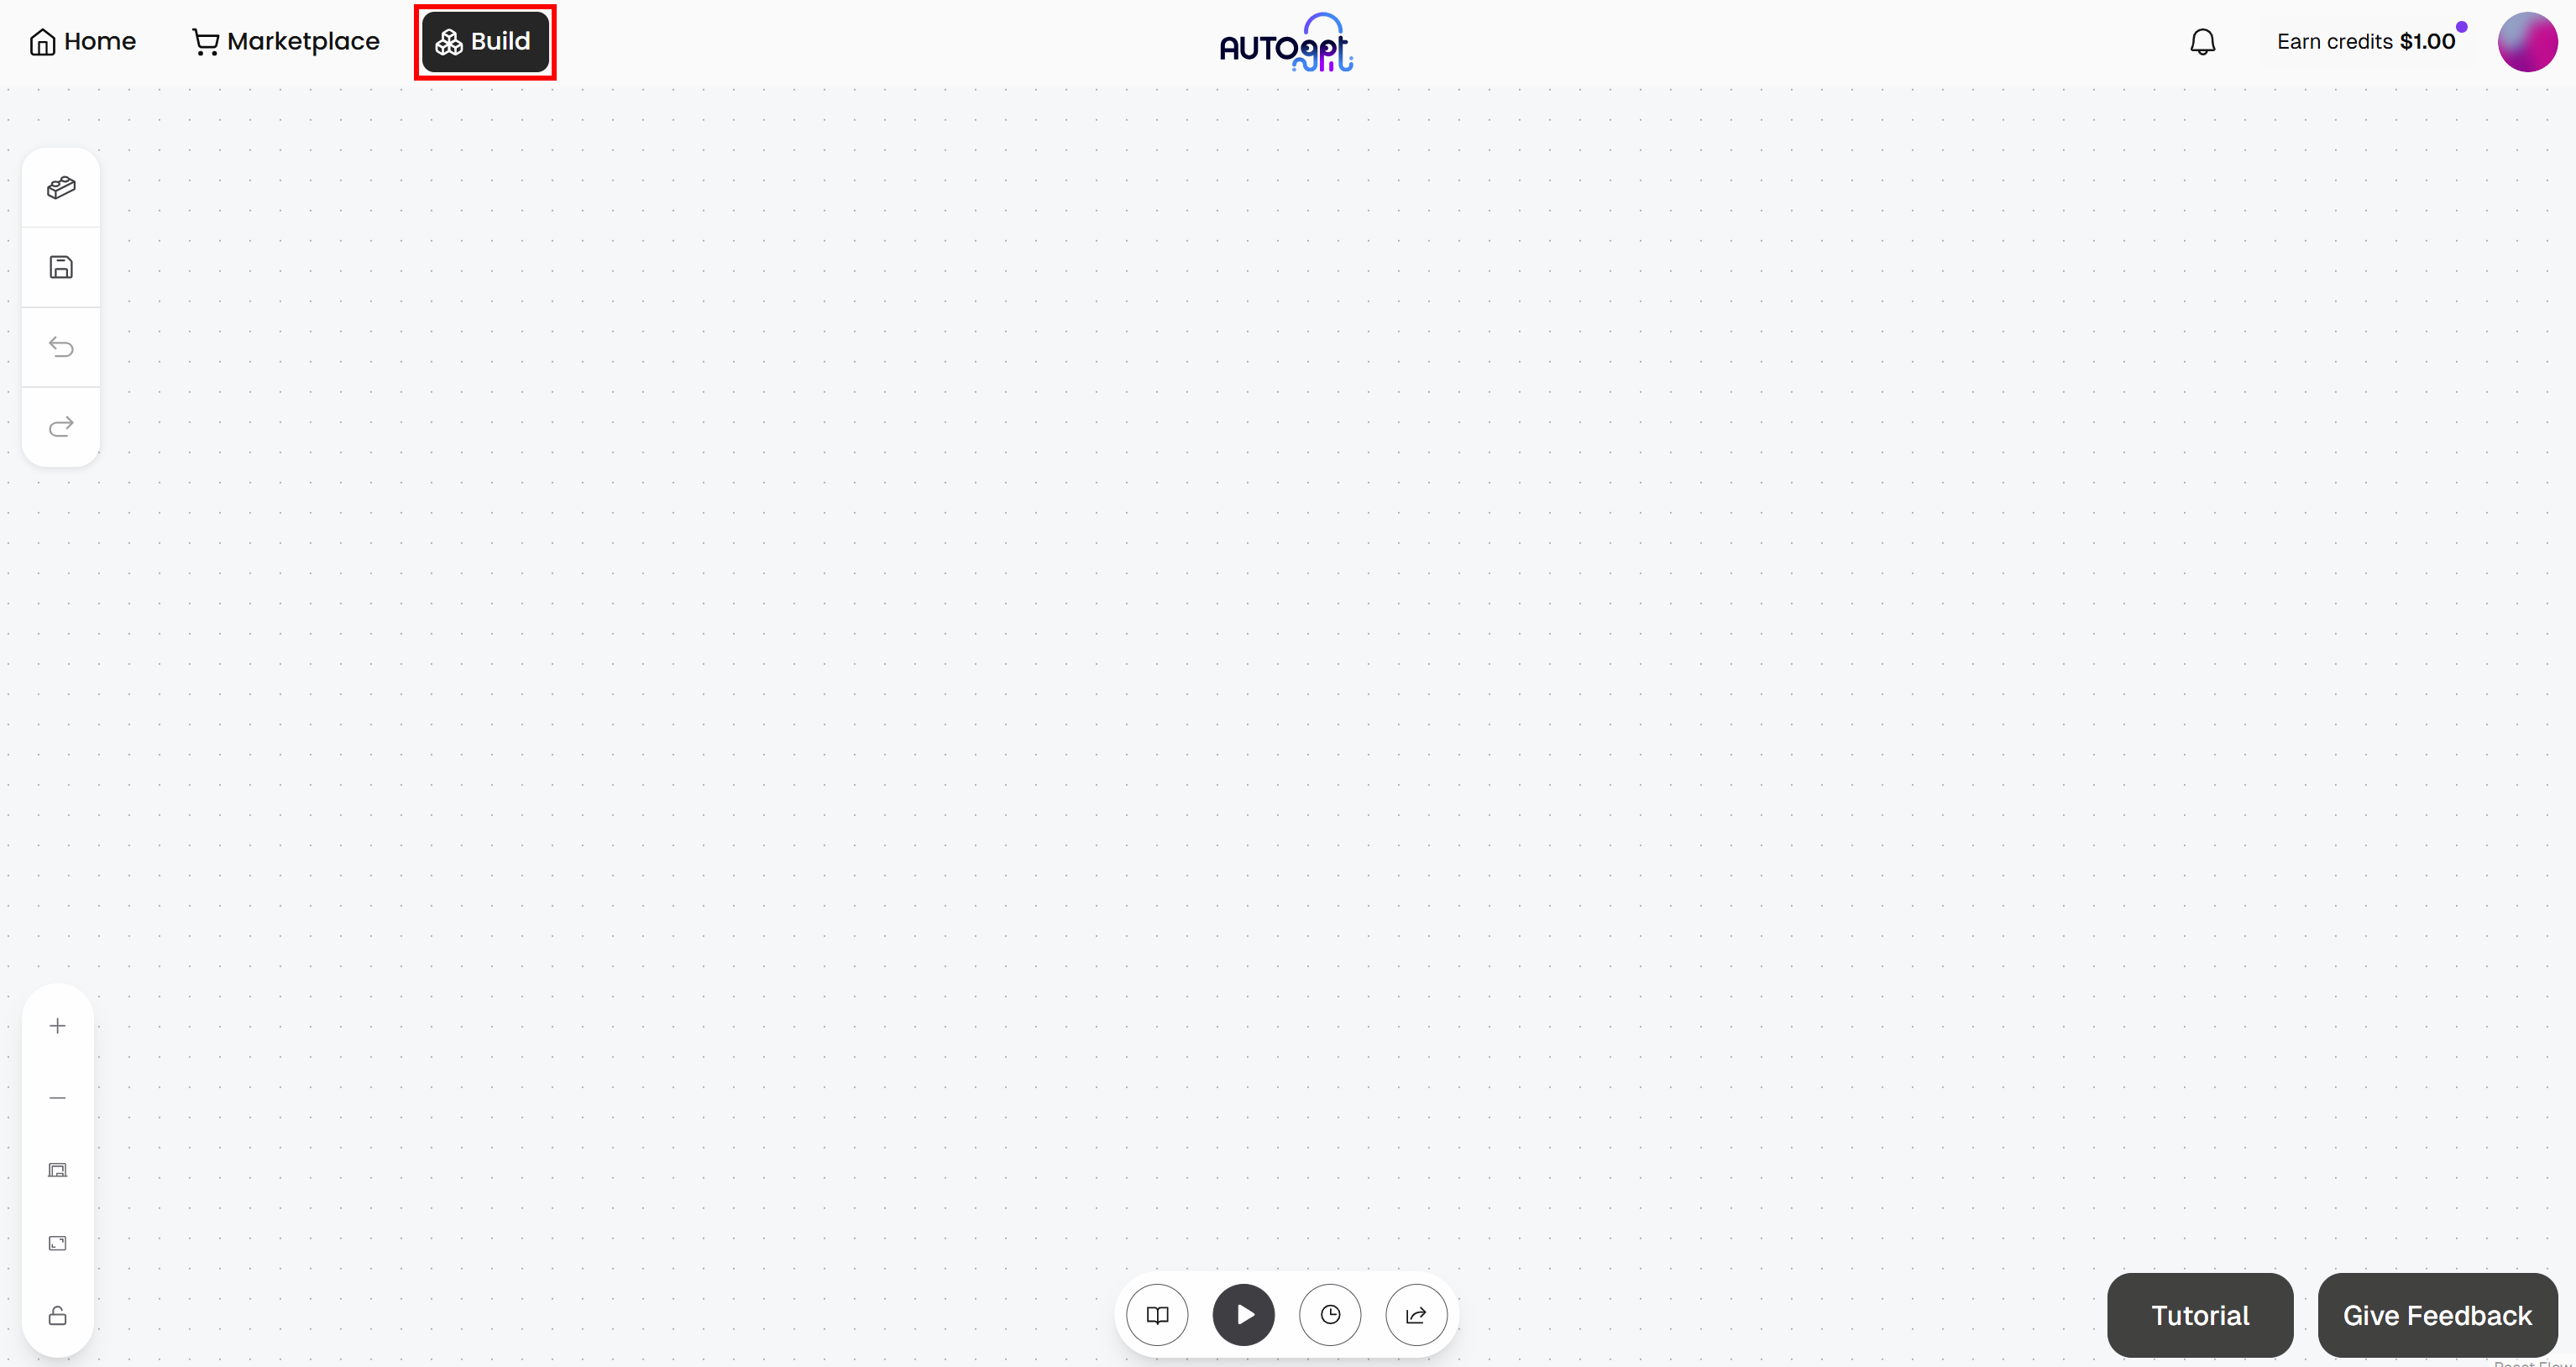
Press the “Save” button, give your agent a name like “Bookmark Likelihood Evaluator”, and then click “Save Agent”: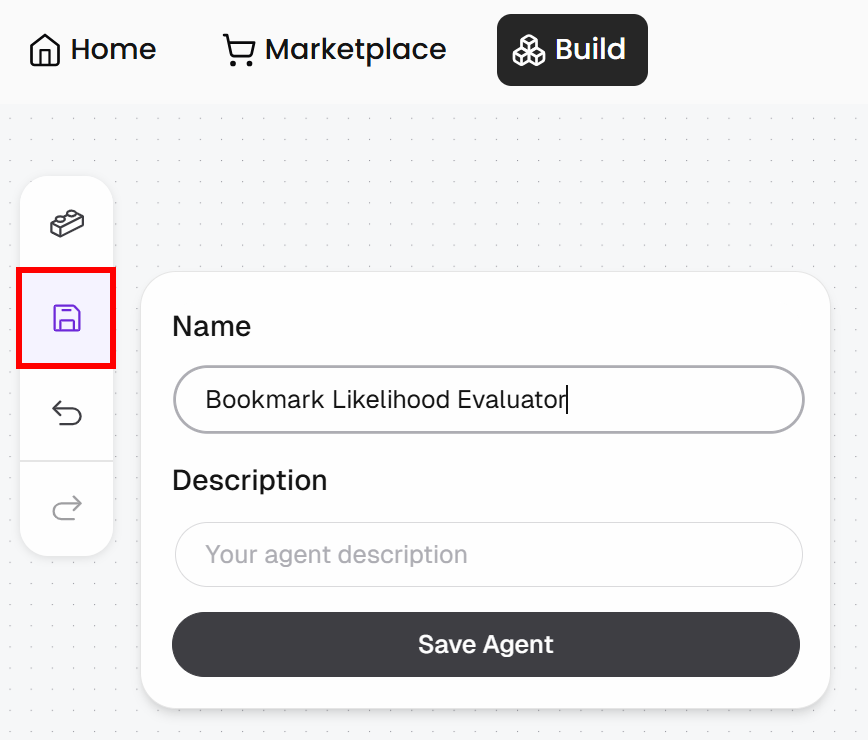
In the Agent Builder page, press the “Blocks” button on the left and add an “Agent Input” block: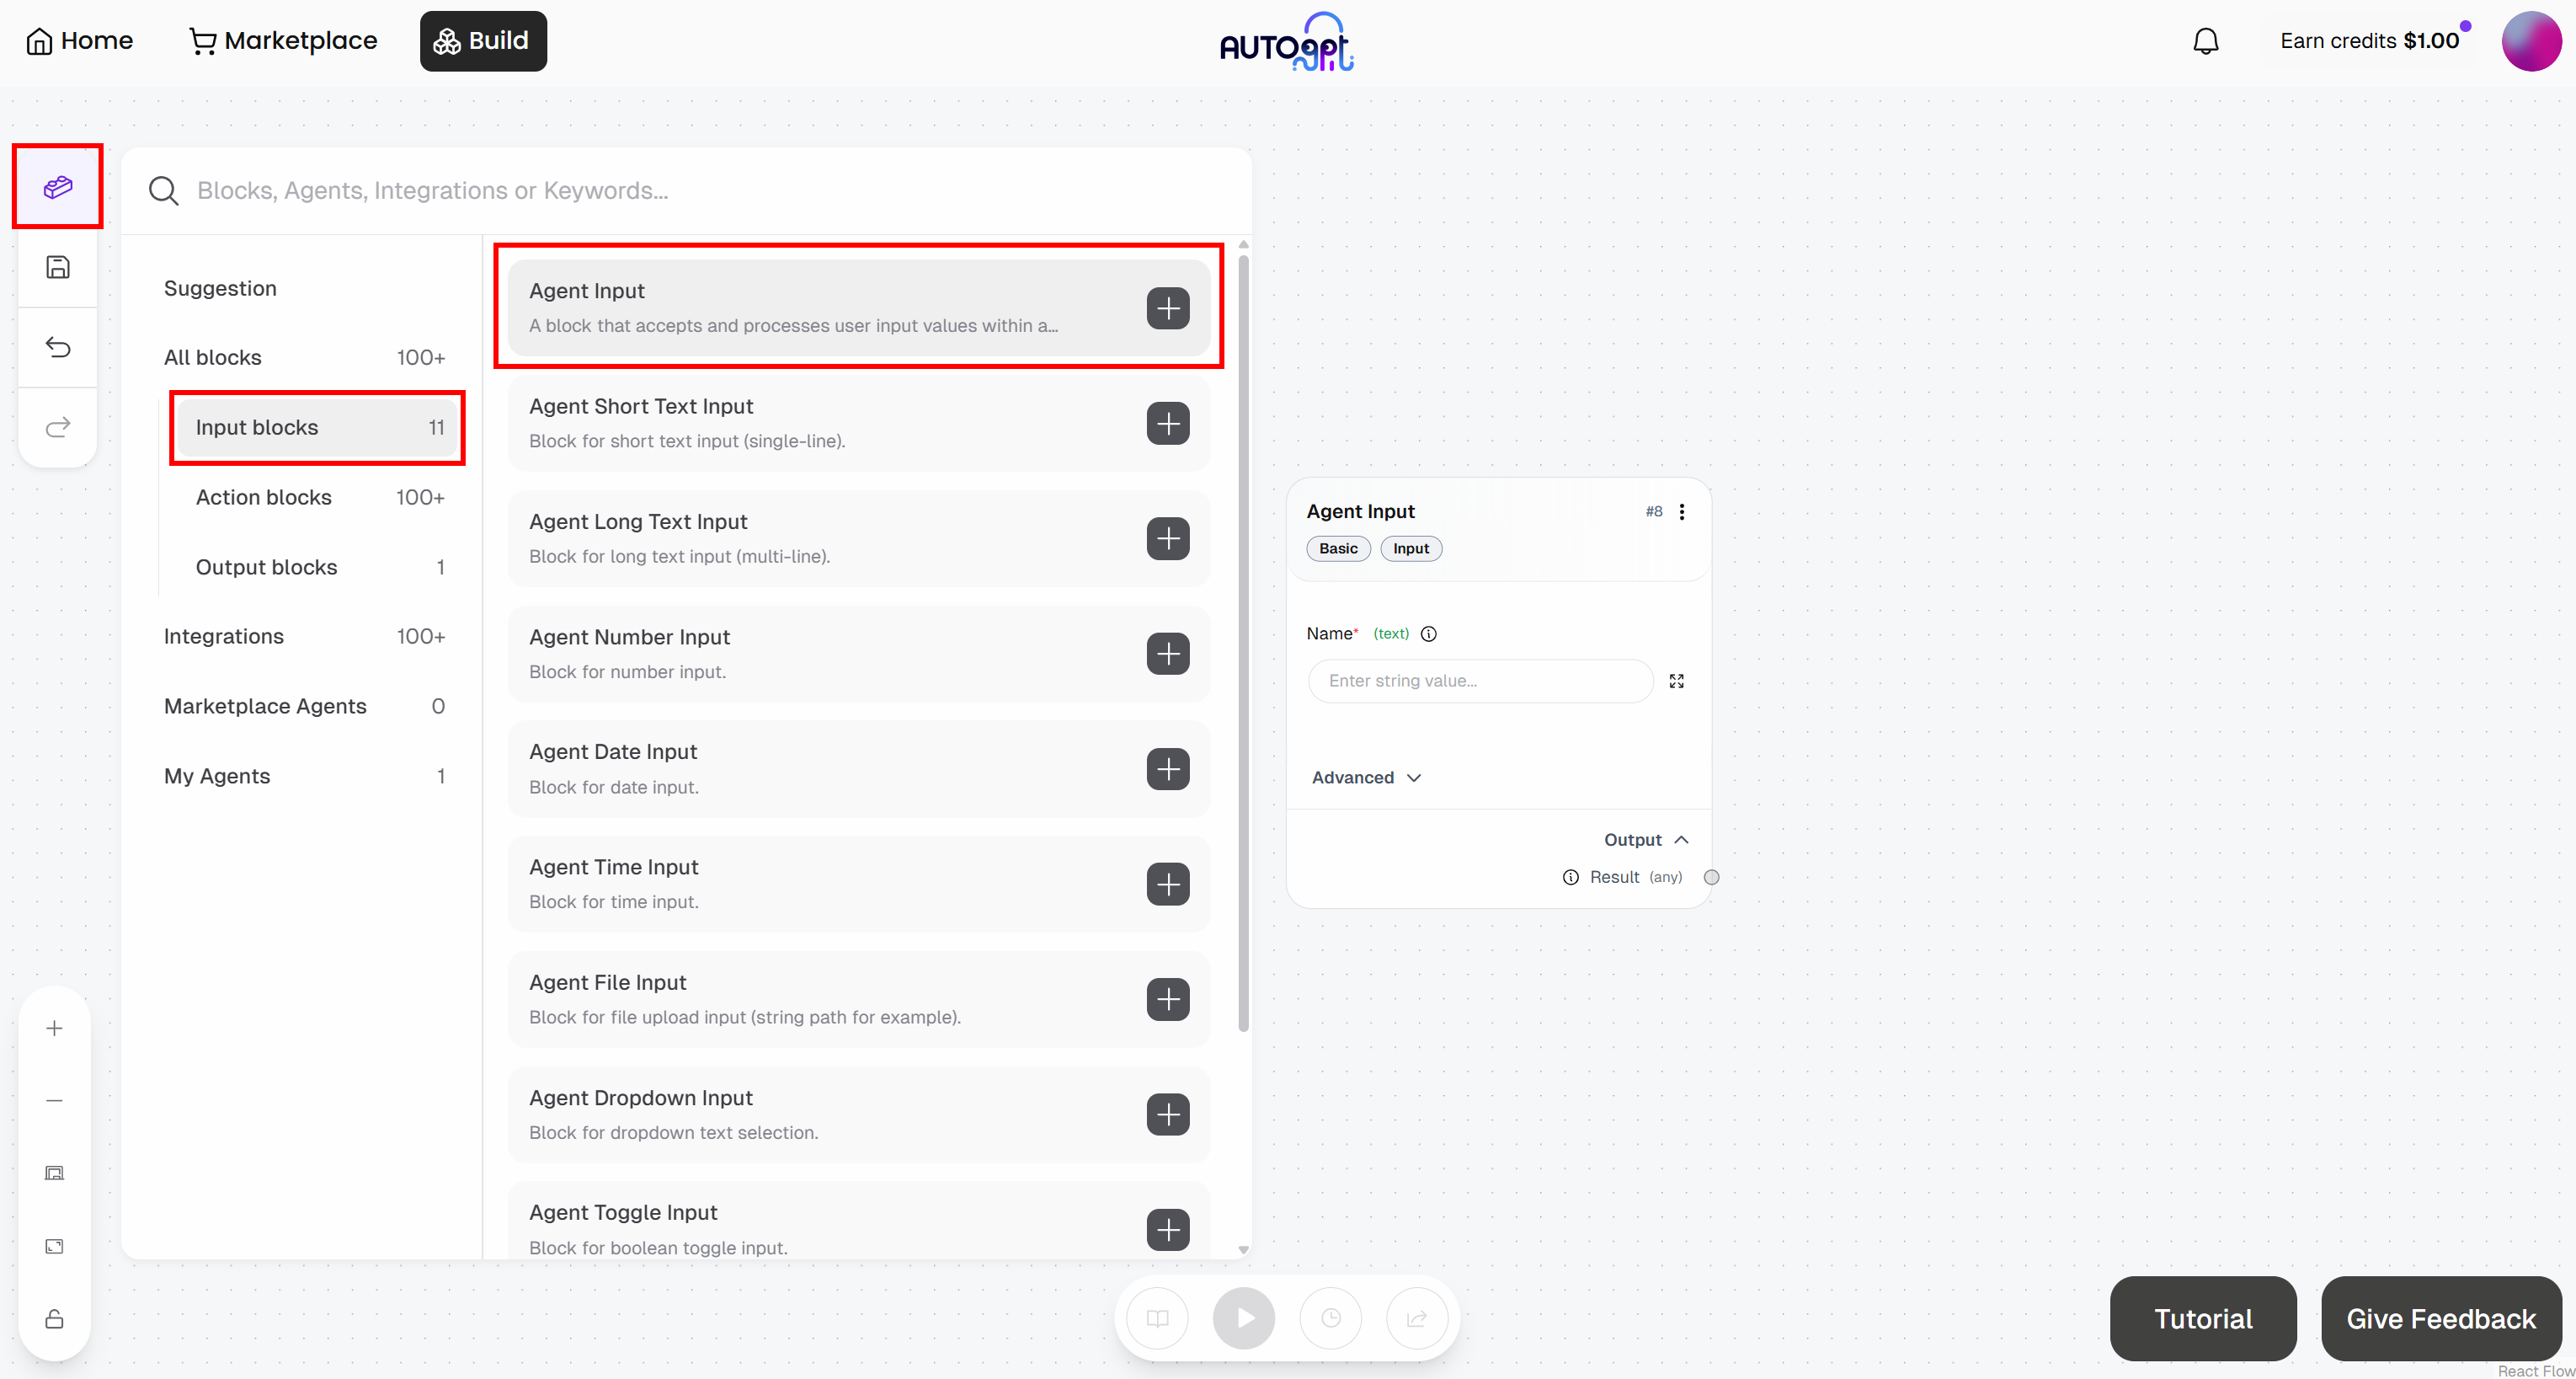
In a similar way, add an “Agent Output” block: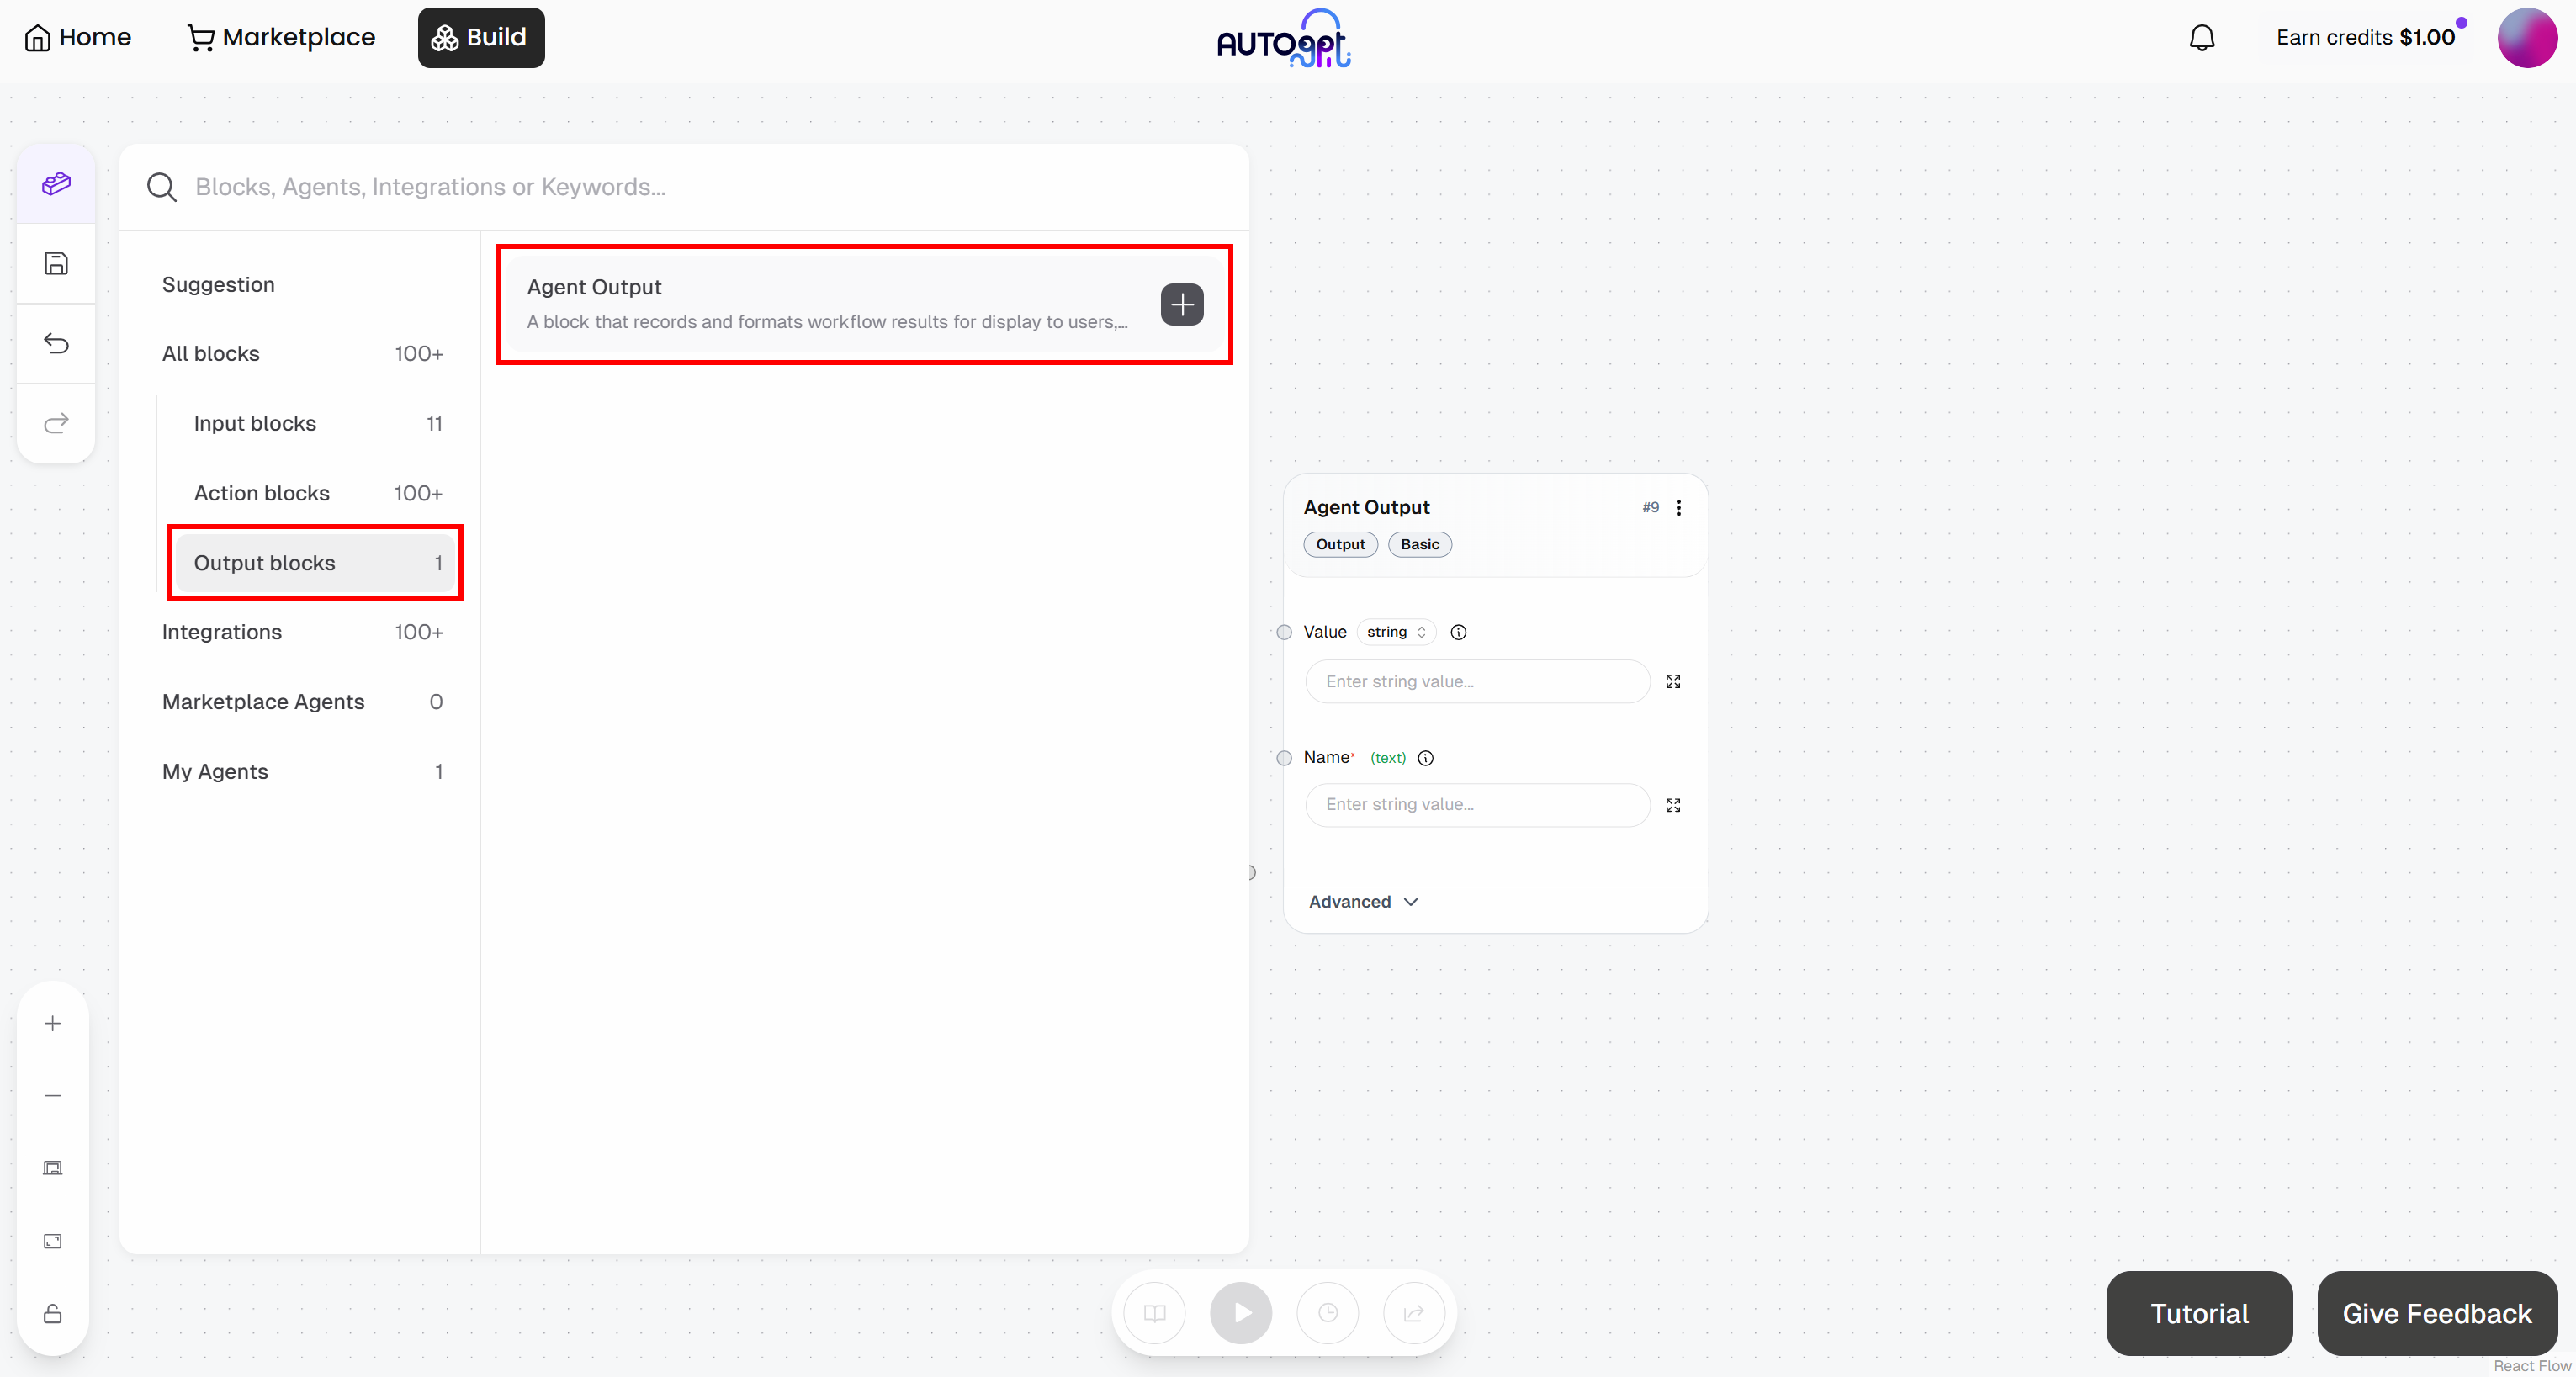
Configure the blocks as follows:
- Agent Input: Name it “Article URL”
- Agent Output block: Name it “Bookmarking Likelihood”
At this point, your initial agentic workflow should look like this: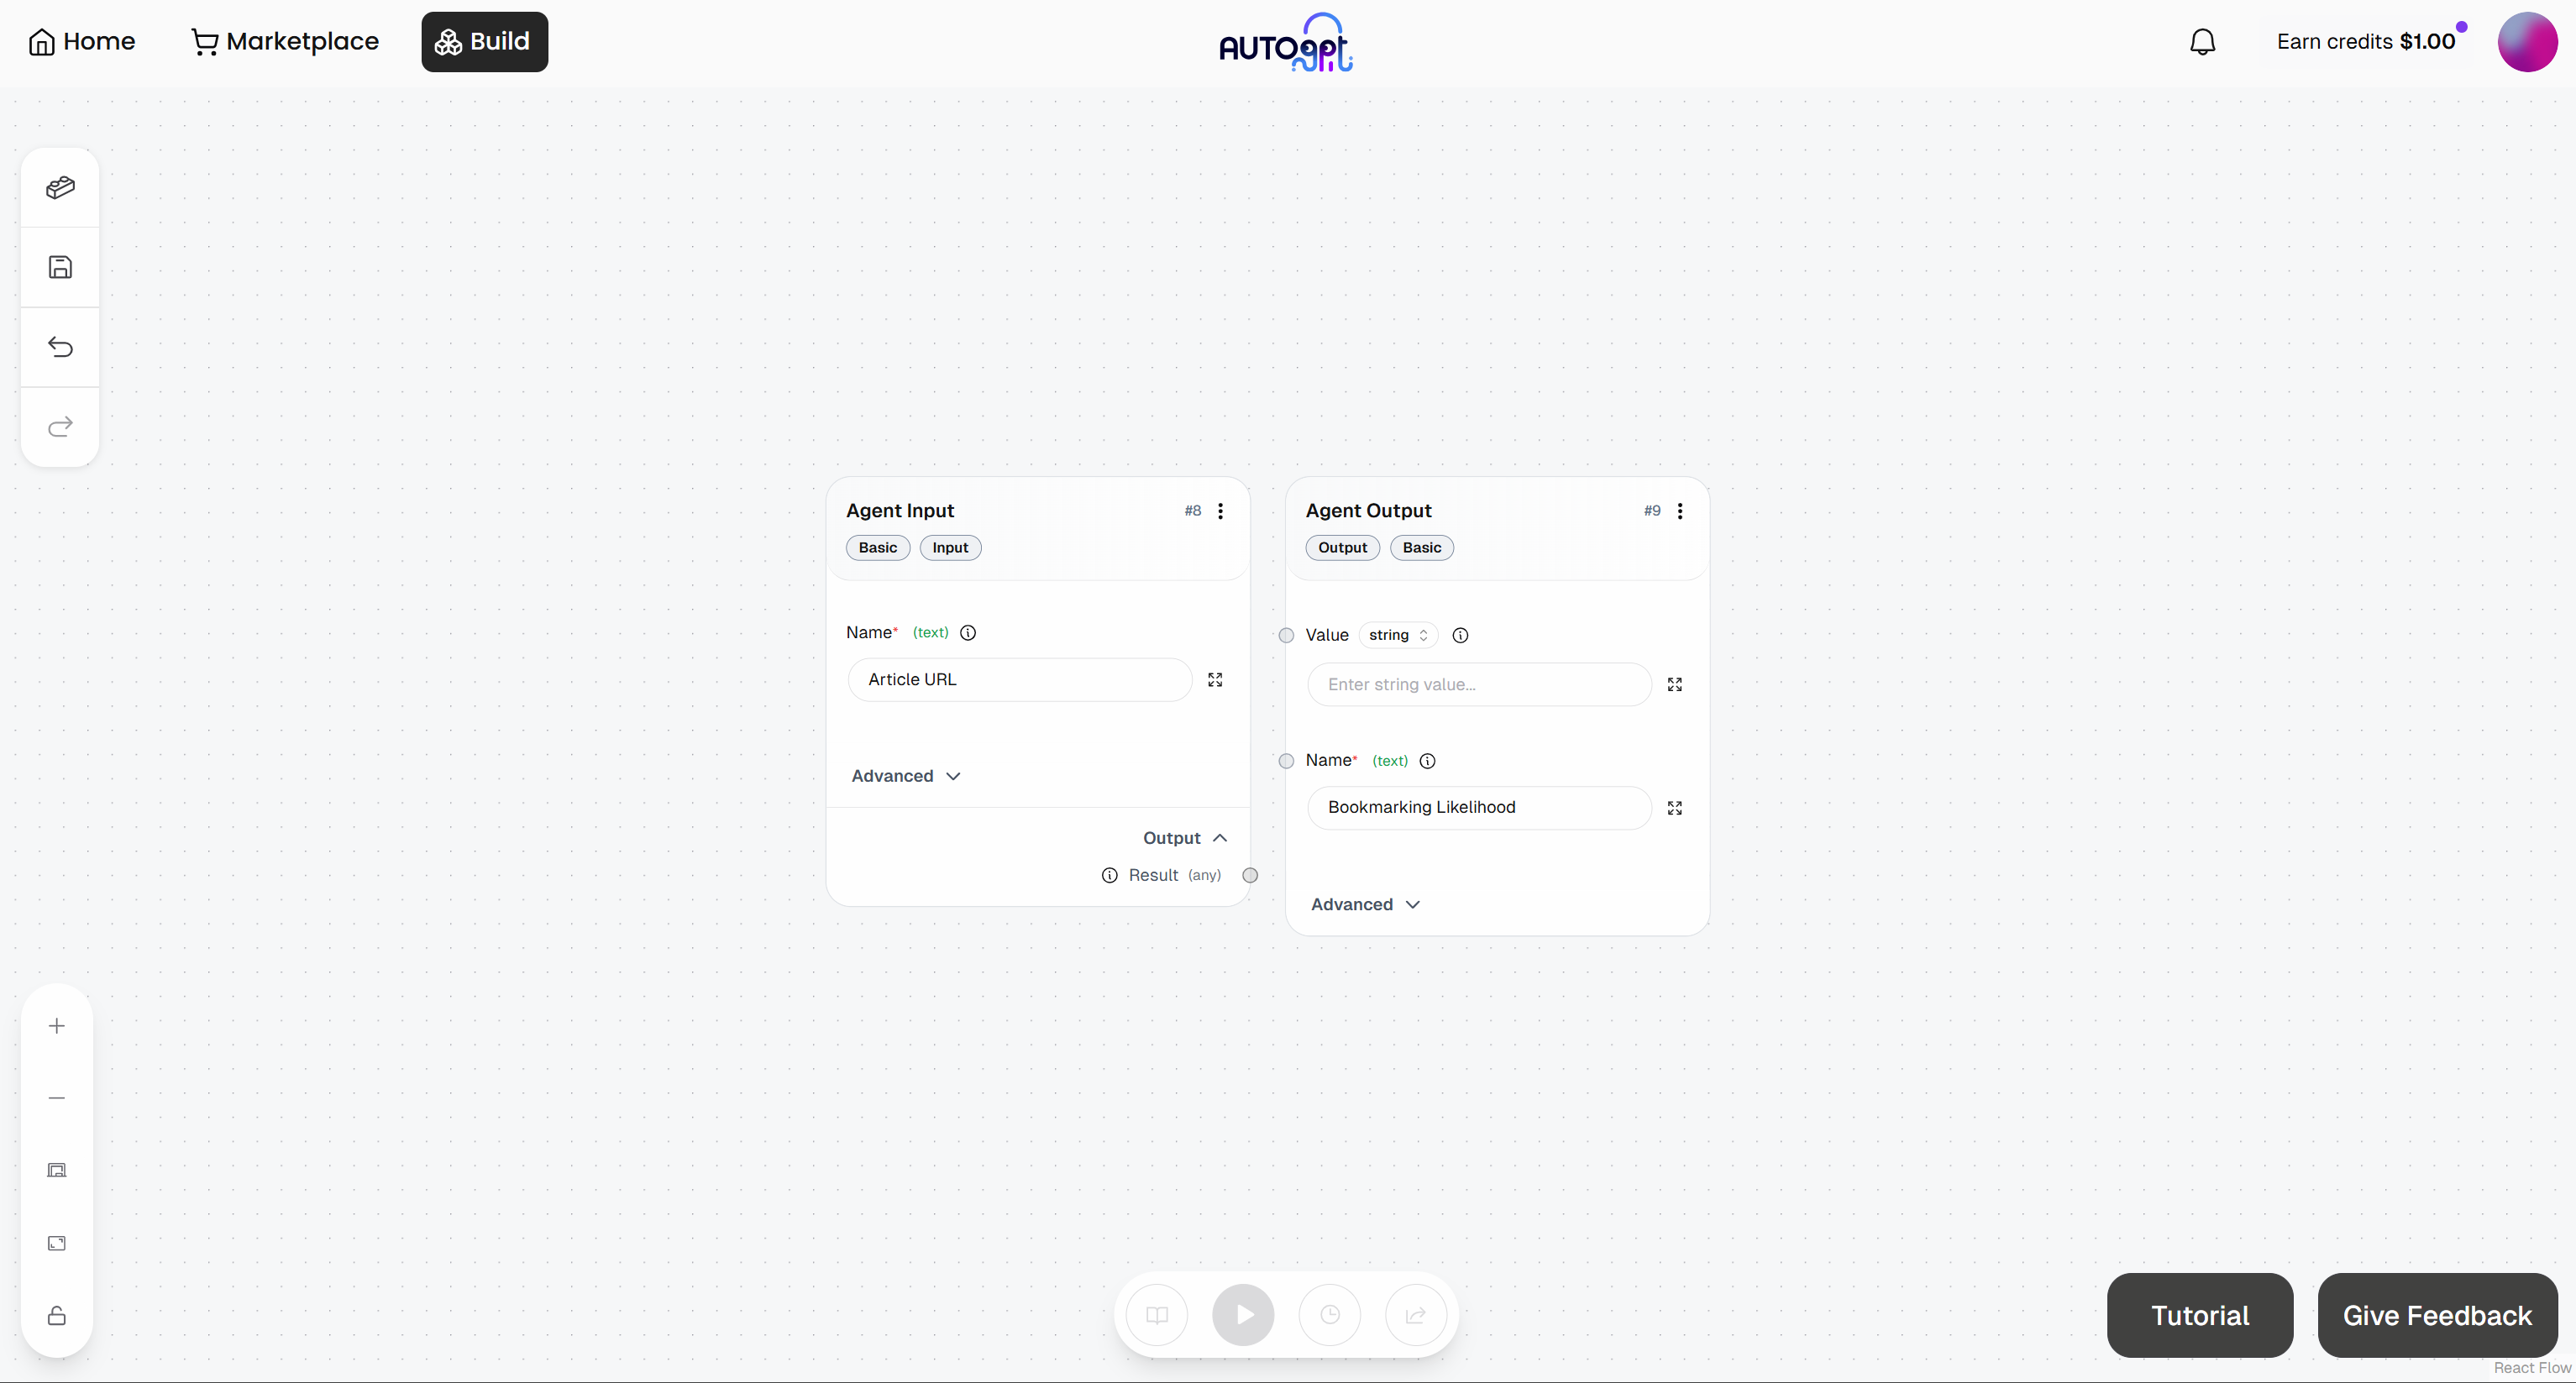
Great! Time to continue defining the rest of your agentic workflow.
Step #6: Make the Scraping Request
To perform the HTTP request to the Bright Data Web Unlocker API, you need two blocks:
- Create Dictionary: Defines the request body.
- Send Authenticated Web Request: Sends the authenticated request to the Web Unlocker endpoint on the Bright Data APIs.
Start by adding the “Create Dictionary” block: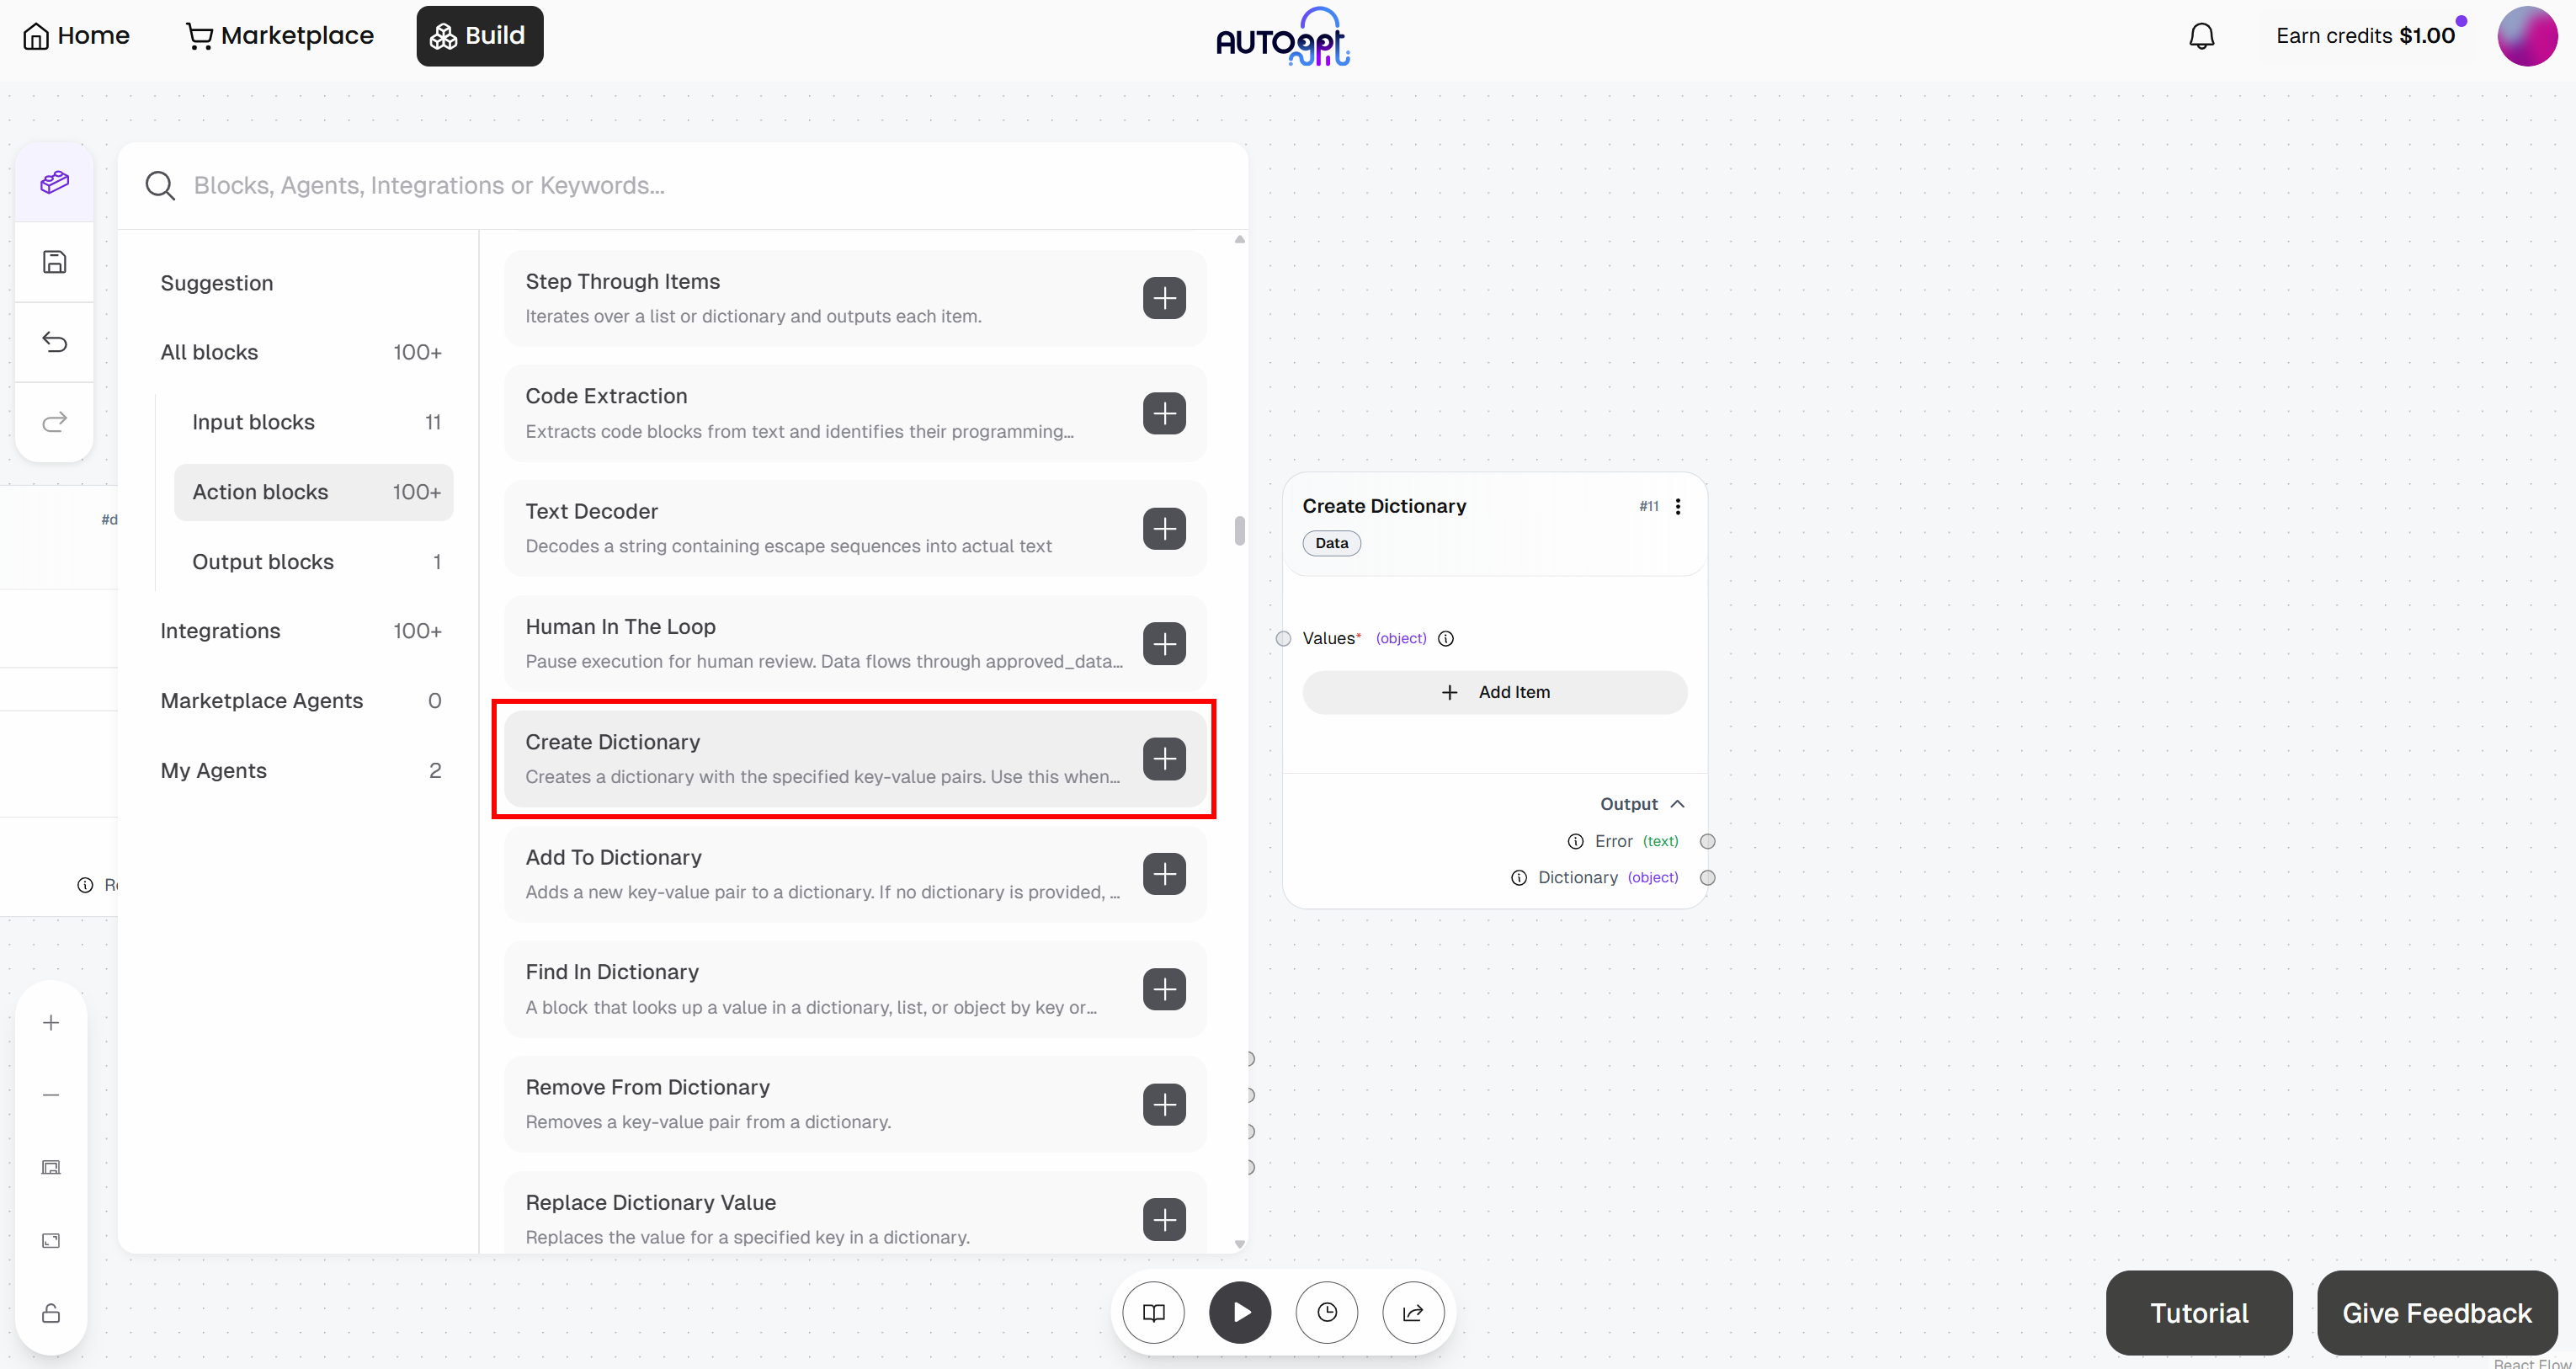
Then, add the “Send Authenticated Web Request” block: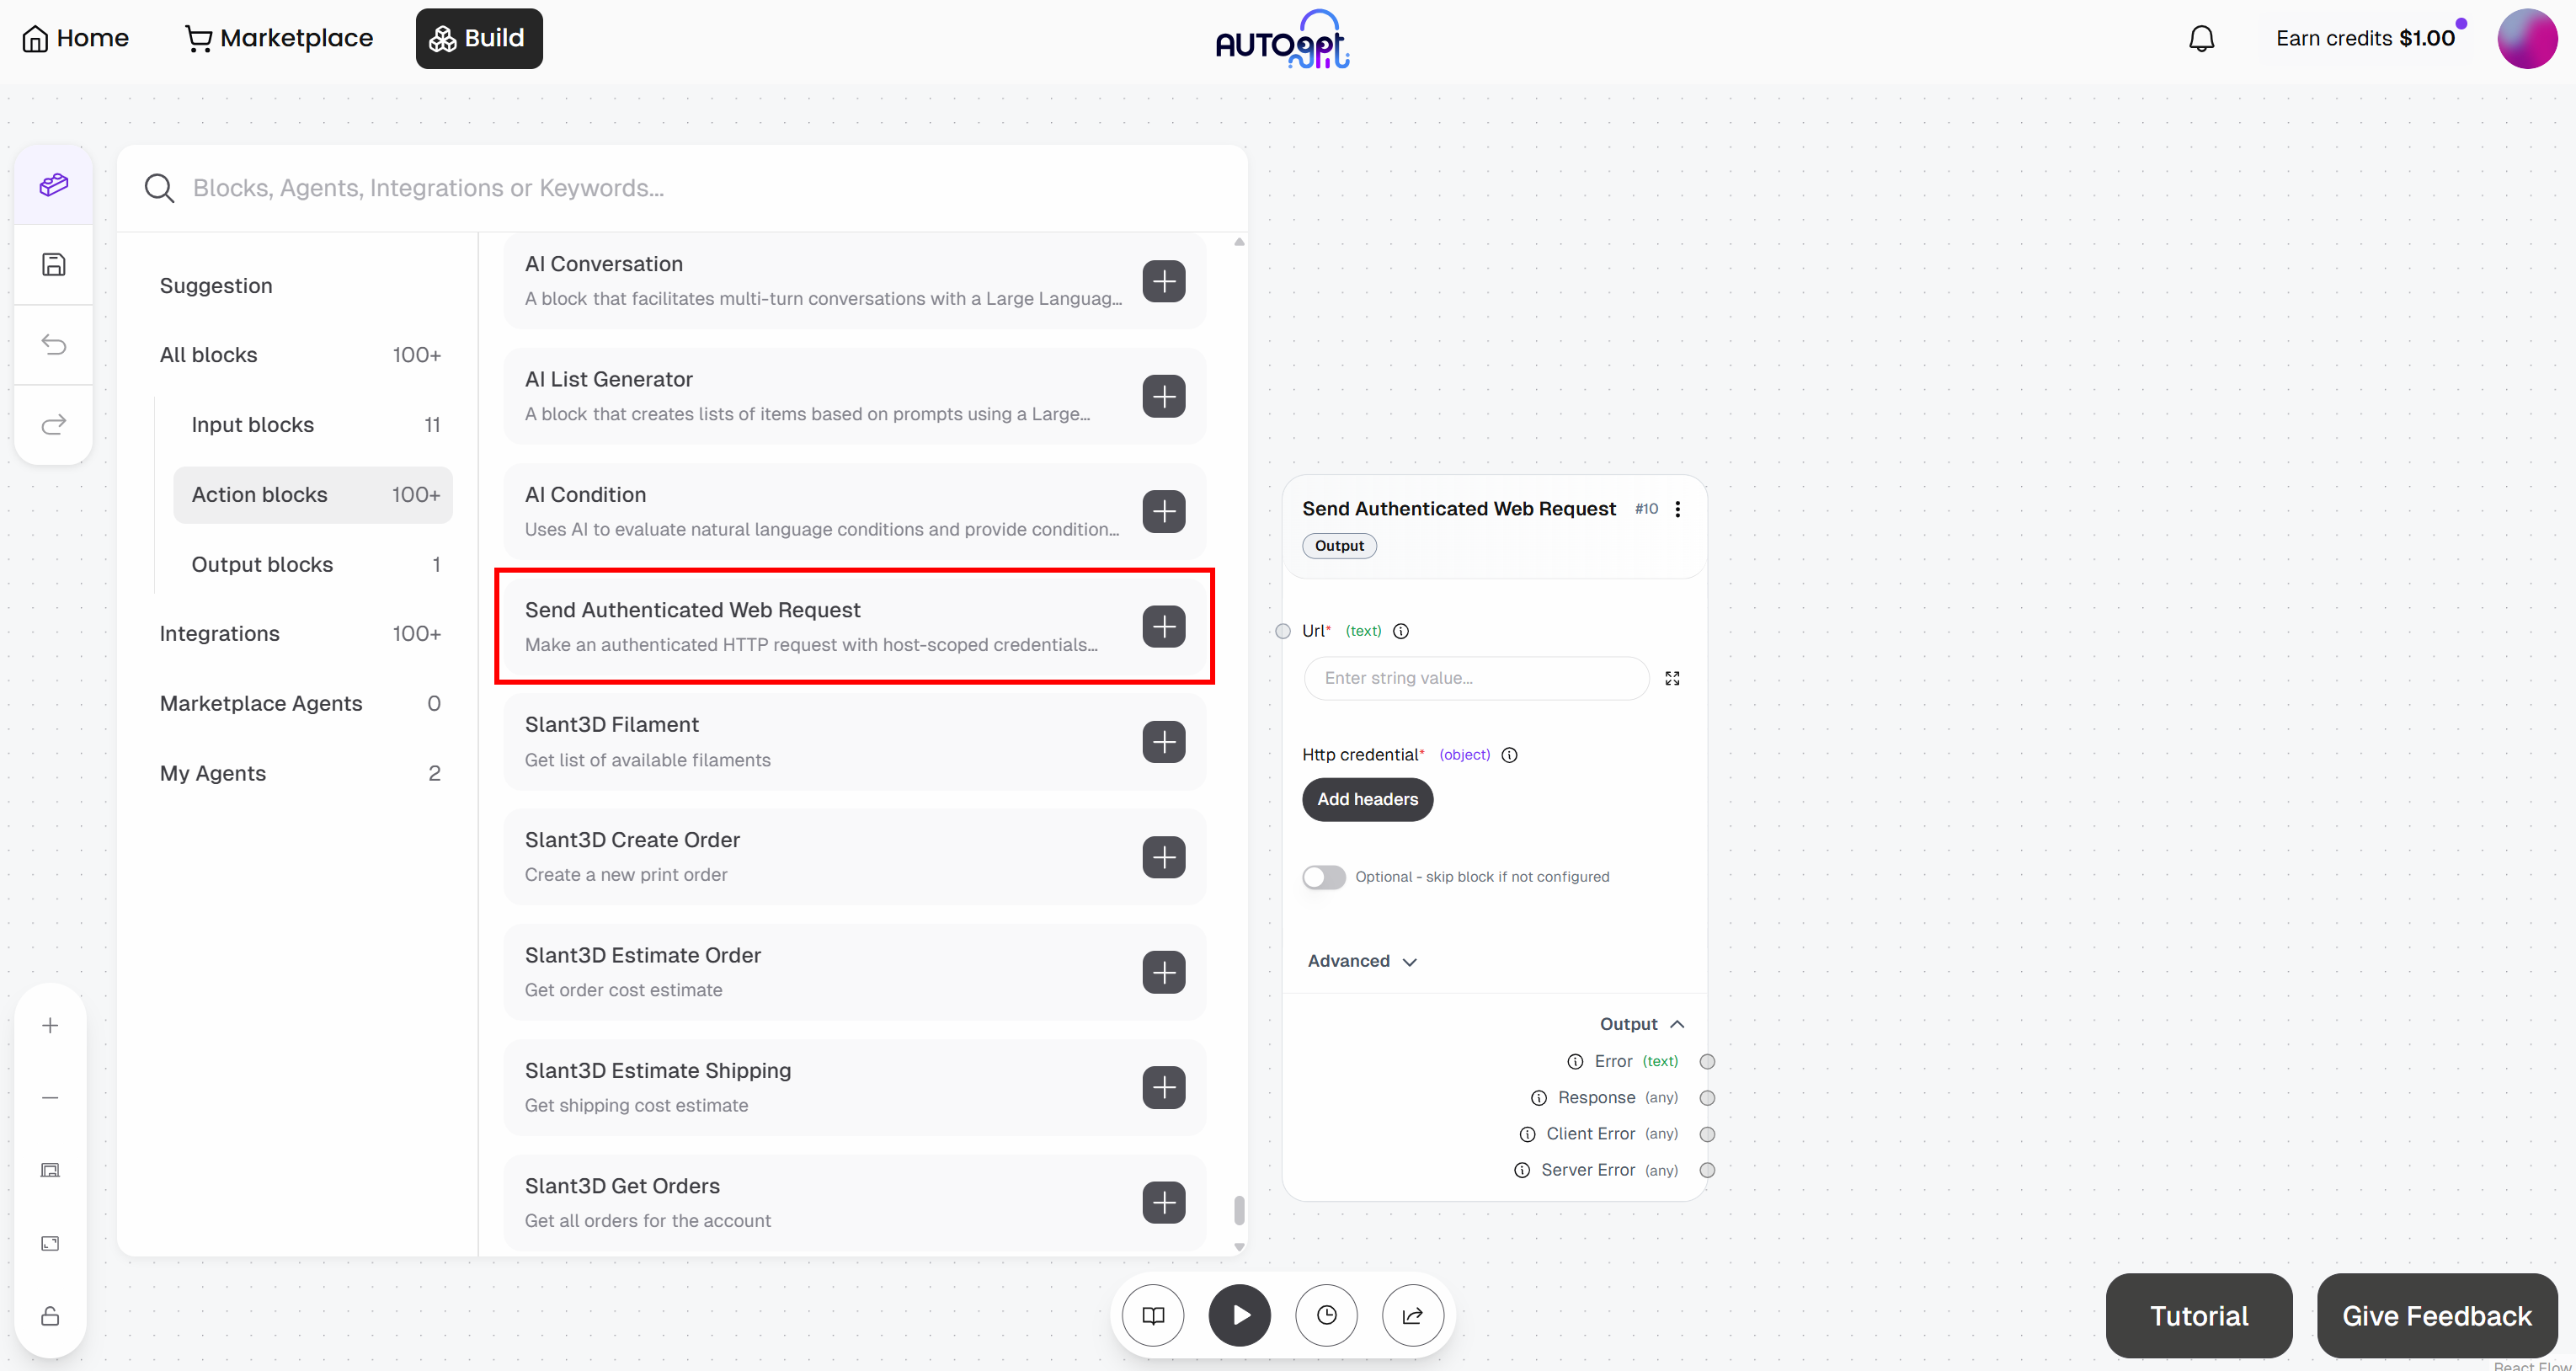
Get ready to configure the “Send Authenticated Web Request” block. This will send a request to the Web Unlocker API. For more details on how this endpoint works and how to call it, refer to the official docs.
Expand the “Advanced” dropdown and populate the entire block like this:
- Url:
https://api.brightdata.com/request. - HttpMethod:
POST
Next, click the “Add headers” button under “Http credentials”: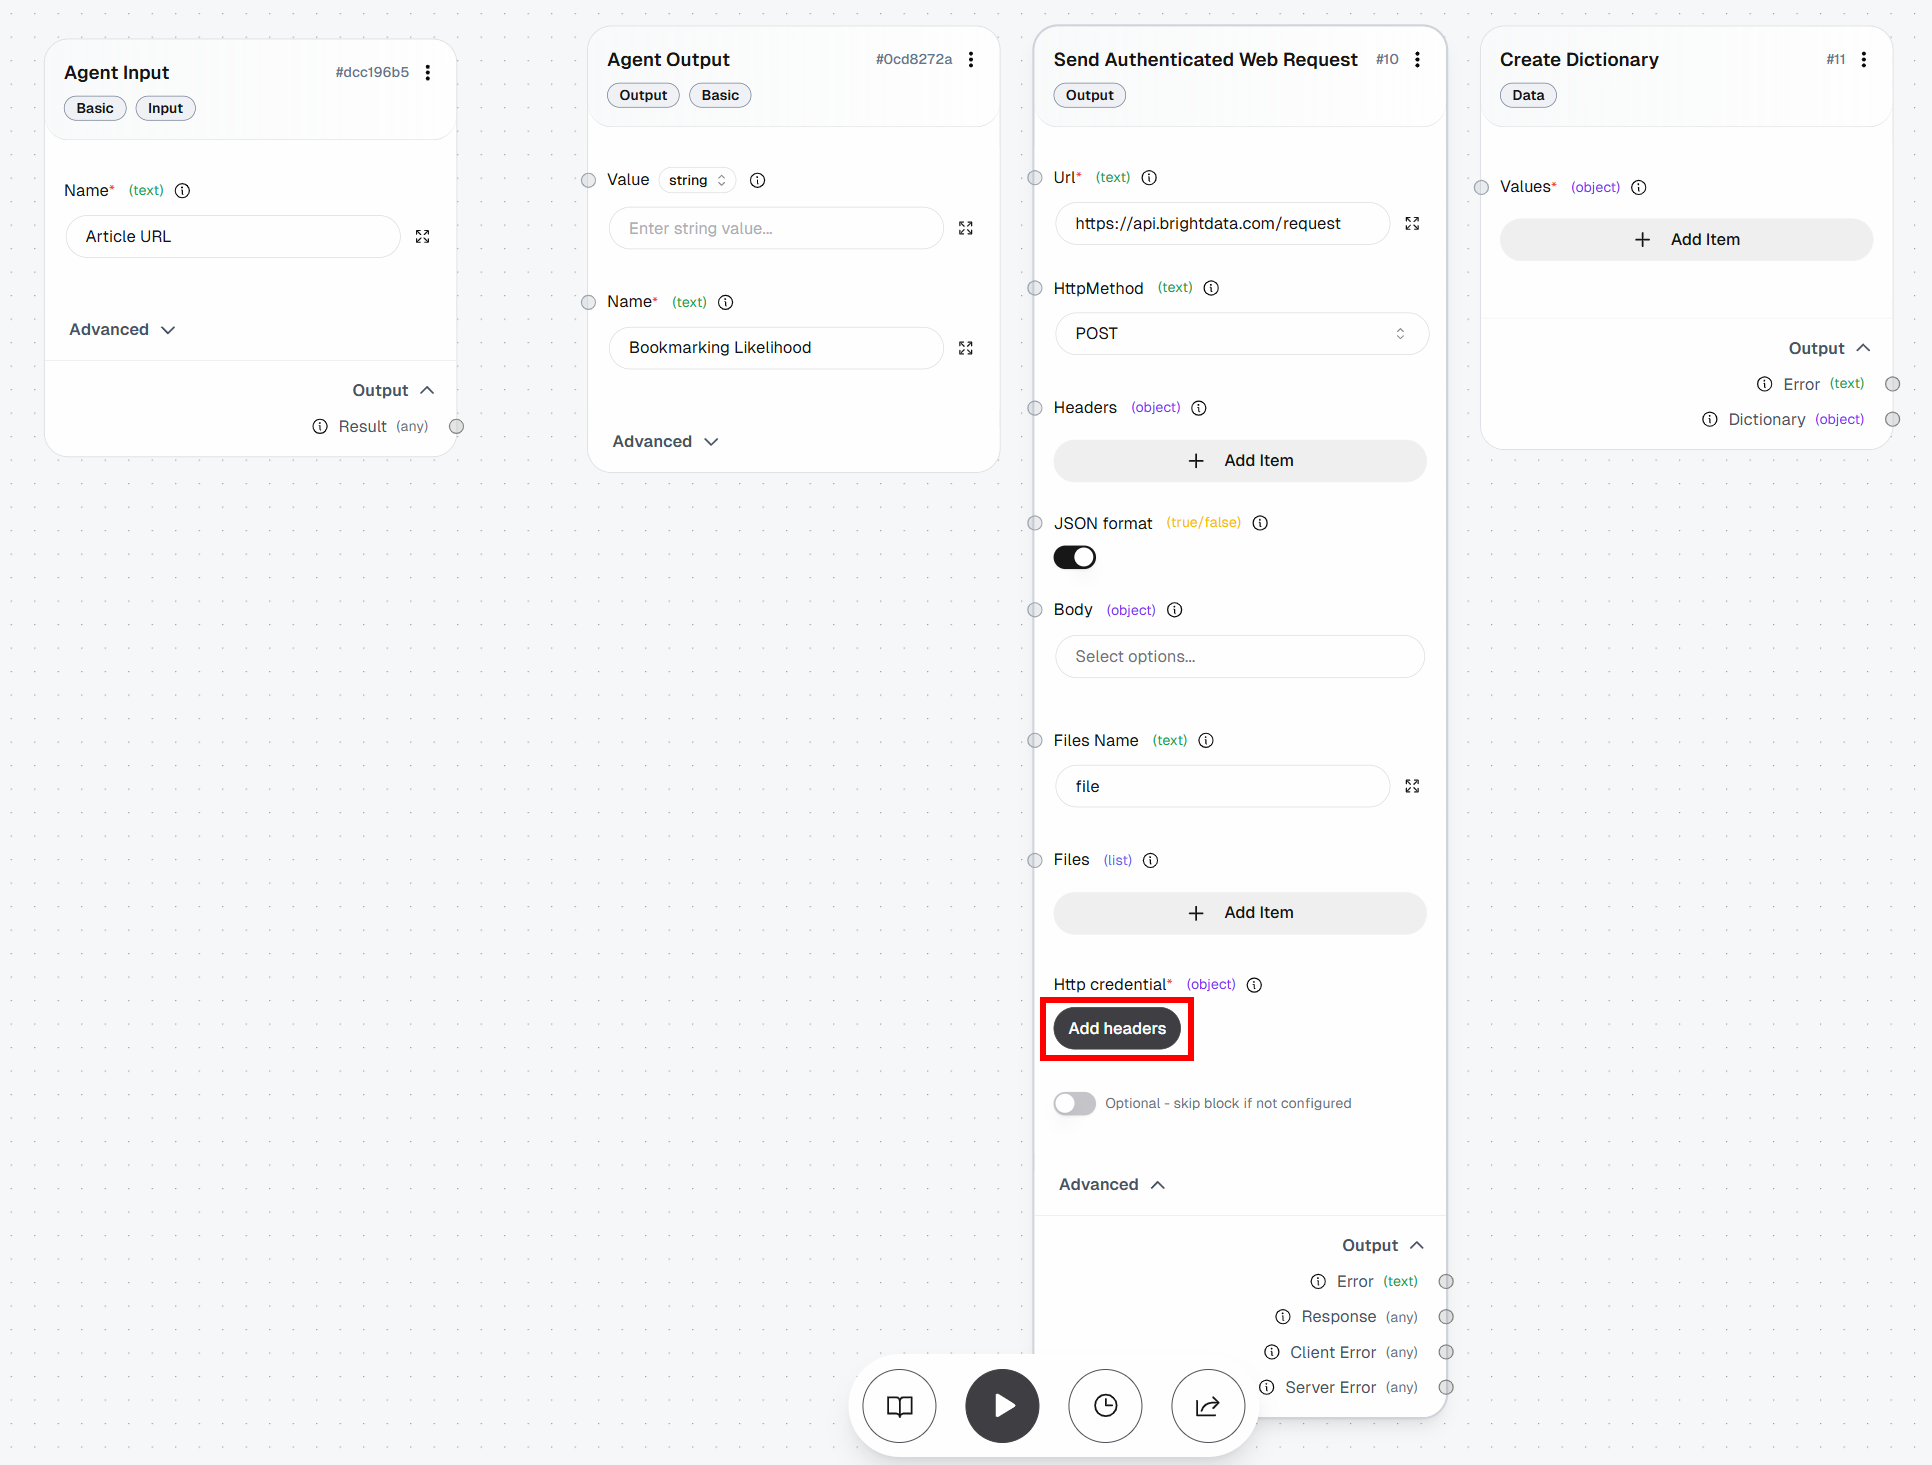
Configure header-based authentication like this:
- Header Name:
Authorization - Header Value:
Bearer <YOUR_BRIGHT_DATA_API_KEY>
Remember to replace the <YOUR_BRIGHT_DATA_API_KEY> placeholder with your actual Bright Data API key.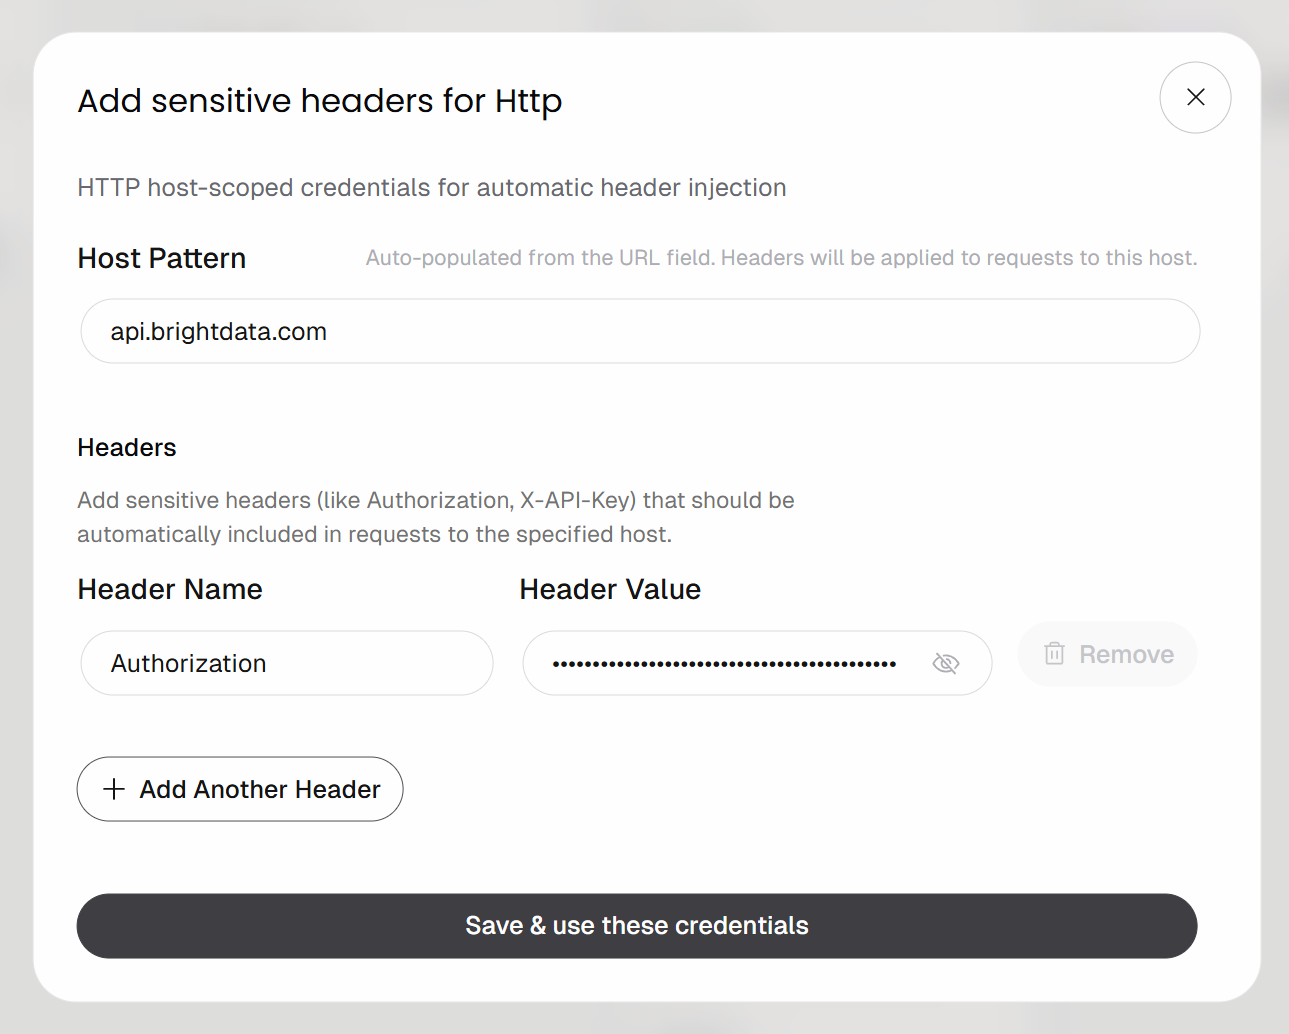
Click the “Save & use these credentials” button to confirm.
The POST request will be authenticated using the Authorization header. That is the recommended authentication method for calling Bright Data APIs.
Now, you need to define the request body. In this case, you want a JSON payload as follows:
{
    "zone": "<YOUR_WEB_UNLOCKER_API_ZONE_NAME>",
    "url": "<INPUT_URL>",
    "format": "raw",
    "data_format": "markdown"
}
This instructs the Bright Data API to use your Web Unlocker API zone (e.g., web_unlocker) on a target URL, which will be provided by the “Agent Input” block. The format: "raw" parameter ensures that the API returns the output directly in the response body, rather than as a JSON structure. The data_format: "markdown" parameter configures the API to extract the article content in Markdown, which is an ideal format for AI agent ingestion.
To do so, move to the “Create Dictionary” block and click “Add Item”. Define the following fields:
zone:<YOUR_WEB_UNLOCKER_API_ZONE_NAME>(e.g.,"web_unlocker")url: (leave empty for now, as it will be populated dynamically)format:"raw"data_format:"markdown"
Then, connect the “Dictionary” output of the “Create Dictionary” block to the “Body” input of the “Send Authenticated Web Request” block: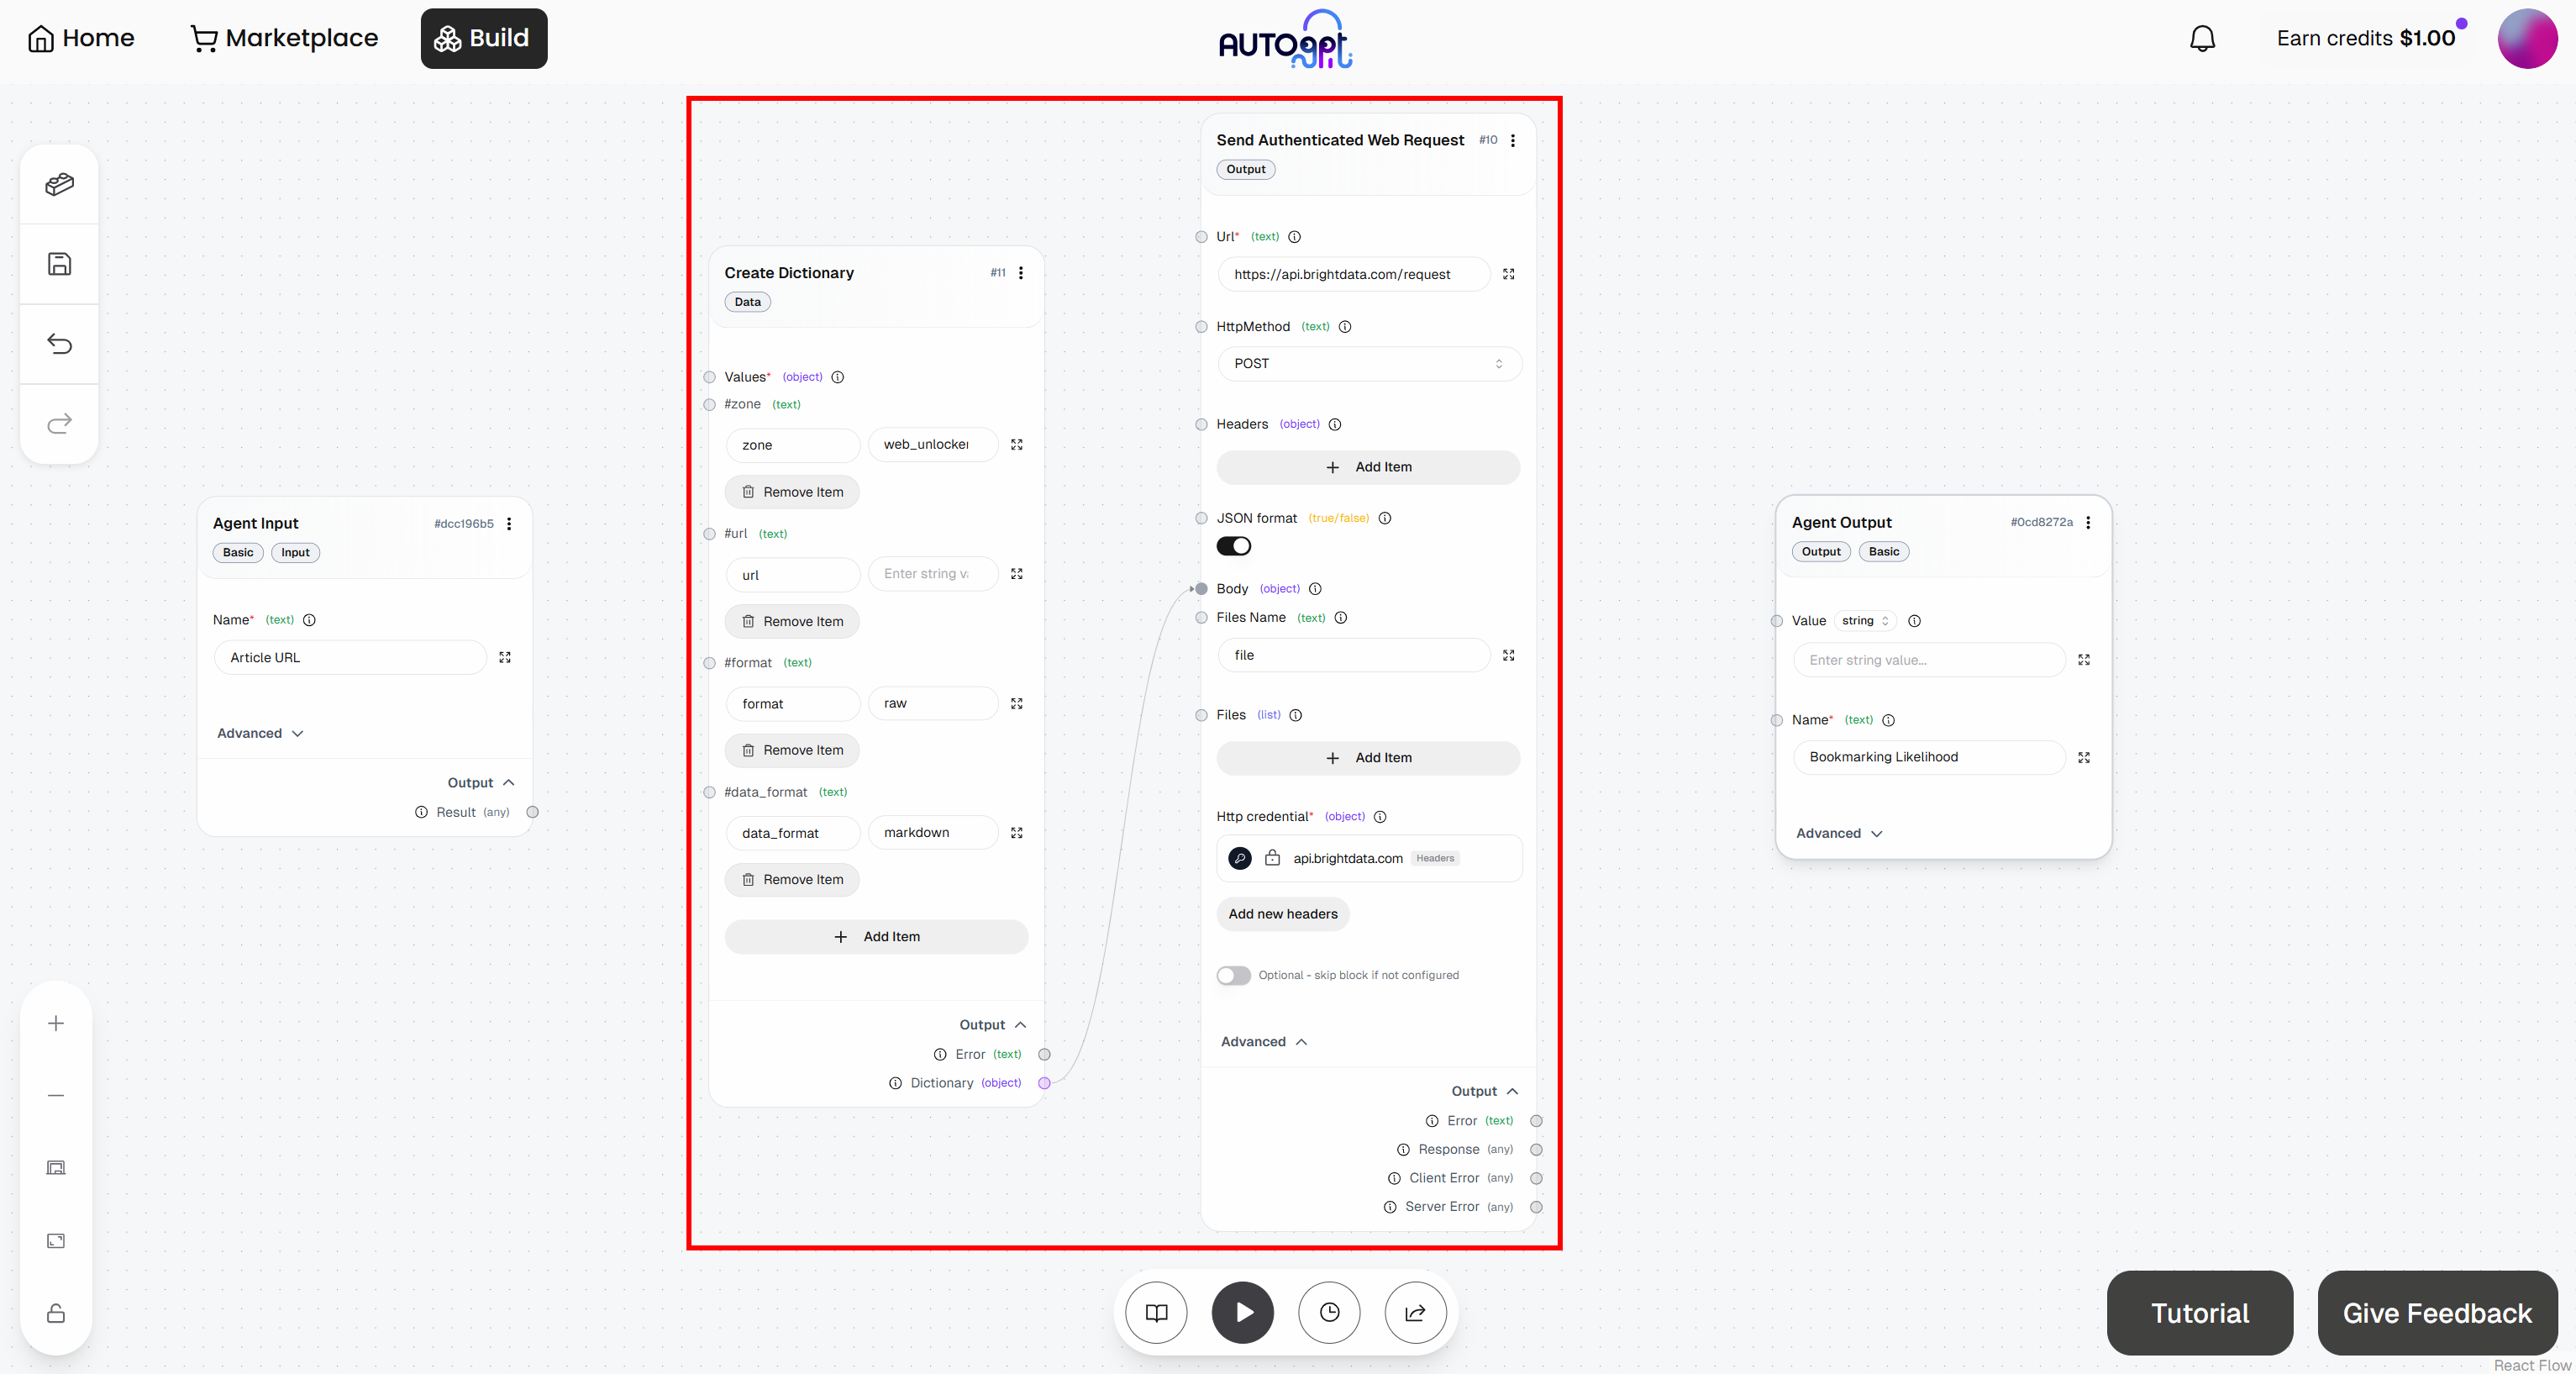
Terrific! The Bright Data integration in your AutoGPT workflow is now complete.
Step #7: Add the LLM Engine
The last missing block is the LLM engine responsible for analyzing the Markdown content retrieved via web scraping through the Web Unlocker API and assigning it a bookmark score.
Since you want this workflow to evaluate different articles over time, it should produce a consistent, structured output.
To achieve the goal, rely on the “AI Structured Response Generator” block. This allows you to instruct an LLM to perform a task and return results in a predefined format.
Start by adding this block to your workflow: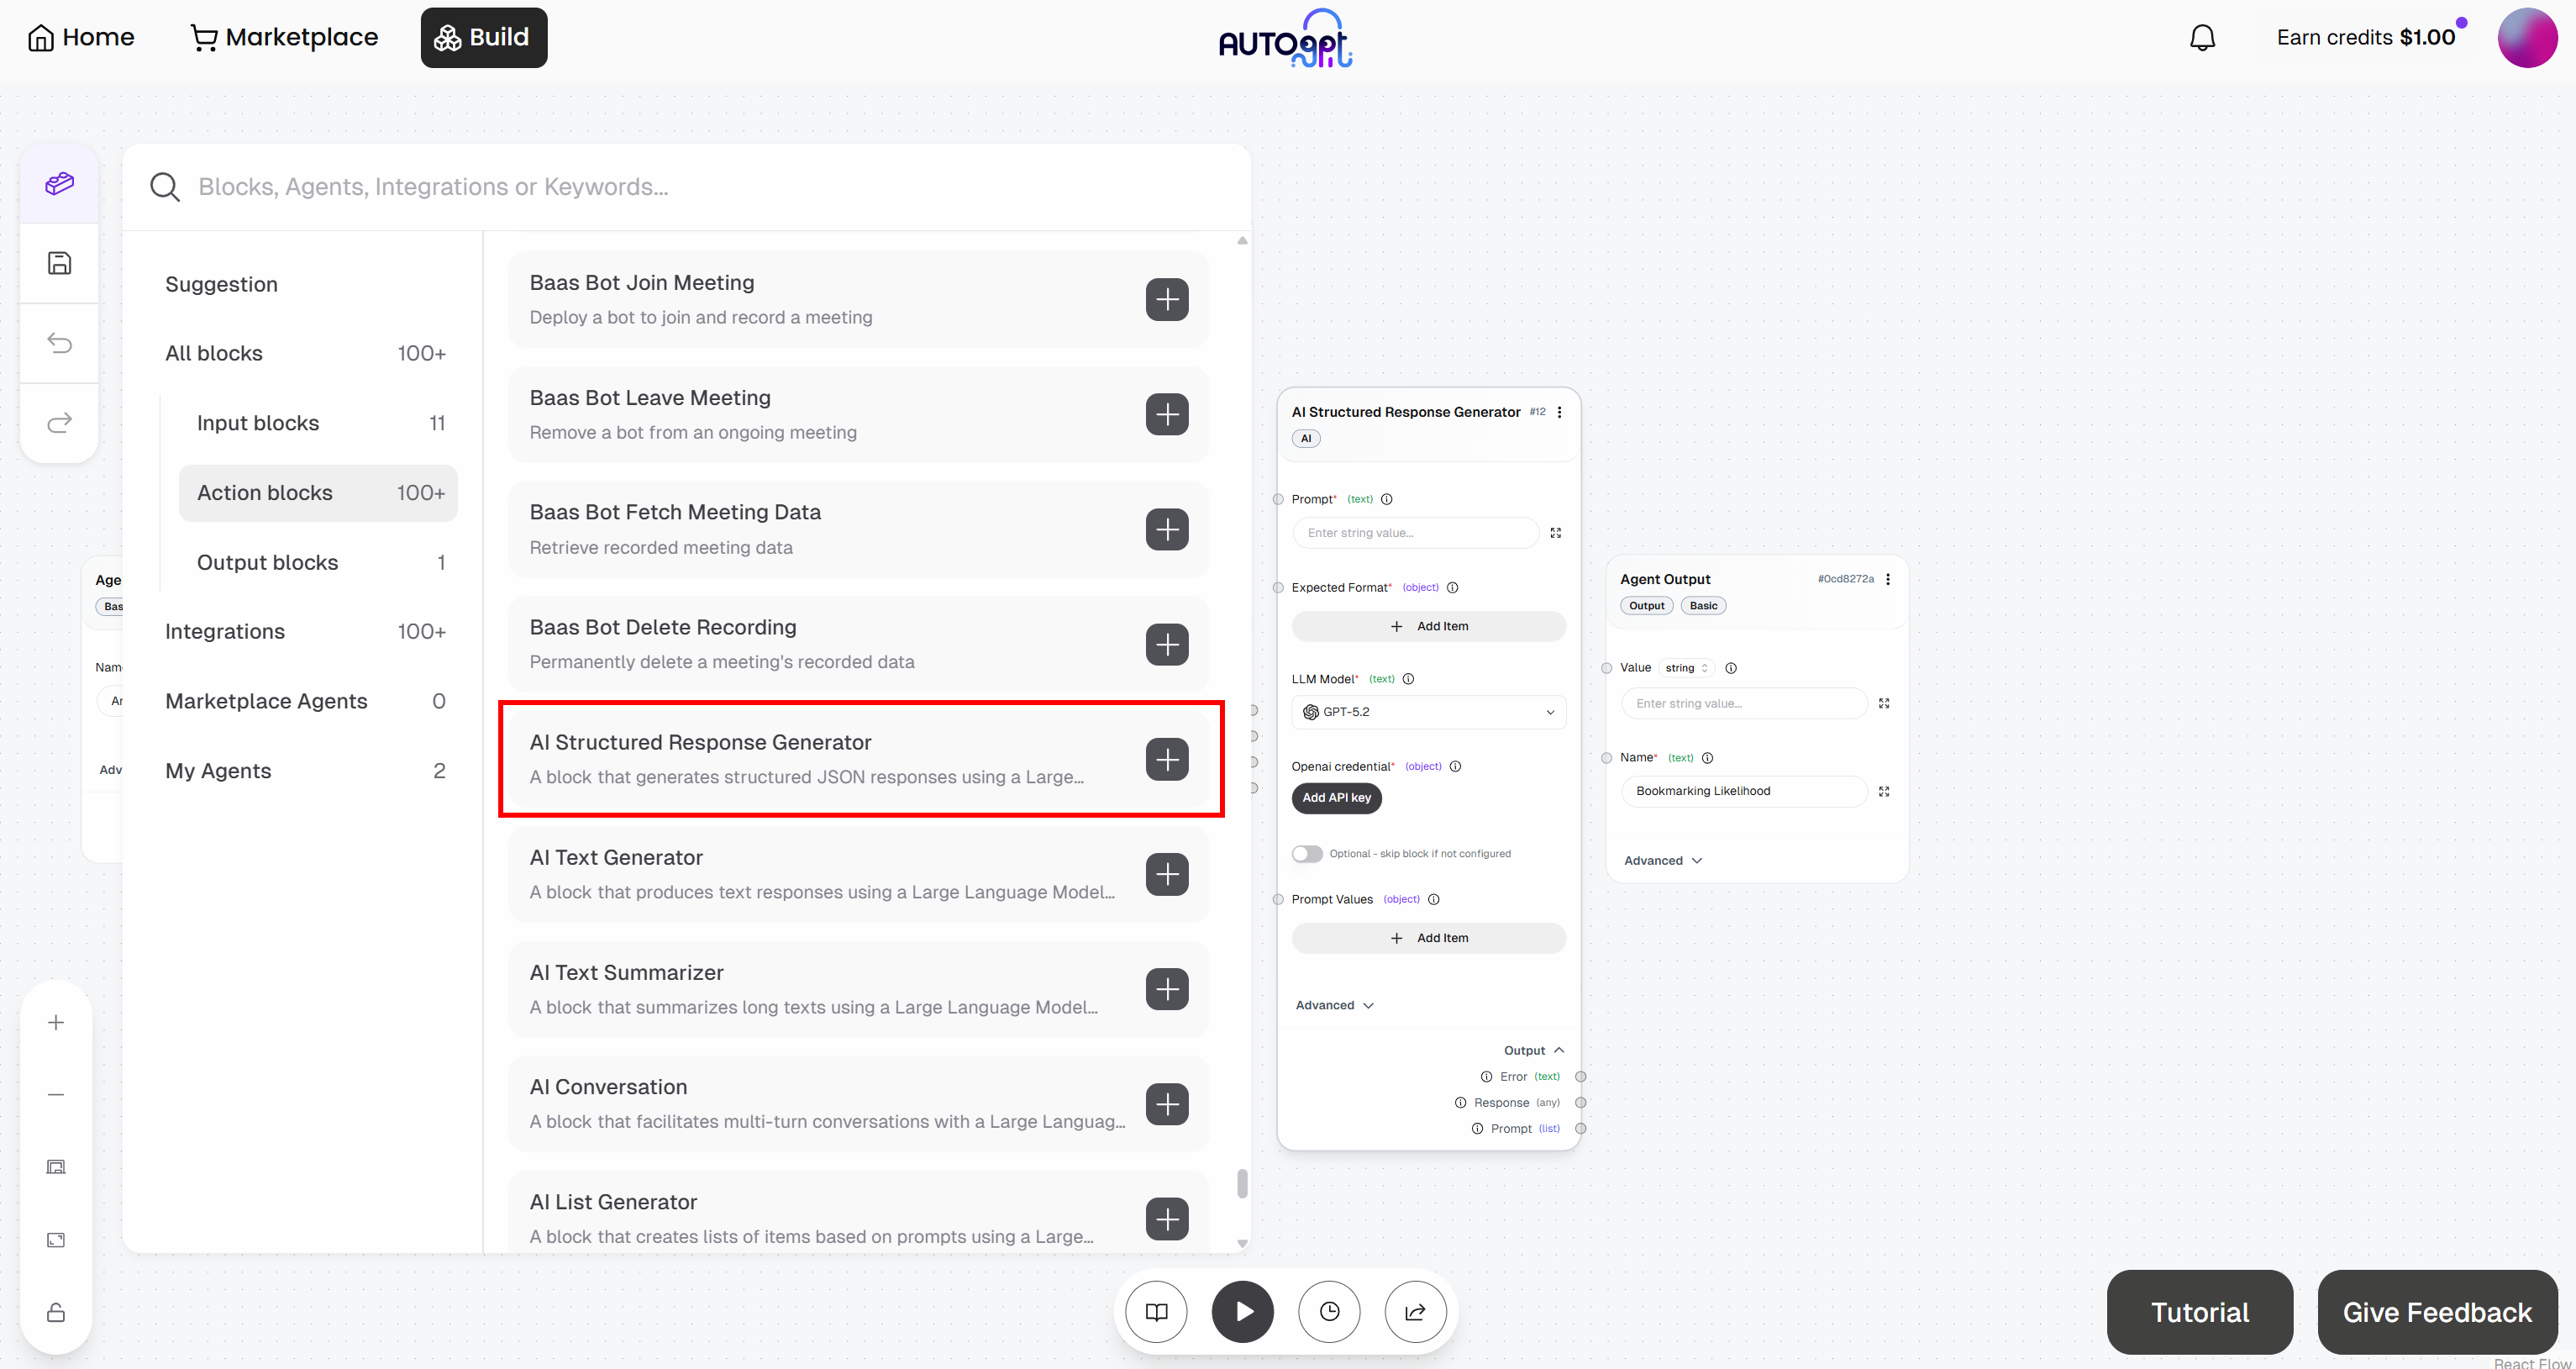
Connect the block to your OpenAI account by clicking the “Add API Key” button. Provide a name for your key, paste your OpenAI API key, and click “Add API Key”: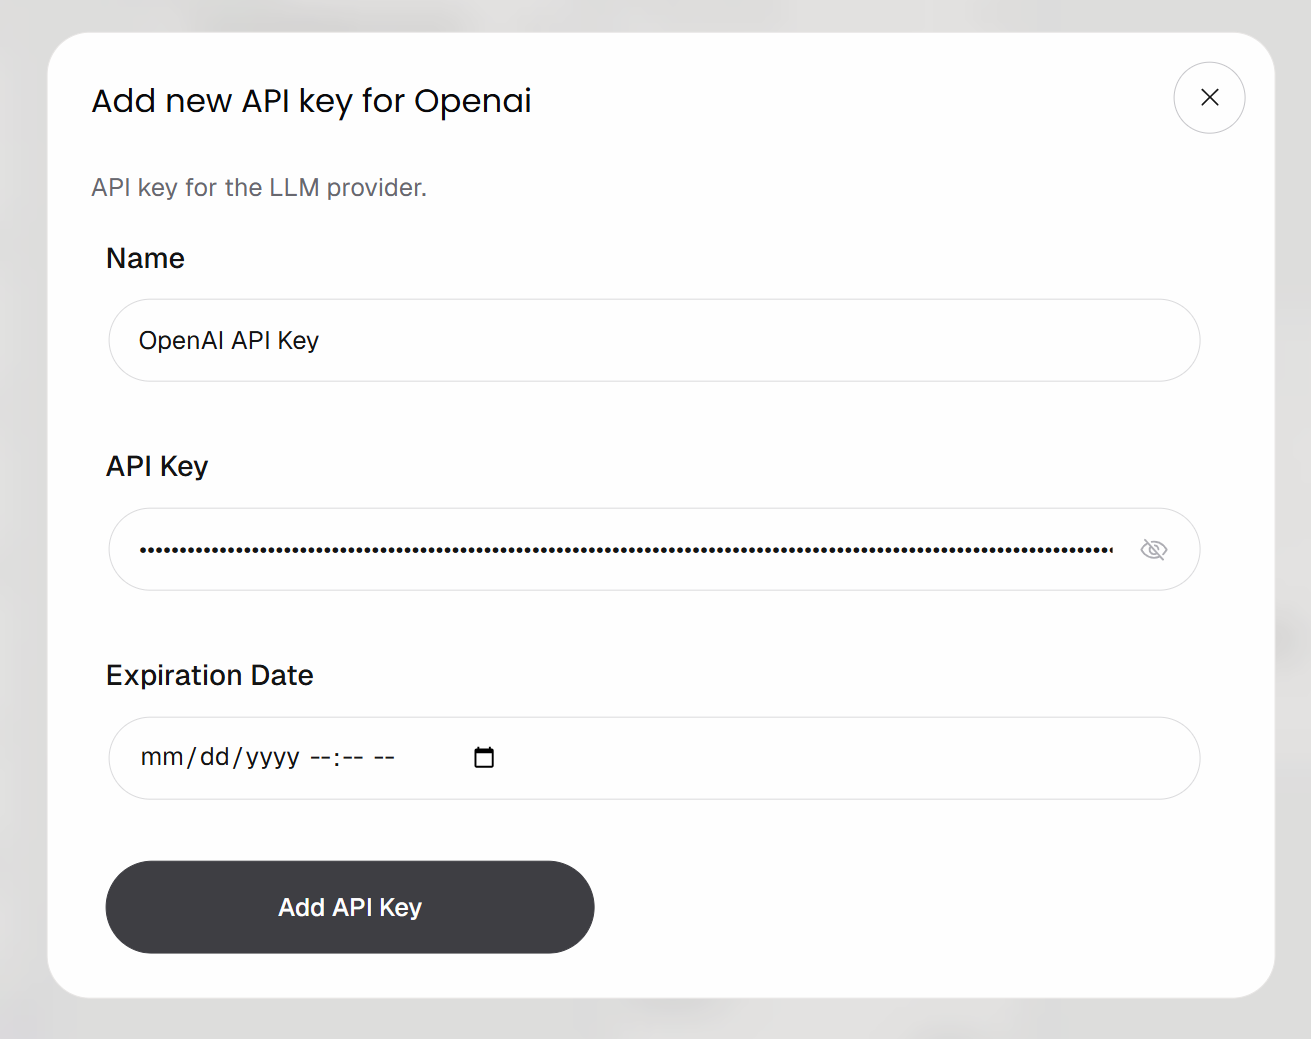
Your “AI Structured Response Generator” block is now authenticated and ready to call the configured OpenAI model.
Now, populate the block with the following:
- Prompt:
You are an expert content evaluator.

Your task is to analyze the following article and determine how worthwhile it is to bookmark for future reference.

Article:
"{{article}}"

Evaluate the article based on:
- Practical usefulness (does it provide actionable insights?)
- Depth (is it superficial or in-depth?)
- Signal-to-noise ratio (is it concise or full of fluff?)
- Reusability (is it something worth revisiting later?)

Return a JSON object with:
- "score": an integer from 1 to 10 (1 = not worth bookmarking, 10 = must bookmark)
- "comment": a concise, human-like explanation (1–2 sentences max)

Guidelines:
- Be critical and avoid overrating
- Prefer higher scores only for content with long-term value
- Avoid generic comments
-  *Model*: GPT-5.1 Mini (or any other general-purpose OpenAI model)
In the prompt, note the {{article}} placeholder. That is a variable that will be dynamically replaced with a “Prompt Value”. Specifically, it will be replaced with the Markdown content returned by the “Send Authenticated Web Request” block.
To configure a “Prompt Value”, click “Add item” and define a variable named article. Then, connect the “Response” output of the “Send Authenticated Web Request” block to the article prompt value: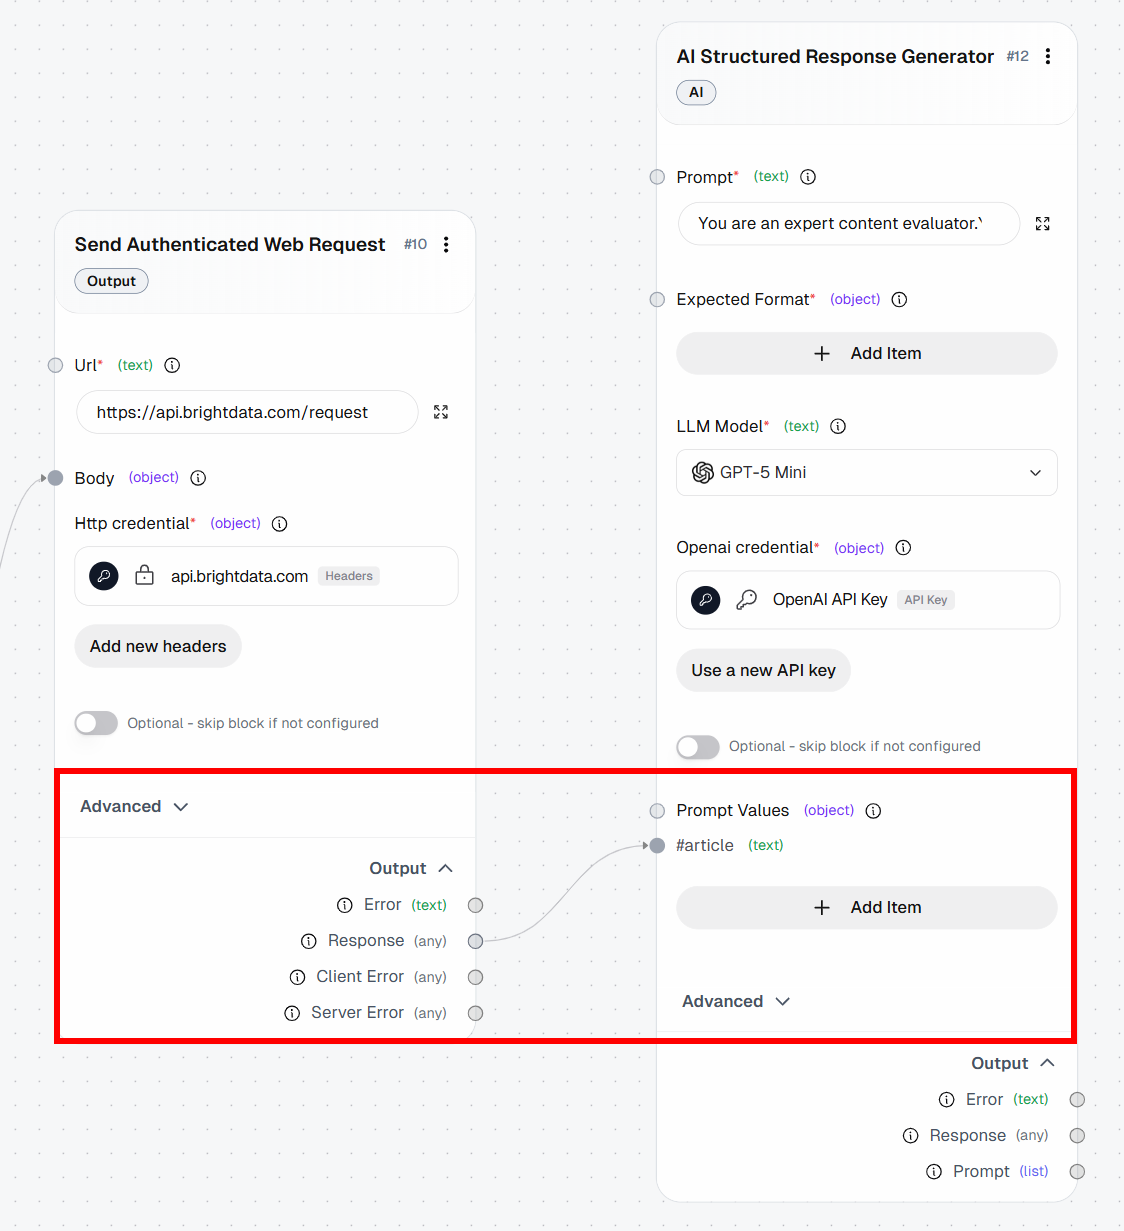
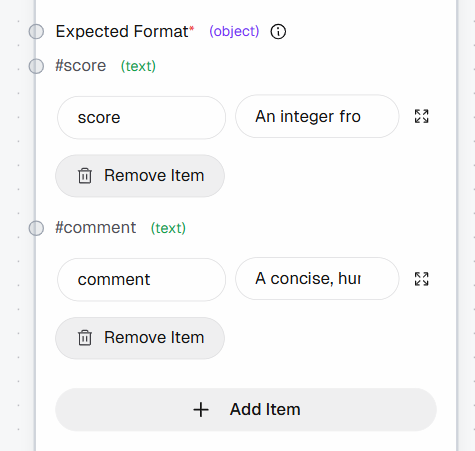
Next, define the structured output by adding the following fields to the “Expected Format” section:
score: “An integer from 1 to 10 (1 = not worth bookmarking, 10 = must bookmark)”comment: “A concise, human-like explanation (1–2 sentences max)”
Cool! Your Bright Data–powered AutoGPT agentic workflow now includes all building blocks. It only remains to connect them all.
Step #8: Connect All Blocks
To finalize the workflow, connect all the blocks to create a complete pipeline.
Start by connecting the “Result” output of the “Agent Input” block to the url field of the “Create Dictionary” block. This ensures that the input URL flows from the workflow input into the Web Unlocker API request, which will scrape the page and pass the result to the LLM for analysis.
Finally, connect the “Response” output of the “AI Structured Response Generator” block to the “Agent Output” block. This closes the workflow and completes the data flow.
Below is what your final AutoGPT workflow, enhanced with web scraping capabilities thanks to Bright Data, should look like: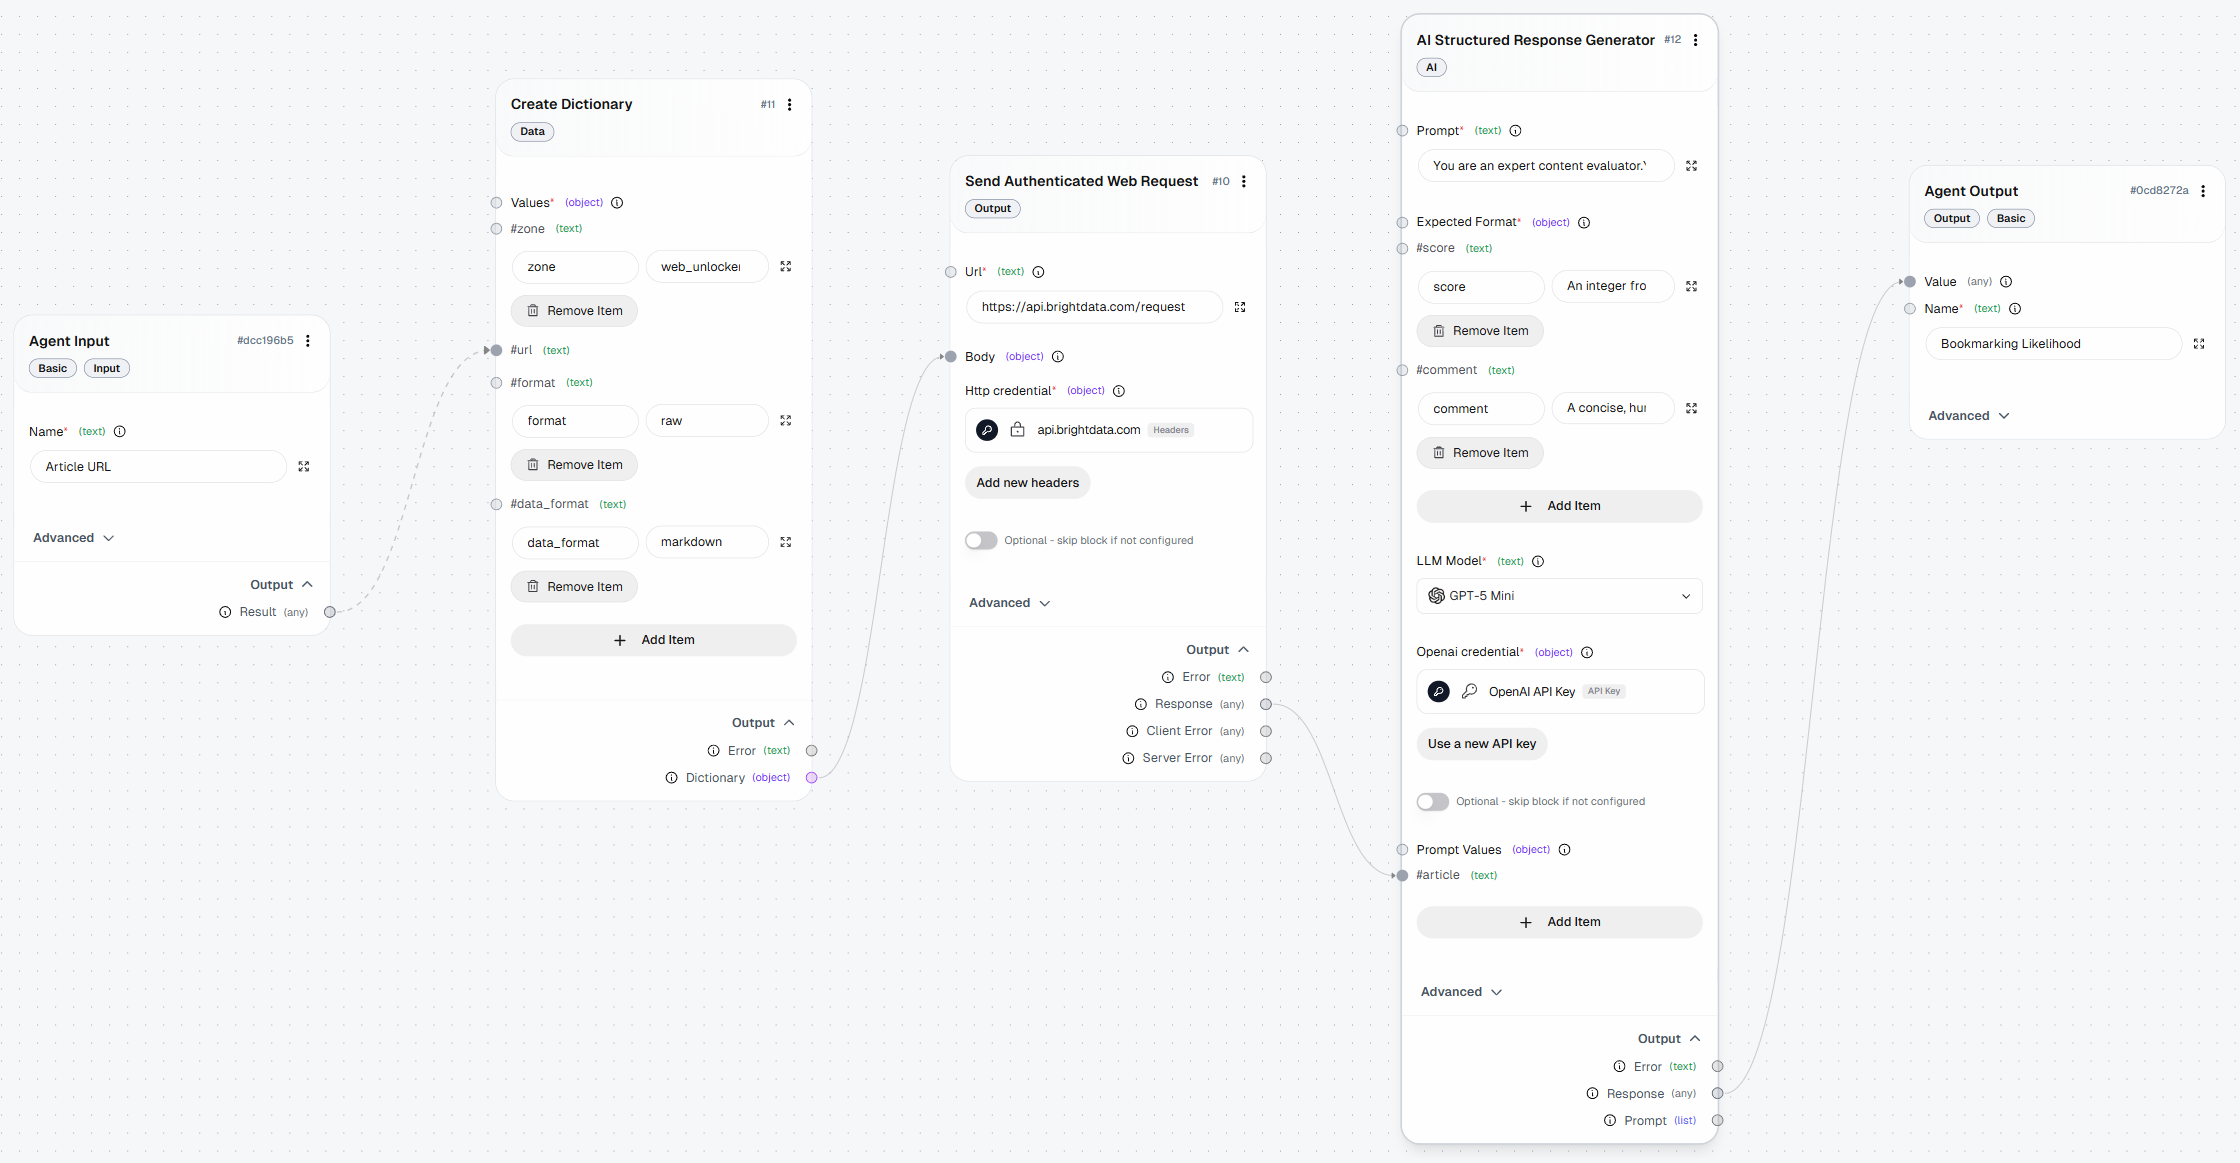
Step #9: Test the Agent
Click the “Run agent” button to launch your agentic workflow and test it: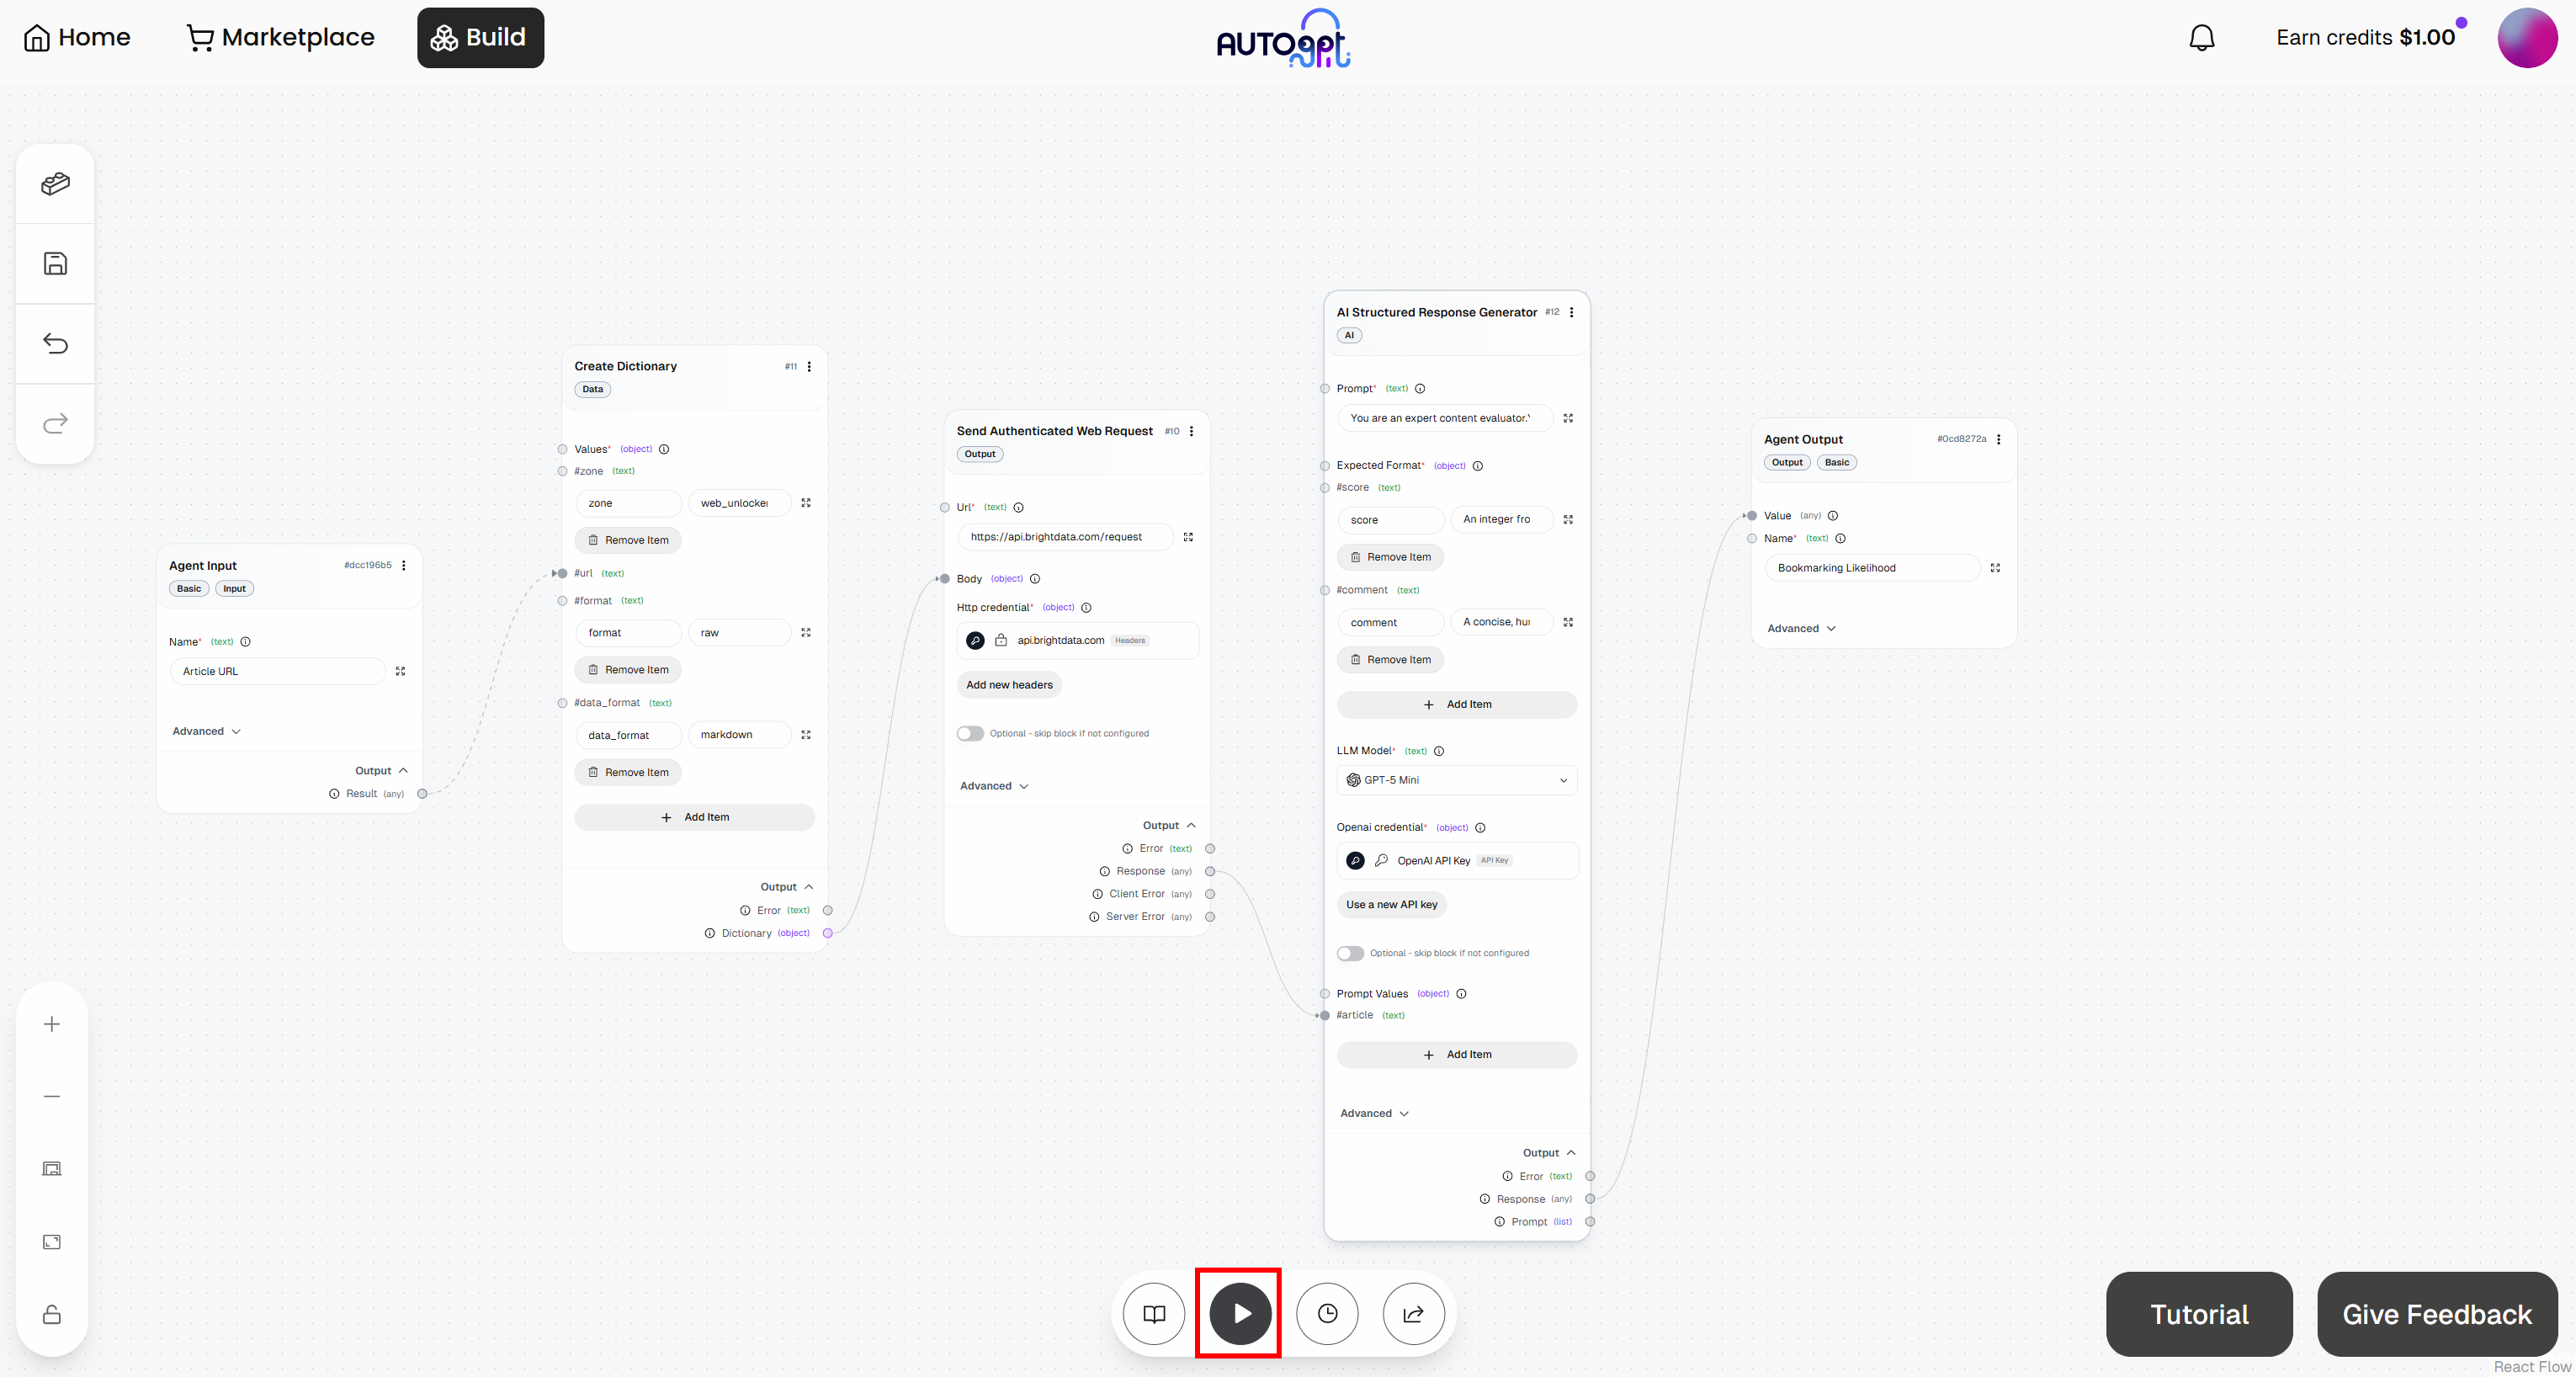
You will be prompted to provide the workflow input URL (i.e., the article URL). Paste a blog post like this:
https://awealthofcommonsense.com/2024/03/whats-the-investment-case-for-gold/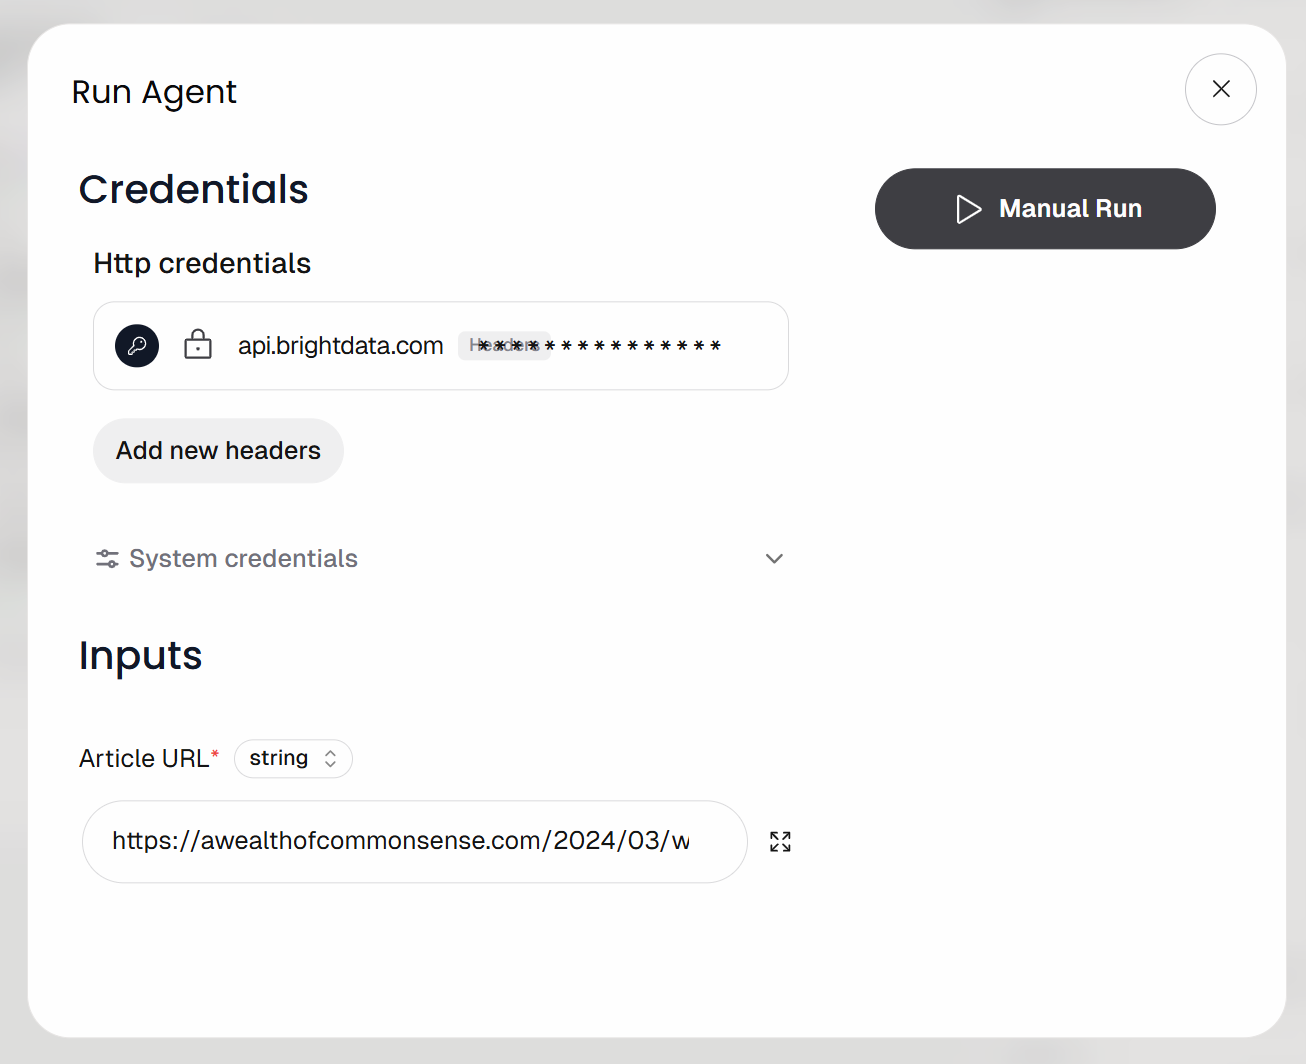
Then, launch the workflow by clicking the “Manual Run” button. This is what you should see:
Expand the output on the “Agent Output” block. You will notice that the AI agent produced a result like this: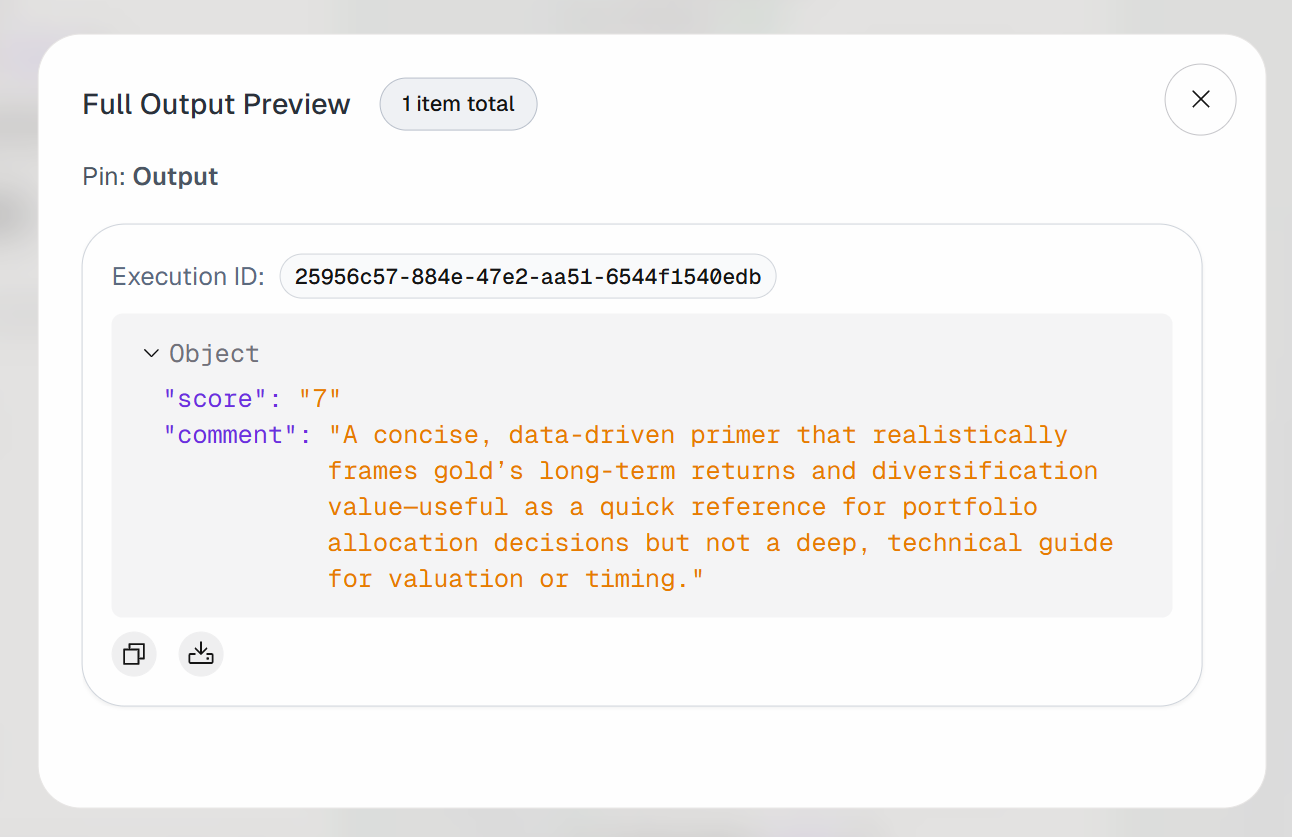
Thus, the input article is considered valuable enough to be bookmarked for future reading.
If you inspect the output of the “Send Authenticated Web Request” block, you will observe:
That corresponds to the Markdown version of the target input article: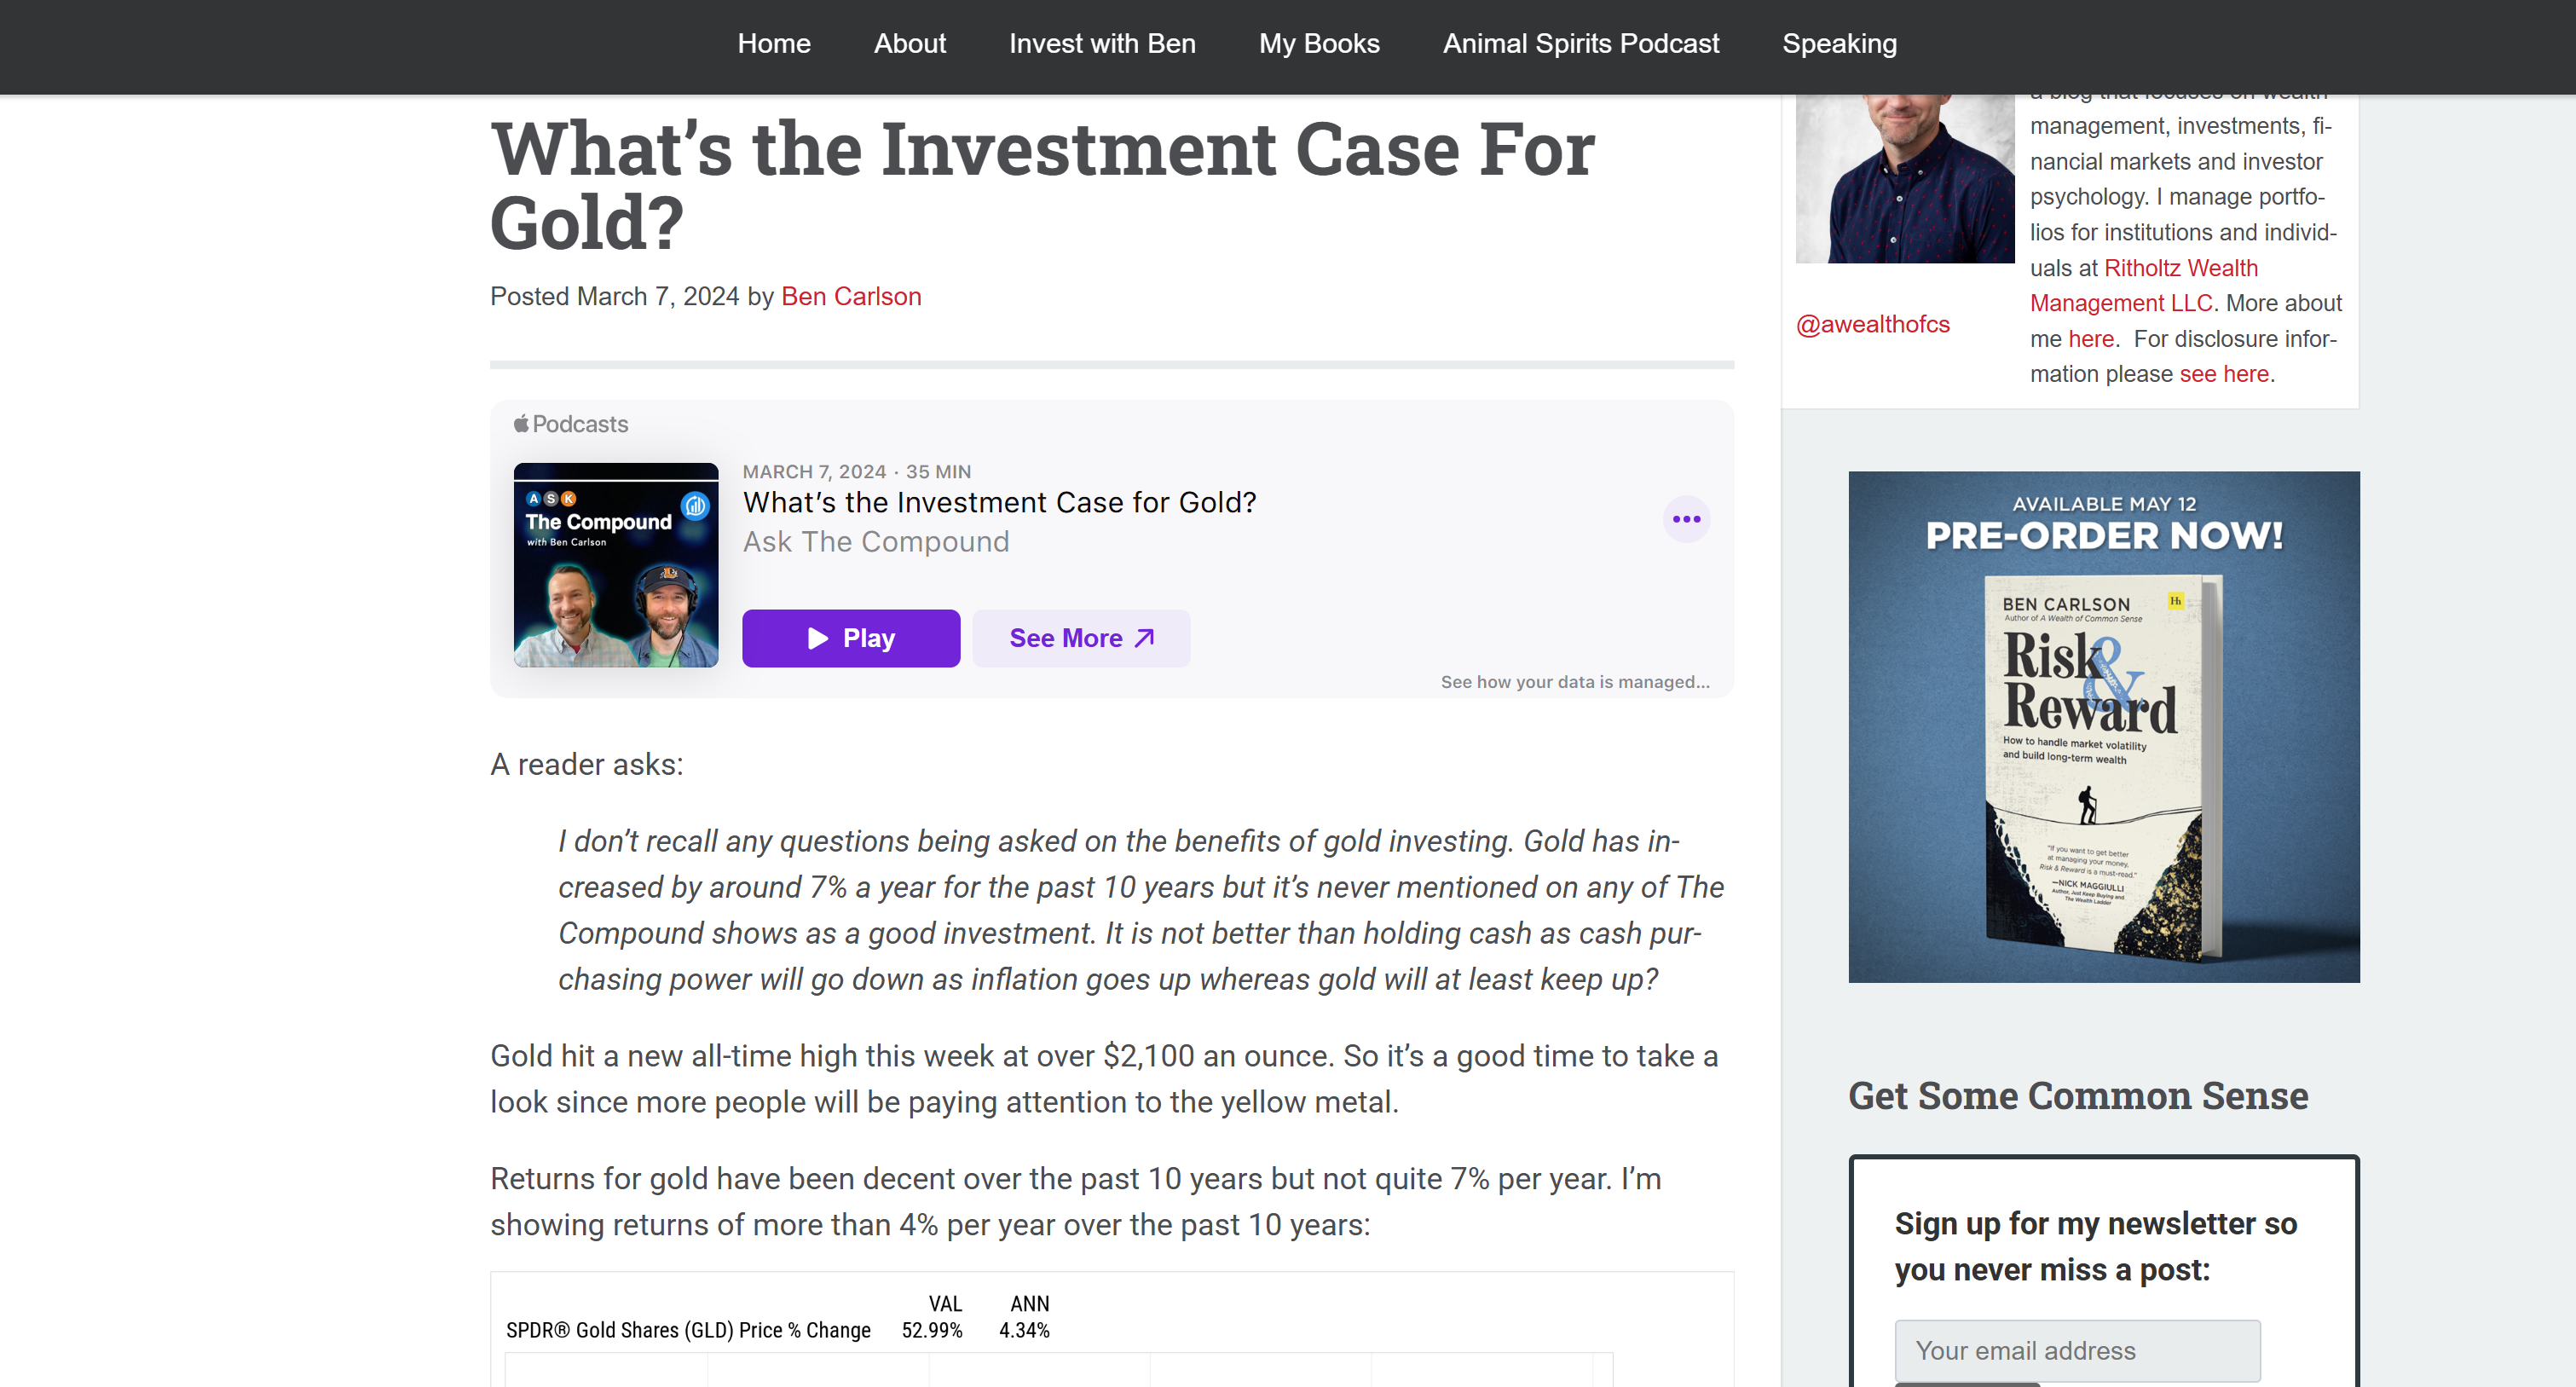
This confirms that the Bright Data Web Unlocker API successfully retrieved the page content quickly and in a format that makes LLM processing more efficient and effective.
Et voilà! You just built an AI agent in AutoGPT that integrates with Bright Data for dynamic web data retrieval.
Next Steps
This was a simple example, but keep in mind that the AutoGPT + Bright Data integration can be extended to support much more advanced agentic workflows.
For example, with a similar approach, you can connect your agent to other Bright Data API-based products to add web searching and crawling capabilities. Similarly, you can integrate with scraping APIs that provide direct data feeds from multiple domains.
To make your agent more powerful, explore the wide range of capabilities offered by AutoGPT by diving into the official documentation.
Conclusion
In this blog post, you learned how to add Bright Data’s web exploration, interaction, search, and data scraping capabilities to AutoGPT. This empowers AI agents to overcome the major knowledge and interaction limitations typical of standard LLMs.
You saw how to build a simple bookmark advisor AI agent. To create more complex agentic workflows—requiring access to live web feeds, web search, or web interactions—integrate AutoGPT with the full suite of Bright Data services for AI.
Create a Bright Data account for free today and start experimenting with our AI-ready web data solutions!

Technical Writer
Antonello Zanini is a technical writer, editor, and software engineer with 5M+ views. Expert in technical content strategy, web development, and project management.


