
In this tutorial, you will learn:
- What Firebase Studio is and the features it offers.
- Why you need an Amazon web data provider like Bright Data to build a CamelCamelCamel-like web experience.
- How to create an Amazon price tracker web app with Firebase Studio, using Amazon data from Bright Data’s Amazon Scraper API.
Let’s dive in!
What Is Firebase Studio?
Firebase Studio is a cloud-based, AI-powered development environment built by Google. Its main goal is to accelerate the creation and deployment of production-quality applications with AI. In particular, it provides a comprehensive workspace where Gemini-powered AI assistance is integrated throughout the entire development lifecycle.
Key Features
Some of the top features available in Firebase Studio are:
- Cloud-based development environment: Equips you with a full coding workspace with AI assistance, including code suggestions, generation, and explanations.
- App prototyping agent: Supports the rapid prototyping of applications, such as Next.js web apps, with AI support, reducing the need for extensive manual coding.
- Support for various frameworks and languages: Work with popular technologies like Flutter, Go, Angular, Next.js, and more, using the frameworks they prefer.
- Integration with Firebase services: Integrates with services such as Firebase App Hosting, Cloud Firestore, and Firebase Authentication.
- Tools for development and deployment: Built-in support for emulation, testing, debugging, and monitoring app performance.
- Import and customization options: Import existing projects from GitHub, GitLab, Bitbucket, or compressed archives, and fully customize them with AI.
What You Need to Build an Amazon Price Tracker Web App
CamelCamelCamel is an online service that tracks Amazon product prices, providing price history charts and alerts for price drops to help users find the best deals. In simple terms, its core feature is Amazon price tracking, which is exactly what we will focus on in this guide.
The idea here is to build a web app that works as an alternative, implementing Amazon price tracking in a simplified way. Normally, this would take days (or even months) to develop, but thanks to Firebase Studio, you can have a working prototype up and running in just minutes.
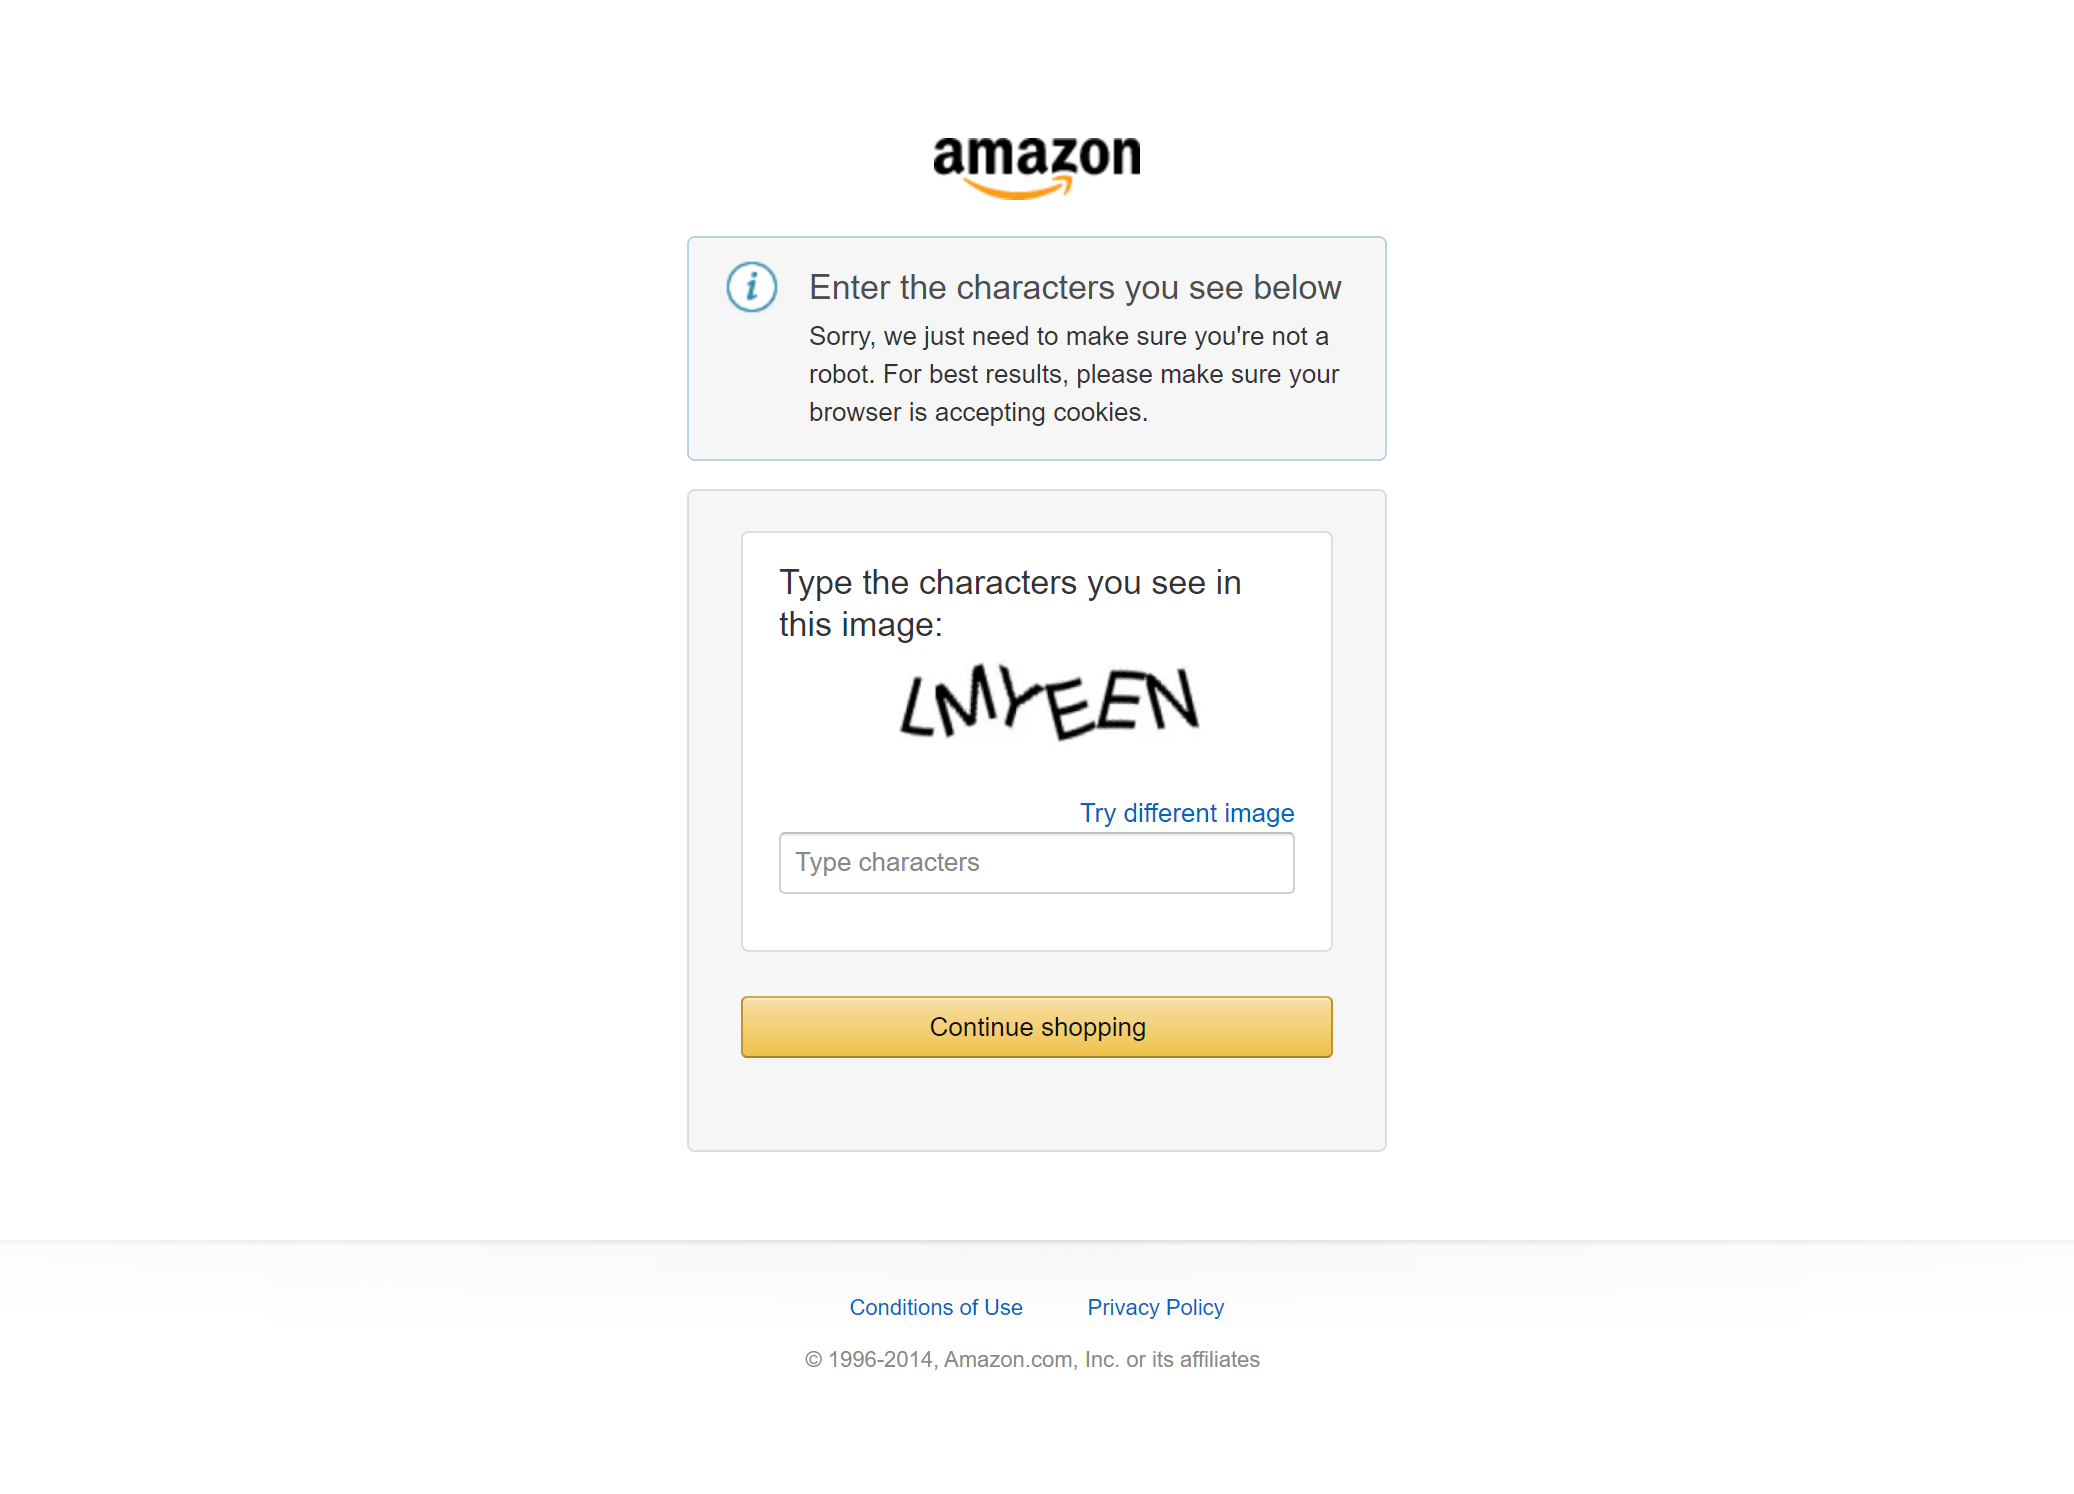
A major challenge in this task is obtaining Amazon product data. Scraping Amazon is notoriously difficult due to strict anti-bot measures like CAPTCHAs (remember the notorious Amazon CAPTCHA) that can block most automated requests:
This is where Bright Data comes in!
Bright Data offers a complete set of solutions for obtaining web data in both raw and structured formats from virtually any website. With IP rotation, browser fingerprinting, CAPTCHA solving, and many other essential aspects handled automatically, you do not have to worry about blocks or restrictions.
Specifically, we will use the Amazon product data returned by Bright Data’s Amazon Scraper API. This enables you to retrieve fresh Amazon product data by simply calling an API endpoint.
See how Firebase Studio and Bright Data work together to quickly craft a CamelCamelCamel-like web experience!
How to Build an Amazon Price Tracker Like CamelCamelCamel in Firebase Studio
Follow the steps below to learn how to create a CamelCamelCamel-like web app that tracks Amazon prices. Integrate Bright Data into your Firebase Studio prototype!
Prerequisites
To follow along with this tutorial, make sure you have:
- A Google account
- A Firebase Studio account
- A Gemini API key
- A Firestore database set up and ready to be connected to via API
- A Bright Data account with a configured API key
Note: Do not worry about setting everything up just yet, as you will be guided through the steps as we go.
You will also need:
- Knowledge of Next.js development in TypeScript
- Familiarity with how the Bright Data Scraper API works (see the Bright Data docs for more details)
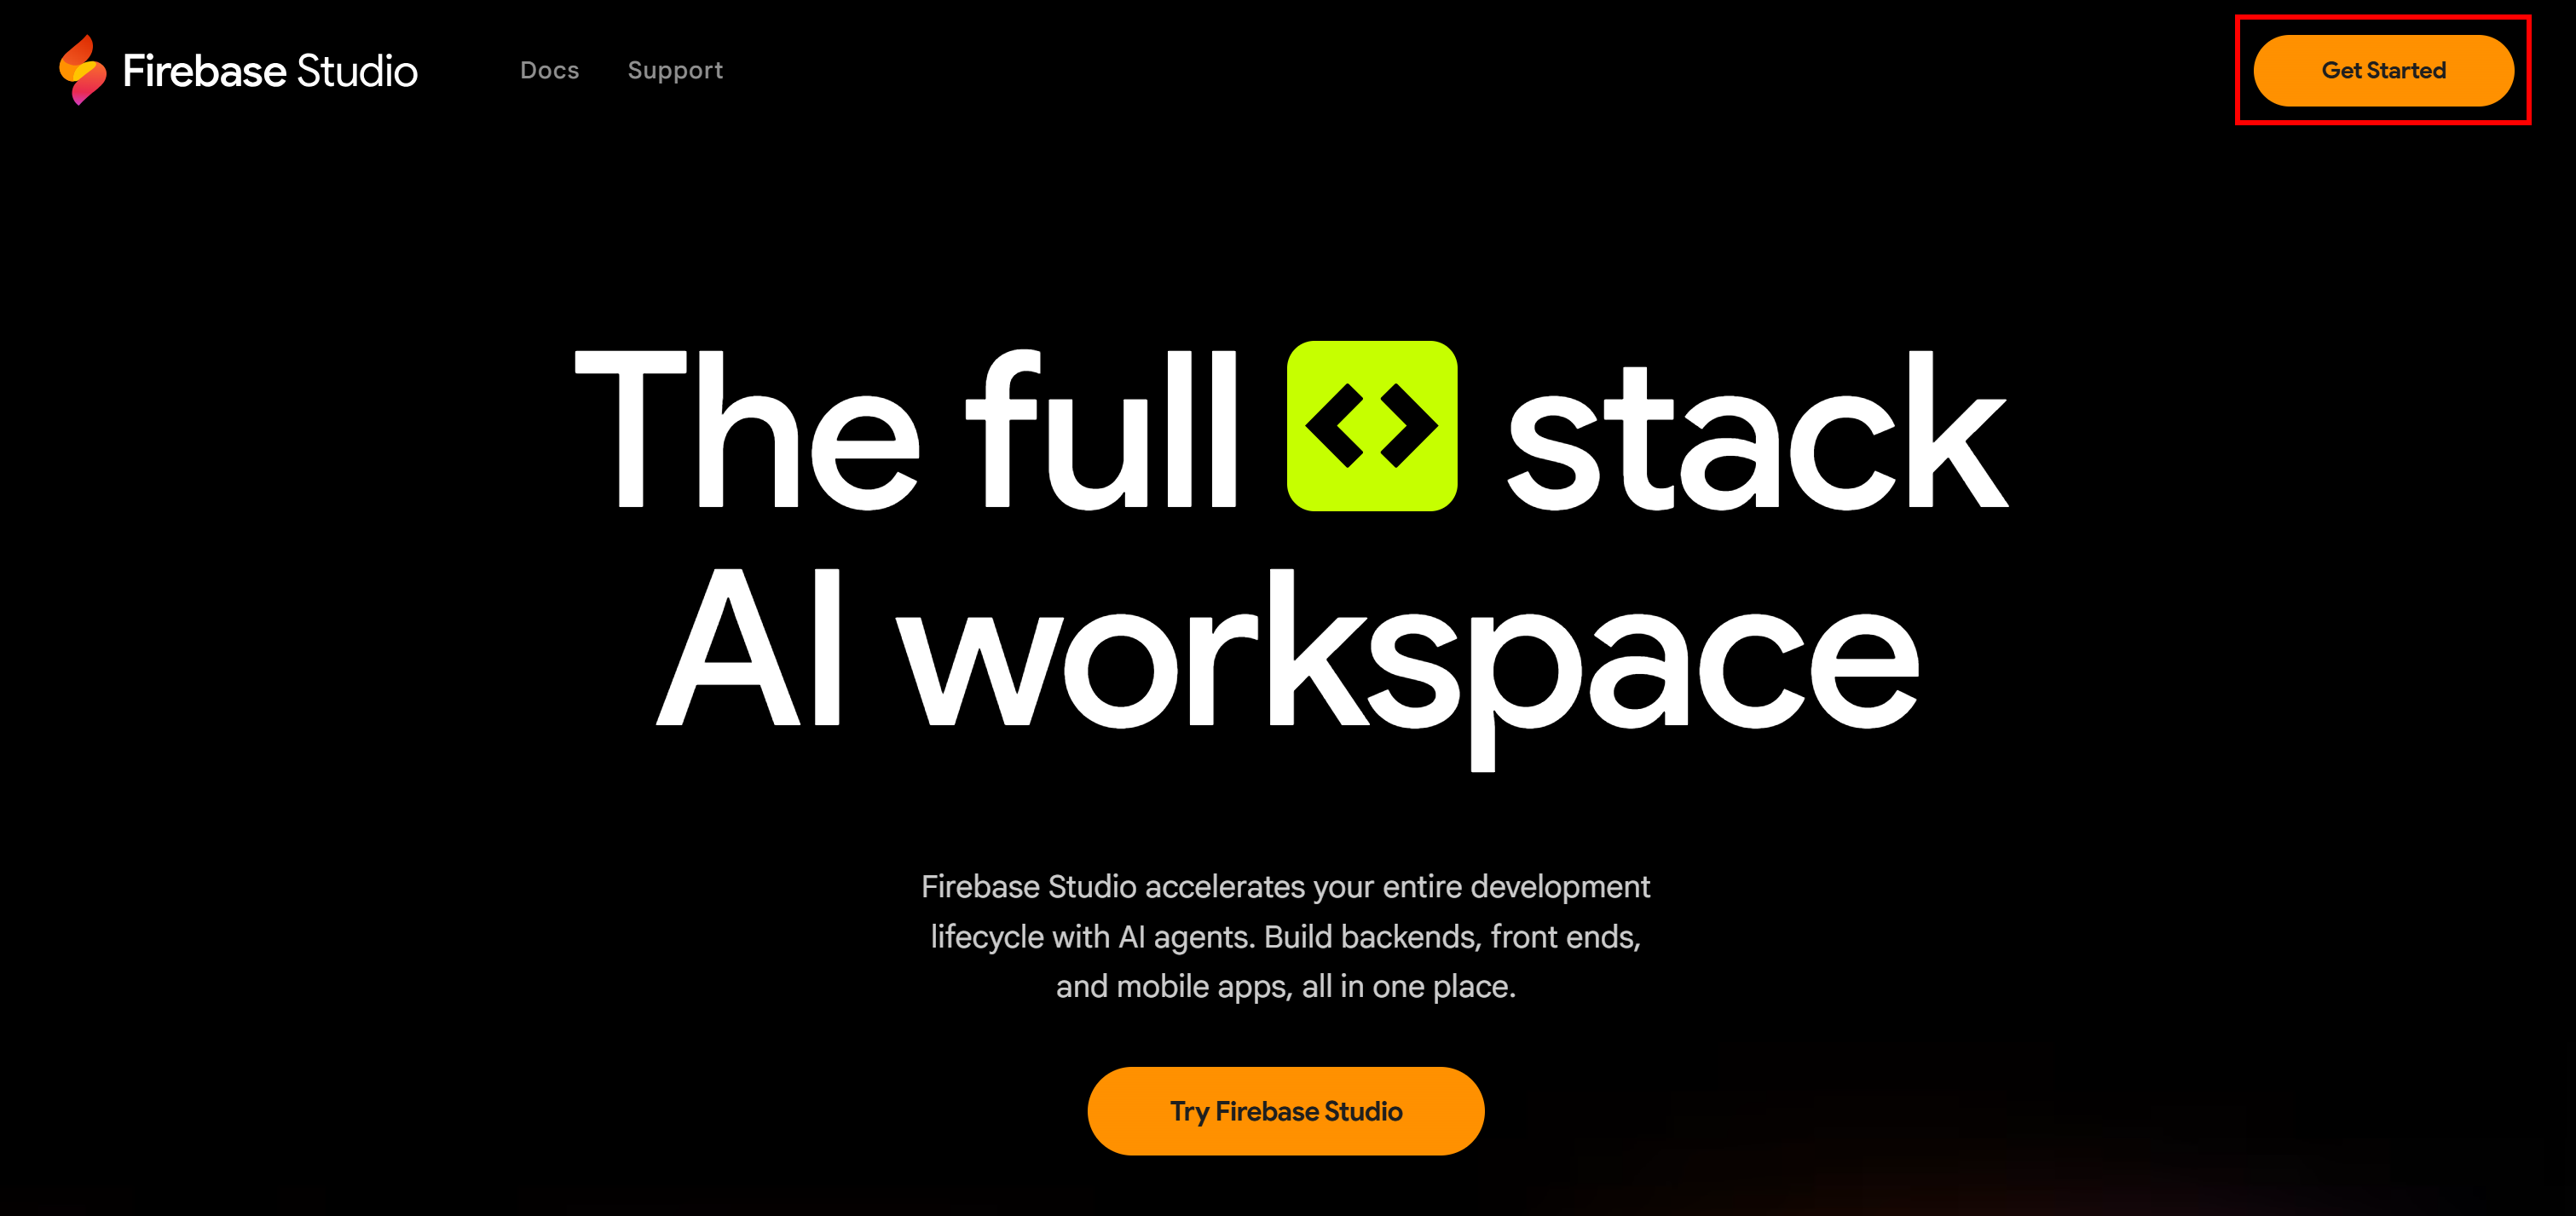
Step #1: Set Up Firebase Studio
Go to the Firebase Studio website and click the “Get Started” button:
You will be asked to log in with one of your Google accounts. Select one and continue.
Once logged in, you will land on the app building page:
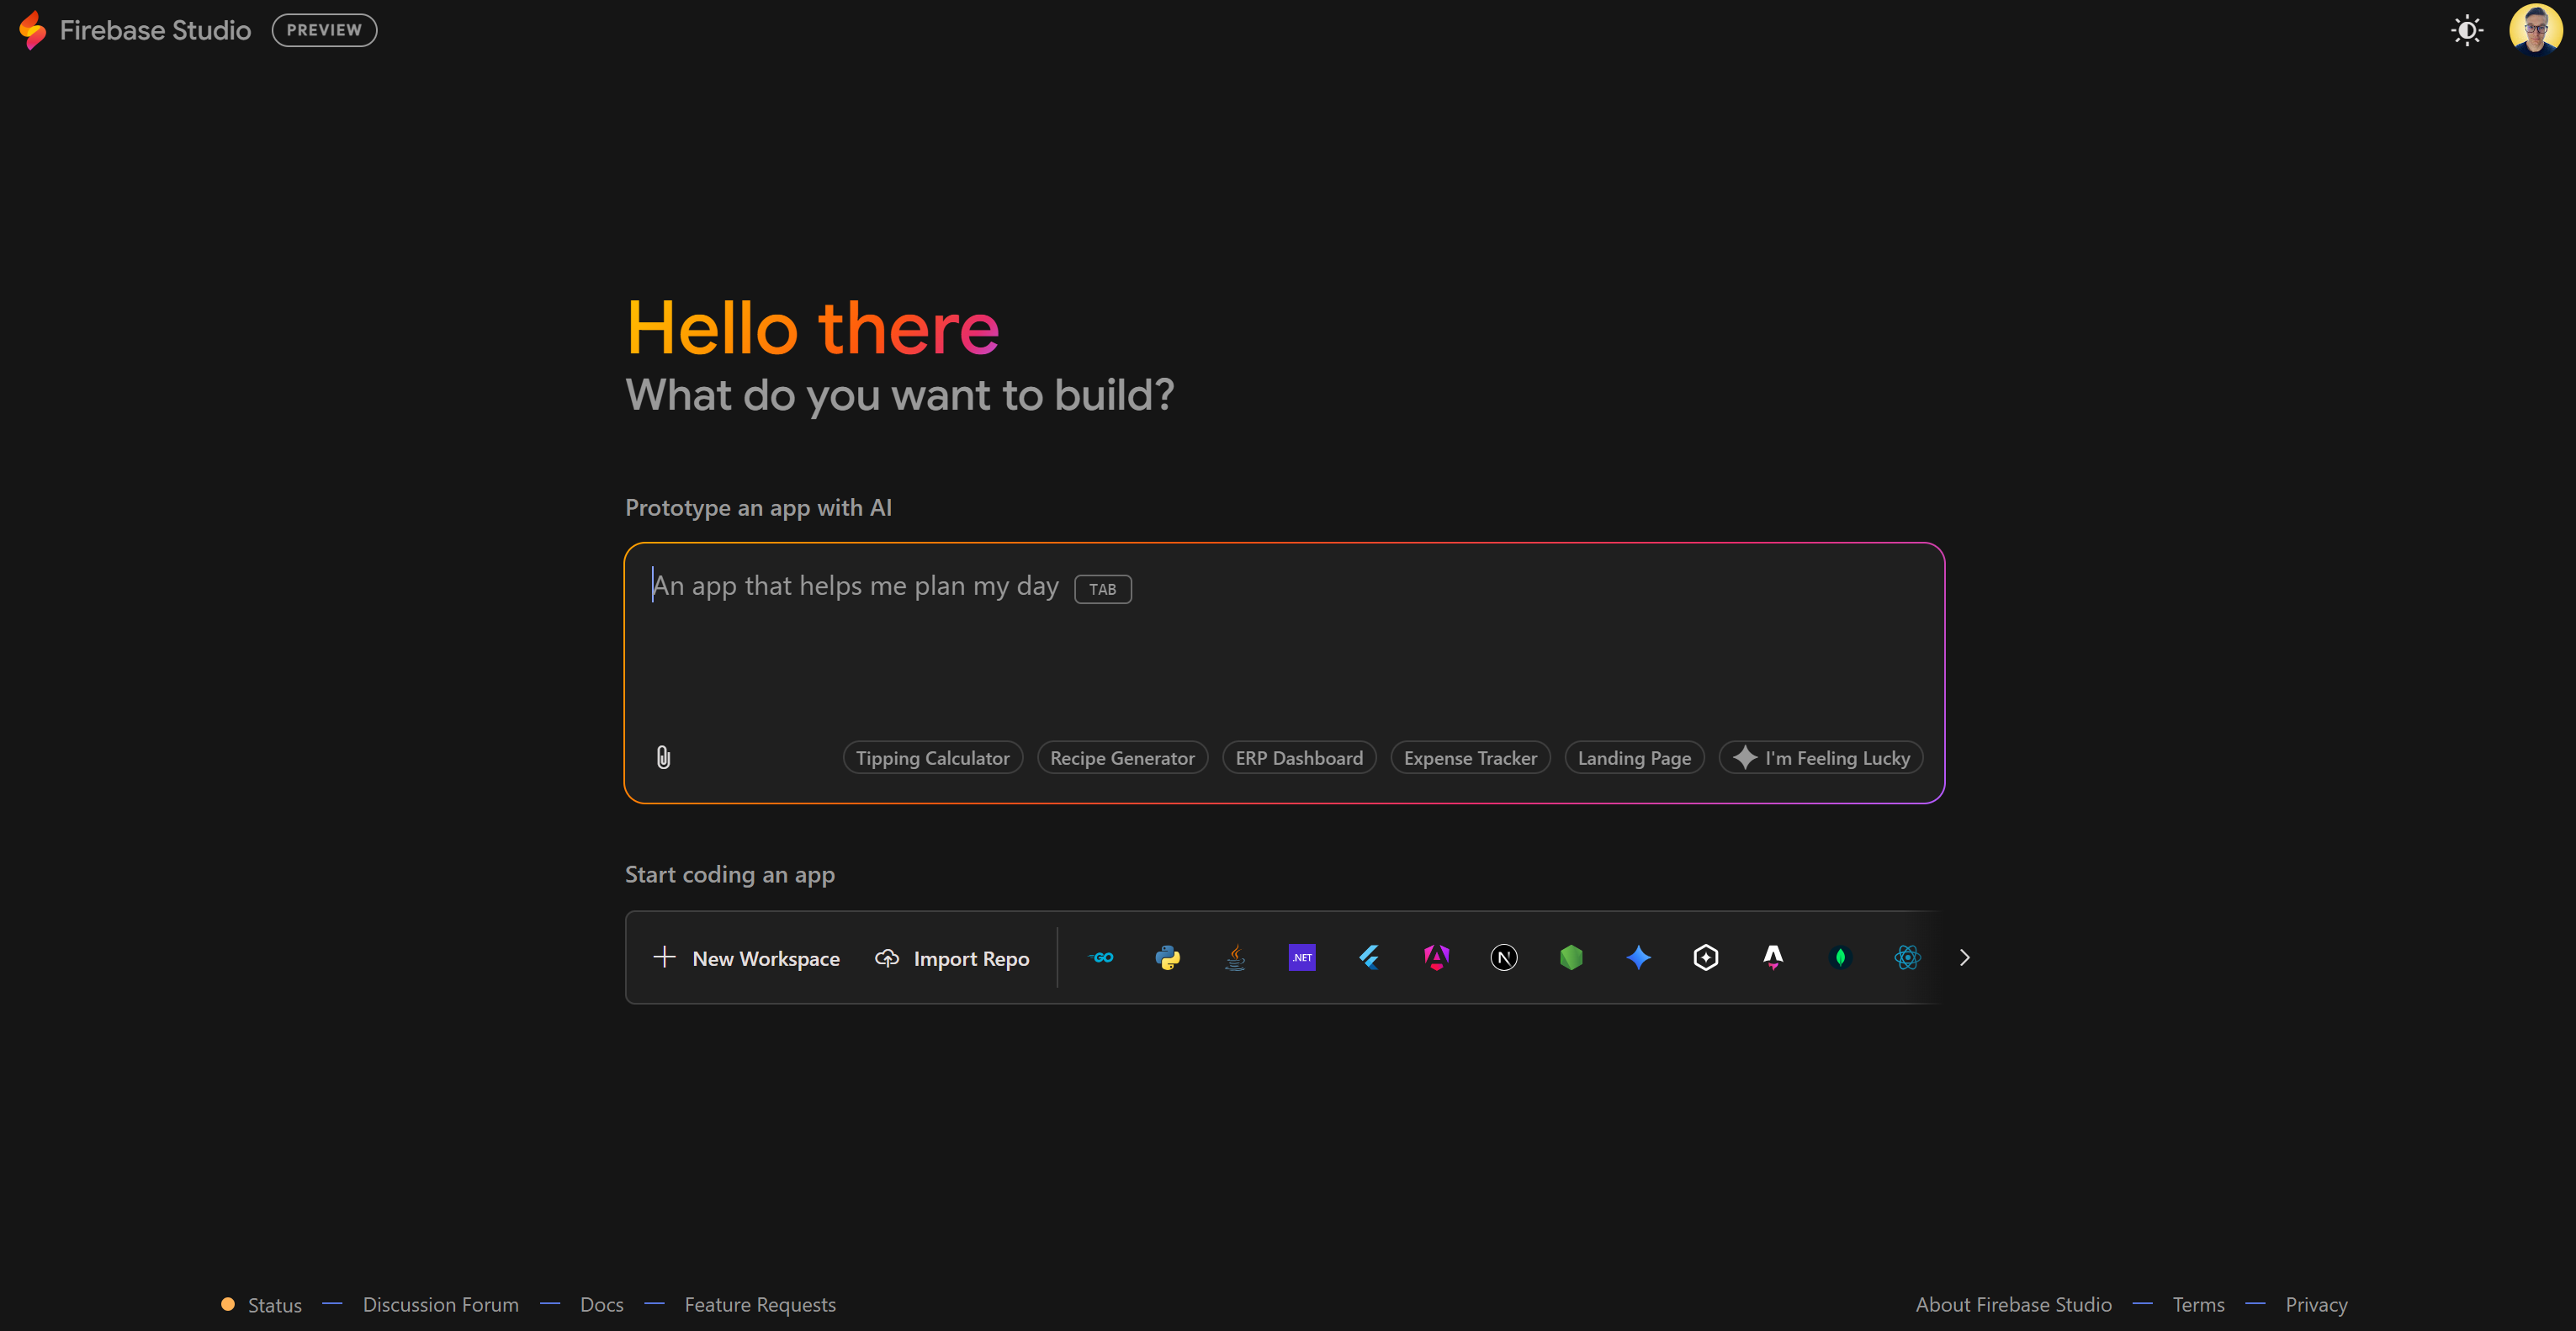
Here, you can enter a prompt to ask the AI to initialize the project for you. Great!
Step #2: Devise the Prompt
Remember, your goal here is to build a CamelCamelCamel alternative. Simply put, this web app should let users monitor Amazon product prices from a list of items.
When working with a solution like Firebase Studio (or v0), prompt engineering is key. So, take the time to craft the best possible prompt. To get high-quality results, you will need a well-structured prompt. Below are some best practices:
- Focus only on the core features. The more you add, the greater the risk of messy, hard-to-debug code.
- Clearly state the technologies you want to use (frontend, backend, database, etc.).
- Mention that you will handle the Bright Data integration later. For now, some mocked logic is enough.
- Use a numbered list to break down the main tasks.
- Keep the prompt detailed but concise. If it becomes too long, the AI might get confused.
This is an example of a solid prompt you can use:
## Goal
Build a Next.js web app for tracking Amazon product prices.

## Requirements

### 1. Landing Page
- An index page with a clean UI and a form where users can submit an Amazon product URL.

### 2. Data Handling
- When a user submits a URL:
  - Call a mocked API endpoint (representing Bright Data’s Amazon Scraper) to fetch product details:
    - URL
    - Title
    - Price
    - Image
    - ASIN
    - ...
  - Store this product data in Firestore.
  - Add the product to a product dashboard with a card list showing each product. When clicked, each product card should lead to a specific product page.

### 3. Price Tracking
- Create a scheduled job (e.g., once per day) that re-calls the mocked Bright Data API for each saved product.
- Save each new price record in Firestore, using the product ASIN as the ID and appending to its price history.

### 4. Product Page
- On the product page, display a table with:
  - Product info (title, image, URL, etc.)
  - Latest price
  - Price history (as rows in a table, or ideally a simple chart showing price evolution)

---

**Important**:
- Implement the external Bright Data API calls as mock functions returning static JSON. I will later replace these with real API integration.

## Tech Stack
- Next.js with TailwindCSS for styling
- Firestore as the database (with a collection called "products")

## Actions
Scaffold the entire project structure, with pages, Firestore schema, mocked API functions, and the scheduled function for daily price updates.
Notice how the prompt is written in Markdown format, which makes it easier to organize and break down the task into sections. Plus, AI models generally understand Markdown pretty well.
The example prompt above follows all the best practices and will help the AI successfully build the intended app. Perfect!
Step #3: Execute the Prompt and Explore Early Output
Paste your prompt into the “Prototype an app with AI” text area in Firebase Studio and press Enter.
The Firebase Studio App Prototyping agent will generate an app blueprint containing all the main information:
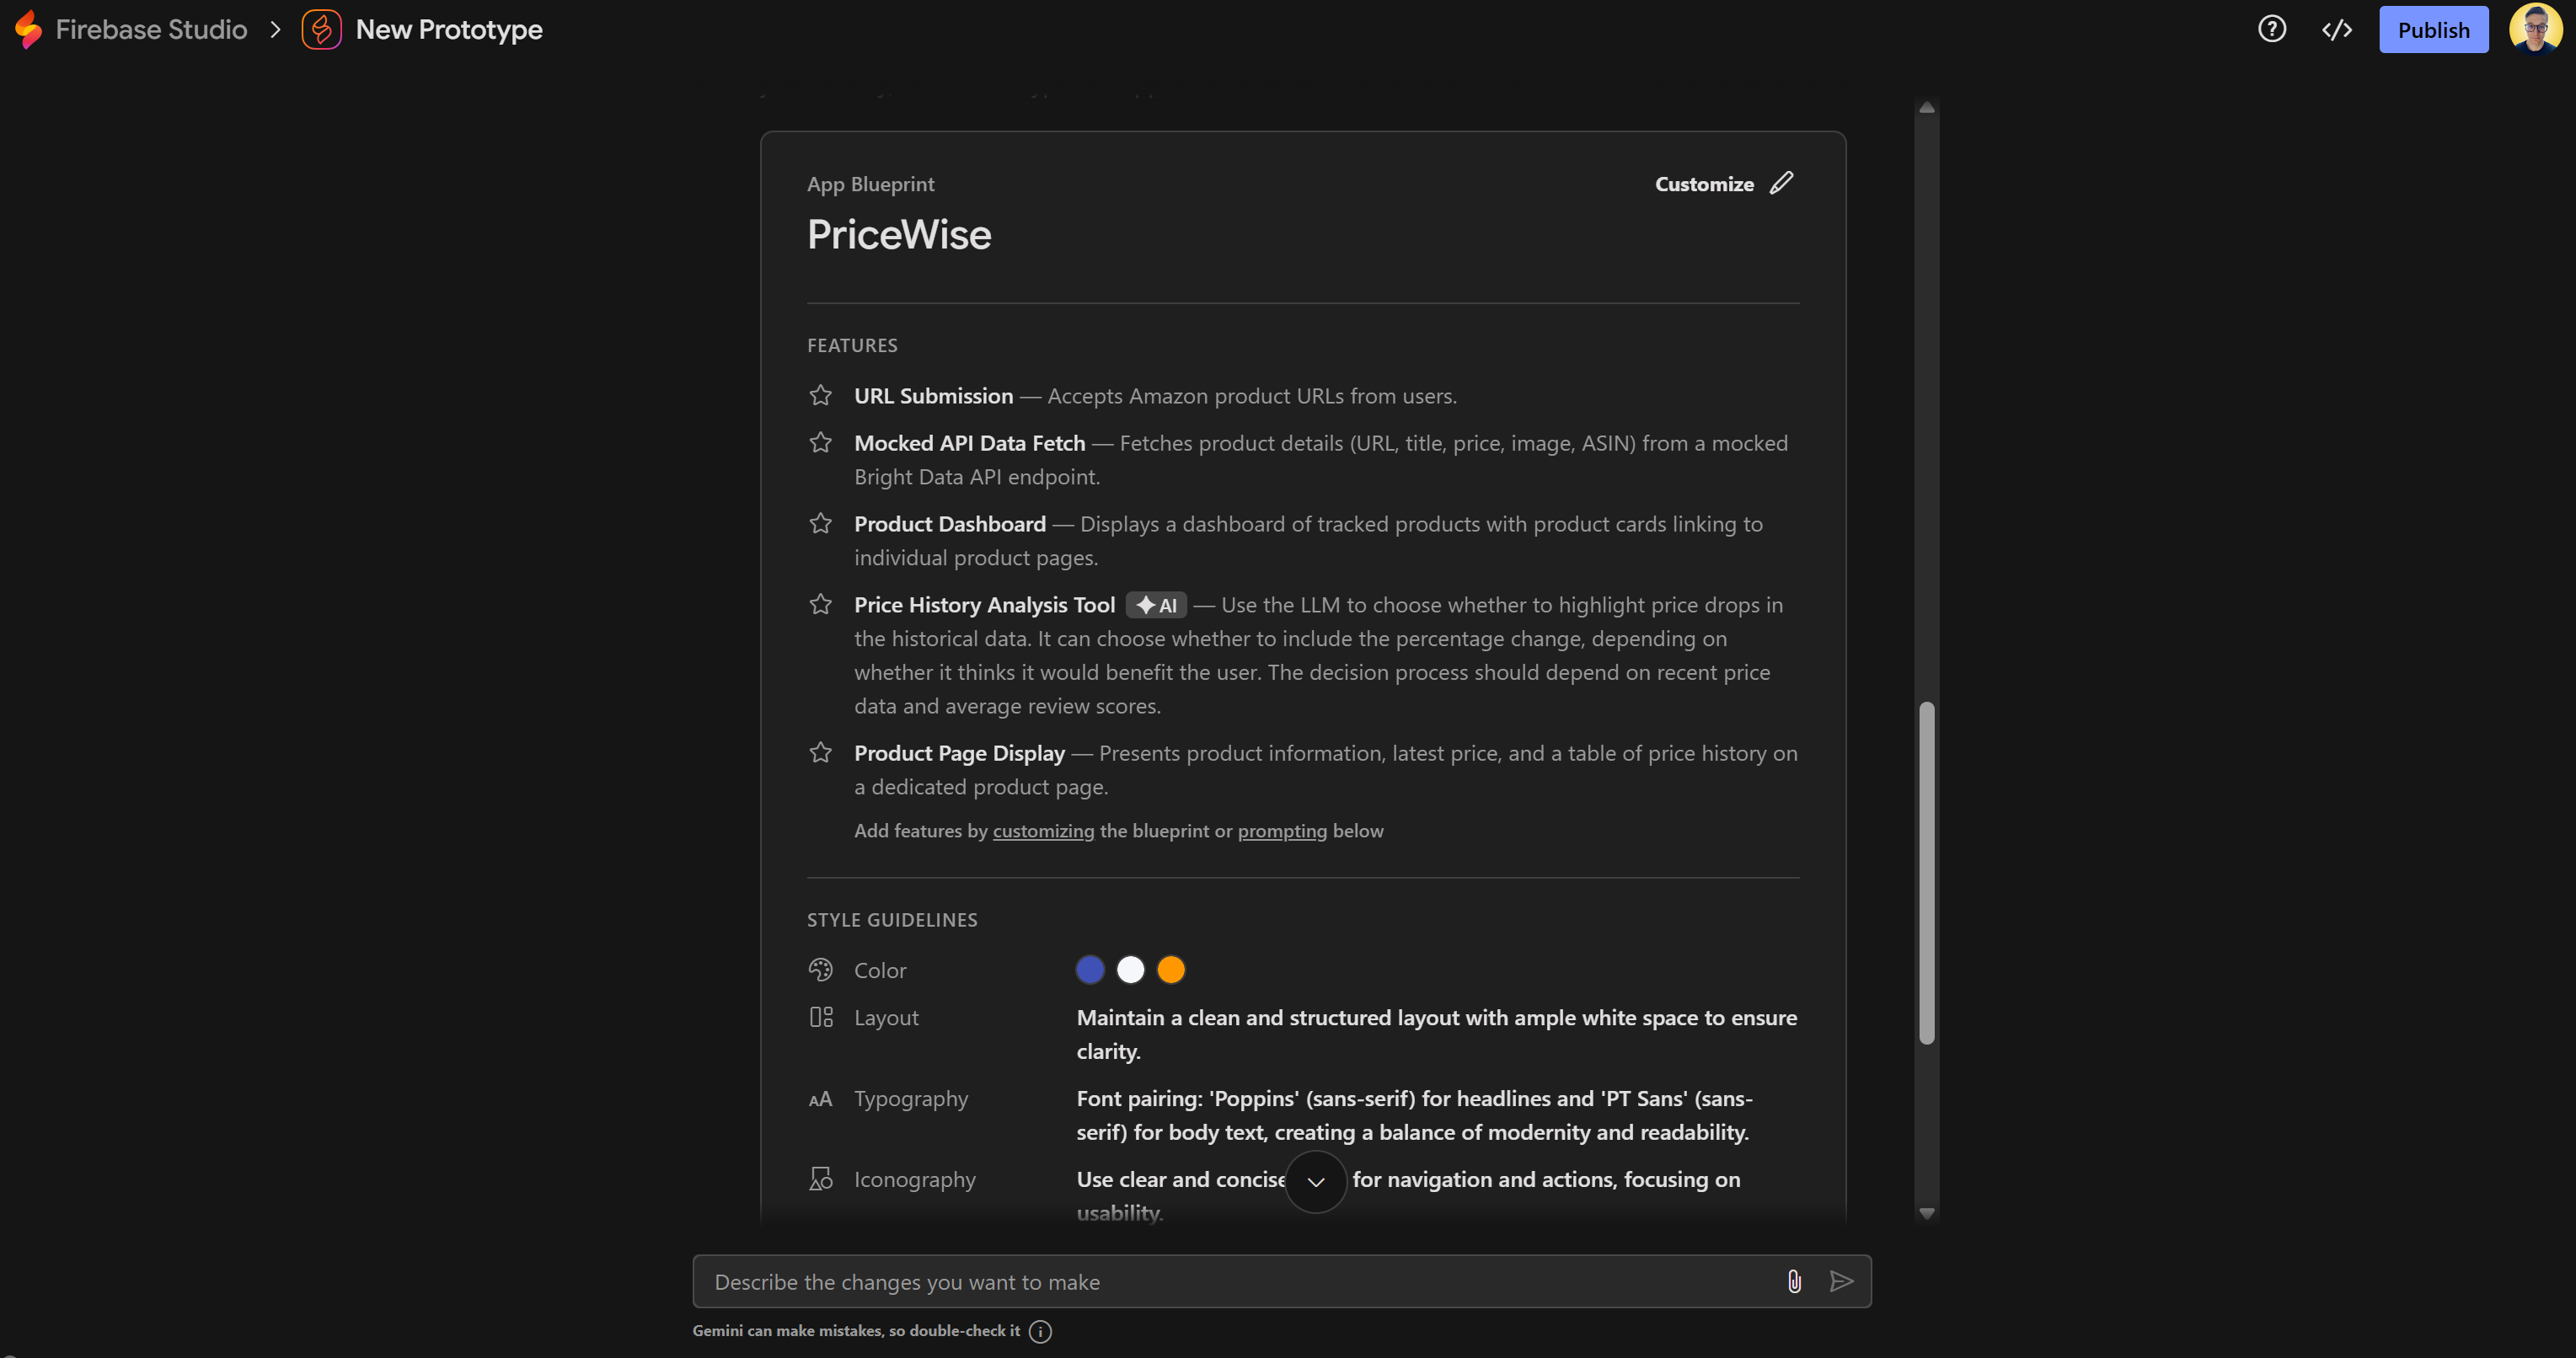
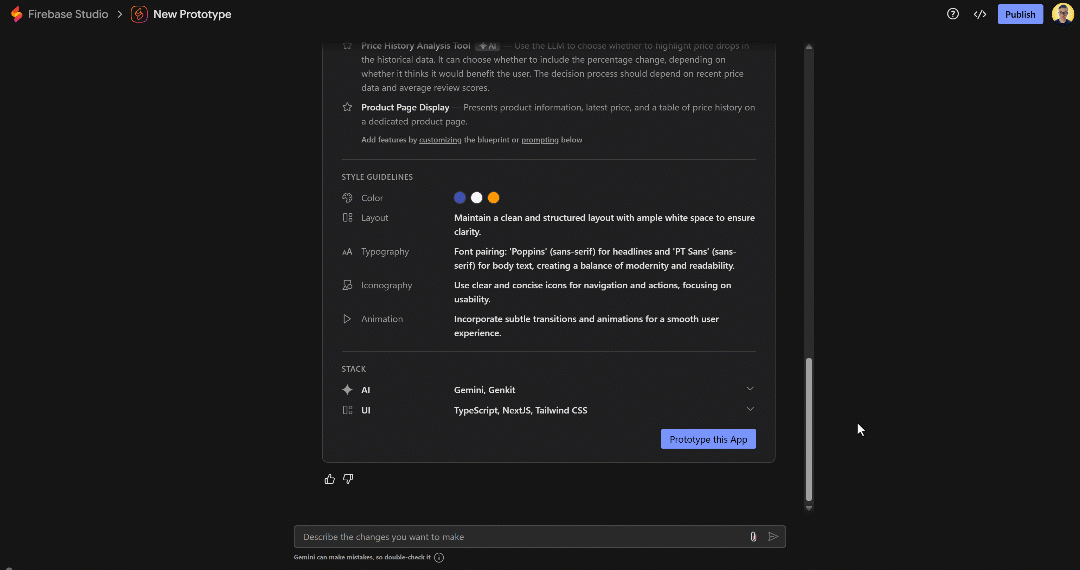
Feel free to customize and refine the blueprint to better fit your needs.
When you are ready, scroll down and click the “Prototype this App” button to instruct the AI to generate the app:
Firebase Studio will now start building out the files for your Next.js project. Be patient, as this can take up to a few minutes.
Once the process completes, you will see your running prototype in a preview window:
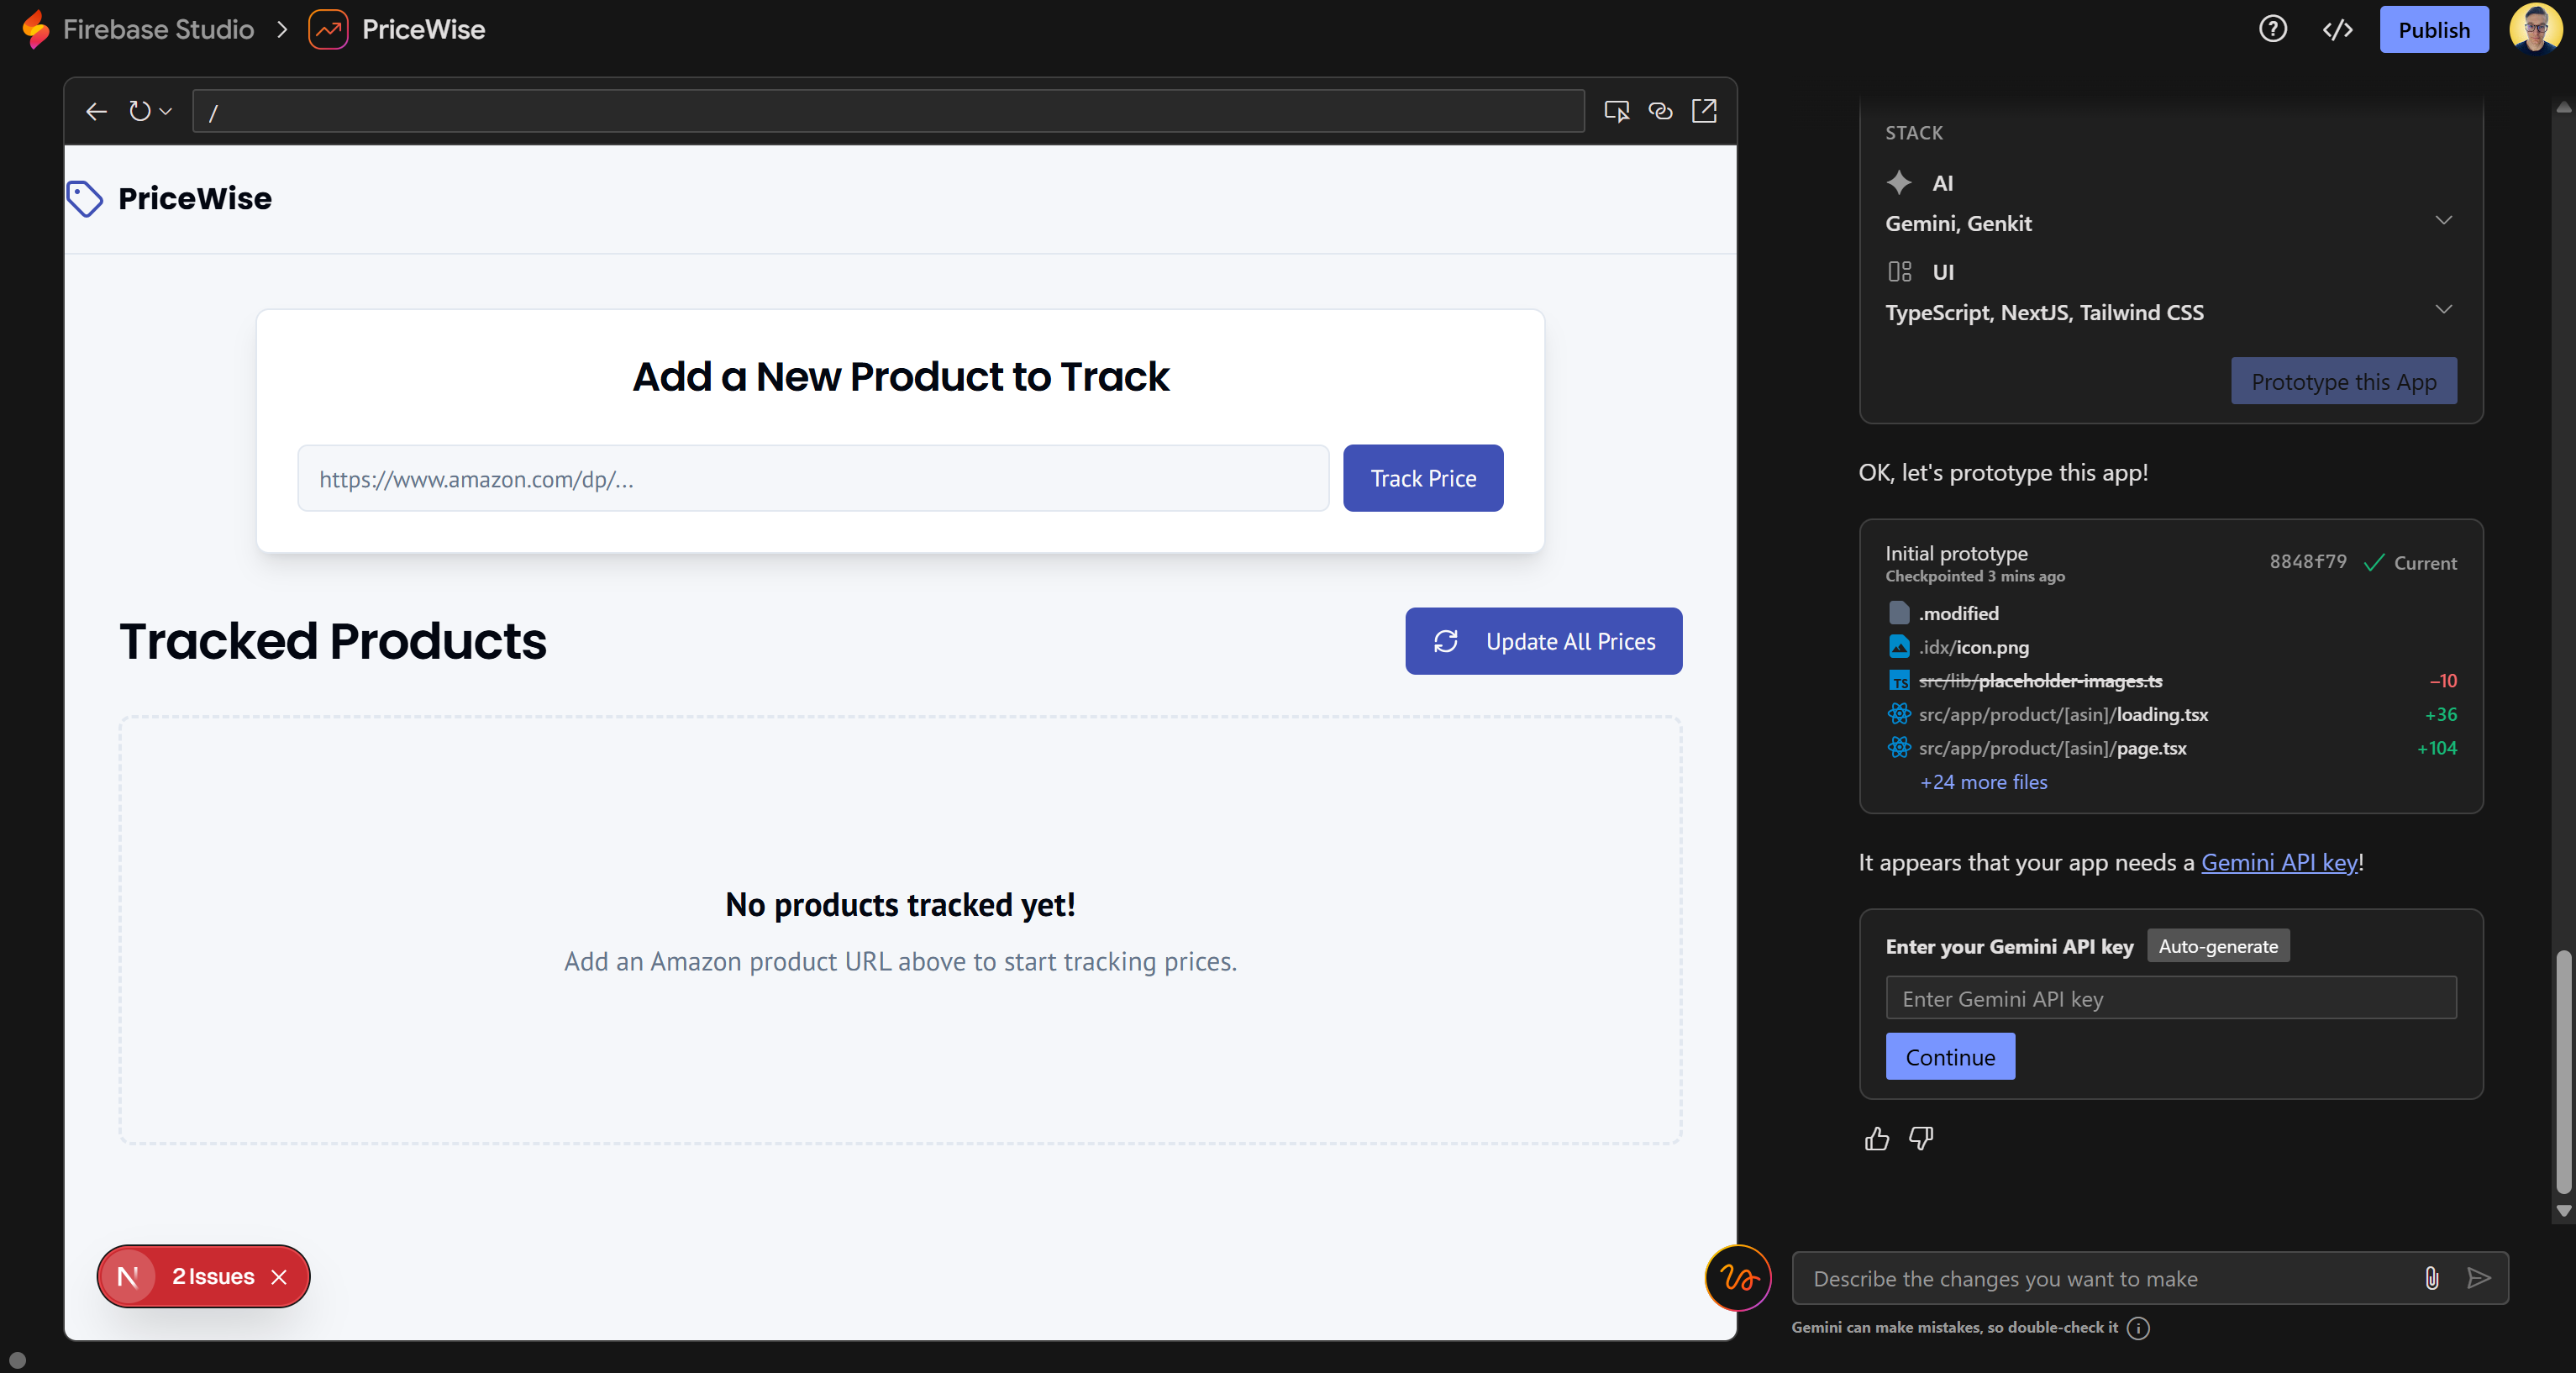
Notice how the app’s UI closely matches the structure you described in your prompt. That already looks like a very promising result!
Step #4: Complete the Gemini Integration
In the bottom-left corner, you should see a prompt asking you to complete the Gemini integration by entering your Gemini API key:
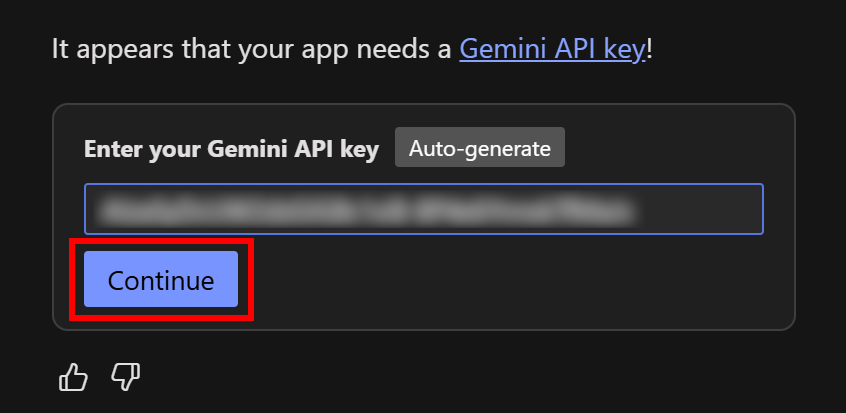
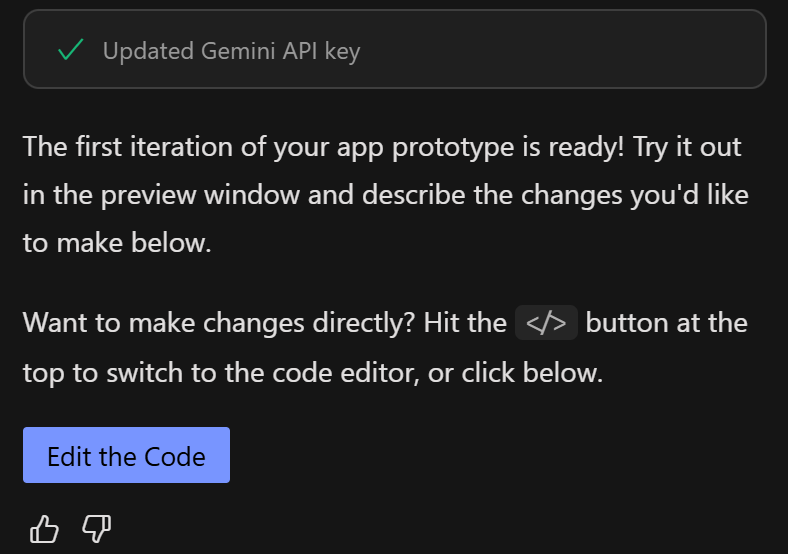
Retrieve your Gemini API key from Google AI Studio, paste it into the field, and press the “Continue” button. If everything works correctly, you should get a success message like this:
Meanwhile, Firebase Studio should automatically finish loading its development environment (based on Visual Studio Code). Otherwise, reach it by clicking the “Switch to Code” button. What you should see is:

On the right-hand side, you will now see a Gemini panel inside your coding setup. From here, you can ask Gemini for contextual tips, new features, fixes, and guidance while you build. Well done!
Step #5: Fix the Issues
As you can see in the “Web” preview tab (shown in the previous screenshots), the current application has 2 issues. That is completely normal, as AI-generated code is rarely perfect and usually requires tweaks and fixes.
Before moving forward, go through the reported issues. Use the Next.js visual elements in the app to identify what is broken and fix them one by one. After all, building on top of a broken app does not make much sense.
For server-side debugging, check the logs in the “OUTPUT” panel. Press Ctrl + <backtick> to open the Terminal section. There, switch to the “OUTPUT” tab and select the “Previews” element:
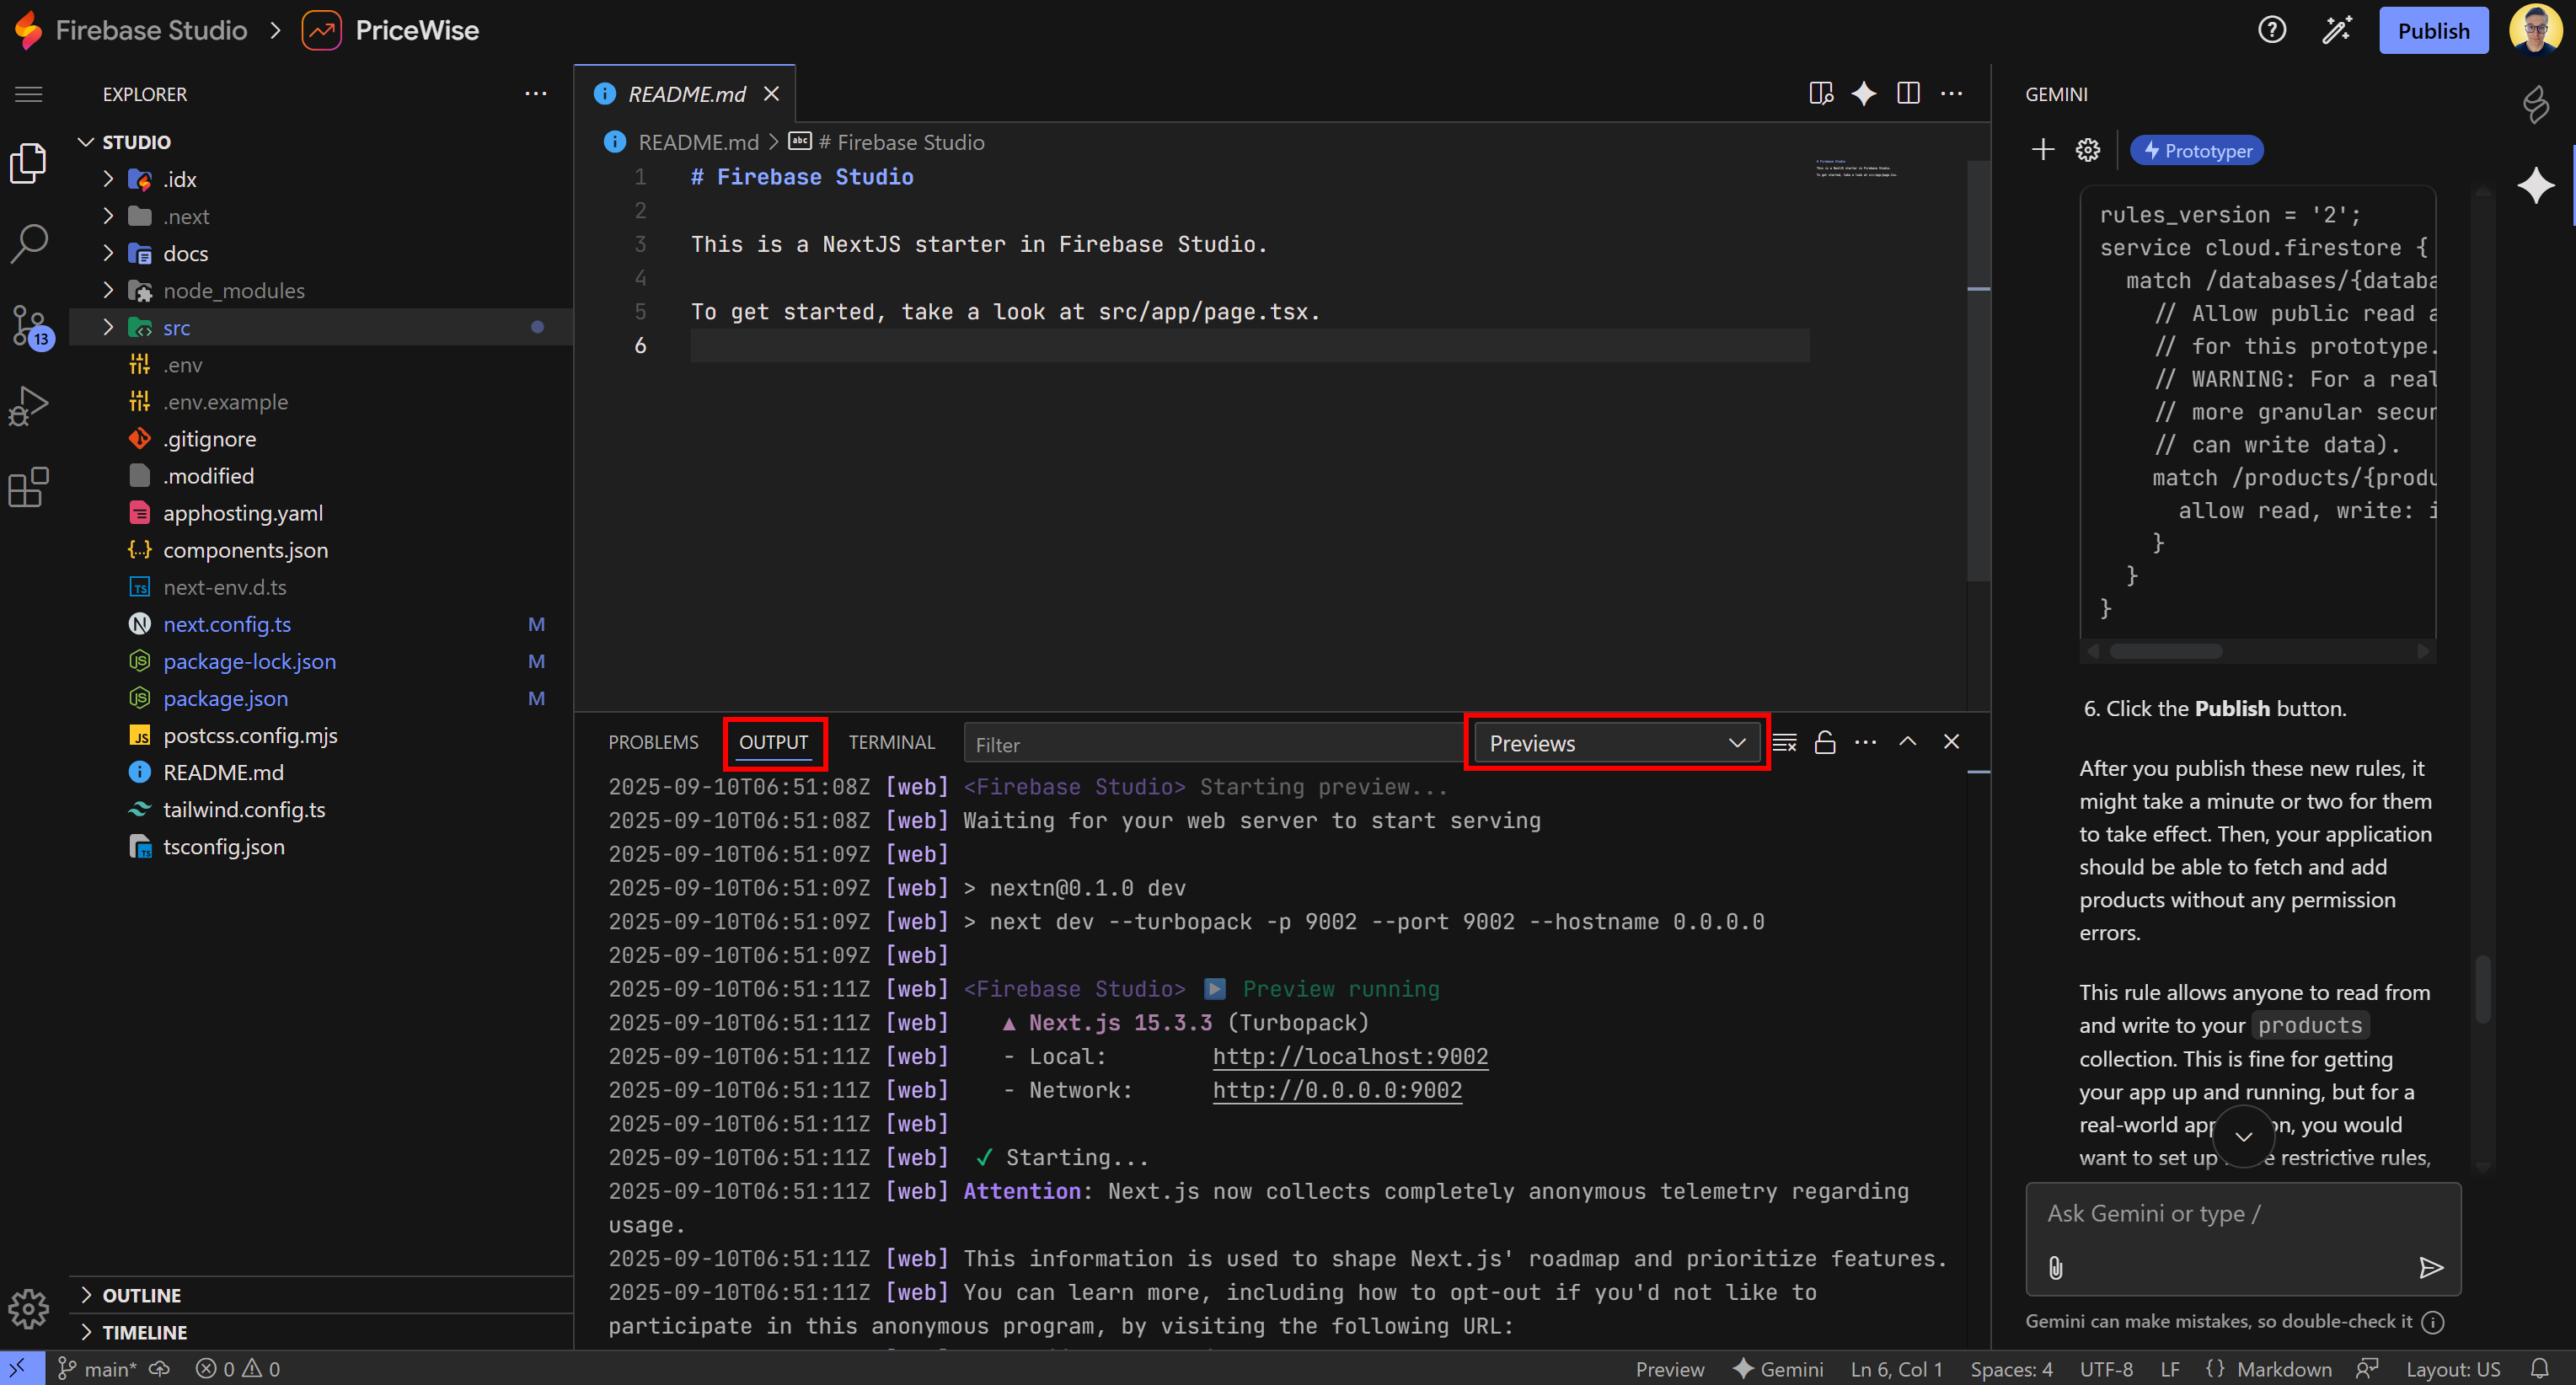
Remember: You can also ask Gemini for help fixing these issues by prompting it directly with the errors you get.
Once you have fixed all problems, your app should look like this:
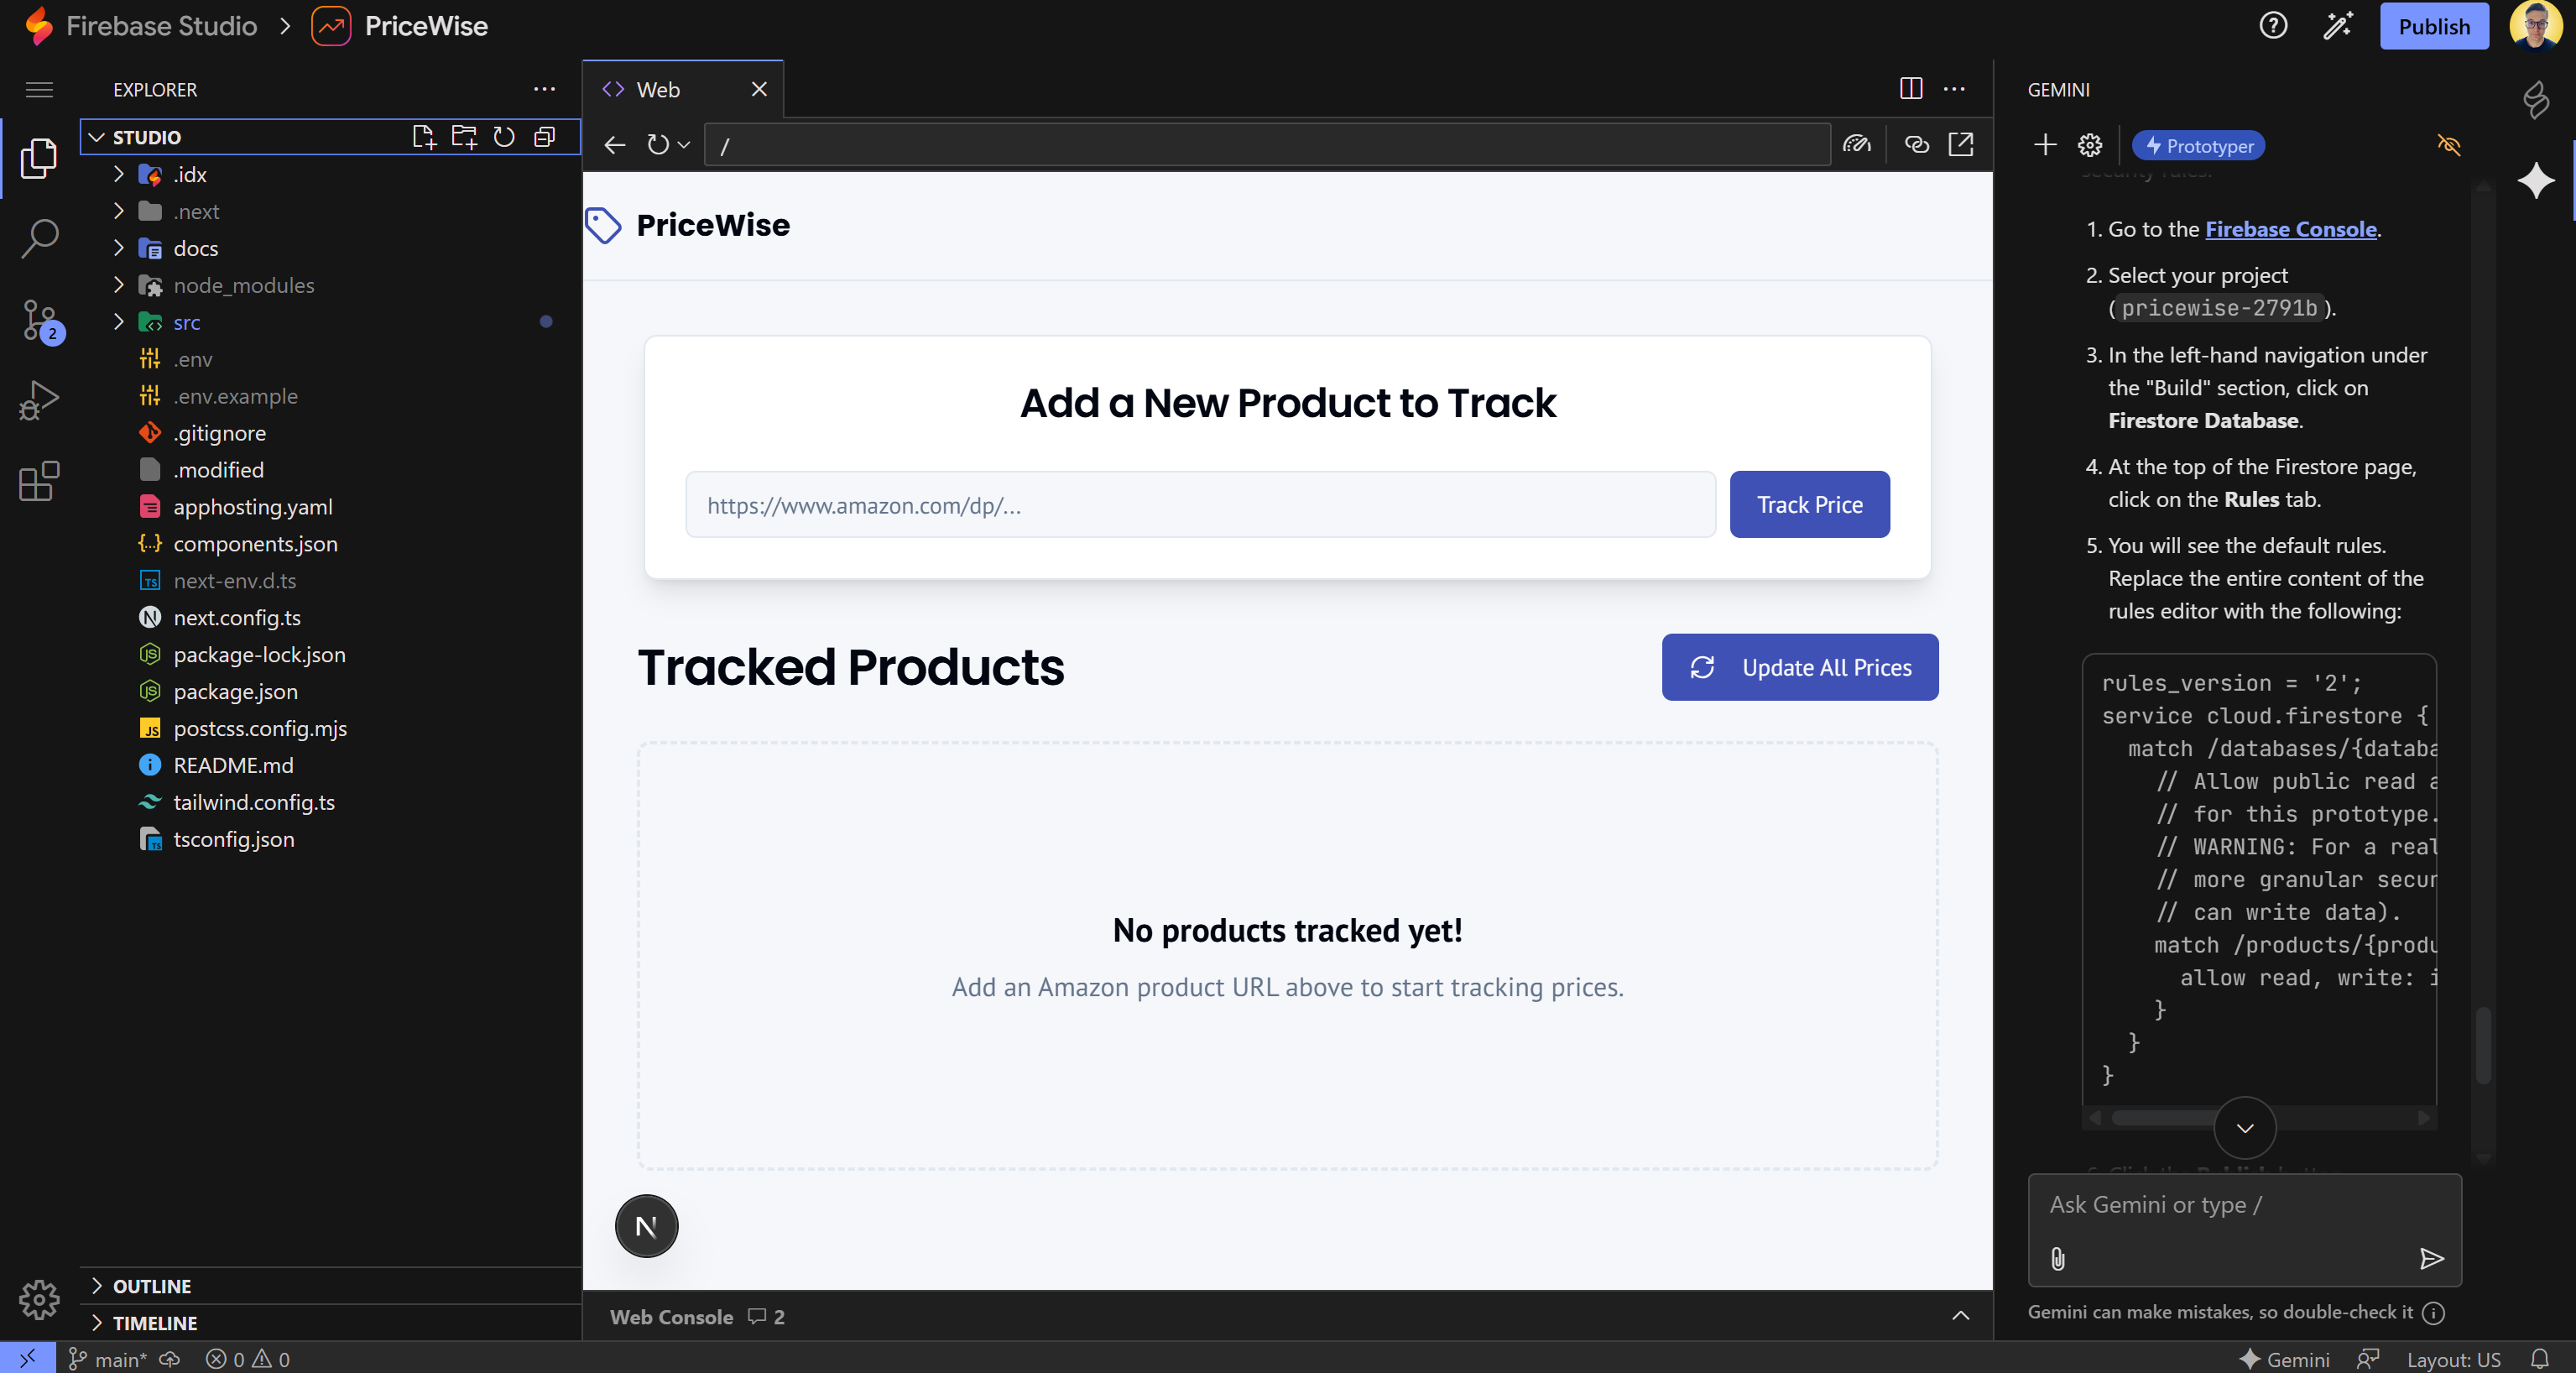
Notice that the “Issues” indicator in the top-left corner has disappeared, which means all Next.js issues have been resolved!
Step #6: Configure Firestore
One of the great features of Firebase Studio is that it runs directly in the Firebase environment, making it easy to integrate with all other Firebase products.
In this project, you will need to set up a Firestore database so your app can read and store data, keeping track of its state. That is required as Firestore was specified as the database technology in the prompt.
Tip: For a simplified integration, you can ask Gemini to guide you through the entire task.
Start by logging in to Firebase and creating a new project:
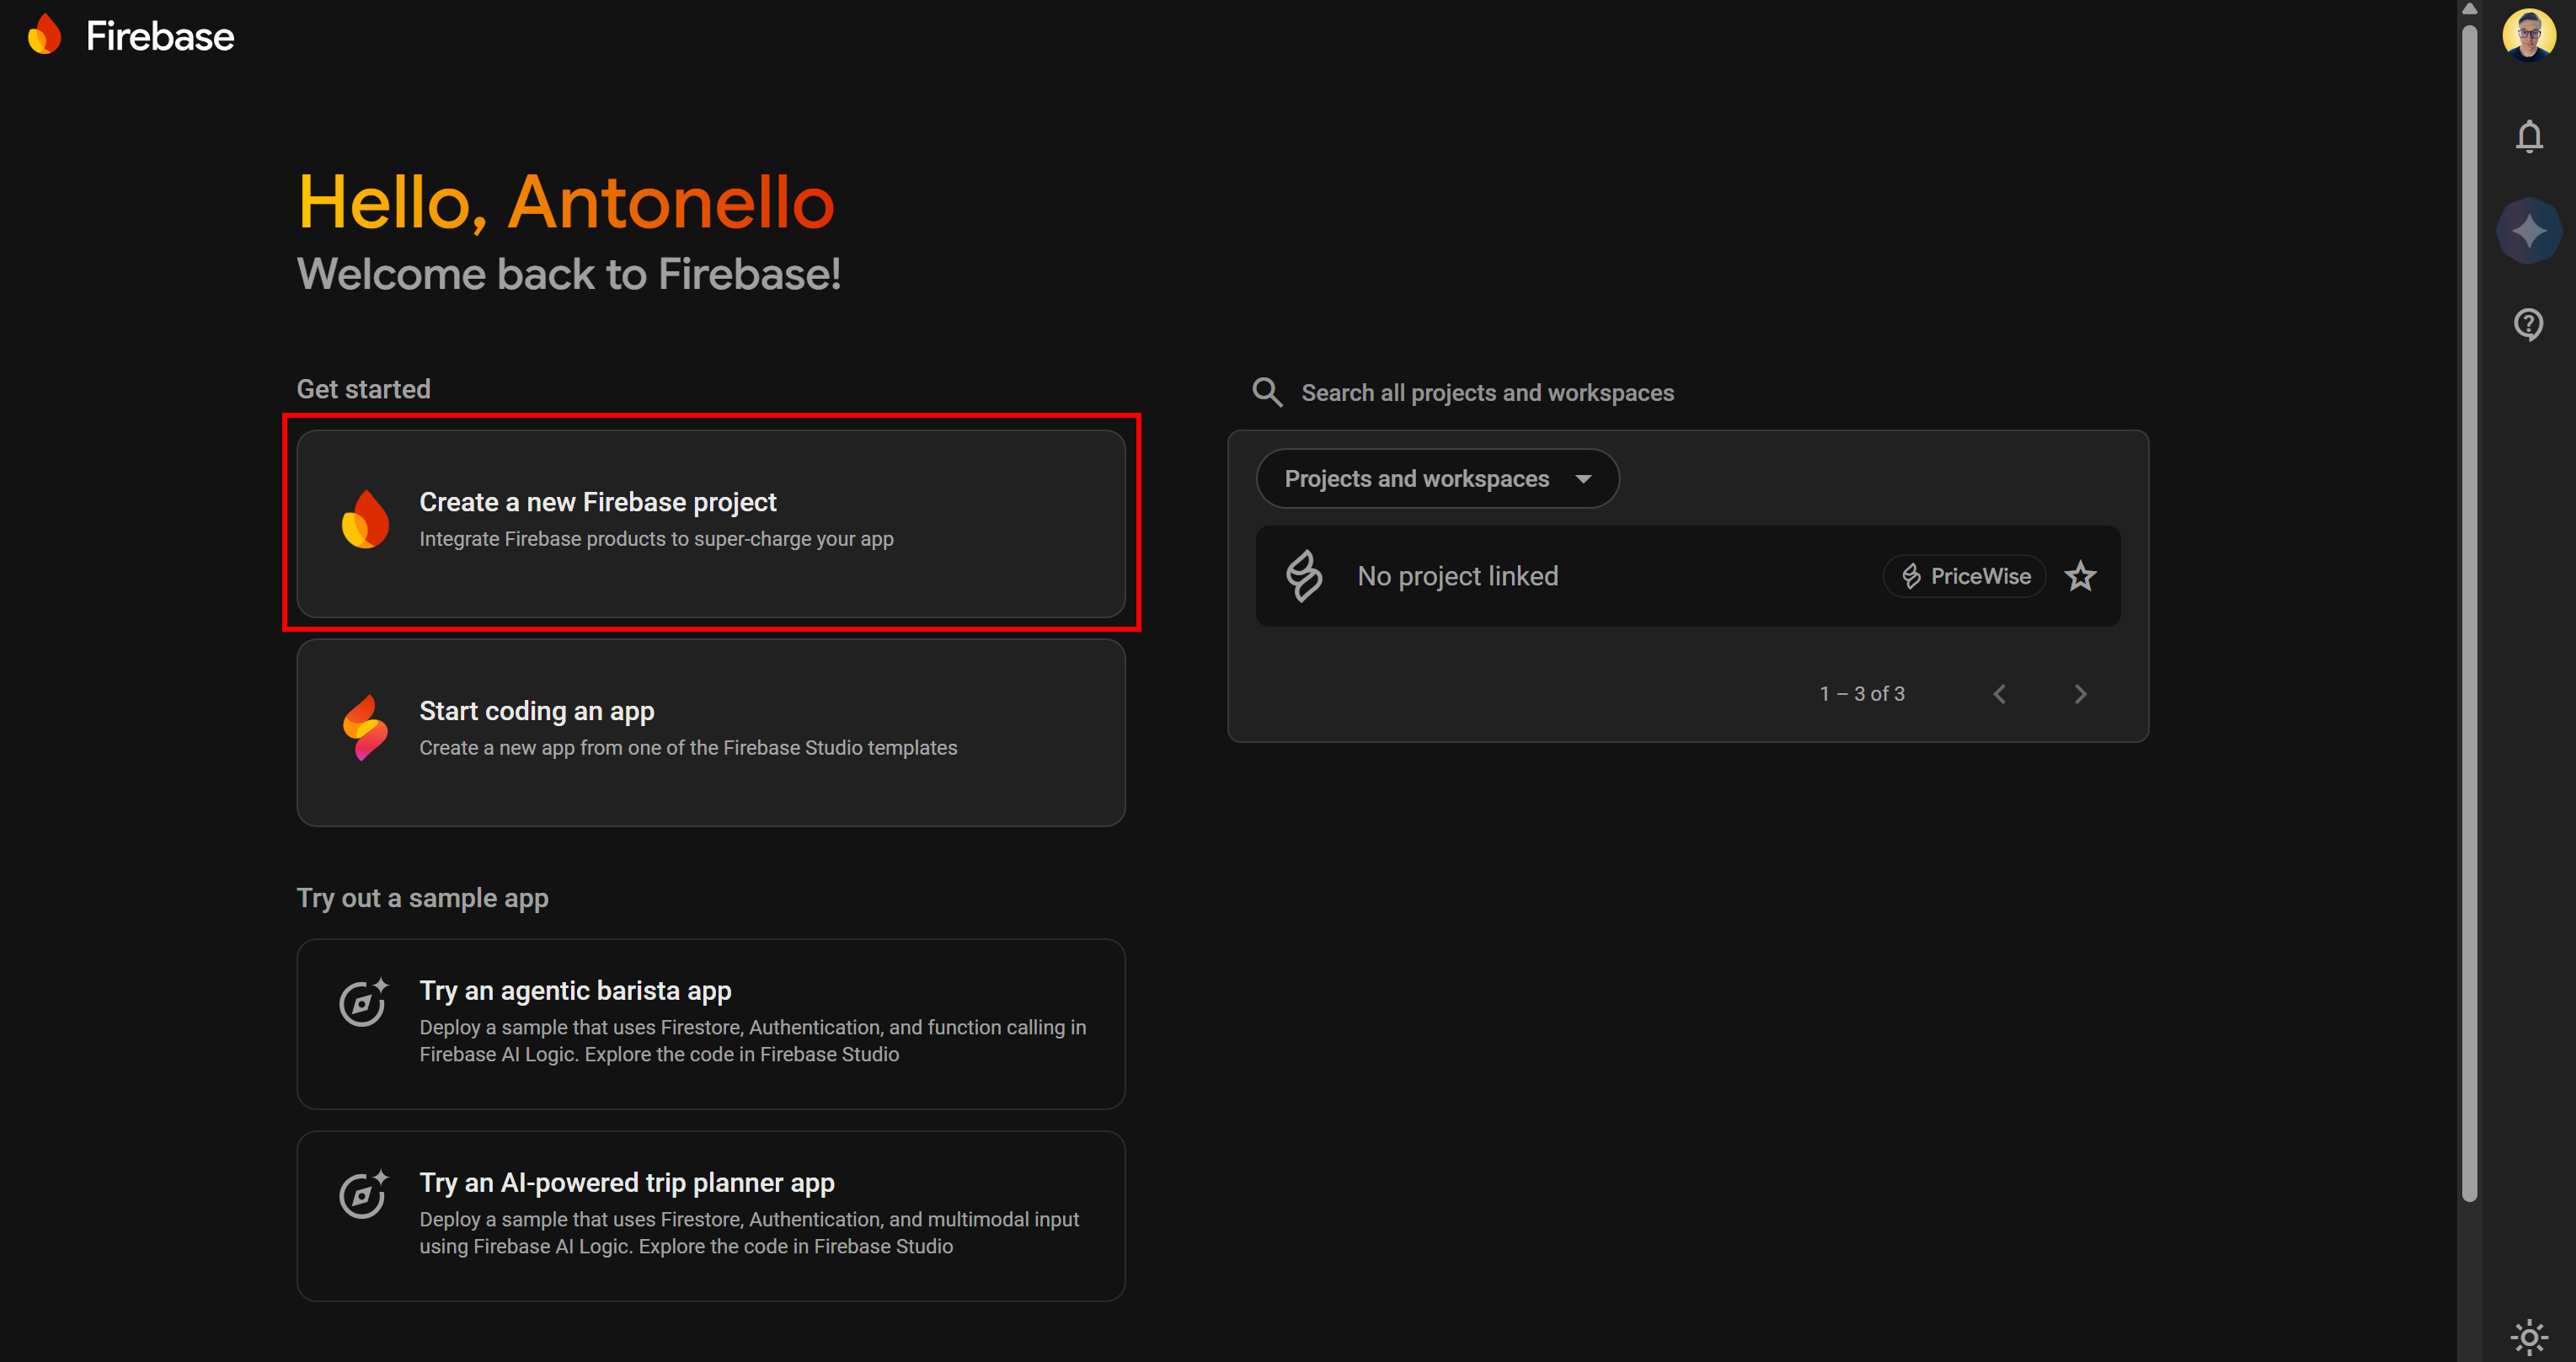
Give your project a name and follow the project creation wizard. Firebase will start creating your project:

Press the “+ add app” button and select the web app icon to initialize a new Firebase web app:

Give your web app a name and follow the instructions. In the end, you will receive a connection snippet with the Firebase configuration:
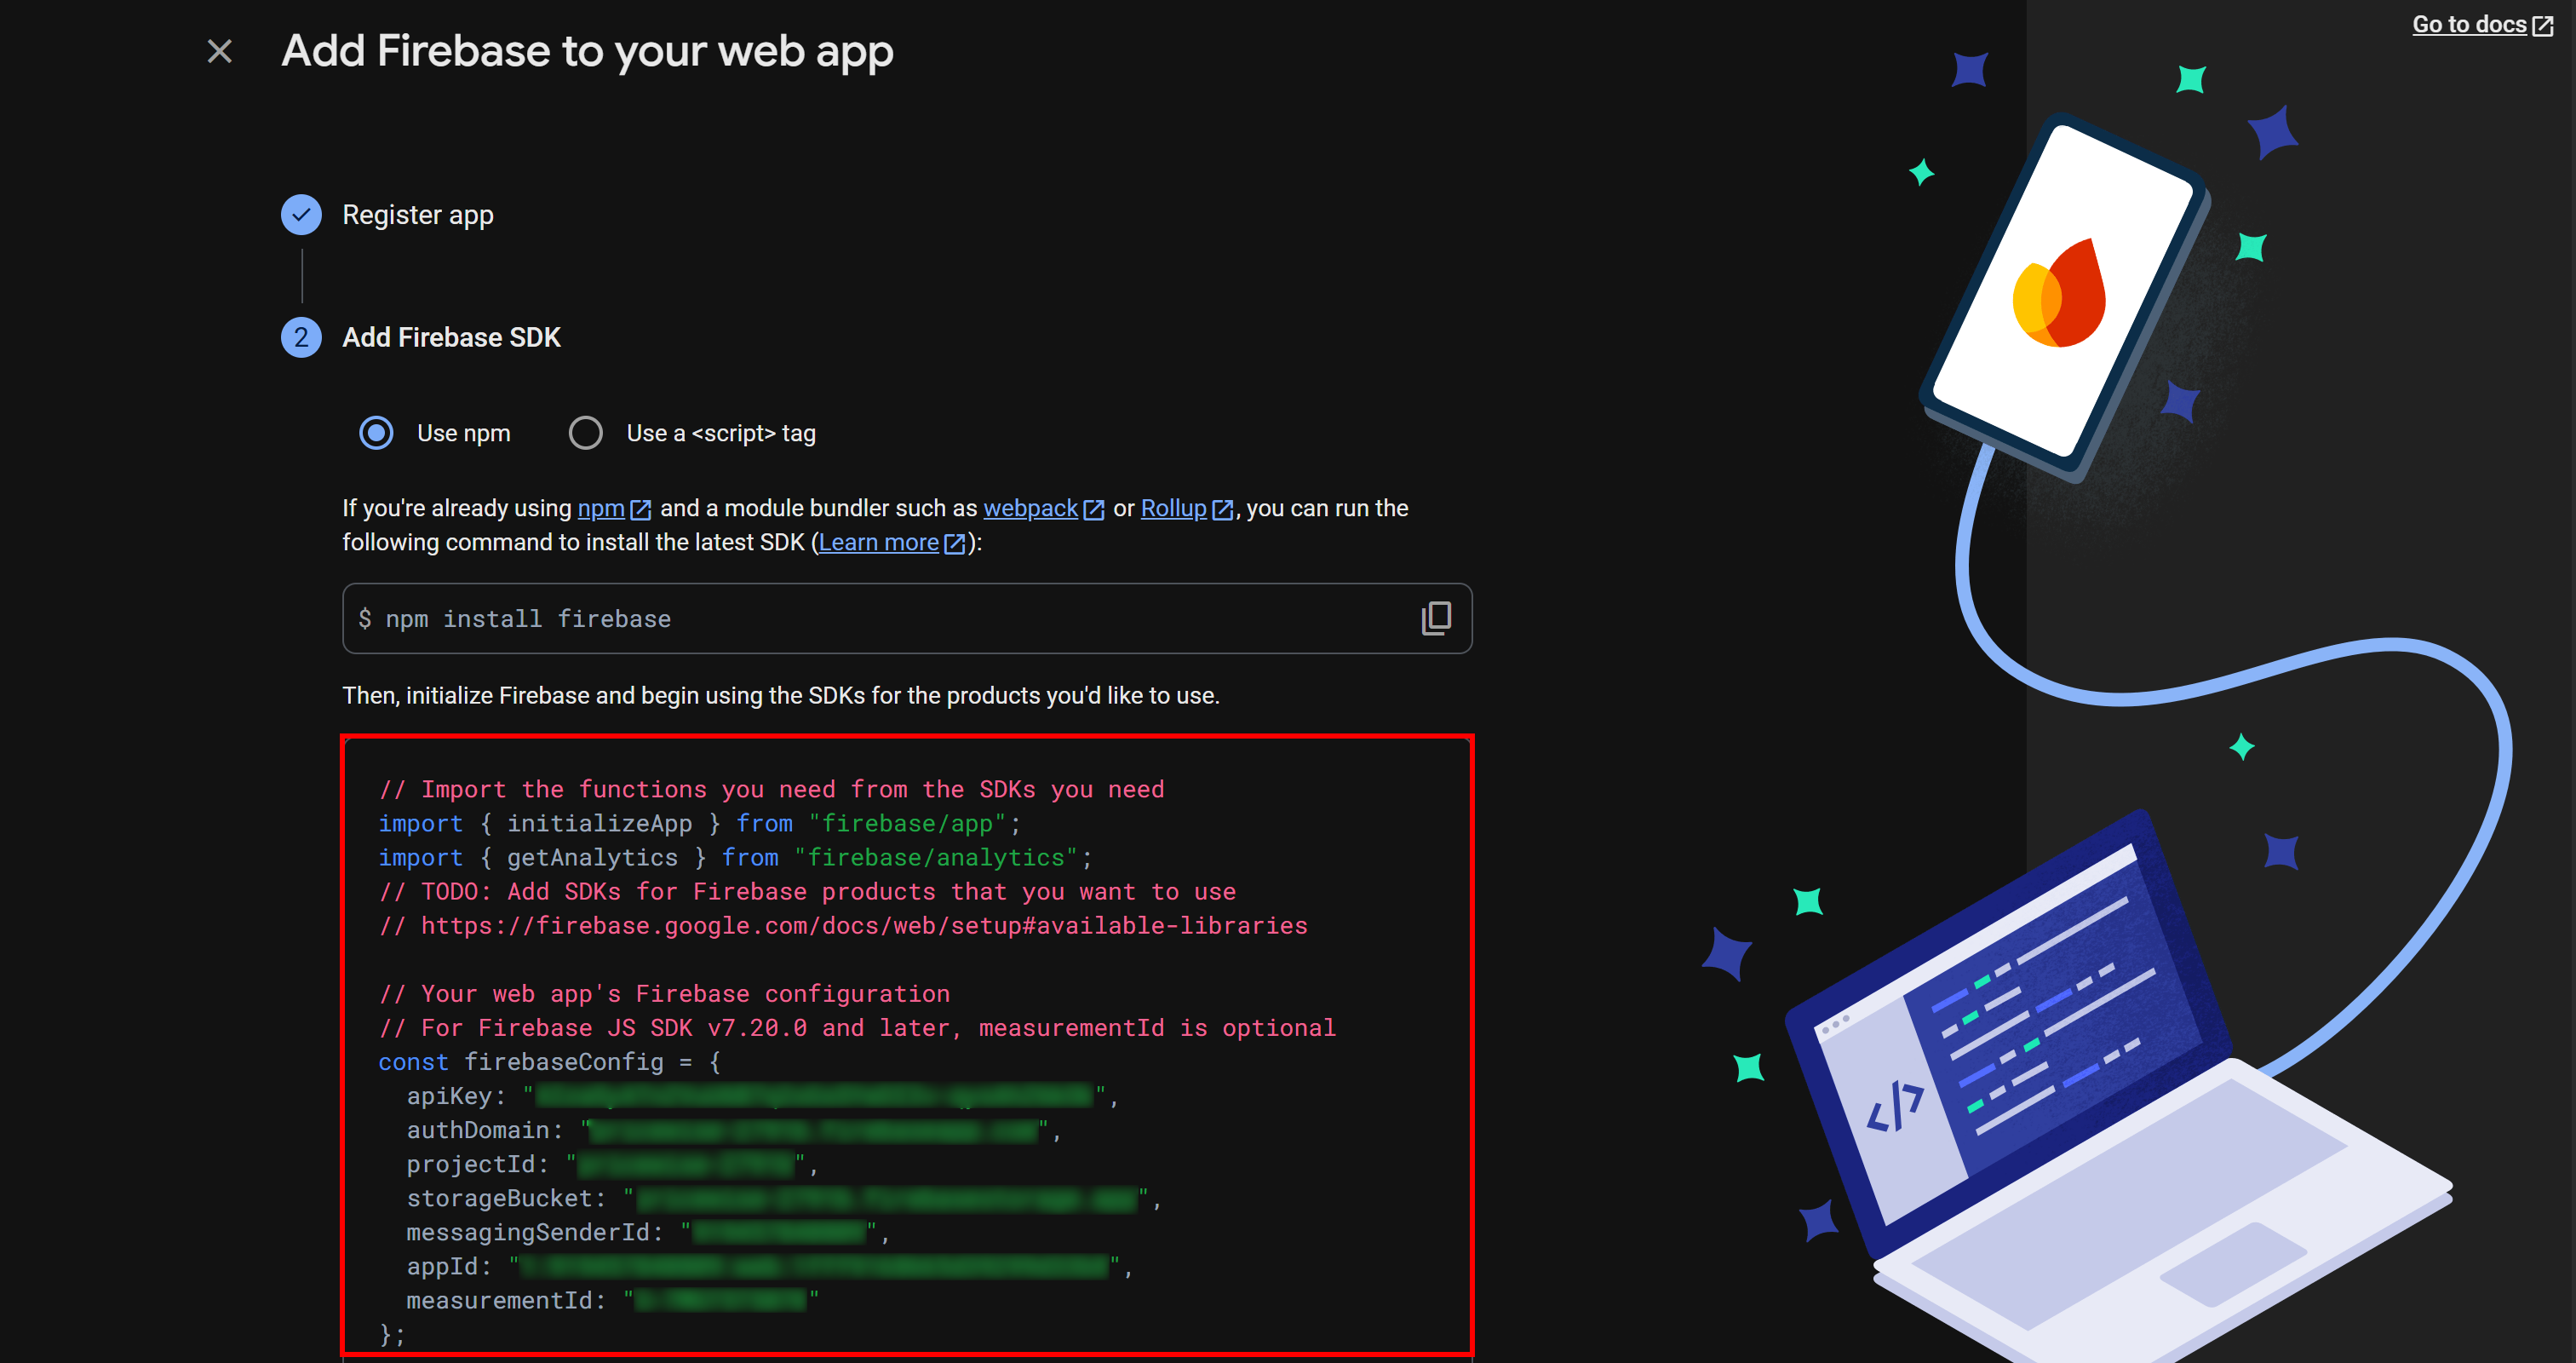
Save these credentials from the firebaseConfig object in a safe place, as you will need them to connect your prototype app to Firebase.
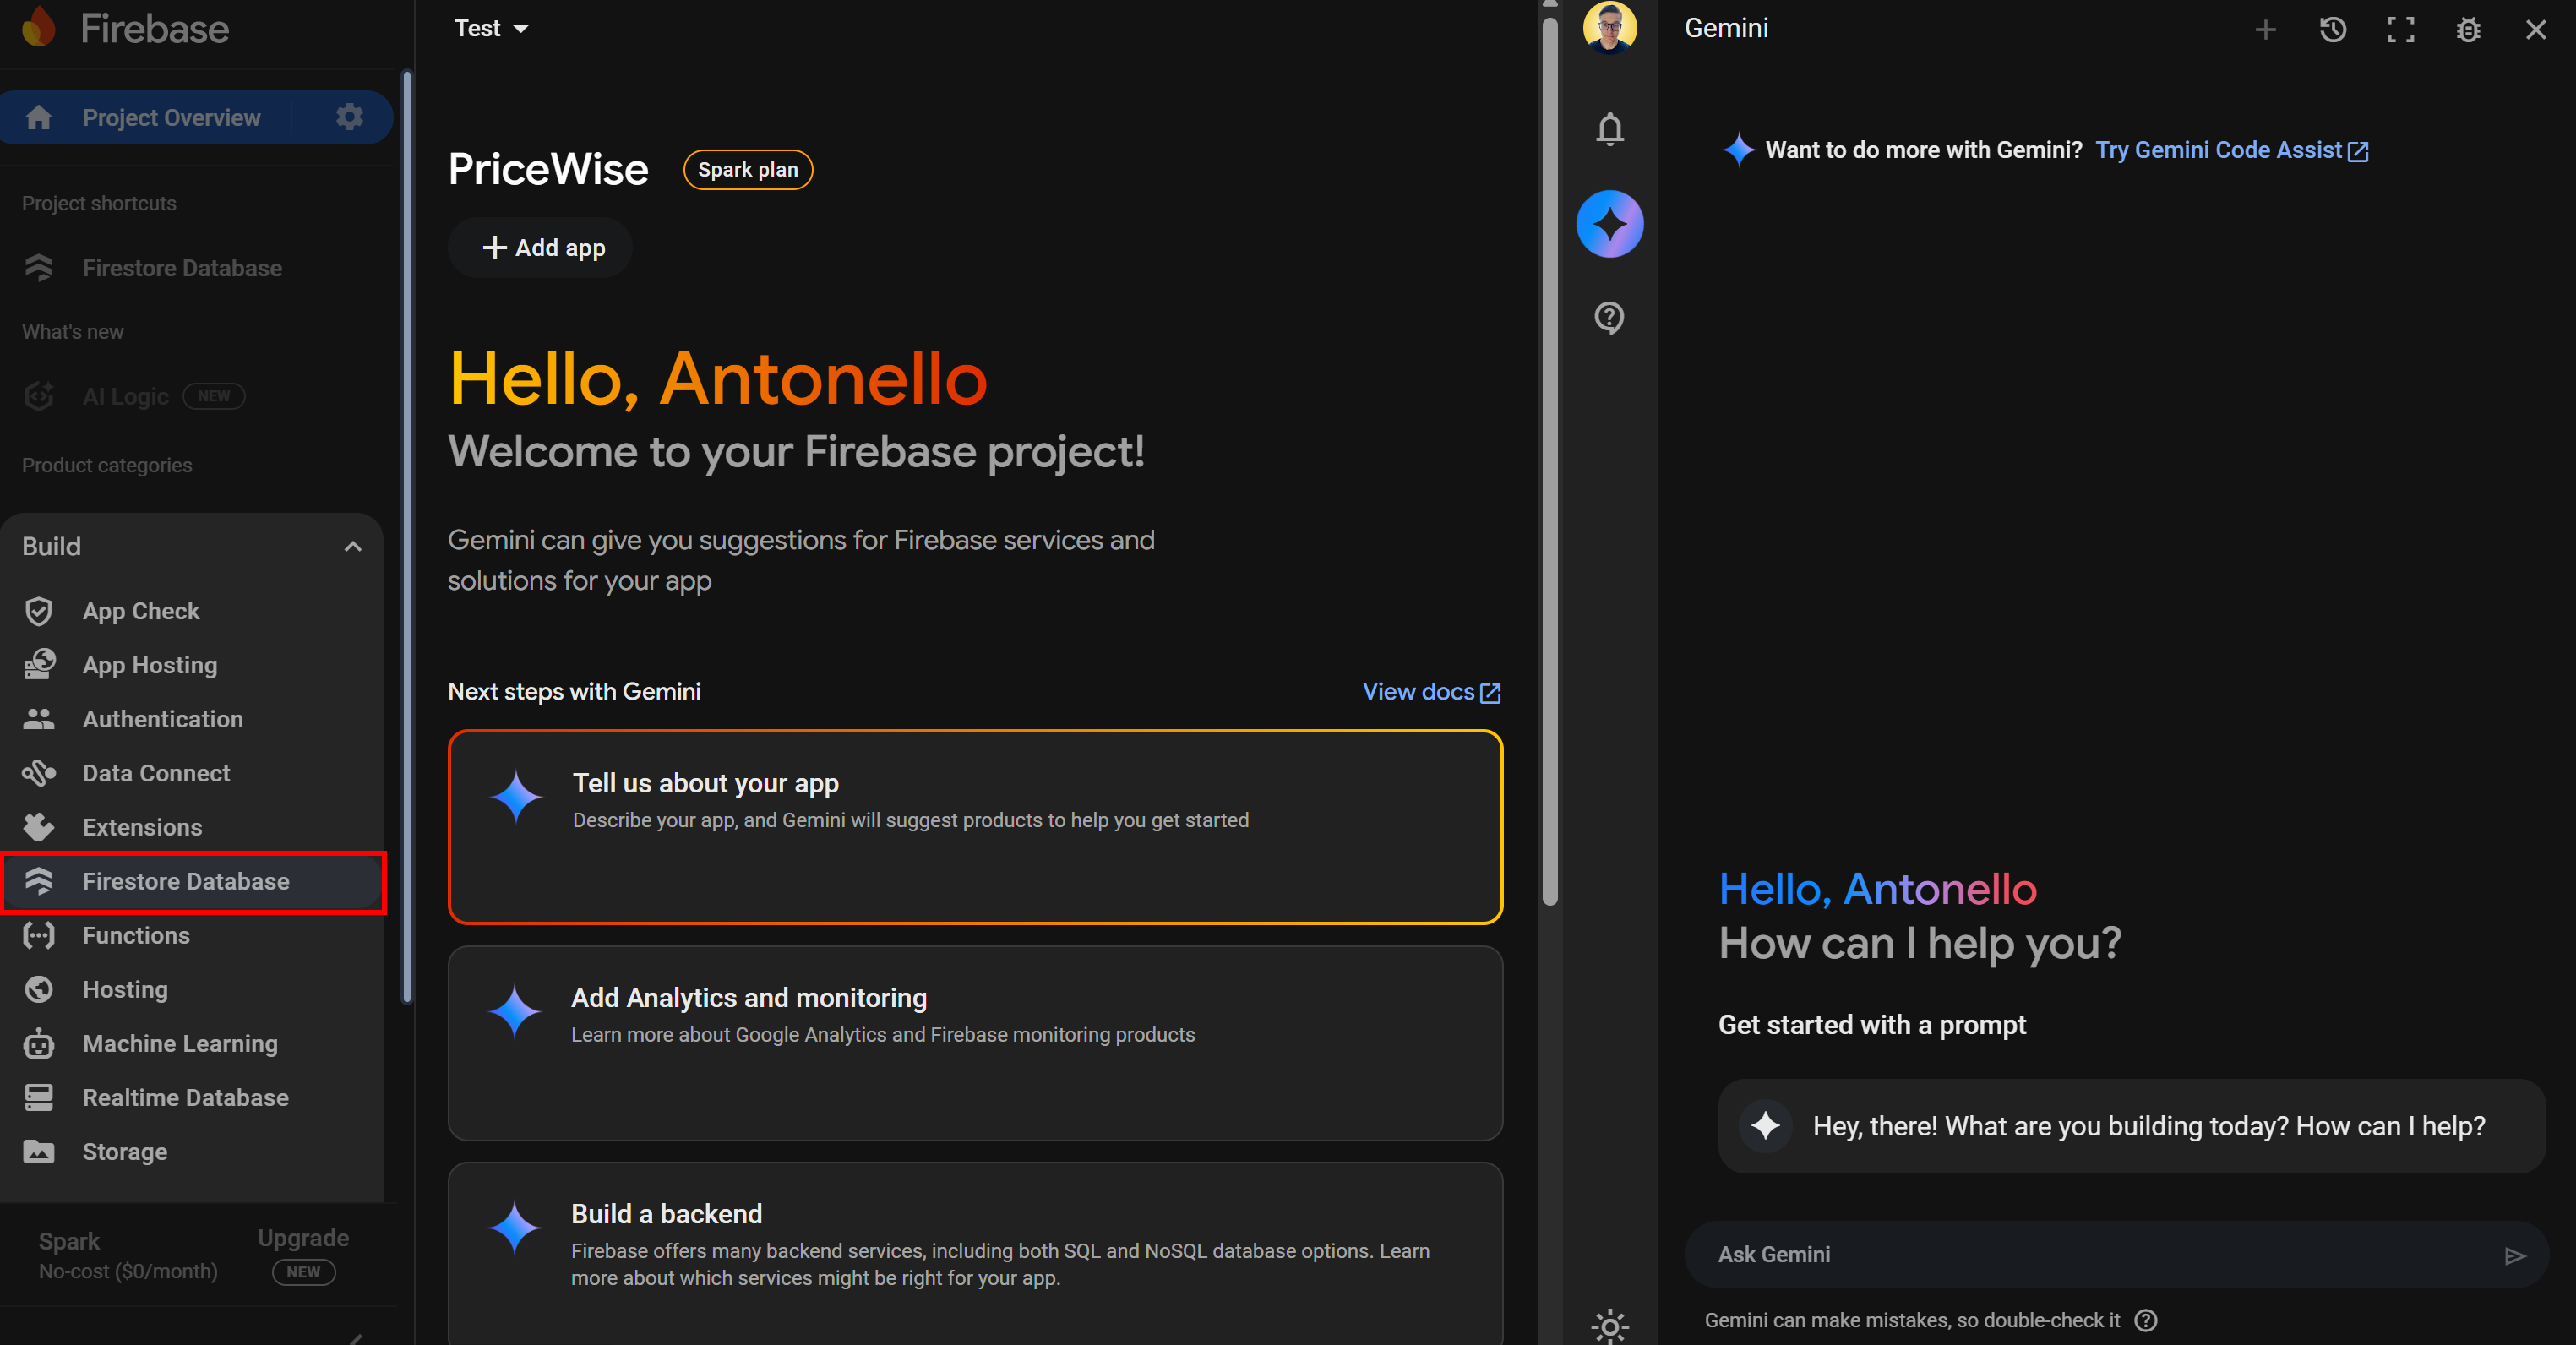
Next, on your project page of the Firebase Console, under the “Build” section, select the “Firestore Database” option:
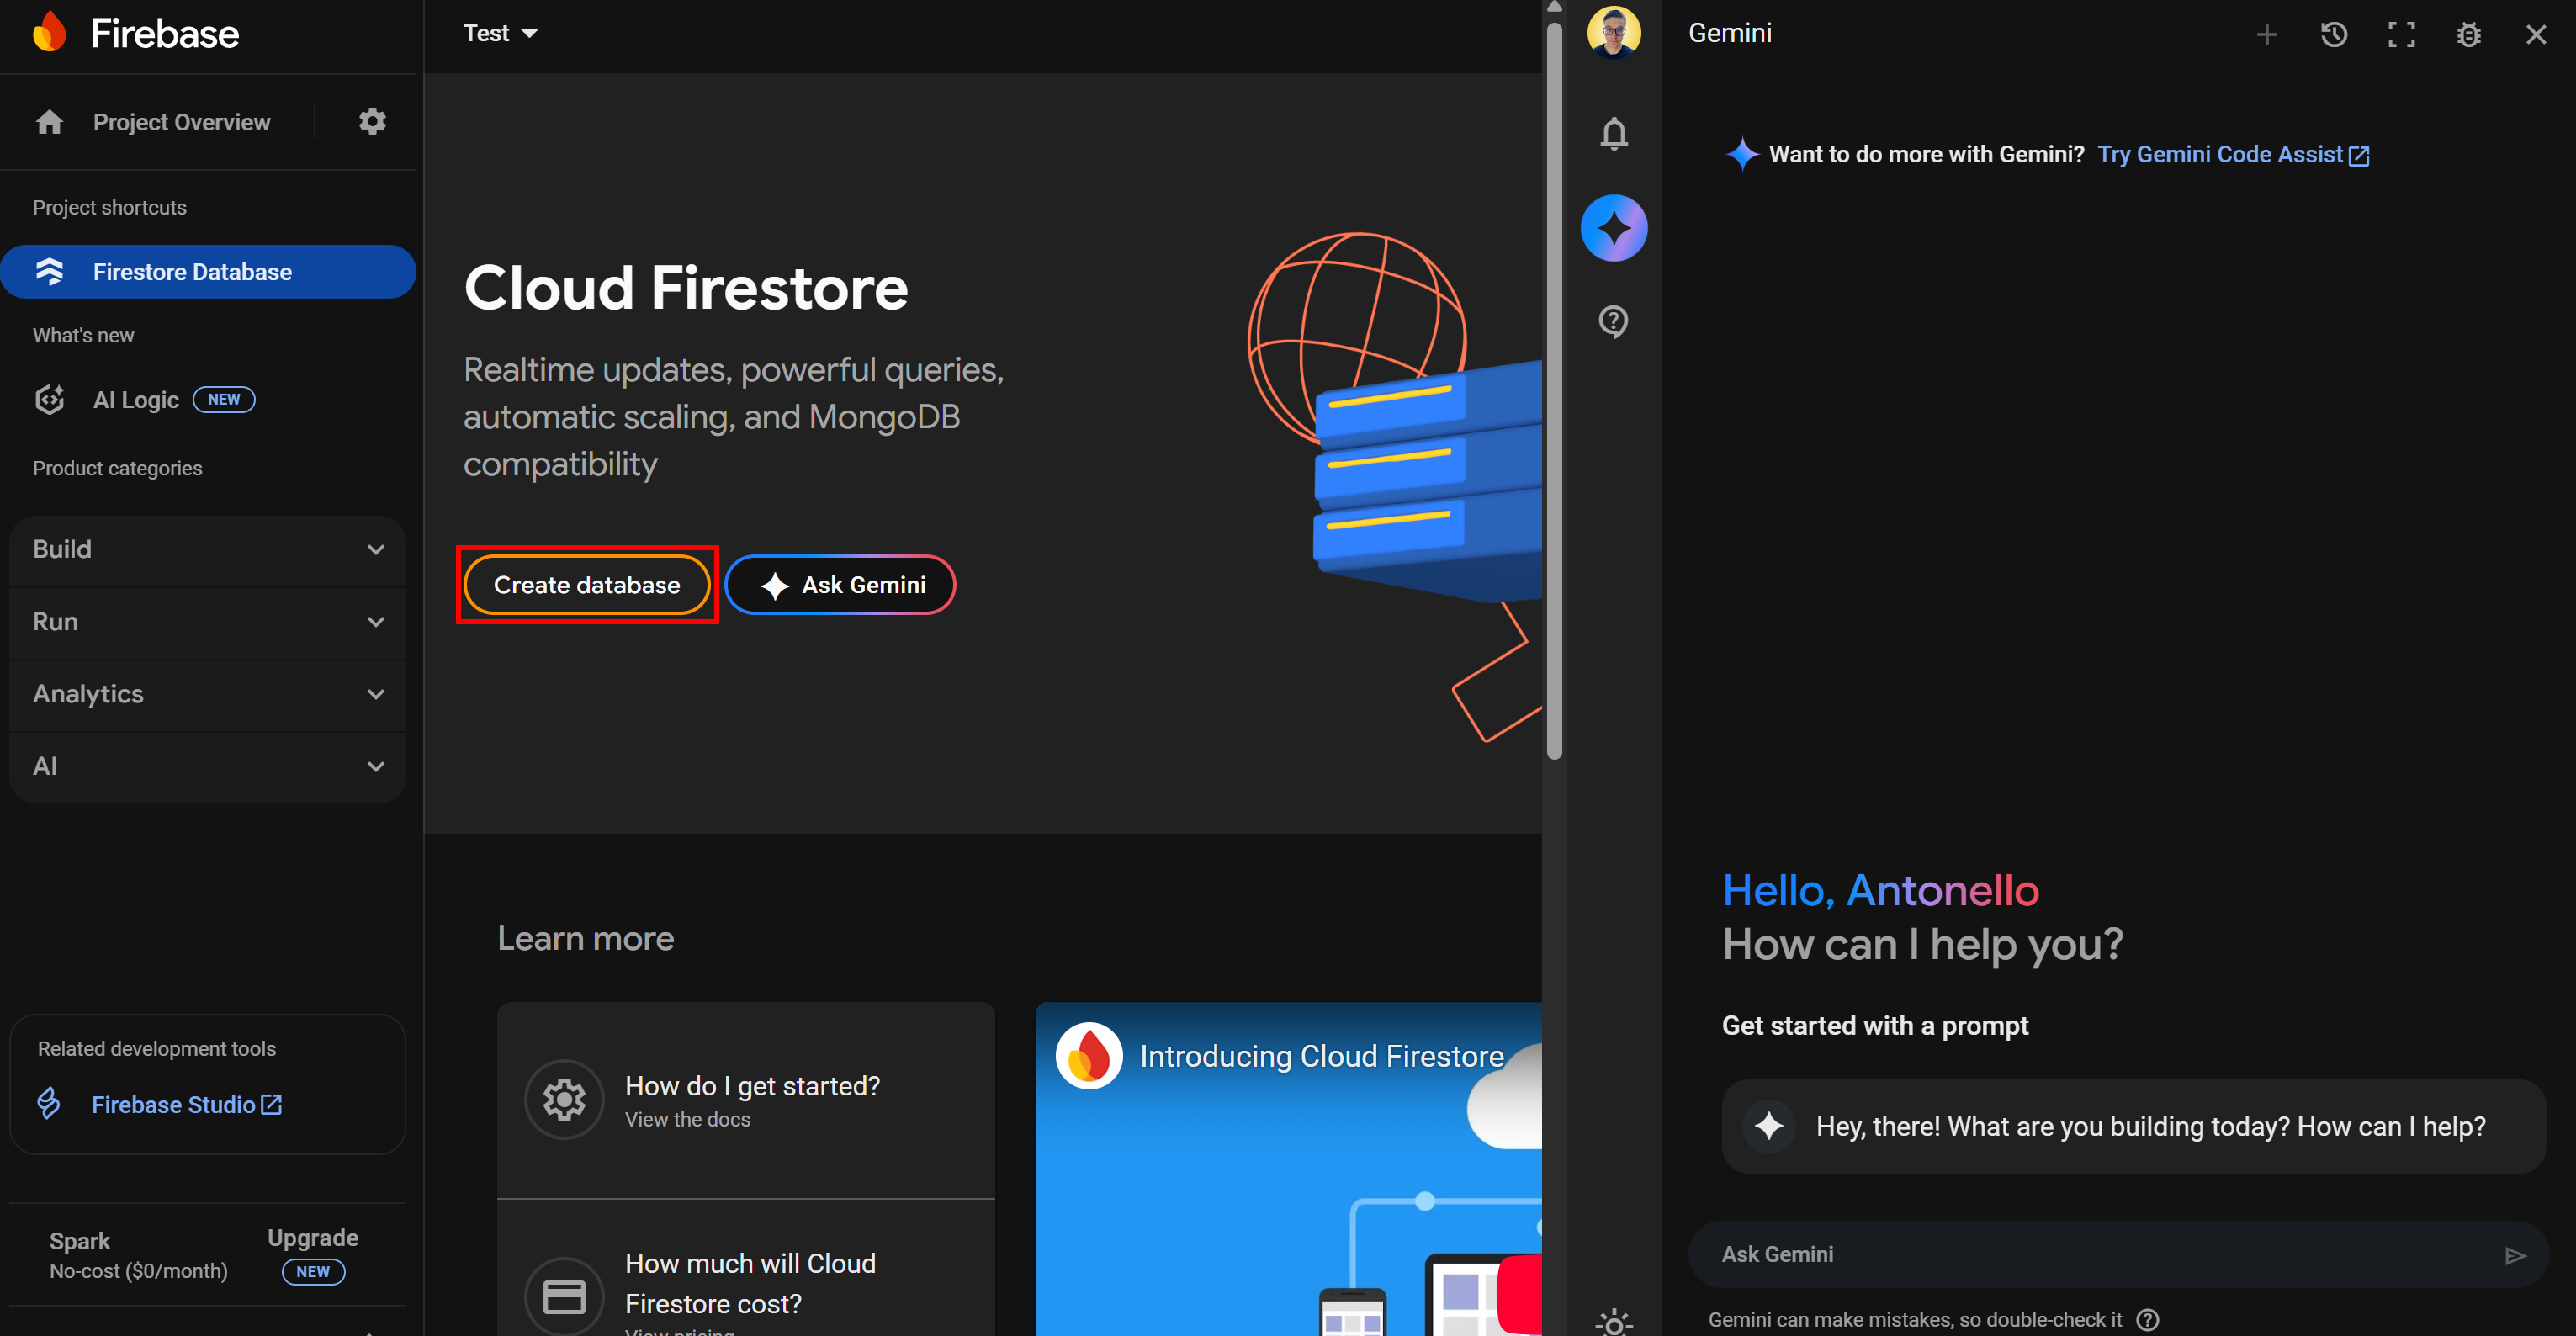
Click “Create database” button and initialize a standard database in production mode:
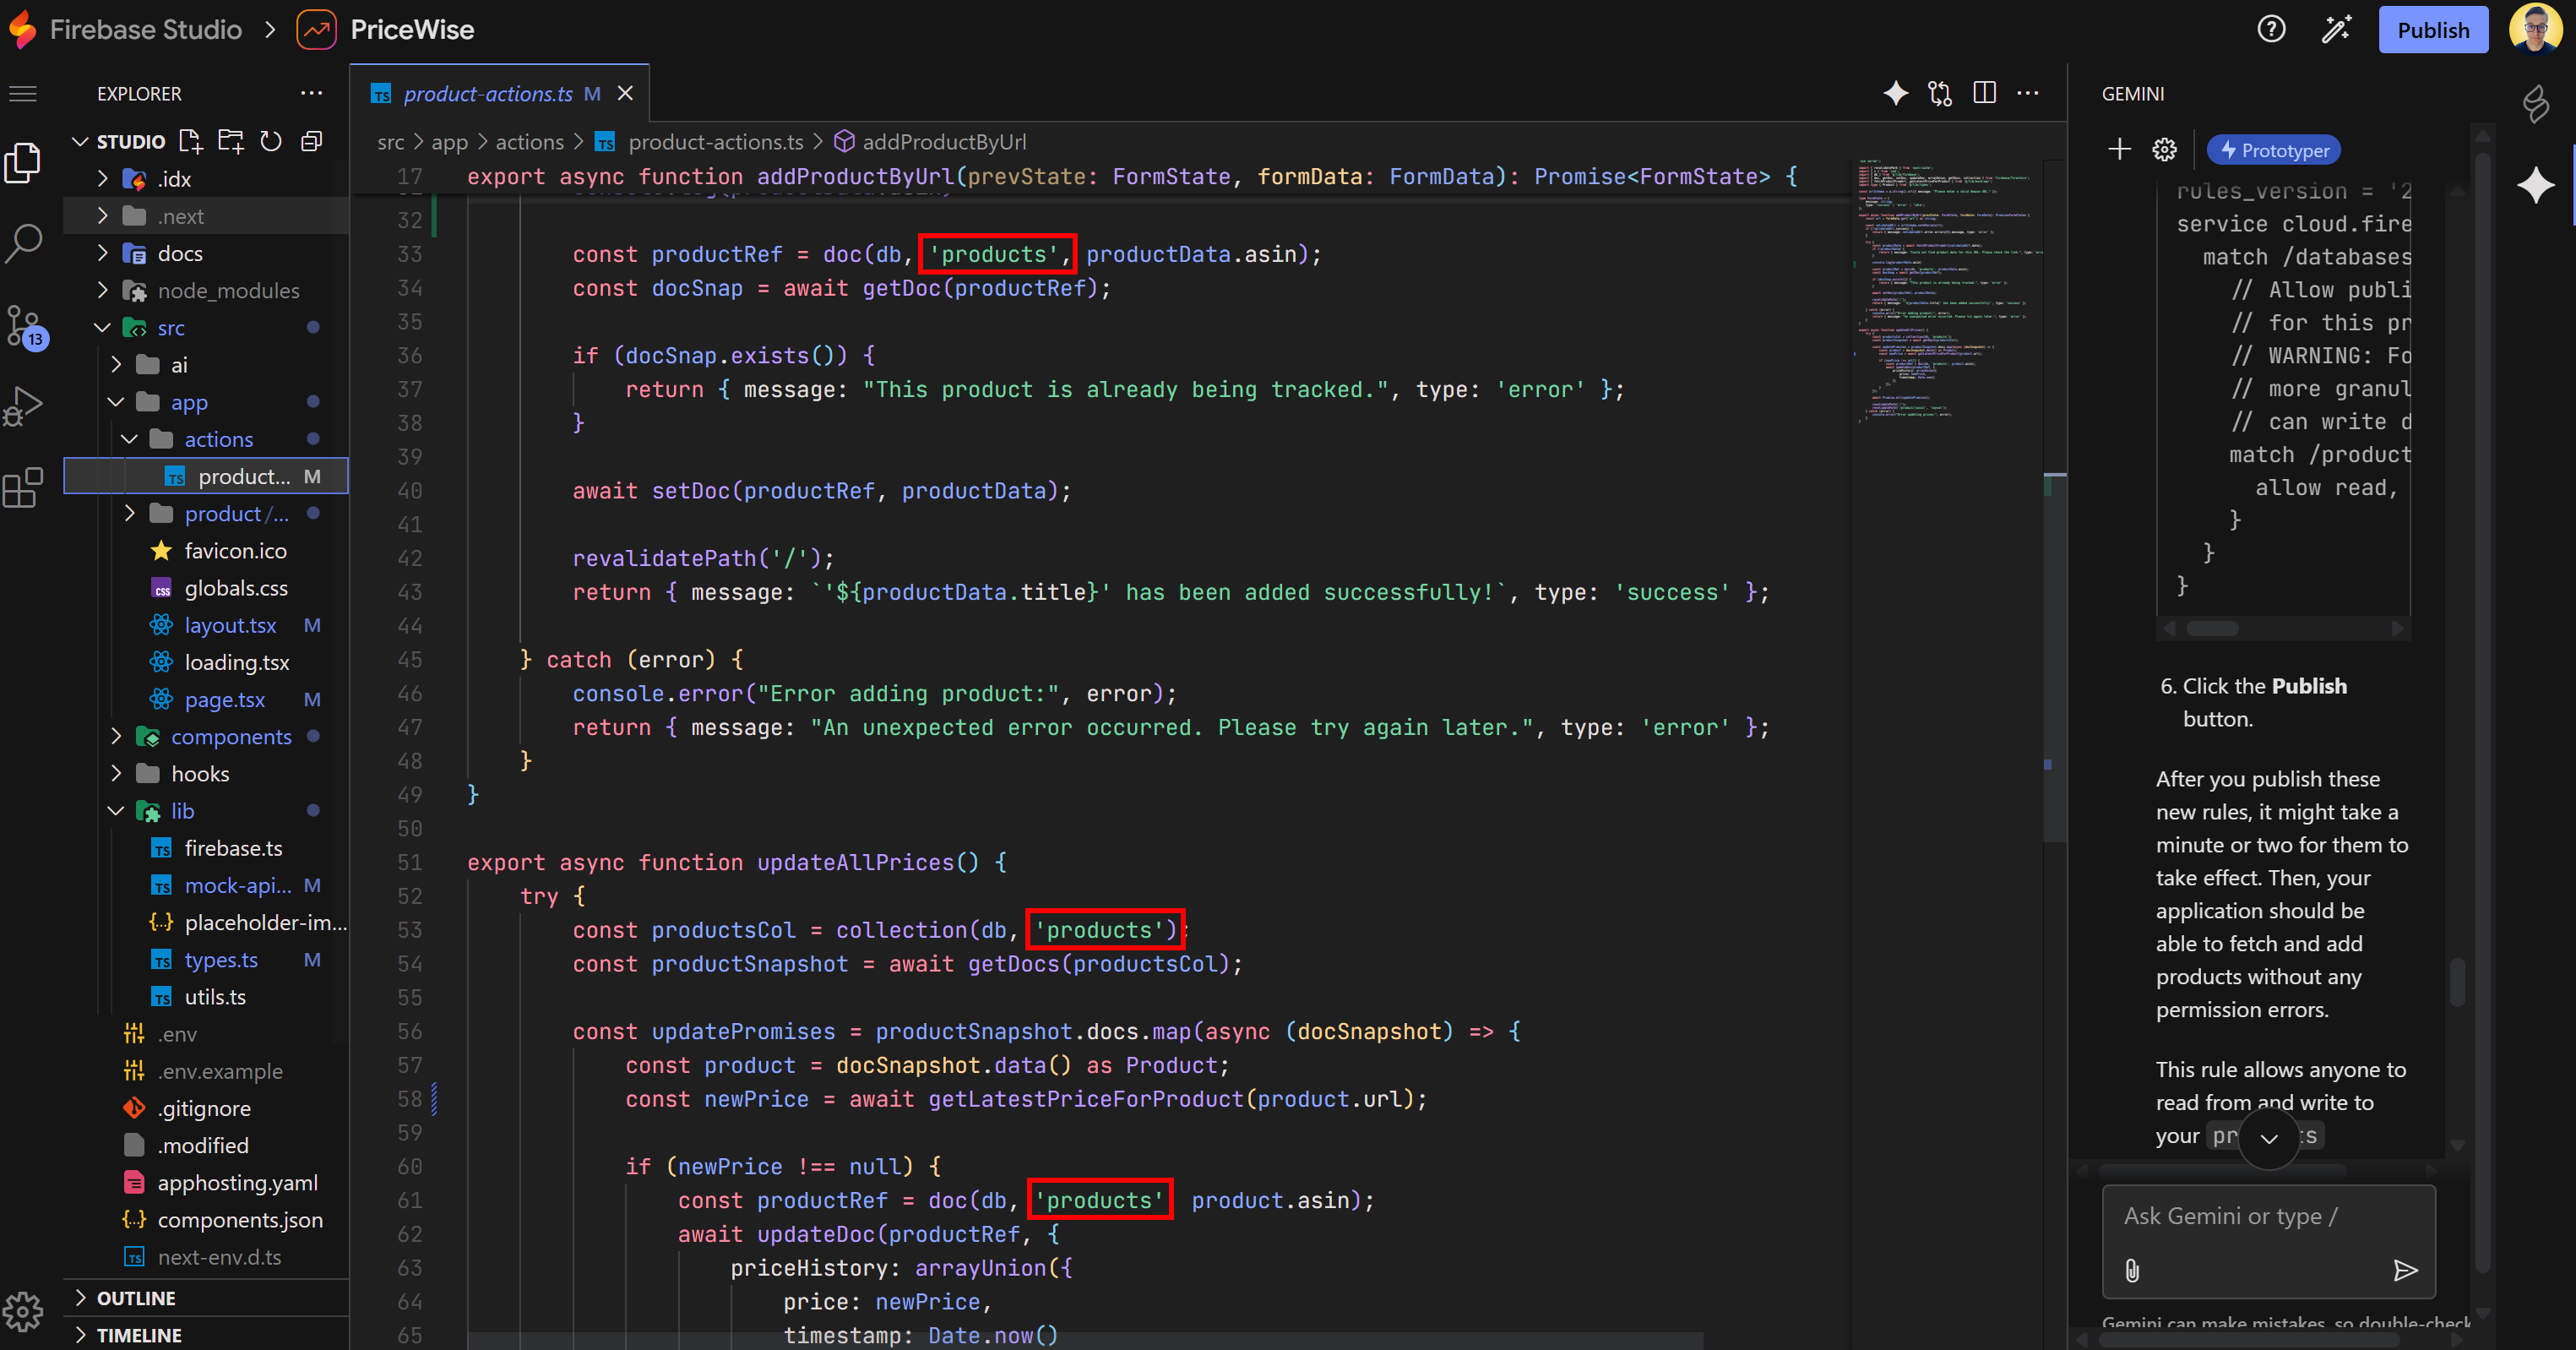
At the top of the Firestore page, reach the “Rules” tab. Add the following rules to allow reading and writing:
rules_version = '2';

service cloud.firestore {
  match /databases/{database}/documents {
    match /{document=**} {
      allow read, write: if true;
    }
  }
}
Then, click “Publish” to update your rules:
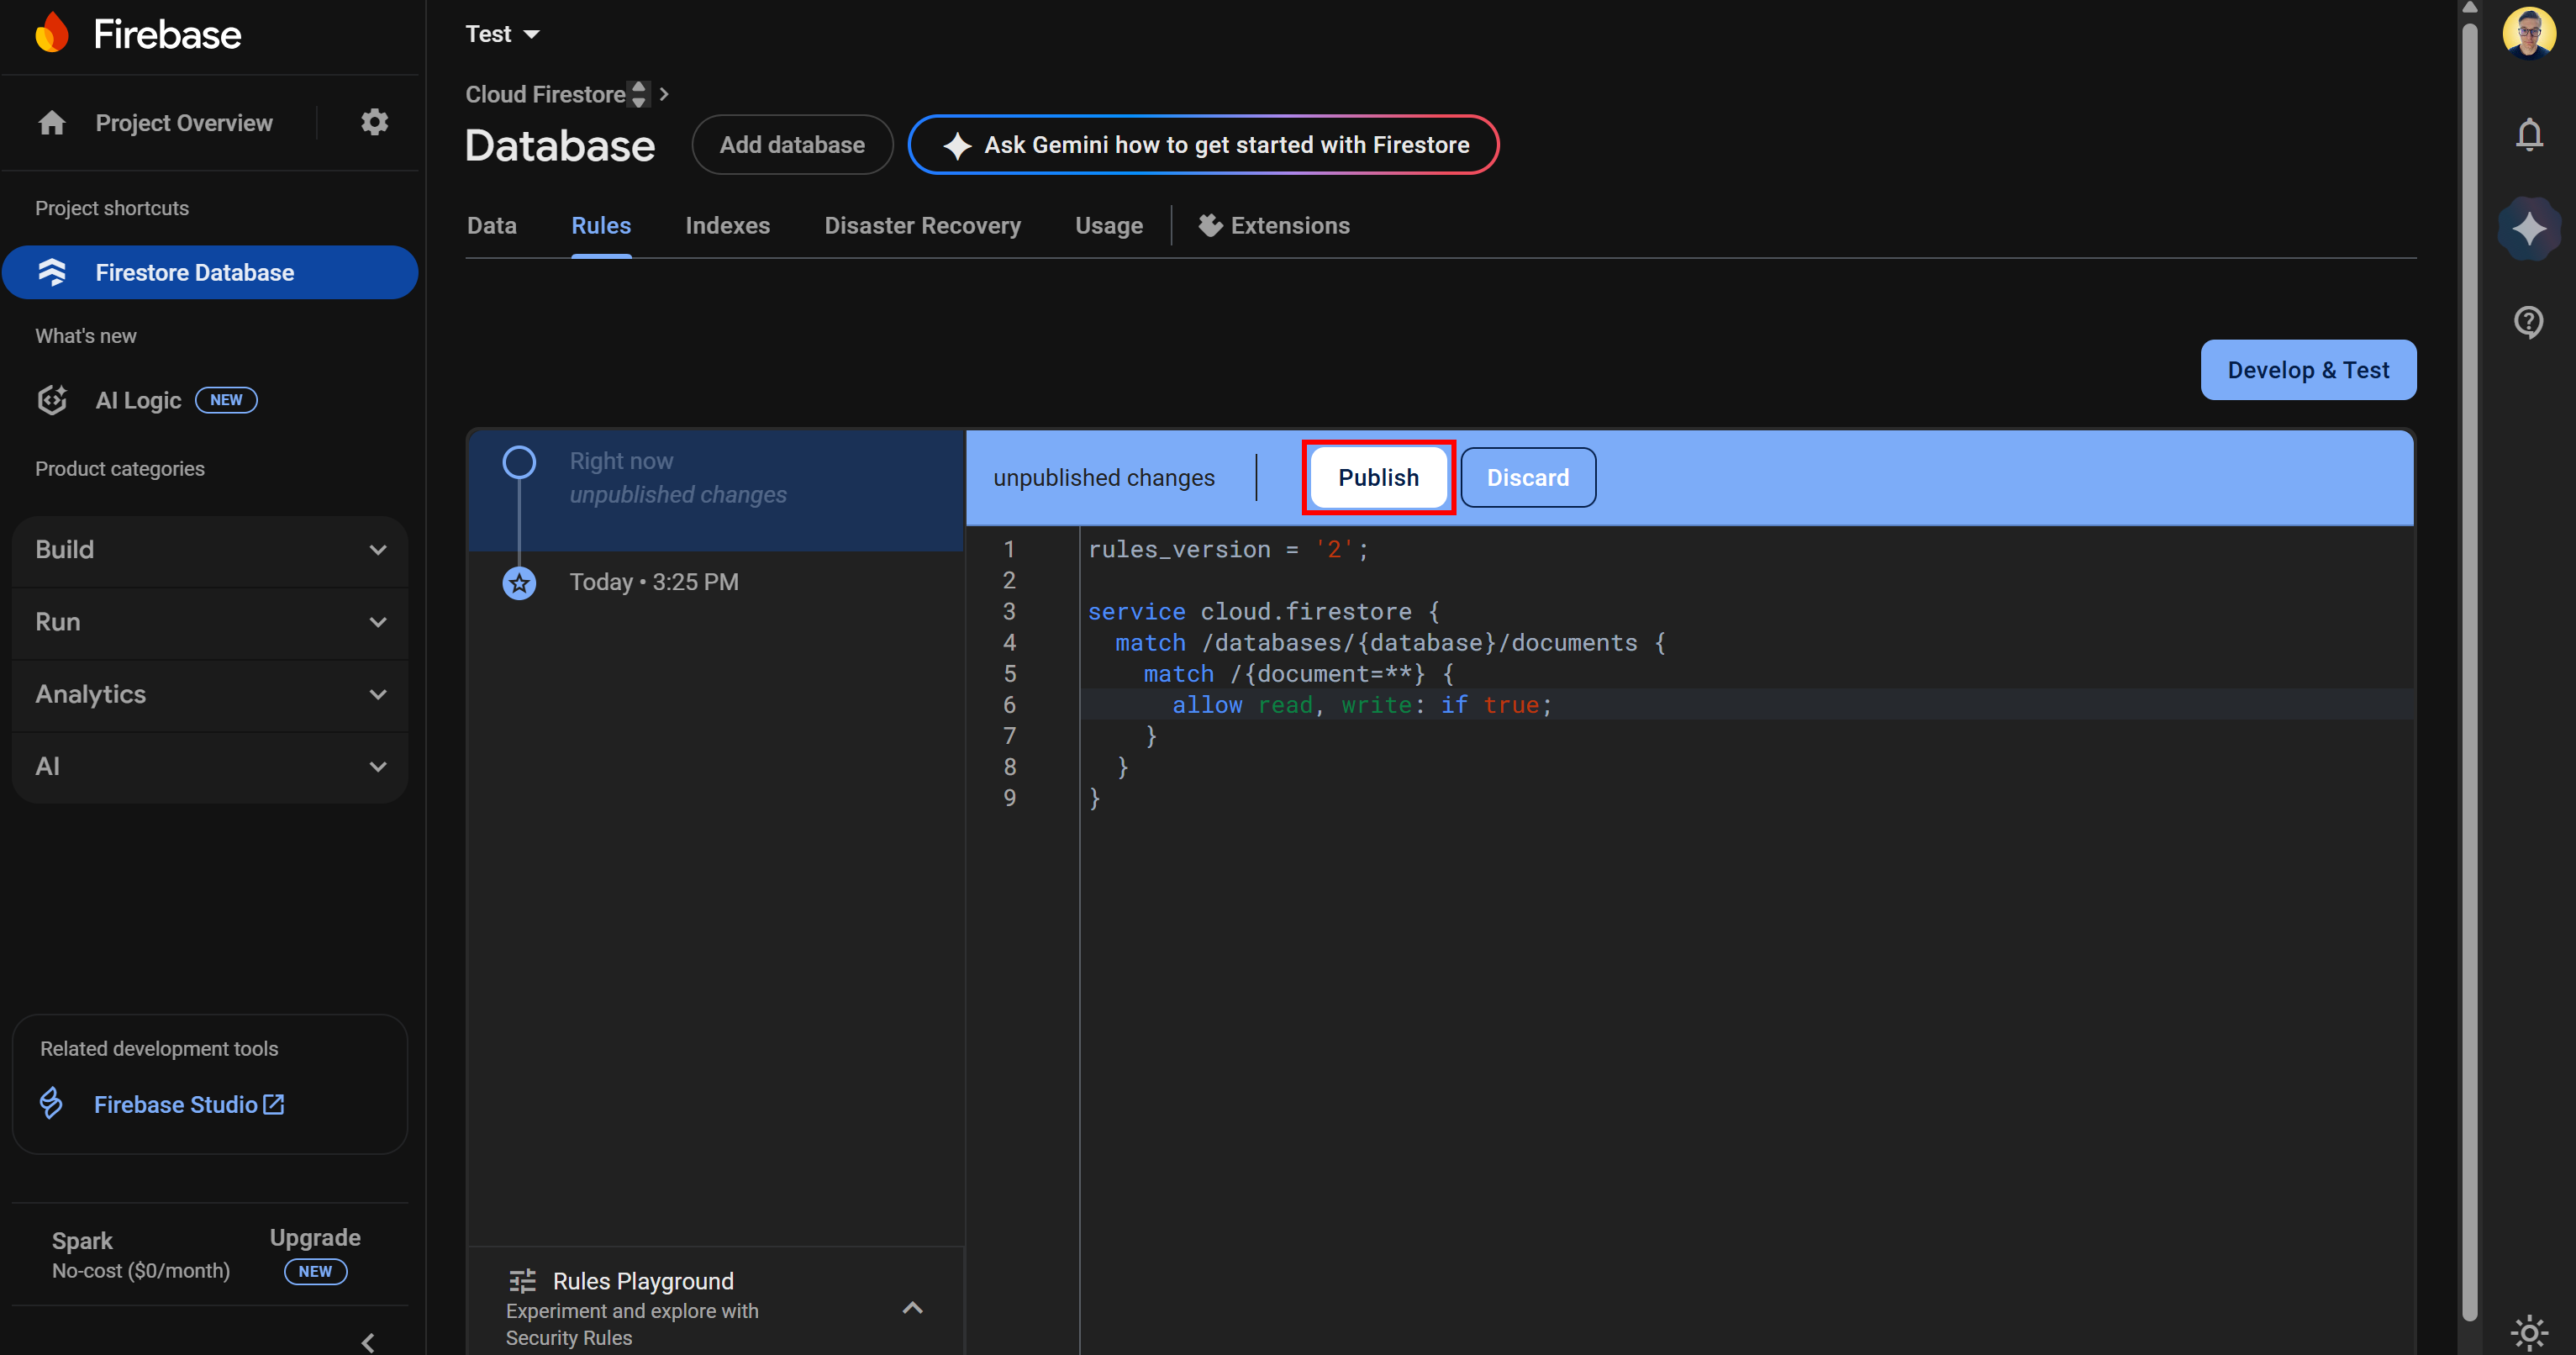
Note: These rules make your database public, so anyone could read, modify, or delete data. This is fine for a prototype, but in production, you must configure more secure, granular rules.
Create a new collection called products (the same name specified in the prompt):
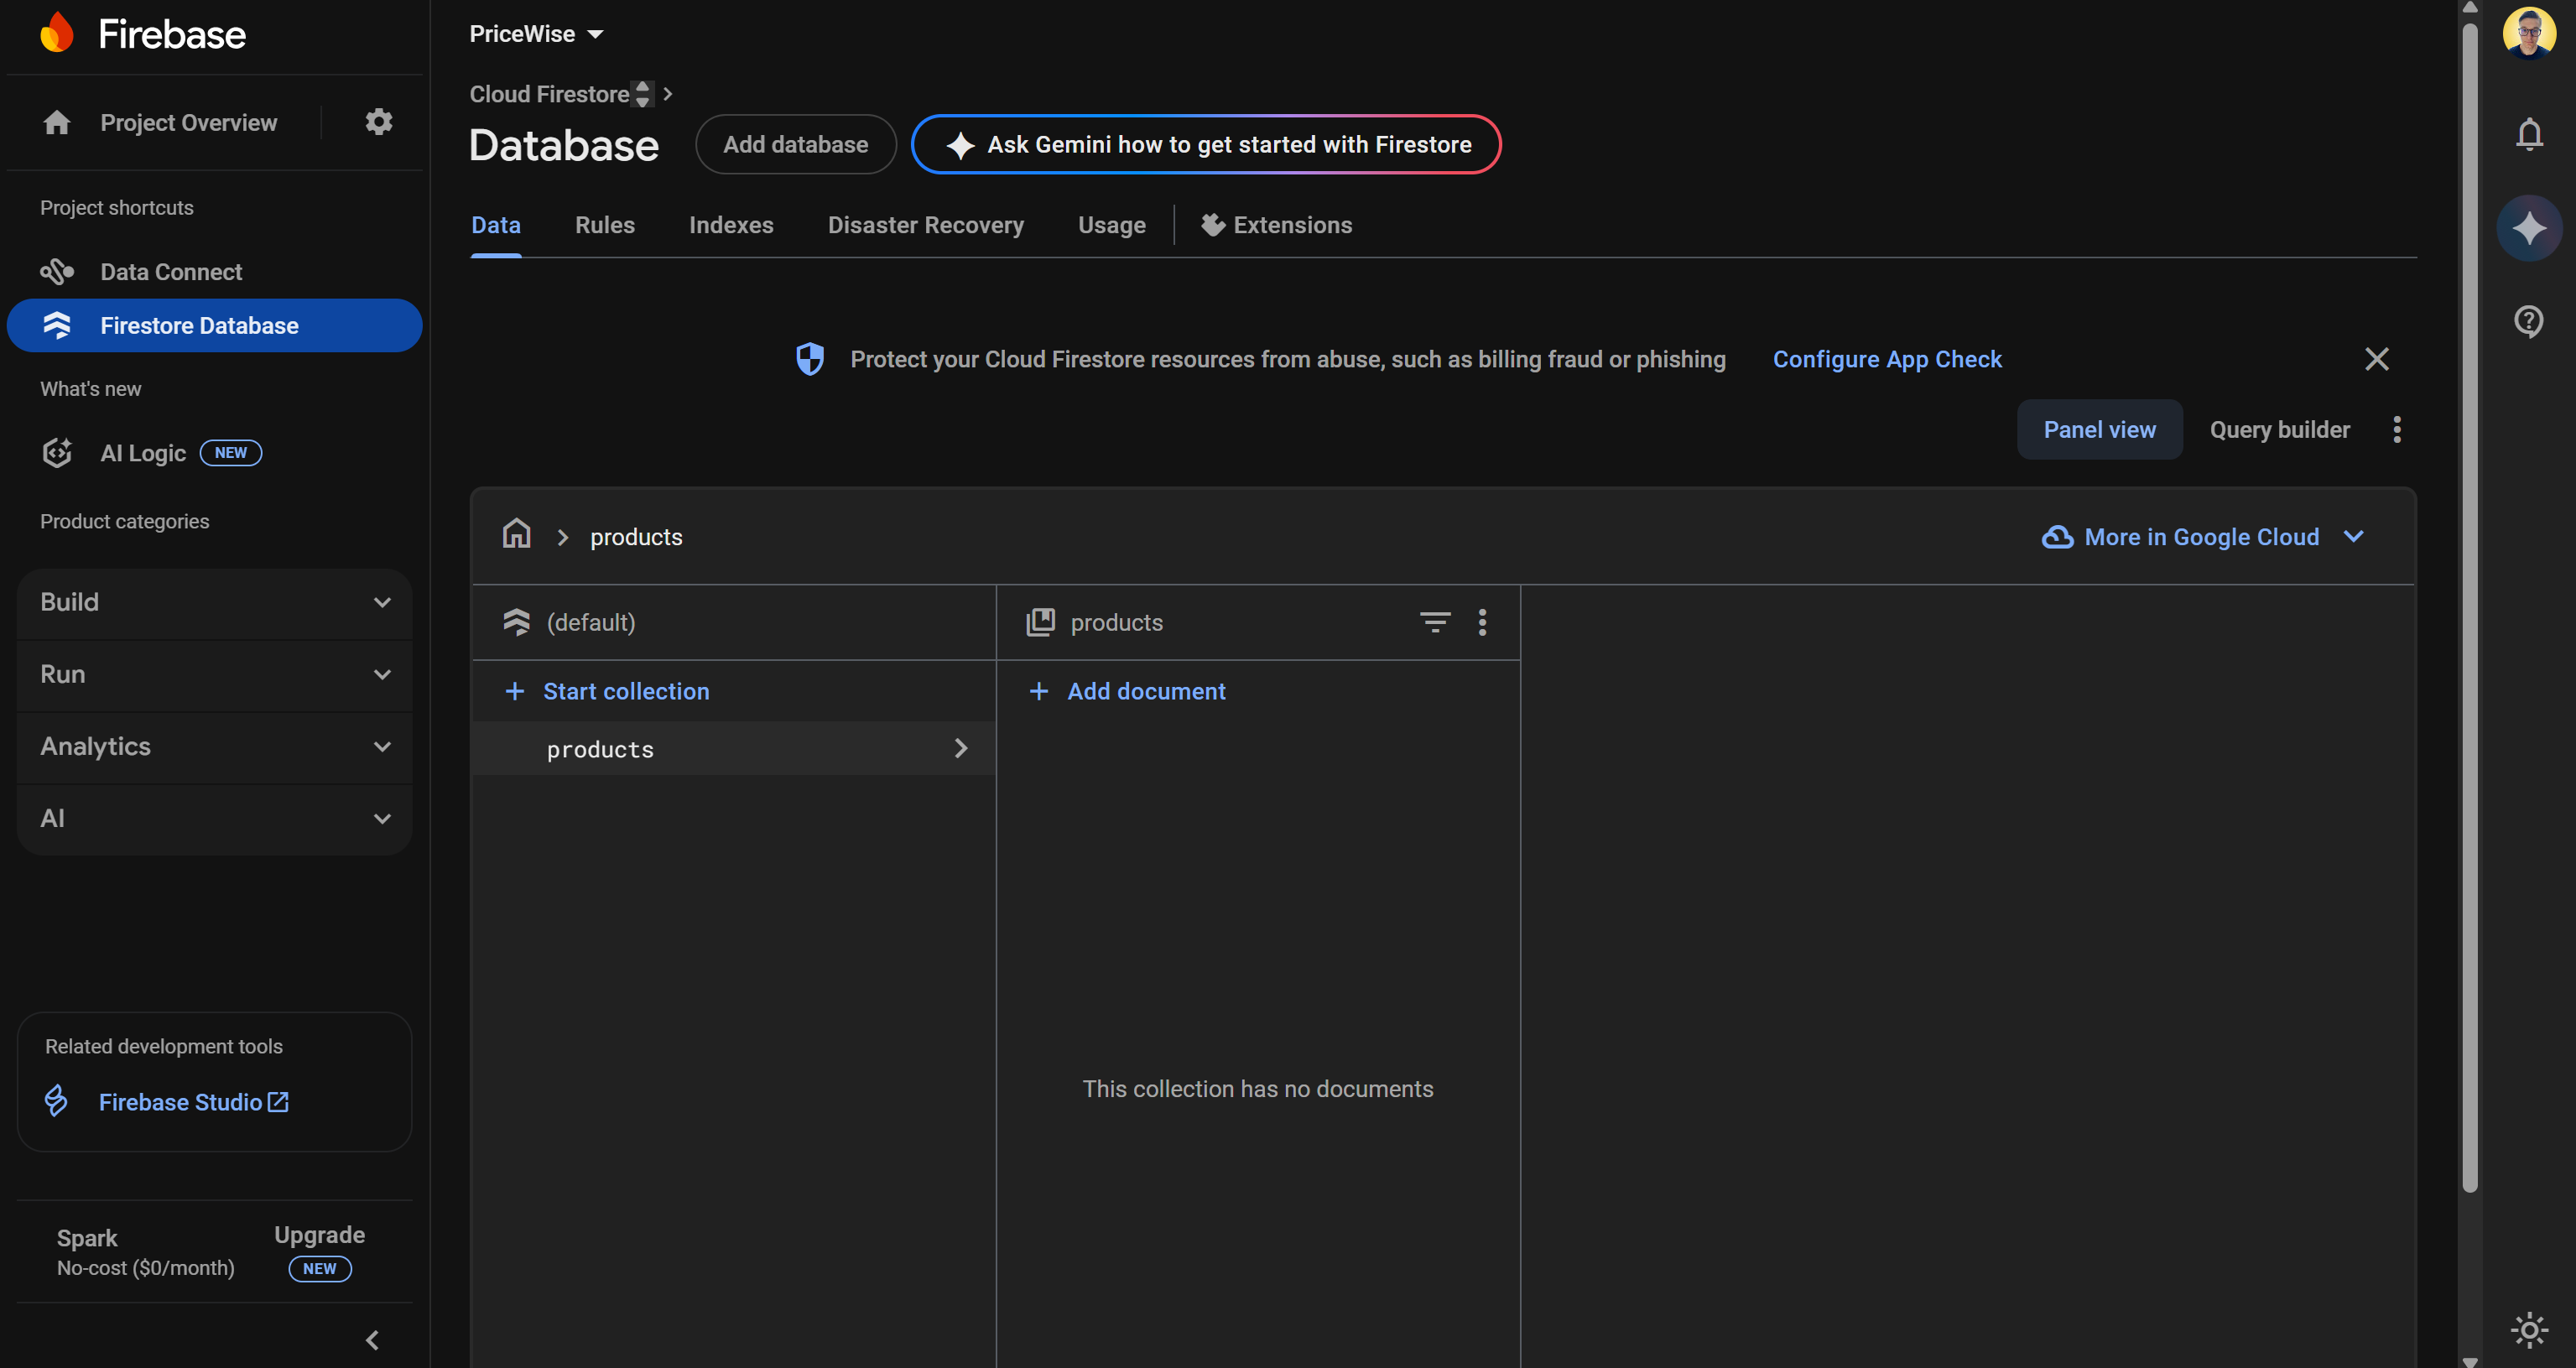
Proceed by creating a new entry and setting the asinc field as a string key. After testing that your application can successfully write to Firestore, remember to delete this sample entry.
Now, in the Google Cloud Console, navigate to the “Google Cloud Firestore API” page. Here, enable your API:
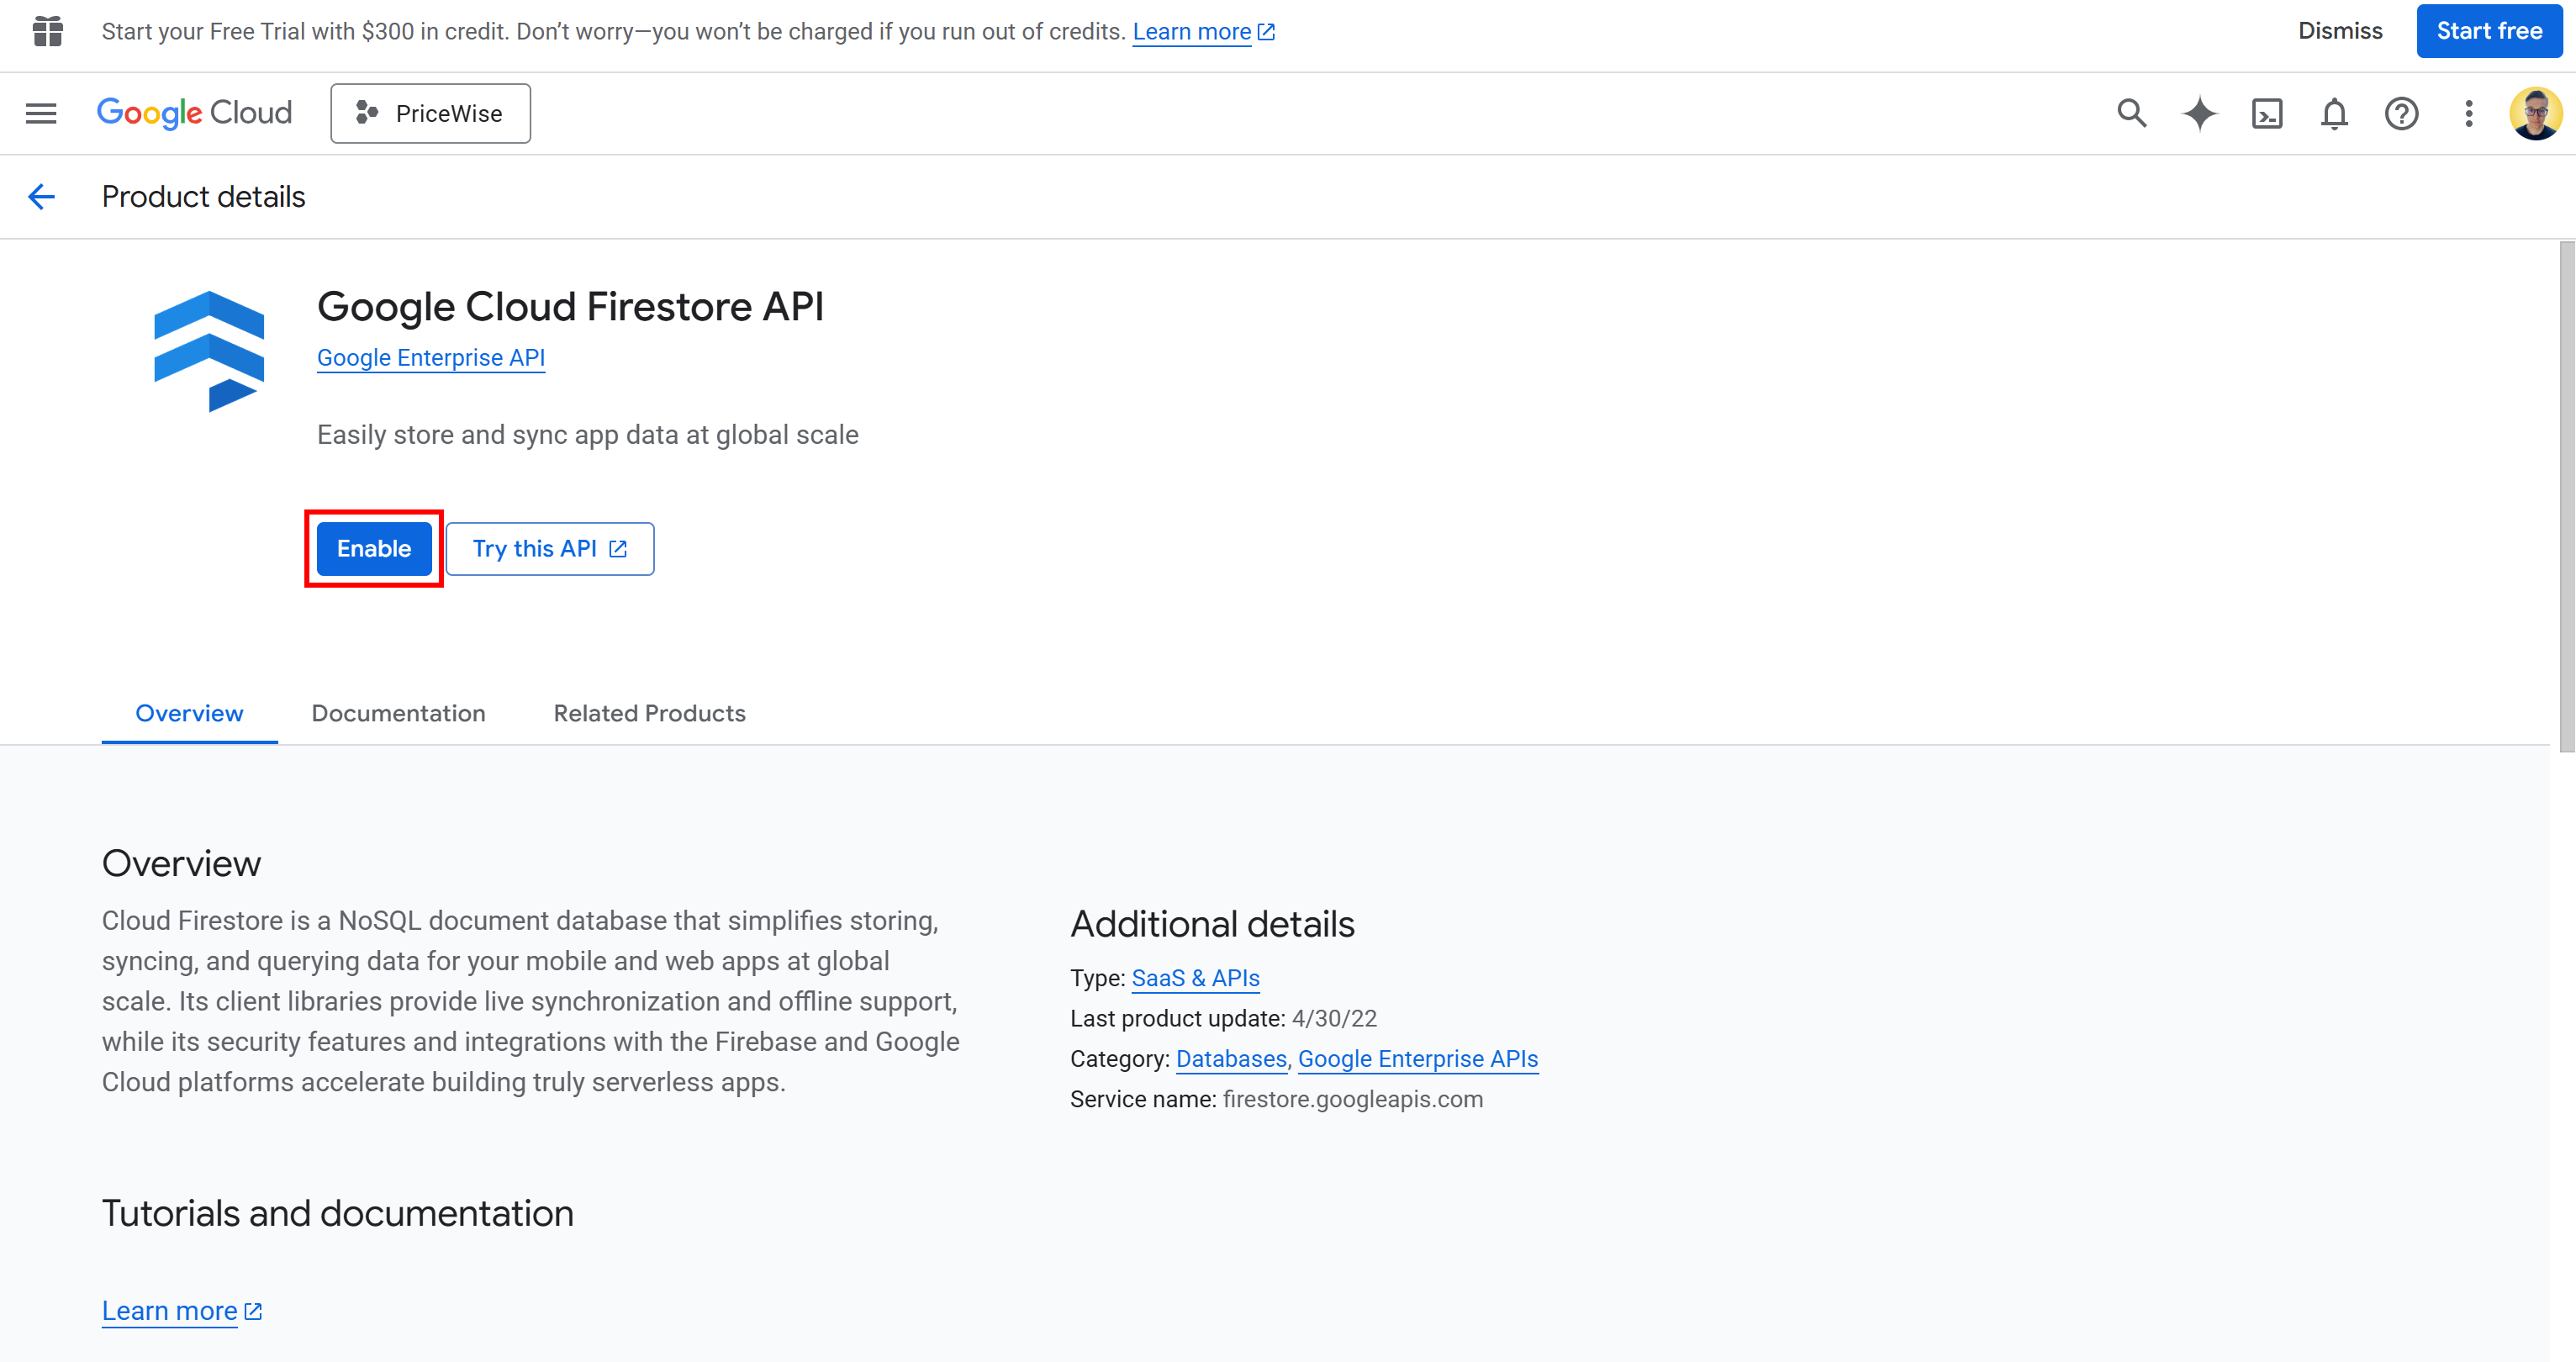
The apiKey field provided in the firebaseConfig object can now be used for connecting to your Firestore database.
Here we go! You now have a Firestore database ready to integrate into your Firebase Studio app.
Step #7: Connect to Firestore
Back in Firebase Studio, inspect your project. Somewhere in your file structure, you should see a file for the Firestore connection. In this case, it is src/lib/firebase.ts:
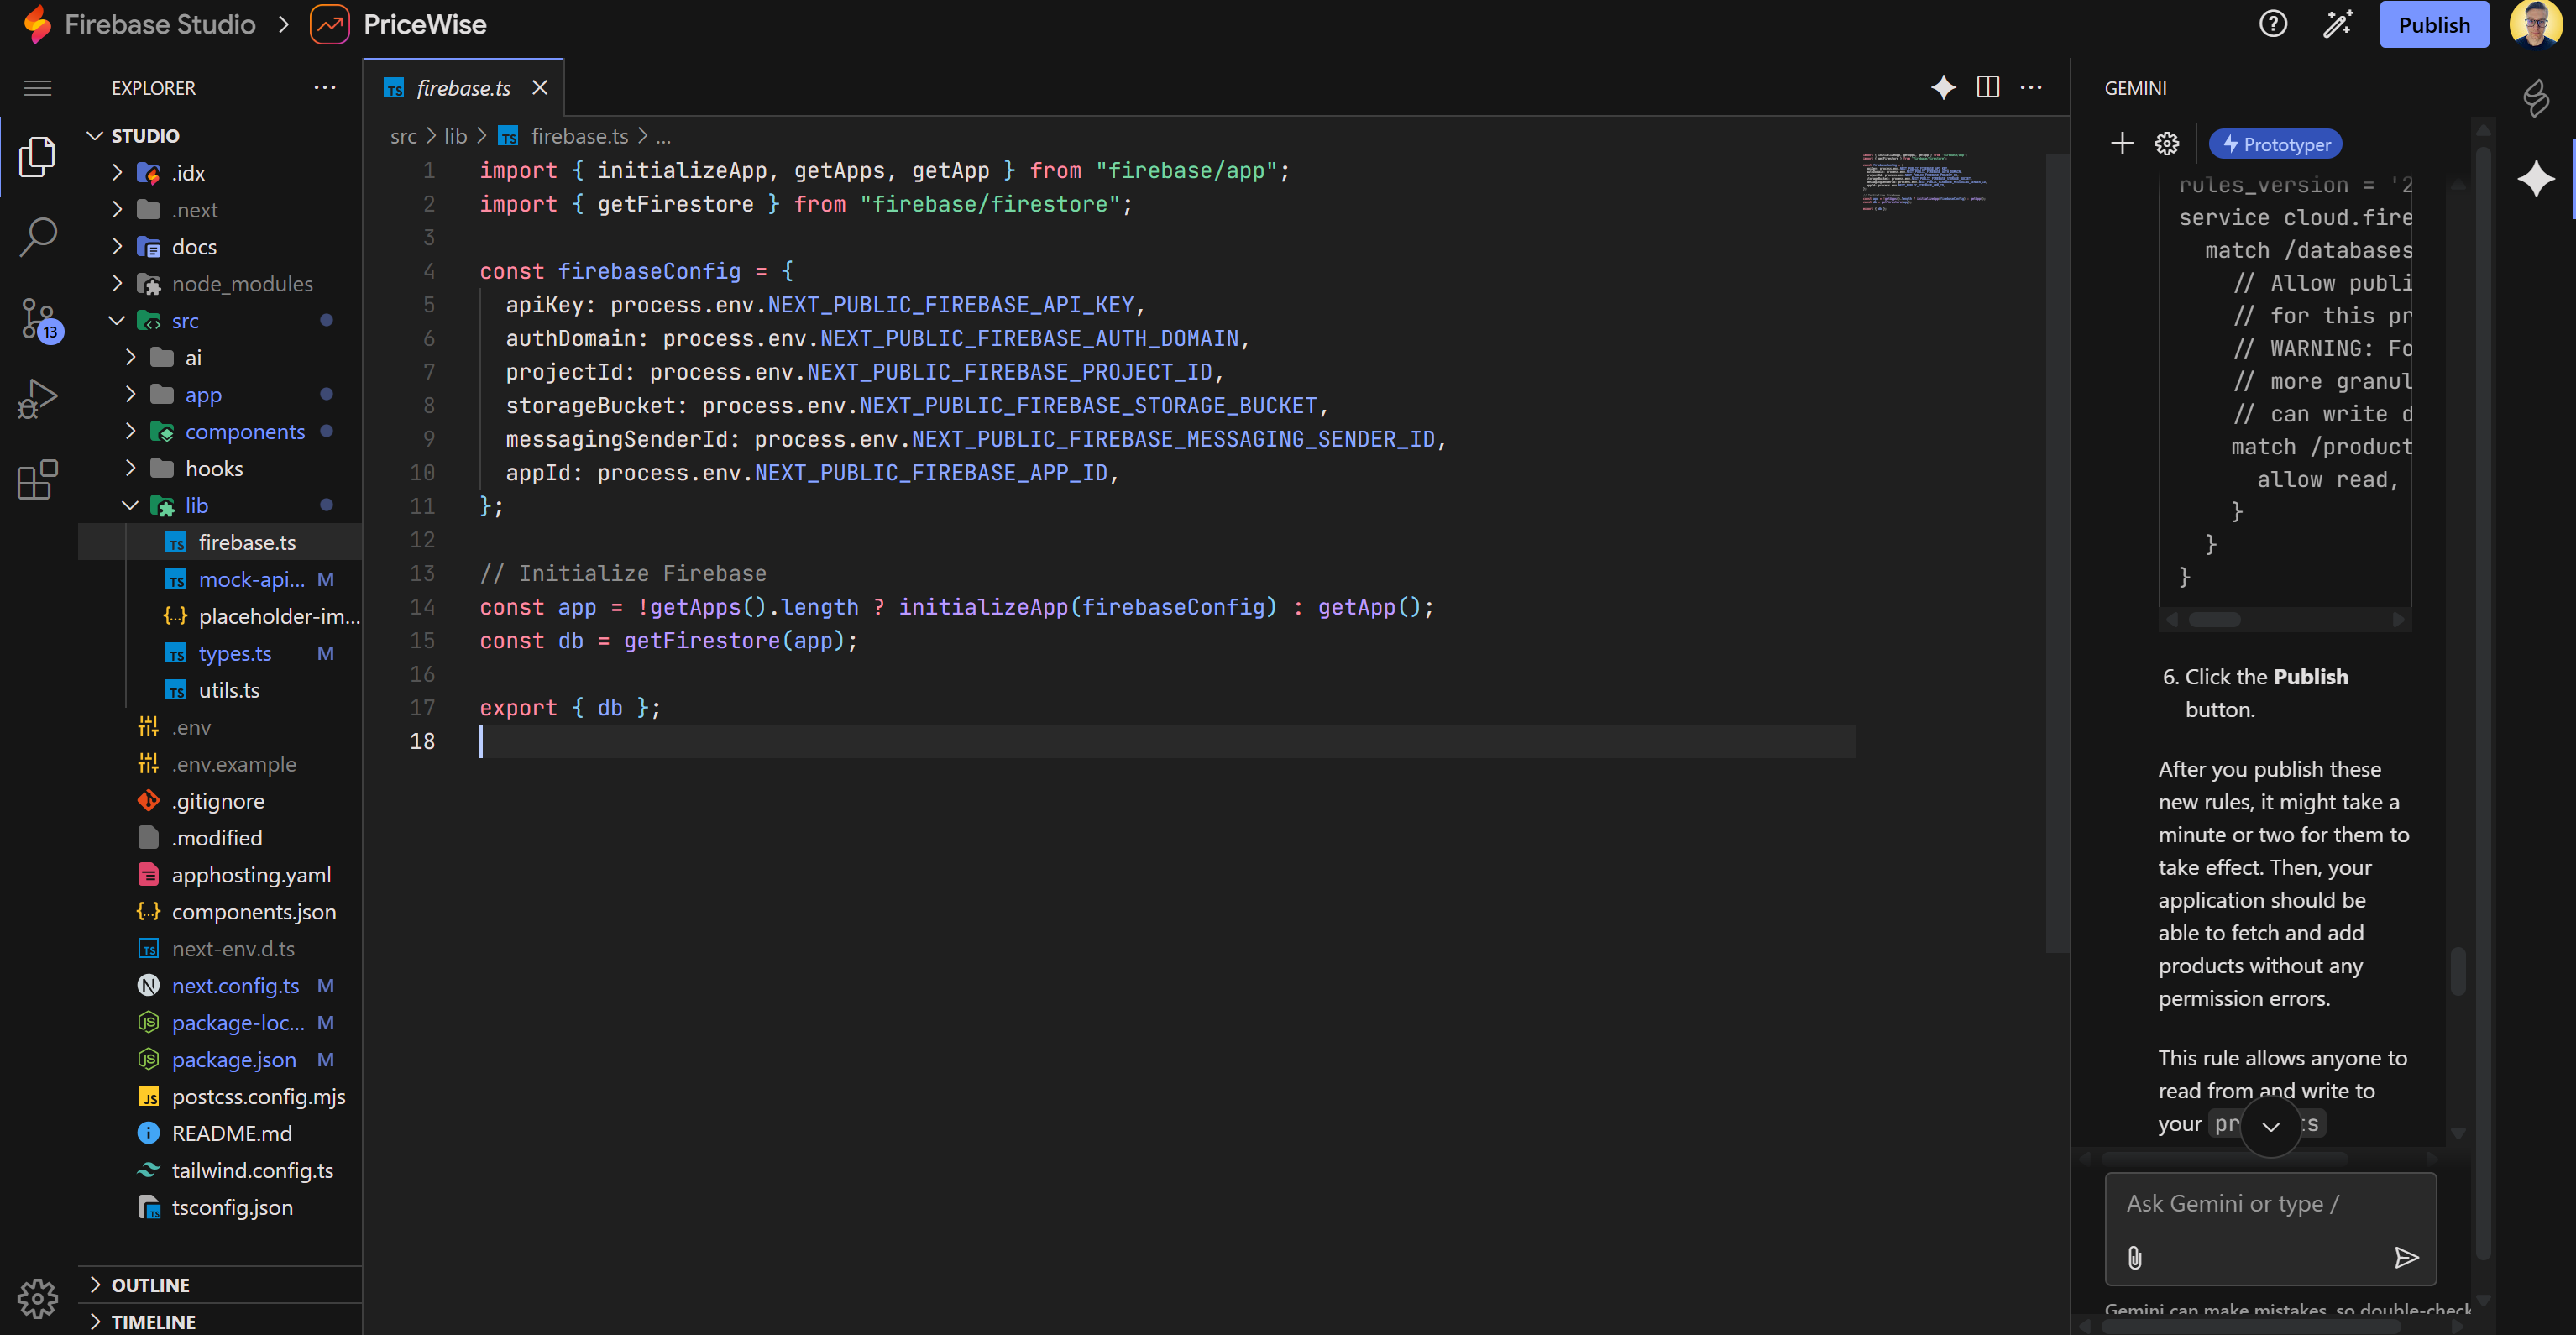
As you can tell, this file expects the Firebase connection credentials to be defined in Next.js public environment variables. Add them to the .env file (which should have been created by the AI; otherwise, create it yourself):
NEXT_PUBLIC_FIREBASE_API_KEY="<YOUR_FIREBASE_API_KEY>"
NEXT_PUBLIC_FIREBASE_AUTH_DOMAIN="<YOUR_FIREBASE_AUTH_DOMAIN>"
NEXT_PUBLIC_FIREBASE_PROJECT_ID="<FIREBASE_PROJECT_ID>"
NEXT_PUBLIC_FIREBASE_STORAGE_BUCKET="<YOUR_FIREBASE_STORAGE_BUCKET>"
NEXT_PUBLIC_FIREBASE_MESSAGING_SENDER_ID="<YOUR_FIREBASE_MESSAGING_SENDER_ID>"
NEXT_PUBLIC_FIREBASE_APP_ID="<YOUR_FIREBASE_APP_ID>"Note: These values come from the firebaseConfig object you got earlier.
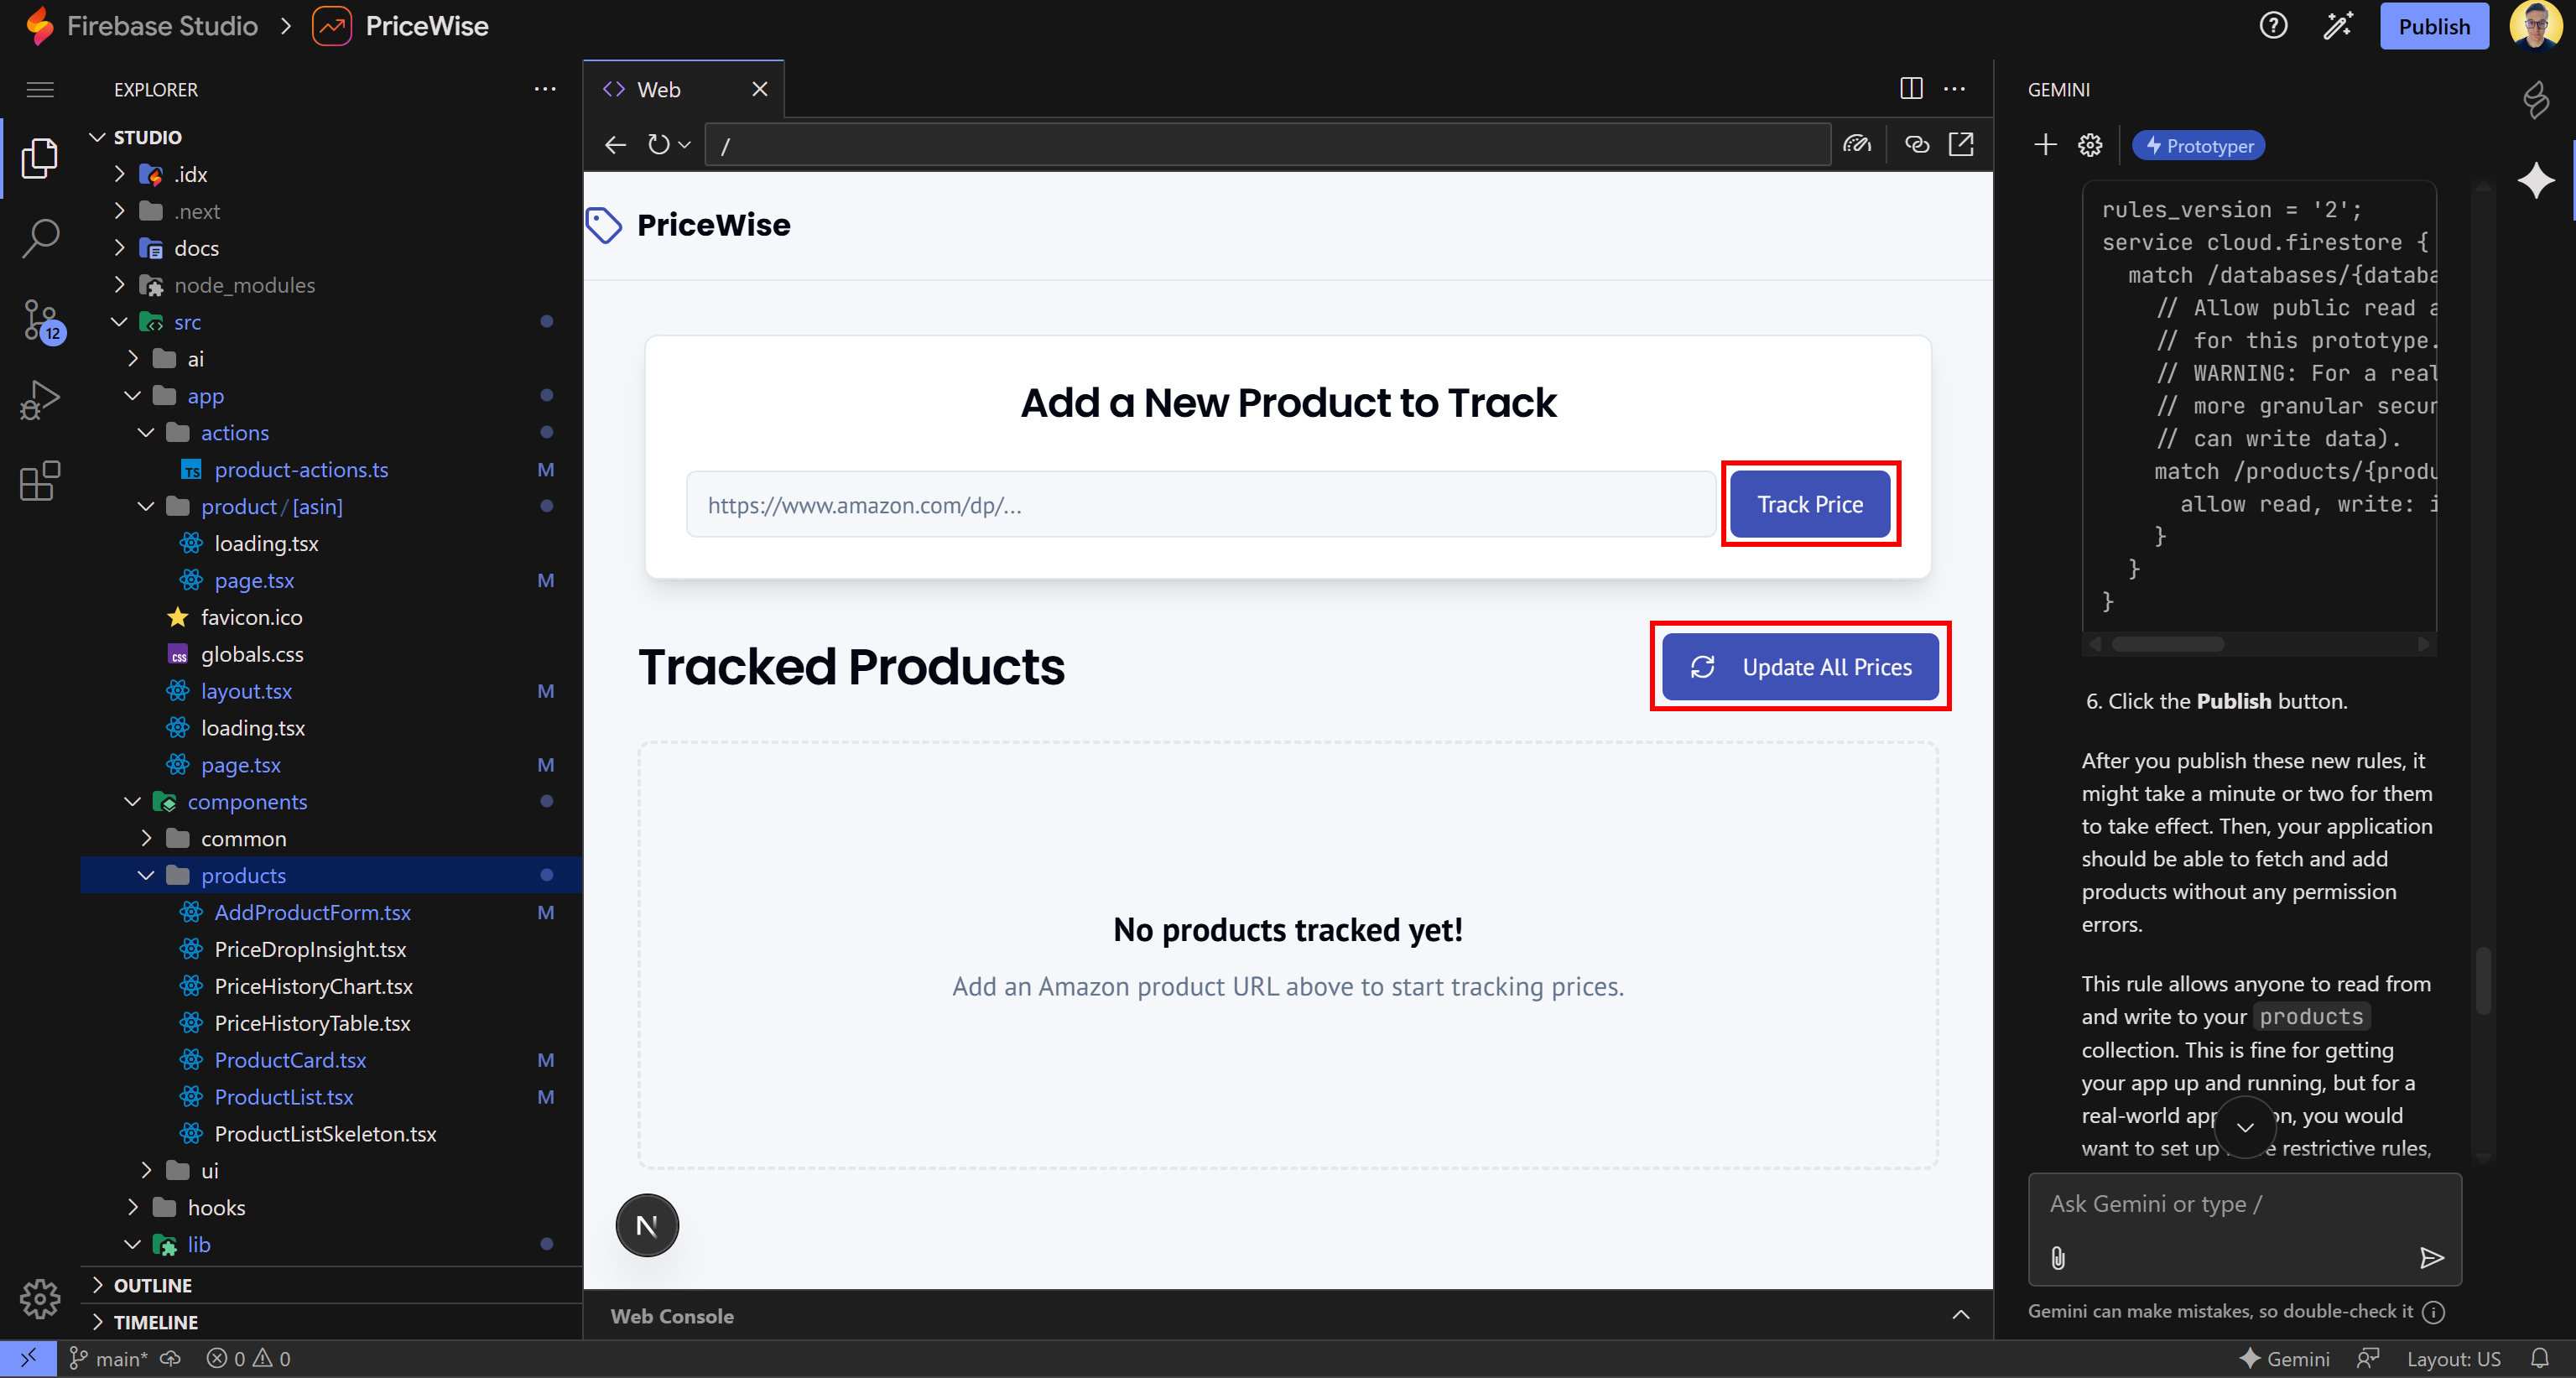
In the “Web” tab, perform a hard restart to ensure that all changes are properly reloaded. Your Firebase application should now be able to connect to Firestore.
If you want to check that the application is correctly operating on the products collection, explore the code. You should see something like this:
Notice that the application works on the products collection as intended.
Cool! One step closer to completing your prototype.
Step #8: Integrate Bright Data
Currently, the Amazon product info and price retrieval logic is mocked (in this case, in a src/lib/mock-api.ts file):
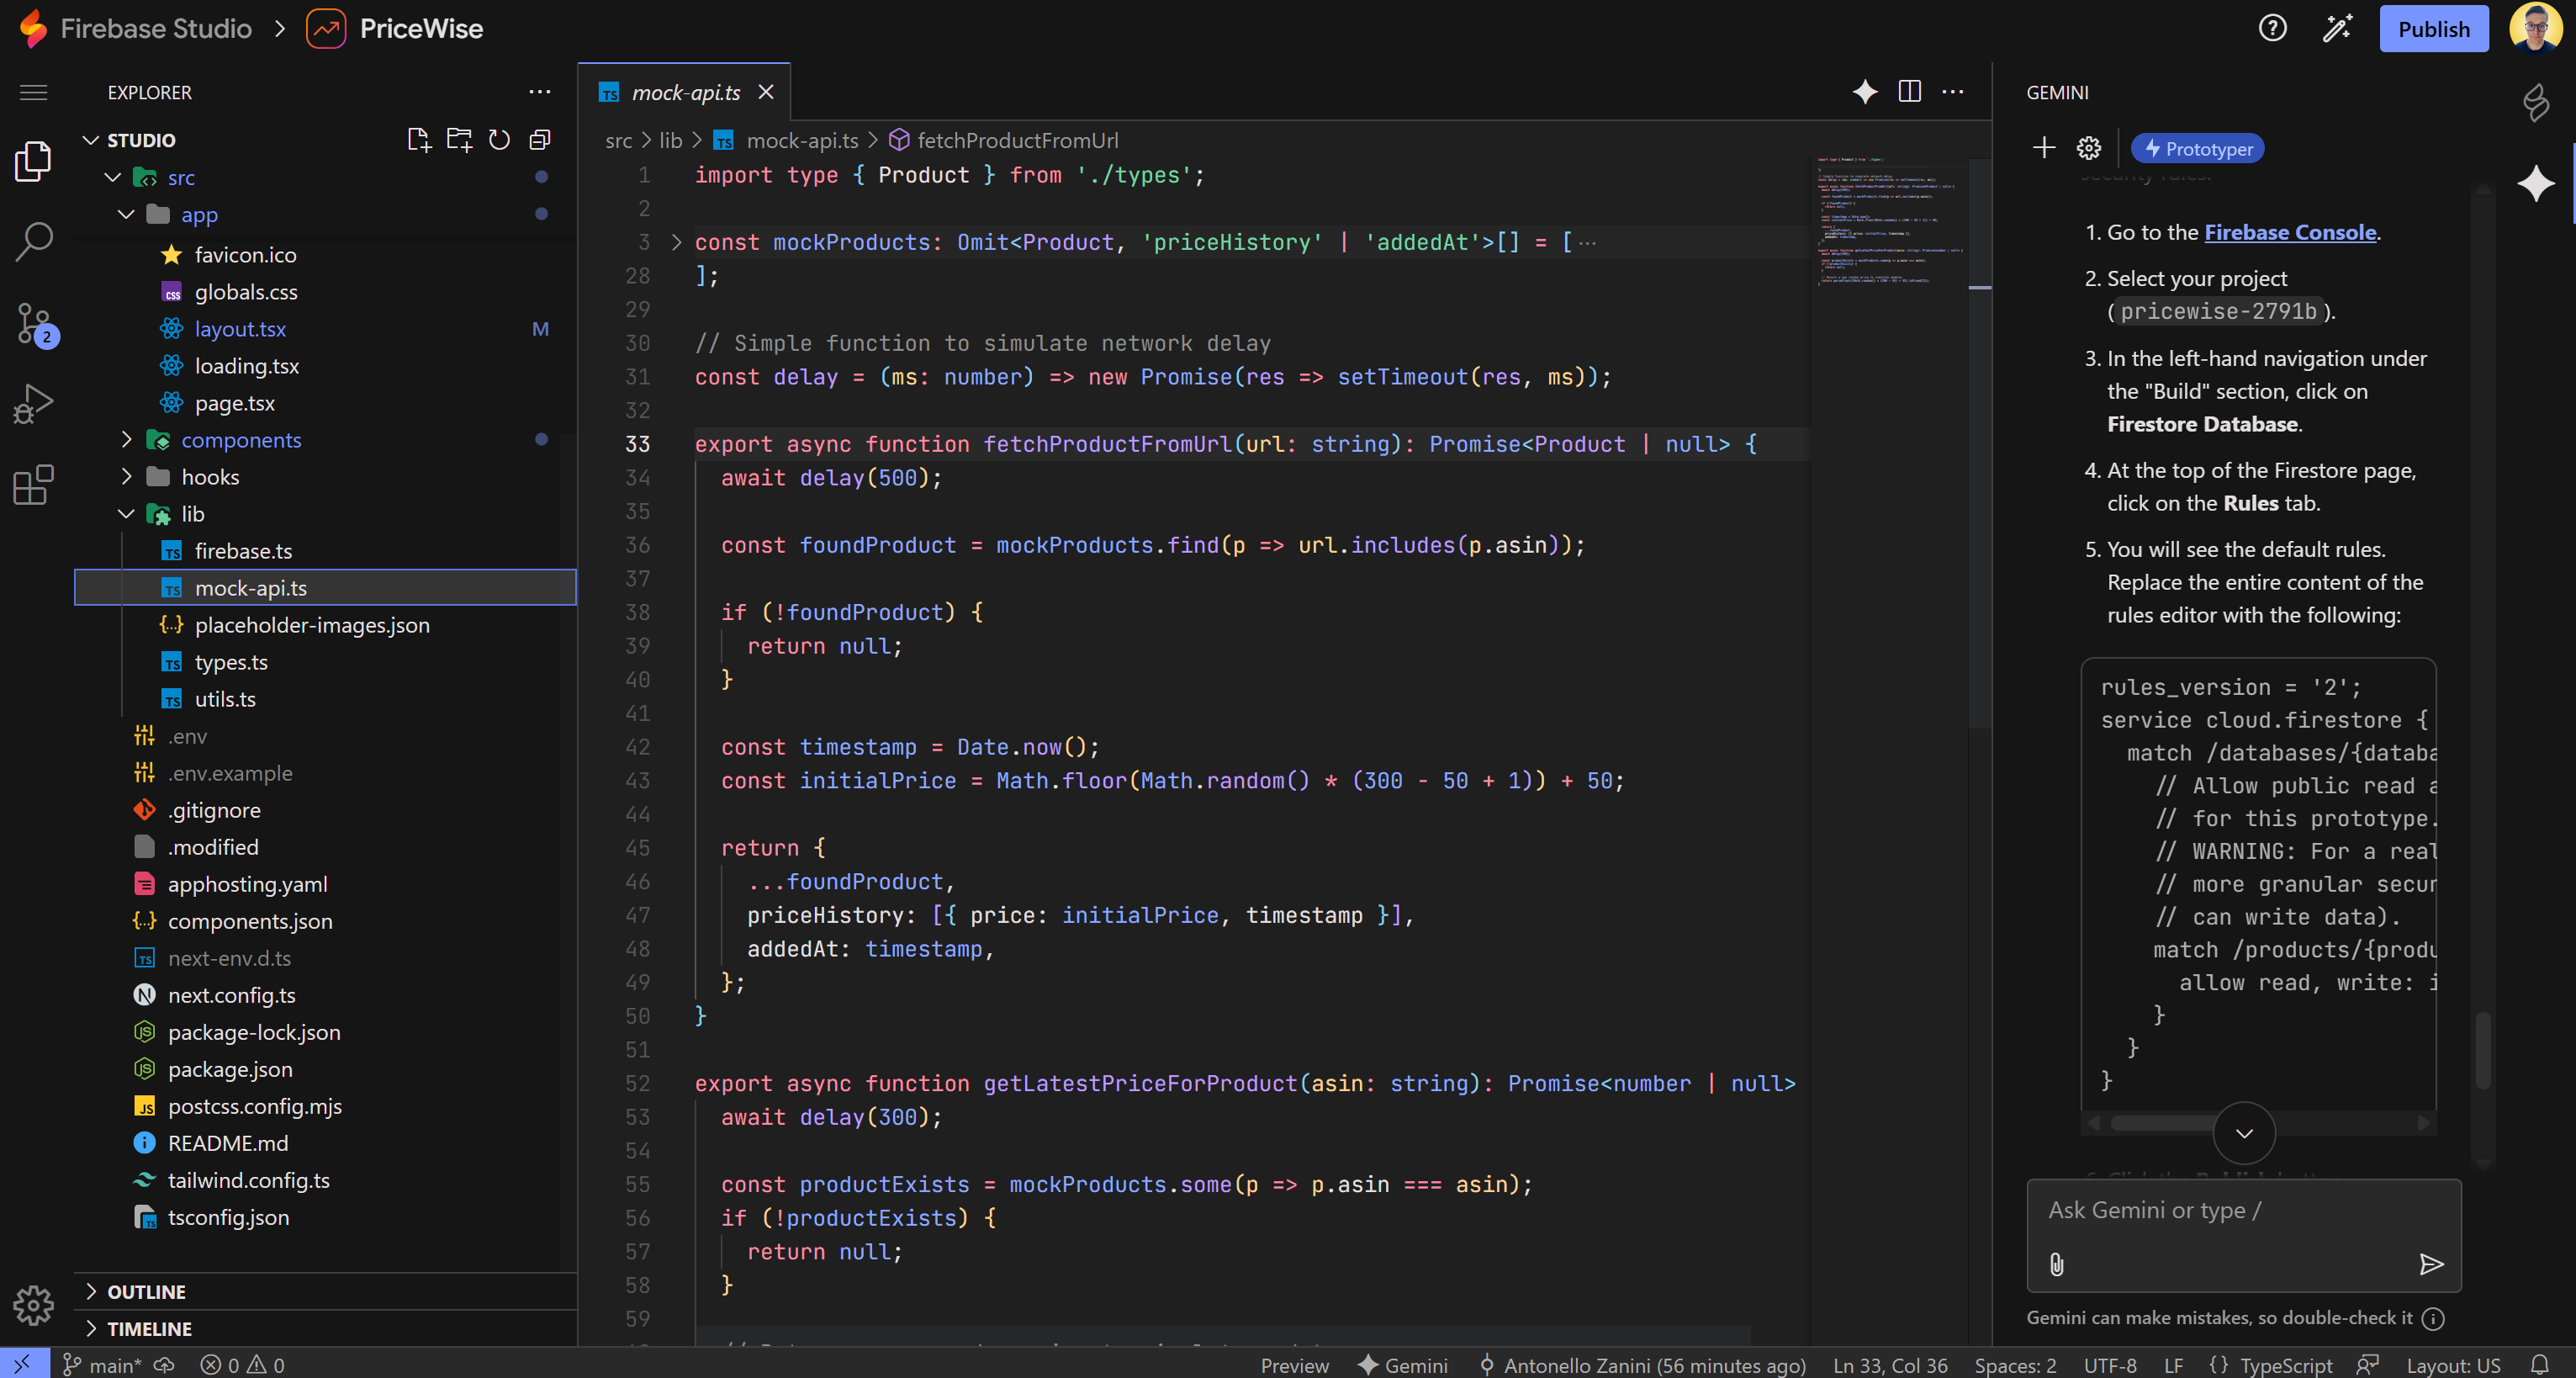
This file contains the two main low-level data retrieval functions that are called in the business logic of the “Track Price” and Update All Prices” buttons:
Specifically, the mock-api.ts defines the two functions:
fetchProductFromUrl(): Mocks fetching Amazon product information from a given product URL.getLatestPriceForProduct(): Mocks fetching the latest price for a given Amazon product.
What you need to do next is replace that mock logic with real calls to Bright Data’s Amazon Scraper via API.
Start by logging into your Bright Data account or creating a new one if you have not yet. Navigate to the “API Request Builder” tab for the “Amazon Products – Collect by URL” scraper. Select the “Node (Axios)” option to get a code snippet showing how to call the API to retrieve product data:
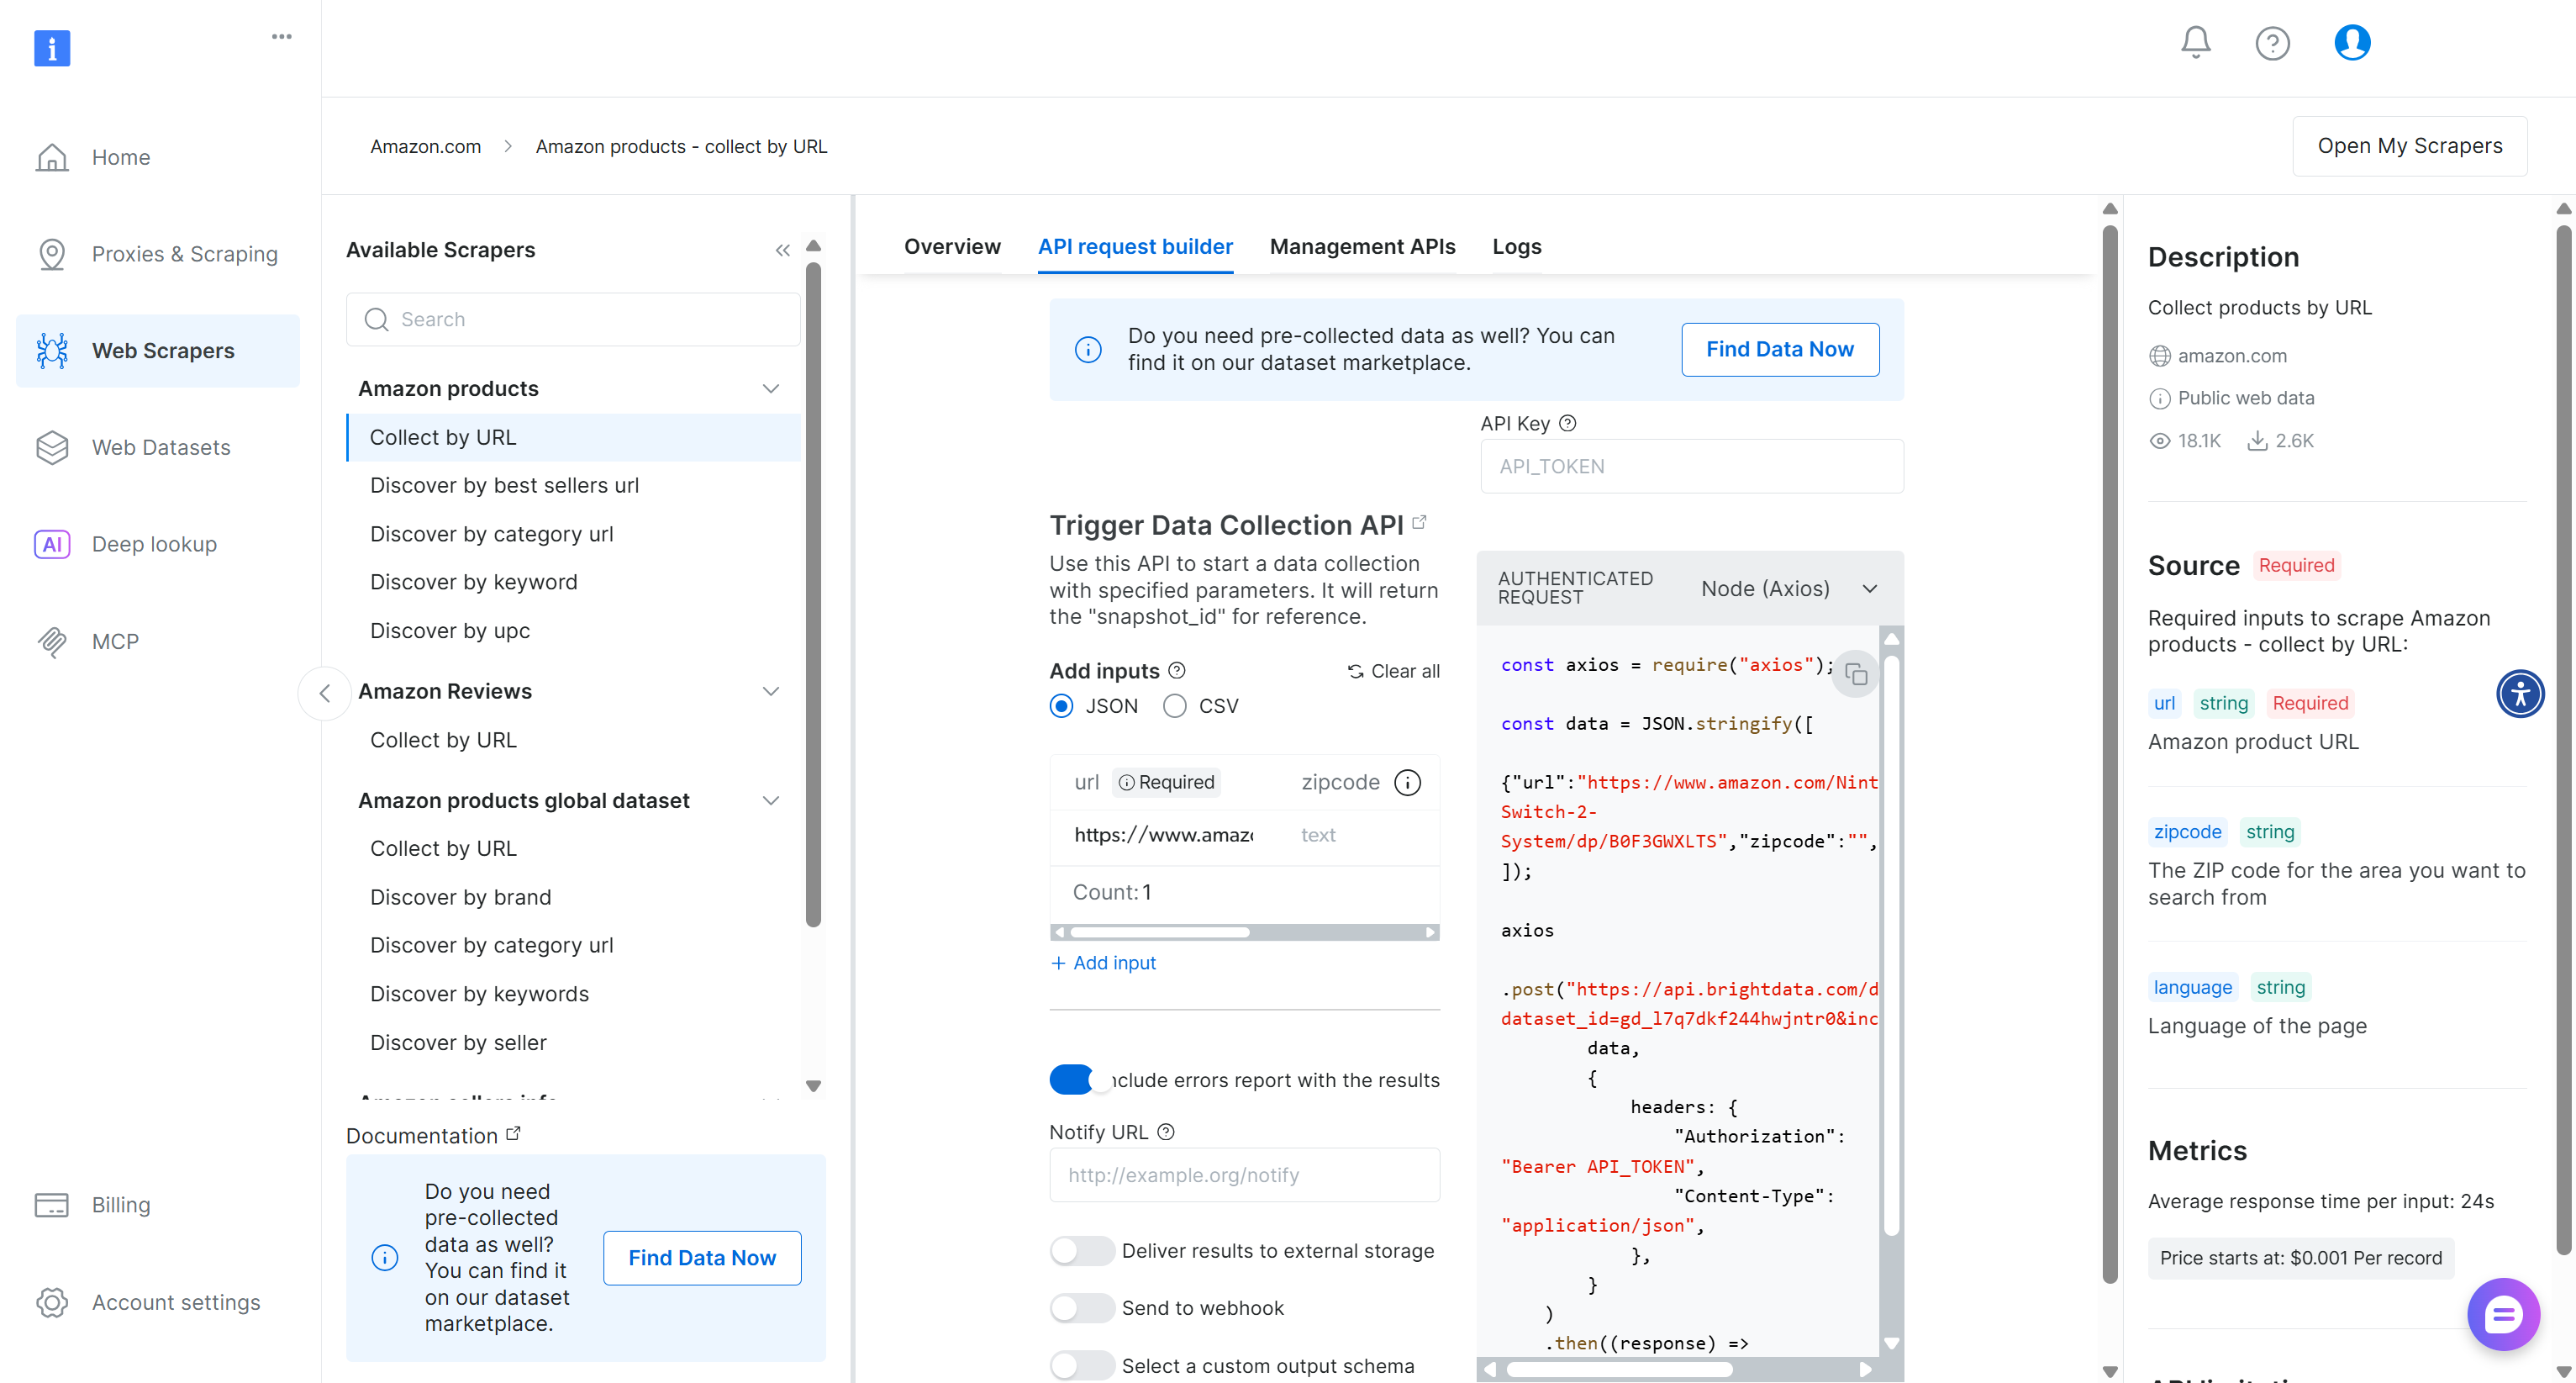
If you are not familiar with how Bright Data’s Web Scraper APIs work, let’s go through a brief explanation.
You start by triggering a scraping task using the /trigger endpoint, which creates a scraping snapshot for the specified product URL. Once the snapshot is initiated, you periodically check its status using the snapshot/{snapshot_id} endpoint to see if the scraped data is ready. When it is ready, you call the same API to get the scraped data.
These Web Scraper APIs can be called programmatically by authenticating with your Bright Data API key. Follow the official guide to obtain the key, then add it to your .env file as follows:
BRIGHT_DATA_API_KEY="<YOUR_BRIGHT_DATA_API_KEY>"Basically, what you need to do is:
- Call the
/triggerendpoint with the product URL to start a new scraping task, authenticating using the Bright Data API token. - Start a polling process on
snapshot/{snapshot_id}to periodically check whether the snapshot containing the scraped data is ready. - Once the snapshot is ready, access the Amazon product data.
To begin, install the Axios HTTP client in your project with:
npm install axios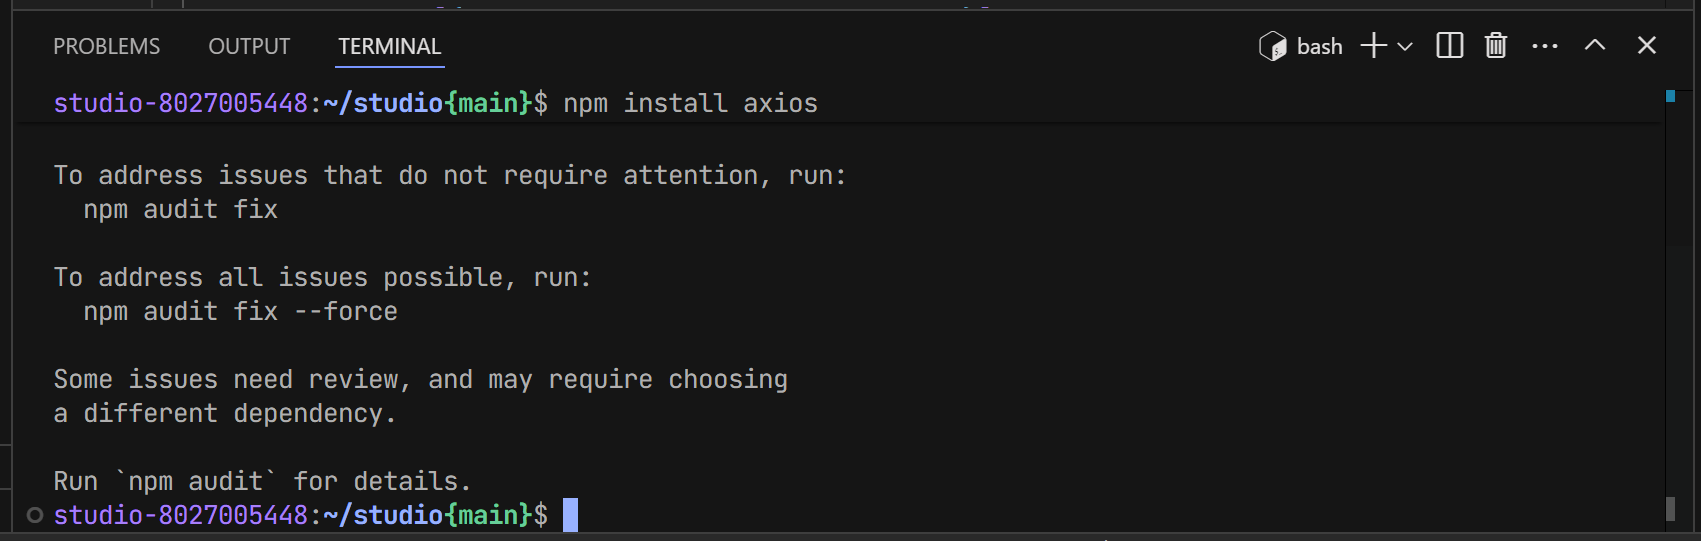
Next, replace the contents of src/lib/mock-api.ts with the following logic:
'use server'

import axios from 'axios';
import type { Product } from './types';

// access your Bright Data API key from the envs
const BRIGHT_DATA_API_KEY = process.env.BRIGHT_DATA_API_KEY;

// create a custom Axios client for connecting to the
// Bright Data Amazon Scraper
const client = axios.create({
  headers: {
    Authorization: `Bearer ${BRIGHT_DATA_API_KEY}`,
    'Content-Type': 'application/json',
  },
});

async function triggerAndPoll(url: string): Promise<Product> {
  // trigger a new snapshot
  const triggerRes = await client.post(
    'https://api.brightdata.com/datasets/v3/trigger',
    [{
      'url': url
    }],
    {
      params: {
        dataset_id: 'gd_l7q7dkf244hwjntr0', // Amazon dataset ID
        include_errors: true, // for debugging
      },
    }
  );

  // get the snapshot ID
  const snapshotId = triggerRes.data?.snapshot_id;

  // attempt up to 600 times to retrieve the snapshot data
  const maxAttempts = 600;
  let attempts = 0;
  while (attempts < maxAttempts) {
    try {
      // check if the data is available
      const snapshotRes = await client.get(
        `https://api.brightdata.com/datasets/v3/snapshot/${snapshotId}`,
        {
          params: { format: 'json' },
        }
      );

      // if the data is not available (the scraping task is not over)
      const status = snapshotRes.data?.status;
      if (['running', 'building'].includes(status)) {
        attempts++;
        // wait for 1 second
        await new Promise((resolve) => setTimeout(resolve, 1000));
        continue;
      }

      // if the data is available
      return snapshotRes.data[0] as Product;
    } catch (err) {
      attempts++;
      // wait for 1 second
      await new Promise((resolve) => setTimeout(resolve, 1000));
    }
  }

  throw new Error(
    `Timeout after ${maxAttempts} seconds waiting for snapshot data`
  );
}

export async function fetchProductFromUrl(url: string): Promise<Product | null> {
  const productData = await triggerAndPoll(url);
  const timestamp = Date.now();
  const initialPrice = productData.final_price;
  if (initialPrice) {
    productData['priceHistory'] = [{ price: initialPrice, timestamp }]
  }

  return productData
}

export async function getLatestPriceForProduct(url: string): Promise<number | null> {
  const productData = await triggerAndPoll(url);

  return productData.final_price || null
}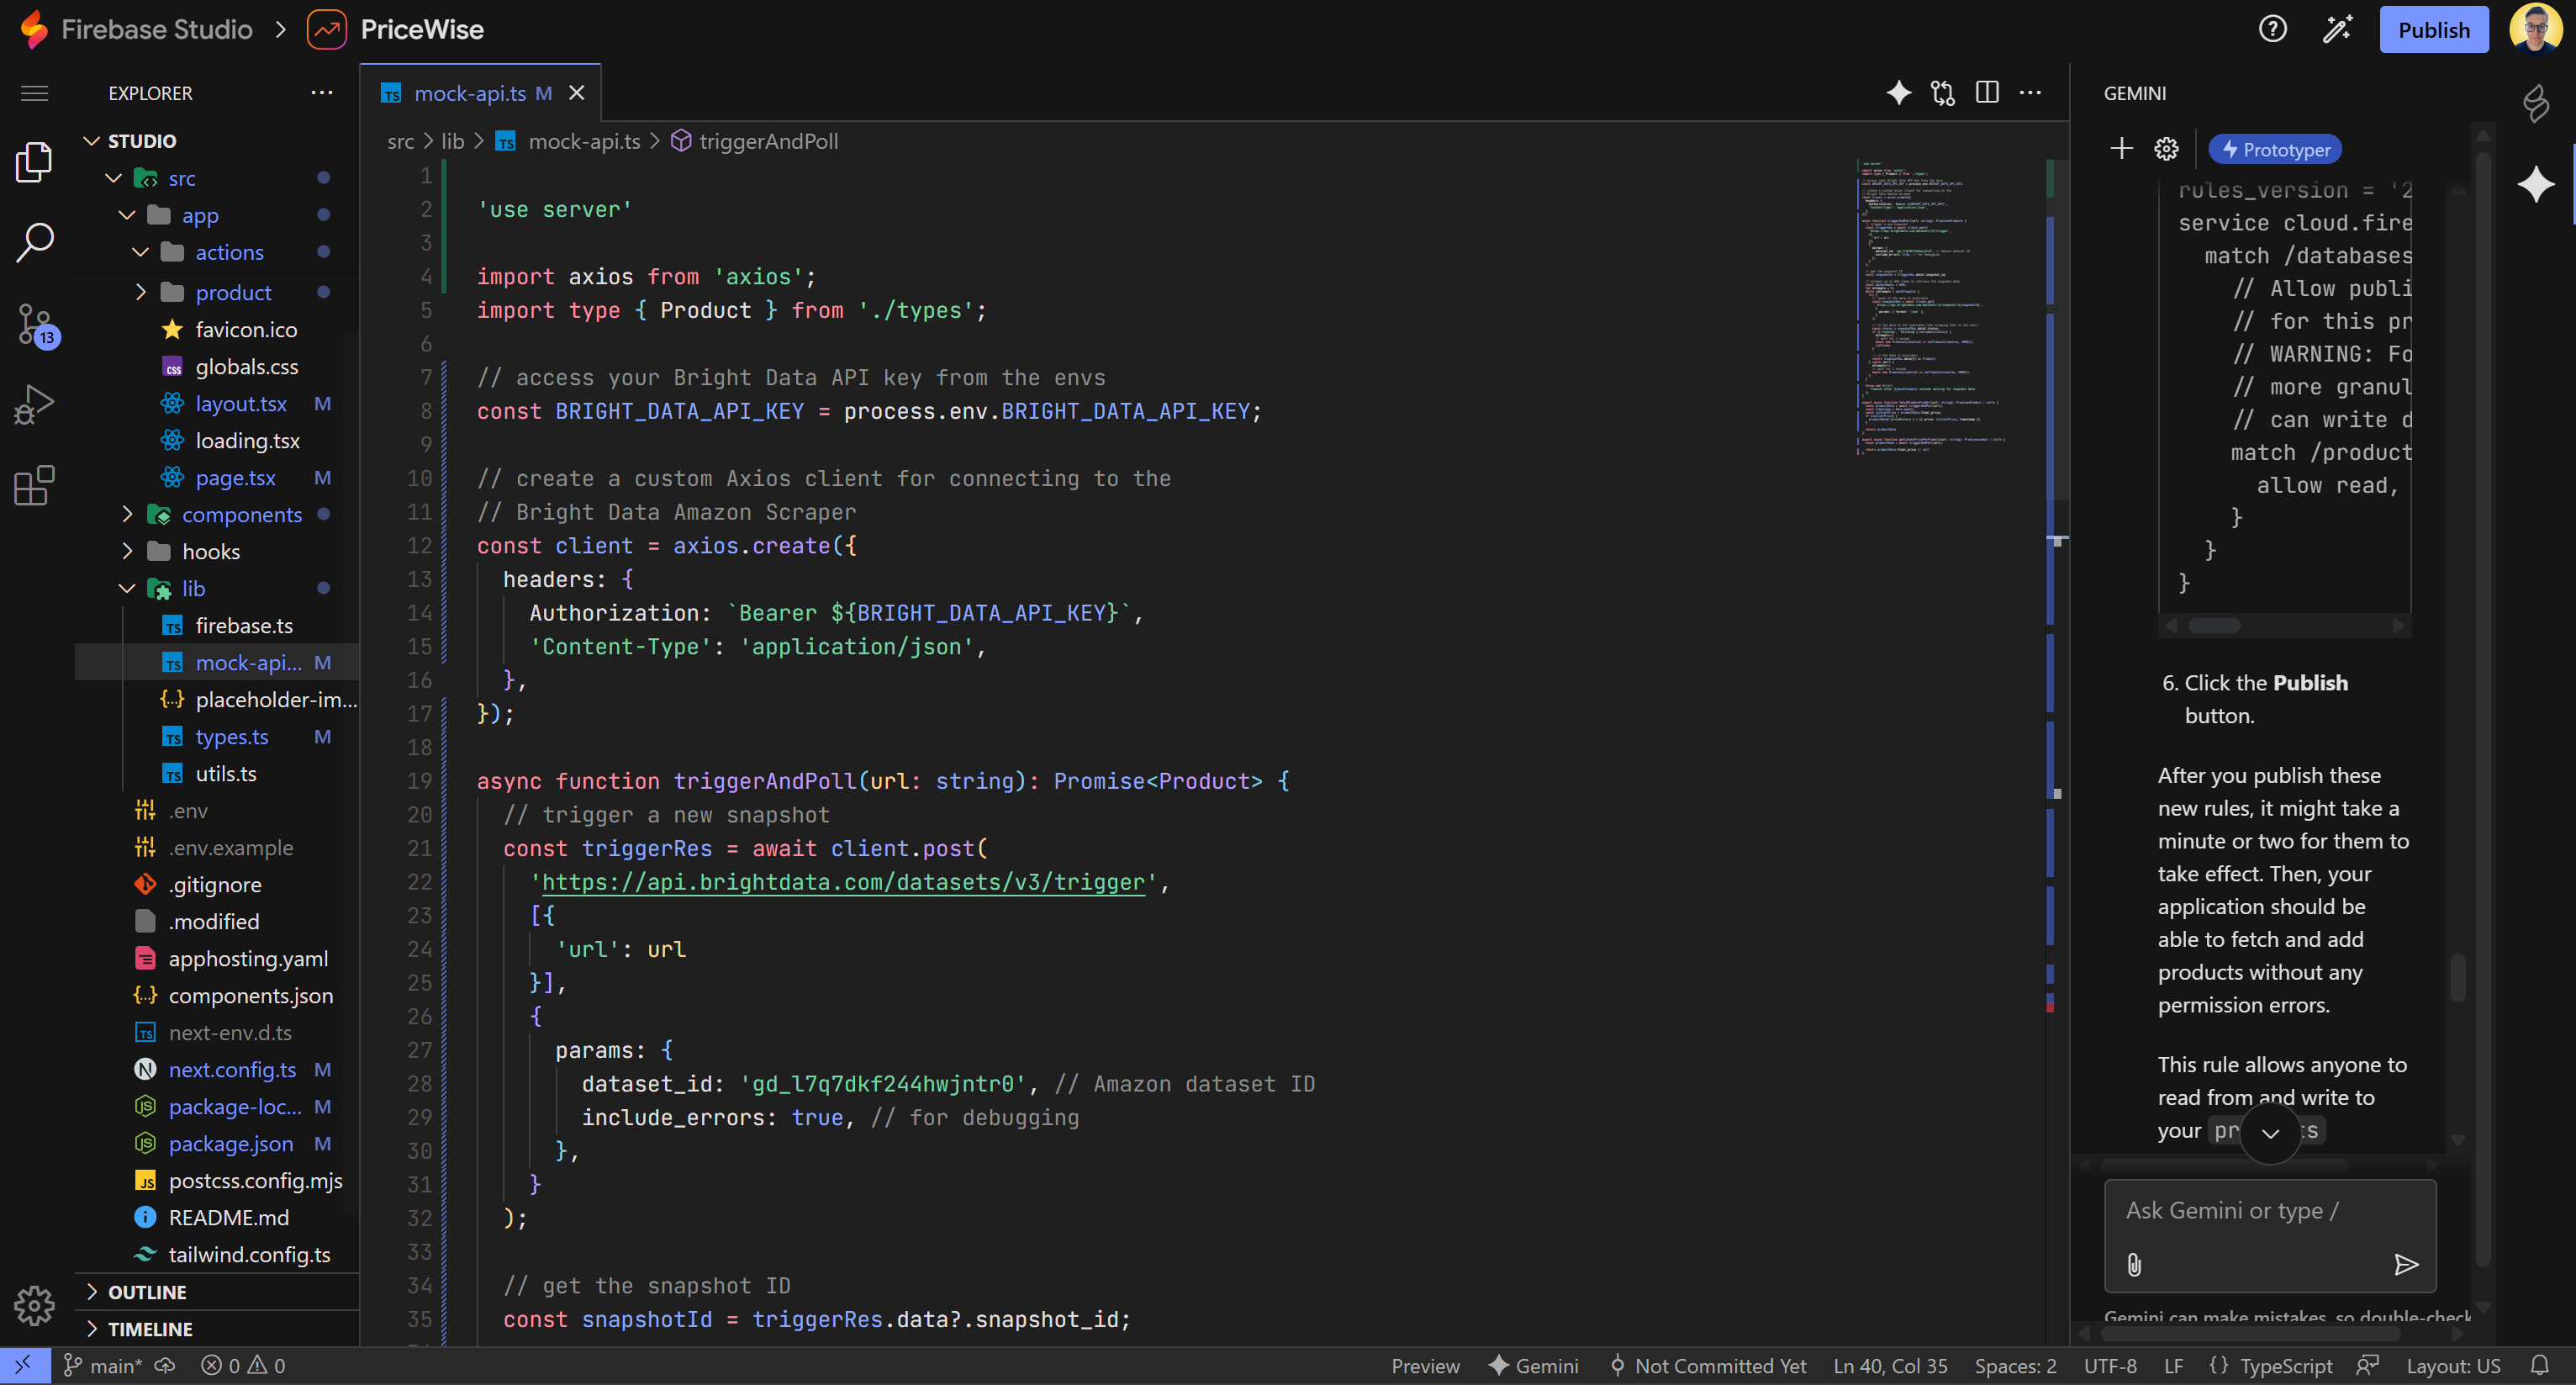
The new implementation uses Axios to connect to Bright Data, triggers a snapshot for a given URL, polls until the data is ready, and returns the product information.
The triggerAndPoll() utility handles the entire data retrieval logic from the Bright Data Scraper API. fetchProductFromUrl() returns the full product object with an initial price history, while getLatestPriceForProduct() returns only the current price read from the final_price field.
To understand which fields are returned by the Bright Data Amazon Scraper API, explore the “Overview” section in your dashboard:
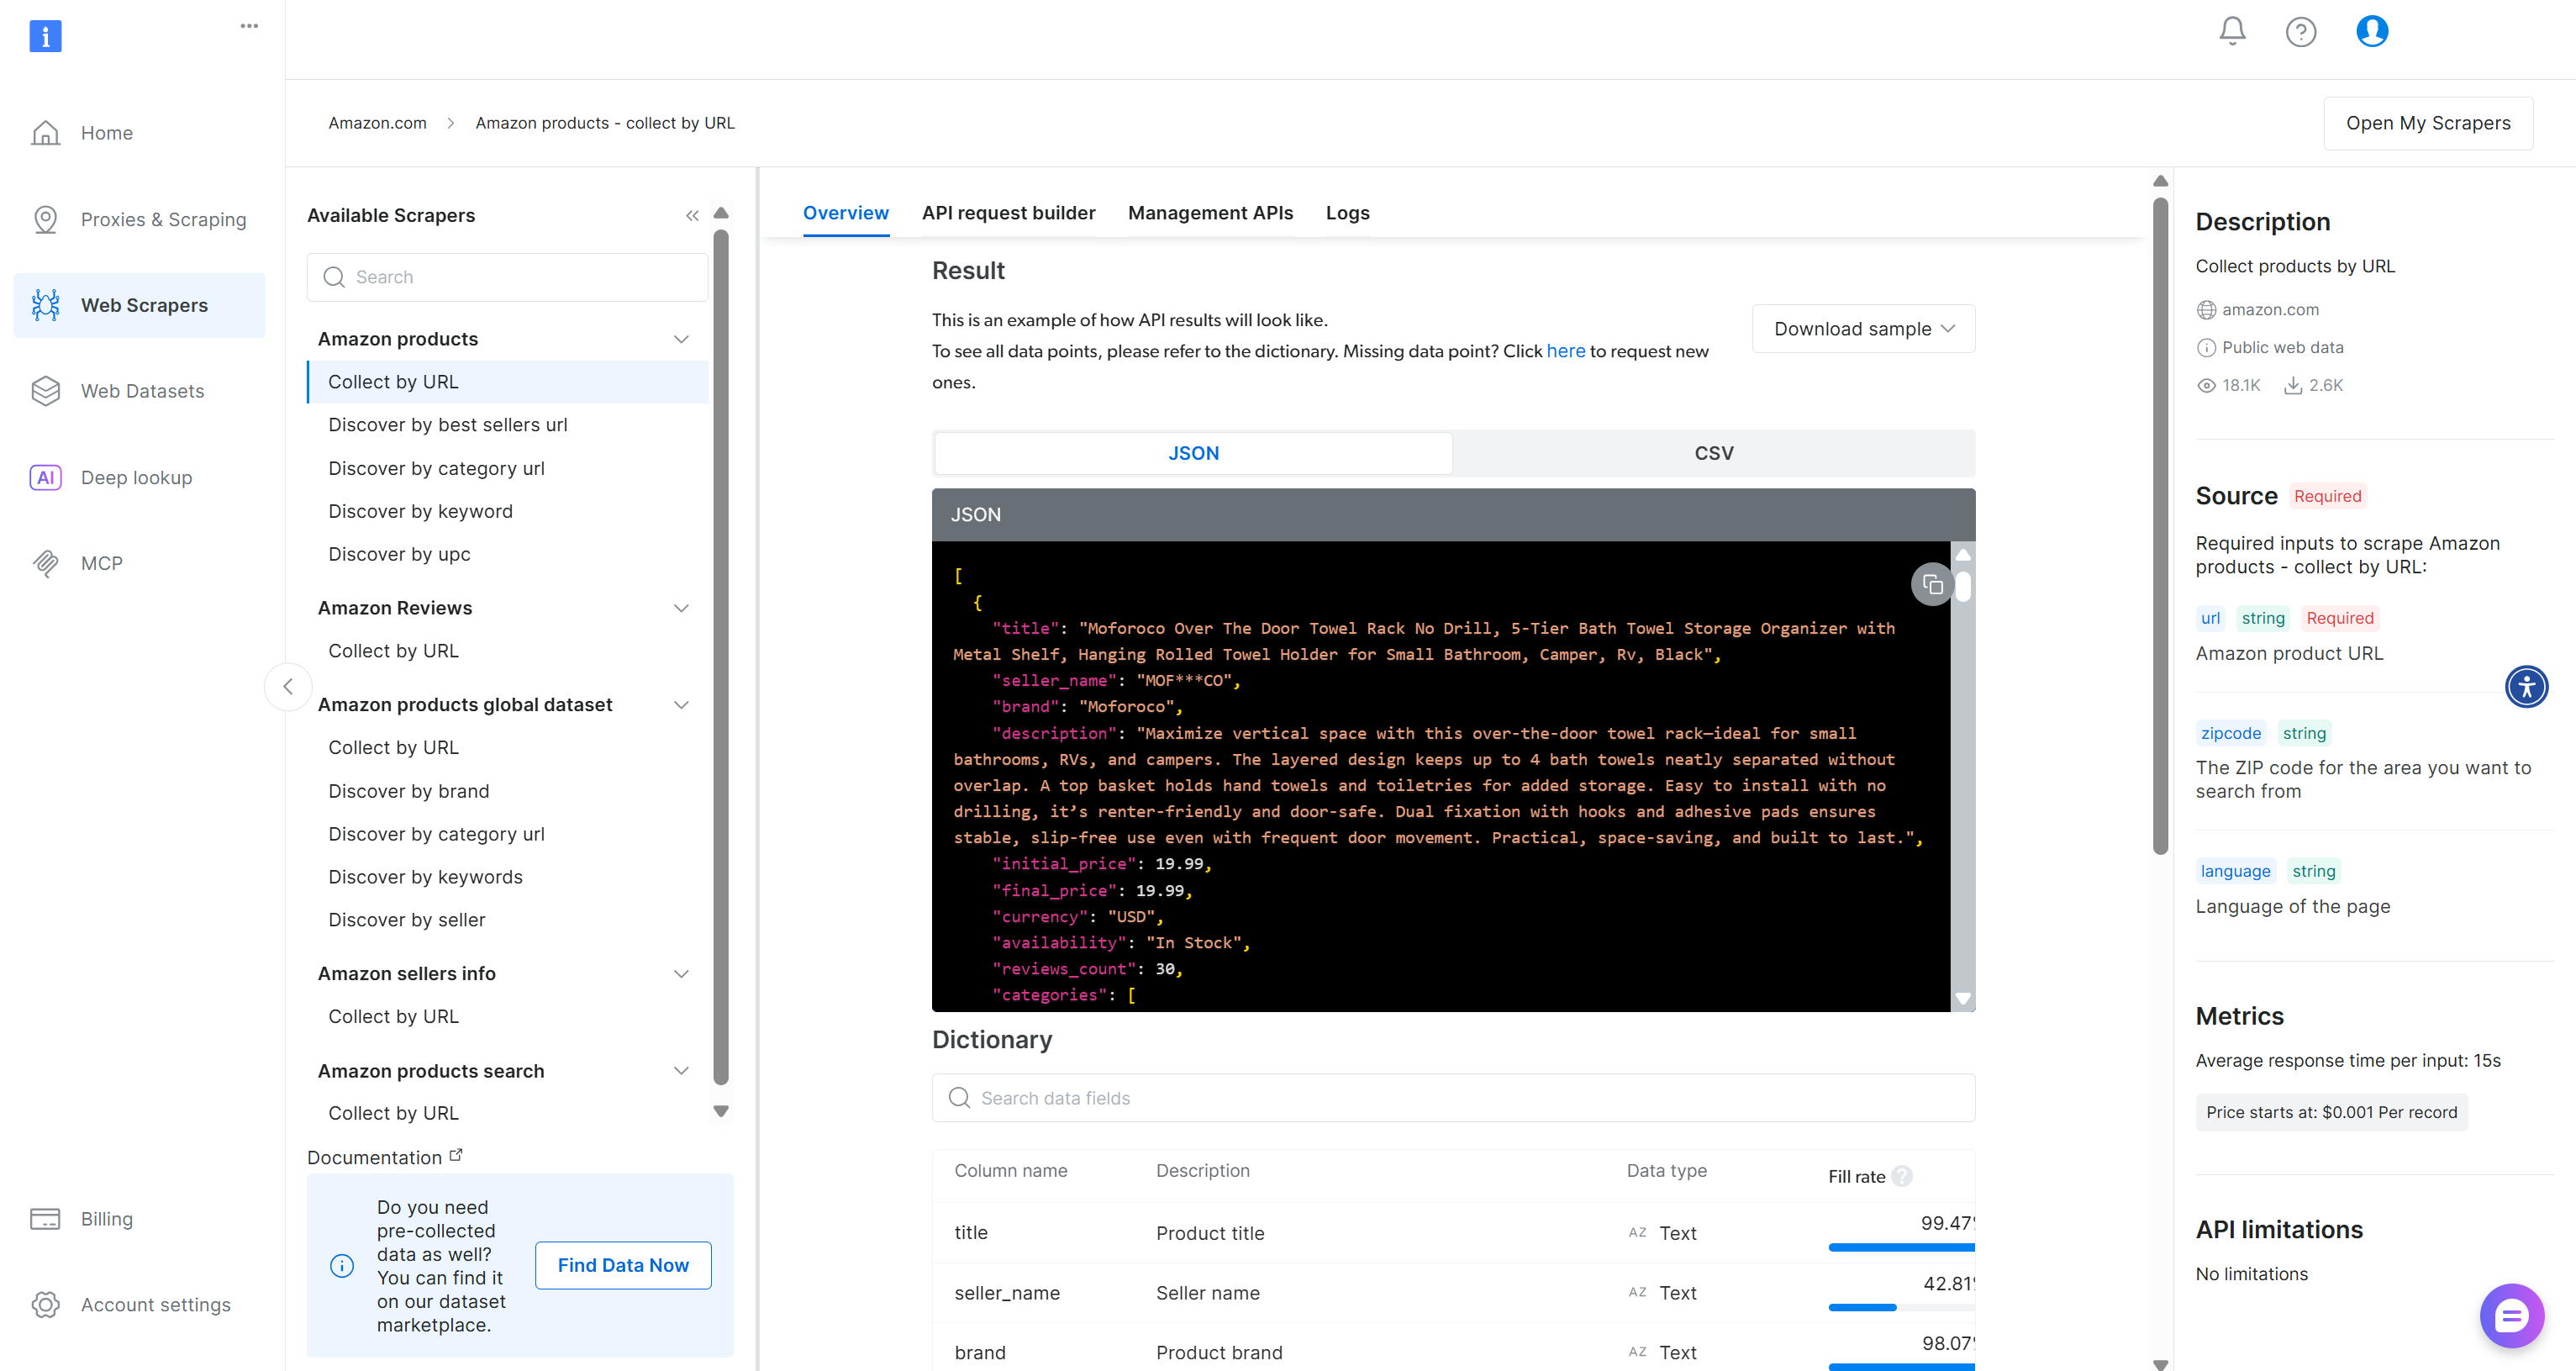
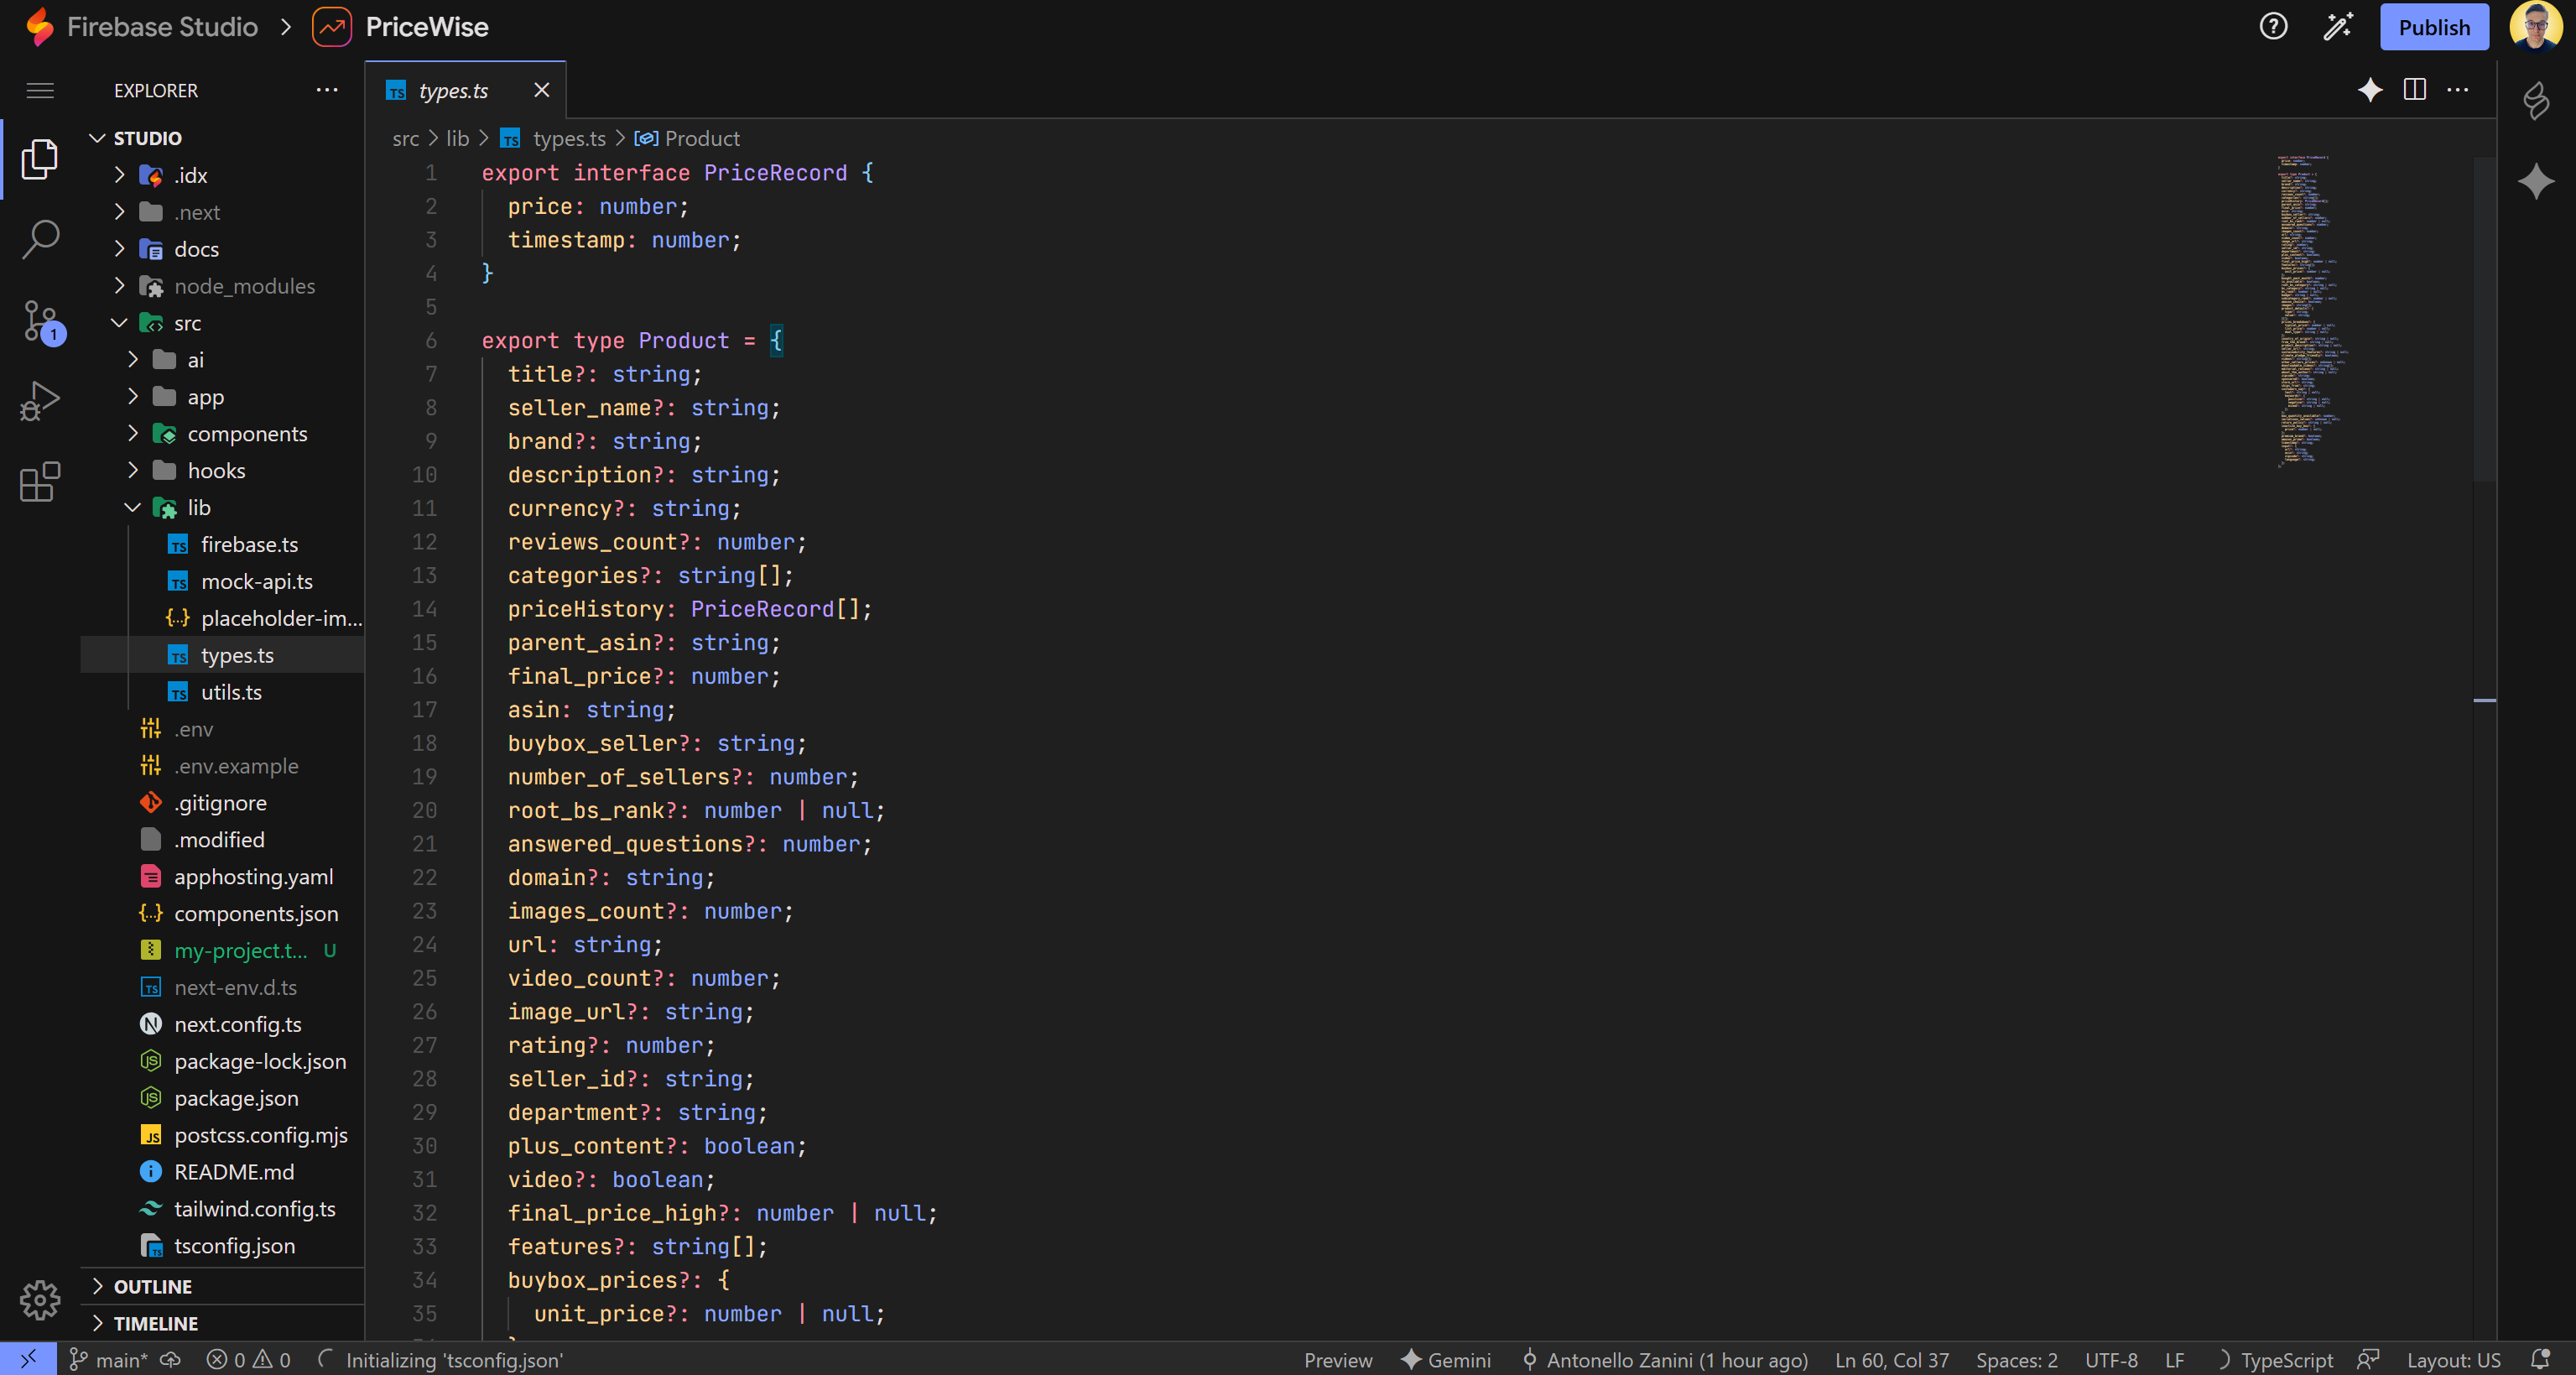
Feed the sample JSON to Gemini and ask the AI to update the TypeScript Product type accordingly:
Fantastic! No further steps are required. At this point, your application should be fully functional and ready for testing, with live product data being fetched and displayed.
Step #9: Test the Prototype App
Your CamelCamelCamel alternative is now ready. You can find the complete code in the GitHub repository supporting this article. Clone it with:
git clone https://github.com/Tonel/price-wiseThis is nothing more than an MVP (Minimal Viable Product), but it is fully functional enough to explore your ideas and even extend it into a production-ready application.
To ensure all updates in your codebase are applied, perform a hard restart:

Then, click on the “Open in New Window” icon:

You should now have access to your Firebase Studio prototype in a dedicated browser tab:
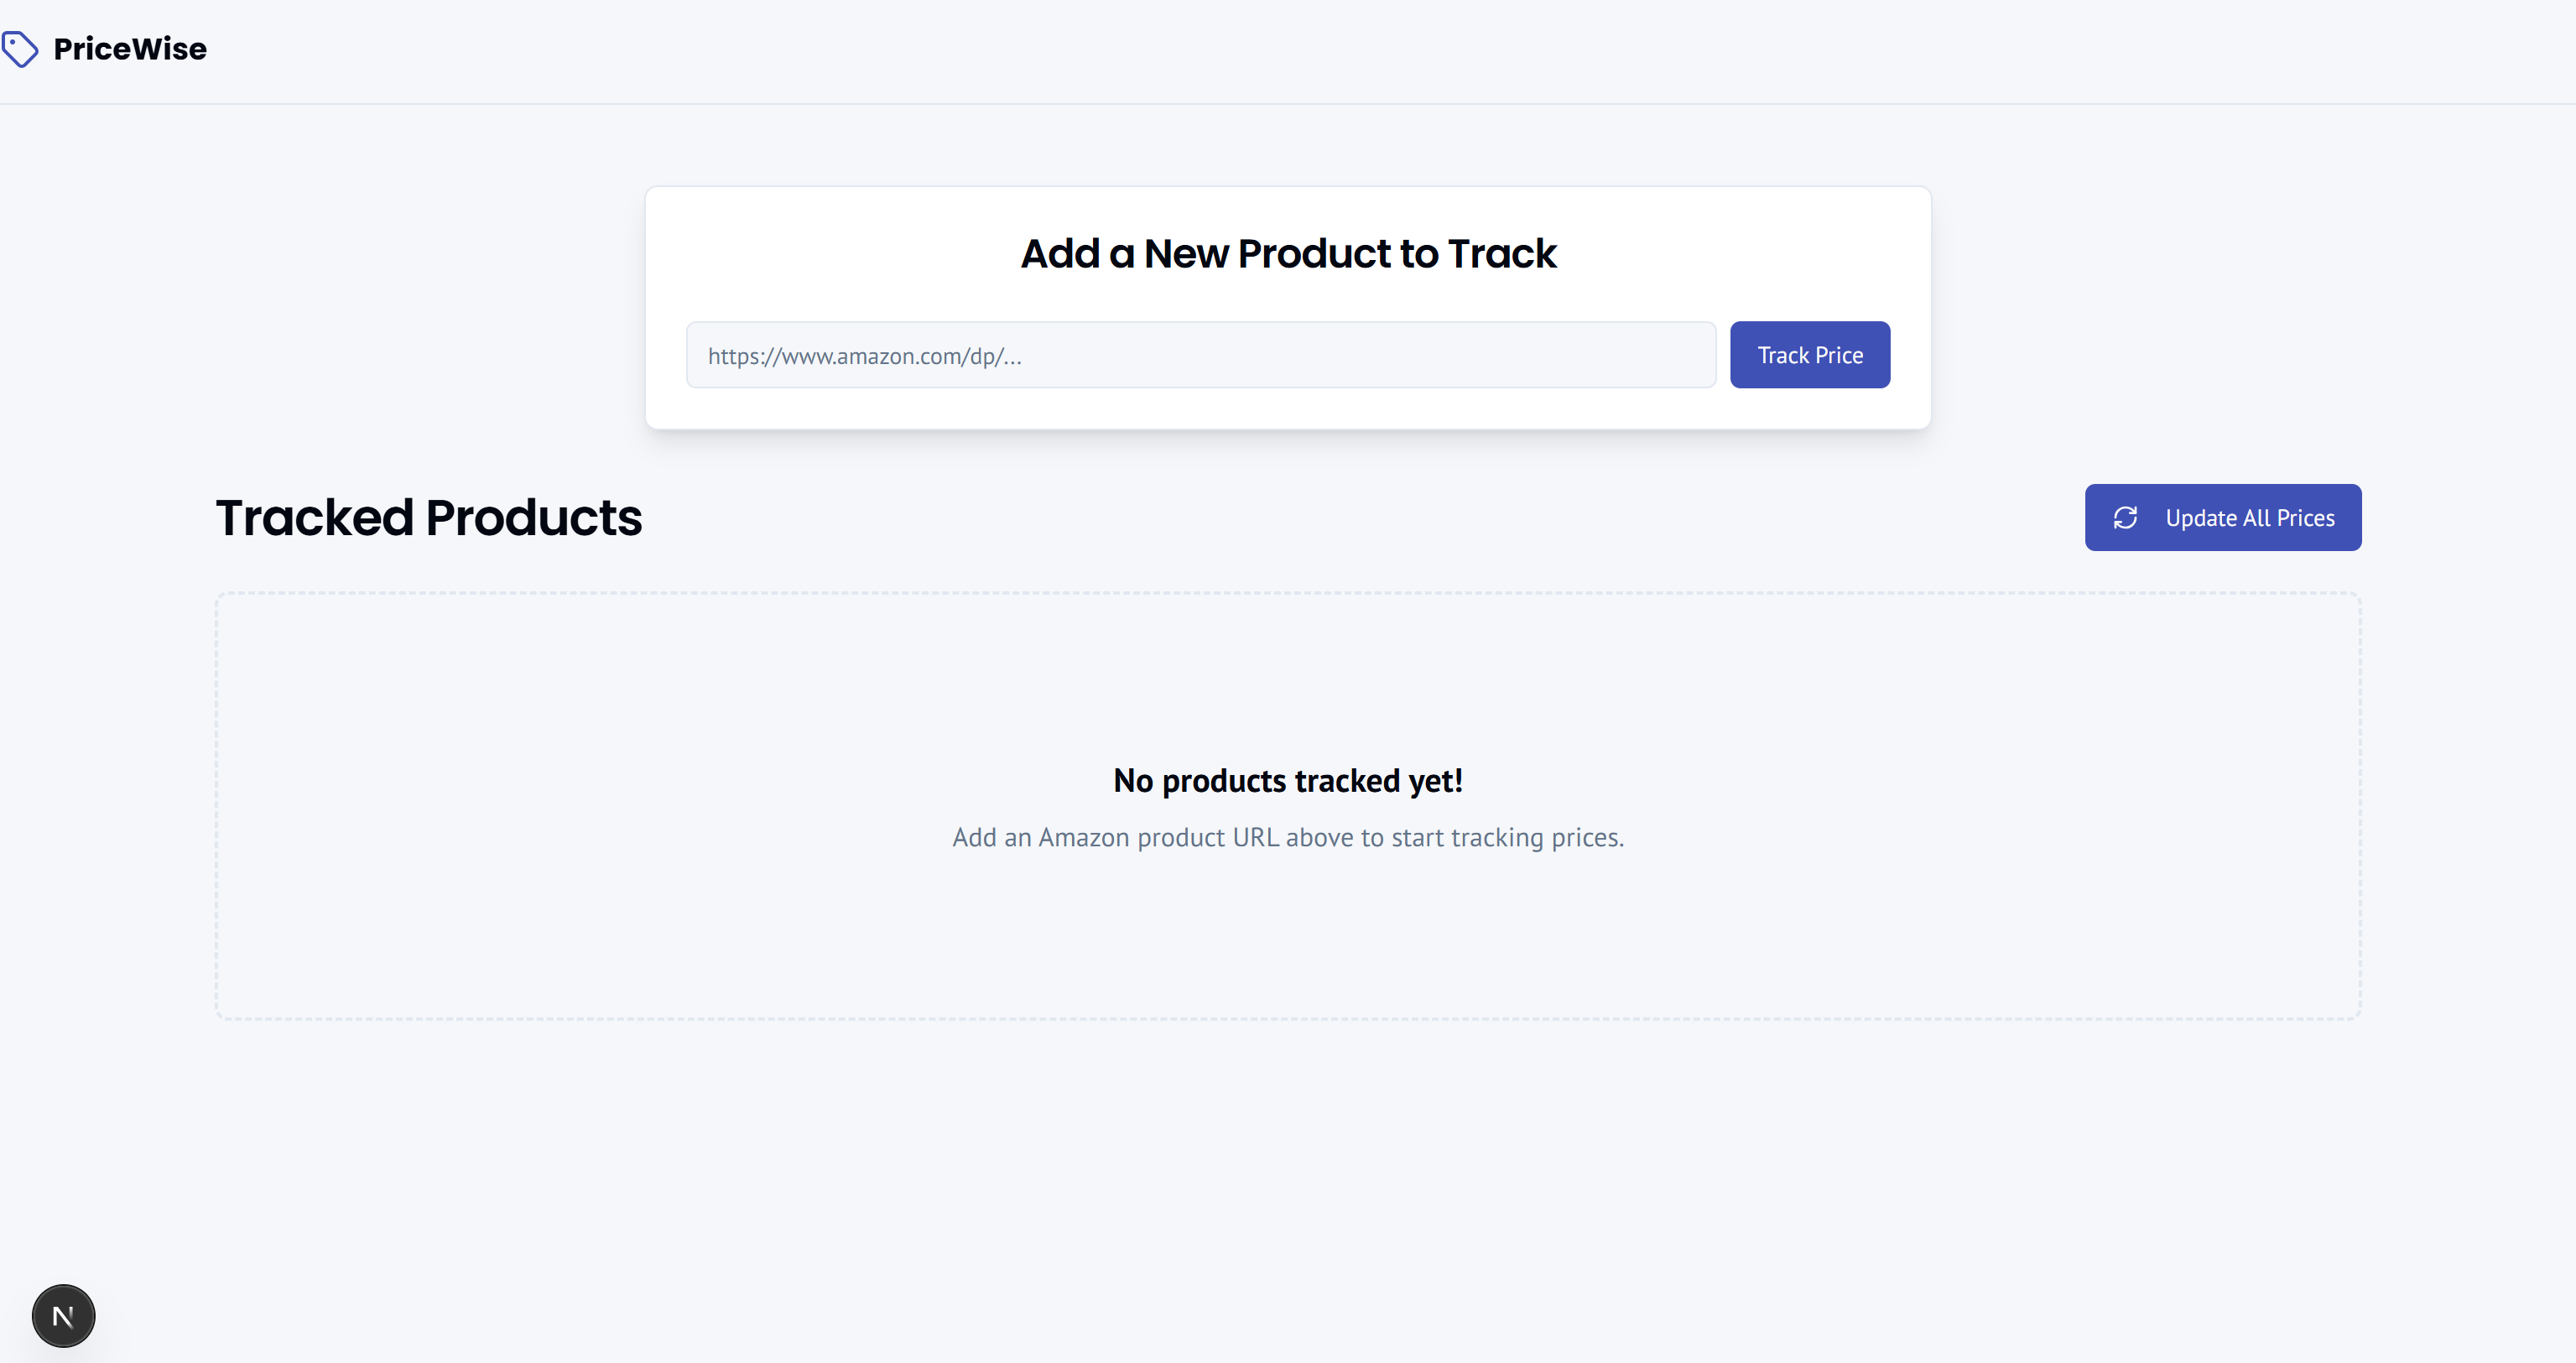
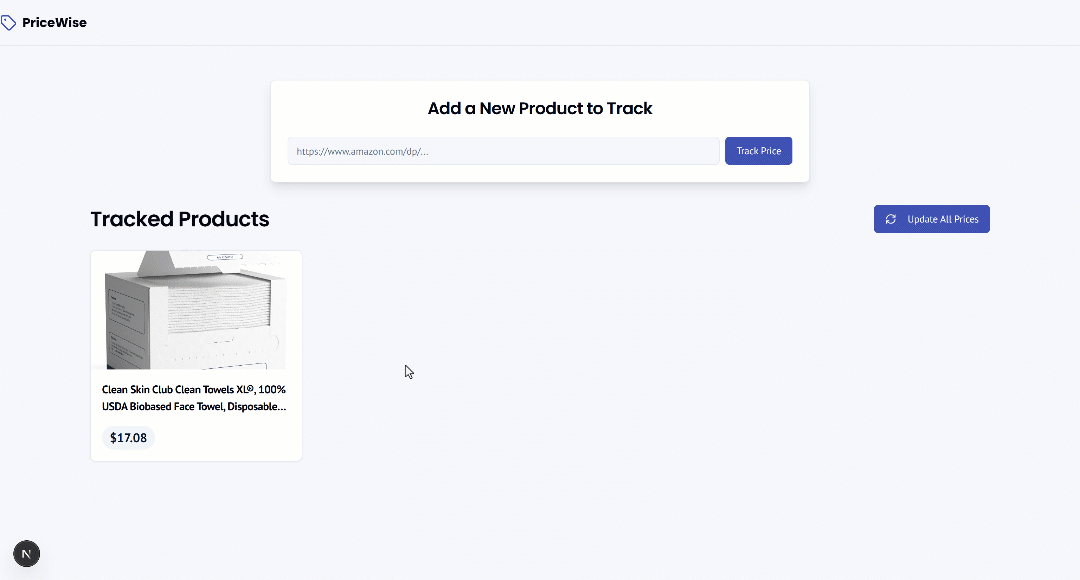
Test the CamelCamelCamel-like web app by pasting an Amazon product URL and pressing the “Track Price” button:
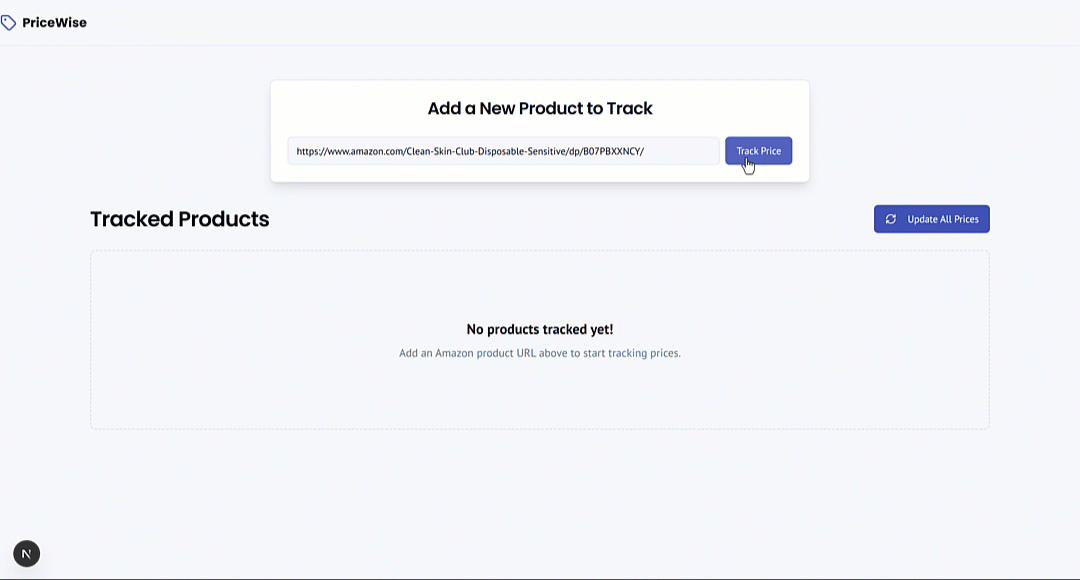
The product will be added to the “Tracked Products” section, displaying data exactly as it appears on its Amazon page.
This demonstrates the power of the Bright Data Web Scraper API, which successfully retrieved the product data in seconds.
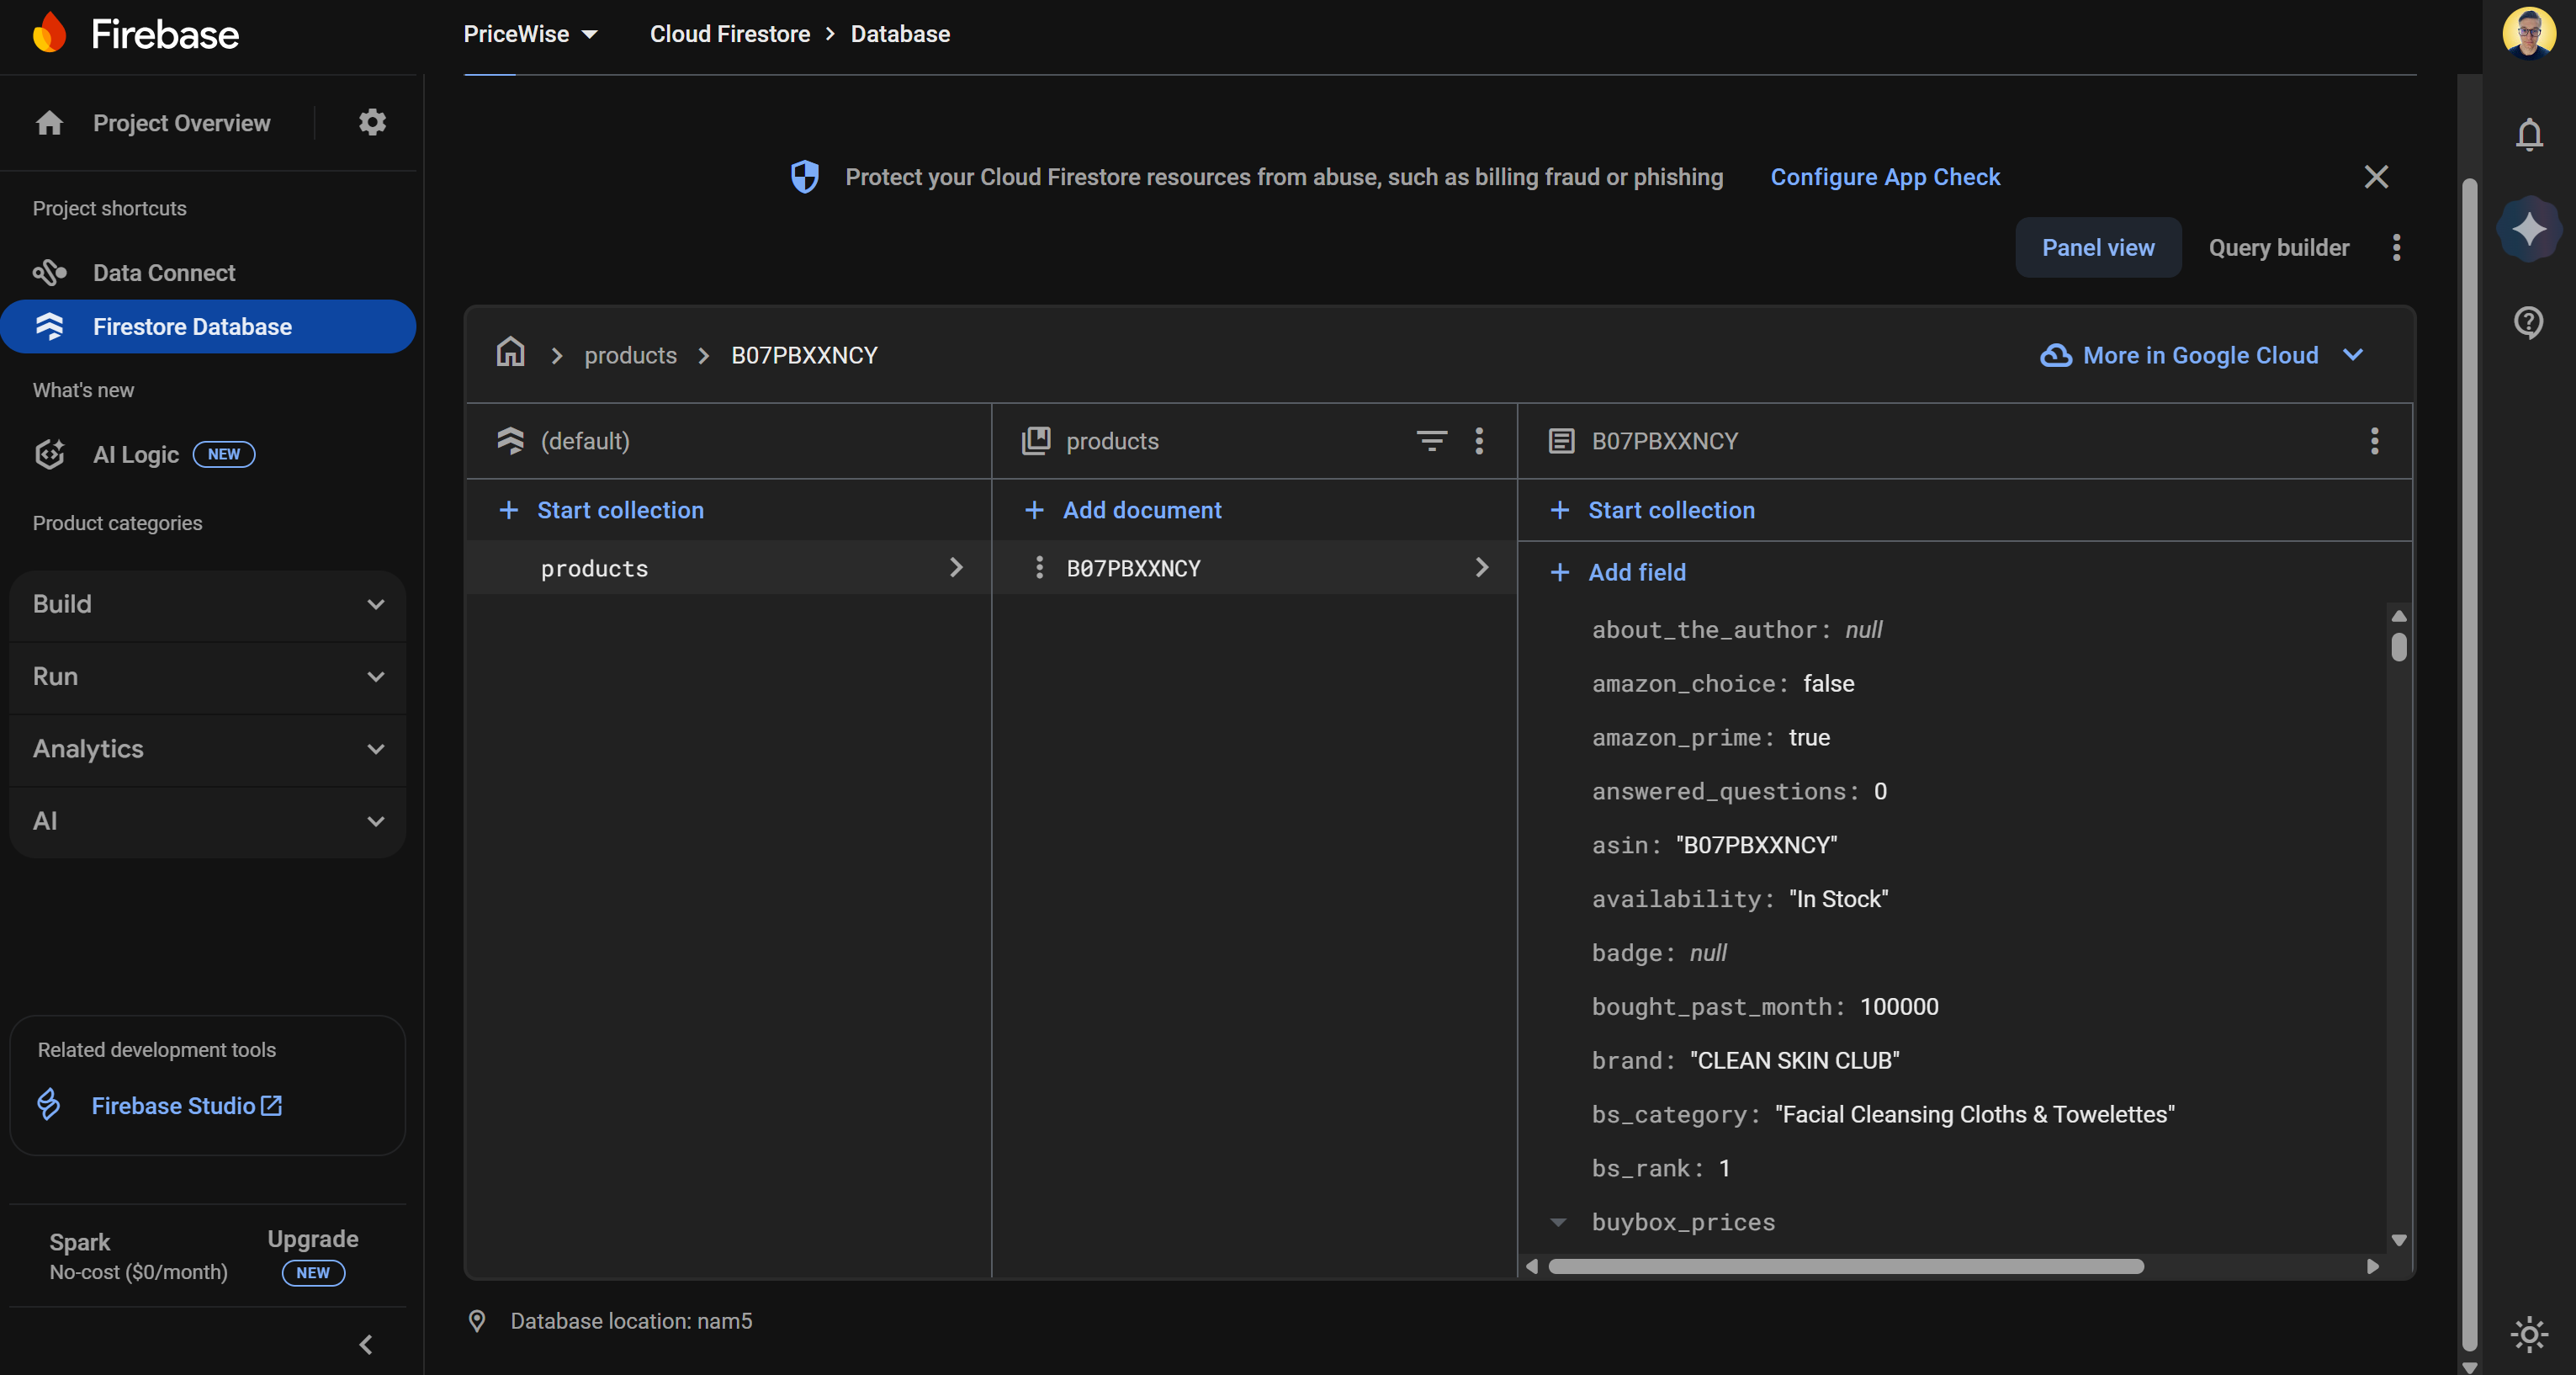
Verify that the product data was stored in the Firestore database:
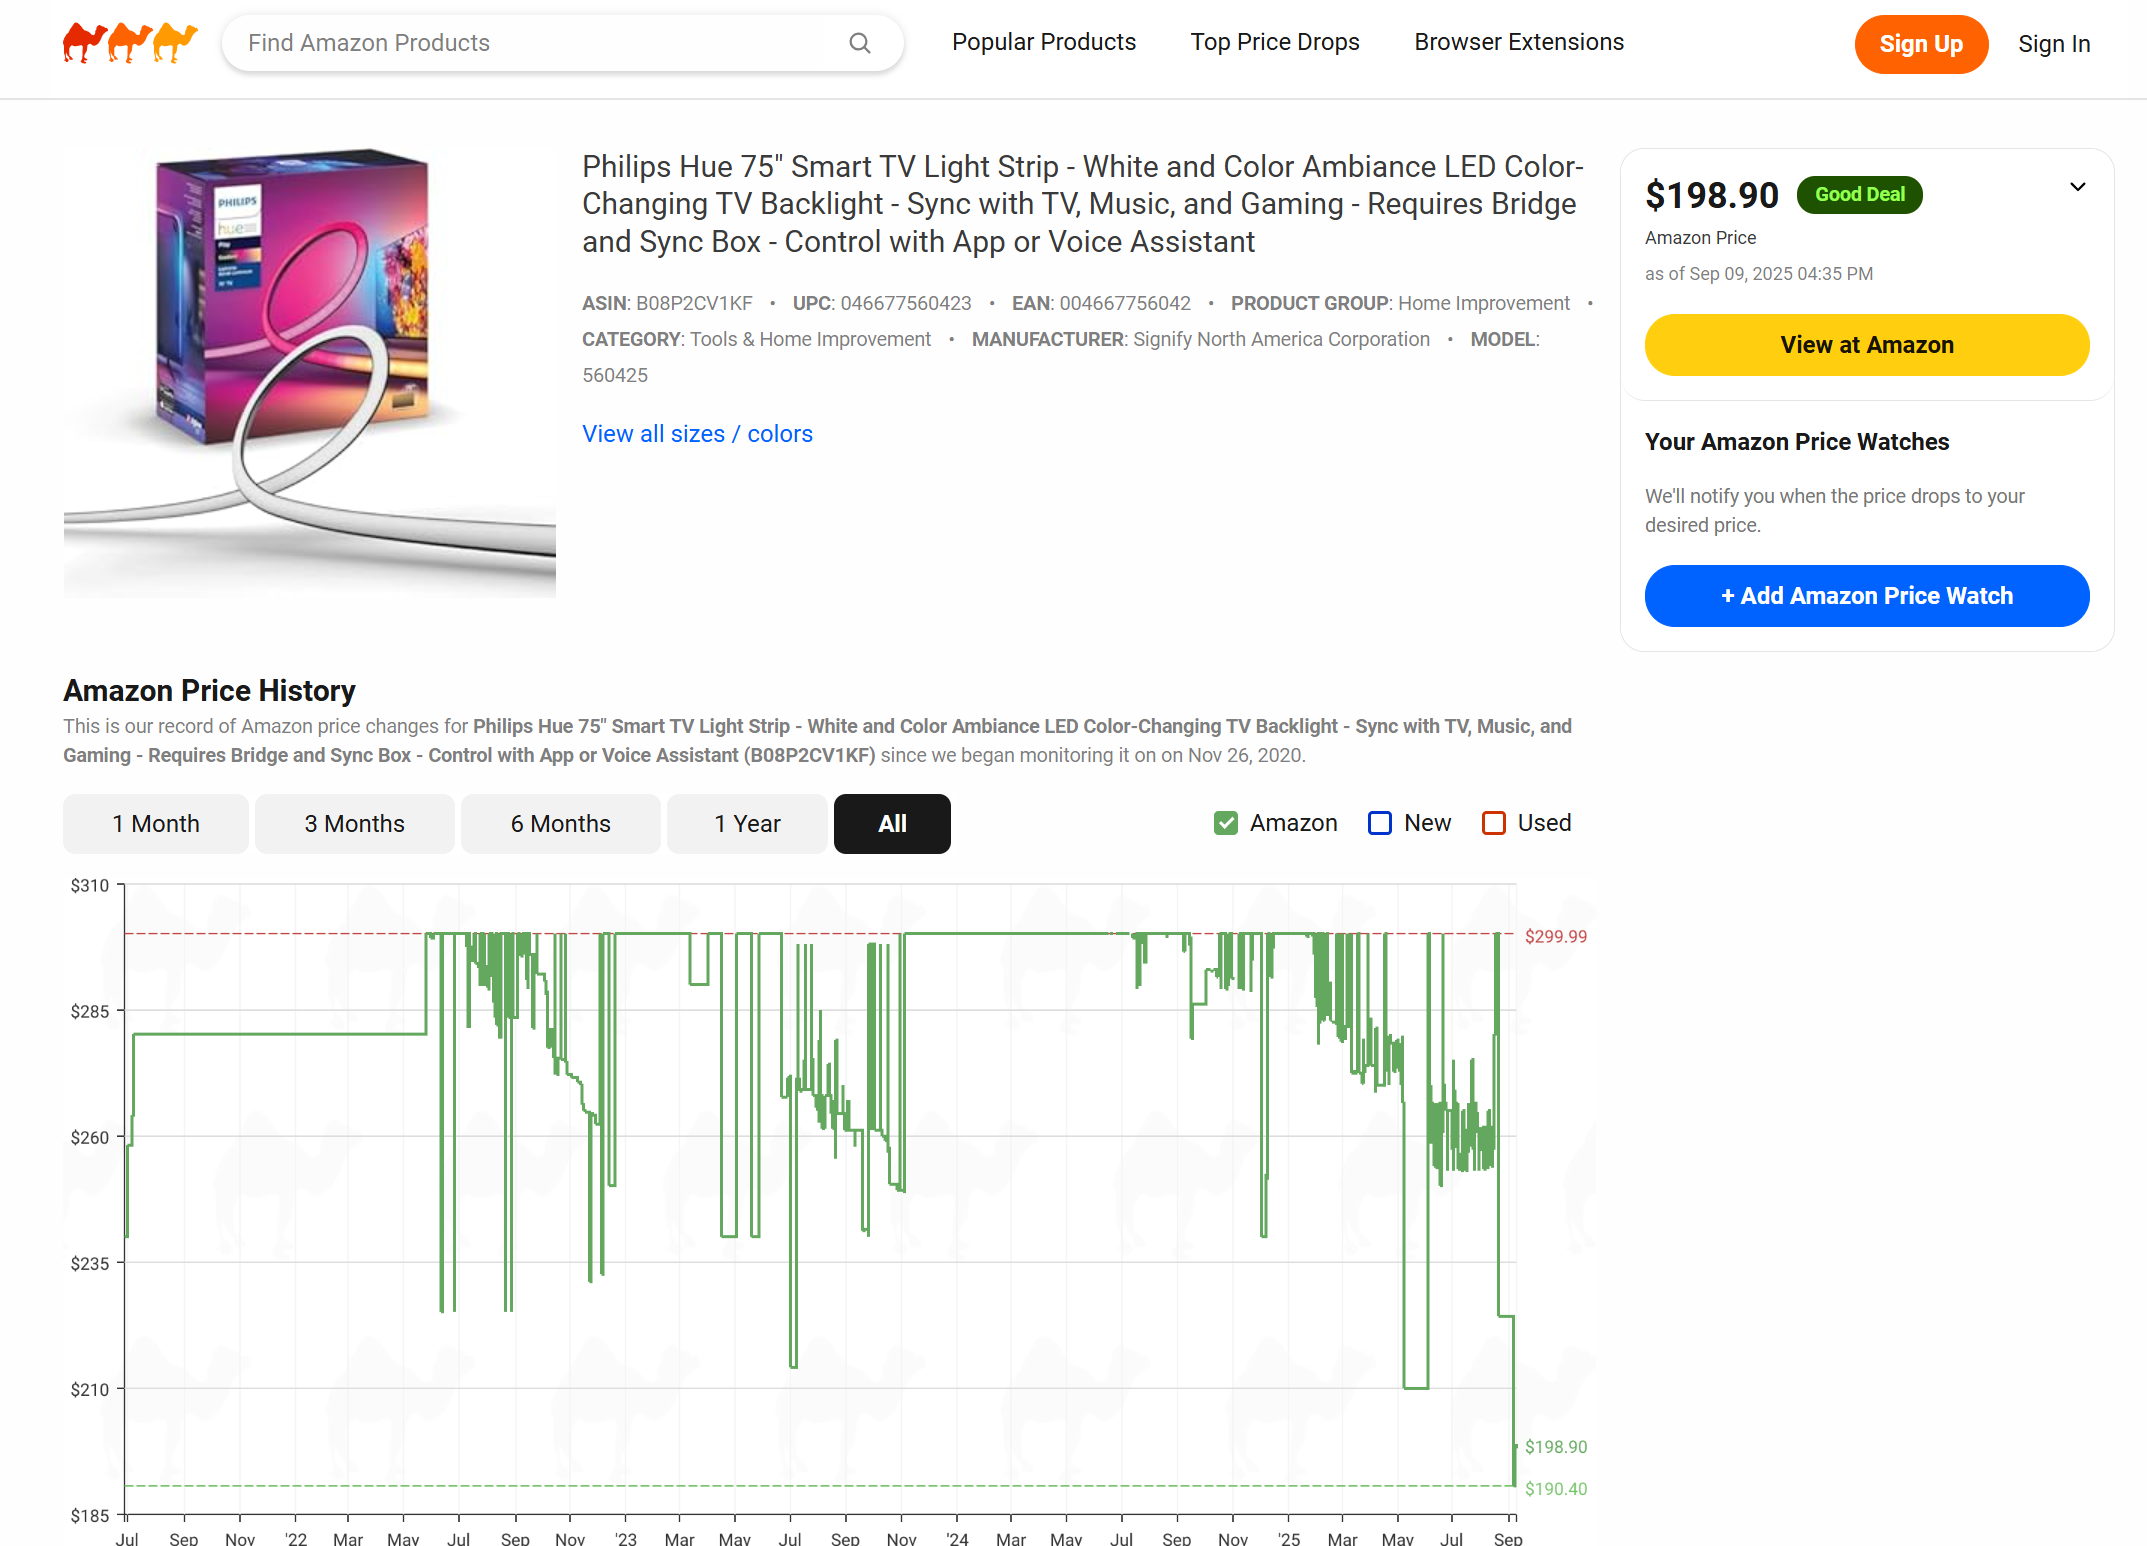
Now, assume a few days have passed and the price has fluctuated. Visit the product page to see the updated price:
More in detail, notice how the product page contains both a chart and a table showing the price evolution for that product:

Impressive, isn’t it?
Et voilà! In just a few minutes and with very little code, you have built a CamelCamelCamel-style web app for Amazon product price tracking. None of this would have been possible without Bright Data’s real-time web data capabilities and Firebase Studio’s simplified development environment.
Next Steps
The application built here is just a prototype. To make it production-ready, consider the following steps:
- Integrate authentication: Use Firebase Authentication to quickly add a login system so that each user can save and monitor their own products.
- Add more features: Continue iterating in Gemini by requesting new features, or download the project code and manually integrate additional functionality.
- Make your app public: Publish your application using one of the deployment options offered by Firebase Studio.
Conclusion
In this blog post, you saw how Firebase Studio’s AI-driven app-building capabilities can help you create a CamelCamelCamel competitor site in just minutes. This would not be possible without a reliable, easy-to-integrate source of Amazon product and price data, such as Bright Data’s Amazon Scraper.
What we built here is just one example of what is possible when you combine scraped data with a dynamic AI-generated web app. Remember that a similar approach can be applied to countless other use cases. All you need are the right tools to access the data that fits your needs!
Why stop here? Explore our Web Scraper APIs, which provide dedicated endpoints for extracting fresh, structured, and fully compliant web data from over 120 popular websites.
Sign up for a free Bright Data account today and start building with AI-ready web data retrieval solutions!

Technical Writer
Antonello Zanini is a technical writer, editor, and software engineer with 5M+ views. Expert in technical content strategy, web development, and project management.


