
In this guide, you will learn:
- What Agent.ai is and what makes it unique compared to other AI agent-building platforms.
- Why extending AI agents’ capabilities through third-party services is important, and how Bright Data supports that.
- How to add web data retrieval features via Bright Data APIs to an Agent.ai workflow—without a single line of code.
Let’s dive in!
What Is Agent.ai?
Agent.ai is a professional network and marketplace where people can discover, build, and use AI agents to perform tasks and achieve business goals.
At its core, it is a low-code/no-code platform that lets you create AI agents without any programming knowledge. Put simply, Agent.ai is both a builder platform and a marketplace for AI agents.
Thanks to its user-friendly interface, it enables you to:
- Create custom AI agents tailored to your specific needs.
- Configure multi-step workflows to automate processes.
- Define integrations so agents can interact with other systems.
- Set decision-making rules for smarter agent behavior.
- Deploy agents to support your business objectives.
Unlike coding-heavy tools such as LangChain, LlamaIndex, or Crew.ai, Agent.ai does not require programming expertise for AI agent building.
What You Can Do on Agent.ai
Below is what is possible on the platform:
- Discover AI agents: Browse and search for ready-made agents built by others.
- Create custom agents: Build AI agents specific to your goals.
- Configure workflows: Design multi-step workflows for automation.
- Connect with systems: Use APIs and tools to link your agent with platforms like Slack, Gmail, or Google Sheets.
- Hire AI agents: Bring in prebuilt agents to get work done immediately.
How It Works
Agent.ai provides several core capabilities that power its agents:
- Input and output: You provide input (e.g., a task or question), and the agent generates the required output (like drafting an email or analyzing data).
- Reasoning: Agents use context and logic to make informed decisions and plan next steps.
- Tools and APIs: Agents can call external services and tools to extend their functionality.
- Memory: Agents remember context and past interactions for more advanced reasoning and planning.
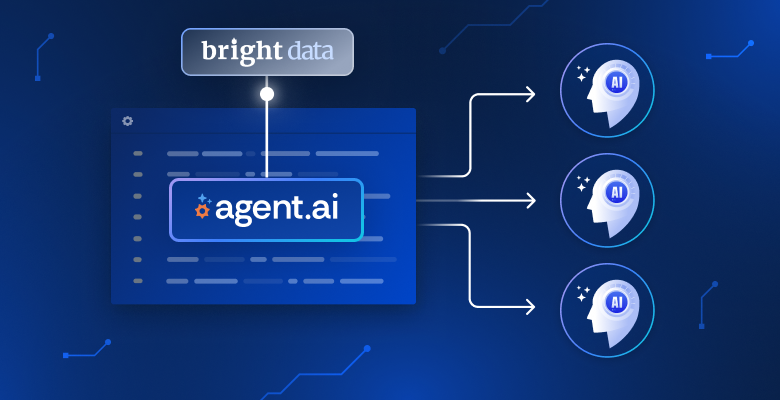
Why and How to Connect Bright Data to Agents in Agent.ai
LLMs can handle a wide range of tasks on their own, but agents built solely on them are limited. In particular, agents become truly effective only when combined with external capabilities. For example, the ability to access real-time web data, scrape content from any webpage, crawl entire sites to map their URLs, or interact with web pages just like a human user would.
Those are exactly the capabilities provided by Bright Data thanks to its AI-ready toolkit of services that integrate effortlessly with agents. These include:
- Unlocker API: Reliably fetch content from any public URL by automatically bypassing blocks and solving CAPTCHAs.
- Crawl API: Extract data from entire websites in LLM-friendly formats for better reasoning and inference.
- SERP API: Collect real-time, geo-targeted search engine results to discover the most relevant data sources.
- Browser API: Allow agents to interact with dynamic websites and run automated workflows at scale using remote stealth browsers.
All of these products are accessible via API, meaning you can connect them directly into your agent in Agent.ai’s no-code workflow (or in similar platforms like Dify).
Build an AI Agent with Bright Data Integration in Agent.ai
In this section, you will learn how to integrate Bright Data’s web data retrieval capabilities into an Agent.ai agent via API. Specifically, you will build a sample News Summarizer agent that:
- Accepts the URL of a news article as input.
- Scrapes its content using the Web Unlocker API, returning the output in Markdown format.
- Passes the Markdown to an LLM for summarization.
- Presents the summary to the user.
Note: This is just an example. You can leverage Bright Data’s services for many other integrations and scenarios.
Now, follow the steps below to learn how to build this agent in a no-code workflow. Alternatively, if you prefer, explore the final output directly by checking out the agent page.
Prerequisites
To follow this tutorial, make sure you have:
- An Agent.ai account.
- A Bright Data account with an API key and a Web Unlocker zone ready.
Do not worry if you have not yet set up your Bright Data account. You will be guided through that process later in the steps below.
Step #1: Create a New Agent
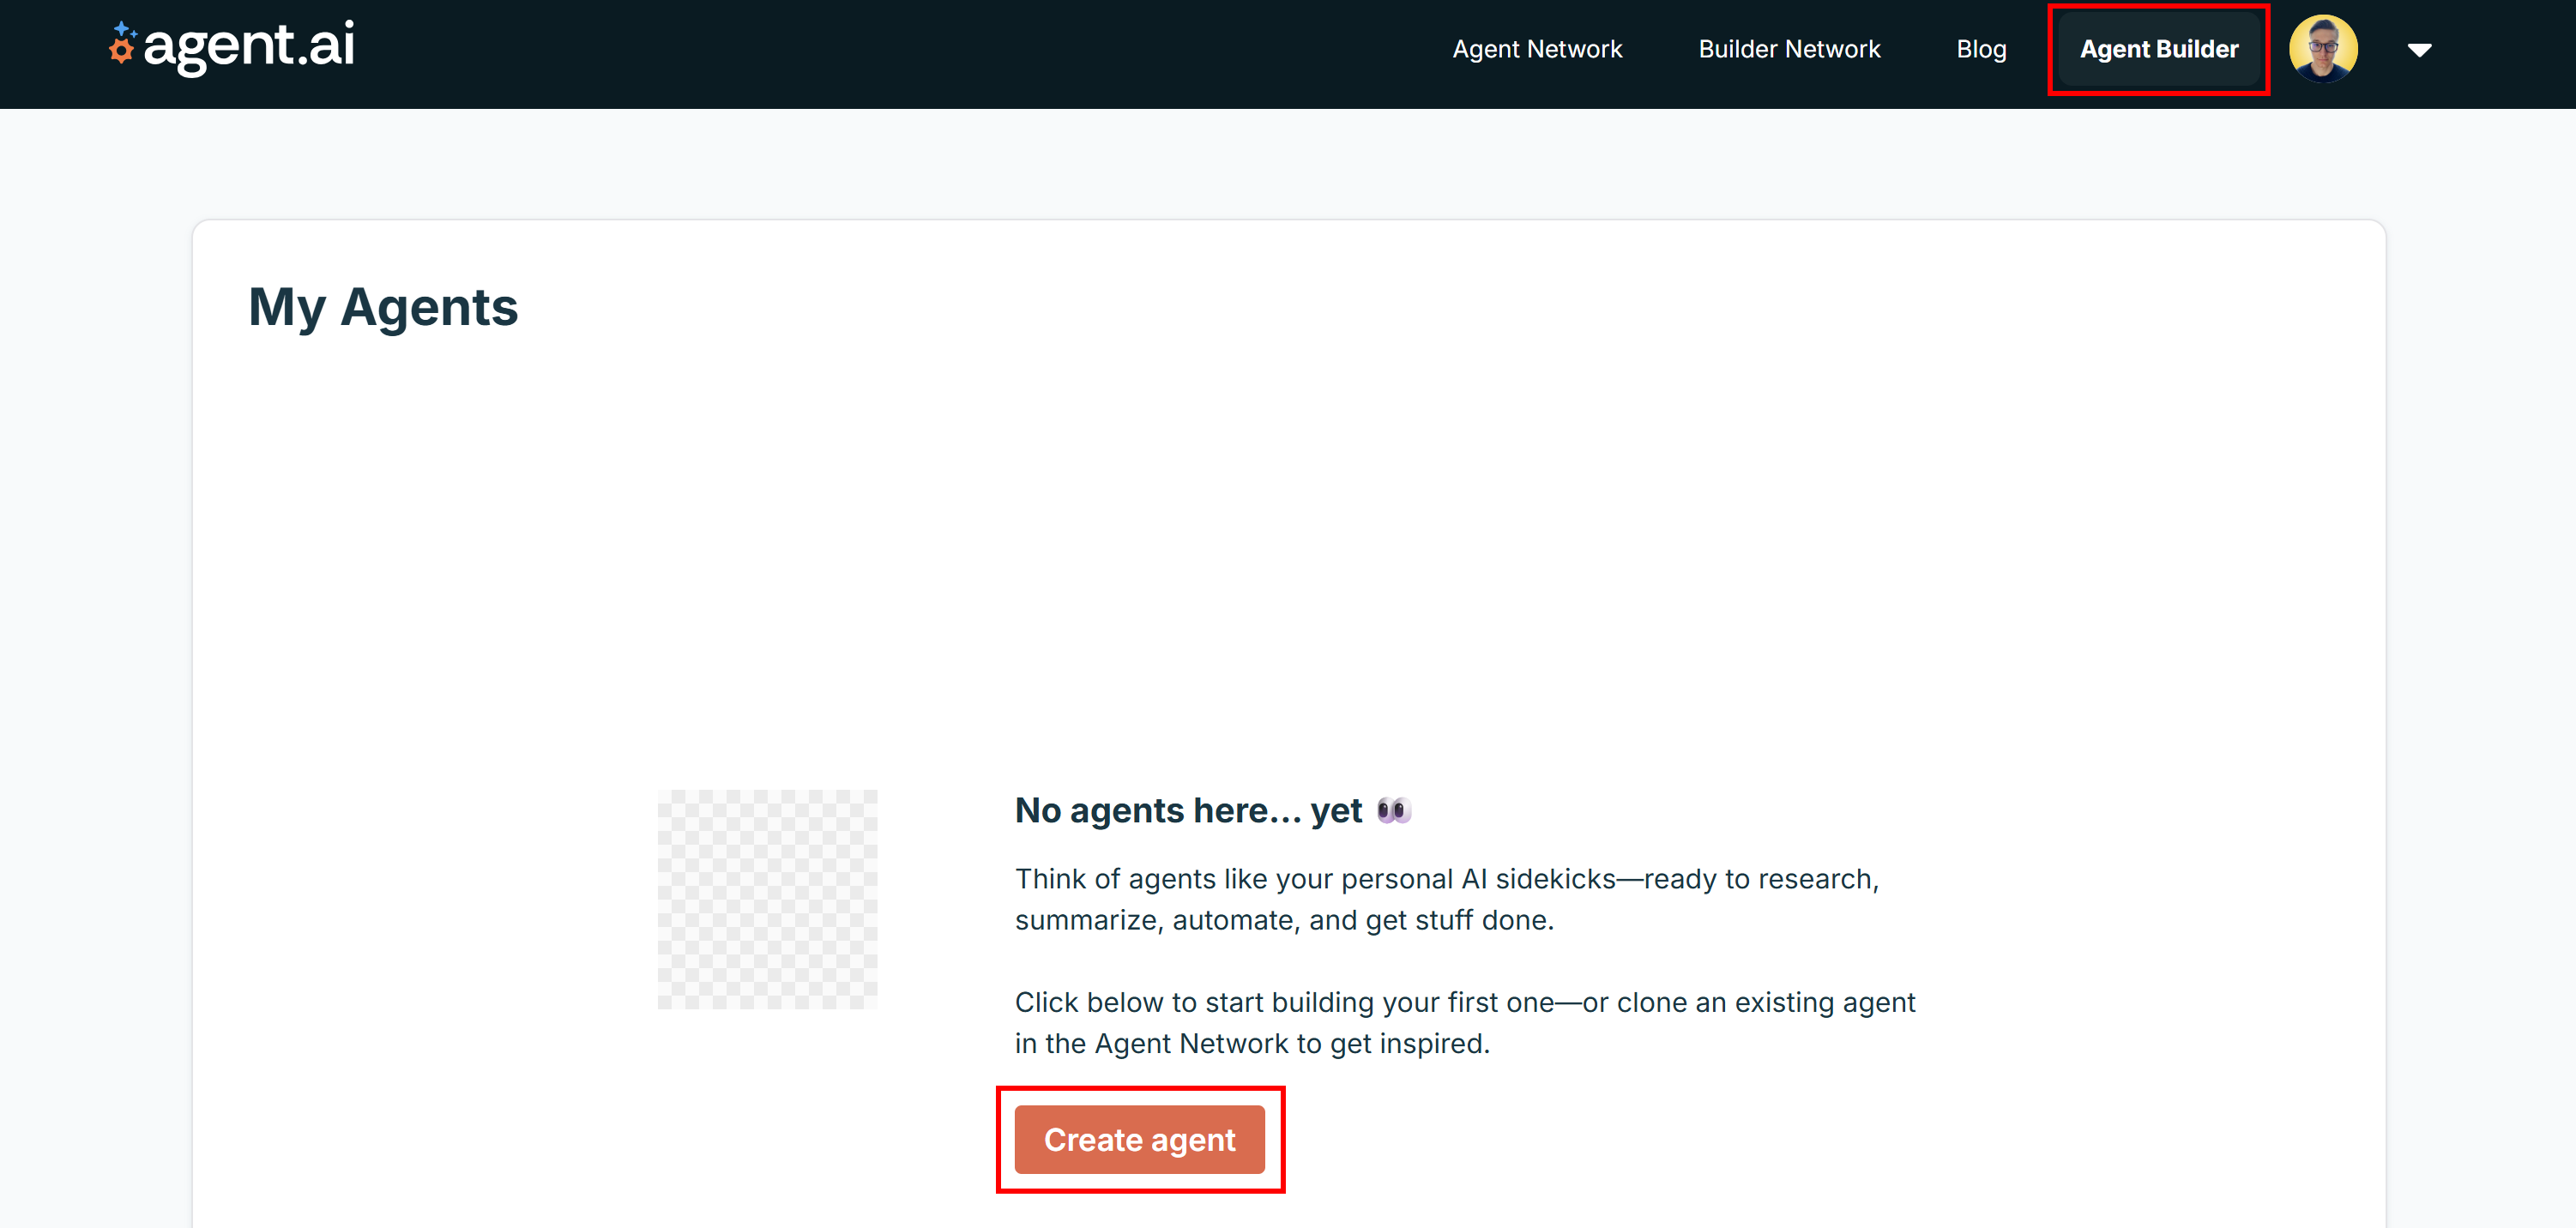
Start by creating an Agent.ai account or logging in.
Once logged in, click the “Agent Builder” link in the top-right corner. Enable the “Agent Builder” feature, and you will be redirected to the “My Agents” section of your account. Here, click the “Create agent” button to start crafting a new agent:
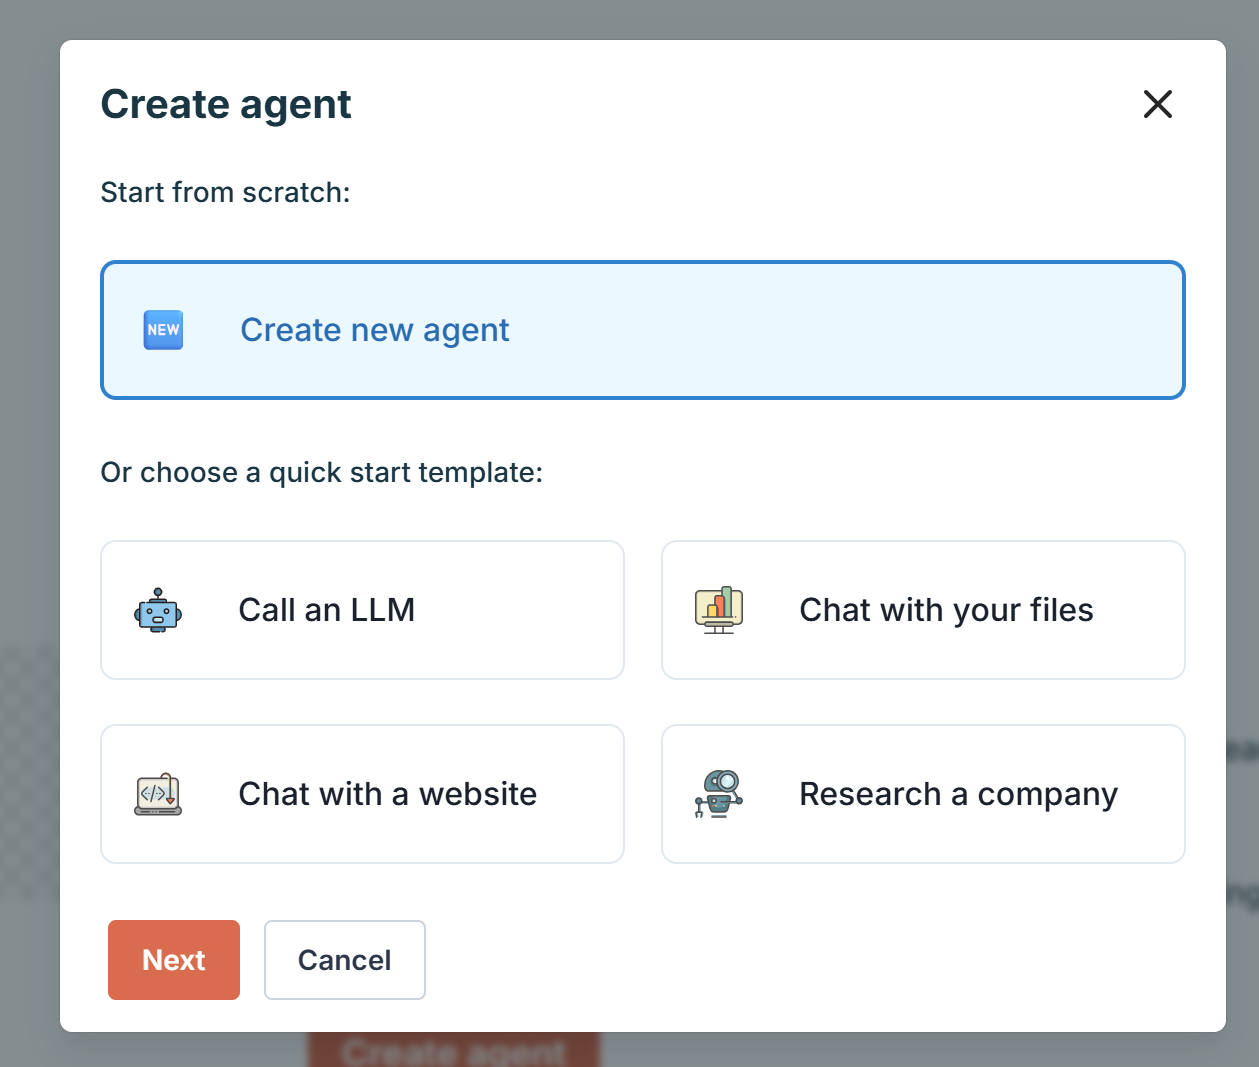
Select the “Create new agent” option and press “Next” to initialize a new agent from scratch:
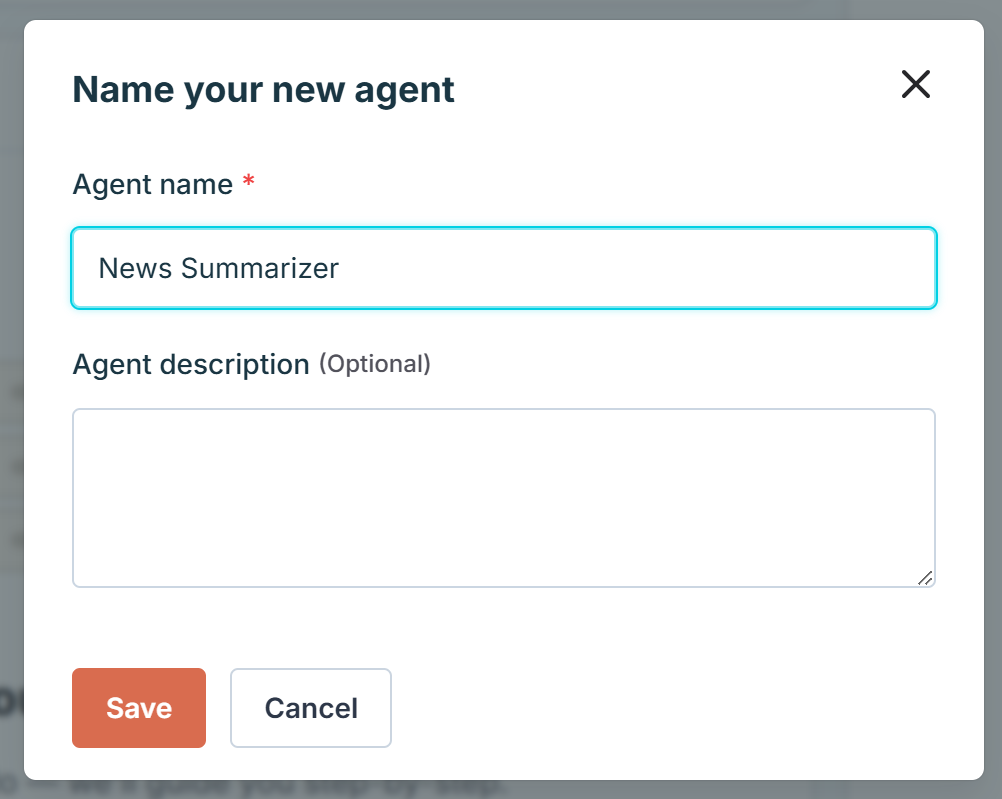
Give your agent a name (e.g., “News Summarizer”), and press “Save”:
You will now have access to Agent.ai’s Agent Builder view:
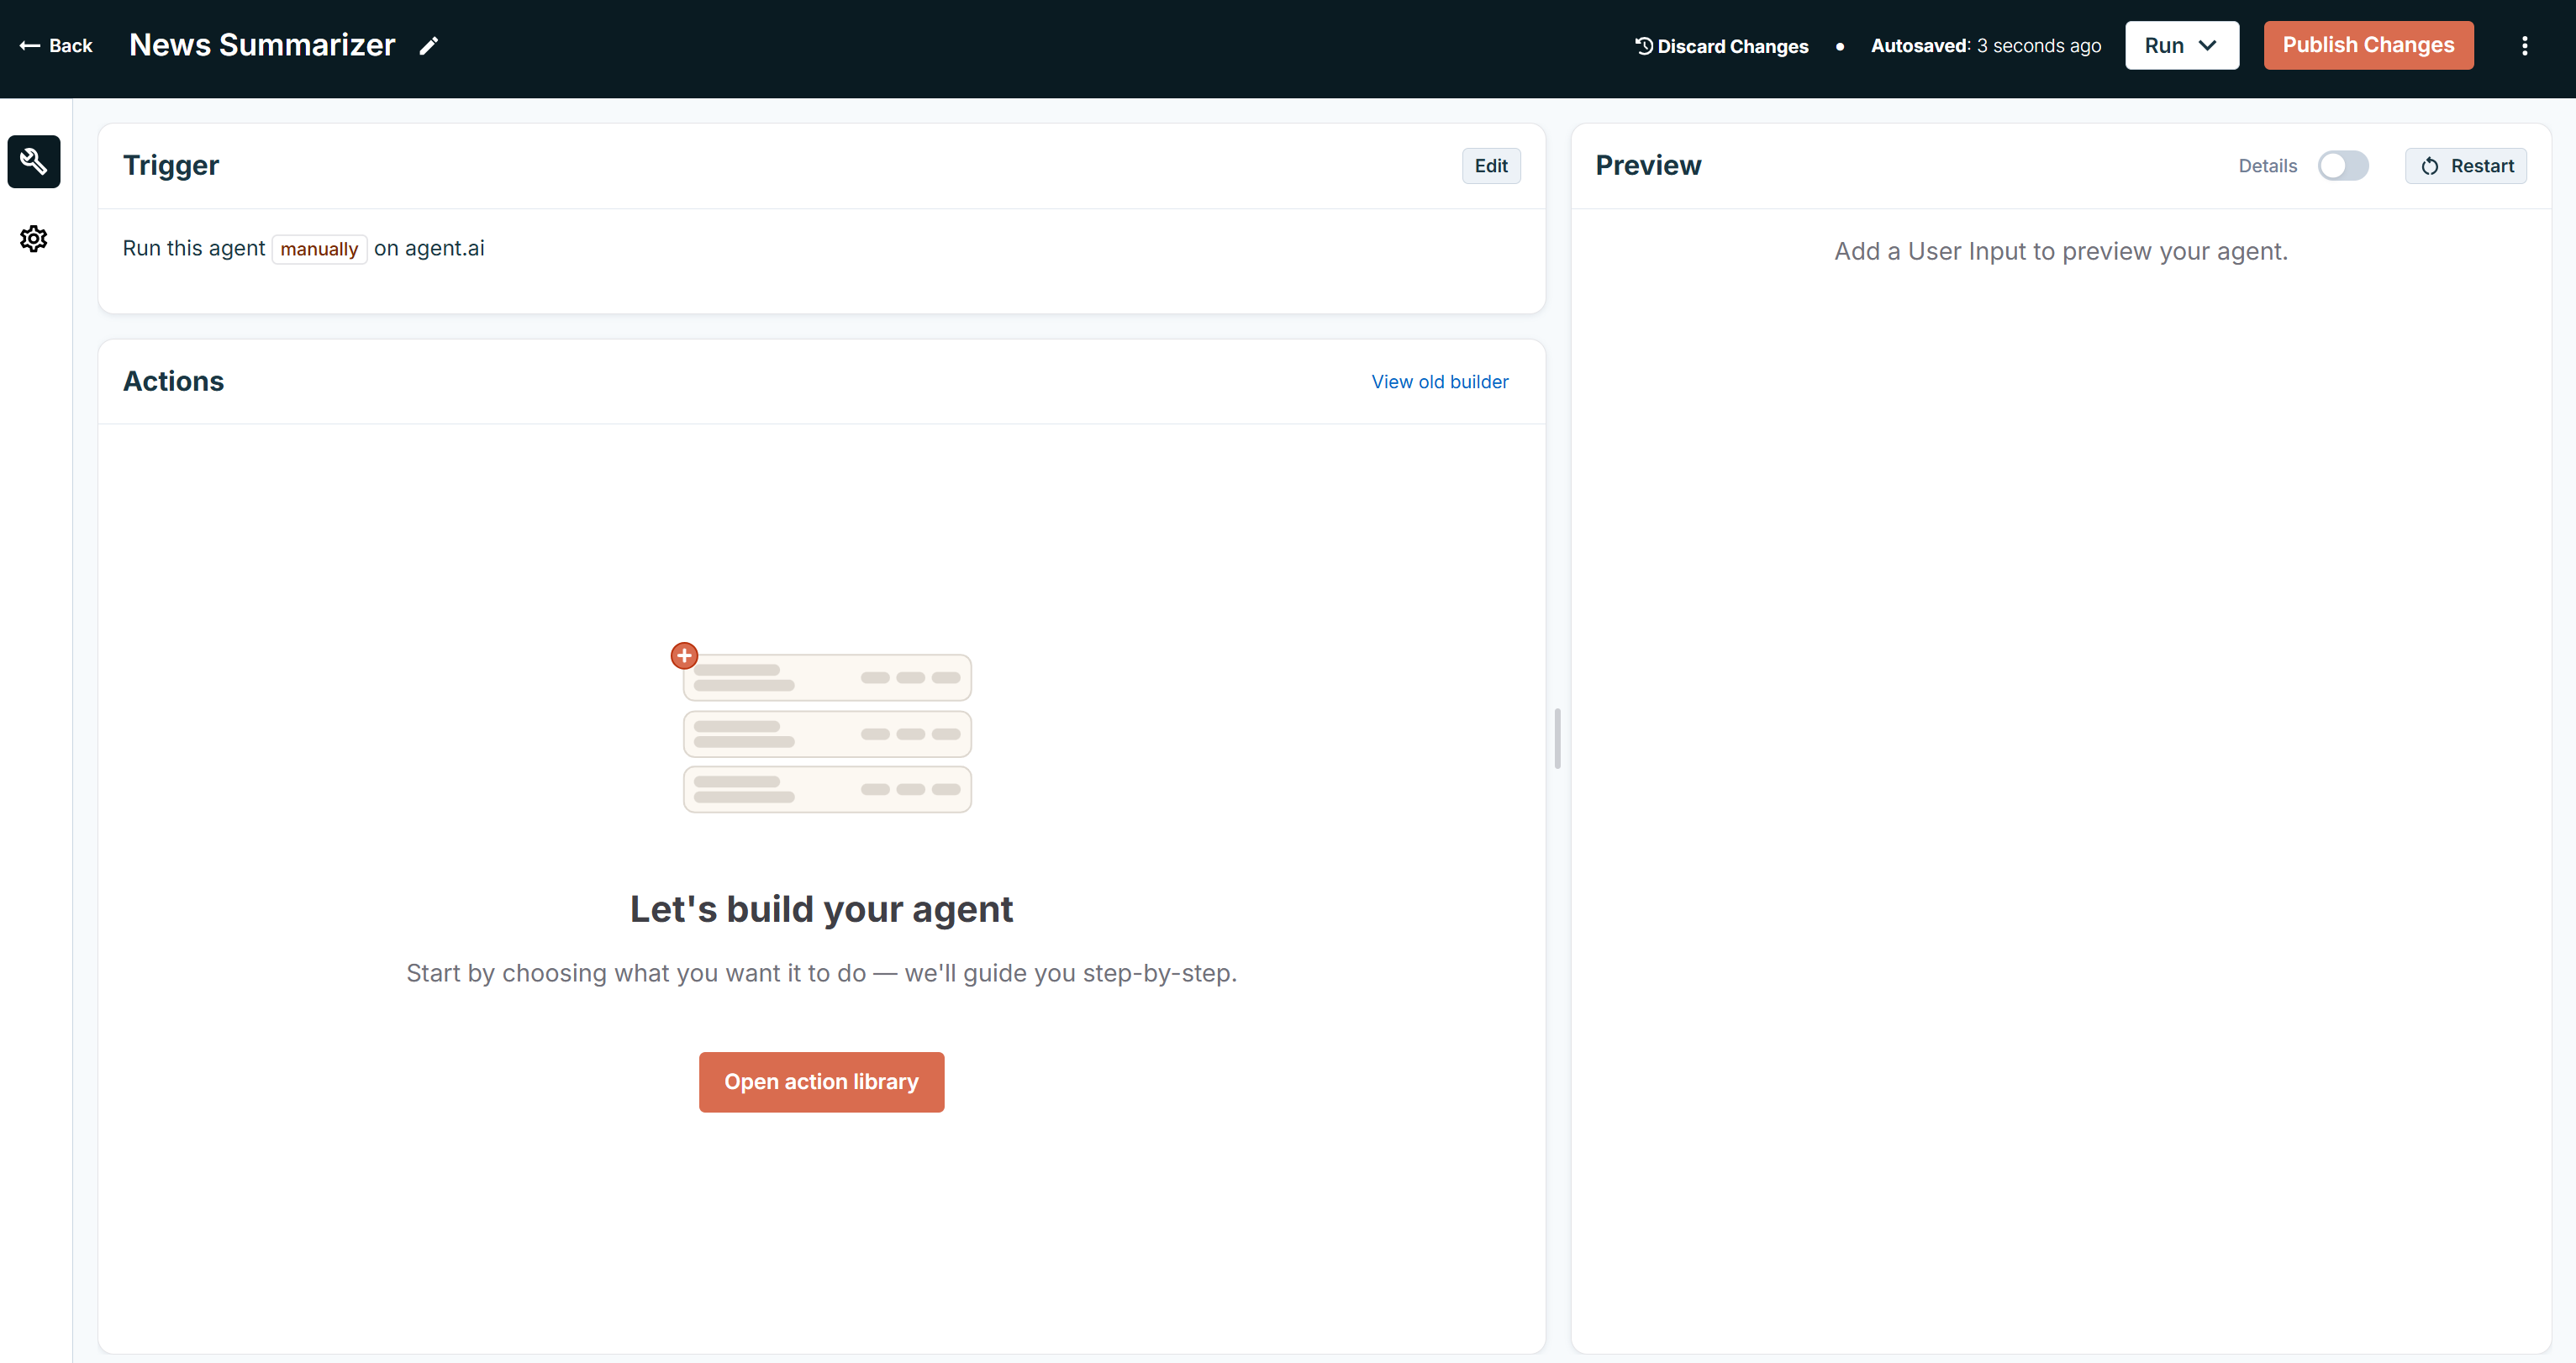
Wonderful! You have successfully created a new blank AI agent.
Time to start defining its logic!
Step #2: Define the User Input Logic to Capture the News Page URL
First, your agent needs to receive the URL of the news page to summarize as input. To do that, add an input action to your agent.
Click the “Open Action Library” button and select the “Get User Input” action under the “Inputs & Data Retrieval” dropdown:
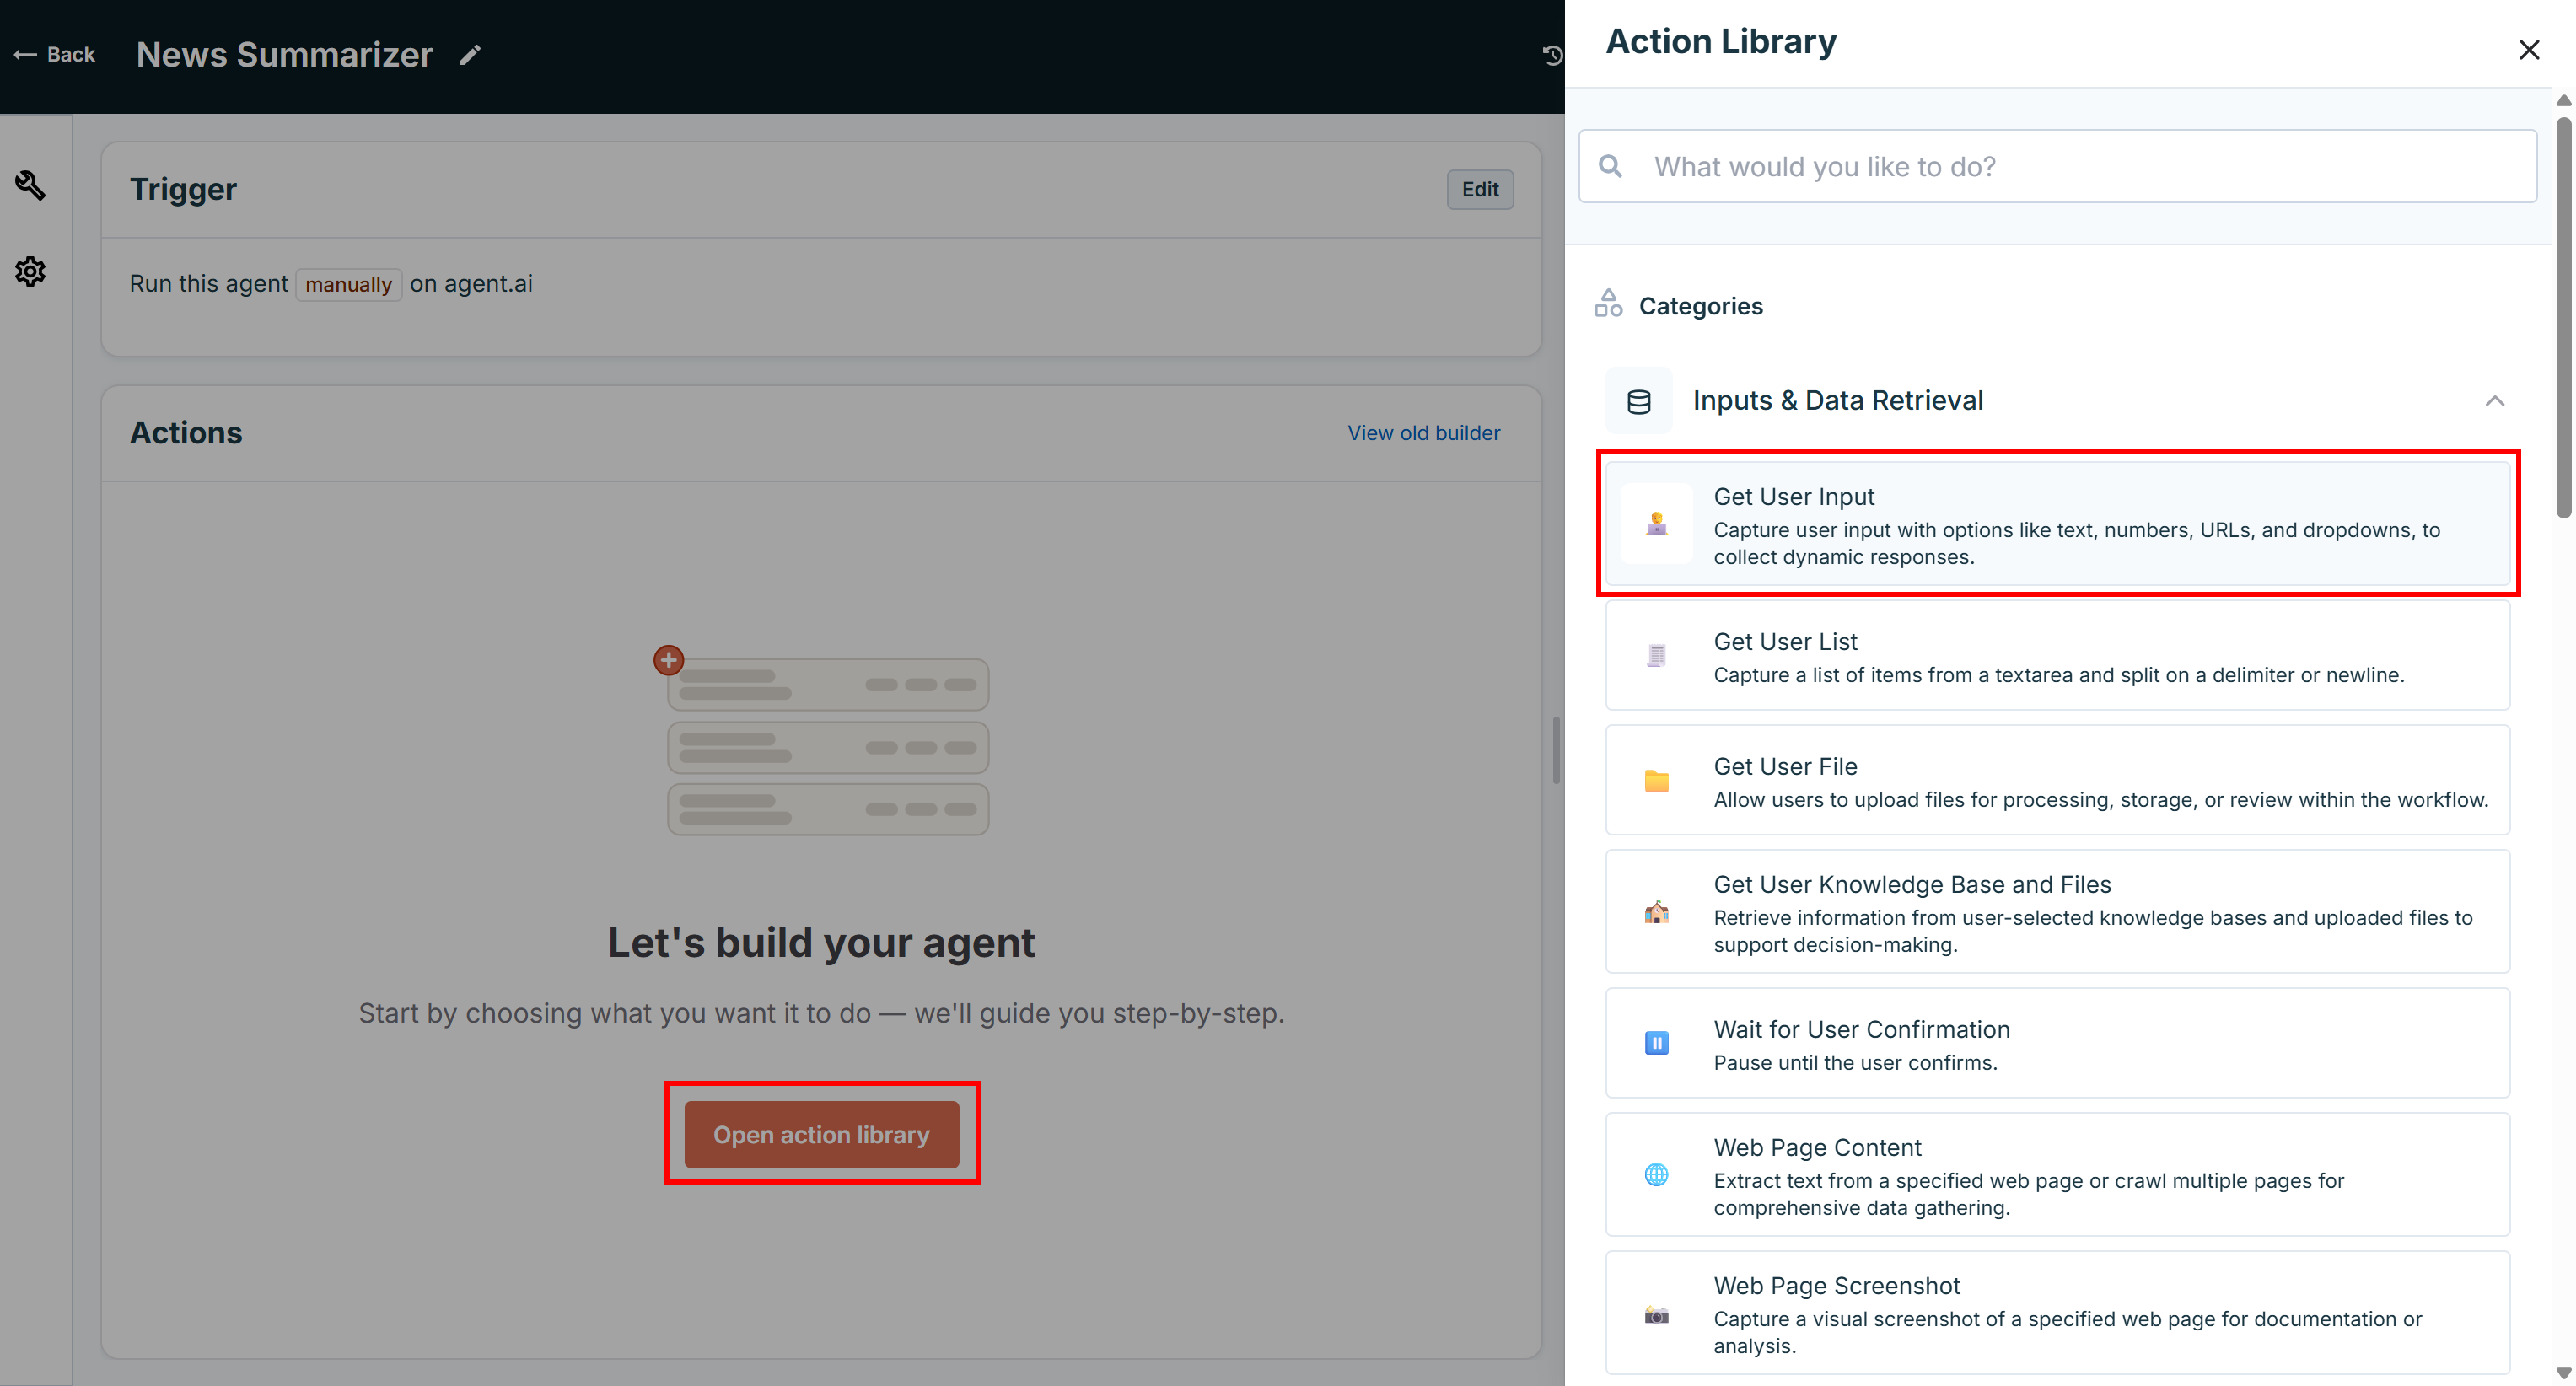
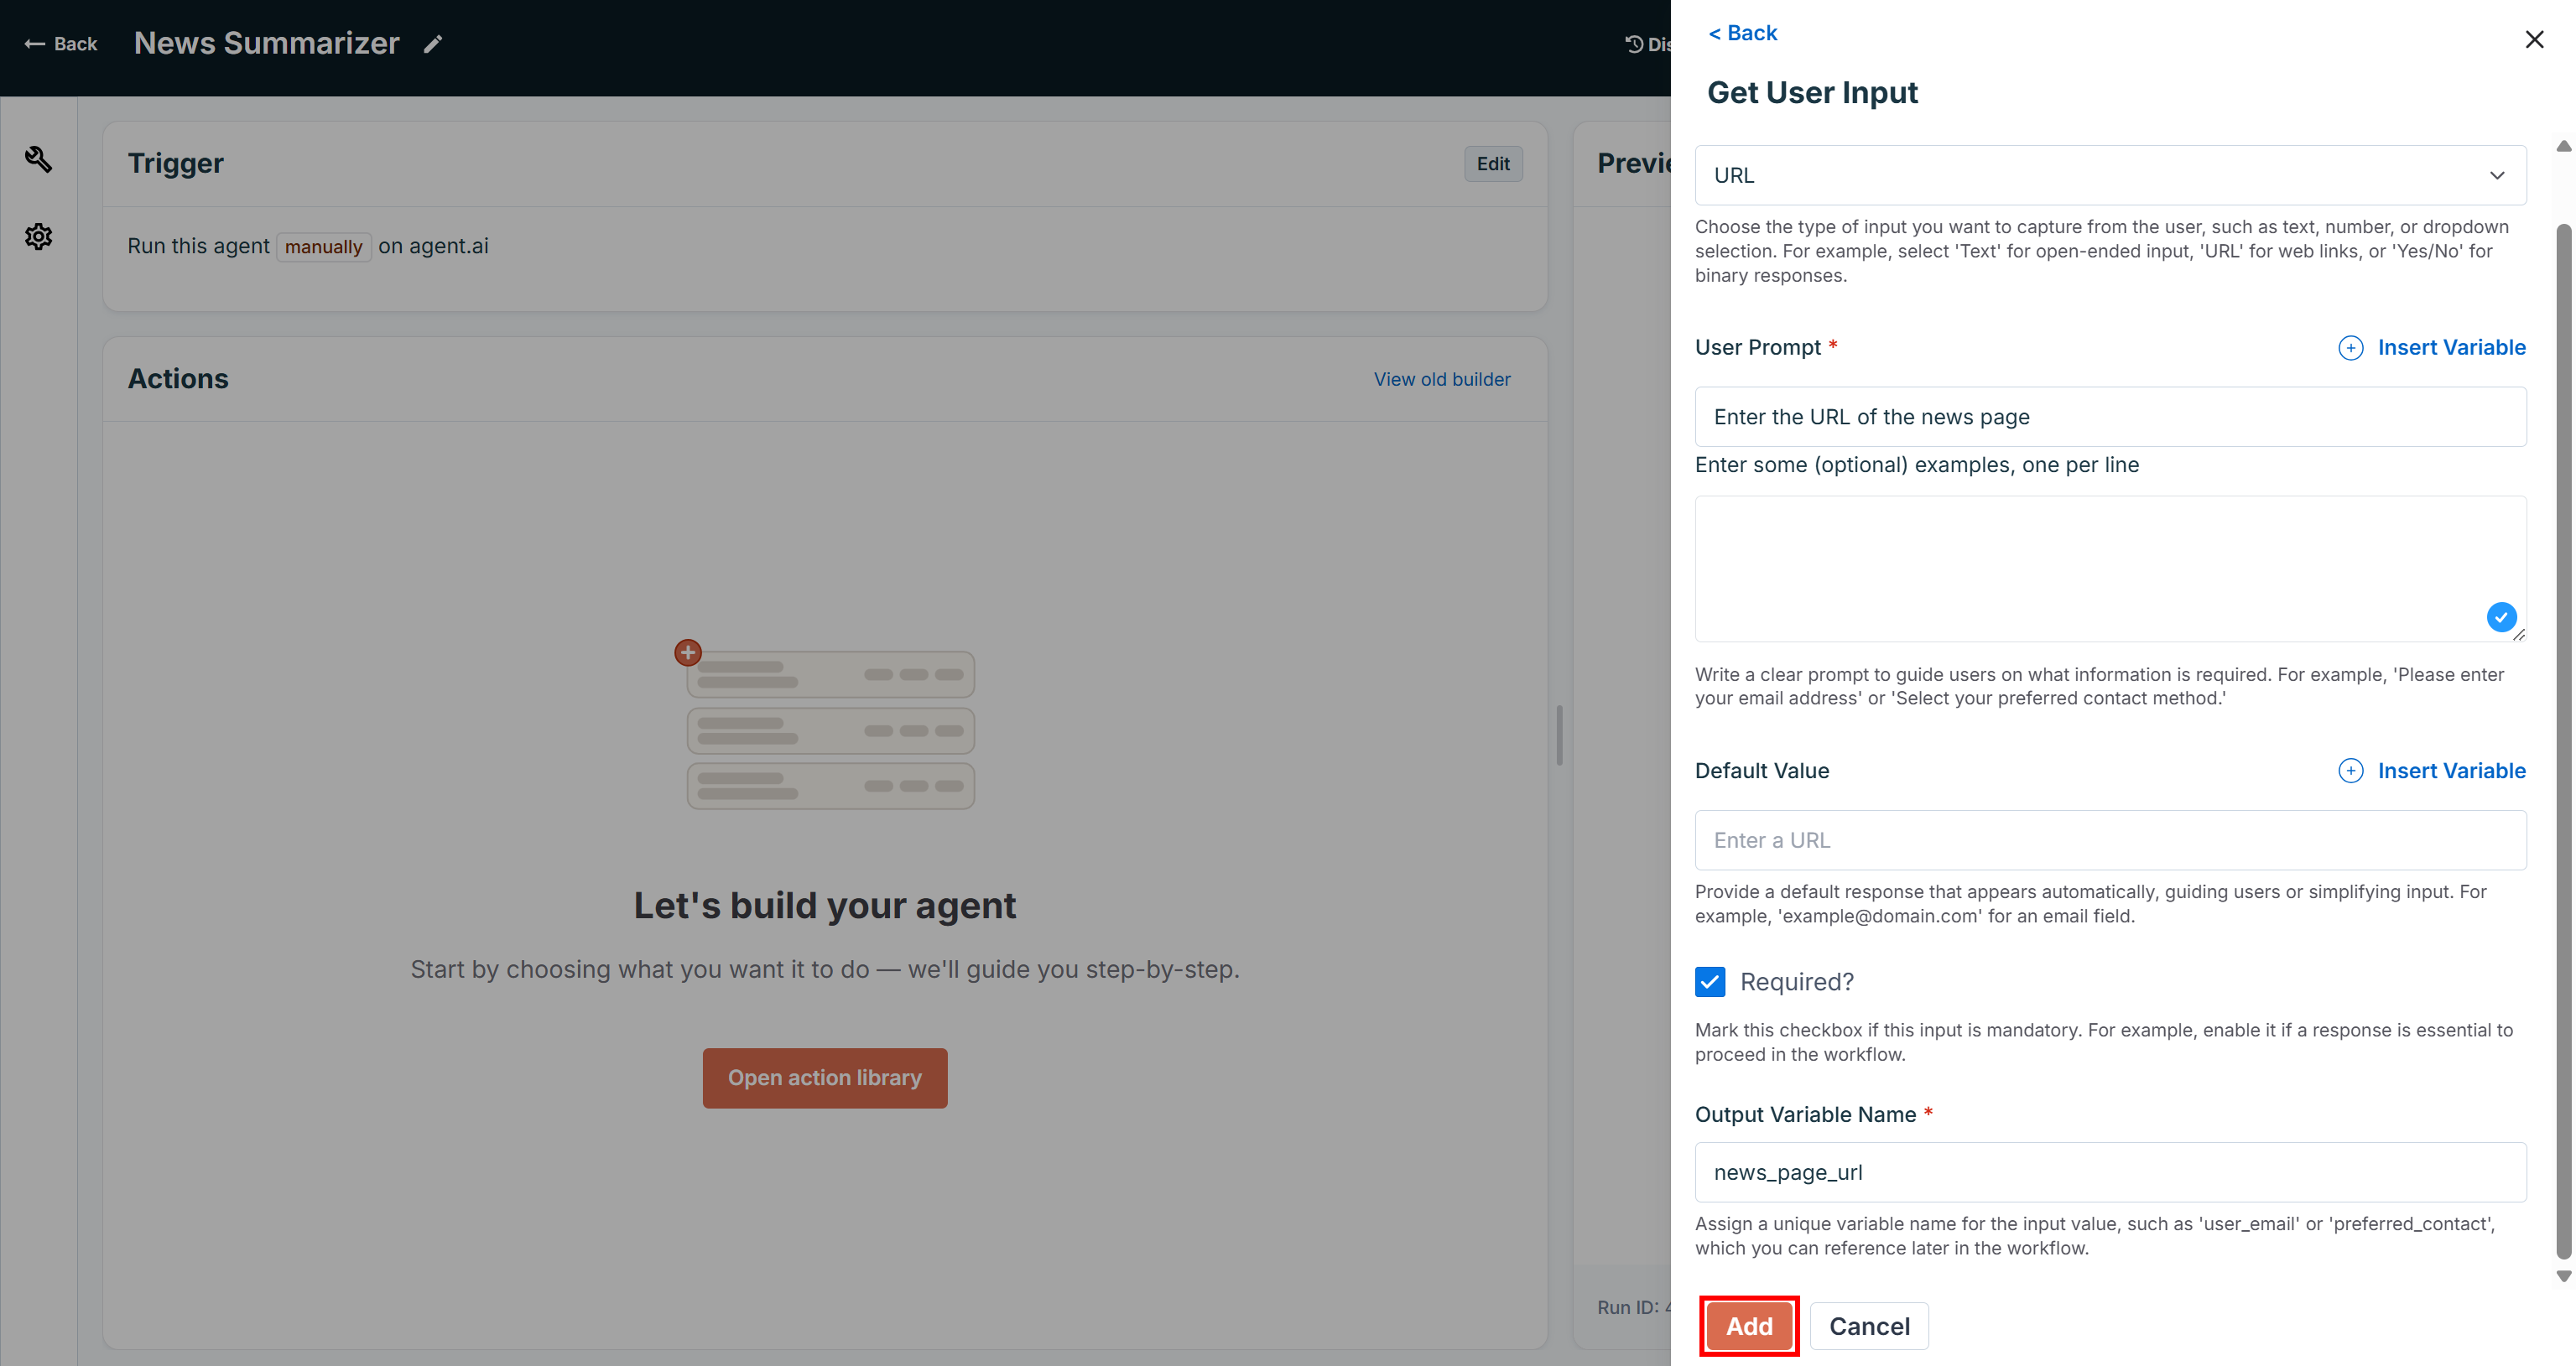
Configure the “Get User Input” action as follows:
- Type: URL
- Use Prompt: “Enter the URL of the news page”
- Required: ✓
- Output Variable Name:
news_page_url
This configuration defines a user input that only accepts URLs, makes it required, and stores the input in the news_page_url variable, which will be accessible to the agent.
When you are done, press “Add”:
You should now see this:
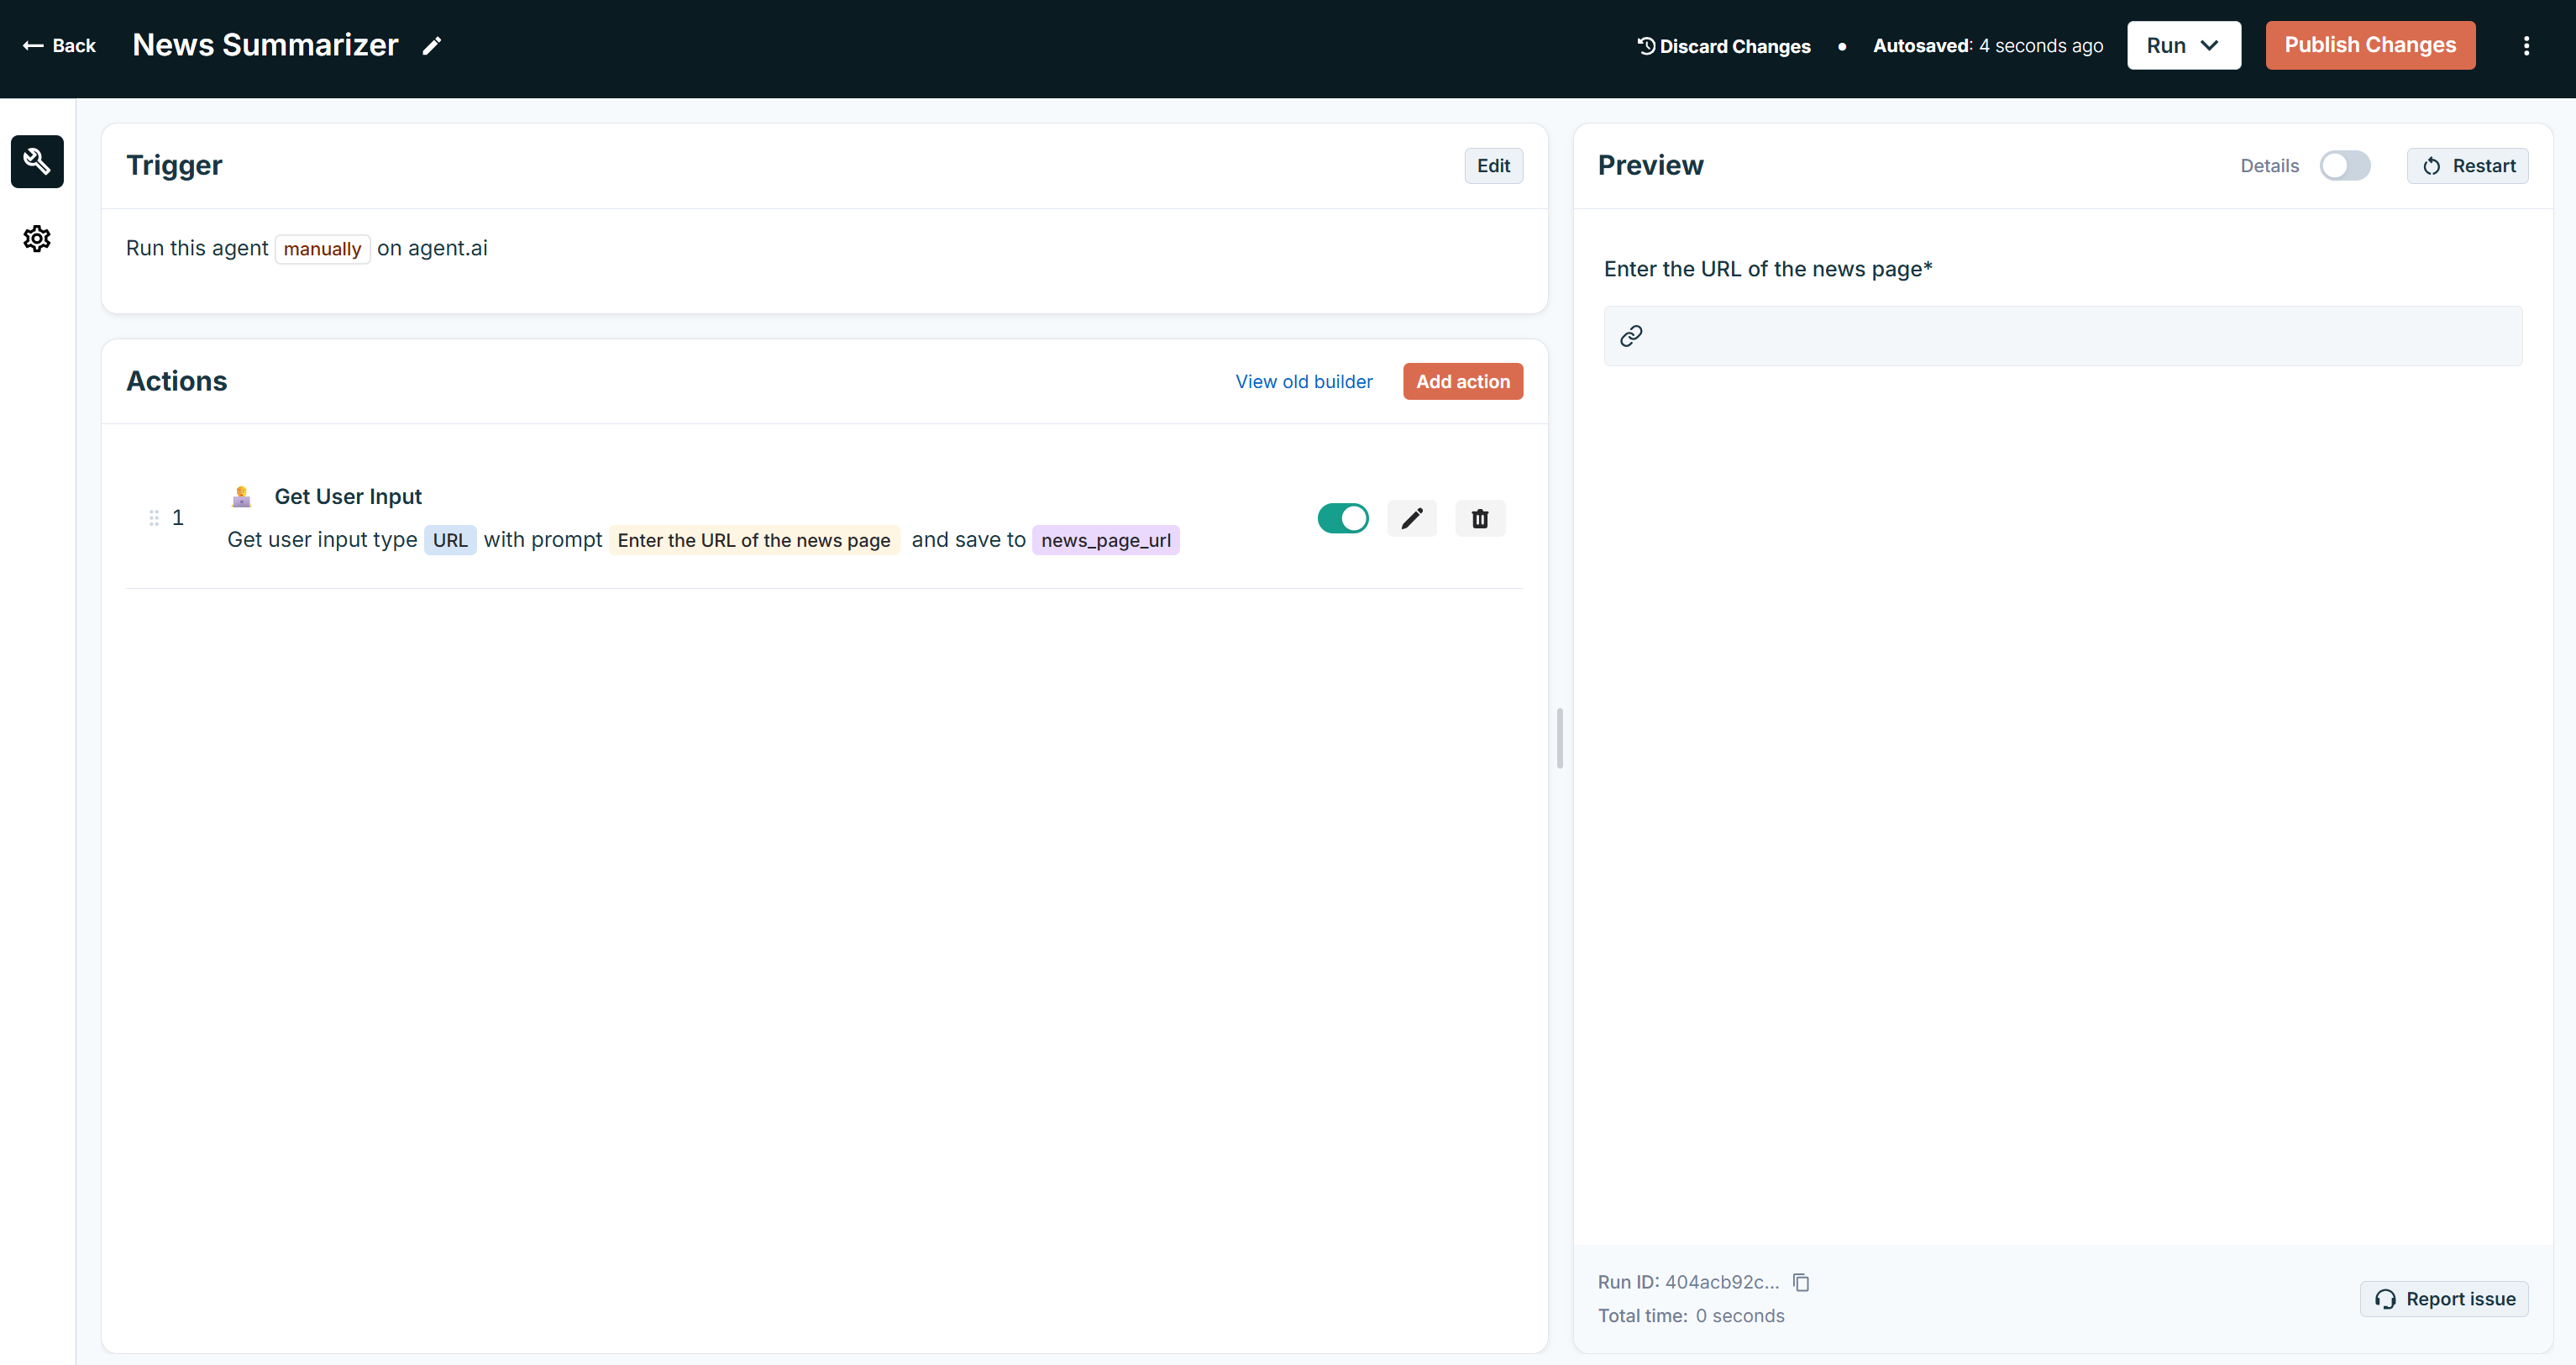
Notice the “Get User Input” action in the “Actions” section and how an “Enter the URL of the news page” input option now appears in the “Preview” section of the agent builder view. Well done!
Step #3: Complete the Agent to Avoid Issues
If you try to interact with the “Enter the URL of the news page” input, you will notice that it is disabled. This is a common behavior that occurs when your Agent.ai agent does not have any output action defined.
To make your agent testable, add a simple output. Click the “Add Action” button and select “Show User Option” under the “Outputs” dropdown:

Configure it with some placeholder logic, for example, always returning the string “test”:

Next, click the “Restart” button in the “Preview” section to reload the agent preview:
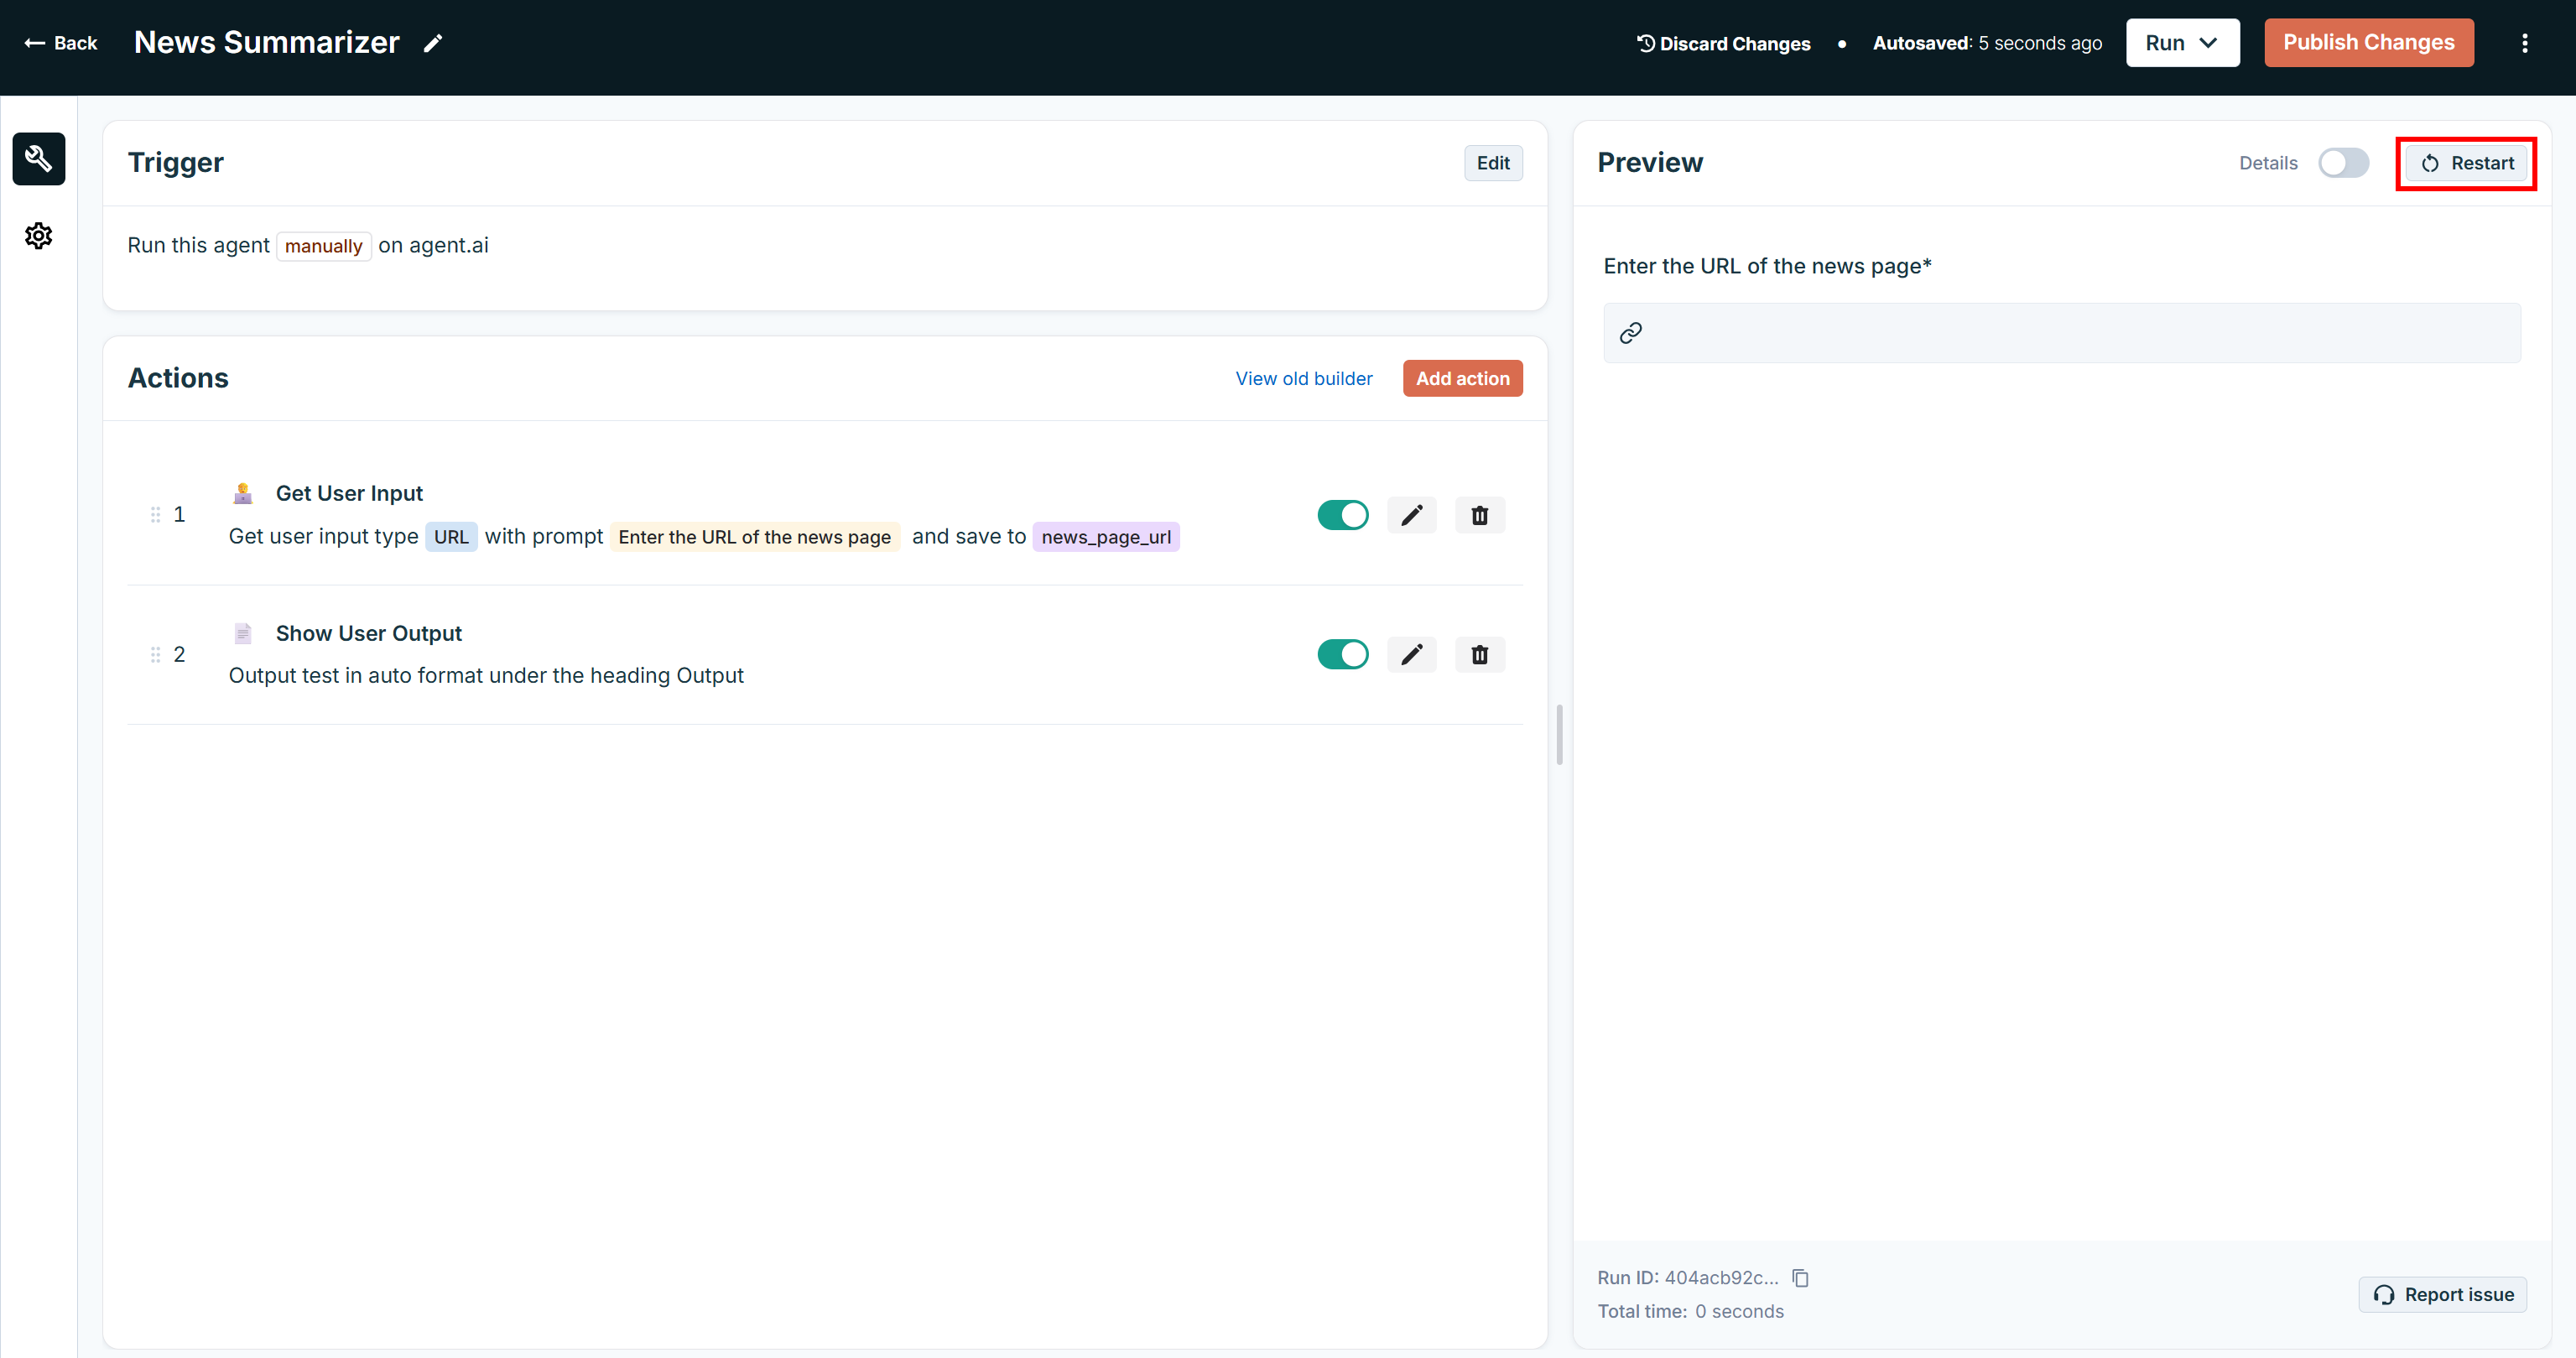
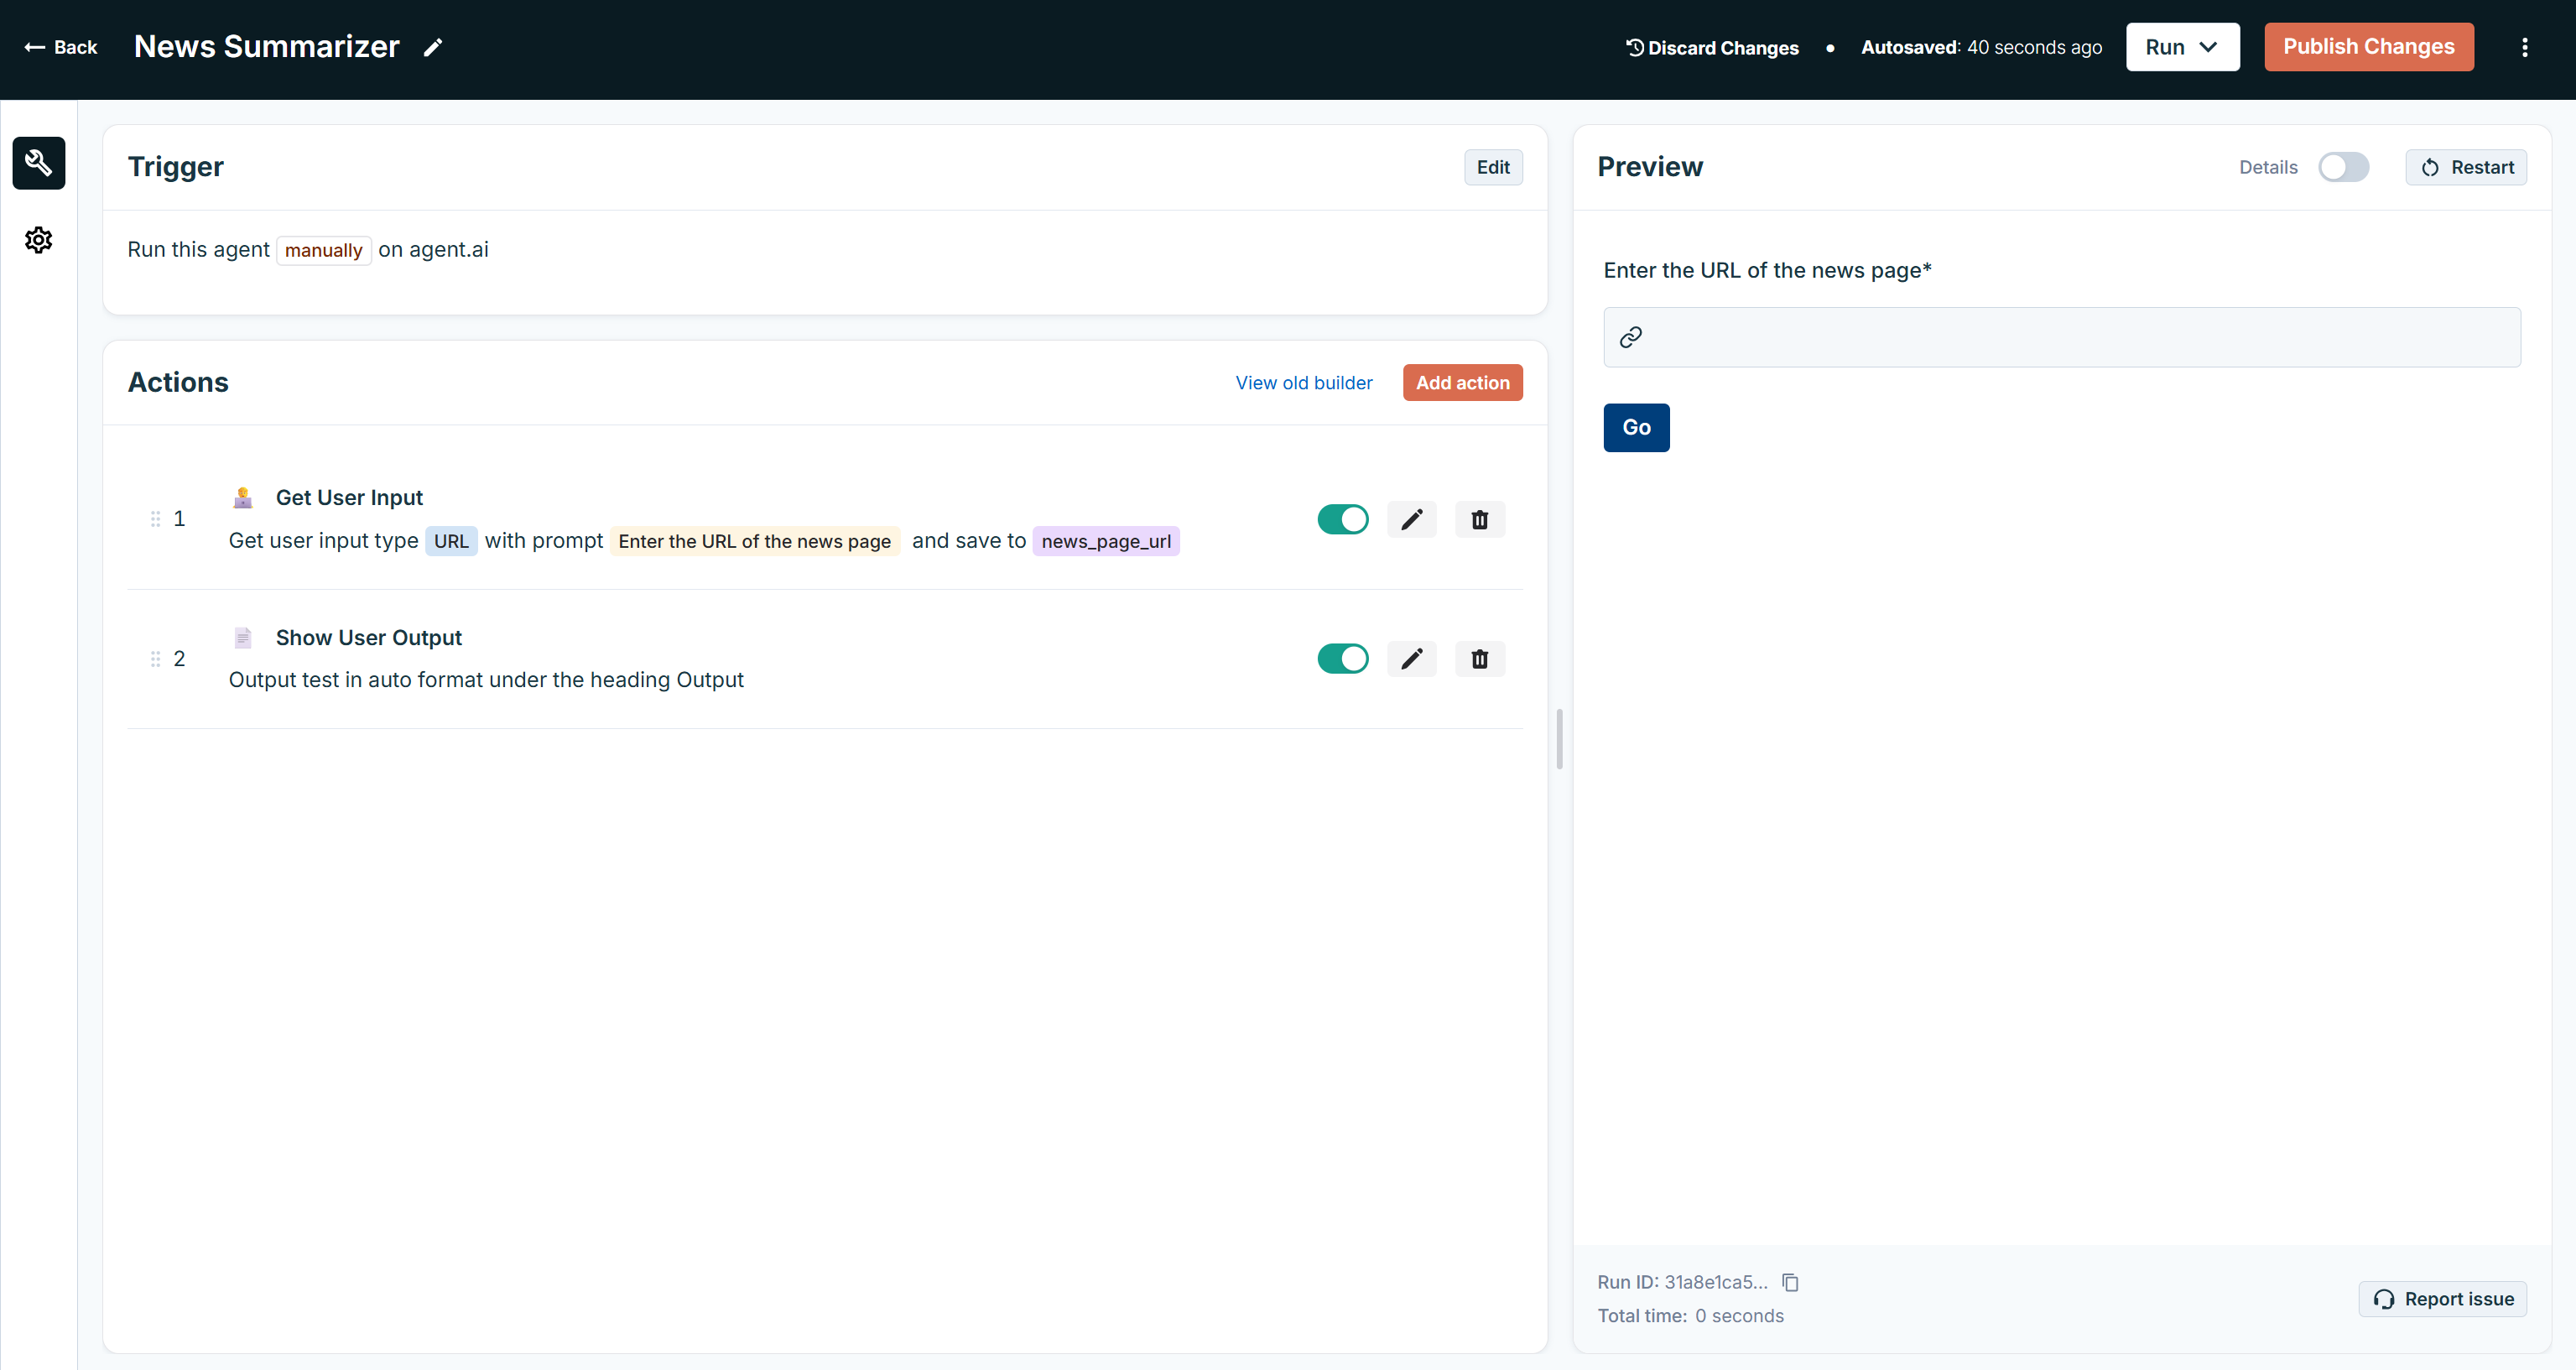
Now, the “Enter the URL of the news page” input will be usable, and the agent will be testable:
Perfect! Do not worry about the placeholder output logic in the “Show User Option” action, as you will update that later in the tutorial.
Step #4: Set Up Your Bright Data Account
The next step is to pass the news URL to the Bright Data Web Unlocker API to retrieve its content in Markdown. Before doing that, let’s take a moment to configure your Bright Data account so it can perform the required request.
Note: If you intend to use other Bright Data web data retrieval products available via APIs, follow a similar approach as shown below. Just adapt some actions accordingly. For more guidance, always refer to the official documentation.
To call the Web Unlocker API in your Agent.ai agent, you need to:
- Enable the Web Unlocker solution in your Bright Data dashboard.
- Retrieve your Bright Data API token, which grants access to both the Web Unlocker (together with Web Scraper API and all other API-available services).
Follow the steps below to complete the setup!
First, if you do not already have a Bright Data account, create one. If you already have an account, log in and reach your dashboard. Click the “Proxies and Scraping” button on the left menu to go to the “Proxies & Scraping Infrastructure” page:
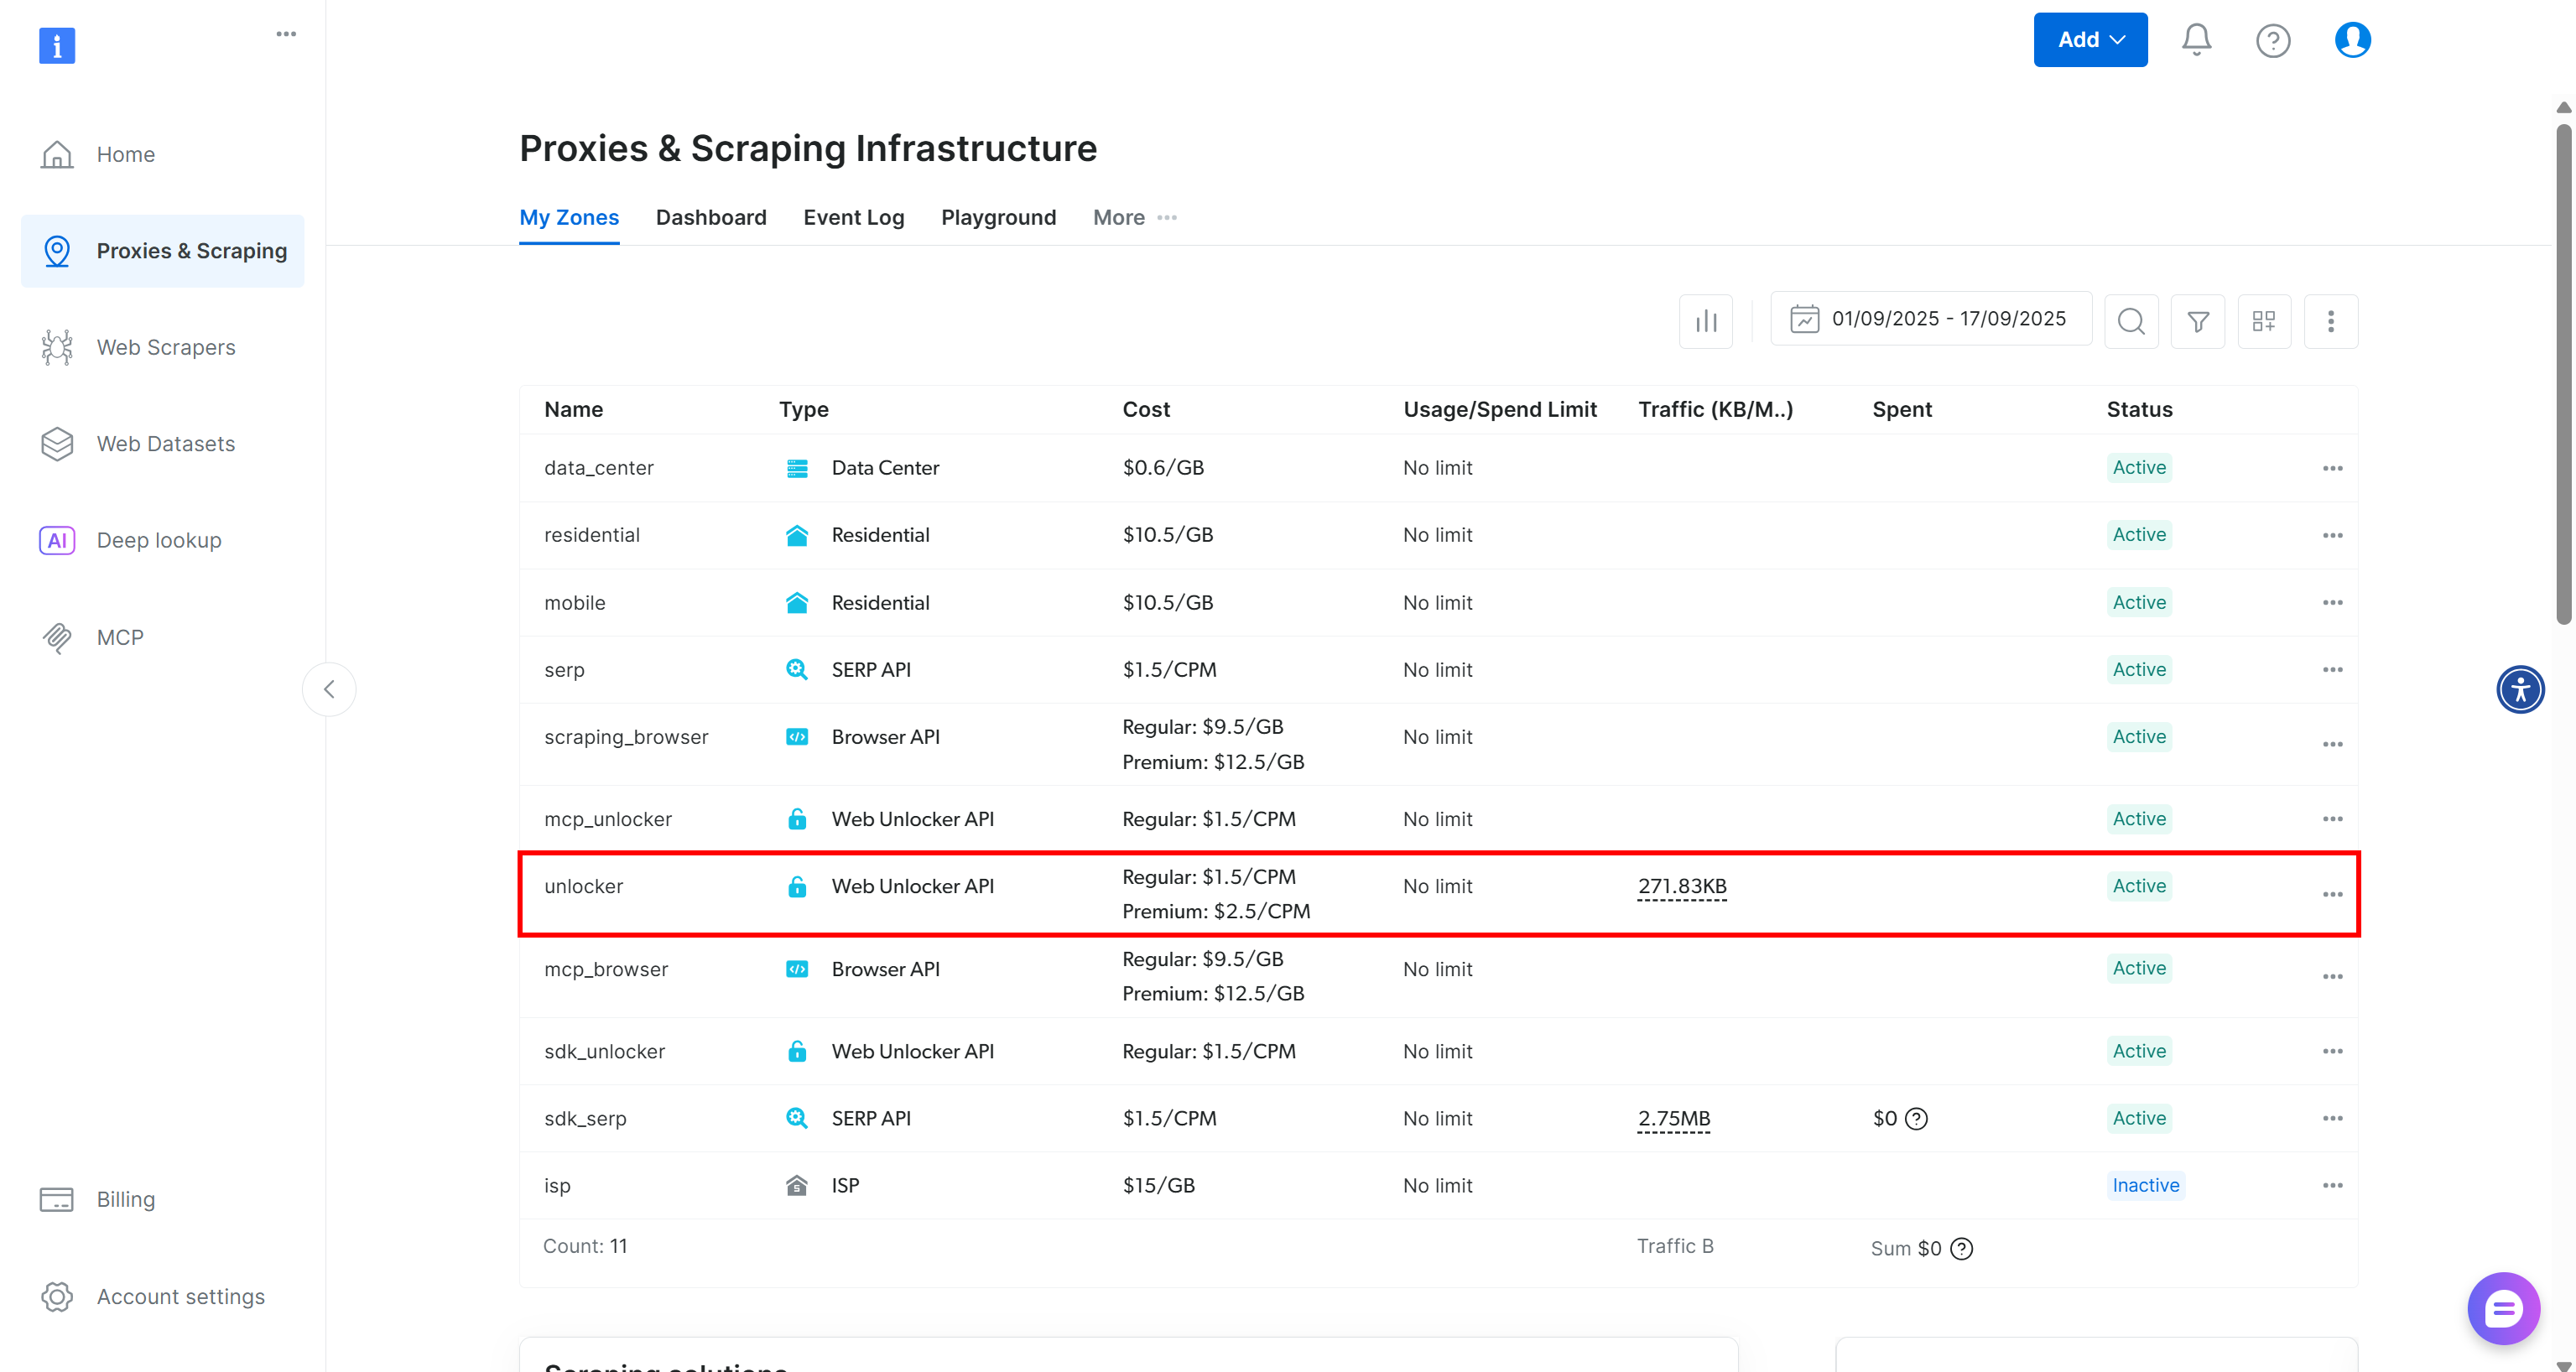
If you already see an active Web Unlocker API zone (as above), you are good to go for micro-step 1. The zone name (e.g., unlocker) is important, as you will need it later in your agent configuration.
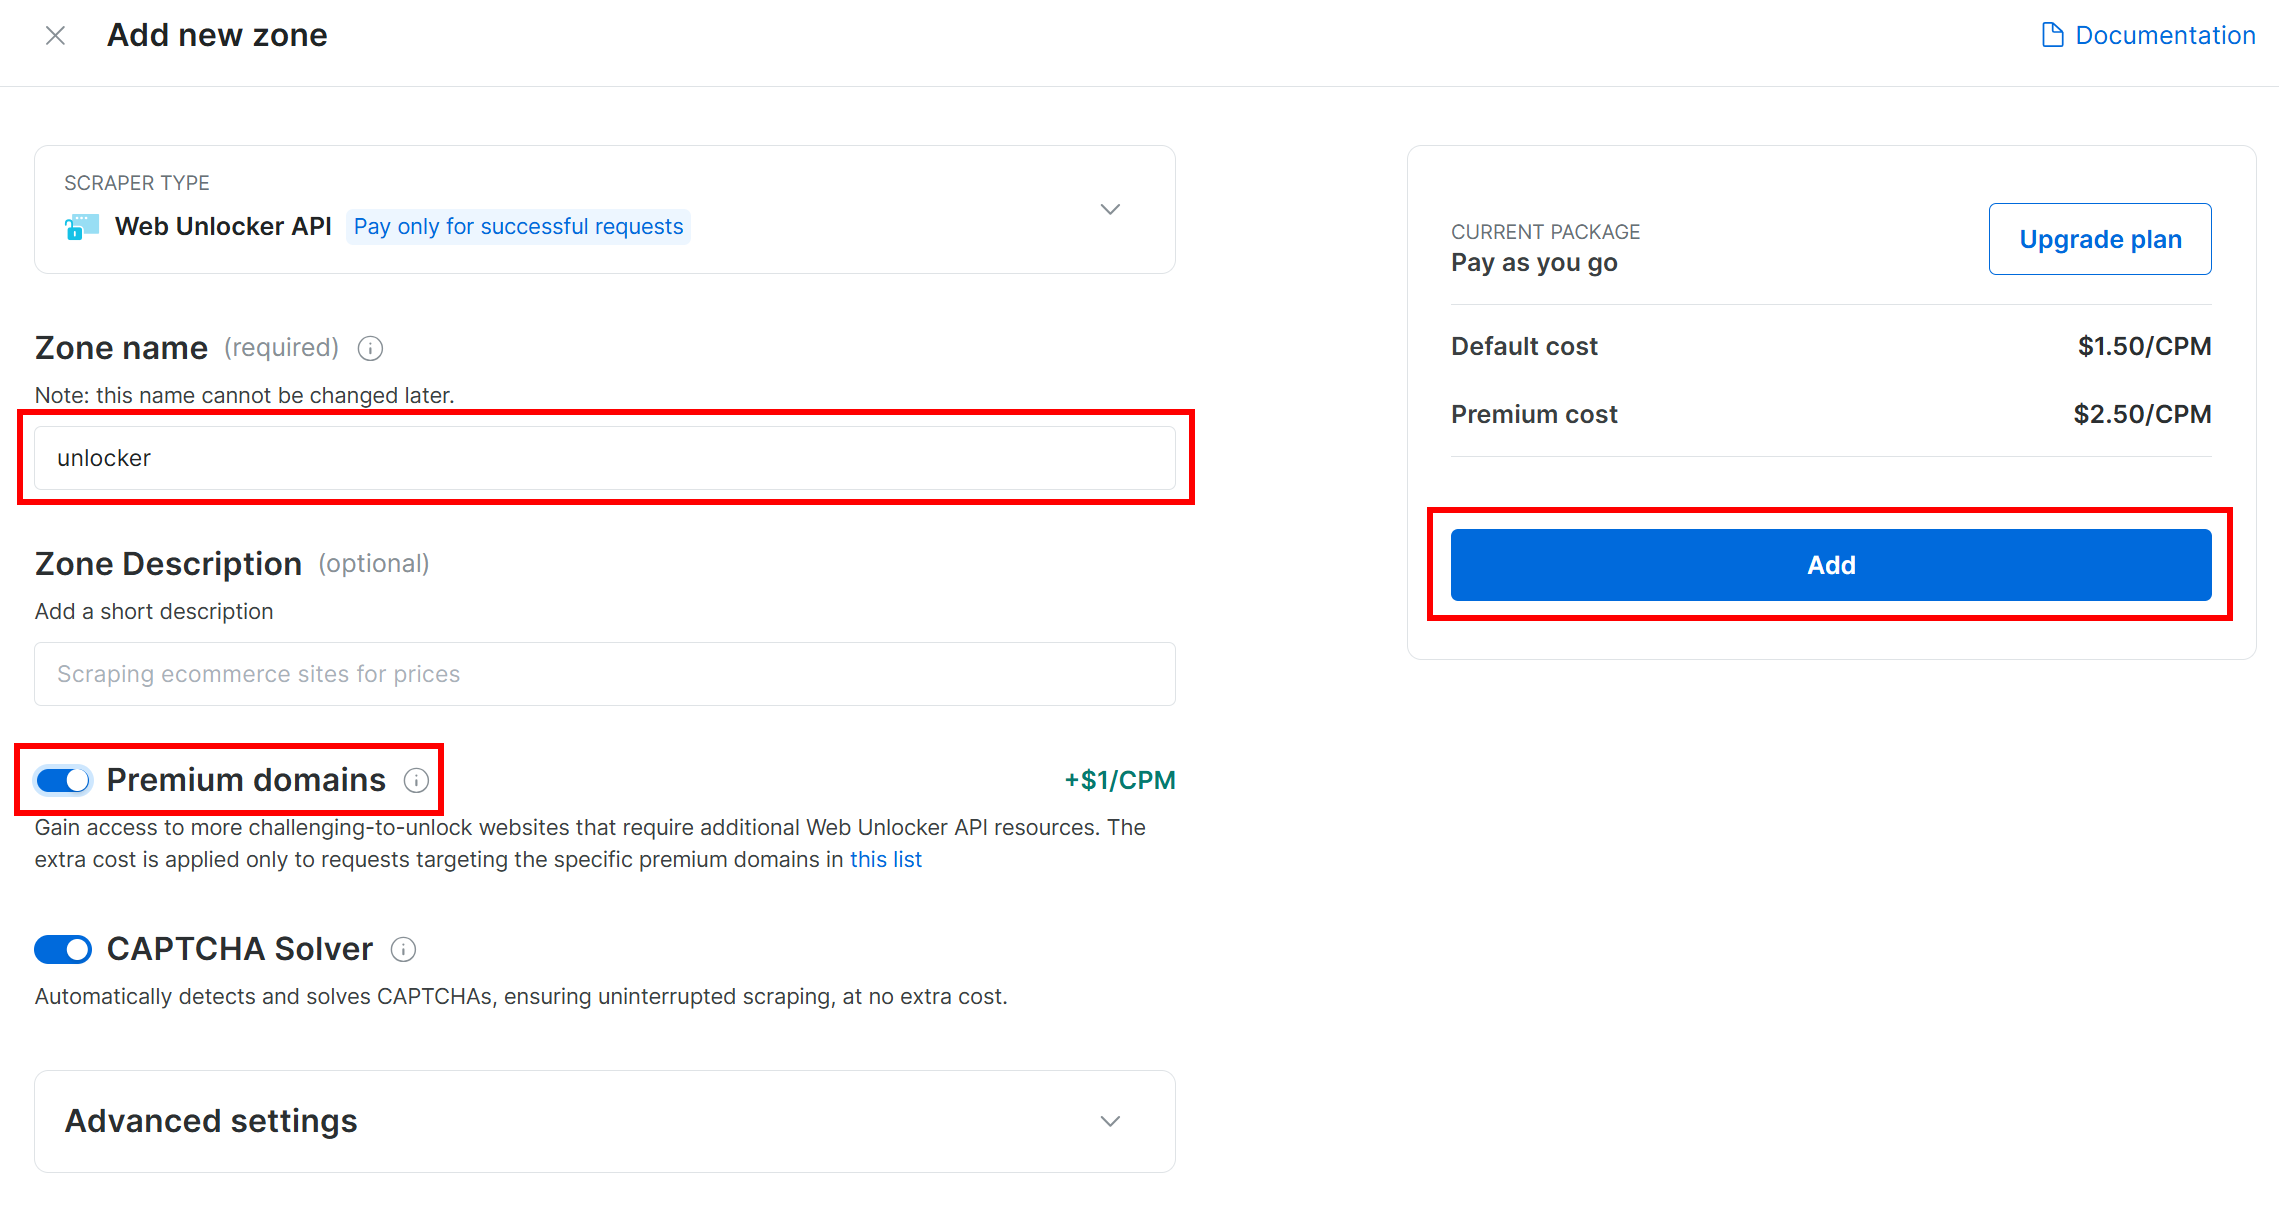
If you do not have a zone yet, scroll down to the “Web Unlocker API” section and click “Create zone”:
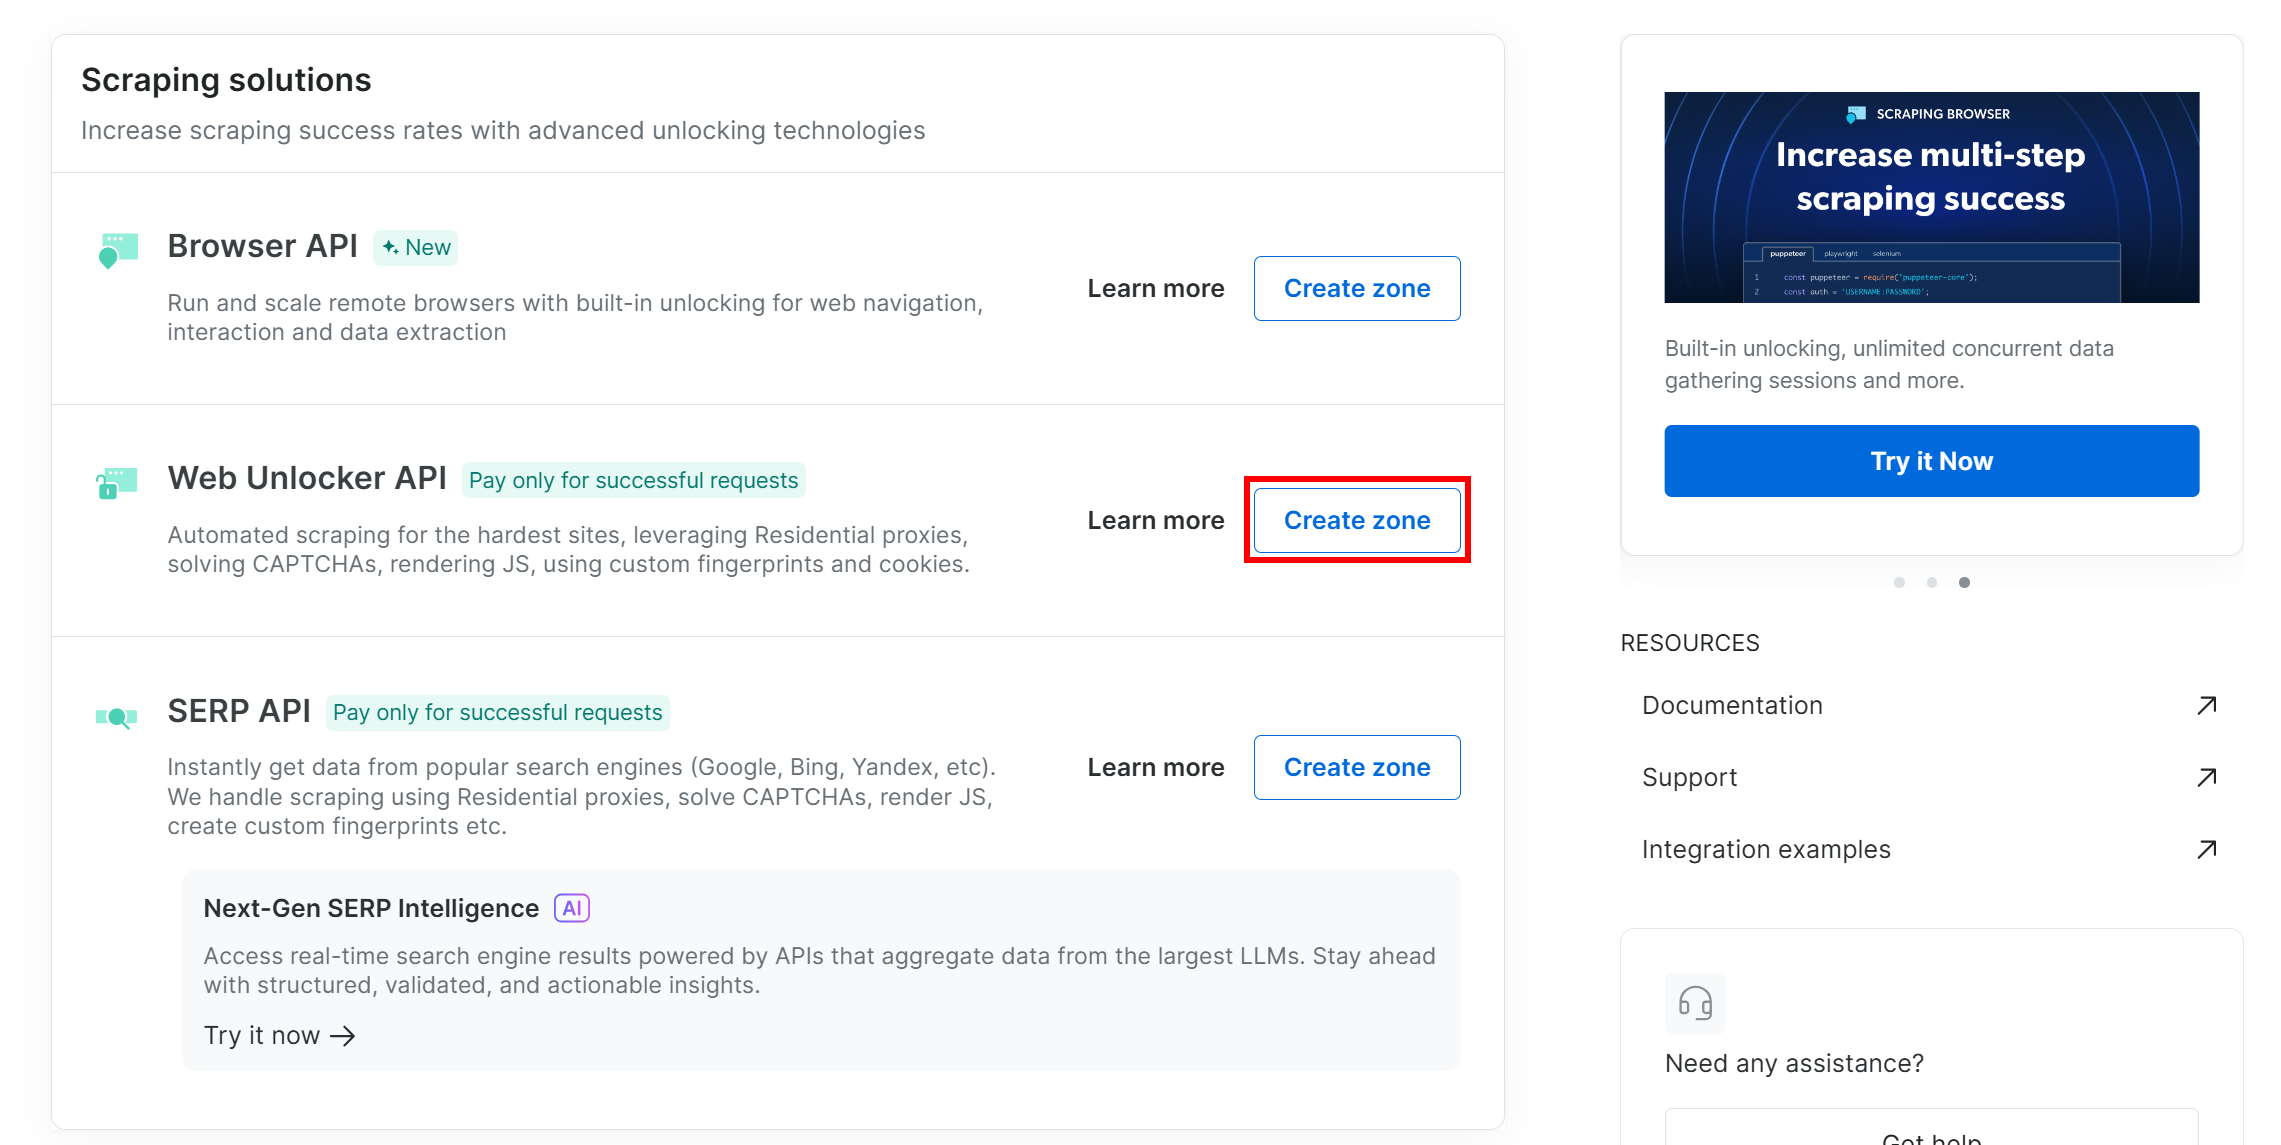
Give your new zone a name, such as unlocker, enable advanced features for better performance, and click “Add”:
Once the zone is created, you will be redirected to the zone’s configuration page:
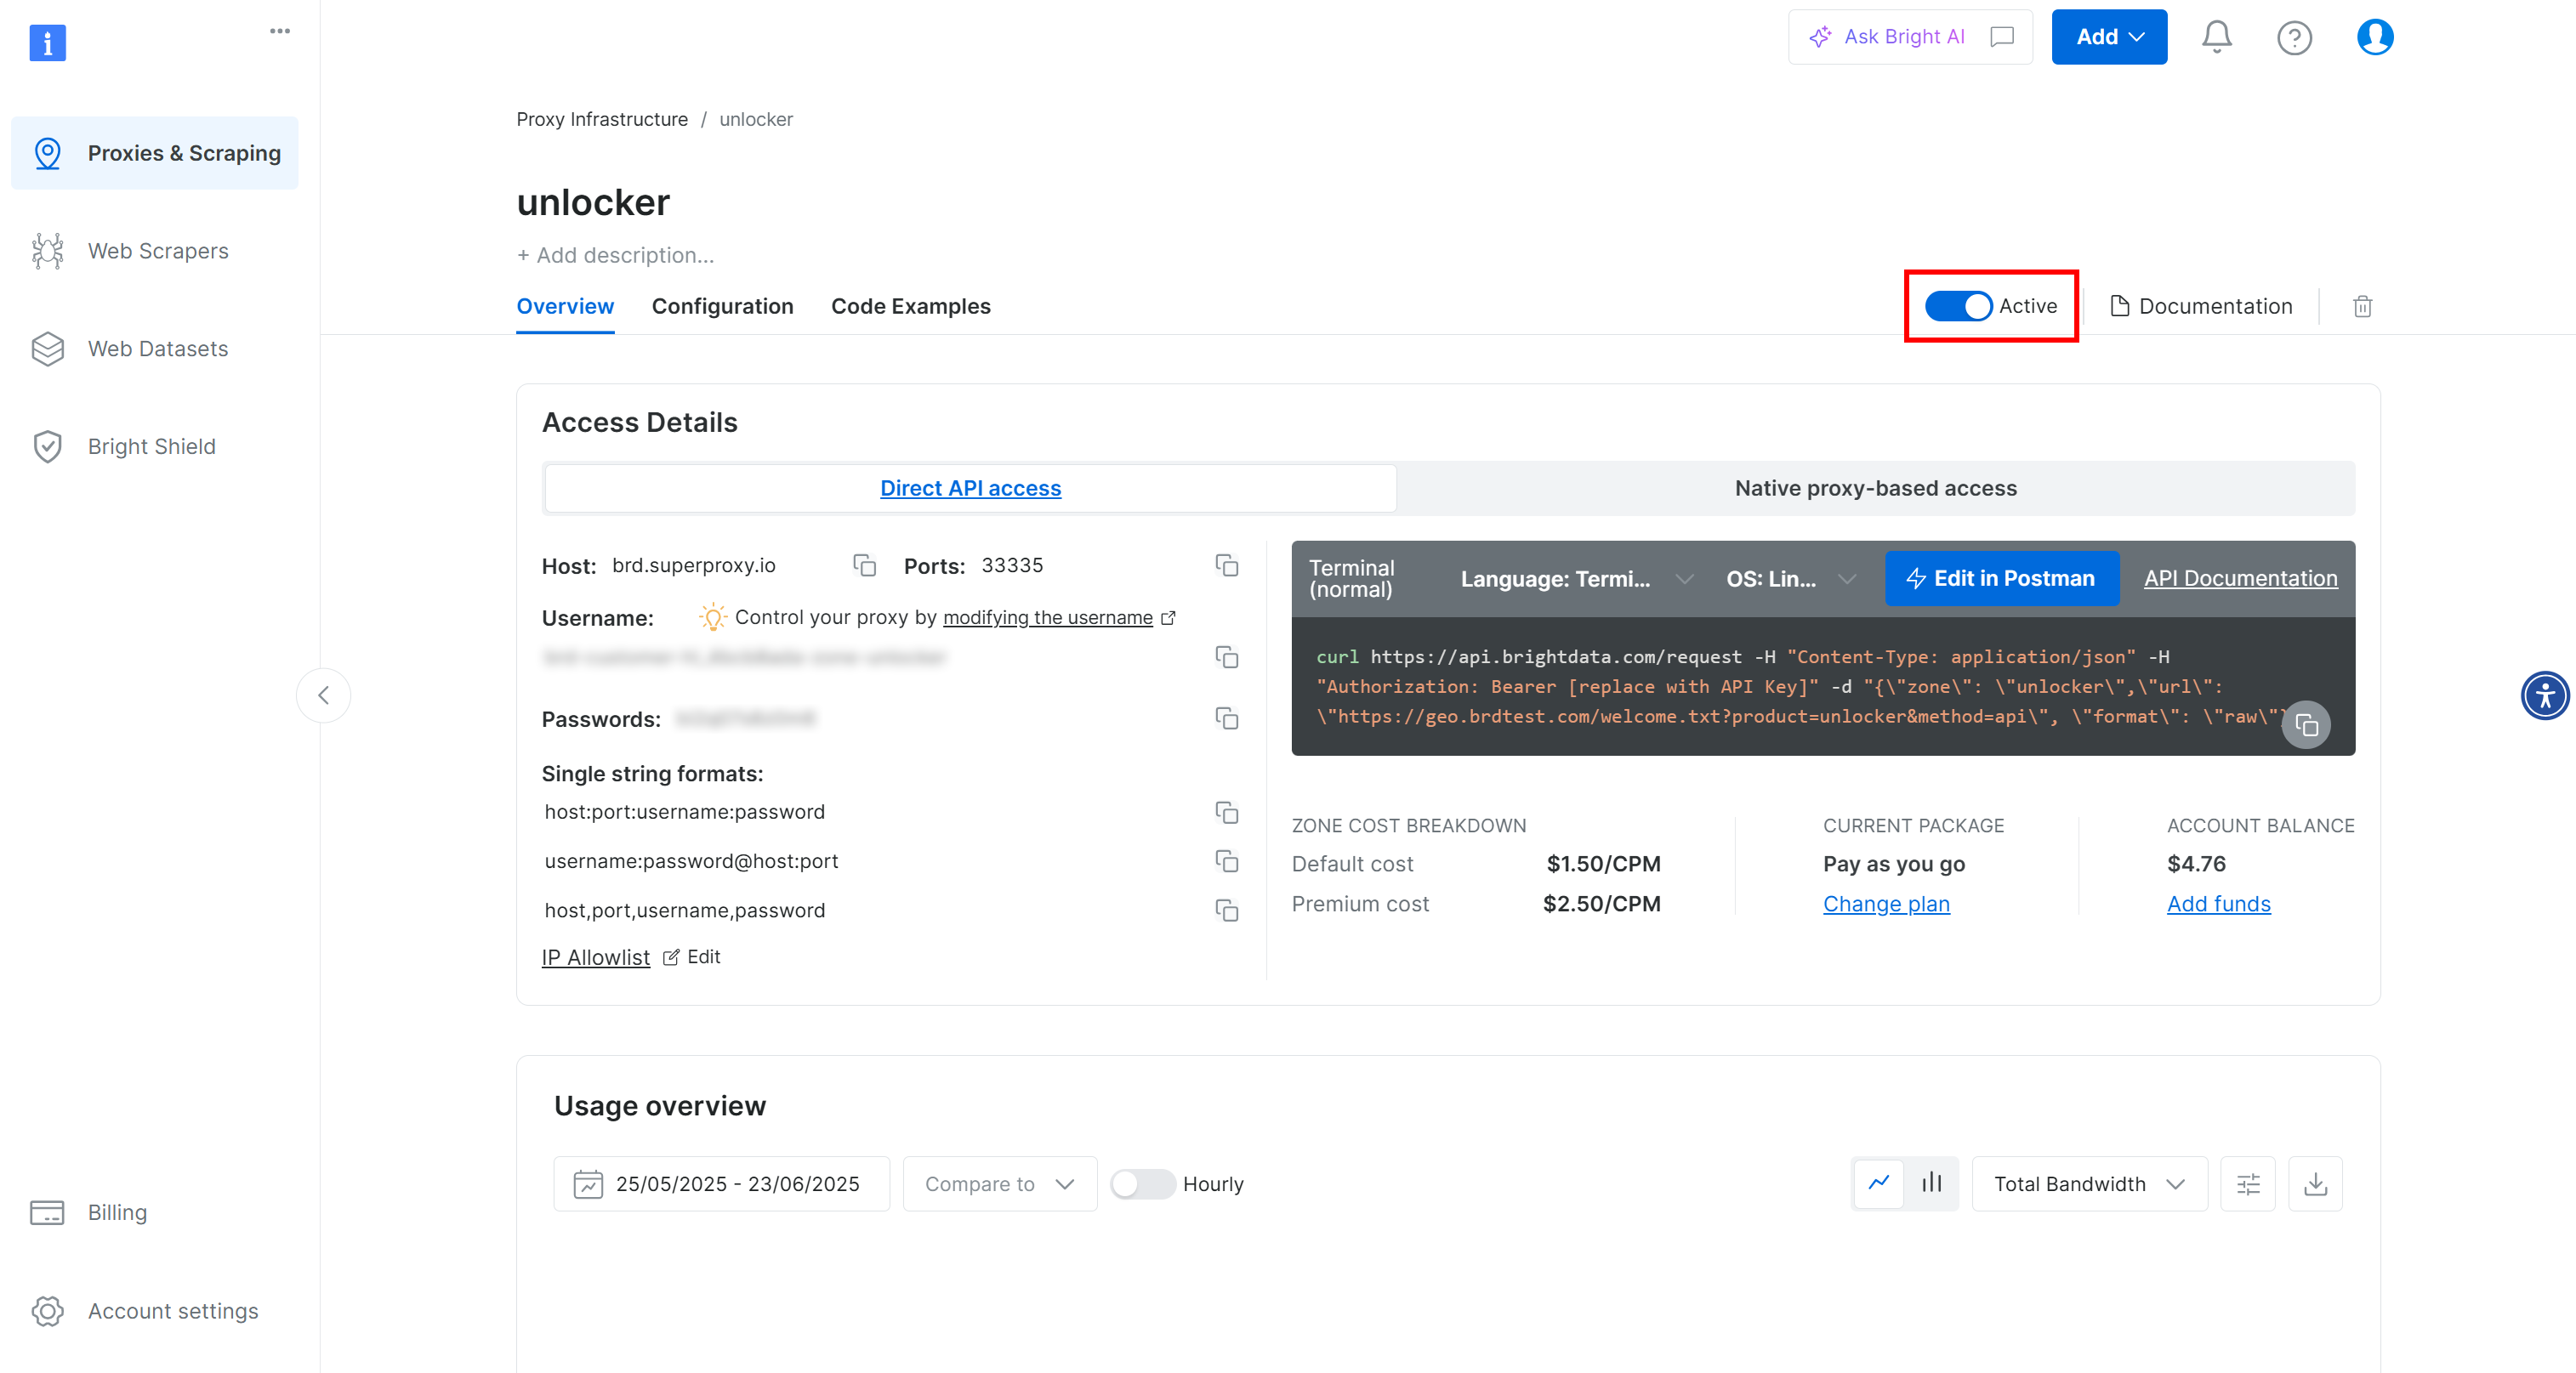
Make sure the activation toggle is set to “Active”. This confirms that the zone is properly configured and ready for use.
For micro-step 2, follow the official Bright Data guide to generate your API key. Once you have it, store it in a safe place, as you will need it soon.
Great! You can now use your Bright Data Web Unlocker zone in your Agent.ai agent.
Step #5: Store Your Bright Data Credentials in Agent.ai
To call Web Unlocker API, you have to specify your zone name and Bright Data API key in the request. For reference, see how the API request works in the official Bright Data documentation.
To avoid storing those sensitive credentials directly in your agent, add them to your profile’s secrets. In Agent.ai, secrets let you securely store sensitive data (like API keys or tokens) and use them in your agents without hard-coding values into your workflows.
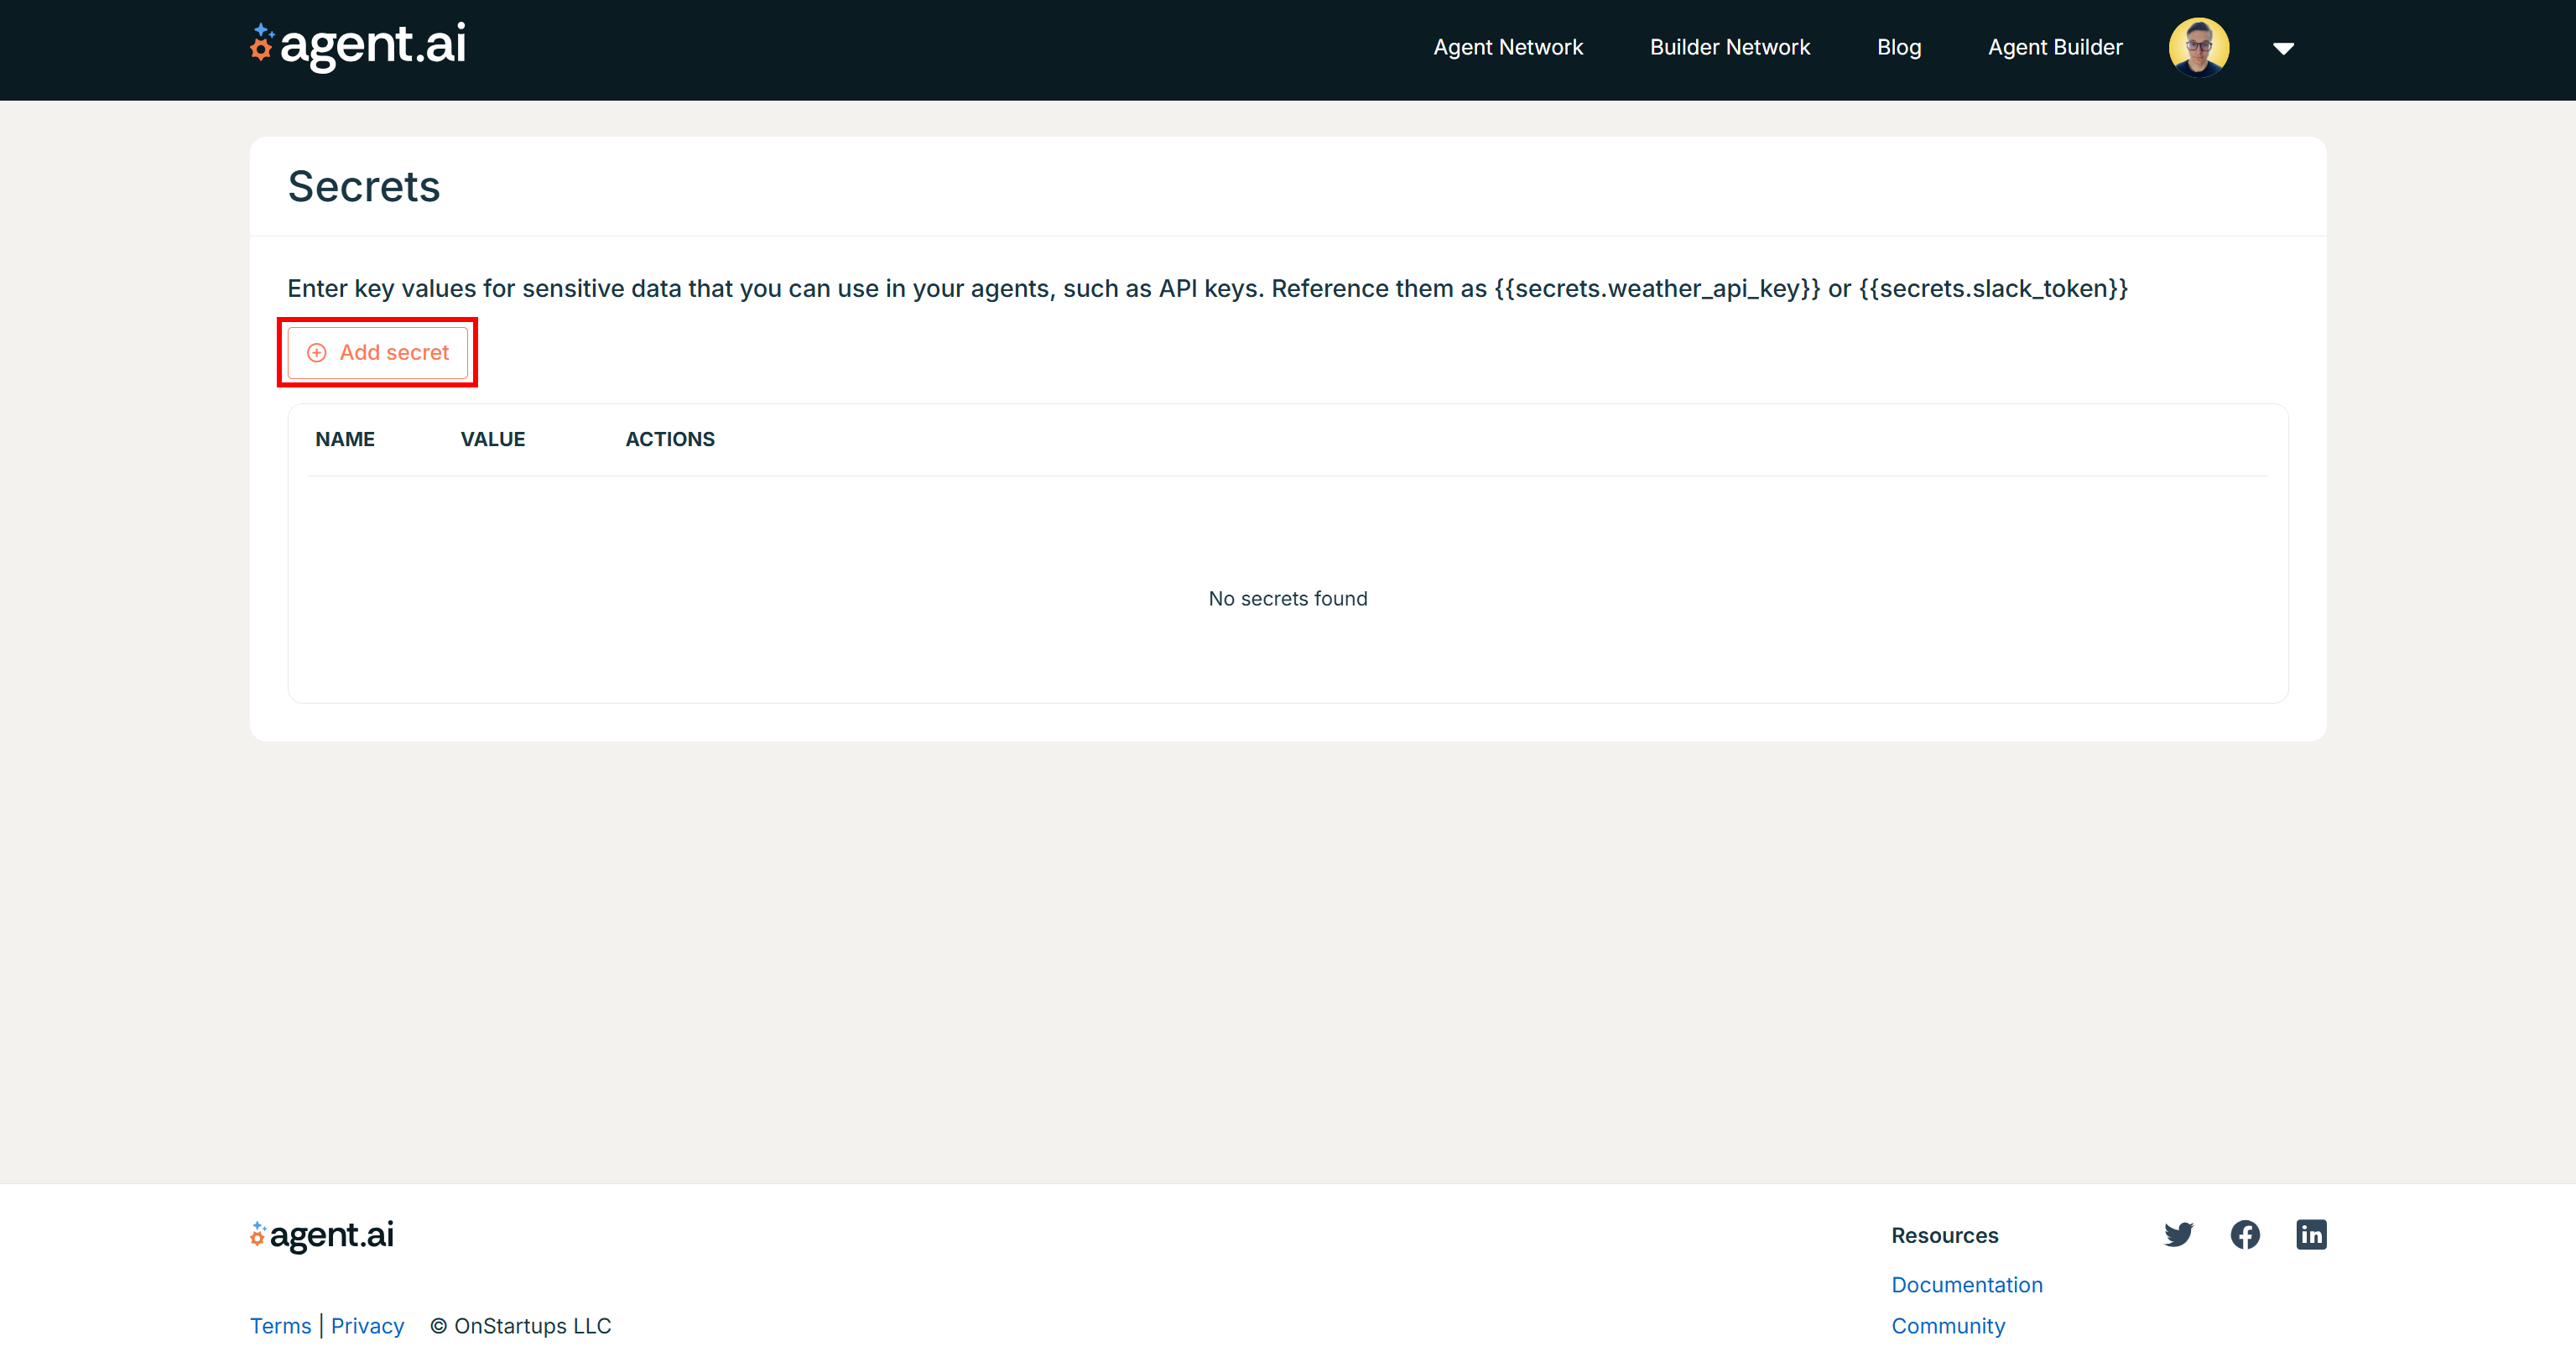
To define secrets, go to the Agent.ai home page, click on your profile picture, and select the “Secrets” option.
In the “Secrets” page, click the “Add Secret” button to create a new secret:
Add a secret for your Bright Data API key. For example:
- Name:
bright_data_api_key - Value: Paste your Bright Data API key retrieved in the previous step.
Similarly, add another secret for your Web Unlocker zone name. For example:
- Name:
web_unlocker_zone_name - Value: Your Web Unlocker zone name (e.g.,
unlocker)
You should now see both secrets listed like this:
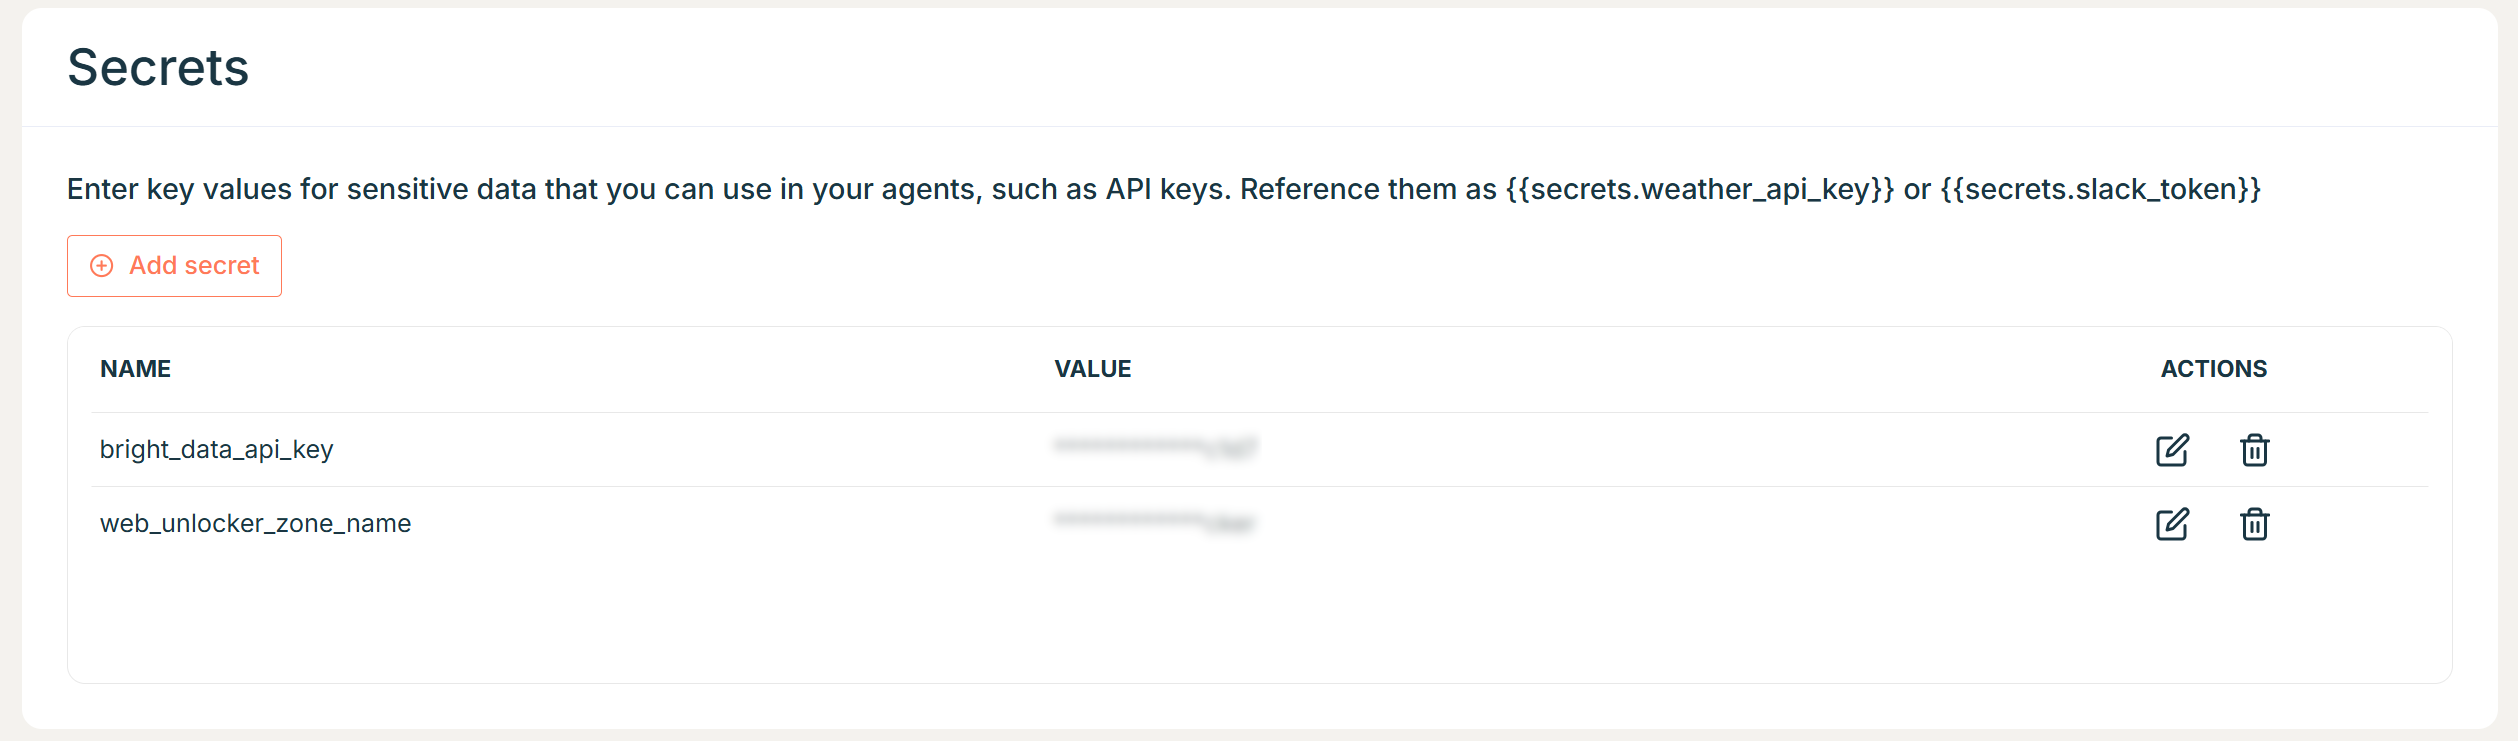
Awesome! These secrets can now be used for Bright Data integration in any agent you build in Agent.ai.
Step #6: Invoke the Bright Data Web Unlocker API
Before calling the Web Unlocker API in your agent, get familiar with its request format. Below is how to call it using cURL to get the output from a target site in Markdown format:
curl -X POST "https://api.brightdata.com/request" \
-H "Authorization: Bearer <YOUR_BRIGHT_DATA_API_KEY>" \
-H "Content-Type: application/json" \
-d '{
  "zone": "<WEB_UNLOCKER_ZONE_NAME>",
  "url": "<YOUR_TARGE_URL>",
  "format": "raw",
  "data_format": "markdown"
}'
The above cURL command:
- Performs a POST request to
https://api.brightdata.com/request. - Use your Bright Data API key in the
Authorizationheader to authenticate the request. - Specify your Web Unlocker zone in the request body.
- Set
"data_format": "markdown"to get the output in Markdown.
Behind the scenes, the request contacts the Web Unlocker service. This bypasses anti-bot protections, scrapes the content of the target page, converts it to AI-ready Markdown, and returns it as a string (thanks to the "format": "raw" option).
See that in the following example call:
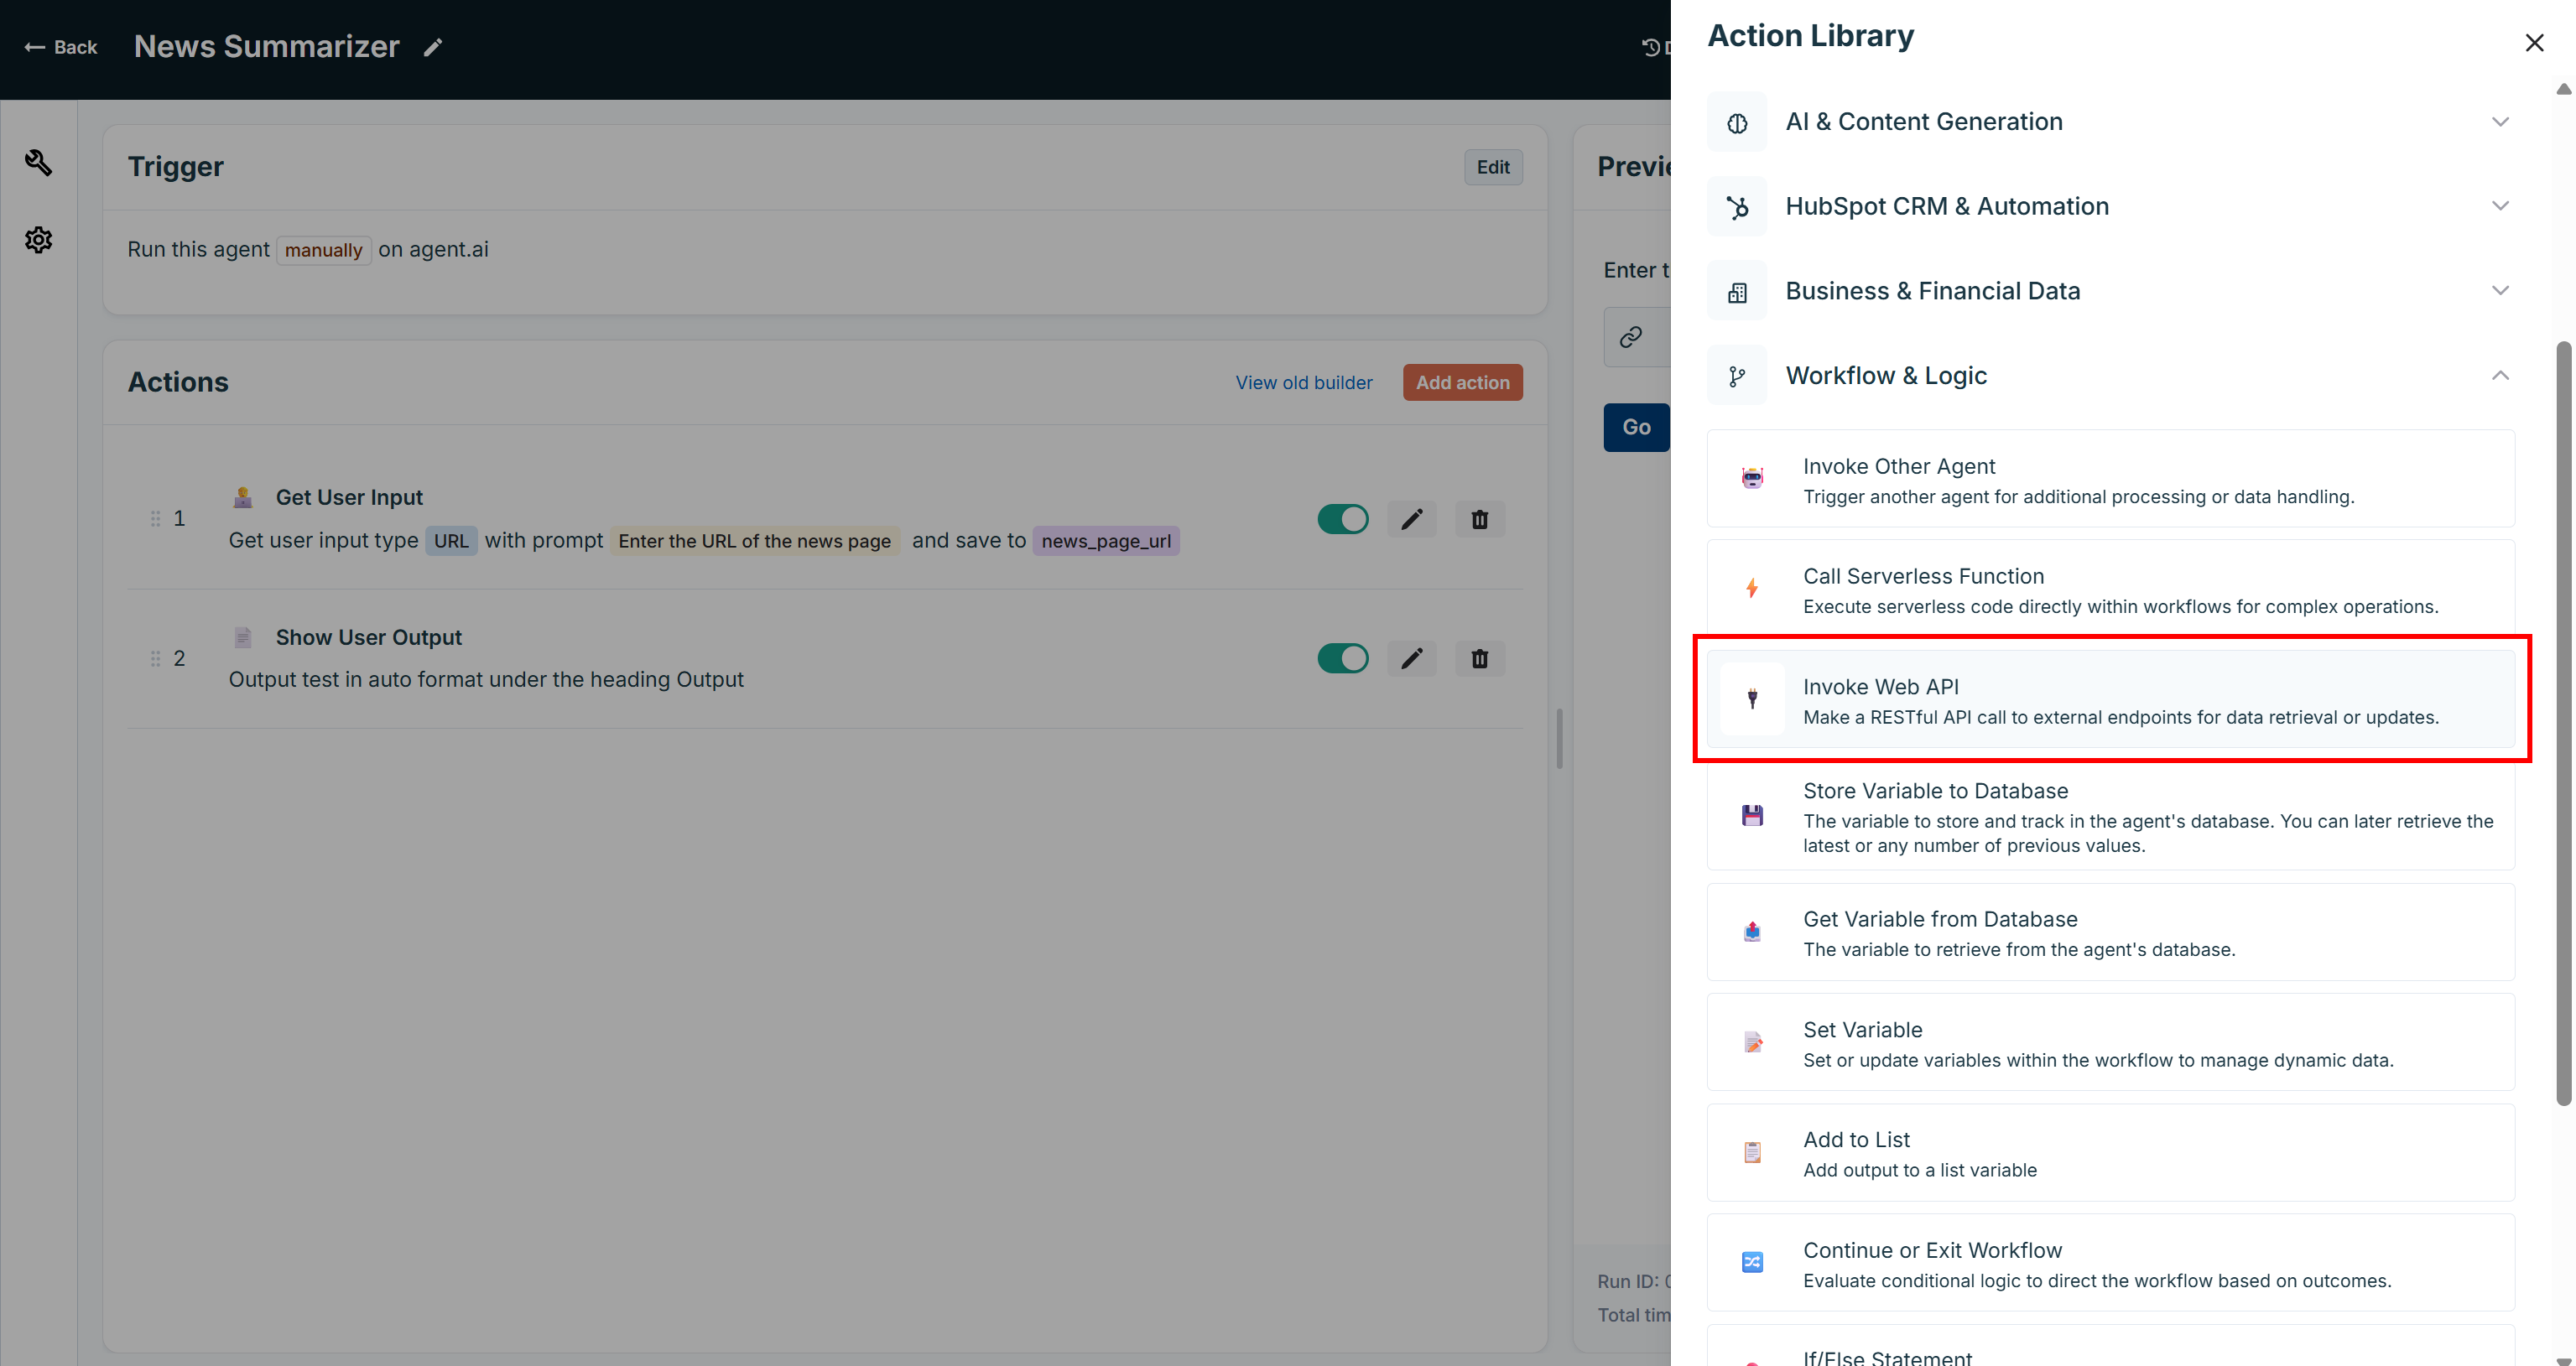
To programmatically perform the Web Unlocker API request in your agent, click “Add Action” and select “Invoke Web API” under the “Workflow & Logic” dropdown:
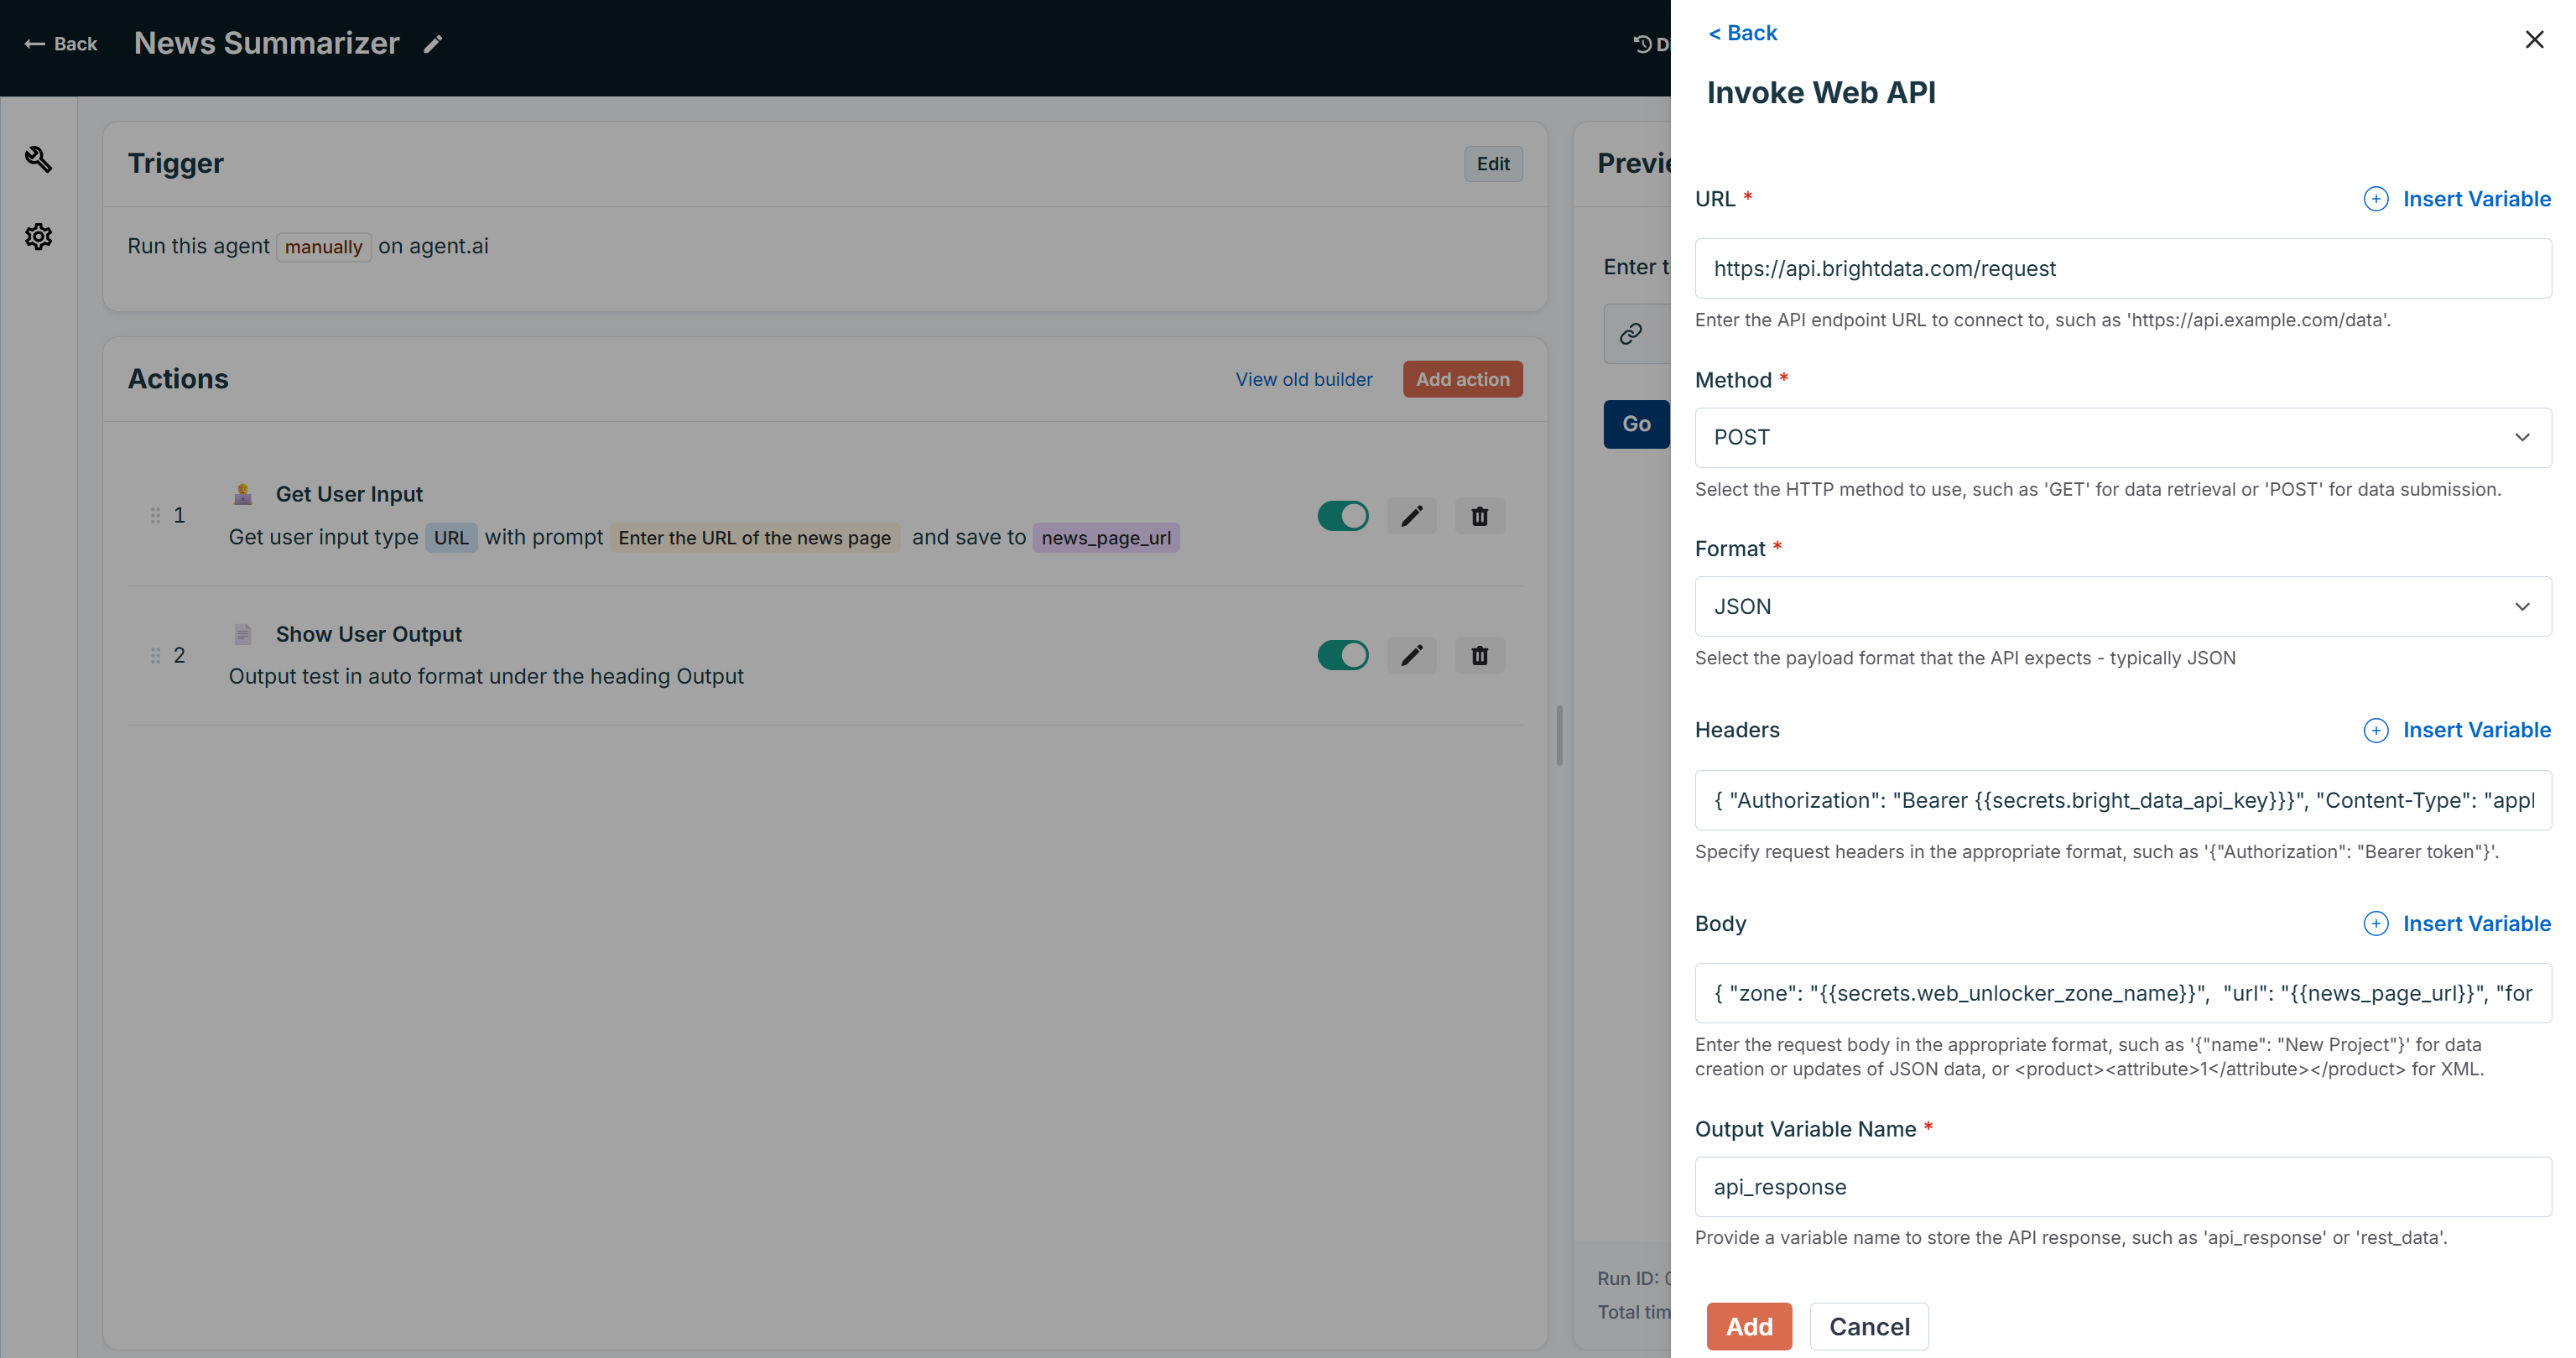
Fill out the action as below:
- URL:
https://api.brightdata.com/request - Method: POST
- Format: JSON
- Headers:
{ "Authorization": "Bearer {{secrets.bright_data_api_key}}", "Content-Type": "application/json" } - Body:
{ "zone": "{{secrets.web_unlocker_zone_name}}", "url": "{{news_page_url}}", "format": "raw", "data_format": "markdown"} - Output Variable Name:
api_response
Note that you can access the secrets you defined earlier using the syntax:
{{secrets.YOUR_SECRET_NAME}}The resulting “Invoke Web API” action will be:
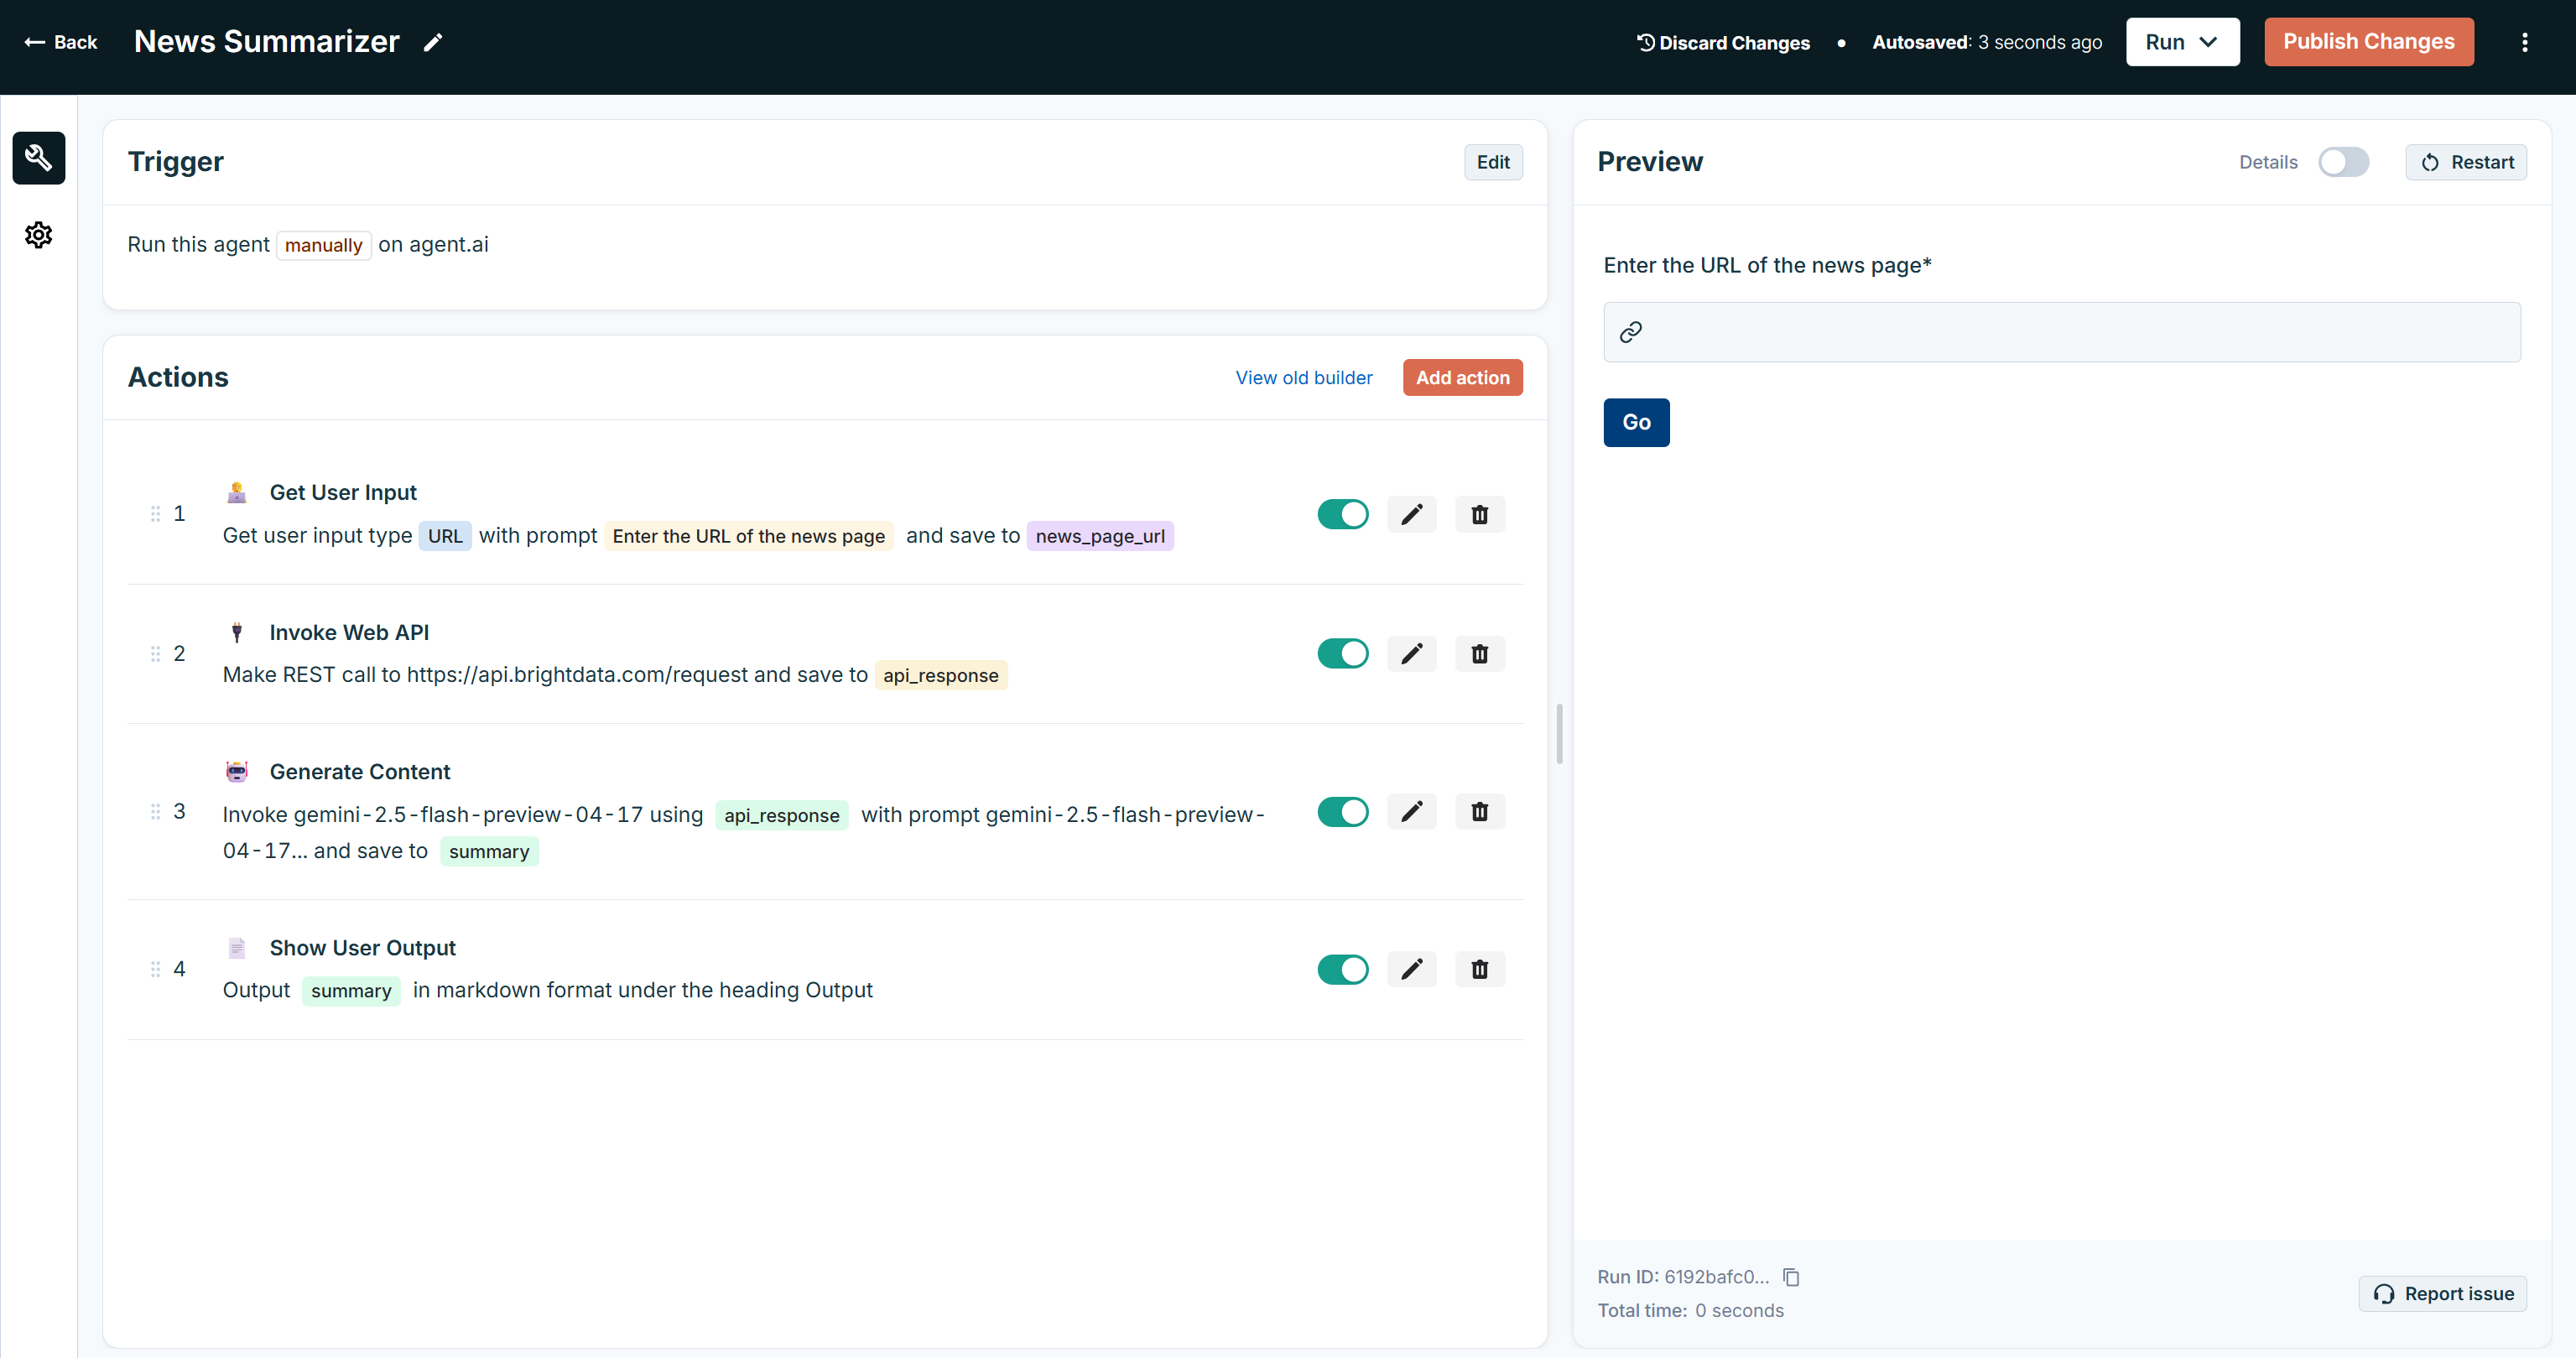
Press “Add” to add the action to the agent. Then, reorder the actions so that “Invoke Web API” comes before the “Show User Output” action:
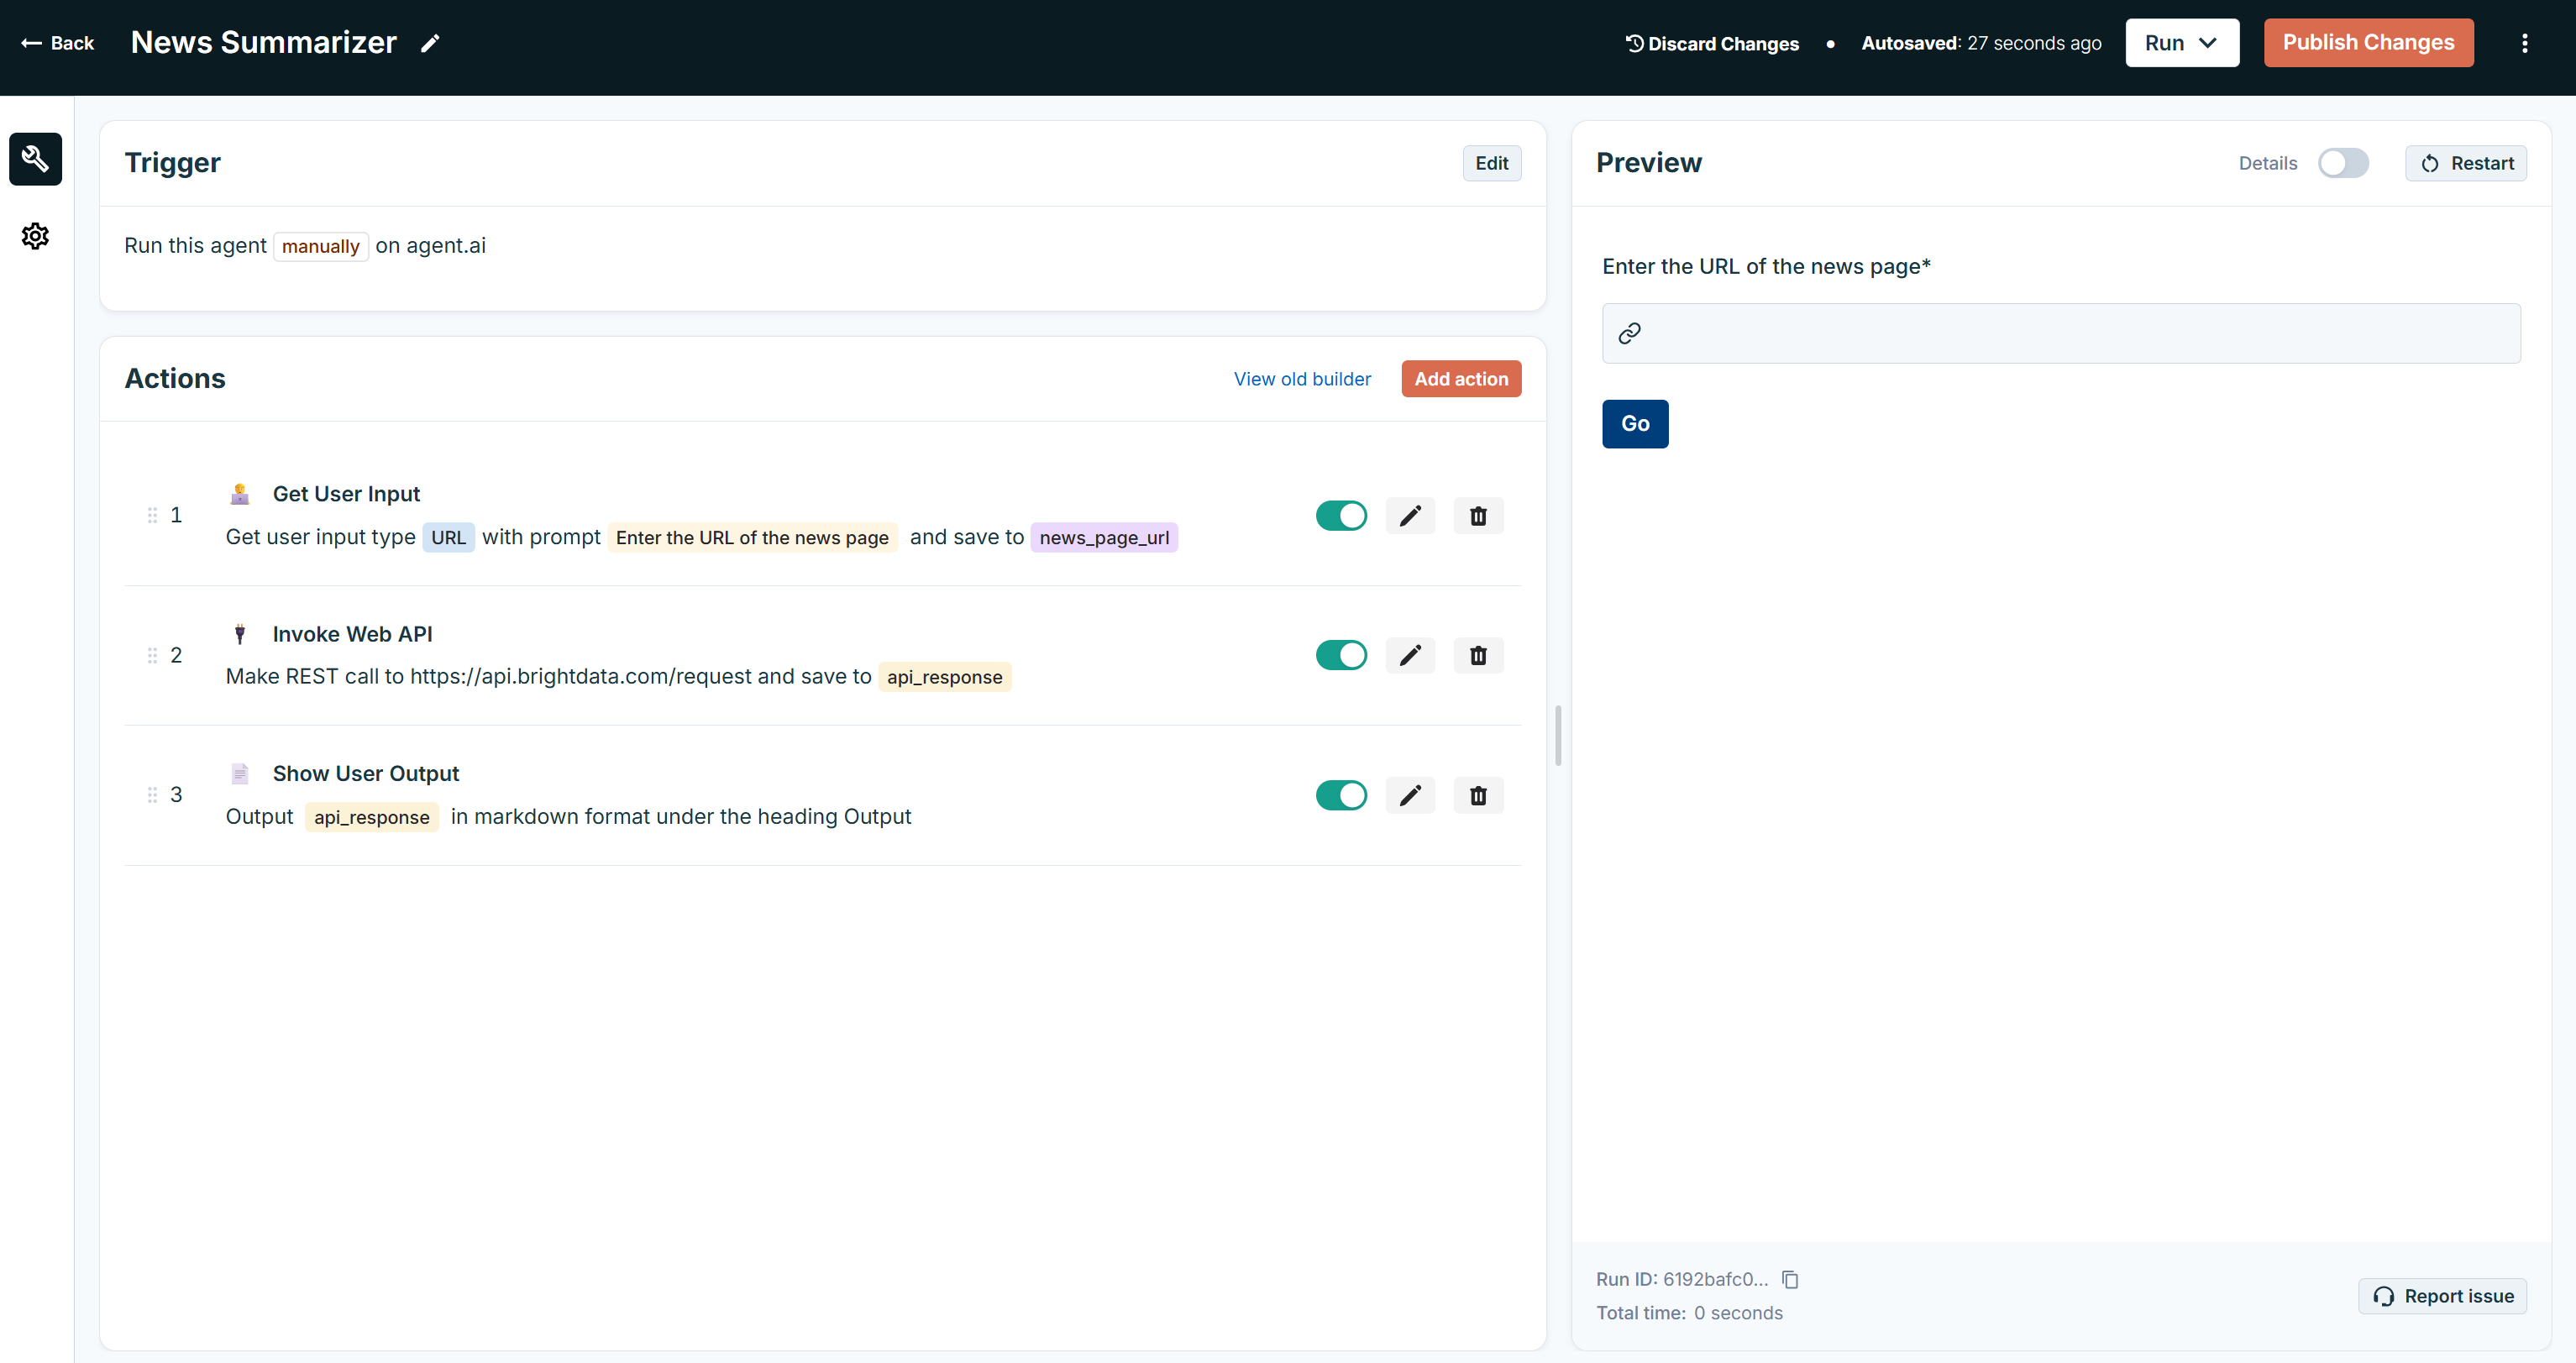
Cool! Your agent can now connect to Bright Data’s web scraping capabilities via API and retrieve the news page content in Markdown.
Step #7: Add the LLM Summarization Step
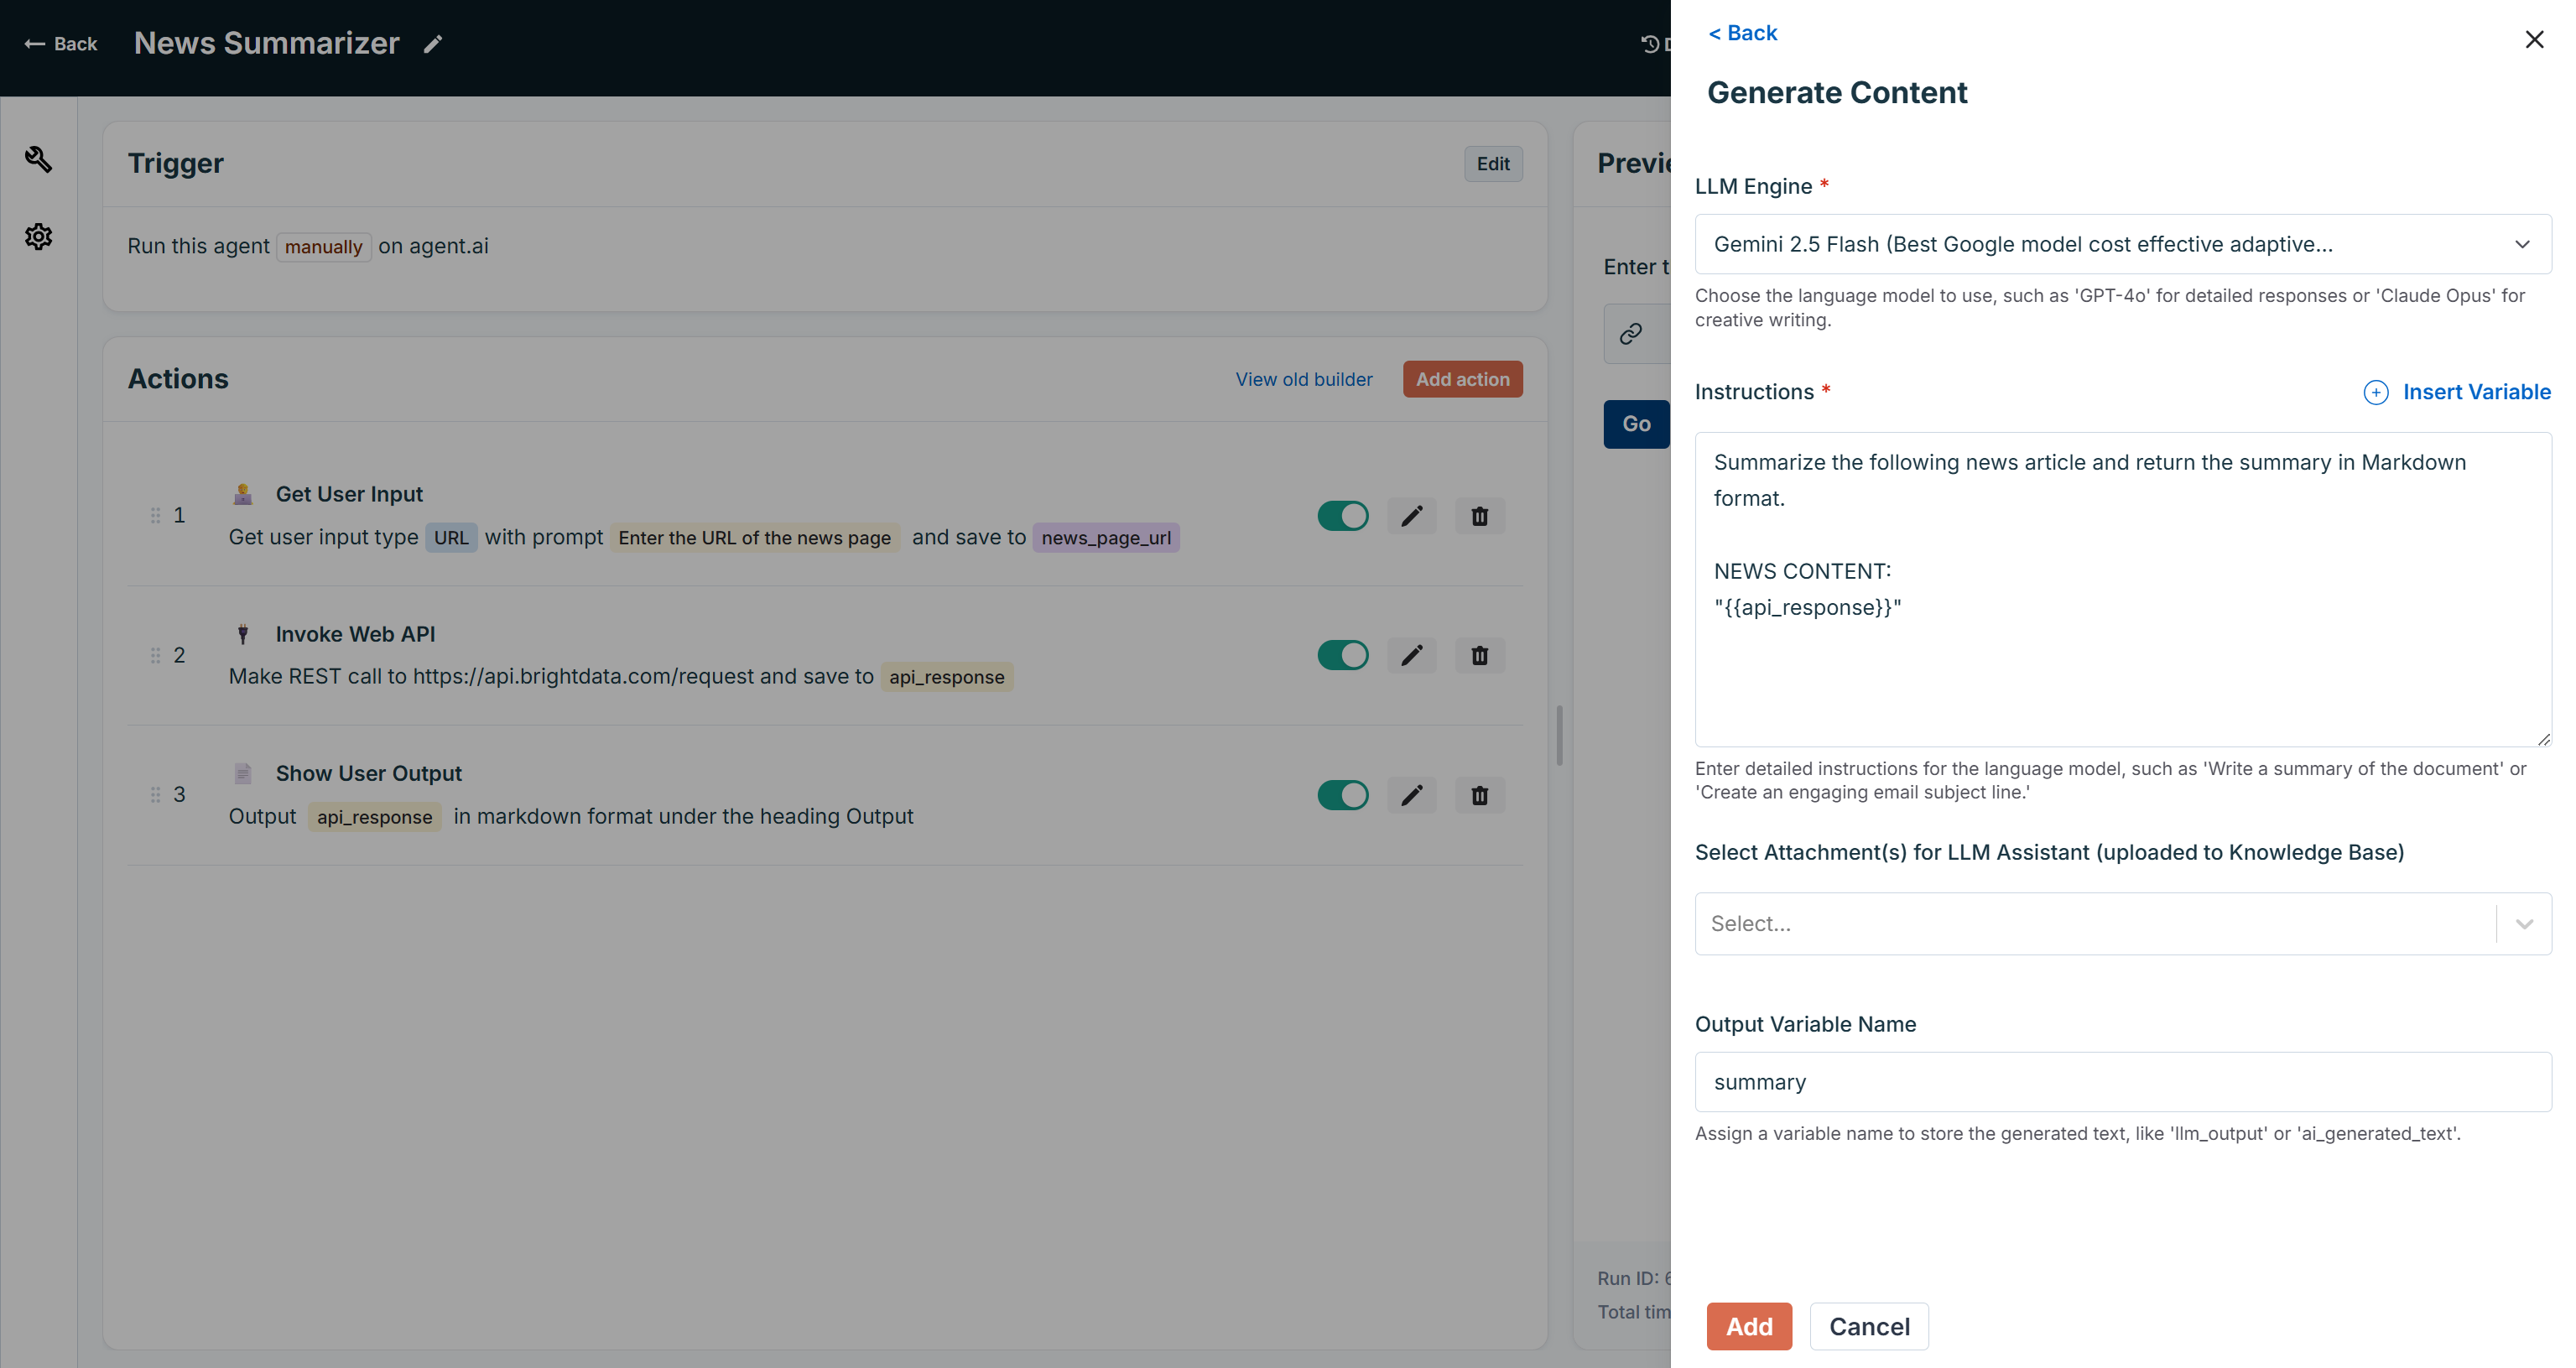
Now that you have the news article in Markdown, pass it to an LLM for summarization. To do this, configure a “Generate Content” action:

Select an LLM such as Gemini 2.5 Flash, and write a prompt like this:
Summarize the following news article and return the summary in Markdown format.

NEWS CONTENT:
"{{api_response}}"
Here, {{api_response}} contains the Markdown content of the news article, which will be automatically inserted into the prompt. That is possible thanks to the {{VARIABLE_NAME}} Agent.ai syntax. Also, define the “Output Variable Name” as something like output so you can access the summary later.
Your “Generate Content” action should look like this:
Press “Add” to add the new action. Next, reorder the actions so that “Generate Content” comes after “Invoke Web API” and before the “Show User Output” action:
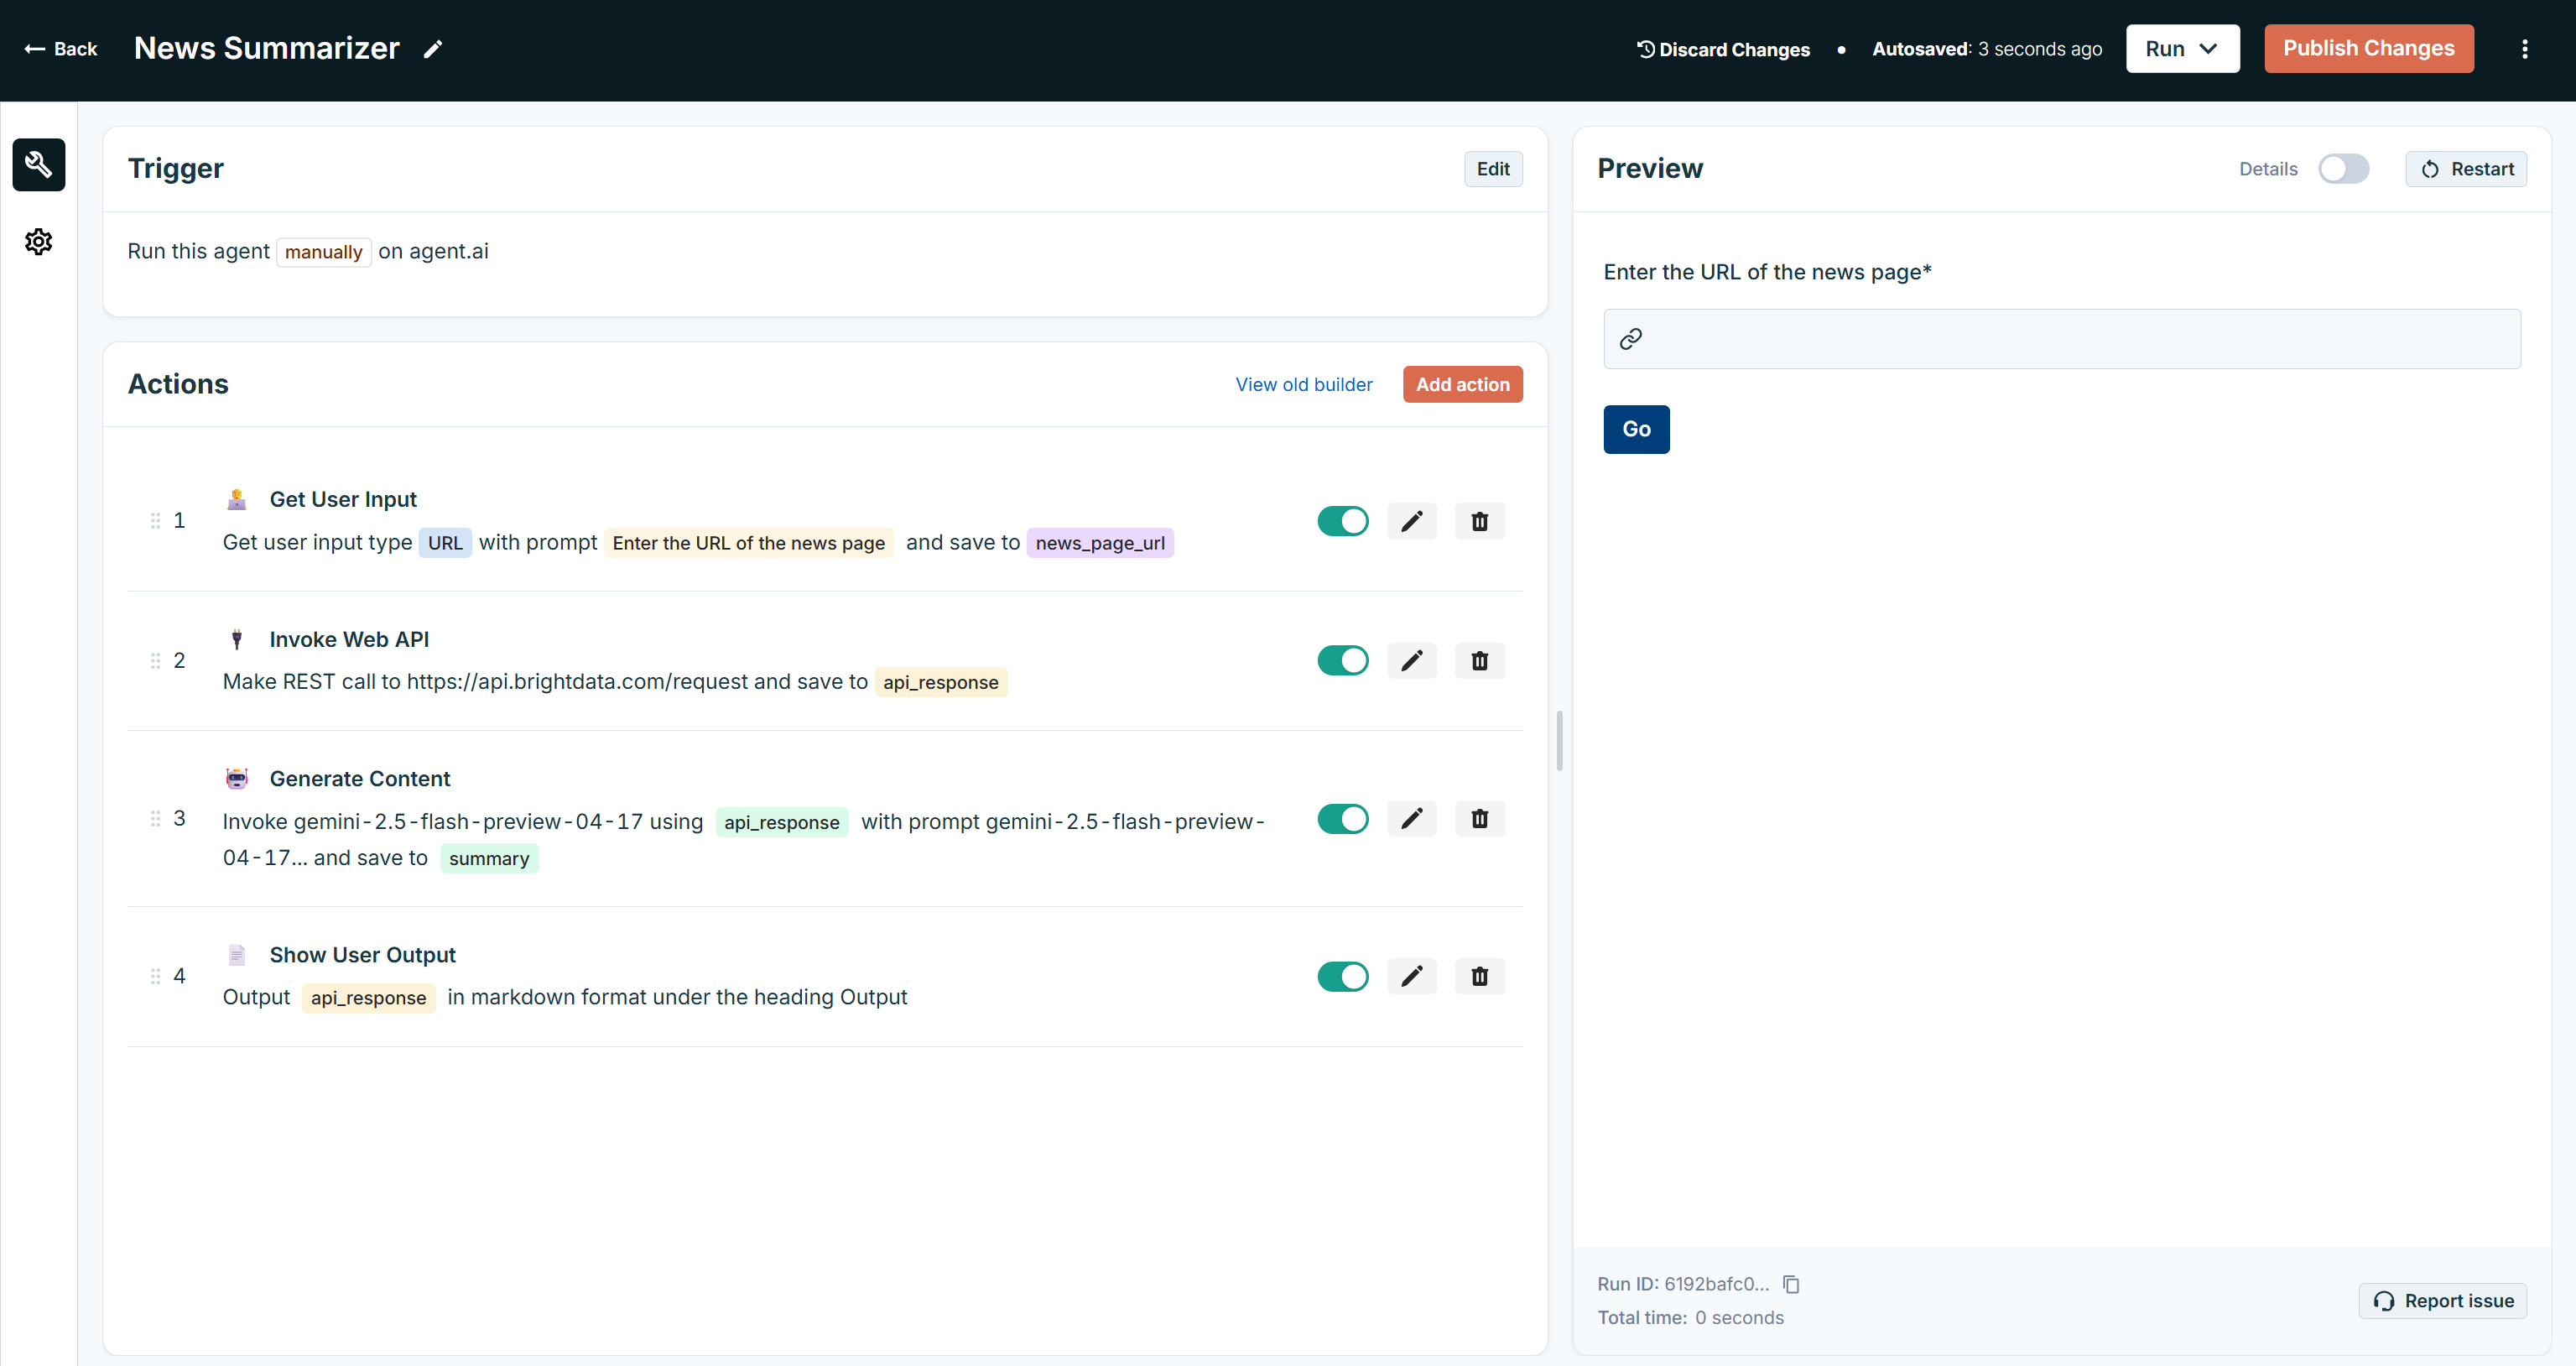
And there you go! Your AI news summarization agent is almost ready.
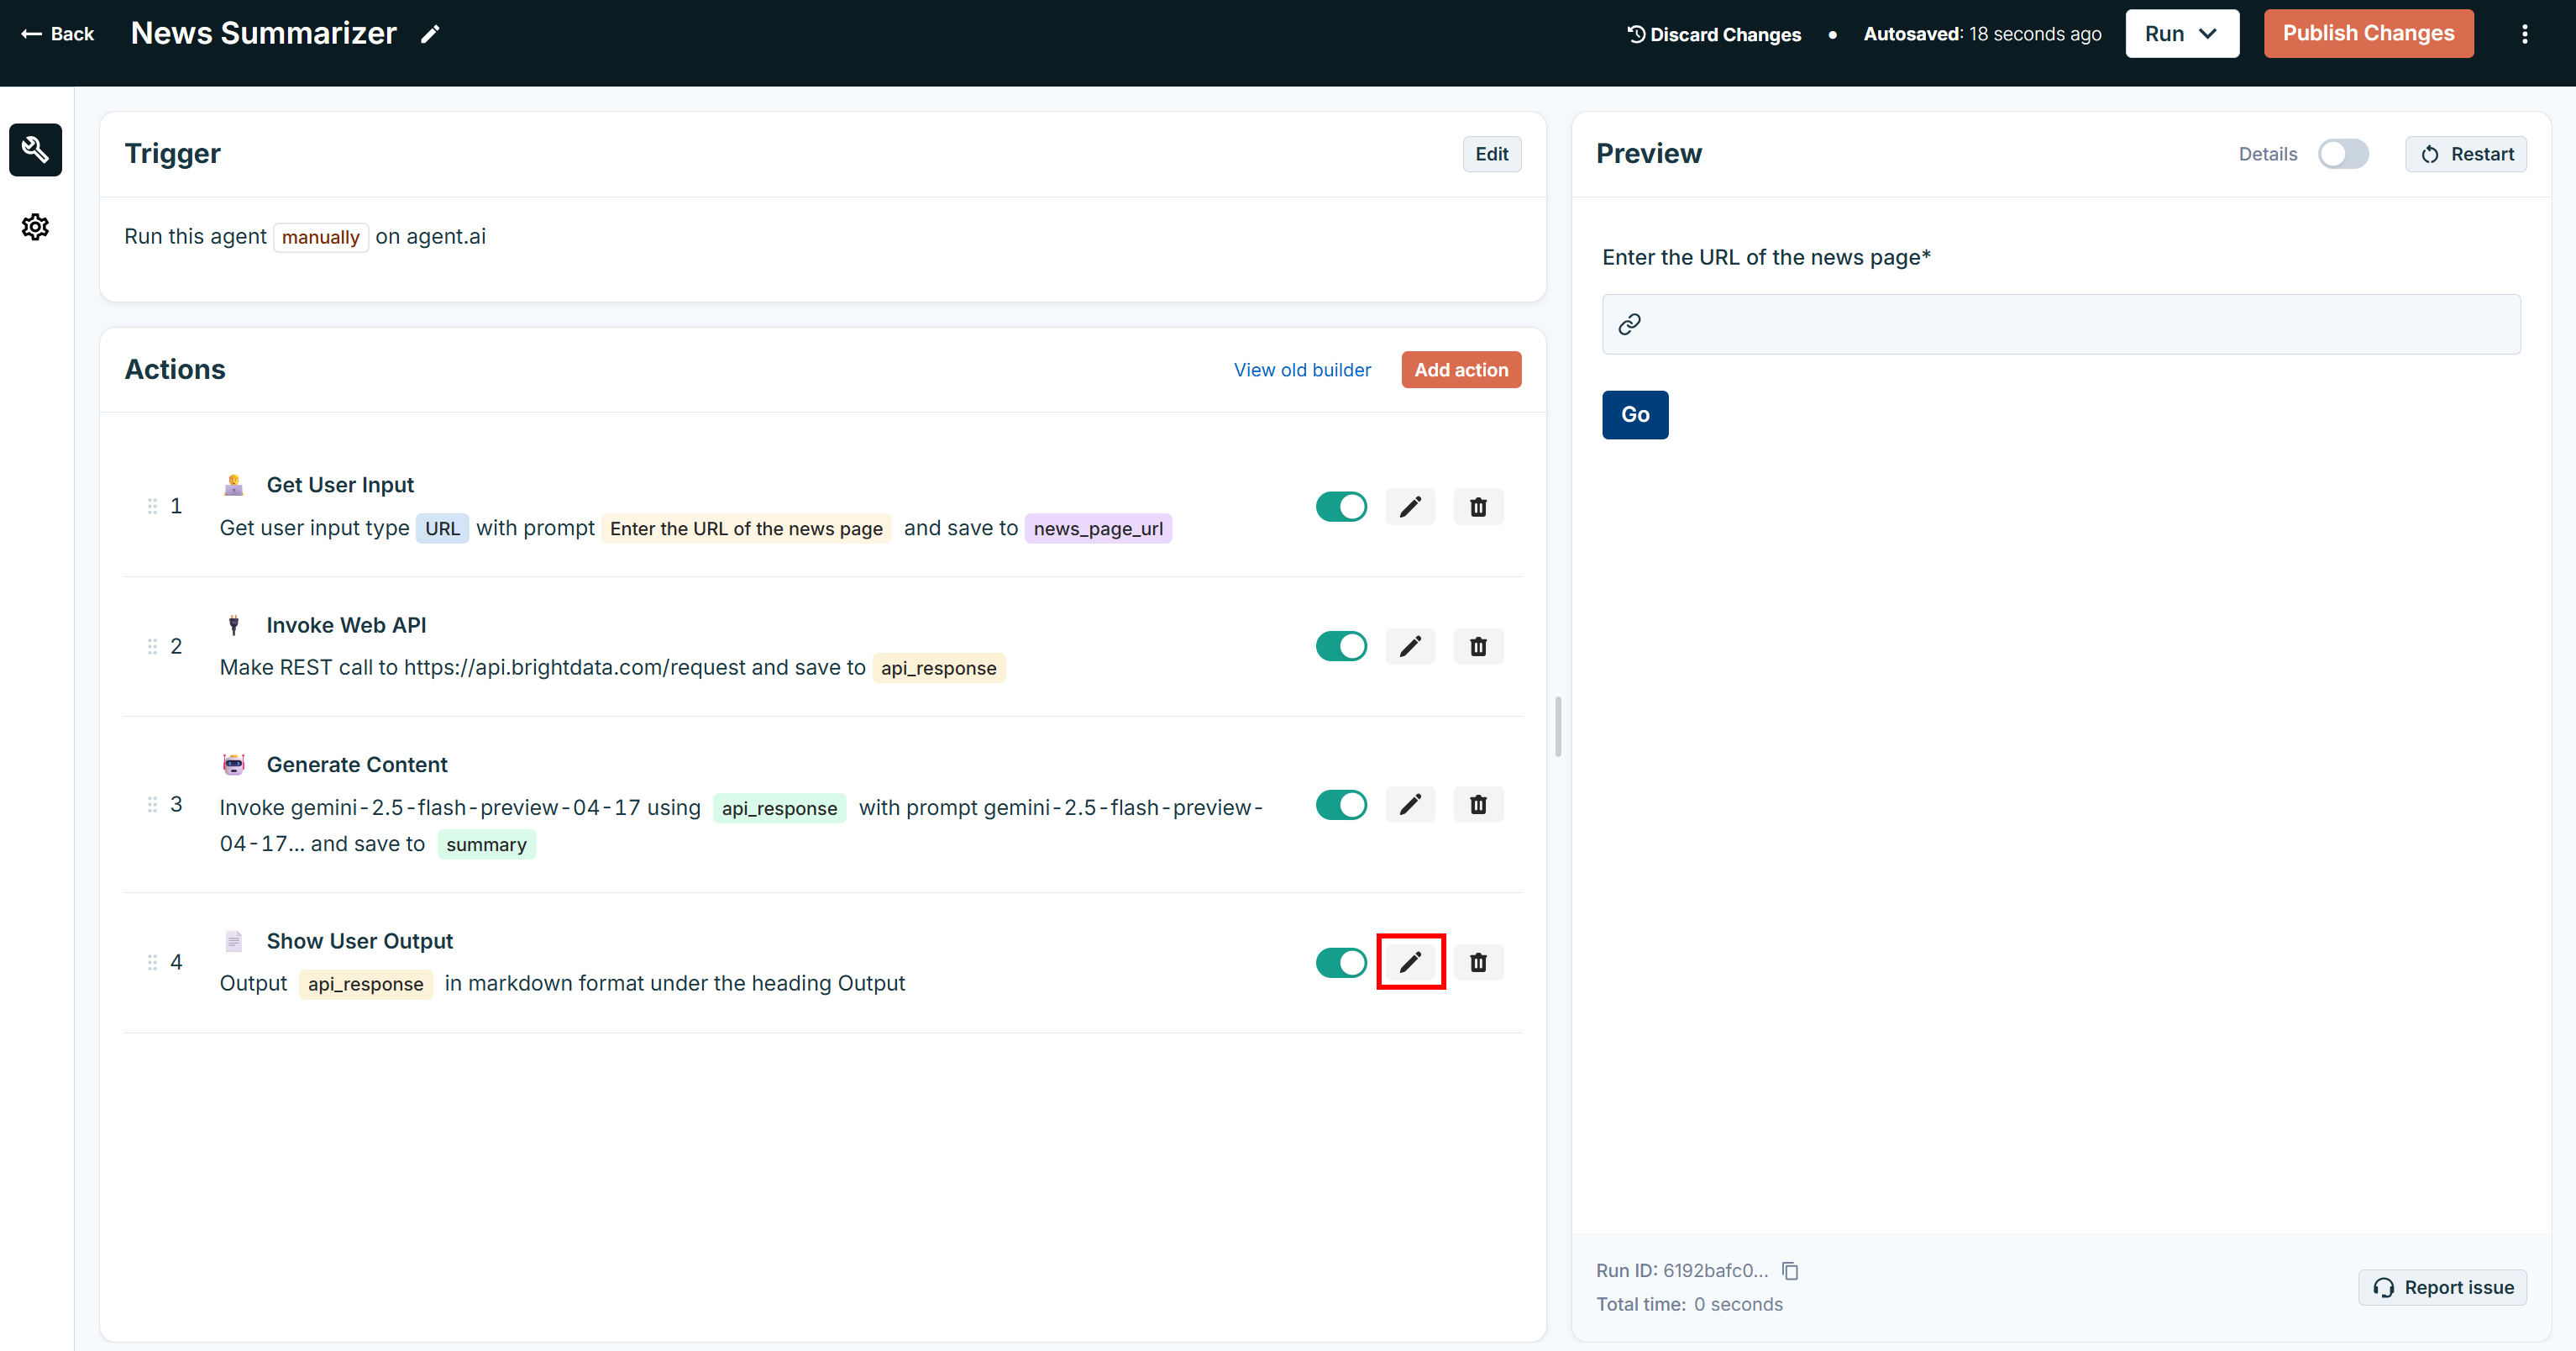
Step #8: Fix the Output Action
Now that your agent produces an actual summary, it is time to show it to the user. Edit the “Show User Output” action by clicking the edit button on its action card:
Configure the “Output Formatted” field to use the variable containing the summary produced by the “Generate Content” action:
{{summary}}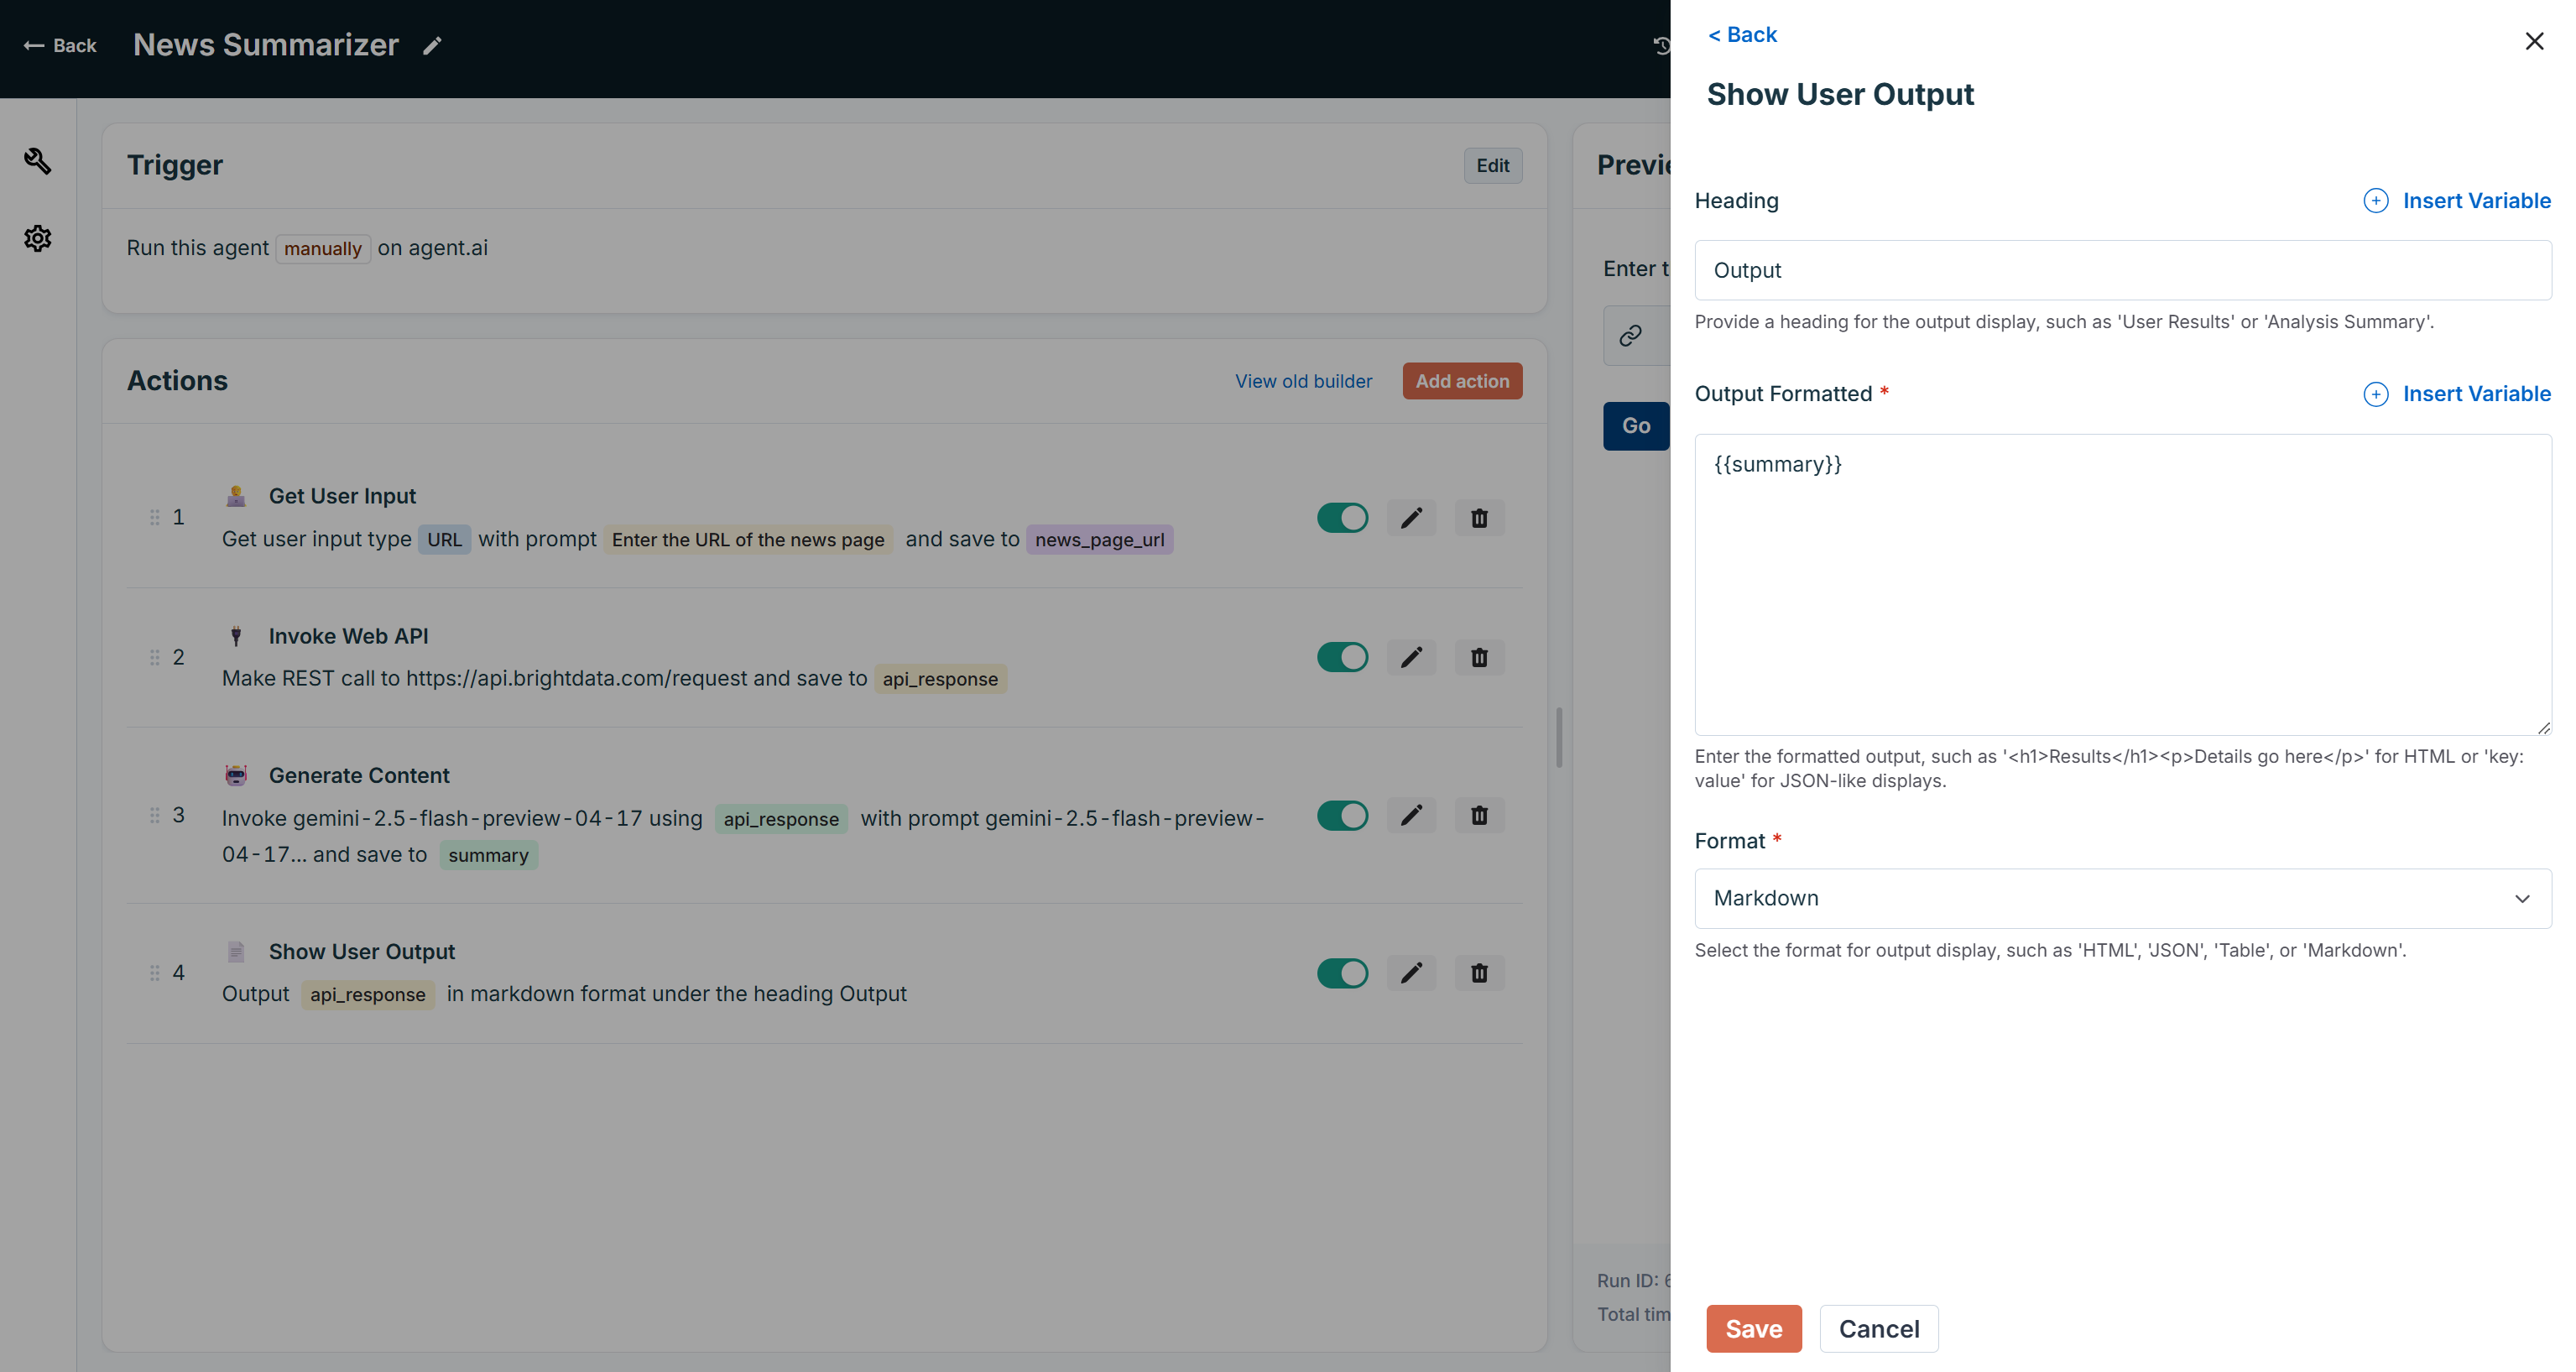
Mission complete! Your AI news summarization agent is now ready.
Step #9: Test the Agent
This is what your final News Summarizer agent looks like:
Important: You can try out this agent on the News Summarizer agent page. Click the “View Agent Flow” button to explore its actions and customize them.
Test it by selecting the “Run > Rung draft version” option:

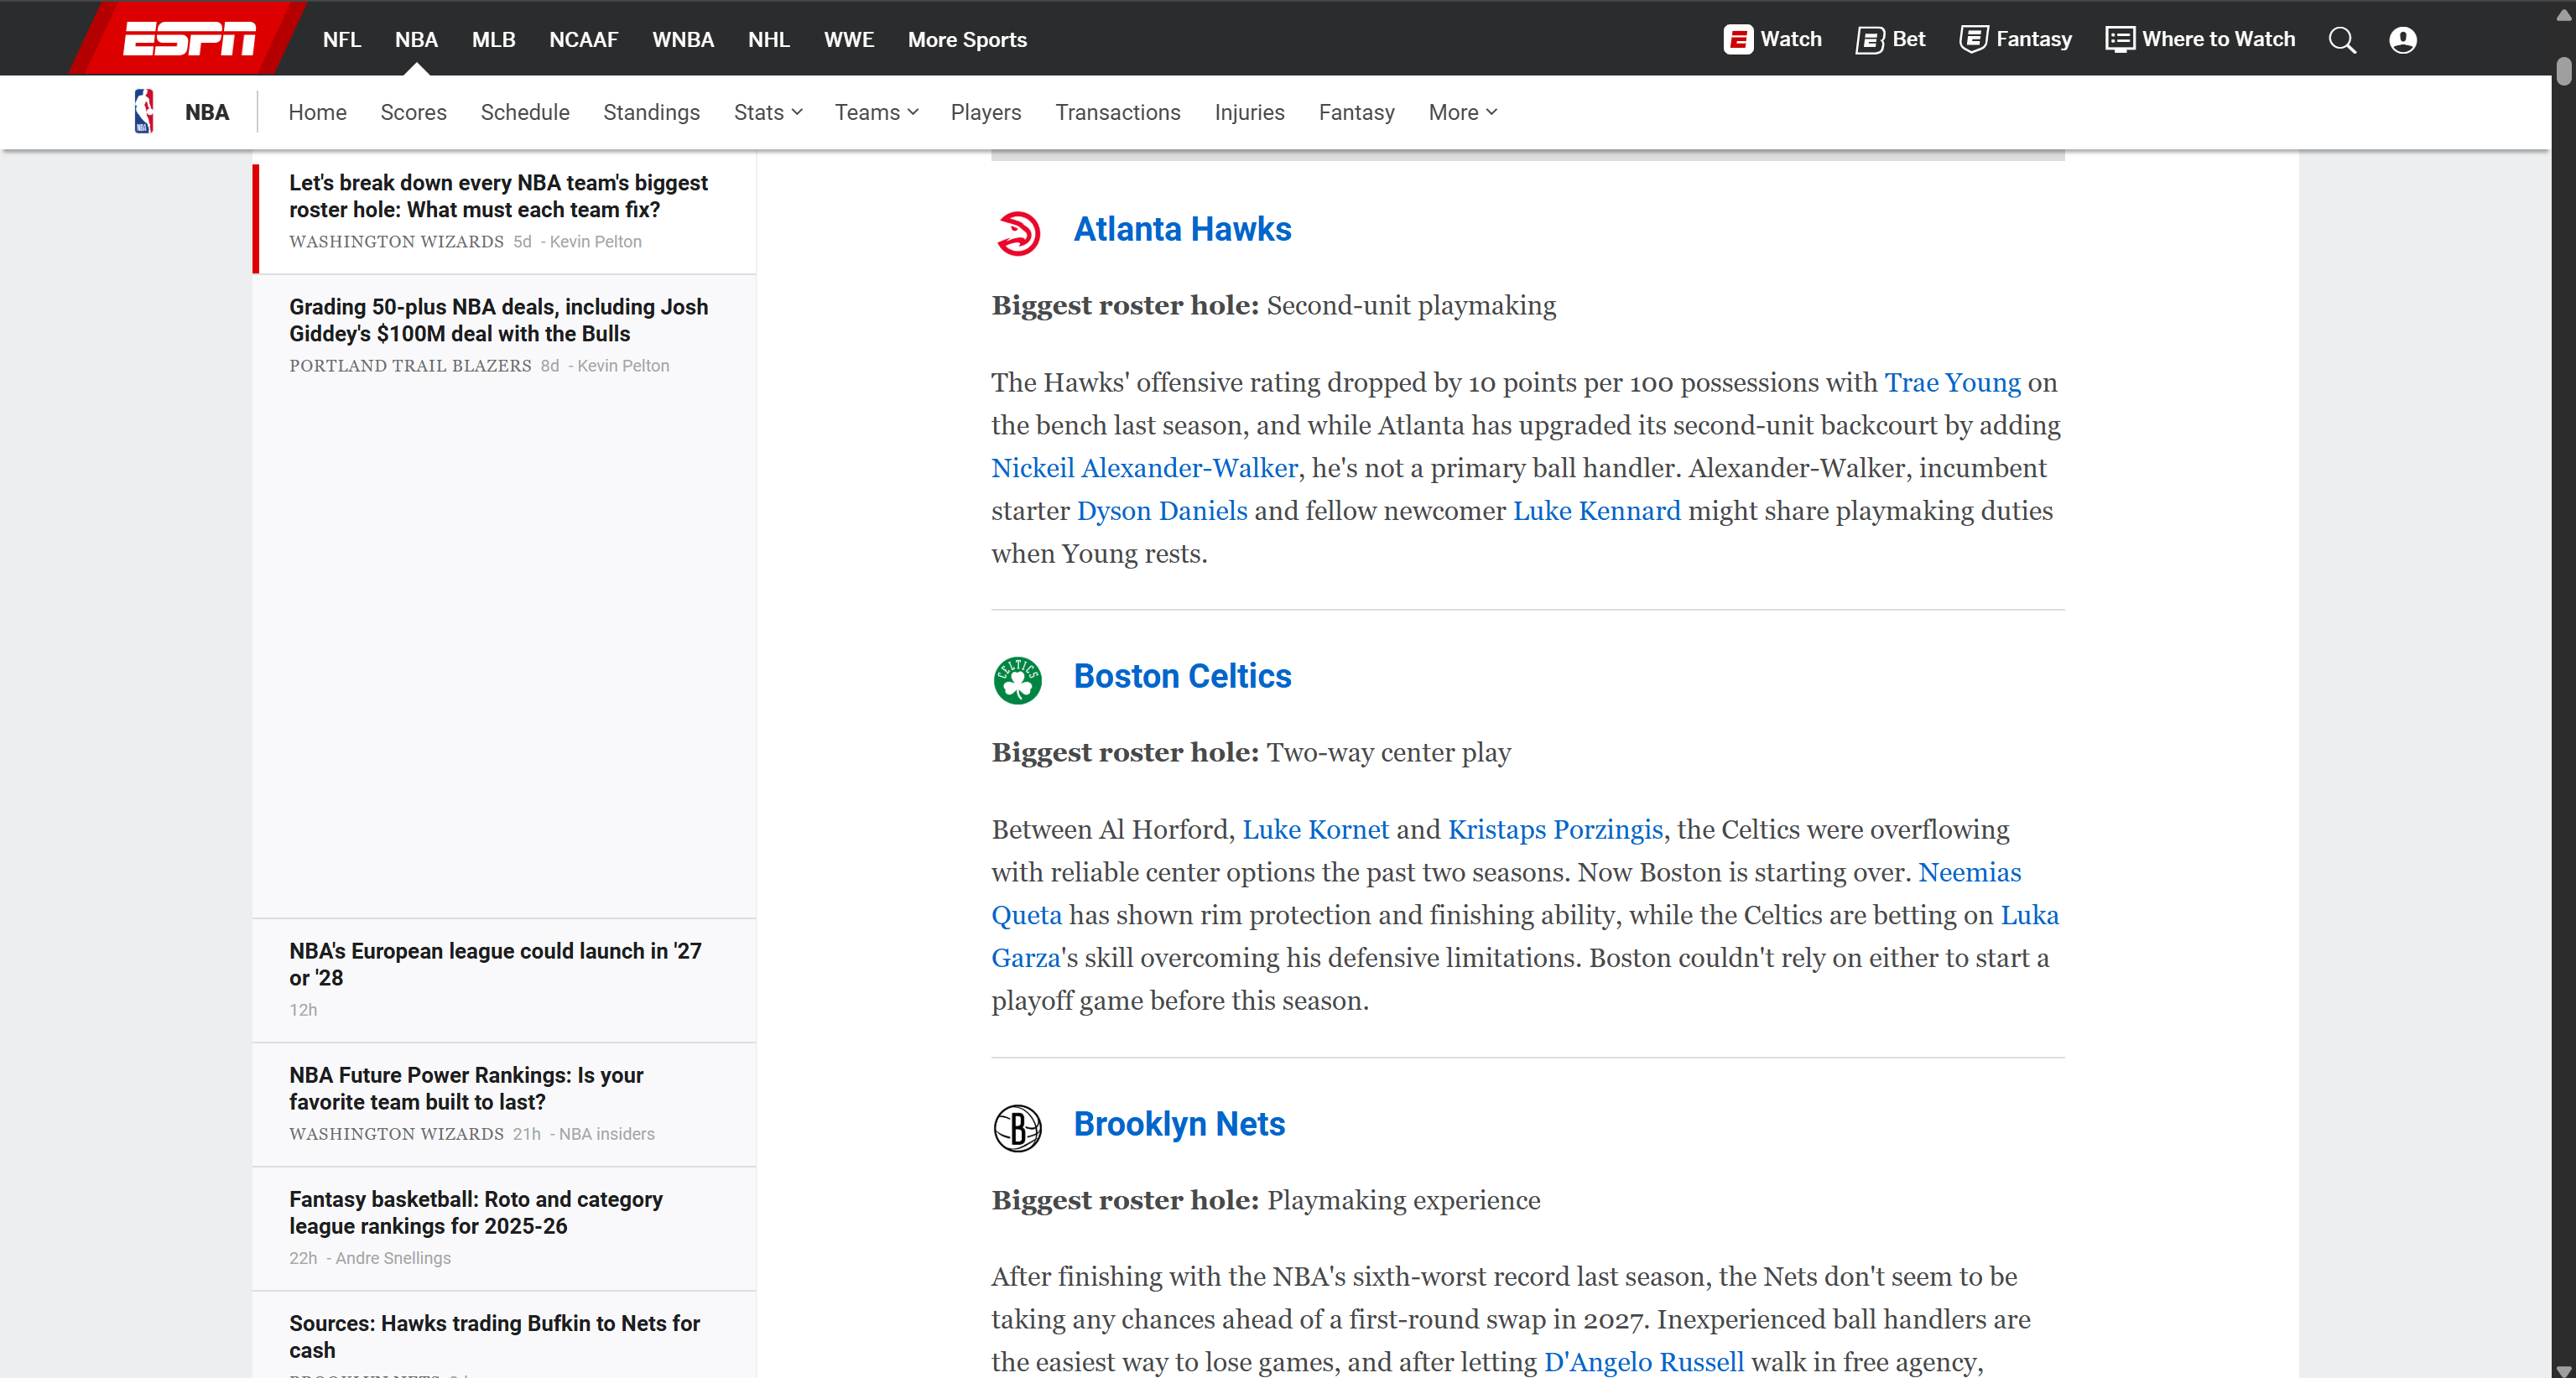
Paste the URL of a news article (e.g., an ESPN article) and press “Go”:

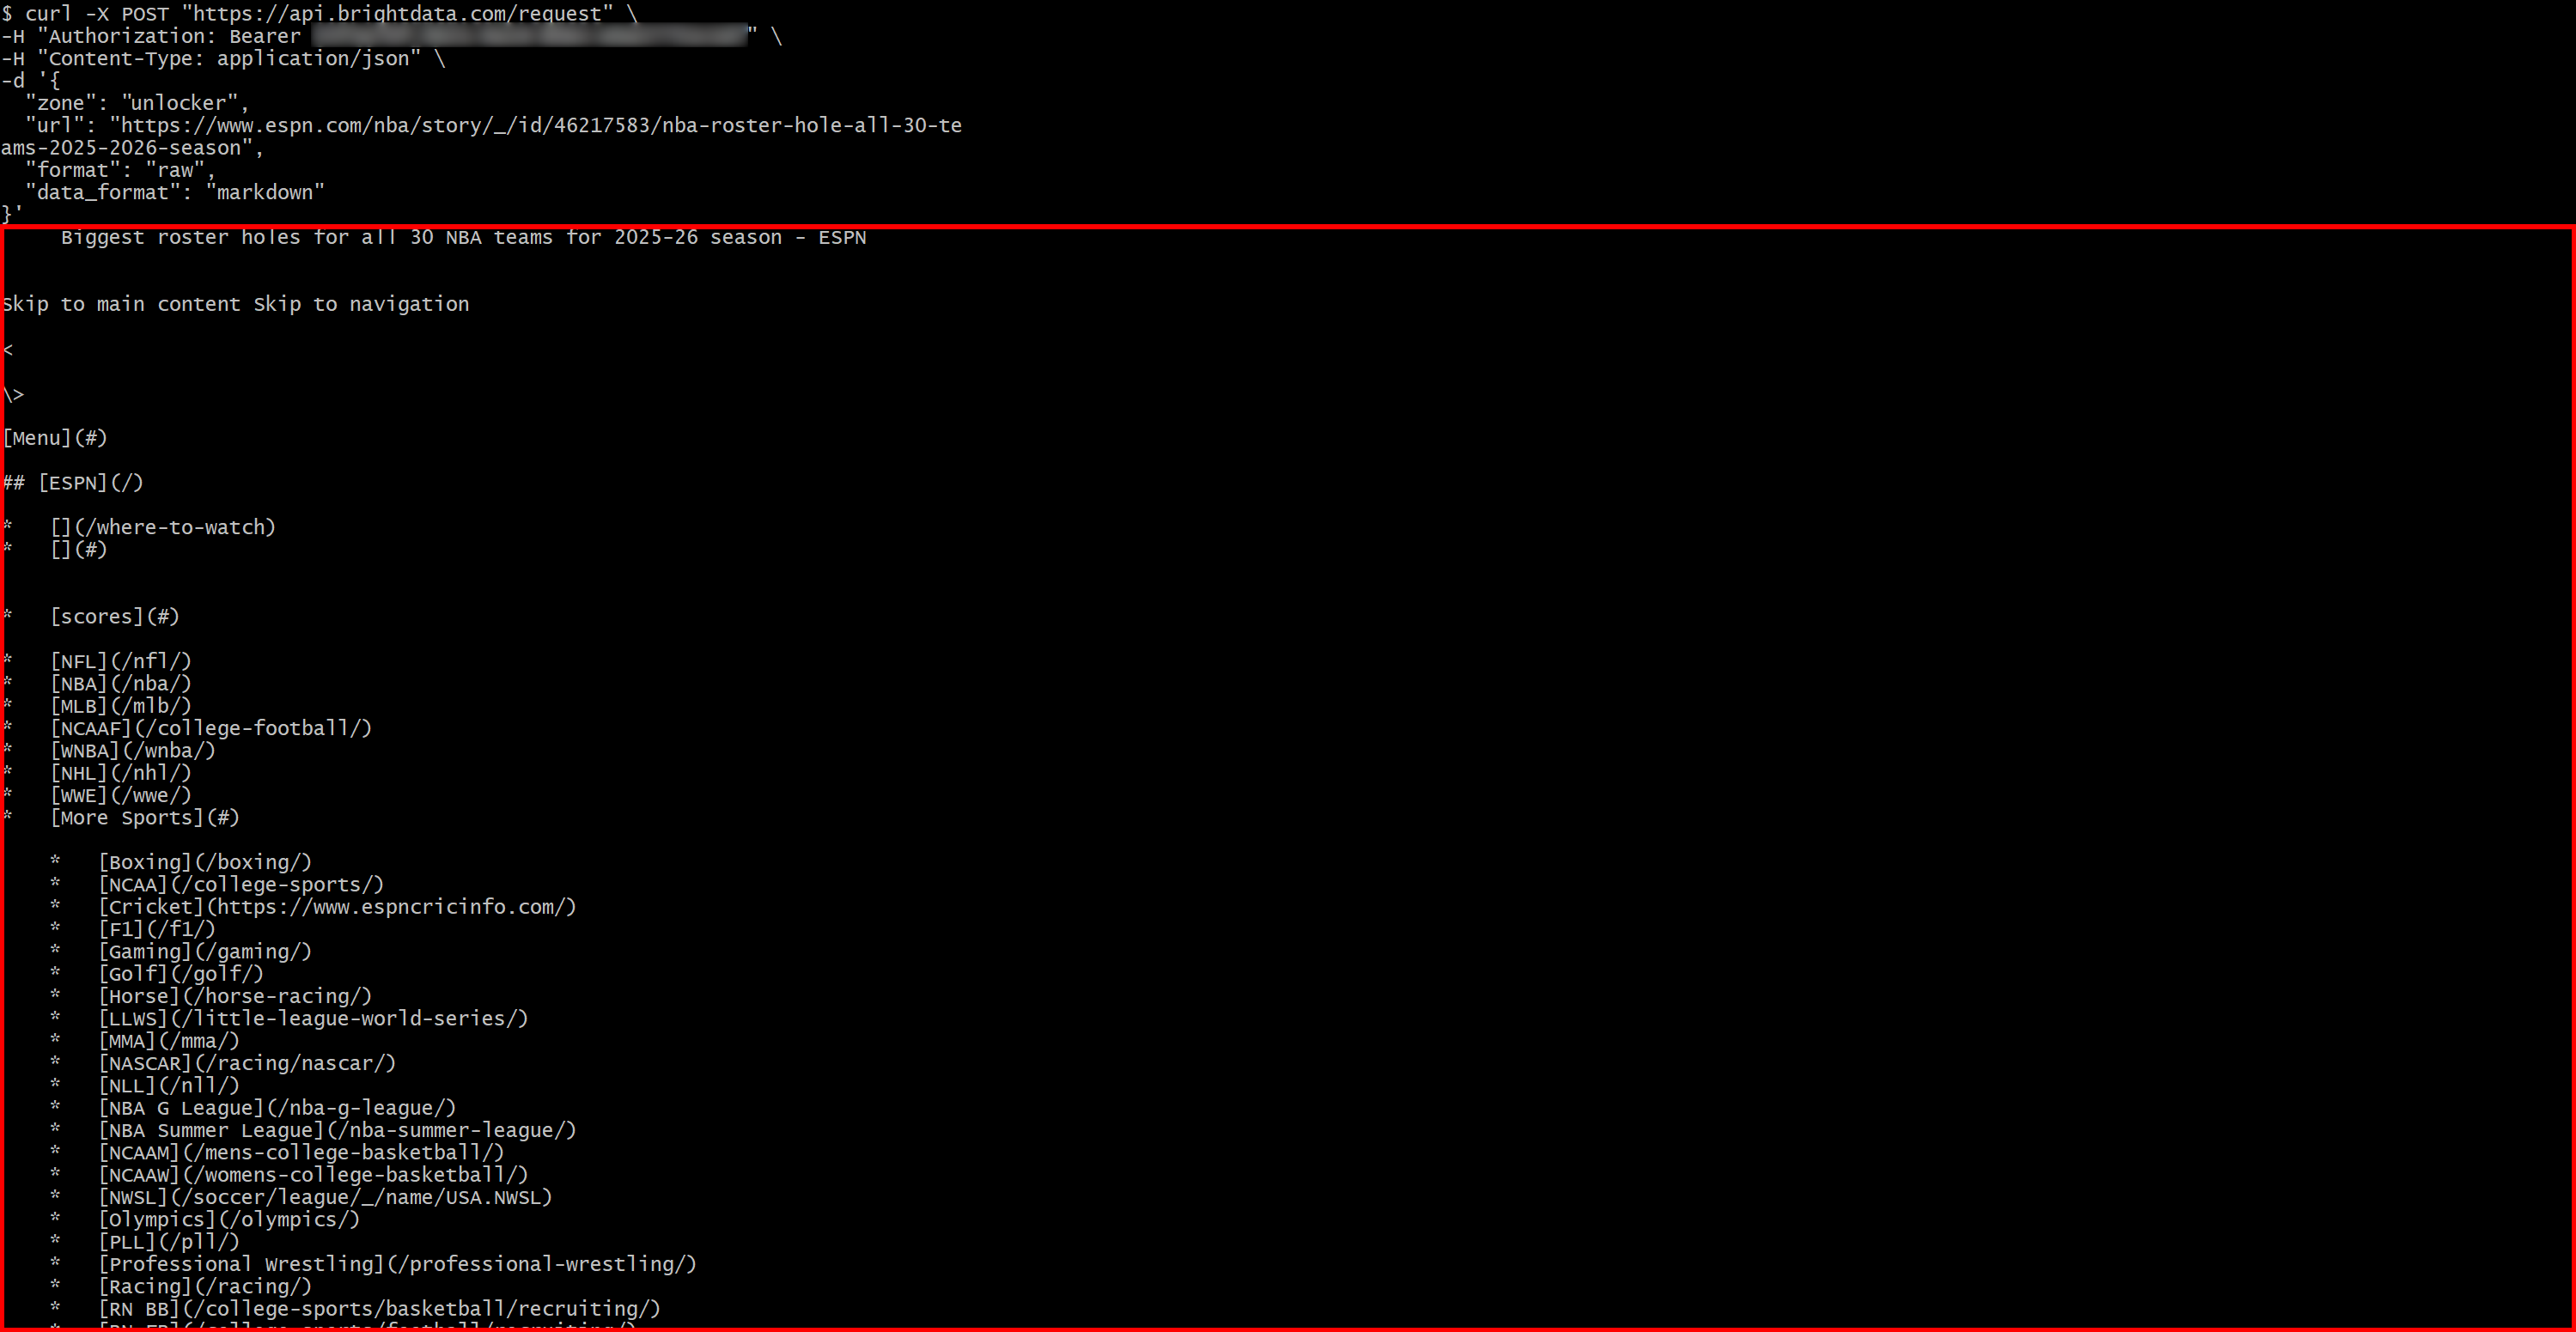
Under the hood, the agent will run its four actions. It will scrape the article’s content in Markdown via Bright Data and then summarize it using Gemini. The output should look something like this:
An ESPN article by Kevin Pelton identifies the biggest roster holes for all 30 NBA teams heading into the 2026-26 season. The analysis, released as the NBA offseason concludes and training camps approach, highlights various deficiencies. These issues range from a lack of specific skills like second-unit playmaking (Atlanta Hawks) or efficient shot creation (Toronto Raptors), to positional weaknesses such as starting center (Charlotte Hornets) or power forward (Philadelphia 76ers). Other teams face challenges like insufficient perimeter depth (Cleveland Cavaliers), a need for defensive disruption (Chicago Bulls), or a lack of playmaking experience (Brooklyn Nets). Pelton notes that some rebuilding teams may prioritize short-term gains over cohesive units due to the new collective bargaining agreement, while others, like the Golden State Warriors, are awaiting resolution of restricted free agency. For title contenders such as the defending champion Oklahoma City Thunder, the absence of significant roster issues indicates a well-built team, suggesting that any single flaw for aspiring contenders could be addressed through internal growth or midseason additions.As you can verify on the original ESPN article page, the summary is quite accurate:
If you are curious about what happens behind the scenes, click the “Dev Console” button. In this view, you can inspect each action executed by the agent:
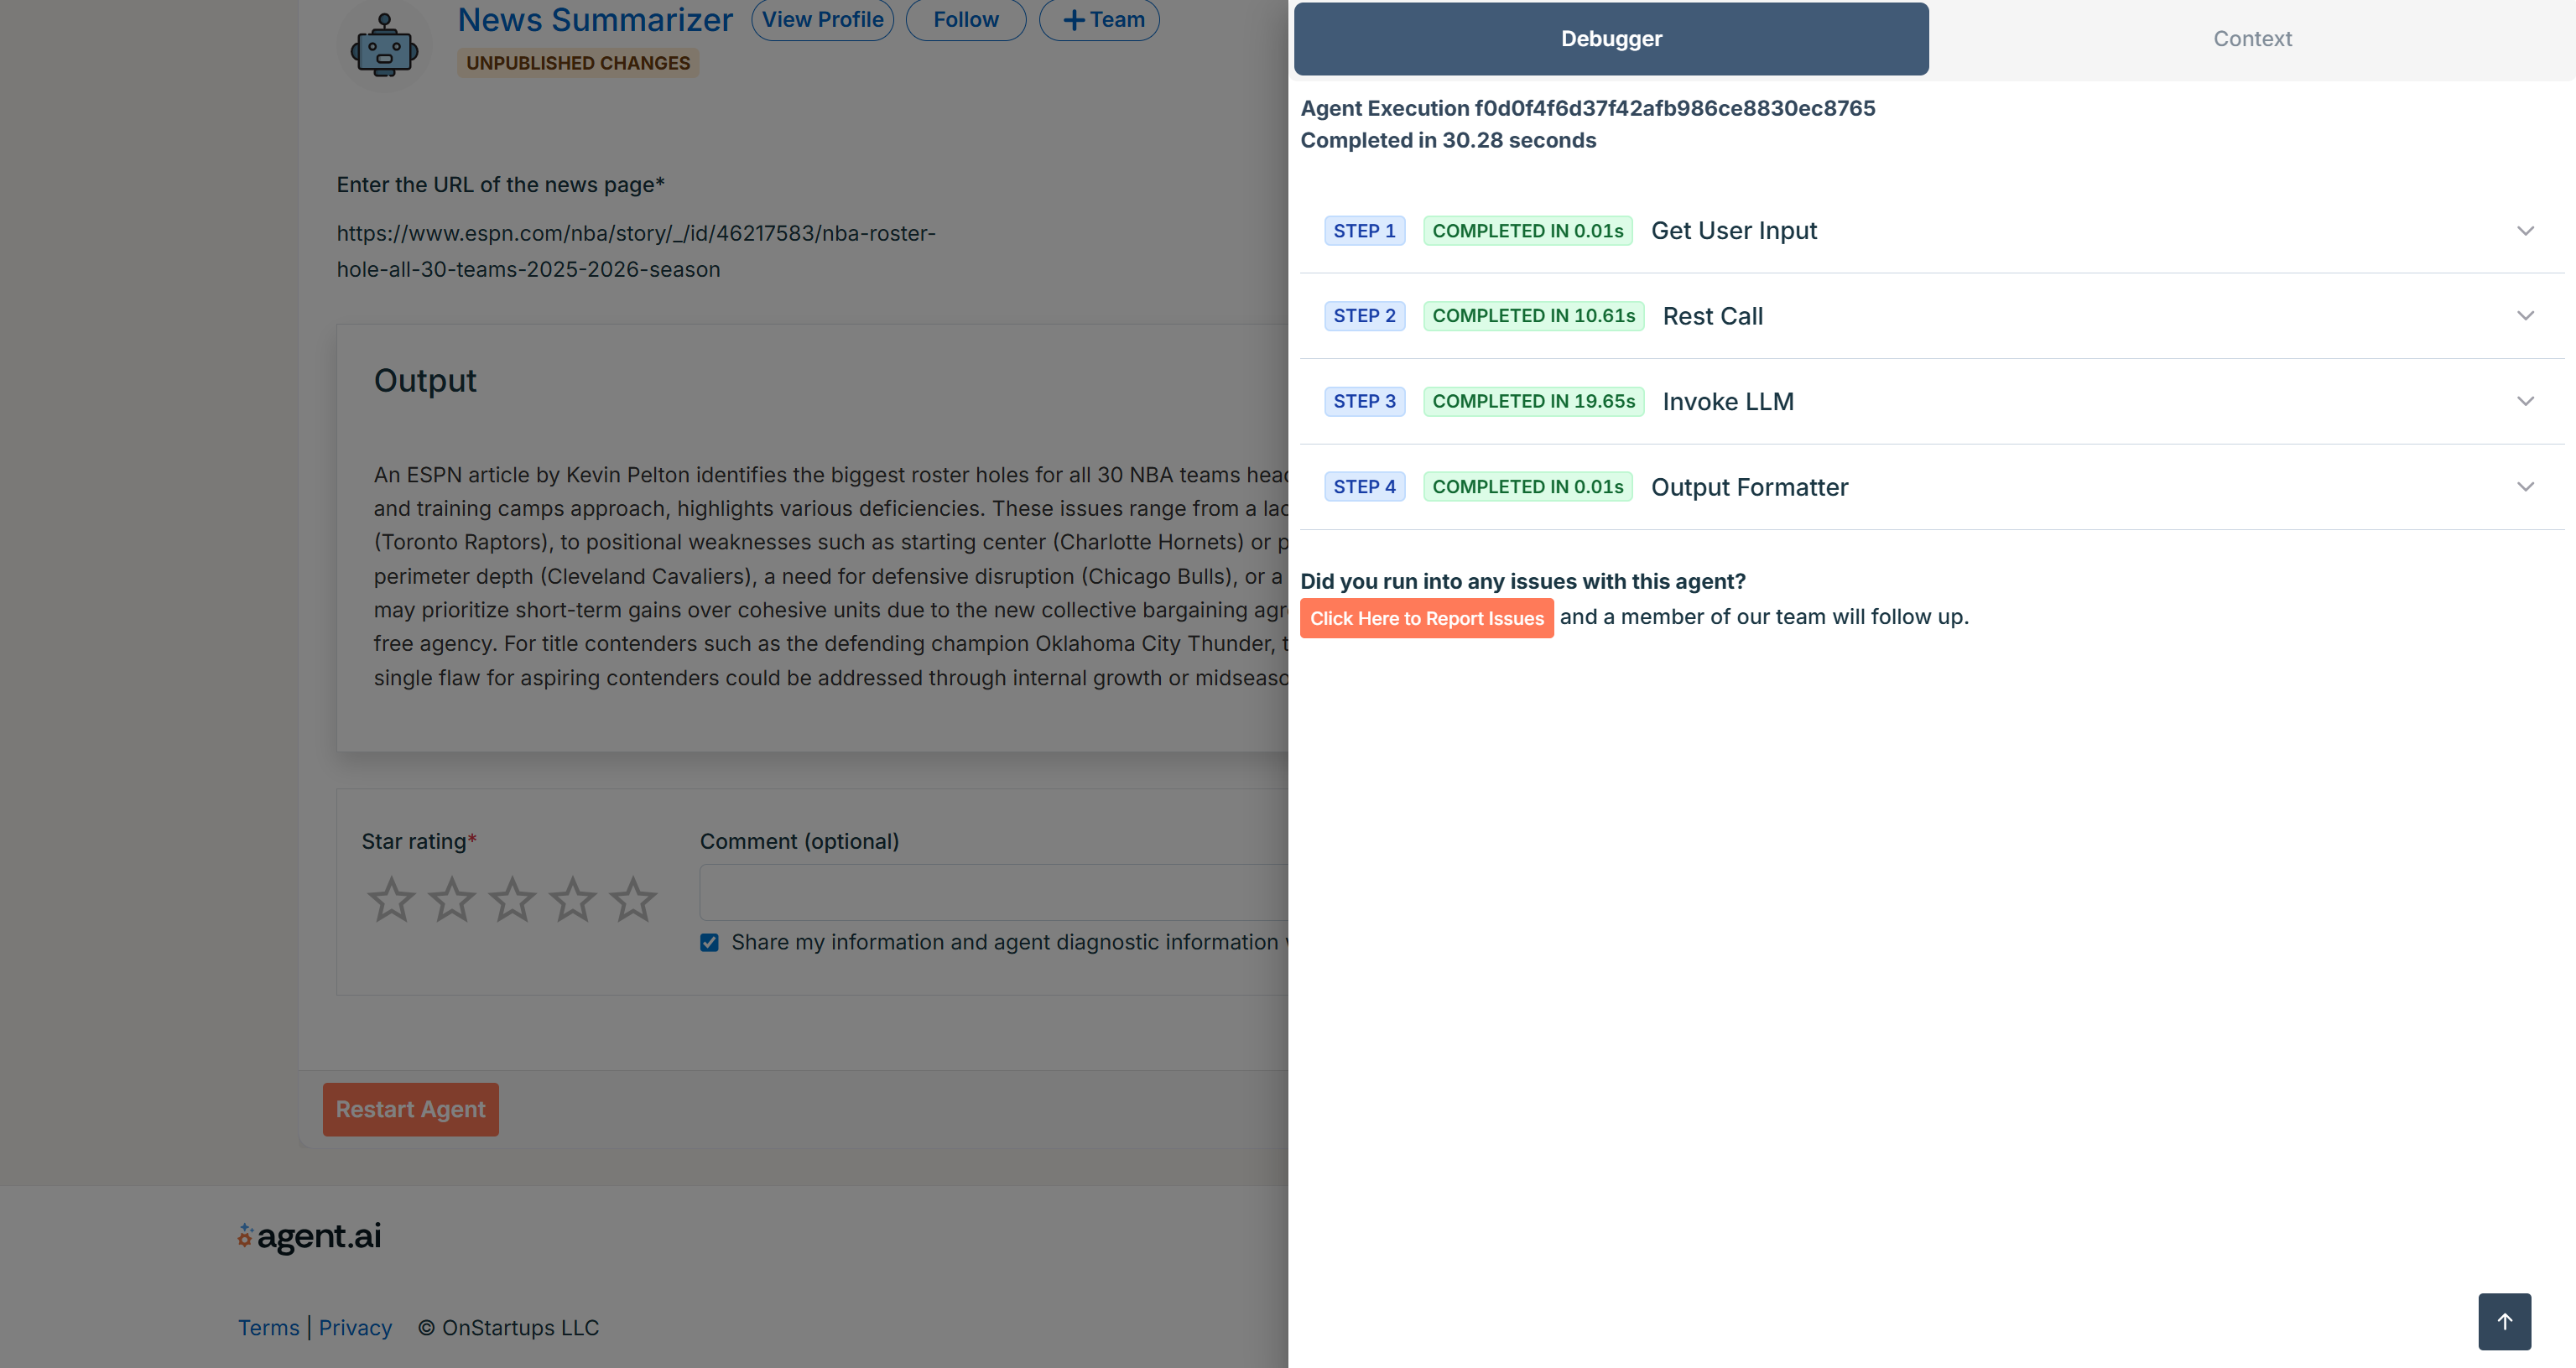
Expanding “STEP 2: REST Call” reveals that the output from the Web Unlocker API corresponds to the Markdown version of the news article provided as input:

This confirms that Bright Data was integrated correctly and that the page was successfully scraped.
Et voilà! You now have an Agent.ai agent integrated with Bright Data via API. By tweaking the user prompt or trying other Bright Data products, you can easily build agents that support many other use cases.
Next Steps: Go Public
Your current agent uses secrets for authentication, which works perfectly for private usage. However, if you want to enable Bright Data capabilities in a public agent, you will need to let users configure their own API key and zone name.
To do this, add extra input fields for the required credentials, as shown in the example below:
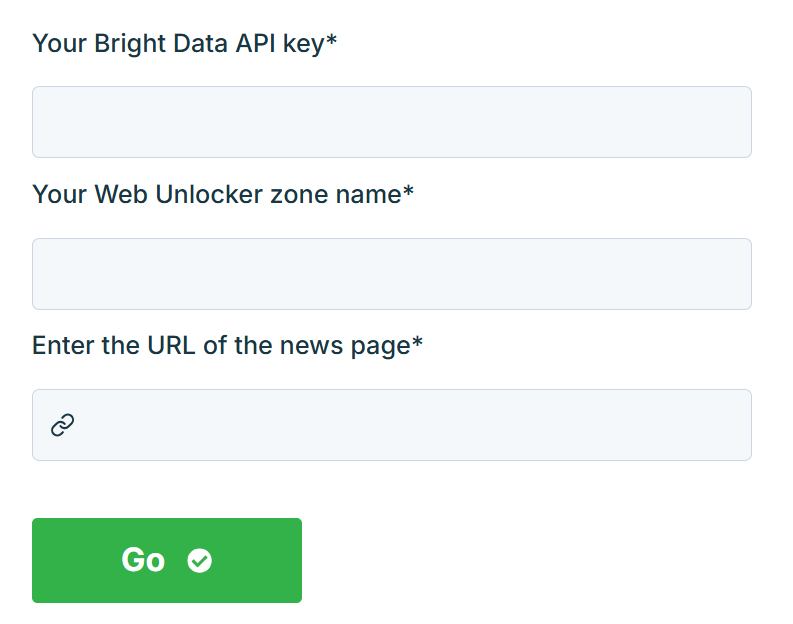
Once that is done, make your agent public and start collecting reviews from other users!
Extra: Once your agent is published (whether public or private) you can also expose it to other platforms via MCP. This allows solutions like Claude Desktop and similar tools to use your agent to complete the tasks described in your prompts.
Conclusion
In this blog post, you saw how to use Agent.ai to build a news summarization agent in a no-code workflow. This was made possible with Bright Data’s web data retrieval services, which are available for AI integration via APIs.
The example workflow we built was simple, but you might want to create more sophisticated AI agents. To do that, you will need tools for retrieving, validating, and transforming web content. That is precisely what Bright Data’s AI infrastructure delivers.
Create a free Bright Data account today and start experimenting with our AI-ready web data tools!

Technical Writer
Antonello Zanini is a technical writer, editor, and software engineer with 5M+ views. Expert in technical content strategy, web development, and project management.


