

In this guide on Scrapy Splash, you will learn:
- What Scrapy Splash is
- How to use Scrapy Splash in Python in a step-by-step tutorial
- Advanced scraping techniques with Splash in Scrapy
- Limitations when scraping websites with this tool
Let’s dive in!
What is Scrapy Splash?
Scrapy Splash refers to the integration between these two tools:
- Scrapy: A Python open-source crawling framework library for extracting the data you need from websites.
- Splash: A lightweight headless browser designed for rendering JavaScript-heavy web pages.
You might be wondering why a powerful tool like Scrapy needs Splash. Well, Scrapy can only handle static sites, as it relies on HTML parsing capabilities (specifically, from Parsel). However, when scraping dynamic websites, you need to deal with JavaScript rendering. A common solution is to use an automated browser, which is exactly what Splash provides.
With Scrapy Splash, you can send a special request—known as SplashRequest—to a Splash server. This server fully renders the page by executing JavaScript and returns the processed HTML. So, it lets your Scrapy Spider retrieve data from dynamic pages.
In short, you need Scrapy Splash if:
- You are working with JavaScript-heavy websites that Scrapy alone cannot scrape.
- You prefer a lightweight solution compared to Selenium or Playwright.
- You want to avoid the overhead of running a full browser for scraping.
If Scrapy Splash does not meet your needs, consider these alternatives:
- Selenium: A full-fledged browser automation ability for scraping JavaScript-heavy websites, which provides interesting extensions like Selenium Wire.
- Playwright: An open-source browser automation tool providing consistent cross-browser automation and robust API, which supports multiple programming languages.
- Puppeteer: An open-source Node.js library developed that provides a high-level API for automating and controlling Chrome via the DevTools Protocol.
Scrapy Splash in Python: A Step-by-Step Tutorial
In this section, you will understand how to use Scrapy Splash to retrieve data from a website. The target page will be a special JavaScript-rendered version of the popular “Quotes to Scrape” site:

This is just like the usual “Quotes to Scrape,” but it uses infinite scrolling to load data dynamically via AJAX requests triggered by JavaScript.
Requirements
To replicate this tutorial using Scrapy Splash in Python, your system must match the following requirements:
- Python 3.10.1 or higher.
- Docker 27.5.1 or higher.
If you do not have those two tools installed on your machine, follow the above links.
Prerequisites, Dependencies, and Splash Integration
Suppose you call the main folder of your project scrapy_splash/. At the end of this step, the folder will have the following structure:
scrapy_splash/
    └── venv/
Where venv/ contains the virtual environment. You can create the venv/ virtual environment directory like so:
python -m venv venvTo activate it, on Windows, run:
venvScriptsactivateEquivalently, on macOS and Linux, execute:
source venv/bin/activateIn the activated virtual environment, install the dependencies with:
pip install scrapy scrapy-splashAs a final prerequisite, you need to pull the Splash image via Docker:
docker pull scrapinghub/splashThen, start the container:
docker run -it -p 8050:8050 --rm scrapinghub/splashFor more information, follow the OS-based Docker integration instructions.
After starting the Docker container, wait until the Splash service logs the message below:
Server listening on http://0.0.0.0:8050The message signals that Splash is now available at http://0.0.0.0:8050. Visit that URL in your browser, and you should now be seeing the following page:

Depending on your configuration, following the http://0.0.0.0:8050 URL may not show the Splash service working. In this case, try to use one of the following instead:
http://localhost:8050http://127.0.0.1:8050
Note: Remember that the connection to the Splash server must remain open while using Scrapy-Splash. In other words, if you used the CLI to run the Docker container, keep that terminal open and use a separate terminal for the next steps in this procedure.
Wonderful! You now have what you need to scrape web pages with Scrapy Splash.
Step #1: Start a New Scrapy Project
Inside the scrapy_splash/ main folder, type the command below to launch a new Scrapy project:
scrapy startproject quotesWith that command, Scrapy will create a quotes/ folder. Inside it, it will automatically generate all the files you need. This is the resulting folder structure:
scrapy_splash/
   ├──  quotes/
   │       ├── quotes/
   │       │      ├── spiders/
   │       │      ├── __init__.py
   │       │      ├── items.py
   │       │      ├── middlewares.py
   │       │      ├── pipelines.py
   │       │      └── settings.py
   │       │
   │       └── scrapy.cfg
   └── venv/
Perfect! You started a new Scrapy project.
Step #2: Generate The Spider
To generate a new spider to crawl the target website, navigate to the quotes/ folder:
cd quotesThen, generate a new spider with:
scrapy genspider words https://quotes.toscrape.com/scrollYou will obtain the following result:
Created spider 'words' using template 'basic' in module:
  quotes.spiders.words
As you can tell, Scrapy has automatically created a words.py file inside the spiders/ folder. The words.py file contains the following code:
import scrapy

class WordsSpider(scrapy.Spider):
    name = "words"
    allowed_domains = ["quotes.toscrape.com"]
    start_urls = ["https://quotes.toscrape.com/scroll"]
    def parse(self, response):
        pass
This will soon contain the required scraping logic from the dynamic target page.
Hooray! You generated the spider to scrape the target website.
Step #3: Configure Scrapy to Use Splash
You now have to configure Scrapy so that it can use the Splash service. To do so, add the following configurations to the file settings.py:
# Set the Splash local server endpoint
SPLASH_URL = "http://localhost:8050"
# Enable the Splash downloader middleware
DOWNLOADER_MIDDLEWARES = {
    "scrapy_splash.SplashCookiesMiddleware": 723,
    "scrapy_splash.SplashMiddleware": 725,
    "scrapy.downloadermiddlewares.httpcompression.HttpCompressionMiddleware": 810,
}
# Enable the Splash deduplication argument filter
SPIDER_MIDDLEWARES = {
    "scrapy_splash.SplashDeduplicateArgsMiddleware": 100,
}
In the above configs:
SPLASH_URLsets the endpoint for the local Splash server. This where Scrapy will send requests for JavaScript rendering.DOWNLOADER_MIDDLEWARESenables specific middlewares to interact with Splash. In particular:SplashCookiesMiddlewareconfigures Scrapy to handle cookies when making requests through Splash.SplashMiddlewaretells Scrapy to do the actual rendering of dynamic content through Splash.HttpCompressionMiddlewarechanges how Scrapy deals with HTTP compression for downloaded content.
SPIDER_MIDDLEWARESguarantees that requests with the same Splash arguments are not duplicated, which is useful for reducing unnecessary load and improving efficiency.
For more detailed information about these configurations, refer to the official Scrapy-Splash documentation.
Good! Now Scrapy can connect to Splash and programmatically use it for JavaScript rendering.
Step #4: Define the Lua Script for JavaScript Rendering
Scrapy can now integrate with Splash to render web pages that rely on JavaScript, like the target page of this guide. To define custom rendering and interaction logic, you need to use Lua scripts. That is because Splash relies on Lua scripts to interact with web pages via JavaScript and control the browser’s behavior programmatically.
Specifically, add the Lua script below to words.py:
script = """
function main(splash, args)
      splash:go(args.url)

      -- custom rendering script logic...

      return splash:html()
    end
"""
In the above snippet, the script variable contains the Lua logic that Splash will execute on the server. In particular, this script instructs Splash to:
- Navigate to the defined URL with the method
splash:go(). - Return the rendered HTML content with the method
splash:html().
Use the Lua script above in a start_requests() function inside the WordsSpider class:
def start_requests(self):
    for url in self.start_urls:
        yield SplashRequest(
            url,
            self.parse,
            endpoint="execute",
            args={"lua_source": script}
        )
The above start_requests() method overrides Scrapy’s default start_requests(). This way, Scrapy Splash can execute the Lua script to retrieve the JavaScript-rendered HTML of the page. Lua script execution occurs via the "lua_source": script argument in the SplashRequest() method. Also, note the use of the "execute" Splash endpoint (which you will learn more soon).
Do not forget to import SplashRequest from Scrapy Splash:
from scrapy_splash import SplashRequestYour words.py file is now equipped with the correct Lua script to access the JavaScript-rendered content on the page!
Step #5: Define the Data Parsing Logic
Before getting started, inspect a quote HTML element on the target page to understand how to parse it:

There, you can see that the quote elements can be selected with .quote. Given a quote, you can then get:
- The quote text from
.text. - The quote author from
.author. - The quote tags from
.tags.
The scraping logic to retrieve all the quotes from the target page can be defined through the following parse() method:
def parse(self, response):
    # Retrieve CSS selectors
    quotes = response.css(".quote")
    for quote in quotes:
        yield {
            "text": quote.css(".text::text").get(),
            "author": quote.css(".author::text").get(),
            "tags": quote.css(".tags a.tag::text").getall()
        }
parse() processes the response returned by Splash. In detail, it:
- Extracts all
divelements with the classquoteusing the CSS selector".quote". - Iterates over each
quoteelement to extract the name, author, and tag for each quote.
Very well! The Scrapy Splash scraping logic is complete.
Step #6: Put It All Together and Run The Script
This is what your final words.py file should look like:
import scrapy
from scrapy_splash import SplashRequest

# Lua script for JavaScript rendering
script = """
function main(splash, args)
      splash:go(args.url)

      return splash:html()
    end
"""

class WordsSpider(scrapy.Spider):
    name = "words"
    start_urls = ["https://quotes.toscrape.com/scroll"]
    def start_requests(self):
        for url in self.start_urls:
            yield SplashRequest(
                url,
                self.parse,
                endpoint="execute",
                args={"lua_source": script}
            )
    def parse(self, response):
        quotes = response.css(".quote")
        for quote in quotes:
            yield {
                "text": quote.css(".text::text").get(),
                "author": quote.css(".author::text").get(),
                "tags": quote.css(".tags a.tag::text").getall()
            }
Run the script with this command:
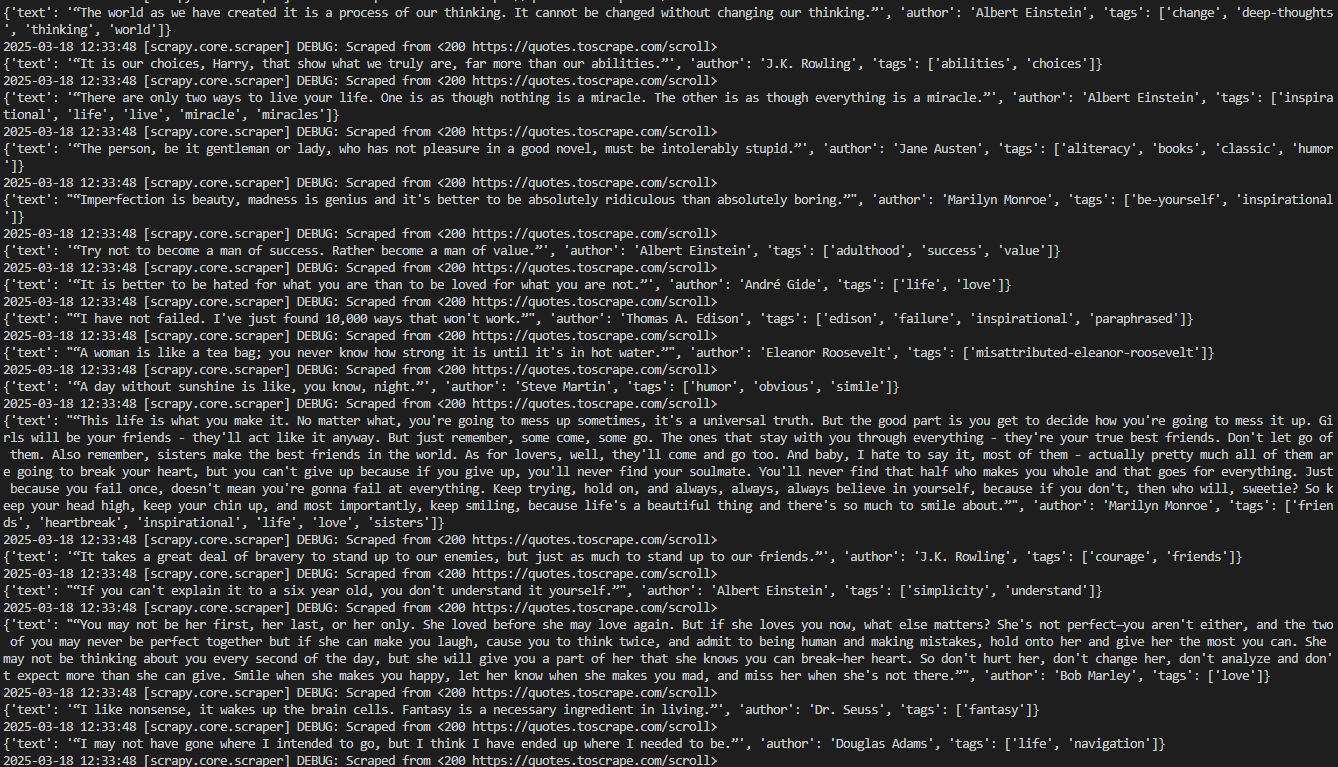
scrapy crawl wordsThis is the expected result:

The desired result can be better visualized like this:
2026-03-18 12:21:55 [scrapy.core.scraper] DEBUG: Scraped from <200 https://quotes.toscrape.com/scroll>
{'text': '“The world as we have created it is a process of our thinking. It cannot be changed without changing our thinking.”', 'author': 'Albert Einstein', 'tags': ['change', 'deep-thoughts', 'thinking', 'world']}

2026-03-18 12:21:55 [scrapy.core.scraper] DEBUG: Scraped from <200 https://quotes.toscrape.com/scroll>
{'text': '“It is our choices, Harry, that show what we truly are, far more than our abilities.”', 'author': 'J.K. Rowling', 'tags': ['abilities', 'choices']}

# omitted for brevity...

2026-03-18 12:21:55 [scrapy.core.engine] INFO: Closing spider (finished)
Note that the output contains the data of interest.
Note that if you remove the start_requests() method from the Words``Spider class, Scrapy will not return any data. That is because, withour Splash, it cannot render pages that require JavaScript.
Very good! You completed your first Scrapy Splash project.
A Note on Splash
Splash is a server that communicates over HTTP. This allows you to scrape web pages with Splash using any HTTP client, by calling its endpoints. The endpoints it provides are:
execute: Executes a custom Lua rendering script and return its result.render.html: Returns the HTML of the javascript-rendered page.render.png: Returns an image (in PNG format) of the javascript-rendered page.render.jpeg: Returns an image (in JPEG format) of the javascript-rendered page.render.har: Returns information about Splash interaction with a website in HAR format.render.json: Returns a JSON-encoded dictionary with information about the javascript-rendered webpage. It can include HTML, PNG, and other information, based on arguments passed.
To understand more about how these endpoints work, consider the render.html endpoint. Connect to the endpoint with this Python code:
# pip install requests
import requests
import json

# URL of the Splash endpoint
url = "http://localhost:8050/render.html"

# Sending a POST request to the Splash endpoint
payload = json.dumps({
  "url": "https://quotes.toscrape.com/scroll" # URL of the page to render
})
headers = {
  "content-type": "application/json"
}
response = requests.request("POST", url, headers=headers, data=payload)
print(response.text)
This snippet defines:
- The Splash instance on localhost as the URL making a call to the
render.htmlendpoint. - The target page to scrape inside the
payload.
Run the above code and tou will obtain the rendered HTML of the whole page:
<!DOCTYPE html>
<html lang="en">
  <head>
      <meta charset="UTF-8">
      <title>Quotes to Scrape</title>
      <link rel="stylesheet" href="/static/bootstrap.min.css">
      <link rel="stylesheet" href="/static/main.css">
  </head>
  <body>
      <!-- omitted for brevity... -->
  </body>
</html>
While Splash can handle JavaScript-rendered HTML independently, using Scrapy Splash with SplashRequest makes web scraping much easier.
Scrapy Splash: Advanced Scraping Techniques
In the previous paragraph, you completed a basic Scrapy tutorial with Splash integration. Time to try some advanced scraping techniques with Scrapy Splash!
Managing Advanced Scrolling
The target page contains quotes that are loaded dynamically via AJAX thanks to infinite scrolling:

To manage the interaction with the infinite scrolling, you need to change the Lua script as follows:
script = """
function main(splash, args)
    local scroll_delay = 1.0  -- Time to wait between scrolls
    local max_scrolls = 10    -- Maximum number of scrolls to perform
    local scroll_to = 1000    -- Pixels to scroll down each time

    splash:go(args.url)
    splash:wait(scroll_delay)

    local scroll_count = 0
    while scroll_count < max_scrolls do
        scroll_count = scroll_count + 1
        splash:runjs("window.scrollBy(0, " .. scroll_to .. ");")
        splash:wait(scroll_delay)
    end

    return splash:html()
end
"""
This modified script relies on these variables:
max_scrollsdefines the maximum number of scrolls to perform. This value may need to be changed based on how much content you want to scrape from the page.scroll_tospecifies the number of pixels to scroll down each time. Its value might need to be adjusted depending on the page’s behavior.splash:runjs()executes thewindow.scrollBy()JavaScript function to scroll the page down by the specified number of pixels.splash:wait()ensures the script waits before loading new content. The amount of time (in seconds) to wait is defined by the variablescroll_delay.
In simpler terms, the above Lua script simulates a defined number of scrolls in an infinite scrolling web page scenario.
The code in the words.py file will look like this:
import scrapy
from scrapy_splash import SplashRequest

# Lua script for infinite scrolling
script = """
function main(splash, args)
    local scroll_delay = 1.0  -- Time to wait between scrolls
    local max_scrolls = 10    -- Maximum number of scrolls to perform
    local scroll_to = 1000    -- Pixels to scroll down each time

    splash:go(args.url)
    splash:wait(scroll_delay)

    local scroll_count = 0
    while scroll_count < max_scrolls do
        scroll_count = scroll_count + 1
        splash:runjs("window.scrollBy(0, " .. scroll_to .. ");")
        splash:wait(scroll_delay)
    end

    return splash:html()
end
"""

class WordsSpider(scrapy.Spider):
    name = "words"
    start_urls = ["https://quotes.toscrape.com/scroll"]
    def start_requests(self):
        for url in self.start_urls:
            yield SplashRequest(
                url,
                self.parse,
                endpoint="execute",
                args={"lua_source": script}
            )
    def parse(self, response):
        # Retrieve CSS selectors
        quotes = response.css("div.quote")
        for quote in quotes:
            yield {
                "text": quote.css("span.text::text").get(),
                "author": quote.css("span small.author::text").get(),
                "tags": quote.css("div.tags a.tag::text").getall()
            }
Run the script using the command below:
scrapy crawl wordsThe crawler will print all the scraped quotes consistently with the max_scrolls variable. This is the expected result:
Note that the output now includes significantly more quotes than before. This confirms that the pages have been successfully scrolled down, and new data has been loaded and scraped.
Perfect! You have now learned how to manage infinite scrolling with Scrapy Splash.
Wait For Element
Web pages can retrieve data dynamically or render nodes in the browser. This means the final DOM may take time to render. To avoid errors when retrieving data from a website, you should always wait for an element to be loaded on the page before interacting with it.
In this example, the element to wait will be the text from the first quote:

To implement waiting logic, write a Lua script as follows:
script = """
function main(splash, args)
       splash:go(args.url)

       while not splash:select(".text") do
         splash:wait(0.2)
         print("waiting...")
       end

       return { html=splash:html() }
    end
"""
This script creates a while loop that waits for 0.2 seconds if the text element is on the page. To verify if the .text element in on the page, you can use the the splash:select() method.
Wait For Time
Since dynamic-content web pages take time to load and render, you can wait for a few seconds before accessing the HTML content. This can be achieved through the method splash:wait() like so:
script = """
function main(splash, args)
       splash:wait(args.wait)
       splash:go(args.url)
       return { html=splash:html() }
    end
"""
In this case, the seconds that the script must wait are expressed in the SplashRequest() method with a Lua script argument.
For example, set"wait" : 2.0 to tell the Lua script to wait 2 seconds:
import scrapy
from scrapy_splash import SplashRequest

script = """
function main(splash, args)
       splash:wait(args.wait)
       splash:go(args.url)
       return { html=splash:html() }
    end
"""

class WordsSpider(scrapy.Spider):
    name = "words"
    start_urls = ["https://quotes.toscrape.com/scroll"]
    def start_requests(self):
        for url in self.start_urls:
            yield SplashRequest(
                url,
                self.parse,
                endpoint="execute",
                args={"lua_source": script, "wait": 2.0} # Waiting for 2 seconds
            )
# ...Note: A hard wait (splash:wait()) is useful for local testing since it ensures the page loads before proceeding. That approach is not ideal for production as it adds unnecessary delays, hurting performance and scalability. Additionally, you cannot know in advance the right amount of time to wait.
Well done! You learned how to wait a certain amount of time in Scrapy Splash.
Limitations of Using Scrapy Splash
In this tutorial, you learned how to use Scrapy Splash to extract data from the Web in different scenarios. While this integration is straightforward, it has some downsides.
For instance, setting up Splash requires running a separate Splash server with Docker, adding complexity to your scraping infrastructure. Additionally, Splash’s Lua scripting API is somewhat limited compared to more modern tools like Puppeteer and Playwright.
However, as with all headless browsers, the biggest limitation comes from the browser itself. Anti-scraping technologies can detect when a browser is being automated rather than used normally, leading to script blocks.
Forget these challenges with Scraping Browser—a dedicated cloud-based scraping browser designed for infinite scalability. It includes CAPTCHA solving, browser fingerprint management, and anti-bot bypassing, so you don’t have to worry about getting blocked.
Conclusion
In this article, you learned what Scrapy Splash is and how it works. You started with the basics and then explored more complex scraping scenarios.
You also discovered the limitations of the tool, particularly its vulnerability to anti-bot and anti-scraping systems. To overcome these challenges, Scraping Browser is an excellent solution. This is just one of the many Bright Data scraping solutions you can try:
- Proxy Services: Four different types of proxies to bypass location restrictions, including 150 million+ residential IPs
- Web Scraper APIs: Dedicated endpoints for extracting fresh, structured web data from over 100 popular domains.
- SERP API: API to handle all ongoing unlocking management for SERP and extract one page
Sign up for Bright Data now and start your free trial to test our scraping solutions.

Technical Writer
Federico Trotta is a technical writer, editor, and data scientist. Expert in technical content management, data analysis, machine learning, and Python development.


