
In this tutorial, you will understand:
- What Zapier Agents are and how integrating Bright Data overcomes the common limitations of regular AI agents.
- How to combine Bright Data with a Zapier Agent through the official Bright Data tools available in Zapier.
- How to connect a Zapier Agent to the 60+ tools available through Web MCP.
Let’s get started!
Introduction to Zapier Agents (formerly Zapier Central)
Before diving into the Bright Data setup in Zapier Agents, let’s first clarify what this platform is and why this integration is valuable.
What Is Zapier Agents?
Zapier Agents, formerly known as Zapier Central, is a beta service (as of this writing) provided by Zapier. It allows you to build AI-powered teammates that can autonomously perform real work across your business tools.
In practice, these AI agents combine large language models with Zapier’s automation capabilities, so that they can behave more like coworkers than simple chatbots. That is possible as Zapier Agents lets you equip an agent with company knowledge, define its behaviors, and let it operate across 8,000+ apps and 300+ AI tools without code.
Why You Need a Zapier Agents + Bright Data Integration
The Zapier Agents platform provides the flexibility and interoperability you desire to craft enterprise-grade AI agents that operate as true teammates.
Yet, even the most advanced AI workflows face inherent limitations of large language models. These include outdated knowledge caused by static training data and limited access to the web.
The solution is to integrate your Zapier Agent with Bright Data, which is officially supported in the Zapier platform.
Bright Data provides products for web scraping, search, browser automation, and more. These capabilities enable your AI systems to access real-time, actionable web data and unlock their full potential for enterprise applications.
Using Zapier Agents With Bright Data Integrations: A Step-by-Step Guide
In this guided section, you will learn how to integrate Bright Data tools into a Zapier agent. This will rely on Bright Data services to retrieve review data for Google Play Store applications. Then, it will generate a daily report and send it to your Gmail address.
The idea is to automate the work of a teammate who monitors your apps on the Google Play Store and tracks their performance.
Important: This is just one of many agentic use cases supported by Zapier Bright Data integrations.
Follow the instructions below!
Prerequisites
To follow along with this tutorial, you need:
- A Zapier account (a free plan is enough).
- A Bright Data account with an API key in place.
If you do not have a Bright Data API key yet, follow the documentation guide to generate one.
Step #1: Get Started with Zapier Agents
Log in to Zapier and navigate to the Agents service page. You should see something like this: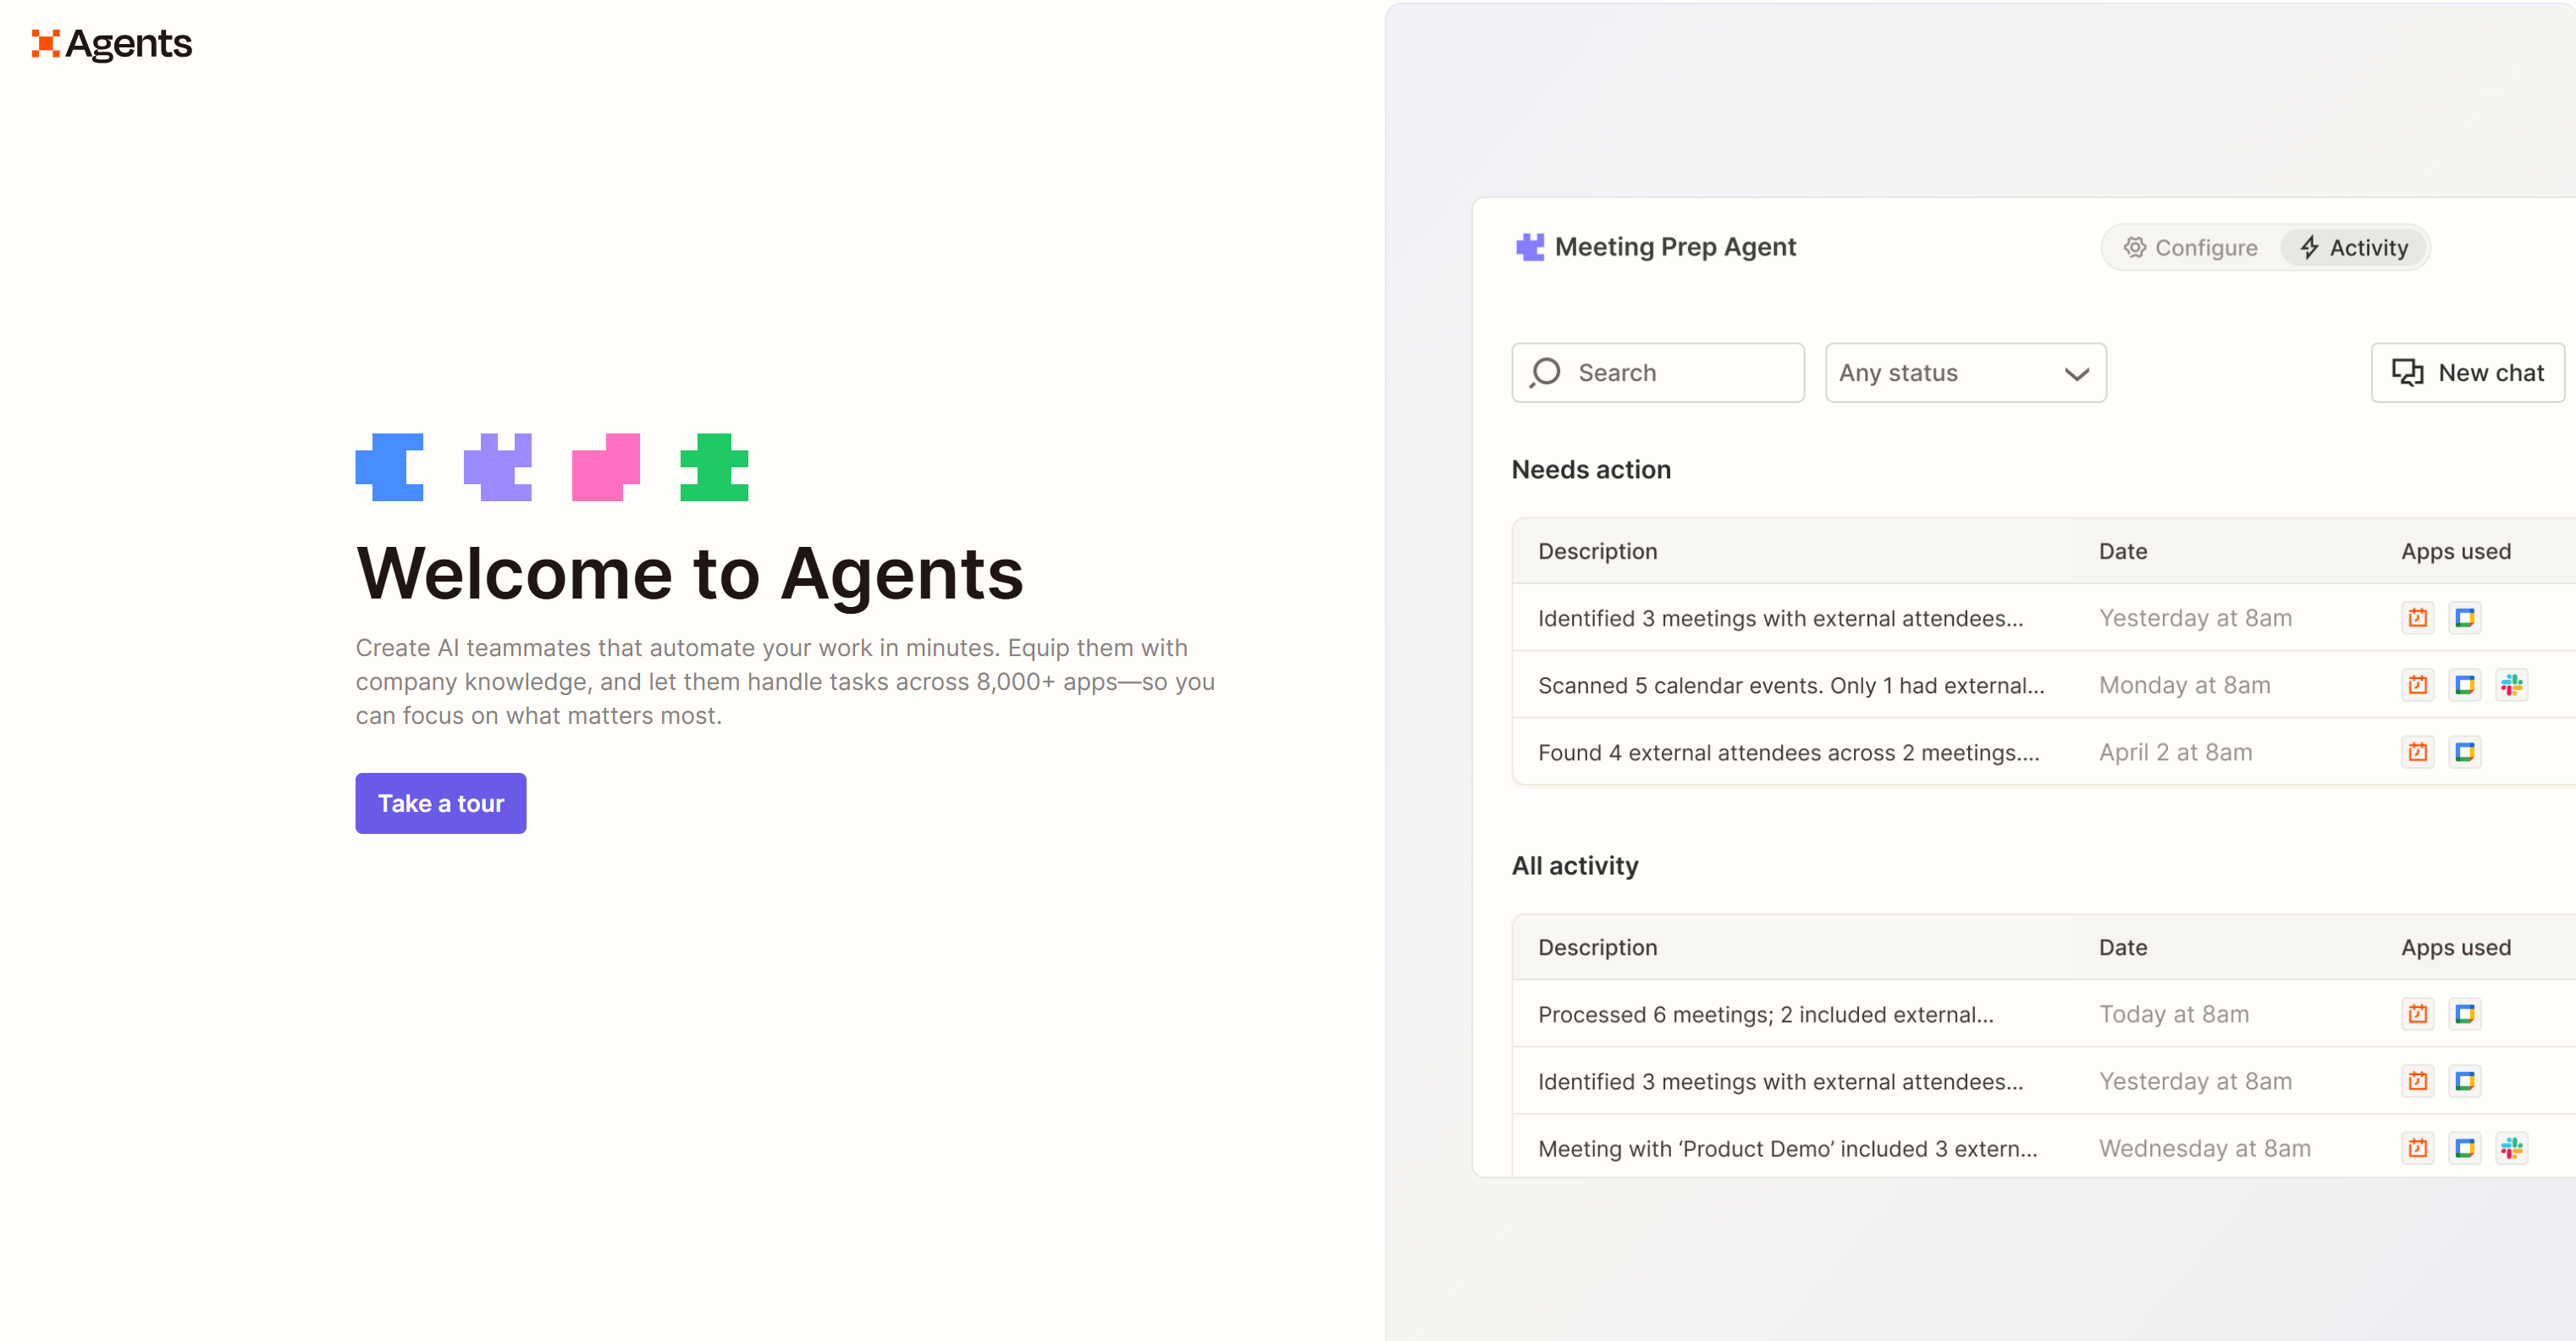
Click “Take a tour” and follow the wizard to learn how Zapier Agents work.
When reaching the final step, press the “Create your first agent” button: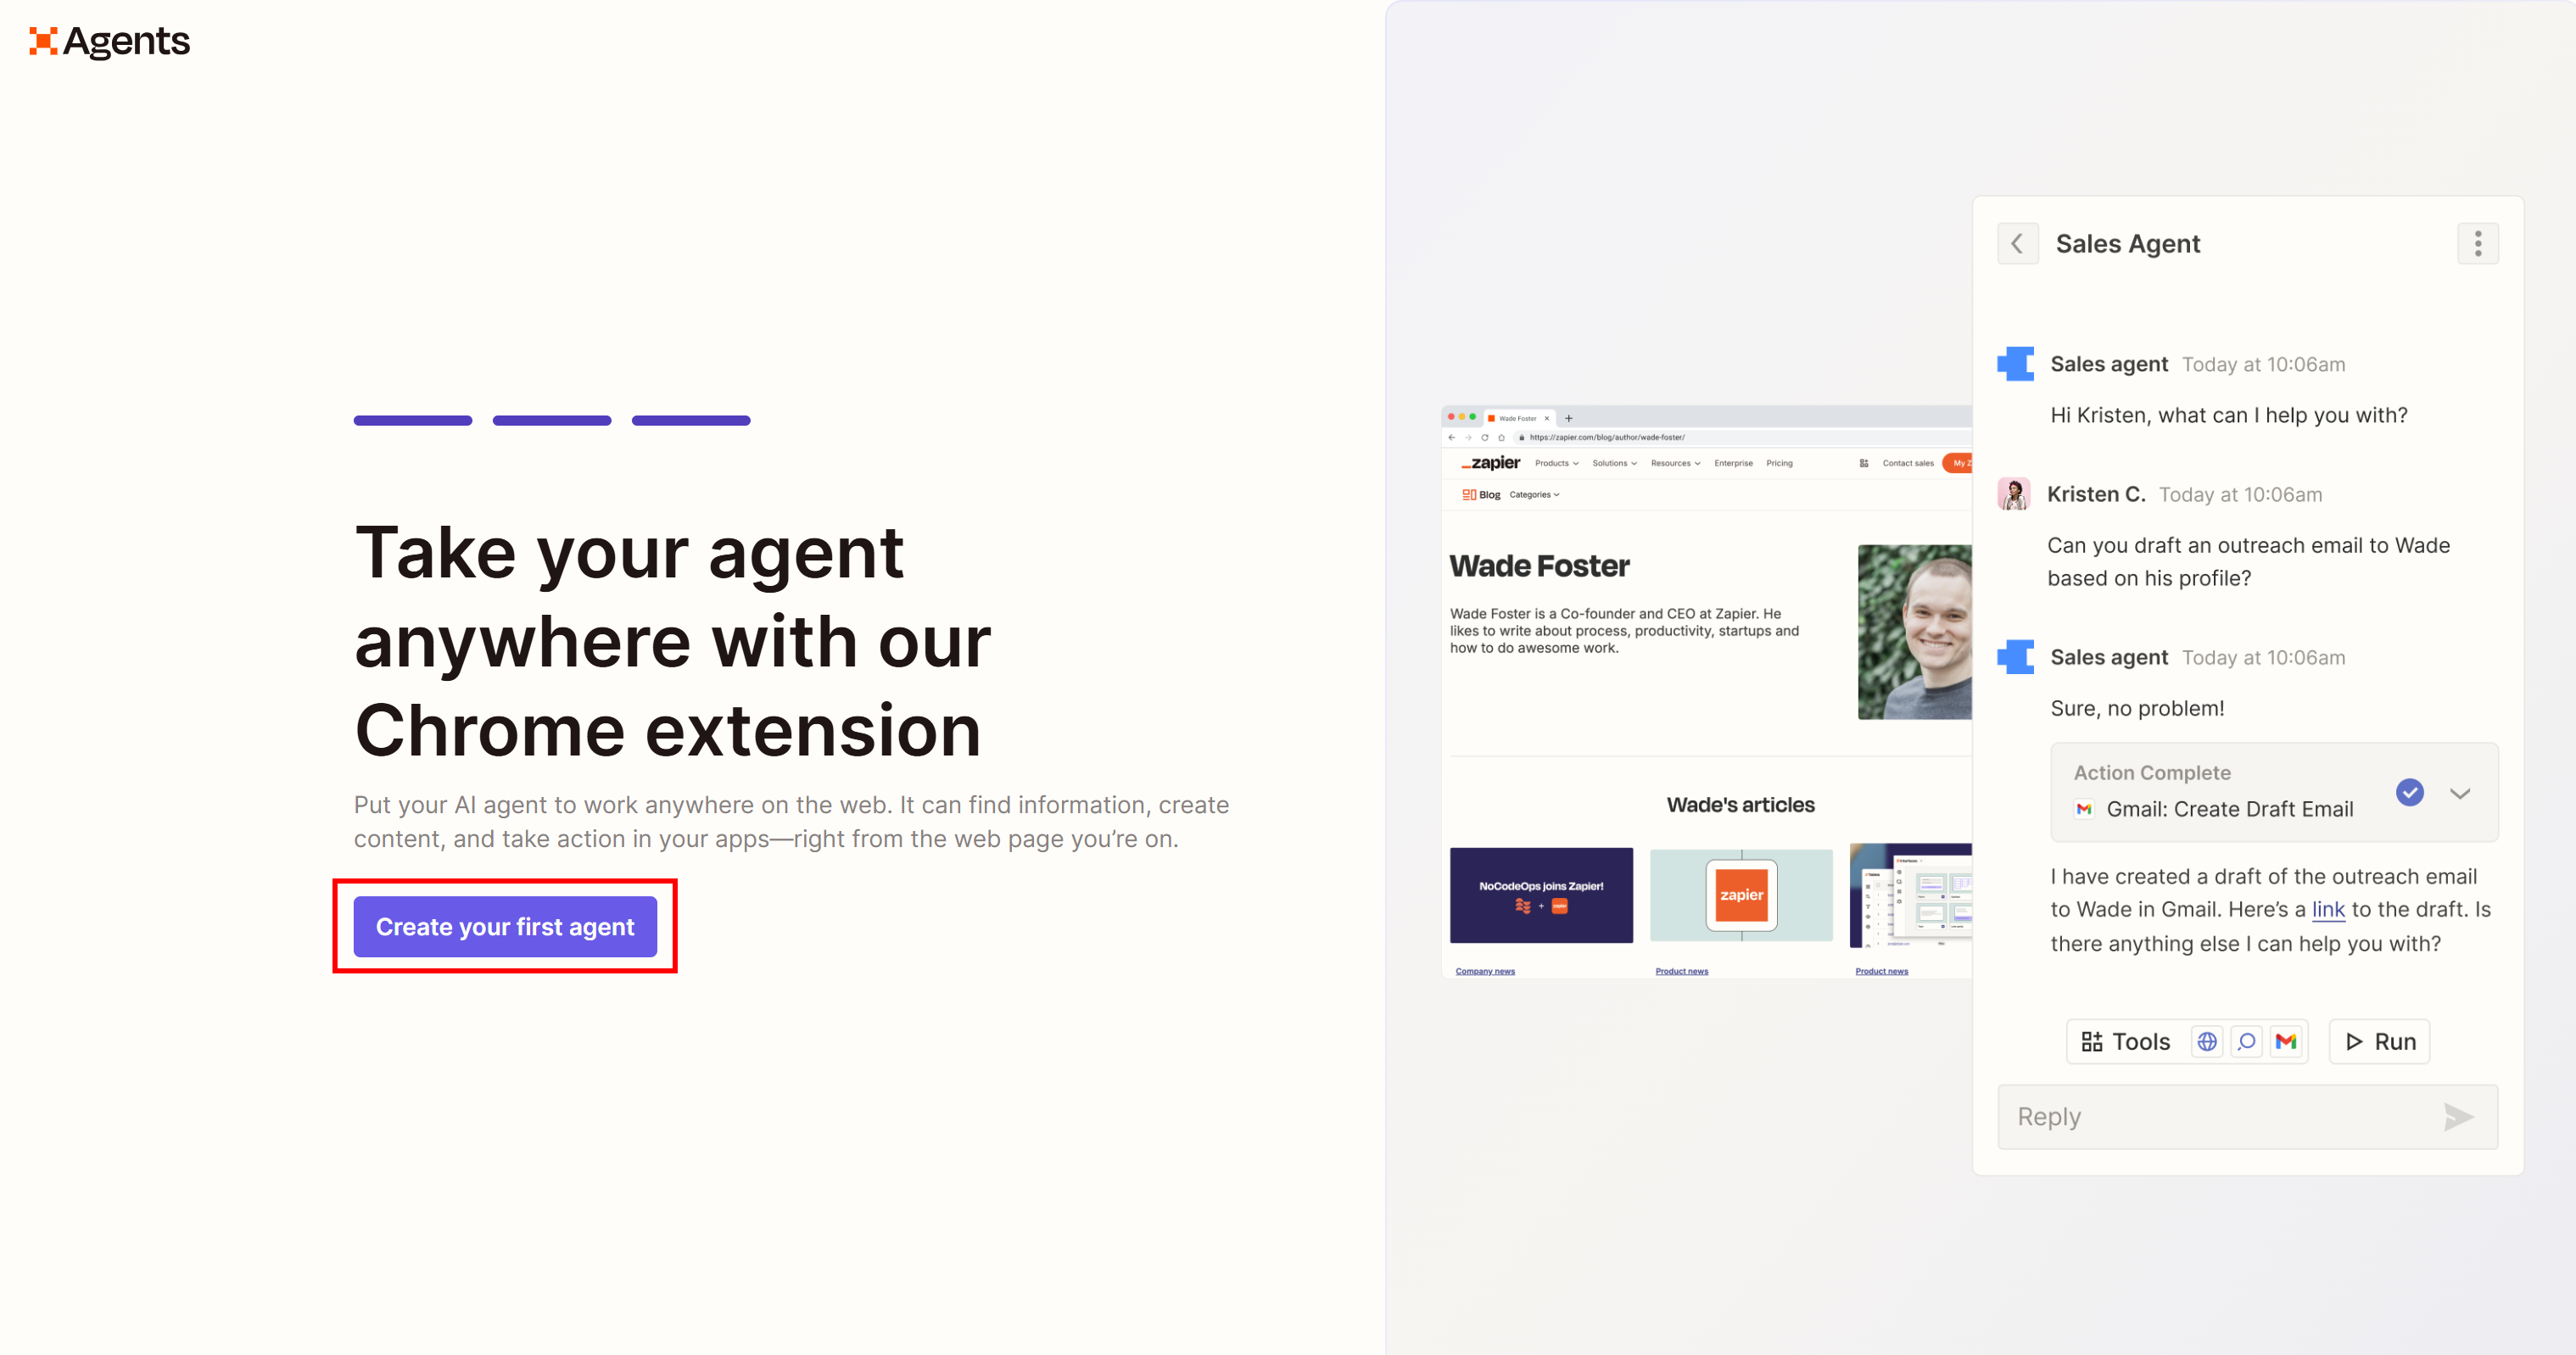
You will finally get to the “Create a custom agent” form: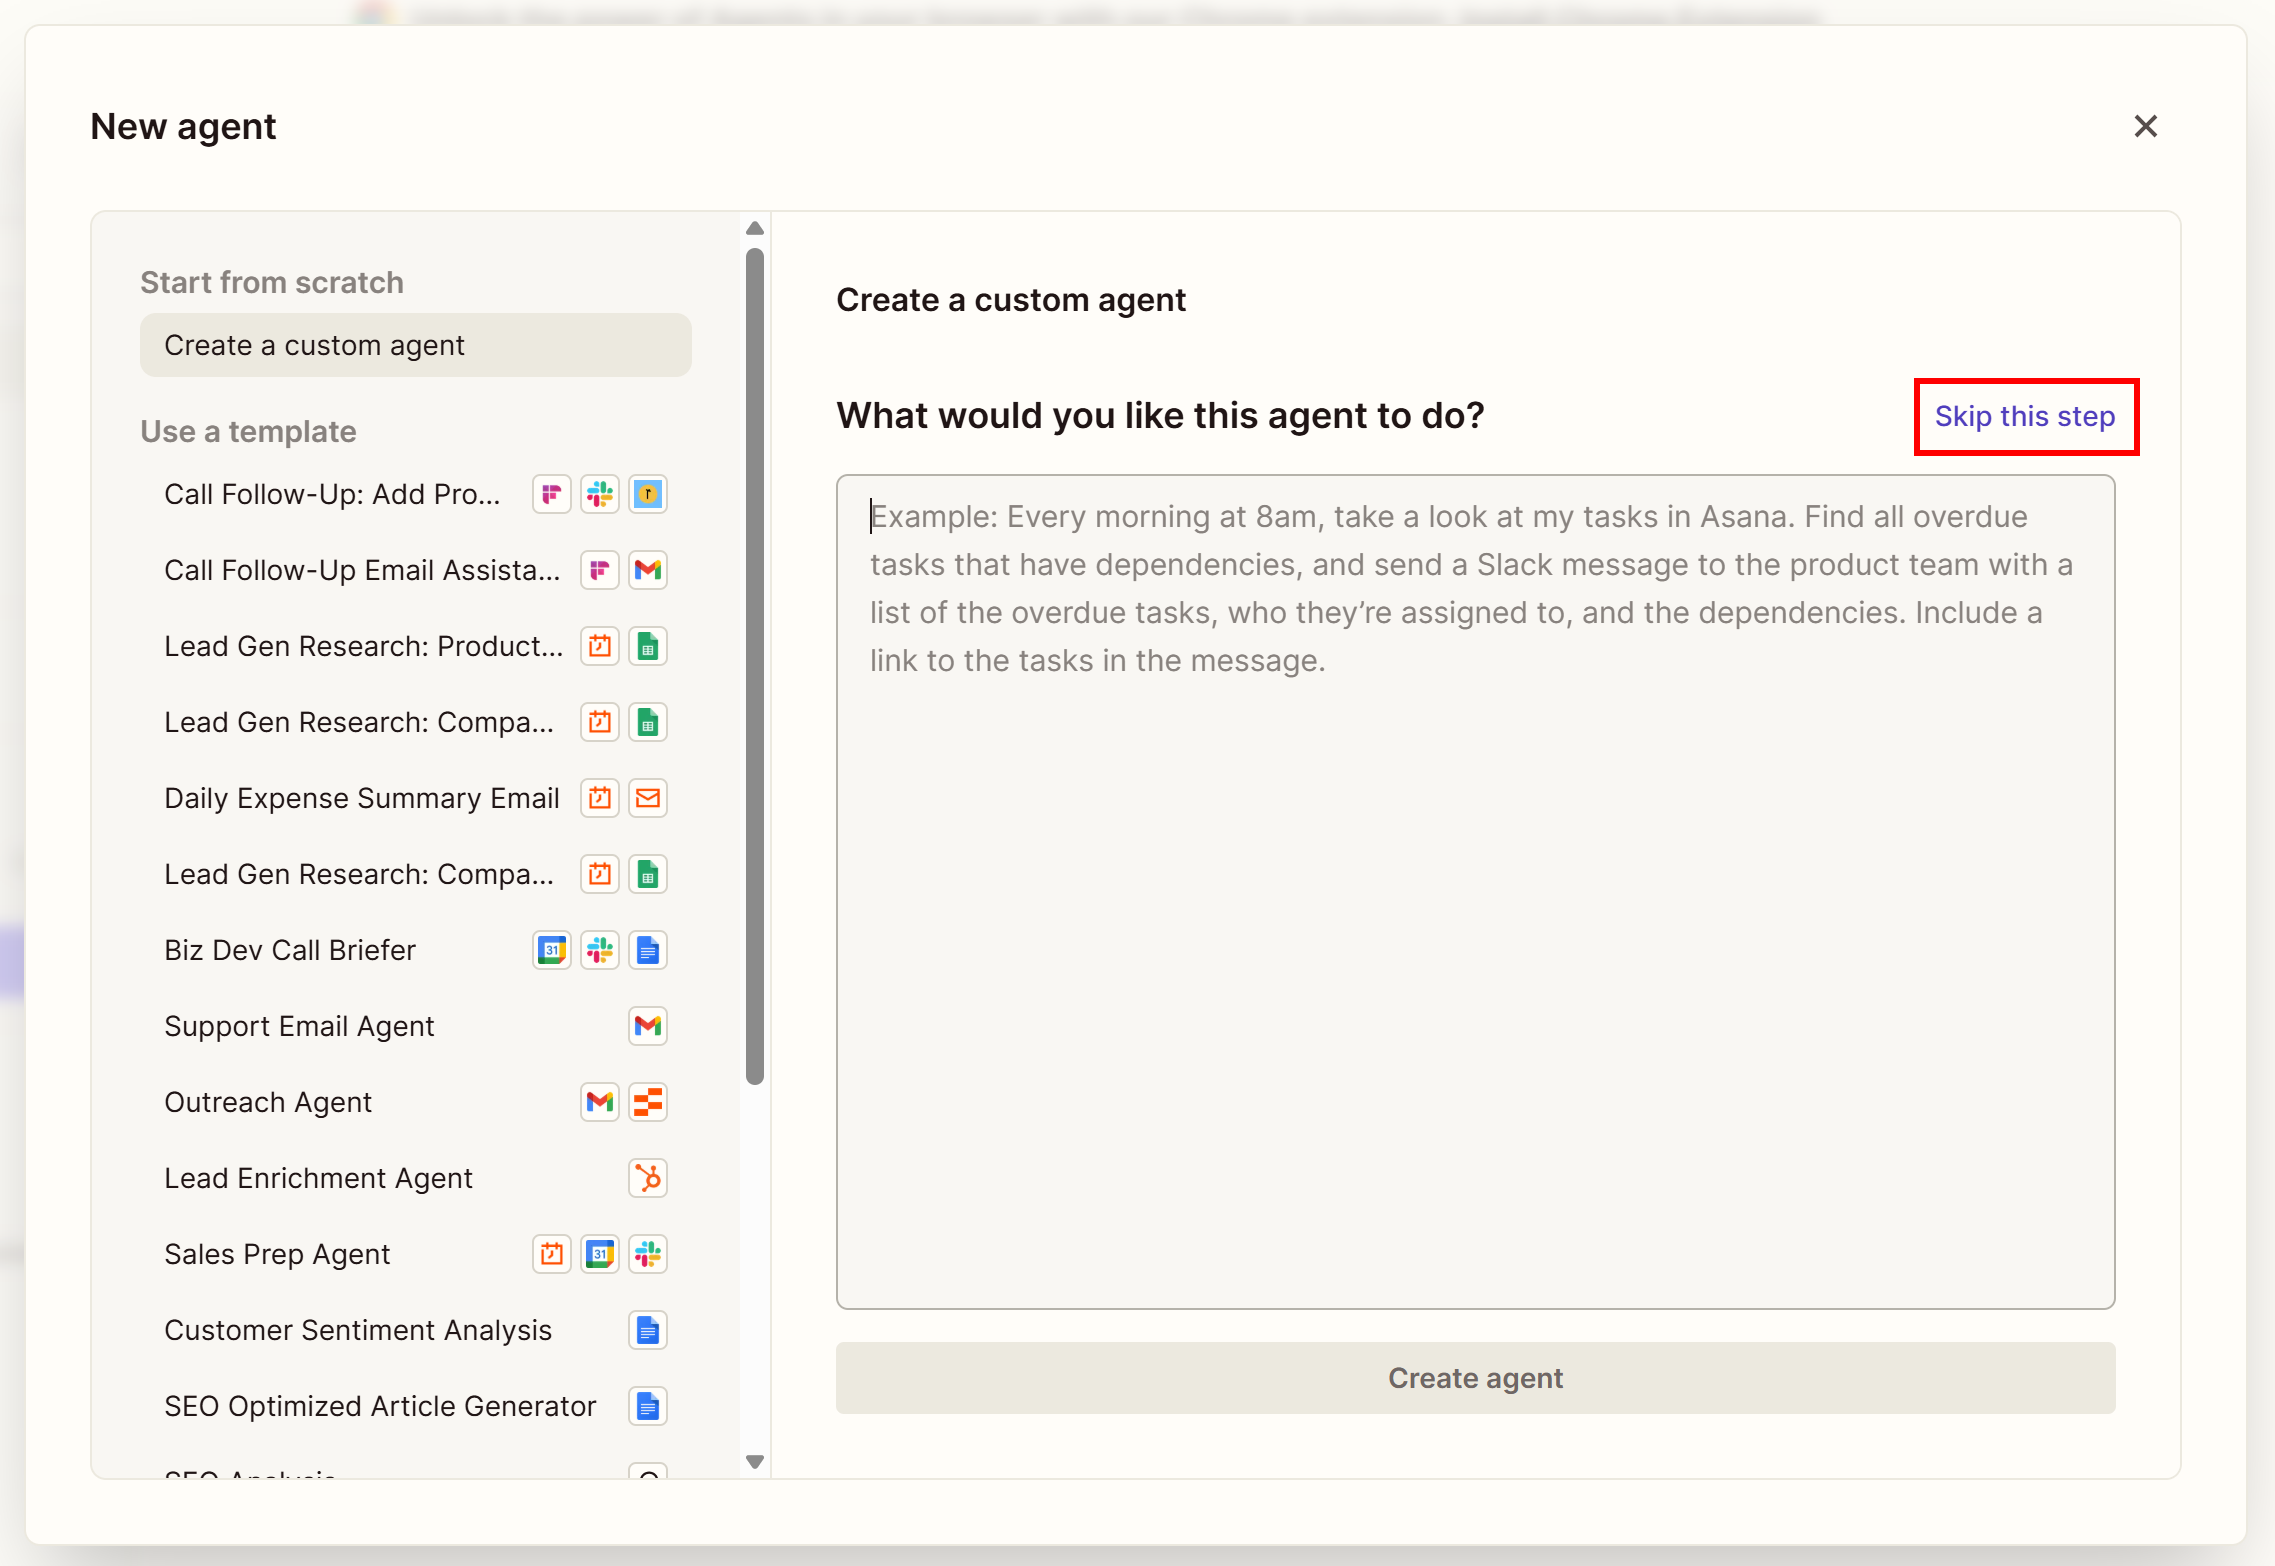
Here, you can describe your AI agent and let Zapier Agents create it for you. Since the integration we are showcasing is simple, and we want to provide full guidance, click the “Skip this step” option.
You will be redirected to the Zapier Agents configuration page for your new “Untitled Agent”:
Well done! You now have a blank AI agent ready in Zapier Agents.
Step #2: Initialize the Configuration for Your AI Agent
Start customizing your AI agent by changing its name. Double-click on “Untitled Agent” and give it a meaningful name:
You could name it “Google Play Store Review Checker Agent”:
Next, add an initial trigger to define when the agent should run on the Zapier Agents platform. To do so, press the “Add trigger” button in the “Trigger” section:
For example, configure the agent to launch at 8:00 AM and press “Save”: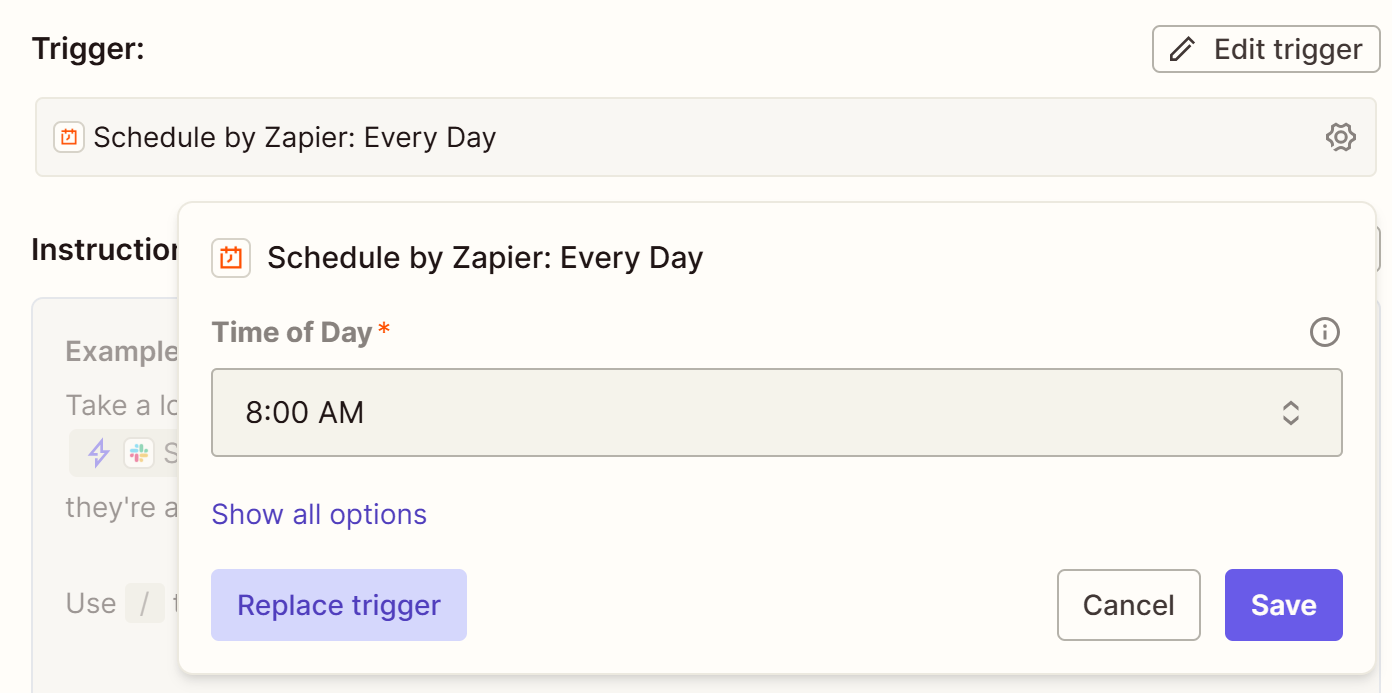
This way, every time you log in to start working, you will have already received an email with the Google Play Store report. That provides key information to monitor how your apps are performing. You can review the latest user feedback, respond to issues, and understand what your recent users appreciate about your app—helping you maintain and improve its quality.
Fantastic! That is a great start.
Step #3: Connect Bright Data Tools
To retrieve reliable, structured, and up-to-date data from your Google Play Store application pages, you must configure the Bright Data tools. Explore the available Zap Actions for Bright Data in the official documentation.
In this case, you are going to rely on the following tool:
| Tool | Description |
|---|---|
| Scrape Google Play Store | Create a new scraping request for Google Play Store data, waits for data to be received |
Behind the scenes, the Zapier tool calls Bright Data’s Google Play Scraper,. This programmatically collects Google Play Store app data, such as reviews, price, number of installations, and more.
To give your Zapier Agent the ability to scrape Google Play Store pages, connect it to Bright Data’s “Scrape Google Play Store” tool. Begin by pressing “Add tool” in the “Tools this agent can use” section:
In the modal that appears, search for “bright data” and select the “Bright Data” option:
Next, search for “google play” and select the “Scrape Google Play Store” option: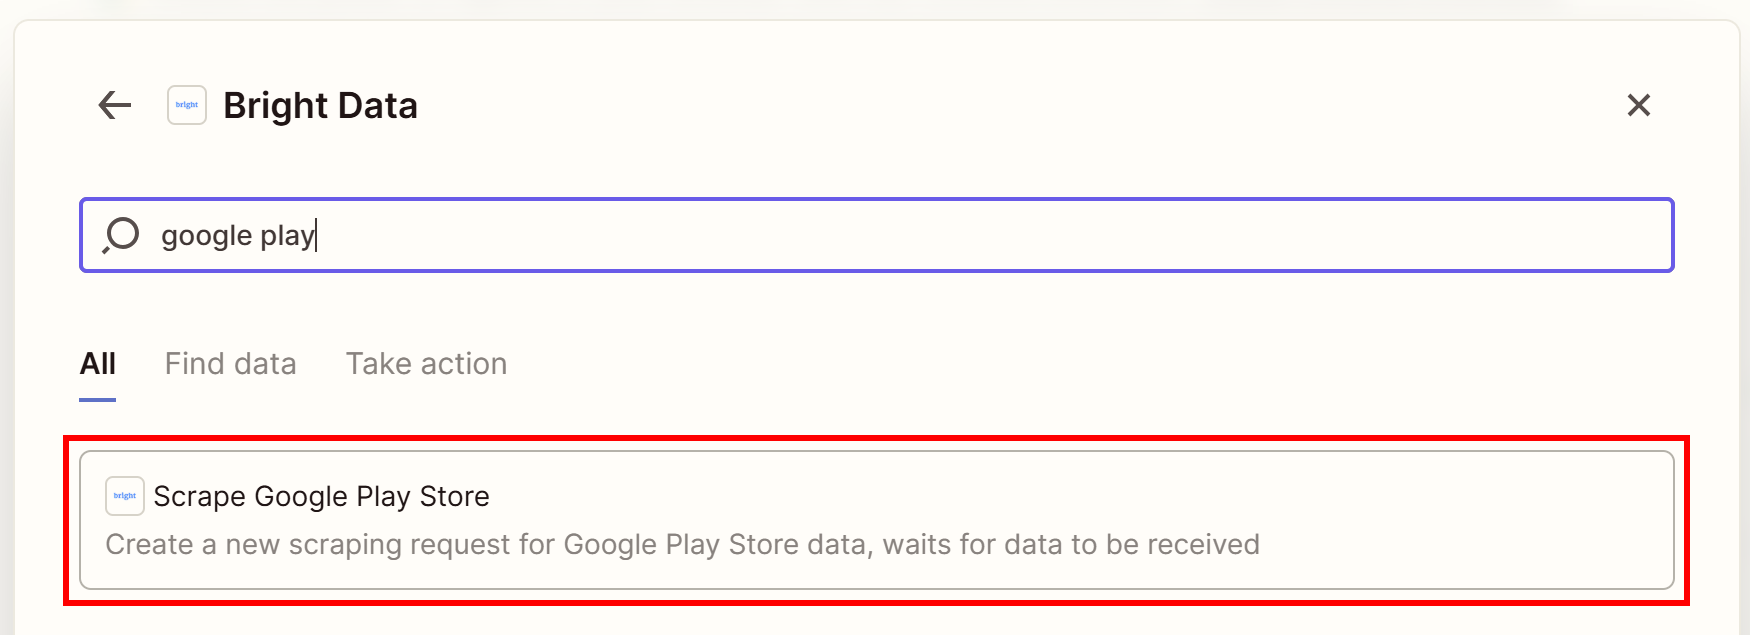
Press the “Connect” button to link the Bright Data tool to your agent: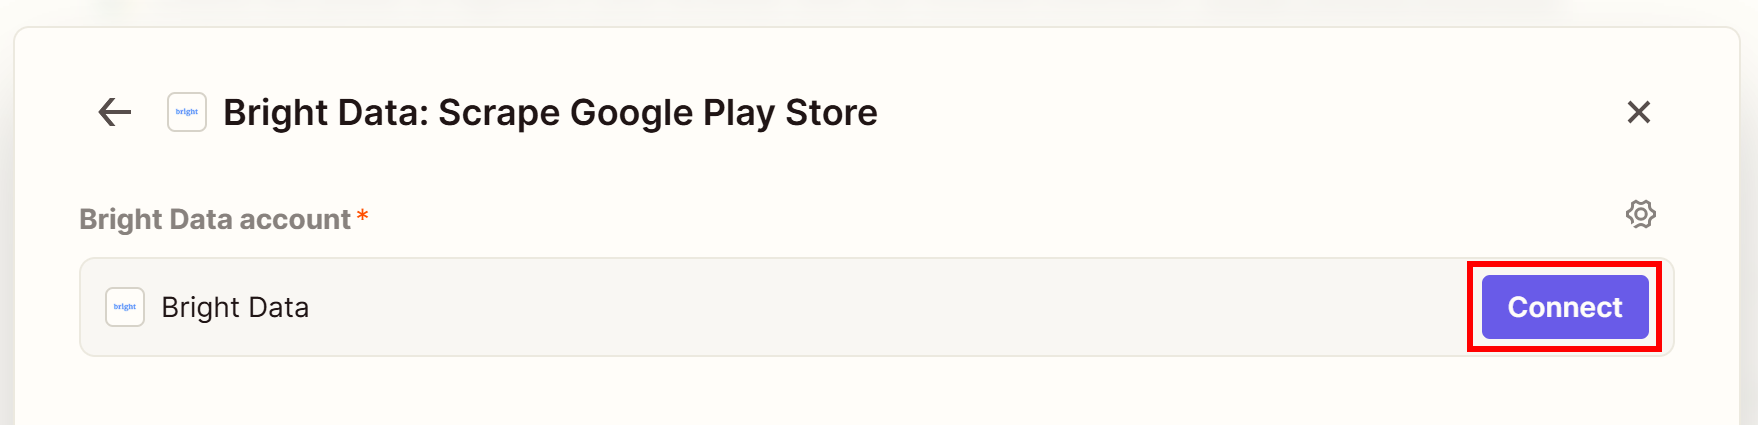
You will be asked to connect your Zapier account to Bright Data through your Bright Data API key. Paste it in the browser window that opens and click “Yes, Continue to Bright Data”: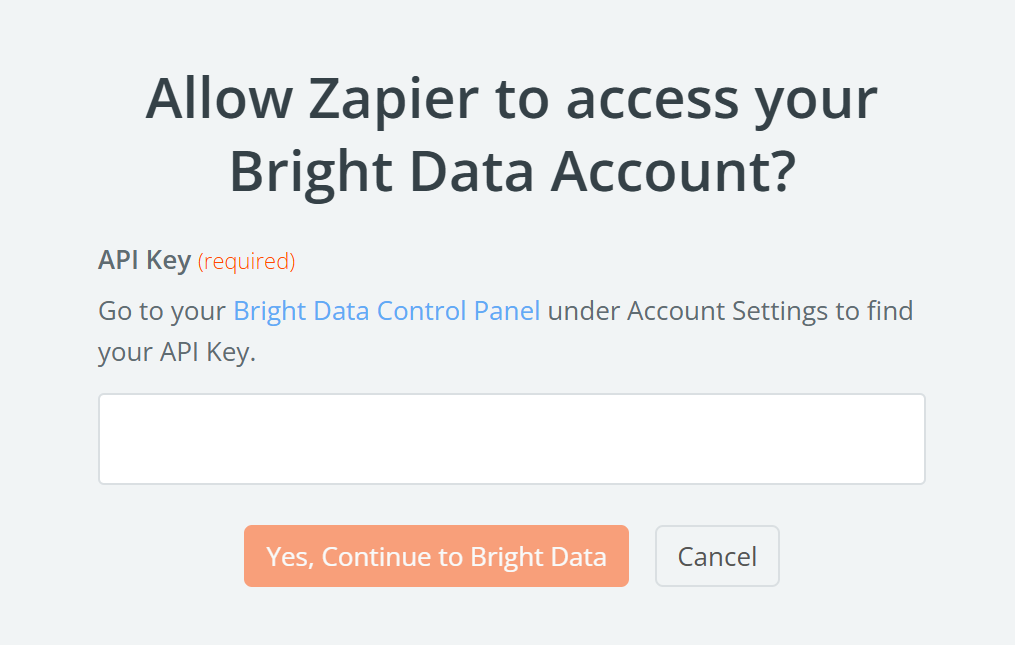
You will access the configuration page for the “Bright Data: Scrape Google Play Store” tool. Leave all settings as default, as you want the agent to use the tool freely: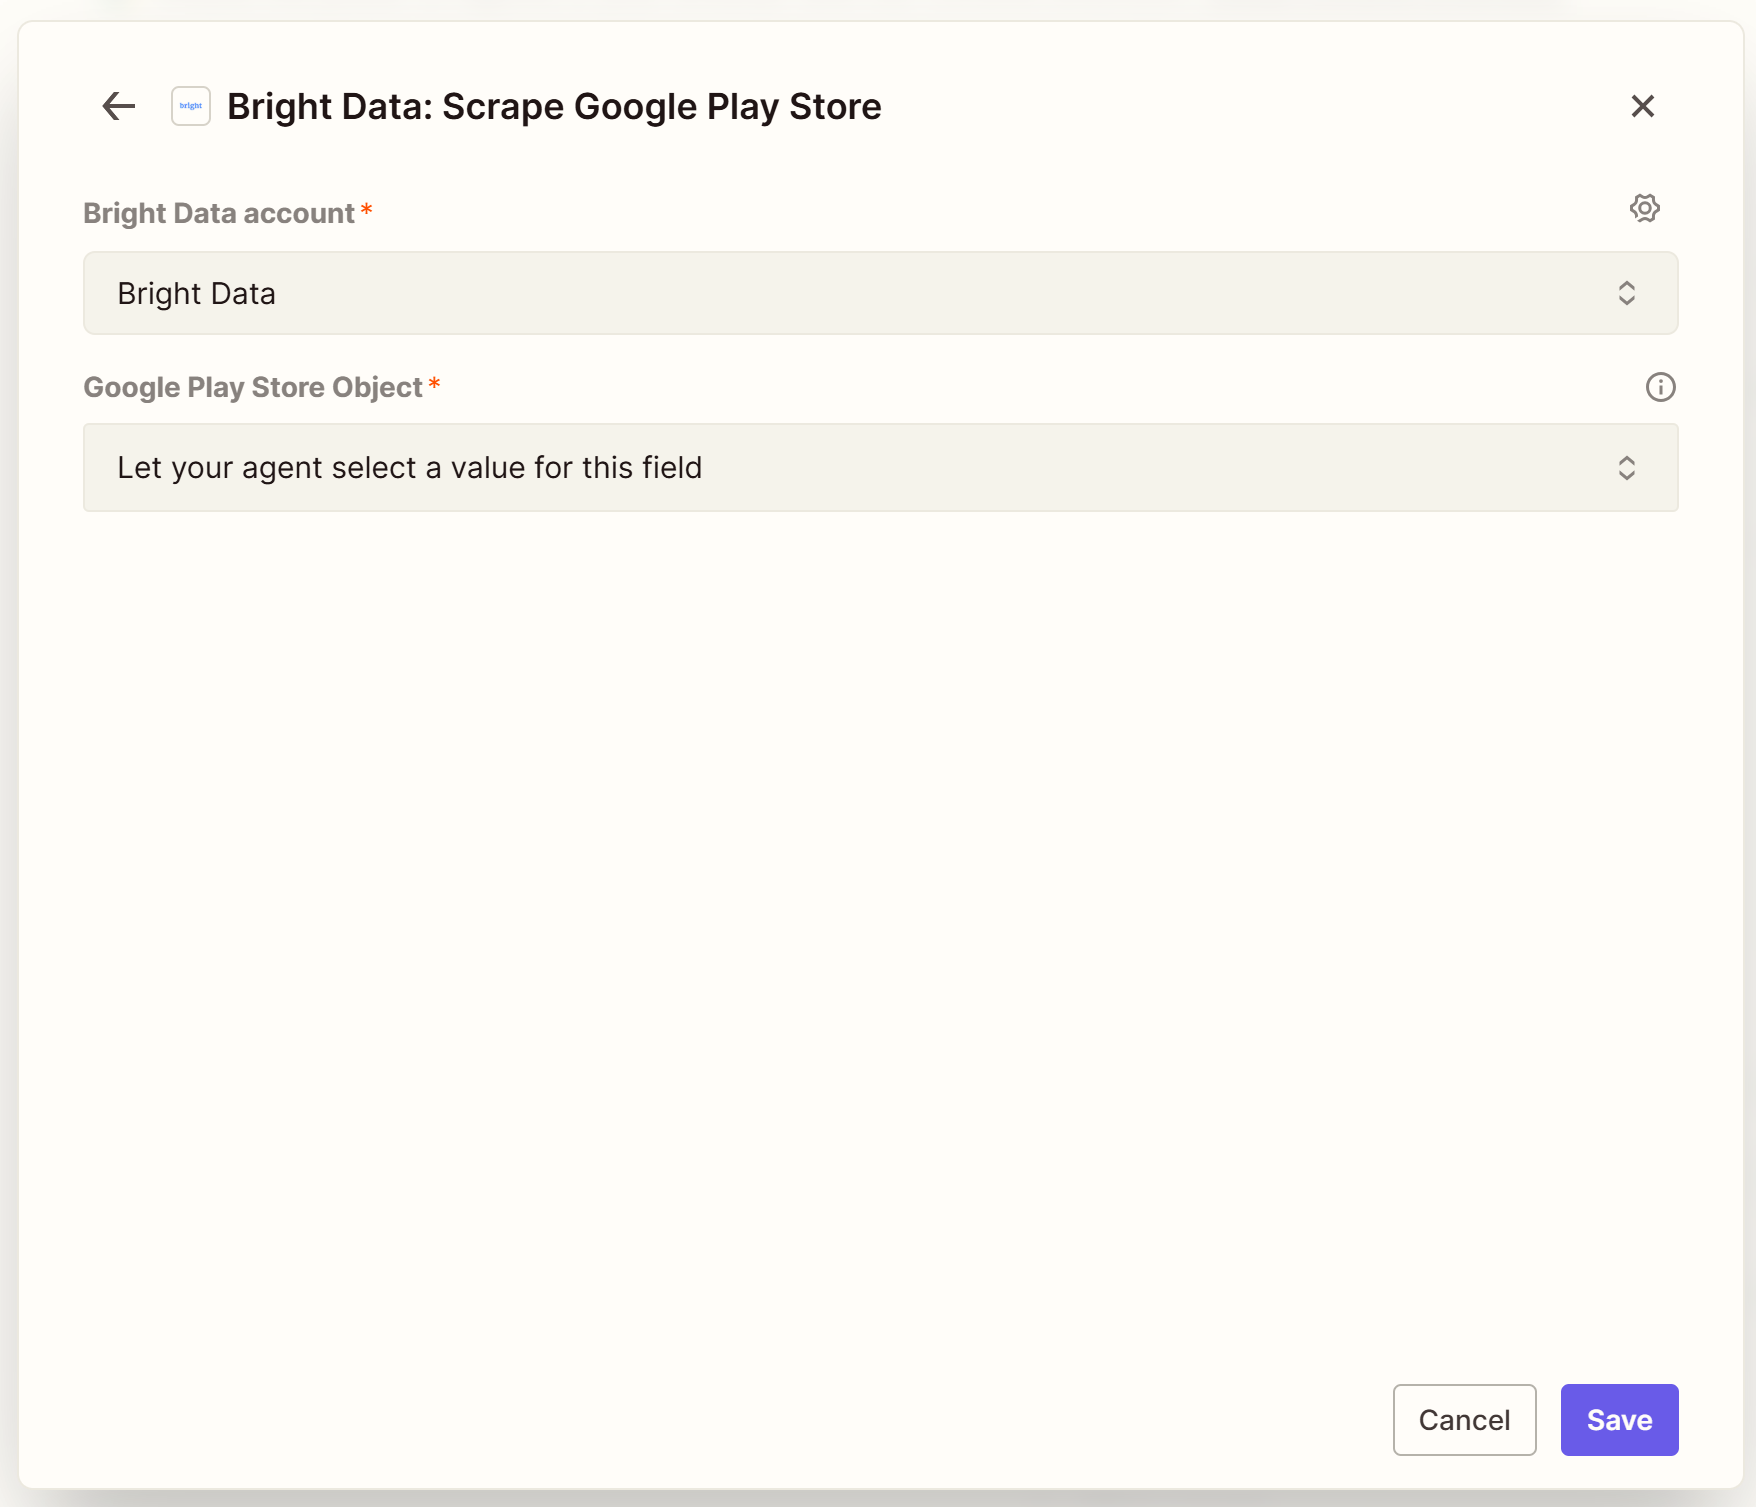
In the ”Tools this agent can use” section, the newly configured “Bright Data: Scrape Google Play Store” tool will now appear:
Note: Ignore the “Default Tools” entry, as these are always available for every AI agent.
Fantastic! Your AI agent now has access to the Bright Data Google Play Store Scraper.
Step #4: Connect the Gmail Tool
Since the report containing insights about your Google Play Store applications should be sent via email, you need to connect a tool for that. Assuming you are using Gmail, let’s connect your Zapier agent to your Gmail account.
Press the “Add tool” button in the “Tools this agent can use” section and select the “Gmail” option: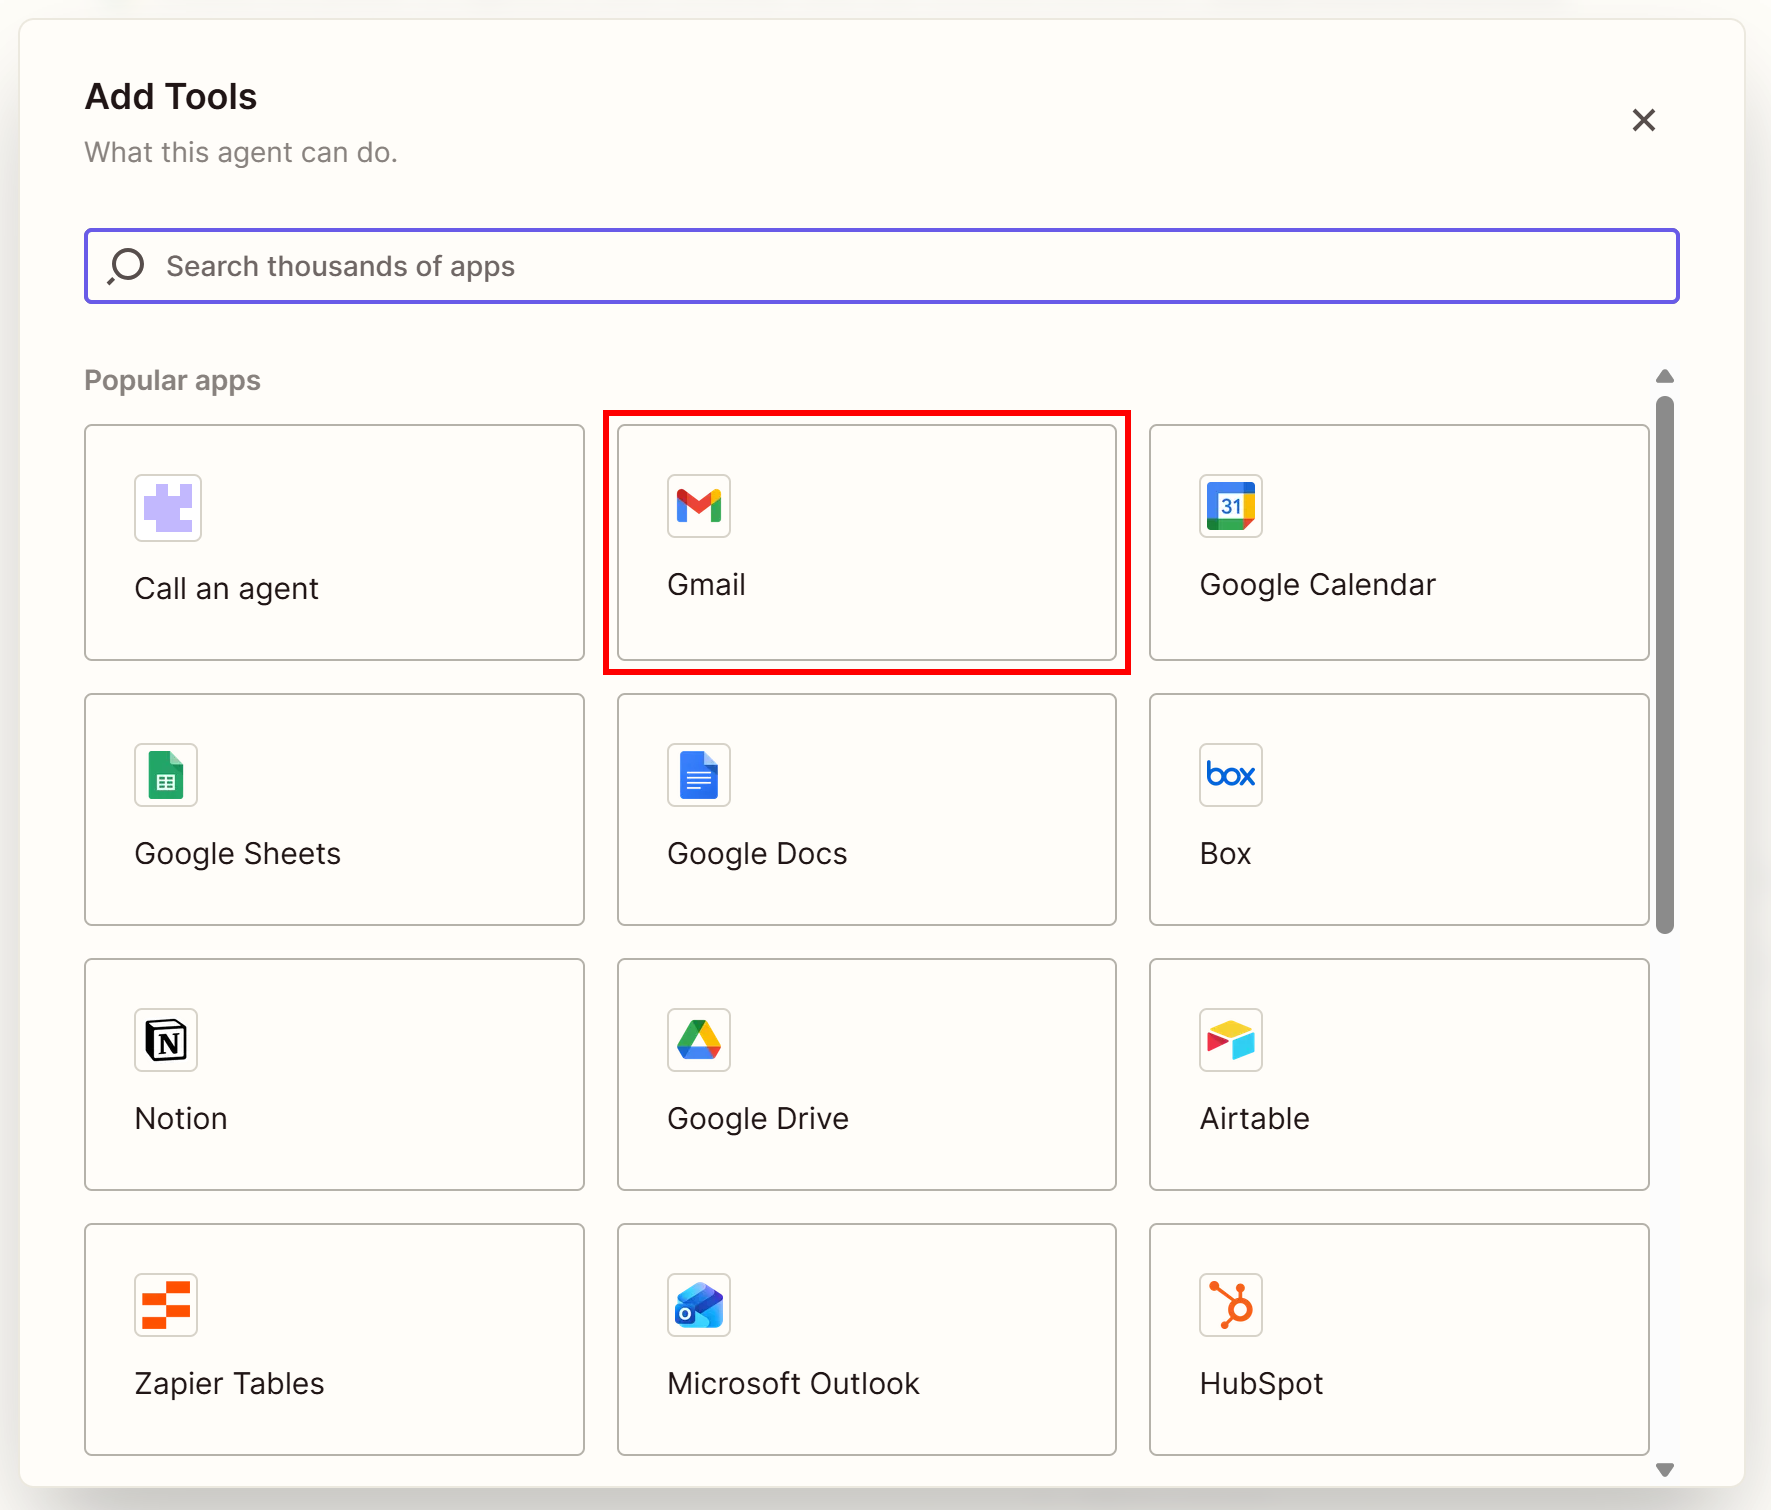
Then, search for “send” and click on the “Send Email” tool: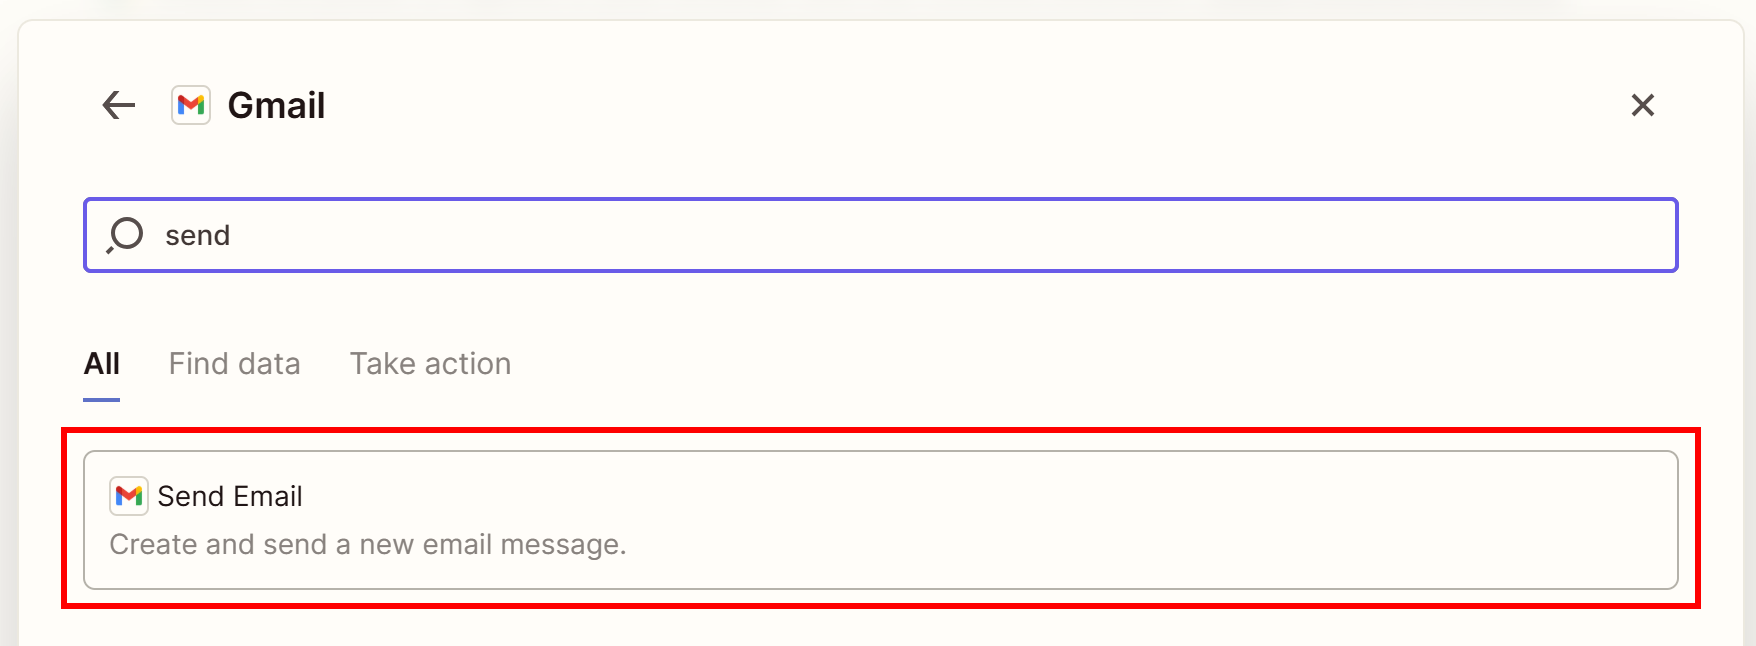
You will be asked to connect your Zapier account to your Gmail account. Follow the instructions, grant Zapier the necessary permissions in Google, and finally click the “Connect” button.
The “Tools this agent can use” section will now include the “Gmail: Send Email” tool: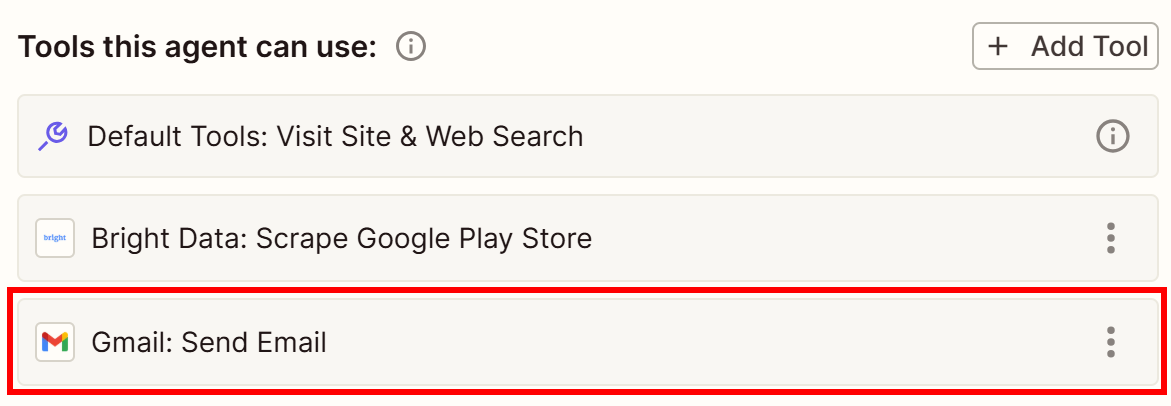
Amazing! Your Zapier AI agent can now send emails to your Gmail account.
Step #5: Configure the Agent Instructions
If you look at the “Instructions to follow” text area, you should see: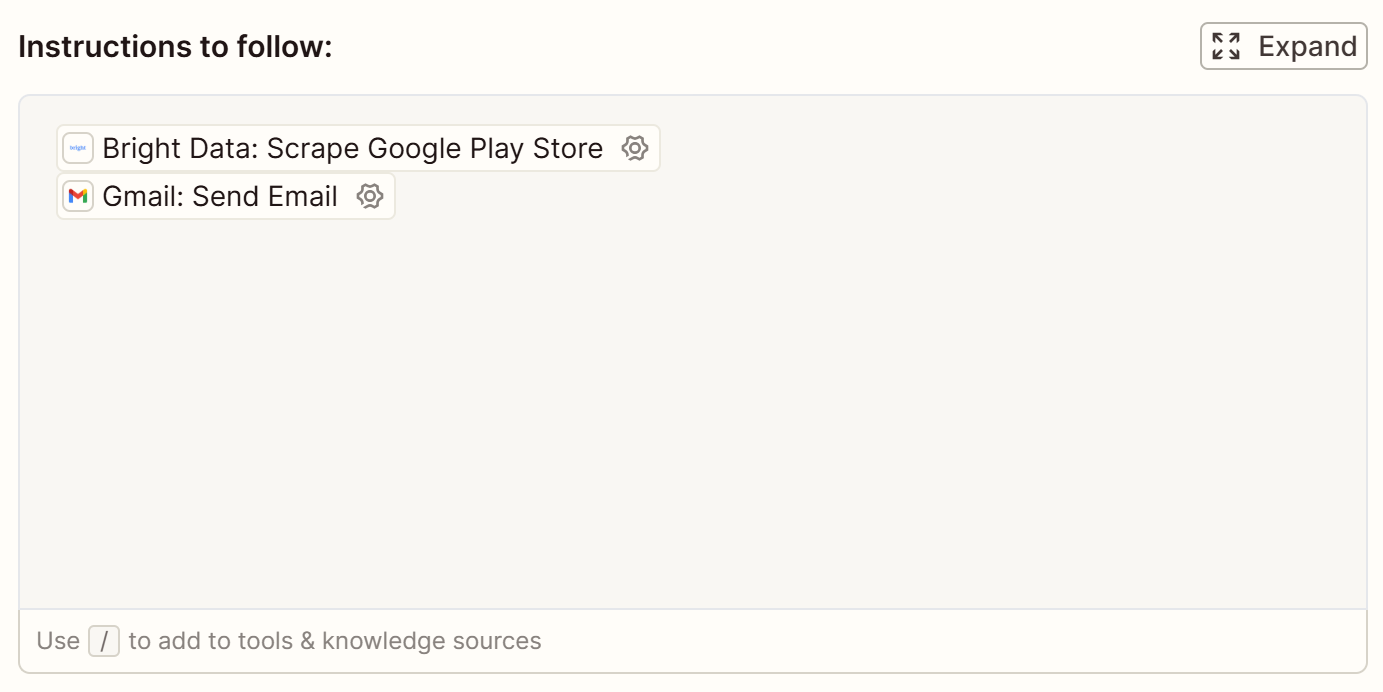
Note that Zapier Agents, by default, have added the two configured tools to it.
To achieve the goal, describe the agent’s instructions as below:
You are an AI agent that retrieves structured data from Google Play Store pages using Bright Data, analyzes it, and produces a report sent via Gmail.

To achieve this goal, follow the instructions below for the specified Google Play Store pages:
- https://play.google.com/store/apps/details?id=com.supercell.clashroyale
- https://play.google.com/store/apps/details?id=com.einnovation.temu

For each Google Play Store URL, one by one:
1. Use the following tool to trigger the Google Play Store scraping task:
"Bright Data: Scrape Google Play Store"
2. Once snapshots from all Google Play Store pages have been retrieved, process them using AI and produce a concise, enterprise-ready HTML report with a clean look and feel. For each app, include:
- Name
- URL
- Review statistics (total number of reviews, review score, distribution of 1–5 star reviews)
- Short sentiment analysis comment (maximum 30 words) based on the latest reviews
3. Send the final HTML report via Gmail with:
"Gmail: Send Email"Note: Replace the Google Play Store page URLs with the ones you want to monitor (in this example, we used the Clash Royale and Temu pages). In a production-ready AI agent, consider reading these URLs from a shared Google Sheets file or a similar source.
The instructions above are clear enough to let the AI Agent produce the desired Google Play report. Note that structured emails are essentially HTML pages, so the AI can be asked to generate an HTML report.
Once you are done, you should see instructions like this:
Make sure that the Bright Data and Gmail tools appear below the correct numbered list entries.
Good! Your AI agent now knows exactly what to do.
Step #6: Test the Agent
To get started with agent testing, press the “Agent Preview” button at the bottom center: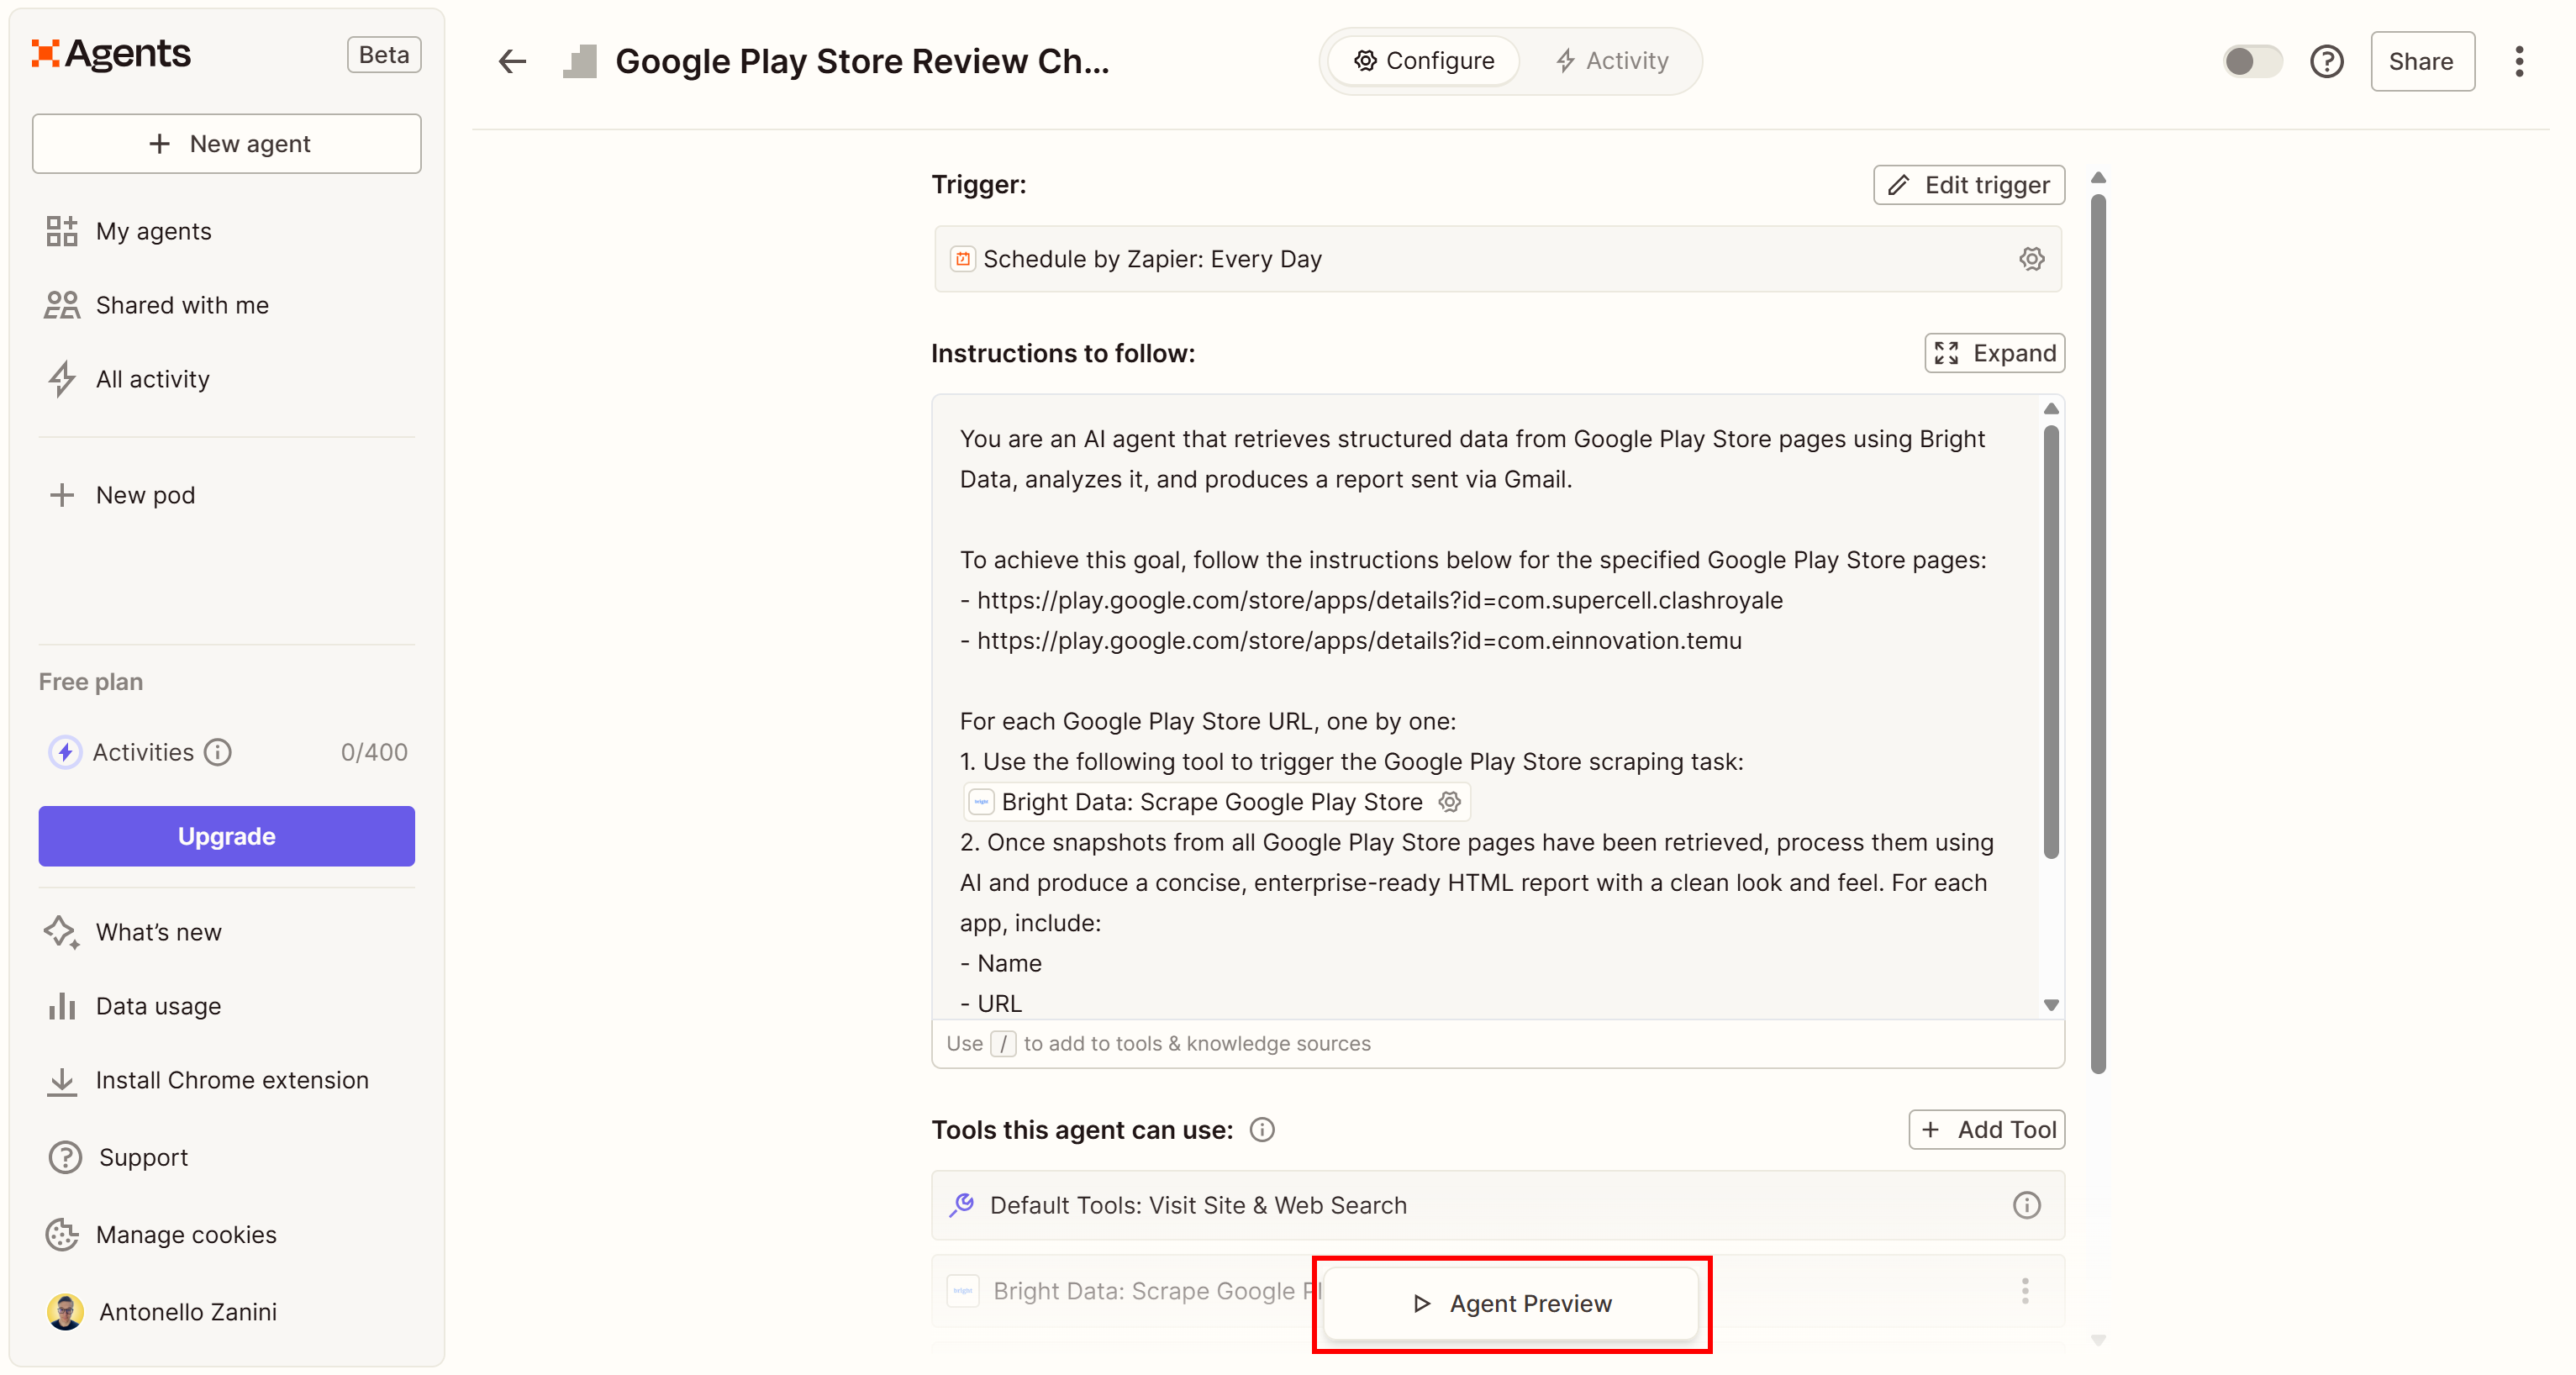
The “Agent Preview” section will appear on the right. Launch the agent by pressing the “Test agent” button: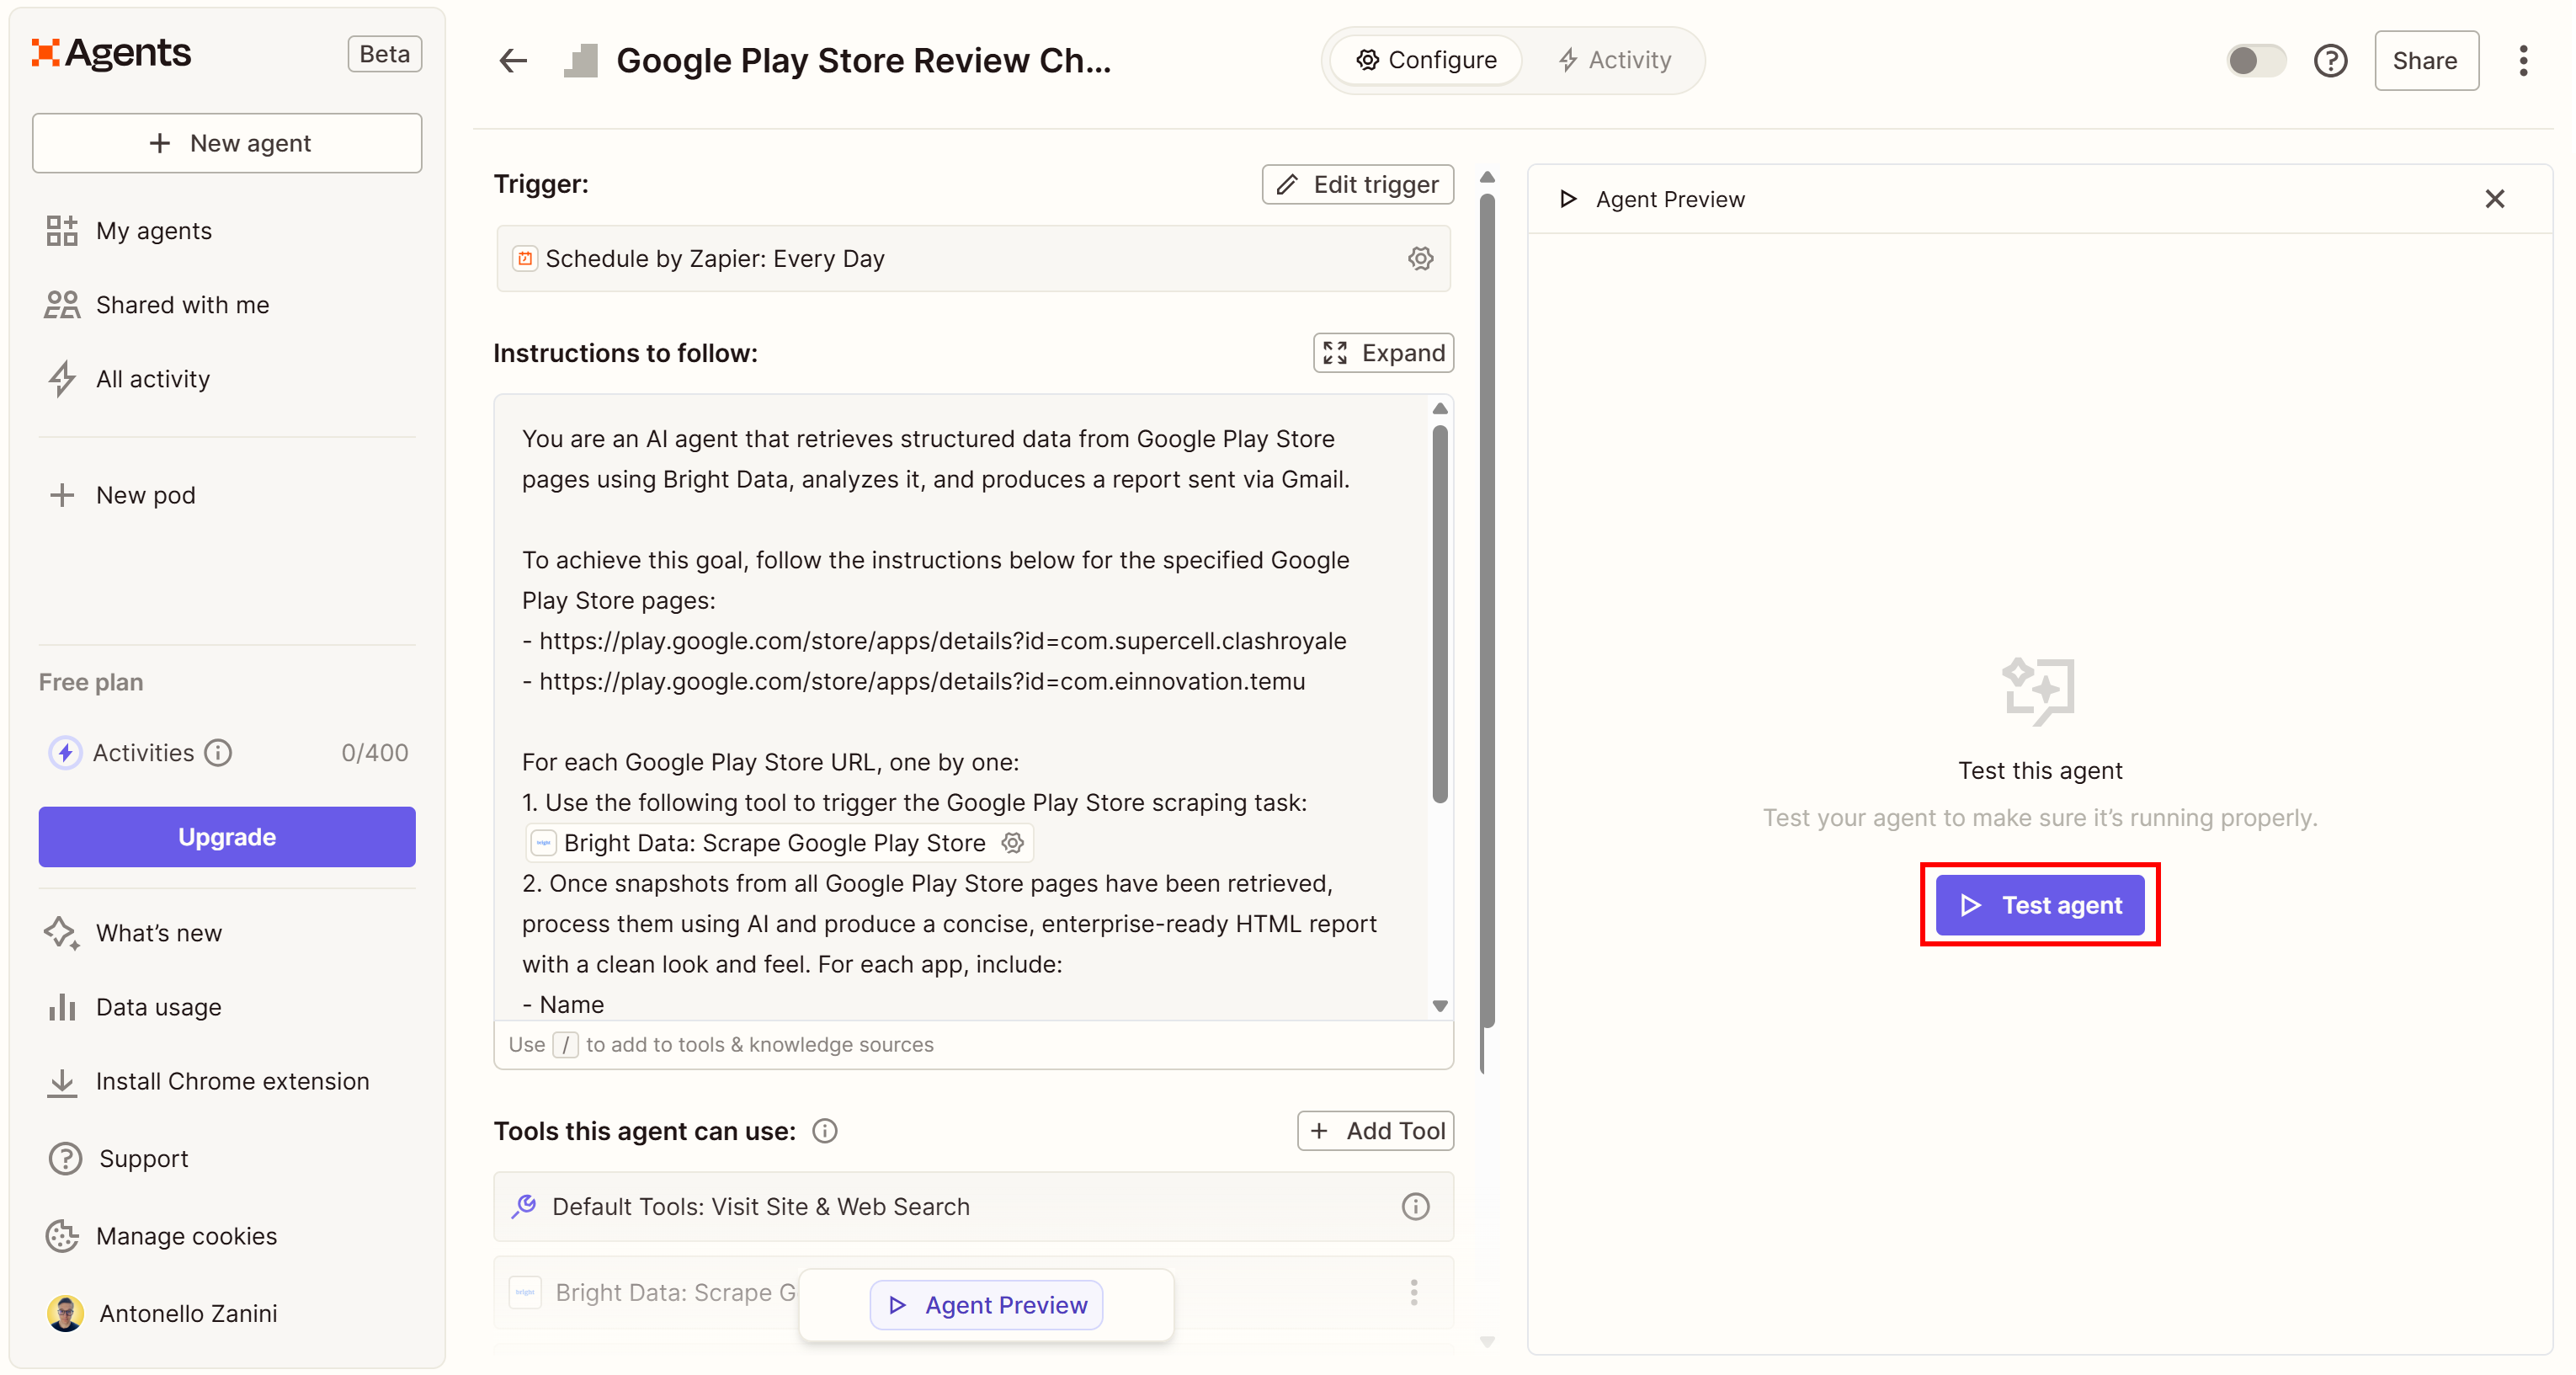
This is what you should see during the AI agent run: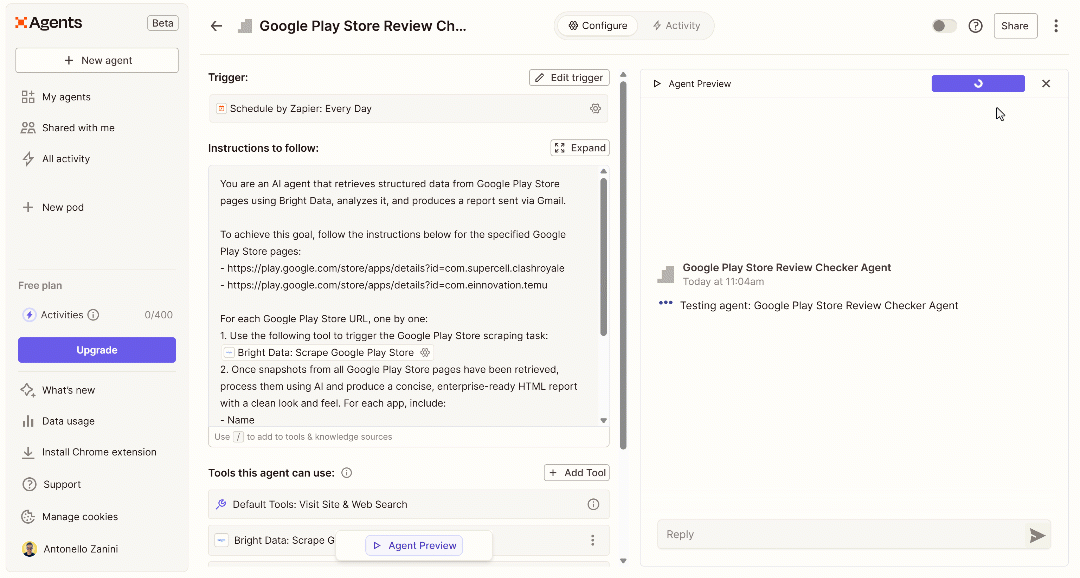
The GIF above has been sped up, but this is what happens step by step:
- The agent shows you a preview of the “Bright Data: Scrape Google Play Store” tool to retrieve data from the first configured Google Play Store page in the agent’s instructions.
- Since this is a test, and you do not want the agent to perform unintended actions, you will be asked to approve the tool execution. Click the “Approve” button.
- This triggers a Bright Data Google Play Store scraping run and retrieves the required data.
- The agent repeats the previous steps for the second Google Play Store URL.
- The AI agent processes the retrieved information and produces an HTML report to display to you.
- You will be asked to approve the Gmail tool to send the email to your configured Gmail account.
- An email should now arrive in your Gmail inbox with the report.
Here we go! Your Bright Data-powered Zapier Agent is now working like a charm.
Step #7: Explore the Agent’s Output
Open Gmail in your browser or email client, and you should see an email containing the report: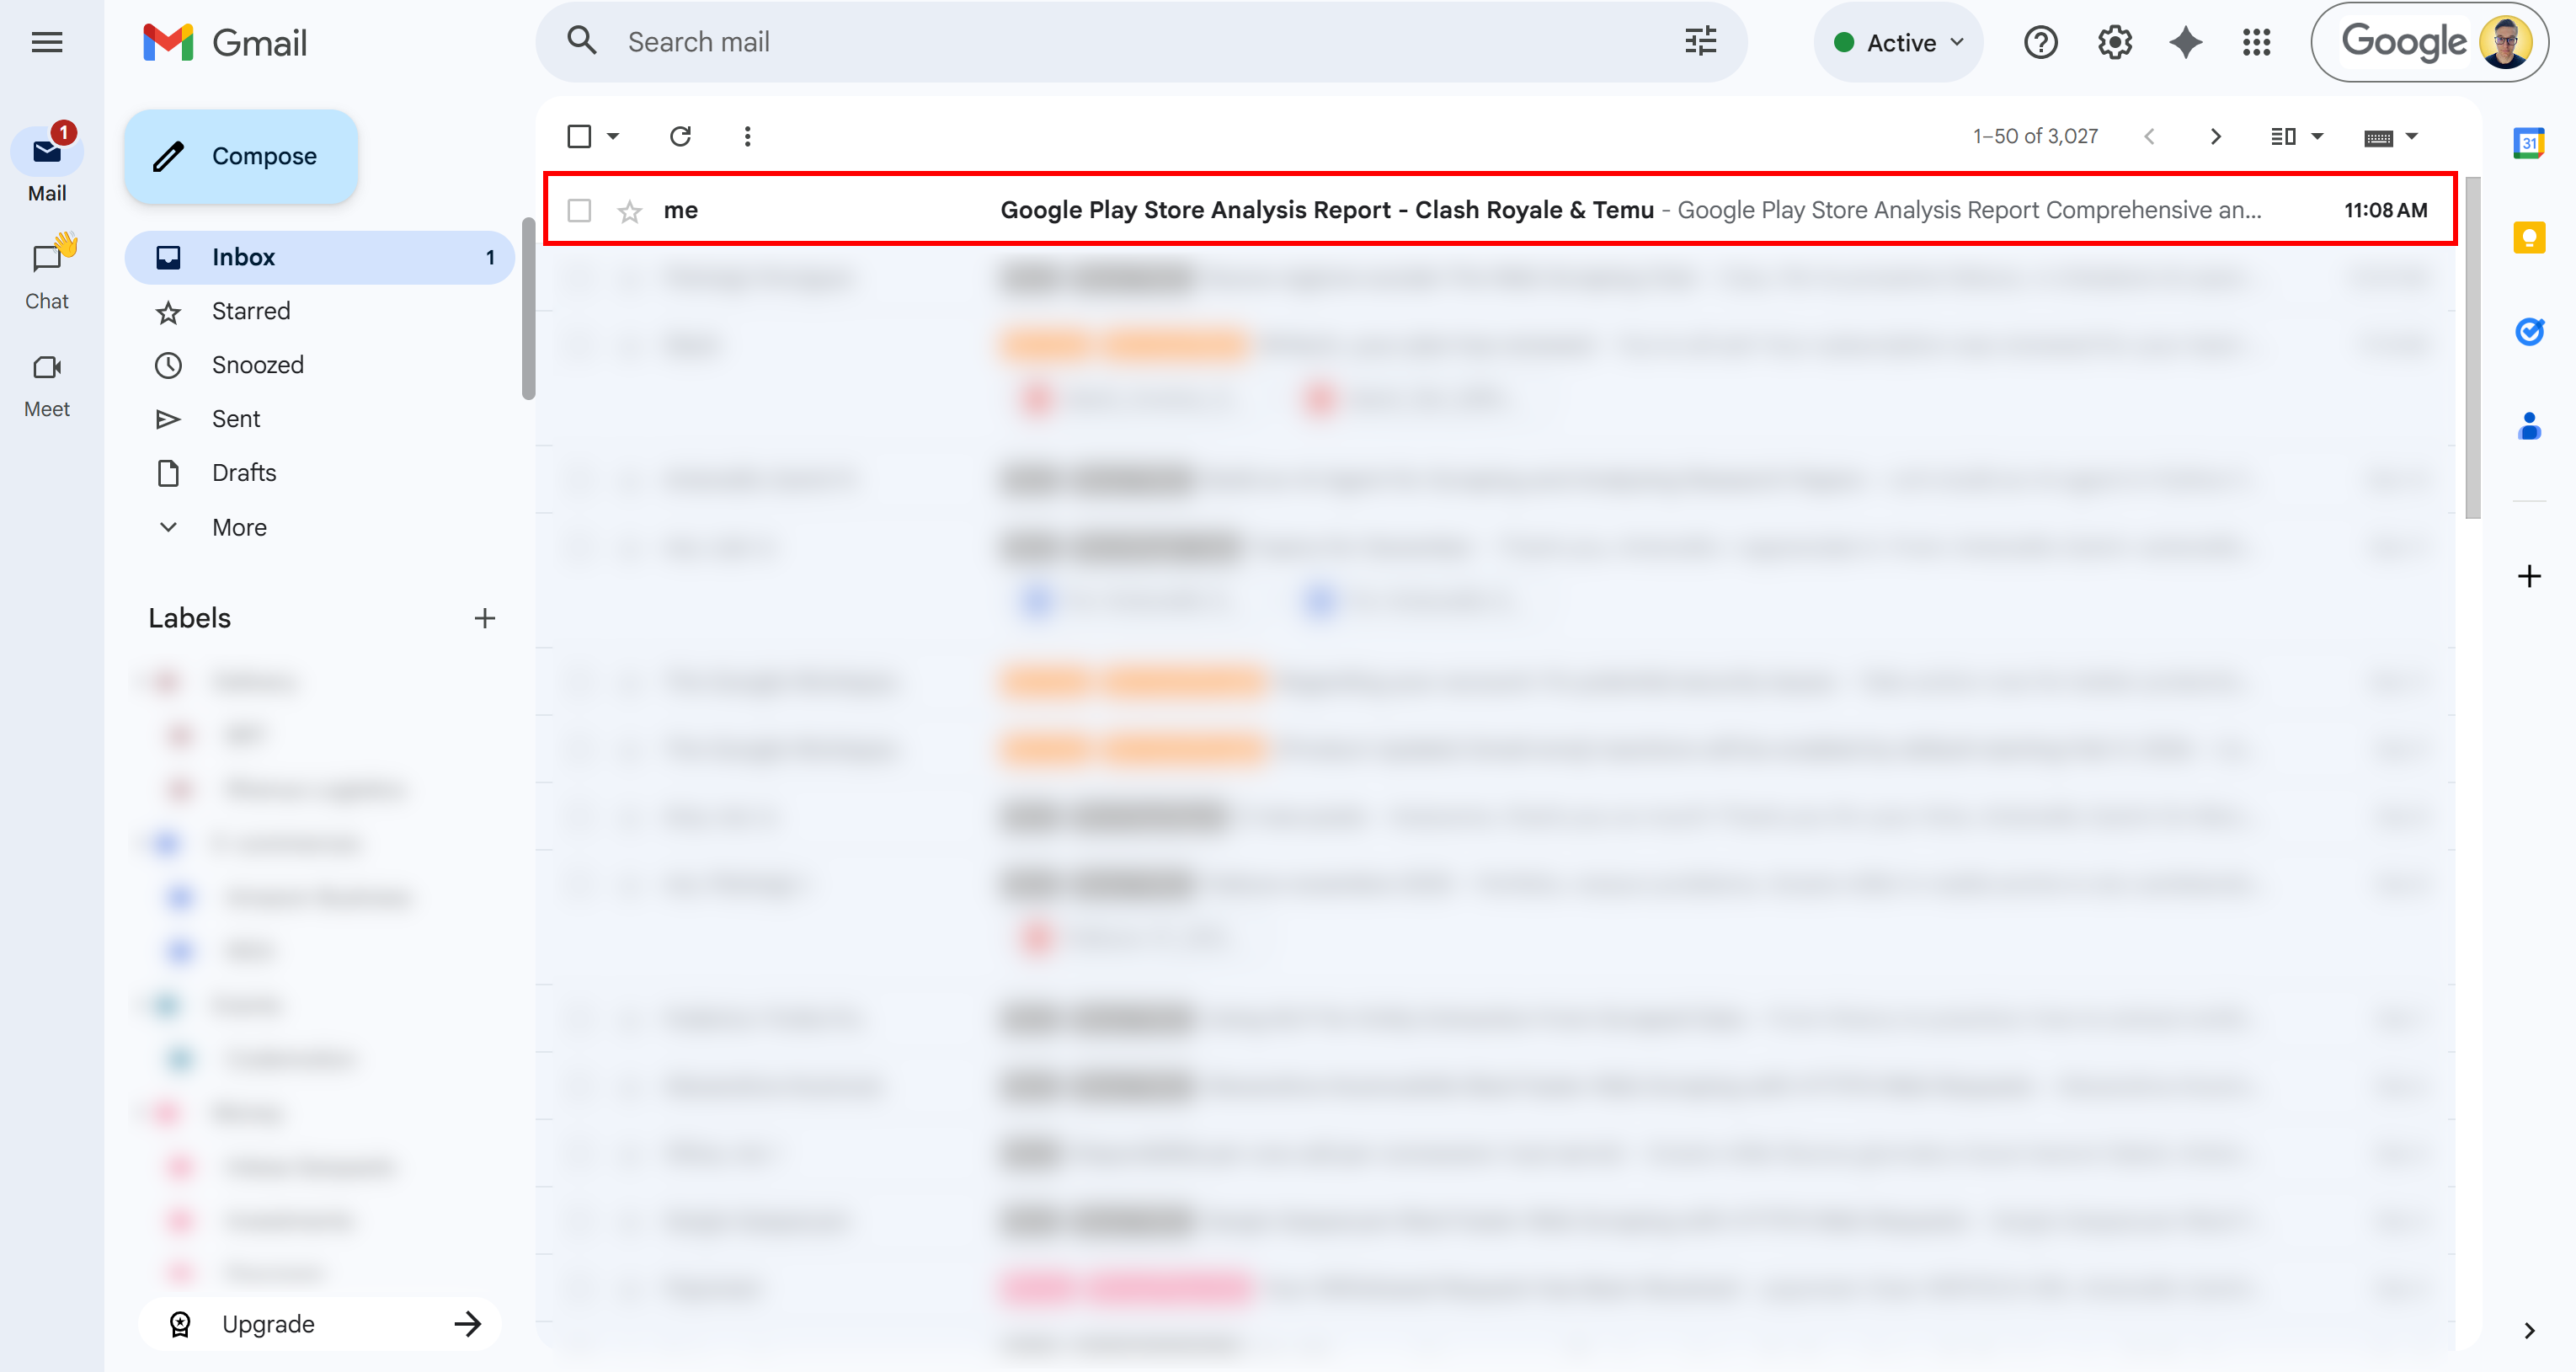
Open it, and you will access a detailed report with all the requested information: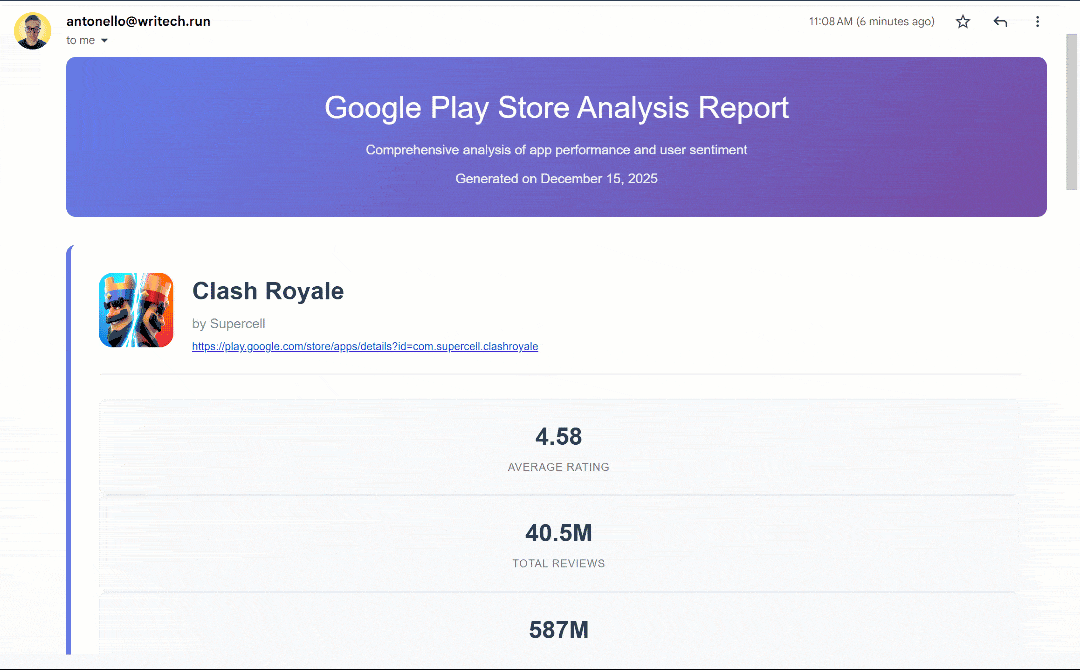
Notice how well-structured the report is and how rich in information it appears!
If you are wondering how that is possible, check the “Bright Data: Scrape Google Play Store” dropdown in the “Agent Preview” section in Zapier Agents: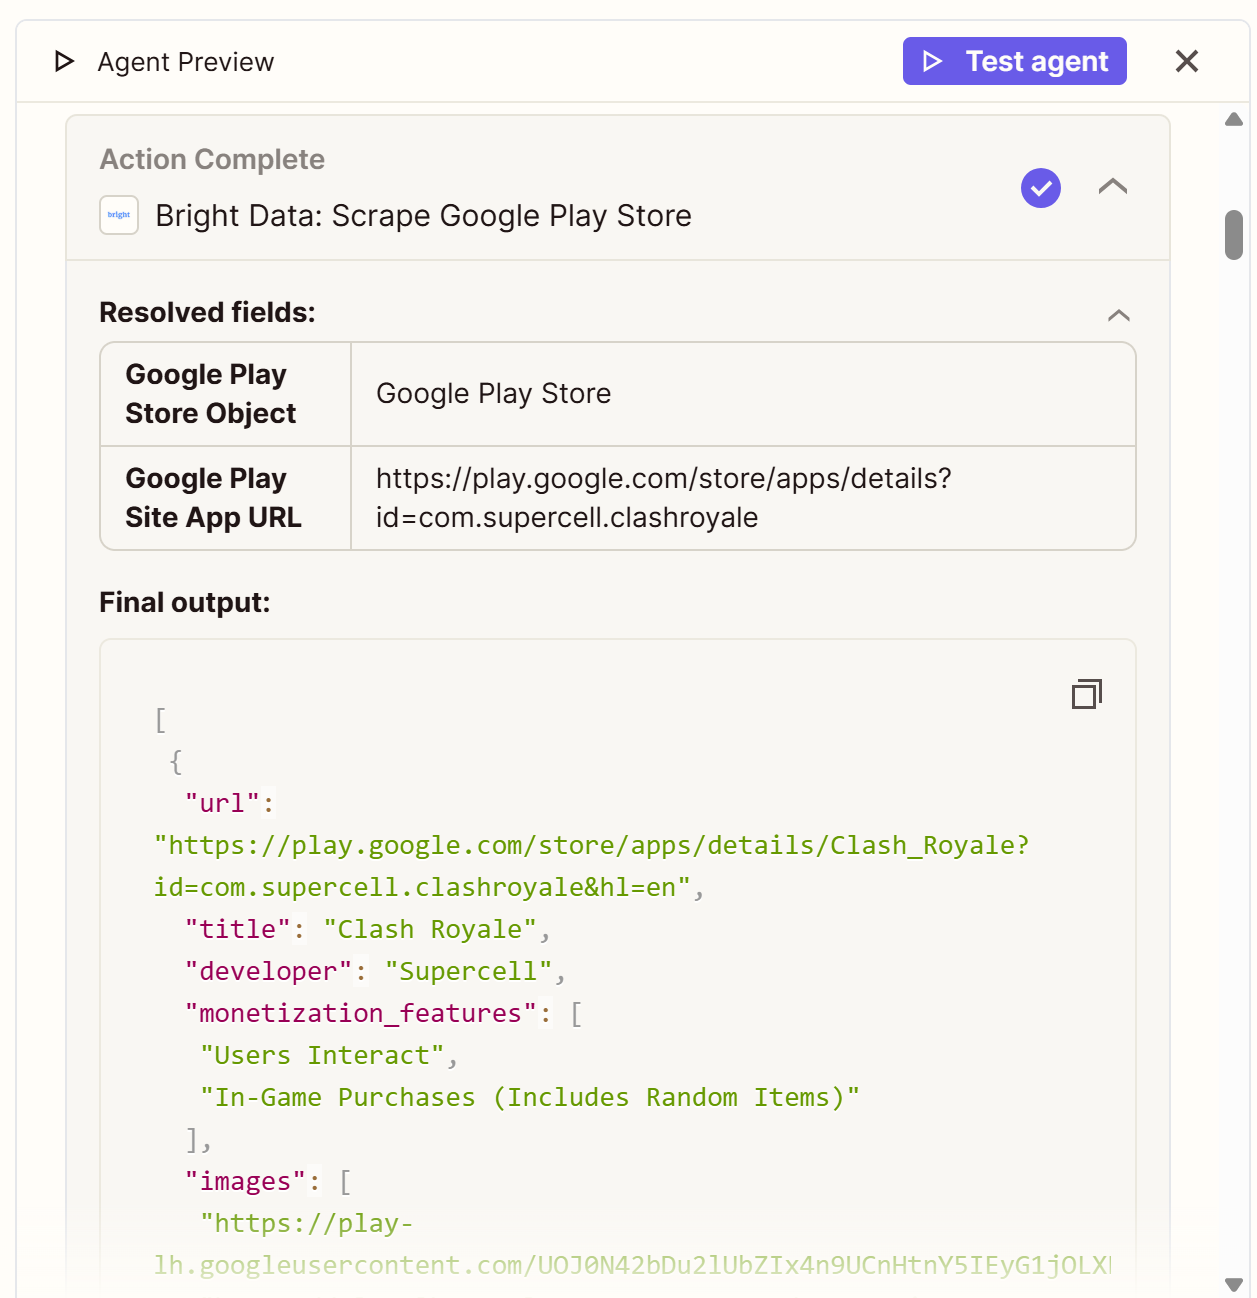
Notice how the Bright Data-powered tool successfully connected to the Google Play Store page and gathered structured data in JSON format.
Specifically, that corresponds exactly to the information you would see on the Clash Royale Google Play Store page (which was of the two input URLs):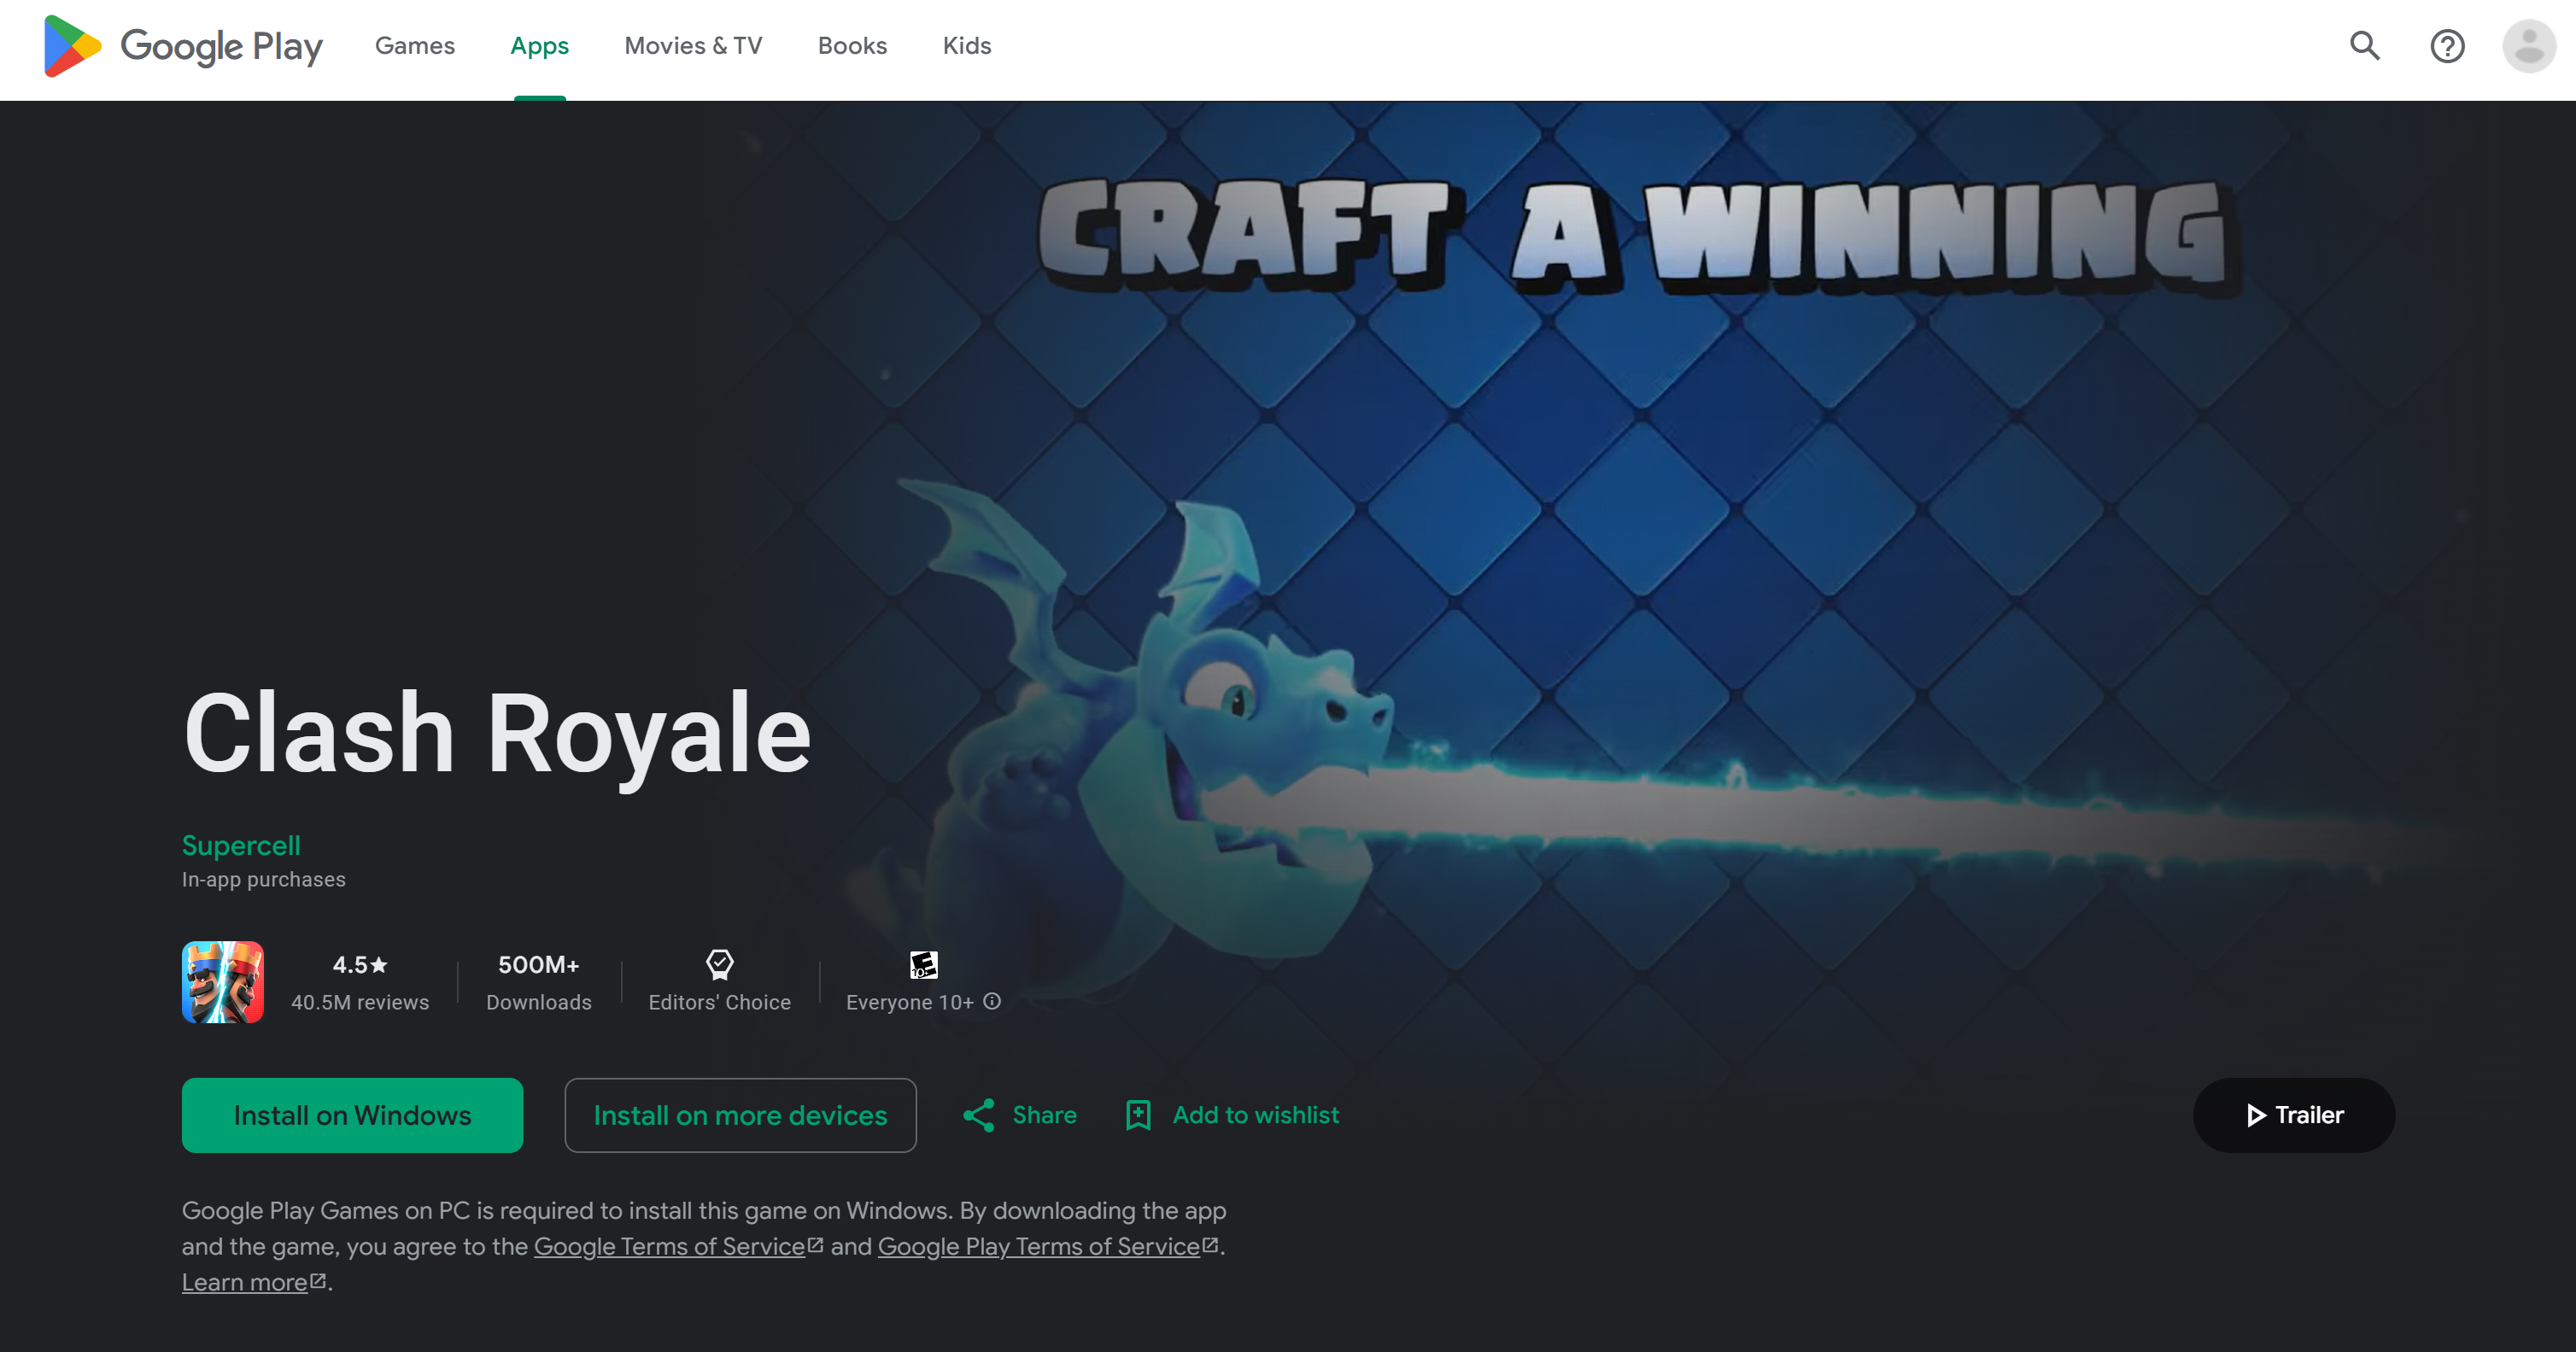
Additionally, since the JSON returned by Bright Data also contains the latest reviews, you can perform sentiment analysis to generate valuable insights. This time, the result was:
Recent reviews reveal growing frustration with pay-to-win mechanics and progression changes. Players criticize expensive upgrades, unbalanced matchmaking, and removal of popular features like 2v2 mode.That is quite insightful information to have!
Et voilà! The Zapier AI agent autonomously retrieved data from the web via Bright Data, processed it, produced an enterprise-ready report, and sent it to you via email. None of this would be possible without the Bright Data integration in Zapier!
Remember, this was just a simple example of one use case enabled by Bright Data solutions available in Zapier. Try other Bright Data tools, integrate additional tools, or modify the input prompt to explore more scenarios!
How to Connect Zapier Agents to Bright Data Web MCP
Another way to integrate Zapier Agents with Bright Data products is by connecting them to Web MCP.
Web MCP gives you access to 60+ tools built on top of Bright Data’s web automation and data-collection platform. Even on the free tier, it provides two powerful tools:
| Tool | Description |
|---|---|
search_engine |
Fetch Google, Bing, or Yandex results in JSON or Markdown format. |
scrape_as_markdown |
Scrape any webpage into clean Markdown while bypassing anti-bot measures. |
To access all other tools, you have to configure the Web MCP server in Pro mode. This premium tier is not free, but it unlocks structured data extraction for major platforms such as Amazon, LinkedIn, YouTube, Google Maps, and more—plus additional tools for automated browser actions.
Now, let’s walk through how to connect Bright Data’s Web MCP inside a Zapier Agent!
Step #1: Set Up the MCP Client in Zapier Agents
For AI agent setup and prerequisites, read through the content up to Step #2 in the previous chapter.
To configure an MCP connection in Zapier, start by clicking the “Add tool” button in the “Tools this agent can use” section. In the “Add tools” modal that appears, search for “mcp” and select the special “MCP Client by Zapier” tool: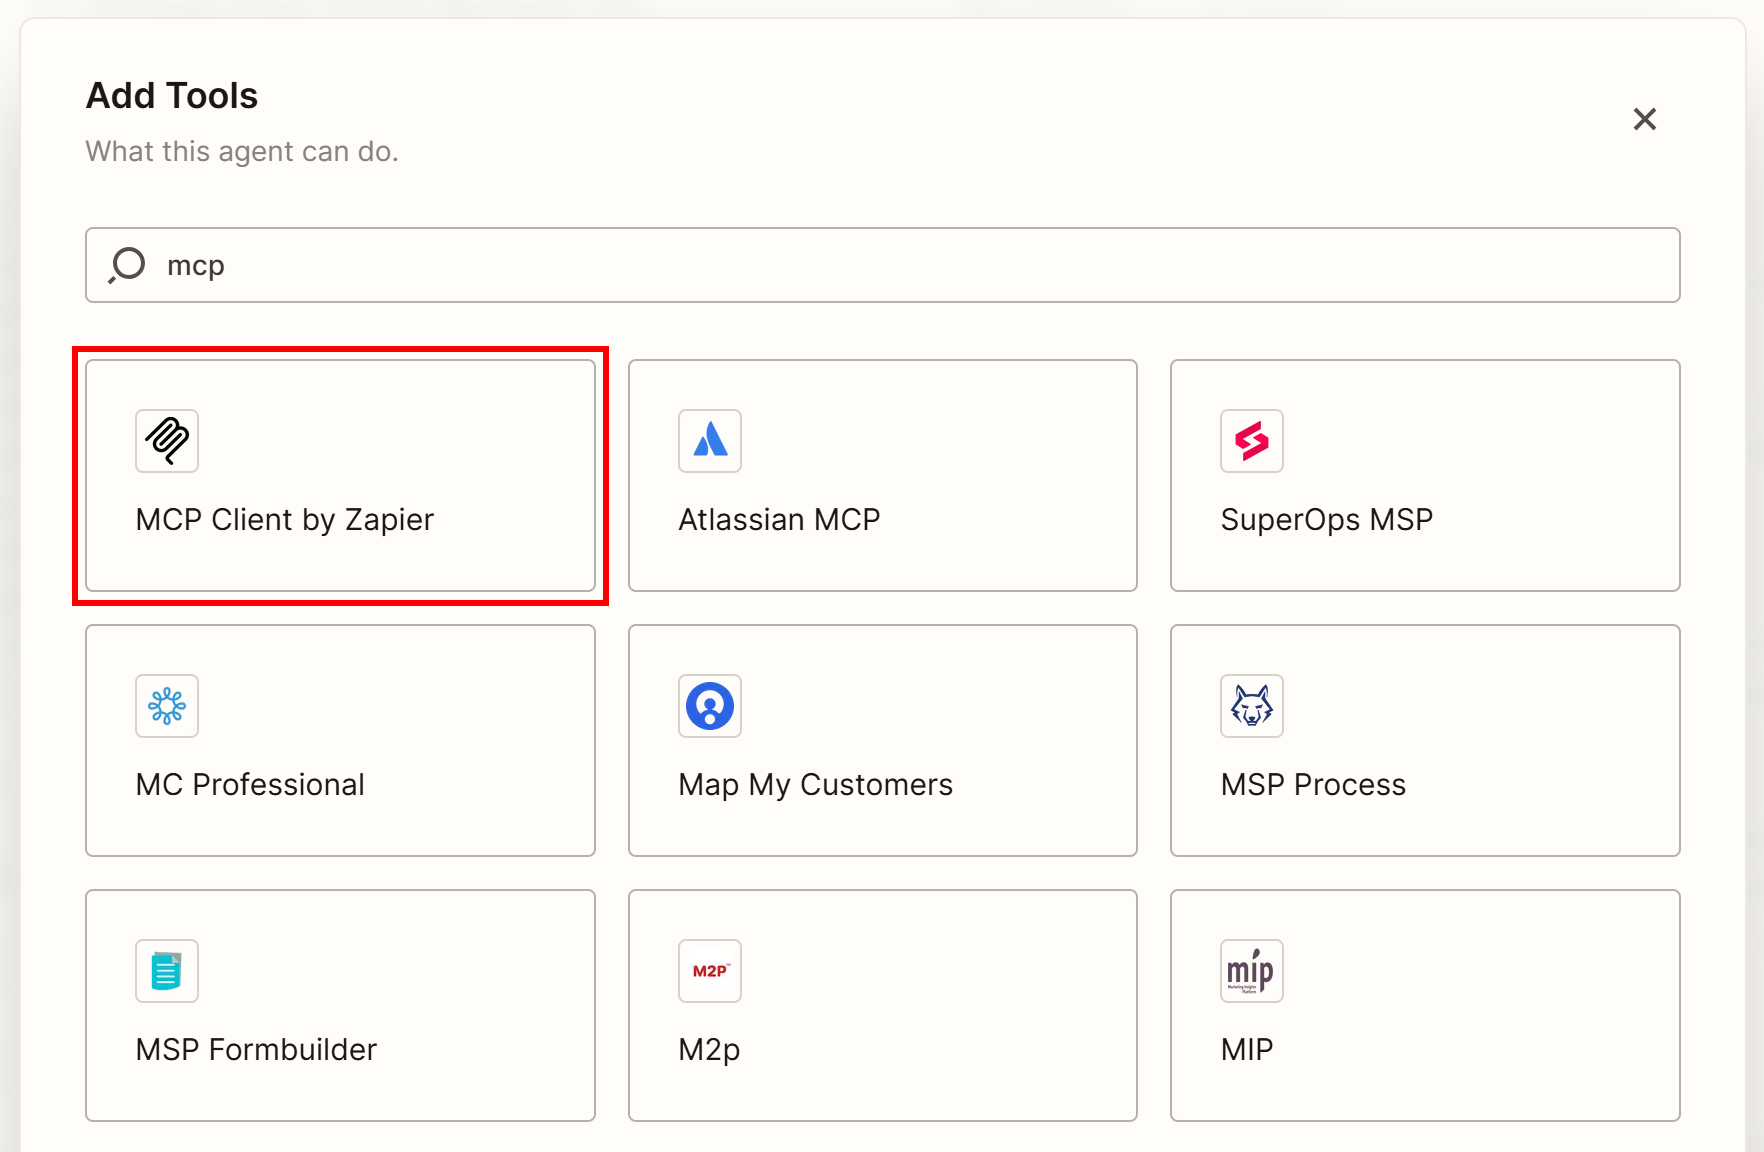
This tool enables you to connect to any remote MCP server, including Bright Data’s Web MCP. Next, select the “Run tool” option: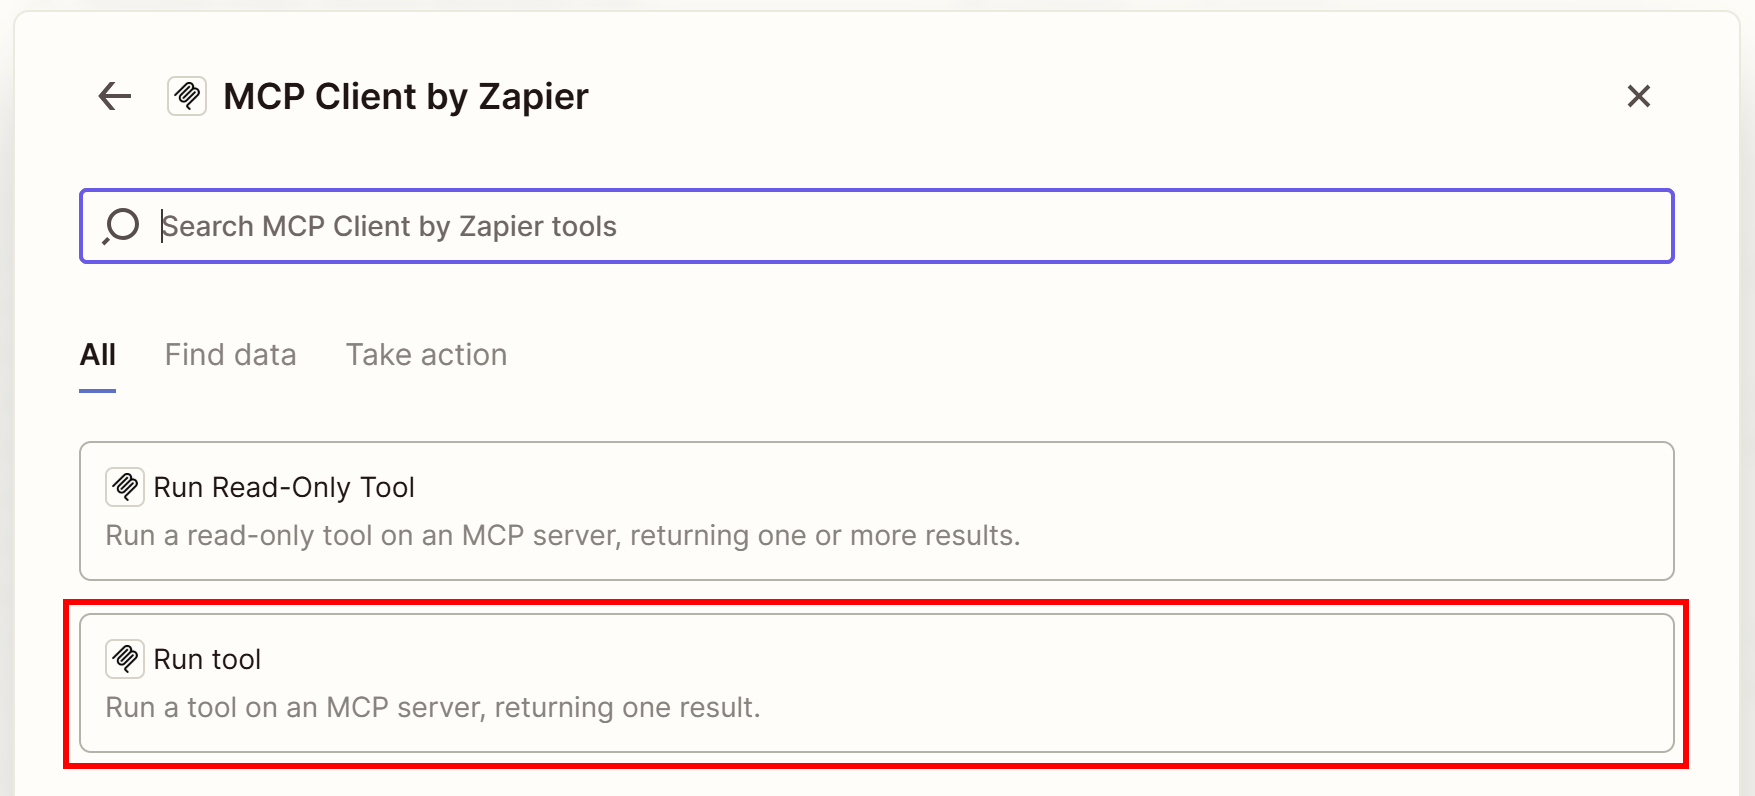
Then, click the “Connect” button: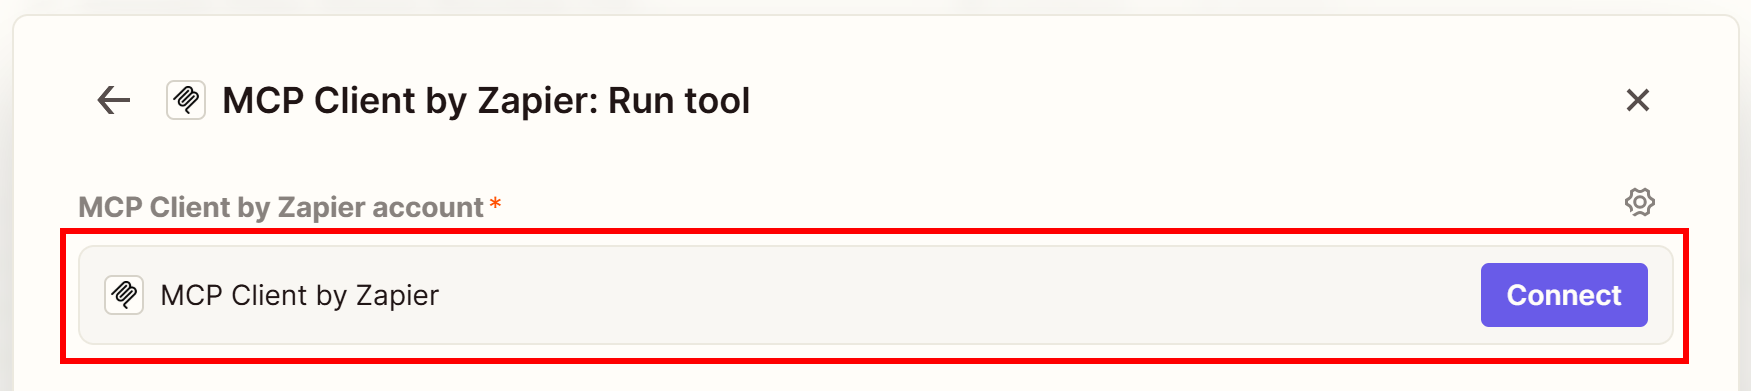
Perfect! You are now ready to provide the Bright Data Web MCP connection details.
Step #2: Configure Bright Data Web MCP Remote
Zapier will open a new browser window where you need to specify the URL of the remote MCP server. Fill in the modal as follows:
- Server URL:
https://mcp.brightdata.com/mcp?token=<YOUR_BRIGHT_DATA_API_KEY>&pro=1Replace <YOUR_BRIGHT_DATA_API_KEY> with your actual Bright Data API key. Also, remember that the pro=1 query argument to enable Pro mode is optional.
- Transport:
Streamable HTTP - OAuth:
No - Bearer Token:
Leave blank
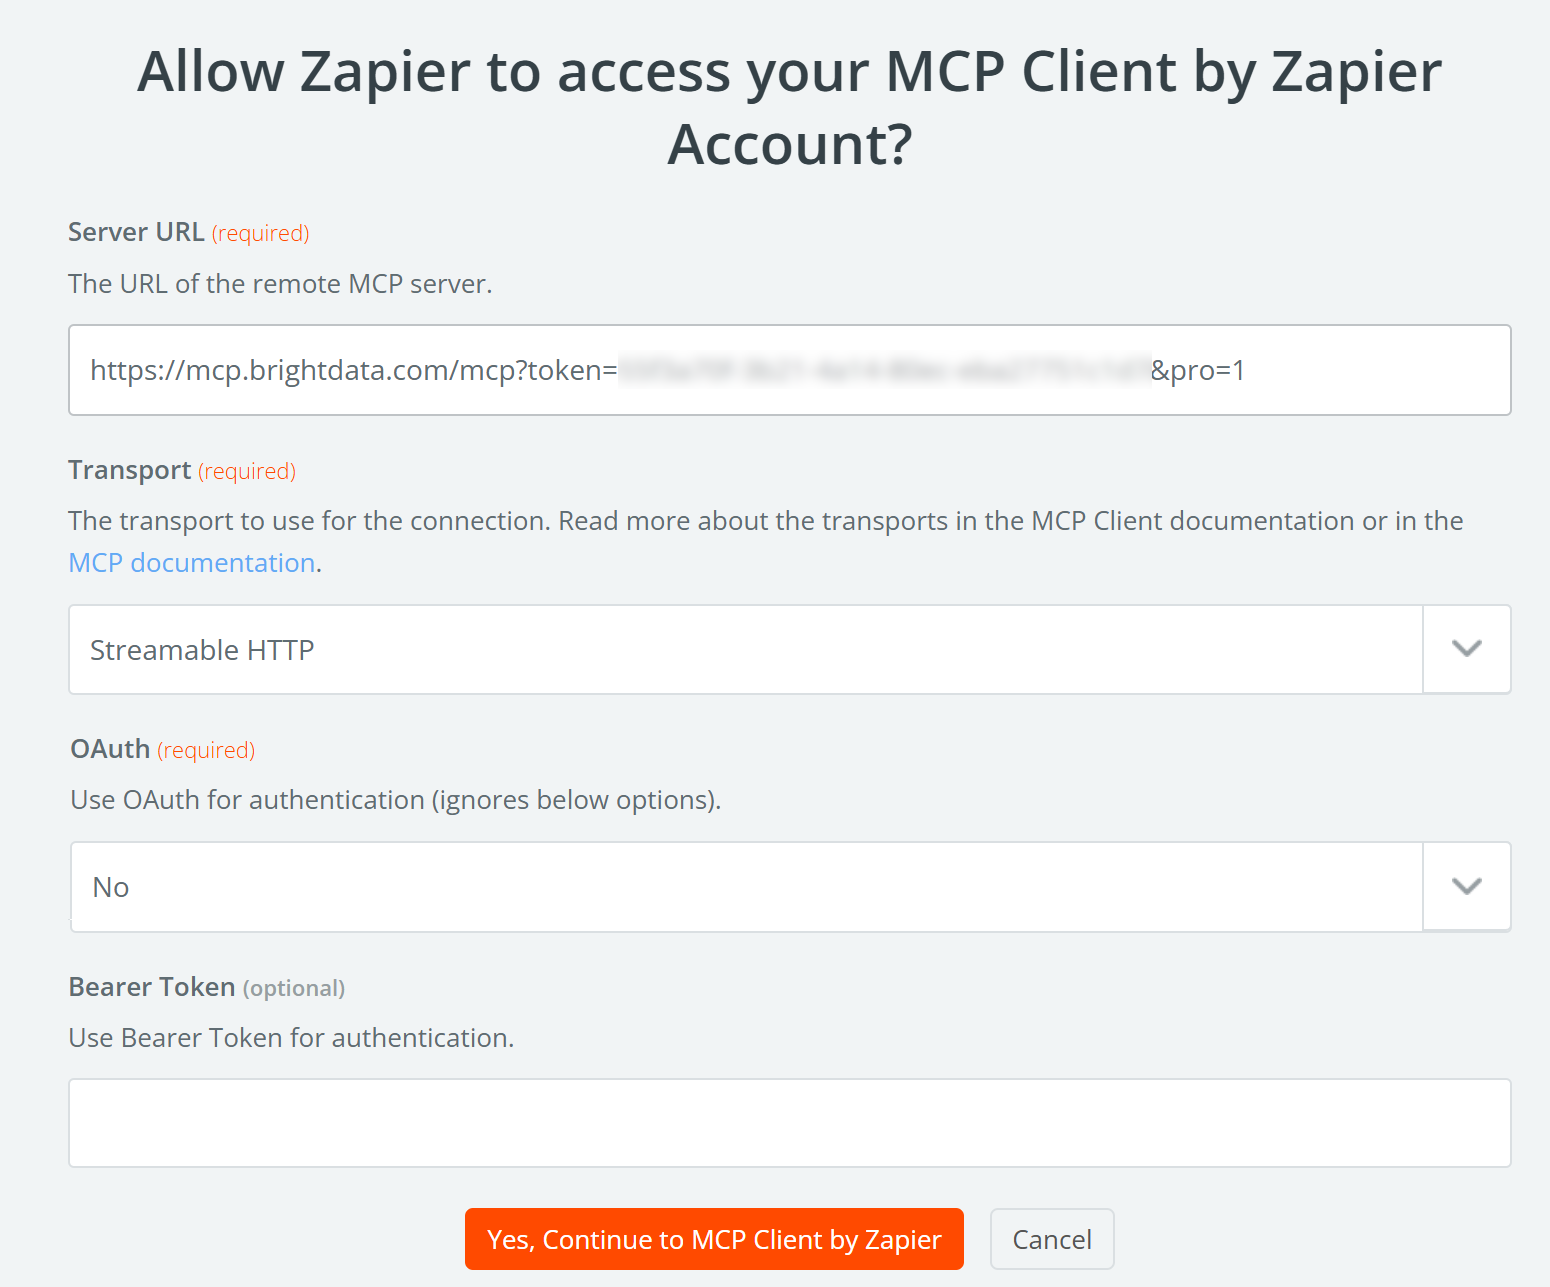
Once done, press the “Yes, Continue to MCP Client by Zapier” button.
If you are wondering where the Bright Data Web MCP URL comes from, it points to the Bright Data remote Web MCP server (through the Streamable HTTP protocol).
Also note that the Web MCP URL includes the pro=1 query parameter. That activates Pro mode, which unlocks access to all 60+ tools. While optional, Pro mode is strongly recommended for enterprise use because it provides the full set of structured data extraction tools—not just the basic ones.
Once connected, the MCP Client by Zapier tool should recognize the Bright Data MCP integration and display the following configuration form: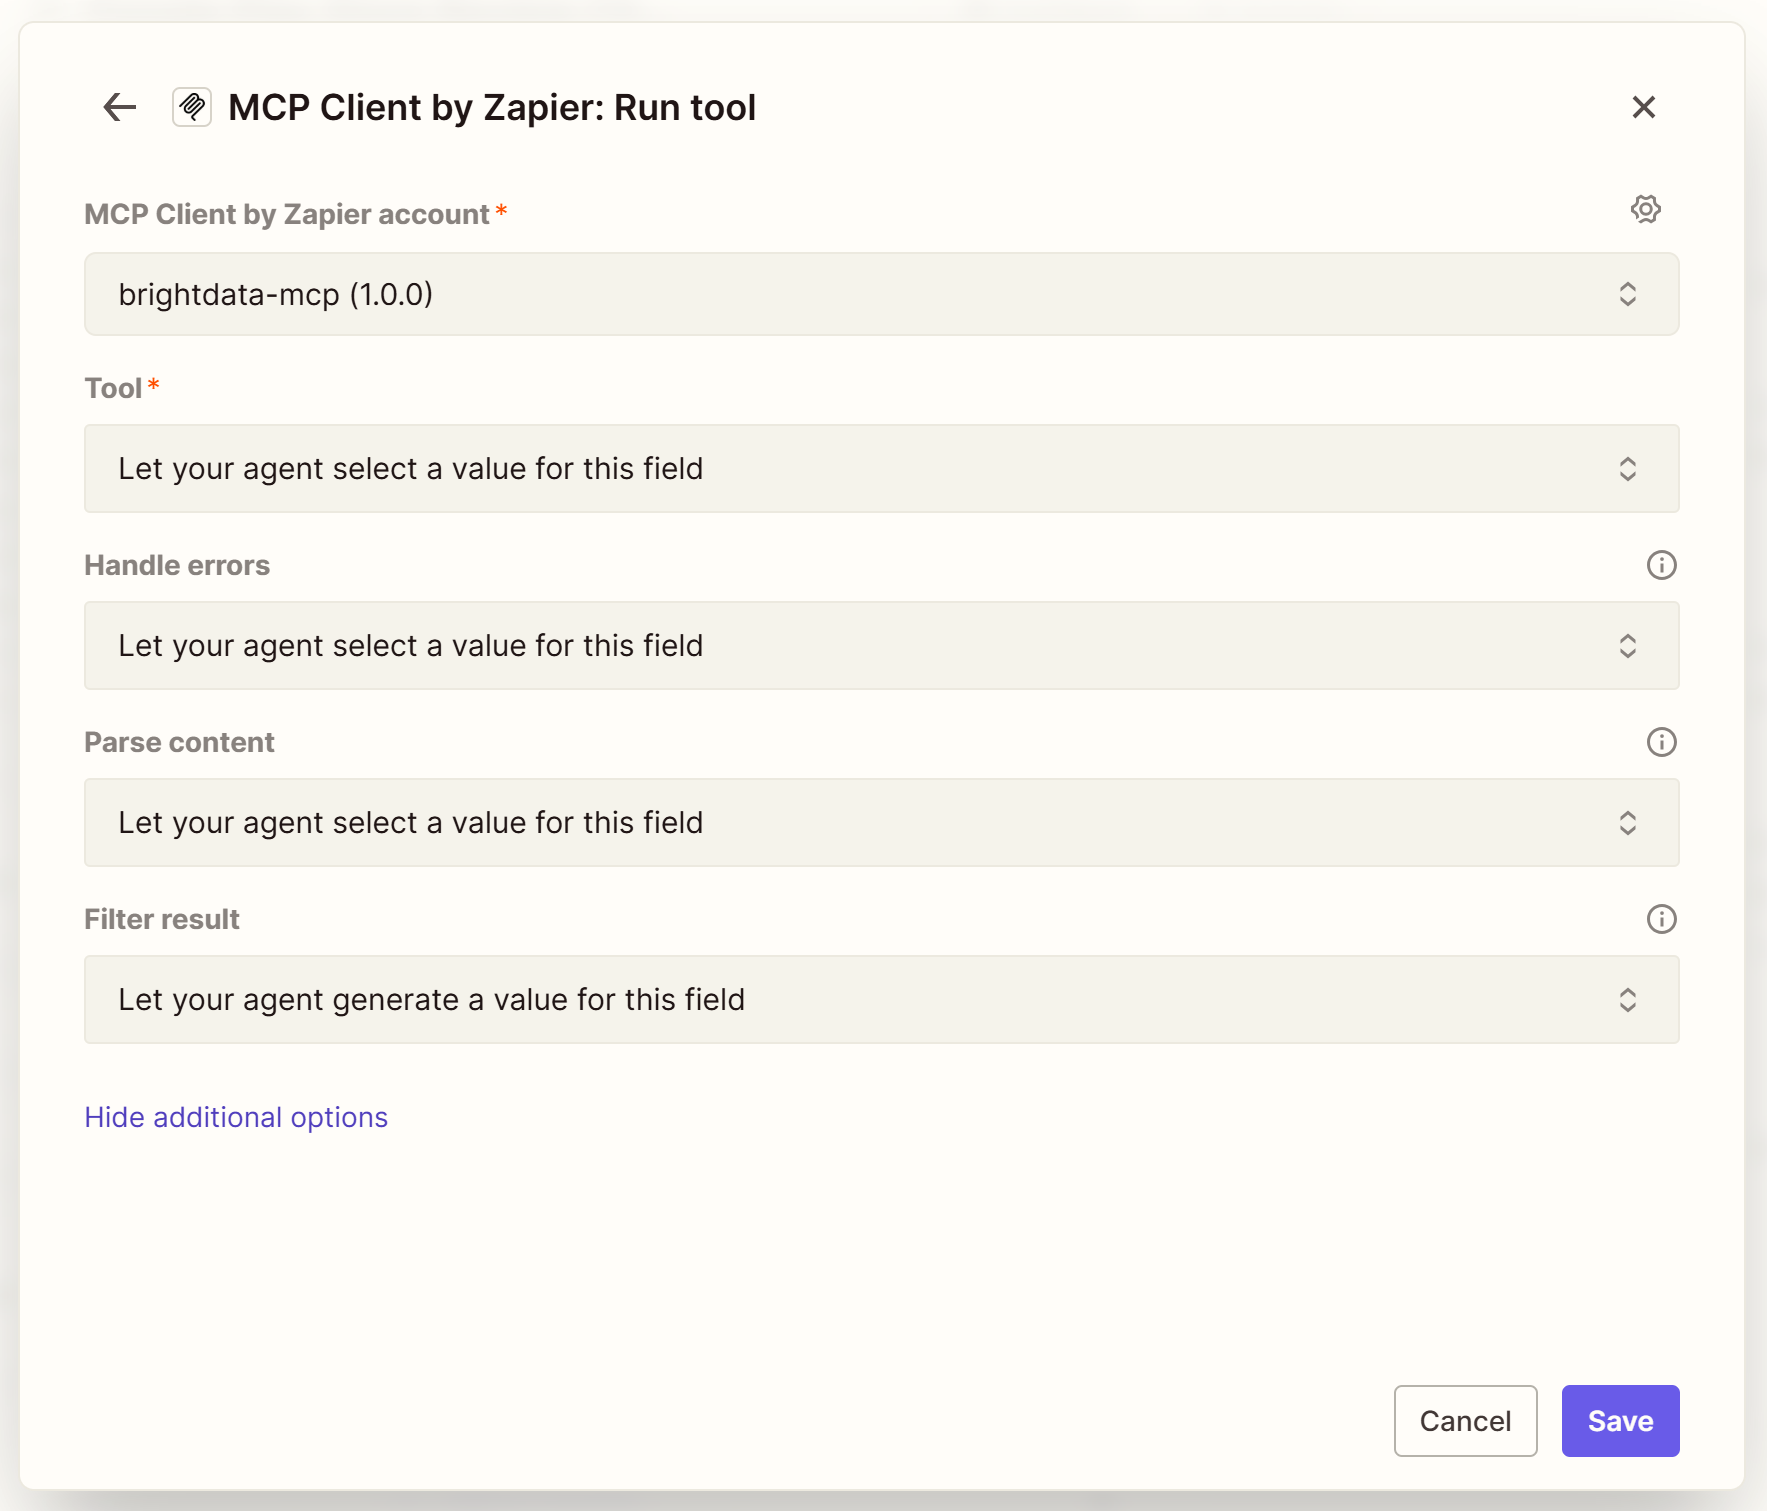
Here, you can configure the behavior of the MCP integration. In most cases, the default configuration is sufficient.
Terrific! Your AI agent can now connect to Web MCP.
Step #3: Verify the Web MCP Connection Works
To check that the Zapier MCP Client is successfully connected to Bright Data Web MCP, select the “Let your agent select a value from one of these choices” option. In the “Choose value” dropdown, you should see the full list of 60+ Web MCP tools: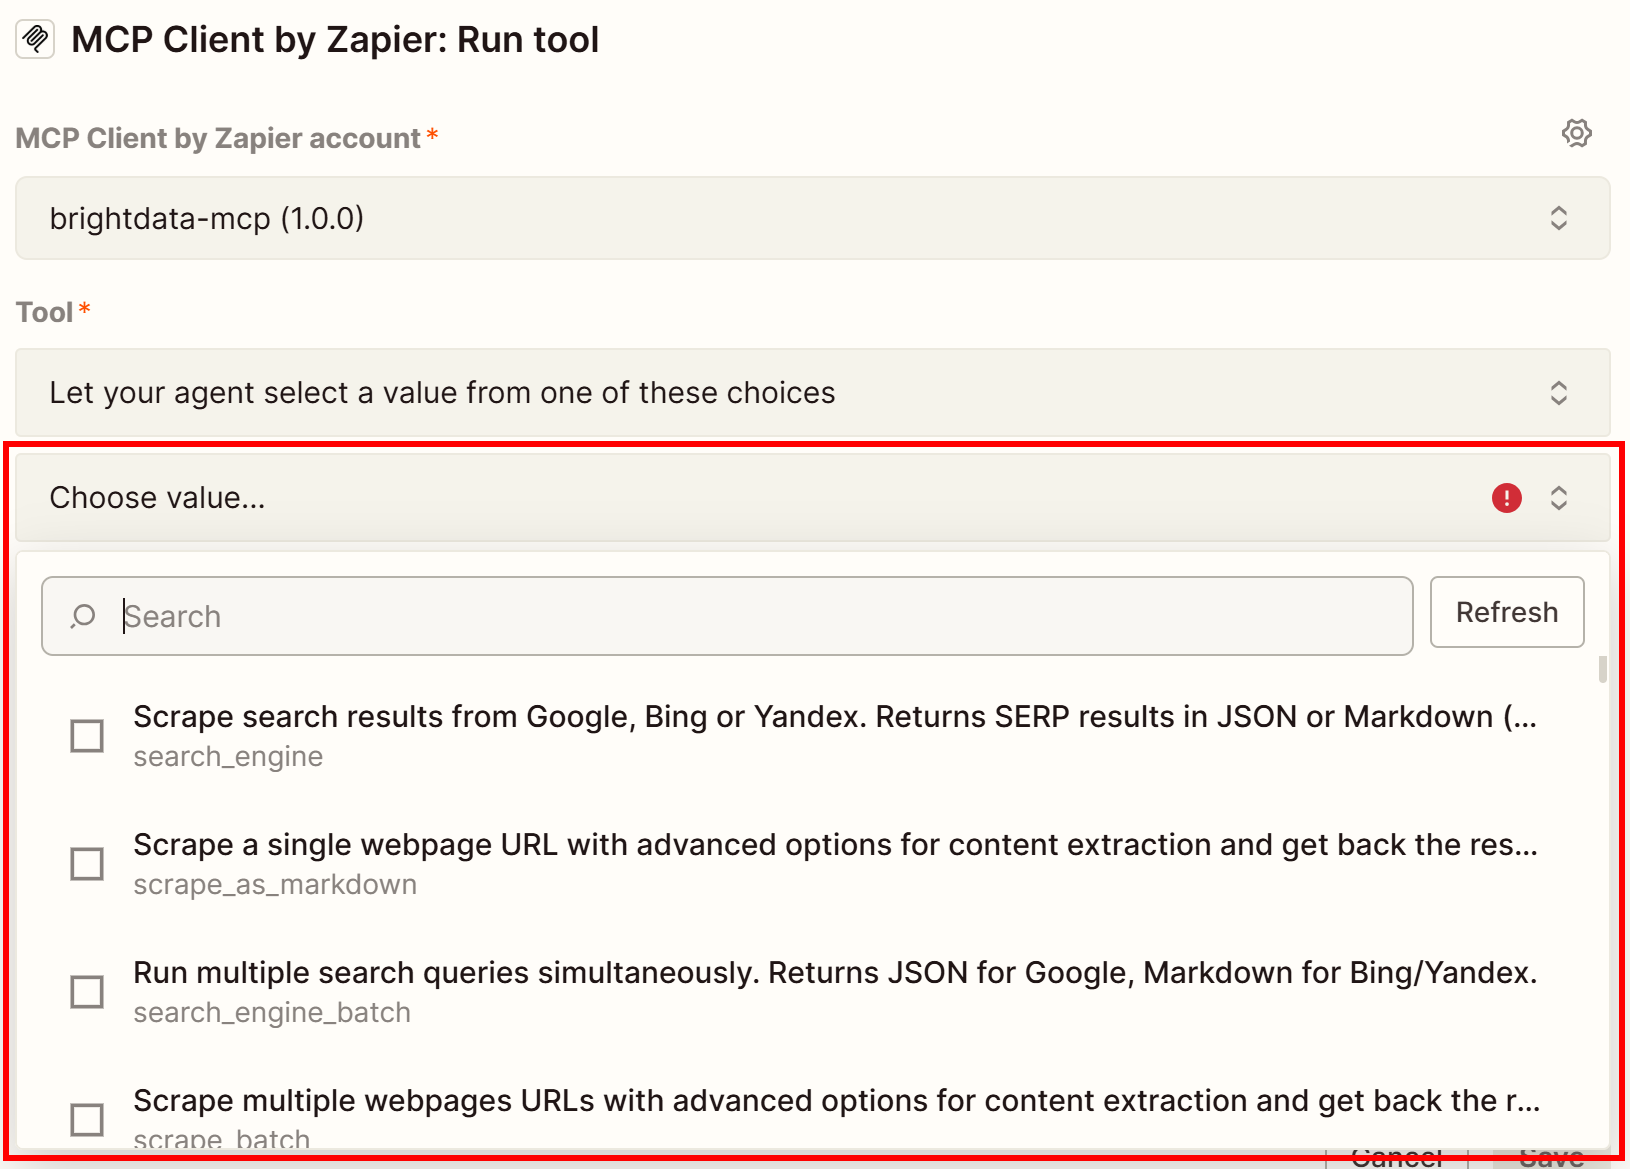
As you can tell from the list, your AI agent has access to all tools provided by Bright Data Web MCP. If you did not include the pro=1 query parameter, only the basic free tools will be available.
Confirm the connection and start experimenting with your agent instructions, as we showed earlier.
Mission accomplished! Your Zapier agent can now handle a wide range of use cases by automatically invoking the appropriate Bright Data Web MCP tools when needed.
Conclusion
In this article, you learned how to leverage Bright Data integrations in Zapier Agents, either through the official tools or via MCP.
This setup empowers AI agents to perform web searches, extract structured data, automate web interactions, and access live web data from popular websites. All of this is powered by the full suite of services in the Bright Data ecosystem for AI.
Sign up for a free Bright Data account and start exploring AI web data tools in Zapier today!

Technical Writer
Antonello Zanini is a technical writer, editor, and software engineer with 5M+ views. Expert in technical content strategy, web development, and project management.


