
In this article, you will see:
- What LM Studio is and the features it offers.
- Why it makes sense to extend its local AI models using Bright Data’s Web MCP tools.
- How to use Web MCP in LM Studio to give your AI more powerful capabilities.
Let’s dive in!
What Is LM Studio?
LM Studio is a desktop application that lets you run LLMs offline on your machine. This application provides a user-friendly interface for finding, downloading, and interacting with several open-source LLMs. All that, without requiring any technical expertise.
The main features LM Studio offers are:
- Multi-platform experience: The application is available on Windows, macOS, and Linux.
- Local and private processing: Your data stays on your computer for complete privacy and security.
- Offline operation: Run models without an internet connection for uninterrupted work.
- Easy setup: Simplifies installing and running LLMs, making advanced AI accessible to both beginners and professionals.
- User-friendly interface: Intuitive GUI with a built-in chat function for experimenting with LLMs.
- Model variety: Supports a wide range of open-source LLMs in formats like GGUF, which you can easily discover and download.
- Local inference server: Hosts a local HTTP server that mimics the OpenAI API, making it easy to integrate local LLMs into other applications.
- Customization: Adjust model parameters, such as temperature, context size, and more.
- CLI integration: Connects to your LM Studio instance directly from the command line using
lms. - Extensibility: Extend local AI models with plugins and tools from MCP servers.
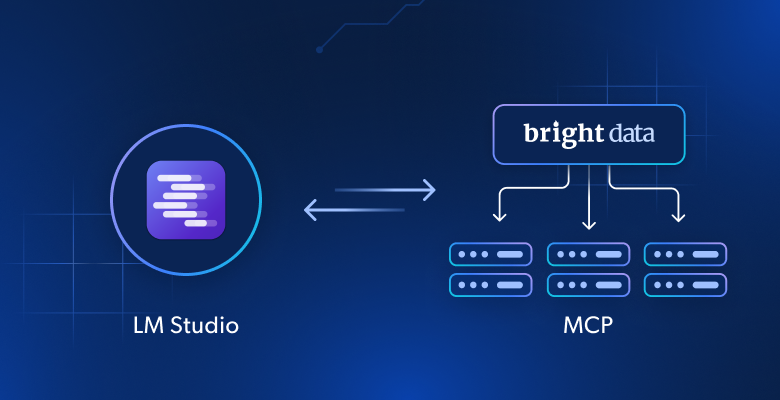
Why Connect Bright Data’s Web MCP to LM Studio
As of version 0.3.17, LM Studio can act as an MCP host. This means you can connect MCP servers to the desktop application and make their tools available to your AI models.
LM Studio supports both local and remote MCP servers. At the same time, given its local-first philosophy, it makes the most sense to connect it to local MCP servers.
A great example is Web MCP, Bright Data’s web MCP server, which is available both as an open-source package and as a remote server. This gives AI models the ability to retrieve recent web data and interact with web pages like humans, setting up models to overcome most of their major built-in limitations.
More in detail, Web MCP exposes over 60 AI-ready tools, all powered by Bright Data’s infrastructure for web interaction and data collection.
Even on the free tier, you get access to two very useful tools:
| Tool | Description |
|---|---|
search_engine |
Retrieve search results from Google, Bing, or Yandex in JSON or Markdown. |
scrape_as_markdown |
Scrape any webpage into clean Markdown format, bypassing bot detection and CAPTCHA. |
Beyond those two, Web MCP comes with tools for cloud browser interaction and dozens of specialized tools for structured data feeds across platforms like YouTube, Amazon, LinkedIn, TikTok, Google Maps, and more.
See Web MCP in action with LM Studio!
How to Use Bright Data’s Web MCP Tools with Local AI in LM Studio
In this step-by-step section, you will learn how to connect LM Studio to a local instance of Bright Data Web MCP. This setup provides a supercharged AI experience directly on your computer.
Specifically, your AI model will use the tools exposed by the MCP server to retrieve Google Maps reviews in real time for feedback analysis. This is just one of the many scenarios supported by this integration.
Follow the instructions below to get started!
Prerequisites
To follow this tutorial, you will need:
- LM Studio v0.3.17 or later installed locally.
- A Bright Data account with an active API key.
Do not worry about setting anything up just yet, as you will be guided through the next steps.
Step #1: Install LM Studio
Download the LM Studio installer for your operating system and install the application locally.
Make sure you are using LM Studio version 0.3.17 or later, since the MCP client feature was introduced in that release. If you already have LM Studio installed, with a local LLM configured, update it to the latest version. Then, you can directly skip to Step #3.
Otherwise, Open LM Studio, complete (or skip) the initial setup wizard, and you will be taken to the following screen:
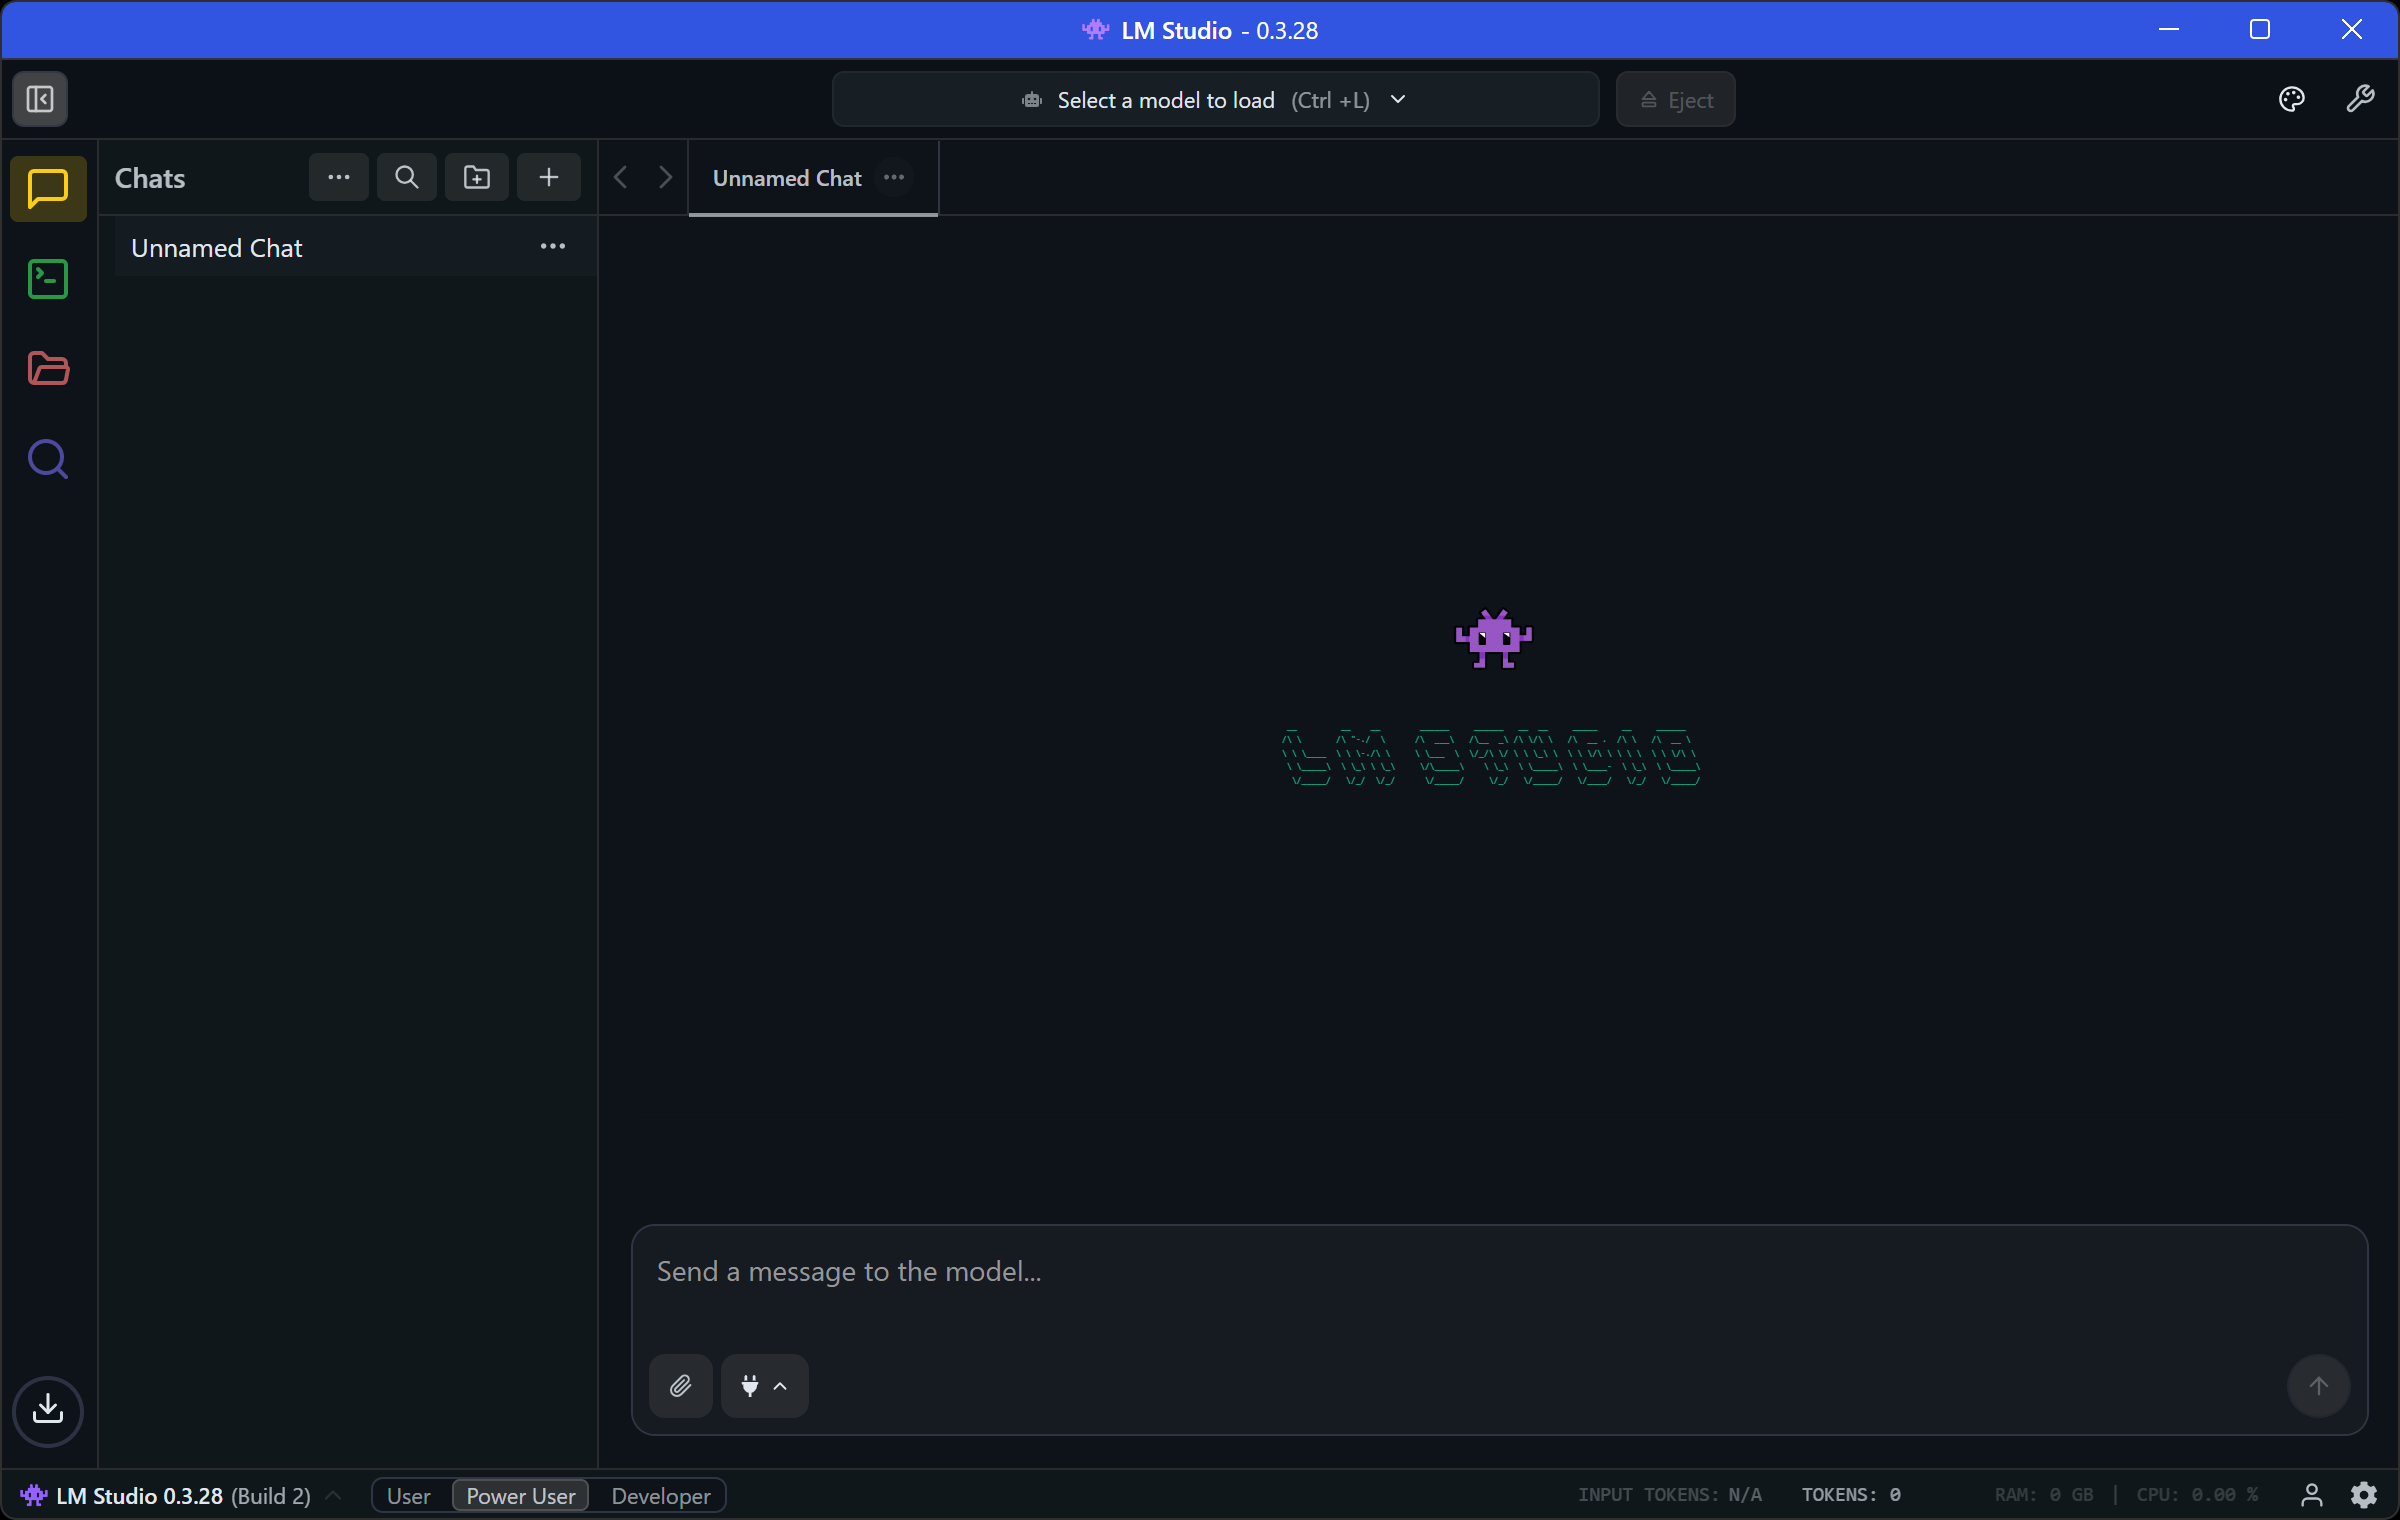
Great! LM Studio is now installed and ready to use.
Step #2: Download an LLM
LM Studio only works when powered by a local AI model. Fortunately, it includes a built-in model downloader that lets you easily fetch any supported model from Hugging Face.
To download a model, begin by clicking the “Search” icon on the left sidebar:
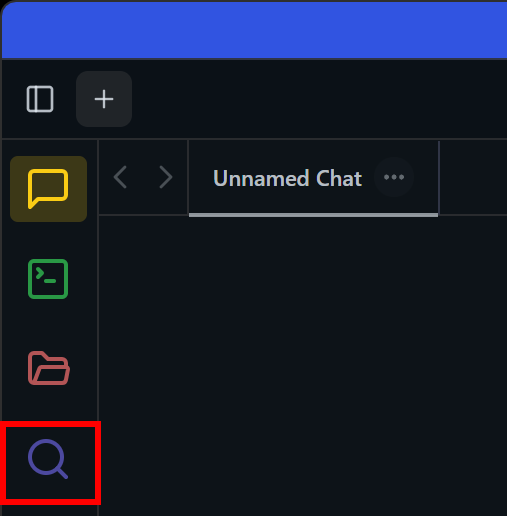
This will open the following modal. Make sure you are on the “Model Search” tab:
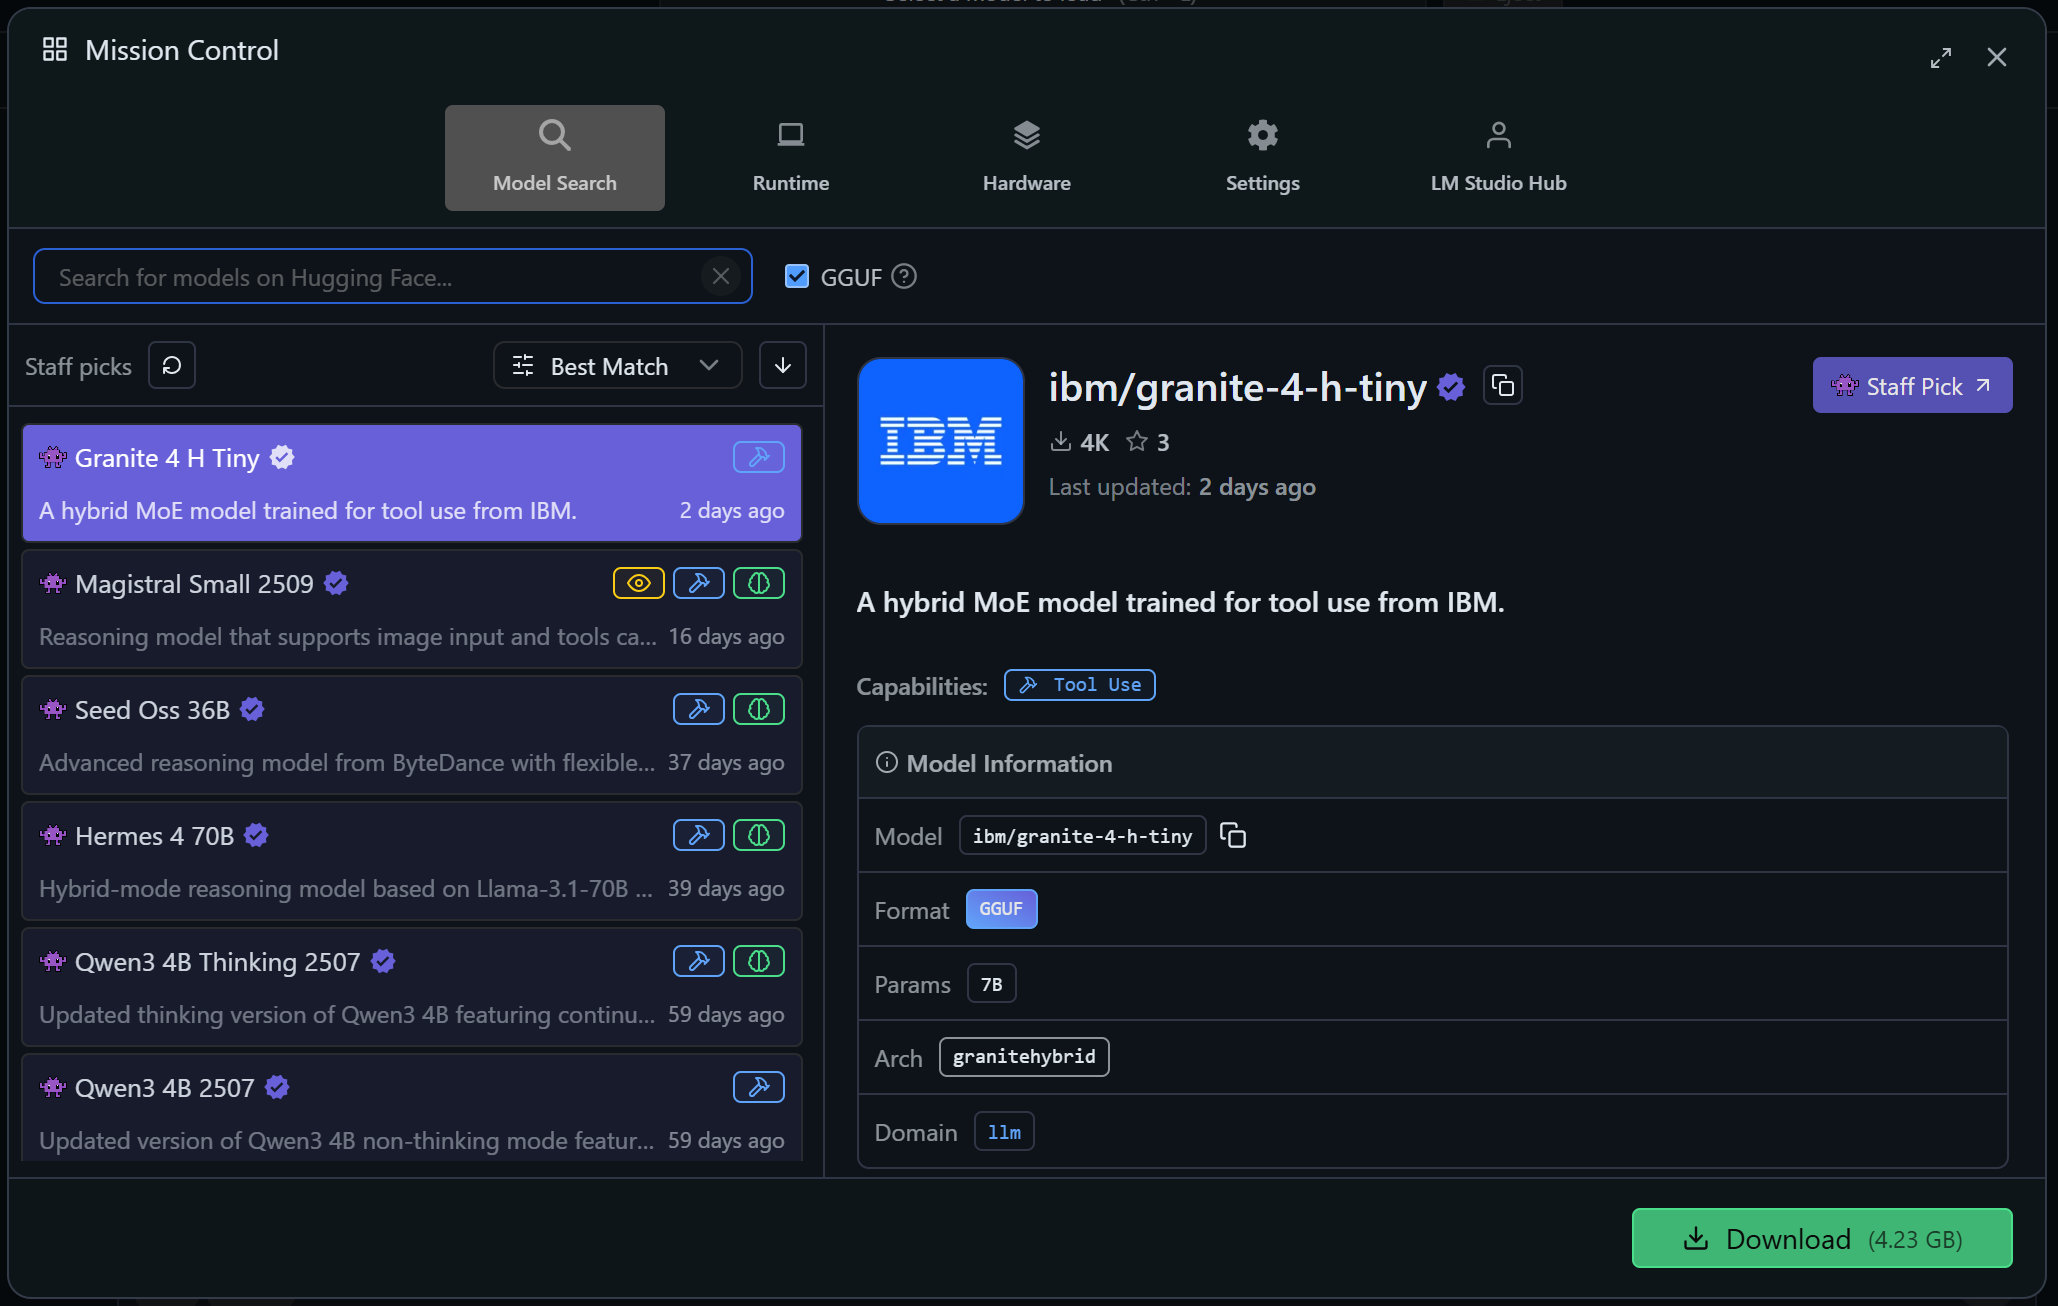
Here, search for a model (e.g., llama, gemma, lmstudio, etc.), select one, and click “Download” to retrieve it locally.
In this example, we will use Qwen3 4B Thinking 2507:
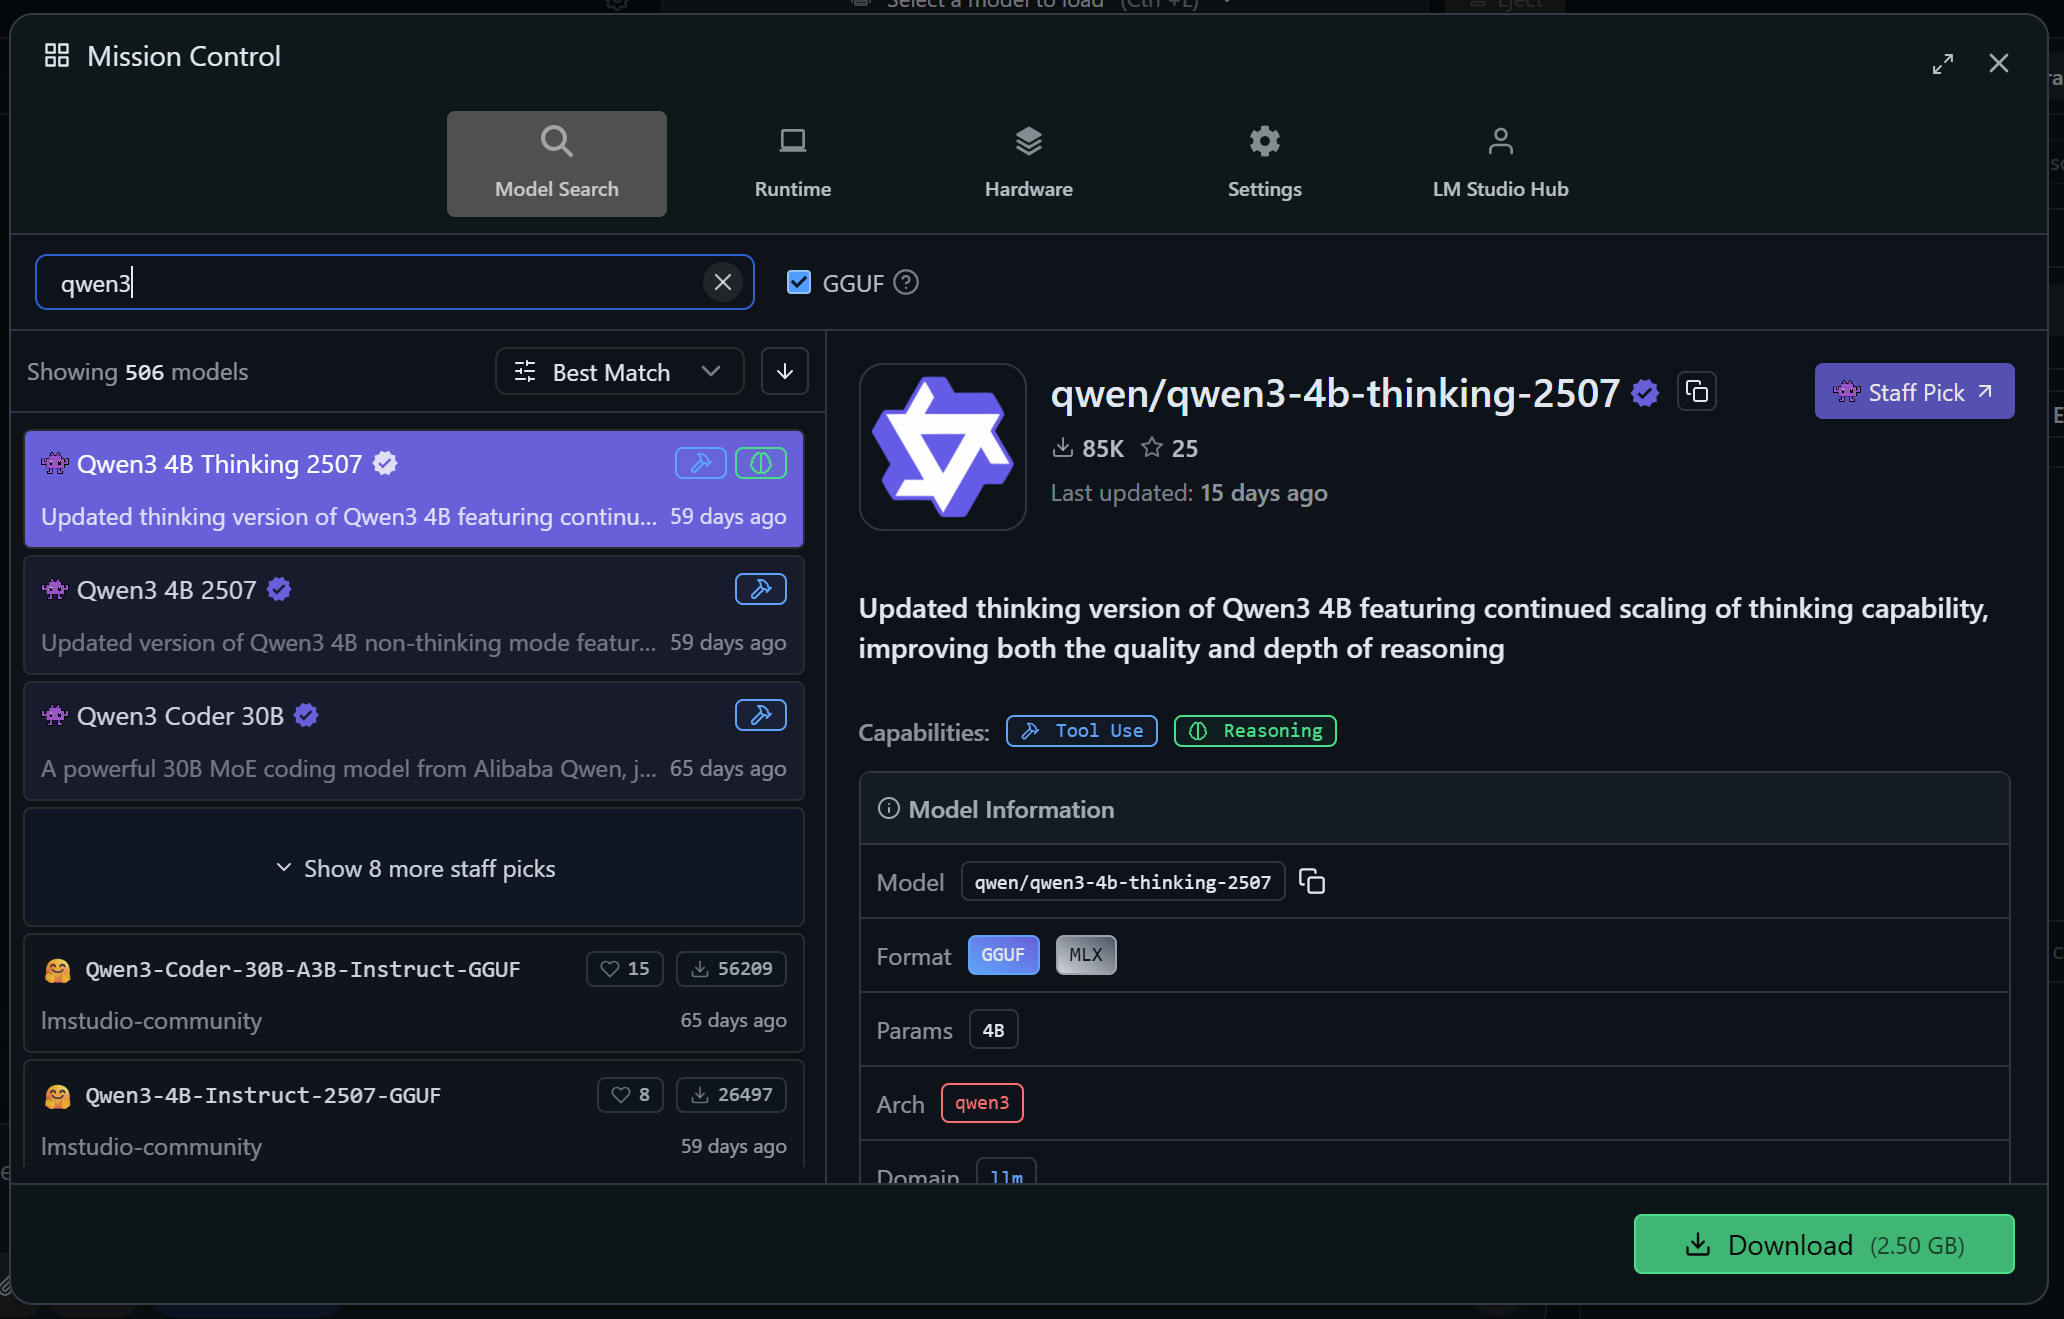
This is a powerful model that supports tool calling (note the “Tool Use” label in the “Capabilities” section). Remember that Qwen3 has proven effective for web data scraping.
Note: Any other model with tool usage support will also work. So, choose whichever you prefer.
Once downloaded, set the AI model in the application:

Wonderful! LM Studio is now fully operational. Time to move on to Web MCP integration.
Step #3: Test Bright Data’s Web MCP Locally
Before configuring the connection to the Bright Data Web MCP in LM Studio, you must verify that your machine can actually run the server.
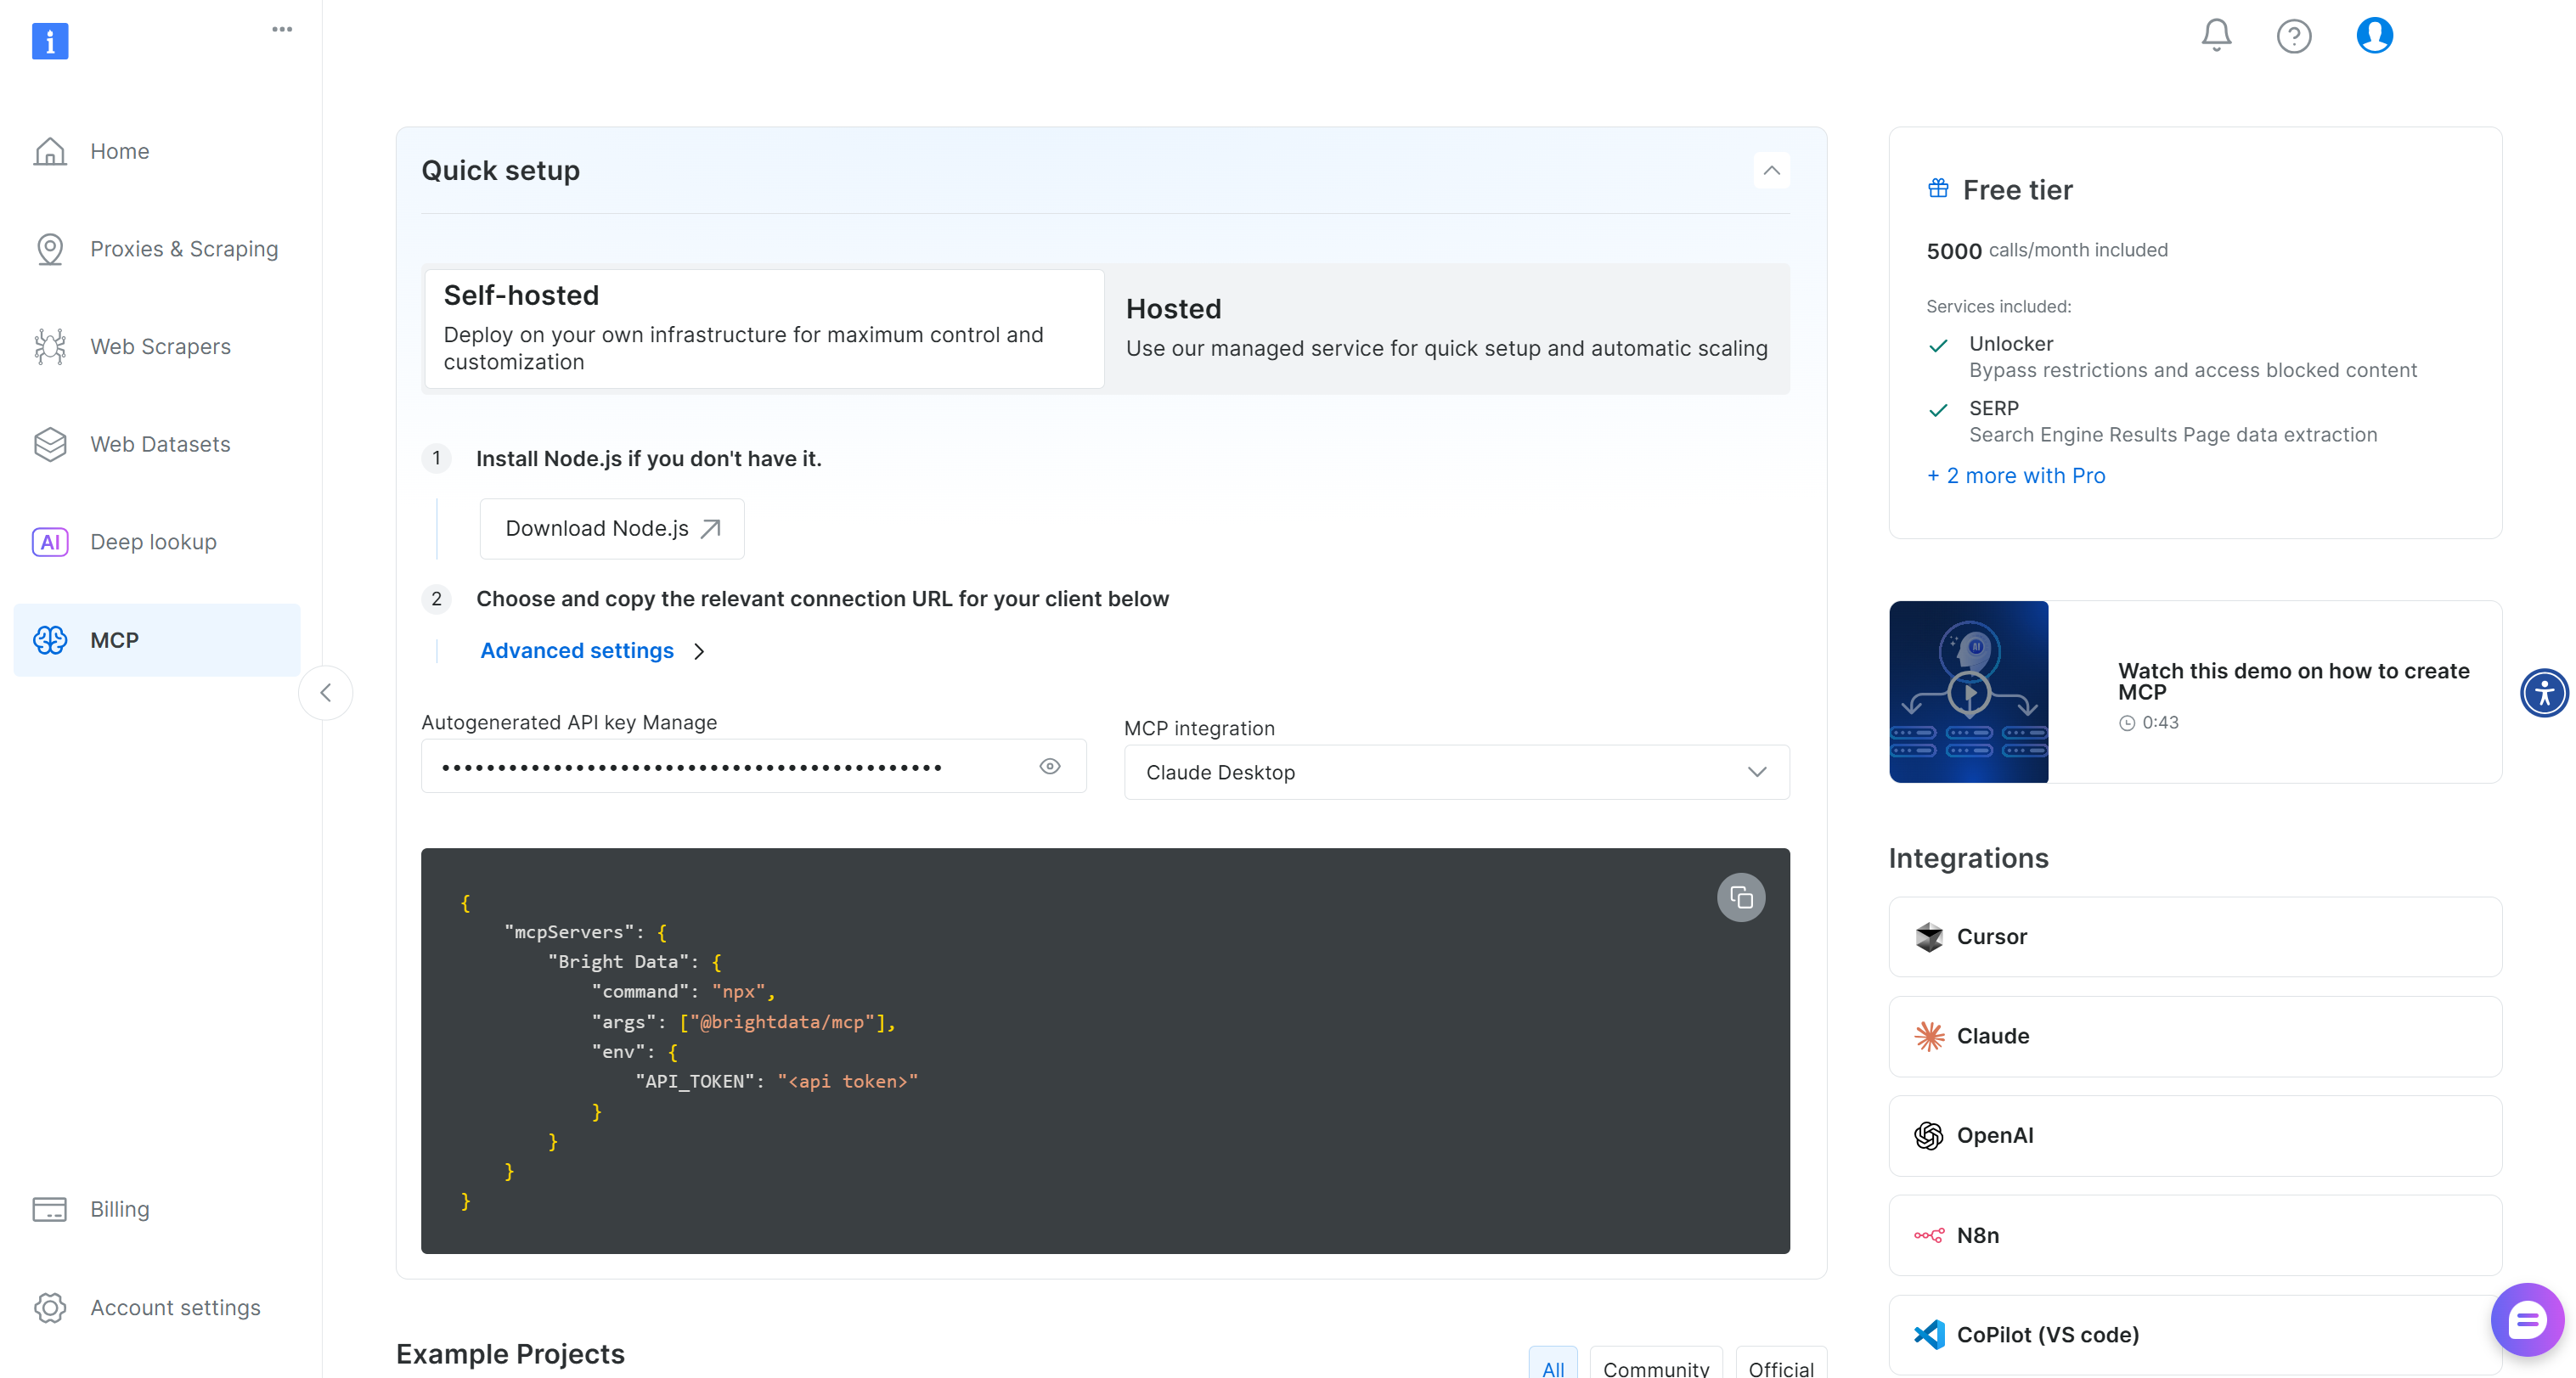
Start by creating a Bright Data account. Or, if you already have one, just log in. For a quick setup, refer to the instructions in the “MCP” section of your account:
Otherwise, for more guidance, take a look at the following instructions.
First, retrieve your Bright Data API key. Store it in a safe place, as you will need it shortly. For a simplified Web MCP integration process, we will assume that your API key has Admin permissions.
Now, install the Web MCP globally on your machine with this command:
npm install -g @brightdata/mcpCheck that the MCP server works by executing it:
API_TOKEN="<YOUR_BRIGHT_DATA_API>" npx -y @brightdata/mcpOr, equivalently, in PowerShell:
$Env:API_TOKEN="<YOUR_BRIGHT_DATA_API>"; npx -y @brightdata/mcpReplace the <YOUR_BRIGHT_DATA_API> placeholder with your Bright Data API token. Those commands set the required API_TOKEN environment variable and launch the Web MCP locally by running the @brightdata/mcp package.
If successful, you should see an output similar to this:

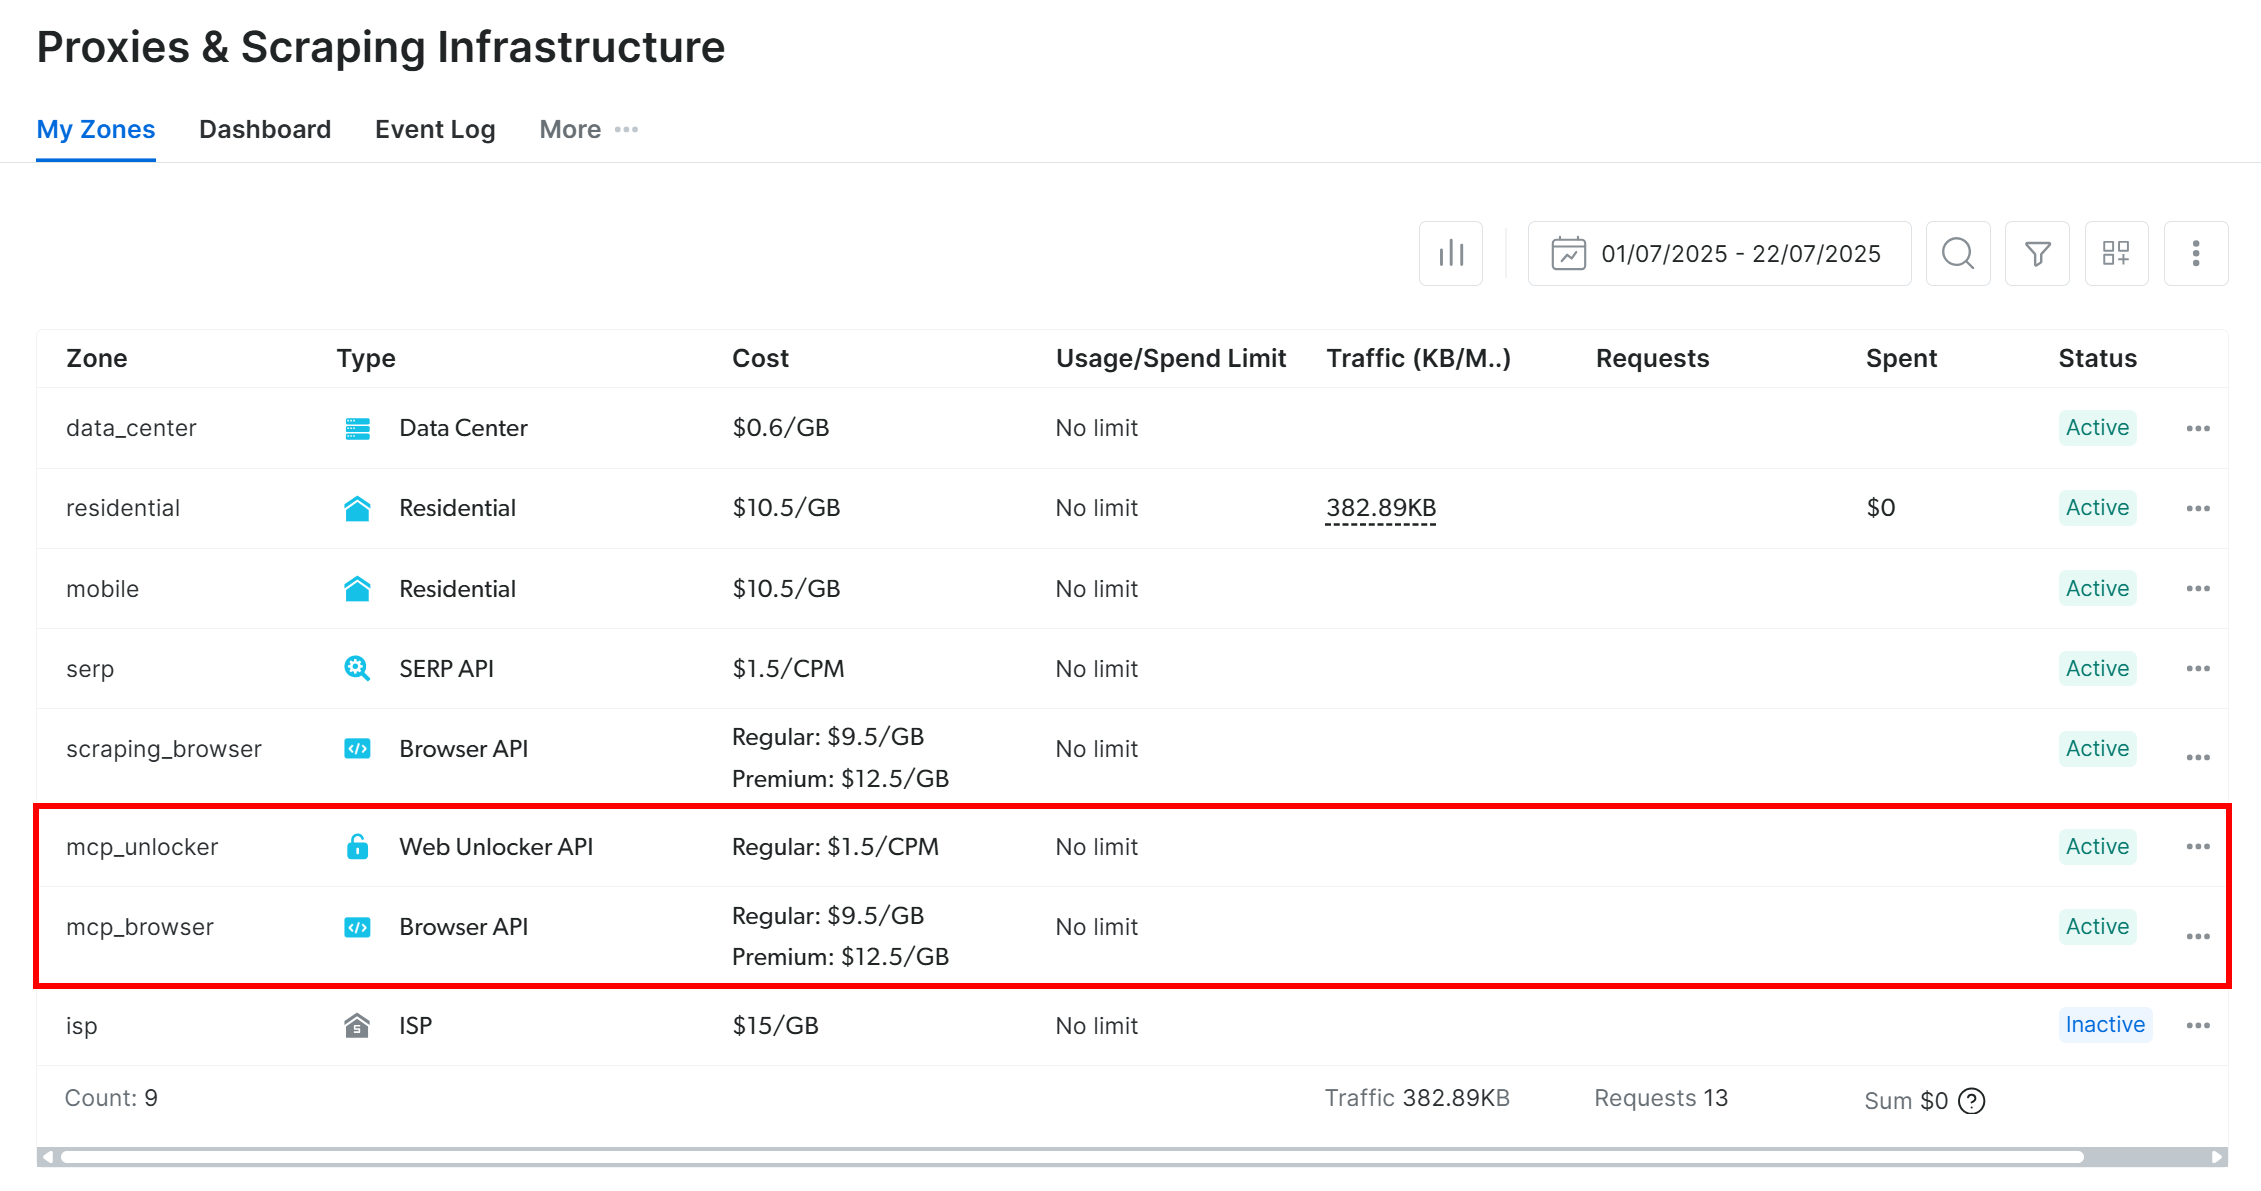
That is because on the first launch, the Web MCP automatically creates two default zones in your Bright Data account:
mcp_unlocker: A zone for Web Unlocker.mcp_browser: A zone for Browser API.
Web MCP relies on those two Bright Data products to power its 60+ tools.
If you want to verify that the zones were set up, reach the “Proxies & Scraping Infrastructure” page in your Bright Data dashboard. You should see the two zones in the table:
Note: If your API token does not have Admin permissions, the two zones will not be created. In this case, you must define them manually and set them via environment variables as shown on GitHub.
On the Web MCP free tier, the MCP server only exposes the search_engine and scrape_as_markdown tools (and their batch versions). To unlock all other tools, you need to enable Pro mode **by setting the PRO_MODE="true" environment variable:
API_TOKEN="<YOUR_BRIGHT_DATA_API>" PRO_MODE="true" npx -y @brightdata/mcpOr, on Windows:
$Env:API_TOKEN="<YOUR_BRIGHT_DATA_API>"; $Env:PRO_MODE="true"; npx -y @brightdata/mcpPro mode unlocks all 60+ tools, but it is not included in the free tier. So, it will incur additional charges.
Here we go! You just verified that the Web MCP server runs on your machine. Kill the MCP process, as you are about to configure LM Studio to connect to it.
Step #4: Configure Web MCP Connection
You can add MCP connections in LM Studio by editing the app’s mcp.json configuration file.
That file uses the same syntax as in Cursor.
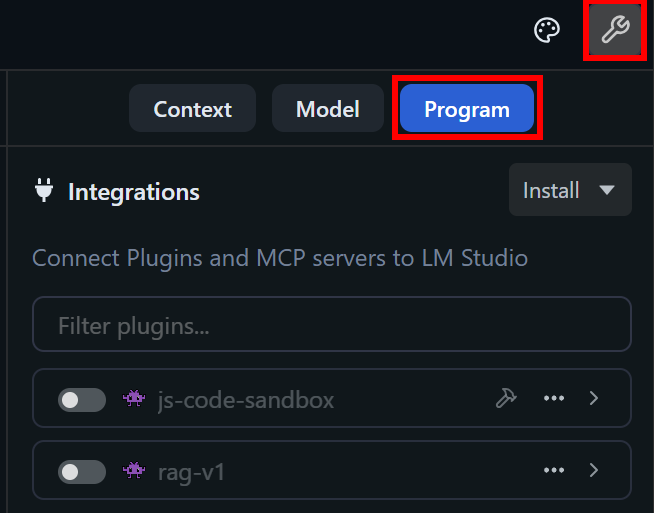
To access mcp.json, click the “Show Settings” icon and switch to the “Program” tab on the right-hand sidebar:
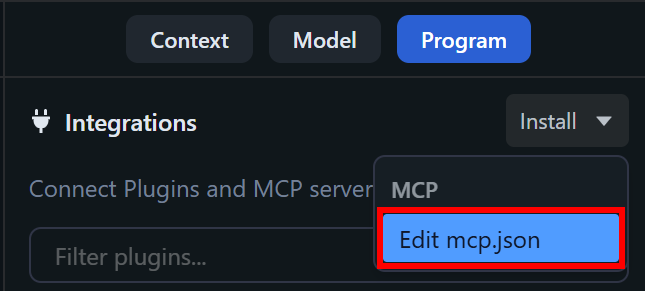
Next, open the “Install” dropdown and select the “Edit mcp.json” option:
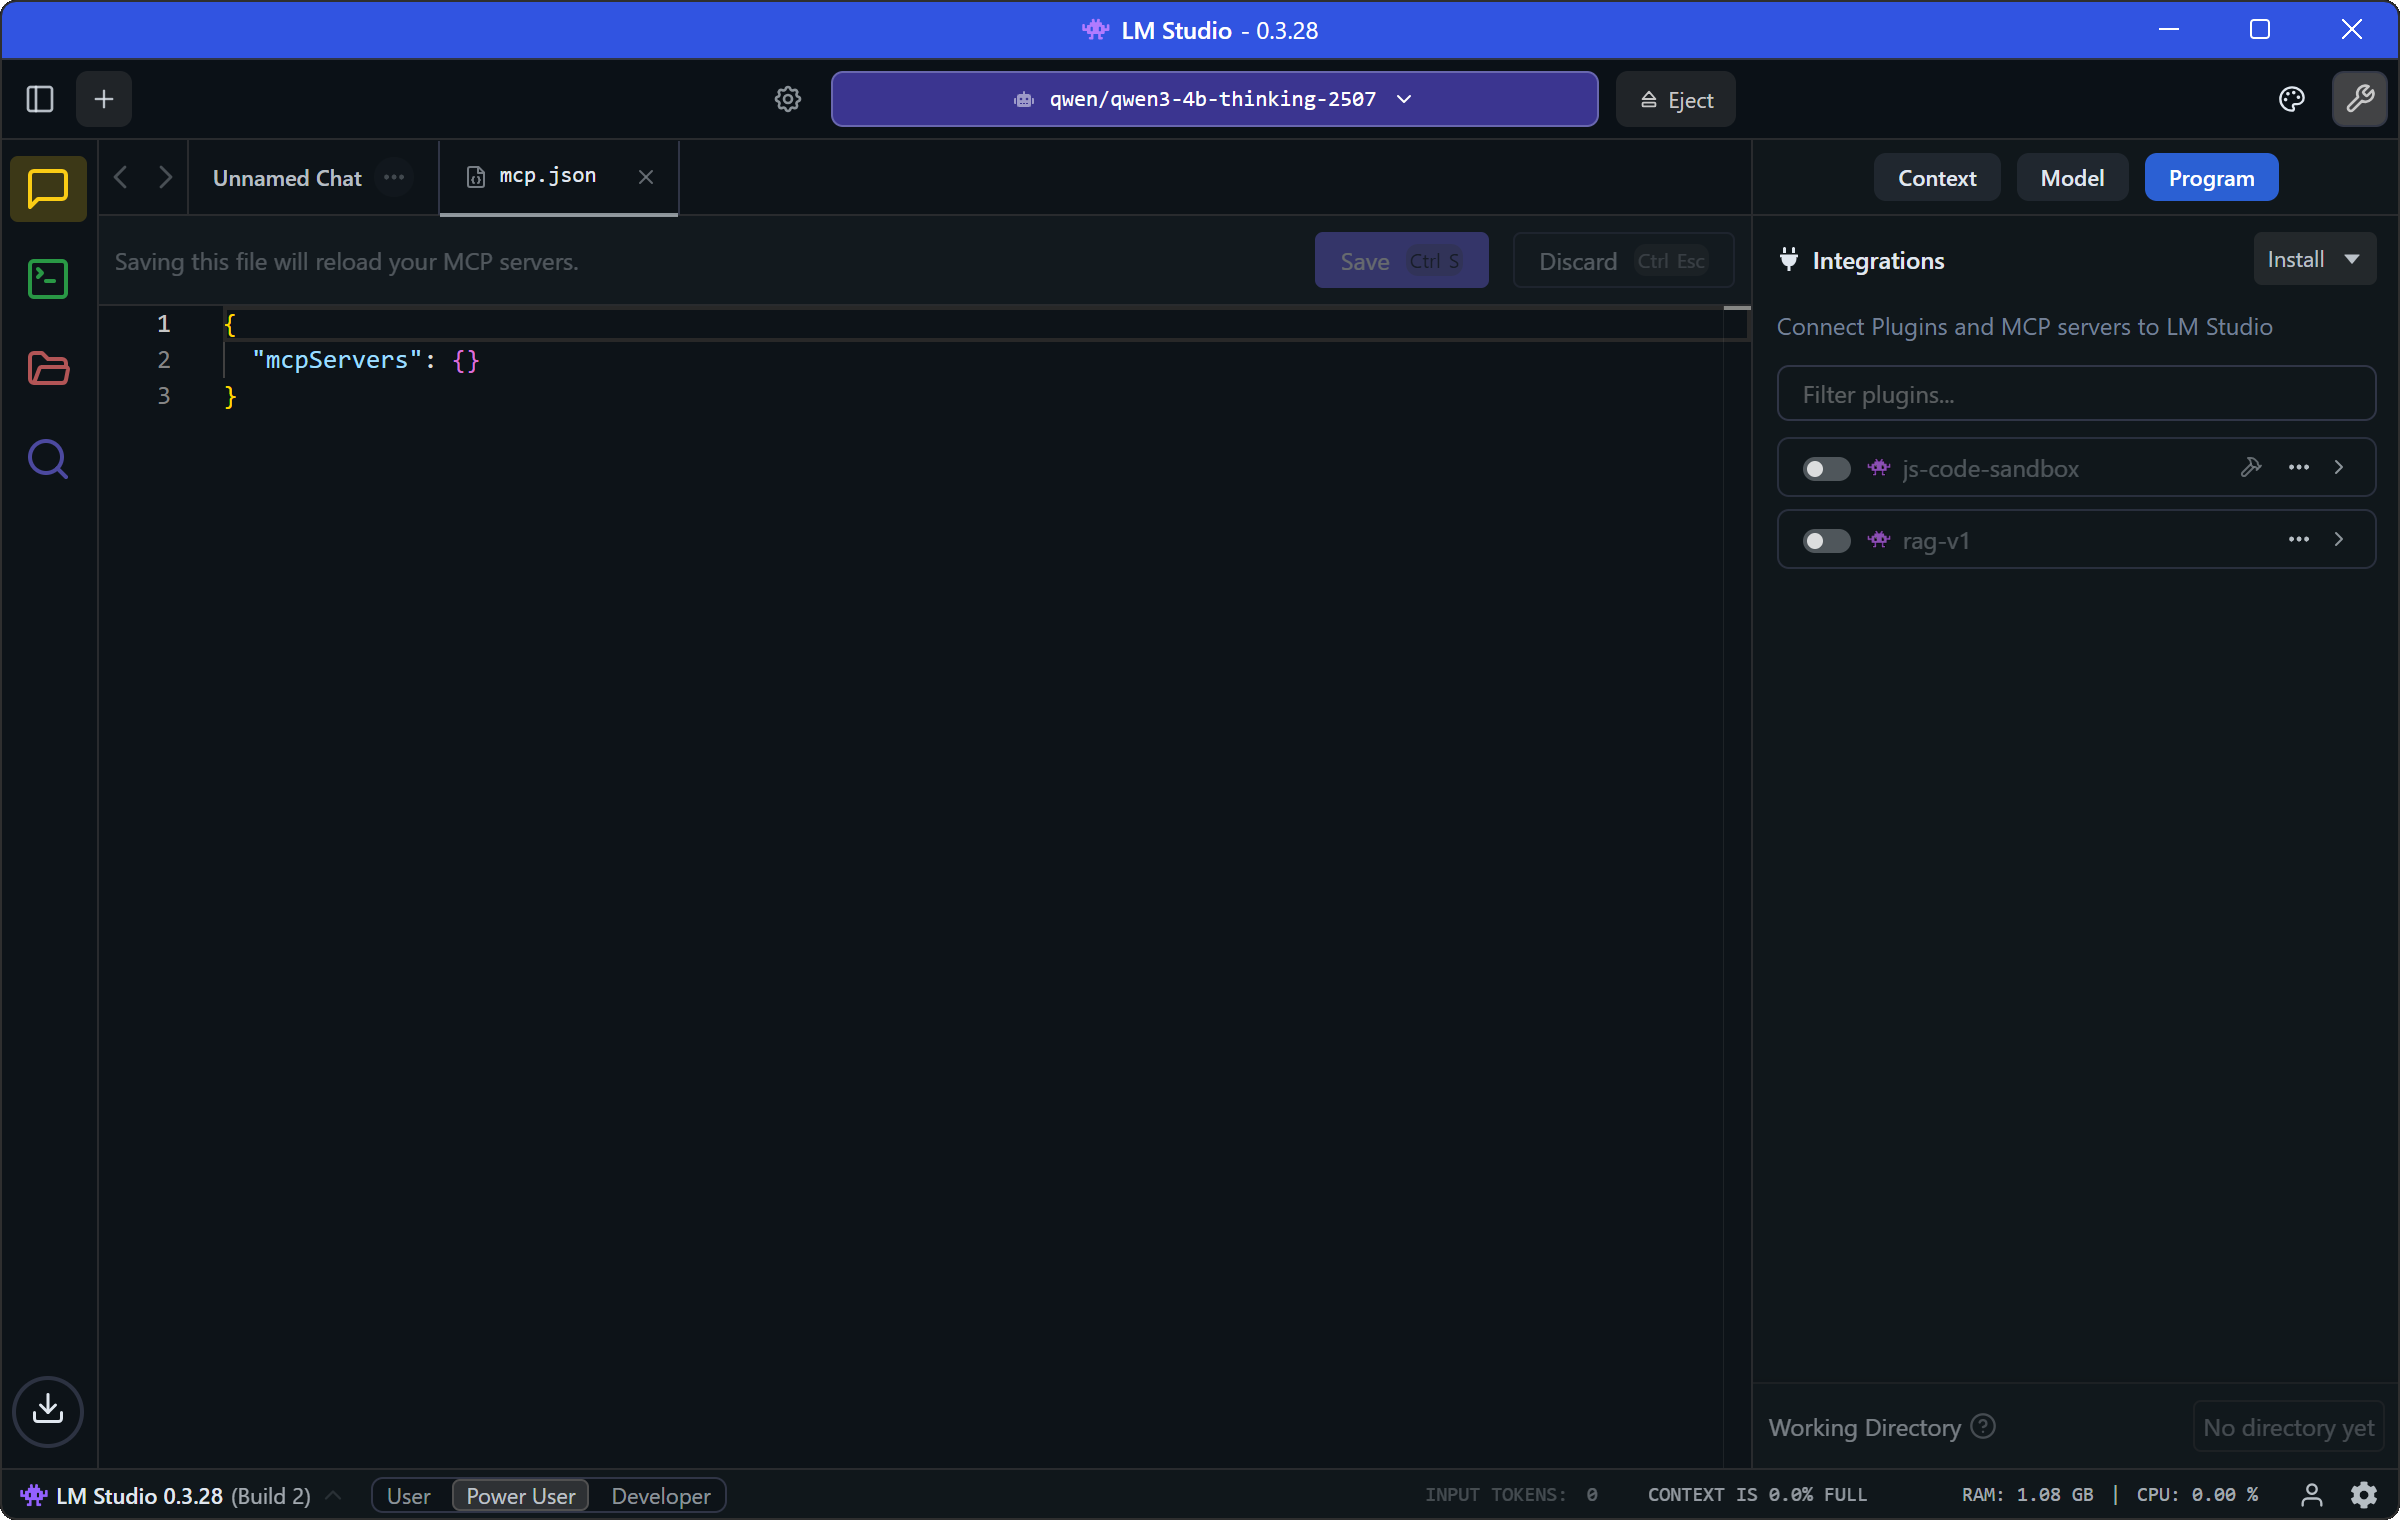
You will now see the mcp.json file opened directly in LM Studio:
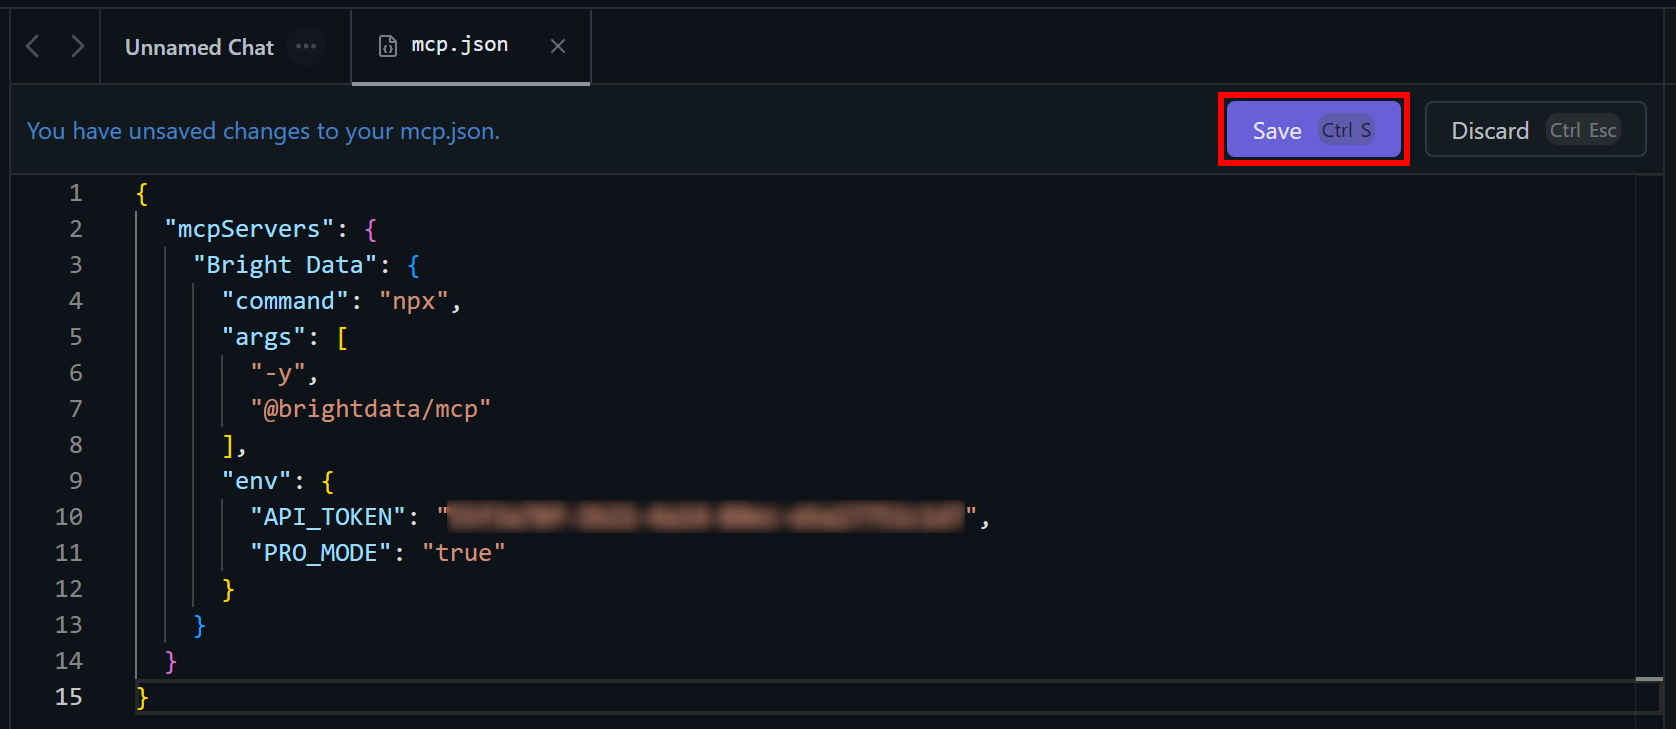
In this file, paste the following JSON configuration:
{
  "mcpServers": {
    "Bright Data": {
      "command": "npx",
      "args": ["-y", "@brightdata/mcp"],
      "env": {
        "API_TOKEN": "<YOUR_BRIGHT_DATA_API_KEY>",
        "PRO_MODE": "true"
      }
    }
  }
}
This setup mirrors the npx command tested earlier, using environment variables as credentials and settings:
API_TOKENis required. Set it to your Bright Data API key obtained earlier.PRO_MODEis optional, so you can remove it if you don’t want to enable Pro Mode.
Once done, press “Save” to apply the Web MCP integration:
Great! You can now close the mcp.json tab and return to your chat tab.
Step #5: Verify the Web MCP Tools Are Available
LM Studio can now start the Web MCP server locally using the configured npx command and access tools from it.
In particular, in the “Program” tab, you should see a new plugin called mcp/bright-data. Verify that you have access to all Web MCP tools by clicking the “View plugin’s tools” button:
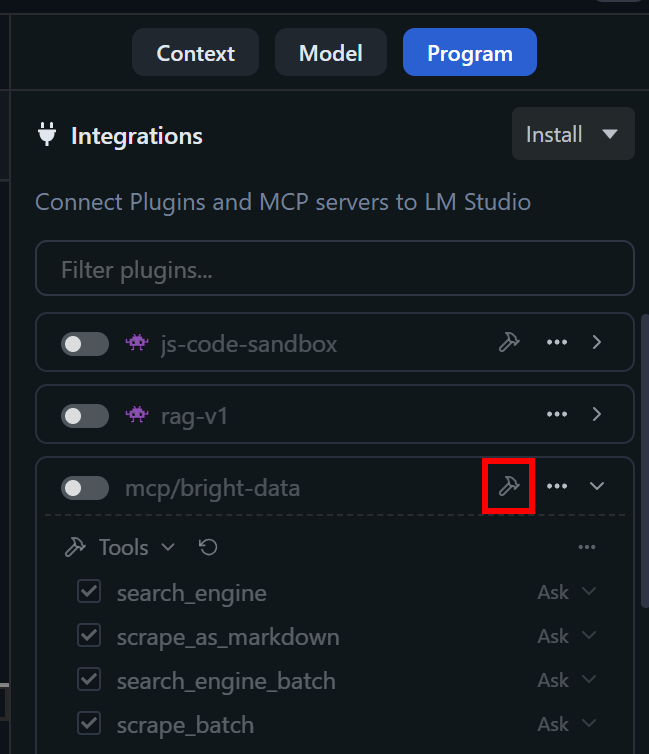
If Pro mode is disabled (default behavior), you will only see the search_engine and scraped_as_markdown tools (and their fetch versions). Instead, if Pro mode is enabled (PRO_MODE: "true" is set), you should see all 60+ available tools.
This confirms that the integration with Bright Data’s Web MCP server in LM Studio has been successful!
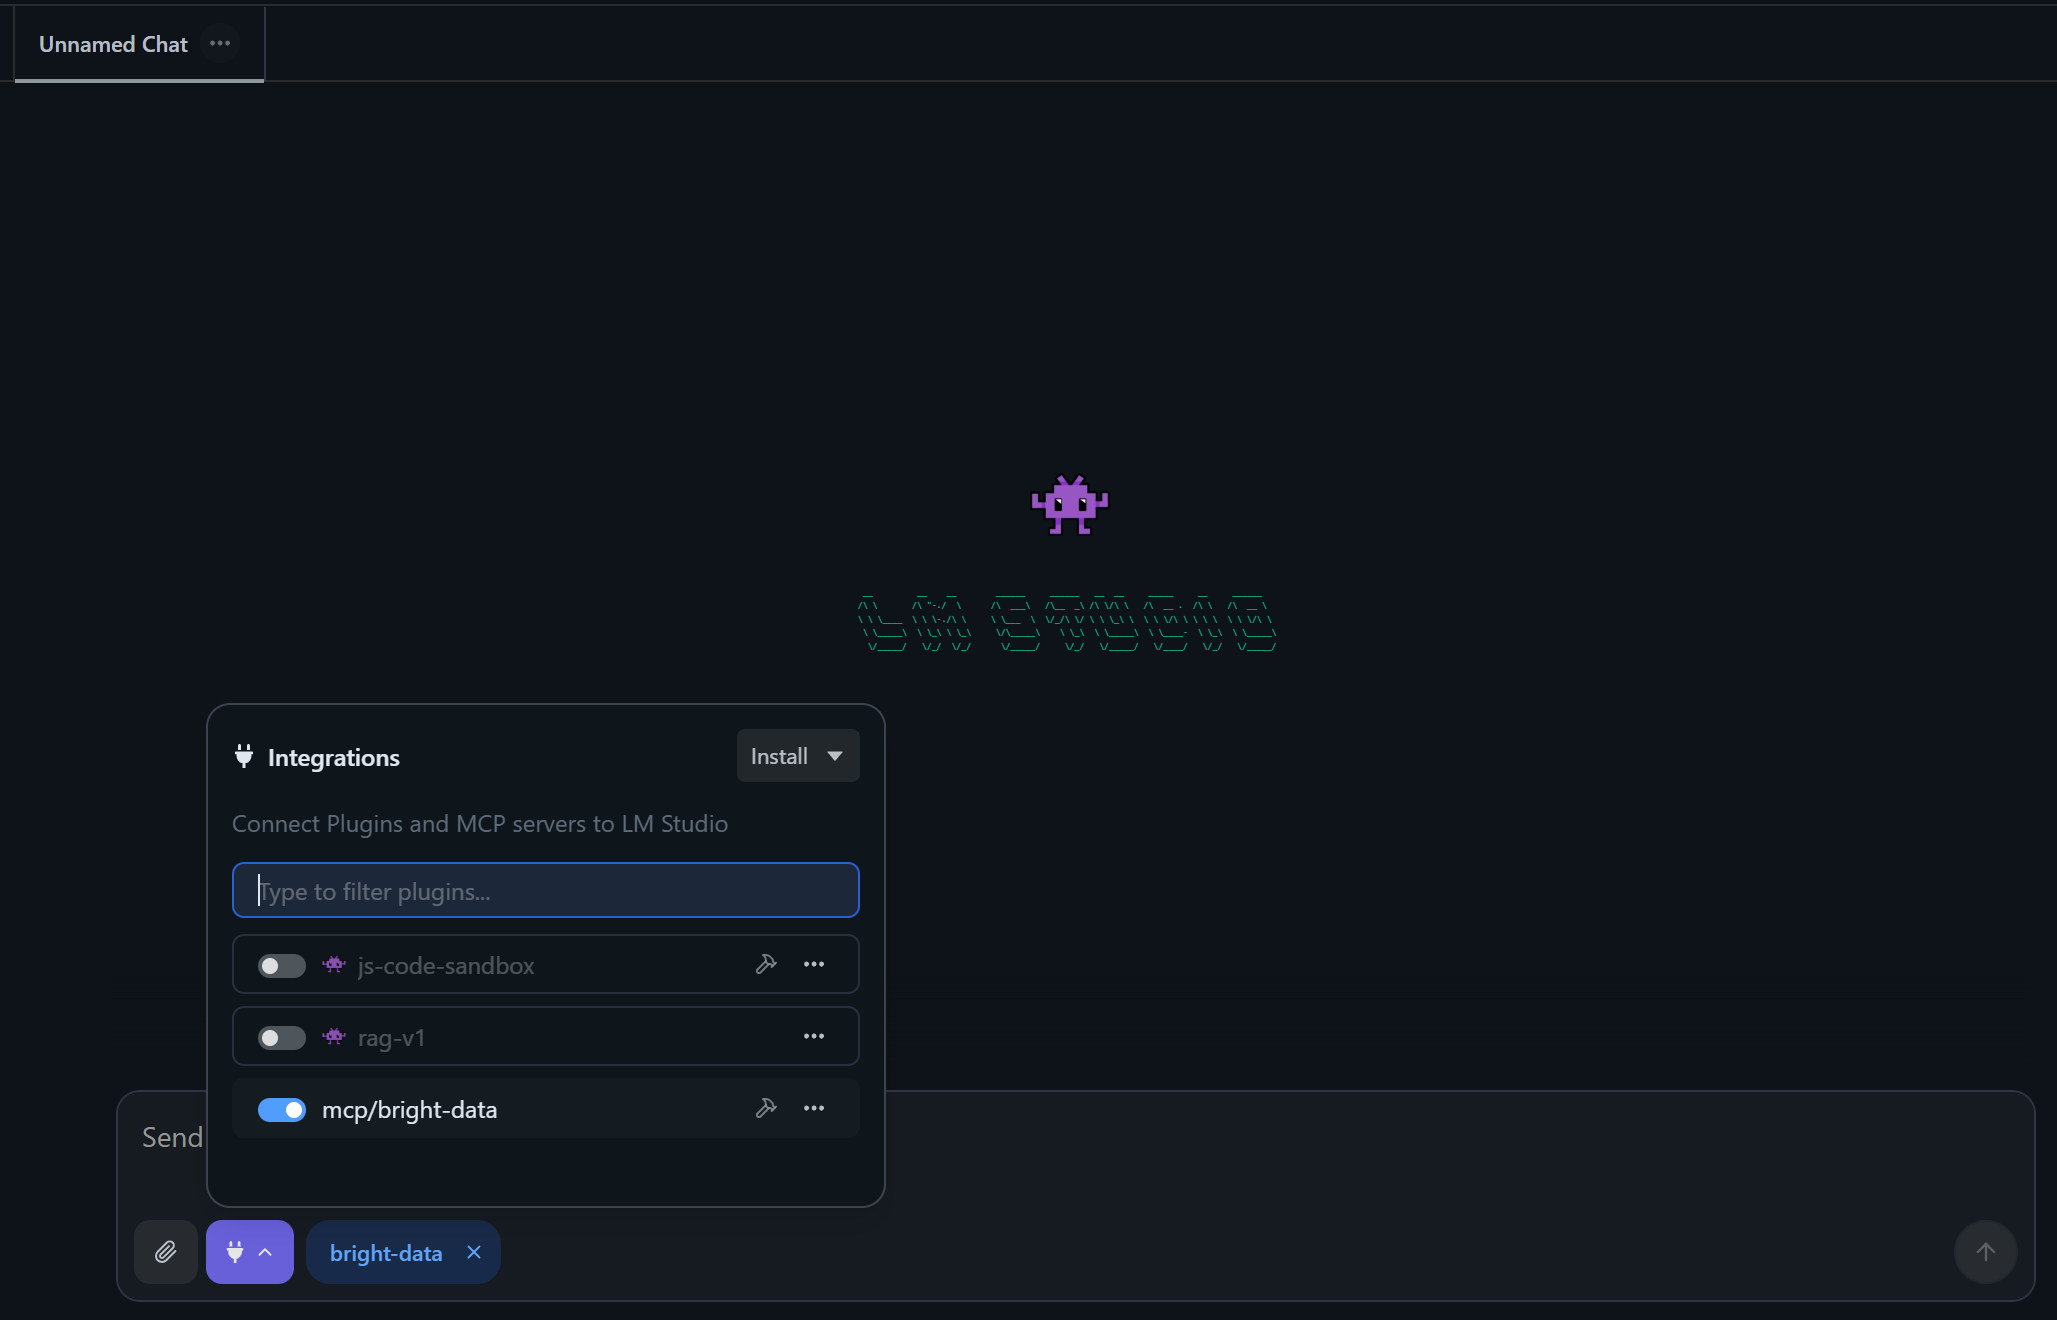
Then, activate the mcp/bright-data plugin by toggling it:
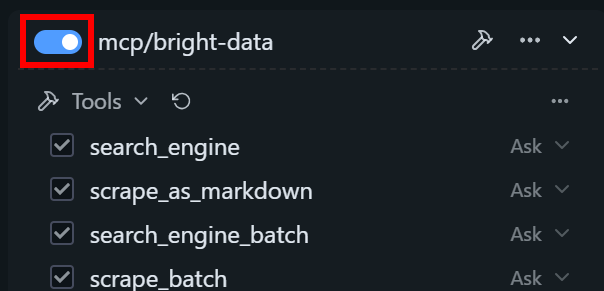
In the chat tab, you will see “bright-data” listed as an active plugin:
Terrific! You now have an enhanced AI model with access to multiple useful Web MCP tools.
Step #6: Prepare the AI Model for Tool Execution
If you try to run any prompt right now, it will probably fail with an error like this:
“Trying to keep the first XXXX tokens when context the overflows. However, the model is loaded with context length of only 4096 tokens, which is not enough. Try to load the model with a larger context length, or provide a shorter input.”
This happens because, by default, LM Studio sets the context length of a newly downloaded model to 4096 tokens. That is often too low for tool execution!
To fix that issue, click the gear icon on the left of the model selection dropdown. Then, increase the “Context Length” to a larger value:
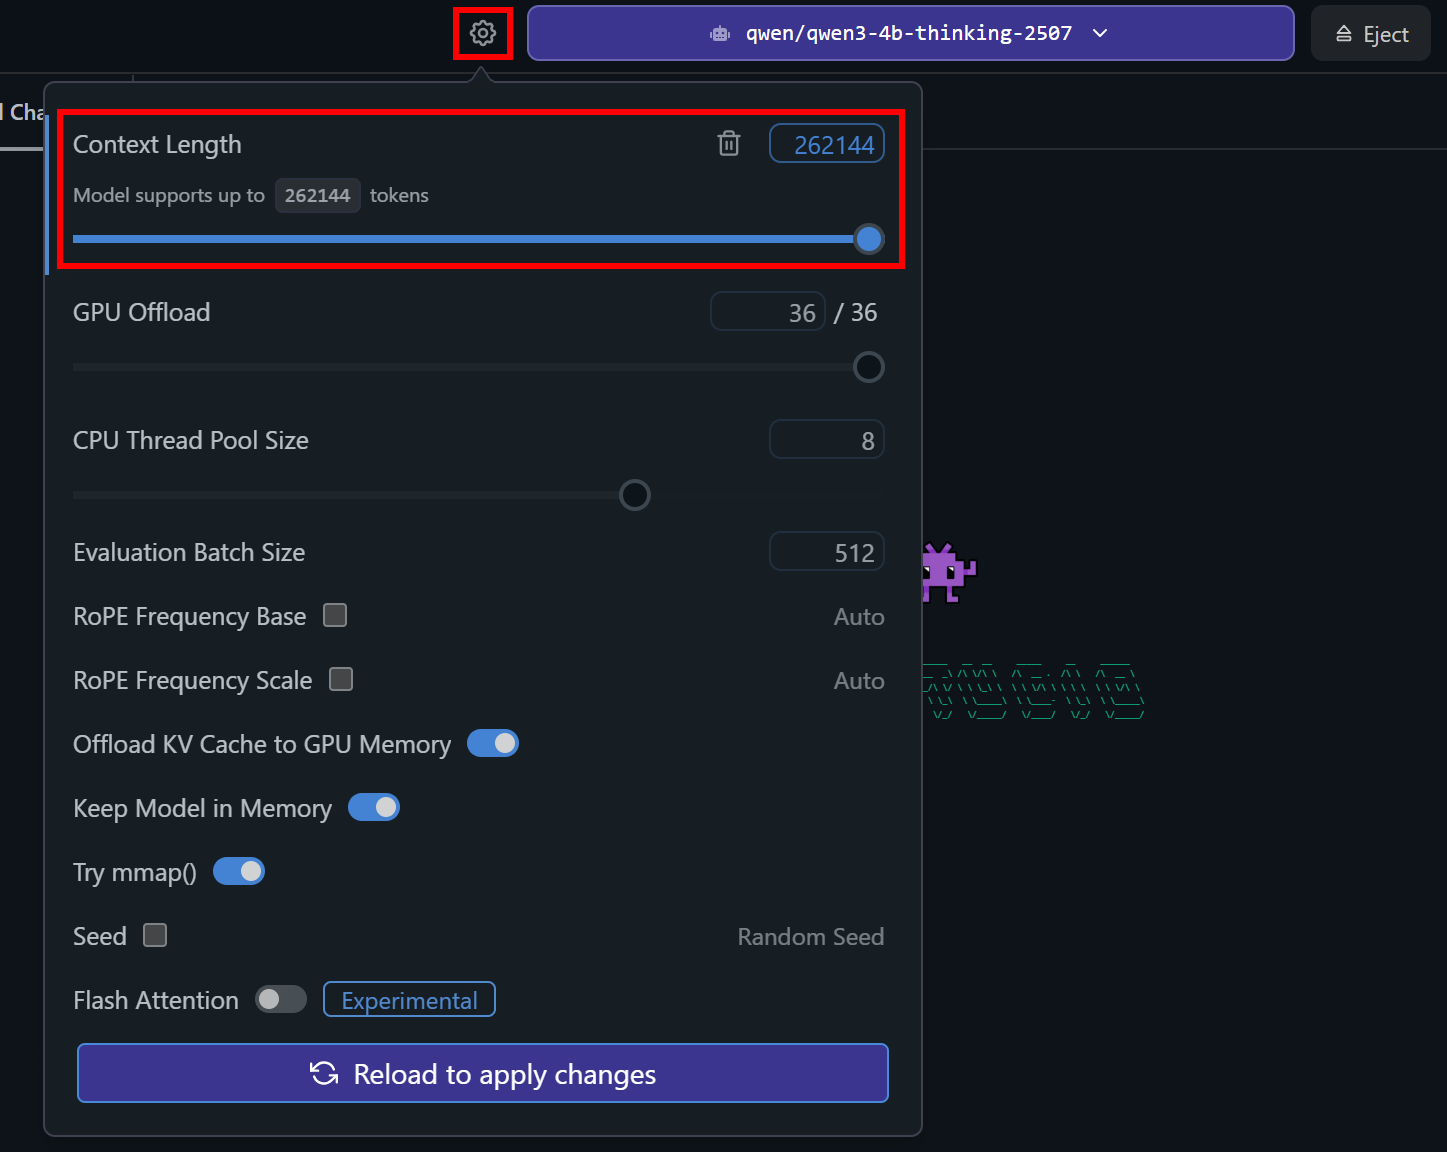
Now, save the changes by clicking the “Reload to apply changes” button. This reloads the model with the updated configuration.
Perfect! The local LLM is now ready for tool execution.
Step #7: Test Your Supercharged Local AI Model
The local AI model in LM Studio now has access to all web data retrieval and interaction capabilities provided by Web MCP. To verify this, try testing your model with a prompt like this:
I am the owner of the following shop in Manhattan:
"https://www.google.com/maps/place/The+$10+Shop/@40.7417447,-73.9932183,17z/data=!3m1!4b1!4m6!3m5!1s0x89c259067c12c915:0x71f11ffbb8a2223c!8m2!3d40.7417447!4d-73.9932183!16s%2Fg%2F11tt34hz63"
Please retrieve the Google Maps reviews for this location and provide actionable feedback on areas I can improve to enhance customer experience.
This prompt assumes that you are the owner of a shop listed on Google Maps and want AI to generate actionable insights from reviews. Normally, this task would require a lot of manual work, such as reading each review, understanding it, and extracting unique insights.
Thanks to the Web MCP integration in LM Studio, the AI model can automatically retrieve reviews from Google Maps and feed that data into the model to generate actionable feedback.
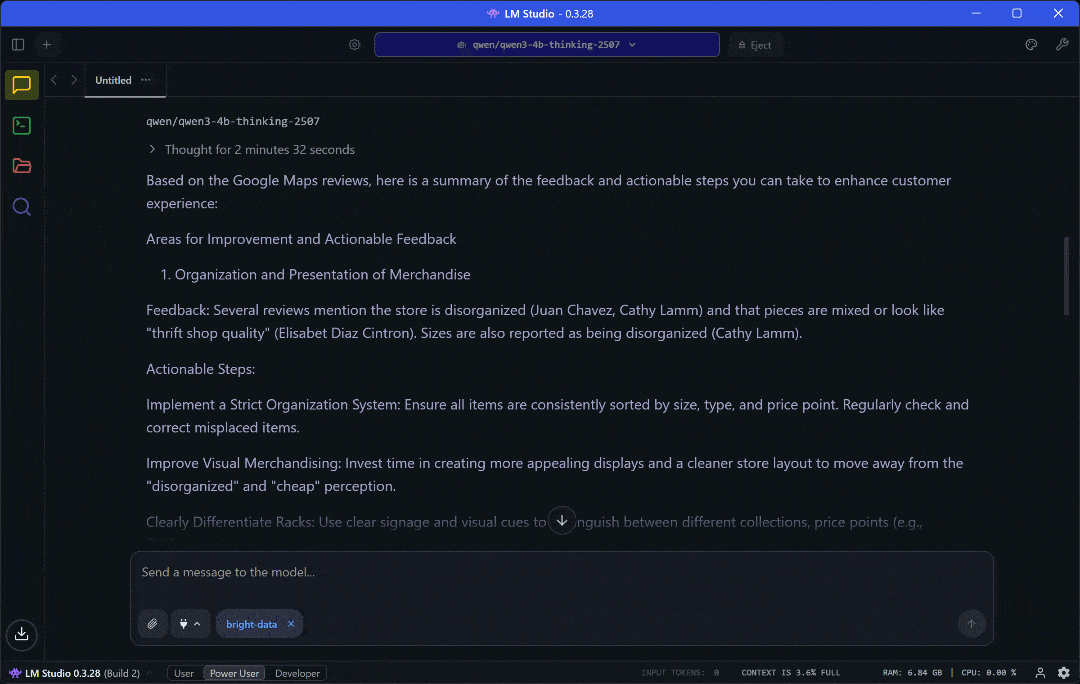
Execute the prompt, and you should see something like this:
What happens here is:
- The local model processes the prompt, thinks about the task, and generates a plan.
- It calls the
web_data_google_maps_reviewstool from Web MCP. The tool’s description is “Quickly read structured Google Maps reviews data. Requires a valid Google Maps URL. This can be a cache lookup, making it more reliable than scraping.” So, that is exactly the right tool for the goal! - The local model executes the tool, retrieves the reviews data, and processes it.
- It then analyzes the data and produces a report with actionable insights grounded in real reviews.
The result will be a report like:
Wow! With a single prompt, you get a complete report containing all the insights you need.
As you can verify on the Google Maps source page, the report is backed by live review data retrieved on the fly.
If you have ever tried to scrape Google Maps, you know how challenging it can be due to required user interactions and anti-bot protections. Surely, an AI model could not do this on its own. This is exactly where a Web MCP server makes the difference!
Feel free to experiment with different prompts. With the wide range of Bright Data Web MCP tools, you can tackle many other use cases.
Et voilà! You just experienced the power of combining Bright Data’s Web MCP with LM Studio.
Conclusion
In this blog post, you learned how to take advantage of MCP integration in LM Studio. In particular, you saw how to extend it with tools from Bright Data’s Web MCP, executed locally using the @brightdata/mcp and connected to a local Qwen3 model in LM Studio.
This integration equips your model with tools for web search, structured data extraction, live web data feeds, automated web interactions, and more. To build even more sophisticated AI agents that rely on data, explore the full range of AI-ready products and services available within Bright Data’s AI ecosystem.
Create a Bright Data account for free today and get your hands on our web data tools!

Technical Writer
Antonello Zanini is a technical writer, editor, and software engineer with 5M+ views. Expert in technical content strategy, web development, and project management.


