
In this guide, you will see the following:
- What Pica is and why it is an excellent choice for building AI agents that integrate with external tools.
- Why AI agents require integration with third-party solutions for data retrieval.
- How to use the built-in Bright Data connector in a Pica agent to fetch web data for more accurate responses.
Let’s dive in!
What Is Pica?
Pica is an open-source platform designed to quickly build AI agents and SaaS integrations. It provides simplified access to 125+ third-party APIs without requiring the management of keys or complex configurations.
The goal of Pica is to make it effortless for AI models to connect with external tools and services. With Pica, you can set up integrations in just a few clicks and then easily use them in your code. This enables AI workflows to handle real-time data retrieval, deal with complex automation, and more.
The project has rapidly gained popularity on GitHub, amassing over 1,300 stars in just a few months. That demonstrates its strong community growth and adoption.
Why AI Agents Need Web Data Integrations
Every AI agent framework inherits core limitations from the LLMs on which it is built. Since LLMs are pre-trained on static datasets, they lack real-time awareness and cannot reliably access live web content.
This often results in outdated answers or even hallucinations. To overcome these limitations, agents (and the LLMs they depend on) need access to trusted, up-to-date web data. Why web data specifically? Because the web remains the most comprehensive and current source of information available.
That is why an effective AI agent must be able to quickly and easily integrate with third-party AI web data providers. And this is exactly where Pica comes into play!
On the Pica platform, you will find over 125 available integrations, including one for Bright Data:
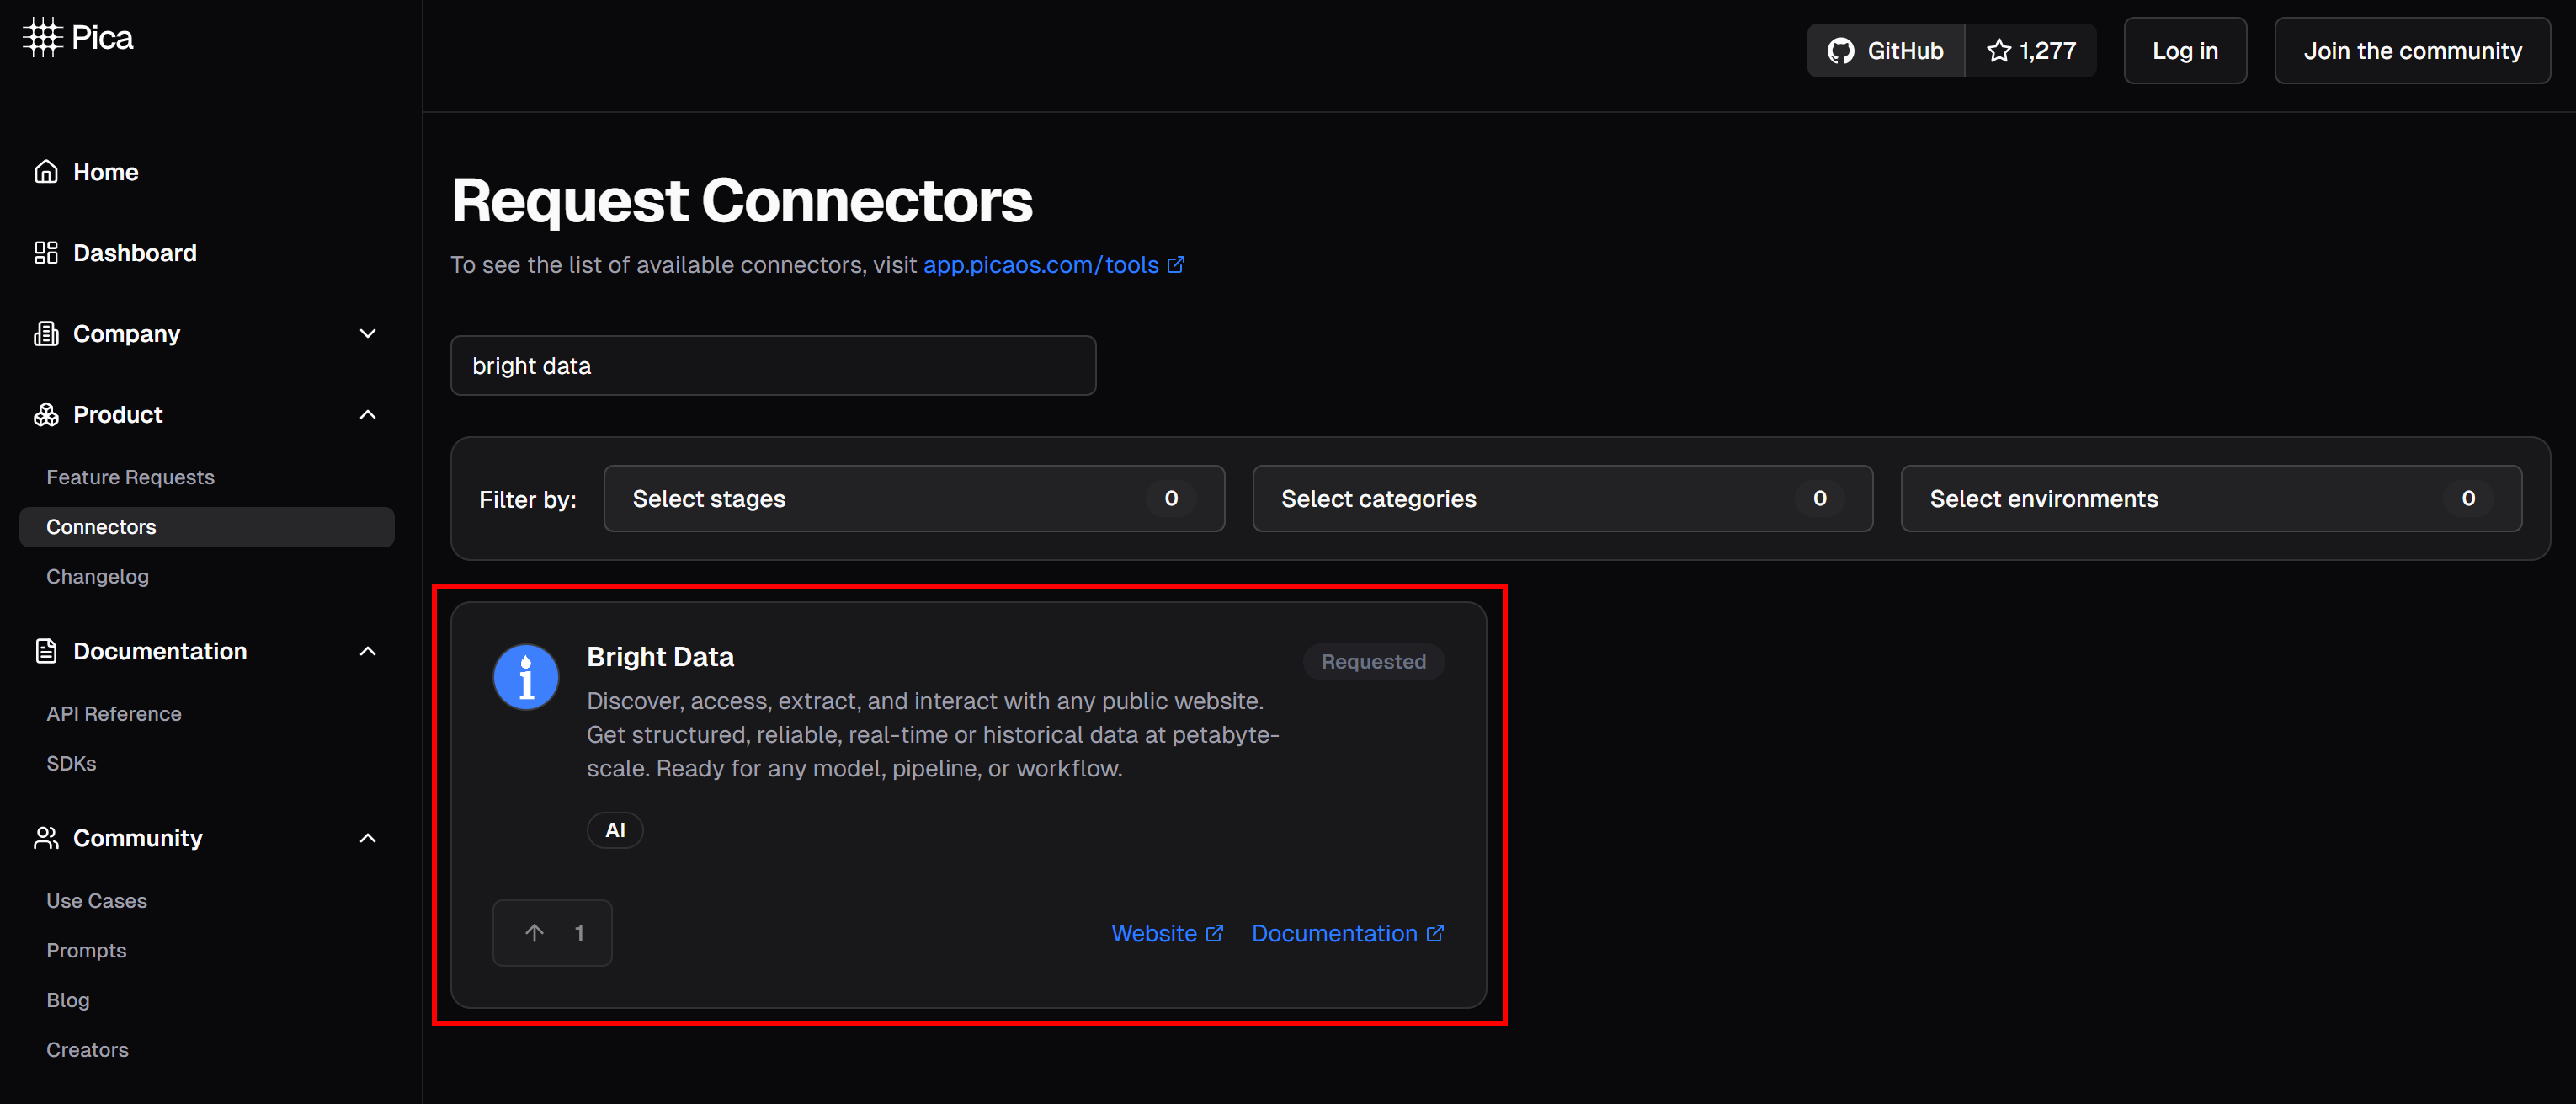
The Bright Data integration empowers your AI agents and workflows to seamlessly connect to:
- Web Unlocker API: An advanced scraping API that bypasses bot protections, delivering any web page’s content in Markdown format.
- Web Scraper APIs: Specialized solutions for ethically extracting fresh, structured data from popular sites like Amazon, LinkedIn, Instagram, and 40 others.
These tools give your AI agents, workflows, or pipelines the ability to back their responses with reliable web data, extracted on the fly from relevant pages. See this integration in action in the next chapter!
How to Build an AI Agent That Can Retrieve Data From the Web with Pica and Bright Data
In this guided section, you will learn how to use Pica to build a Python AI agent that connects to the Bright Data integration. This way, your agent will be able to retrieve structured web data from sites like Amazon.
Follow the steps below to create your Bright Data–powered AI agent with Pica!
Prerequisites
To follow this tutorial, you need:
- Python 3.9 or higher installed on your machine (we recommend the latest version).
- A Pica account.
- A Bright Data API key.
- An OpenAI API key.
Do not worry if you do not have a Bright Data API key or a Pica account yet. We will show you how to set them up in the next steps.
Step #1: Initialize Your Python Project
Open a terminal and create a new directory for your Pica AI agent project:
mkdir pica-bright-data-agentThe pica-bright-data-agent folder will contain the Python code for your Pica agent. This will use Bright Data integration for web data retrieval.
Next, navigate into the project directory and create a virtual environment inside it:
cd pica-bright-data-agent
python -m venv venv
Now, open the project in your favorite Python IDE. We recommend Visual Studio Code with the Python extension or PyCharm Community Edition.
Inside the project folder, create a new file named agent.py. Your directory structure should look like this:
pica-bright-data-agent/
├── venv/
└── agent.py
Activate the virtual environment in your terminal. In Linux or macOS, run:
source venv/bin/activateEquivalently, on Windows, fire this command:
venv/Scripts/activateIn the next steps, you will install the required Python packages. If you prefer to install everything right now, with your virtual environment activated, simply run:
pip install langchain langchain-openai pica-langchain python-dotenvYou are all set! You now have a Python development environment ready to build an AI agent with Bright Data integration in Pica.
Step #2: Set up Environment Variables Reading
Your agent will connect to third-party services like Pica, Bright Data, and OpenAI. To keep these integrations secure, avoid hardcoding your API keys directly into your Python code. Instead, store them as environment variables.
To make loading environment variables easier, utilize the python-dotenv library. In your activated virtual environment, install it with:
pip install python-dotenvNext, import the library and call load_dotenv() at the top of your agent.py file to load your environment variables:
import os
from dotenv import load_dotenv

load_dotenv()
This function allows your script to read variables from a local .env file. Create this .env file in the root of your project directory. Your folder structure will look like this:
pica-bright-data-agent/
├── venv/
├── .env         # <-----------
└── agent.py
Great! You are now set up to securely handle your API keys and other secrets using environment variables.
Step #3: Configure Pica
If you have not done so yet, create a free Pica account. By default, Pica will generate an API key for you. You can use that API key with LangChain or any other supported integration.
Visit the “Quick start” page and select the “LangChain” tab:
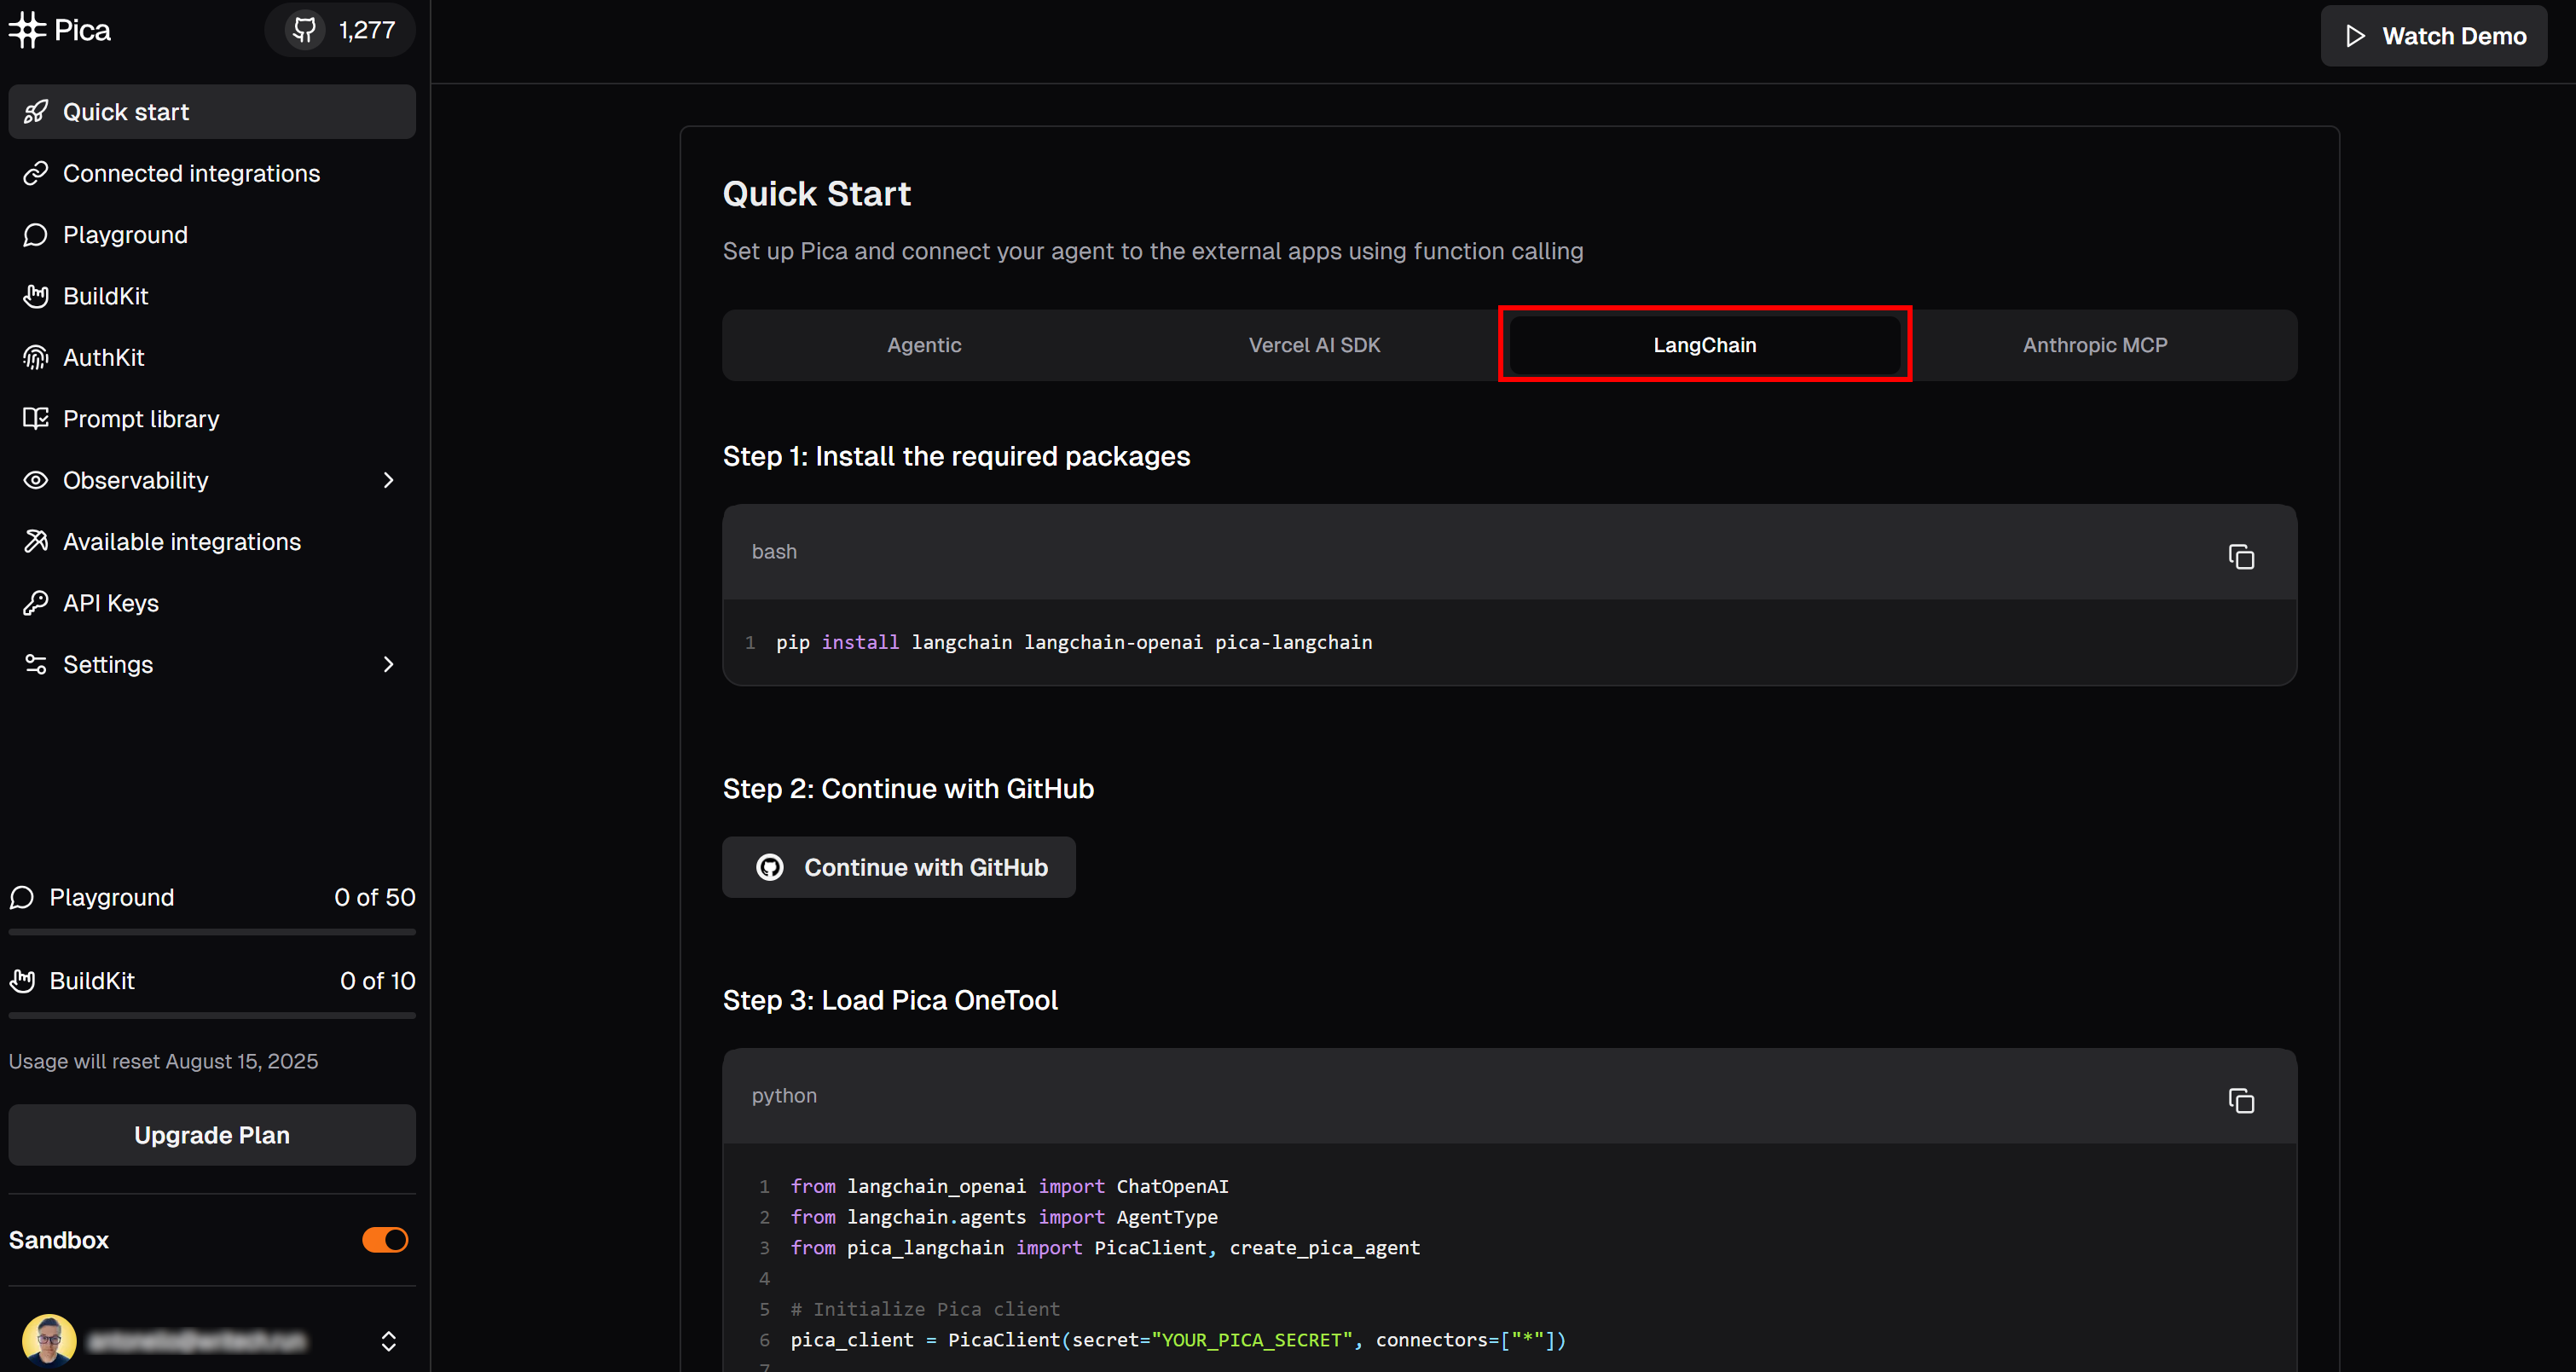
Here, you will find instructions to get started with Pica in LangChain. Specifically, follow the installation command shown there. In your activated virtual environment, run:
pip install langchain langchain-openai pica-langchainNow, scroll down until you reach the “API Key” section:
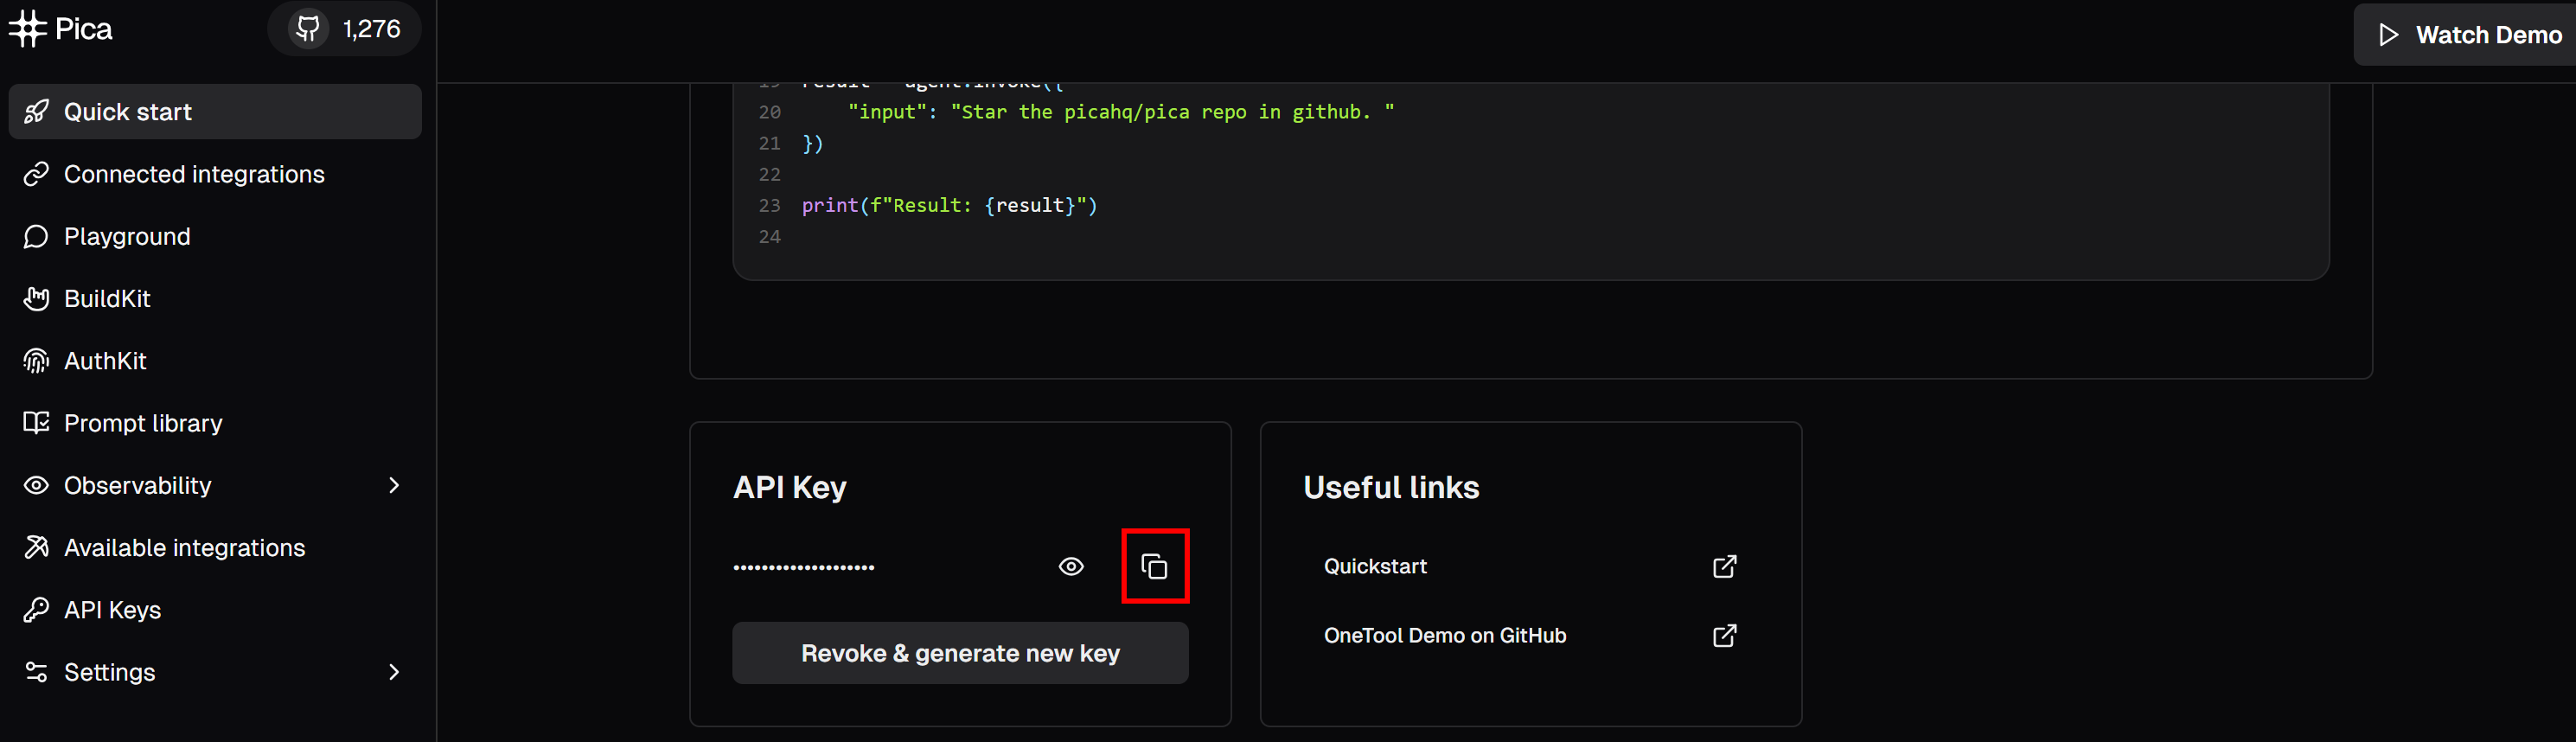
Click the “copy to clipboard” button to copy your Pica API key. Then, paste it into your .env file by defining an environment variable like this:
PICA_API_KEY="<YOUR_PICA_KEY>"Replace the <YOUR_PICA_KEY> placeholder with the actual API key you just copied.
Fantastic! Your Pica account is now fully configured and ready to use in your code.
Step #4: Integrate Bright Data in Pica
Before getting started, make sure to follow the official guide to set up a Bright Data API key. You will need this key to connect your agent to Bright Data using the built-in integration available on the Pica platform.
Now that you have your API key, you can add the Bright Data integration in Pica.
In the “LangChain” tab of your Pica dashboard, scroll down to the “Recent Integrations” section and press the “Browse integrations” button:

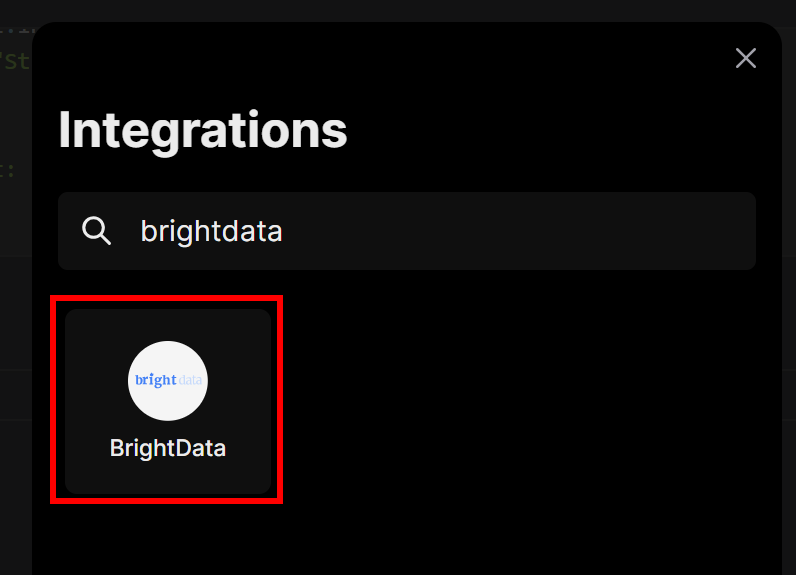
This will open a modal. In the search bar, type “brightdata” and select the “BrightData” integration:
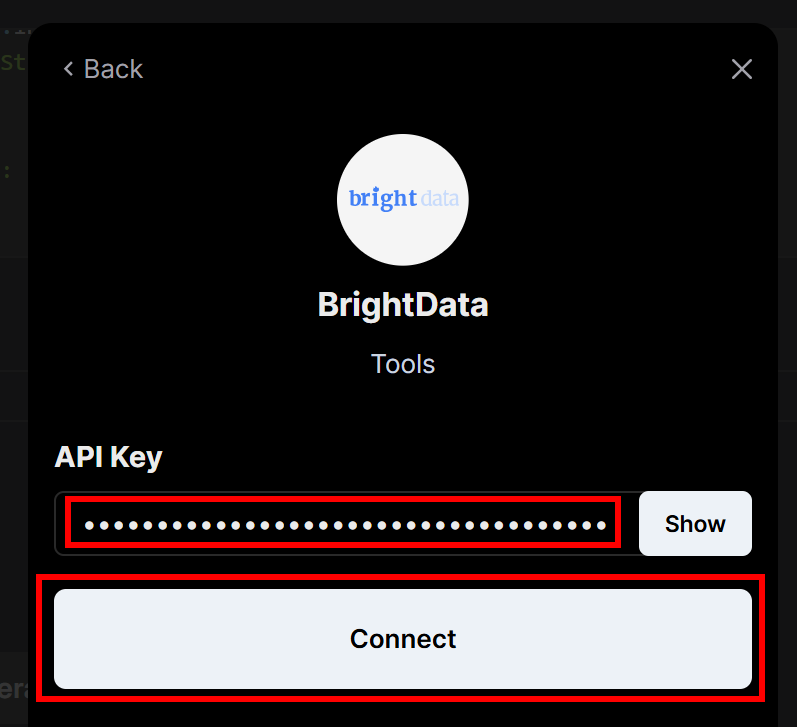
You will be prompted to enter the Bright Data API key you created earlier. Paste it in, then click the “Connect” button:
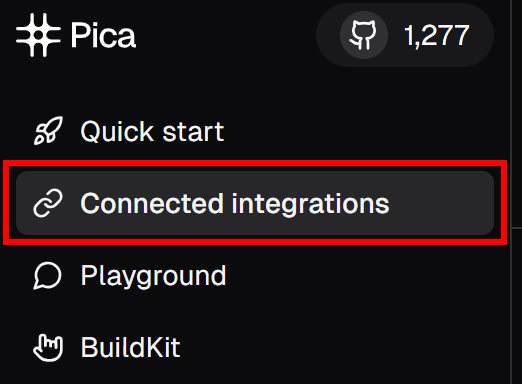
Next, on the left-hand menu, click on the “Connected Integrations” menu item:
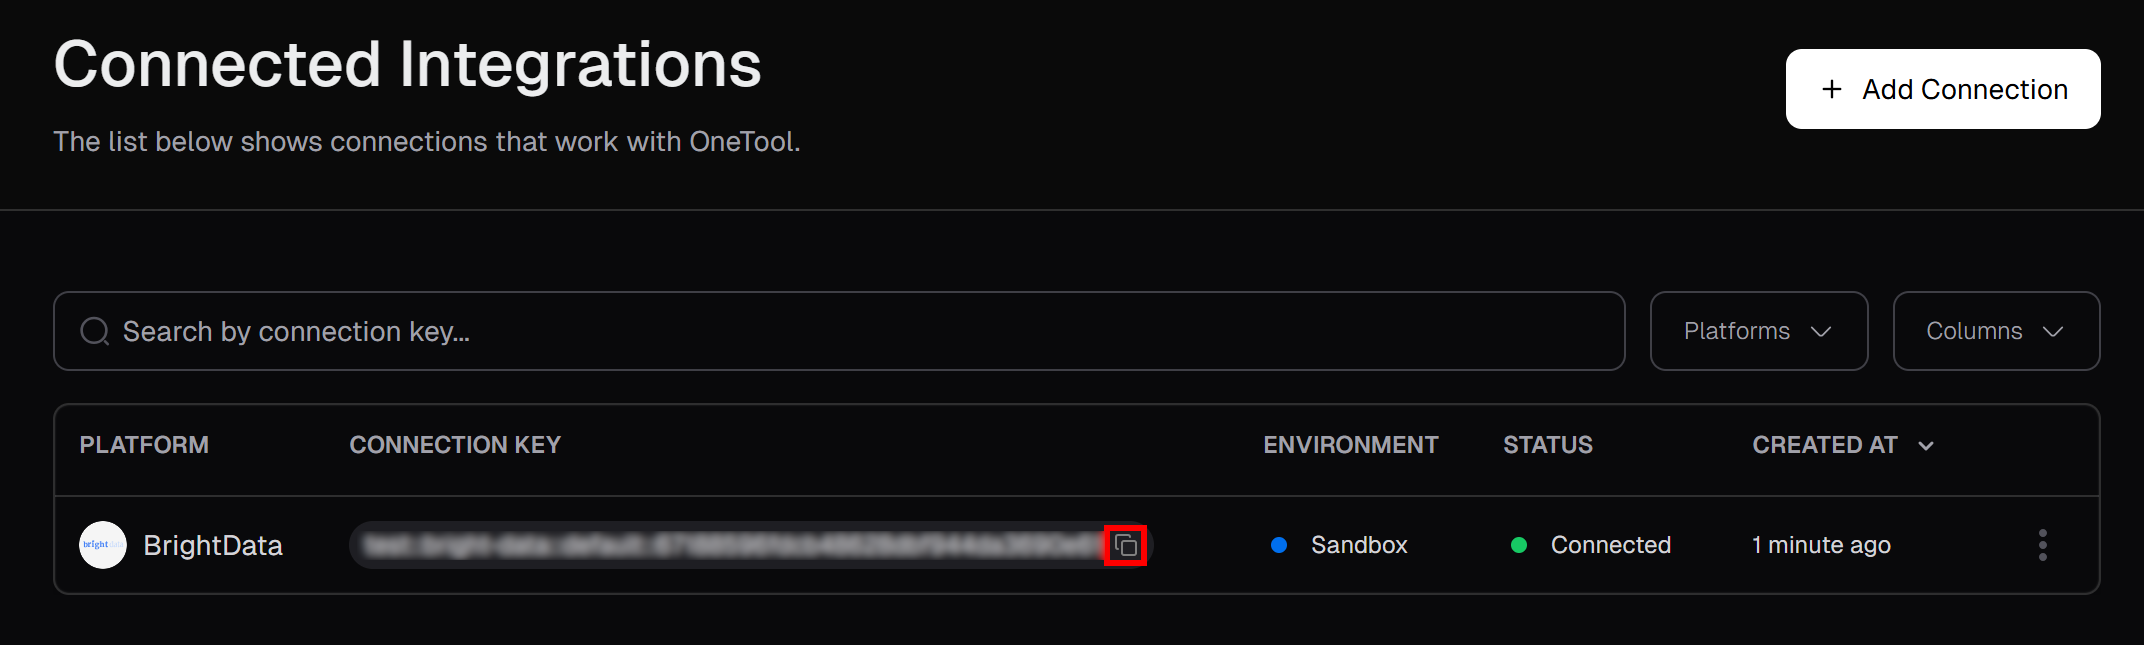
On the “Connected Integrations” page, you should now see Bright Data listed as a connected integration. From the table, click the “Copy to clipboard” button to copy your connection key:
Then, paste it into your .env file by adding:
PICA_BRIGHT_DATA_CONNECTION_KEY="<YOUR_PICA_BRIGHT_DATA_CONNECTION_KEY>"Be sure to replace the <YOUR_PICA_BRIGHT_DATA_CONNECTION_KEY> placeholder with the actual connection key you copied.
You will need that value to initialize your Pica agent in code, so it knows to load the configured Bright Data connection. See how to do that in the next step!
Step #5: Initialize Your Pica Agent
In agent.py, initialize your Pica agent with:
pica_client = PicaClient(
    secret=os.environ["PICA_API_KEY"],
    options=PicaClientOptions(
        connectors=[
            os.environ["PICA_BRIGHT_DATA_CONNECTION_KEY"]
        ]
    )
)
pica_client.initialize()
The snippet above initializes a Pica client, connecting to your Pica account using the PICA_API_KEY secret loaded from your environment. Also, it selects the Bright Data integration you configured earlier from among all available connectors.
This means any AI agents you create with this client will be able to leverage Bright Data’s real-time web data retrieval capabilities.
Do not forget to import the required classes:
from pica_langchain import PicaClient
from pica_langchain.models import PicaClientOptions
Terrific! You are ready to proceed with LLM integration.
Step #6: Integrate OpenAI
Your Pica agent will need an LLM engine to understand the input prompts and perform the desired tasks using Bright Data’s capabilities.
This tutorial uses the OpenAI integration, so you’ll define the LLM for your agent in your agent.py file like this:
llm = ChatOpenAI(
    model="gpt-4o",
    temperature=0,
)
Note that all Pica LangChain examples in the documentation use temperature=0. This ensures the model is deterministic, always producing the same output for the same input.
Remember that the ChatOpenAI class comes from this import:
from langchain_openai import ChatOpenAIIn particular, ChatOpenAI expects your OpenAI API key to be defined in an environment variable named OPENAI_API_KEY. So, in your .env file, add:
OPENAI_API_KEY=<YOUT_OPENai_API_KEY>Replace the <YOUR_OPENAI_API_KEY> placeholder with your actual OpenAI API key.
Amazing! You now have all the building blocks to define your Pica AI agent.
Step #7: Define Your Pica Agent
In Pica, an AI agent consists of three main parts:
- A Pica client instance
- An LLM engine
- A Pica agent type
In this case, you want to build an AI agent that can call OpenAI functions (which in turn connect to Bright Data’s web retrieval capabilities via the Pica integration). Thus, create your Pica agent like this:
agent = create_pica_agent(
    client=pica_client,
    llm=llm,
    agent_type=AgentType.OPENAI_FUNCTIONS,
)
Do not forget to add the necessary imports:
from pica_langchain import create_pica_agent
from langchain.agents import AgentType
Marvelous! Now all that is left is to test your agent on a data retrieval task.
Step #8: Interrogate Your AI Agent
To verify that the Bright Data integration works in your Pica agent, give it a task it normally could not perform on its own. For example, ask it to retrieve updated data from a recent Amazon product page, such as the Nintendo Switch 2 (available at https://www.amazon.com/dp/B0F3GWXLTS/).
To do so, invoke your agent with this input:
agent_input = """
Use Bright Data to run a web scraping task and return the results from the following Amazon product URL:
https://www.amazon.com/dp/B0F3GWXLTS/
"""
result = agent.invoke({
    "input": agent_input
})
Note: The prompt is intentionally explicit. It tells the agent exactly what to do, which page to scrape, and which integration to use. This ensures that the LLM will leverage the Bright Data tools configured through Pica, producing the expected results.
Finally, print the agent output:
print(f"\nAgent Result:\n{result}")And with this last line, your Pica AI agent is complete. Time to see it all come together in action!
Step #9: Put It All Together
Your agent.py file should now contain:
import os
from dotenv import load_dotenv
from pica_langchain import PicaClient, create_pica_agent
from pica_langchain.models import PicaClientOptions
from langchain_openai import ChatOpenAI
from langchain.agents import AgentType

# Load environment variables from .env file
load_dotenv()

# Initialize Pica client with the specific Bright Data connector
pica_client = PicaClient(
    secret=os.environ["PICA_API_KEY"],
    options=PicaClientOptions(
        connectors=[
            os.environ["PICA_BRIGHT_DATA_CONNECTION_KEY"] # Load the specific Bright Data connection
        ]
    )
)
pica_client.initialize()

# Initialize the LLM
llm = ChatOpenAI(
    model="gpt-4o",
    temperature=0,
)

# Create your Pica agent
agent = create_pica_agent(
    client=pica_client,
    llm=llm,
    agent_type=AgentType.OPENAI_FUNCTIONS,
)

# Execute a web data retrieval task in the agent
agent_input = """
Use Bright Data to run a web scraping task and return the results from the following Amazon product URL:
https://www.amazon.com/dp/B0F3GWXLTS/
"""
result = agent.invoke({
    "input": agent_input
})

# Print the produced output
print(f"\nAgent Result:\n{result}")
As you can see, in less than 50 lines of code, you built a Pica agent with powerful data retrieval capabilities. This is possible thanks to the Bright Data integration available directly on the Pica platform.
Run your agent with:
python agent.pyIn your terminal, you should see logs similar to the following:
# Omitted for brevity...
2026-07-15 17:06:03,286 - pica_langchain - INFO - Successfully fetched 1 connections
# Omitted for brevity...
2026-07-15 17:06:05,546 - pica_langchain - INFO - Getting available actions for platform: bright-data
2026-07-15 17:06:05,546 - pica_langchain - INFO - Fetching available actions for platform: bright-data
2026-07-15 17:06:05,789 - pica_langchain - INFO - Found 54 available actions for bright-data
2026-07-15 17:06:07,332 - pica_langchain - INFO - Getting knowledge for action ID: XXXXXXXXXXXXXXXXXXXX on platform: bright-data
# Omitted for brevity...
2026-07-15 17:06:12,447 - pica_langchain - INFO - Executing action ID: XXXXXXXXXXXXXXXXXXXX on platform: bright-data with method: GET
2026-07-15 17:06:12,447 - pica_langchain - INFO - Executing action for platform: bright-data, method: GET
2026-07-15 17:06:12,975 - pica_langchain - INFO - Successfully executed Get Dataset List via bright-data
2026-07-15 17:06:12,976 - pica_langchain - INFO - Successfully executed action: Get Dataset List on platform: bright-data
2026-07-15 17:06:16,491 - pica_langchain - INFO - Executing action ID: XXXXXXXXXXXXXXXXXXXX on platform: bright-data with method: POST
2026-07-15 17:06:16,492 - pica_langchain - INFO - Executing action for platform: bright-data, method: POST
2026-07-15 17:06:22,265 - pica_langchain - INFO - Successfully executed Trigger Synchronous Web Scraping and Retrieve Results via bright-data
2026-07-15 17:06:22,267 - pica_langchain - INFO - Successfully executed action: Trigger Synchronous Web Scraping and Retrieve Results on platform: bright-data
In simpler terms, this is what your Pica agent did:
- Connected to Pica and fetched your configured Bright Data integration.
- Discovered there were 54 available tools on the Bright Data platform.
- Retrieved a list of all datasets from Bright Data.
- Based on your prompt, it selected the “Trigger Synchronous Web Scraping and Retrieve Results” tool and used it to scrape fresh data from the specified Amazon product page. Behind the scenes, this triggers a call to the Bright Data Amazon Scraper, passing in the Amazon product URL. The scraper will retrieve and return the product data.
- Successfully executed the scraping action and returned the data.
Your output should look something like this:

Paste this output into a Markdown editor, and you will see a well-formatted product report like this:

As you can tell, the agent was able to produce a Markdown report containing meaningful, up-to-date data from the Amazon product page. You can verify the accuracy by visiting the target product page in your browser:

Notice how the produced data is real data from the Amazon page, not hallucinated by the LLM. That is a testament to the scraping done through Bright Data’s tools. And this is just the beginning!
With the wide range of Bright Data actions available in Pica, your agent can now retrieve data from virtually any website. That includes complex targets like Amazon that are known for strict anti-scraping measures (such as the notorious Amazon CAPTCHA).
Et voilà! You just experienced seamless web scraping, powered by Bright Data integration within your Pica AI agent.
Conclusion
In this article, you saw how to use Pica to build an AI agent that can back its responses with fresh web data. This was made possible thanks to Pica’s built-in integration with Bright Data. The Pica Bright Data connector gives AI the ability to fetch data from any web page.
Keep in mind, this was just a simple example. If you want to build more advanced agents, you will need robust solutions for fetching, validating, and transforming live web data. That is precisely what you can find in the Bright Data AI infrastructure.
Create a free Bright Data account and start exploring our AI-ready web data extraction tools!

Technical Writer
Antonello Zanini is a technical writer, editor, and software engineer with 5M+ views. Expert in technical content strategy, web development, and project management.


