

In this guide, you will learn:
- What Pydoll is and the features it provides
- How to use it to scrape JavaScript-powered websites
- How to bypass Cloudflare protection
- Its biggest limitations
- How to overcome those limitations using rotating proxy integration
- The top Python-based alternatives to Pydoll
Let’s dive in!
An Introduction to Pydoll
Discover what Pydoll is, how it works, and what it offers as a Python web scraping library.
What It Is
Pydoll is a Python browser automation library built for web scraping, testing, and automating repetitive tasks. What sets it apart is that it eliminates the need for traditional web drivers. In detail, it connects directly to browsers through the DevTools Protocol—no external dependencies required.
Pydoll’s first stable release, version 1.0, launched in February 2026. That makes it a relatively new player in the web scraping space. Despite that, it has already gained strong momentum, earning over 3,000 stars on GitHub:

As you can tell, the library is gaining a lot of popularity in the Python web scraping community.
Features
Here is a summary of the main features offered by Pydoll:
- Zero webdrivers: Eliminates browser driver dependency, reducing version mismatch issues and simplifying setup for Chromium-based automation.
- Async-first architecture: Built entirely on asyncio for high concurrency, efficient memory usage, and modern Python development patterns.
- Human-like interactions: Mimics realistic typing, mouse movements, and clicking to reduce bot detection during automation.
- Event-driven capabilities: Enables real-time reaction to browser, DOM, network, and lifecycle events for responsive automation.
- Multi-browser support: Compatible with Chrome, Edge, and other Chromium browsers using the same unified interface.
- Screenshot and PDF export: Capture full pages, specific elements, or generate high-quality PDFs from any loaded webpage.
- Native Cloudflare bypass: Automatically bypasses Cloudflare anti-bot without third-party services, mimicking trusted browser sessions when IP reputation is high.
- Concurrent scraping: Scrapes multiple pages or websites in parallel, dramatically reducing total execution time.
- Advanced keyboard control: Simulates real user typing with precise control over timing, modifiers, and special key handling.
- Powerful event system: Provides real-time monitoring and handling of network requests, page loads, and custom browser events.
- File upload support: Automates file uploads using both direct input and interactive file chooser dialogs.
- Proxy integration: Supports proxy usage for IP rotation, geo-targeting, or avoiding rate limits during scraping.
- Request interception: Intercept, modify, or block HTTP requests and responses for advanced automation and scraping control.
Find out more in the official documentation.
Using Pydoll for Web Scraping: Complete Tutorial
In this tutorial section, you will learn how to use Pydoll to scrape data from the asynchronous, JavaScript-powered version of “Quotes to Scrape”:

This page dynamically renders the quote elements using JavaScript after a short delay. Thus, traditional scraping tools will not work out of the box. To extract the content from that page, you need a browser automation tool just like Pydoll.
Follow the steps below to build a Pydoll web scraper that dynamically extracts quote data from “Quotes to Scrape.”
Step #1: Project Setup
Before getting started, make sure that you have Python 3+ installed on your machine. Otherwise, download it and follow the installation instructions.
Then, execute the following command to create a folder for your scraping project:
mkdir pydoll-scraperThe pydoll-scraper directory will serve as the project folder.
Navigate to the folder in your terminal and initialize a Python virtual environment inside it:
cd pydoll-scraper
python -m venv venv
Load the project folder in your favorite Python IDE. Visual Studio Code with the Python extension or PyCharm Community Edition will do.
Create a scraper.py file in the project’s folder, which should now contain:

At this point, scraper.py is just an empty Python script. Still, it will soon contain the data parsing logic.
Next, activate the virtual environment in your IDE’s terminal. On Linux or macOS, run:
source venv/bin/activateEquivalently, on Windows, launch:
venv/Scripts/activateWonderful! Your Python environment is now set up for web scraping with Pydoll.
Step #2: Set Up Pydoll
In an activated virtual environment, install Pydoll via the pydoll-python package:
pip install pydoll-pythonNow, add the logic below to the scraper.py file to get started with Pydoll:
import asyncio
from pydoll.browser.chrome import Chrome

async def main():
    async with Chrome() as browser:
        # Launch the Chrome browser and open a new page
        await browser.start()
        page = await browser.get_page()

        # scraping logic...

# Execute the async scraping function
asyncio.run(main())
Note that Pydoll provides an asynchronous API for web scraping and requires the use of Python’s asyncio standard library.
Great! You now have a basic Pydoll script in place.
Step #3: Connect to the Target Site
Call the go_to() method provided by the page object to navigate to the target site:
await page.go_to("https://quotes.toscrape.com/js-delayed/?delay=2000")The ?delay=2000 query parameter instructs the page to load the desired data dynamically after a 2-second delay. That is a feature of the target sandbox site, designed to help test dynamic scraping behavior.
Now, try running the above script. If everything is working correctly, Pydoll will:
- Launch a Chrome instance
- Navigate to the target site
- Close the browser window immediately—since there is no additional logic in the script yet
Specifically, this is what you should be able to see before it gets closed:

Perfect! You are ready to add the waiting logic.
Step #4: Wait for the HTML Elements to Appear
Take a look at the last image from the previous step. That represents the content of the page controlled by Pydoll in the Chrome instance. You will notice that it is completely blank—no data has been loaded.
The reason is that the target site dynamically renders data after a 2-second delay. Now, that delay is specific to the example site. Still, having to wait for the page to render is a common scenario when scraping SPAs (single-page applications) and other dynamic websites that rely on AJAX.
Learn more in our article on scraping dynamic websites with Python.
To deal with that common scenario, Pydoll provides built-in waiting mechanisms via this method:
wait_element(): Waits for a single element to appear (with timeout support)
The above method support CSS selectors, XPath expressions, and more—similar to how Selenium’s By object works.
It is now time to get familiar with the HTML of the target page. So, open it in your browser, wait for the quotes to load, right-click one of the quotes, and select the “Inspect” option:

In the DevTools panel, you will see that each quote is wrapped in a <div> with the class quote. That means you can target them using the CSS selector:
.quoteNow, use Pydoll to wait for these elements to appear before continuing:
await page.wait_element(By.CSS_SELECTOR, ".quote", timeout=3)Do not forget to import By:
from pydoll.constants import ByExecute the script again, and this time you will see that Pydoll waits for the quote elements to load before closing the browser. Nice work!
Step #5: Prepare for Web Scraping
Remember, the target page contains more than just one quote. Since you want to scrape all of them, you need a data structure to hold that data. A simple array works perfectly, so initialize one:
quotes = []To find elements from the page, Pydoll provides two handy methods:
find_element(): Finds the first matching elementfind_elements(): Finds all matching elements
Just like with wait_element(), these methods accept a selector using the By object.
So, select all the quote elements on the page with:
quote_elements = await page.find_elements(By.CSS_SELECTOR, ".quote")Next, loop through the elements and get ready to apply your scraping logic:
for quote_element in quote_elements:
  # Scraping logic...
Terrific! Time to the data extraction logic.
Step #6: Implement the Data Parsing Logic
Start by inspecting a single quote element:

As you can tell from the above HTML, a single quote element contains:
- The text quote in a
.textnode - The author in the
.authorelement - A list of tags in the
.tagelements
Implement the scraping logic to select those elements and extract the data of interest from with:
# Extract the quote text (and remove curly quotes)
text_element = await quote_element.find_element(By.CSS_SELECTOR, ".text")
text = (await text_element.get_element_text()).replace("“", "").replace("”", "")

# Extract the author name
author_element = await quote_element.find_element(By.CSS_SELECTOR, ".author")
author = await author_element.get_element_text()

# Extract all associated tags
tag_elements = await quote_element.find_elements(By.CSS_SELECTOR, ".tag")
tags = [await tag_element.get_element_text() for tag_element in tag_elements]Note: The replace() method strips out the unnecessary curly double quotes from the extracted quote text.
Now, utilize the scraped data to populate a new dictionary object and add it to the quotes array:
# Populate a new quote with the scraped data
quote = {
    "text": text,
    "author": author,
    "tags": tags
}
# Append the extracted quote to the list
quotes.append(quote)
Well done! It only remains to export the scraped data to CSV.
Step #7: Export to CSV
Currently, the scraped data is stored in a Python list. Make it easier to share and explore with others by exporting it to a human-readable format like CSV.
Use Python to create a new file called quotes.csv and populate it with the scraped data:
with open("quotes.csv", "w", newline="", encoding="utf-8") as csvfile:
            # Add the header
            fieldnames = ["text", "author", "tags"]
            writer = csv.DictWriter(csvfile, fieldnames=fieldnames)

            # Populate the output file with the scraped data
            writer.writeheader()
            for quote in quotes:
                writer.writerow(quote)
Remember to import csv from the Python Standard Library:
import csvMission complete! Your Pydoll scraper is ready for execution.
Step #8: Put It All Together
The scraper.py file should now contain:
import asyncio
from pydoll.browser.chrome import Chrome
from pydoll.constants import By
import csv

async def main():
    async with Chrome() as browser:
        # Launch the Chrome browser and open a new page
        await browser.start()
        page = await browser.get_page()

        # Navigate to the target page
        await page.go_to("https://quotes.toscrape.com/js-delayed/?delay=2000")

        # Wait up to 3 seconds for the quote elements to appear
        await page.wait_element(By.CSS_SELECTOR, ".quote", timeout=3)

        # Where to store the scraped data
        quotes = []

        # Select all quote elements
        quote_elements = await page.find_elements(By.CSS_SELECTOR, ".quote")

        # Iterate over them and scrape data from them
        for quote_element in quote_elements:
            # Extract the quote text (and remove curly quotes)
            text_element = await quote_element.find_element(By.CSS_SELECTOR, ".text")
            text = (await text_element.get_element_text()).replace("“", "").replace("”", "")

            # Extract the author
            author_element = await quote_element.find_element(By.CSS_SELECTOR, ".author")
            author = await author_element.get_element_text()

            # Extract all tags
            tag_elements = await quote_element.find_elements(By.CSS_SELECTOR, ".tag")
            tags = [await tag_element.get_element_text() for tag_element in tag_elements]

            # Populate a new quote with the scraped data
            quote = {
                "text": text,
                "author": author,
                "tags": tags
            }
            # Append the extracted quote to the list
            quotes.append(quote)

    # Export the scraped data to CSV
    with open("quotes.csv", "w", newline="", encoding="utf-8") as csvfile:
                # Add the header
                fieldnames = ["text", "author", "tags"]
                writer = csv.DictWriter(csvfile, fieldnames=fieldnames)

                # Populate the output file with the scraped data
                writer.writeheader()
                for quote in quotes:
                    writer.writerow(quote)

# Execute the async scraping function
asyncio.run(main())
Wow! In less than 60 lines of code, you can build a web scraping bot with Pydoll.
Test the script above by running:
python scraper.pyOnce it finishes executing, a quotes.csv file will appear in your project folder. Open it, and you will see the scraped data neatly organized:

Et voilà! Your Pydoll web scraping script works as expected.
Bypassing Cloudflare With Pydoll
When interacting with a site in a browser automation tool, one of the biggest challenges you will face is web application firewalls (WAFs). Think of solutions like Cloudflare, which usually come with advanced anti-bot protections.
When your requests are suspected to come from an automated browser, these systems typically show a CAPTCHA. In some cases, they present it to all users during the first visit to the site.
Bypassing CAPTCHAs in Python is not a piece of cake. However, there are ways to trick Cloudflare into thinking you are a real user, so that it does not show a CAPTCHA in the first place. Here is where Pydoll comes in, providing a dedicated API for that very purpose.
To demonstrate how it works, we will use the “Antibot Challenge” test page from the ScrapingCourse site:

As you can see, the page always performs the Cloudflare JavaScript Challenge. Once bypassed, it displays some sample content to confirm that the anti-bot protection has been defeated.
Pydoll exposes two approaches to handle Cloudflare:
- Context manager approach: Handles the anti-bot challenge synchronously, pausing script execution until the challenge is resolved.
- Background processing approach: Deals with the anti-bot asynchronously in the background.
We will cover both methods. Yet, as mentioned in the official docs, keep in mind that Cloudflare bypassing may not always work. That is because of issues like IP reputation or navigation history.
For more advanced techniques, read our full tutorial on scraping Cloudflare-protected sites.
Context Manager Approach
To automatically let Pydoll handle the Cloudflare anti-bot challenge for you, use the expect_and_bypass_cloudflare_captcha() method like this:
import asyncio
from pydoll.browser.chrome import Chrome
from pydoll.constants import By

async def main():
    async with Chrome() as browser:
        # Launch the Chrome browser and open a new page
        await browser.start()
        page = await browser.get_page()

        # Wait for the Cloudflare challenge to be executed
        async with page.expect_and_bypass_cloudflare_captcha():
            # Connect to the Cloudflare-protected page:
            await page.go_to("https://www.scrapingcourse.com/antibot-challenge")
            print("Waiting for Cloudflare anti-bot to be handled...")

        # This code runs only after the anti-bot is successfully bypassed
        print("Cloudflare anti-bot bypassed! Continuing with automation...")

        # Print the text message on the success page
        await page.wait_element(By.CSS_SELECTOR, "#challenge-title", timeout=3)
        success_element = await page.find_element(By.CSS_SELECTOR, "#challenge-title")
        success_text = await success_element.get_element_text()
        print(success_text)

asyncio.run(main())
When you run this script, the Chrome window will automatically bypass the challenge and load the target page.
The output will be:
Waiting for Cloudflare anti-bot to be handled...
Cloudflare anti-bot bypassed! Continuing with automation...
You bypassed the Antibot challenge! 😀
Background Processing Approach
If you prefer not to block script execution while Pydoll handles the Cloudflare challenge, you can use the enable_auto_solve_cloudflare_captcha() and disable_auto_solve_cloudflare_captcha() methods like so:
import asyncio
from pydoll.browser import Chrome
from pydoll.constants import By

async def main():
    async with Chrome() as browser:
        # Launch the Chrome browser and open a new page
        await browser.start()
        page = await browser.get_page()

        # Enable automatic captcha solving before navigating
        await page.enable_auto_solve_cloudflare_captcha()

        # Connect to the Cloudflare-protected page:
        await page.go_to("https://www.scrapingcourse.com/antibot-challenge")
        print("Page loaded, Cloudflare anti-bot will be handled in the background...")

        # Disable anti-bot auto-solving when no longer needed
        await page.disable_auto_solve_cloudflare_captcha()

        # Print the text message on the success page
        await page.wait_element(By.CSS_SELECTOR, "#challenge-title", timeout=3)
        success_element = await page.find_element(By.CSS_SELECTOR, "#challenge-title")
        success_text = await success_element.get_element_text()
        print(success_text)

asyncio.run(main())
This approach allows your scraper to perform other operations while Pydoll solves the Cloudflare anti-bot challenge in the background.
This time, the output will be:
Page loaded, Cloudflare anti-bot will be handled in the background...
You bypassed the Antibot challenge! 😀
Limitations of This Approach to Web Scraping
With Pydoll—or any scraping tool—if you send too many requests, there is a good chance that you will get blocked by the target server. That occurs because most websites implement rate limiting to prevent bots (like your scraping script) from overwhelming their servers with requests.
That is a common anti-scraping and anti-DDoS technique. After all, no one wants their site to be flooded with automated traffic.
Even if you are following best practices like respecting robots.txt, making many requests from the same IP address can still raise suspicion. As a result, you might still run into 403 Forbidden or 429 Too Many Requests errors.
The best way to avoid this is by rotating your IP address using a web proxy.
If you are not familiar with that, a web proxy acts as a middleman between your scraper and the target website. It forwards your requests and returns the responses, making it appear to the target site as if the traffic is coming from the proxy—not your actual machine.
This technique not only helps hide your real IP, but it is also useful for bypassing geo-restrictions and many other use cases.
Now, there are several types of proxies out there. To avoid getting blocked, you need a high-quality provider offering genuine rotating proxies like Bright Data.
In the next section, you will see how to integrate Bright Data’s rotating proxies with Pydoll to scrape web pages more effectively—especially at scale.
Integrating Pydoll with Bright Data’s Rotating Proxies
Bright Data controls one of the largest proxy networks in the world, trusted by Fortune 500 companies and over 20,000 customers. Its proxy network includes:
- Datacenter proxies – Over 770,000 datacenter IPs.
- Residential proxies – Over 150,000,000 residential IPs in more than 195 countries.
- ISP proxies – Over 700,000 ISP IPs.
Follow the steps below and learn how to use Bright Data’s residential proxies with Pydoll.
If you do not have an account yet, sign up for Bright Data. Otherwise, go ahead and log in to access your dashboard:

From the dashboard, click the “Get proxy products” button:

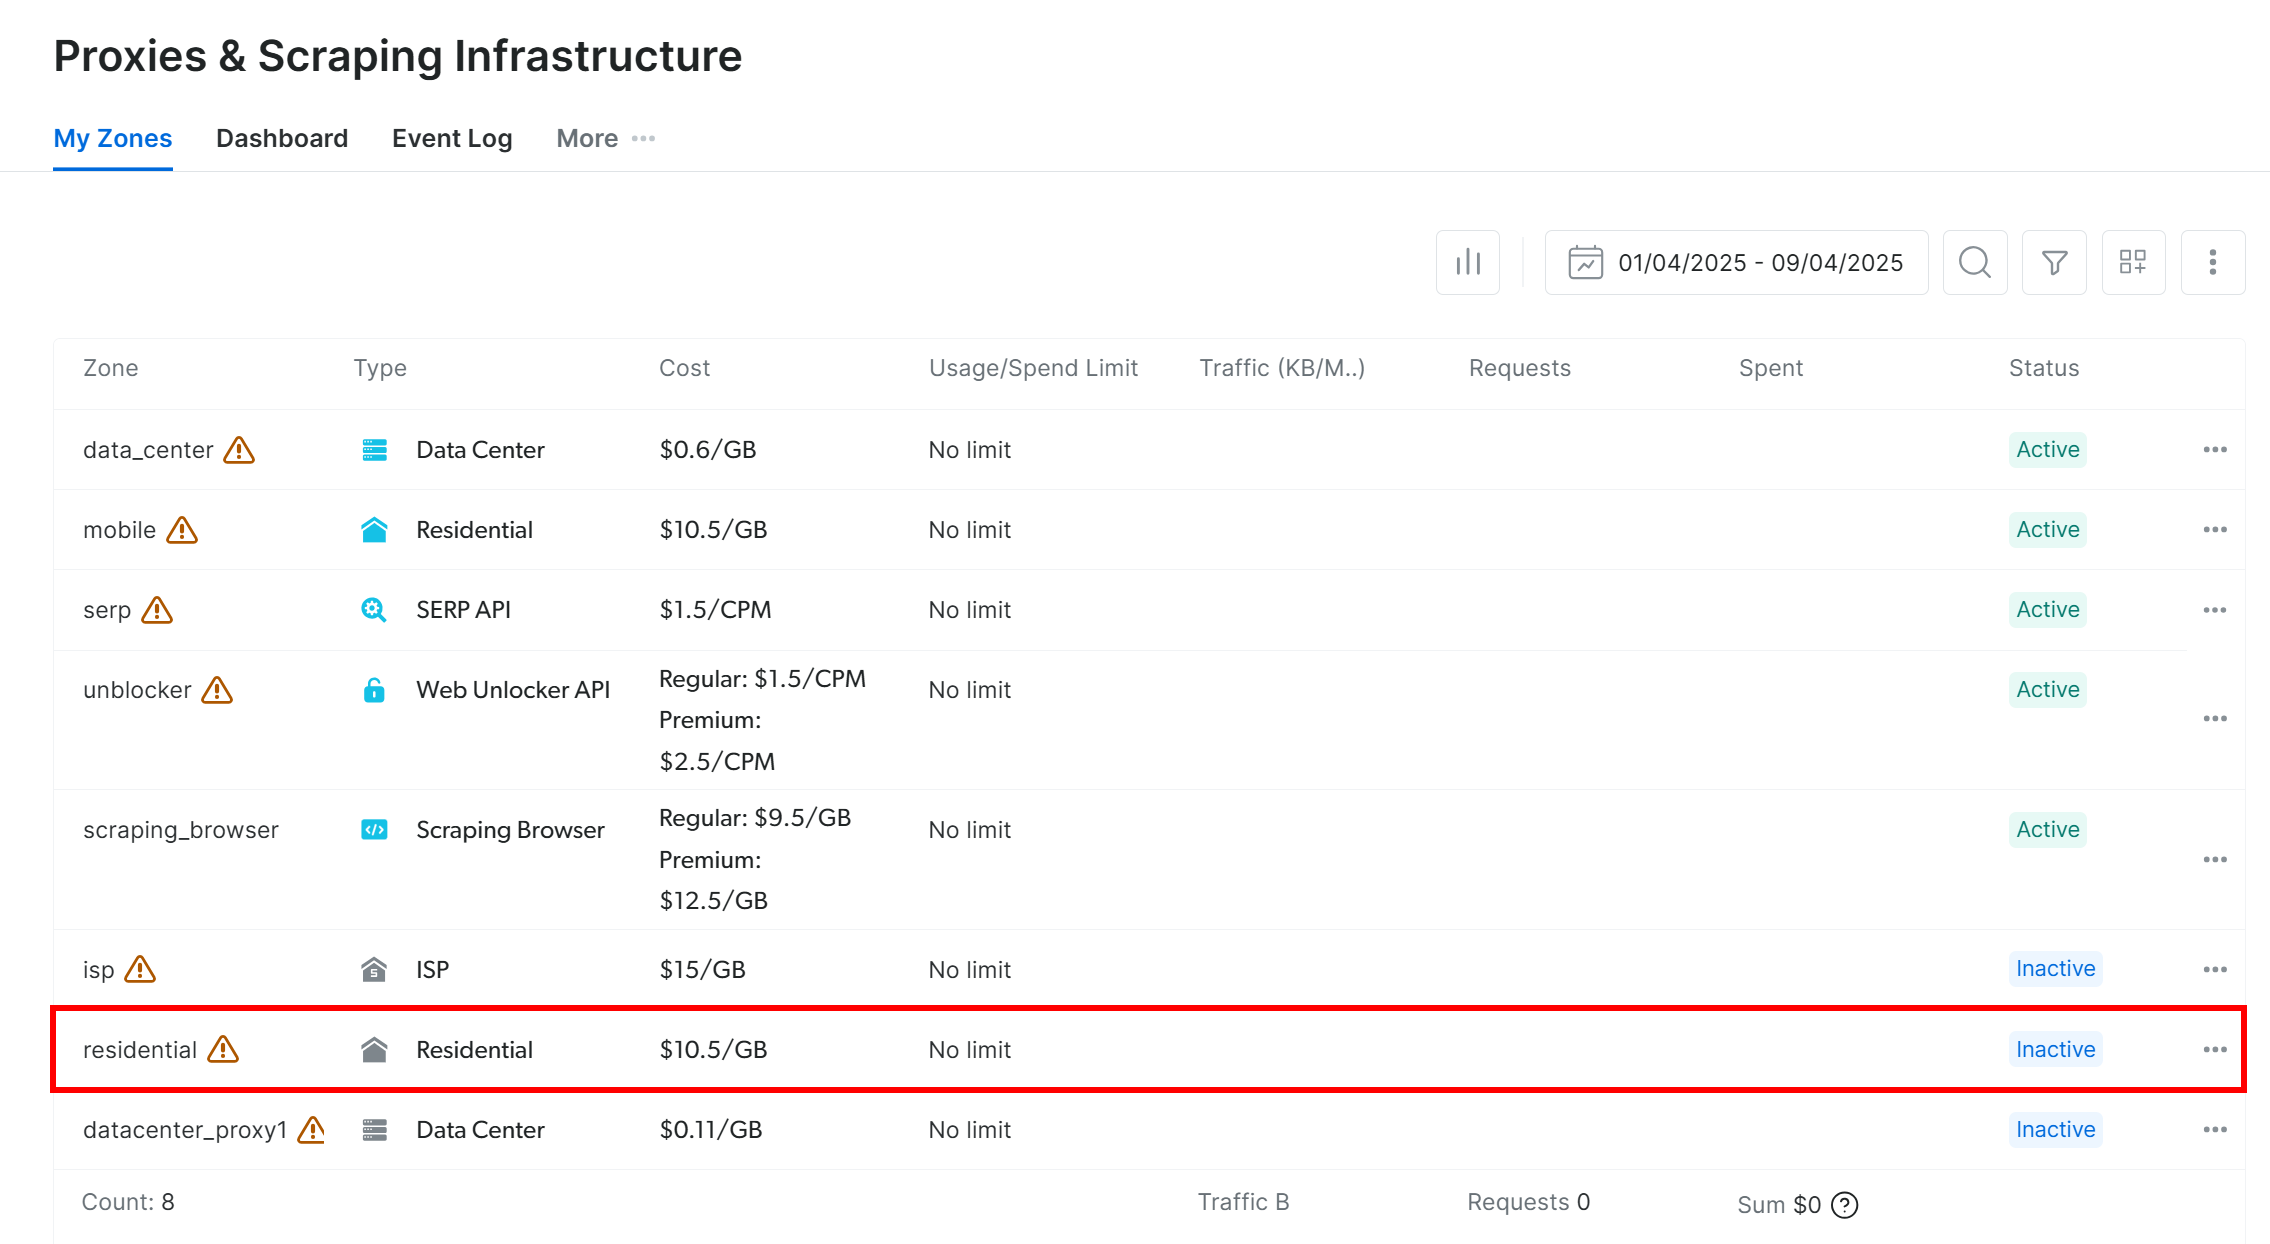
You will be redirected to the “Proxies & Scraping Infrastructure” page:

In the table, find the “Residential” row and click it:
You will land on the residential proxy setup page:

If this is your first time, follow the setup wizard to configure the proxy according to your needs. For help, reach out to the 24/7 support.
Go to the “Overview” tab and locate your proxy’s host, port, username, and password:

Use those details to build your proxy URL:
proxy_url = "<brightdata_proxy_username>:<brightdata_proxy_password>@<brightdata_proxy_host>:<brightdata_proxy_port>";Replace the placeholders (<brightdata_proxy_username>, <brightdata_proxy_password>, <brightdata_proxy_host>, <brightdata_proxy_port>) with your actual proxy credentials.
Make sure to activate the proxy product by toggling the switch from “Off” to “On”:

Now that you have got your proxy ready, this is how to integrate it into Pydoll using its built-in proxy configuration capabilities:
import asyncio
from pydoll.browser.chrome import Chrome
from pydoll.browser.options import Options
from pydoll.constants import By
import traceback

async def main():
    # Create browser options
    options = Options()

    # The URL of your Bright Data proxy
    proxy_url = "<brightdata_proxy_username>:<brightdata_proxy_password>@<brightdata_proxy_host>:<brightdata_proxy_port>" # Replace it with your proxy URL

    # Configure the proxy integration option
    options.add_argument(f"--proxy-server={proxy_url}")

    # To avoid potential SSL errors
    options.add_argument("--ignore-certificate-errors")

    # Start browser with proxy configuration
    async with Chrome(options=options) as browser:
        await browser.start()
        page = await browser.get_page()

        # Visit a special page that returns the IP of the caller
        await page.go_to("https://httpbin.io/ip")

        # Extract the page content containing only the IP of the incoming
        # request and print it
        body_element = await page.find_element(By.CSS_SELECTOR, "body")
        body_text = await body_element.get_element_text()
        print(f"Current IP address: {body_text}")

# Execute the async scraping function
asyncio.run(main())
Every time you run this script, you’ll see a different exit IP address, thanks to Bright Data’s proxy rotation.
Note: Normally, Chrome’s --proxy-server flag does not support authenticated proxies out of the box. However, Pydoll’s advanced proxy manager overrides that limitation, allowing you to use password-protected proxy servers.
With Bright Data’s rotating proxies, Pydoll proxy rotation is simple, reliable, and scalable!
Alternatives to Pydoll for Web Scraping
Pydoll is undoubtedly a powerful web scraping library, especially for automating browsers with built-in anti-bot bypass features. Yet, it is not the only tool in the game.
Below are a few solid Pydoll alternatives worth considering:
- SeleniumBase: A Python framework built on top of Selenium/WebDriver APIs, offering a professional-grade toolkit for web automation. It supports everything from end-to-end testing to advanced scraping workflows.
- Undetected ChromeDriver: A patched version of ChromeDriver designed to evade detection by popular anti-bot services like Imperva, DataDome, and Distil Networks. Ideal for stealth scraping when using Selenium.
If you are looking for a more general-purpose web scraping solution that works across any website and supports multiple programming languages, check out our scraping services:
- Scraping Browser: A Selenium-, Playwright-, Puppeteer-compatible browser with built-in unlocking capabilities.
- Web Scraper APIs: Pre-configured APIs for extracting structured data from 100+ major domains.
- Web Unlocker: An all-in-one API that handles site unlocking on sites with anti-bot protections.
- SERP API: A specialized API that unlocks search engine results and extracts complete SERP data.
Conclusion
In this proxy integration tutorial, you learned what Pydoll is and how it works. We explored how to use it for web scraping on a JavaScript-powered website and saw how to address its main
limitation via proxy integration.
You also understood why using Pydoll without an IP rotation mechanism can lead to unreliable results. For stable performance, enhanced security, and scalability, you must choose a trusted proxy provider. Save time and effort by going straight to the best proxy provider on the market, Bright Data.
Create an account and start testing our proxies for free today!

Technical Writer
Antonello Zanini is a technical writer, editor, and software engineer with 5M+ views. Expert in technical content strategy, web development, and project management.


