
Web scraping plays an important role in collecting data at scale, particularly when making fast and informed decisions is essential.
In this tutorial, you will learn:
- What Midscene.js is and how it works,
- The limitations of using Midscene.js,
- How Bright Data helps overcome those challenges
- How to integrate Midscene.js with Bright Data for effective web scraping
Let’s dive in!
What is Midscene.js?
Midscene.js is an open-source tool that lets you automate browser interactions using plain English. Instead of writing complex scripts, you can simply type commands like “Click the login button” or “Type in the email field.” Midscene then converts those instructions into automation steps using AI agents.
It also supports modern browser automation tools, such as Puppeteer and Playwright, making it especially useful for tasks like testing, UI automation, and scraping dynamic websites.
In detail, the main features it offers are:
- Natural language control: Automate tasks using clear, English-based prompts rather than code.
- AI integration with MCP server: Connects to AI models through an MCP server to help generate automation scripts.
- Built-in Puppeteer and Playwright support: Acts as a high-level layer over popular frameworks, making your workflows easy to manage and extend.
- Cross-platform automation: Supports both web (via Puppeteer/Playwright) and Android (via its JavaScript SDK).
- No-code experience: Offers tools like the Midscene Chrome Extension so you can build automations without writing any lines of code.
- Simple API Design: Provides a clean, well-documented API to interact with page elements and extract content efficiently.
Limitations of Using Midscene for Web Browser Automation
Midscene uses AI models like GPT-4o or Qwen to automate browsers through natural language commands. It works with tools like Puppeteer and Playwright, but has key limitations.
Midscene’s accuracy depends on the clarity of your instructions and the underlying page structure. Vague prompts like “click the button” can fail if there are multiple similar buttons. The AI relies on screenshots and visual layouts, so small structural changes or missing labels can cause errors or misclicks. Prompts that work on one webpage may not work on another with a similar appearance.
To minimize errors, write clear, specific instructions that match the page’s structure. Always test prompts with the Midscene Chrome Extension before integrating them into automation scripts.
Another key limitation is high resource consumption. Each automation step with Midscene sends a screenshot and prompt to the AI model, using many tokens—especially on dynamic or data-heavy pages. This can lead to rate limits from the AI API and higher usage costs as the number of automated steps increases.
Midscene also cannot interact with protected browser elements like CAPTCHAs, cross-origin iframes, or content behind authentication walls. As a result, scraping secure or gated content is not possible. Midscene is most effective on static or moderately dynamic sites with accessible, structured content.
Why Bright Data is a More Effective Solution
Bright Data is a powerful data collection platform that helps you build, run, and scale your web scraping operations. It offers a powerful proxy infrastructure, automation tools, and datasets for businesses and developers, enabling you to access, extract, and interact with any public website.
- Handles Dynamic and JavaScript-Heavy Websites Bright Data offers various tools, such as the SERP API, Crawl API, Browser API, and Unlocker API, that enable you to access, extract data, and interact with complex websites that load content dynamically. These tools provide various tools that allow you to retrieve data from any platform, making it ideal for e-commerce, travel, and real estate platforms.
- Efficient Proxy Infrastructure Bright Data offers a powerful and flexible proxy infrastructure through its four main networks: Residential, Datacenter, ISP, and Mobile. These networks provide access to millions of IP addresses globally, allowing users to collect web data reliably while minimising blocks.
- Supports Multimedia Contents Bright Data allows the extraction of various content types, including videos, images, audio, and text, from publicly available sources. Its infrastructure is designed to handle large-scale media collection and support advanced use cases such as training computer vision models, building speech recognition tools, and powering natural language processing systems.
- Provides Ready-Made Datasets Bright Data provides ready-made datasets that are fully structured, high-quality, and ready to use. These datasets span a variety of domains, including e-commerce, job postings, real estate, and social media, m0aking them suitable for different industries and use cases.
How to Integrate Midscene.js With Bright Data
In this tutorial section, you will learn how to scrape data from websites using Midscene and Bright Data’s Browser API and how to combine both tools for better web scraping functionalities.
To demonstrate this, we will scrape a static webpage that displays a list of employee contact cards. We will begin by using Midscene and Bright Data individually, and then integrate both using Puppeteer to show how they can work together.
Prerequisites
To follow along with this tutorial, make sure you have the following:
- A Bright Data account.
- a code editor, such as Visual Studio Code, Cursor, etc.
- An OpenAI API key that supports the GPT-4o model.
- Basic knowledge of the JavaScript programming language.
If you do not yet have a Bright Data account, do not worry. We will walk you through how to create them in the steps below.
Step #1: Project Set Up
Open your terminal and run the following command to create a new folder for your automation scripts:
mkdir automation-scripts
cd automation-scripts
Add a package.json file into the newly created folder using the following code snippet:
npm init -y
Change the package.json type value from commonjs to module.
{
	"type": "module"
}
Next, install the necessary packages to enable TypeScript execution and access the Midscene.js functionality:
npm install tsx @midscene/web --save
Next, install Puppeteer and Dotenv packages.
npm install puppeteer dotenv
Puppeteer is a Node.js library that provides a high-level API to control Chrome or Chromium browsers. Dotenv allows you to safely store your API keys.
Now, all the necessary packages have been installed. We can start writing the automation scripts.
Step #2: Automate Web Scraping With Midscene.js
Before we proceed, create a .env file inside the automation-scripts folder and copy the OpenAI API key into the file as an environment variable.
OPENAI_API_KEY=<your_openai_key>
Midscene uses the OpenAI GPT-4o model to take carry out the automation tasks based the user’s commands.
Next, create a file inside the folder.
cd automation-scripts
touch midscene.ts
Import Puppeteer, Midscene Puppeteer Agent, and the dotenv configuration into the file:
import puppeteer from "puppeteer";
import { PuppeteerAgent } from "@midscene/web/puppeteer";
import "dotenv/config";
Add the following code snippet to the midscene.ts file:
const sleep = (ms: number) => new Promise((r) => setTimeout(r, ms));
Promise.resolve(
	(async () => {
		//👇🏻 initialize puppeteer
		const browser = await puppeteer.launch({
			headless: false,
		});

		//👇🏻 set the page config
		const page = await browser.newPage();
		await page.setViewport({
			width: 1280,
			height: 800,
			deviceScaleFactor: 1,
		});

		/*
    ----------
    👉🏻 Write automation scripts here 👈🏼
    -----------

    */
	})()
);
The code snippet initializes Puppeteer inside an asynchronous Immediately Invoked Function Expression (IIFE). This structure allows you to use await at the top level without wrapping the logic in multiple function calls.
Next, add the following code snippets within the IIFE:
//👇🏻 Navigates to the web page
await page.goto(
	"<https://lf3-static.bytednsdoc.com/obj/eden-cn/nupipfups/Midscene/contacts3.html>"
);

// 👇🏻 init Midscene agent
const agent = new PuppeteerAgent(page as any);

//👇🏻 gives the AI model a query
const items = await agent.aiQuery(
	"get all the contacts details from the screen"
);

//👇🏻 Waits for 5secs
await sleep(5000);

// 👀 log the results
console.log("search result", items);
The code snippet above goes to the webpage address, initializes the Puppeteer agent, retrieves all the contact details from the webpage, and logs the result.
Step #3: Automate Web Scraping With Bright Data Browser API
Create a brightdata.ts file within the automation-scripts folder.
cd automation-scripts
touch brightdata.ts
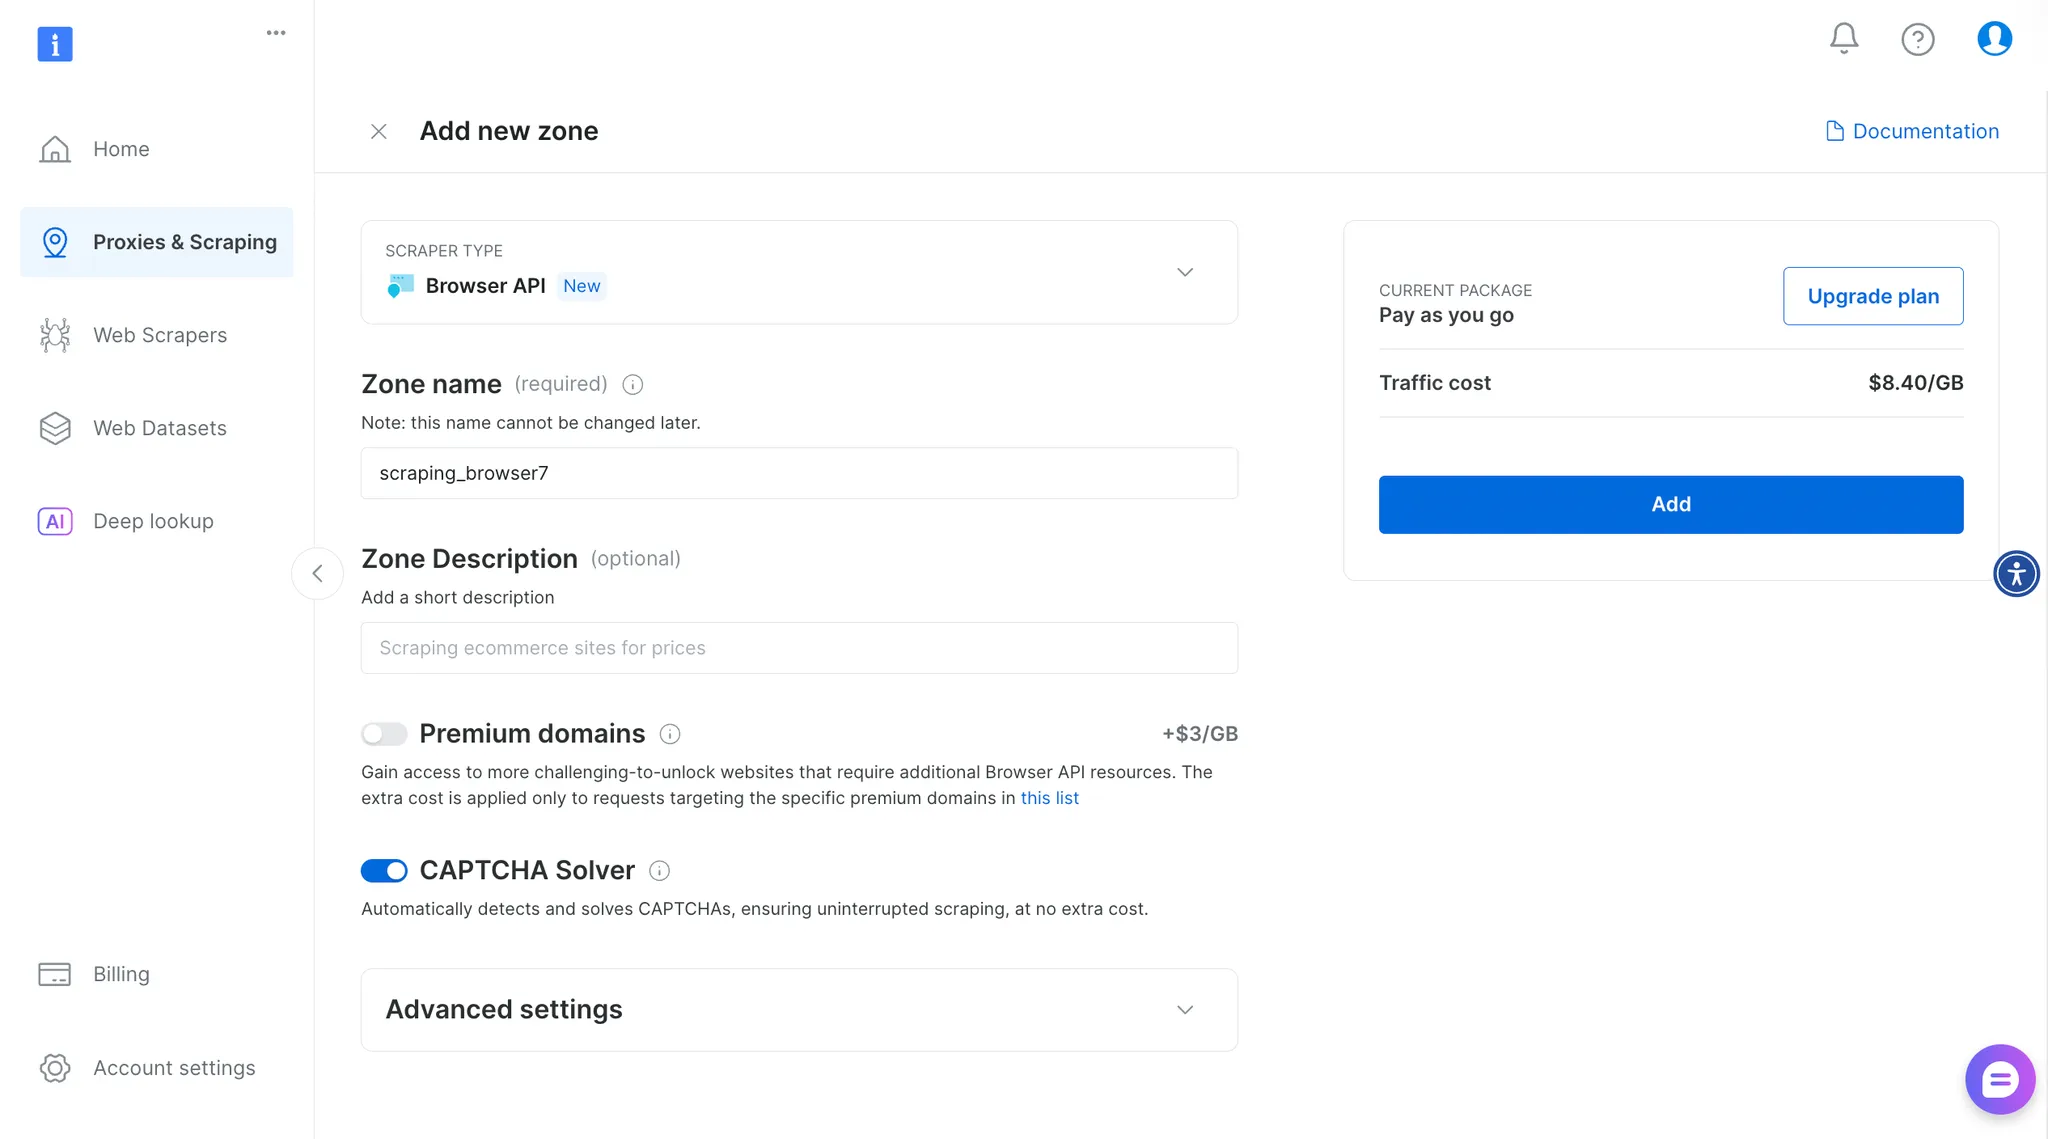
Navigate to the Bright Data homepage and create an account.
Select Browser API on your dashboard, then enter the zone name and description to create a new browser API.
Next, copy your Puppeteer credentials and save it in the brightdata.ts file as shown below:
const BROWSER_WS = "wss://brd-customer-******";
Modify the brightdata.ts as shown below:
import puppeteer from "puppeteer";

const URL =
	"<https://lf3-static.bytednsdoc.com/obj/eden-cn/nupipfups/Midscene/contacts3.html>";

const BROWSER_WS = "wss://brd-customer-******";

run(URL);

async function run(url: string) {
	try {
		/*
    ---------------------------
    👉🏻 Web automation workflow 👈🏼
    ---------------------------
    */

    //👇🏻 close the browser
    await browser.close();

	} catch (err) {
		console.error("Error fetching data");
	}
}
The code snippet declares a variable for the webpage URL and Bright Data’s browser API credential, then declares a function that accepts the URL as a parameter.
Add the following code snippet within the web automation workflow placeholder:
//👇🏻 connect to Bright Data Browser API
console.log("Connecting to browser...");
const browser = await puppeteer.connect({
	browserWSEndpoint: BROWSER_WS,
});

console.log("Connected! Navigate to site...");
const page = await browser.newPage();

//👇🏻 Go to webpage
await page.goto(url, { waitUntil: "domcontentloaded", timeout: 60000 });
console.log("Navigated! Waiting for popup...");
The code snippet below connects Puppeteer to the Bright Data Browser using your API WebSocket endpoint. Once the connection is established, it opens a new browser page and navigates to the URL passed into the run() function.
Lastly, retrieve the data on the webpage using CSS selectors with the following code snippet:
//👇🏻 Get contact details using CSS attribute
const contacts = await page.evaluate(() => {
	const cards = document.querySelectorAll("#contactsGrid .contact-card");
	return Array.from(cards).map((card) => {
		const nameEl = card.querySelector(".contact-name");
		const detailsEl = card.querySelectorAll(
			".contact-details .detail-item span:not(.detail-icon)"
		);
		const metaEl = card.querySelector(".contact-meta");
		if (!nameEl || !detailsEl.length || !metaEl) {
			return null; // Skip if any required element is missing
		}

		const contact = {
			name:
				(nameEl as HTMLElement)?.dataset.name ||
				(nameEl as HTMLElement)?.innerText.trim() ||
				null,
			jobTitle: (metaEl as HTMLElement)?.innerText.trim() || null,
			phone: (detailsEl[0] as HTMLElement)?.innerText.trim() || null,
			email: (detailsEl[1] as HTMLElement)?.innerText.trim() || null,
			company: (detailsEl[2] as HTMLElement)?.innerText.trim() || null,
			address: (detailsEl[3] as HTMLElement)?.innerText.trim() || null,
			lastContact: (detailsEl[4] as HTMLElement)?.innerText.trim() || null,
		};

		return contact;
	});
});

console.log("Contacts grid found! Extracting data...", contacts);
The code snippet above loops through each contact card on the webpage and extracts key details such as the name, job title, phone number, email address, company, address, and last contact date.
Here is the complete automation script:
import puppeteer from "puppeteer";

const URL =
	"<https://lf3-static.bytednsdoc.com/obj/eden-cn/nupipfups/Midscene/contacts3.html>";
const BROWSER_WS ="wss://brd-customer-*******";

run(URL);

async function run(url: string) {
	try {

		//👇🏻 connect to Bright data Browser API
		console.log("Connecting to browser...");
		const browser = await puppeteer.connect({
			browserWSEndpoint: BROWSER_WS,
		});

		console.log("Connected! Navigate to site...");
		const page = await browser.newPage();

		//👇🏻 Go to webpage
		await page.goto(url, { waitUntil: "domcontentloaded", timeout: 60000 });
		console.log("Navigated! Waiting for popup...");

		//👇🏻 Get contact details using CSS attribute
		const contacts = await page.evaluate(() => {
			const cards = document.querySelectorAll("#contactsGrid .contact-card");
			return Array.from(cards).map((card) => {
				const nameEl = card.querySelector(".contact-name");
				const detailsEl = card.querySelectorAll(
					".contact-details .detail-item span:not(.detail-icon)"
				);
				const metaEl = card.querySelector(".contact-meta");
				if (!nameEl || !detailsEl.length || !metaEl) {
					return null; // Skip if any required element is missing
				}

				const contact = {
					name: (nameEl as HTMLElement)?.dataset.name || (nameEl as HTMLElement)?.innerText.trim() || null,
					jobTitle: (metaEl as HTMLElement)?.innerText.trim() || null,
					phone: (detailsEl[0] as HTMLElement)?.innerText.trim() || null,
					email: (detailsEl[1] as HTMLElement)?.innerText.trim() || null,
					company: (detailsEl[2] as HTMLElement)?.innerText.trim() || null,
					address: (detailsEl[3] as HTMLElement)?.innerText.trim() || null,
					lastContact: (detailsEl[4] as HTMLElement)?.innerText.trim() || null,

				};

				return contact;
			});
		});

		console.log("Contacts grid found! Extracting data...", contacts);

		//👇🏻 close the browser
		await browser.close();
	} catch (err) {
		console.error("Error fetching data");
	}
}
Step #4: AI Automation Scripts With Midscene and Bright Data
Bright Data supports web automation with AI agents through the integration with Midscene. Since both tools support Puppeteer, combining them allows you to write simple AI-powered automation workflows. Create a combine.ts file and copy the following code snippet into the file:
import { PuppeteerAgent } from "@midscene/web/puppeteer";
import puppeteer from "puppeteer";
import "dotenv/config";

const URL =
	"<https://lf3-static.bytednsdoc.com/obj/eden-cn/nupipfups/Midscene/contacts3.html>";
const BROWSER_WS = "wss://brd-customer-******";

const sleep = (ms: number) => new Promise((r) => setTimeout(r, ms));
Promise.resolve(
	(async () => {
		/*
    		---------------------------
    		👉🏻 Web automation workflow 👈🏼
   			 ---------------------------
   		 */

		//👇🏻 close the browser
		await browser.close();
	})()
);
The code snippet above creates an asynchronous IIFE (Immediately Invoked Function Expression) and includes a sleep function that allows you to add delays within the AI automation script.
Next, add the following code snippet to the web automation workflow placeholder:
//👇🏻 connect to Bright Data Browser API
console.log("Connecting to browser...");
const browser = await puppeteer.connect({
	browserWSEndpoint: BROWSER_WS,
});

//👇🏻 declares page
console.log("Connected! Navigate to site...");
const page = await browser.newPage();

//👇🏻 Go to website
await page.goto(URL, { waitUntil: "domcontentloaded", timeout: 60000 });

// 👀 init Midscene agent
const agent = new PuppeteerAgent(page as any);

// 👇🏻 get contact details using AI agent
const items = await agent.aiQuery(
	"get all the contacts details from the screen"
);

//👇🏻 delays for 5secs
await sleep(5000);

//👇🏻 logs the result
console.log("search result", items);
The code snippet initializes Puppeteer and its agent to navigate to the webpage, fetch all the contact details, and log the results to the console. This shows how you can integrate the Puppeteer AI agent with Bright Data Browser API to rely on the clear commands that Midscene provides.
Step #5: Putting It All together
In the previous section, you learned how to integrate Midscene with Bright Data Browser API. The complete automation script is shown below:
import { PuppeteerAgent } from "@midscene/web/puppeteer";
import puppeteer from "puppeteer";
import "dotenv/config";

const URL =
	"<https://lf3-static.bytednsdoc.com/obj/eden-cn/nupipfups/Midscene/contacts3.html>";
const BROWSER_WS = "wss://brd-customer-*****";

const sleep = (ms: number) => new Promise((r) => setTimeout(r, ms));
Promise.resolve(
	(async () => {
		//👇🏻 connect to Bright Data Browser API
		console.log("Connecting to browser...");
		const browser = await puppeteer.connect({
			browserWSEndpoint: BROWSER_WS,
		});

		console.log("Connected! Navigate to site...");
		const page = await browser.newPage();

		//👇🏻 Go to Booking.com
		await page.goto(URL, { waitUntil: "domcontentloaded", timeout: 60000 });


		// 👀 init Midscene agent
		const agent = new PuppeteerAgent(page as any);

		const items = await agent.aiQuery(
			"get all the contacts details from the screen"
		);

		await sleep(5000);

		console.log("search result", items);

		await browser.close();
	})()
);
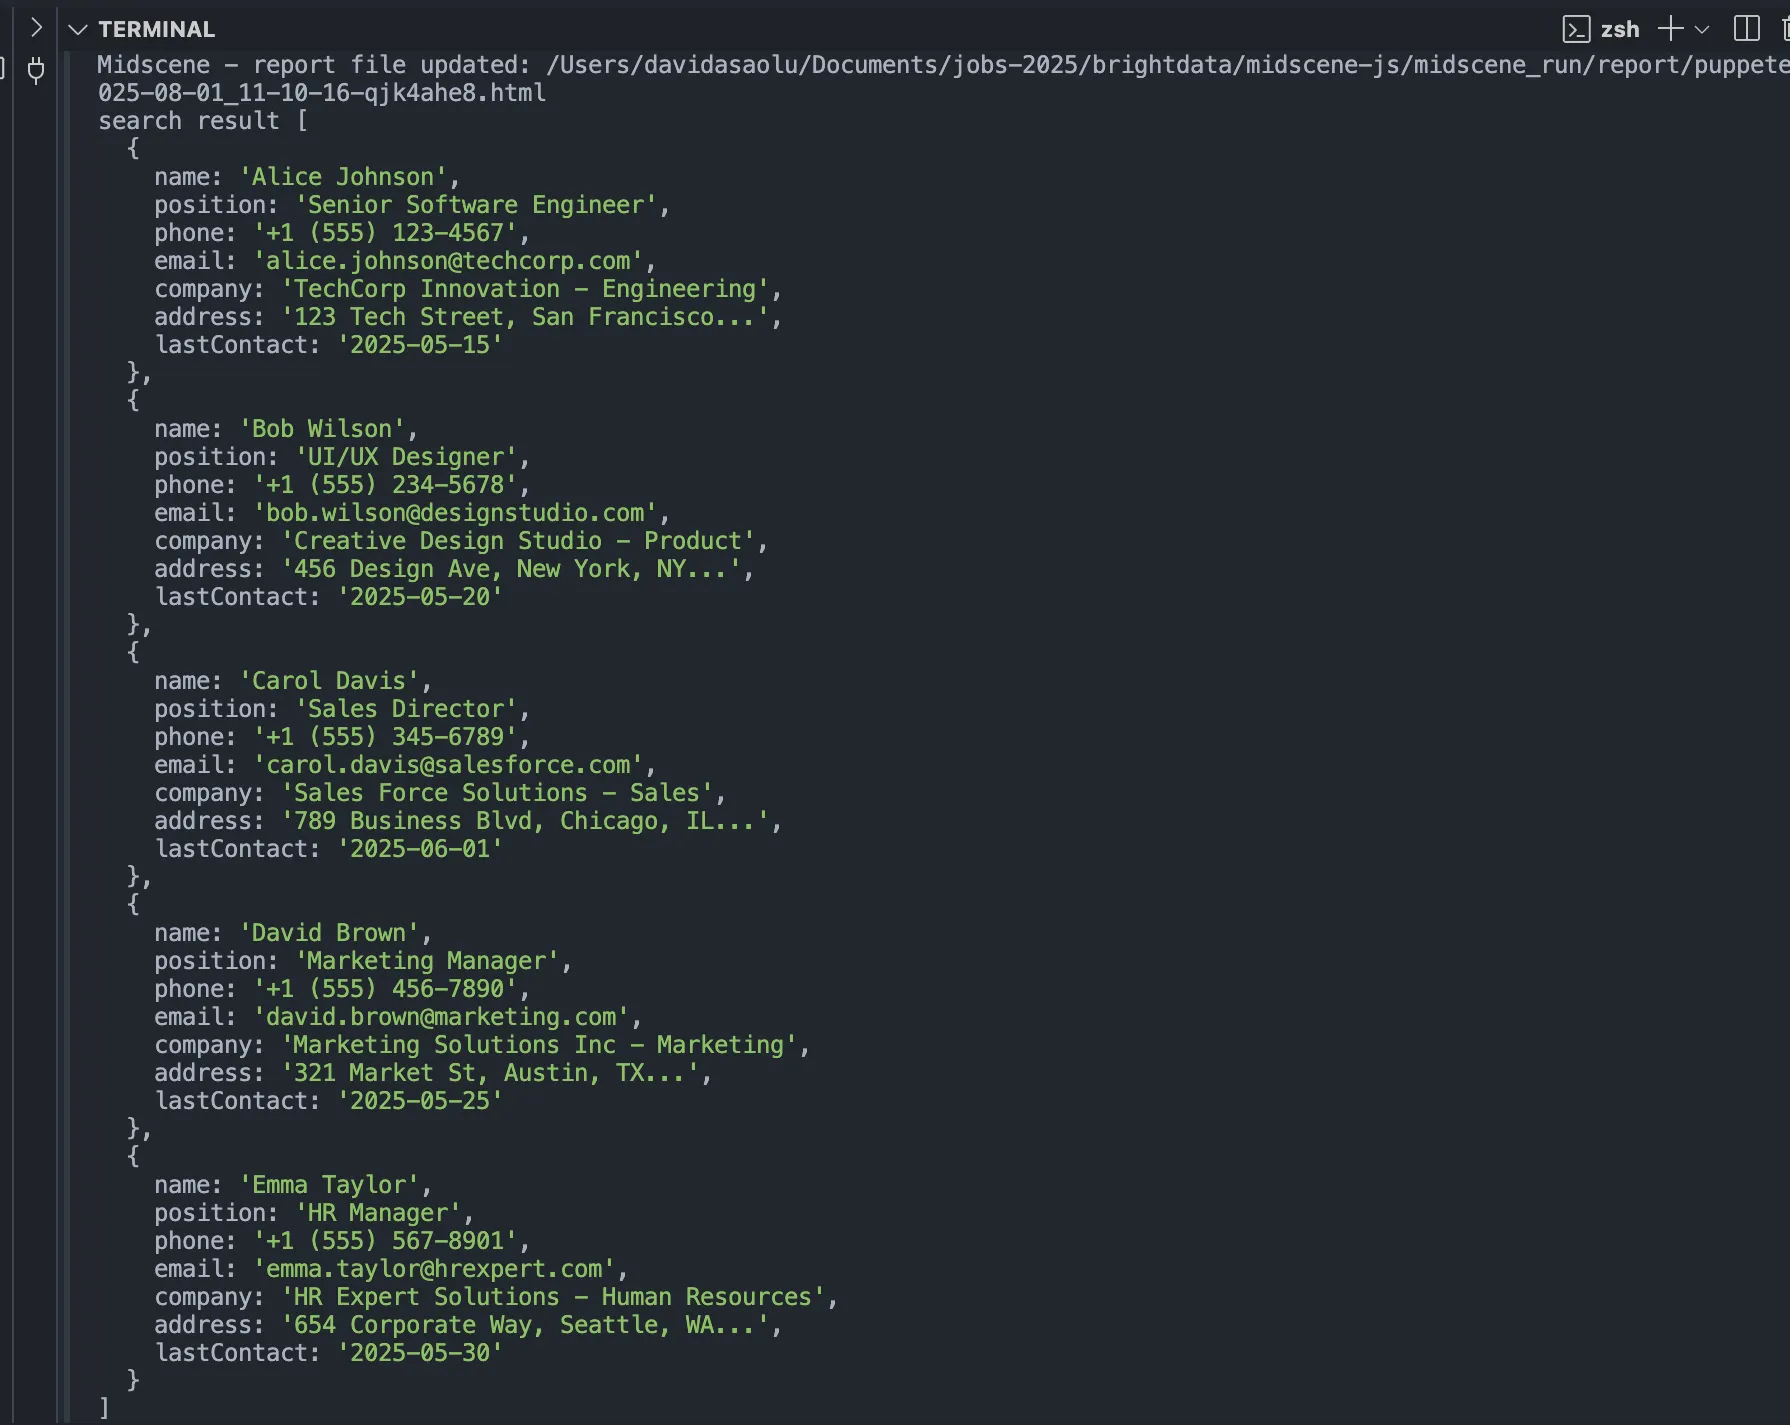
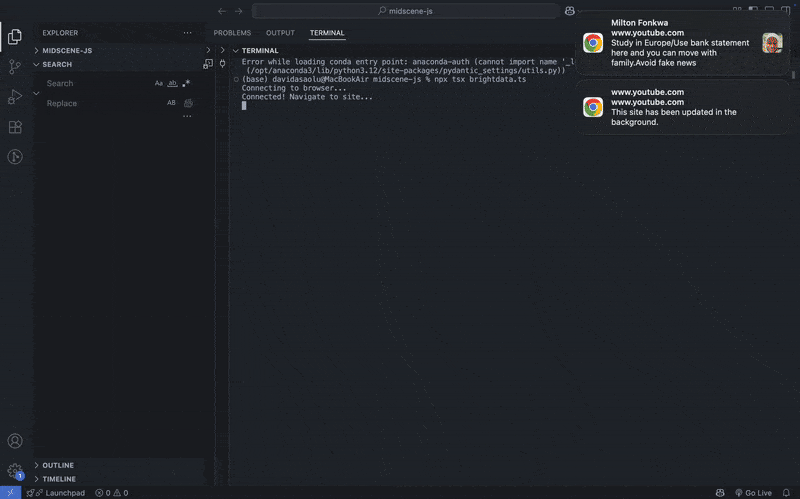
Run the following code snippet in your terminal to execute the script:
npx tsx combine.ts
The code snippet above executes the automation script and logs the contact details to the console.
 [
  {
    name: 'Alice Johnson',
    jobTitle: 'Senior Software Engineer',
    phone: '+1 (555) 123-4567',
    email: '[email protected]',
    company: 'TechCorp Innovation - Engineering',
    address: '123 Tech Street, San Francisco...',
    lastContact: 'Last contact: 2026-05-15'
  },
  {
    name: 'Bob Wilson',
    jobTitle: 'UI/UX Designer',
    phone: '+1 (555) 234-5678',
    email: '[email protected]',
    company: 'Creative Design Studio - Product',
    address: '456 Design Ave, New York, NY...',
    lastContact: 'Last contact: 2026-05-20'
  },
  {
    name: 'Carol Davis',
    jobTitle: 'Sales Director',
    phone: '+1 (555) 345-6789',
    email: '[email protected]',
    company: 'Sales Force Solutions - Sales',
    address: '789 Business Blvd, Chicago, IL...',
    lastContact: 'Last contact: 2026-06-01'
  },
  {
    name: 'David Brown',
    jobTitle: 'Marketing Manager',
    phone: '+1 (555) 456-7890',
    email: '[email protected]',
    company: 'Marketing Solutions Inc - Marketing',
    address: '321 Market St, Austin, TX...',
    lastContact: 'Last contact: 2026-05-25'
  },
  {
    name: 'Emma Taylor',
    jobTitle: 'HR Manager',
    phone: '+1 (555) 567-8901',
    email: '[email protected]',
    company: 'HR Expert Solutions - Human Resources',
    address: '654 Corporate Way, Seattle, WA...',
    lastContact: 'Last contact: 2026-05-30'
  }
]
Step #6: Next Steps
This tutorial shows what’s possible when you integrate Midscene with the Bright Data Browser API. You can build on this foundation to automate more complex workflows.
By combining both tools, you can perform efficient and scalable browser automation tasks, such as:
- Scraping structured data from dynamic or JavaScript-heavy websites
- Automating form submissions for testing or data collection
- Navigating websites and interacting with elements using natural language instructions
- Running large-scale data extraction jobs with proxy management and CAPTCHA handling
Conclusion
So far, you have learnt how to automate web scraping processes using Midscene and the Bright Data Browser API, and how to use both tools to scrape websites via AI agents.
Midscene heavily depends on AI models for browser automation, and using it with the Bright Data Scraping Browser means reduced lines of code with effective web scraping features. The Browser API is just one example of how Bright Data’s tools and services can empower advanced AI-driven automation.
Sign up now to explore all the products.

Technical Writer
Arindam Majumder is a developer advocate, YouTuber, and technical writer who simplifies LLMs, agent workflows, and AI content for 5,000+ followers.


