







In this article, you will learn:
- Why reliable web data acquisition is a critical part of an AI-ready data pipeline, and how Bright Data can handle that.
- How the Bright Data + Snowflake workflow can help optimize data pipeline costs.
- How filtering and sending only relevant web data cuts Snowflake storage overhead and eliminates wasteful compute cycles.
- How to deliver Bright Data web datasets to Snowflake and turn them into insights through Cortex Agents.
- How to choose between persistent batch datasets and live web access (Bright Data MCP) for your AI architecture.
- What each Snowflake Cortex component (Analyst, Search, Sense, and Agents) does in the workflow.
- How Bright Data and Snowflake can work together to gather live web data through MCP and CoCo CLI.
Let’s dive in!
From Web Data to AI-Ready Intelligence
For many businesses, the web is one of the richest sources of external data available. Product information, company profiles, market signals, social media activity, reviews, pricing, and other public information can give valuable context for business decisions.
The challenge is accessing that data reliably at high volume. Web data is distributed across millions of websites, changes continuously, and often requires specialized infrastructure to collect, structure, and keep up to date. Building this capability internally can require significant engineering effort.
This is where Bright Data’s data acquisition infrastructure comes in. The platform is designed to collect web data at scale, with the coverage, reliability, and real-time availability needed for enterprise workloads.
Rather than building and maintaining your own web data collection infrastructure, you can use Bright Data to handle the complexity of collecting and preparing the data your use case requires.
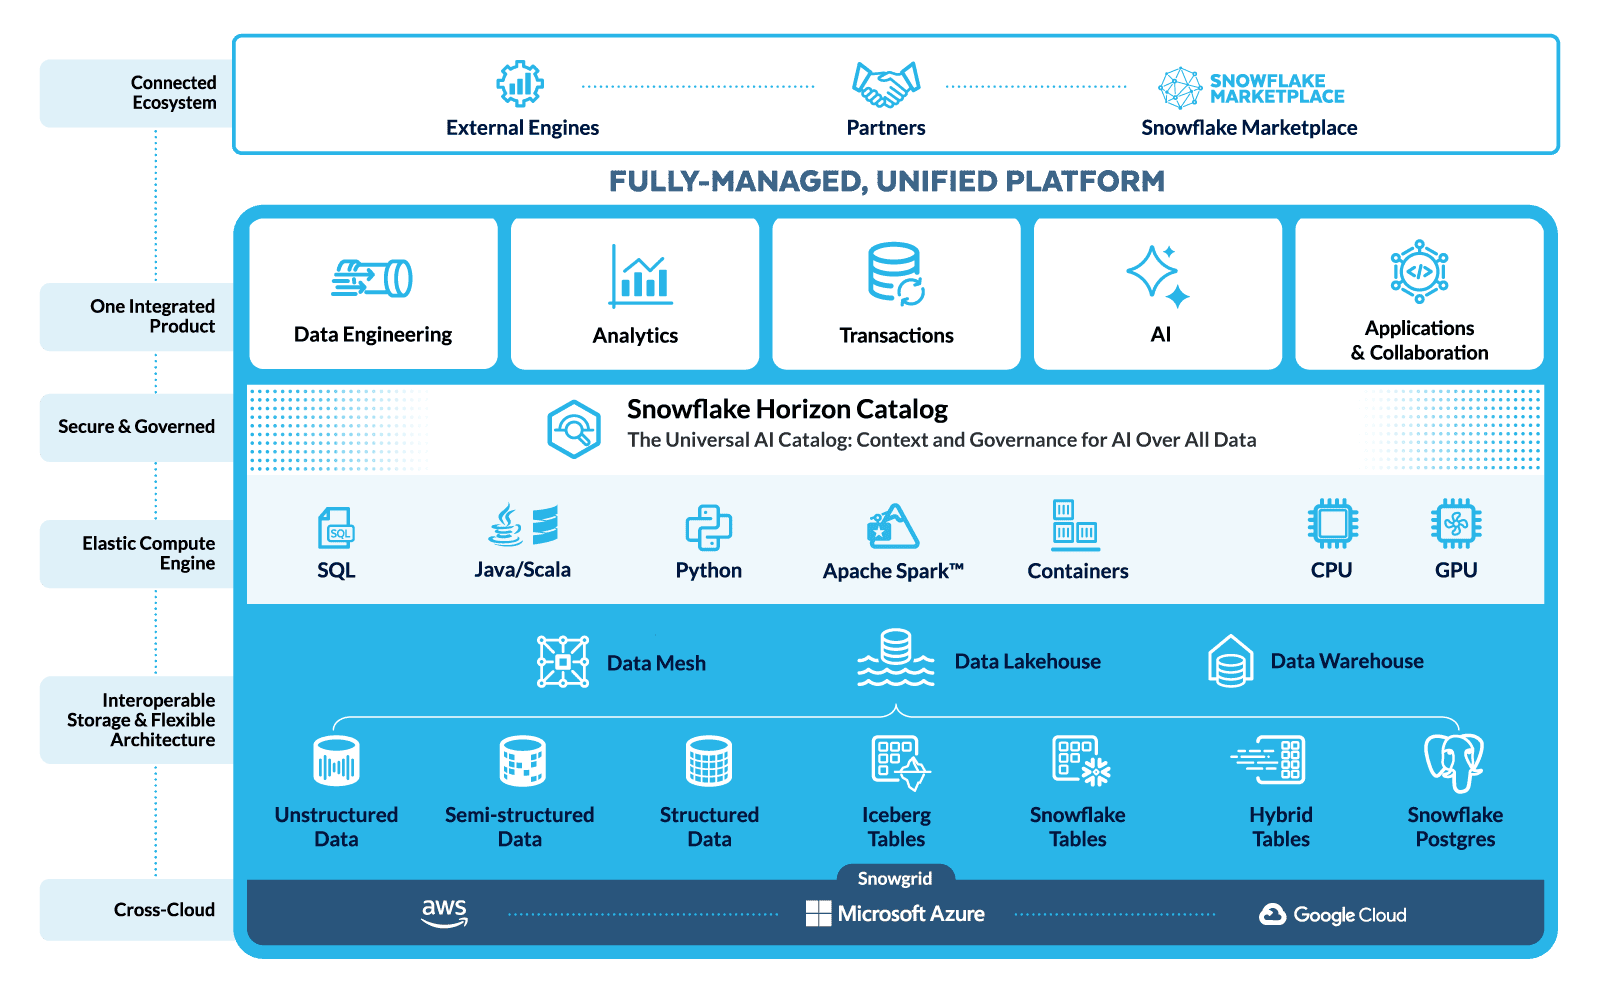
Snowflake then gives you the environment where that external data can be stored. It can also be processed and then consolidated with existing enterprise data by Cortex AI.
The result is a clear path from external web data to business intelligence, with Bright Data handling the complexity of web data retrieval and Snowflake providing the infrastructure for analysis and AI-powered activation.
Bright Data as the Data Layer for Snowflake
Before web data can be analyzed in Snowflake, it needs to be collected and prepared for use. Bright Data addresses this challenge with enterprise-grade infrastructure for web data collection.
Bright Data’s platform includes more than 400 million residential IPs, enabling high scalability and concurrency, with 99.99% uptime and a 99.95% success rate.
When it comes to web data, Bright Data provides hundreds of datasets containing 21+ billion records, 1,000+ ready-made Web Scraper APIs, and 90+ PB of cached data queryable via APIs.
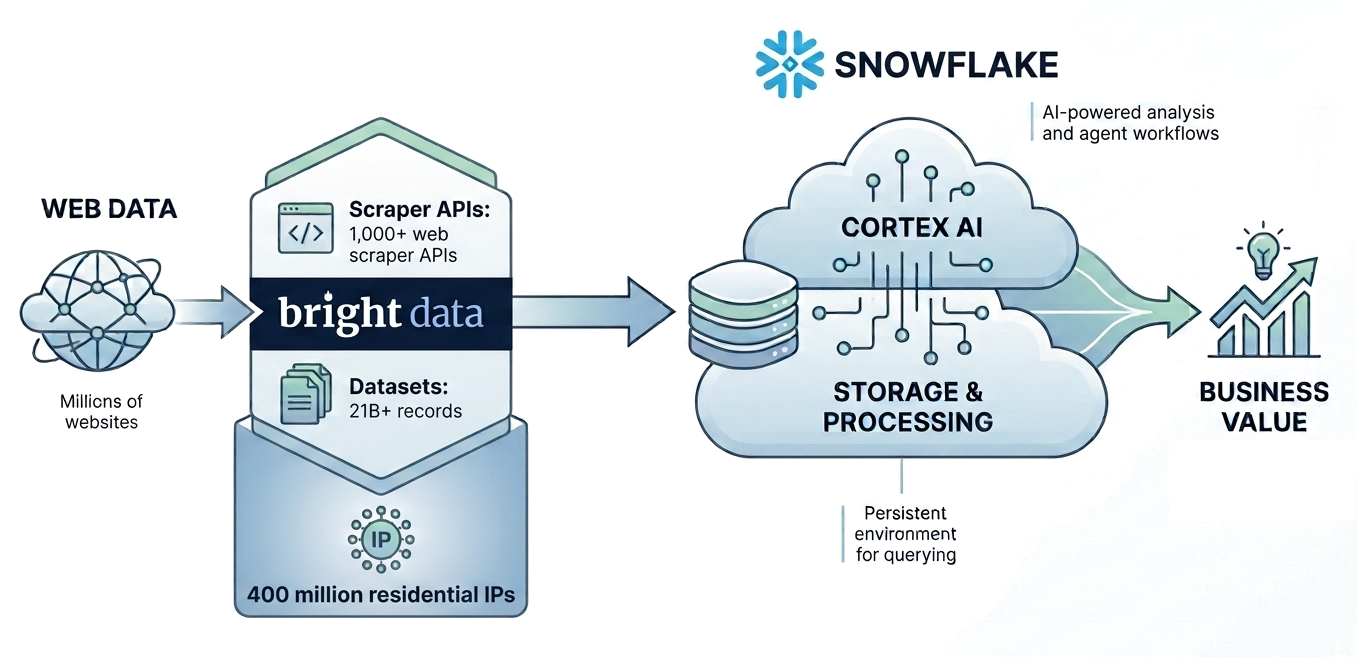
Together, Bright Data and Snowflake cover two complementary capabilities:
- Acquire the right external data with Bright Data: Identify the web data your business needs and collect it at the required scale and freshness.
- Store, merge, and activate it in Snowflake: Bring that external data together with your current Snowflake data and use Snowflake’s processing and AI capabilities to turn it into actionable intelligence.
This approach also lets you optimize the data pipeline upstream. Instead of automatically moving entire datasets into Snowflake, Bright Data’s filtering and customization capabilities help you select only the data you need. That means less unnecessary data to store, while preserving the information needed for subsequent processing.
Persistent Datasets or Live Web Access? Choosing Your Ingress Pattern
Before building your agent, decide how you want to access and store web data. Should you load scraped data into Snowflake and query it there, or should your Cortex Agent fetch data from the web dynamically at inference time?
Bright Data supports both patterns, and each is suited to different use cases.
| Persistent batch datasets | Live ingress via Bright Data MCP | |
|---|---|---|
| How it works | A filtered dataset is delivered to Snowflake tables once or on a schedule. | The Cortex Agent calls Bright Data tools for search, scraping, or browser automation when it needs an answer. |
| Where the data lives | In Snowflake, alongside your business data. | Fetched on demand and not stored unless you explicitly persist it. |
| Freshness | Current as of the last dataset delivery. | Fresh web data fetched at query time. |
| Latency per question | Low, since queries run directly against the warehouse. | Higher, because data must be fetched from the web and pages may need to be rendered. |
| Best query pattern | Repeatable, aggregate, and join-heavy analysis. | Ad-hoc, time-sensitive, or long-tail lookups. |
| Joins with internal data | Native SQL joins with your existing warehouse data. | The agent combines web results with other information in its context. |
| Reproducibility and auditability | High, as the same dataset snapshot can produce the same result. | Low, as web pages and their contents can change between requests. |
| Cost profile | Dataset delivery, plus Snowflake storage and compute costs. | Per-request usage that scales with agent activity. |
| Typical examples | Influencer scoring, market sizing, data enrichment, and BI dashboards. | Price checks, news monitoring, claim verification, and reading specific URLs. |
As a rule of thumb for choosing which approach to follow, remember this: if you expect to ask the same types of questions repeatedly across a defined population, store the data. If the answer depends on what the web says right now or on a page you cannot predict in advance, fetch the data on demand.
In the following sections, you will first see how to work with the persistent dataset approach and then explore how to add live web access with Bright Data MCP.
From Storage to AI: Understanding the Snowflake Consumption Model
Now that you have seen how Bright Data and Snowflake fit together, the next question is naturally about cost. Data pipelines can involve several layers of consumption, from acquiring web data to storing, processing, and analyzing it with AI.
Bringing web data into Snowflake involves multiple consumption layers. Depending on the workflow, costs can come from data acquisition through Bright Data, Snowflake storage and compute, and AI services utilized to analyze the data.
Bright Data pricing depends on the product, data source, volume, and collection requirements. Find the latest pricing and available options on the Bright Data pricing page.
Once data reaches Snowflake, consumption depends on how much data you store, process, query, and activate. Snowflake’s pricing model covers storage, compute, and additional services, including AI capabilities. For current pricing details, refer to Snowflake’s pricing options.
Want a detailed cost breakdown? Reach out to [email protected].
How to Deliver Bright Data Web Data into Snowflake and Activate It with Cortex AI
In this step-by-step section, you will learn how to send web data collected with Bright Data to Snowflake for storage and computation. Specifically, you will then see how to connect that data to a Snowflake Cortex AI agent for analysis.
This walkthrough uses the persistent batch dataset pattern described in the comparison above. It fits this use case because influencer scoring is a repeatable analysis over a defined population that benefits from joins with internal campaign data.
Prerequisites
To follow this tutorial, make sure you have:
- A Snowflake account with a database and schema configured and ready for data ingestion.
- A Bright Data account.
Familiarity with Bright Data data delivery options for Snowflake will also be helpful.
Step #1: Select the Bright Data Dataset
All Bright Data datasets can be configured for ingestion into Snowflake, as well as several other cloud platforms.
Start by logging in to your Bright Data account and navigating to “Datasets > Dataset Marketplace”:
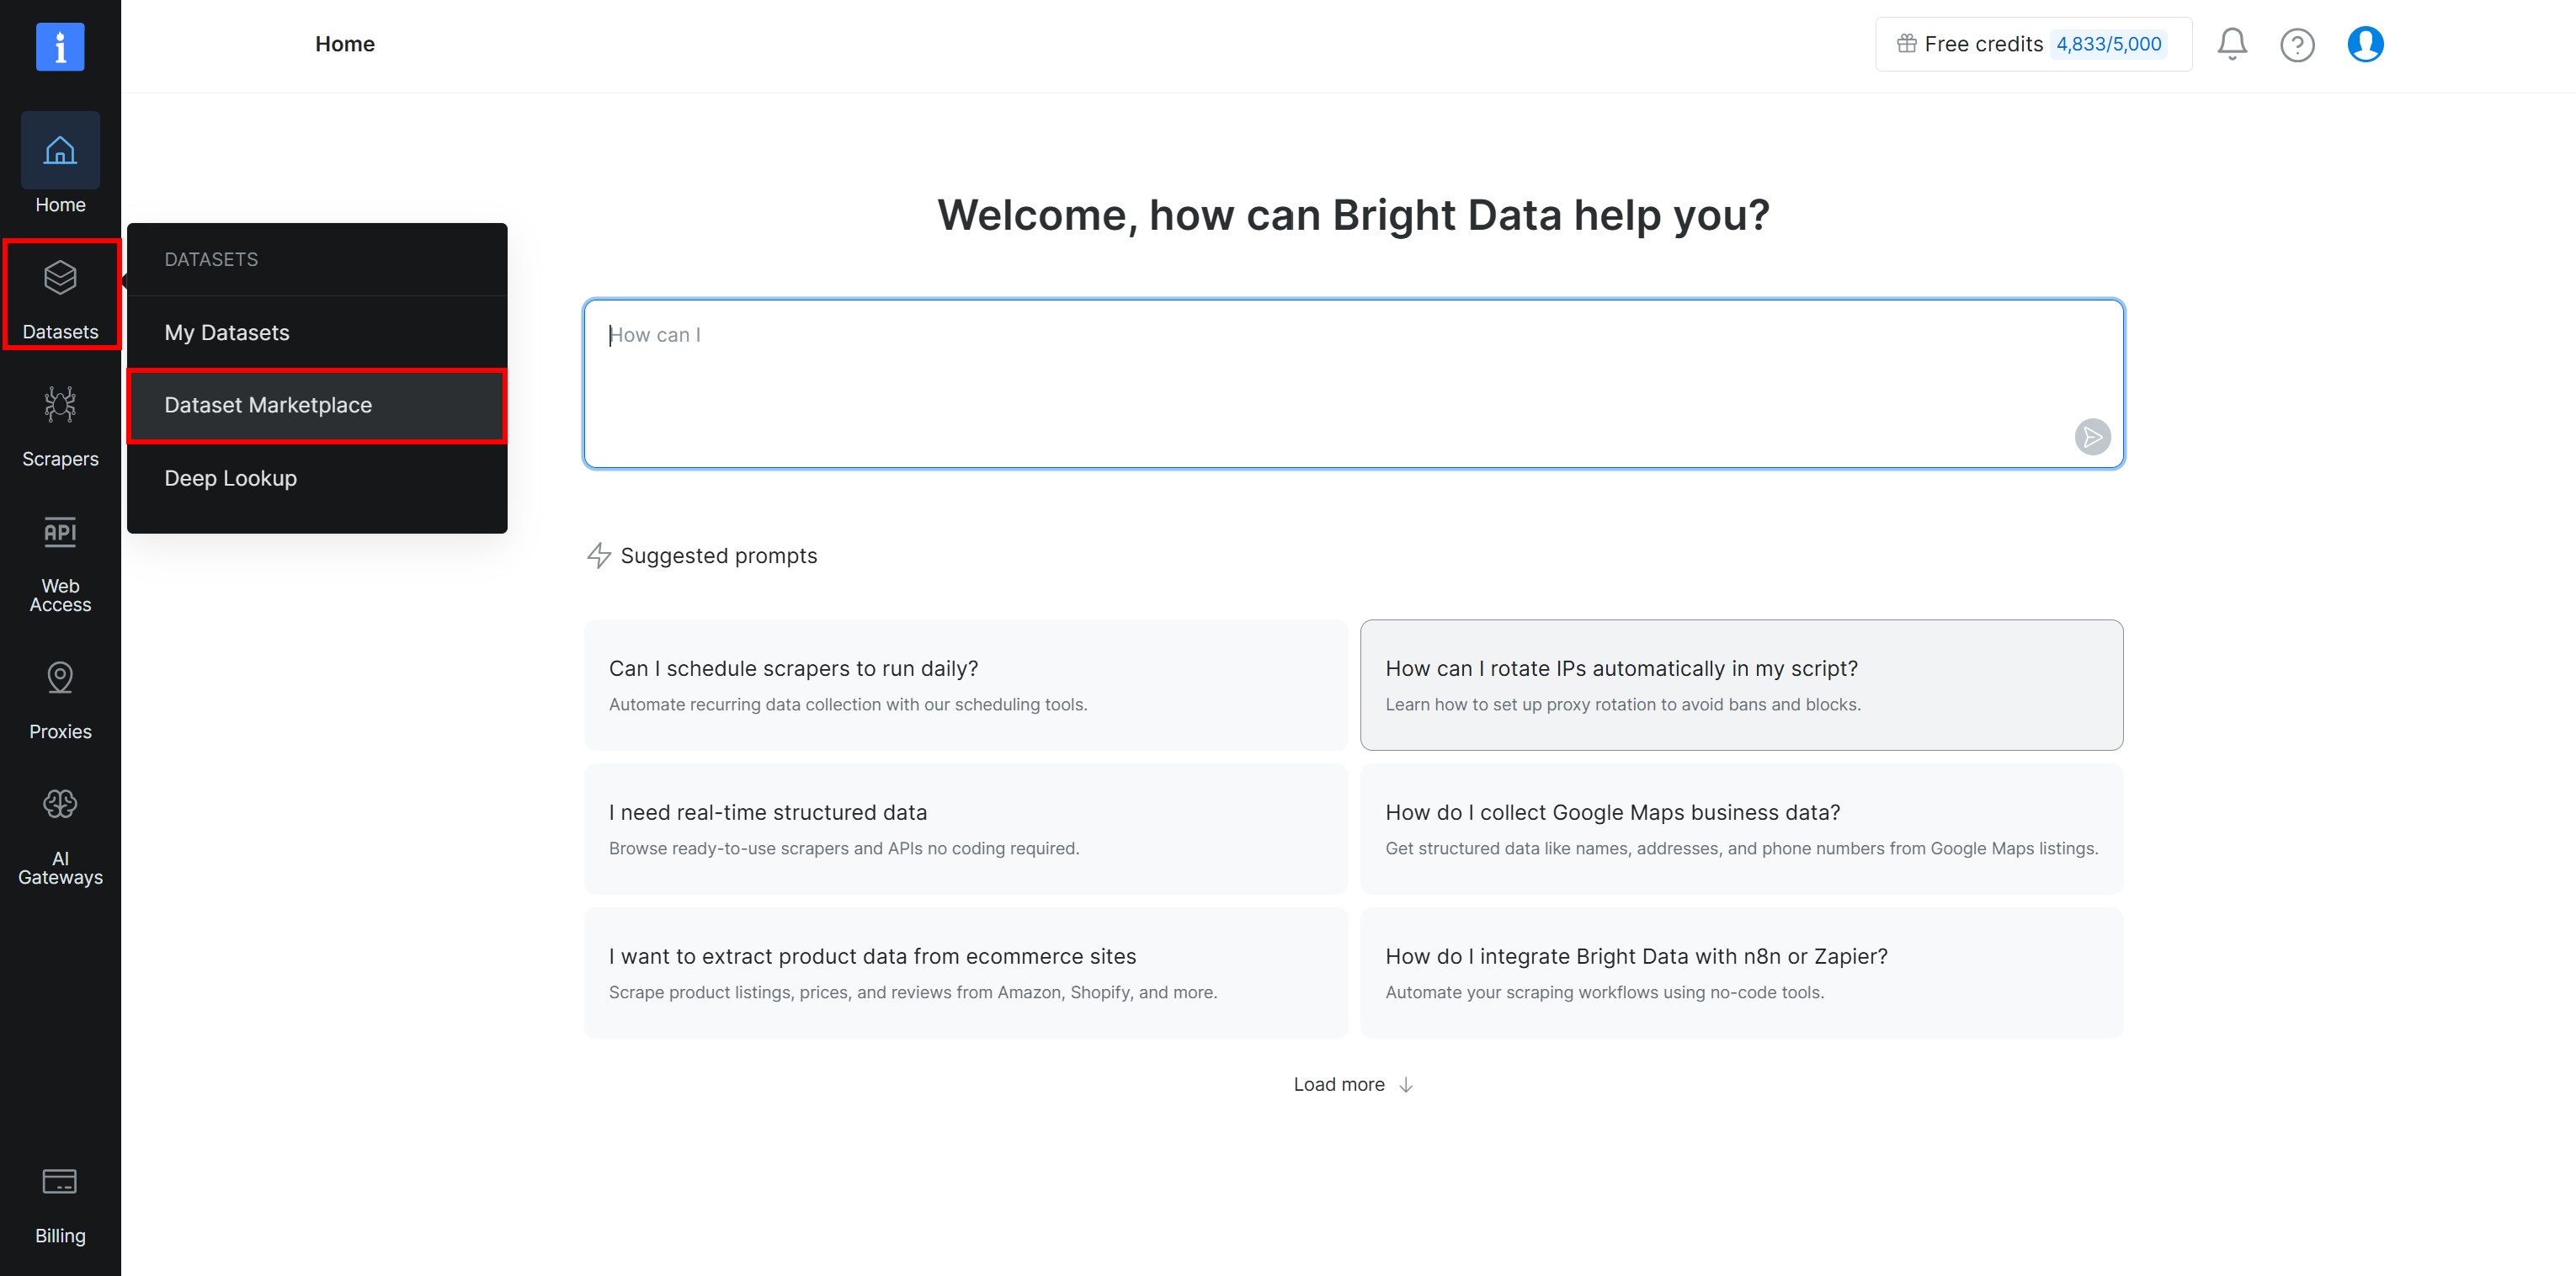
On the “Dataset Marketplace” page, search for the dataset you are interested in.
In this tutorial, we will harness Instagram profile data to identify influencers who could be a good fit for sponsoring a skincare product.
The Bright Data dataset gives external information about the influencers, while your pre-existing Snowflake records can provide internal context such as product information, target audiences, campaign requirements, or previous campaign performance. A Cortex Agent can then merge these sources to determine which influencers are the best fit for a particular campaign.
Thus, search for “instagram” and select the “Instagram – Profiles” dataset:
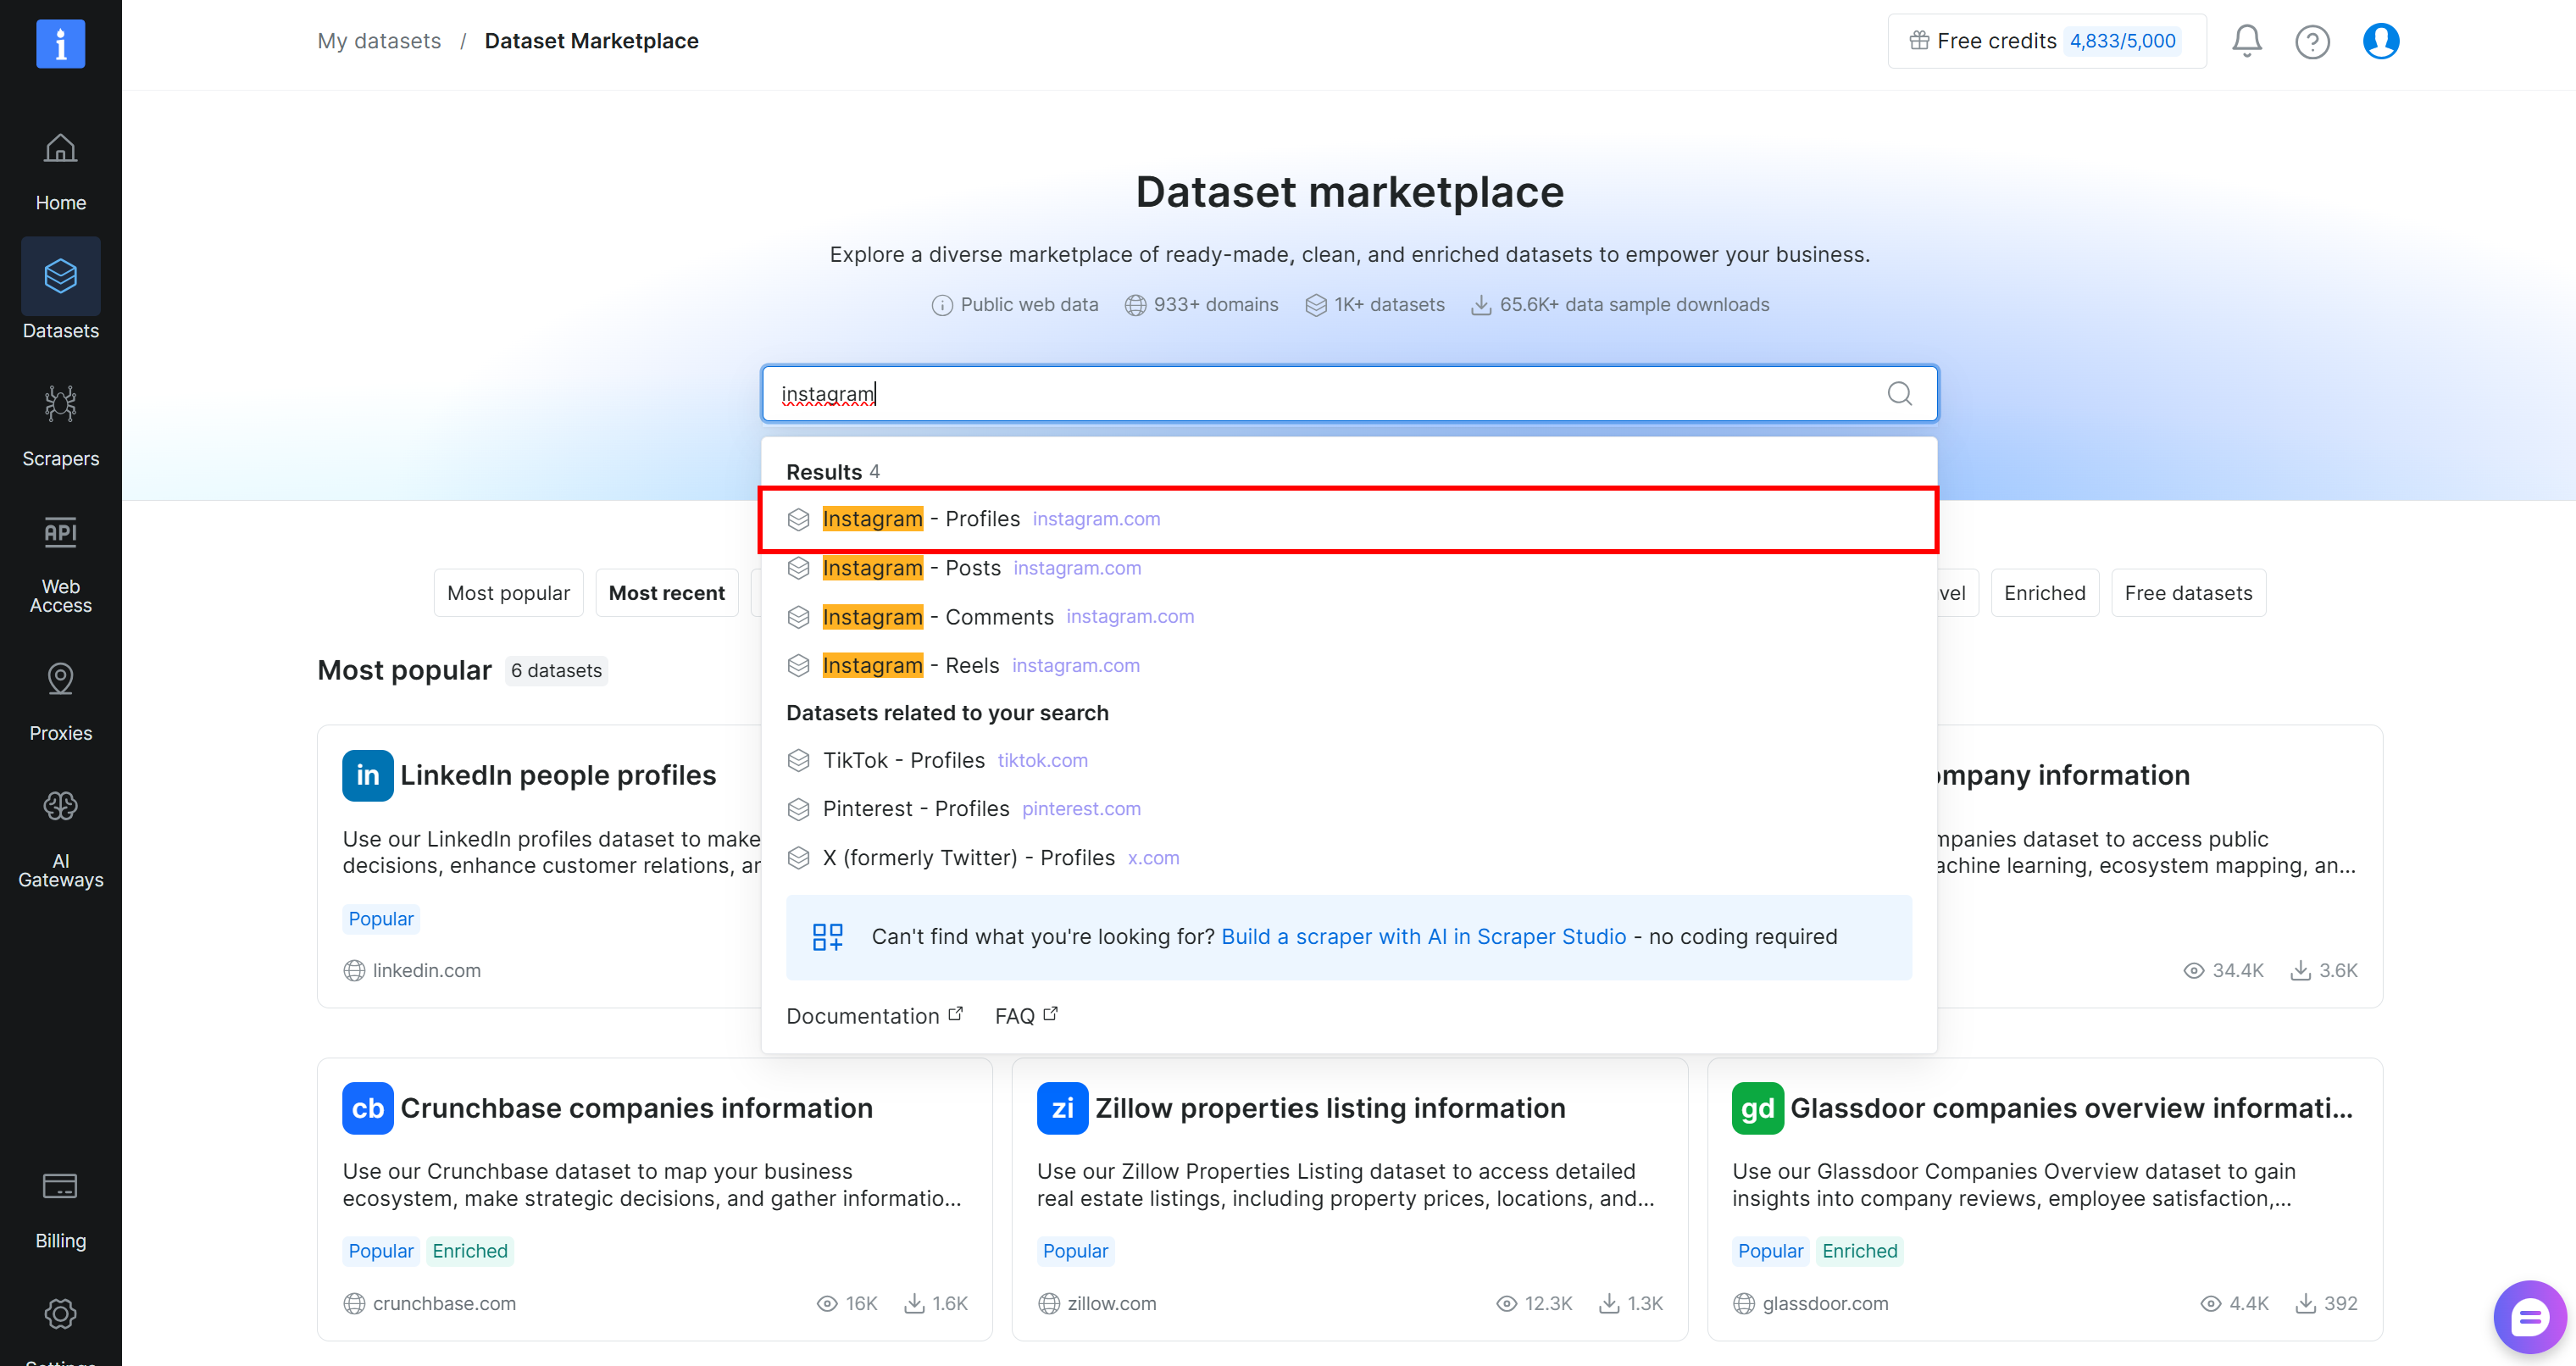
Well done! You will then be redirected to the dataset page, where you can proceed with the purchase.
Alternative approach: You can also get Bright Data services directly from the Snowflake Marketplace:
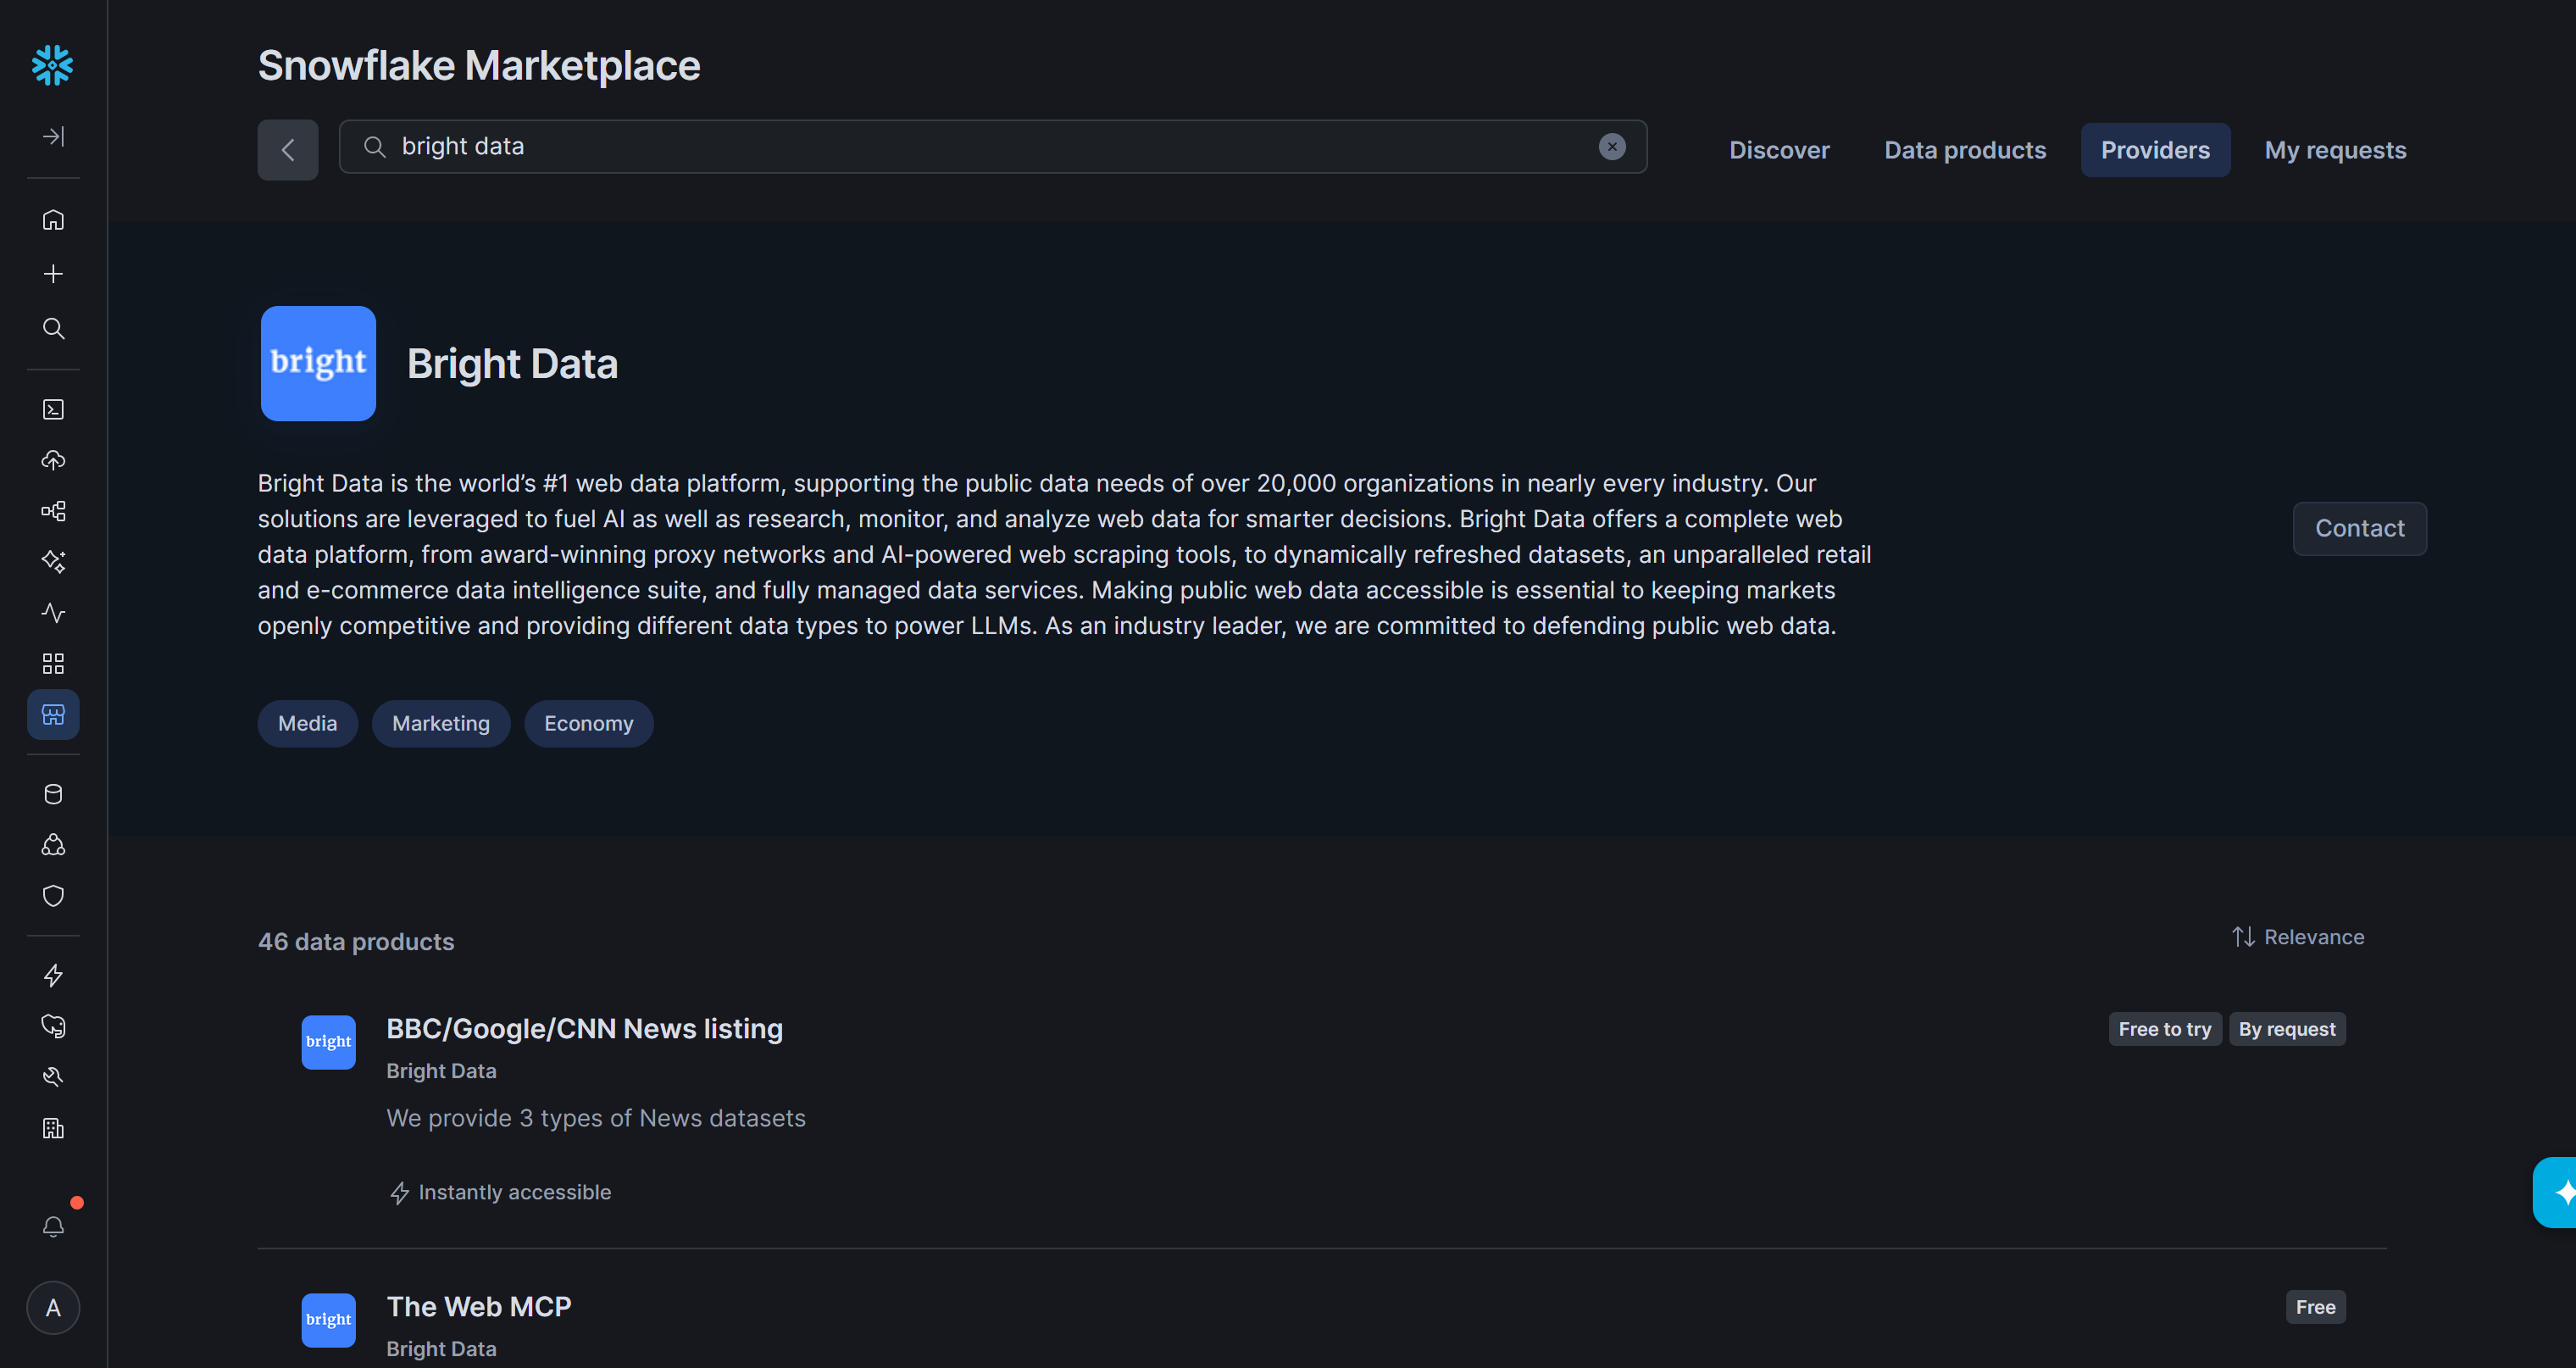
Remember that Bright Data is an official Snowflake provider and partner.
Step #2: Get the Data of Interest
The Bright Data “Instagram – Profiles” dataset contains more than 650 million records. In most cases, however, you only need a subset of the full dataset. This is why Bright Data comes with built-in filtering options.
On the “Instagram – Profiles” dataset page, click “Filters” on the left:
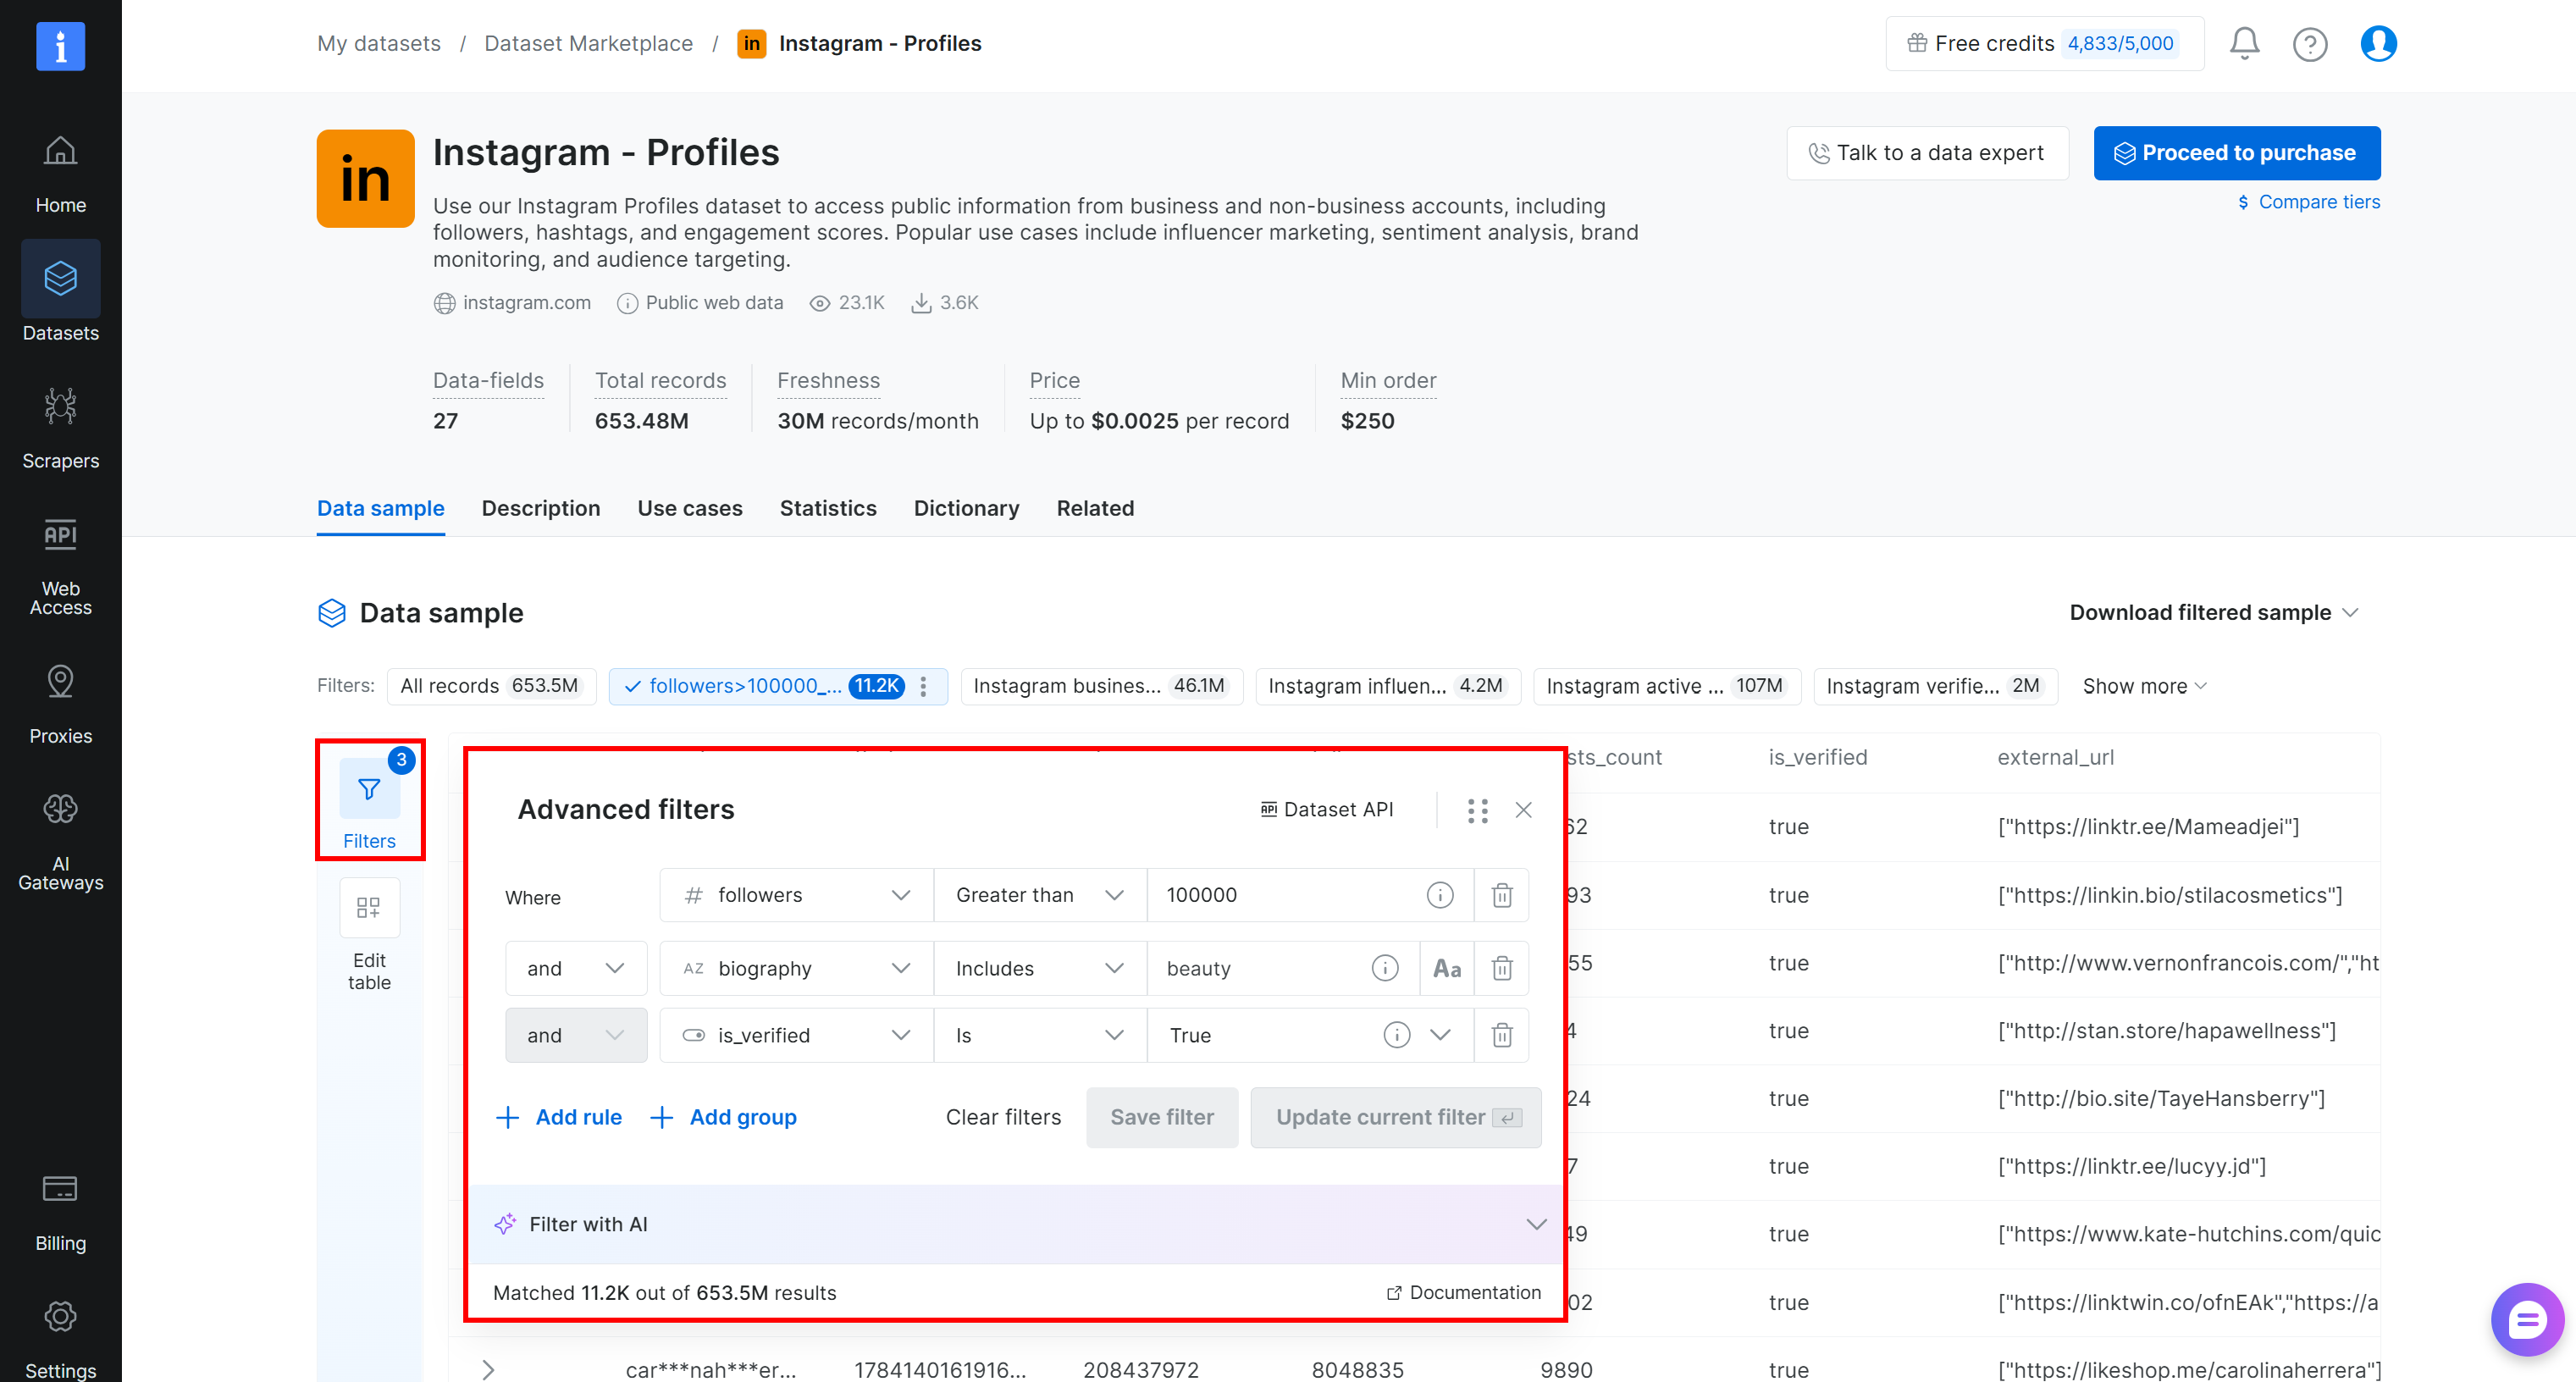
Now, assume you want Instagram profiles that:
- Have more than 100K followers.
- Include the word “beauty” in their biography.
- Are verified.
This filtering step is also important from a data-efficiency perspective. Instead of moving the entire 653.5 million-record dataset into Snowflake, you can narrow it down to the required records first. Here, Bright Data’s filtering reduces the dataset to approximately 11.2K profiles, helping avoid storage overhead.
Apply the filters. You can also explore the filtered profiles directly in the Bright Data control panel or download a sample of up to 1K records (with some obscured fields).
Once you are satisfied with the filters and results, click “Proceed to purchase” and select a delivery frequency. You can choose between a one-time purchase or periodic refreshes of the selected data (monthly, quarterly, or bi-annual):
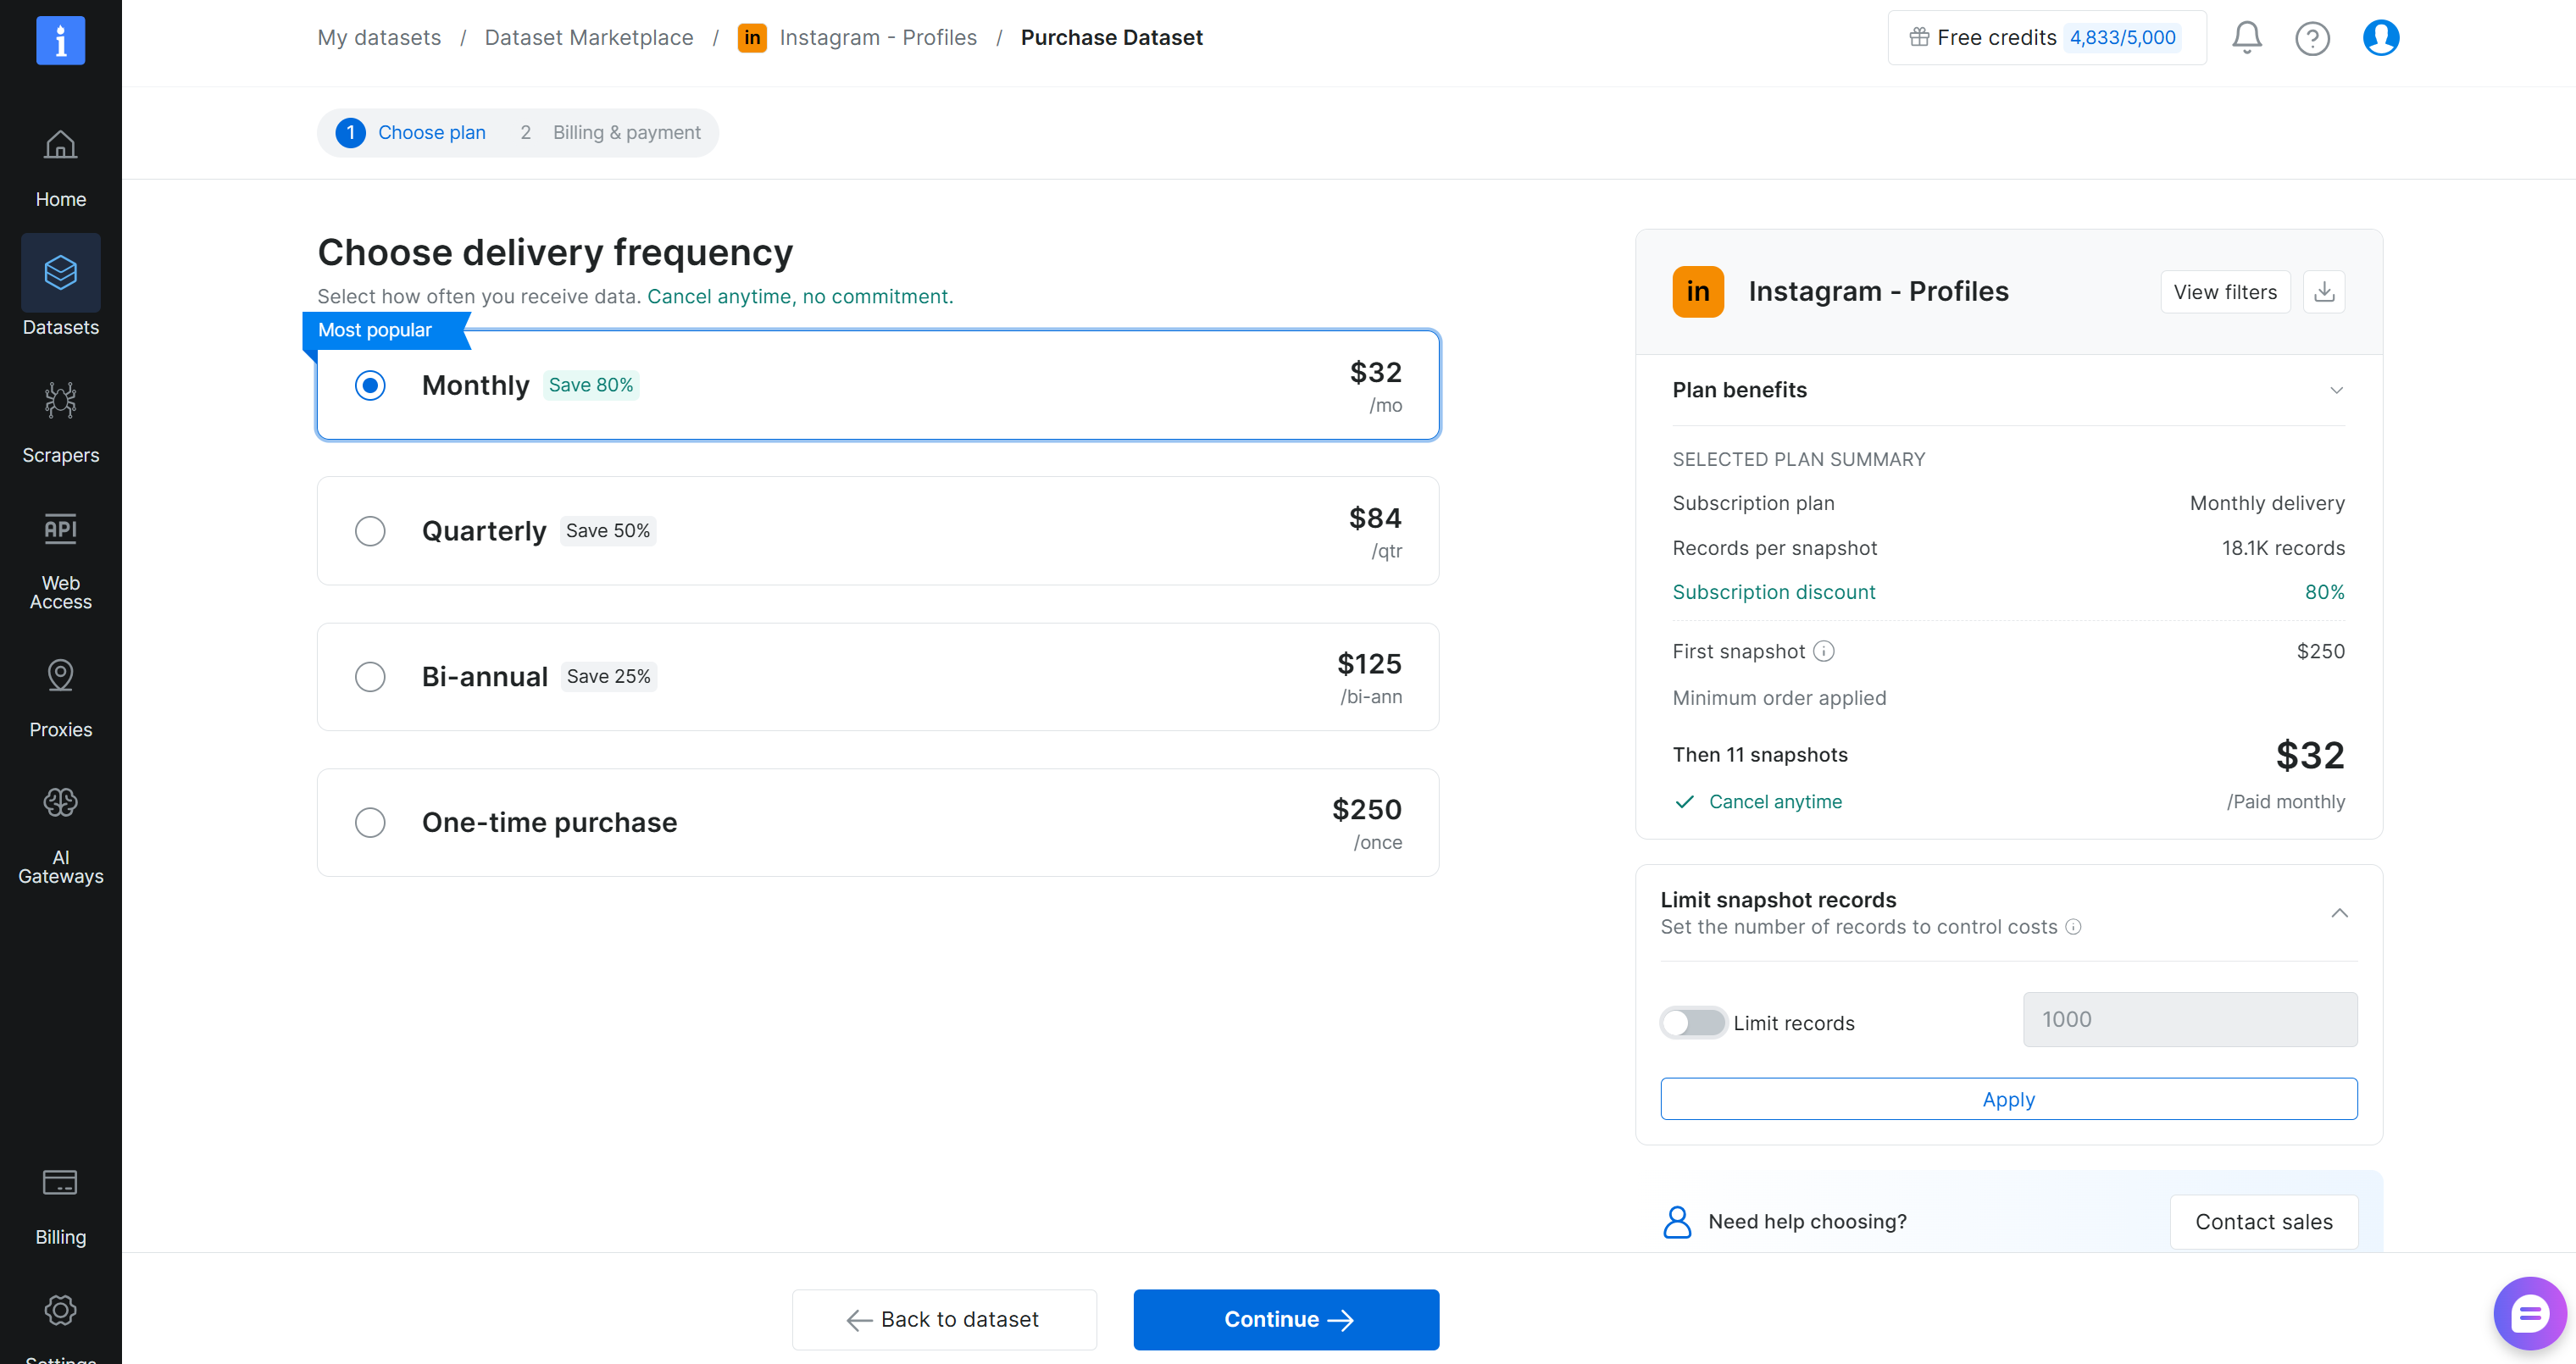
Complete the payment process and wait for the dataset to be prepared. As soon as the dataset snapshot is ready, you will receive an email with a link to it:
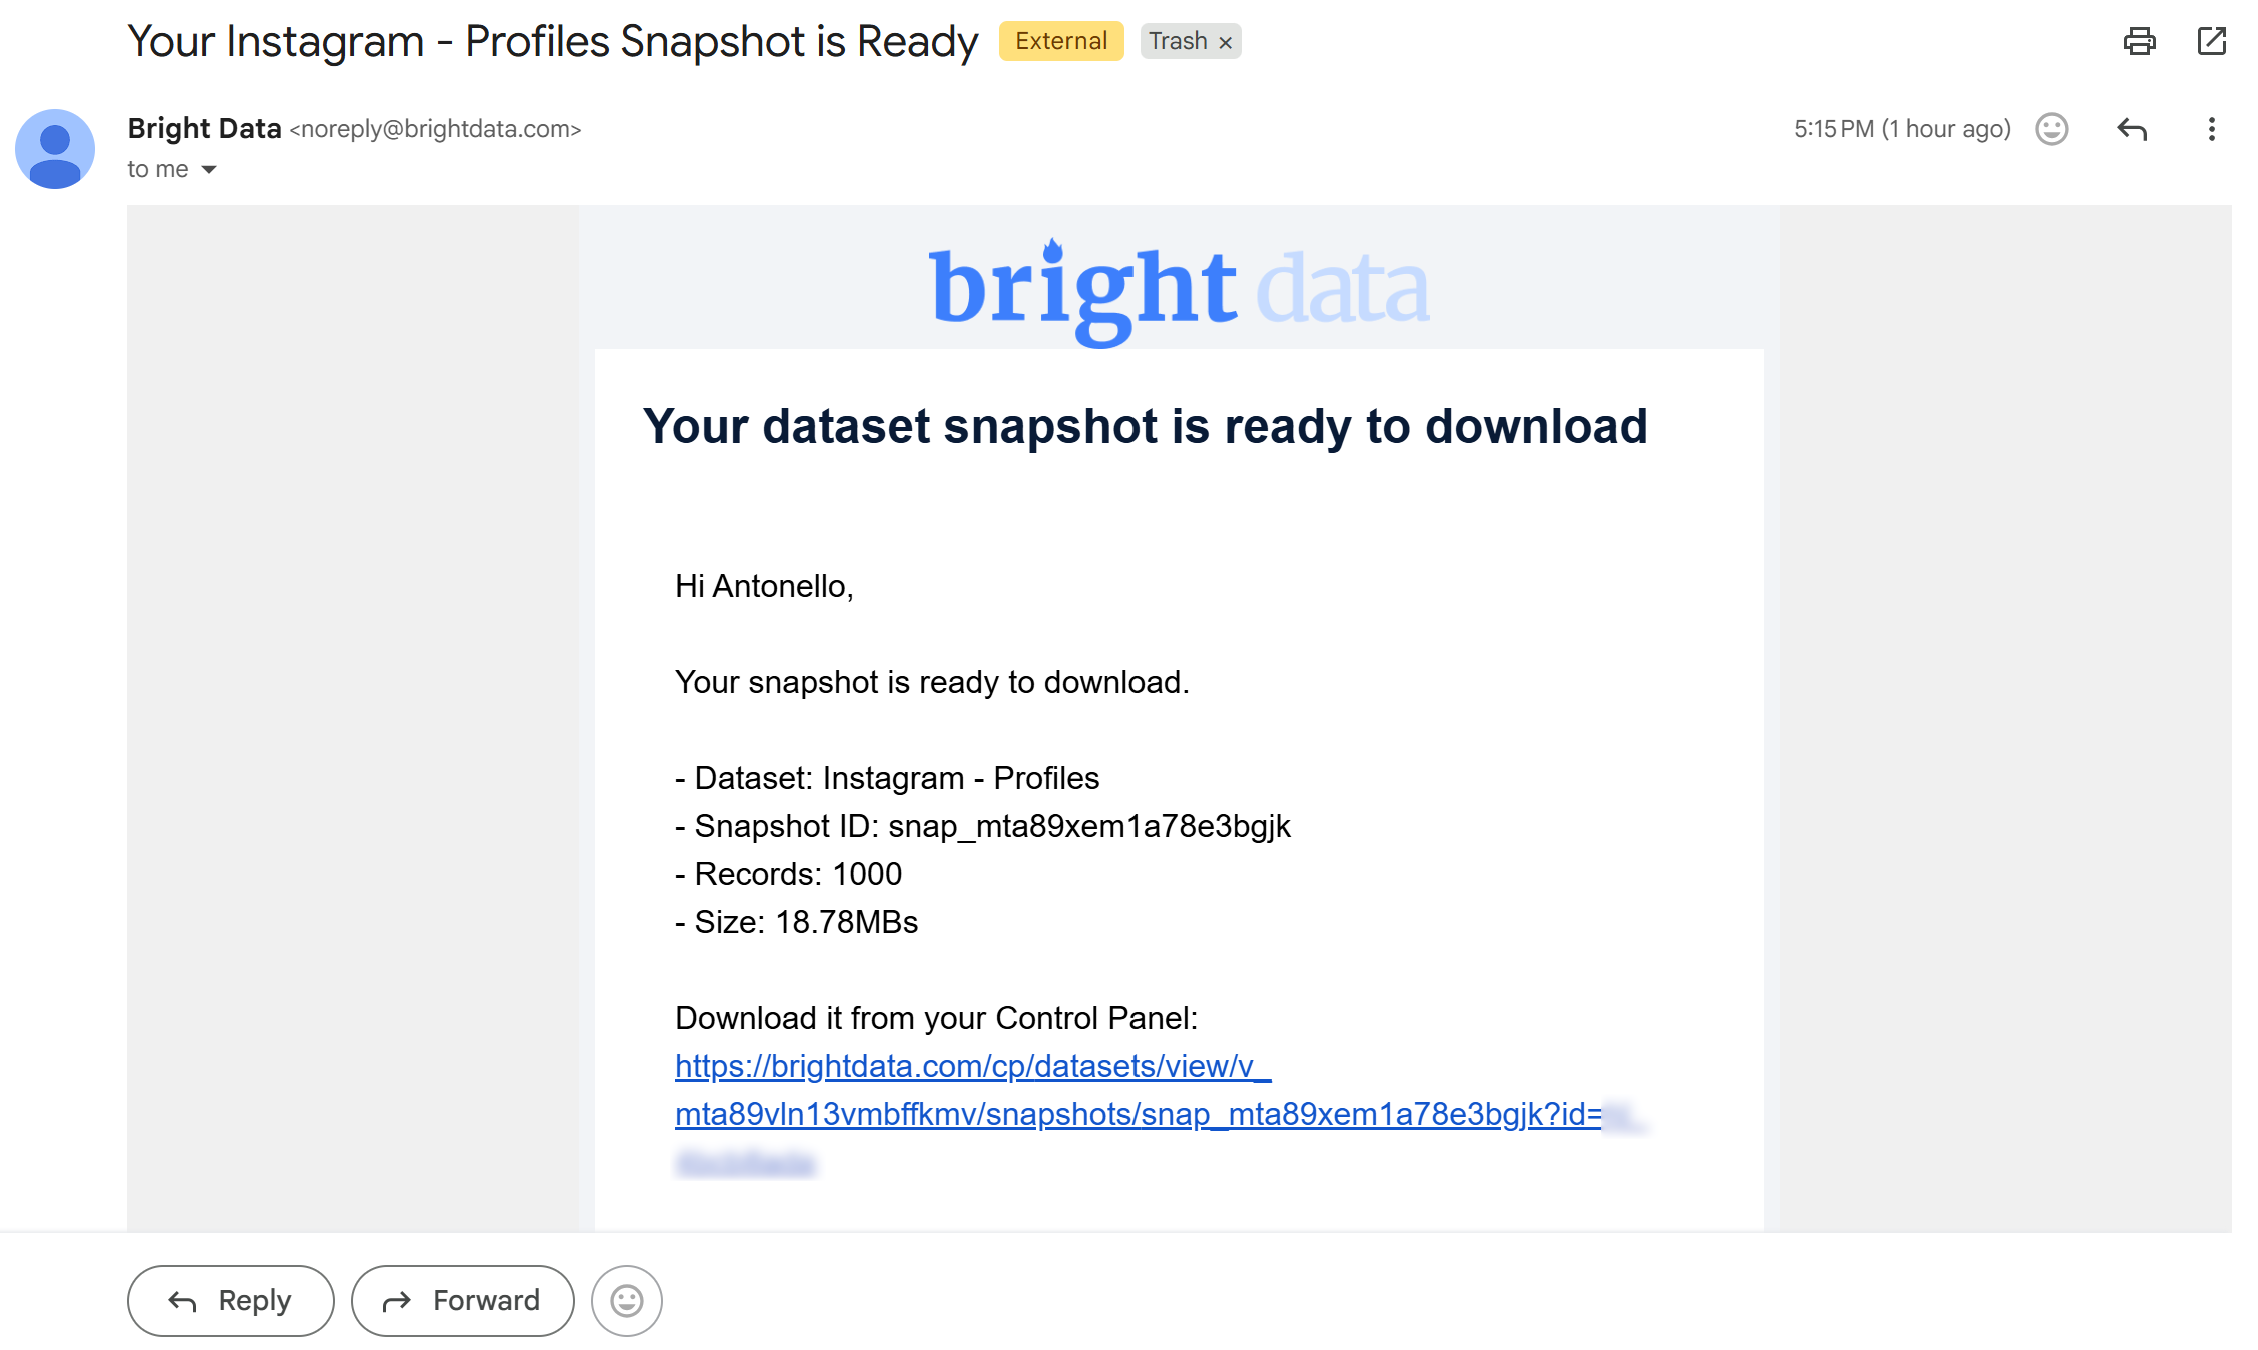
Click the URL in the email to open the snapshot page:
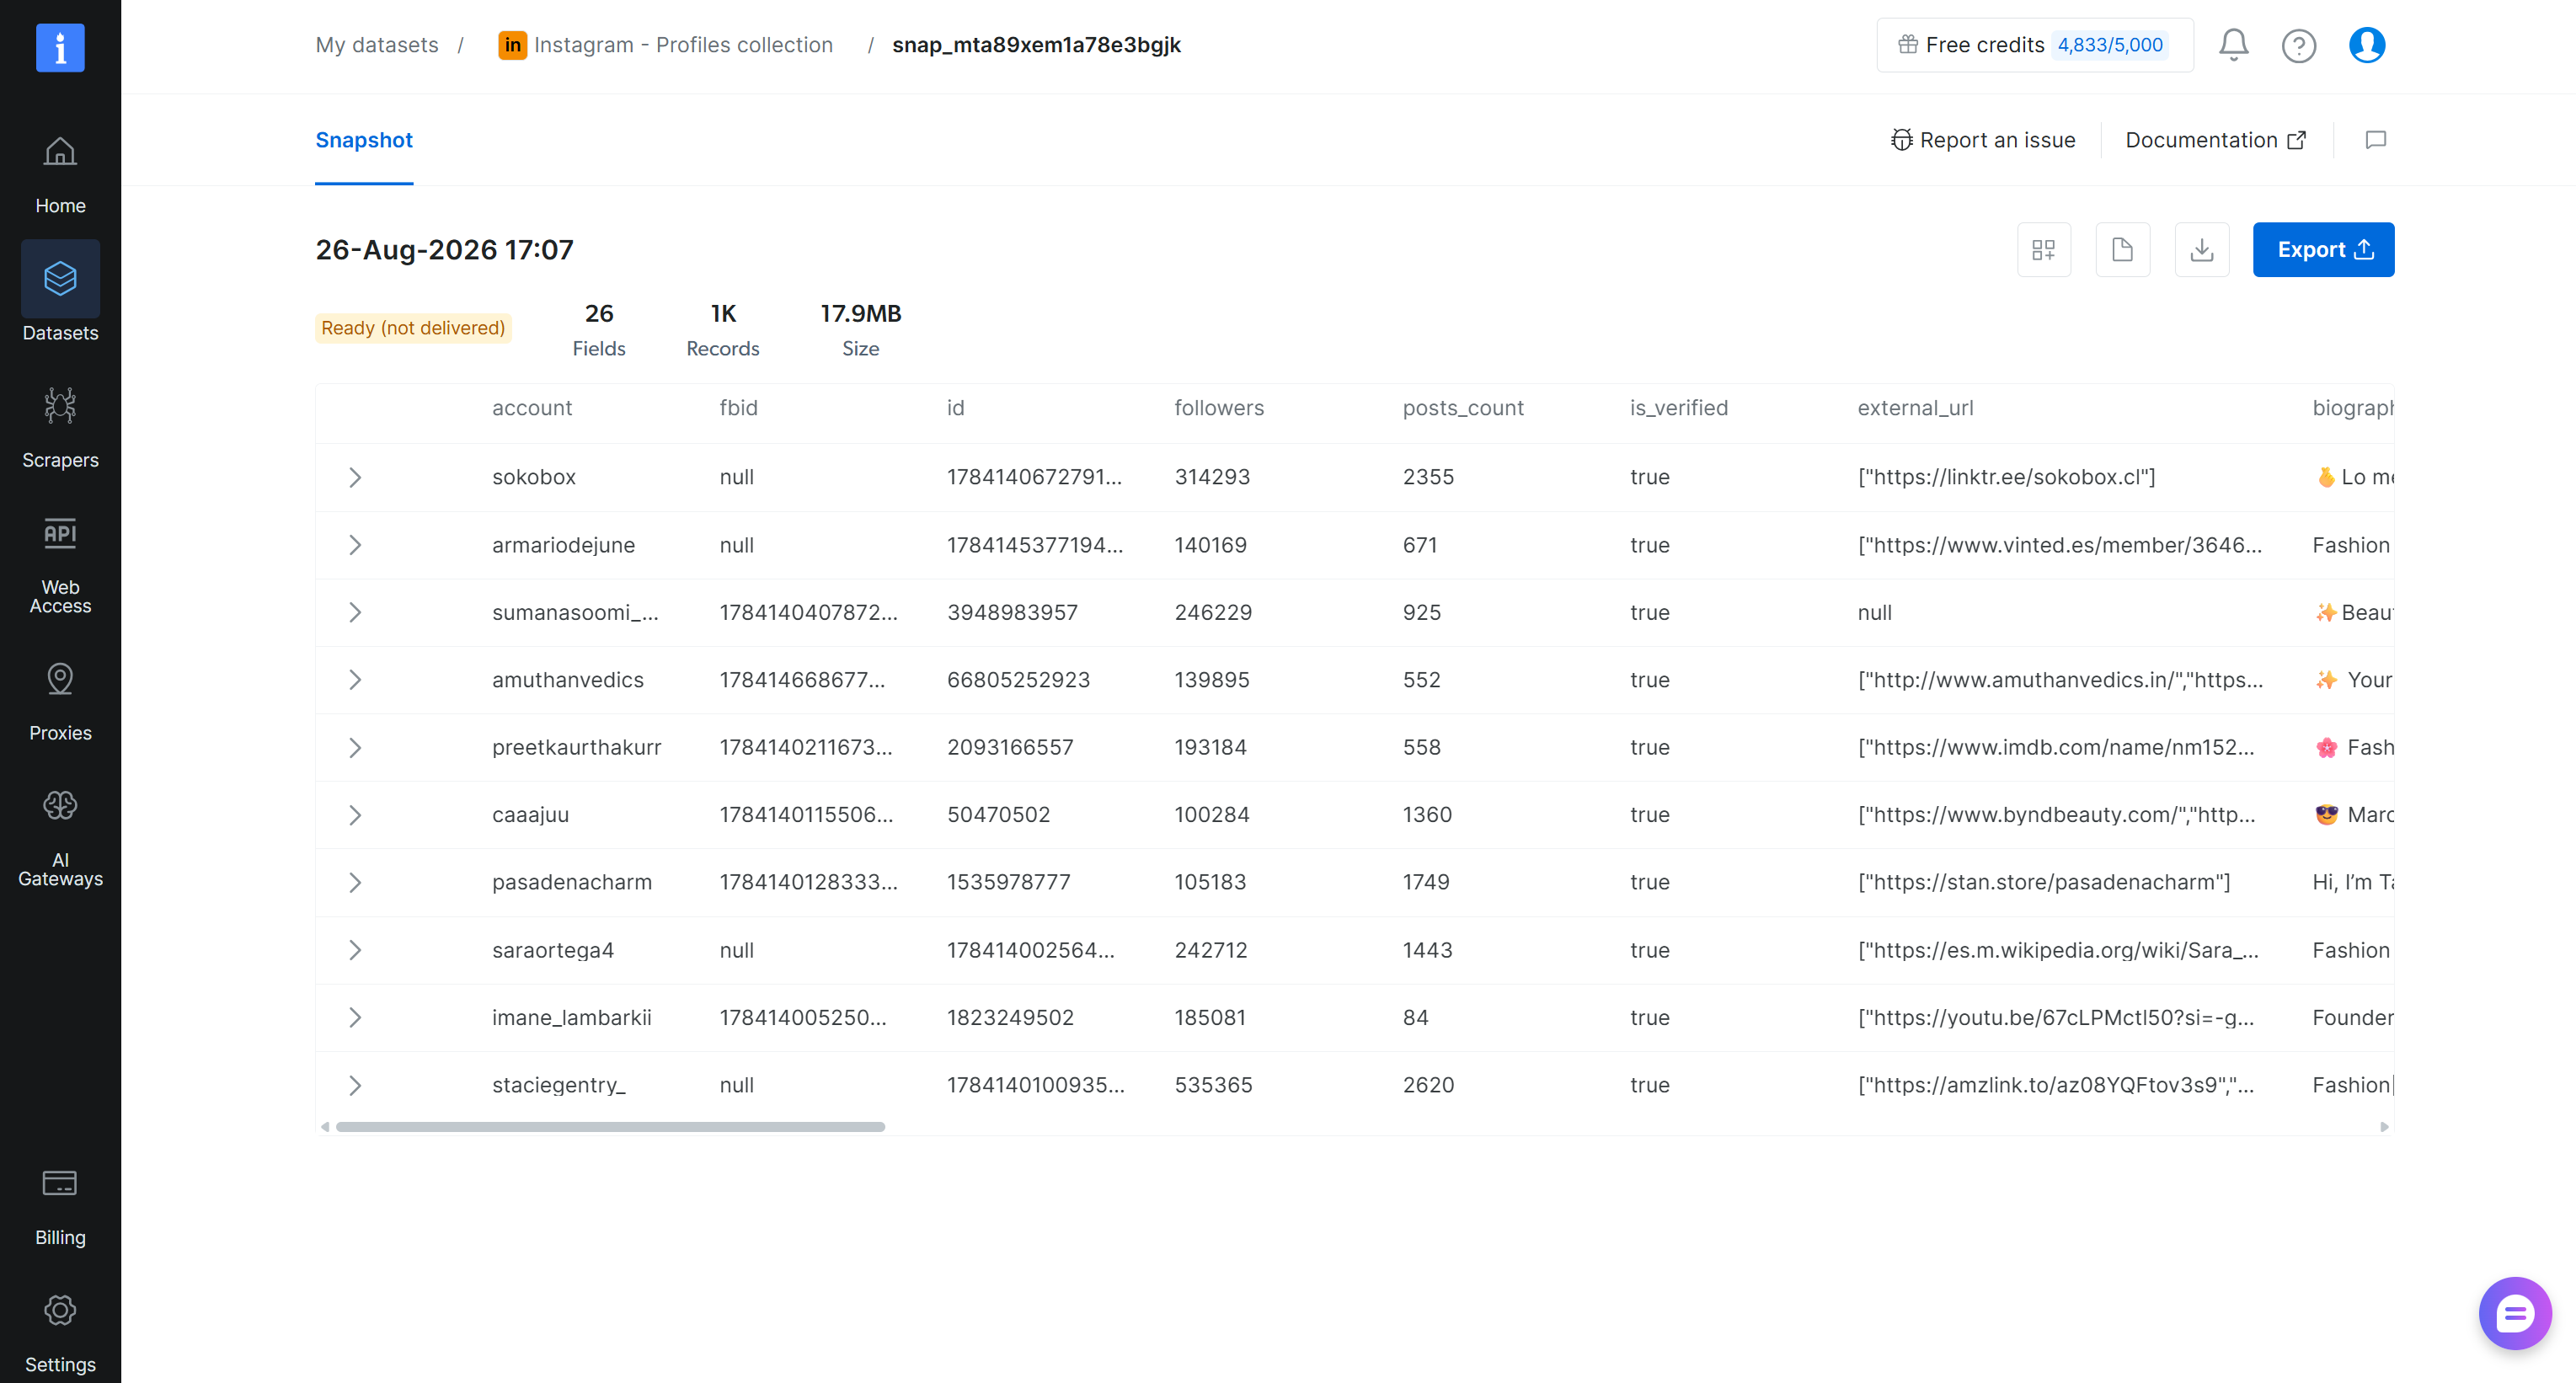
Here, you can preview some of the data and view a report with details such as the cost and number of records. Most importantly, you can download the dataset or export it directly to Snowflake, along with other supported destinations.
Note: In this example, we limited the number of purchased records to 1K for simplicity. This is why the number of records is set to 1K instead of 11.2K.
Step #3: Send the Bright Data Web Data to Snowflake
To send the filtered dataset to Snowflake, begin by clicking the “Export” button on the dataset snapshot page:

Select “Snowflake” and fill in the required fields to configure the data delivery:
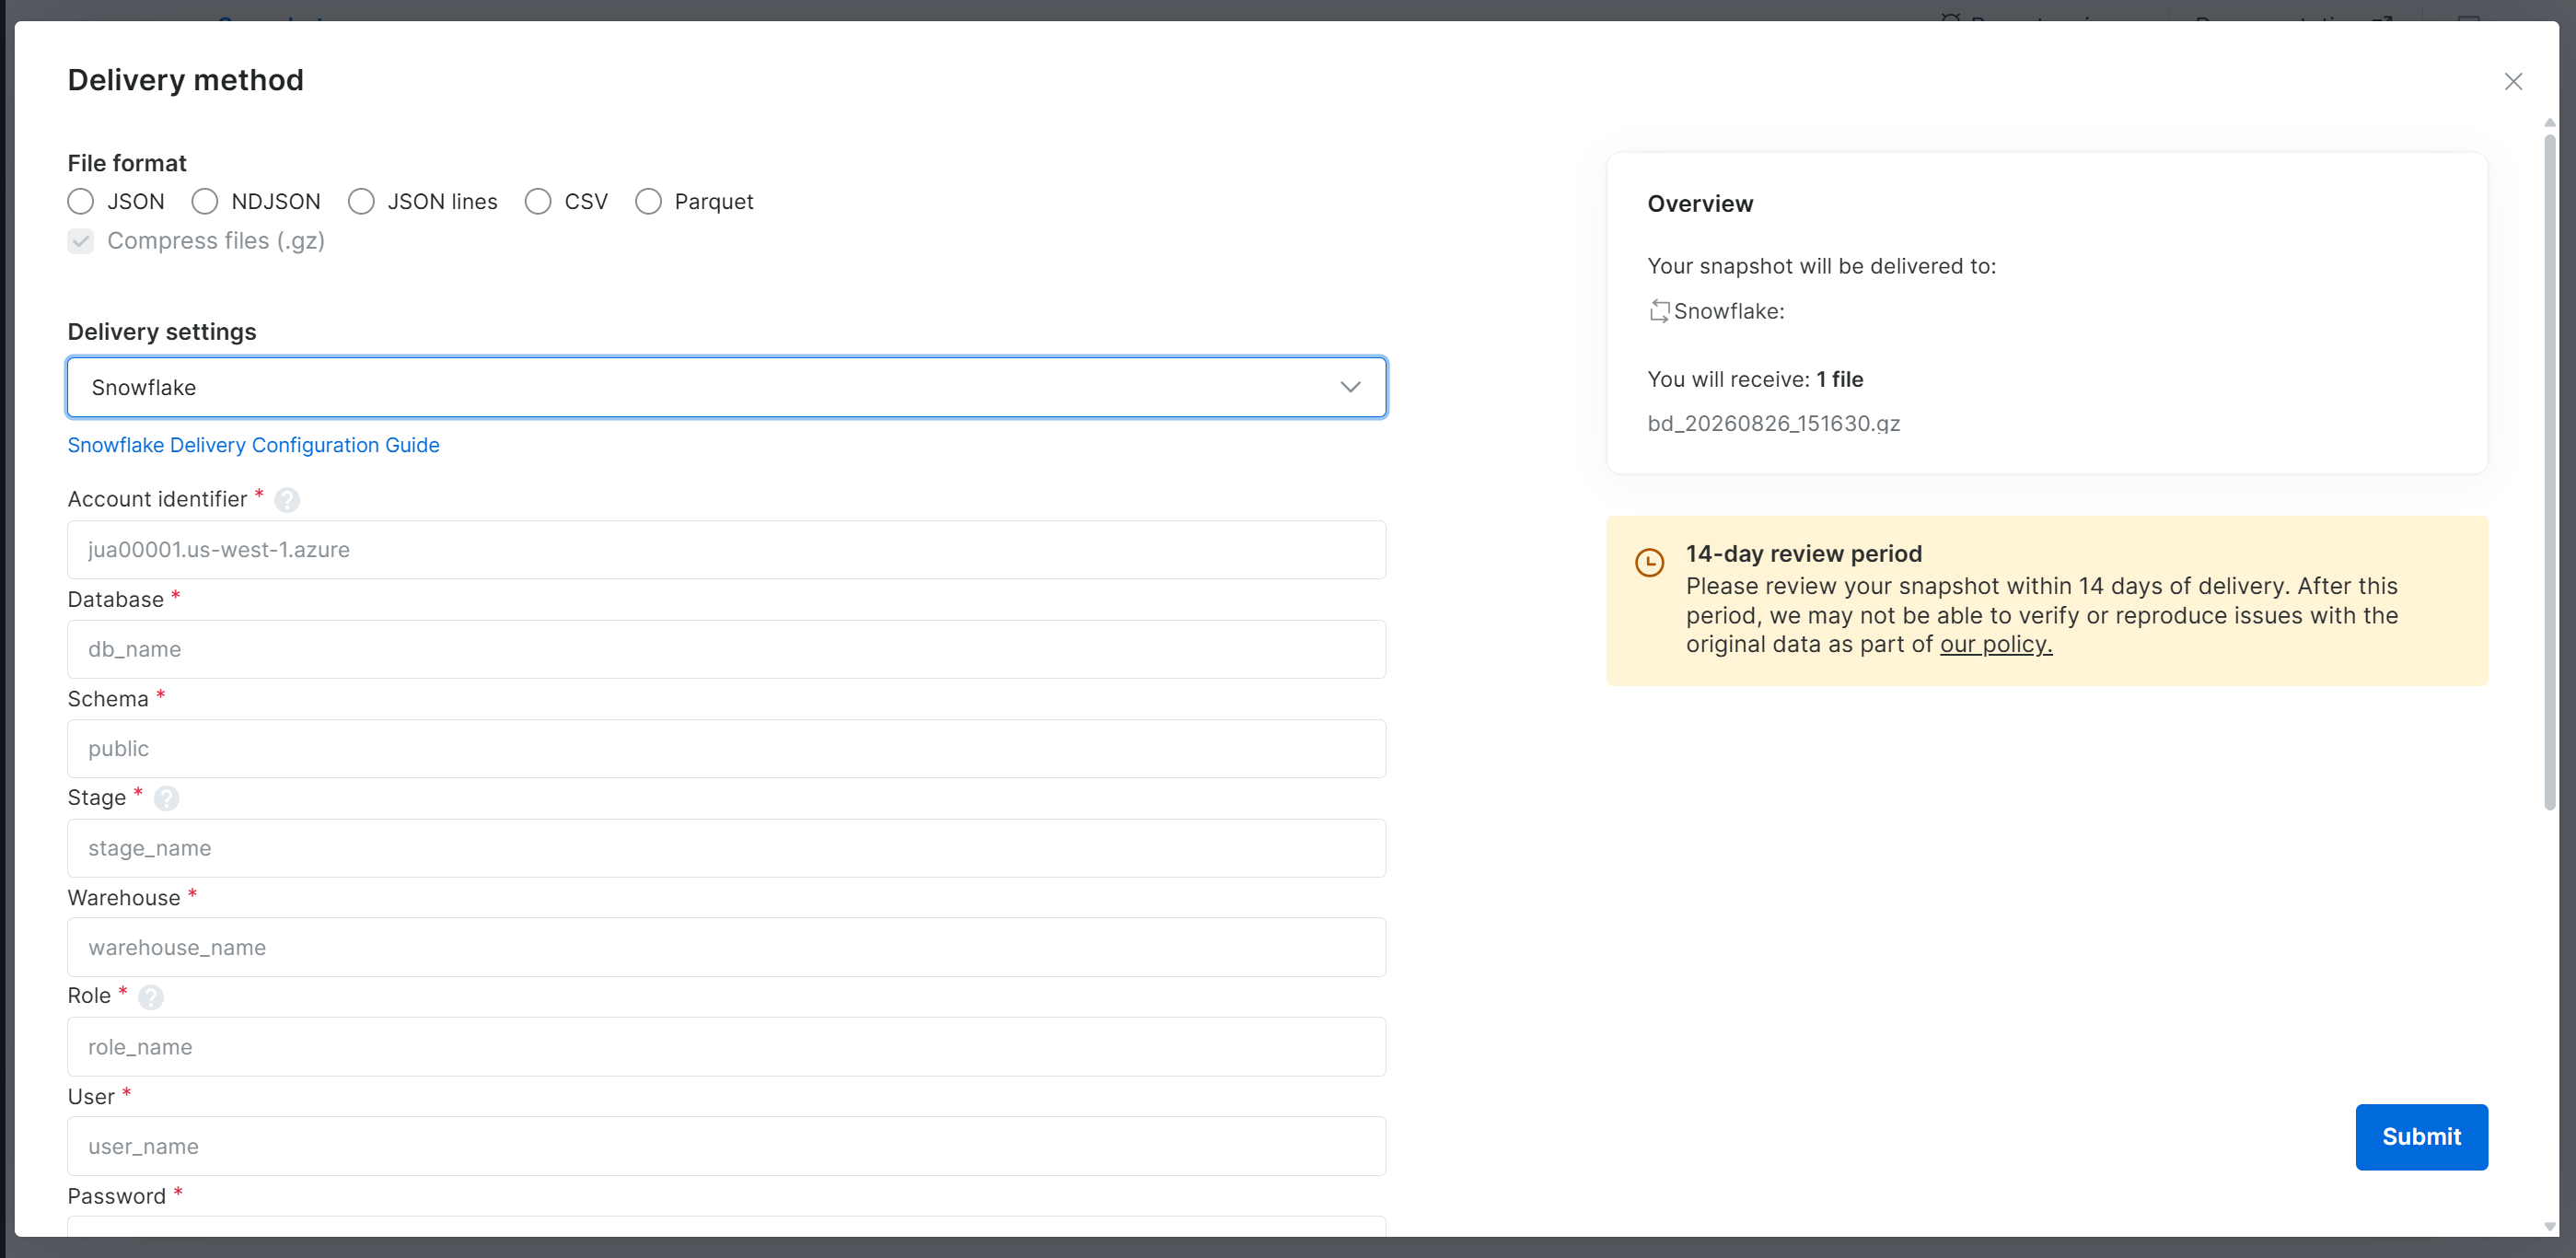
If you are not familiar with these settings, refer to our full guide on how to ingest Bright Data datasets into Snowflake. You will find all the instructions for configuring Snowflake for Bright Data dataset delivery, along with guidance on how to complete the required fields.
For this example, assume that you have configured the delivery to import the data into the SNOWFLAKE_INTELLIGENCE.PUBLIC.INSTAGRAM_PROFILES table. Once the ingestion is finished, you can explore the imported data directly in Snowflake:
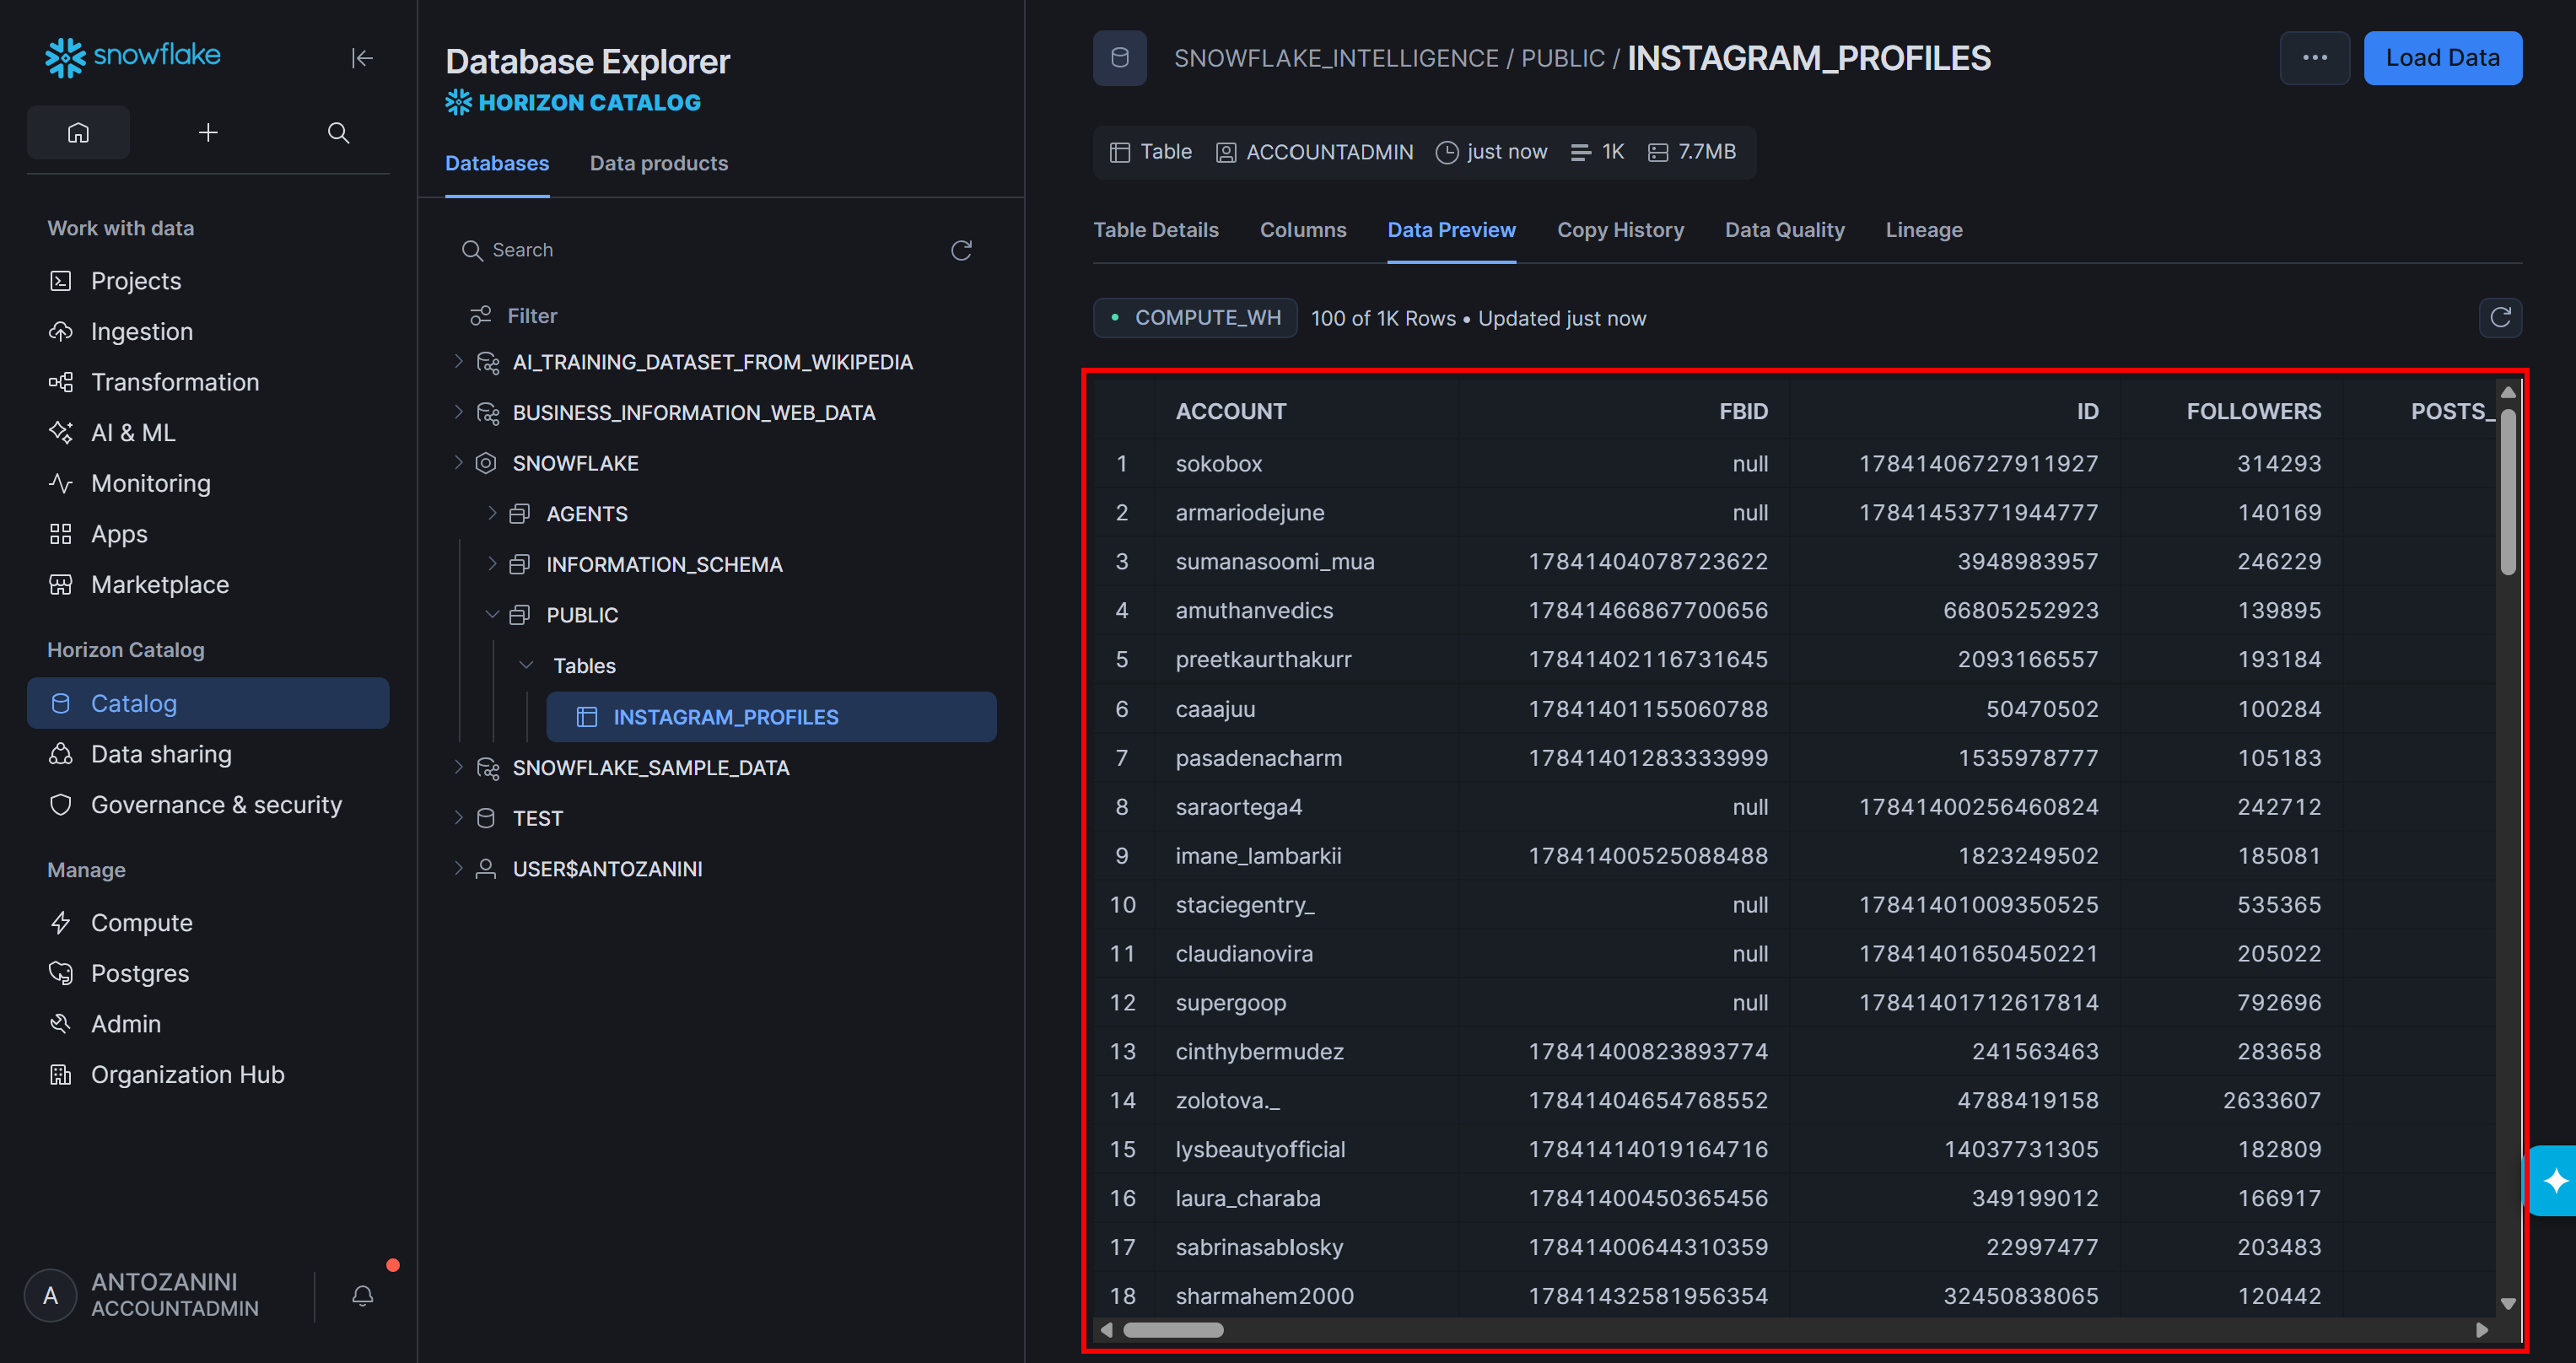
Notice how the table contains the same filtered Instagram profile data you selected from the Bright Data dataset. The data is now available in Snowflake alongside your business data, allowing a Cortex AI Agent to analyze both sources together.
Step #4: Create a Cortex Agent
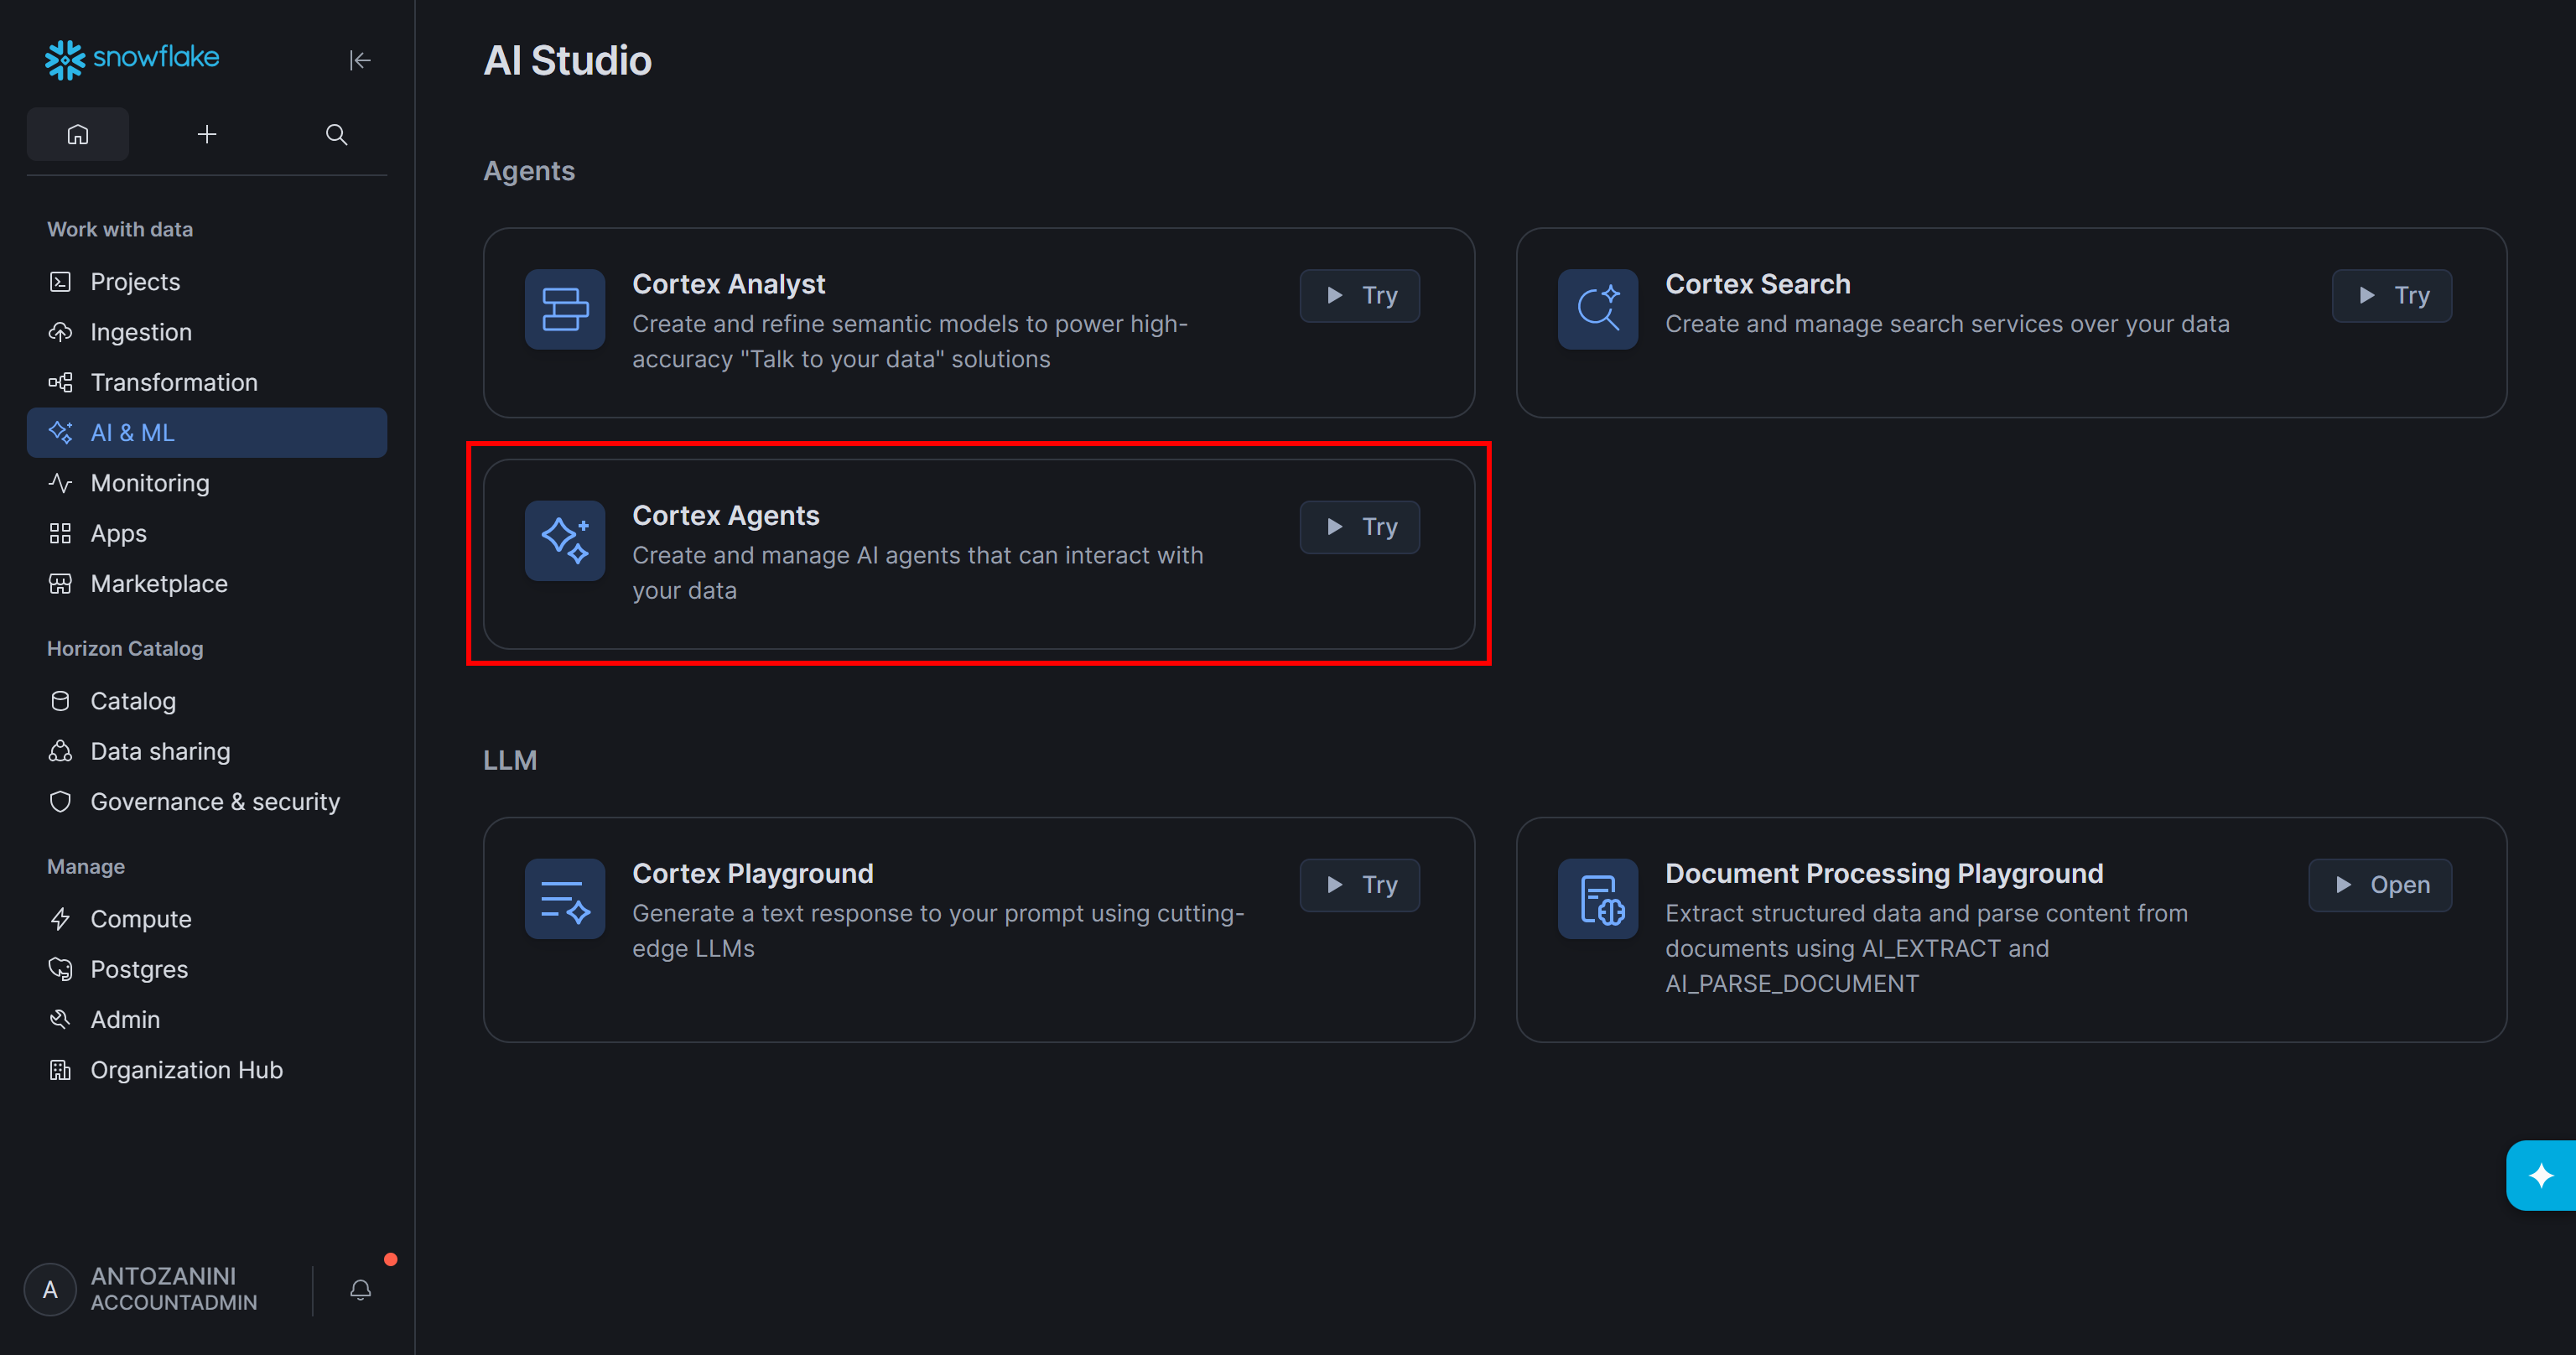
To add a new Cortex Agent to your Snowflake warehouse, go to the “AI & ML” page and select the “Cortex Agents” card:
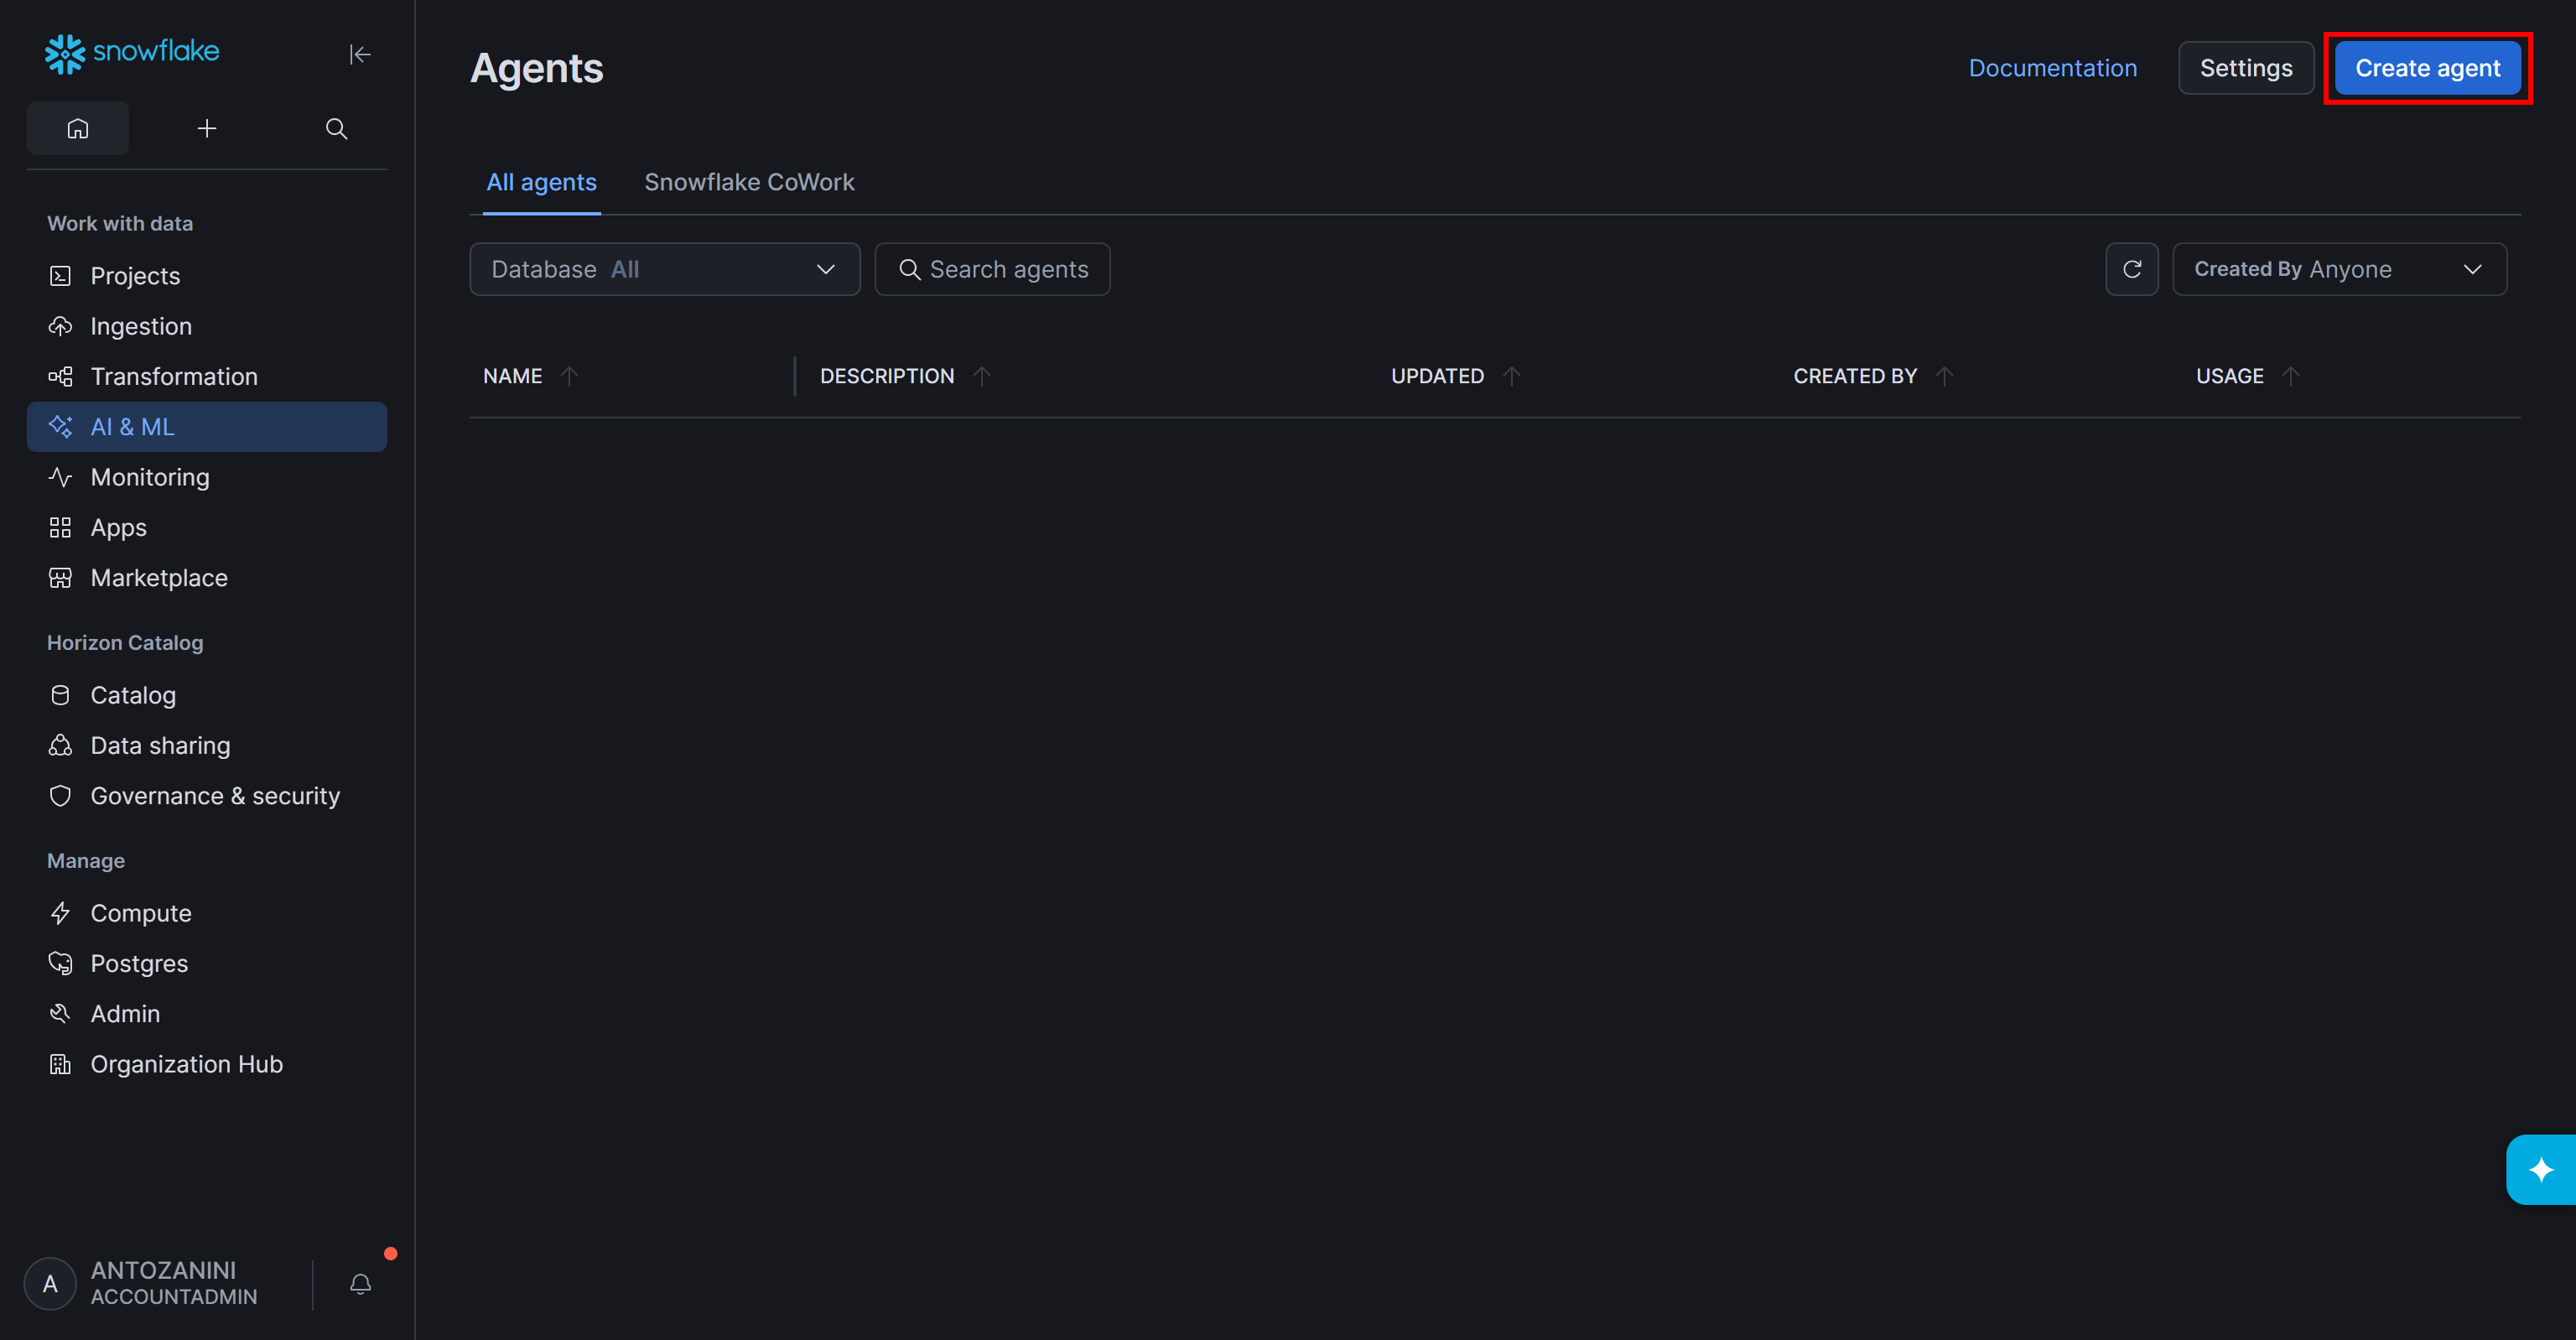
On the “Agents” page, click “Create agent”:
Select the database and schema containing your imported Bright Data dataset (together with other valuable business data). Next, give your agent a name (e.g., “Influencer_Analyzer”):
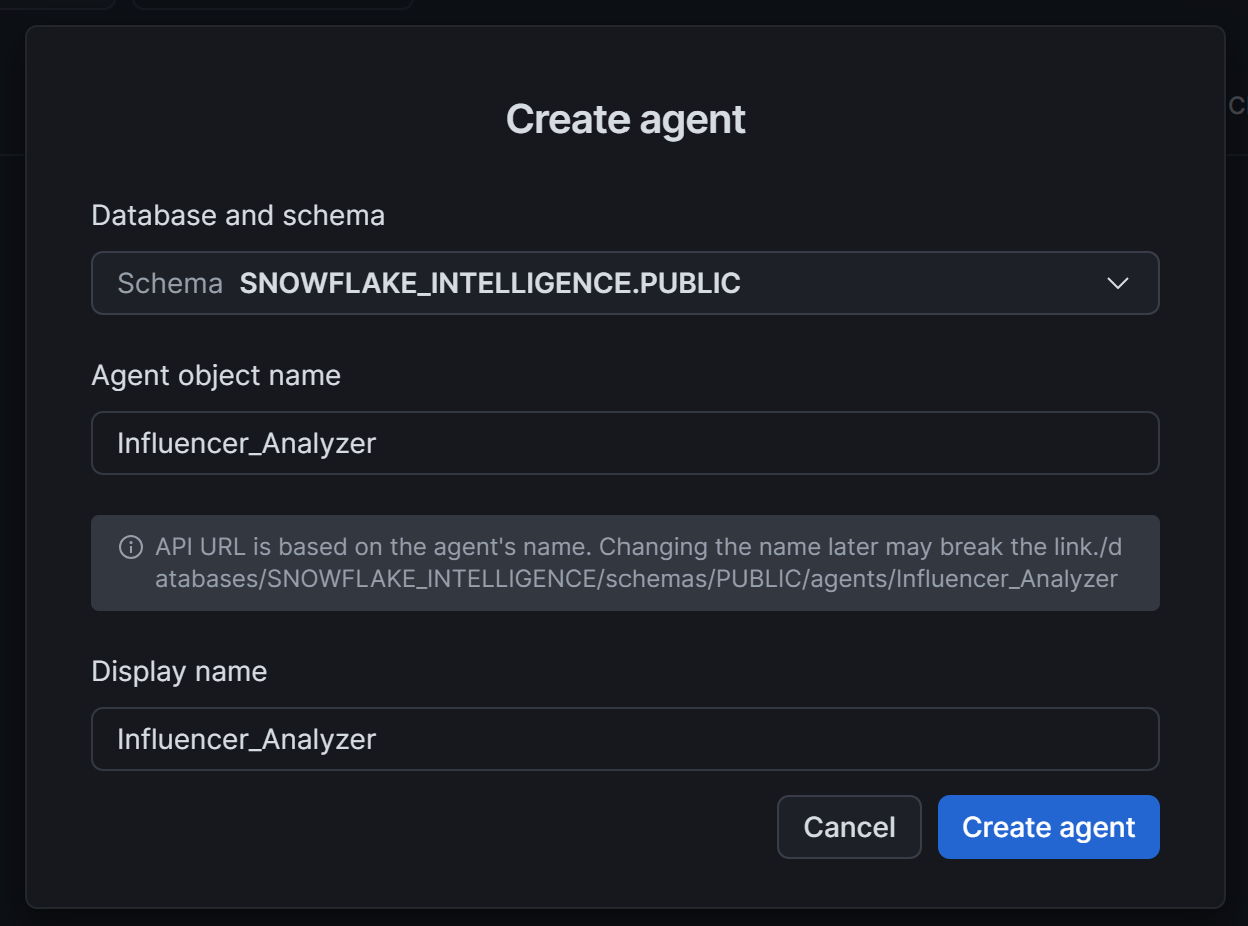
Finally, click the “Create agent” button to finish setting up your Cortex Agent.
Step #5: Finalize the Agent Configuration
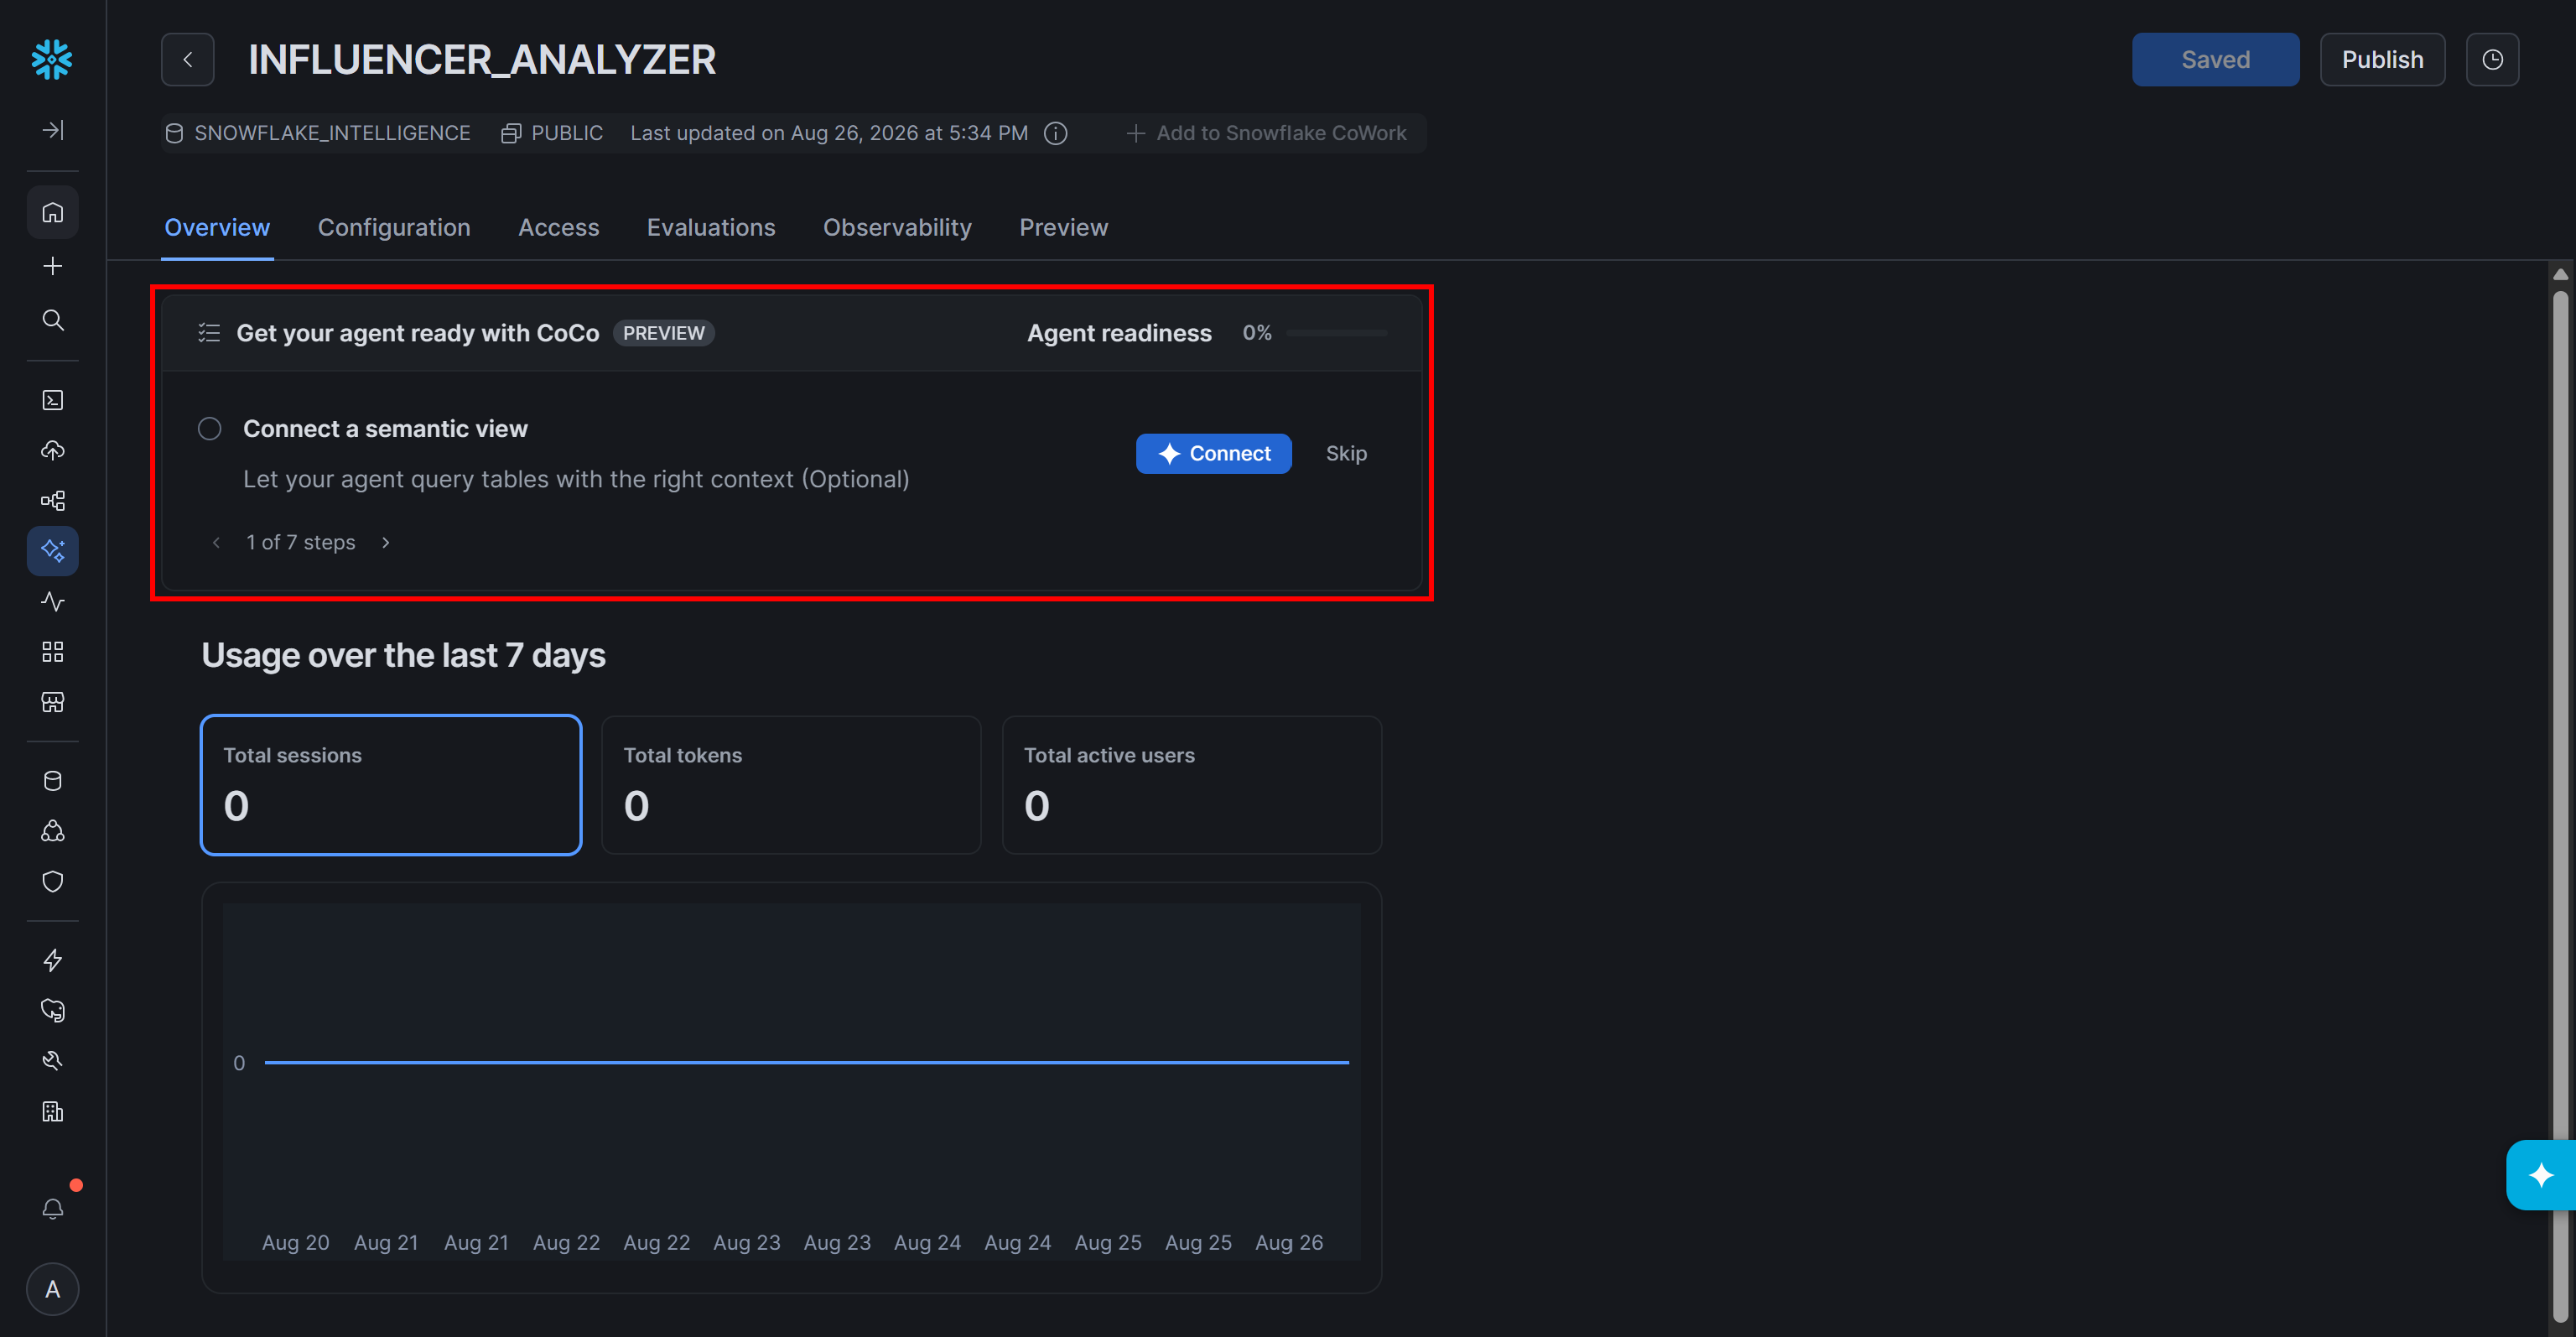
On the Cortex Agent page, launch the guided setup via Snowflake CoCo by clicking “Connect”:
In the CoCo chat, you will be guided through the configuration process, including creating the agent’s semantic view, connecting a search service:
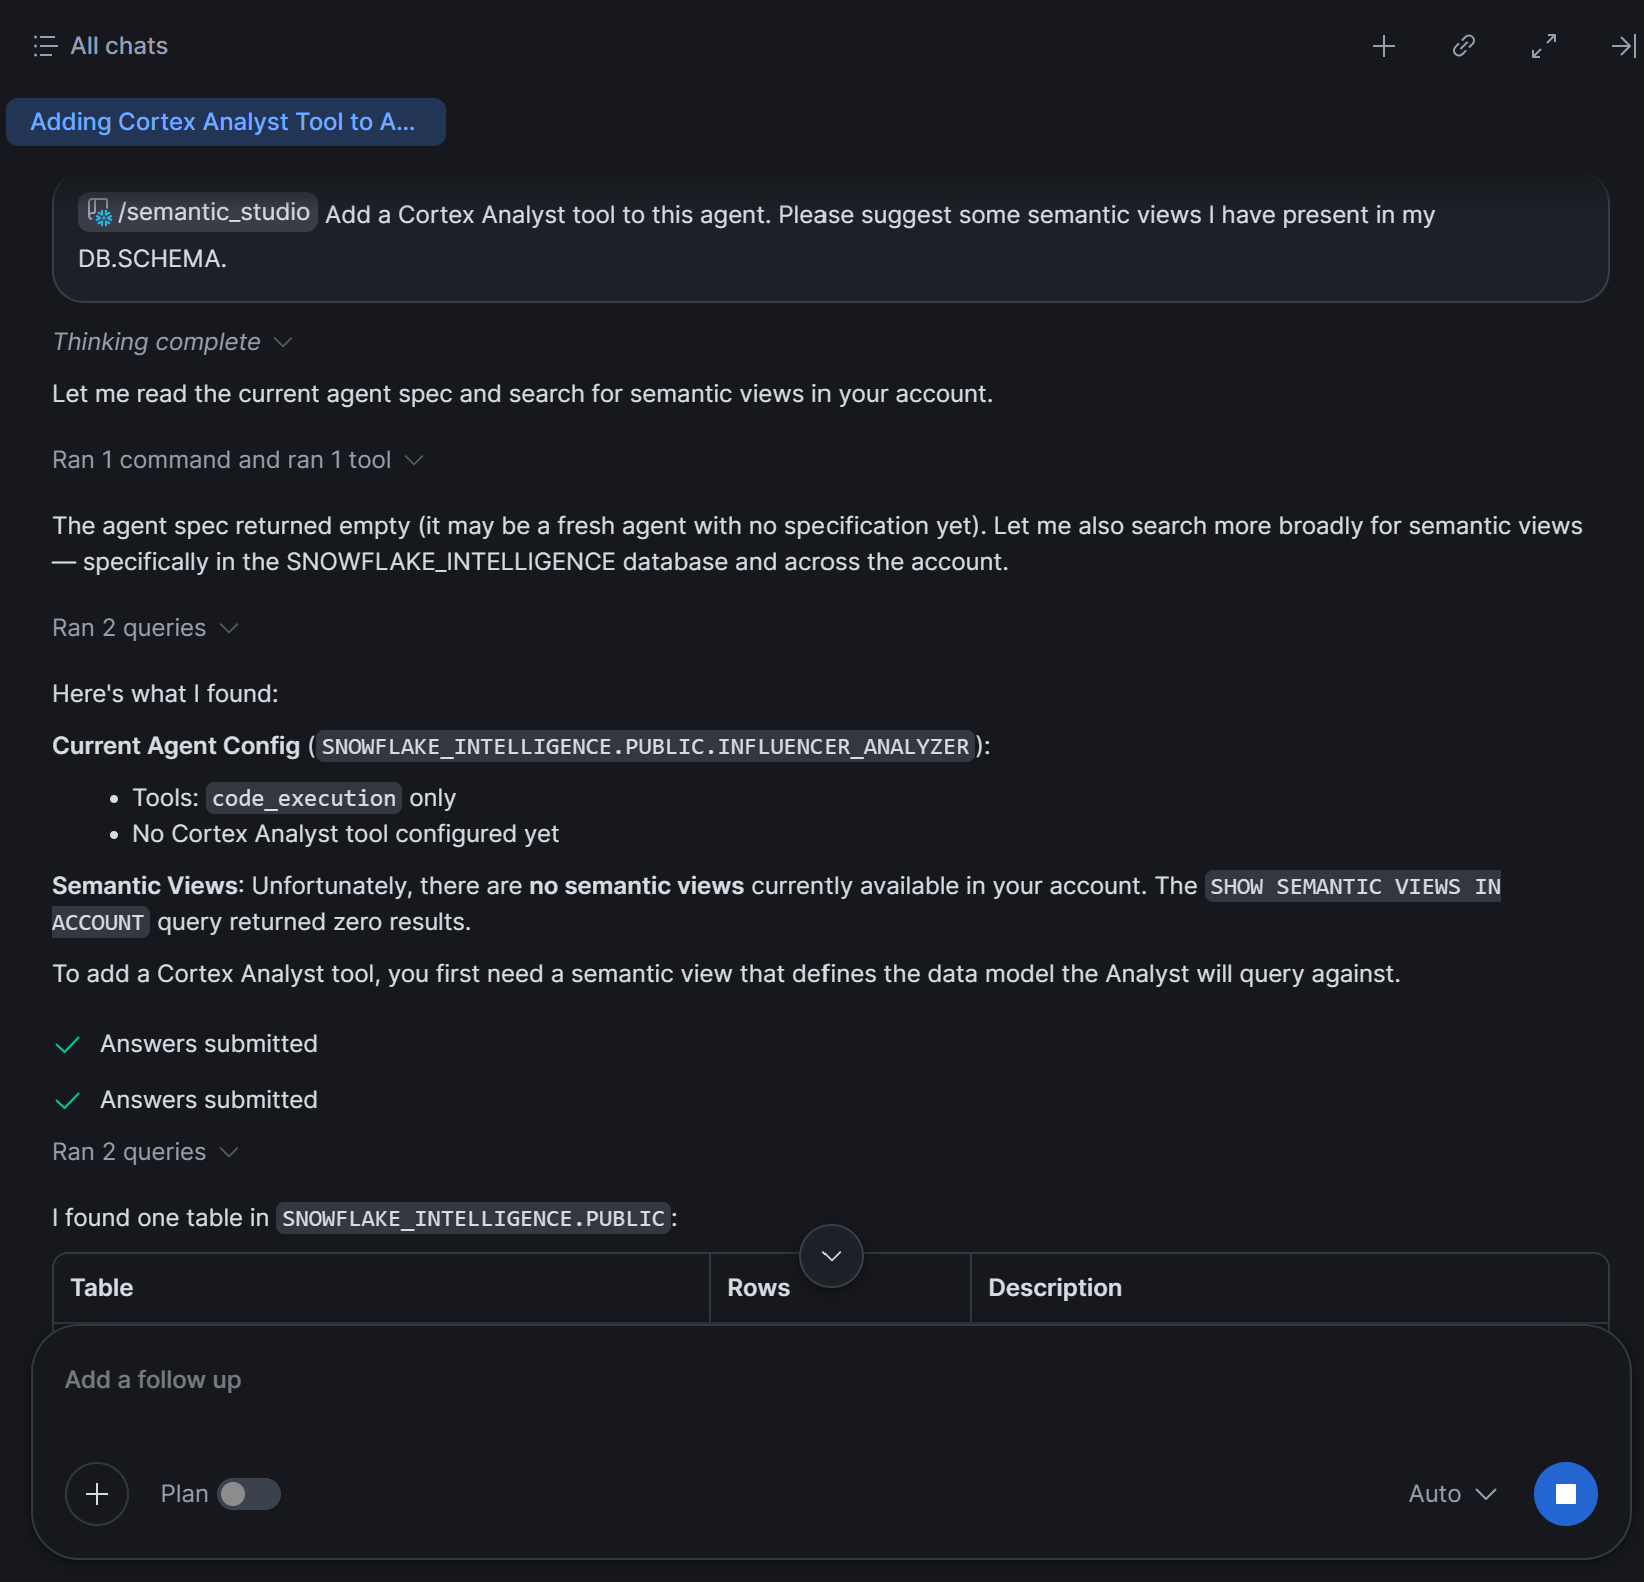
CoCo also wires together the required Snowflake Cortex components, which include:
| Component | What it does |
|---|---|
| Cortex Analyst | Converts natural-language questions into SQL over structured tables. It is guided by a semantic view (or a YAML semantic model) that defines metrics, dimensions, and relationships. |
| Cortex Search | Builds hybrid indexes that combine vector (semantic) and keyword search over unstructured text, allowing the agent to retrieve information by meaning as well as by exact terms. |
| Cortex Sense | A runtime context layer that learns business definitions, metrics, and table relationships from query history and metadata, grounding the agent without requiring you to maintain a semantic view by hand. |
| Cortex Agents | The orchestrator that plans a task and routes each step to the appropriate tool. |
Next, open the “Configuration” tab to define the agent description and instructions, and add tools, skills, and MCP integrations:
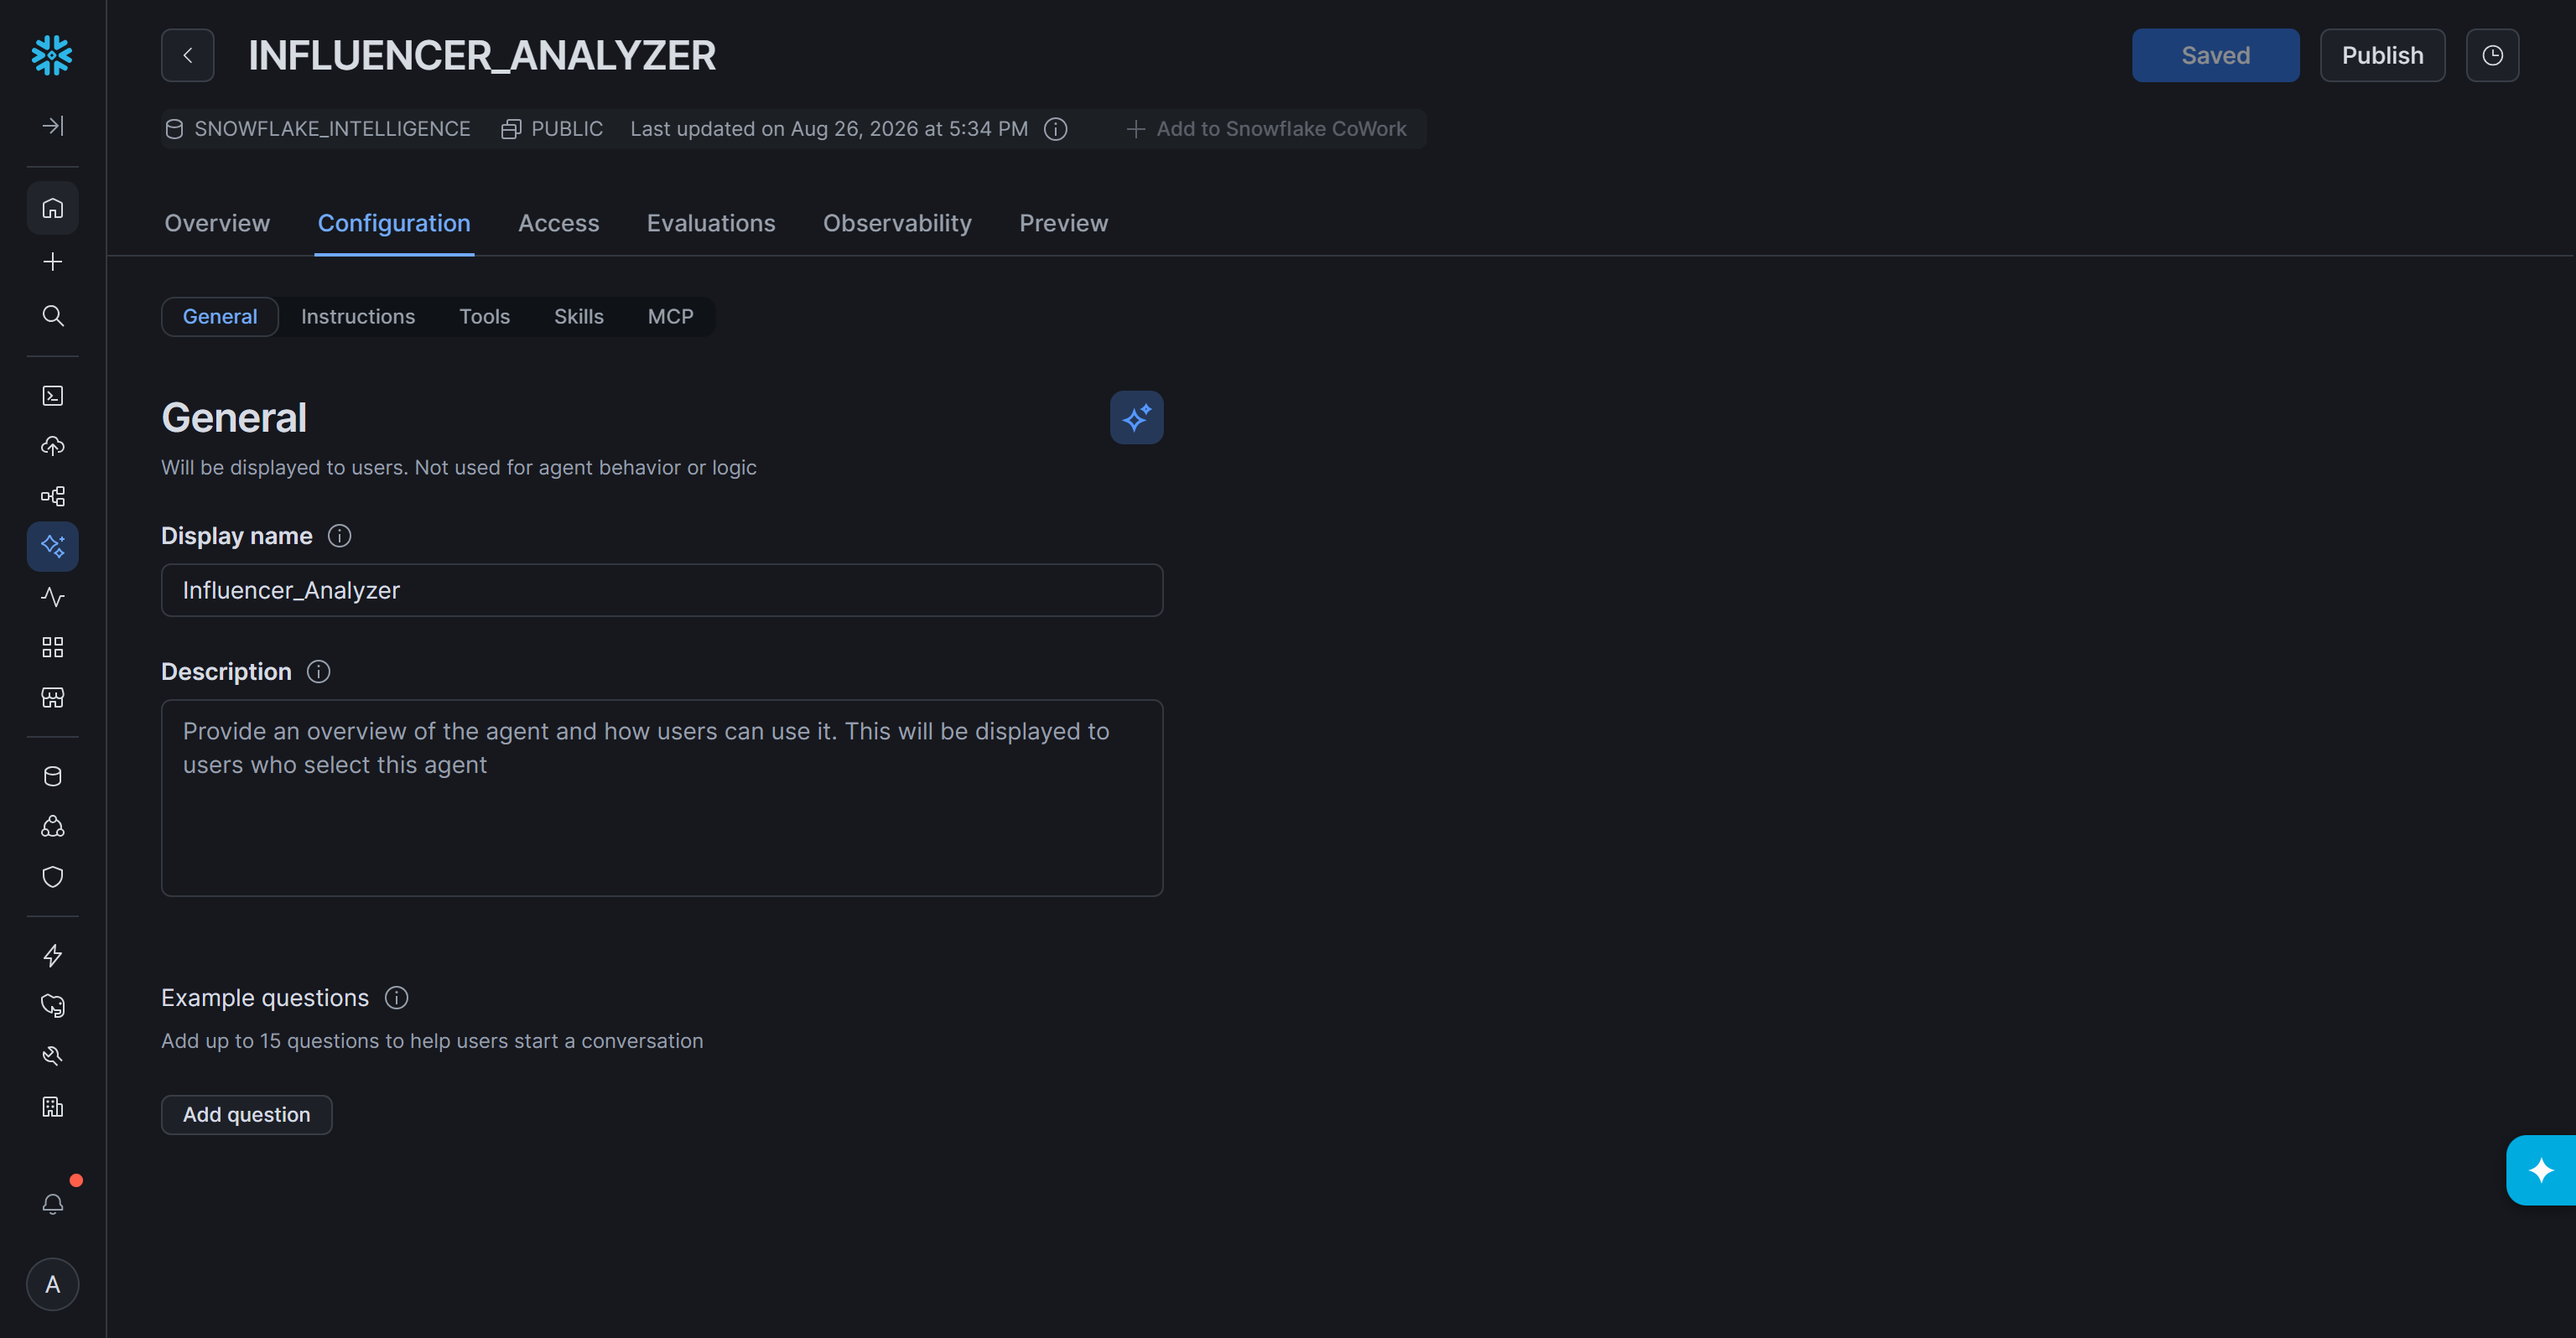
Your agent can now query, reason over, and process the data stored in the configured Snowflake schema.
Step #6: Test the Agent
Once configured, move to the “Preview” tab to test your agent. For example, enter a prompt such as:
Retrieve the top 5 Spanish-speaking influencers from the list to promote our revolutionary skincare product targeting female teenagers. Give each influencer a suitability score.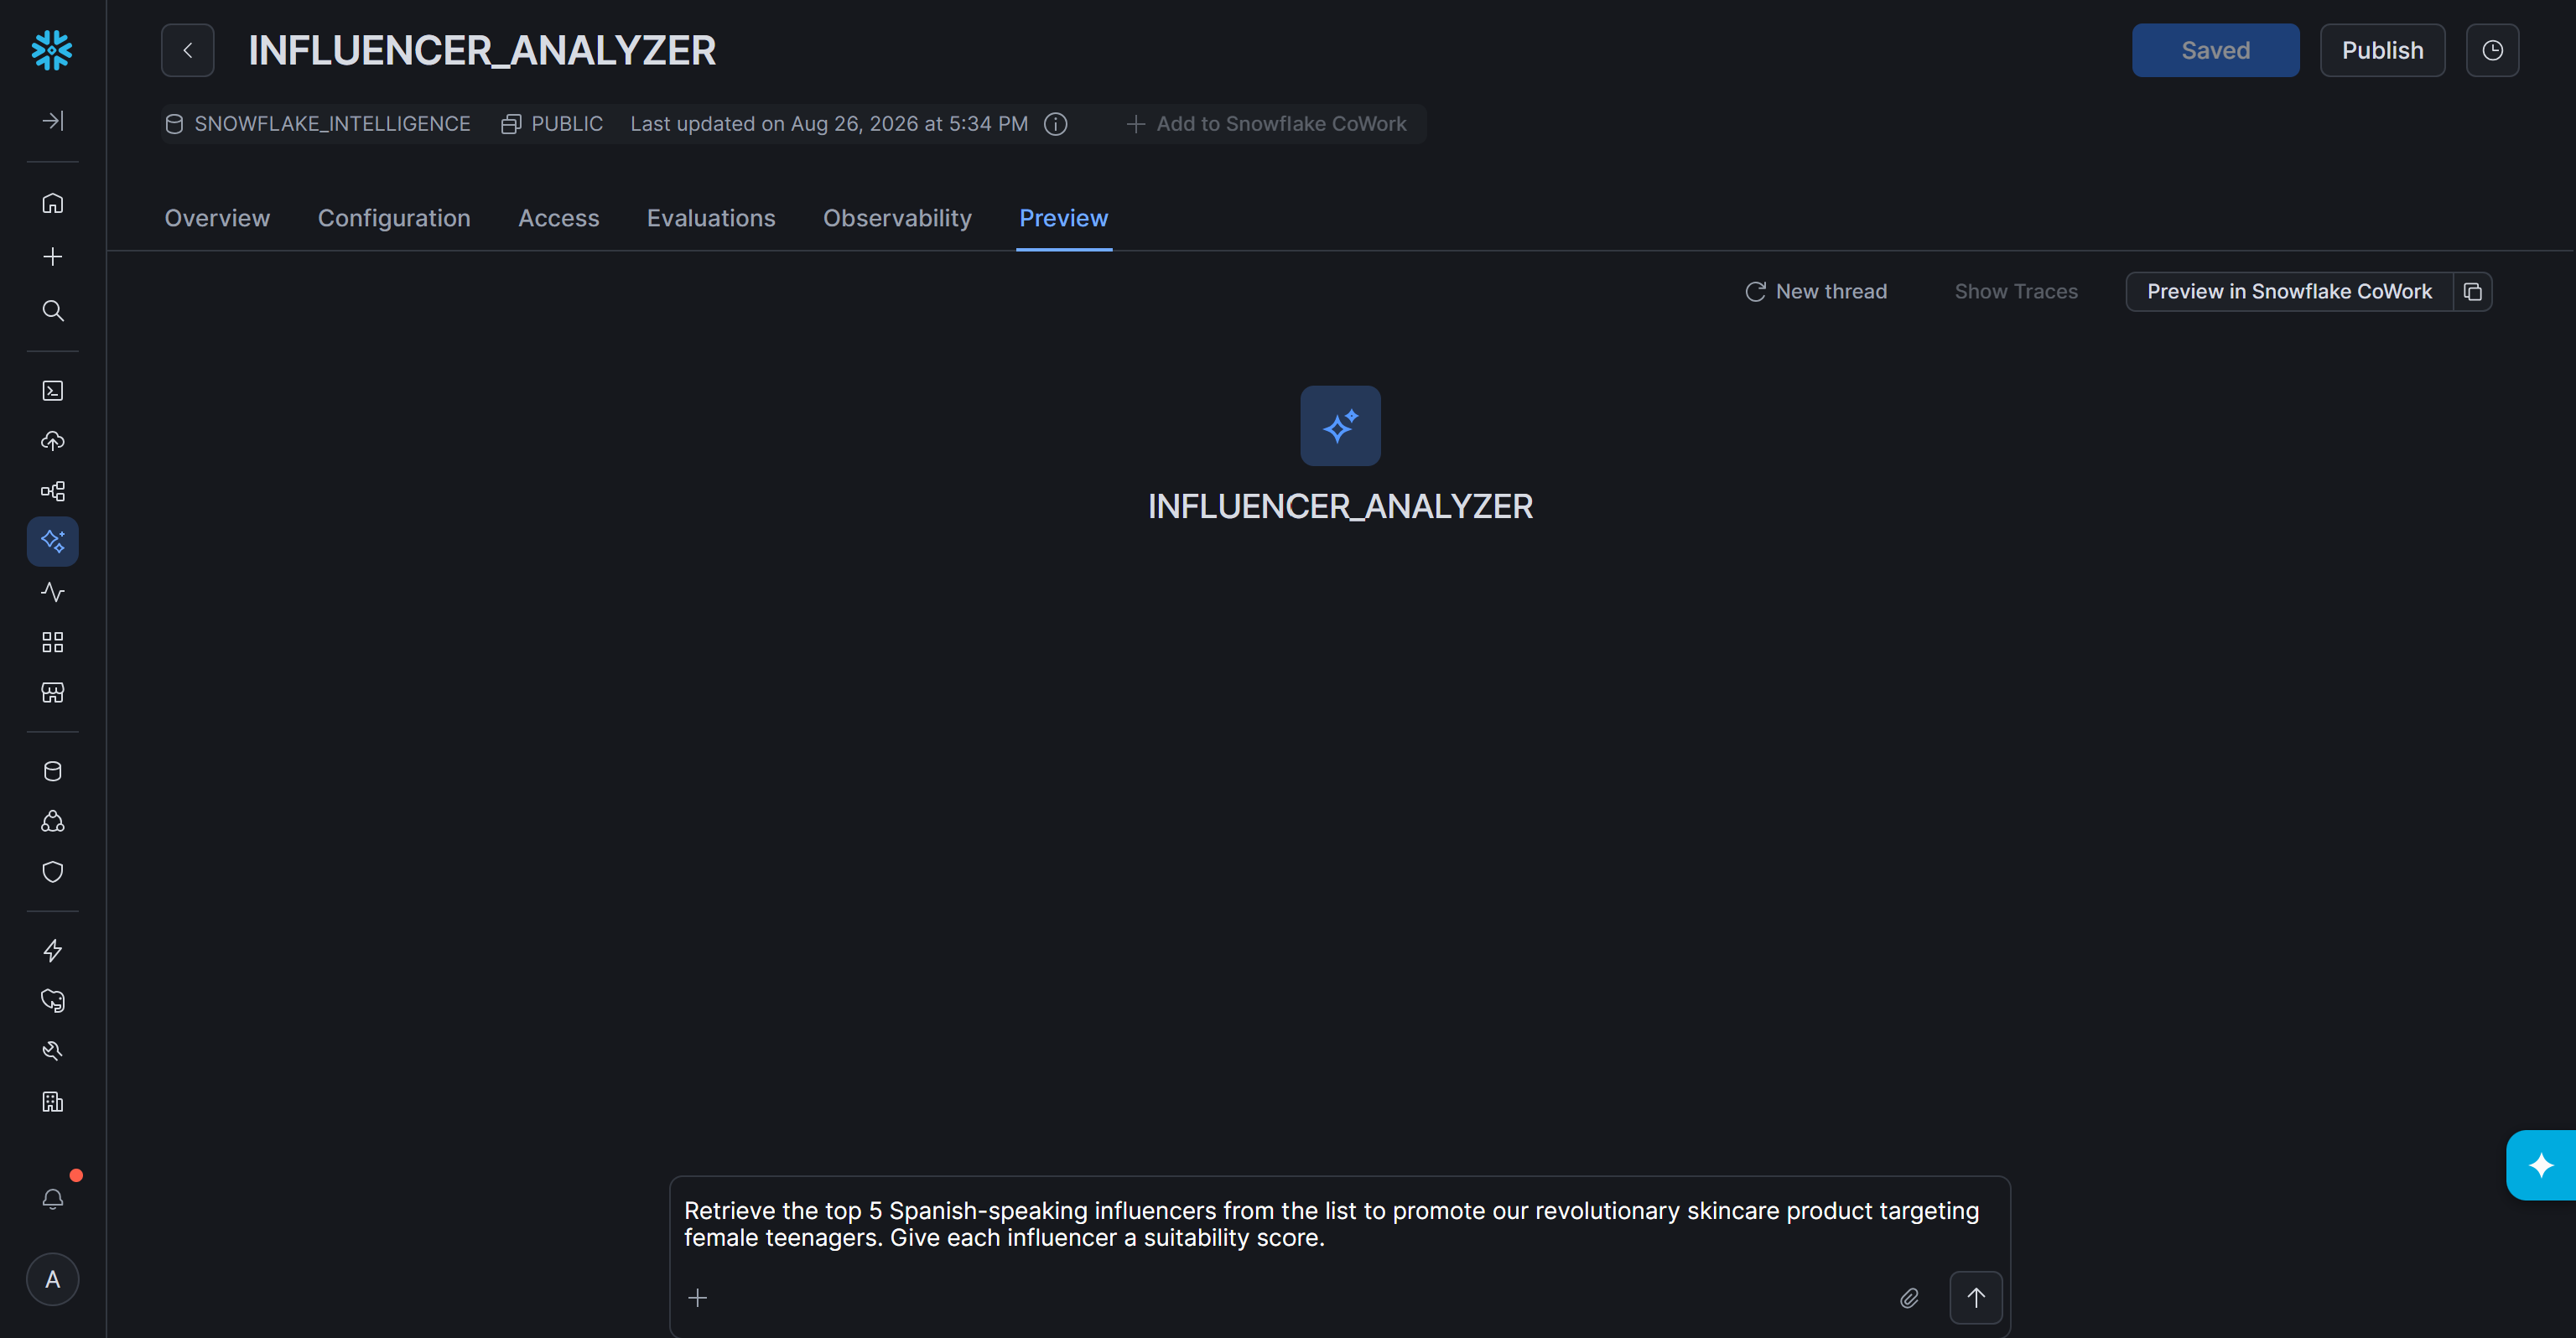
The agent will query the Instagram profile data in your Snowflake table and return the five most suitable influencers, along with a suitability score for each one. Under the hood, it can use Cortex Analyst for structured filtering (such as language and profile attributes) and Cortex Search to assess biography and caption fit before scoring. In a more realistic scenario, you could also give the agent context on your product data to help it better refine the results.
Add Live Web Access with Bright Data MCP
The workflow above covers the persistent batch dataset pattern. As the comparison matrix shows, the other pattern is live ingress: instead of storing web data first, your agent fetches it at inference time.
You can connect Bright Data to Cortex Agents through MCP, or integrate it with CoCo CLI (previously known as Cortex Code CLI).
Get Live Web Data Through Bright Data MCP
Not every workflow requires the same type of web data. Persistent datasets are helpful when you repeatedly analyze a defined collection of structured information, while other AI applications need access to live information. In the influencer example, you could keep the 1K-profile dataset for ranking, then use MCP to check a shortlisted influencer’s latest posts before outreach.
Bright Data MCP provides the complementary live-data layer. Instead of first storing a web dataset in Snowflake, agents can interact with Bright Data’s API-based solutions via MCP to search, scrape, and interact with current web content.
This gives the Bright Data + Snowflake integration two data-ingress patterns: persistent, filtered datasets for repeatable analysis and live web access for time-sensitive questions.
Note that the Bright Data MCP app is also available directly through the Snowflake Marketplace:
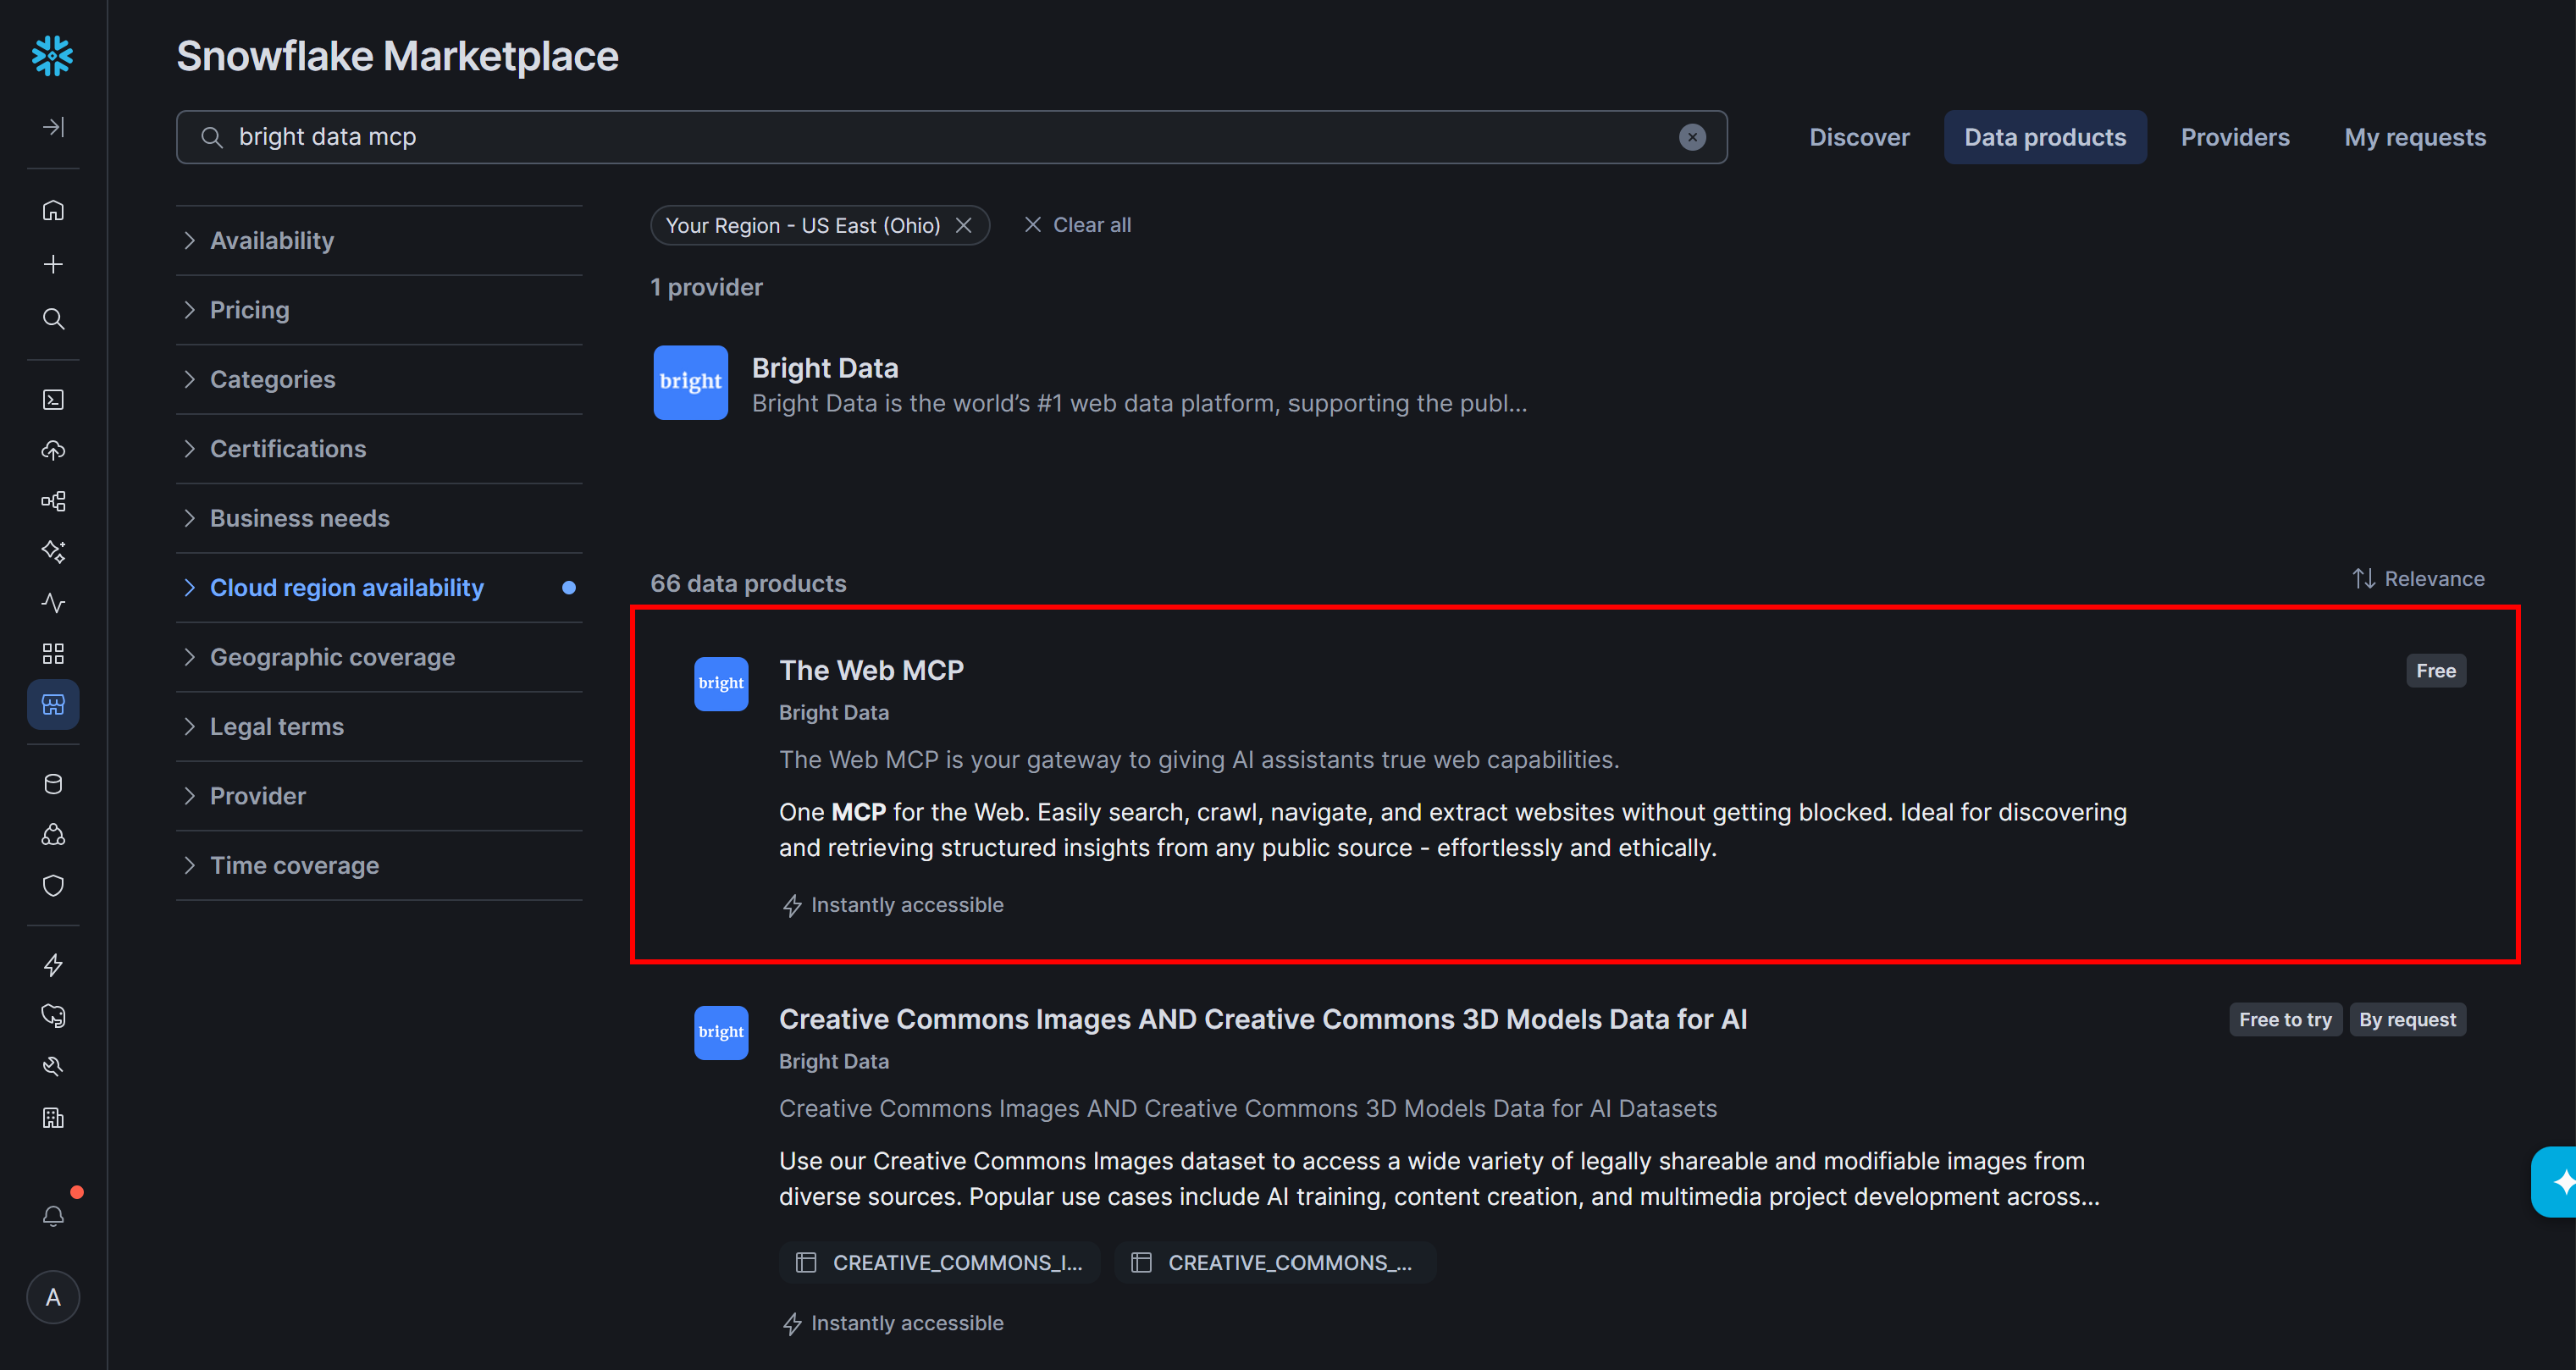
Alternatively, you can set up the MCP server manually.
Some of the most interesting scenarios supported by the Bright Data MCP include:
| Use case | Bright Data MCP capability |
|---|---|
| Retrieve page content | Markdown scraping tools |
| Ground on the latest information | Search engine querying tools + Markdown scraping tools |
| Extract structured information | Platform-specific extraction tools |
| Interact with dynamic websites | Browser automation |
In short, datasets give you repeatable analysis over a stored snapshot, while Bright Data MCP gives your agent live access to the web. Many mature architectures use both.
Connect Bright Data with CoCo CLI
The Bright Data MCP and agent skills can extend CoCo CLI’s Snowflake-based capabilities with enterprise-grade web access. This is useful when you want an AI assistant that can merge Snowflake operations with real-time web research, scraping, and browser automation.
For more guidance, read our dedicated article on Snowflake CoCo CLI with Bright Data.
Conclusion
In this blog post, you learned how the Bright Data + Snowflake integration connects reliable web data acquisition with enterprise analytics and AI.
Bright Data provides the infrastructure to retrieve meaningful web data at scale, while its filtering and customization capabilities let you refine that data before bringing it into Snowflake. This can help keep unnecessary data out of downstream storage and compute.
Once the dataset is in Snowflake, it can be combined with your existing data and used across analytics and AI workloads. For workloads that depend on current information, the Bright Data MCP lets agents fetch live web data at inference time, either on its own or alongside persistent datasets in a hybrid architecture.
Together, Bright Data and Snowflake provide a flexible path from web data to AI-ready intelligence: choose the right ingress pattern (persistent datasets, live MCP access, or both), bring the data into the environment where your business data already lives, and activate it with Cortex AI capabilities such as Analyst, Search, and Agents.
Create a Bright Data account today and start bringing relevant web data into Snowflake for AI-powered analysis!



Technical Writer
 5.5 years experience
Antonello Zanini is a technical writer, editor, and software engineer with 5M+ views. Expert in technical content strategy, web development, and project management.