







In this article, you will learn:
- What DeerFlow is and what it offers as a harness for long-horizon tasks.
- Why Bright Data is a great fit for web search and fetch capabilities.
- How to integrate Bright Data into DeerFlow through the Bright Data MCP.
Let’s dive in!
What Is DeerFlow?
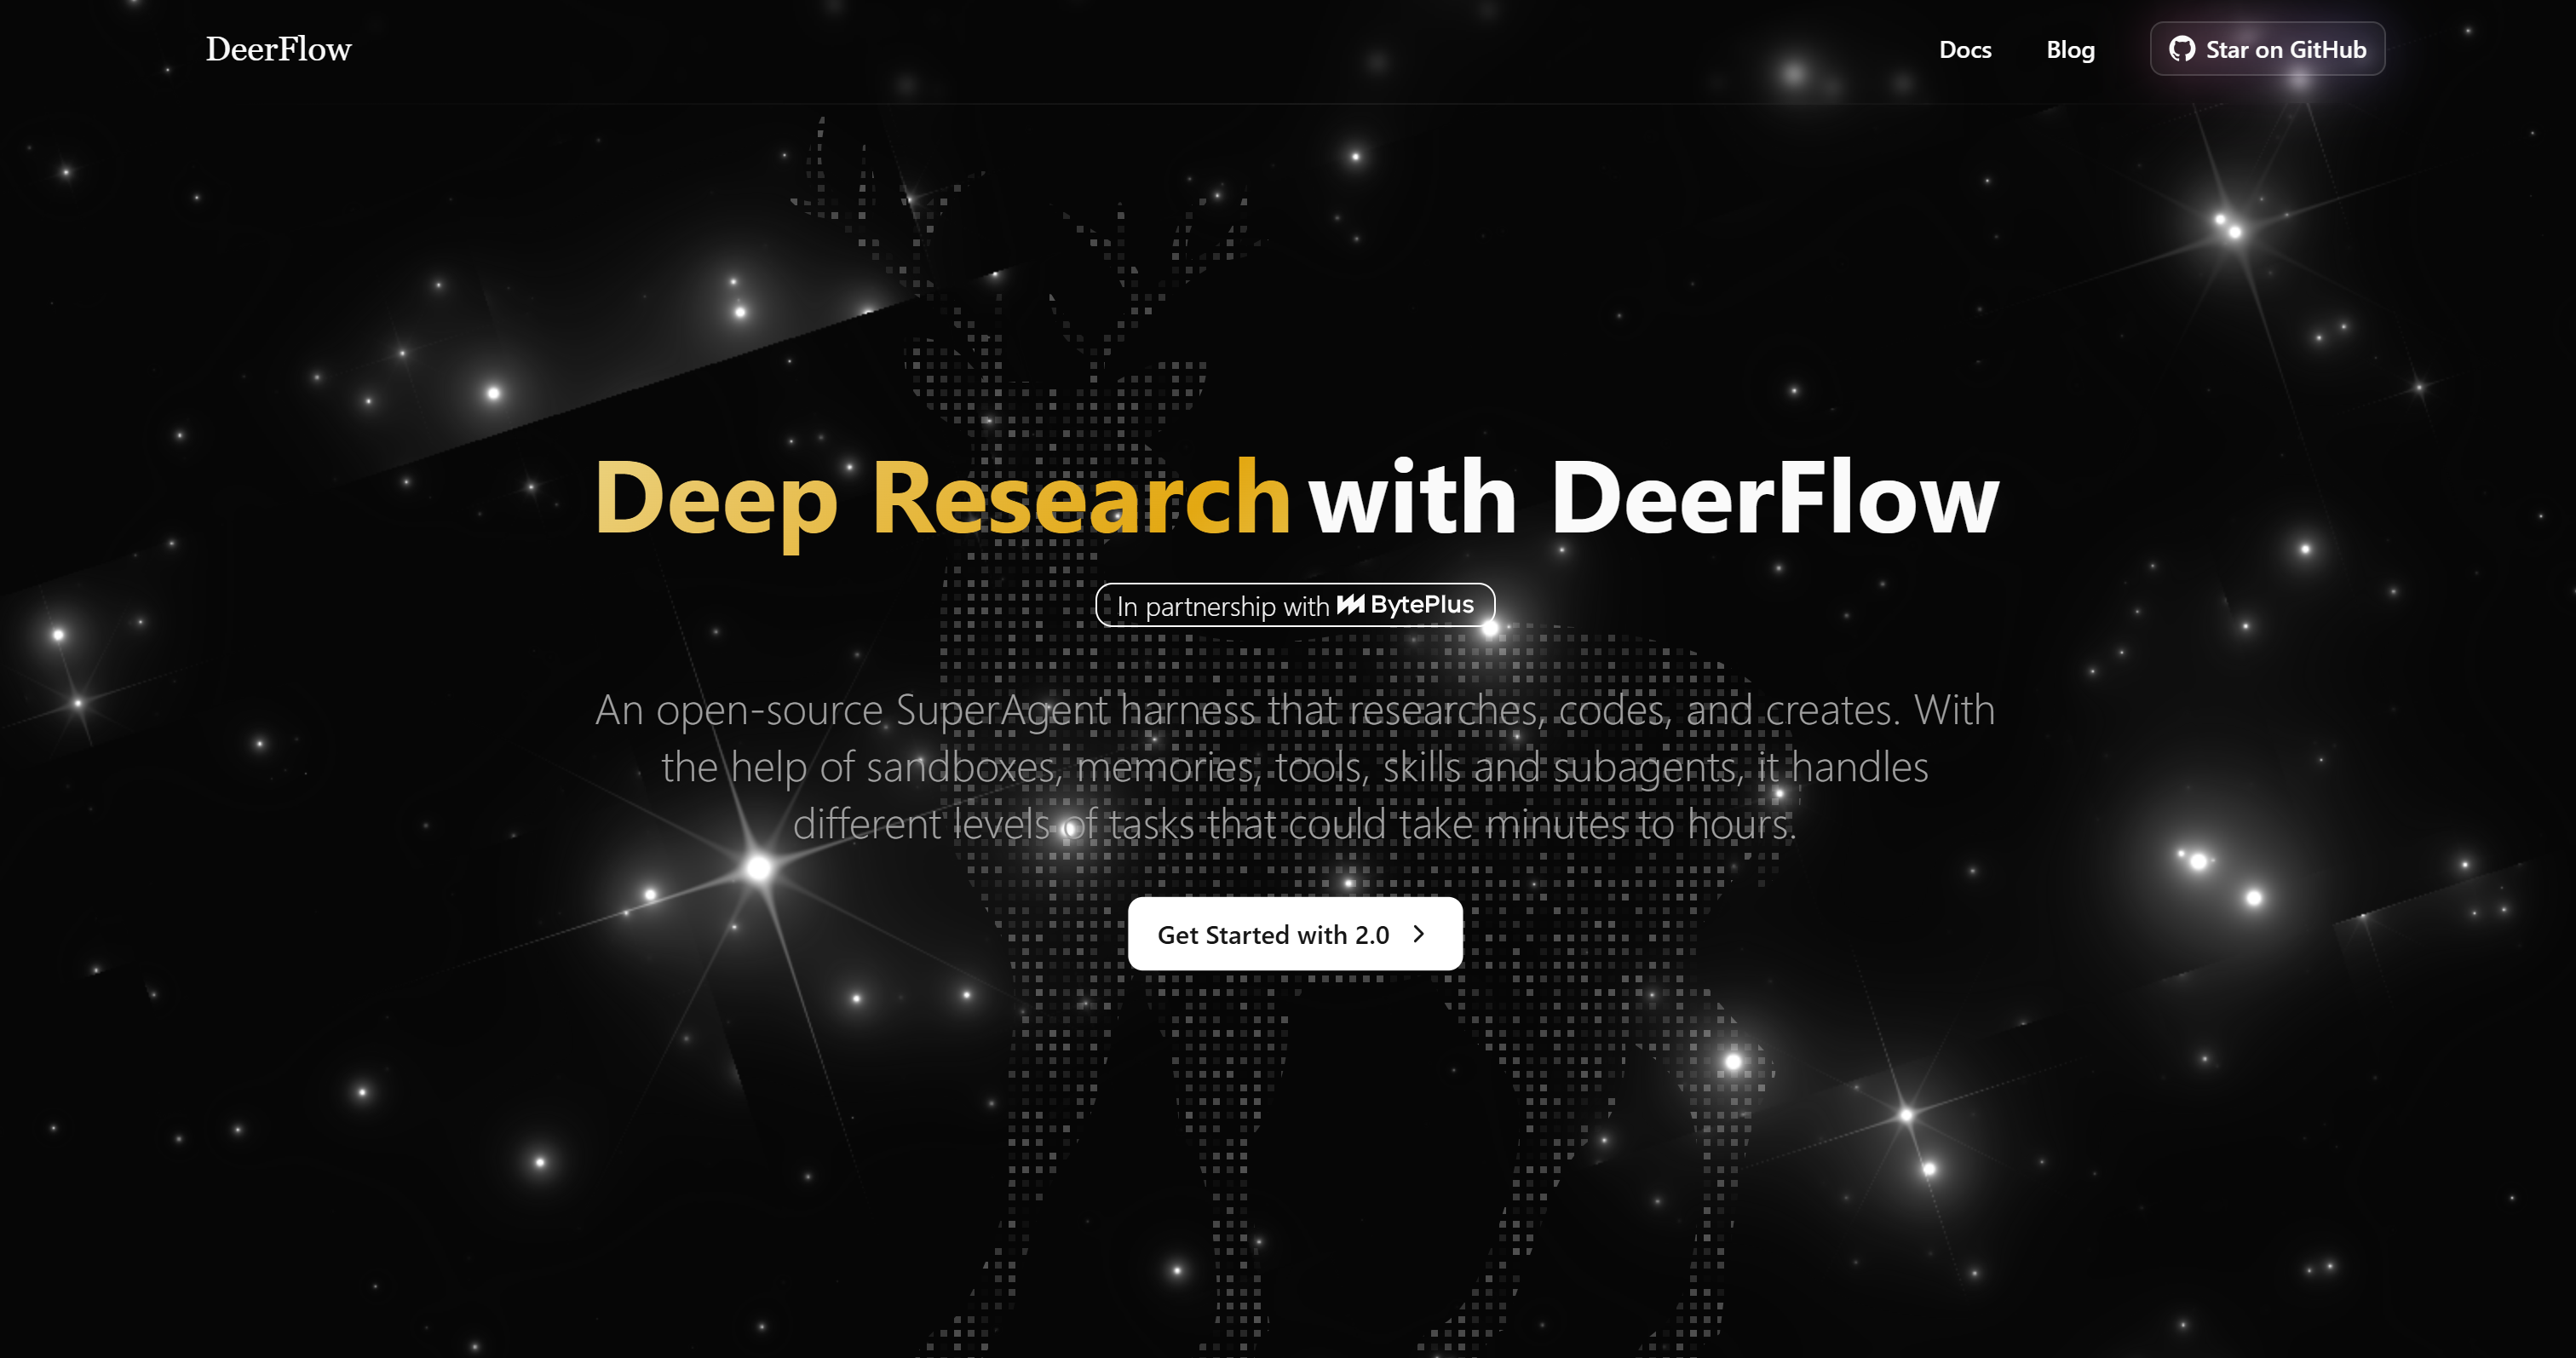
DeerFlow is an open-source AI agent harness developed by ByteDance. It orchestrates sub-agents, memory, skills, tools, and sandboxes to help you handle complex tasks with AI.
You can interact with DeerFlow directly through its web app or via messaging platforms such as Telegram and WeChat through its messaging gateway.
DeerFlow specializes in long-horizon workloads. It supports use cases such as deep research, coding, data pipelines, report generation, and content creation. The project is fully open-source and counts more than 79k GitHub stars.
Main Features
The core capabilities supported by DeerFlow are:
- Skills and tools: Extensible capabilities for research, reports, slides, web pages, image generation, and more.
- Sub-agents: Spawns specialized agents with isolated contexts, tools, and termination conditions for complex tasks.
- Sandbox execution: Gives agents isolated environments to read, write, edit, and execute files and commands.
- Agentic browser: Lets agents navigate websites, click, type, submit forms, and interact with dynamic pages.
- Web access: Provides web search, fetching, and rendered page capture tools.
- Long-term memory: Stores user preferences, profiles, and accumulated knowledge across sessions.
- Context engineering: Summarizes completed work and offloads intermediate results to maintain context efficiently.
- MCP support: Connects external MCP servers to extend the agent’s tools and capabilities.
- Scheduled tasks: Runs recurring or one-time tasks automatically using cron-based schedules.
- Messaging channels: Lets users interact with agents through Telegram, Slack, Discord, Feishu, DingTalk, WeChat, and more.
- Observability: Integrates with LangSmith, Langfuse, and Monocle to trace agent runs, tools, and LLM calls.
- Embedded client: Provides a Python client for integrating DeerFlow directly into applications.
Find out more in the official docs.
Bright Data as a DeerFlow Web Search and Fetch Engine
Among DeerFlow’s many features, you can find built-in web search and fetch tools. These tools let the internal AI agent look for new online sources and access their content for web grounding.
That is essential for overcoming the knowledge cutoff of LLMs. It also allows the AI agent to perform tasks using fresh web data for more accurate responses. To provide the web search and fetch tools, DeerFlow integrates with some SERP and web search API solutions such as Firecrawl, Brave, and DuckDuckGo.
However, these providers may not always be ready for enterprise use. They may lack support for multilingual searches, multiple search engines, or reliable access to websites without getting blocked. Some may also lack CAPTCHA solvers and a large IP proxy network.
That is exactly where Bright Data can help!
Bright Data stands out from DeerFlow’s built-in web providers through its global infrastructure, which includes more than 400 million residential IPs. This architecture provides the scalability, anti-bot capabilities, and performance needed for real-world web data workflows. It supports unlimited concurrency, offers 99.99% uptime, and achieves a 99.95% success rate.
Bright Data MCP as the Solution
The easiest way to connect DeerFlow to Bright Data’s web tools is through the Bright Data MCP.
Bright Data MCP provides more than 70 tools, each powered by Bright Data’s API-based products. Even in Rapid mode (free tier with 5,000 requests per month), you get useful tools for web search, scraping, and source discovery:
| Tool | Description |
|---|---|
search_engine + special version for parallel requests (search_engine) |
Retrieves results from search engines such as Google, Bing, Yandex, and more. |
scrape_as_markdown + special version for parallel requests (scrape_batch) |
Converts web pages into clean Markdown while handling bot protection. |
discover |
Performs AI-powered searches and returns ranked, relevant web results. |
To access all 70+ tools, you need to enable Pro mode. This unlocks structured data extraction tools for platforms such as Amazon, LinkedIn, Instagram, YouTube, Zillow, and Google Maps, plus 40+ other websites. It also includes browser automation tools powered by Bright Data’s Browser API.
How to Integrate the Bright Data MCP into DeerFlow
In this step-by-step section, you will learn how to set up Bright Data MCP in DeerFlow.
The Bright Data integration gives DeerFlow AI agents the ability to search the web, discover new sources, scrape web pages, and interact with web content without worrying about anti-bot blocks.
Follow the steps below!
Prerequisites
To follow this tutorial section, make sure you have:
- A Unix-based system with
makeavailable, such as a Linux distribution (e.g., Ubuntu), macOS, or WSL. - A Bright Data account with an API key configured. Follow the official guide to generate your Bright Data API key.
- An API key for one of the supported LLM providers. (Here, we will connect through an OpenAI API key.)
- An AI coding agent set up locally, such as Claude Code, OpenAI Codex, or a similar tool.
While not strictly required, it is also recommended to have:
- A basic understanding of how MCP works.
- Familiarity with the tools exposed by the Bright Data MCP.
Step #1: Install DeerFlow
Create a folder for your DeerFlow installation, launch a local coding agent session inside it, and run the following prompt:
Help me clone DeerFlow if needed, then bootstrap it for local development by following https://raw.githubusercontent.com/bytedance/deer-flow/main/Install.mdThis is the easiest way to install DeerFlow.
The coding AI agent will download the Markdown file containing the installation instructions from the DeerFlow repository. Then, it will follow them to install and configure DeerFlow locally.
If you are missing any prerequisites, the agent will provide the commands you need to install them. Run those commands in another terminal window, then continue the conversation with your AI agent.
At the end of the process, you should see output similar to this:

Your installation folder should now contain a DeerFlow project with a structure similar to:
<your_deerflow_installation_folder>
├── backend/
├── contracts/
├── deploy/
├── docker/
├── docs/
├── frontend/
├── logs/
├── plans/
├── pr-build/
├── scripts/
├── skills/
├── temp/
├── tests/
├── AGENTS.md
├── CHANGELOG.md
├── CHANGELOG_zh.md
├── CLAUDE.md
├── CODE_OF_CONDUCT.md
├── CONTRIBUTING.md
├── Install.md
├── LICENSE
├── Makefile
├── README.md
├── README_fr.md
├── README_ja.md
├── README_ru.md
├── README_zh.md
├── RELEASING.md
├── SECURITY.md
├── config.example.yaml
├── deer-flow.code-workspace
└── extensions_config.example.json
Two particularly important files are:
extensions_config.example.json: A sample JSON file for configuring DeerFlow extensions through MCP servers or skills.config.example.yaml: A sample configuration file for setting up LLM integrations, skills directories, and many other options that let you customize DeerFlow’s AI agent behavior.
Well done! DeerFlow is now installed locally.
Step #2: Configure DeerFlow
Now, in the DeerFlow installation folder, run the following command to configure the harness:
make setup
This starts an interactive CLI setup wizard, which guides you through several configuration steps. The first one is choosing an LLM provider.
Note: DeerFlow strongly recommends using Doubao-Seed-2.0-Code, DeepSeek V3.2, and Kimi 2.5.
Here, however, you will see how to integrate DeerFlow with OpenAI. Begin by selecting “OpenAI” as the target LLM provider:
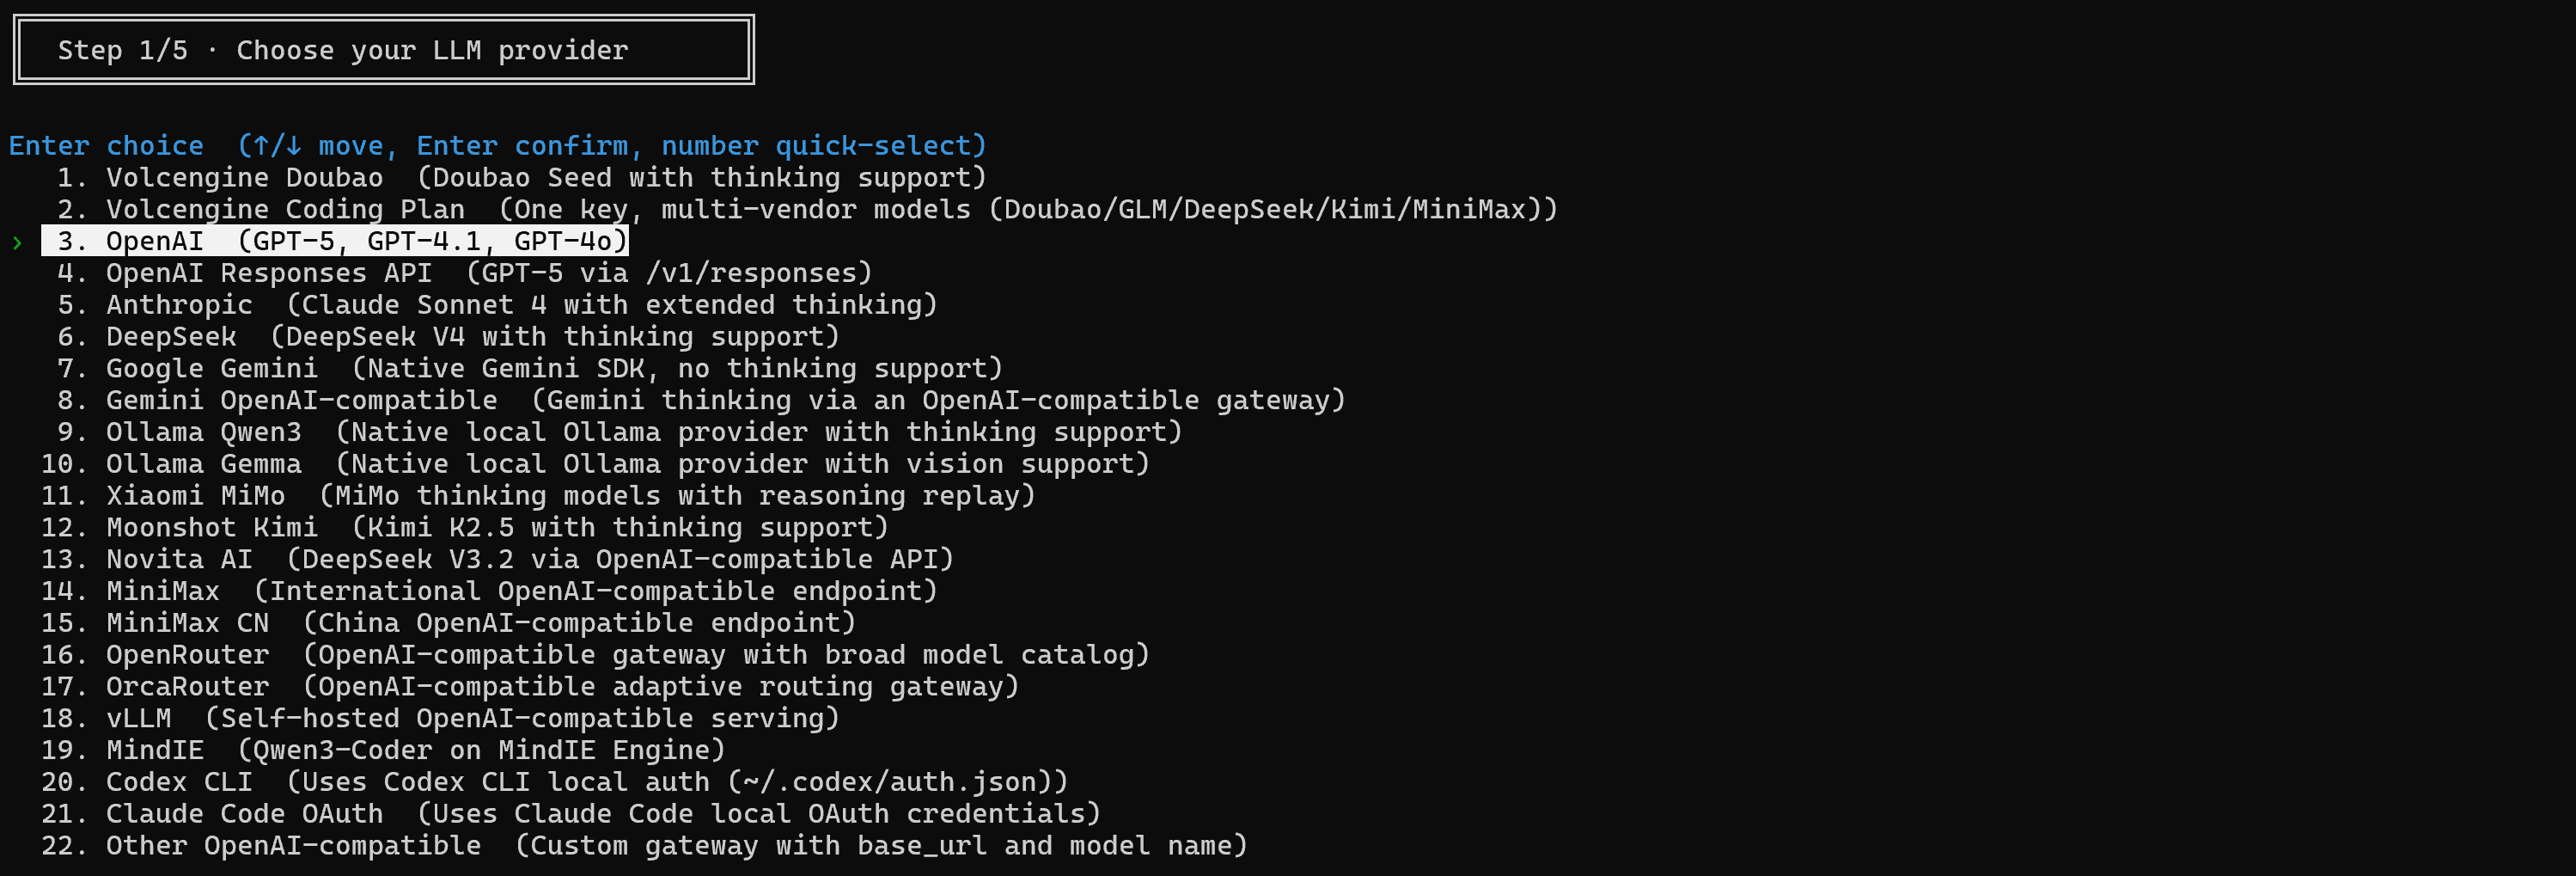
Proceed by choosing a model (e.g., gpt-5-mini). Then, enter your OpenAI API key. DeerFlow will then employ the selected OpenAI model to power its AI agent.
Next, you will be asked whether you want to optionally configure one of the built-in web search and fetch tools:

In both cases, select the “Skip for now” option, as Bright Data MCP will provide this functionality.
Continue by selecting an execution and safety policy. You can also optionally integrate an IM channel. In the end, the setup process will generate a minimal config.yaml file required to start DeerFlow and store your API keys in .env.
Wonderful! You are now ready to launch DeerFlow.
Step #3: Start the DeerFlow Frontend
In the DeerFlow installation folder, run the command below to install the frontend and backend dependencies:
make installThen, start a local development server with:
make devYou should get output similar to this:
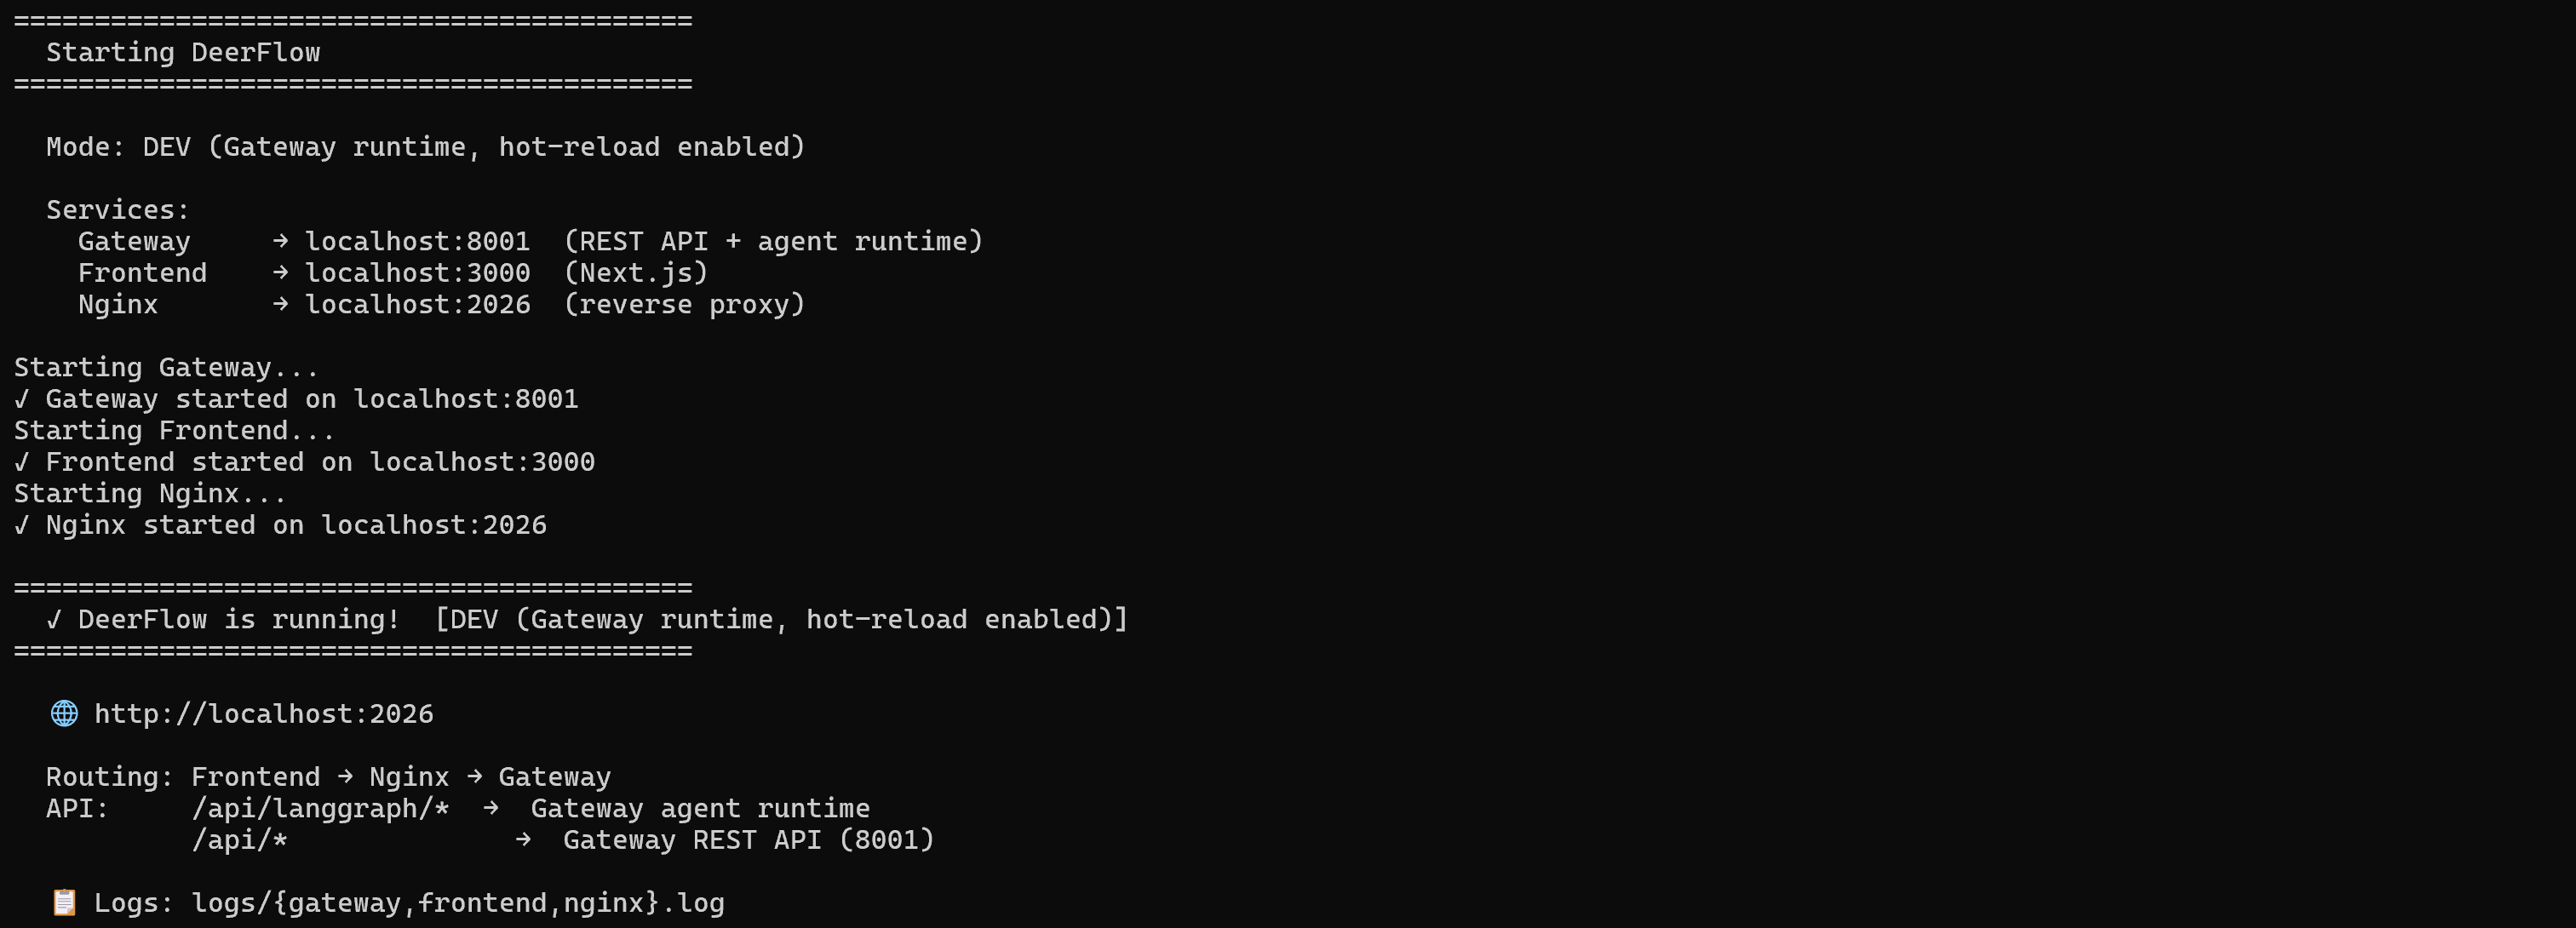
DeerFlow will now be running locally with:
- Gateway: The backend of the application, running on port
8001 - Frontend: Running on port
3000, with a reverse proxy handled by Nginx on port2026.
To access the DeerFlow frontend, open the following URL in your browser:
http://localhost:2026You should see:
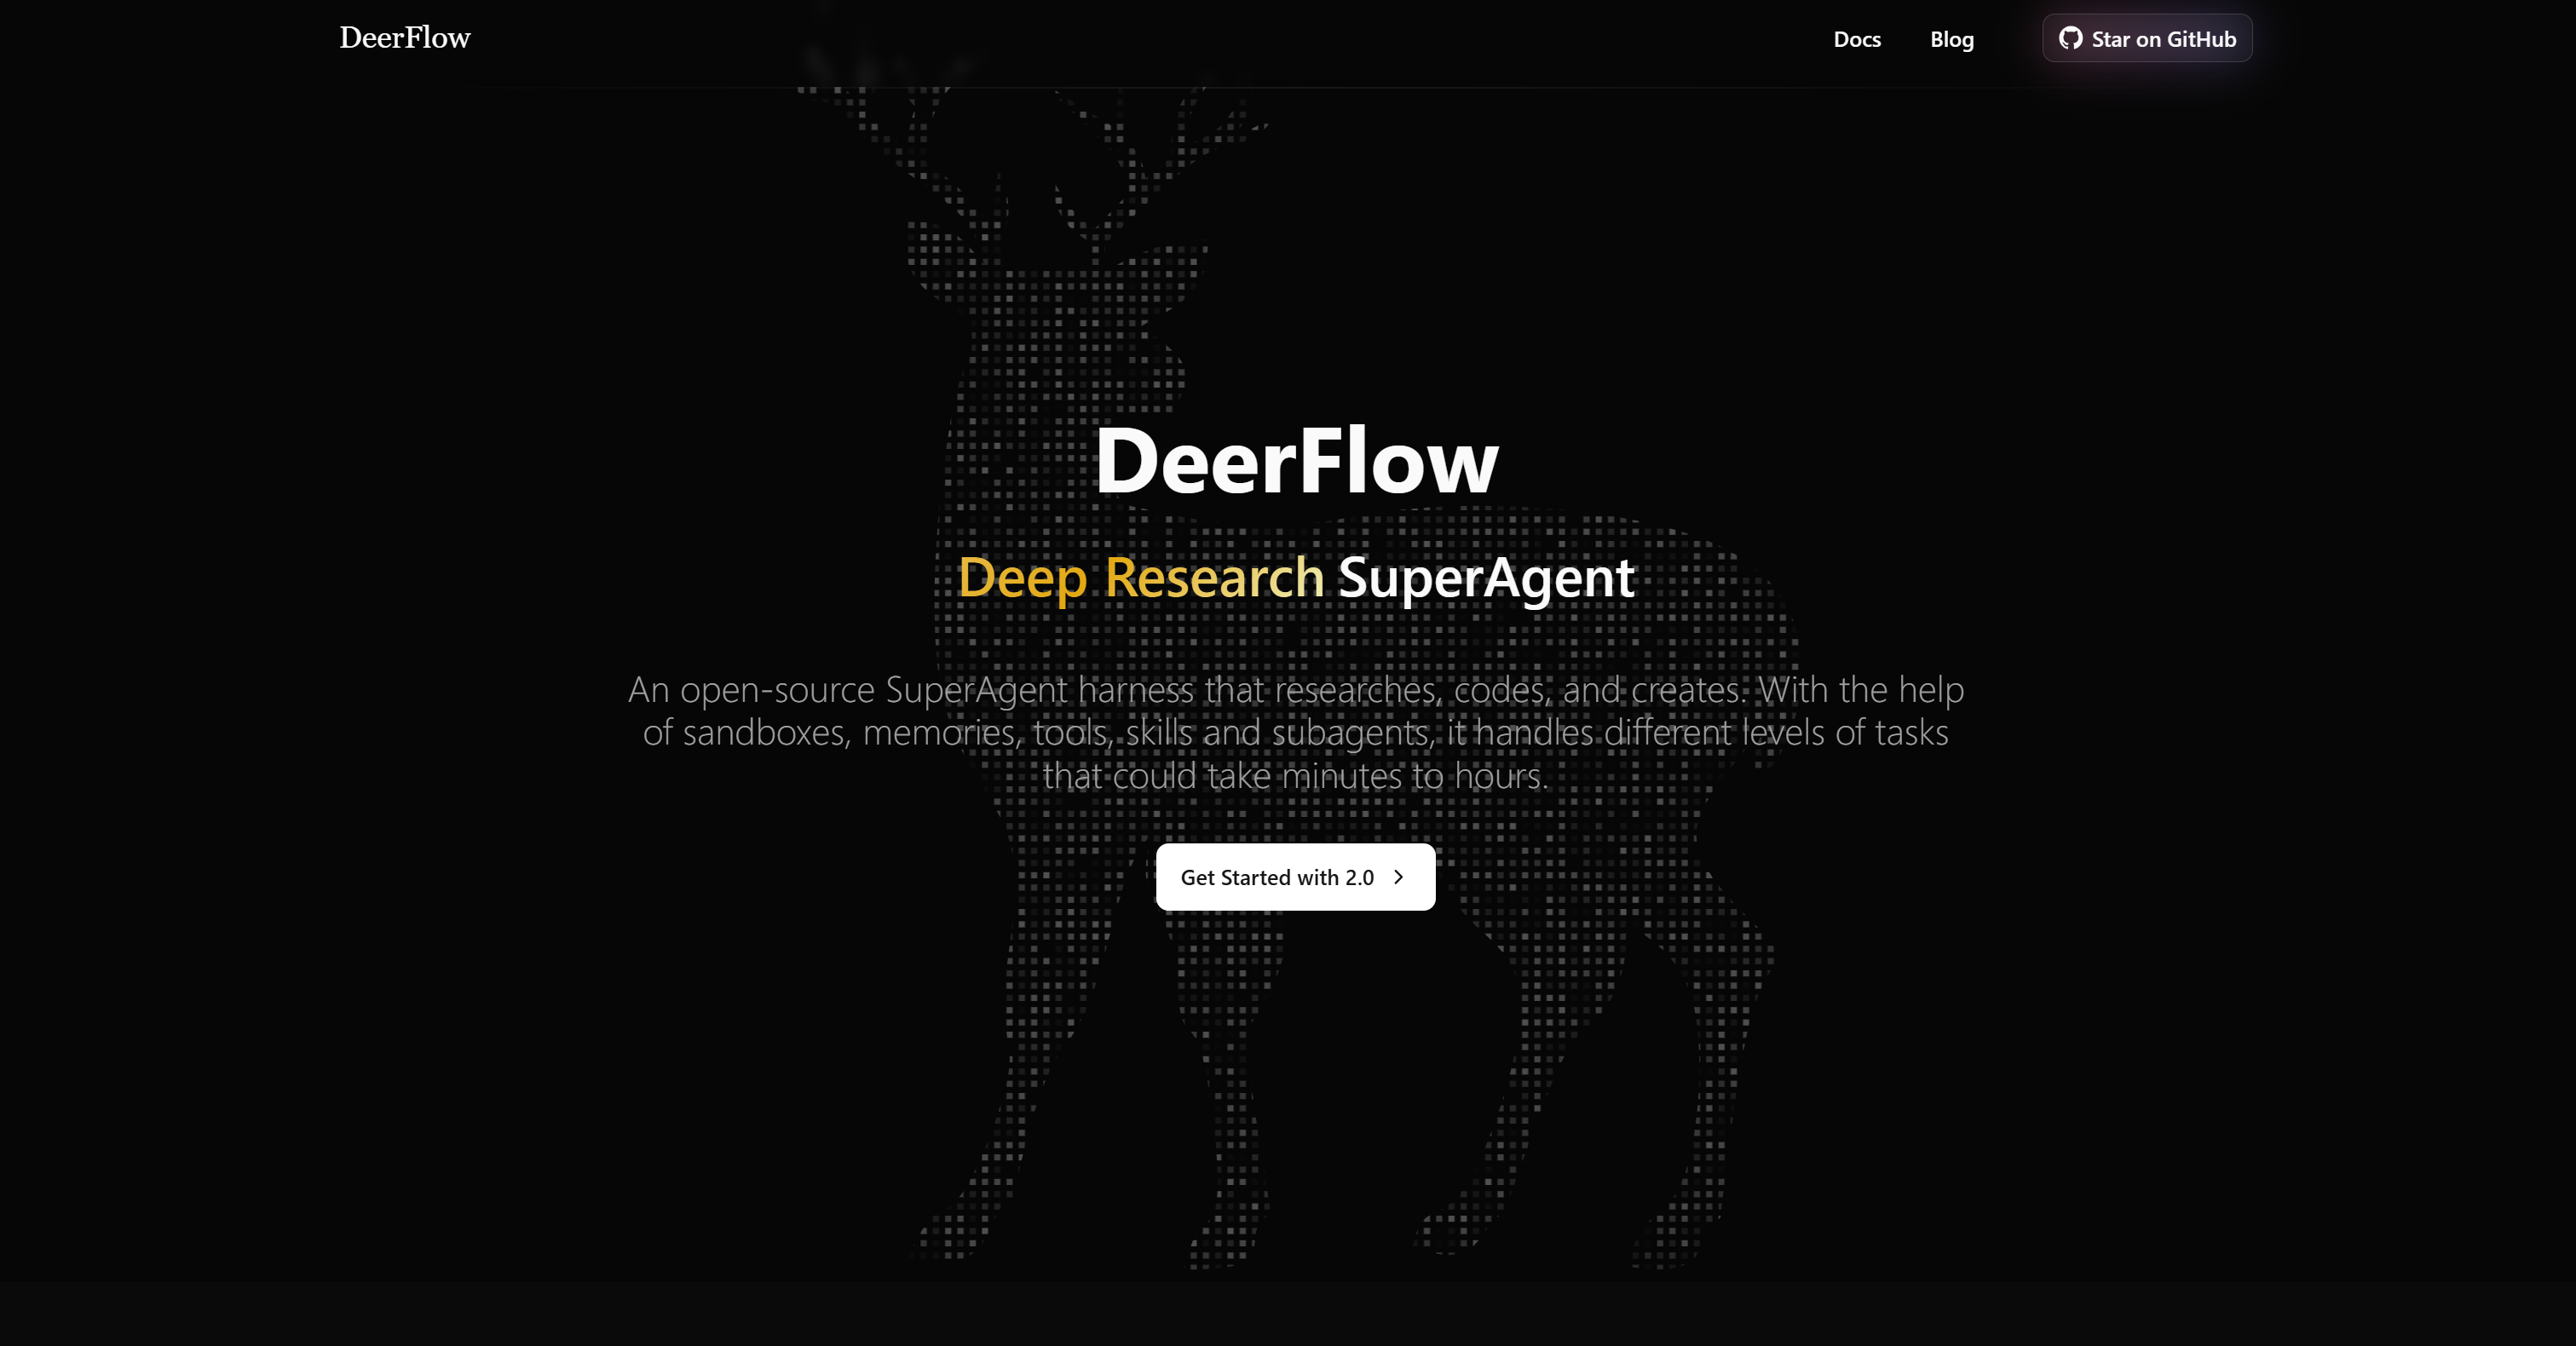
Note that the local frontend shares the same UI used by the official DeerFlow website.
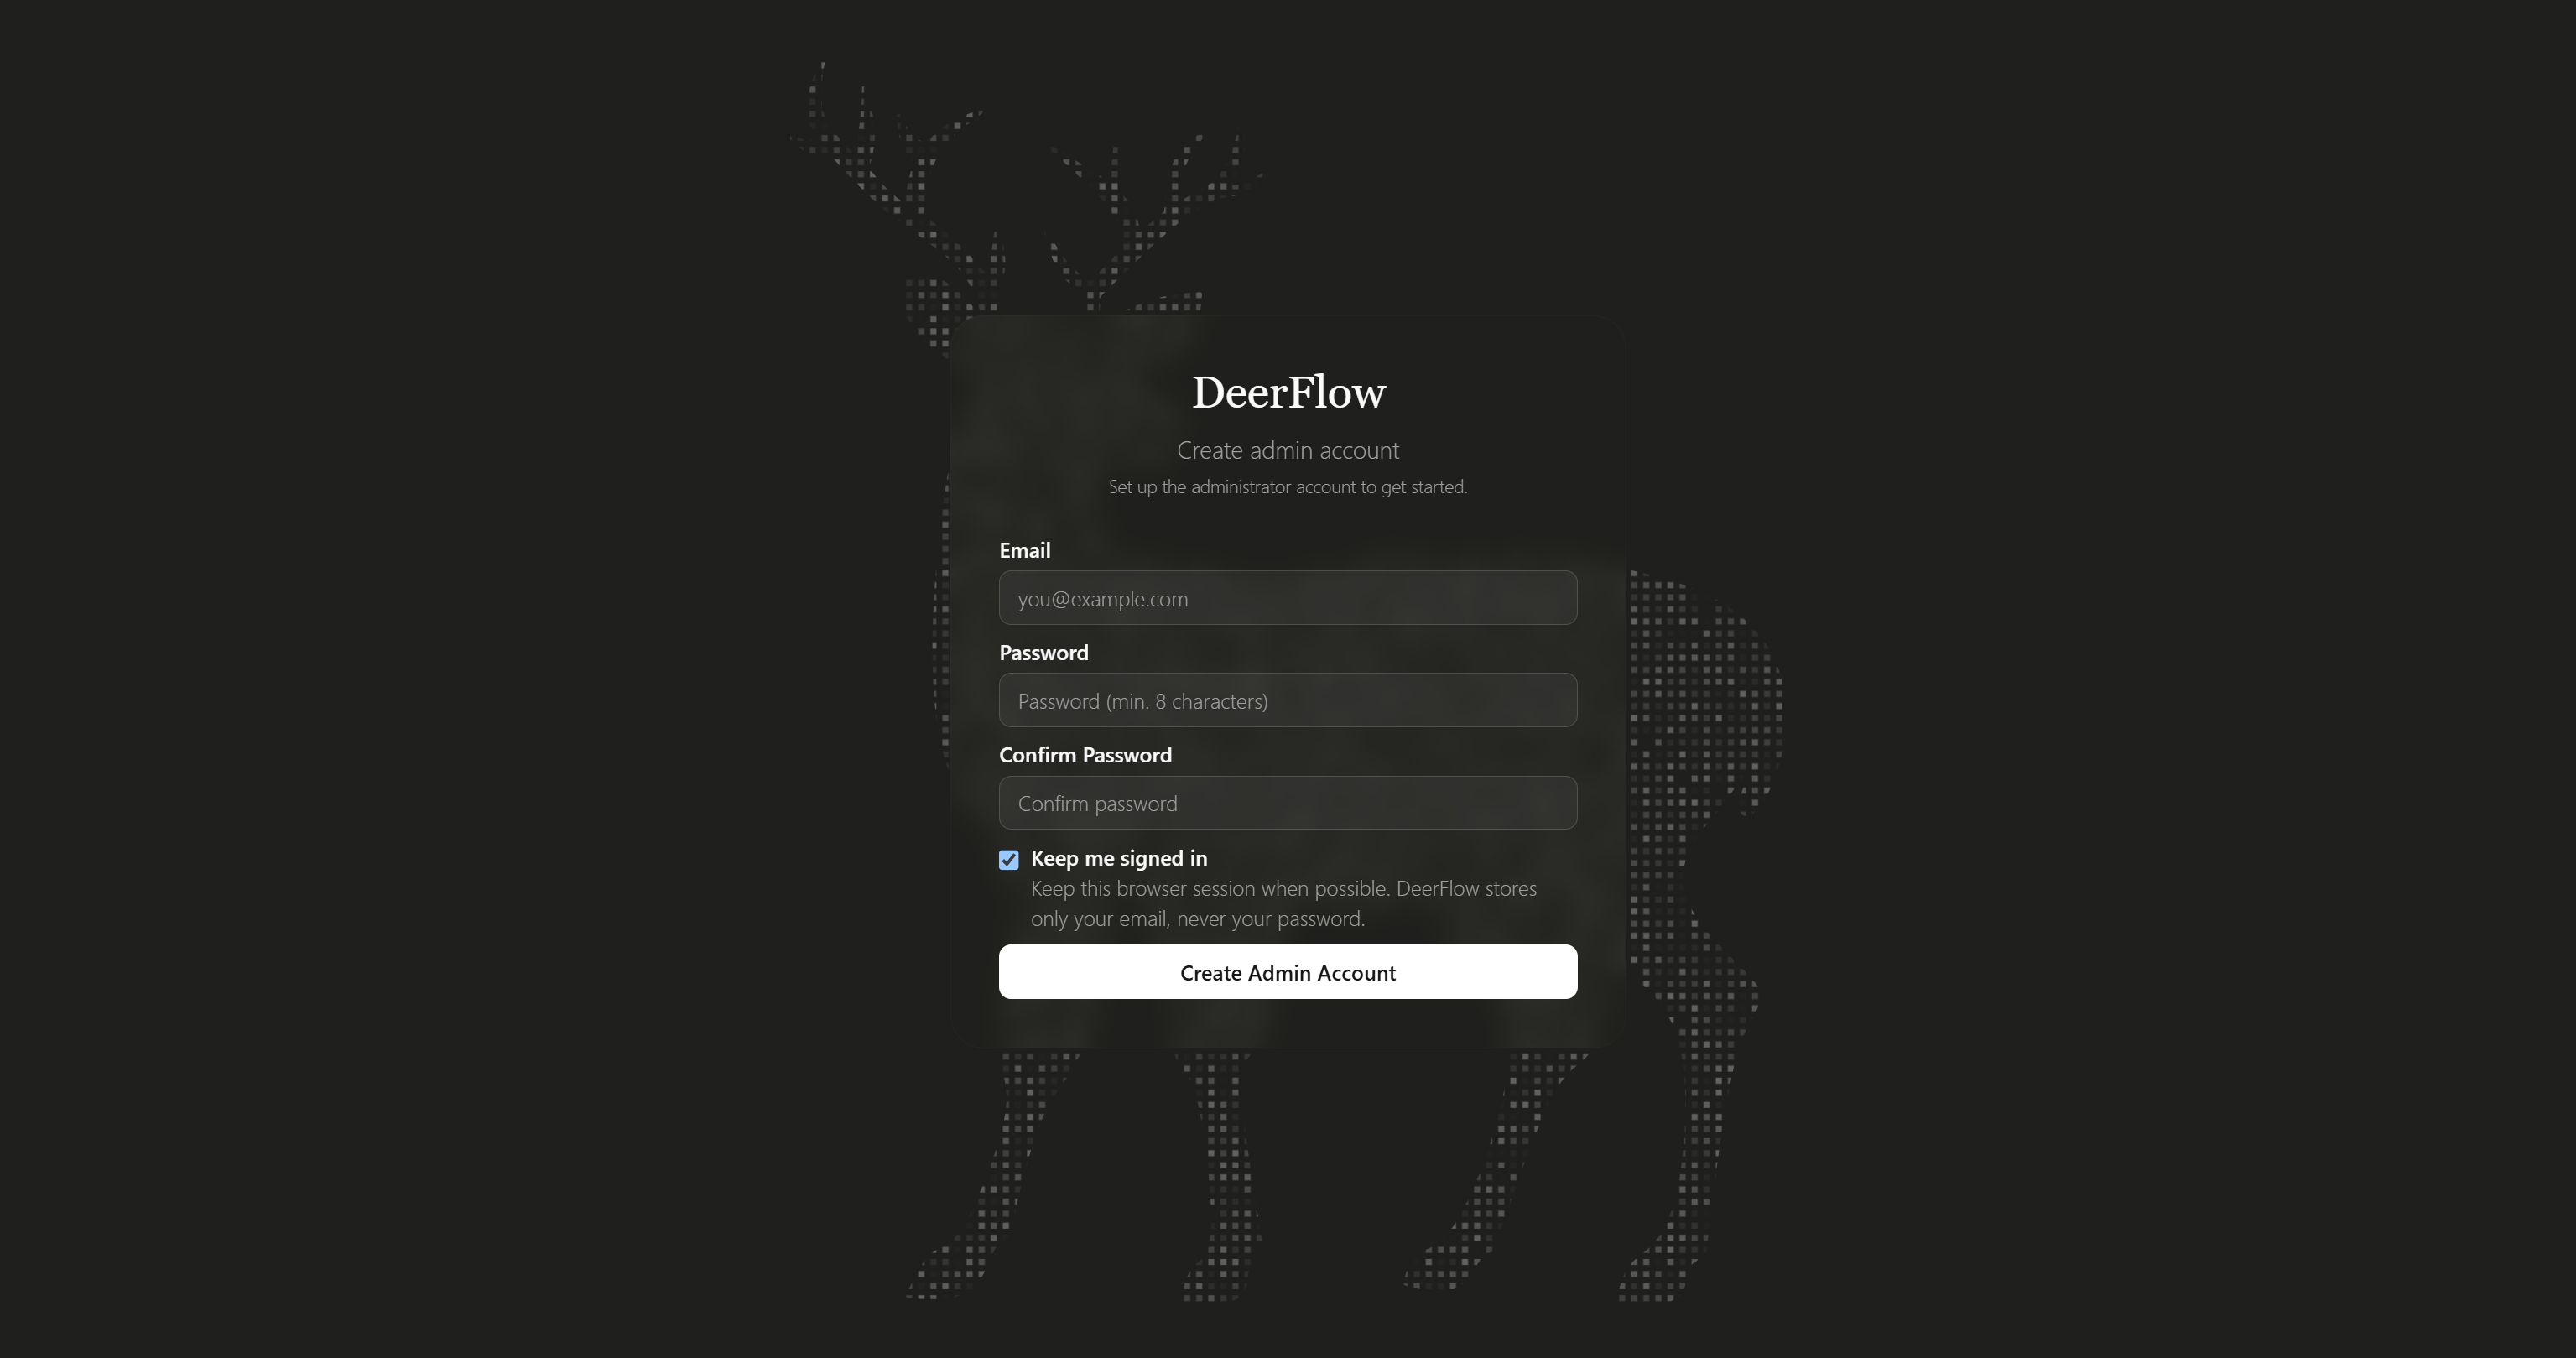
Click “Get Started with 2.0” to access your DeerFlow workspace. The first time you access the workspace, you will be asked to create an admin account.
Fill out the signup form to create your local account:
Next, log in to reach the DeerFlow workspace:
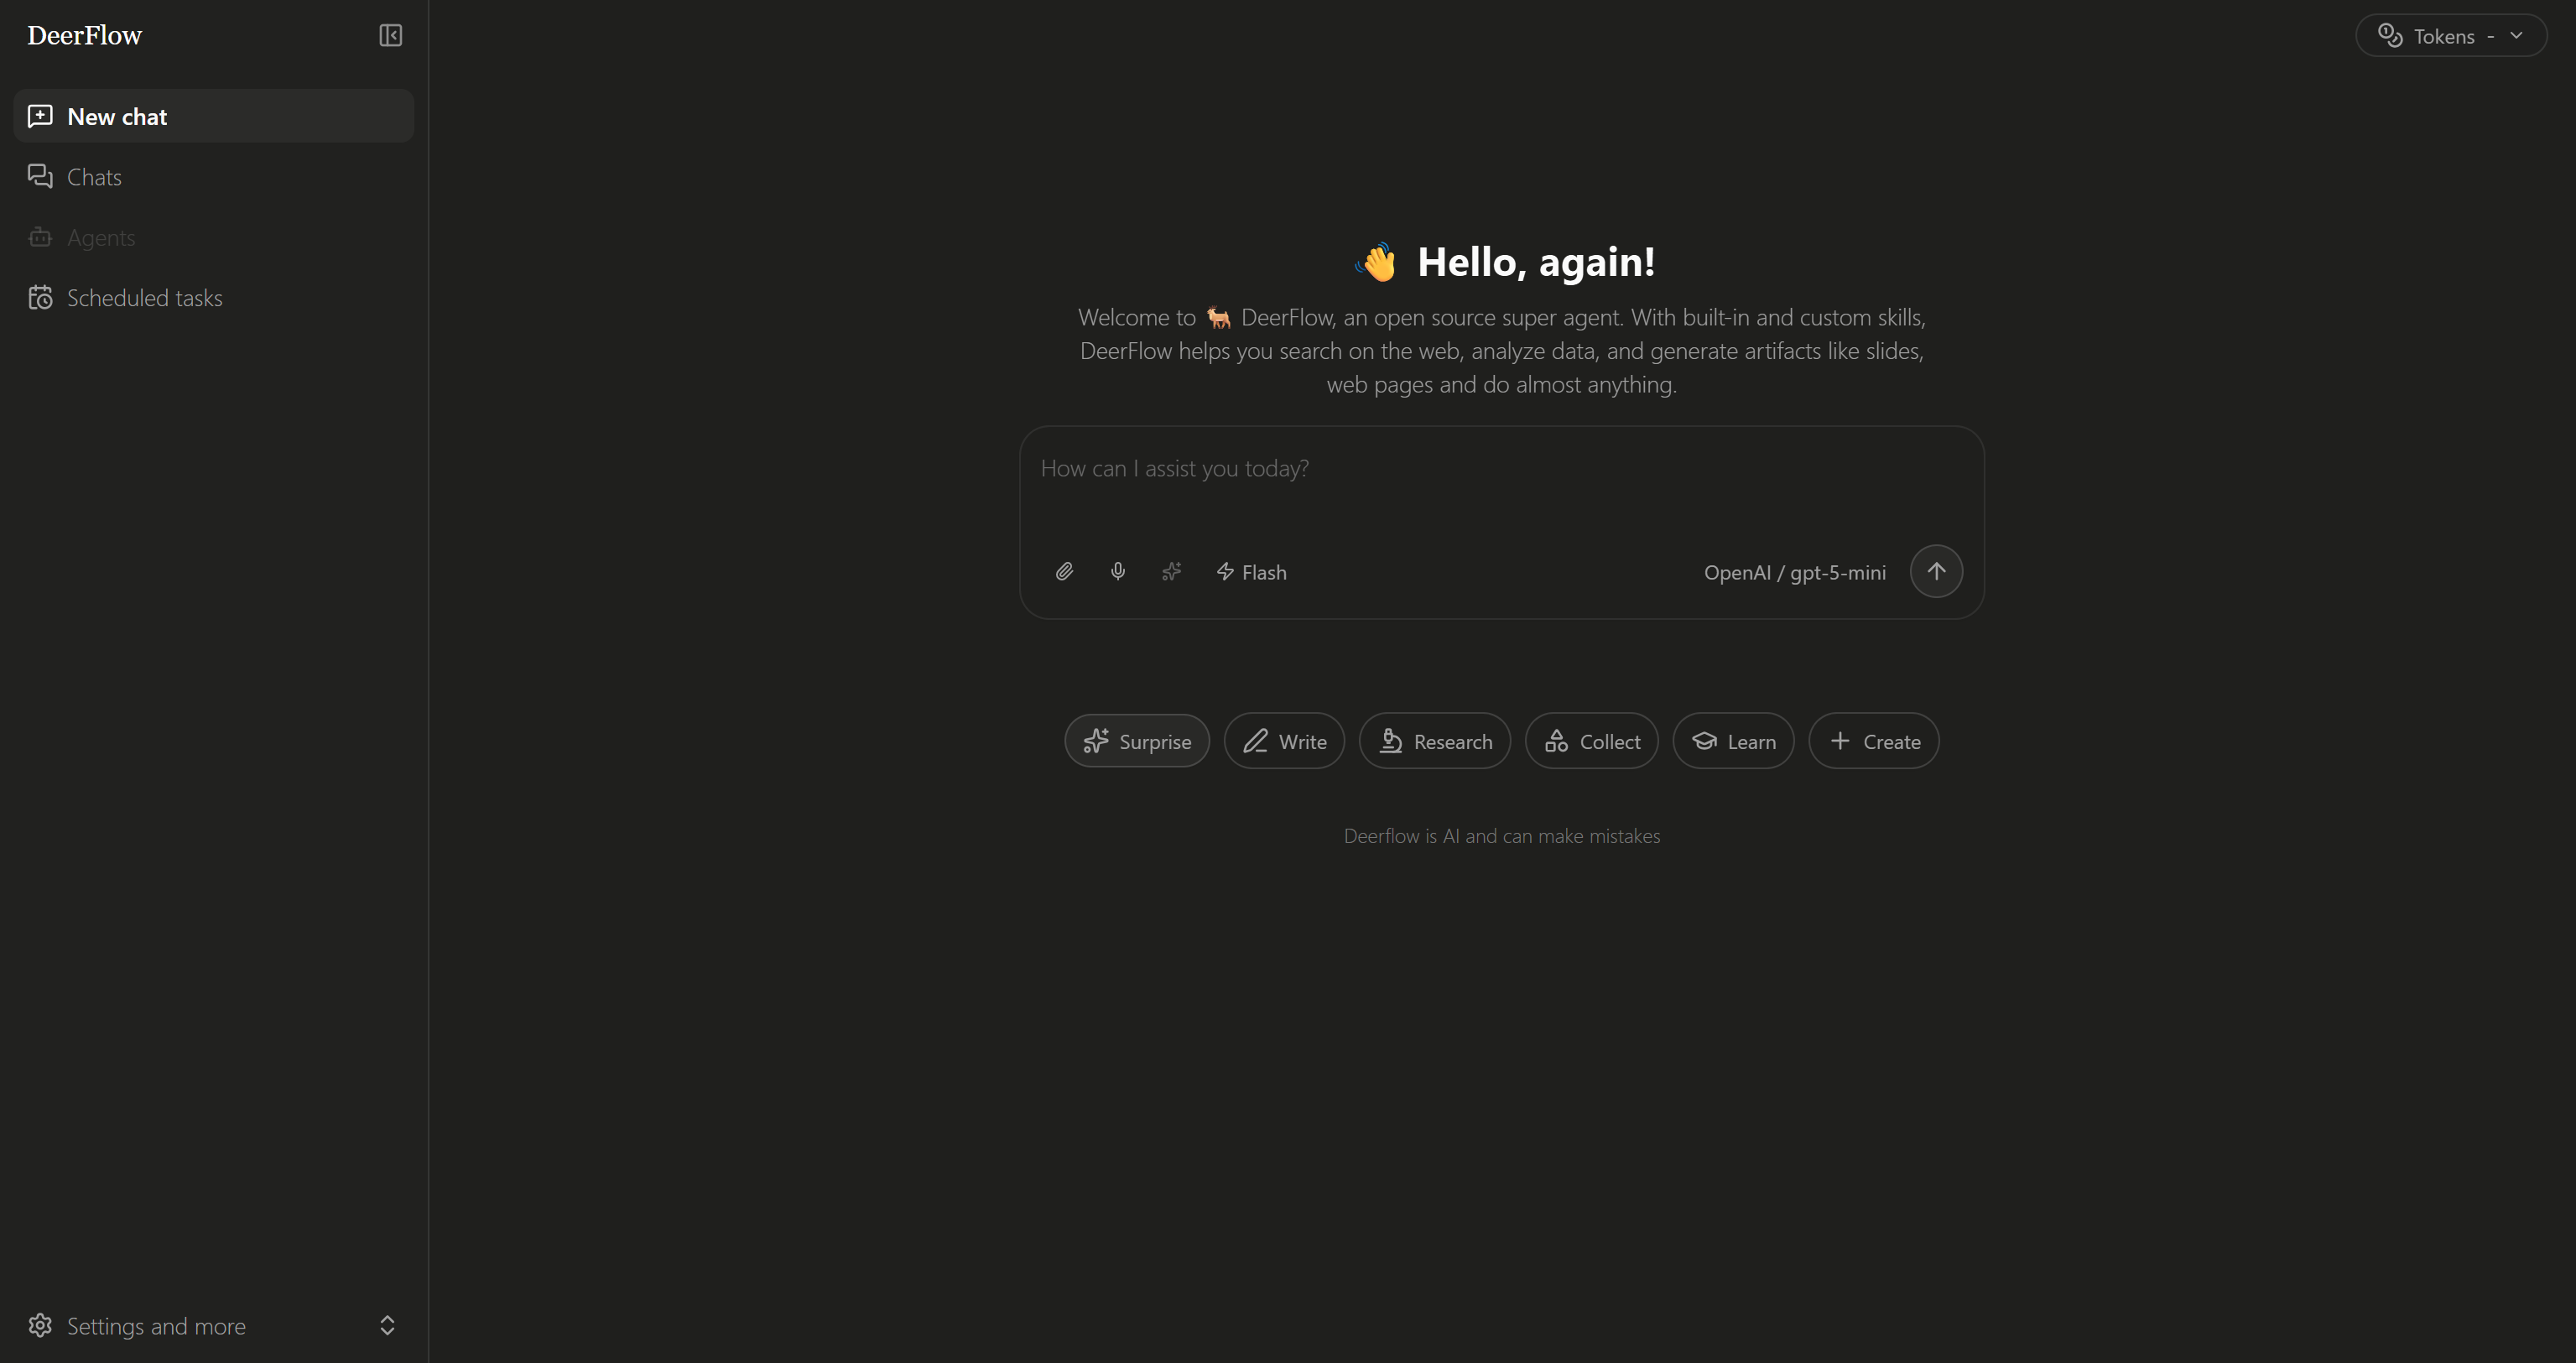
From here, you can interact with the DeerFlow agent and explore the configured MCP servers, skills, IM channels, and other settings. Amazing!
Step #4: Get Familiar with the Bright Data MCP
Before connecting Bright Data MCP to DeerFlow, verify that the MCP server runs on your machine.
Start by installing the Bright Data MCP package globally through the @brightdata/mcp npm package:
npm install -g @brightdata/mcpCheck that the MCP server starts correctly with:
API_TOKEN="<YOUR_BRIGHT_DATA_API>" npx -y @brightdata/mcpReplace <YOUR_BRIGHT_DATA_API> with your Bright Data API key. This sets the required API_TOKEN environment variable and starts the Bright Data MCP server locally. For more details, see the Bright Data MCP documentation.
If everything is set up correctly, you should see startup logs similar to these:

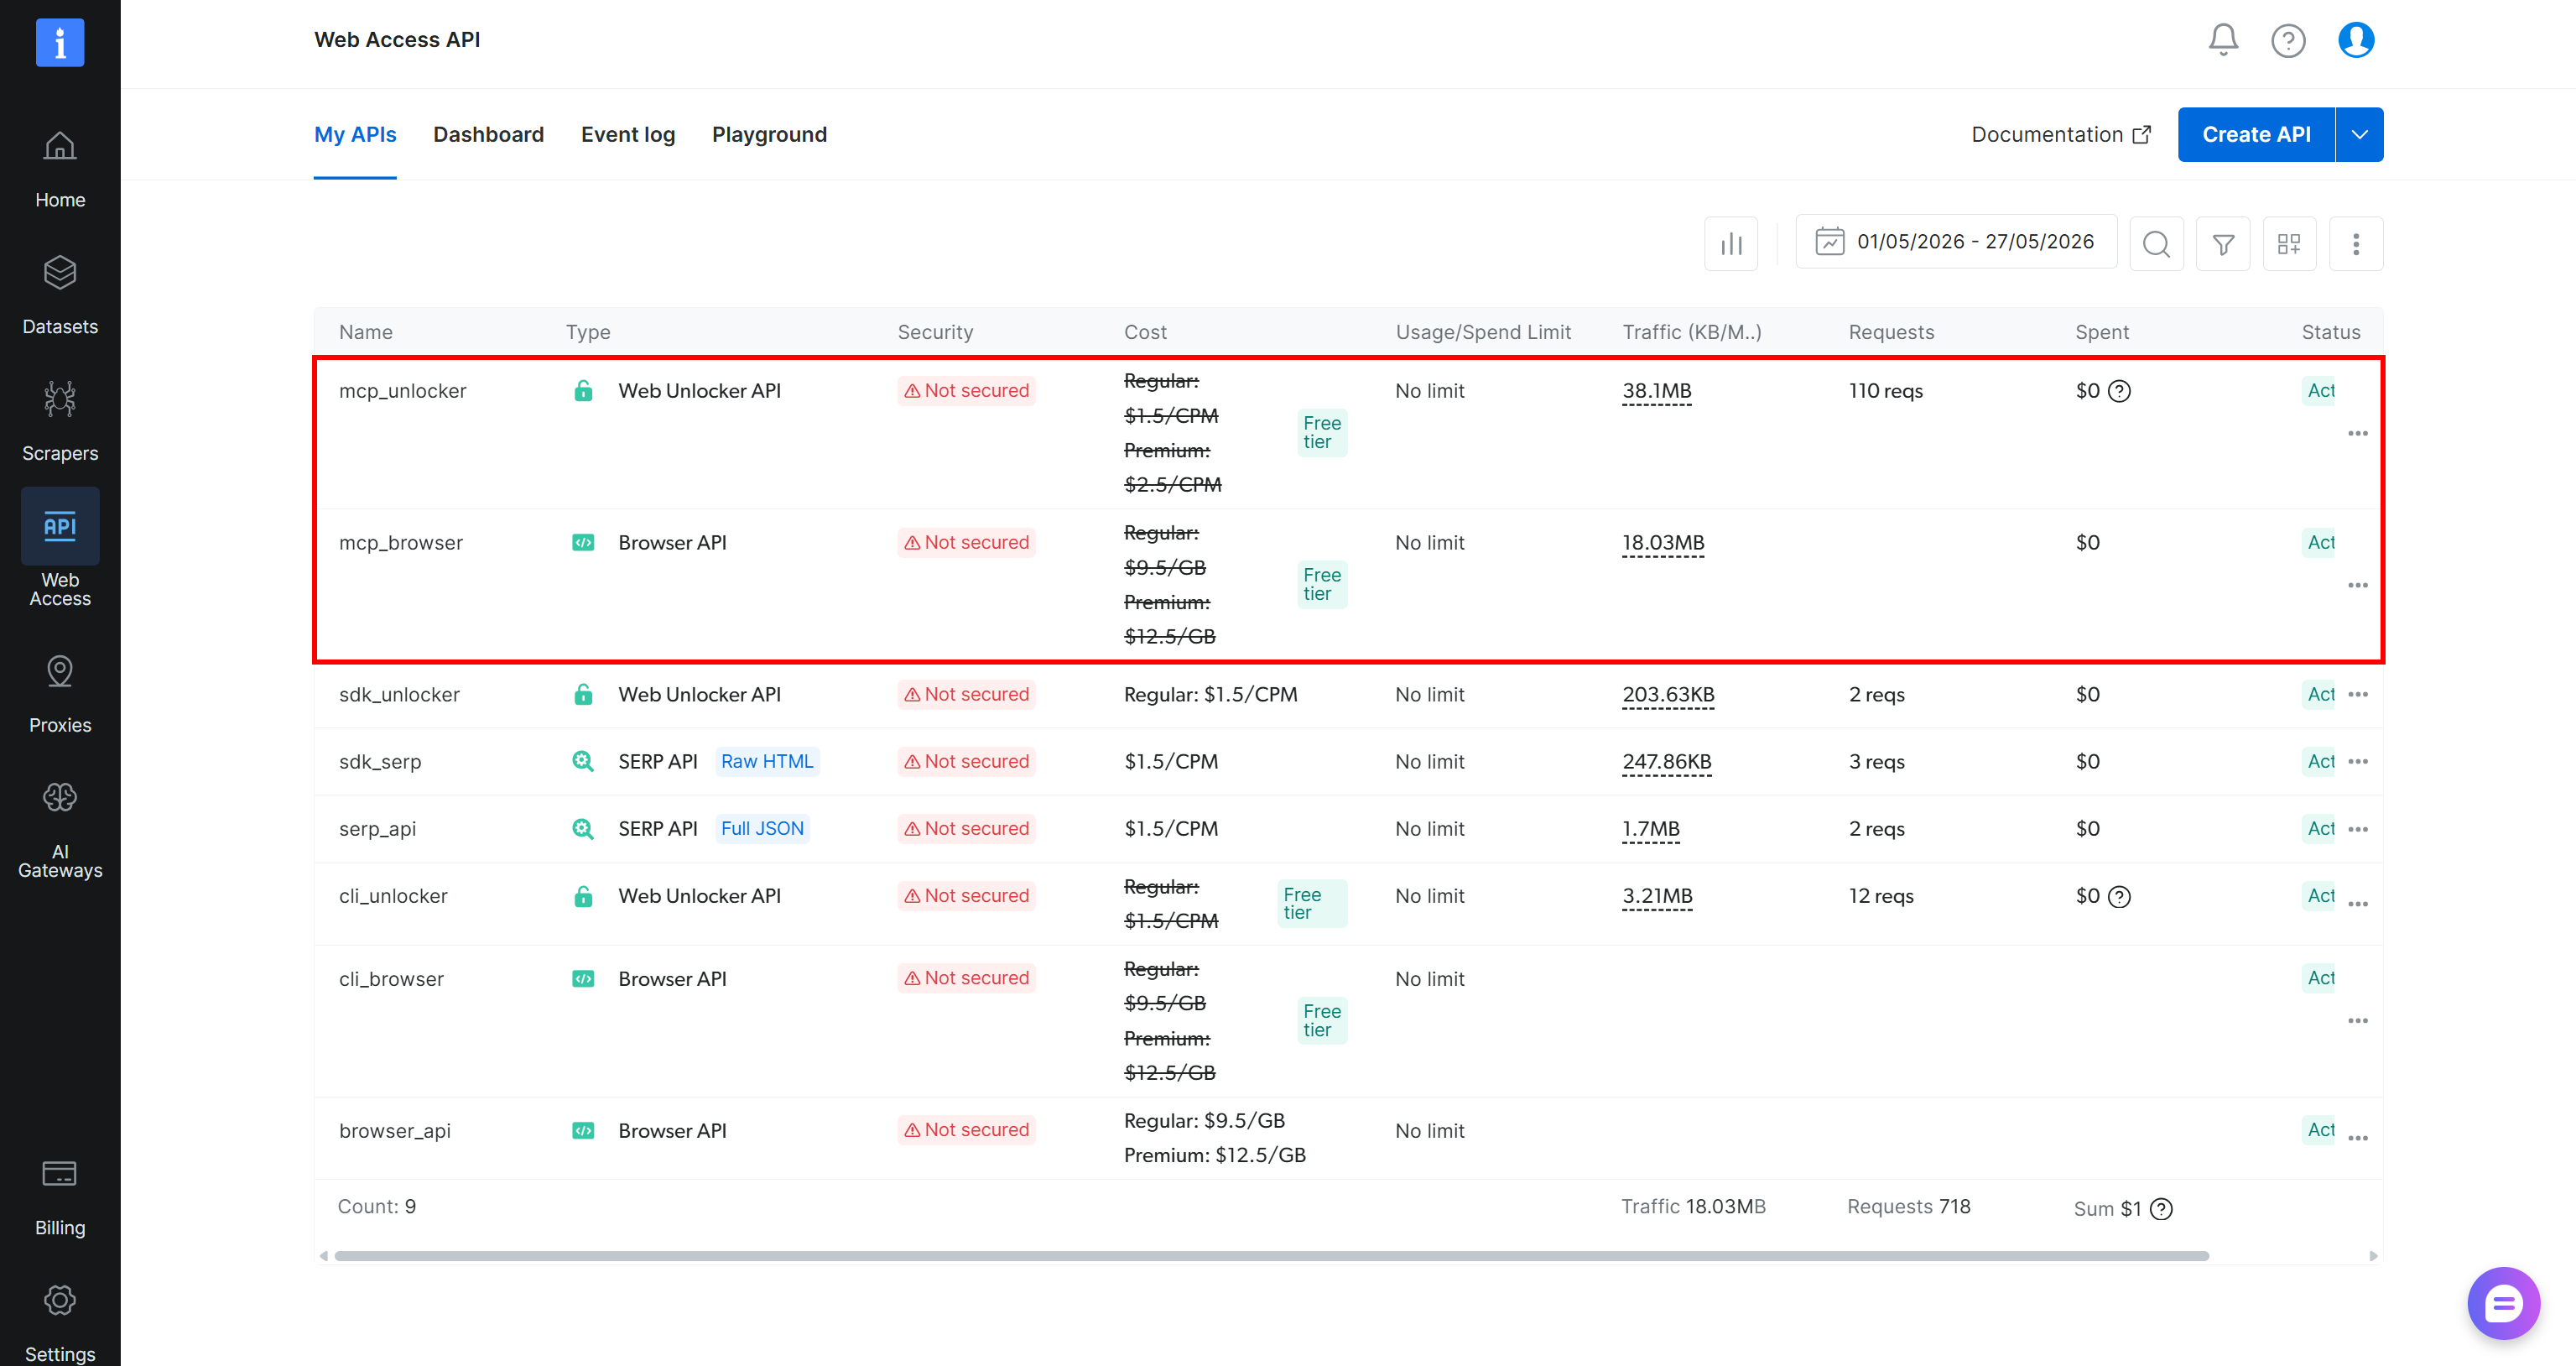
Keep in mind that, on its first run, the @brightdata/mcp package automatically creates two APIs in your Bright Data account:
mcp_unlocker: Connects to the Bright Data Web Unlocker API (and SERP API).mcp_browser: Connects to the Bright Data Browser API.
These APIs power the 70+ tools available through Bright Data MCP. You can also configure custom APIs, as described in the official repository.
To confirm that the default APIs were created successfully, open “Web Access > Web Access API” in the Bright Data control panel. Both APIs should appear in the “My APIs” table:
By default, Bright Data MCP starts in Rapid mode (free tier), which provides access to a limited selection of tools. To enable all 70+ tools, switch to Pro mode by setting the PRO_MODE=true environment variable:
API_TOKEN="<YOUR_BRIGHT_DATA_API>" PRO_MODE="true" npx -y @brightdata/mcpNote: Pro mode [incurs additional charges](https://github.com/brightdata/brightdata-mcp?tab=readme-ov-file#-pricing, modes).
Terrific! You now know that the Bright Data MCP works locally. Next, connect it to DeerFlow.
Step #5: Configure the Bright Data MCP in DeerFlow
You can configure an MCP server connection in DeerFlow through the extensions_config.json file.
Start by creating a copy of the example configuration file included with your installation:
cp extensions_config.example.json extensions_config.jsonThe example file contains configurations for the GitHub and PostgreSQL MCP servers. Remove them and make sure the mcpServers section contains the following:
{
  // ...
  "mcpServers": {
    "bright-data-web-mcp": {
      "enabled": true,
      "command": "npx",
      "args": [
        "@brightdata/mcp"
      ],
      "env": {
        "API_TOKEN": "<YOUR_BRIGHT_DATA_API_KEY>",
        "PRO_MODE": "true"
      }
    }
  },
  // ...
}
This tells DeerFlow how to connect to a local Bright Data MCP server instance (called bright-data-web-mcp. In detail, it instructs it to use the npx -y @brightdata/mcp command together with these two environment variables:
API_TOKEN(required): Set this to your Bright Data API key.PRO_MODE(optional): Set totrueto enable Pro mode. Set it tofalseor removePRO_MODE=trueto set up a Bright Data MCP connection in Rapid mode.
Note the "enabled": true setting to enable the MCP server connection.
Save extensions_config.json. DeerFlow now has everything it needs to start the Bright Data MCP server locally and connect to it. Cool!
Step #6: Verify That the Connection Works
Terminate the current DeerFlow process and relaunch it with:
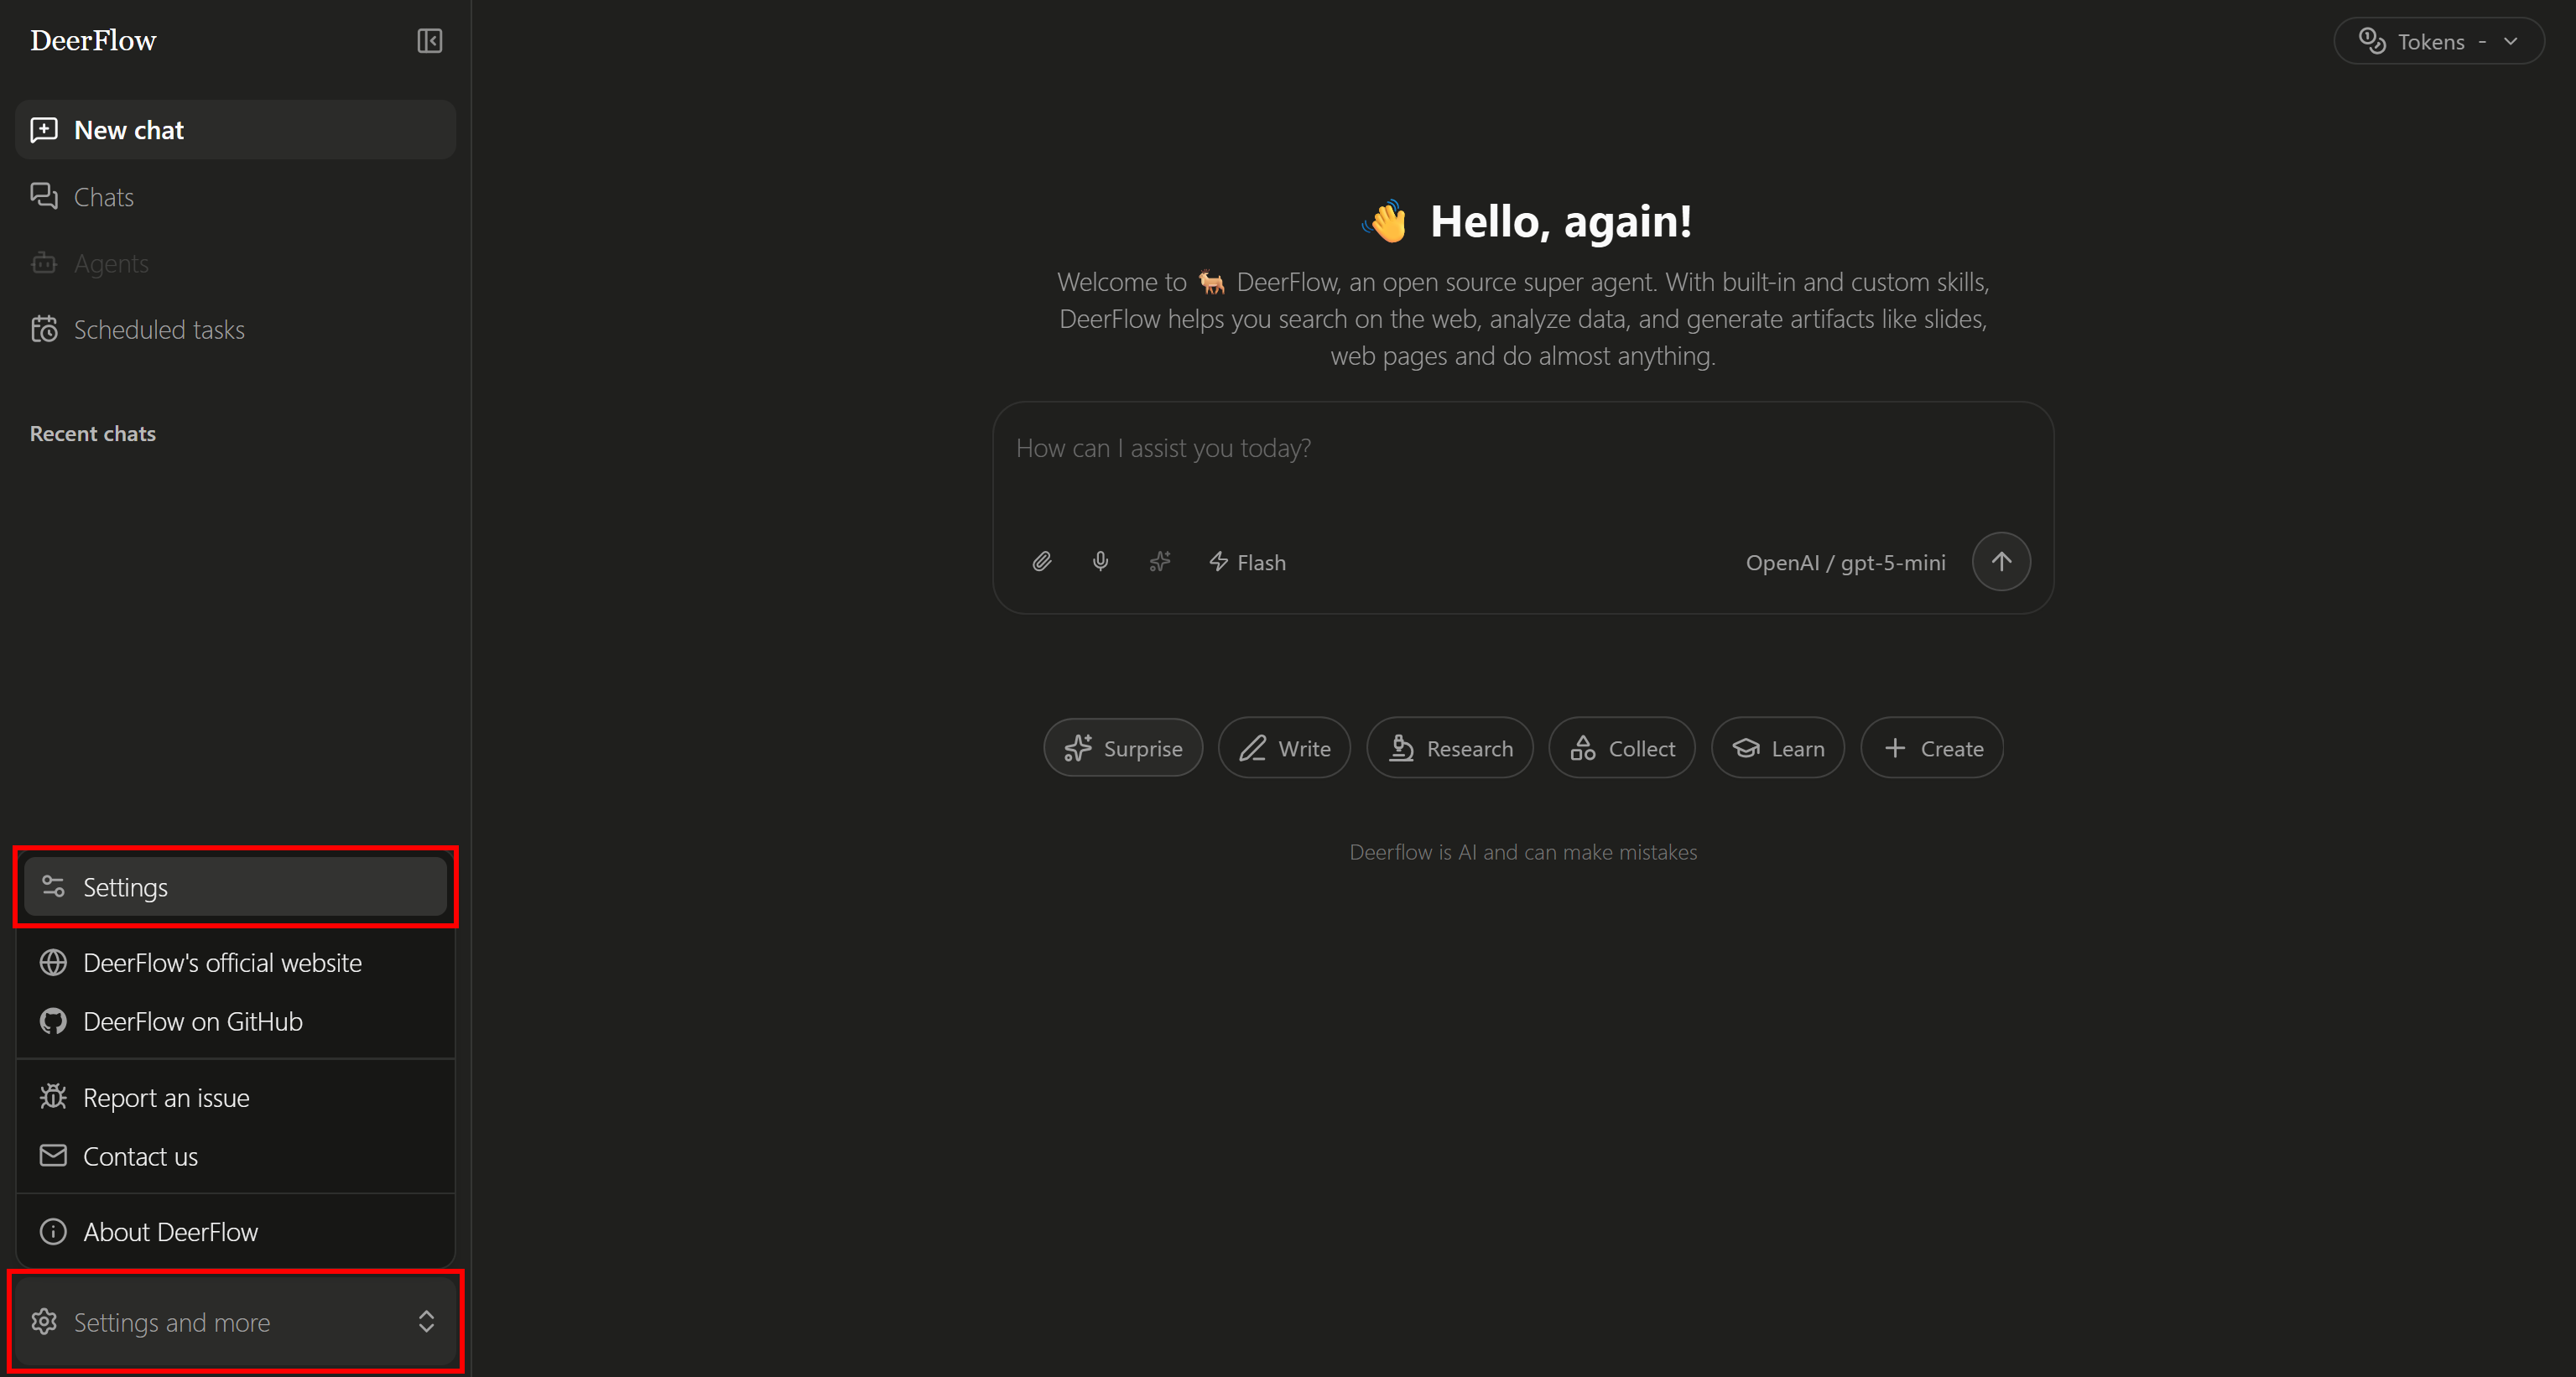
make devIn the workspace web app, click “Settings and more” in the bottom-left corner and select “Settings”:
The “Settings” modal will appear. Go to the “Tools” section, where you will see the configured bright-data-web-mcp server:
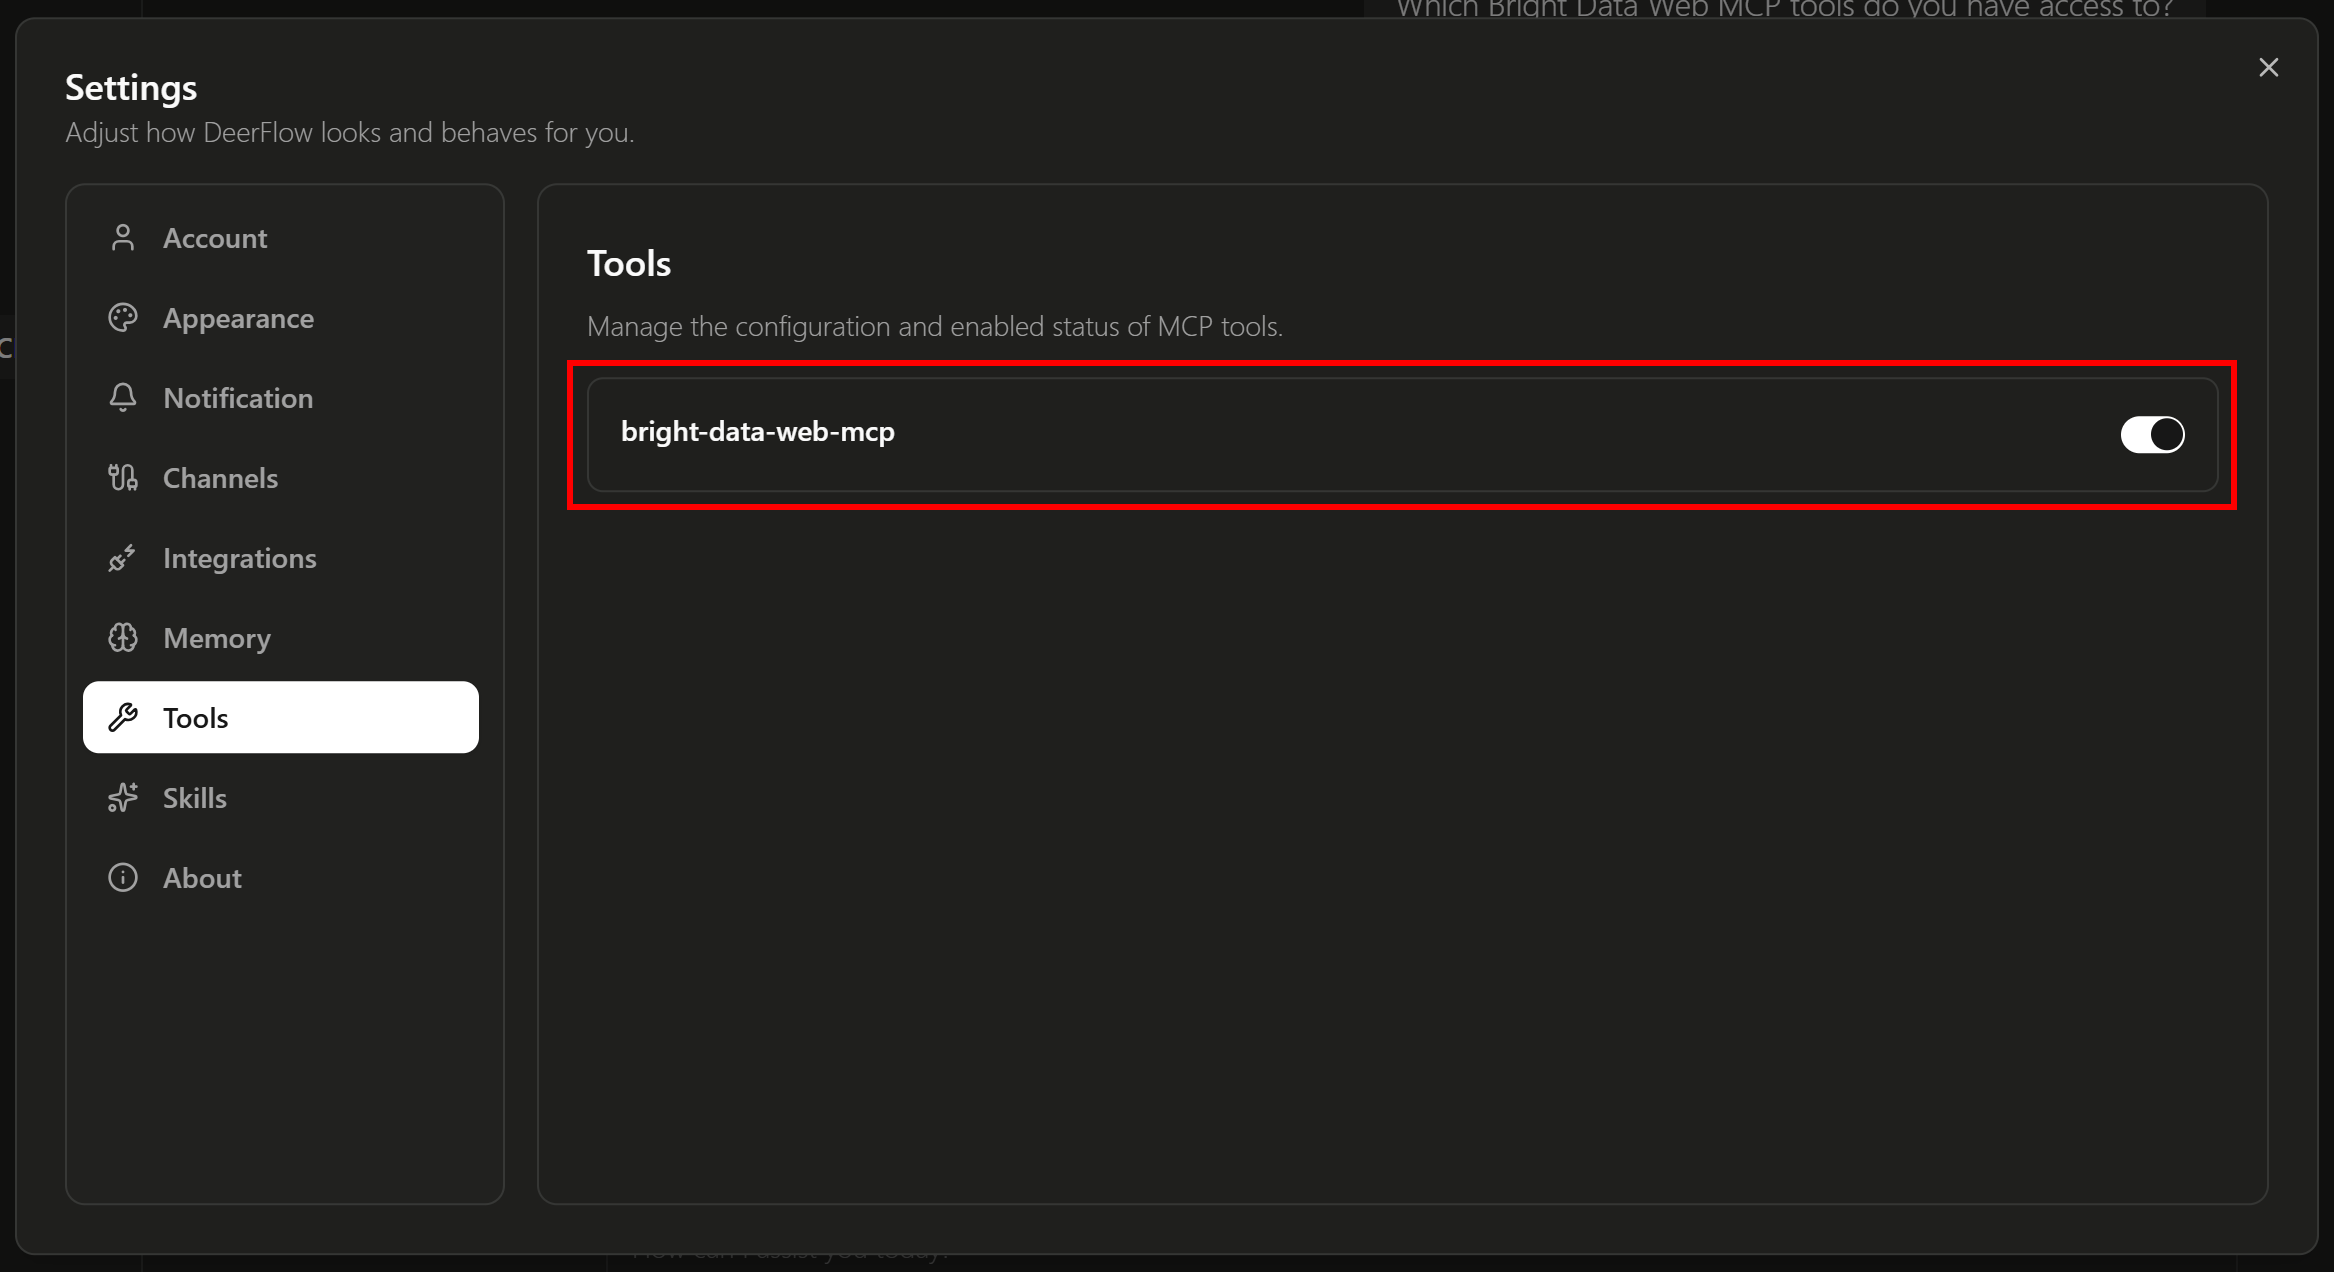
As configured, the Bright Data MCP connection is already enabled.
DeerFlow does not currently provide a way to view the tools available from an MCP server. Thus, start a new chat and enter a prompt like:
Which Bright Data MCP tools do you have access to? If you configured Bright Data MCP in Pro mode, you will get a response similar to this:
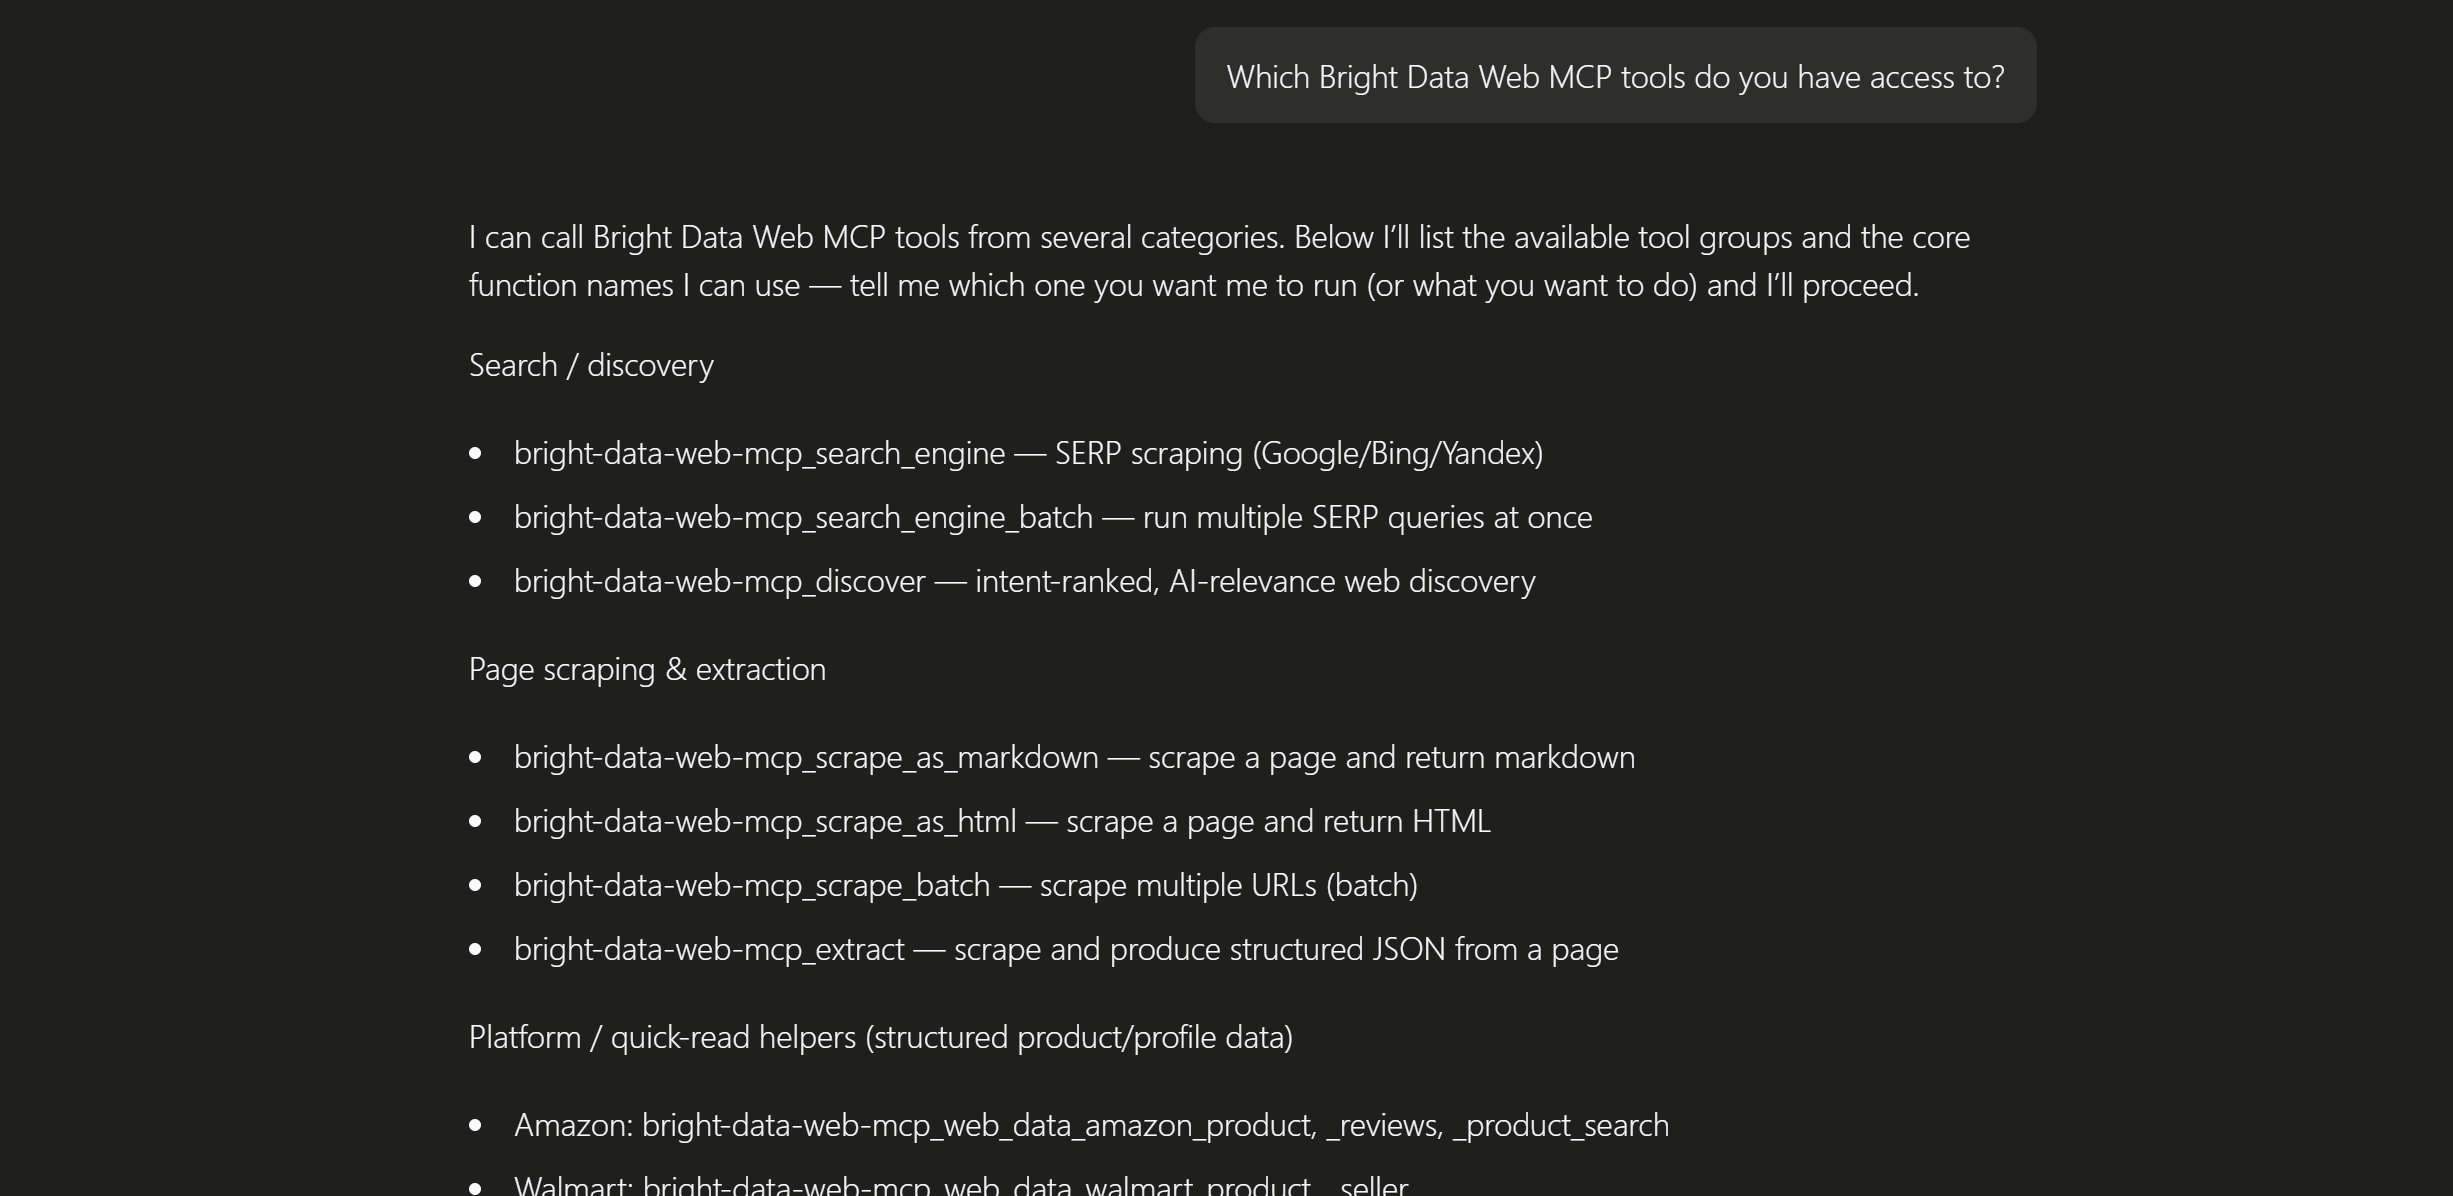
Notice how this lists all 70+ tools exposed by Bright Data MCP. If you are using Rapid mode, the AI agent will instead return only the tools available in that mode.
Fantastic! This confirms that the DeerFlow AI agent can access the Bright Data MCP tools.
Step #7: Test the Integration
Time to verify that the capabilities provided by Bright Data via its Bright Data MCP are correctly integrated and accessible in DeerFlow. To do so, you need to give the AI agent a task that requires web discovery and scraping.
For example, assume you want to discover some papers about a specific topic (MCP itself, in this case) and let the DeerFlow AI agent analyze them.
Do not forget that DeerFlow comes with a built-in academic-paper-review skill for scientific paper analysis:
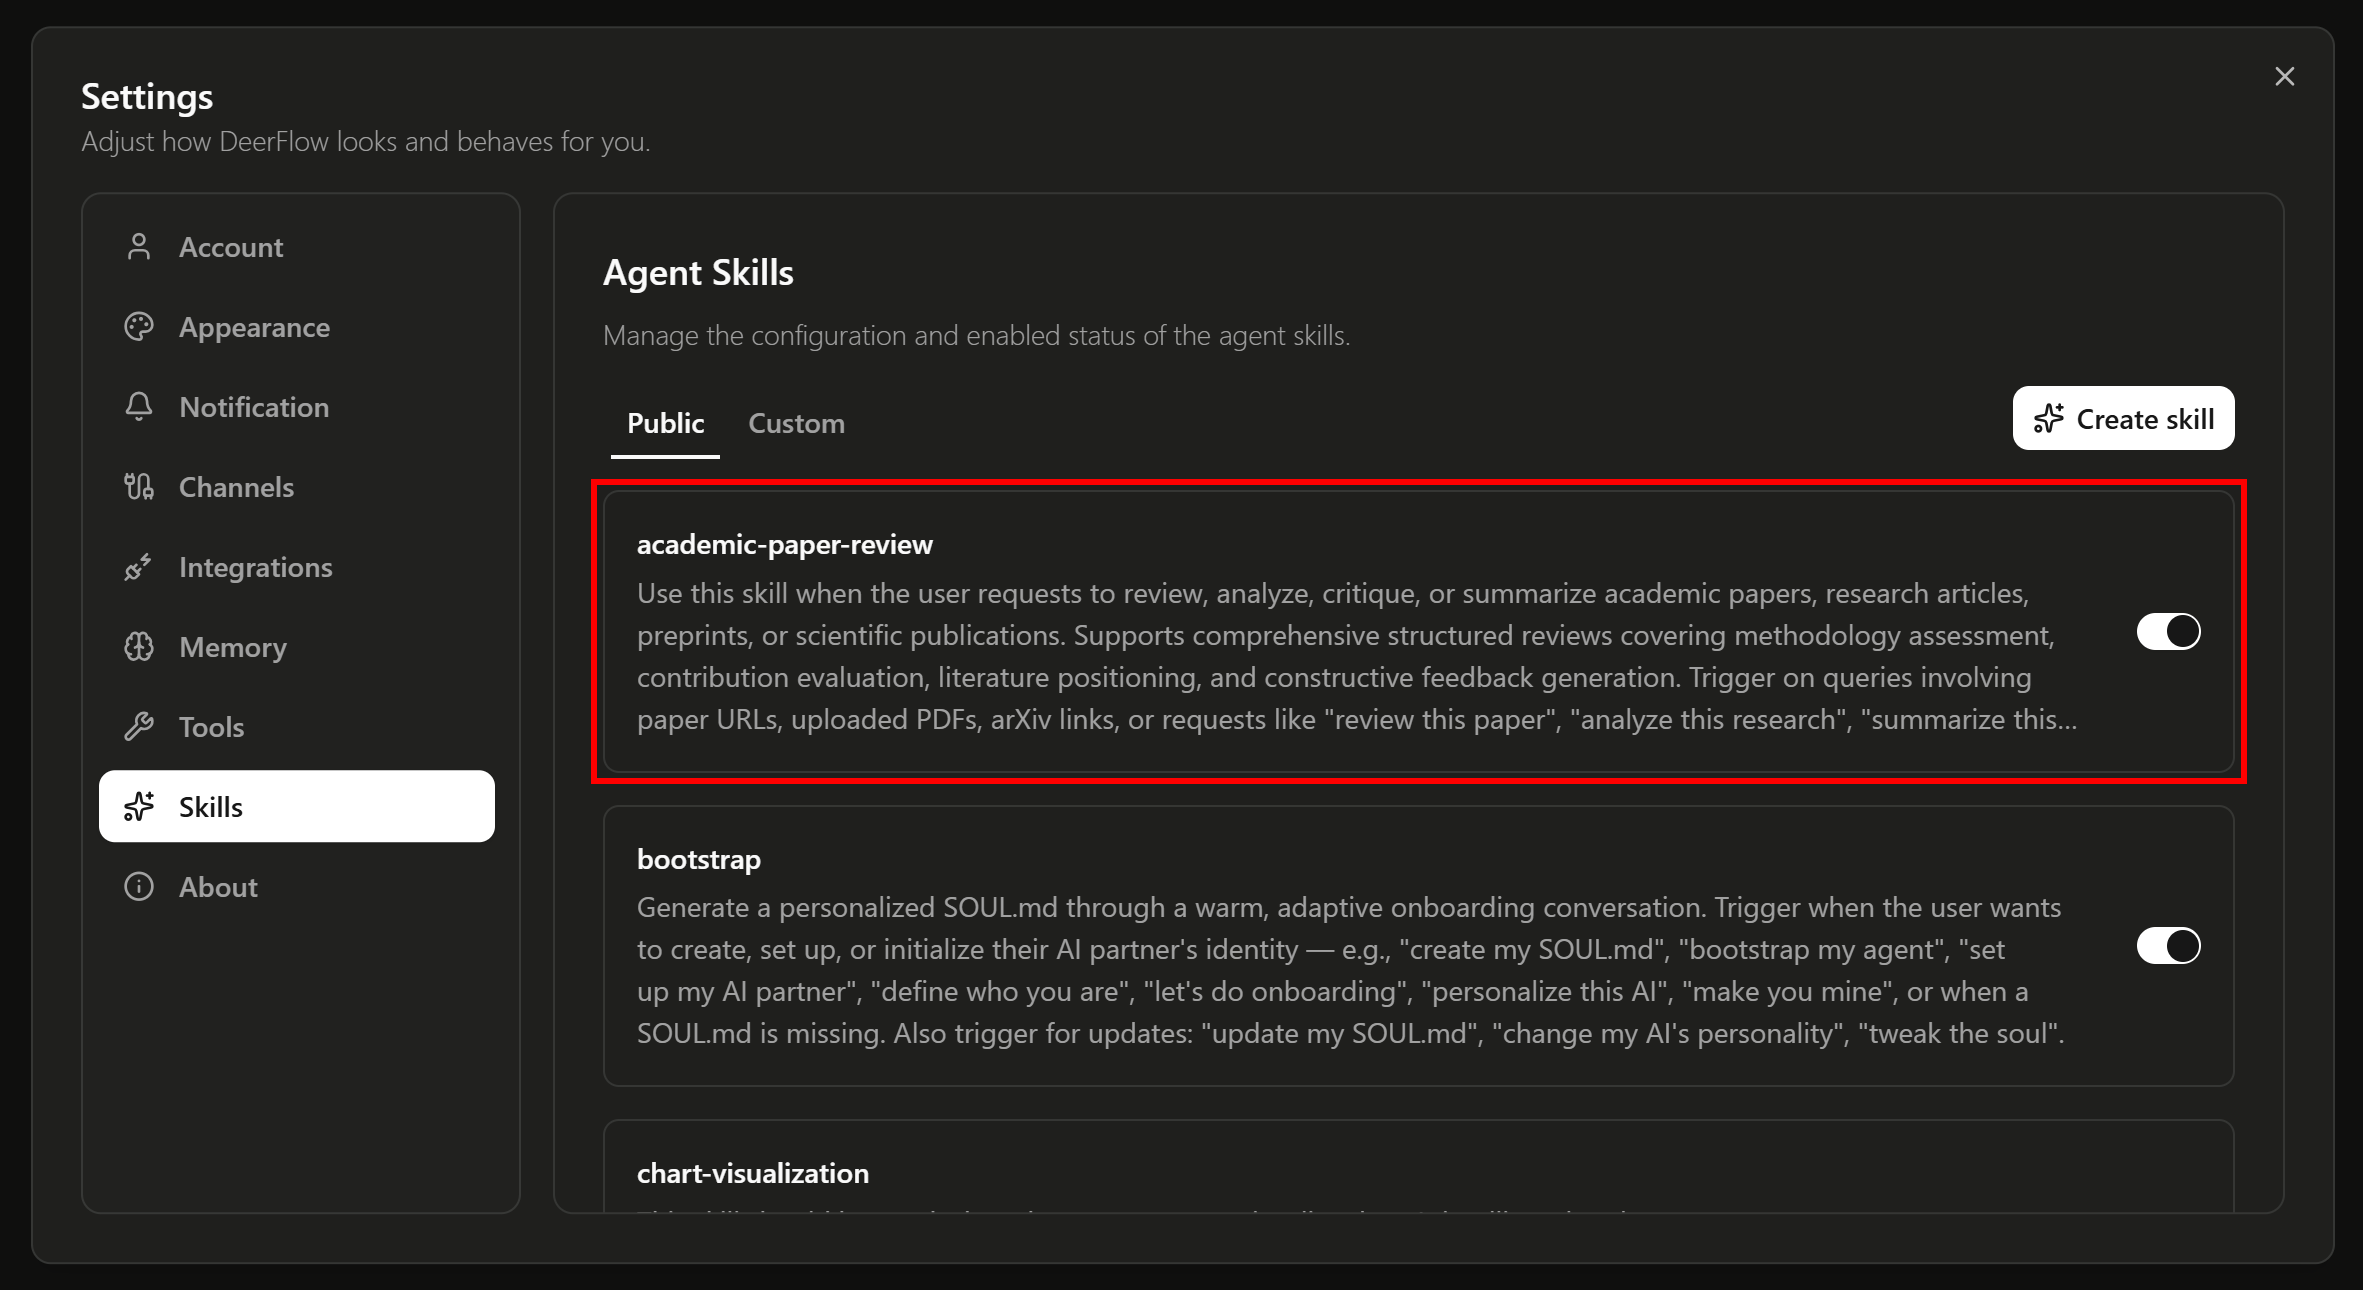
Let’s see if the AI agent can use Bright Data MCP tools to source and access papers from the web.
To check that, try asking the agent to perform a task like this:
Search the web for the most recent papers (last 12 months) on arXiv related to MCP (Model Context Protocol). Select the 5 most relevant papers and scrape their Markdown content from their HTML pages. Review and summarize the papers using the /academic-paper-review skill, then produce a final report highlighting the most interesting insights, findings, and criticisms.This is what should happen:
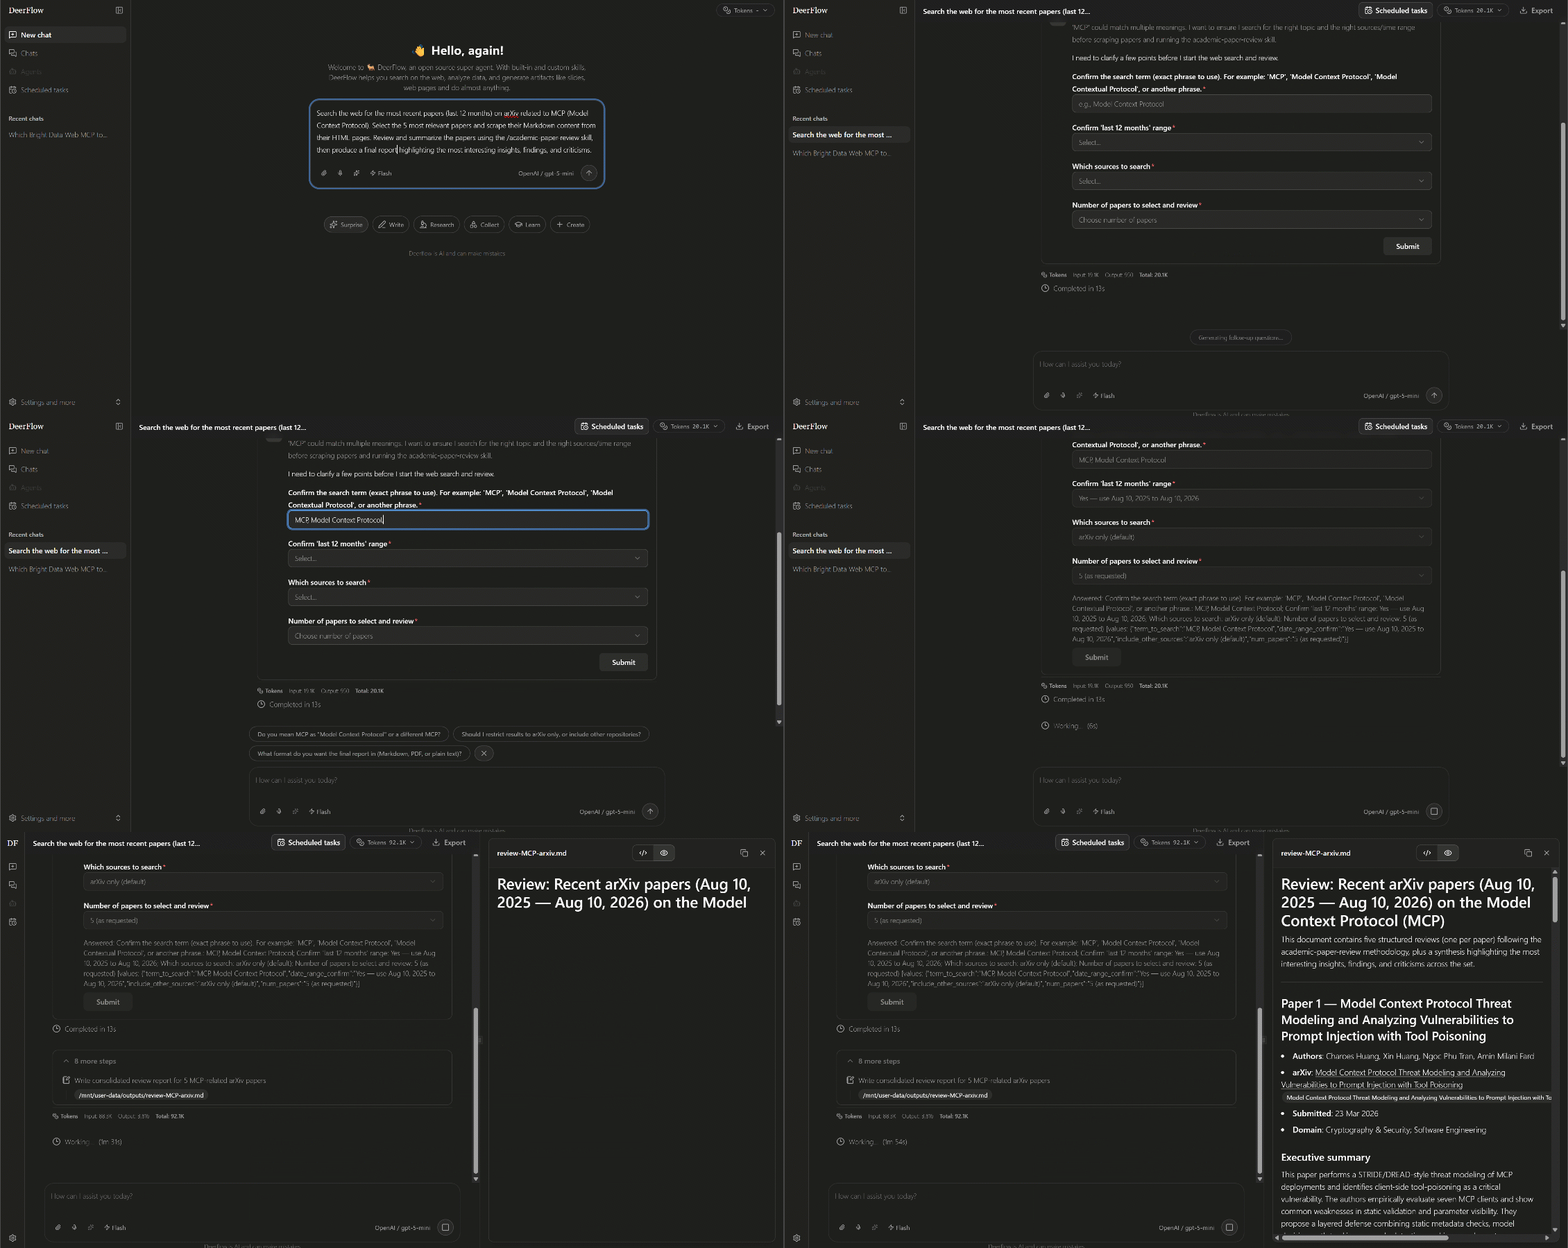
Initially, the AI agent displayed a form asking you to provide:
- The keyword to search for (recommended: “MCP” and “Model Context Protocol”).
- The time range (recommended: “12 months”).
- The sources to get papers from (recommended: “arXiv”).
- The number of papers (recommended: “5”).
Once you fill out the form and submit the data, the AI agent will start the task. Fantastic!
Step #8: Analyze the Agent Run and Output
To better understand what the DeerFlow AI agent did, expand the steps dropdown:
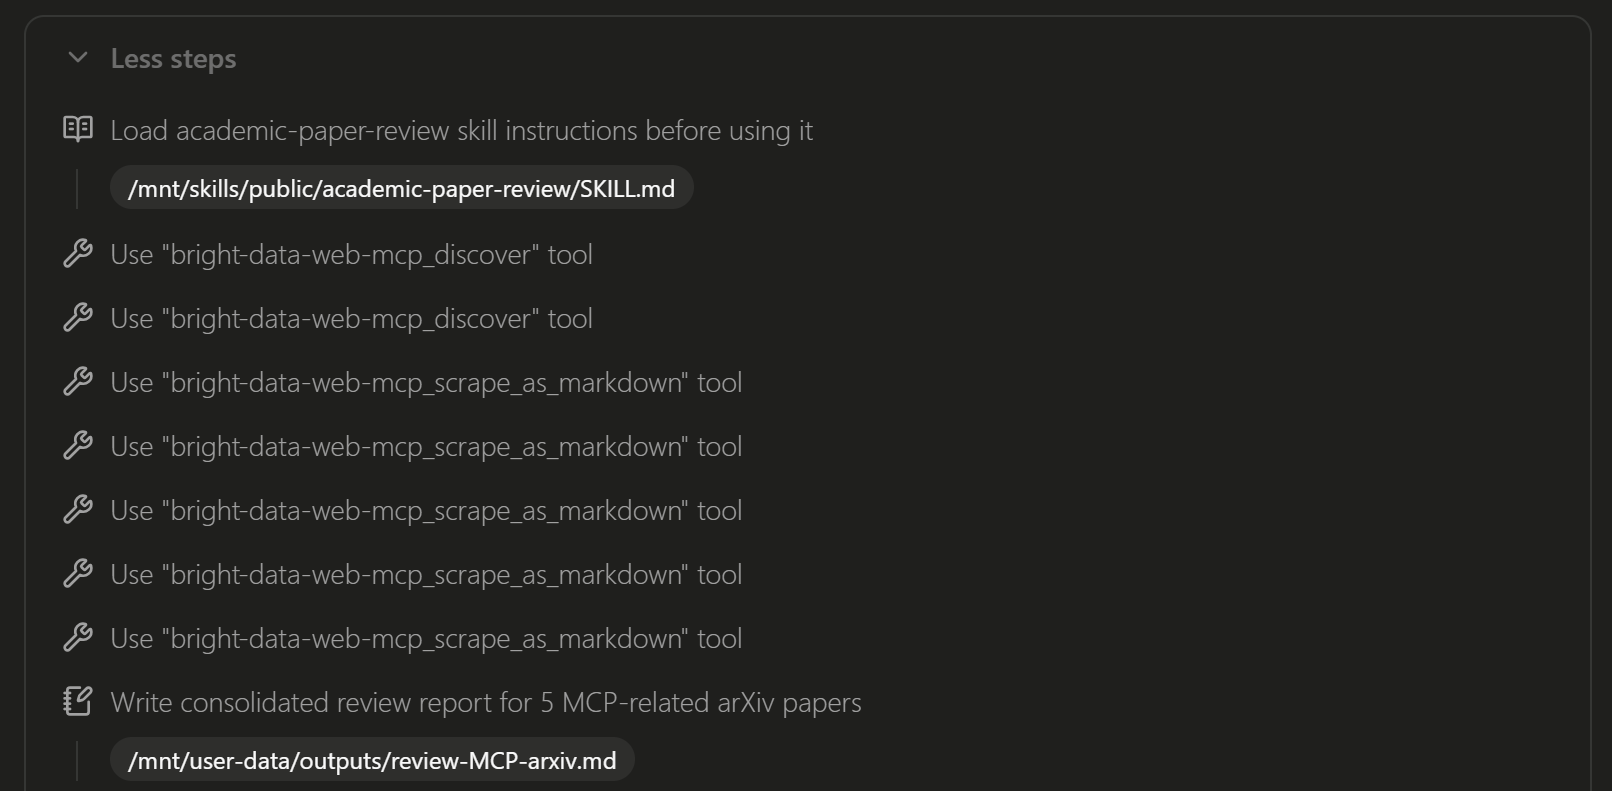
During the run, the AI agent:
- Loaded the
academic-paper-reviewskill. - Used the Bright Data MCP
discovertool to search for papers on “MCP” and “Model Context Protocol.” - Retrieved the HTML page URL for each arXiv paper.
- Scraped the five papers using the
scrape_as_markdowntool via Bright Data’s Web Unlocker API. - Reviewed the papers using the loaded skill and consolidated the analysis into a final Markdown report.
Scroll through the produced report, and you will see:
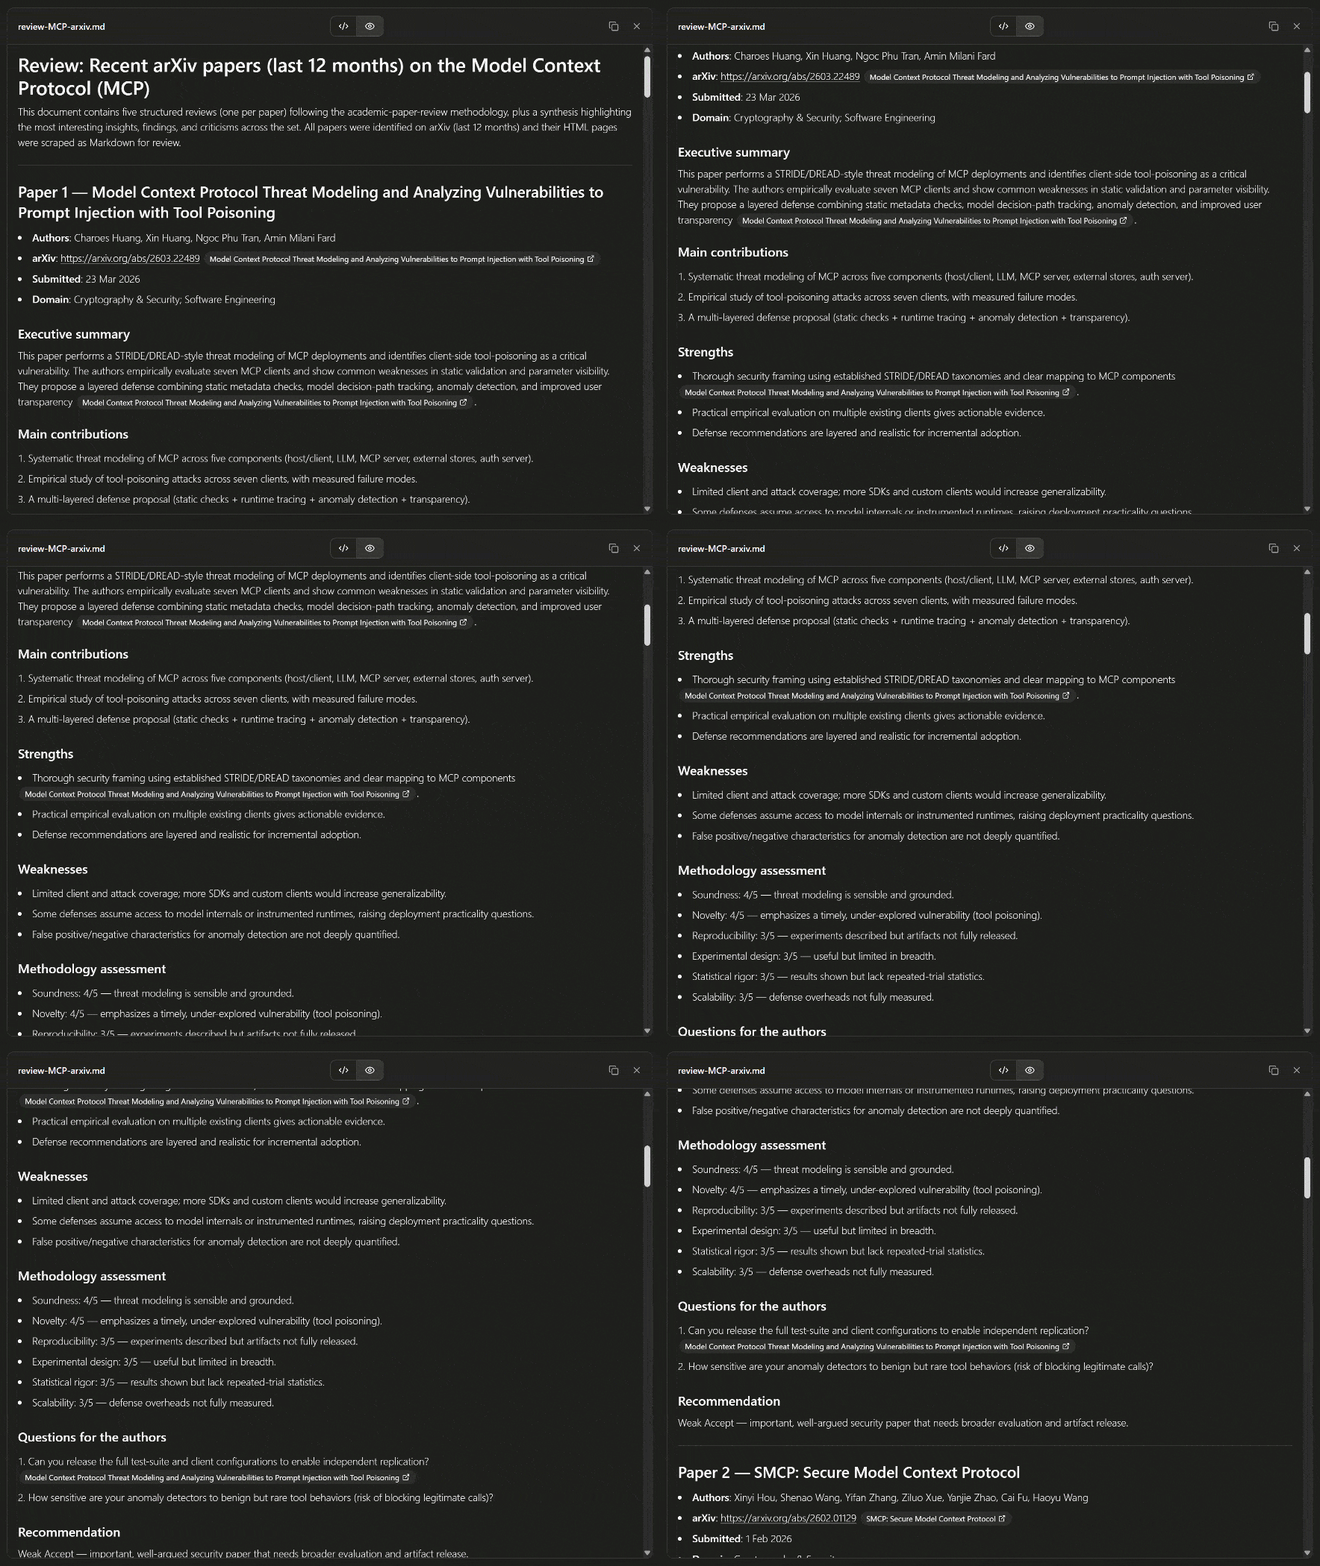
Notice how, for each paper, the DeerFlow AI agent produced a summary, main contributions, strengths, weaknesses, methodology assessment, questions for the authors, and recommendations. The report is also backed by direct links to the papers and includes a thorough analysis with scores derived from DeerFlow’s academic-paper-review skill.
Et voilà! This proves that Bright Data is correctly integrated with DeerFlow and can serve as a source for web search, discovery, scraping, and many other web-based capabilities.
Conclusion
In this blog post, you learned what DeerFlow is and how it enables AI agents to handle long-horizon tasks. In particular, you explored how to connect it to the Bright Data MCP as a source of enterprise-grade tools for web access.
As demonstrated here, Bright Data integration can fully replace DeerFlow’s built-in web search and fetch options. This provides production-grade, scalable, and highly reliable tools to access web pages and interact with them without getting blocked.
Sign up for a Bright Data account for free today and explore our AI-ready web products!



Technical Writer
 5.5 years experience
Antonello Zanini is a technical writer, editor, and software engineer with 5M+ views. Expert in technical content strategy, web development, and project management.