







In this article, you will learn:
- What Arcade is, the features it provides, and the problems it solves.
- The tools available thanks to the existing Bright Data integration in Arcade.
- How to leverage these tools in production-ready AI agents using Arcade, both in Claude Desktop and Claude Code.
Let’s dive in!
An Introduction to Arcade
Understand what Arcade brings to the table and why it provides advantages over connecting AI agents directly to MCP servers.
What Is Arcade?
Arcade is a cloud-based MCP runtime that supports the development of production-safe AI agents.
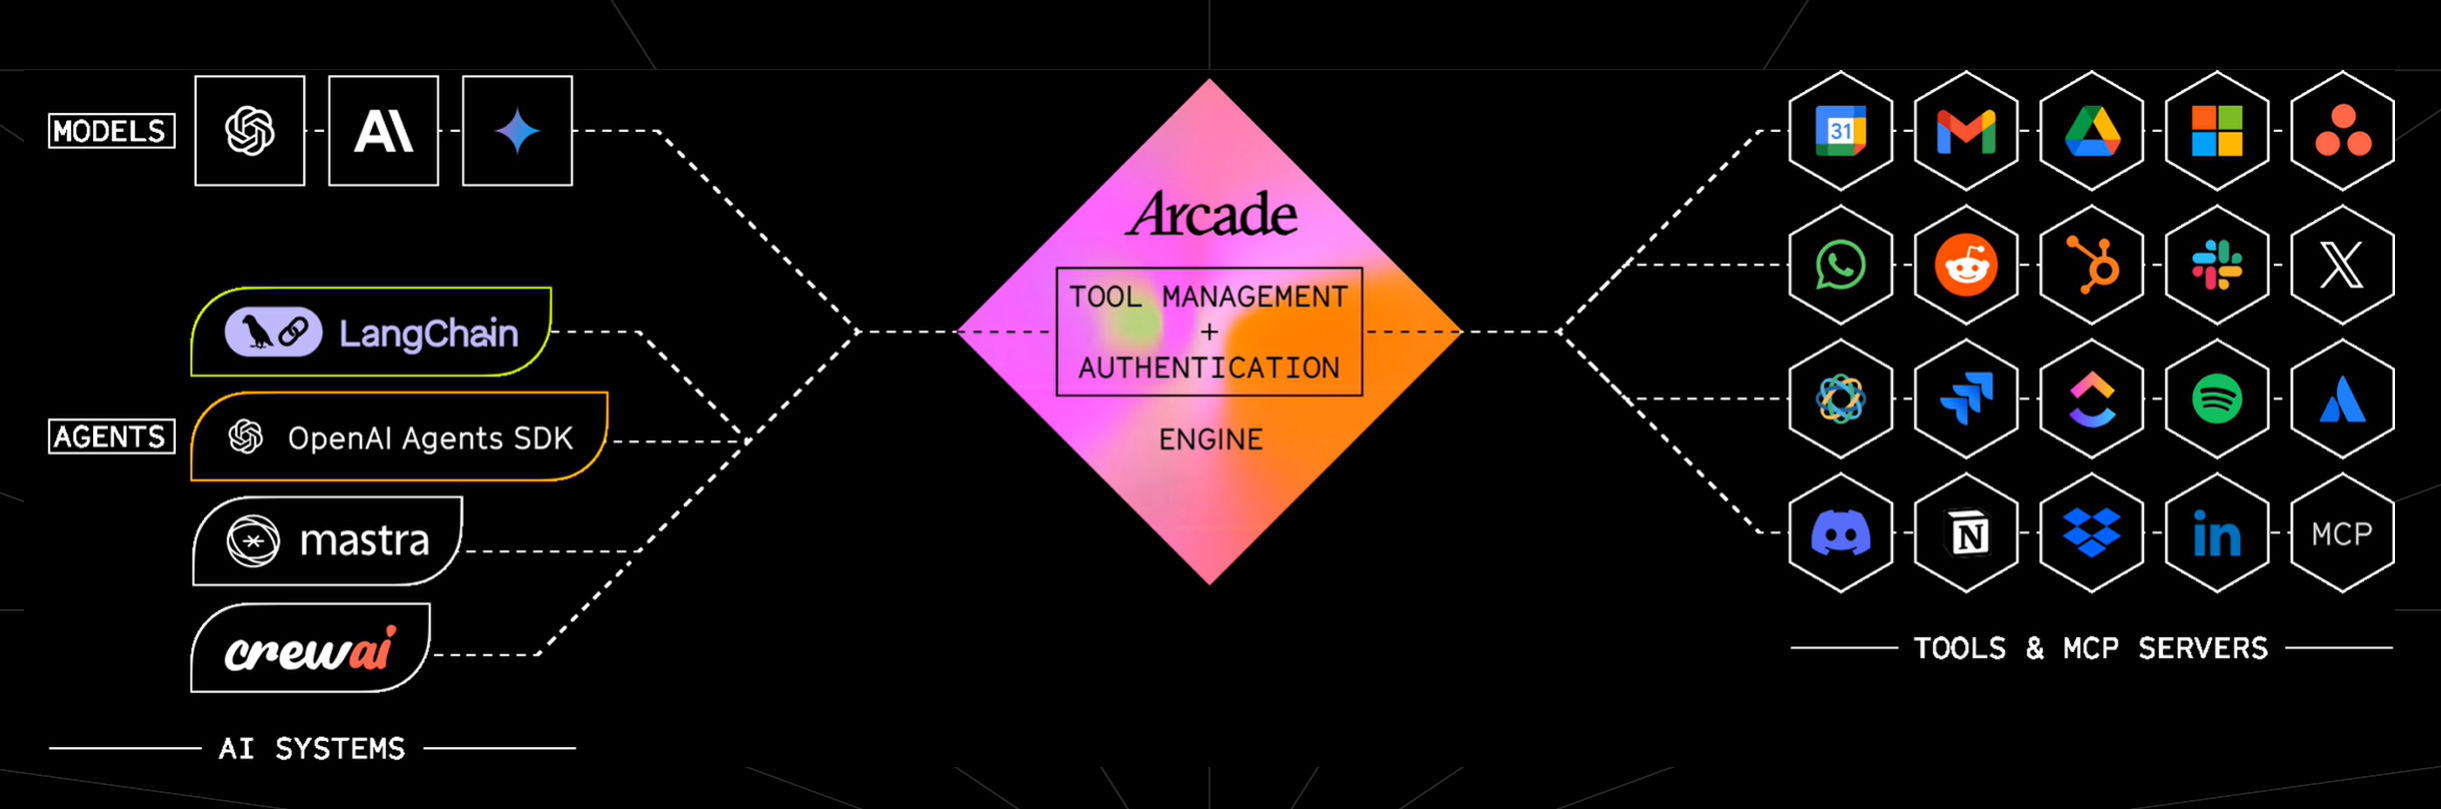
In detail, it provides the infrastructure layer between AI models and external systems, connected via custom tools and MCP servers. It achieves that by handling authentication, authorization, and tool execution. That way, AI agents can interact with apps (e.g., Gmail, Slack, etc.) and AI data providers (e.g., Bright Data, Hugging Face, etc.) in a scalable and secure way.
Some of Arcade’s most relevant features include:
- Secure authentication: Built-in OAuth and user-delegated permissions, eliminating token management complexity.
- Pre-built connectors: Ready-to-use integrations for popular tools like GitHub, Slack, Gmail, Jira, and more.
- Agent development SDK: Build custom tools and connect agents to any API or data source.
- Tool orchestration: A runtime that selects and executes the appropriate tools across multi-step workflows.
- Multi-tenant support: Designed for applications requiring per-user authorization at scale.
- Deployment flexibility: Run in the cloud, in a VPC, on-premises, or in air-gapped environments.
Discover more in the official docs.
Why It Exists and Which Problems It Addresses
As you probably already know, AI agents are great at reasoning. However, their knowledge is limited to the static datasets they were trained on. As a result, they lack context on fresh events and cannot natively interact with the external world.
In other words, AI agents are stuck in “read-only mode.” To overcome these limitations, trusted agentic applications rely on external data access and integrations with third-party applications (e.g., via MCP or direct API-based integrations). This allows AI agents to access sensitive data (emails, calendars, CRM records) and act on behalf of users. Still, that is where things start to break down…
The reason is that connecting AI agents directly to MCP servers or APIs requires handling OAuth flows, token storage, refresh logic, permission scopes, and user-level access control. All of this is complex, error-prone, and difficult to secure. As soon as you move beyond a prototype, it quickly becomes a major bottleneck.
Arcade solves that by providing a scalable MCP runtime that takes care of authentication and authorization. It includes a built-in system to manage OAuth 2.0, API keys, and user tokens, ensuring that agents can securely access and act on external services with the correct permissions. It also handles scope-based authorization, prompting users when needed and enforcing fine-grained control over what an agent can do.
Compared to directly connecting agents to MCP servers, Arcade offers several advantages:
- No auth headaches: OAuth flows, token refresh, and permissions are fully managed.
- User-level security: Agents act with delegated permissions, not shared credentials.
- Reliability at scale: Standardized tool execution with fewer integration edge cases.
- Faster development: Developers can focus on agent logic instead of infrastructure.
In short, Arcade aims to turn AI agents from fragile prototypes into secure, production-ready systems.
Available Development Options in Arcade
Below are the three main ways you can use Arcade in your AI agent:
- Rely on pre-built Arcade MCP servers: Configure one or more of the dozens of pre-built MCP servers available in the Arcade web app. Then, expose the configured tools through your IDE (e.g., VS Code, Cursor) or AI apps (e.g., Claude Desktop) via a unified MCP Gateway interface.
- Build custom tools with Arcade MCP Server: Create and deploy your own MCP servers using the
arcade_mcp_serverpackage. It provides a secure framework, while the Arcade CLI helps scaffold, configure, and deploy everything needed for solid integrations. - Integrate with agent frameworks and MCP clients: Employ Arcade’s SDK to connect with frameworks like CrewAI, LangChain, OpenAI Agents, and others. This enables secure, reliable tool-calling capabilities in your AI applications without building infrastructure from scratch.
Bright Data Integration with Arcade
As highlighted earlier, the two main limitations of AI agents are:
- The lack of up-to-date knowledge.
- The inability to interact with the external world (which usually translates into the inability to interact with the web).
Bright Data is the world’s #1 web data infrastructure, and it provides AI-ready tools to specifically address those challenges (and more).
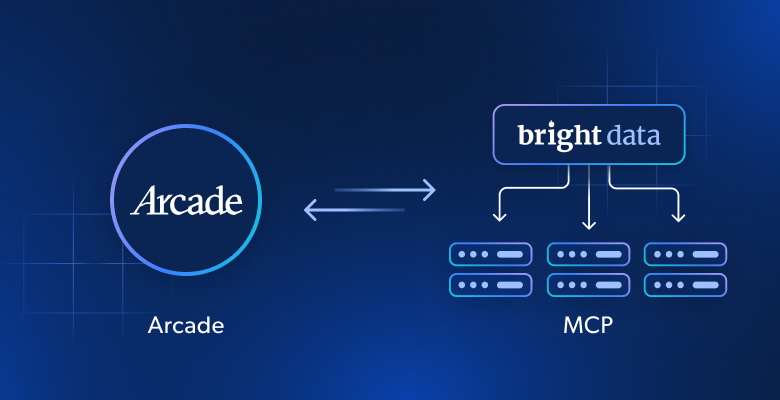
In particular, Bright Data is officially available as an Arcade MCP server:
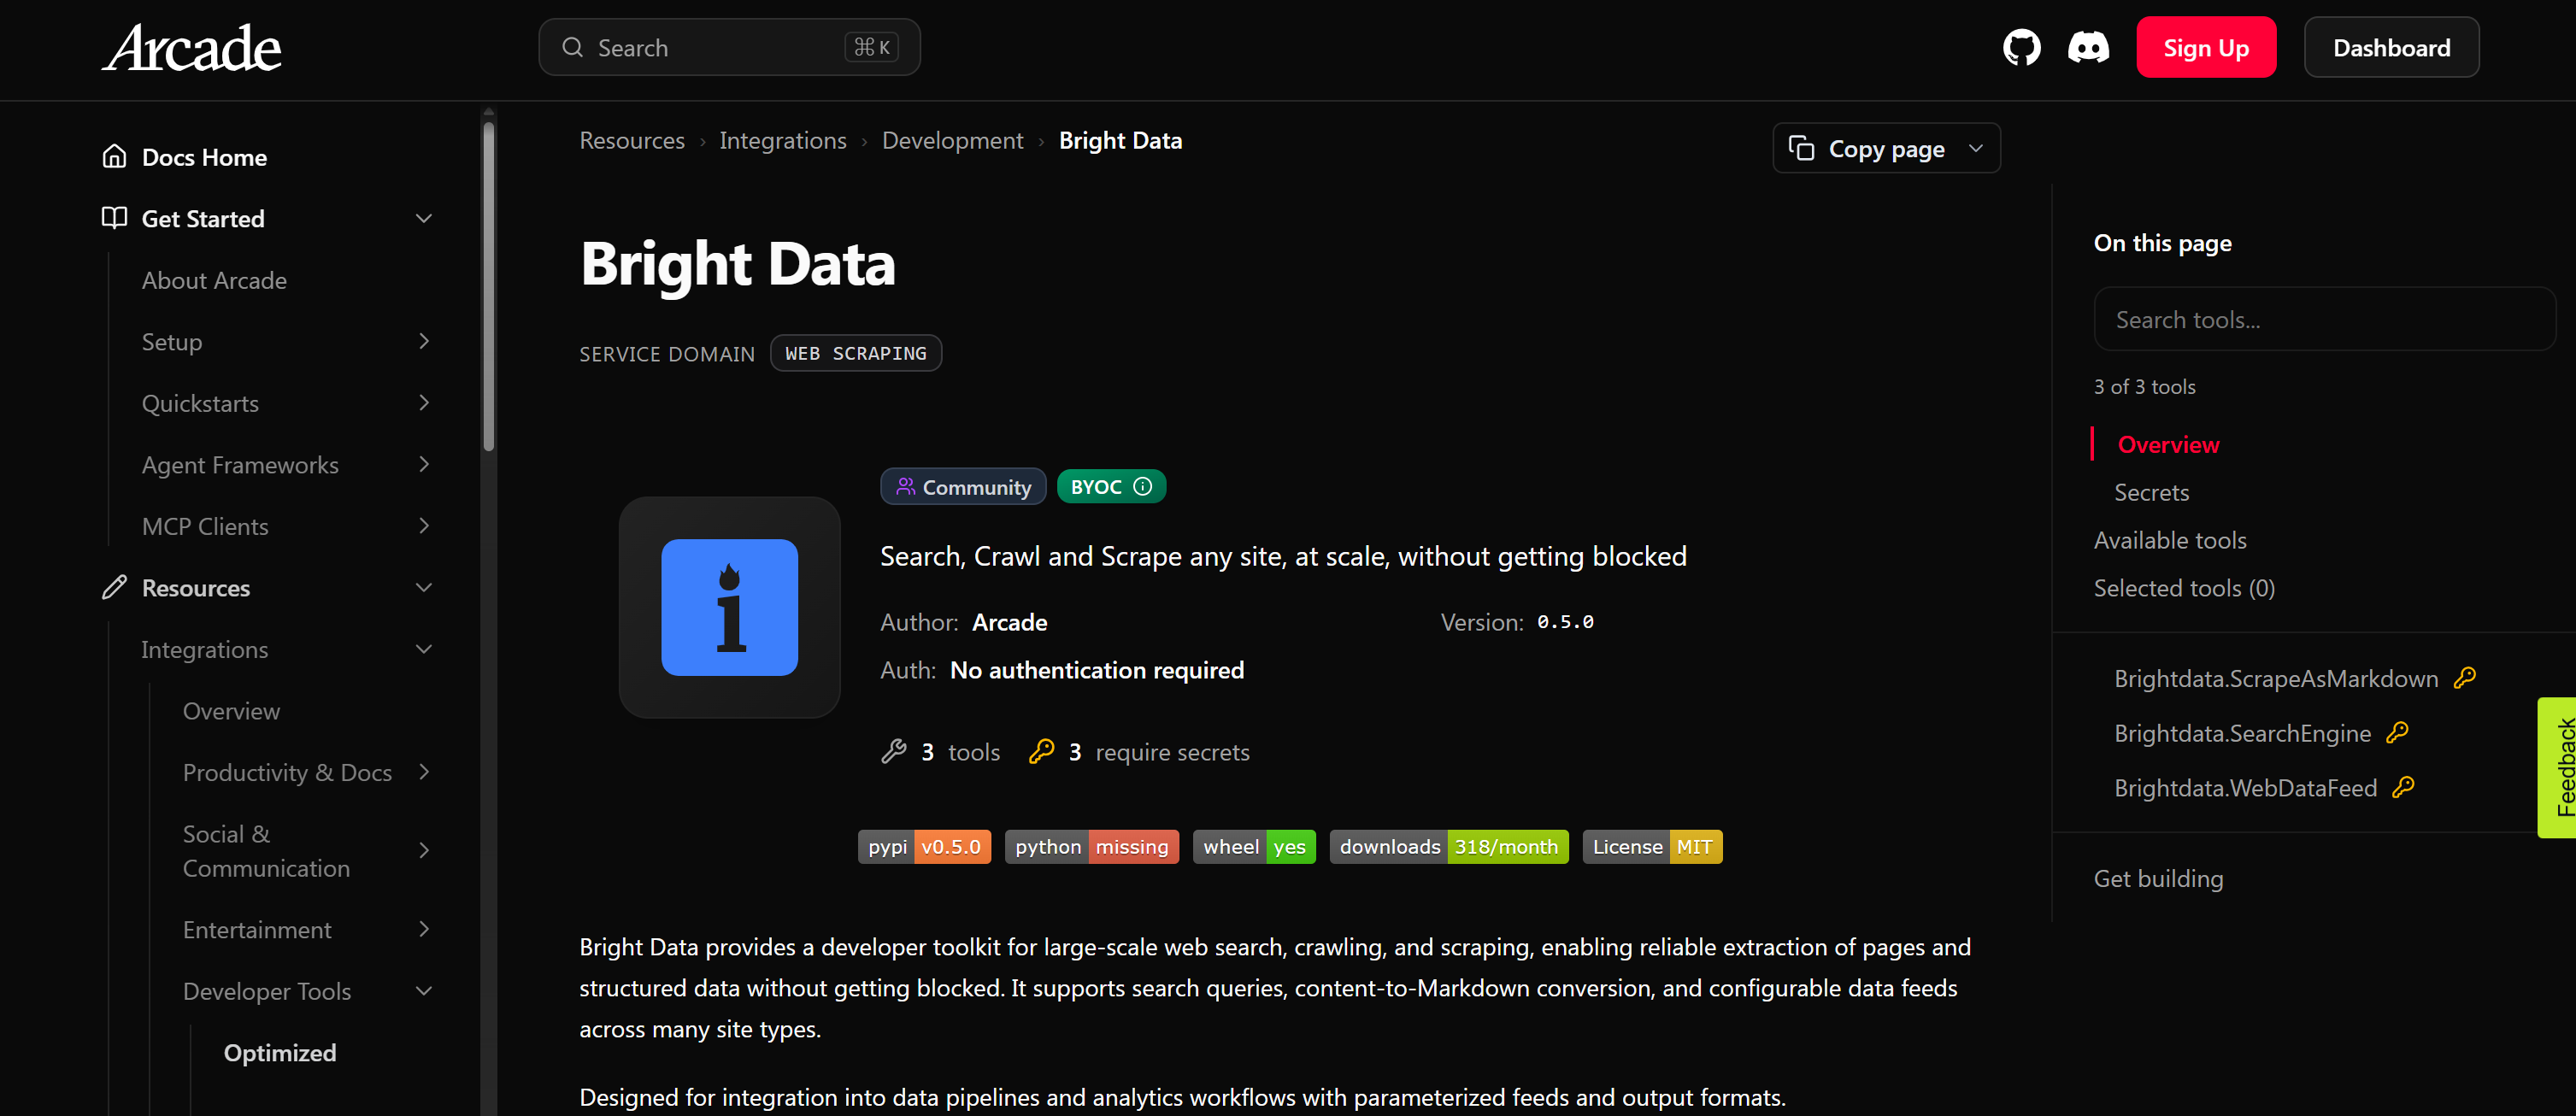
This integration provides enterprise-ready infrastructure for large-scale web search, crawling, and scraping without getting blocked. Bright Data enables reliable extraction of web pages and structured data with high performance, achieving 99.99% uptime and a 99.95% success rate. It is backed by a proxy network of over 400 million IPs across 195 countries, supporting unlimited scalability.
The tools exposed through the Arcade Bright Data MCP Server are:
Brightdata.ScrapeAsMarkdown: Scrapes a webpage and returns content in Markdown format (ideal for LLM ingestion) using Bright Data’s Web Unlocker API.Brightdata.SearchEngine: Performs searches on Google, Bing, or Yandex with advanced parameters via the SERP API.Brightdata.WebDataFeed: Extracts structured data from platforms like LinkedIn, Amazon, and Instagram through Bright Data’s Web Scraping APIs.
Together, these tools equip your AI agent with the ability to search the web and retrieve data in an AI-optimized format.
Using Bright Data Web Data Retrieval Tools via Arcade MCP: A Step-by-Step Guide
Integrating Arcade via its pre-built MCP servers is the fastest and simplest way to get started. Thus, this tutorial section focuses on that approach. If you are instead looking to integrate the Arcade Bright Data MCP with frameworks like LangChain, CrewAI, or similar tools, refer to the detailed guides in the official documentation.
Before getting started, keep in mind that Arcade MCP Gateways support two authentication modes:
- Arcade Auth: Users authenticate with their Arcade account via OAuth. It is ideal for development, testing, and internal use.
- Arcade Headers: End users authenticate via
AuthorizationandArcade-User-IDheaders instead of Arcade directly. This is better suited for production environments.
The integration steps depend on the chosen authentication mode. To demonstrate both approaches, the following sections show how to connect the Bright Data Arcade MCP:
- To Claude Desktop via Arcade Auth.
- To Claude Code via Arcade Headers.
Note that Claude Desktop and Claude Code are just examples,you can use any MCP-compatible solution!
Common Steps
No matter whether you use Arcade Auth or Arcade Headers for authentication, there are some initial steps that are common to both approaches. Let’s start with those!
Step #1: Get Started With Arcade
Create an Arcade account if you have not done so already, or simply log in. Once logged in, go to your account dashboard, and you should see something like this:
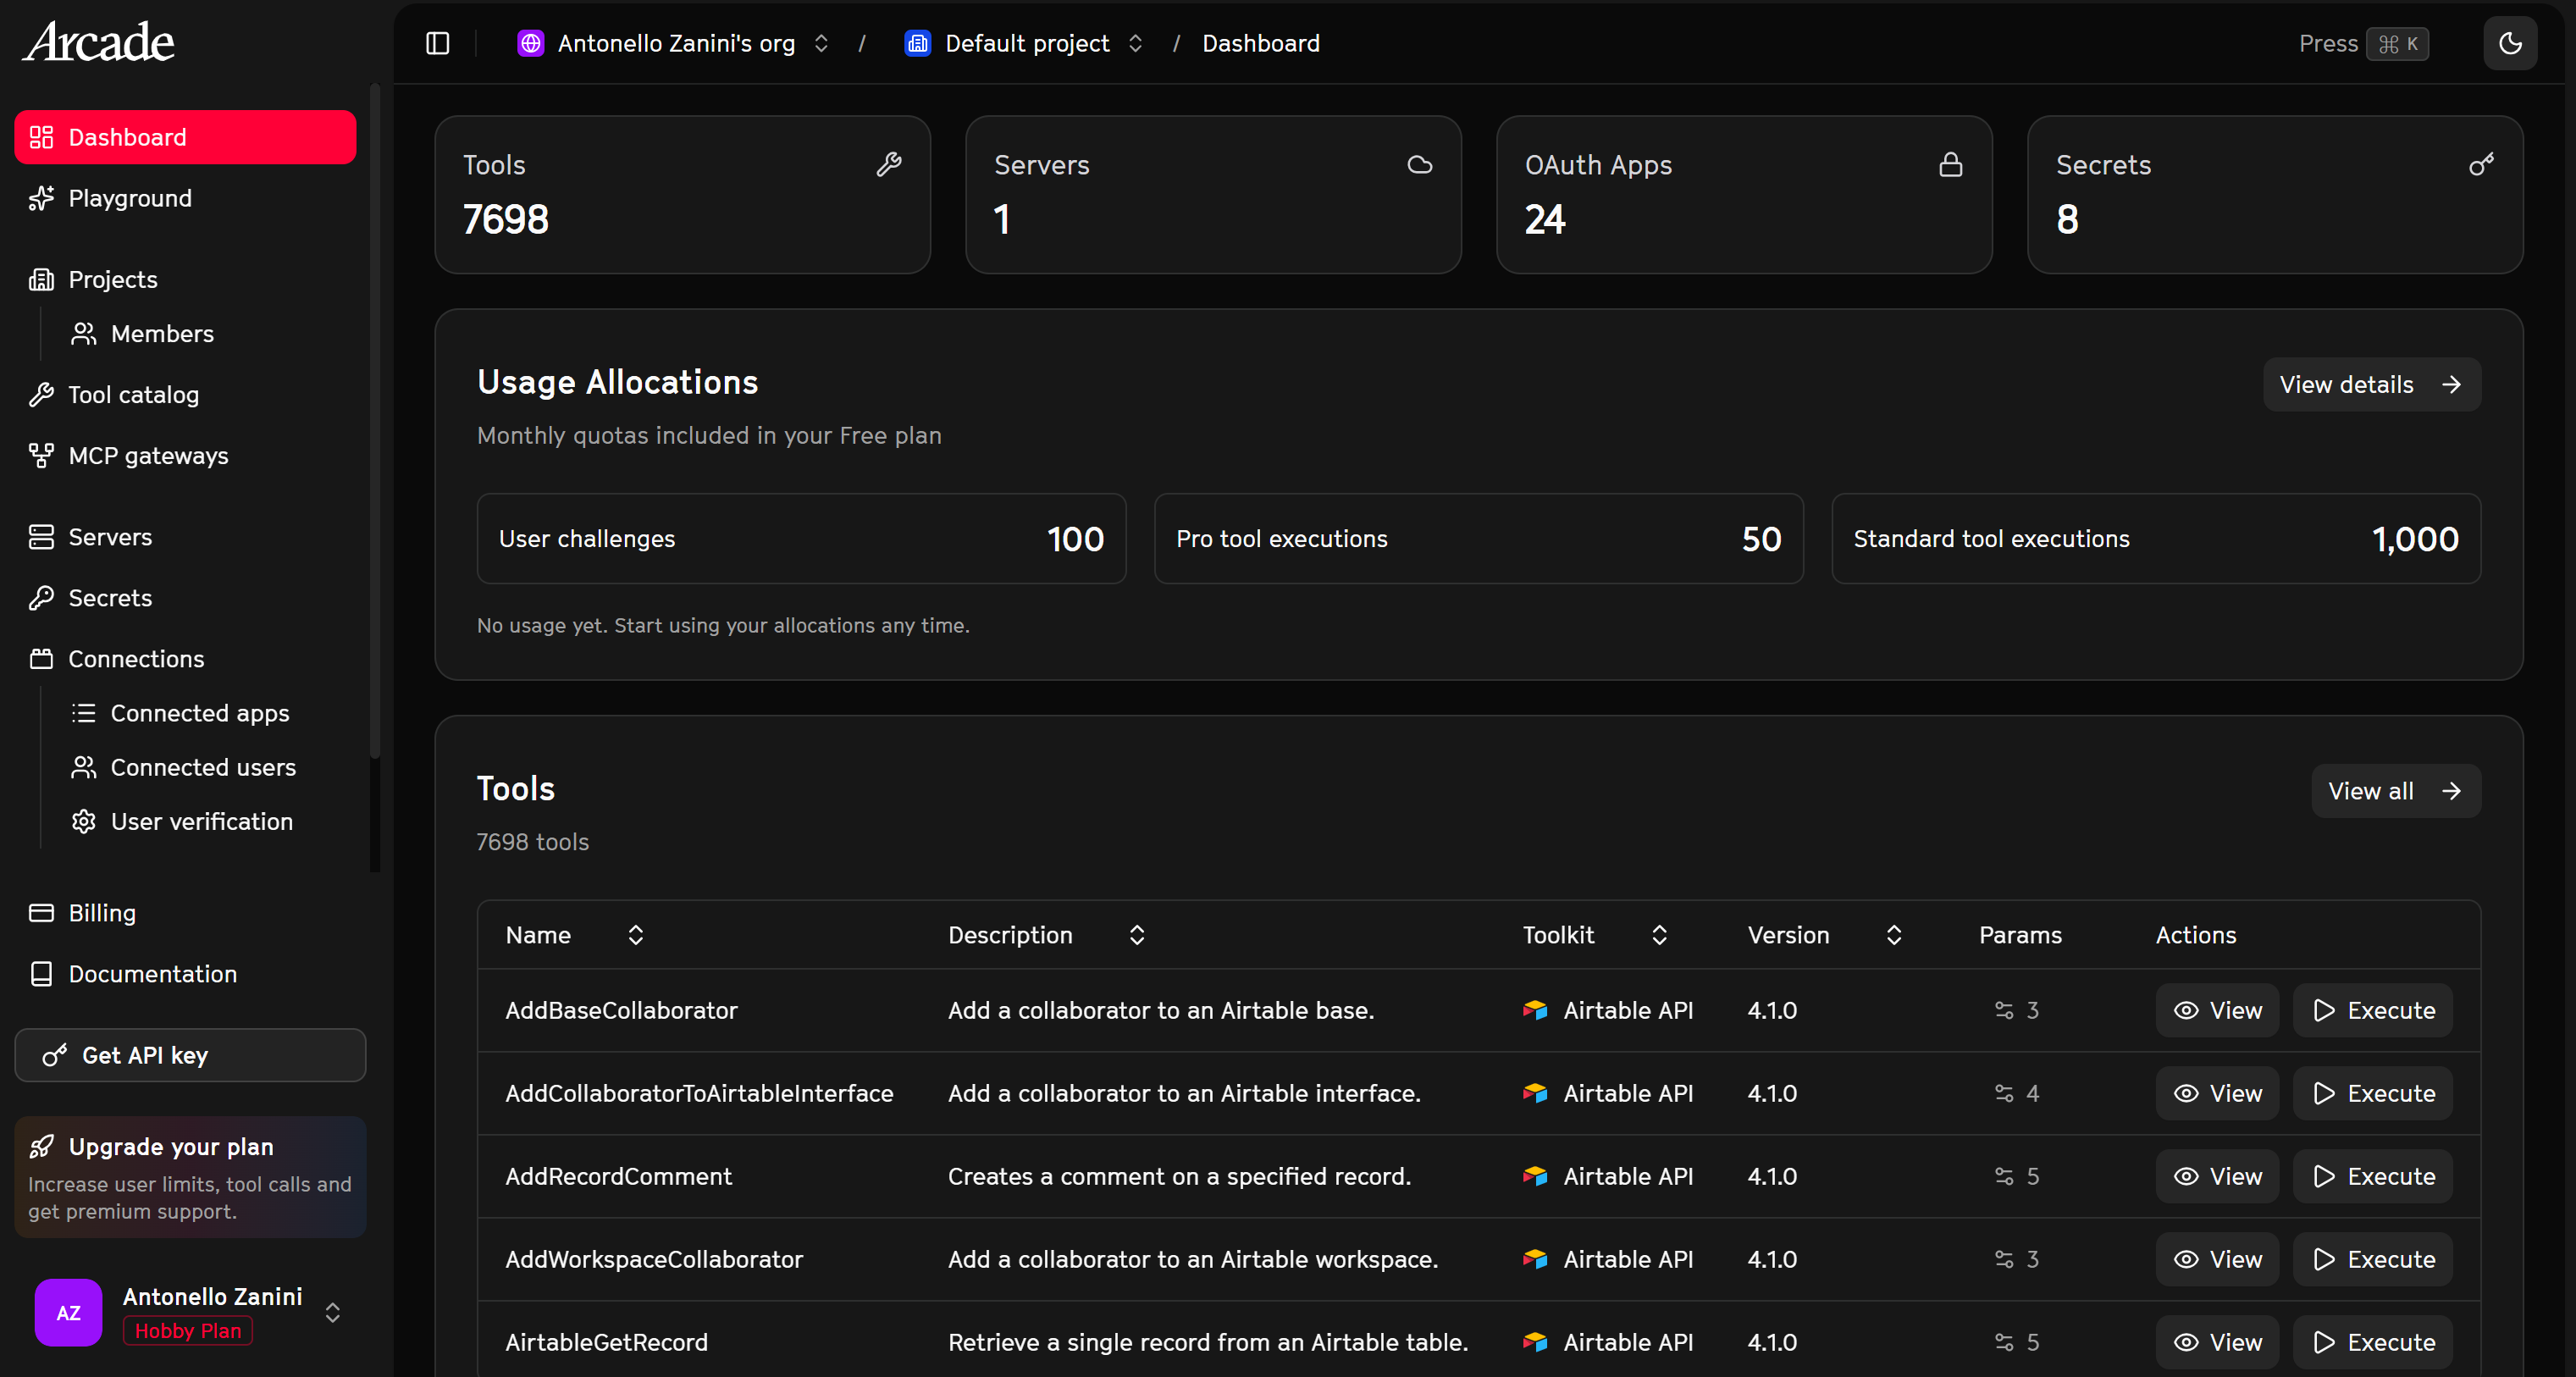
Take some time to familiarize yourself with the UI and explore the available options. Your goal is to create an Arcade MCP Gateway. This mechanism allows you to connect multiple MCP servers in your Arcade platform and expose them through a single MCP interface, which you can then connect to your agent, application, or IDE.
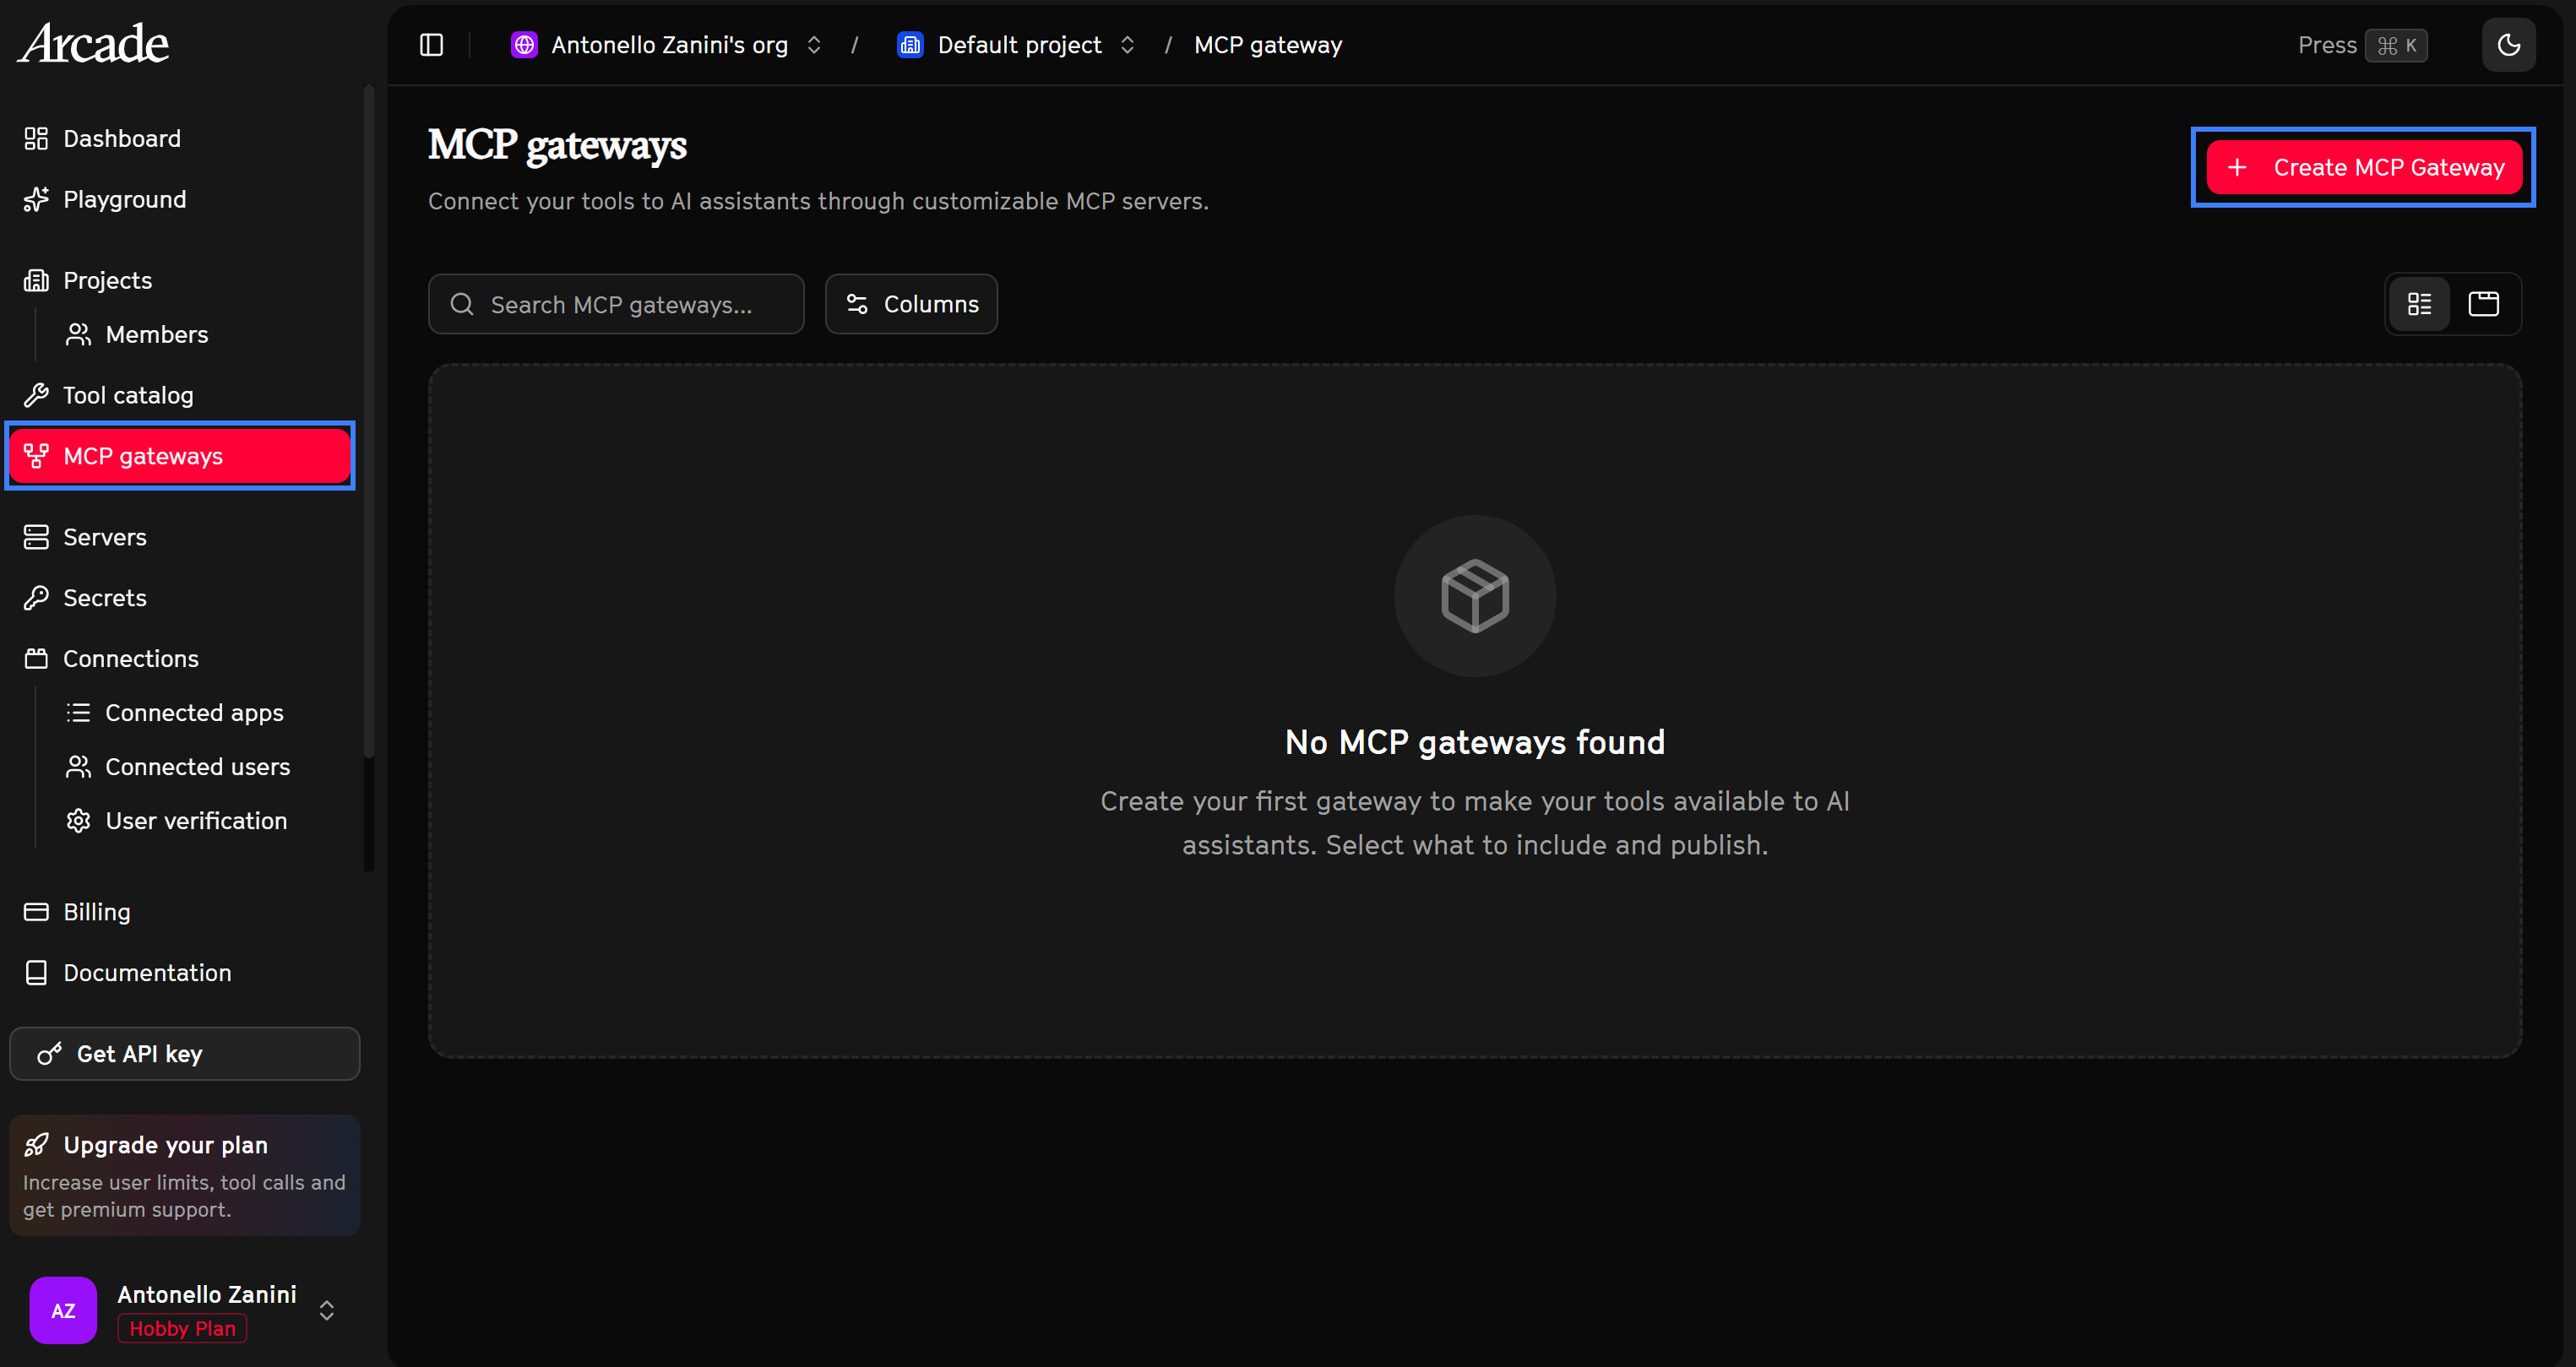
Visit the “MCP gateways” page and press the “Create MCP Gateway” button:
Fill in the MCP Gateway creation form with something like:
- Name:
Bright Data MCP. - Description:
An MCP gateway to connect to Bright Data's web search, scraping, and data feed tools. - Instructions for the LLM:
Use this MCP gateway whenever you need to search the web, retrieve structured data feeds for specific sites (e.g., LinkedIn, Instagram, Amazon), or extract data from any webpage. - Slug:
bright-data-mcp. - Authentication:
Arcade Auth(we will switch this toArcade Headersin the dedicated chapter). - Allowed tools: Press “Select Tools”, search for “bright data,” check the Bright Data tools, and click “Use 3 Tools”.
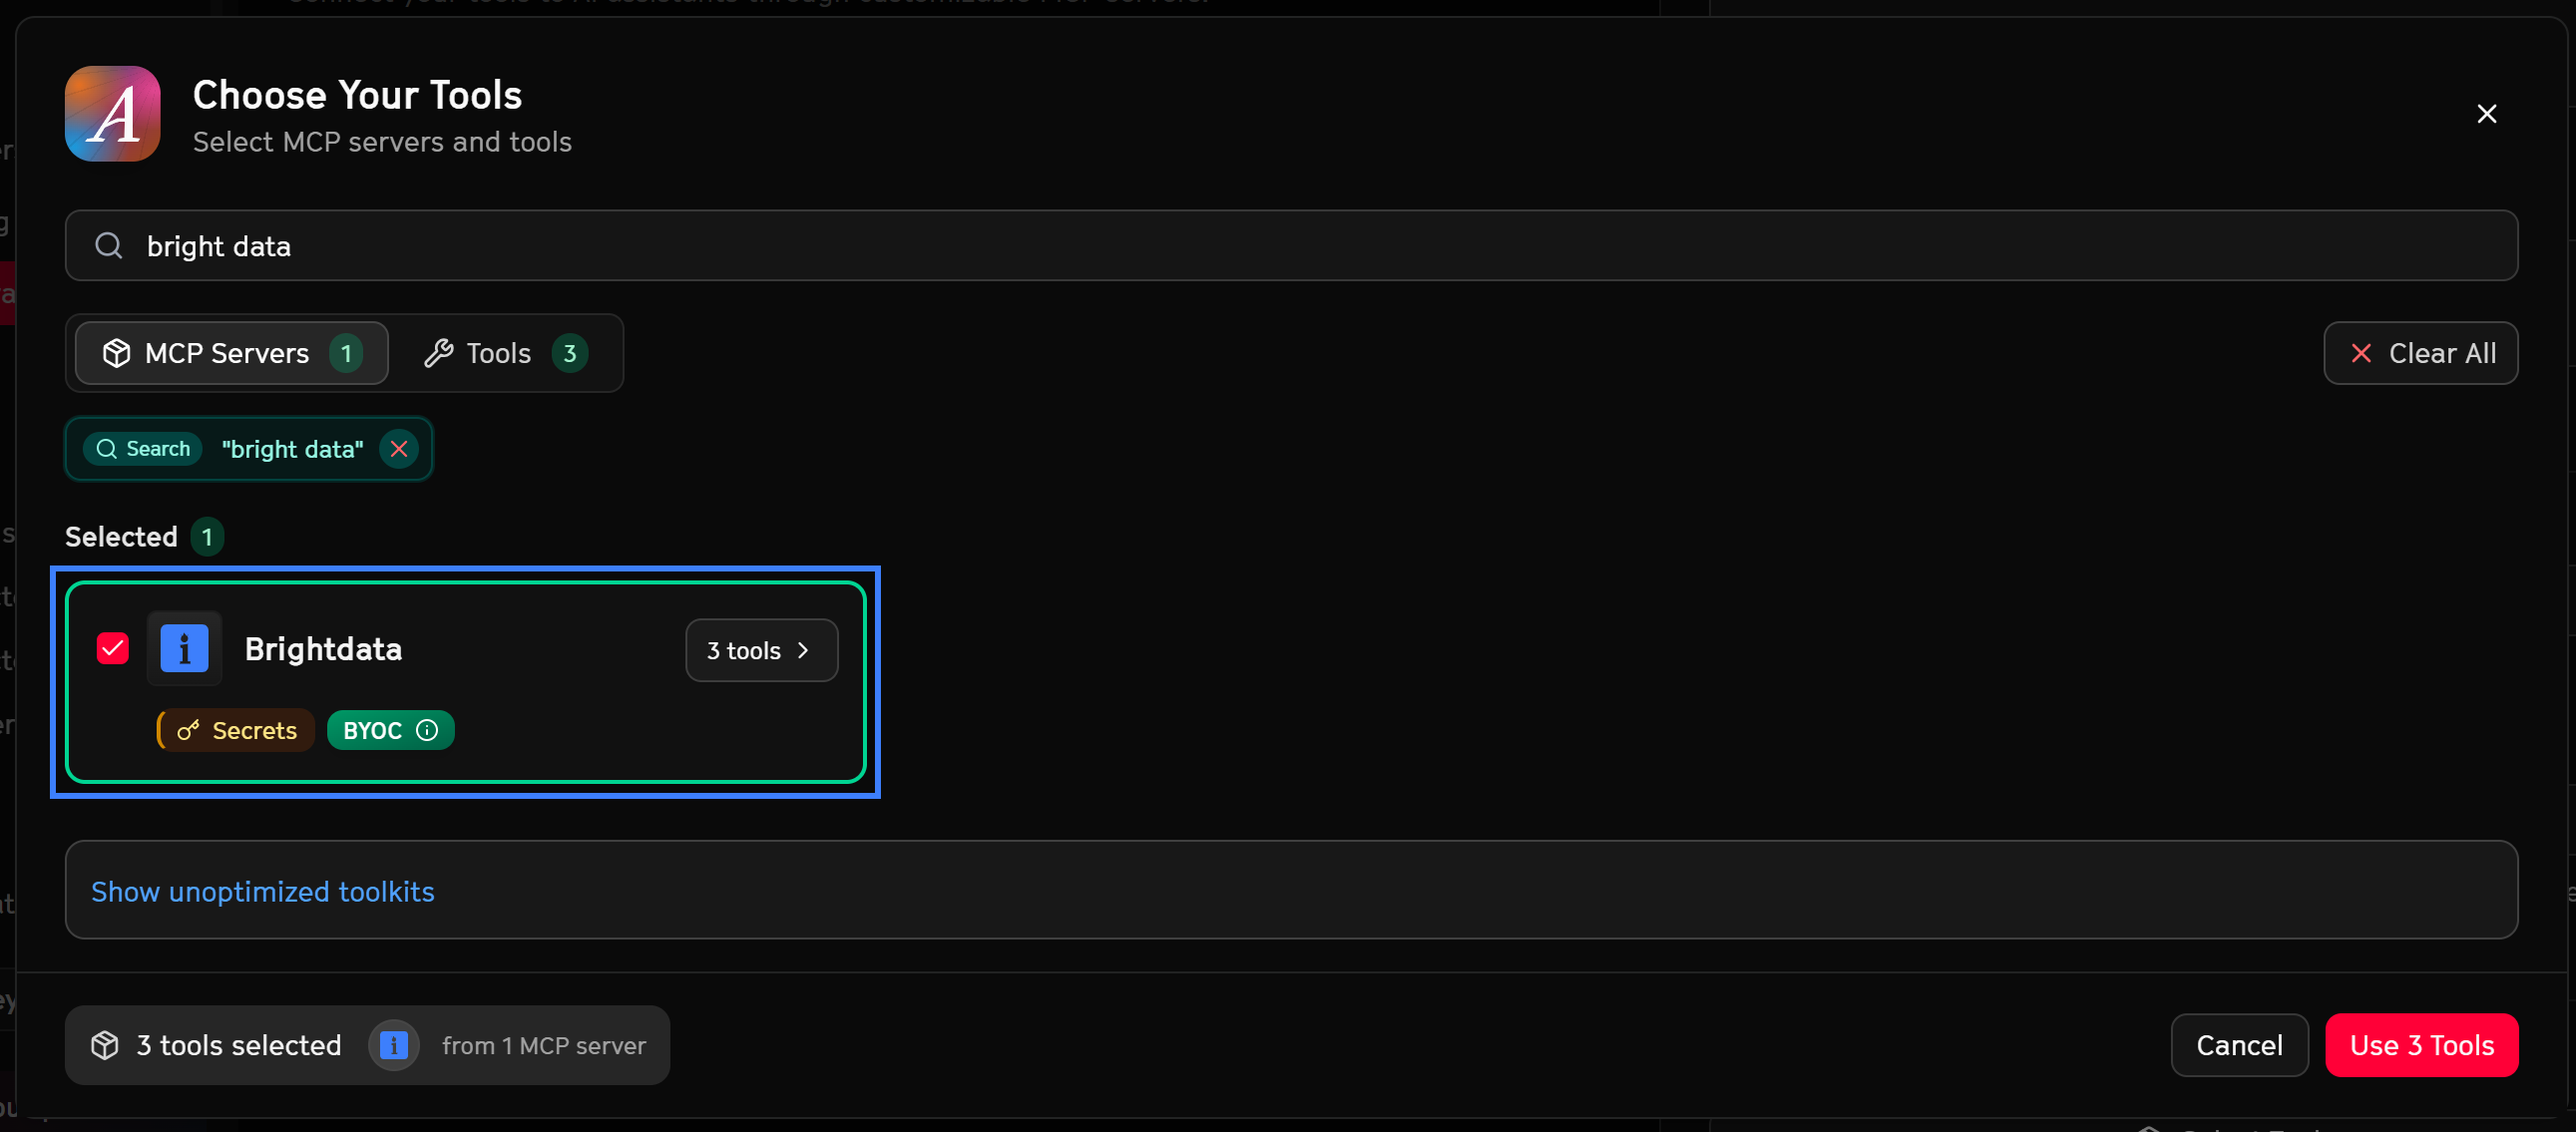
This is what you should now see:
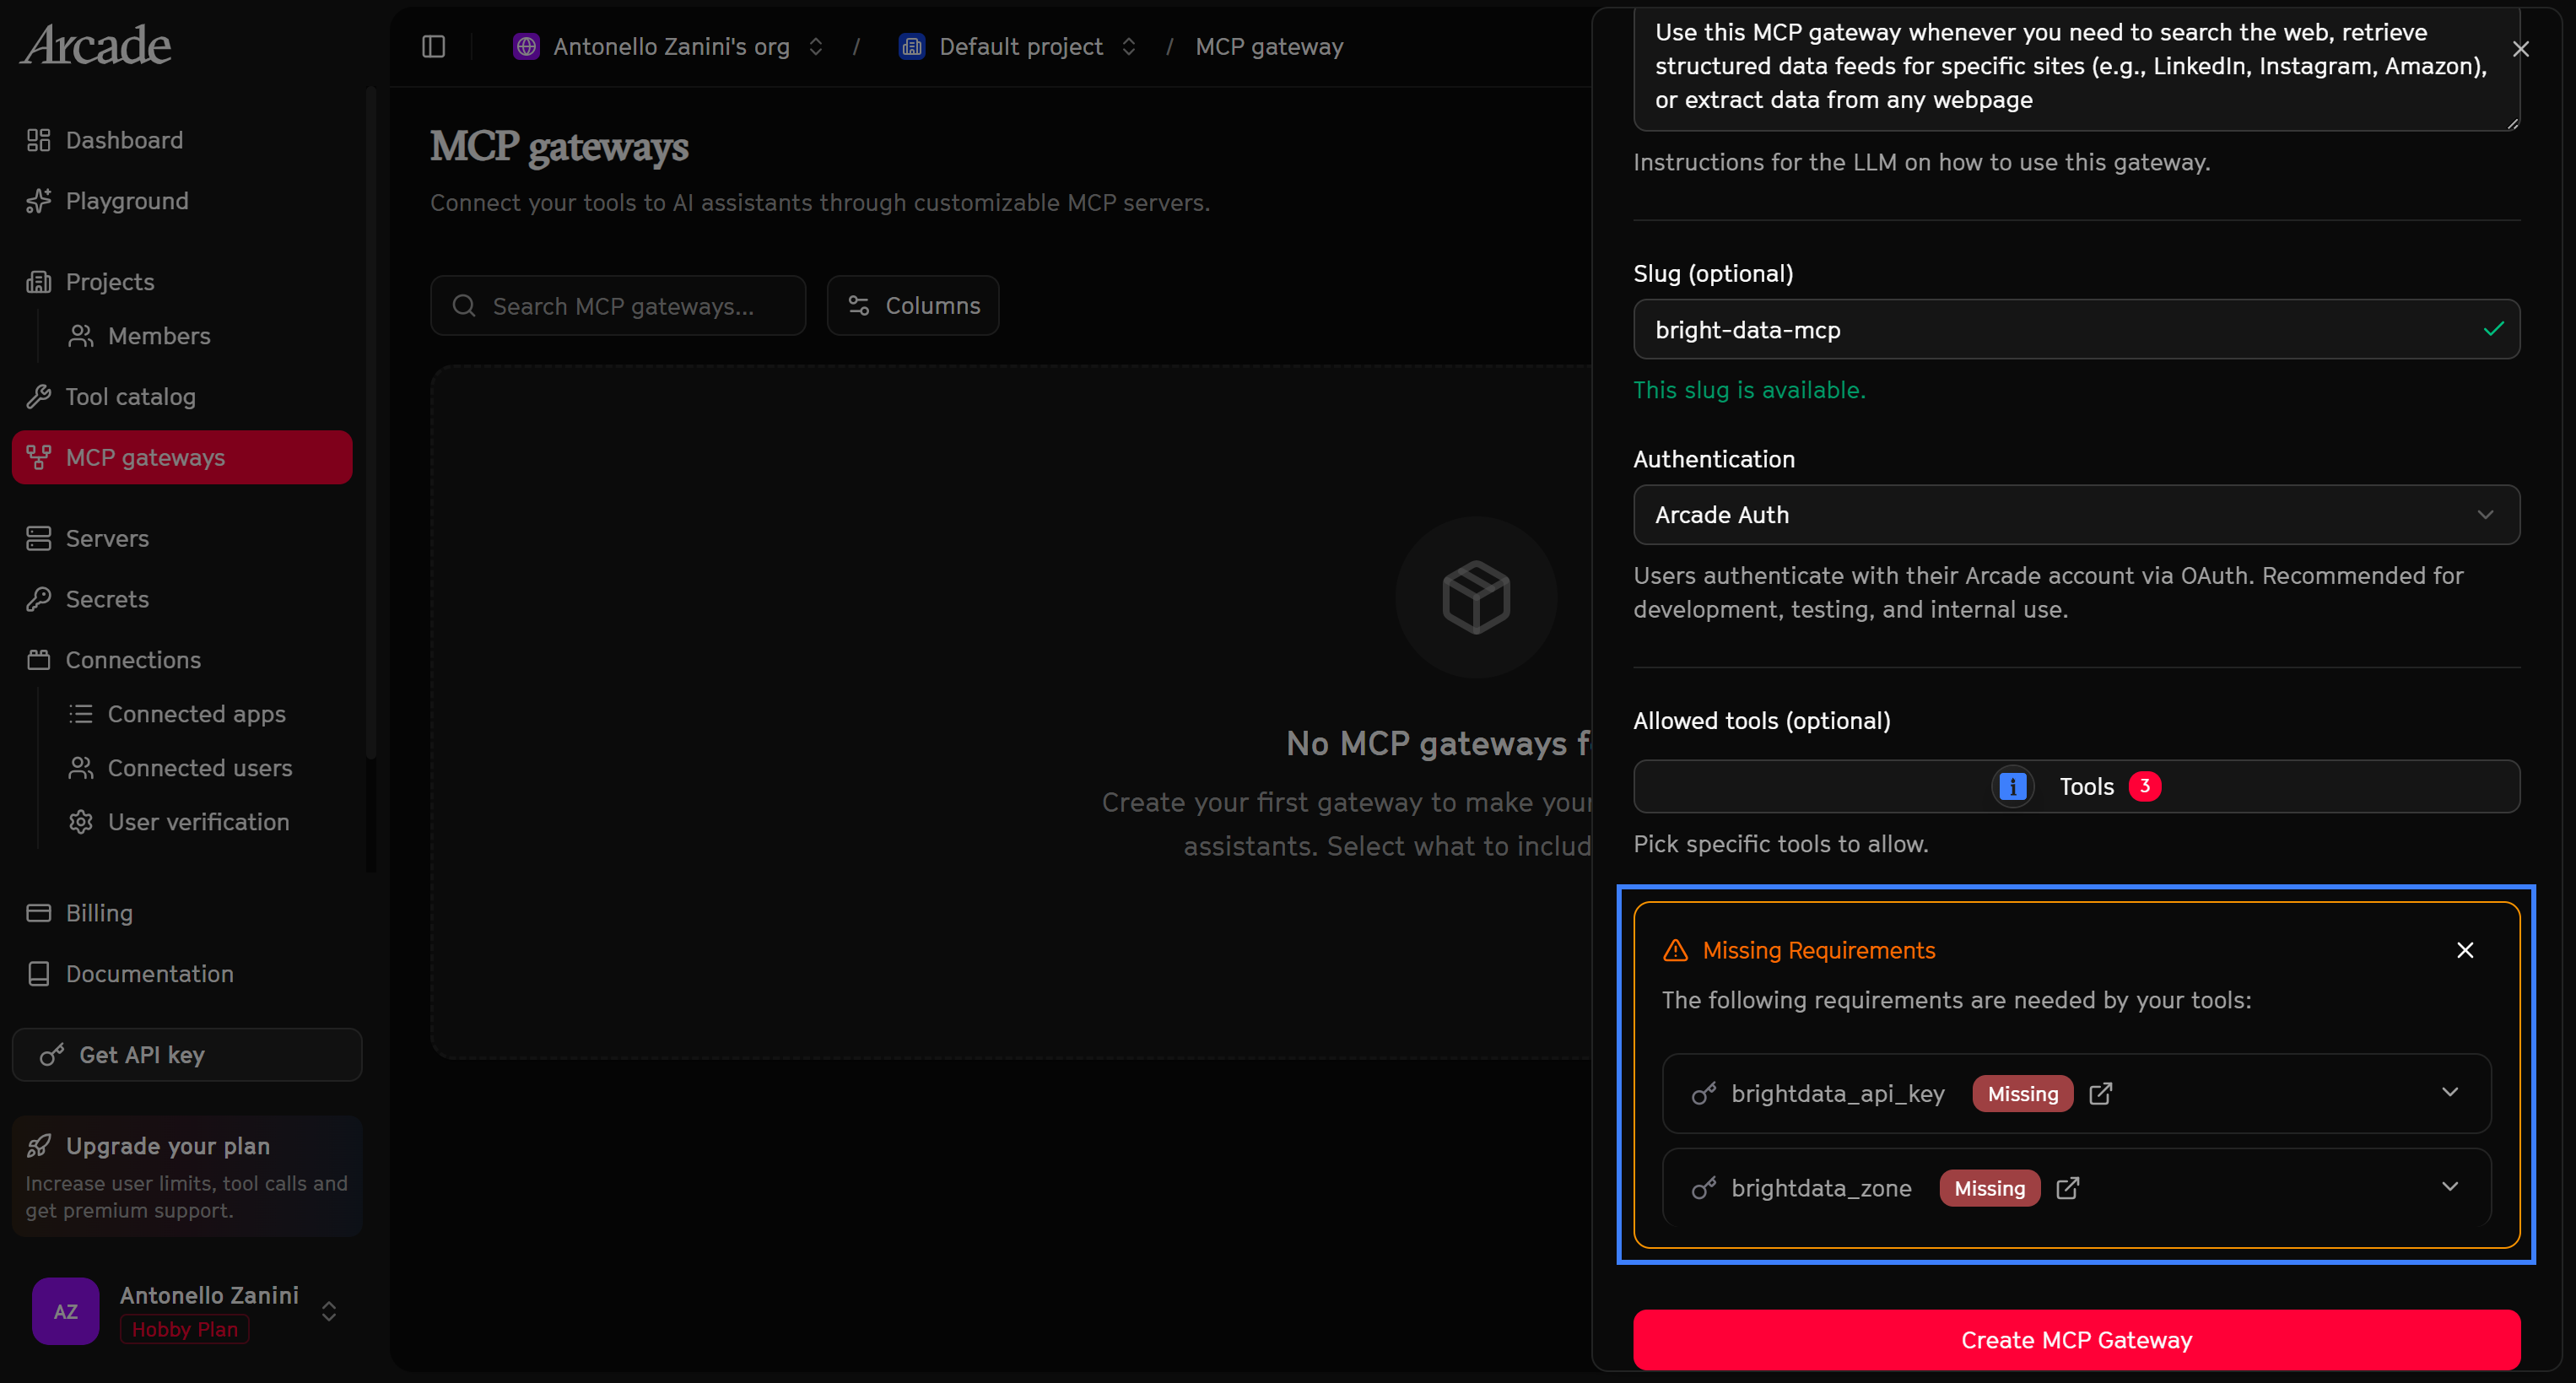
Notice how Arcade is warning you that two required settings are missing:
brightdata_api_key.brightdata_zone.
These are the two secrets needed to connect Arcade to Bright Data. Do not worry, as we will handle them in the next steps. For now, proceed by creating the MCP gateway anyway by pressing the “Create MCP Gateway” button.
You will then see “Bright Data MCP” listed as a new entry in the table:
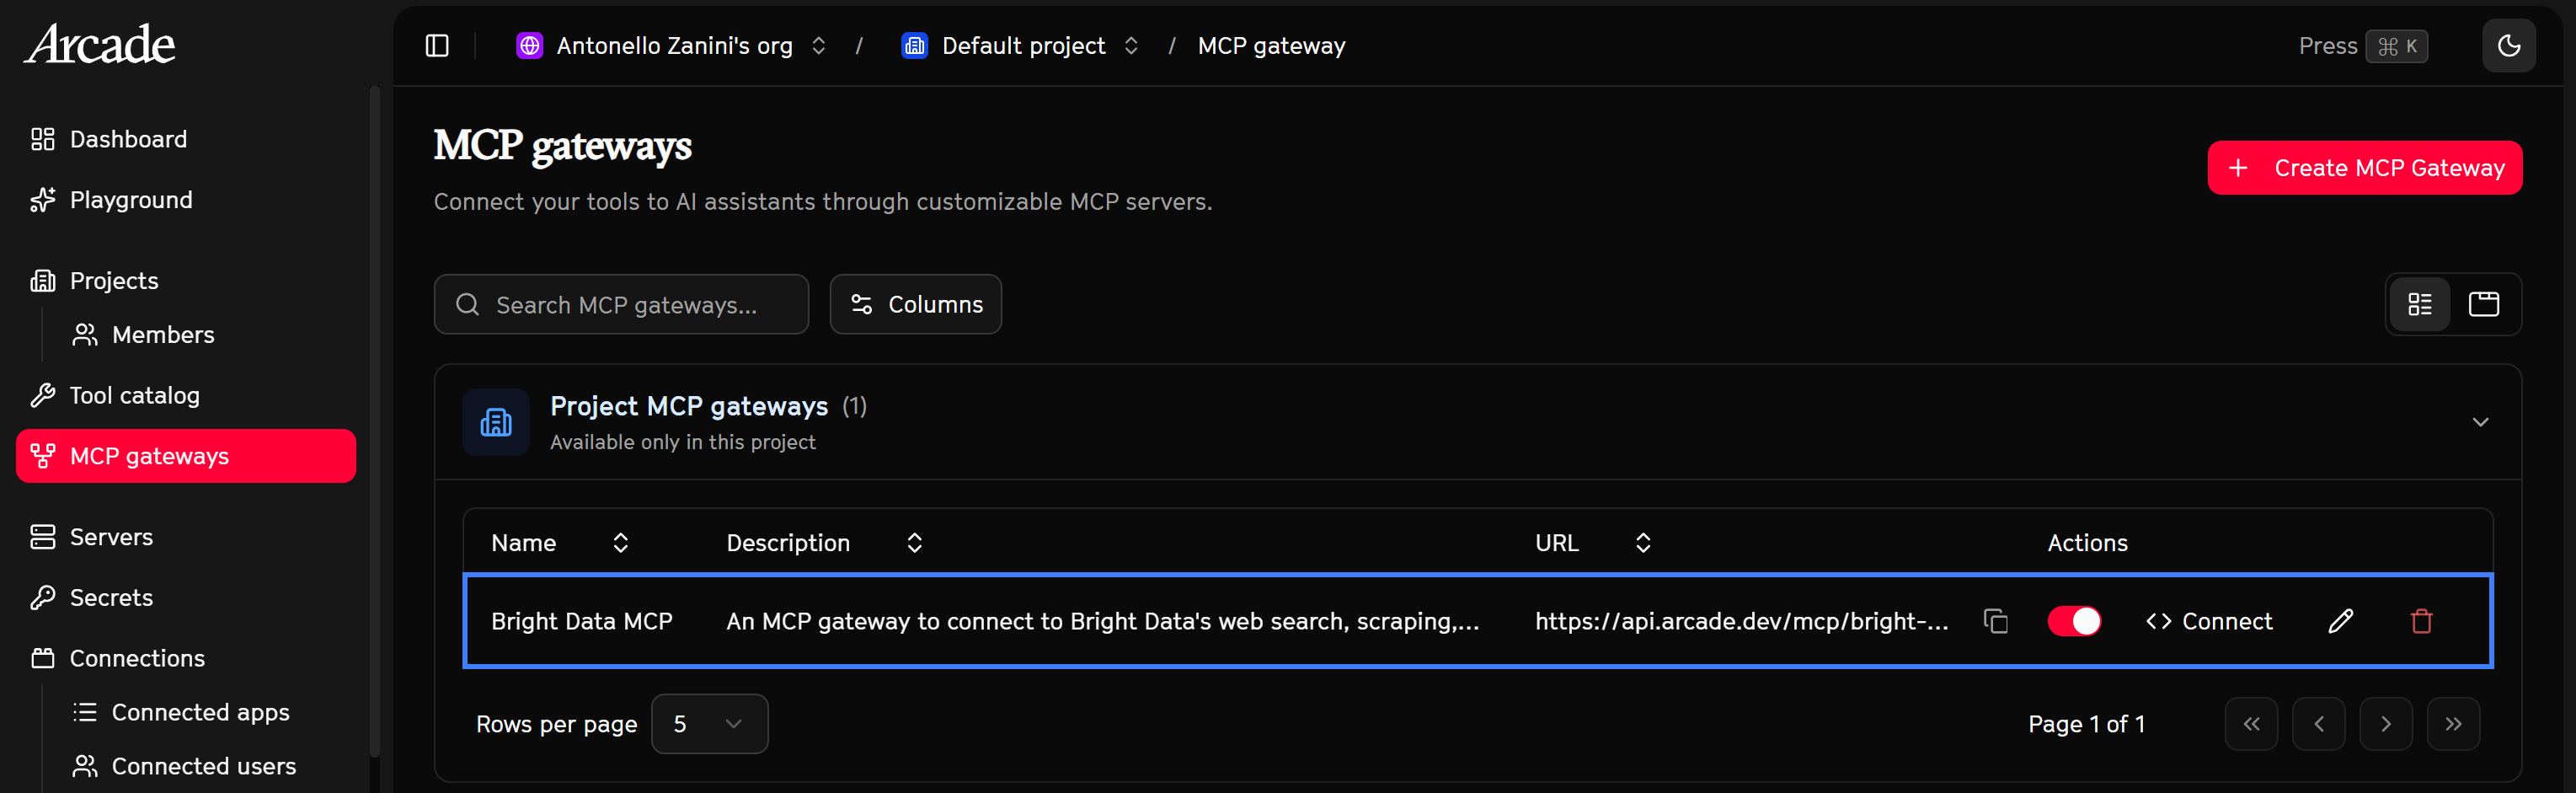
Amazing! Your Arcade-powered MCP gateway connected to Bright Data is now ready.
Step #2: Set Up Your Bright Data Account
As mentioned earlier, the Arcade Bright Data MCP requires you to configure these two secrets:
BRIGHTDATA_API_KEY: Your Bright Data API key.BRIGHTDATA_ZONE: Your Bright Data Web Unlocker zone name.
These two secrets are utilized to connect to Bright Data’s API-based solutions (Web Unlocker, SERP API, and Web Scraping APIs), which power the three exposed tools.
Follow the instructions below to retrieve both!
If you do not have a Bright Data account, create a new one. Otherwise, log in. Next, navigate to your control panel, go to the “Proxies & Scraping” page, and check the “My Zones” table:
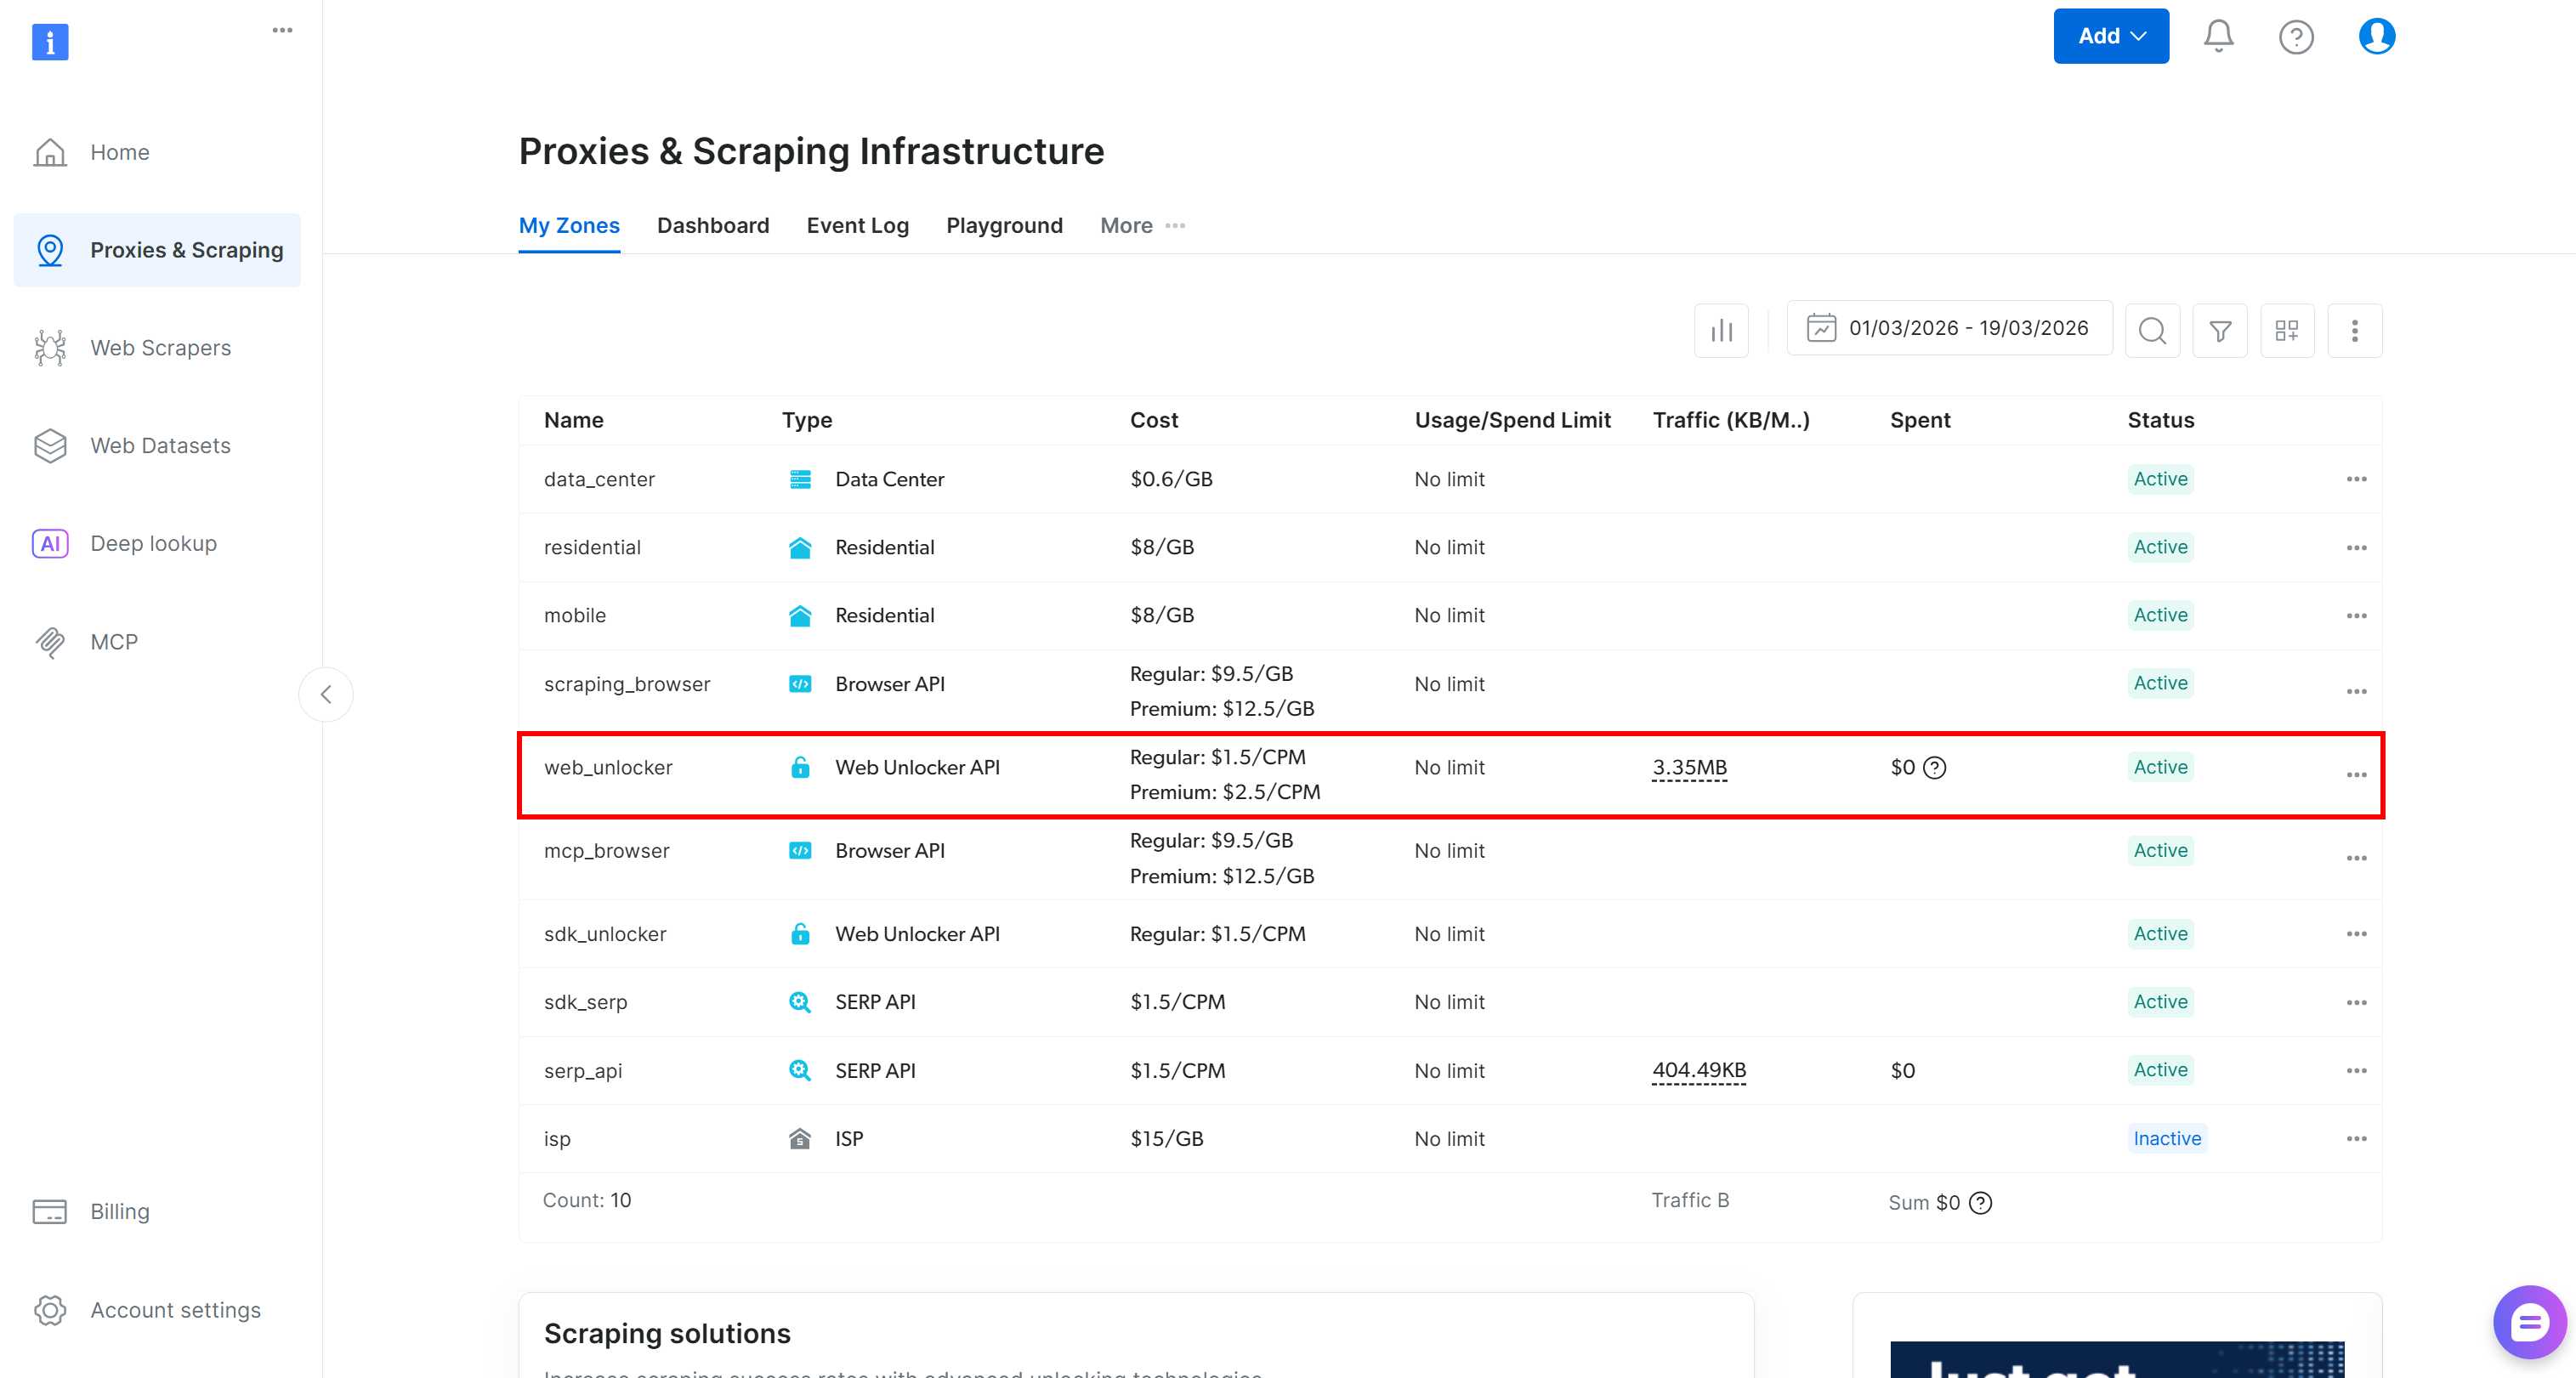
If a Web Unlocker API zone (e.g., web_unlocker) already exists, you can move to the Bright Data API creation step.
If it is missing, create one by scrolling to the “Unblocker API” card and clicking “Create zone”:
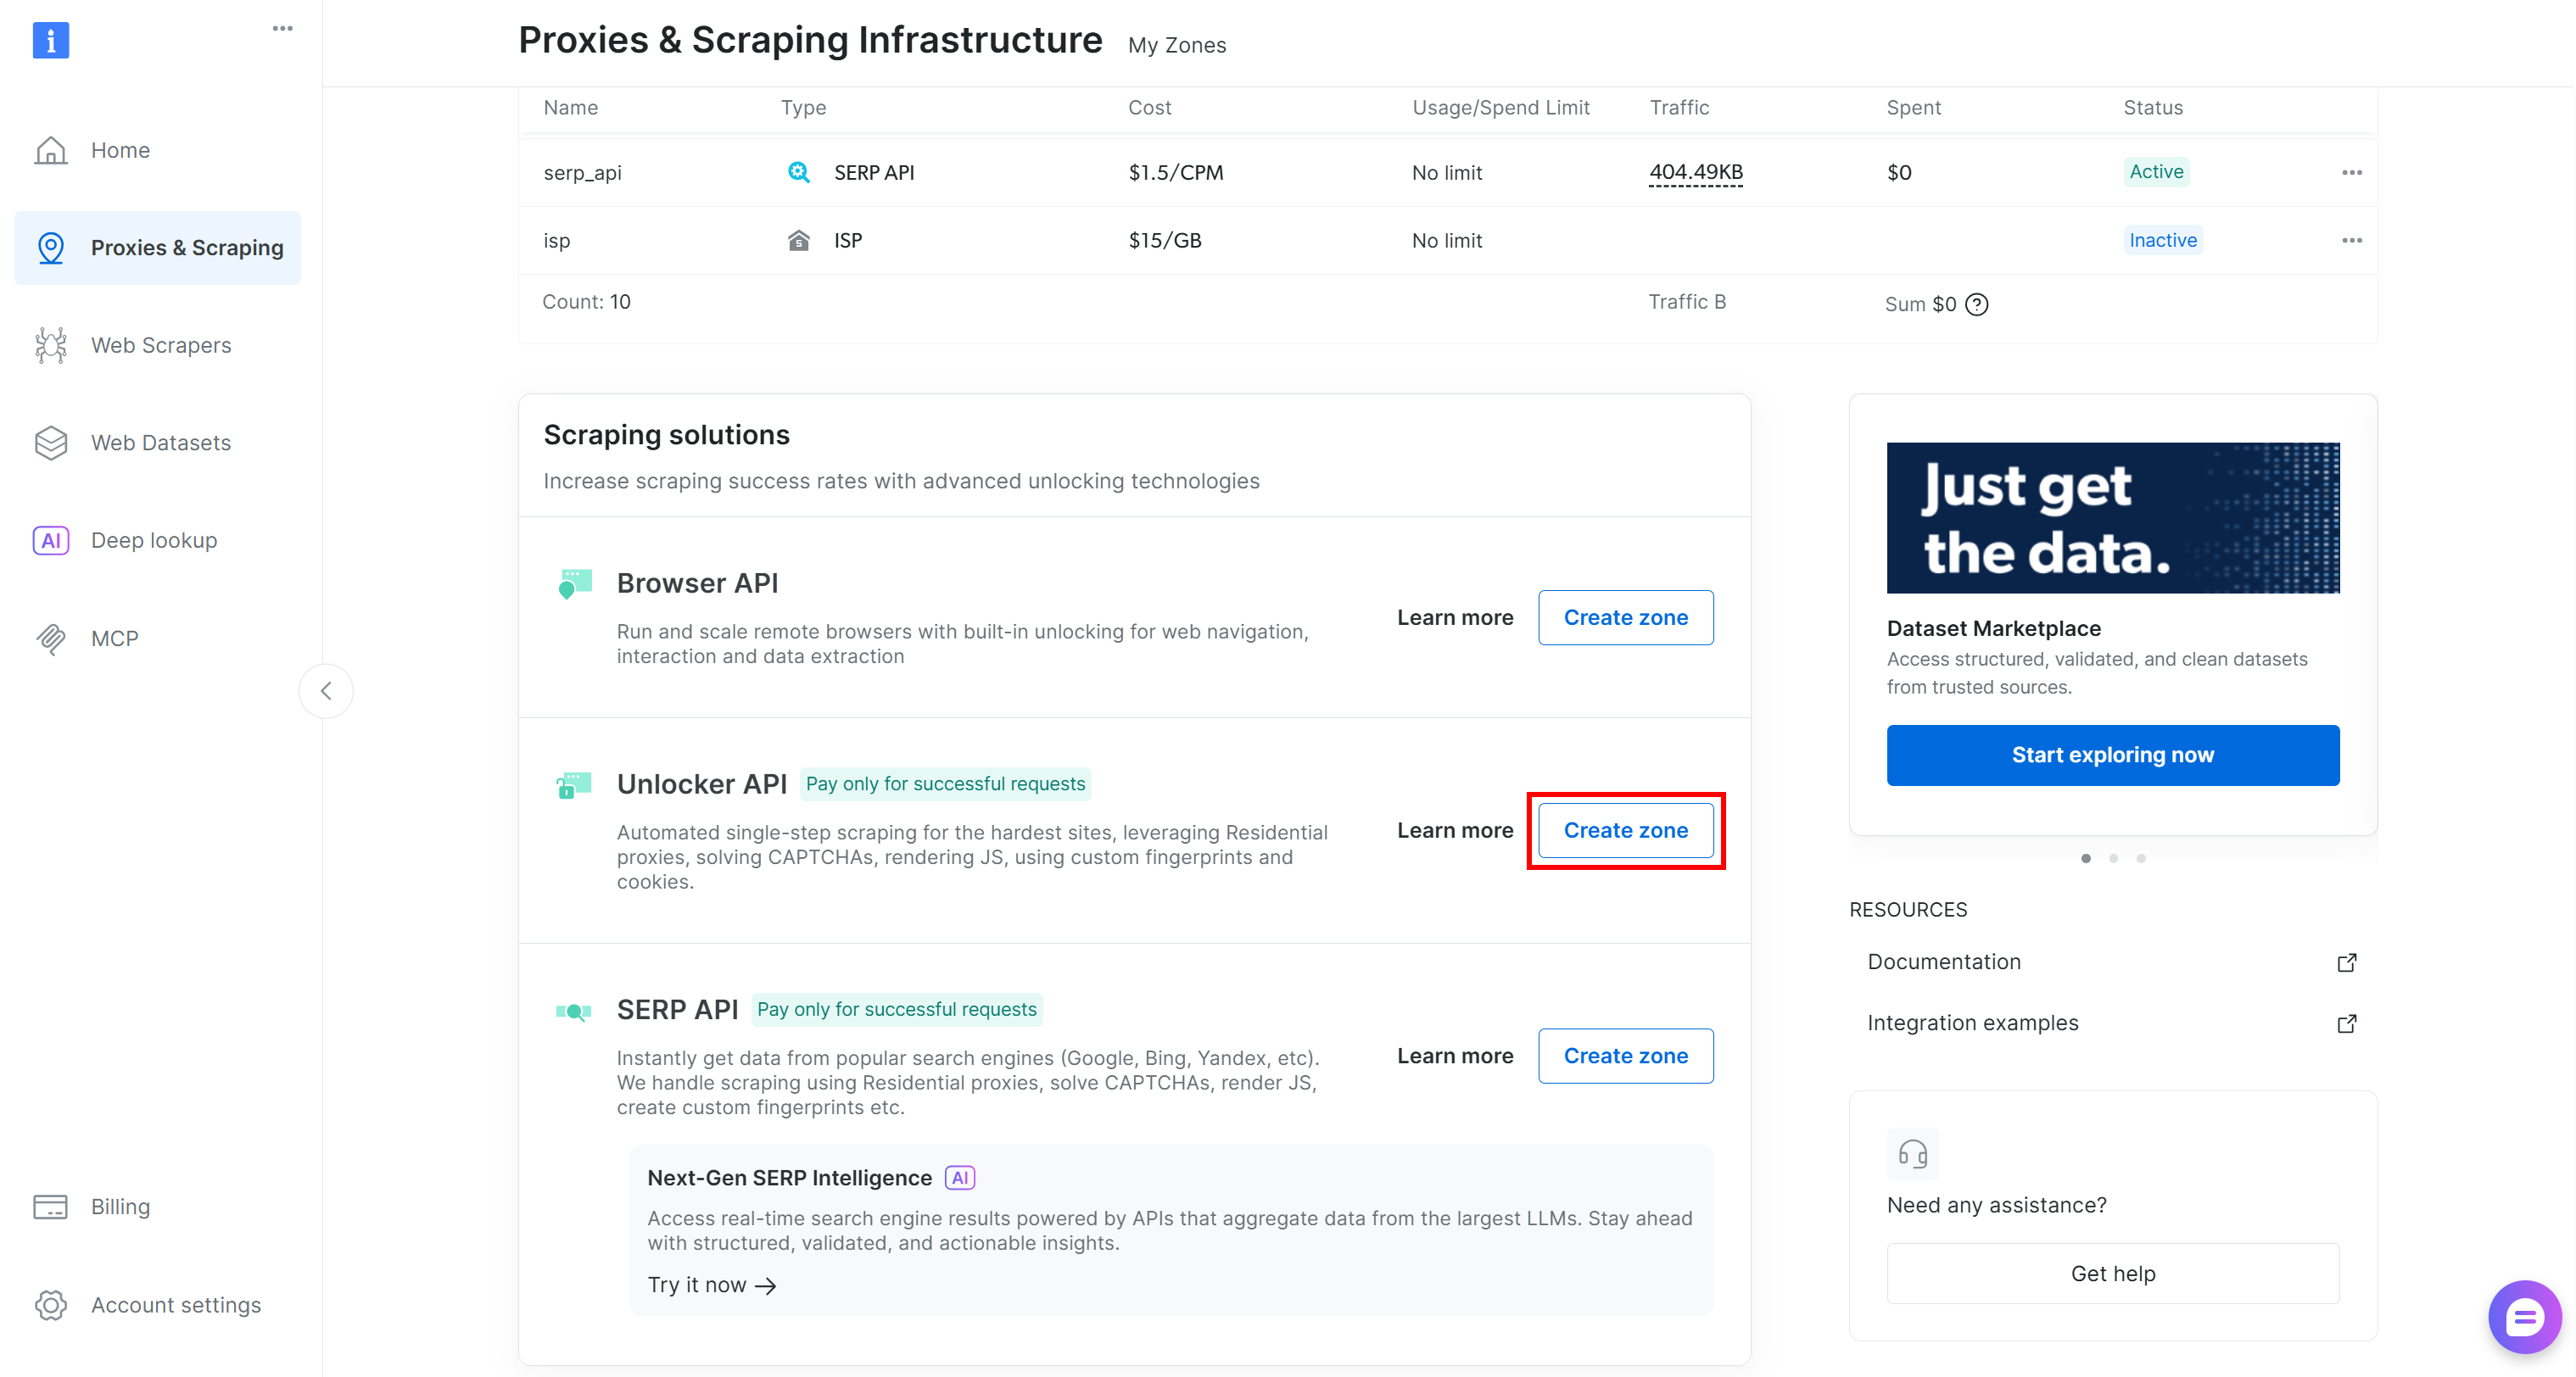
Follow the wizard carefully and name your zone appropriately. For detailed instructions, refer to the official setup guide.
Finally, generate your Bright Data API key and store it securely.
This is it! You now have both required secrets to connect Bright Data to Arcade.
Step #3: Set Up Bright Data Secrets in Arcade MCP
Now that you have the required secrets, set them in Arcade. In your account dashboard, go to the “Secrets” page and click the “Add Secret” button:
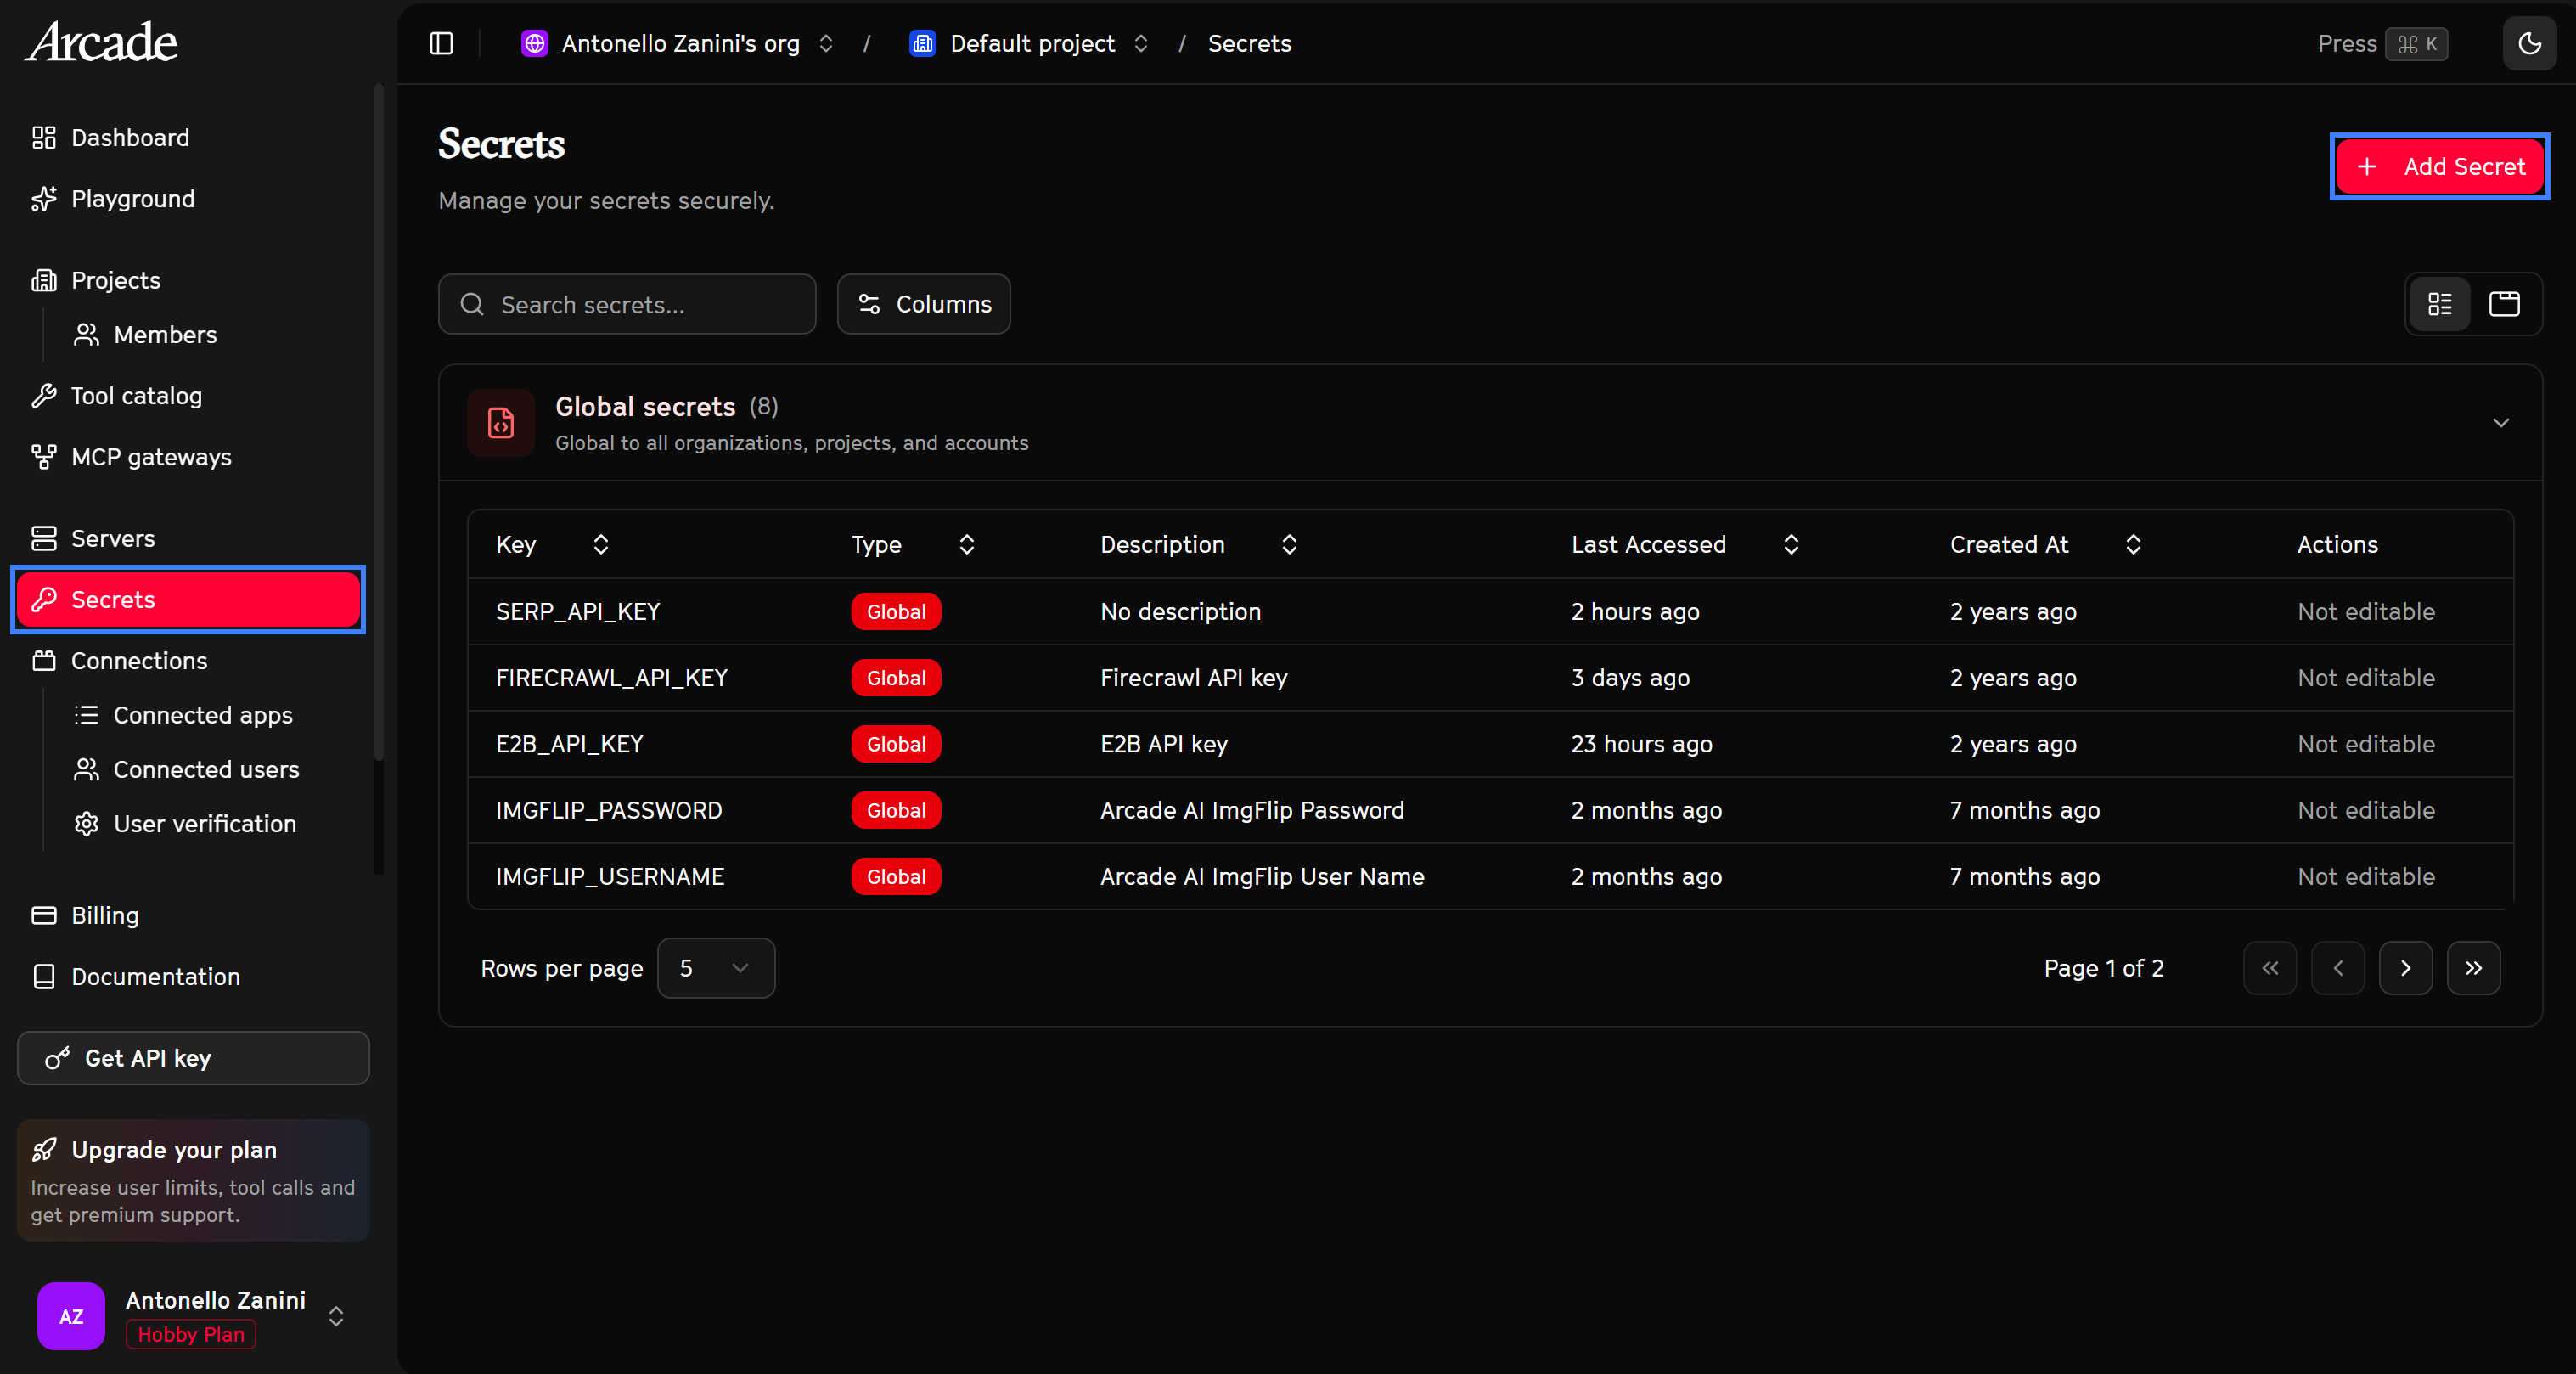
Fill out the “Add New Secret” form as follows:
- ID:
BRIGHTDATA_API_KEY - Value:
<YOUR_BRIGHT_DATA_API_KEY>(replace with the value you retrieved earlier).
Then, click “Create Secret” to confirm.
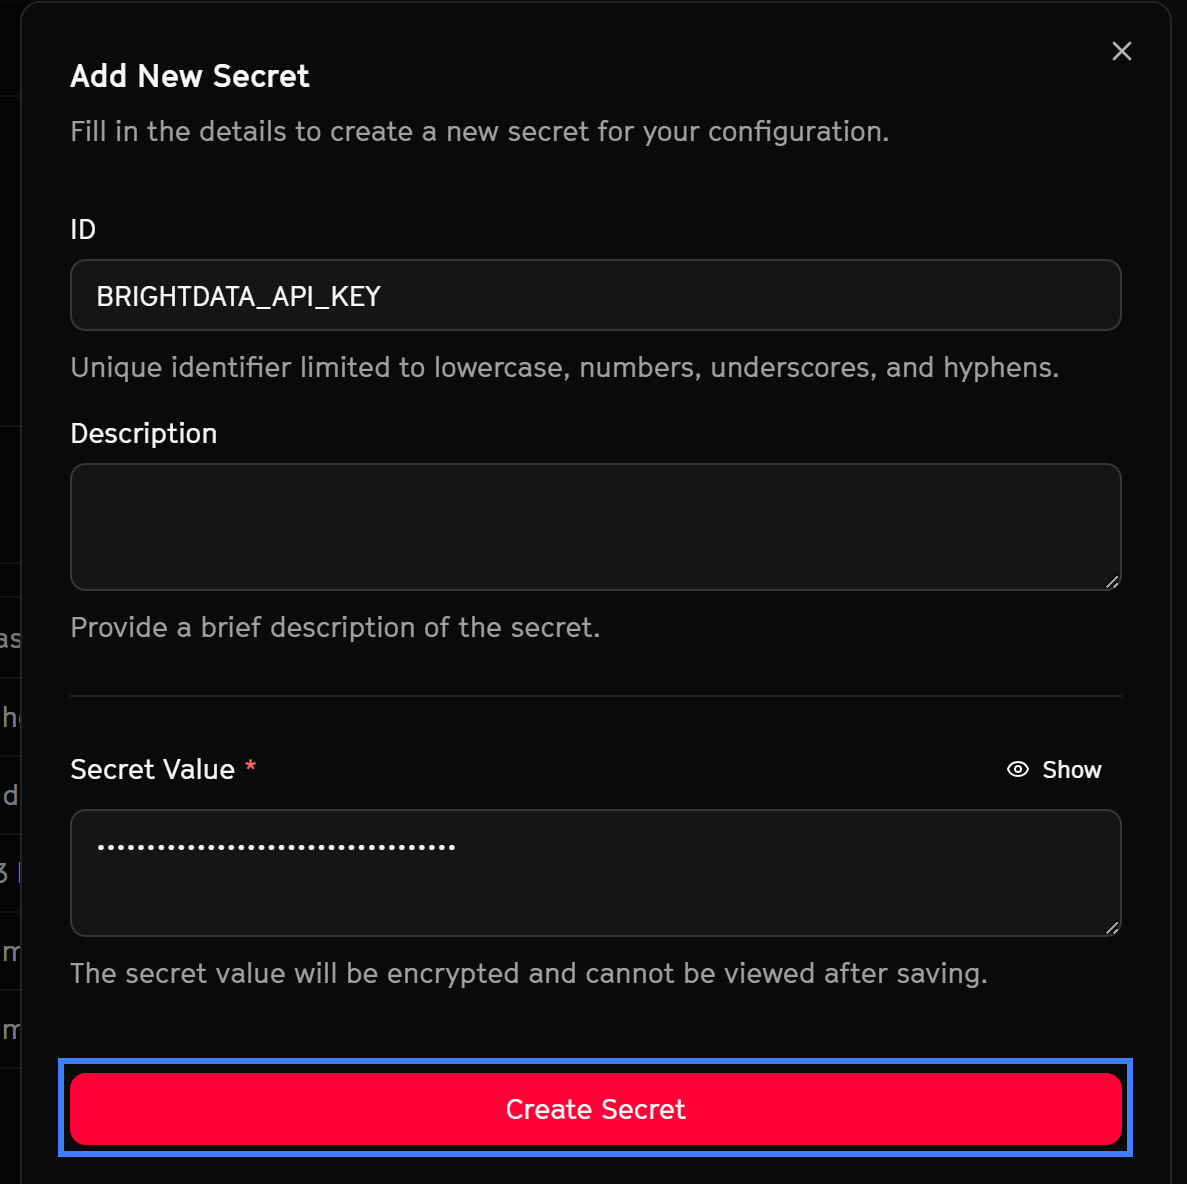
Repeat the process for the second secret:
- ID:
BRIGHTDATA_ZONE - Value: Your Bright Data Web Unlocker API zone (e.g.,
web_unlockeror the name you assigned).
Once added, your Secrets table should look like this:
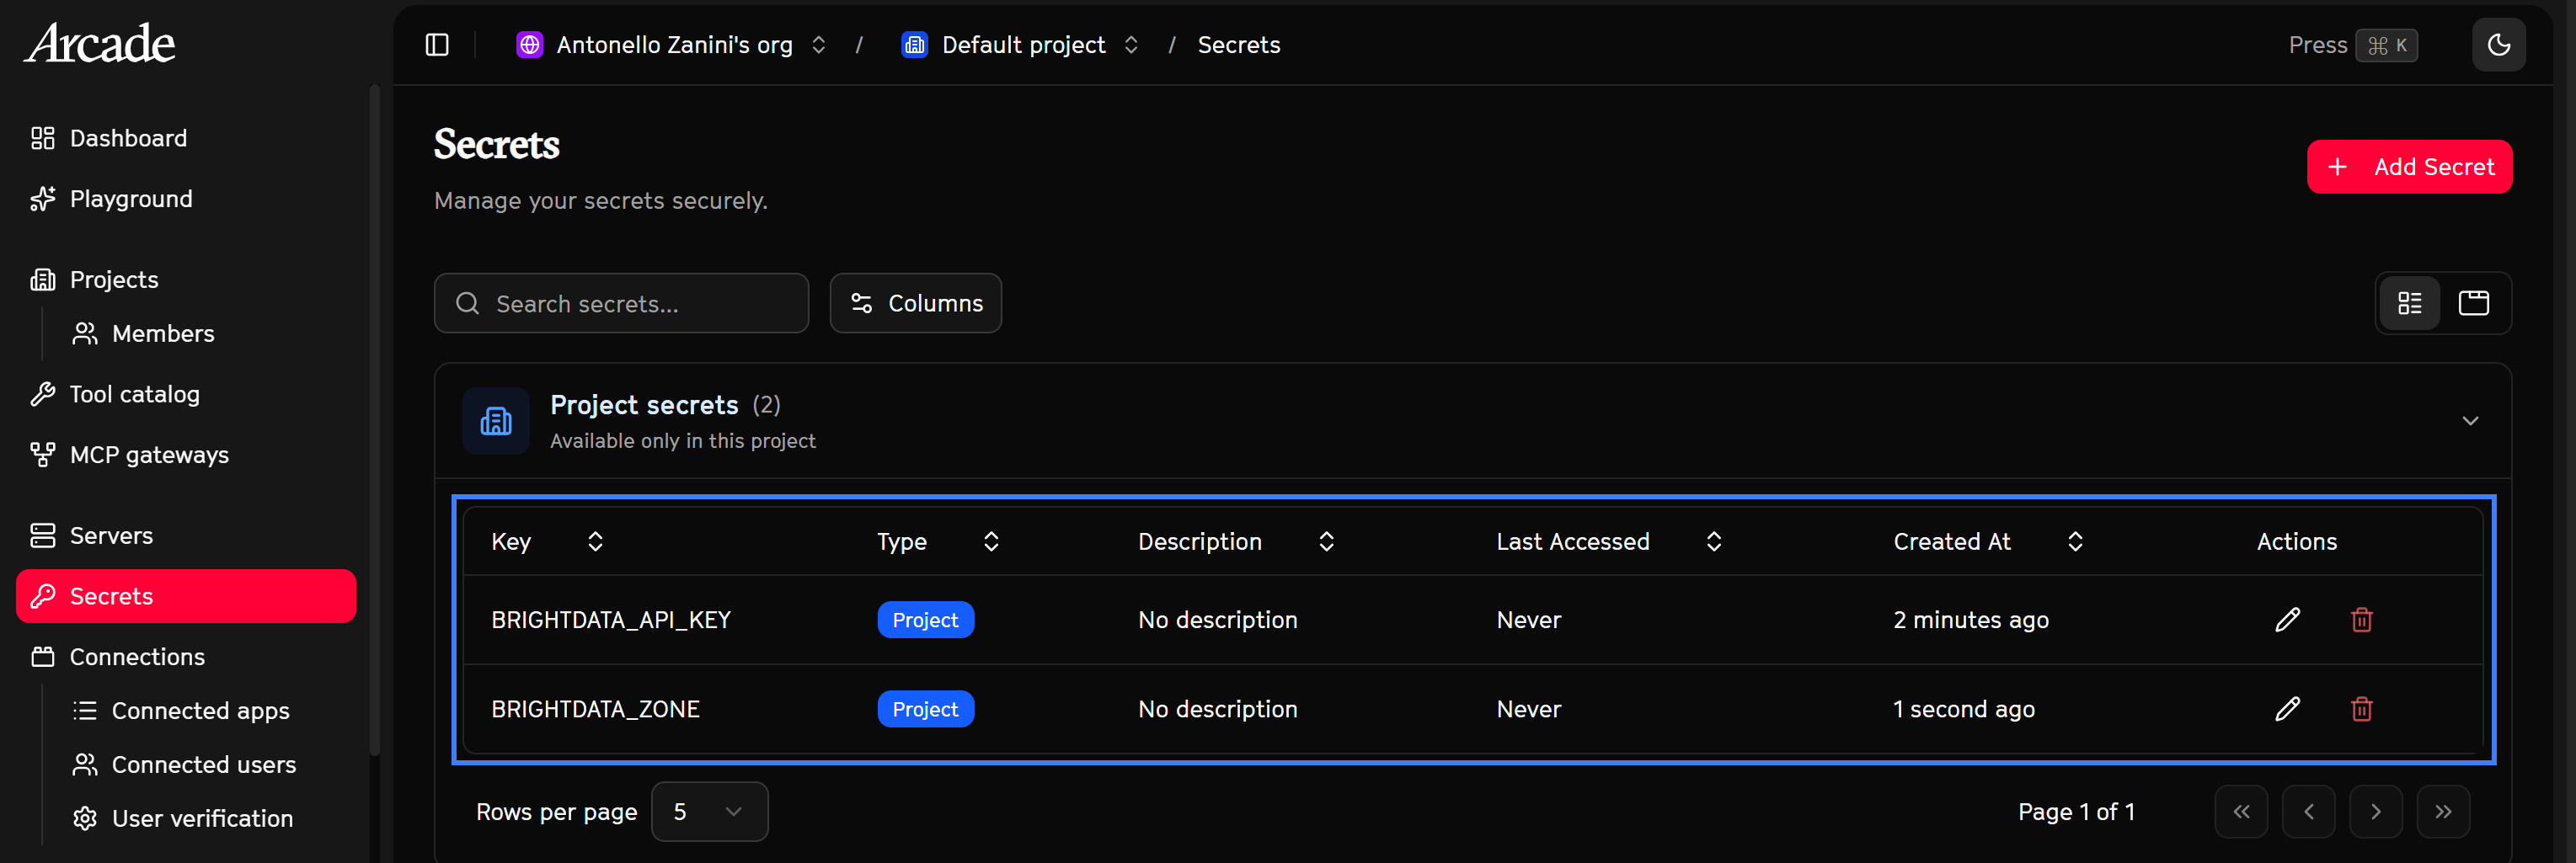
Verify that Arcade recognizes the secrets by going to the “MCP Gateways” page, clicking “Edit” on the “Bright Data MCP” entry, and scrolling down. The previous warning message should now be gone:
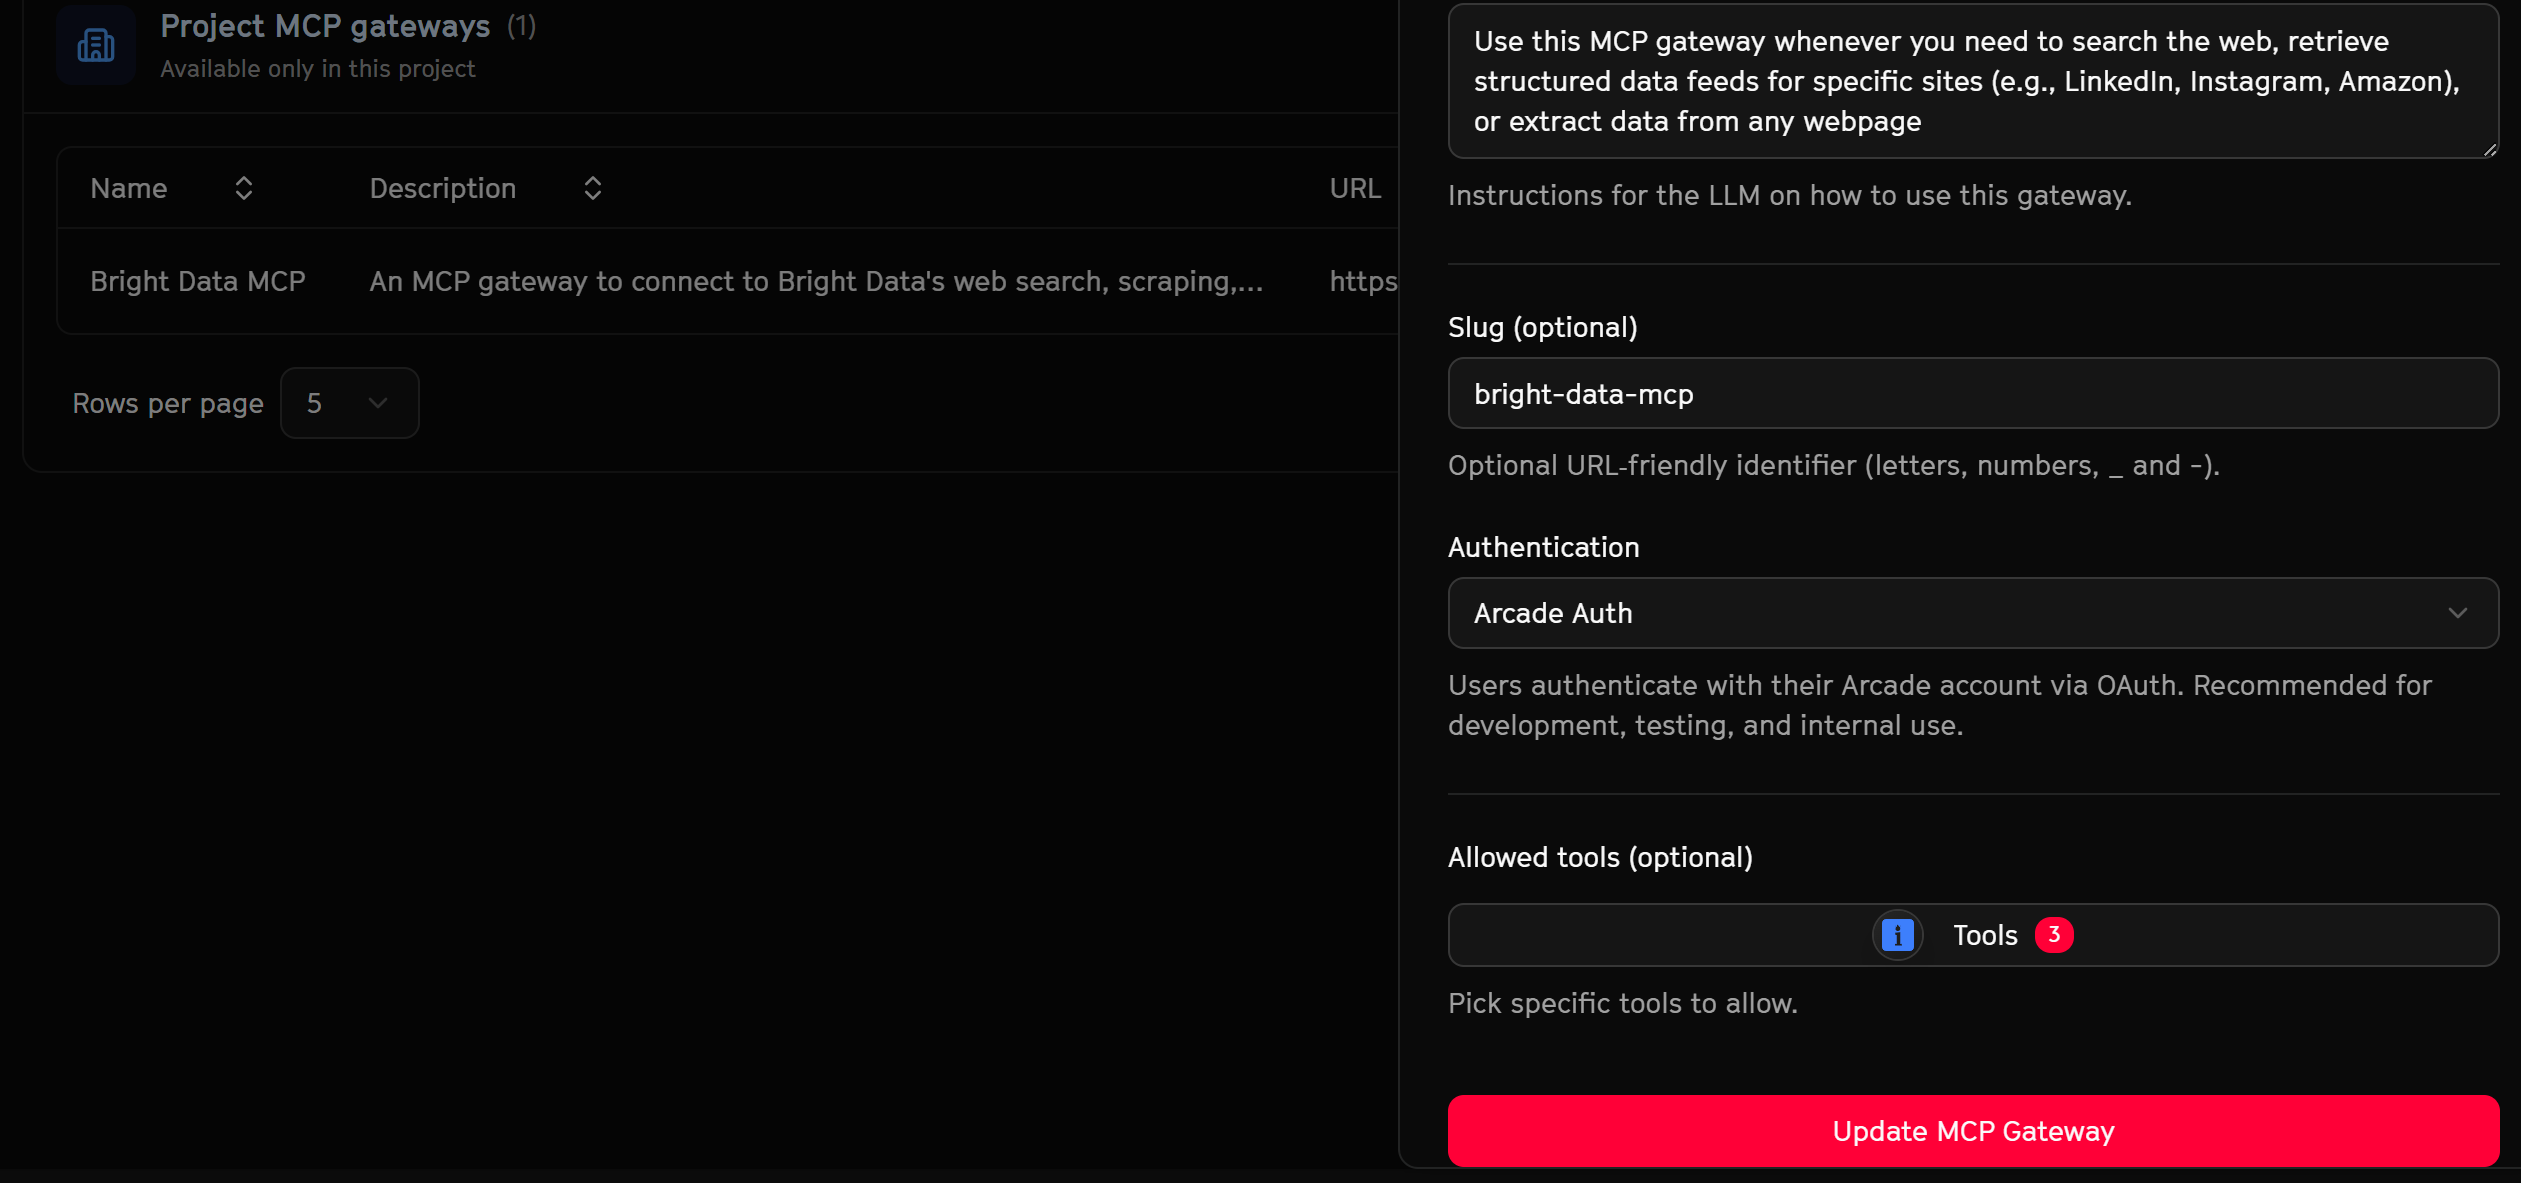
Fantastic! Your Arcade MCP Gateway is now fully configured and ready to expose the Bright Data tools.
Connect to Bright Data Arcade MCP via Arcade Auth in Claude Desktop
Now you will learn how to connect the Bright Data Arcade MCP, configured earlier, to Claude Desktop using authentication via Arcade Auth. To keep this tutorial concise, we will assume that you already have Claude Desktop installed and set up locally.
Keep in mind that the section below is intended to demonstrate how Bright Data integration via Arcade works through Arcade Auth. For guidance on connecting other MCP-compatible solutions, take a look at the Arcade documentation.
Note: If you want to integrate Bright Data directly into Claude Desktop via MCP, explore the docs.
Prerequisites
To integrate Arcade into Claude Desktop via Arcade Auth, you must create a custom connector. This feature is only available for Pro, Max, Team, and Enterprise users. Therefore, you need a Claude account with a paid plan.
Step #4: Add a New Custom Connector
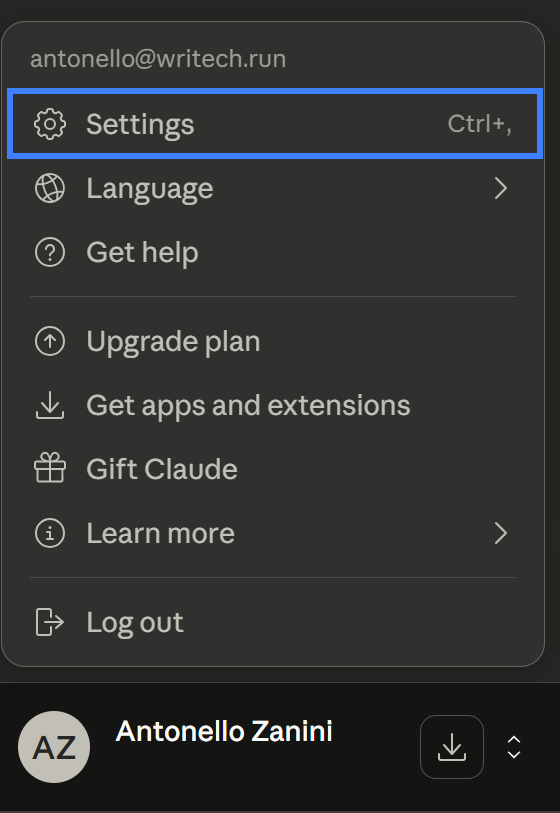
Open Claude Desktop, click on your user avatar in the bottom-left corner, and select the “Settings” option:
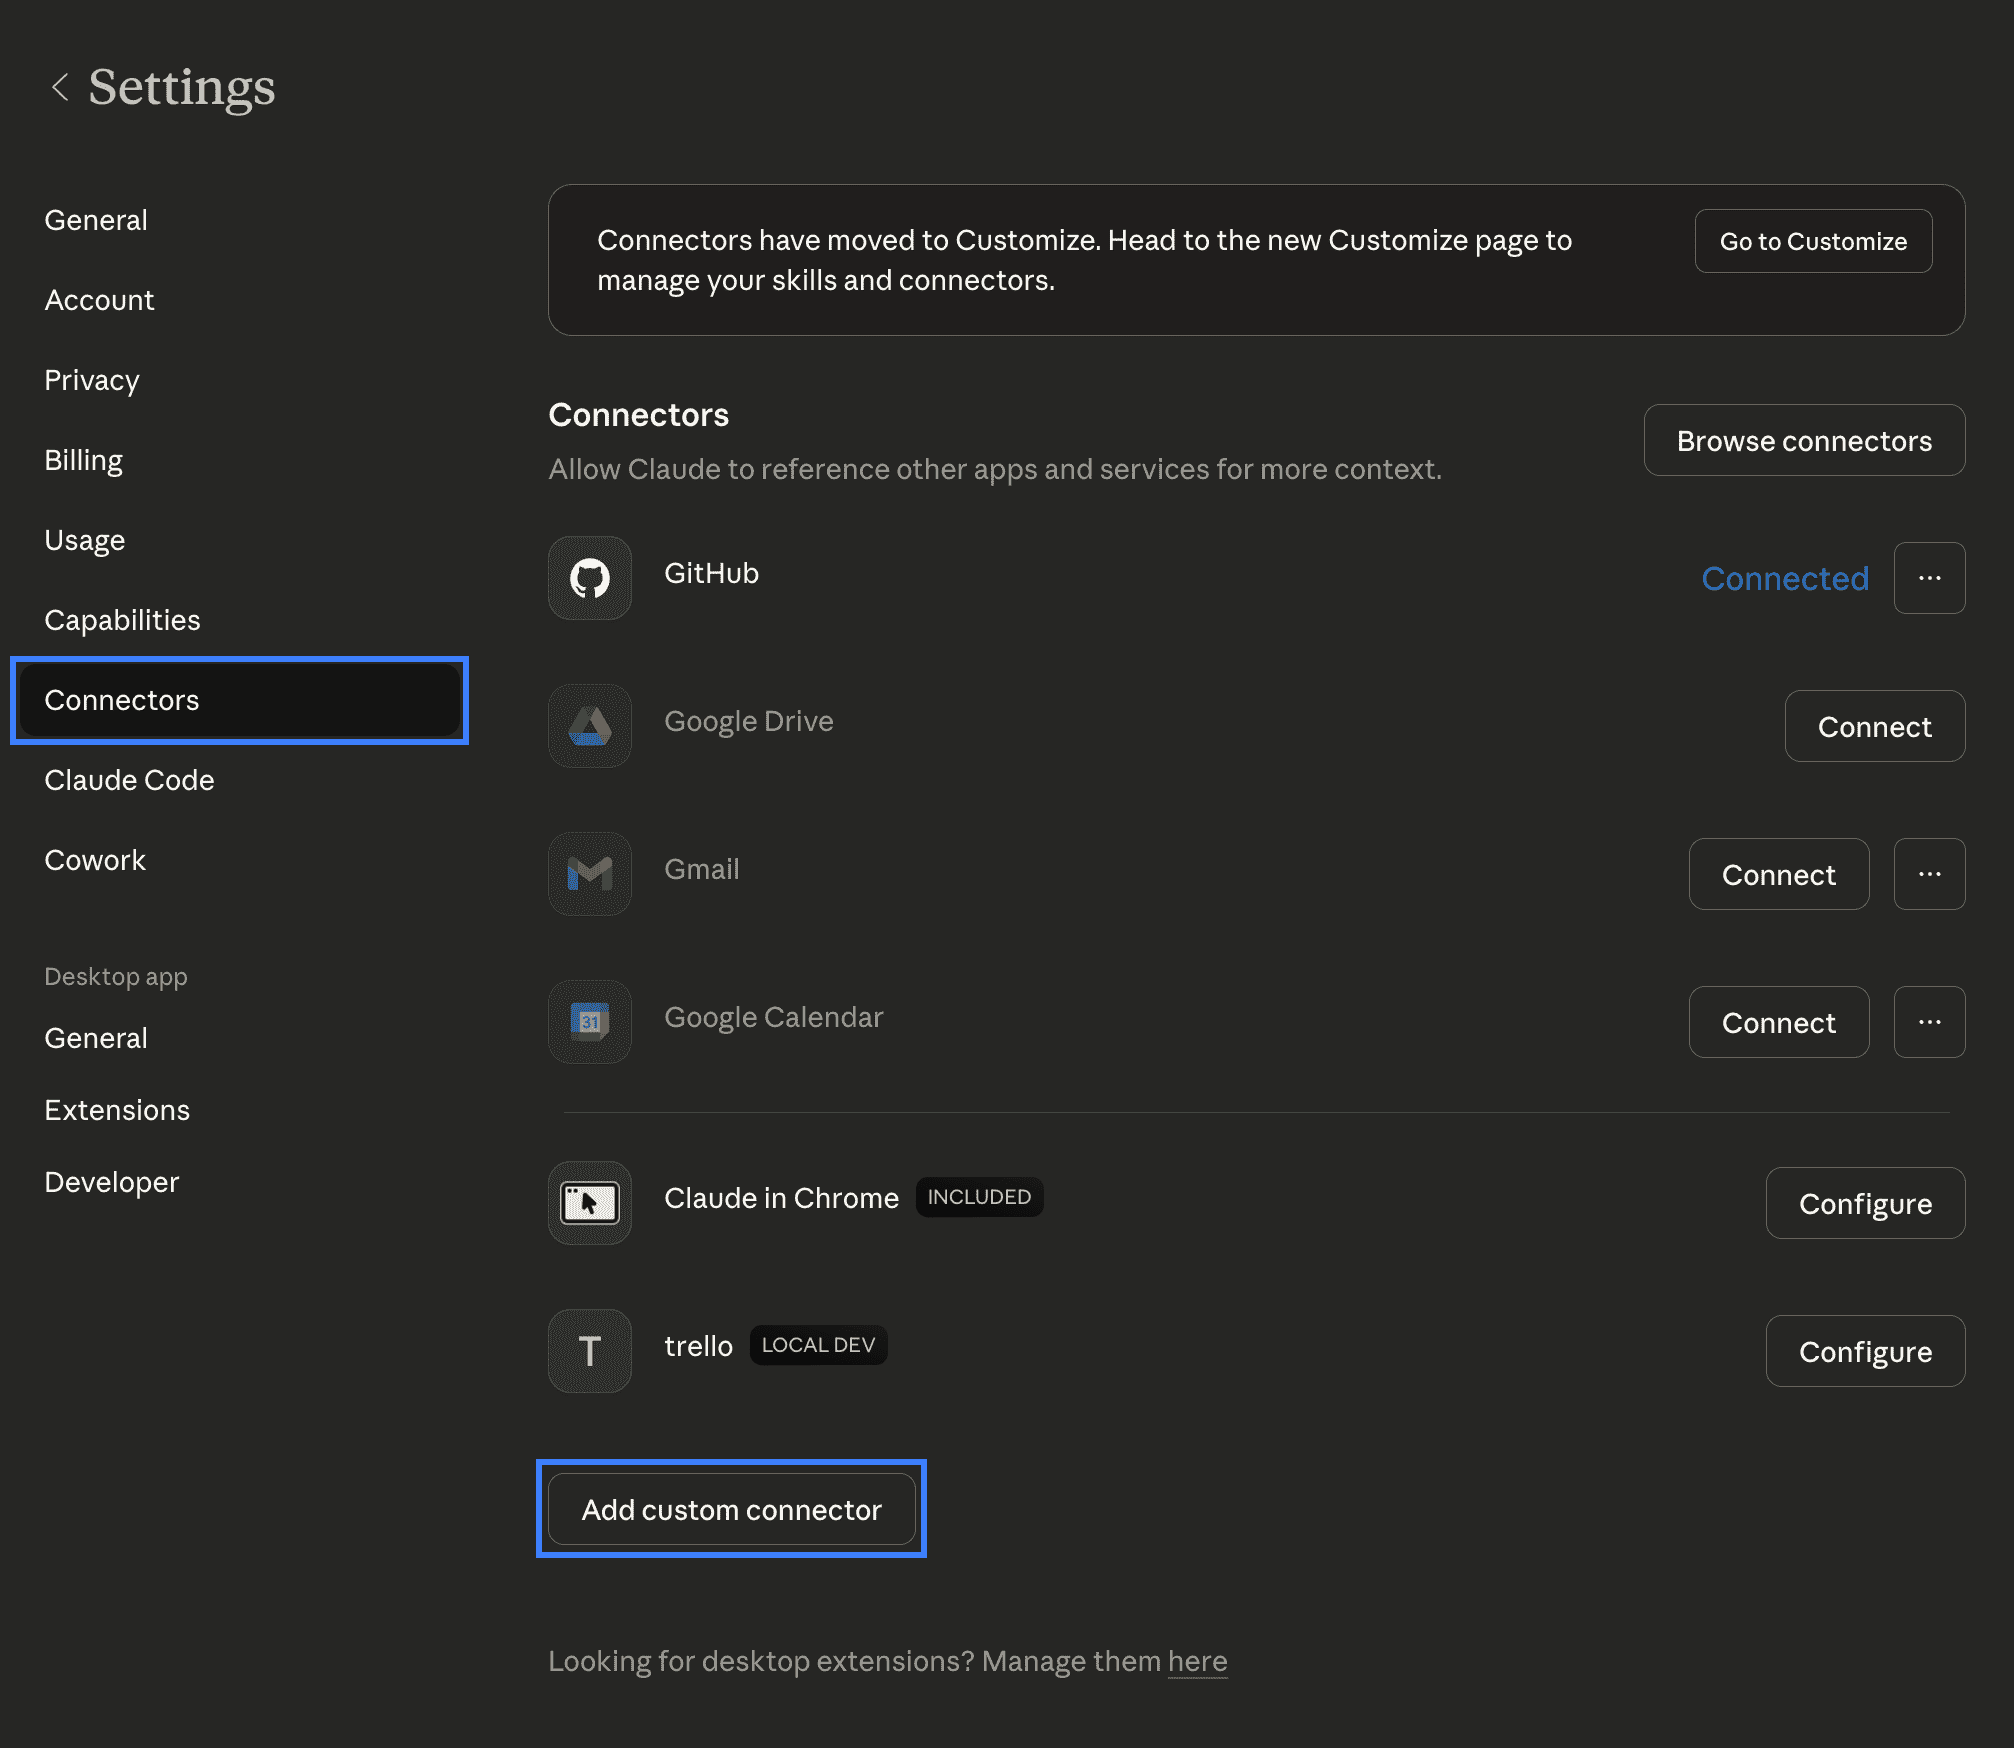
On the “Settings” page, go to the “Connectors” tab and click the “Add custom connector” button:
Great! You can now define the Arcade connector.
Step #5: Configure the Arcade Connector
A modal dialog will open to customize your new connector. Fill it out as follows:
- Name:
Arcade. - URL:
https://api.arcade.dev/mcp/bright-data-mcp. (More generally:https://api.arcade.dev/mcp/<YOUR_BRIGHT_DATA_MCP_GATEWAY_SLUG>.)
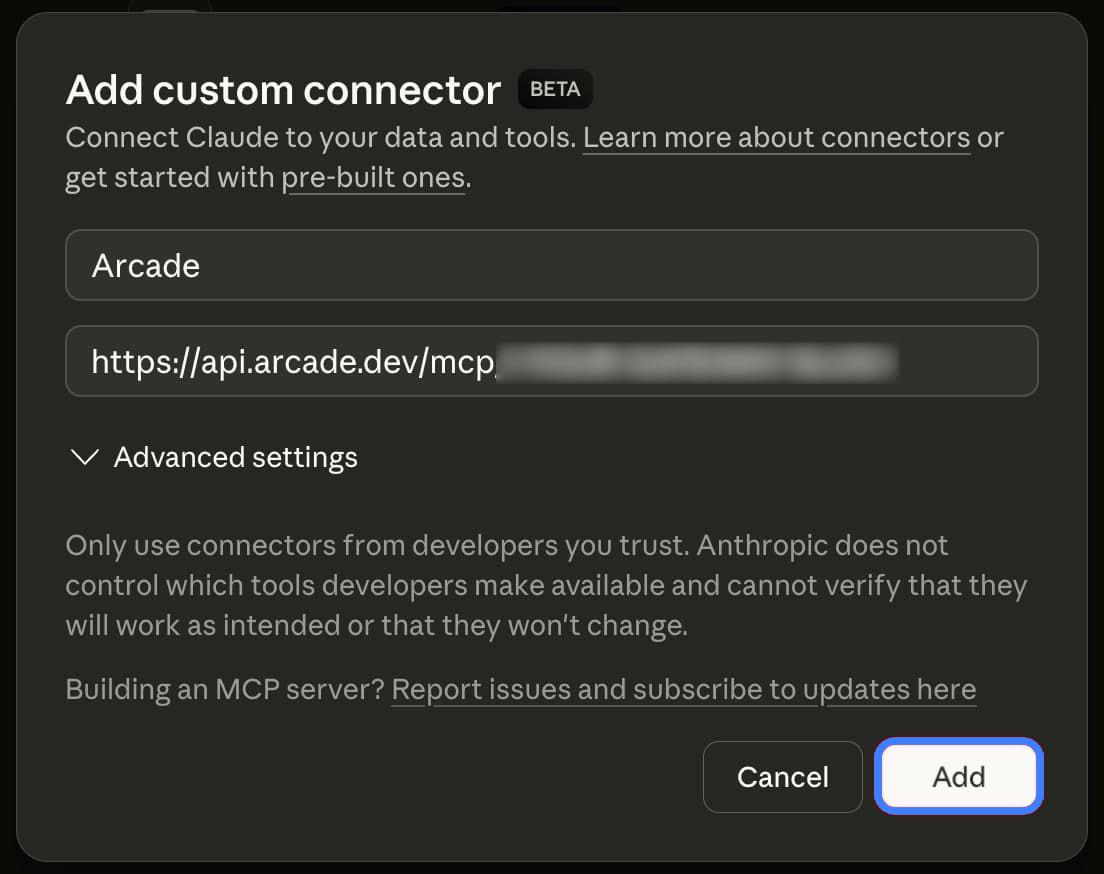
Proceed by clicking the “Add” button.
You will now see the new connector in your list. Click “Connect” to authenticate with your Arcade account:

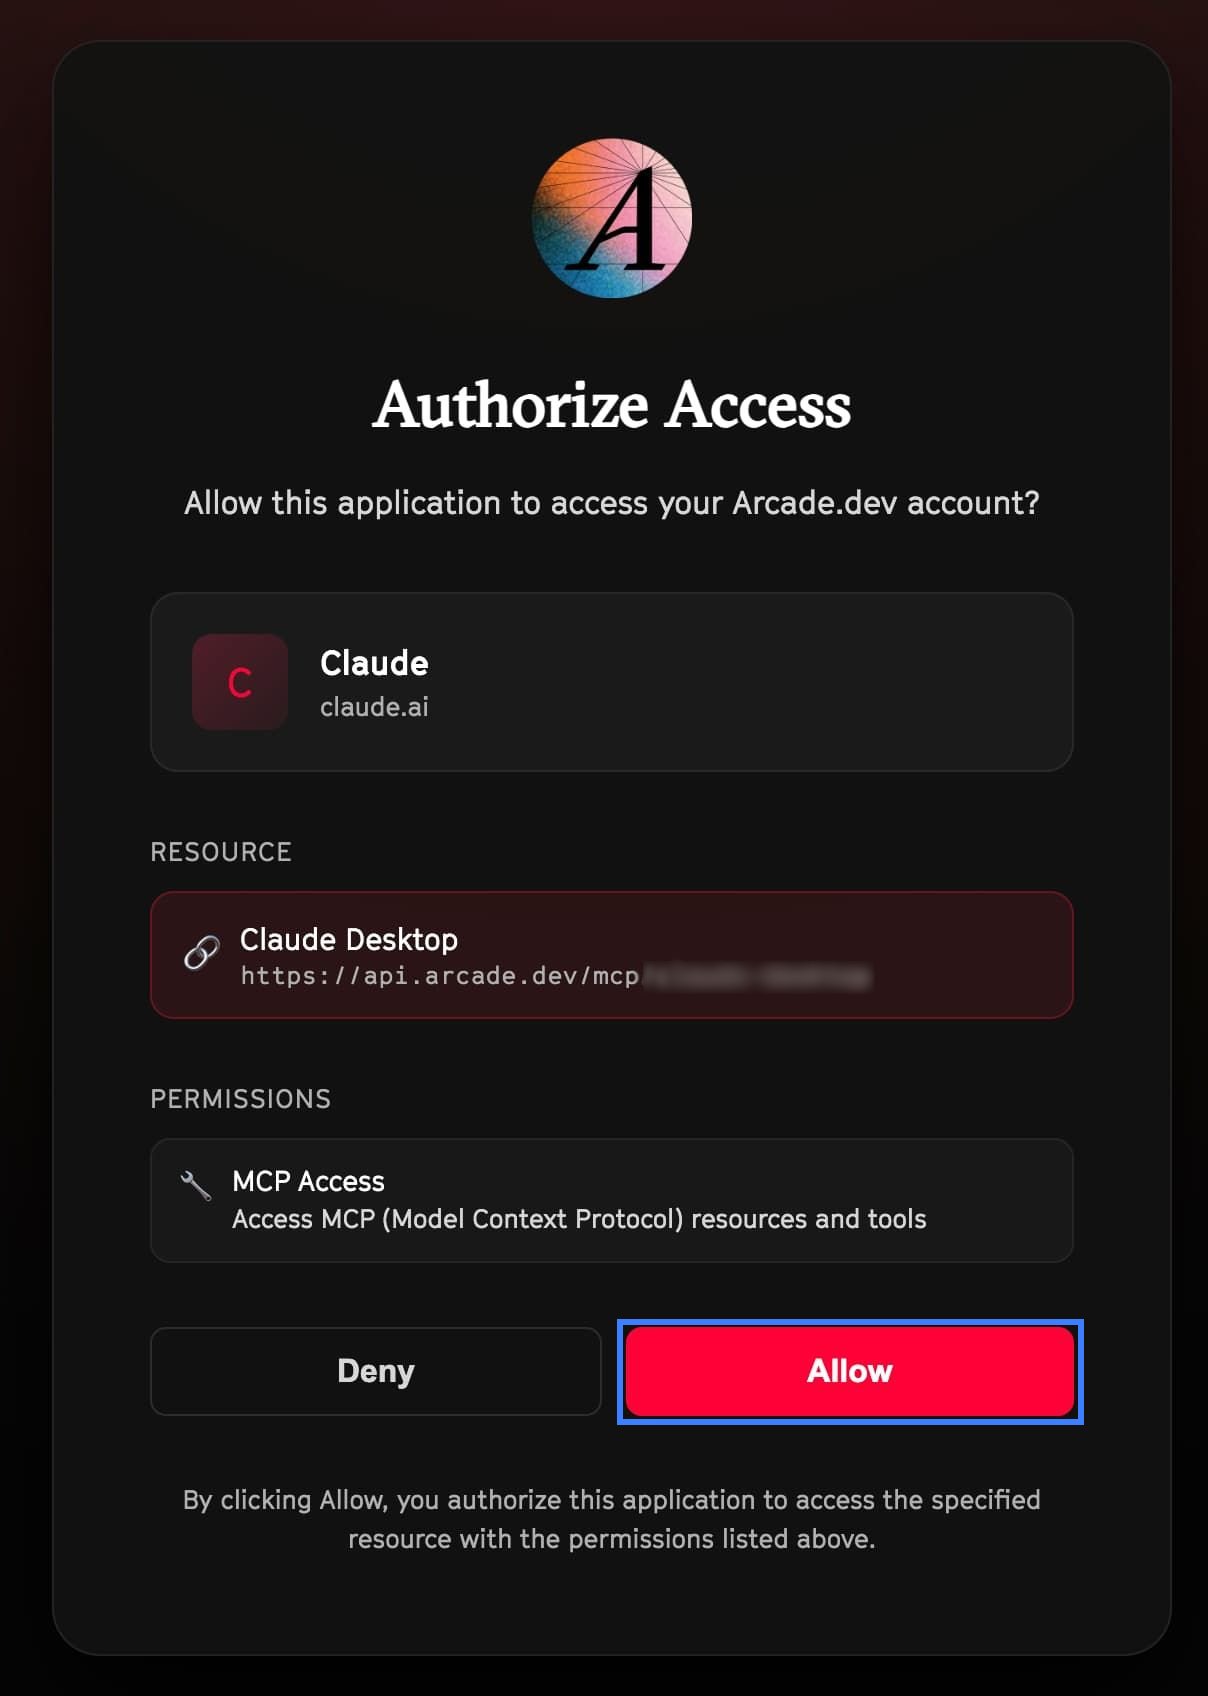
Your browser will open a new tab to the Arcade website for authentication. Verify that the URL matches the one in the modal dialog, then click the “Allow” button:
Sweet! Claude Desktop should now be connected to your Bright Data MCP Gateway.
Step #6: Verify the Connection and Configure the MCP Gateway
To verify that the Arcade Bright Data MCP server is correctly connected to your Claude Desktop app, go to “Settings”, open the “Connectors” tab, and locate the Arcade entry:
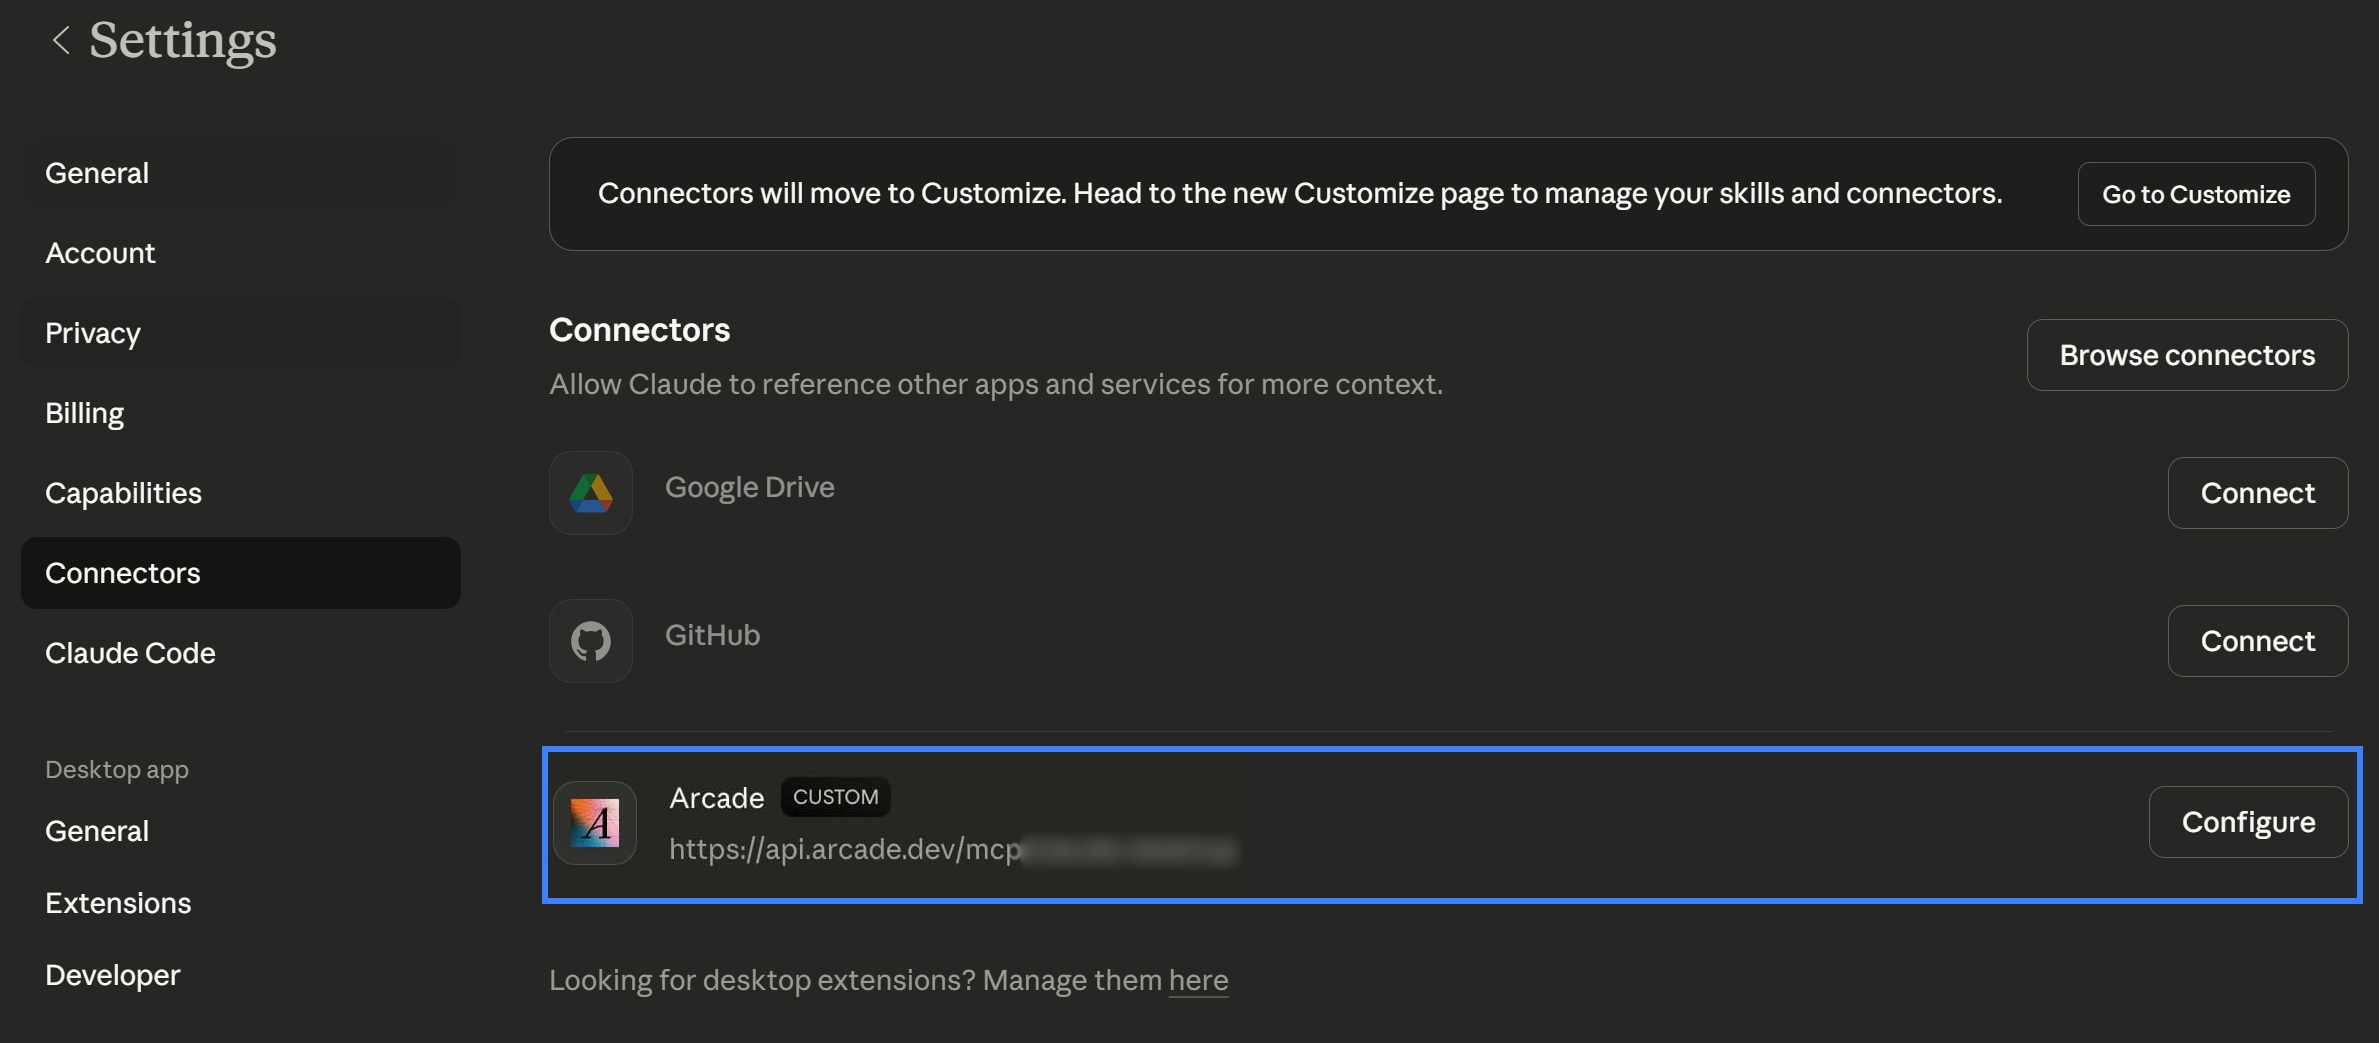
To view the available tools (and configure their permissions), click the “Configure” button. In the configuration panel, you will notice the three tools exposed by the Arcade Bright Data MCP:
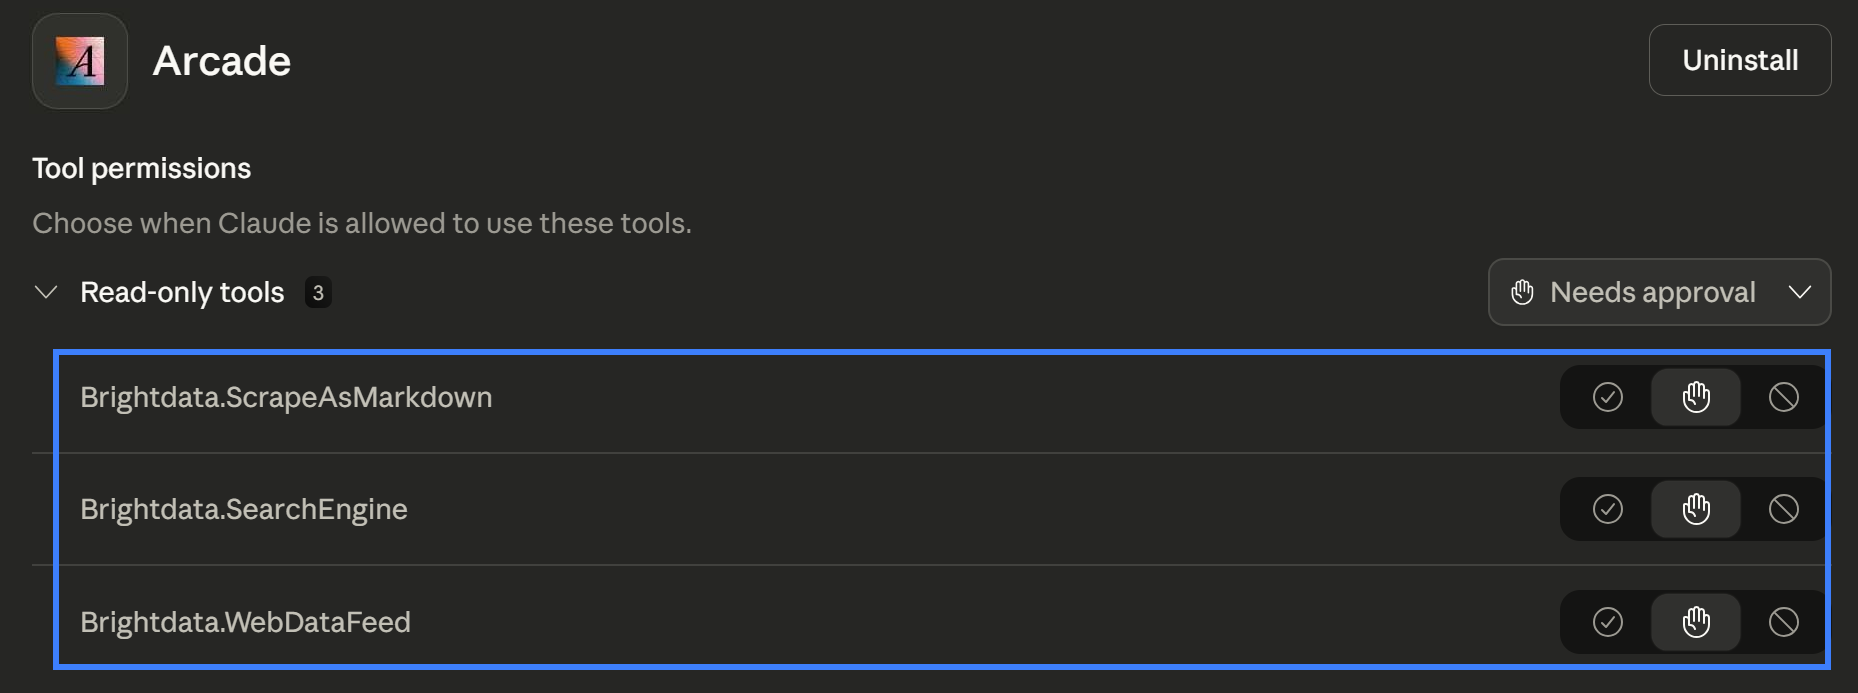
Here, you can also choose which tools are available to Claude Desktop and whether they require human confirmation before execution.
Mission complete! You can now start a new chat in Claude Desktop, enhanced with Bright Data’s web data retrieval capabilities through the Arcade custom connector.
Connect to Bright Data Arcade MCP via Arcade Headers in Claude Code
Here, you will be guided through connecting the Bright Data Arcade MCP to Claude Code using Arcade Headers. To keep this section short, we will assume Claude Code is already installed and set up locally.
Note: If you are looking for a direct integration of Bright Data in Claude Code via MCP, read the full guide.
Step #4: Change the Authentication Method to Arcade Headers
Back in Step #1, you configured the Bright Data MCP Gateway in Arcade using Arcade Auth. It is now time to change that. Click the edit icon on the “Bright Data MCP” entry:
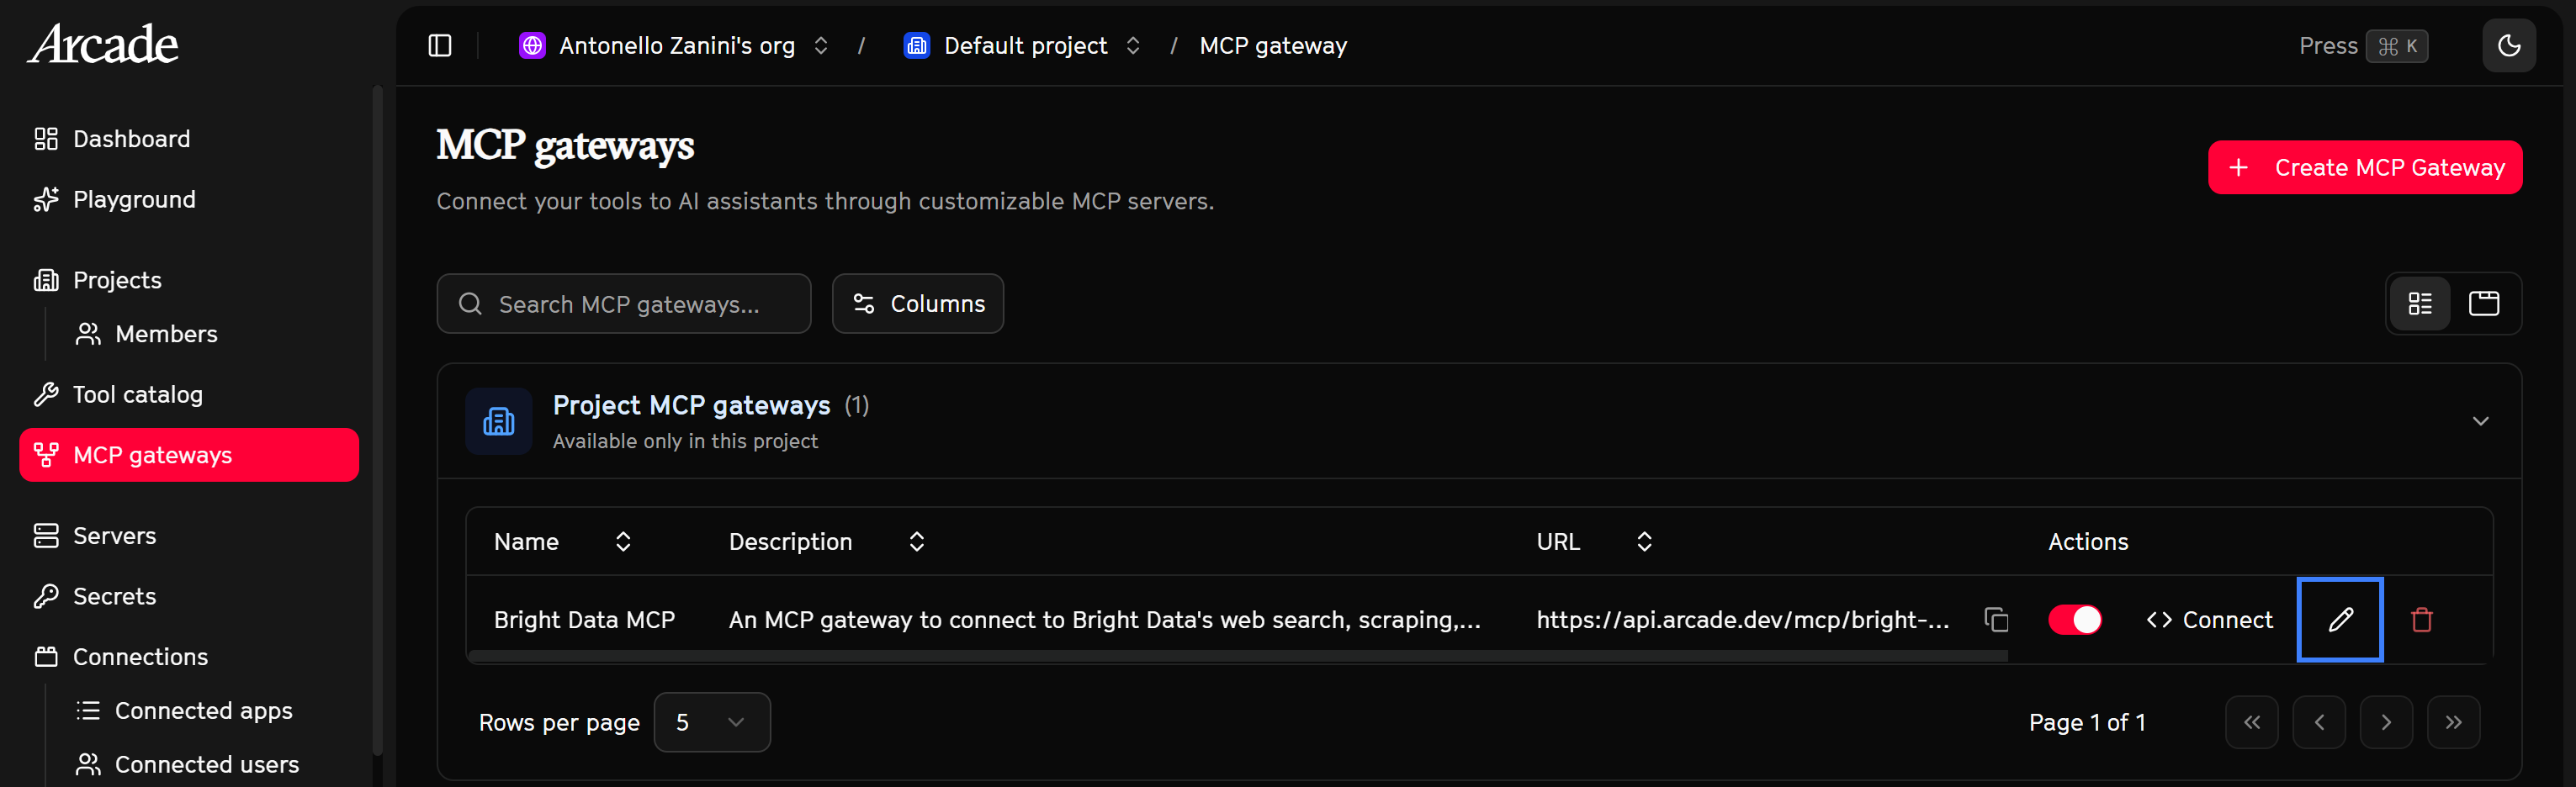
Then, set the “Authentication” field to the “Arcade Headers” option:
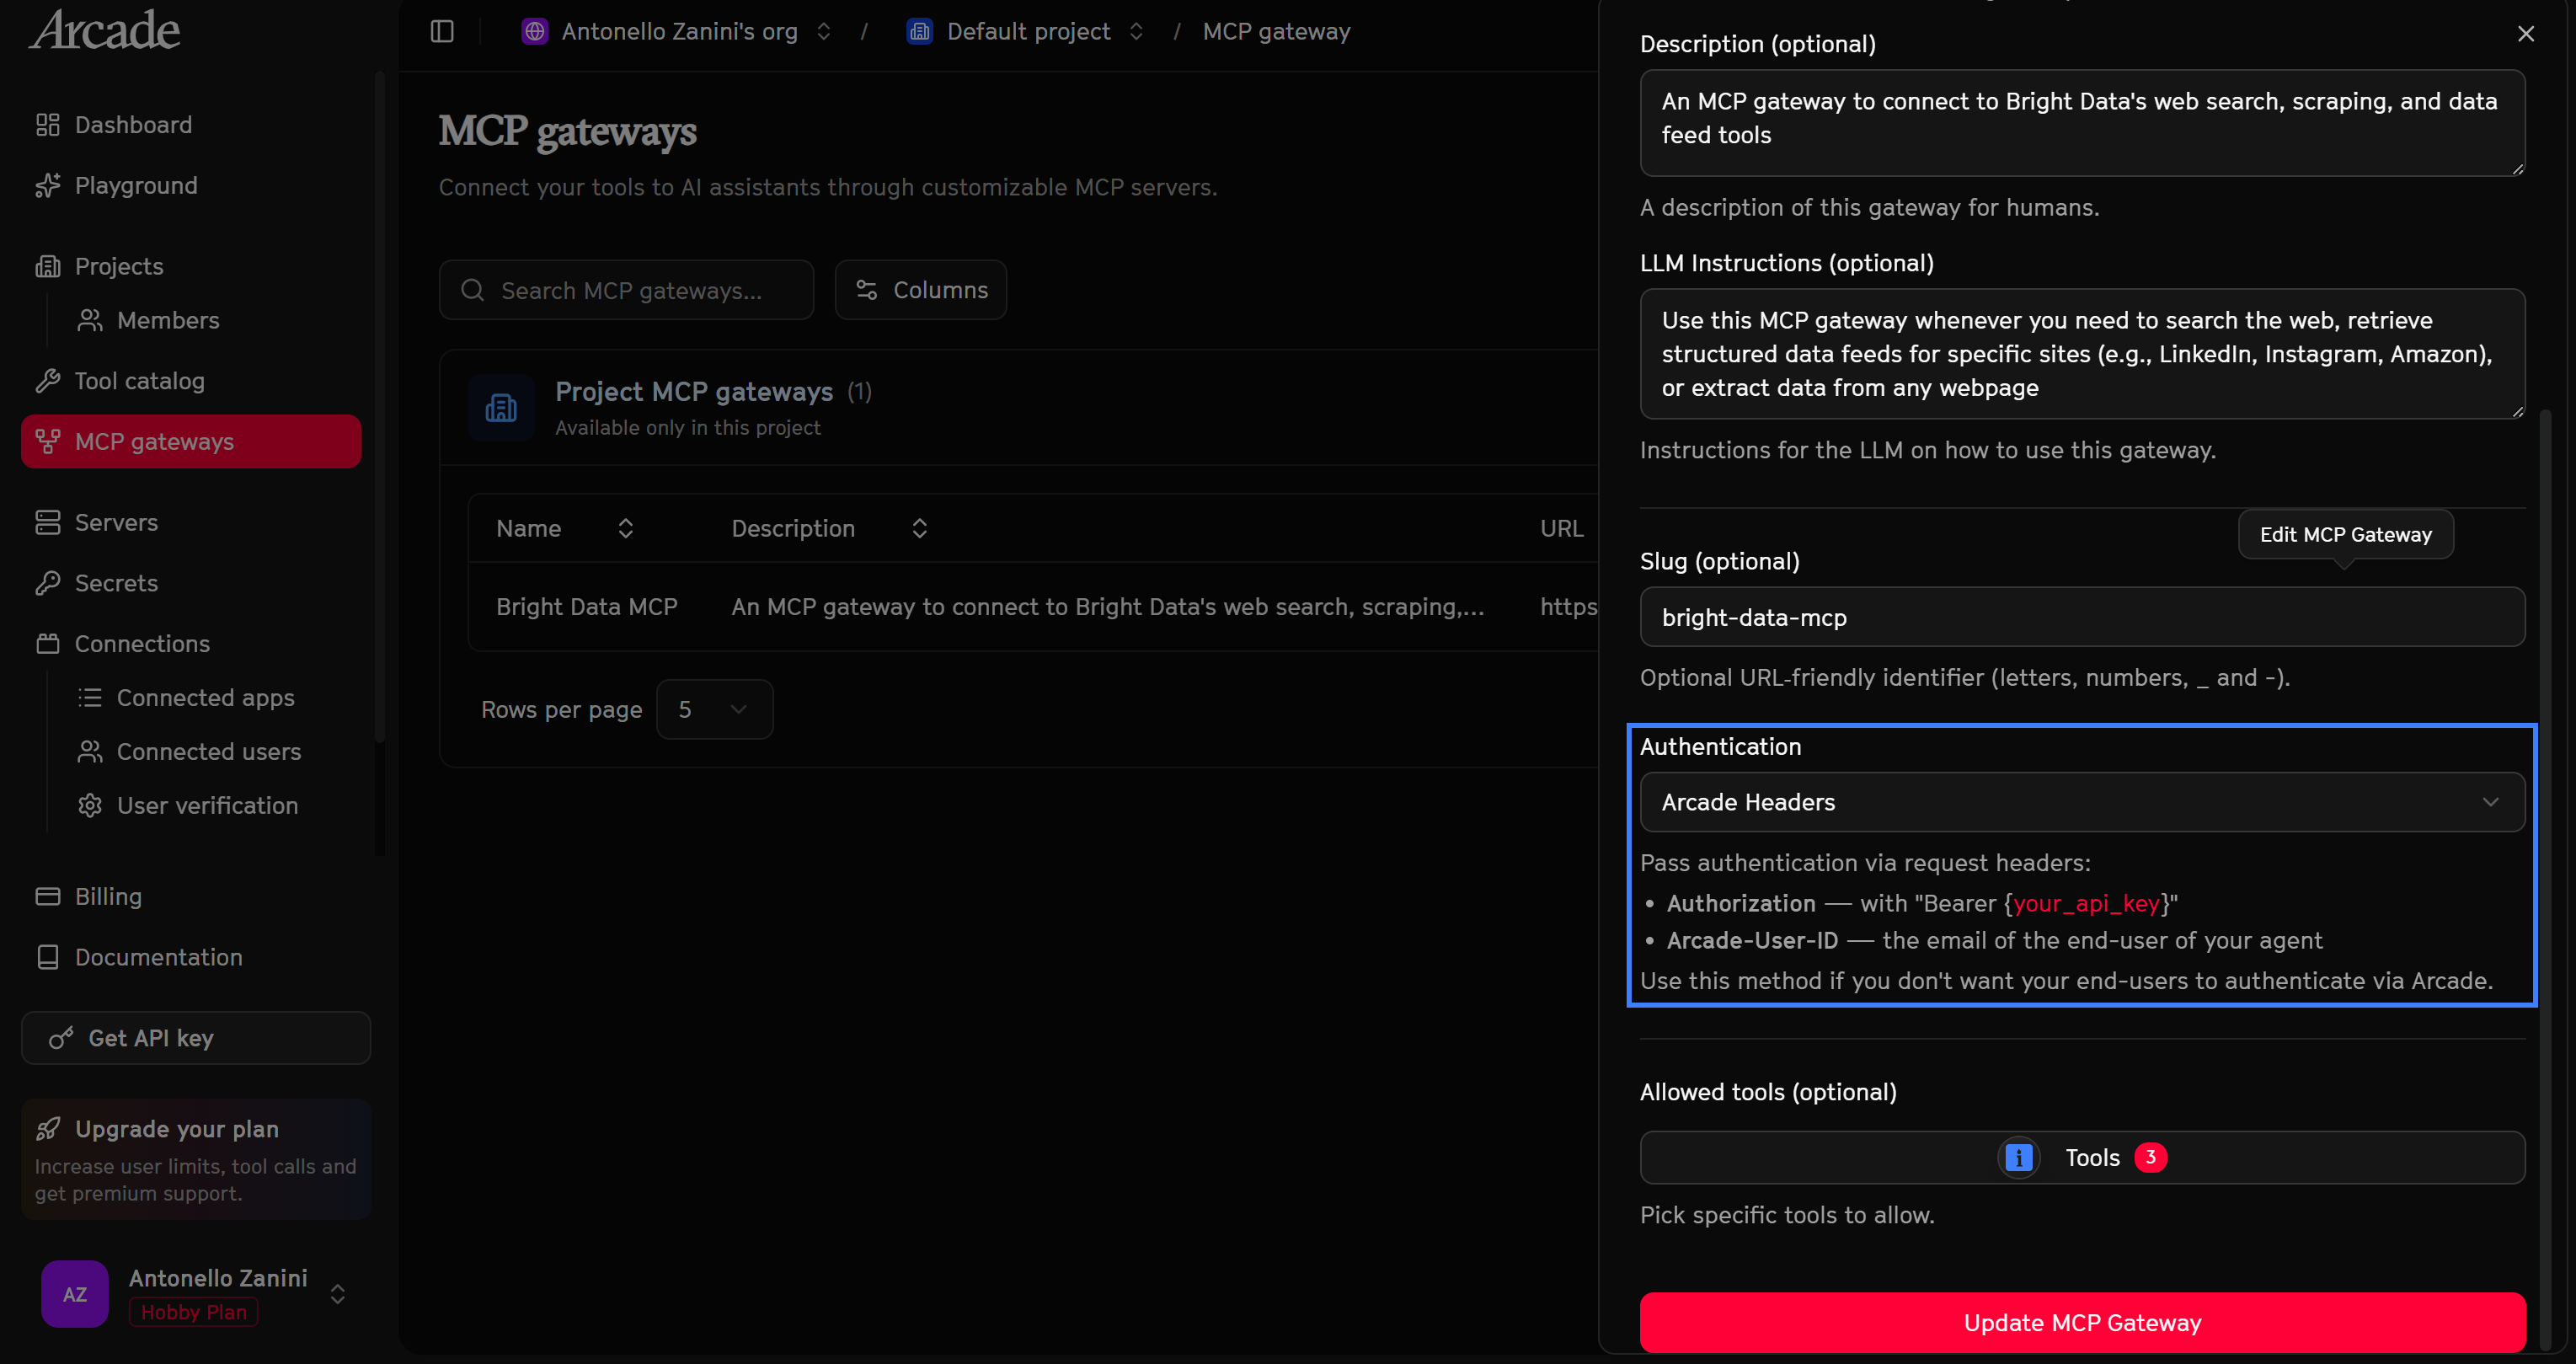
Finally, click the “Update MCP Gateway” button to complete the update.
Cool! Your Arcade Bright Data MCP will now be exposed using header-based authentication, making it ideal for integration with Claude Code.
Step #5: Generate an API Key
As mentioned in the “Authentication” field of the MCP Gateway update form seen earlier, Arcade Headers authentication requires you to set the following headers:
Authorization: Your Arcade API key via a bearer token.Arcade-User-ID: Your Arcade subscription email.
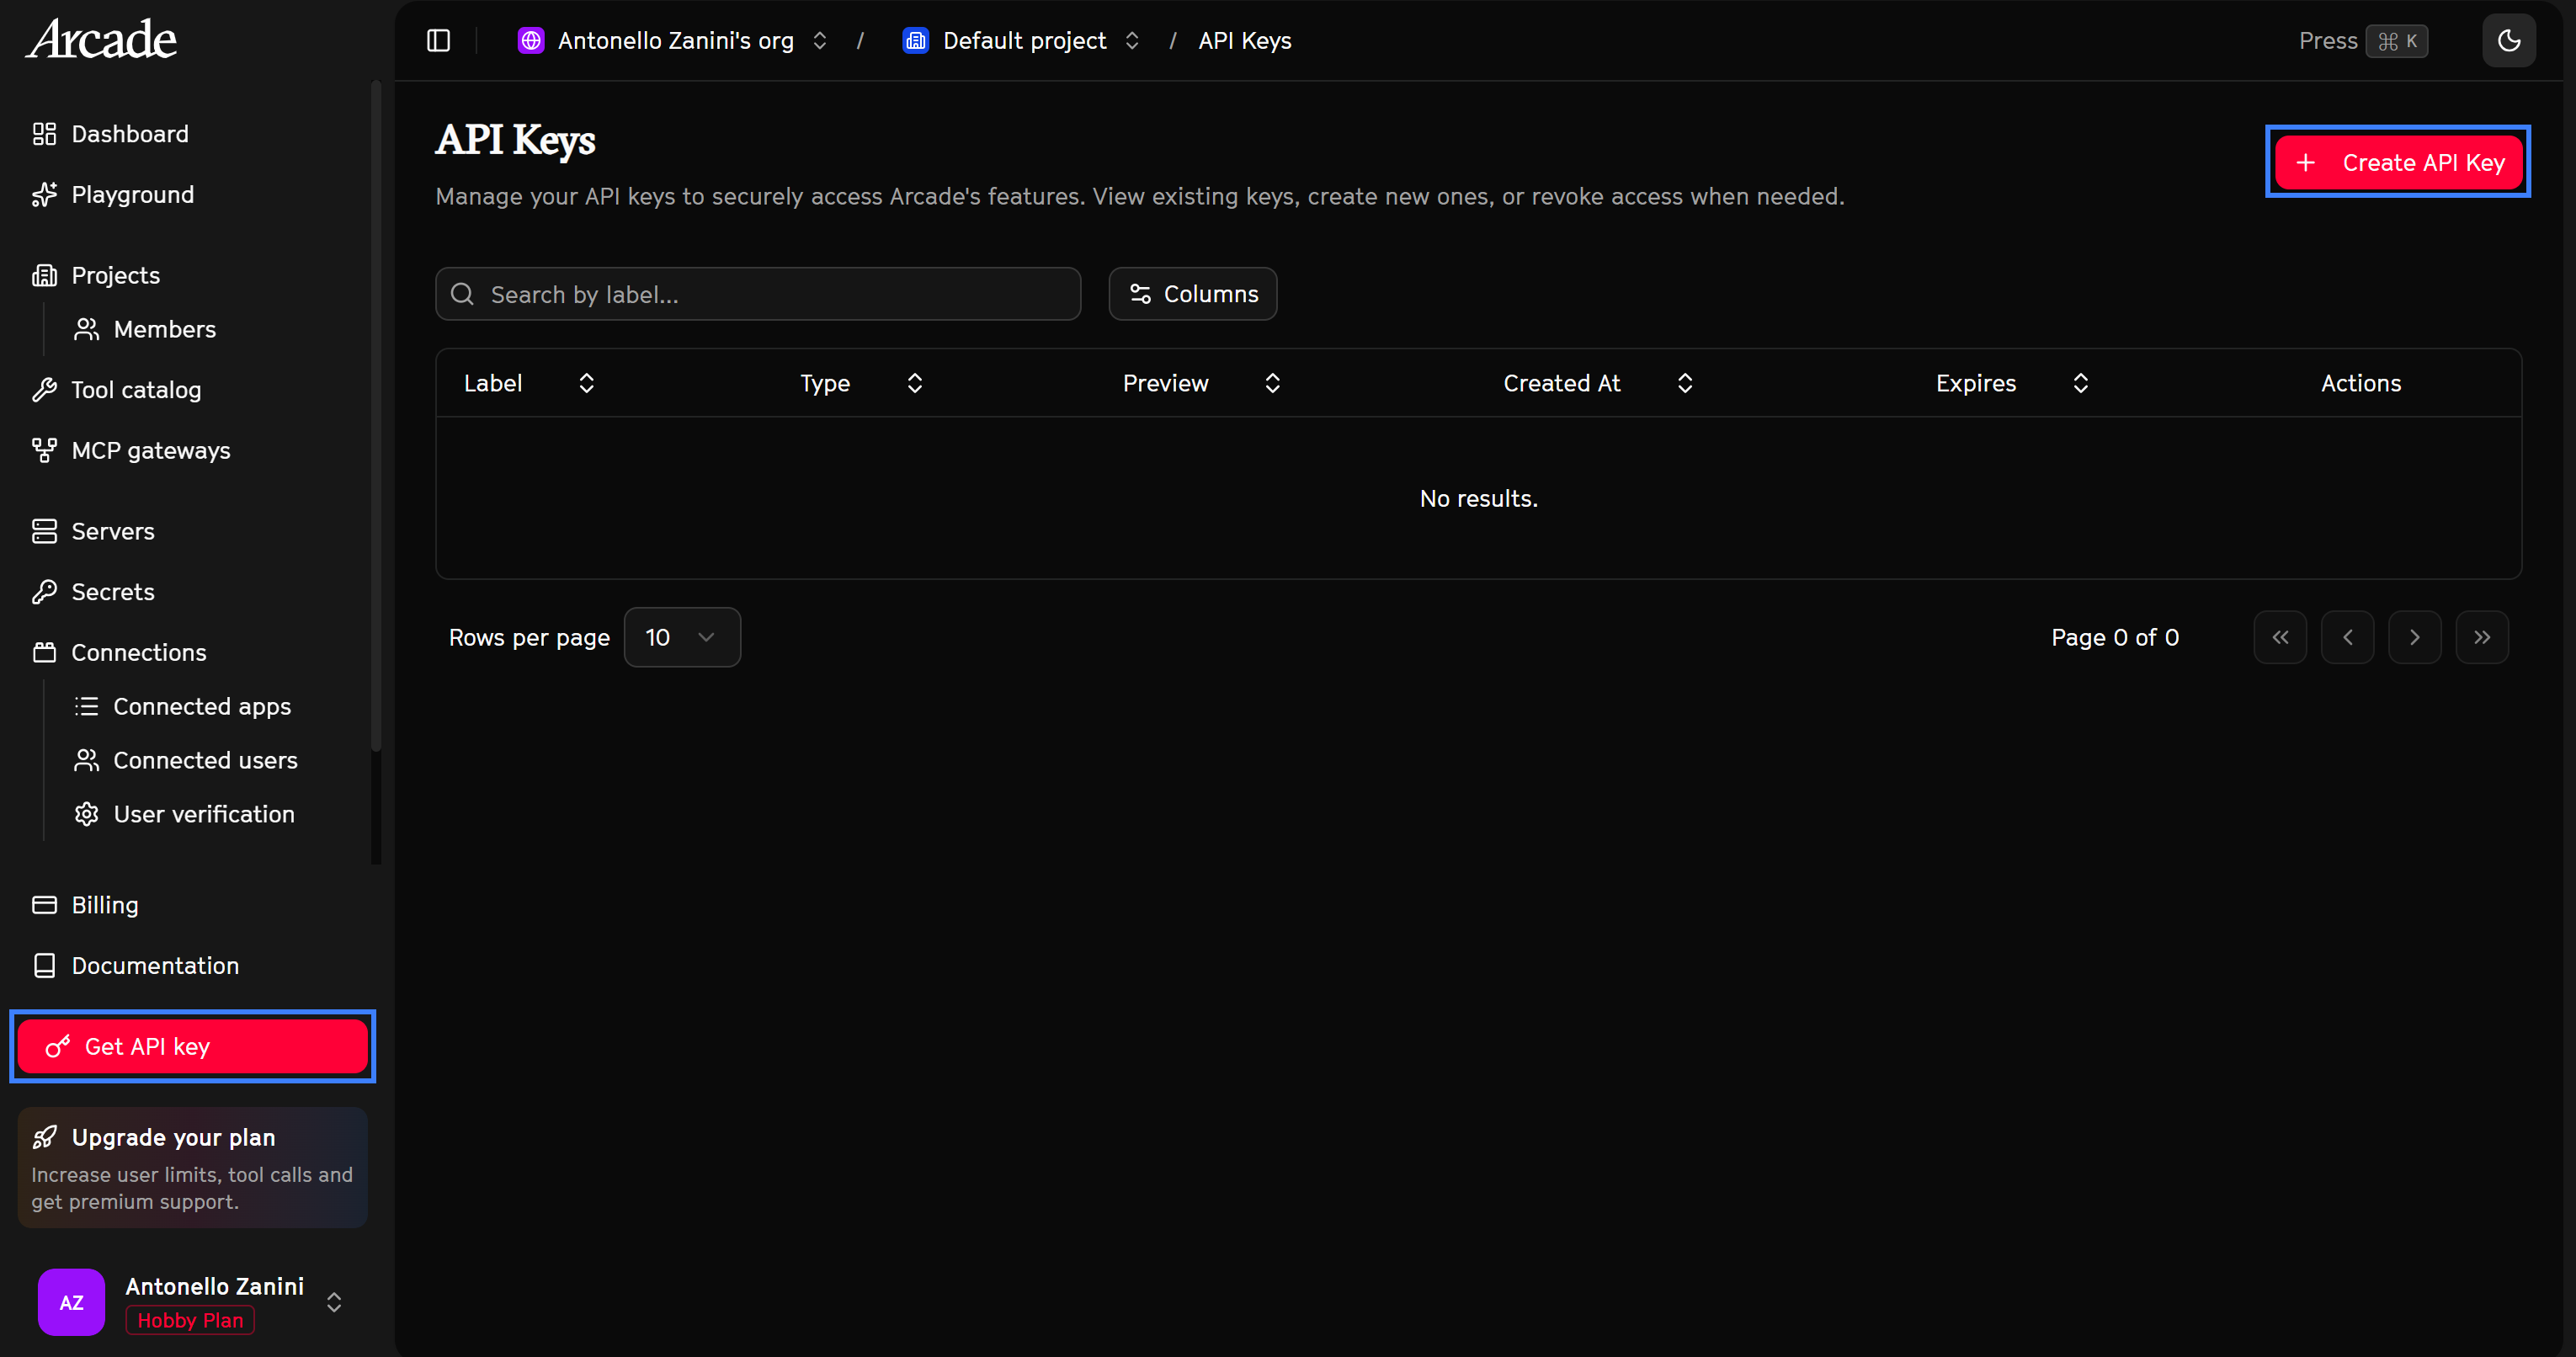
You already have your Arcade subscription email, but you may not yet have an Arcade API key. To create one, go to the “Get API key” page and click the “Create API Key” button:
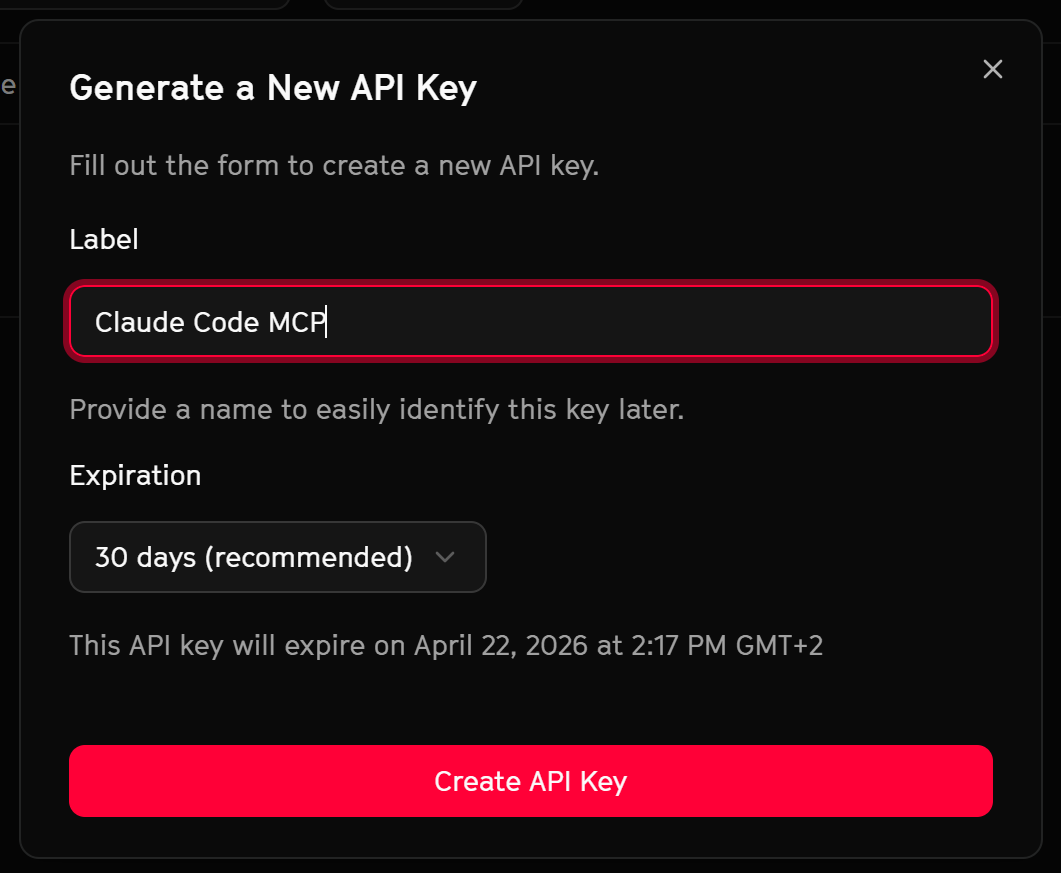
Give your API key a name (e.g., “Claude Code MCP”) and click “Create API Key”:
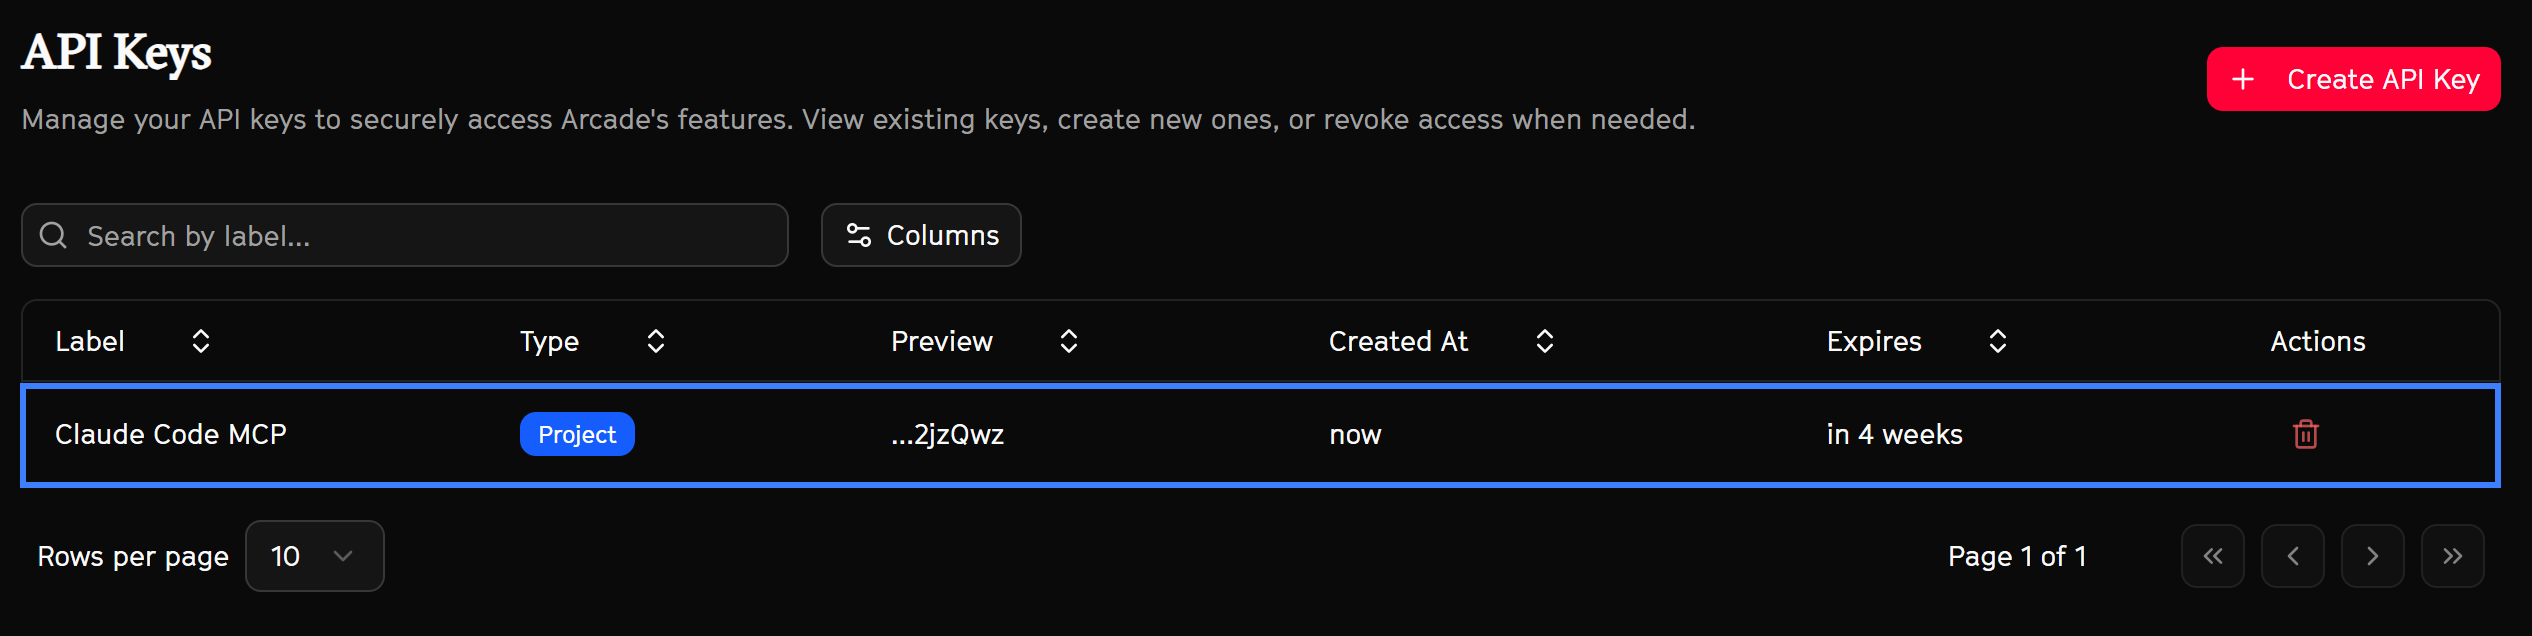
You will be shown the API key token. Store it in a safe place, as you will need it shortly. The API key will also appear in the “API Keys” table:
Excellent! You now have everything you need to connect the Arcade Bright Data MCP Gateway to Claude Code.
Step #6: Add the Arcade Bright Data MCP
Use the following command to add your MCP gateway:
claude mcp add, transport http arcade "<YOUR_BRIGHT_DATA_MCP_GATEWAY_URL>" --header "Authorization: Bearer <YOUR_ARCADE_API_KEY>" --header "Arcade-User-ID: <YOUR_ARCADE_SUBSCRIPTION_EMAIL>"Where <YOUR_BRIGHT_DATA_MCP_GATEWAY_URL> is something like https://api.arcade.dev/mcp/<YOUR_MCP_GATEWAY_SLUG> (in this case, https://api.arcade.dev/mcp/bright-data-mcp).
The arcade MCP will be added to your Claude configuration file (~/.claude.json) as below:
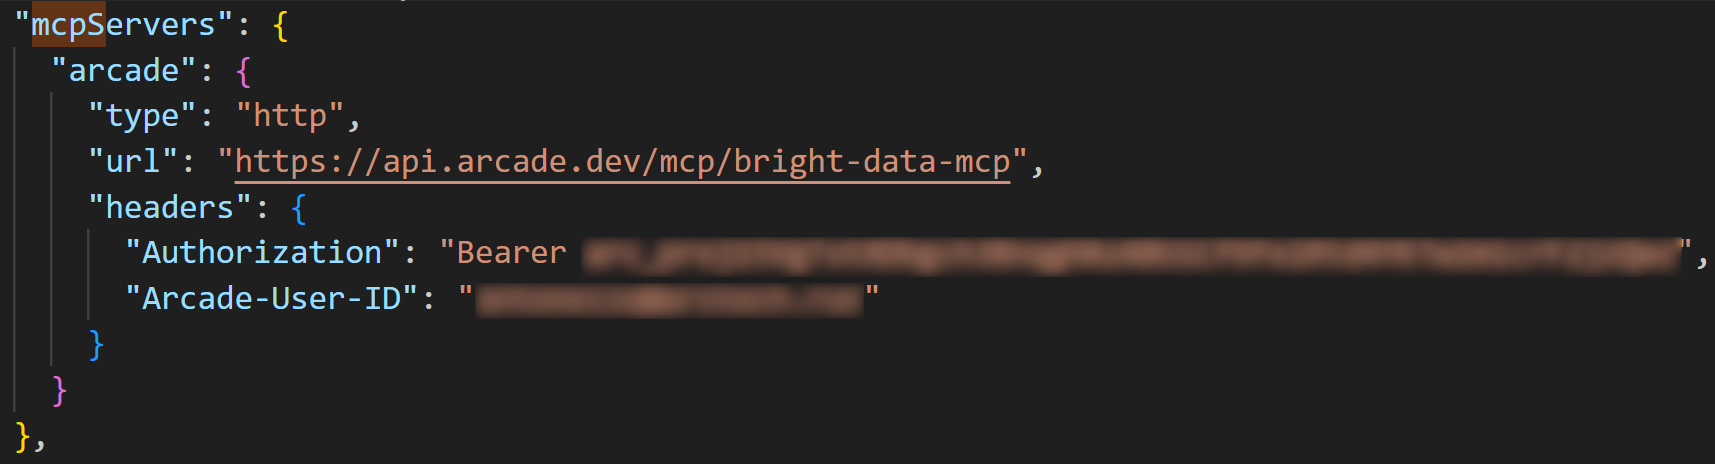
Alternatively, you can manually configure your Claude JSON file as follows:
"mcpServers": {
  "arcade": {
    "type": "http",
    "url": "https://api.arcade.dev/mcp/<YOUR_BRIGHT_DATA_MCP_GATEWAY_SLUG>",
    "headers": {
      "Authorization": "Bearer <YOUR_ARCADE_API_KEY>",
      "Arcade-User-ID": "[email protected]"
    }
  }
}Note: A similar JSON configuration can be applied to use Arcade via Arcade Headers in many other MCP-compatible tools.
Terrific! The Bright Data tools should now be available in Claude Code thanks to the Arcade MCP integration.
Step #7: Check the Available Tools
To verify that Claude Code is connected to the Arcade Bright Data MCP gateway, run:
claude mcp get arcadeThis checks the status of the arcade MCP you added. The result should be:

Now, list the available tools. Start by launching Claude Code:
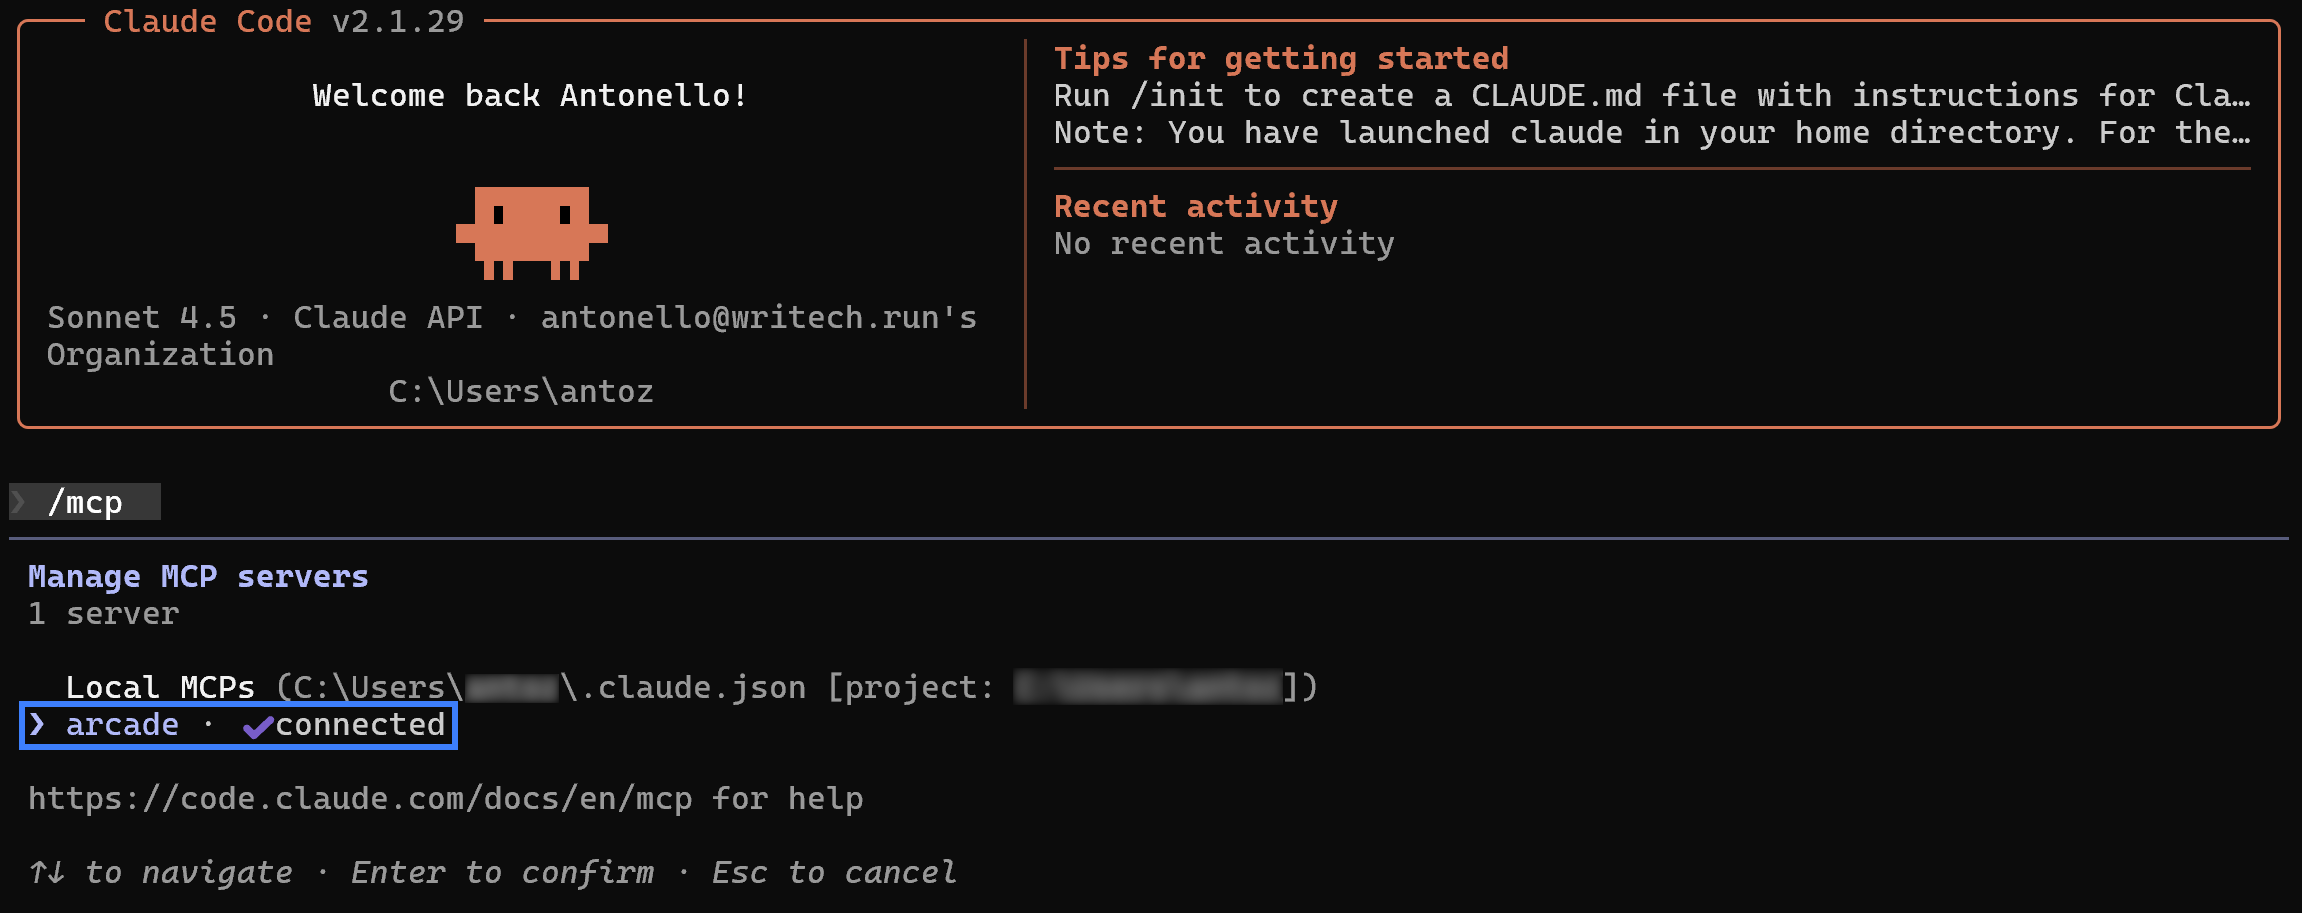
claudeThen, execute the following command:
/mcpSelect the arcade MCP server:
And choose the “View tools” option:
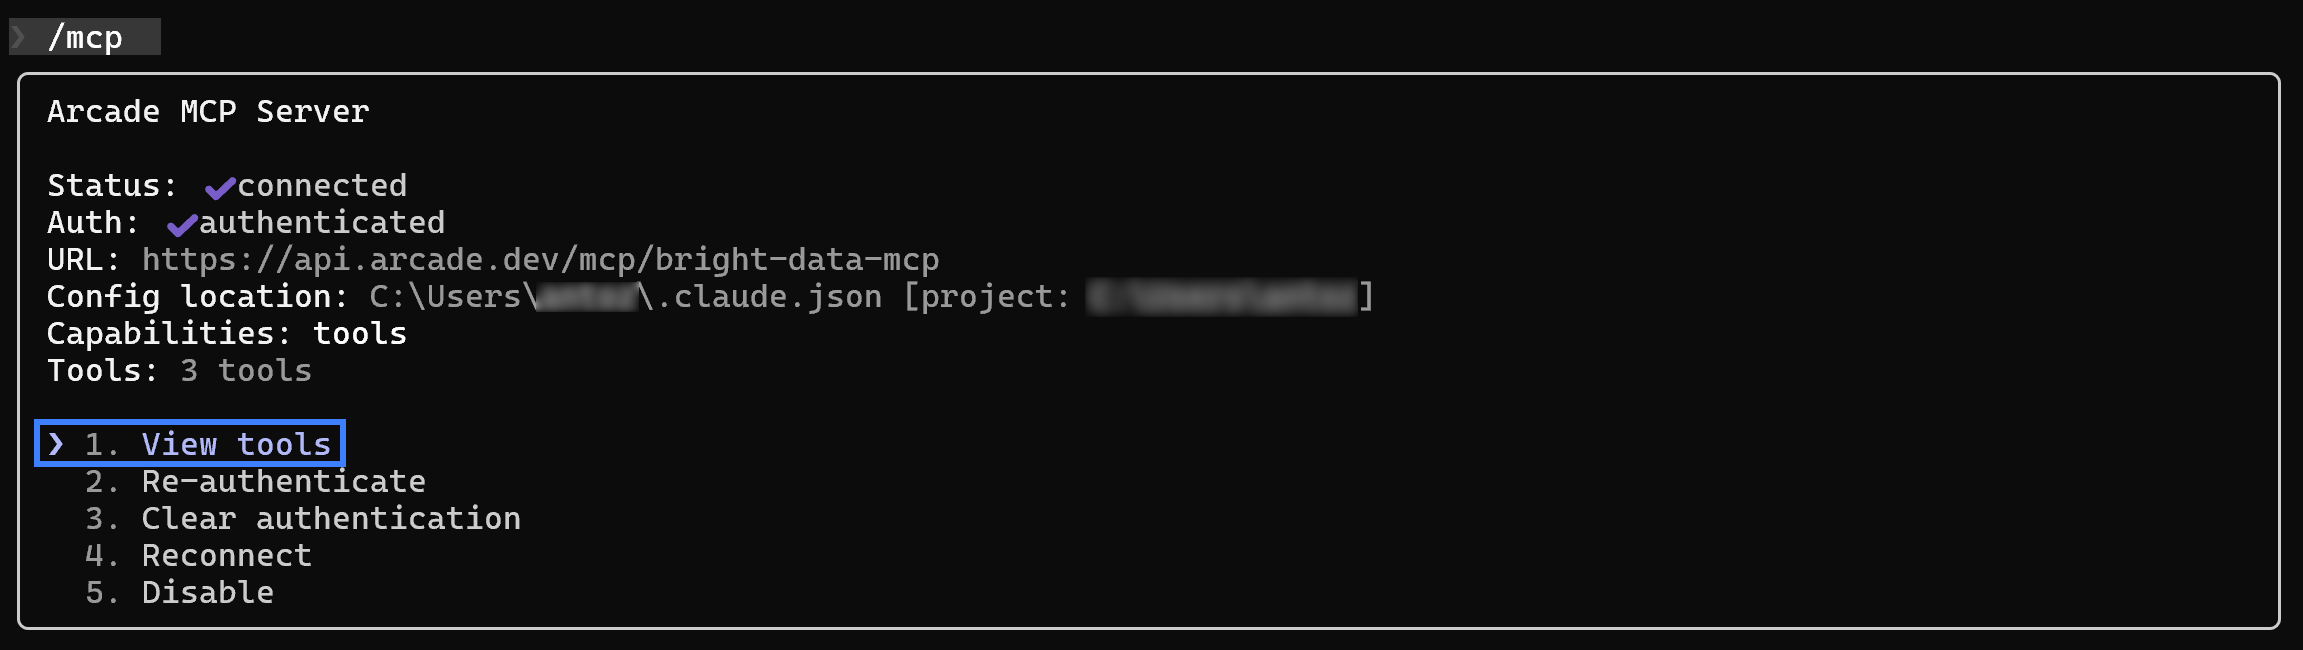
You should now see the three Bright Data tools available in Arcade:

Well done! Your local coding assistant now has access to Bright Data’s web retrieval and search tools via Arcade.
Test the Bright Data + Arcade MCP Integration
To verify that the Bright Data + Arcade integration via MCP is working, launch a prompt like this:
Who won the 2026 Oscars? Search Google using 1,2 reliable sources to answer the question, then access their page content and return the list of winners for each category.That is something a regular LLM cannot handle on its own. That is because it requires live web search and scraping to answer a recent query that the model has not been trained on.
Claude will first ask your permission to use the Brightdata.SearchEngine tool:
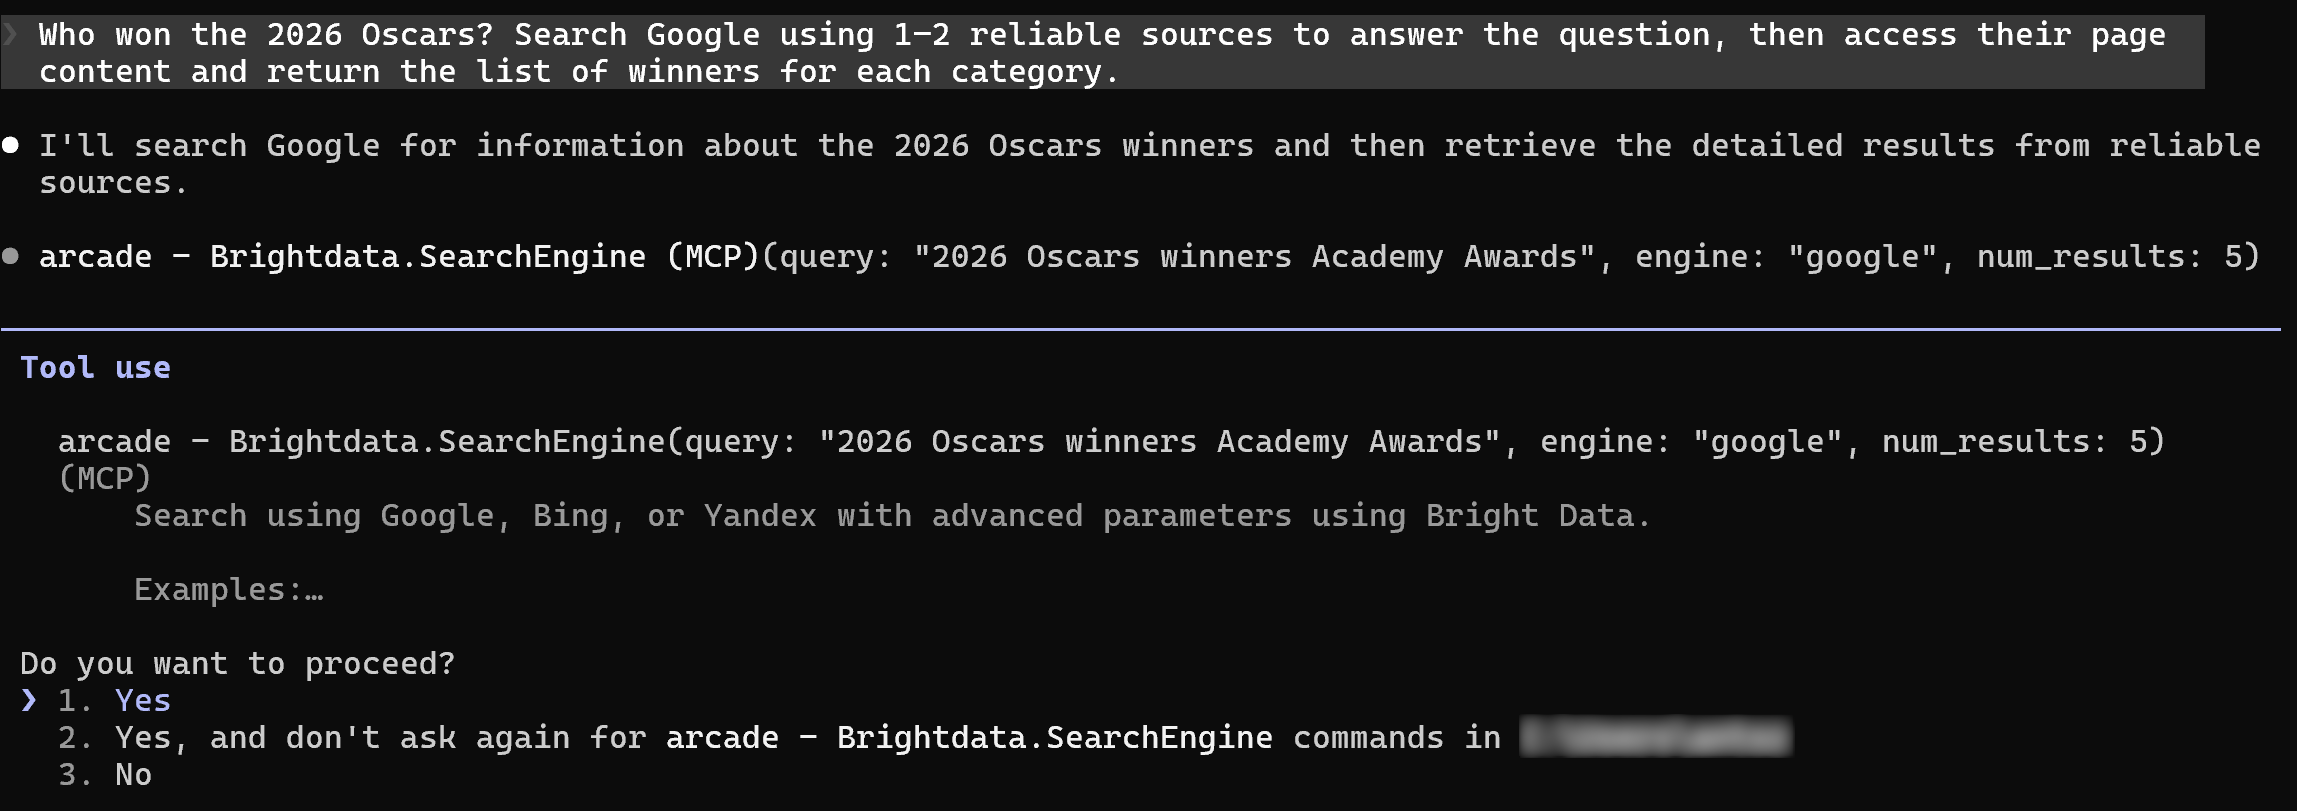
This tool calls the Bright Data SERP API to search for relevant results (in this case, “2026 Oscars winners Academy Awards”) on Google (or the specified search engine).
Next, Claude will select the most relevant sources and ask you to scrape them via the Brightdata.ScrapeAsMarkdown tool:
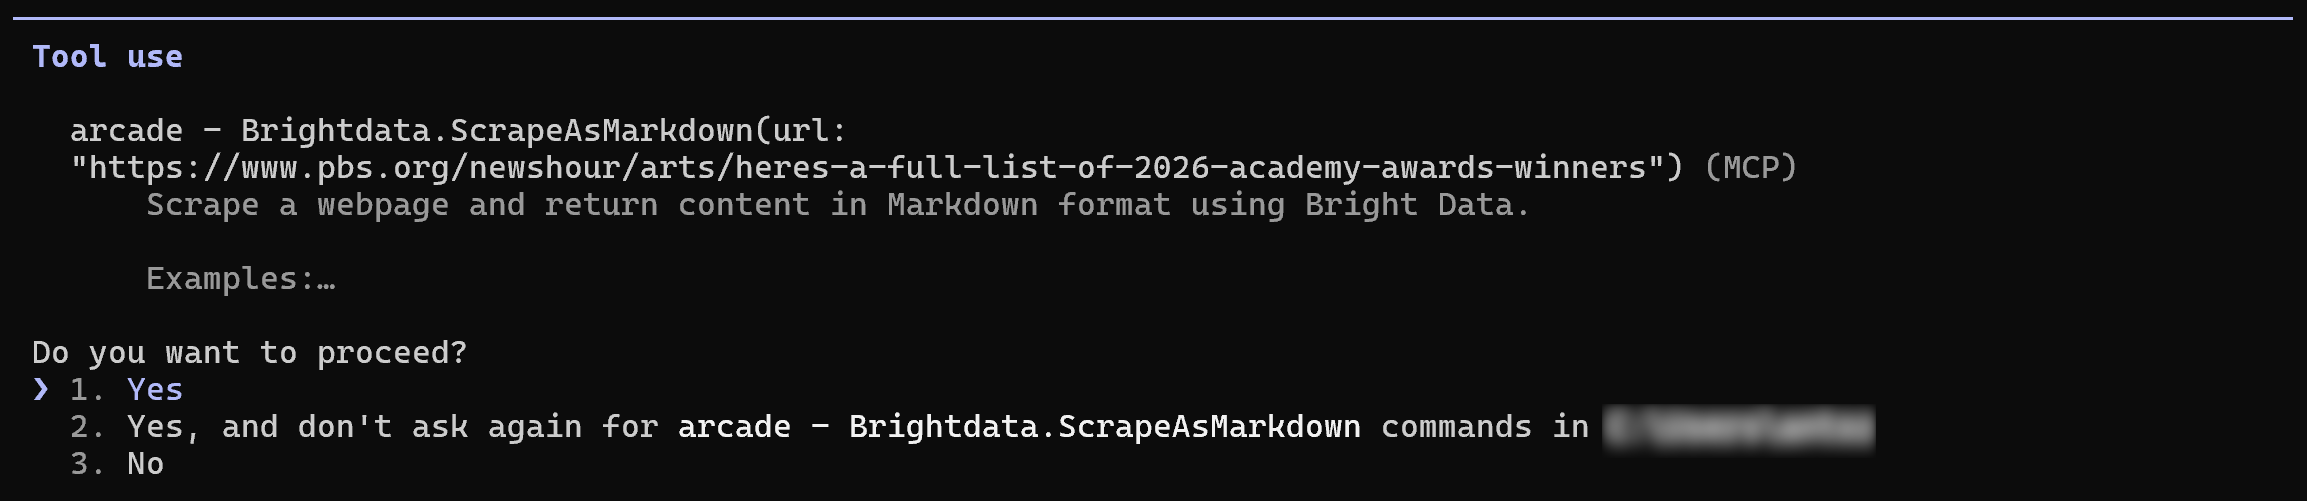
Once you allow the tool to execute on the selected pages, the result will be:

This perfectly matches the list of Oscar winners for 2026.
Well done! The AI agent successfully completed the task thanks to the web exploration capabilities provided by Bright Data via Arcade.
Conclusion
In this blog post, you explored how Arcade addresses the authentication and authorization challenges typical of AI agent third-party integrations. By abstracting the tool integration layer and reinforcing it with OAuth and a robust permissions framework, Arcade helps you keep your AI agents secure.
Among the hundreds of pre-built MCP tools available on the platform, Bright Data stands out by exposing access to some of the most relevant AI-ready data tools:
- Web Unlocker API for web scraping with Markdown output.
- Web Scraping APIs for direct data feeds from over 50 domains.
- SERP API for web search on major search engines.
Here, you saw how to connect Bright Data in Arcade and expose it via an MCP gateway to AI agents in real-world MCP-compatible solutions. The result is a more powerful and secure AI agent, capable of accessing live web data instead of guessing or returning outdated responses.
Create a Bright Data account today and discover your AI-ready web data solutions!



Technical Writer
 5.5 years experience
Antonello Zanini is a technical writer, editor, and software engineer with 5M+ views. Expert in technical content strategy, web development, and project management.