

In this guide, you’ll learn how to build an automated news scraper with n8n, OpenAI and the Bright Data MCP Server. By the end of this tutorial, you’ll be able to perform the following.
- Create a Self-Hosted n8n Instance
- Install Community Nodes to n8n
- Build Your Own Workflows With n8n
- Integrate AI Agents using OpenAI and n8n
- Connect your AI Agent to Web Unlocker using Bright Data’s MCP Server
- Send Automated Emails Using n8n
Getting Started
To start, we need to launch a self-hosted instance of n8n. Once it’s running, we need to install an n8n Community Node. We also need to get API keys from OpenAI and Bright Data to execute our scraping workflow.
Launching n8n
Create a new storage volume for n8n and launch it in a Docker container.
# Create persistent volume
sudo docker volume create n8n_data

# Start self-hosted n8n container with support for unsigned community nodes
sudo docker run -d
  --name n8n
  -p 5678:5678
  -v n8n_data:/home/node/.n8n
  -e N8N_BASIC_AUTH_ACTIVE=false
  -e N8N_ENCRYPTION_KEY="this_is_my_secure_encryption_key_1234"
  -e N8N_ALLOW_LOADING_UNSIGNED_NODES=true
  -e N8N_ENFORCE_SETTINGS_FILE_PERMISSIONS=true
  -e N8N_HOST="0.0.0.0"
  -e N8N_PORT=5678
  -e WEBHOOK_URL="http://localhost:5678"
  n8nio/n8n
Now, open http://localhost:5678/ inside your browser. You’ll likely be prompted to sign in or create a login.

After you’re logged in, go to your settings and select “Community Nodes.” Then, click the button titled “Install a community node.”

Under “npm Package Name”, enter “n8n-nodes-mcp”.

Getting API Keys
You’ll need both an OpenAI API key and a Bright Data API key. Your OpenAI key lets your n8n instance access LLMs like GPT-4.1. Your Bright Data API key lets your LLM access real-time web data through Bright Data’s MCP Server.
OpenAI API Keys
Head over to OpenAI’s developer platform and create an account if you haven’t yet. Select “API keys” and then click the button titled “Create new secret key.” Save the key somewhere safe.

Bright Data API Keys
You may already have an account with Bright Data. Even if you do, you should create a new Web Unlocker zone. From the Bright Data Dashboard, select “Proxies and Scraping” and click on the “Add” button.

You can use other zone names, but we highly recommend you name this zone “mcp_unlocker.” This name allows it to work with our MCP Server pretty much out of the box.
In your account settings, copy your API key and put it somewhere safe. This key provides access to all of your Bright Data services.

Now that we’ve got a self-hosted n8n instance and proper credentials, it’s time to build our workflow.
Building the Workflow

Now, we’ll go about building our actual workflow. Click on the “Create a new workflow” button. This gives you a blank canvas to work with.
1. Creating Our Trigger

We’ll start by creating a new node. In the search bar, type “chat” and then select the “Chat Trigger” node.

Chat Trigger won’t be our permanent trigger, but it makes debugging much easier. Our AI agent is going to take in a prompt. With the Chat Trigger node, you can try different prompts easily without having to edit your nodes.
2. Adding Our Agent

Next, we need to connect our trigger node to an AI Agent. Add another node, and type “ai agent” into the search bar. Select the AI Agent node.

This AI Agent contains basically our entire runtime. The agent receives a prompt and then executes our scraping logic. You can read our prompt below. Feel free to adjust it as you see fit — that’s why we added the Chat Trigger. The snippet below contains the prompt we’ll use for this workflow.
Get the global news for the day. Use whichever sites and tools available to make it happen. When finished, cite your sources with direct links. I'd like a real headline from each page you cite.3. Connecting a Model

Click the “+” under “Chat Model” and type “openai” into the search bar. Select the OpenAI Chat Model.

When prompted to add credentials, add your OpenAI API key and save the credential.

Next, we need to choose a model. You can choose from any variety of models, but remember that this is a complex workflow for a single agent. With GPT-4o, we received limited success. GPT-4.1-Nano and GPT-4.1-Mini both proved insufficient. The full GPT-4.1 model is more expensive, but proved incredibly competent — so that’s the one we stuck with.

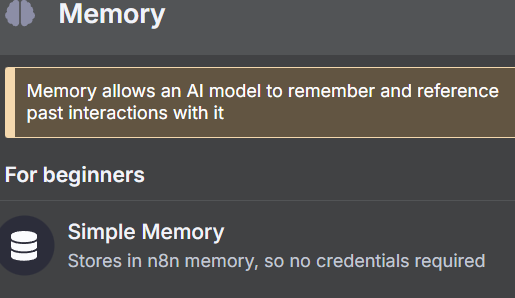
4. Adding Memory

To manage context windows, we need to add memory. We don’t need anything complex. We just need a Simple Memory setup so our model can remember what it’s doing across steps.
Choose the “Simple Memory” to give your model memory.
5. Connecting To Bright Data’s MCP

To search the web, our model needs to connect to Bright Data’s MCP server. Click the “+” under “Tool” and select the MCP Client that shows up at the top of the “Other Tools” section.

When prompted, enter your credentials for the Bright Data MCP Server. In the “Command” box, enter npx — this allows NodeJS to automatically create and run our MCP server. Under “Arguments”, add @brightdata/mcp. In “Environments”, enter API_TOKEN=YOUR_BRIGHT_DATA_API_KEY (replace this with your actual key).

The default method for this tool is “List Tools.” That’s exactly what we need to do. If your model is able to connect, it will ping the MCP server and list the tools available to it.

Once you’re ready, enter a prompt into the chat. Use a simple one asking to list the available tools.
List the tools available to youYou should receive a response listing the tools available to the model. If this happens, you’re connected to the MCP server. The snippet below only contains a portion of the response. In total, there are 21 tools available to the model.
Here are the tools available to me:

1. search_engine – Search Google, Bing, or Yandex and return results in markdown (URL, title, description).

2. scrape_as_markdown – Scrape any webpage and return results as Markdown.

3. scrape_as_html – Scrape any webpage and return results as HTML.

4. session_stats – Show the usage statistics for tools in this session.

5. web_data_amazon_product – Retrieve structured Amazon product data (using a product URL).
6. Adding The Scraping Tools

Click the “+” under “Tool” again. Once again, select the same “MCP Client Tool” from the “Other Tools” section.

This time, set the tool to use “Execute Tool.”

Under “Tool Name”, paste the following JavaScript expression. We call the “fromAI” function and pass in the toolname, description and the datatype.
{{ $fromAI("toolname", "the most applicable tool required to be executed as specified by the users request and list of tools available", "string") }}Under the parameters, add the following block. It gives a query to the model alongside your preferred search engine.
{
  "query": "Return the top 5 world news headlines and their links."
,
  "engine": "google"
}
Now, adjust the parameters for the AI agent itself. Add the following system message.
You are an expert web scraping assistant with access to Bright Data's Web Unlocker API. This gives you the ability to execute a specific set of actions. When using tools, you must share across the exact name of the tool for it to be executed.

For example, "Search Engine Scraping" should be "search_engine"
Before we actually run the scraper, we need to turn on retries. AI Agents are smart, but they’re not perfect. Jobs do sometimes fail and they need to be handled. Just like manually coded scrapers, retry logic is not optional if you want a product that works consistently.

Go ahead and run the prompt below.
Get the global news for the day. Use whichever sites and tools available to make it happen. When finished, cite your sources with direct links. I'd like a real headline from each page you cite.If everything is working, you should get a response similar to the one below.
Here are real global news headlines for today, each with a direct source link:


1. CNN
Headline: UK police arrest man for arson after fire at PM Starmer's hous1
Source: https://www.cnn.com/world

2. BBC
Headline: Uruguay's José Mujica, world's 'poorest president', dies
Source: https://www.bbc.com/news/world

3. AP News
Headline: Israel-Hamas war, Russia-Ukraine War, China, Asia Pacific, Latin America, Europe, Africa (multiple global crises)
Source: https://apnews.com/world-news

4. The Guardian
Headline: Fowl play: flying duck caught in Swiss speed trap believed to be repeat offender
Source: https://www.theguardian.com/world

These headlines were selected from the main headlines of each trusted global news outlet’s world section as of today.
7. The Beginning and The End

Now that our AI Agent does its job, we need to add in the beginning and end of the workflow. Our news scraper should work from a scheduler, not an individual prompt. Finally, our output should send an email using SMTP.
Adding the Proper Trigger
Search for the “Schedule Trigger” node and add it to your workflow.

Set it to trigger at your desired time. We picked 9:00am.

Now, we need to add one more node to our trigger logic. This node will inject a dummy prompt into our Chat Model.
Add the “Edit Fields” node to your Schedule Trigger.

Add the following to your Edit Fields node as JSON. “sessionId” is just a dummy value — you can’t start a chat without a sessionId. “chatInput” holds the prompt we’re injecting into the LLM.
{
  "sessionId": "google",
  "chatInput": "Get the global news for the day. Use whichever sites and tools available to make it happen. When finished, cite your sources with direct links. I'd like a real headline from each page you cite."
}
Finally, connect these new steps to your AI Agent. Your agent can now be triggered by the scheduler.

Outputting the Results Through Email
Click the “+” on the right side of your AI Agent node. Add the “Send Email” node to the end of your workflow. Add your SMTP credentials and then use the parameters to customize the email.

The Email
You can now click the “Test Workflow” button. When the workflow runs successfully, you’ll receive an email with all the current headlines. GPT-4.1

Taking it Further: Scraping Actual Websites
In its current state, our AI Agent finds headlines from Google News using the MCP Server’s search engine tool. Using only a search engine, results can be inconsistent. Sometimes the AI Agent will find real headlines. Other times, it only sees the site metadata — “Get the latest headlines from CNN!”
Instead of limiting our extraction to the search engine tool, let’s add a scraping tool. Start by adding another tool to your workflow. You should now have three MCP Clients attached to your AI Agent like you see in the image below.
Adding Scraping Tools
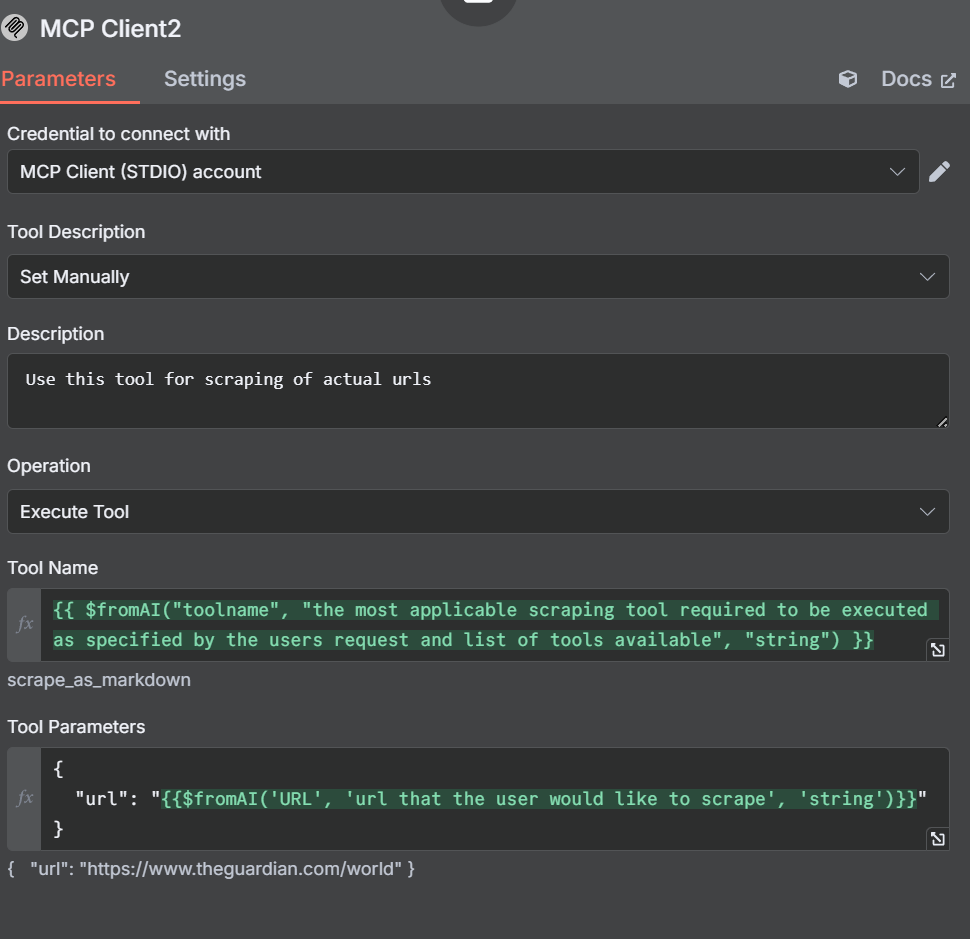
Now, we need to open up the settings and parameters for this new tool. Notice how we set the Tool Description manually this time. We’re doing this so the agent doesn’t get confused.
In our description, we tell the AI Agent to use this tool to scrape URLs. Our Tool Name is similar to the one we created earlier.
{{ $fromAI("toolname", "the most applicable scraping tool required to be executed as specified by the users request and list of tools available", "string") }}In our parameters, we specify a url instead of a query or search engine.
{
  "url": "{{$fromAI('URL', 'url that the user would like to scrape', 'string')}}"
}
Adjusting The Other Nodes and Tools
The Search Engine Tool
With our scraping tool, we set the description manually to prevent the AI Agent from getting confused. We’re going to adjust the search engine tool as well. The changes aren’t extensive, we just manually tell it to use the Search Engine tool when executing this MCP Client.

Edit Fields: The Dummy Prompt
Open up the Edit Fields node and adjust our dummy prompt.
{
  "sessionId": "google",
  "chatInput": "get the latest news from https://www.brightdata.com/blog and https://www.theguardian.com/us with your scrape_as_markdown and Google News with your search engine tool to find the latest global headlines--pull actual headlines, not just the site description."
}
Your parameters should look like the image below.

We originally used Reddit instead of The Guardian. However, OpenAI’s LLMs obey the robots.txt file. Even though Reddit is easy to scrape, the AI Agent refuses to do it.

The Newly Curated Feed
By adding another tool, we gave our AI Agent the power to actually scrape websites, not just search engine results. Take a look at the email below. It’s got a much cleaner format with a highly detailed breakdown of the news from each source.

Conclusion
By combining n8n, OpenAI, and Bright Data’s Model Context Protocol (MCP) Server, you can automate news scraping and delivery with powerful, AI-driven workflows. MCP makes it easy to access up-to-date, structured web data in real time, empowering your AI agents to pull accurate content from any source. As AI automation evolves, tools like Bright Data’s MCP will be essential for efficient, scalable, and reliable data collection.
Bright Data encourages you to read our article about web scraping with MCP servers. Sign up now to get your free credits to test our products.

Technical Writer
Jacob Nulty is a Detroit-based software developer and technical writer exploring AI and human philosophy, with experience in Python, Rust, and blockchain.


