
Antik Proxy Integration
This guide may be outdated. For an up-to-date guide please see our documentation.
Steps to integrate Antik with Bright Data proxies

Sign up to Bright Data:
After signing up, in the Bright Data dashboard, navigate to the “Proxy & Scraping Infrastructure” section and Add a new designated Zone for your proxy usage.

Select proxy type:
In this example, we will show how to set up ISP proxies.

Name proxy solution:
Set the desired IP type, shared IPs, dedicated IPs, or premium IPs.

Select IP count:
Fill in the number of IPs you need.

Country & city selection:
Choose your desired country and city for the IP location.

Choose domain:
Use specific domains or use ‘All domains’ for one IP to target websites using the same IP.

Add zone:
Click the “Add” button to create the Zone.

Access parameters:
Click on the name of your Zone, navigate to the “Access Parameters” tab, and note down the proxy credentials:
- host
- port
- username
- password

Log-in to Antik:
Go to the ‘Proxy’ tab and click ‘Create’ – you will be redirected to Proxy list creating menu.

Select the proxy download type by Text:
Go to your proxy zone’s Access Parameters and extract the user name and password then pase it into the Text box.
The required format :
http://brd-customer-CUSTOMERID-zone-ZONENAME:[email protected]:33335
After that, your proxies will appear in the text field. You can check them for operability (Red Box).

Click on Create:
After making sure that the proxy is working properly you can click on create.

Next step:
And just for clarity this should be the next step. In order to quickly find the required proxy in the list, you can specify a proxy name.
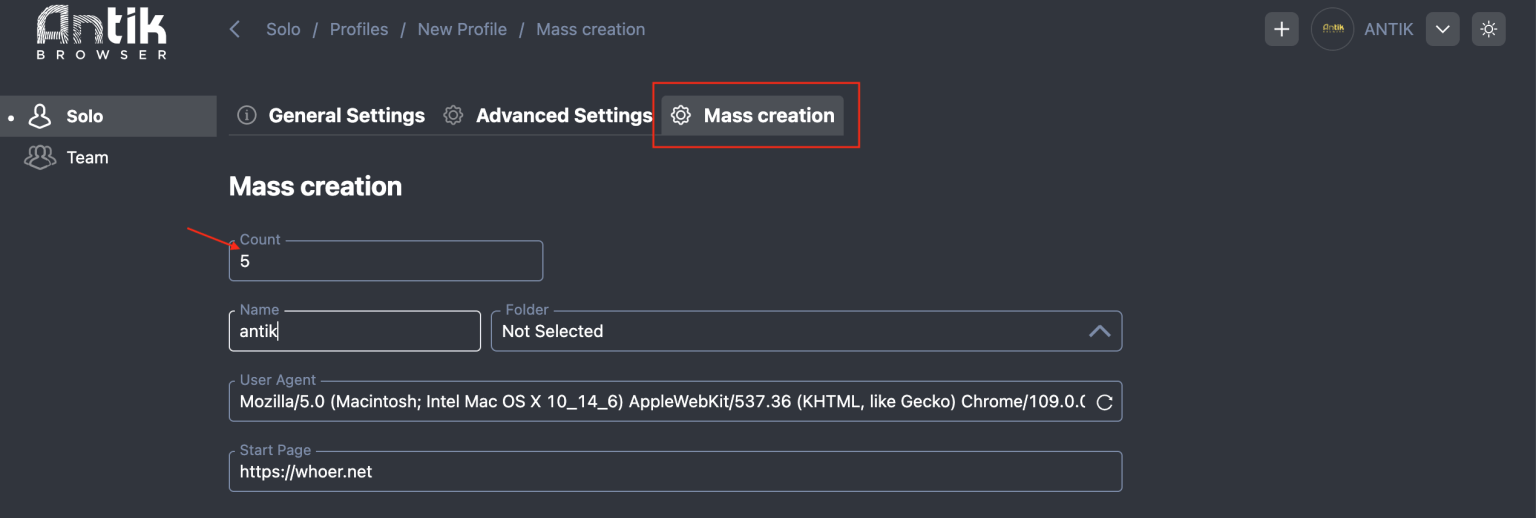
Bulk profile creation
Go to the ‘Mass Creation’ tab and specify the required number of profiles, enter a name mask.

Drag file:
In the proxy field, drag or specify the path to the previously downloaded proxy excel file and click ‘Create’.

That's it!
Congrats – the created profiles with proxies will appear on the profiles page.
⚠️Important note: If you are using Bright Data’s Residential Proxies, Web Unlocker or SERP API, you need to install an SSL certificate to enable end-to-end secure connections to your target website(s). This is a simple process, see https://docs.brightdata.com/general/account/ssl-certificate#installation-of-the-ssl-certificate for instructions.
Get proxies for Antik

Powered by an award-winning proxy infrastructure
Over 400 million residential IPs, best-in-class technology and the ability to target any country, city, ZIP Code, carrier, & ASN make our premium proxy services a top choice for developers.
A proxy for every development path
Mix-and-match networks, peers, and IPs to optimize your continuous flow of web data.


Proxy Network Pricing


- Unlimited scale
- Unlimited seats
- Premium SLA
- 99.99% Network Uptime
- Free Proxy Manager
- Complete data coverage
- Custom price per GB
- Custom solutions
- Unlimited scale
- Unlimited seats
- Premium SLA
- 99.99% Network Uptime
- Free Proxy Manager
- Complete data coverage
- Custom price per GB
- Custom solutions
- Unlimited scale
- Unlimited seats
- Premium SLA
- 99.99% Network Uptime
- Free Proxy Manager
- Complete data coverage
- Custom price per GB
- Custom solutions
- Unlimited scale
- Unlimited seats
- Premium SLA
- 99.99% Network Uptime
- Free Proxy Manager
- Complete data coverage
- Custom price per GB
- Custom solutions
The category leader in proxies and data collection

650TB of public data collected every day

New feature releases every day

Serving 7/10 of the world’s leading universities
