

curl is a command line tool and library that’s used to transfer data with URLs. In the context of web development, curl allows users to make requests and interact with various internet resources, such as websites and APIs, directly from the command line or through scripts.
curl supports a wide range of protocols, including HTTP, HTTPS, FTP, and FTPS, making it incredibly versatile for tasks like file transfers, data retrieval, and API integration. curl’s ability to handle complex operations and send different types of requests has made it an indispensable tool, enabling seamless communication between applications and remote servers. Its flexibility and ease of use make it a fundamental component in modern web development workflows.
GET requests are a crucial component in web communication that are designed to retrieve information or data from a specified resource on a web server. In this tutorial, you’ll learn how to use curl to make a GET request with PHP.
What Is a GET Request
A GET request is an HTTP method that’s designed to retrieve information or data from a specified resource on a web server. For instance, when you input a URL in your web browser and hit enter, you’re triggering a GET request. The browser makes a GET request to the server and returns a web page that’s displayed in the browser.
The purpose of a GET request is to ask the server for a particular resource, whether it’s an HTML page, an image, a document, or even data from an API. The simplicity of the GET request lies in its method; it’s an idempotent operation, meaning it should not change the state of the server or the resource being requested. A GET request is read-only, and it doesn’t typically involve sending data or making alterations to the server; its primary function is data retrieval.
GET requests also support appending key-value pairs, known as query parameters, to the URL. The query parameters allow you to specify exactly what you want. For instance, when you search for something on a search engine, the query you enter is passed as a series of parameters in a GET request to the search engine’s server. The server processes these parameters, retrieves the relevant search results, and sends them back as a response, which is then displayed in your web browser.
It’s important to note that since GET requests expose data in the URL, they’re not suitable for sending sensitive or confidential information as the parameters are visible to anyone who can view the URL.
Implement a GET Request with curl in PHP
In this section, you’ll learn how to initialize curl sessions, set the URL and other specific options, set specific parameters, send requests to remote resources, and handle responses within your PHP applications.
To follow along, you need to make sure that your PHP version has curl support. Most modern PHP installations come with curl enabled by default, but it’s always a good idea to verify that you have it. You can confirm your PHP version and configuration using the phpinfo() function. To do this, create a folder named php-curl, and in it, create a file named info.php. Paste the following code into the file:
<?php
phpinfo();
In your terminal, execute the command php -S localhost:8000 and navigate to http://localhost:8000/info.php in your browser. On the resulting web page, scroll down to the curl section and confirm that curl support is enabled:

Once you’ve confirmed that curl is enabled and before you initialize a curl session, you need to create a new file named curl.php in your project root folder. Then add the following code to your new curl.php file:
<?php
$ch = curl_init();
This initiates a curl session using the curl_init() function. This function initializes a new curl session and returns a curl handle instance, a crucial tool for further operations with curl, such as setting options and sending requests.
Set the URL and Other Options
Configuring curl options, including setting the URL, is a crucial part of making HTTP requests using curl in PHP. It establishes the foundation of the HTTP request, determining the target server, the type of request being made (GET, POST, etc.), and any necessary authentication or parameters.
PHP provides the curl_setopt() function that makes it easy to set the various options for a curl session handle, and it allows you to customize the behavior of the curl request by specifying different parameters and values.
The curl_setopt() function takes the form curl_setopt(CurlHandle $handle, int $option, mixed $value). $handle is the handle returned by the curl_init() function, $option represents the specific option you want to set, and $value represents the value you want to set to the specified option.
To set the URL, add the following code to the curl.php file:
$url = "https://dummyjson.com/products";
curl_setopt($ch, CURLOPT_URL, $url);
This code uses the curl_setopt() function to set the URL option for the curl session handle. CURLOPT_URL is a constant that signifies the option to set the URL for the curl request.
Now, let’s explore a few other options that you can configure.
To set the curl option for a more controlled HTTP request experience, add the following code to the curl.php file:
// Set a timeout for the cURL request
curl_setopt($ch, CURLOPT_TIMEOUT, 30);
// return the response from the server as a string instead of outputting it directly
curl_setopt($ch, CURLOPT_RETURNTRANSFER, true);
// avoid following redirects, if any
curl_setopt($ch, CURLOPT_FOLLOWLOCATION, false);
In this code, CURLOPT_TIMEOUT is configured with a value of 30, defining a maximum execution time of thirty seconds for the curl request. This ensures that if the request takes longer than thirty seconds, it will timeout, preventing prolonged waiting.
CURLOPT_RETURNTRANSFER is set to true, instructing curl to return the response from the server as a string instead of displaying it directly. This allows you to capture and manipulate the response data within the PHP script.
Lastly, CURLOPT_FOLLOWLOCATION is set to false, indicating that curl should not automatically follow HTTP redirects. By disabling automatic redirection, the script retains control over the request flow, allowing for custom handling of redirect responses.
You can find out more about other options that you can configure in the PHP documentation.
Execute the GET Request
To execute the request and view the response, add the following code to the curl.php file:
// Execute the cURL request and capture the response
$response = curl_exec($ch);
// Check for cURL errors
if (curl_errno($ch)) {
   echo 'Curl error: ' . curl_error($ch);
} else {
   // Decode JSON response if it is a JSON string
   $decodedResponse = json_decode($response, true);
   // Check if decoding was successful
   if ($decodedResponse !== null) {
       // Output the JSON response to the UI
       header('Content-Type: application/json');
       echo json_encode($decodedResponse, JSON_PRETTY_PRINT);
   } else {
       // If the response is not valid JSON, echo it as plain text
       echo $response;
   }
}
// Close cURL session
curl_close($ch);
Then navigate to http://localhost:8000/curl.php on your browser, and when the page is loaded, you should get an array of products in JSON format:

Send a GET Request with Parameters
To specify parameters in the URL, add the following code below $url = "https://dummyjson.com/products";:
// Query parameters
$params = [
   'limit' => 2
];

// Construct the complete URL with query parameters
$url .= '?' . http_build_query($params);
In this code, you define "https://dummyjson.com/products" as the base URL. Then you define a query parameter named limit with a value of 2 in an associative array named $params. To incorporate this parameter into the URL, you use the http_build_query($params) function, which converts the associative array into a URL-encoded query string. The resulting query string is concatenated to the original URL using a question mark, creating a complete URL with the specified query parameter. The resulting URL looks like this: "https://dummyjson.com/products?limit=2".
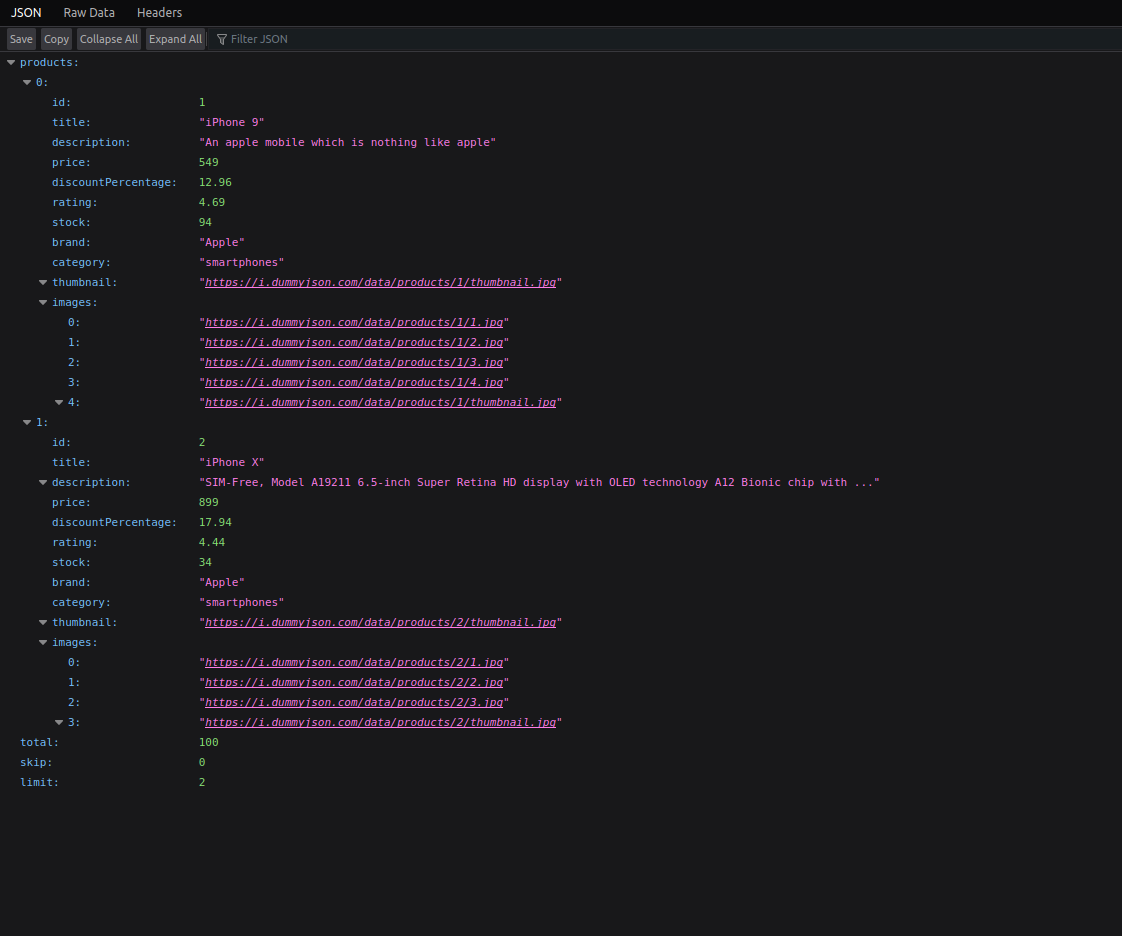
To test this, navigate to http://localhost:8000/curl.php on your browser and reload the page. You should get an array with only two products in JSON format:
Conclusion
In this article, you learned how to make GET requests using curl in PHP. Understanding the fundamentals of a GET request forms the foundation for streamlined data exchange.
Using various curl options, developers can customize their GET requests, ensuring precise control over timeouts, managing redirects, and receiving responses as strings for further manipulation. This flexibility lets developers fine-tune their interactions with web servers and ensures efficient and tailored data retrieval.
To learn more about using curl, check out this guide using curl with Python and this tutorial using curl with proxies. Interested in exploring our products with a free trial? Sign up now!


