

By the end of this article, you’ll understand how to:
- Use Bright Data Google AI Mode Scraper API service
- Leverage Skyvern for task automation
- Use Bright Data API service with Skyvern to automate web tasks.
- Combine automation and data feeds to build an eCommerce assistant.
- Retrieve cart product details automatically
Let’s dive in!
Leveraging Bright Data’s API Service
The foundation of browser automation is the ability to bypass challenges such as CAPTCHA, IP bans, and dynamic web loading. This is where Bright Data becomes essential.
With Bright Data’s Web Scraper, which supports more than 120 web domains, browser automation is more efficient and reliable. It manages common scraping challenges such as IP bans, CAPTCHA, cookies, and other forms of bot detection.
To get started, sign up for a free trial and obtain your API key and dataset_id for the domain you want to scrape. Once you have these, you are ready to begin.
Below are the steps to retrieve fresh data from any domain, like BBC News:
- Create a Bright Data account if you have not already done so. A free trial is available.
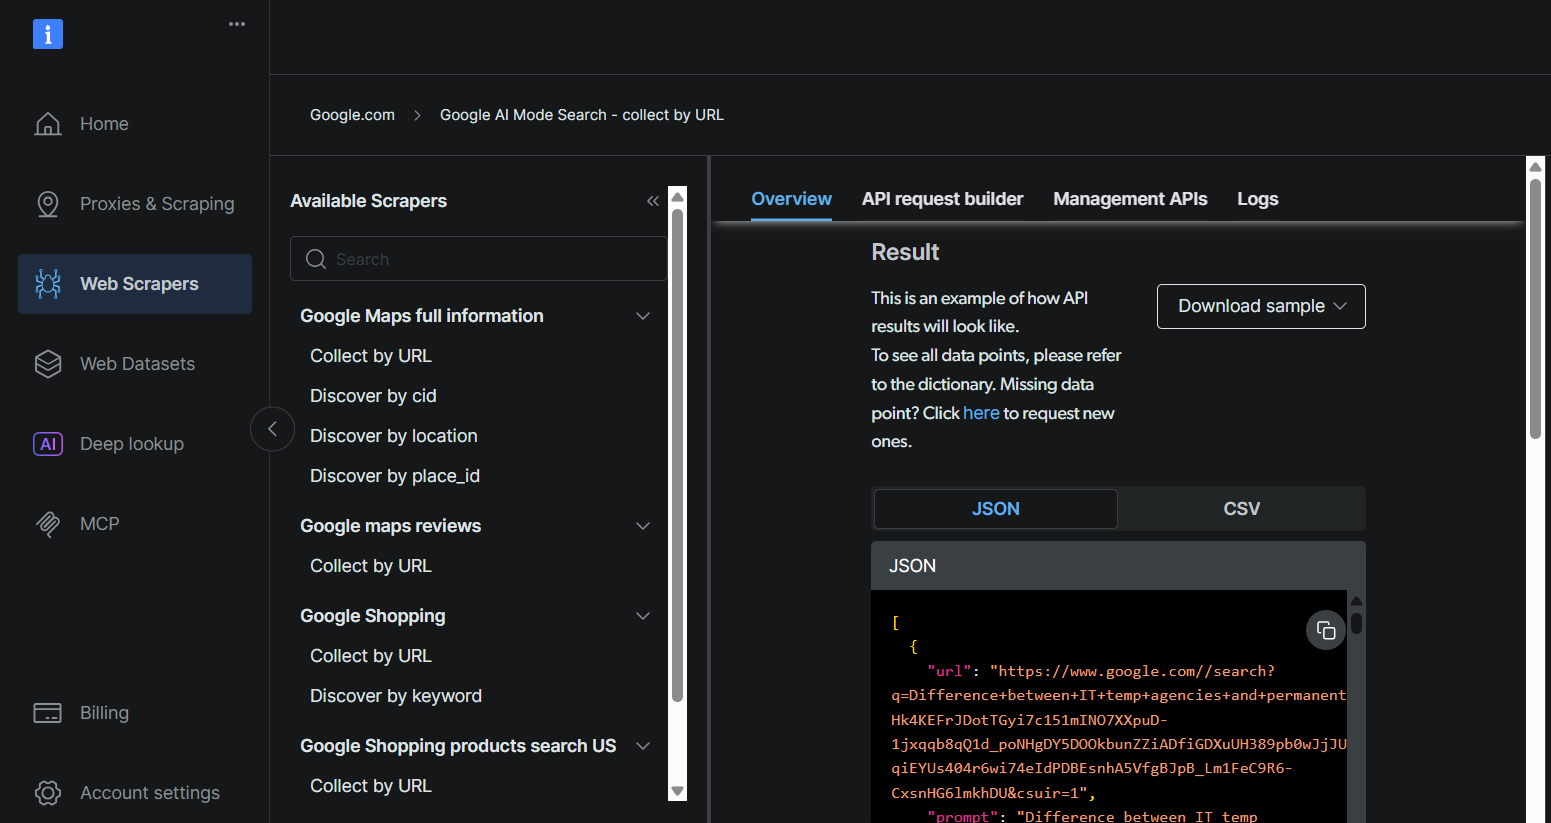
- Go to the Web Scrapers page. Under Web Scrapers Library, explore the available scraper templates.
- Search for your target domain, such as BBC News, and select it.
- From the list of BBC News scrapers, select BBC News — collect by URL. This scraper allows you to retrieve data without logging in to the domain.
- Choose the Scraper API option. The No-Code Scraper helps to retrieve datasets without code.
- Click API Request Builder, then copy your
API key,BBC Dataset URL, anddataset_id. - The
API-keyanddataset_idare required to enable automation capabilities in your workflow. They allow you to access Bright Data capabilities directly while programming.
What is Skyvern
Skyvern is an AI browser automation tool that uses artificial intelligence to automate tasks within web browsers. It combines machine learning, natural language processing, and computer vision to handle complex browser actions.
Skyvern differs from traditional automation tools such as Selenium and Playwright in the following ways:
- Adaptability to UI changes: Self-healing abilities allow Skyvern to dynamically adapt to UI changes without breaking scripts.
- Workflow complexity: Capable of handling multi-step workflows with AI reasoning through a single prompt.
- Visual recognition: Uses computer vision to understand and interact with UI elements visually.
With these capabilities, you can use Skyvern to log into booking sites, complete forms, or add items to shopping carts. When integrated with Bright Data’s web scraping capabilities, Skyvern can provide a powerful framework for addressing diverse web automation needs.
Automation Workflow
For example, if you want to purchase a vehicle part from an online store, you may want to compare available options and automatically add one to your cart. The workflow would look like this:
- Bright Data AI Mode Scraper API fetches the description and product details, such as the part number, from your specified manufacturer.
- You review the output and make your selection. Bright Data provides fast and reliable web data retrieval.
- Skyvern uses the retrieved details from Bright Data to access finditparts.com. It then navigates the site, adds the selected product(s) to the cart, and outputs the cart details and cart URL.
- Proceed directly to checkout and payment.
Prerequisites
- Basic knowledge of Python programming. Download Python here
- An active Bright Data account. Sign up here and retrieve your API key from the welcome email
- Basic knowledge of JSON and REST APIs
Setting Up the Project
Step 1: Set Up Bright Data
Retrieve your Bright Data API key, dataset ID, and Google AI Mode URL by following the same steps described in Leveraging Bright Data’s Robust API Service for your use case.
Step 2: Sign Up on Skyvern Cloud
- Go to https://app.skyvern.com/ and sign up to receive 5 USD free credits.
- Ask the Skyvern agent to run a task to see it in action. For example: Navigate to the Hacker News homepage and retrieve the top three posts.
- Check the history to track the progress of the task. A status of Completed indicates the task finished successfully.
- Once completed, click the task under history to view the output, parameters, and additional details about the task.

Now that Skyvern is set up, you can begin writing your code script.
Step 3: Install Skyvern on Your Machine
3.1 Create a Virtual Environment
In your desired project folder, create a virtual environment with Python:
python -m venv .venv
Activate the environment.
.venv\Scripts\activate
3.2 Install Skyvern on any device with
pip install skyvern
If you encounter installation issues, you can use the Ubuntu terminal on Windows. Check this post to learn how to set up the Ubuntu terminal.
After the terminal is running, navigate to your desired directory and run:
pip install uvCreate a virtual environment with:
uv venv venvThen install Skyvern with:
uv pip install skyvern3.3 Quickstart Skyvern
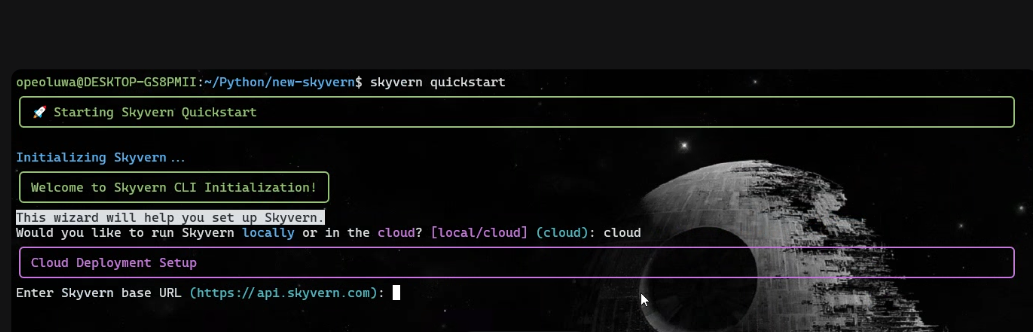
When the installation is complete, run:
skyvern quickstart- When prompted with ‘Would you like to run Skyvern locally or in the cloud?, ‘type – ‘cloud’.
- When prompted with ‘Enter Skyvern baseURL’, press Enter.
- Type ‘n’ for every installation prompt except the MCP prompt, where you should type ‘y’.
After setup, run:
skyvern initCreate a Python script called app.py.
Step 4: Retrieve Product Details with Bright Data
4.1 Retrieve the part number with Bright Data using this code in app.py:
import asyncio
import requests
import time
import json


def trigger_scraping_job(api_key, data):
    """
    Trigger a Bright Data dataset job with a list of dicts containing url, prompt, country.
    Returns the snapshot_id if successful.
    """
    endpoint = "https://api.brightdata.com/datasets/v3/trigger"
    params = {
        "dataset_id": "gd_mcswdt6z2elth3zqr2",  # Your dataset ID
        "include_errors": "true",
    }
    headers = {
        "Authorization": f"Bearer {api_key}",
        "Content-Type": "application/json",
    }
    response = requests.post(endpoint, headers=headers, params=params, json=data)
    if response.status_code == 200:
        snapshot_id = response.json().get("snapshot_id")
        print(f"Request successful! Snapshot ID: {snapshot_id}")
        return snapshot_id
    else:
        print(f"Request failed! Status: {response.status_code}")
        print(response.text)
        return None

def poll_and_retrieve_snapshot(api_key, snapshot_id, output_file, polling_timeout=20):
    """
    Poll the Bright Data snapshot endpoint until data is ready.
    Save the JSON response to an output file.
    """
    snapshot_url = f"https://api.brightdata.com/datasets/v3/snapshot/{snapshot_id}?format=json"
    headers = {
        "Authorization": f"Bearer {api_key}"
    }
    print(f"Polling snapshot for ID: {snapshot_id}...")
    while True:
        response = requests.get(snapshot_url, headers=headers)
        if response.status_code == 200:
            print("Snapshot is ready. Downloading...")
            snapshot_data = response.json()
            with open(output_file, "w", encoding="utf-8") as file:
                json.dump(snapshot_data, file, indent=4)
            print(f"Snapshot saved to {output_file}")
            return
        elif response.status_code == 202:
            print(f"Snapshot is not ready yet. Retrying in {polling_timeout} seconds...")
            time.sleep(polling_timeout)
        else:
            print(f"Request failed! Status: {response.status_code}")
            print(response.text)
            break

if __name__ == "__main__":
    BRIGHT_DATA_API_KEY = "YOUR_BRIGHT_DATA_API_KEY"  # Your API key

    # Match the curl JSON data structure exactly
    data = [
        {
            "url": "https://google.com/aimode",
            "prompt": "find the part number of a wheel seal from finditparts.com whose manufacturer is SKF",
            "country": ""
        }
    ]

    snapshot_id = trigger_scraping_job(BRIGHT_DATA_API_KEY, data)
    if snapshot_id:
        poll_and_retrieve_snapshot(BRIGHT_DATA_API_KEY, snapshot_id, "product.json")
The prompt is: ‘find the part number of a wheel seal from finditparts.com whose manufacturer is SKF.’
This will create a product.json file containing product descriptions and part numbers from the SKF manufacturer.
{
"url": "https://www.finditparts.com/products/16775486/skf-45093xt?srcid=CHL01SCL010-Npla-Dmdt-Gusa-Svbr-Mmuu-K16775486-L22",
"title": "www.finditparts.com",
"description": "SKF 45093XT Wheel Seal | FinditParts",
"icon": "https://encrypted-tbn0.gstatic.com/faviconV2?url=https://www.finditparts.com&client=AIM&size=128&type=FAVICON&fallback_opts=TYPE,SIZE,URL",
"domain": "https://www.finditparts.com",
"cited": true
},
{
"url": "https://www.finditparts.com/products/193780/cr-slash-skf-14115?srcid=CHL01SCL010-Npla-Dmdt-Gusa-Svbr-Mmuu-K193780-L1464",
"title": "www.finditparts.com",
"description": "SKF 14115 Wheel Seal | FinditParts",
"icon": "https://encrypted-tbn0.gstatic.com/faviconV2?url=https://www.finditparts.com&client=AIM&size=128&type=FAVICON&fallback_opts=TYPE,SIZE,URL",
"domain": "https://www.finditparts.com",
"cited": true
},
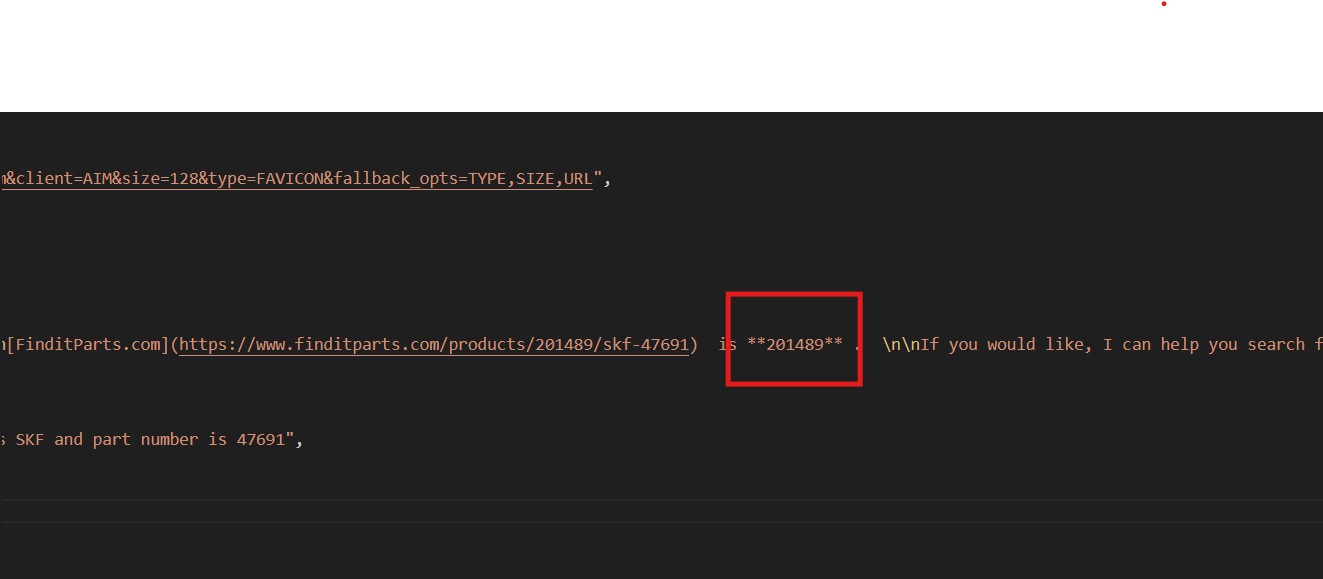
{Next, choose your preferred part number (located in the description) and rerun the Bright Data code with this prompt: ‘Find the product ID for the SKF wheel seal with part number 47691’
    # Match the curl JSON data structure exactly
    data = [
        {
            "url": "https://google.com/aimode",
            "prompt": "Find the product ID for the SKF wheel seal with part number 47691",
            "country": ""
        }
    ]
Skyvern requires the product ID to add details to the cart on finditparts.com (a vehicle parts e-commerce website).
This process will generate a product.json file with the desired product ID.
Step 5: Prompt Skyvern for Its Tasks
First, navigate to https://app.skyvern.com/tasks/create/finditparts. This URL is a shortcut for creating tasks on Skyvern.
Click Advanced Settings under the Base Content section, and update the product ID and prompt for your use case.
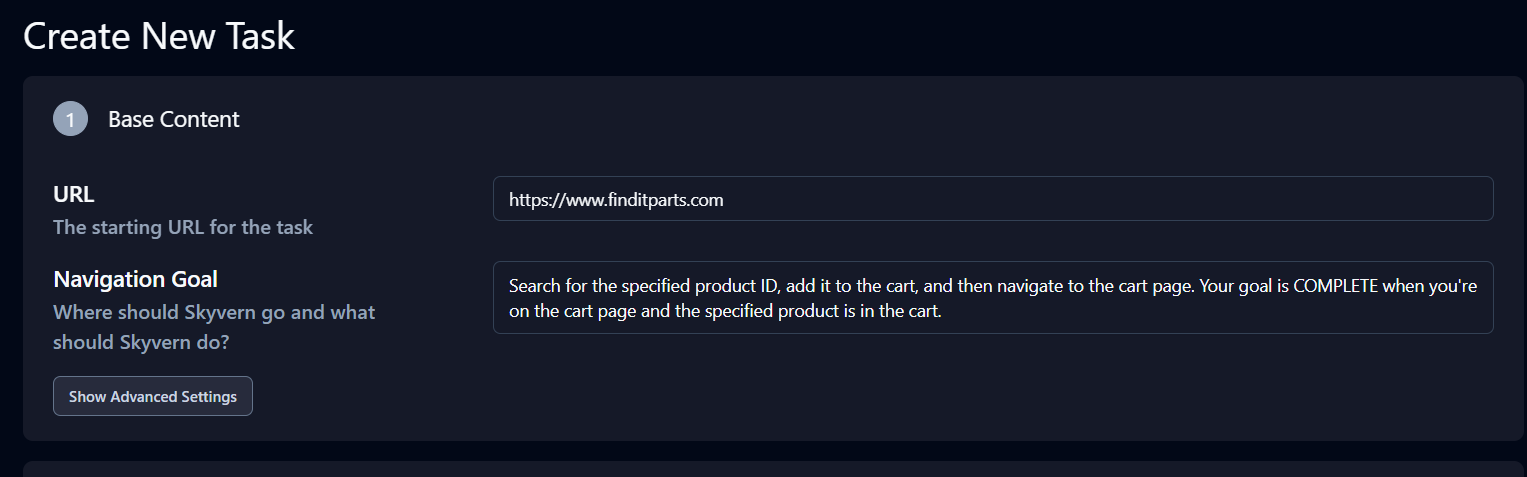
The prompt is: ‘Search for the specified product ID, add it to the cart, and then navigate to the cart page. Your goal is COMPLETE when you’re on the cart page and the specified product is in the cart.’
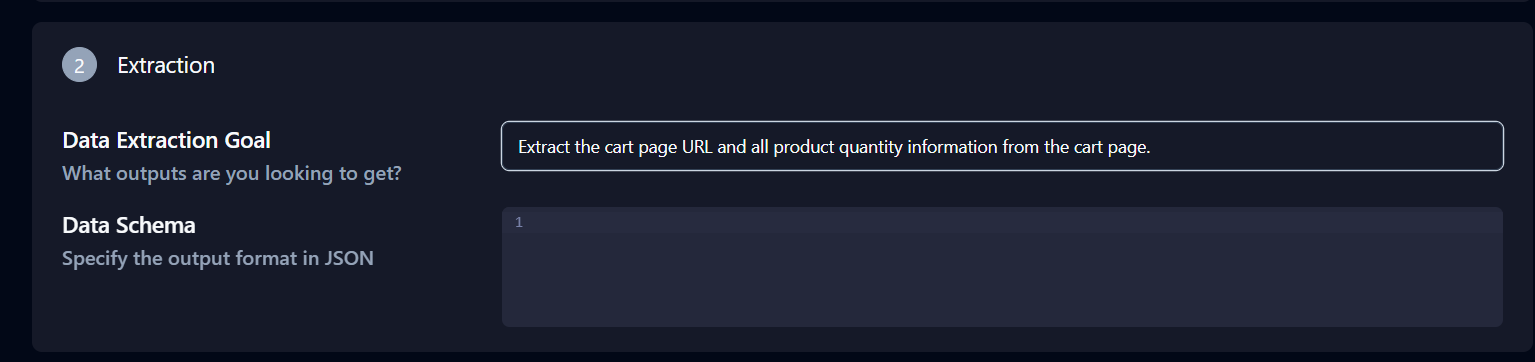
The Extraction section below Advanced Settings is also important. Modify the Data Extraction Goal to: ‘Extract the cart page URL and all product quantity information from the cart page.’
Click Copy API Command at the bottom of the page, paste it into your terminal, and press Enter.
This will create a task_id in your terminal and an instance of the task on your Skyvern Cloud. You can check its status in History to see if it is queued, running, or completed.

A status of Completed means the task has finished. You can now view the cart details and product URL returned by Skyvern.
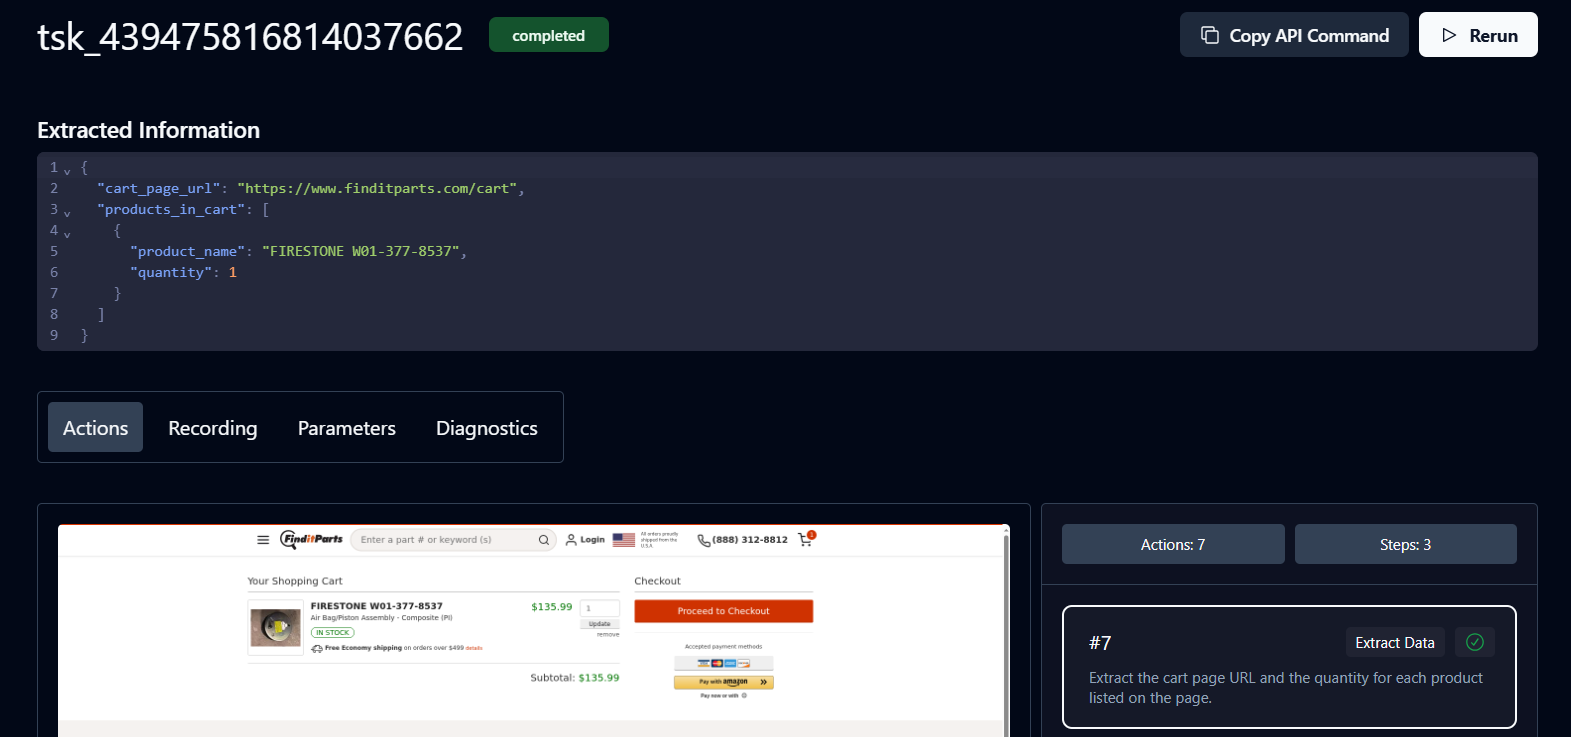
Congratulations. Your workflow is complete. Click the URL to proceed with payment.
Bright Data eliminates the need to manually search through products online by bringing options directly to your machine. This allows you to select the best product and automate the purchasing process with Skyvern.
Next Steps
You can expand the workflow to include adding multiple products to the cart for checkout and generating a Natural Language Processing (NLP) summary of the total products. You can also deploy the workflow to the cloud for continuous monitoring. Finally, you can integrate it with Google Calendar to track discounts.
Conclusion
In this tutorial, you’ve learned how to combine Bright Data’s Scraper API with Skyvern to automate the process of finding and purchasing products online. Beyond the Scraper API, Bright Data offers other tools that can power your AI agents, such as ready-to-use datasets tailored for e-commerce, social media, and more, as well as the Web MCP server for advanced multi-step automation and access to 40+ specialized tools. Together, these products make it easy to build AI-driven workflows that can gather, analyze, and act on web data efficiently.
Start exploring Bright Data’s full suite to enhance your AI automation projects today.

Technical Writer
Arindam Majumder is a developer advocate, YouTuber, and technical writer who simplifies LLMs, agent workflows, and AI content for 5,000+ followers.


